


|
chellesandcheese posted:I haven't added any of my animation mentor stuff yet, but you can see my old one online. Sorry, I was just trying to get a feel for how much feedback I could get. A lot of the stuff on your old reel is very similar to each other, so a lot of it can be cut out. For instance there are 4 separate shots of someone on stand gesturing with one hand out front and one hand behind his back. The one of those with the clearest silhouette is the one with 2 guys "good and valid legislation" so keep that and cut the rest. The eagle shot "things were getting critical" you should keep because it seems the most controlled and the gestures a bit more subtle compared to a few of the other shots where he's moving his head around a bit too much (and not really making much use of arcs). I guess it depends on how much footage you have from Animation Mentor. I wouldn't simply put a run and walk cycle into the reel on their own, I would rather see the walks in context in a shot. Also the reel doesn't need to be much longer than 1 minute, under no circumstances should you keep stuff just to keep the length of the reel up. Include only your absolute best work, or animate a new scene if you're not completely certain on something else, it should only take a week or two.
|
 #
?
Aug 28, 2008 10:21
#
?
Aug 28, 2008 10:21
|
|


|

|
| # ? Apr 28, 2024 22:26 |
|
|
I'm moving to a new building next week (holy poo poo I finally get 4 walls and a door!), and I've been laying some stuff out in anticipation. This uses the Mikael series furniture from Ikea. I don't think the over/under monitor setup is going to be nice to my neck though... Handiklap fucked around with this message at 11:35 on Aug 28, 2008 |
|
#
?
Aug 28, 2008 11:32
|
|

|
cubicle gangster posted:Haha. Nope. I just played around with the specular till it looked all dramatic n' poo poo. Clients ALWAYS pick the wrong one. Hah I kid I kid. You're right though, I didn't think about how it would flatten it out.
|
|
#
?
Aug 28, 2008 17:06
|
|

|
tuna posted:A lot of the stuff on your old reel is very similar to each other, so a lot of it can be cut out. For instance there are 4 separate shots of someone on stand gesturing with one hand out front and one hand behind his back. The one of those with the clearest silhouette is the one with 2 guys "good and valid legislation" so keep that and cut the rest. Thanks so much for the feedback! I'm only in my third semester at AM, so I don't have a lot of footage yet, but I am planning to work my rear end off in the next few weeks to add shots to flesh out my reel. Comments I'd gotten before was that I didn't have enough body mechanics stuff, which is why the walk and run got added in the first place. Now however, after a few tweaks, I have a pantomime action shot that has a run it, so it's going to be going in instead. I'll pull the shots that you recommended. I also have a baseball pitch and a pole jump that aren't bad. Also if you see something like lack of arcs in some of the shots, I do have the files and can tweak, I'll just have to render them out on my own with simpler shaders instead of pulling them from the DVD release. I freely admit that before I started AM I didn't understand arcs at all. Basically, I just got informed that I need to try to move to LA soon, so I'm still in the early stages of planning and tweaking my reel. So right now I'm really just looking for which shots are so bad they should definitely be pulled (like the walk and run) and which ones are obviously the best and should be definite keepers. And if there's anything you guys see that the reel is lacking, please let me know so I can plan to work on that animation in my spare time. I'll keep posting the reel as I update it too. Thanks a lot!
|
|
#
?
Aug 28, 2008 23:51
|
|

|
Alan Smithee posted:I'd be interested in seeing what links you've used, I'm trying to get into 3D for the same reasons and would love to see how you learned your pipeline http://artist-3d.com/free_3d_models/04vehicles_design.php Is a great site, and has some pretty high quality models for free. Nothing close to the quality you'd get buying a model for $100 or so but they do the trick for me. They've also got weapons, buildings, etc. Not just vehicles. http://www.turbosquid.com/Search/Index.cfm/FuseAction/ProcessSmartSearch/intMediaType/2/stgType/Free Is another site for free models. The site has models that are for sale as well. Their free models are mostly low quality. Not realistic enough to put in a real scene anyways. The biggest tip I can give you is learn to render in passes with whatever software you chose to use. I know 3Ds Max, but I wish I started on Maya because it seems to be more TV/Film oriented. Also research and learn how to do an Ambient Occlusion pass. It isn't very hard, but takes some time to render and adds tons of realism to your project. EDIT: About the render passes: I use a Diffuse pass for the basic colour of the object, a shadow pass for some depth, reflection pass takes care of realistic reflections, and the Ambient Occlusion pass adds some lifelike qualities to all the shaded areas. Go a few pages back, I posted still images from each of my render passes with a BMW car in my driveway. bring back old gbs fucked around with this message at 16:07 on Aug 29, 2008 |
|
#
?
Aug 29, 2008 04:29
|
|

|
I've only recently been introduced to the wonders of rendering passes. How do you guys set up yours and which ones do you use the most on a regular basis? Right now I'm using a key light, a bounce light, a sky light, and an AO pass.
|
|
#
?
Aug 29, 2008 05:11
|
|
|
ACanofPepsi posted:http://artist-3d.com/free_3d_models/04vehicles_design.php Wow, learn something new every day. How did I not know about this one?
|
|
#
?
Aug 29, 2008 16:05
|
|
|
Could someone tell me how to get my point lights to stop flickering, please? In Maya.
|
|
#
?
Aug 29, 2008 16:53
|
|

|
spottedfeces posted:Could someone tell me how to get my point lights to stop flickering, please? are you using glow? theres an exposure setting that is set to auto, which means it changes every frame, giving the flicker. As for render passes, atlesast in maya, they can be dodgy. I'm working on a production of a tv series at the moment, so we had to come up with a stable, consistent workflow. It is quite stylistic, so we dont really bother with getting maximum tweakability by doing reflection, shadow passes, etc. We have a great lead compositor so he deals without em. So weve gotten it down to; - Lighting - Specular - Mattes - Materials as for the flow; - I generally reference a master of the entire shot/animation, and use a combo of renderlayers and seperate files. maya can break down a little when you start to change materials between layers. lighting - in one file, use render passes for different light sources; ambient, sunkey, fill, lamp, etc for example. specular - turn off emit diffuse on the lights for a specular pass. depending on what you want, I usually get away with just the one specular layer, because I override the lights to emit either R G B and just use those channels for the different light sources. mattes - In a new file, have Surface shaders set to R G and B and assign to objects. say, R for the groundplane, G for characters, B for props. use these as your alphas, its way easier. materials - materials is something really cool. we have a shader that puts AO into the green channel, fog into the blue, and z-depth into red. Its actually online, we just customized it a bit. ill try and find it later. then there is usually some special consideration needed for something depending on the episode, wether it be water/fur/particles etc. again, same thing, just split it into a new scene and make sure to get your light passes on it, and a matte. but yeah, with render passes simpler is always better. sorry if its a bit scatterbrain im kind of hungover ")
|
|
#
?
Aug 30, 2008 03:27
|
|

|
chellesandcheese posted:Comments I'd gotten before was that I didn't have enough body mechanics stuff, which is why the walk and run got added in the first place. Now however, after a few tweaks, I have a pantomime action shot that has a run it, so it's going to be going in instead. That's cool. Better to make a piece that hits 2 birds with one stone where you can show an entertaining performance AND prove you know proper body mechanics and physics. There's a new 11 sec sound file coming out in a few days (start of every month), so give that a shot as well if you think you have a good idea for it, otherwise throw it away and do something else, since time is tight.
|
|
#
?
Aug 30, 2008 15:24
|
|
|
Kirby posted:are you using glow? theres an exposure setting that is set to auto, which means it changes every frame, giving the flicker. I'm not using glow. This is what it looks like in two consecutive frames. 
|
|
#
?
Aug 30, 2008 19:04
|
|
|
OK, I know that a lot of you guys love to loathe this, but why won't anyone build a souped-up, high-end version of Poser? I like the concept of Poser, but I just hate the limit of the software. Poser is never meant to be a program to create a virtual human. Poser models are nothing but glorified mannekins. I really want to see realistic simulation of muscle/bone/fat/skin/hair/cloth simulations in a program with the same concept of Poser. Perhaps the hardware physics acceleration will help achieve such feat? If I had the money and resource, I'd set up a company to build a software that fits the bill. Poser is good for hobbyists, but I really want to see a kind of software that has the same concept with Poser and is ready for professional use.
|
|
#
?
Aug 31, 2008 08:35
|
|
|
What, like they're doing with Poser Pro? They've already got cloth and hair sims.
|
|
#
?
Aug 31, 2008 08:50
|
|


|
This is an AK-47 model I chose to model for an assessment at my college, which was to create a game asset or vehicle. The tri limit was 3500, and having 1 1024 texture page. The model is now 3200 polys, but I don't have a texture because I ballsed it up the first time round, and now I have added extra detail. The assignment is finished, I'm just cleaning up the model a bit and adding some detail so I can use it for a portfolio piece. I'm just looking for some critique on the actual model and geometry before I go off to unwrap it again for the texture. I will be making a 1024x1024 texture for it. Could I also have some advice on how I should unwrap and texture it, ie should I just have 1 1024 texture page, or should I break it up into 2 pages? If I should break it into 2 texture pages, how would I go about doing that? Another thing that would be helpful is any comments on my lighting/rendering setup. At the moment I am using a 3-point set up, but I am not really happy with it, and I'd like to learn a really good way to show off my models after they're done. Any help is appreciated, thanks.  Click here for the full 800x500 image.  Click here for the full 800x500 image.  Click here for the full 800x500 image.  Click here for the full 800x500 image. A Sober Irishman fucked around with this message at 23:11 on Sep 2, 2008 |
|
#
?
Sep 1, 2008 12:56
|
|

|
A Sober Irishman posted:This is an AK-47 model I chose to model for an assessment at my college, which was to create a game asset or vehicle. The tri limit was 3500, and having 1 1024 texture page. The model is now 3200 polys, but I don't have a texture because I ballsed it up the first time round, and now I have added extra detail. The assignment is finished, I'm just cleaning up the model a bit and adding some detail so I can use it for a portfolio piece.  Click here for the full 1600x552 image.  Click here for the full 800x319 image. if it's a first person model you don't need to model anymore of the detail on the right side, in fact honestly the switch is probably not neccessary considering how flat they are - I doubt it will ever be seen in a first person view. You didn't curve the wood on the front and your clip's extrusions are too shallow. Honestly since the clip isn't usually seen from the regular FPS view, and typical FPS animations turn the gun to the side during a reload, you can probably just normal map the fat ridges that go down the clip, but it might be nice to model them with a bit of geo. You should definitely model the nubs on the left side of the gun, the one that will be facing the player all the time, because thats where the most detail of the gun will be seen. The sights could probably do with more love, too, since those are important. You should show the gun in your portfolio from FPS views in addition to a nice side view. Have you thought about giving the gun some kind of personality other than "standard AK"? A strap, taped mags, etc? Everyone and their mother has made an AK47, and while most of them are pretty poorly done, adding something recognisable and different makes it easy to make it "your" AK. Perhaps a non-standard color scheme or doing the wooden bits in plastic. Also it looks like you're wasting some tris on a symetry seam running up your front site. I'm sure you're not going to be baking normals for this since you don't have a highpoly model, but if your classes aren't focusing on that you should really take the time to learn it on your own. There is no reason to break it into two texture pages, as that just doubles the draw calls. If you wanted to unwrap it to a rectangular unwrap that's certainly doable - in Max I'll just unwrap between 0-2, 0-1, and then scale it down to the 0-1 coords - You should be able to do something similar in Maya. I'm not sure if Maya has support for easy unwrapping to rectangular coordinates, I know Max9 chokes on it.
|
|
#
?
Sep 2, 2008 19:06
|
|
|
Thanks for the advice, I have changed it a bit since those pictures, I have redone the front grip part because it looked poo poo and was annoying me. Click here for the full 815x515 image.  Click here for the full 815x515 image. Also I don't know what you mean by tri wastage on a symmetry seam up my front side, I haven't used symmetry? I will try to think of some extra story and background for it as well, to make it unique. Once again thanks for the advice.
|
|
#
?
Sep 2, 2008 23:09
|
|
|
Sigma-X posted:adding something recognisable and different makes it easy to make it "your" AK. I will accept nothing less than an accessory character model of Ice Cube.  You're welcome.
|
|
#
?
Sep 3, 2008 01:20
|
|
|
A Sober Irishman posted:
Here is where it looks like there's a symmetry line running down the middle. If you're not using symmetry modifiers, you might want to play around with them because they are useful as hell The foregrip is still really boxy - the thing is supposed to be curved. Also, looking at the ref pics I pulled really quickly, I'm not sure what is hanging underneath the barrel. Looking more closely at it, it looks like you've got a weird flat strip going back to the gun? What is that going to be used for? You could probably model that, opacity is expensive.
|
|
#
?
Sep 3, 2008 01:49
|
|
|
Haha, while I'm at it, I may as well make it a solid gold AK-47. Covered in diamonds.
|
|
#
?
Sep 3, 2008 01:50
|
|
|
A Sober Irishman posted:Haha, while I'm at it, I may as well make it a solid gold AK-47. Covered in diamonds. Make it use antique furniture for ammunition and I think we're good to go here.
|
|
#
?
Sep 3, 2008 15:17
|
|

|
Sigma-X posted:Here is where it looks like there's a symmetry line running down the middle. It's a bayonet, but from the ones I've seen, they've got a filleted "T" cross section that tapers from base to tip, thought it would probably add 10 or 15 tris. It flips facing front on a slide-pivot hinge when used; you would wrap a finger around the little nub on the bottom, pull back to clear the hinge lock, and swing the bayonet to the front. Handiklap fucked around with this message at 20:23 on Sep 3, 2008 |
|
#
?
Sep 3, 2008 20:19
|
|
|
Thanks for all the advice on the modeling, now I need to hit you guys up for advice on unwrapping it. Specifically, the areas of the pistol grip and also the stock are giving me a bit of trouble. Any advice for unwrapping those particular parts, and other general advice about unwrapping/texturing a gun model? Thanks.
|
|
#
?
Sep 4, 2008 05:19
|
|
|
I love Solidworks (sorta). I've been working on the bots from MST3K for some time now, but thanks to a crash, I lost my most recent version of the program and couldn't edit my work because of that "future version" bullshit. But I finally bought 2008 and I really like the way Photoworks is playing, this time around. Click here for the full 800x600 image.  Click here for the full 800x600 image.
|
|
#
?
Sep 10, 2008 17:07
|
|

|
Just received word that I passed my certification process. I am now an Autodesk Certified Instructor for Maya. I will be prepping to take the test in order to become ACI for Max as well. Once the workshop is completed for one, then I only need to take the online test in order to be certified in the other.  Now that that process is over, as well as SIGGRAPH and burning man, I can finally get back to working on some 3d stuff!! Looks like I missed some cool stuff going on in this thread too. I have some catching up to do.
sigma 6 fucked around with this message at 00:03 on Sep 11, 2008 |
|
#
?
Sep 10, 2008 23:42
|
|


|
I was wondering if I could get some help. Now, I'm just a designer and apart from making a few guns for UT when I was 15 I don't have much experience with 3D Studio Max. I have to create a concept for a promotional stand and I've decided rather than dicking around in Illustrator, I'd rather do this properly. 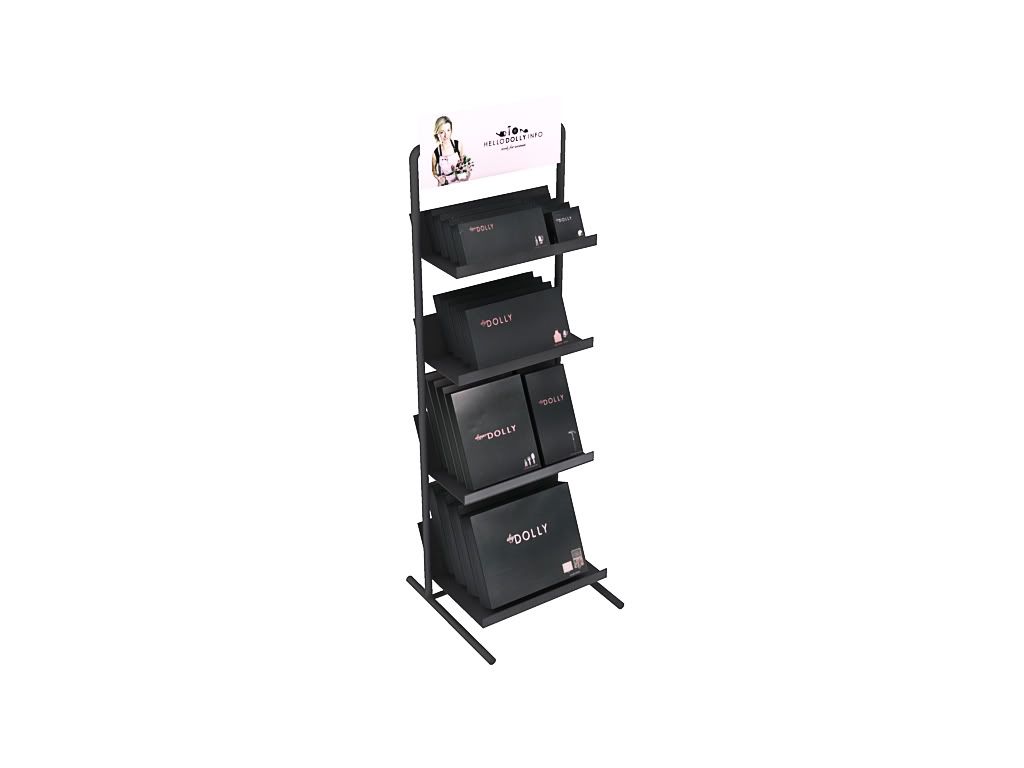 It actually worked out great, but I've hit a bit of a snag. See, the actual shelves are supposed to be wire-mesh sort of a thing, not solid. It's basically supposed to be like this: 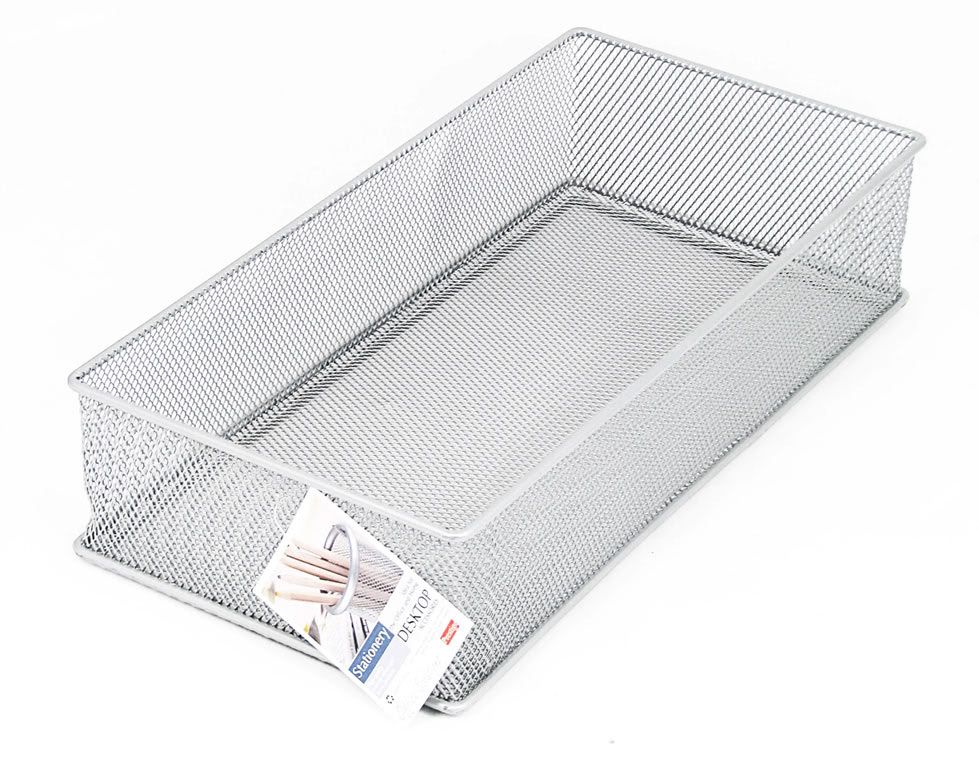 How can I make this material? Is there one I can get somewhere? I've looked at quite a few tutorials but couldn't find anything.
|
|
#
?
Sep 15, 2008 06:07
|
|
|
You want an alpha/transparency map on the material so you can peek through. Should be easy enough to find or make your own.
|
|
#
?
Sep 15, 2008 07:55
|
|
|
Man I really need to get back to material-based pieces like that, because the first thing I thought was, "Oh that would be simple to model, start with..."
|
|
#
?
Sep 15, 2008 14:18
|
|
|
Does anyone have a link to or remember the name of that application that allowed you to take 3d screenshots of games? That is, dump what was being rendered into a scene file you could open in a 3d application. It'd be a really fun learning tool but it's obscenely hard to search for  Thanks in advance. Thanks in advance.vv That's it, thanks! vv Hashy fucked around with this message at 00:49 on Sep 18, 2008 |
|
#
?
Sep 17, 2008 19:44
|
|

|
I'm guessing you mean 3D Ripper DX.
|
|
#
?
Sep 17, 2008 23:22
|
|

|
Some results from this week! It's a still from an animation - going to be putting cars and people in it next week, then should hopefully be mostly done. Anyone got any comments before I call it completley finished? I know the tv is way too bright, going to sort that in the morning.
|
|
#
?
Sep 18, 2008 18:30
|
|

|
cubicle gangster posted:Some results from this week! Awesome as always.  I made this recently (clickable):  The DoF is post, plus some shopping with the colors and whatnot. I think I'm finally getting the hang of this. 
International Log fucked around with this message at 22:12 on Sep 18, 2008 |
|
#
?
Sep 18, 2008 22:02
|
|
|
cubicle gangster posted:Some results from this week! As a landscape architect, I would like to see some street furniture. Trash cans, benches, bike racks, etc. Might make it feel a bit more lived-in, too.
|
|
#
?
Sep 19, 2008 01:54
|
|

|
pistolshit posted:As a landscape architect, I would like to see some street furniture. Trash cans, benches, bike racks, etc. Might make it feel a bit more lived-in, too. So would I, but it's from a real street in london and it really is as bare as that. I'll probably be able to get away with a couple of bins though, i'll drop those in today.
|
|
#
?
Sep 19, 2008 09:33
|
|
|
cubicle gangster posted:So would I, but it's from a real street in london and it really is as bare as that. Needs more chewing gum on the floor and bendy-busses using up the entire length of the road. Also roadworks.
|
|
#
?
Sep 19, 2008 10:26
|
|
|
I actually created a chewing gum on road shader a while ago. It was a blend material with your paving underneath and a rubbery material on top which had some widespread colour noise in it, and a mask which was mapped seperatly. Linked it up to the displacement with a blurring too, so whereever there was a bit of chewing gum it averaged out the depth of the paving and made it flat. Looked awesome, but when I showed it to my boss he just laughed at me  international log: Thats coming along really well. it's simple, but what it does it does well. Just a really effective shot that looks pretty. Keep on with it, and get upping the scale/detail! cubicle gangster fucked around with this message at 04:46 on Sep 20, 2008 |
|
#
?
Sep 19, 2008 13:44
|
|
|
I'm kind of new to 3D software, but I'd say this is probably my best work so far. I'm working on a Dreadnought from WH40k, and I'm still messing with the joints. The Weighting on them is a bit iffy but for now it's decent. There's definitely room for improvement on it, though.   I used C4D 10.5 in my advanced animation I/II class at school.
|
|
#
?
Sep 20, 2008 04:36
|
|
|
need some help with batch baking mental ray maps in Maya. I am trying to generate some light maps for an environment, I have worked out a lot of issues to produce something I think will work . .. all except for the maps it spits out look like they are 8-bit. Here is an example as well as my settings - I have tried setting to 16 bits per channel but that does not smooth it out at all (plus it should be fine with 8 bits per channel).   if I can't figure out how to make it look a little more aliased I guess I will just render them out at twice the size and shrink them or just blur them a bit in photoshop.
|
|
#
?
Sep 21, 2008 21:59
|
|


|
I guess it depends on what your game is going to do with the maps - if you are just after a lightmap that you are going to multiply over your materials, you could uncheck the 'keep original shading network' and just apply a lambert for the purposes of the bake. Is the bittiness showing through because its rendering the textures from the track into your bake? As for the aliasing problem, do you have another uv set you could use? because of the curves you have going on and the tight areas at the edges of the track I would have thought that it will be tricky to solve. Oversampling would probably be the quickest solution as you say.. In your mental ray settings have you tried upping the number of samples? I guess you could also try playing with the general mental ray settings in maya before you bake (i've not tried this in conjunction with a bake before but it may be something to check). You seem to have a pretty detailed mesh - have you considered baking this stuff into the verts? Cool game by the way. I've seen it here and over at Polycount and its looking really good.
|
|
#
?
Sep 22, 2008 20:11
|
|

|
Just got a new computer and I'm trying to install my programs on it. Its a 64 bit and I was having problems with vista 64 bit so I've installed XP 64, and photopshop won't even load the setup. Everything that I can find on google says it doesn't have a 64 bit version, but I get the idea it should just run the 32 bit version. Has anyone else had this problem with 64 bit and any 3d/art packages?
|
|
#
?
Sep 22, 2008 21:24
|
|

|

|
| # ? Apr 28, 2024 22:26 |
|
|
I've used Photoshop across several x64 systems and never had any issues. The only problems I've had were some special Mental Ray shaders that needed to be recompiled and Quicktime/iTunes not working completely.
|
|
#
?
Sep 22, 2008 22:37
|
|