

|
teethgrinder posted:You don't like using the built in Facebook & Flickr management? http://regex.info/blog/lightroom-goodies/flickr http://regex.info/blog/lightroom-goodies/template
|
 #
?
May 9, 2011 14:52
#
?
May 9, 2011 14:52
|
|


|

|
| # ? Apr 28, 2024 04:03 |
|
|
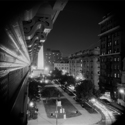
Yeah I need to move on. I've just been resisting, hoping Adobe eventually fixes my fairly minor complaint. This weekend I used his geotag-encoding plug-in to match GPS data from my BlackBerry to my photos in Lightroom. It worked incredibly well. (I was shocked at how precise the GPS tracking was, even with my phone in my pocket during a bike-ride. I used this site and their app: http://www.instamapper.com/) The problem was that the geotags didn't get exported to Flickr. Maybe his Flickr plug-in takes care of that automatically.
|
|
#
?
May 9, 2011 15:00
|
|
|
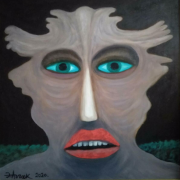
So this whole split tone thing people do? Yes/no?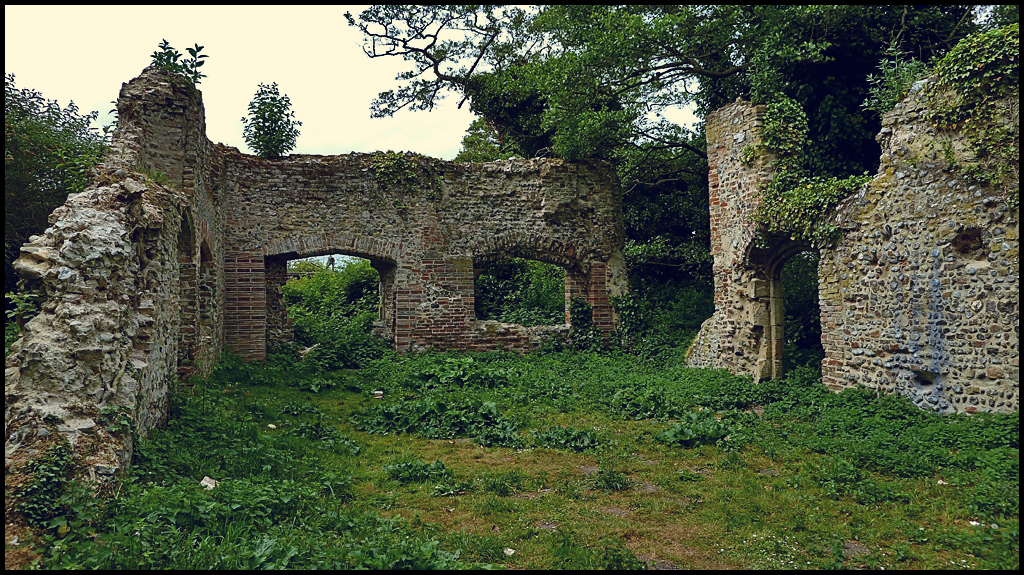 John Money 001 by Gara Von Hoiwkenzoiber, on Flickr 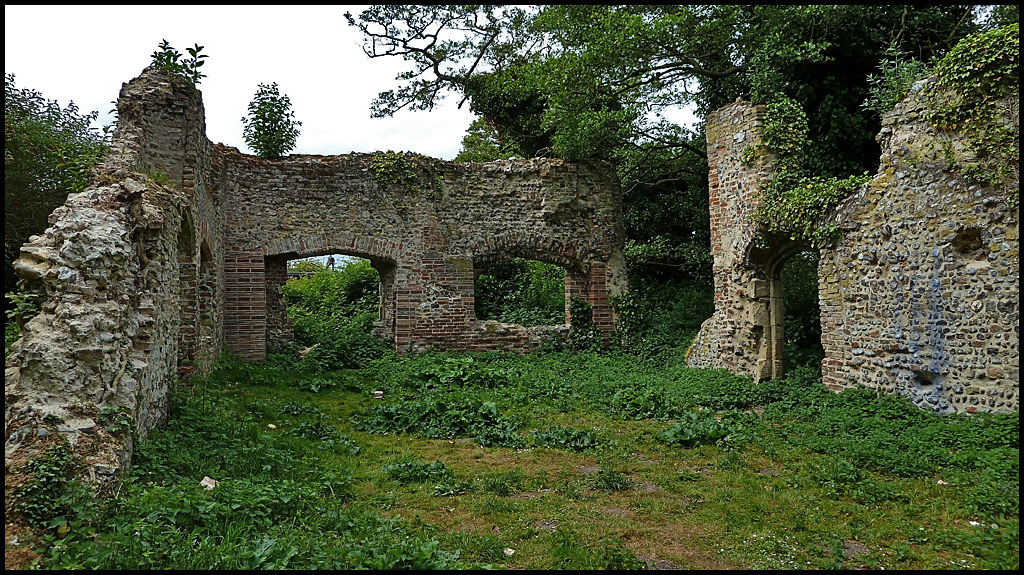 John Money 002 by Gara Von Hoiwkenzoiber, on Flickr
|
|
#
?
May 19, 2011 15:17
|
|

|
I'd say you'd be better off adding color to the shadows rather than the highlights, as all the highlights are in the sky. Perhaps try a very subtle deep blue?
|
|
#
?
May 19, 2011 15:22
|
|
|
Just like any technique, it's about restraint. Just experiment and see what you like, don't worry about it being too trendy or whatever.
|
|
#
?
May 19, 2011 17:07
|
|
|
There's a really weird blue streak on the walls to the right -- was that there originally or was that added (by accident?) in post?
|
|
#
?
May 19, 2011 22:35
|
|

|
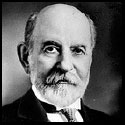
I need a lot of help. I'm trying to teach myself Photoshop (which I have very little experience with), and I'm falling flat on my face right out of the gate. This image, for instance:  1) I want to get rid of that branch in the background. I know how to (rudimentarily) use the clone stamp tool, but I'd be surprised if there wasn't a much, much easier way to deal with it. And is it possible to preserve the strands of hair in front of it? 2) I want to pretty much kill (i.e., desaturate and darken) that green in the background. Doing color range on it leaves a pretty rough edge and doesn't really get in amongst the hair. I've tried playing around with layer masks (which I think I understand) for hue/saturation and selective color adjustments; the green and bit of blue is pretty easy to get rid of, but there's a whole lot of yellow left over that I can't cleanly remove while leaving it alone in the rest of the image. No matter what I try, everything seems to get really ugly in the edge between the hair and background. Are there tools or techniques that make this stuff easier than what I'm making it?
|
|
#
?
May 20, 2011 04:17
|
|
|
William T. Hornaday posted:I need a lot of help. I'm trying to teach myself Photoshop (which I have very little experience with), and I'm falling flat on my face right out of the gate. Duplicate entire layer, flip it horizontally, apply an inverted mask so it�s all hidden, paint into the mask to reveal on top of the branch, The hair will have a bit of symmetry, but then you have a clean green edge you can get rid of the more telling fly away hairs that give away what you did.
|
|
#
?
May 20, 2011 10:41
|
|

|
What the guy above me said, copy and flip the other side of the head. As for the green, how about using a wide soft brush to select the top part of the image in a big upside down kinda-U-shape, then lowering the saturation and brightness for that selected part of the image? I also did photoshop's auto tone, (30%) auto contrast (30%) , and auto colour, (30%) with a high pass filter to make the hairs stand out more. Could be in a completely wrong direction to what you're going for, of course.  tarepanda posted:There's a really weird blue streak on the walls to the right -- was that there originally or was that added (by accident?) in post? It's part of the wall.  John Money 004 by Gara Von Hoiwkenzoiber, on Flickr
|
|
#
?
May 20, 2011 13:56
|
|
|
I haven't gotten around to learning what a high-pass filter is yet, though I assume it's some sort of sharpening technique? Is it like an adjustment layer and/or mask?
|
|
#
?
May 20, 2011 23:19
|
|
|
You'll use it, for example, by creating a copy of a layer then running a high filter on the copy and setting it to like overlay, soft light, whatever, and it sharpens the original image. I usually convert the image to a smart object and then sharpen it with a high pass filter.
|
|
#
?
May 20, 2011 23:24
|
|
|
William T. Hornaday posted:I haven't gotten around to learning what a high-pass filter is yet, though I assume it's some sort of sharpening technique? Is it like an adjustment layer and/or mask? Read PIMM's tutorial : http://mr-chompers.blogspot.com/2009/04/sharpening.html
|
|
#
?
May 21, 2011 01:00
|
|
|
So, what's the best way to bounce back and forth between Lightroom and Photoshop? Do I want 'Edit in Adobe Photoshop' or 'Open as a Smart Object in Photoshop'? What's the difference? Is there a way, having edited it in Photoshop and having brought it back to Lightroom, to take it back to Photoshop yet again and still have all the layers, masks, and adjustments from the previous session still available to play around with?
|
|
#
?
May 22, 2011 11:56
|
|
|
William T. Hornaday posted:Is there a way, having edited it in Photoshop and having brought it back to Lightroom, to take it back to Photoshop yet again and still have all the layers, masks, and adjustments from the previous session still available to play around with? Just "Edit in Photoshop," make your changes, and hit Save. Lightroom will auto-add the file to its library. Any time you want to adjust it in Photoshop, open the .tiff again.
|
|
#
?
May 22, 2011 19:36
|
|
|
William T. Hornaday posted:Is there a way, having edited it in Photoshop and having brought it back to Lightroom, to take it back to Photoshop yet again and still have all the layers, masks, and adjustments from the previous session still available to play around with?
|
|
#
?
May 22, 2011 21:35
|
|
|
TheLastManStanding posted:That's basically what a smart object does. You can't directly play with the smart object in Photoshop, but you can put layers and adjustments on top of it. Then if you want to change the smart layer you open it back up in lightroom, edit it, and it will update in photoshop. Hmm, I guess I wasn't clear. Basically, let's say I take a photo from Lightroom and edit it in Photoshop, adding a layer mask for contrast and another layer mask for sharpening. I save it and it takes me back to Lightroom, where a .tiff file from what I just did in Photoshop has been added to my library. If I decide after that point that I don't like what I did with one of those adjustment layers, is there any way for me to go back into Photoshop and edit those layers? From the looks of it, the answer is no; all the layers appear to be flattened upon leaving Photoshop. From what I can tell, I'd have to make a point of saving a .psd copy of that edited image before I return with it to Lightroom, which isn't exactly a huge hassle but not the most convenient thing ever. When it comes down to it, I'm more or less wondering whether there's a way that I can ideally have it remain an editable Photoshop file (with all the layers still intact and separate) after having brought it back to Lightroom, or I guess at the very least having Photoshop automatically save me a .psd somewhere.
|
|
#
?
May 22, 2011 23:52
|
|
|
Does anyone happen to remember how to change the orientation on the crop overlays?
|
|
#
?
May 22, 2011 23:54
|
|
|
Shift + O; just O to cycle through different overlays.
|
|
#
?
May 23, 2011 00:01
|
|
|
William T. Hornaday posted:Hmm, I guess I wasn't clear. Unless you specifically flatten the file in Photoshop the layers will all be in the tiff file. If you choose 'edit in photoshop' from lightroom, then make your changes in PS and hit save (not save as...) it will end up back in your lightroom library as ORIGINAL_NAME-Edit.tif. From lightroom you can then right click on the tiff file that was added to your library, choose 'edit in Photoshop' and then choose 'edit original' and it will open the tiff file with all of its layers in photoshop just as if you double clicked on it from bridge. does that make sense? jsmith114 fucked around with this message at 01:08 on May 23, 2011 |
|
#
?
May 23, 2011 01:02
|
|
|
jf's Flickr plugin can actually import your publish settings/catalogue from the official Adobe plug-in. So loving awesome and so powerful. (It can even do a "deep scan" and try to match everything on your Flickr account to your Lightroom catalogue, even stuff not ever uploaded through it.) edit: yes/no? Before: 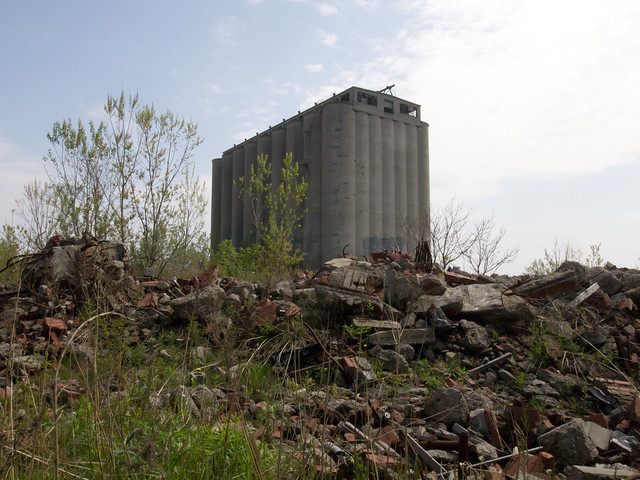 After:  I used HDR to insert a sky where there was none before. To my horror though when I got back to Lightroom, the photo was super-saturated and ultra-sharpened. (My bad for not checking while tweaking it.) Instead of doing it over, I desaturated, and turned down the clarity. ...then when I exported to Flickr, the original all of a sudden has a blue(ish) sky where there was none in Lightroom. I need to learn more about colour profiles and RBG formats. teethgrinder fucked around with this message at 02:35 on May 23, 2011 |
|
#
?
May 23, 2011 02:06
|
|
|
jsmith114 posted:does that make sense? Works perfectly. Thank you.
|
|
#
?
May 23, 2011 02:48
|
|
|
Speaking of Photoshop and Lightroom, has anyone encountered a weird bug where the lens distortion correction from Lightroom doesn't carry over to Photoshop?
|
|
#
?
May 24, 2011 01:13
|
|

|
Yup, I had that happen yesterday. Shooting with a 5d2,50/1.8 and lens correction set to Auto it fixed the distortion in LR3, but not in PS CS5 when I clicked on Edit in Photoshop.
|
|
#
?
May 24, 2011 02:21
|
|
|
Is it possible to fake DOF realistically? I want to blur out the background on this shot a bit but I'm struggling to do it.
|
|
#
?
May 24, 2011 09:54
|
|


|
If you're using PS CS5 you can use the "Lens Blur" tool: Select everything but the car, then create a new channel. On the new channel, put a black to white gradient from the bottom of the car to where the buildings are (keeping the car black) Now the sky should be all white and the car and the ground under it should be black (on the channel). Now you can run Filter -> Lens Blur and set the source to the channel you created. You can tweak the settings from there to control how blurred your background gets.
|
|
#
?
May 24, 2011 10:09
|
|
|
New channel? I don't understand channels. Guess it's time to do some reading. Understand the rest though. What's the easiest way to cutout the car? Just pentool > Select?
|
|
#
?
May 25, 2011 16:35
|
|
|
You can paint out a mask as well, use 2 layers, blur the one on top and reveal the bottom one by just painting in a mask. Look up how to use layer masks.
|
|
#
?
May 25, 2011 18:15
|
|

|
I got a bunch of vacation photos developed (4 total rolls) that all have this scan line on them. Every picture: Is that a screw up with the developer or is something wrong with my camera?
|
|
#
?
May 25, 2011 18:58
|
|

|
To the best of my knowledge, there is nothing even remotely close to anything that could cause that in-camera.
|
|
#
?
May 25, 2011 19:01
|
|


|
NAPP has a nice set of Photoshop beginner tutorials up: http://www.photoshopuser.com/keyconcepts?utm_source=napp&utm_medium=email&utm_campaign=join+email+march
|
|
#
?
May 25, 2011 22:35
|
|
|
the posted:I got a bunch of vacation photos developed (4 total rolls) that all have this scan line on them. Every picture:
|
|
#
?
May 26, 2011 01:12
|
|
|
spf3million posted:Can you see the line on the actual negative? It's most likely a problem with the scanner. No. I had them redo them, and the new ones look... better... but some still have a faint line on them. I guess I'll have to pick a new place to get my photos developed!
|
|
#
?
May 26, 2011 03:17
|
|
|
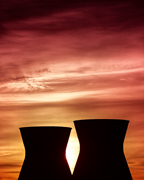
Just wanted to show an example of an image Nik Software's Dfine 2 was able to rescue that Lightroom 3 couldn't help: 
|
|
#
?
May 26, 2011 04:47
|
|
|
A5H posted:Is it possible to fake DOF realistically? I want to blur out the background on this shot a bit but I'm struggling to do it. I haven't used it, but there is a LR/PS plugin called Bokeh 2 by Alien Skin that apparently does what you're wanting.
|
|
#
?
May 26, 2011 09:16
|
|

|
I bought a lens off amazon and received a $100 credit against Lightroom 3, making it only $79. Should I buy it? (Tell me to buy it.)
|
|
#
?
May 27, 2011 19:46
|
|

|
Lightroom is amazing and indispensable.
|
|
#
?
May 27, 2011 20:06
|
|

|
bobz0r posted:I bought a lens off amazon and received a $100 credit against Lightroom 3, making it only $79. Should I buy it? (Tell me to buy it.) Yes It's a fantastic editor that has a pretty easy learning curve compared to Photoshop. I rarely pop my photos into PS anymore after getting Lightroom.
|
|
#
?
May 27, 2011 20:26
|
|

|
So I have a photo of a colorful subject in front of a grey-ish background. I would like to blend this on top of a more interesting background. Is there a way to do this in Photoshop with blending modes and Blend-Ifs ?
|
|
#
?
May 27, 2011 22:01
|
|
|
teethgrinder posted:Just wanted to show an example of an image Nik Software's Dfine 2 was able to rescue that Lightroom 3 couldn't help:
|
|
#
?
May 29, 2011 07:39
|
|
|

|
| # ? Apr 28, 2024 04:03 |
|
|
It depends. I usually let it do it's thing. Sometimes I manually override it to preserve faces/hair better. Make sure you don't miss the "more" settings though. The debanding ones work really well. I don't really understand where banding comes from in some low-light noisy photos I've taken, but dfine completely removed it.
|
|
#
?
May 29, 2011 17:24
|
|