|
Cpt.Wacky posted:No, you need to pressure can stock because stock it's not low-acid. The other option is freezing. Oh, so can I just fill a bunch of jars with stock and once cool, throw them into the deep freeze? How long will they keep, do you know? Thank you! And thanks for letting me know about the pressure canner. I may have to quit dragging my feet and purchase one.
|
 #
?
Nov 17, 2014 20:05
#
?
Nov 17, 2014 20:05
|
|


|

|
| # ? Apr 25, 2024 05:11 |
|
|
Nibblet posted:Oh, so can I just fill a bunch of jars with stock and once cool, throw them into the deep freeze? How long will they keep, do you know? Thank you! Probably 4-6 months. If you have a foodsaver there is a cheap attachment for canning jars that you could use shortly after it's frozen to help it keep a little better.
|
|
#
?
Nov 17, 2014 20:29
|
|

|
Cpt.Wacky posted:Probably 4-6 months. If you have a foodsaver there is a cheap attachment for canning jars that you could use shortly after it's frozen to help it keep a little better. Oh poo poo, yeah! I DO have a foodsaver, I didn't even think about that! Thank you so much for your help!
|
|
#
?
Nov 17, 2014 20:42
|
|
|
Nibblet posted:Oh, so can I just fill a bunch of jars with stock and once cool, throw them into the deep freeze? How long will they keep, do you know? Thank you! If you freeze in jars, either use wide-mouth or leave extra headspace (unless you want broken jars). http://nchfp.uga.edu/questions/FAQ_freezing.html#21
|
|
#
?
Nov 17, 2014 21:19
|
|

|
There should be a convenient fill line for freezing on your jars too: http://www.rootsimple.com/2013/02/how-to-freeze-food-in-canning-jars/
|
|
#
?
Nov 17, 2014 23:51
|
|
|
I just reduce my stock way the gently caress down and then freeze in ice cube trays. Then wherever I want to add stock to something I just chuck in a cube and anywhere from 1 cup water to no water at all. It's very convenient.
|
|
#
?
Nov 18, 2014 11:31
|
|


|
I'm making my turkey today (only cause we're going to be out of town for Thanksgiving) and plan on spending tomorrow boiling my carcass and making stock. Thanks to everyone for your advice and tips. I'm thinking this will save me from picking up glass shards in my freezer.
|
|
#
?
Nov 18, 2014 22:12
|
|
|
I am trying to find some advice, or some experience that anyone has actually canning duck confit at home. (Or something that will turn out in a similar manner as the confit that I'm familiar with) I have prepared duck confit in the traditional way, (preserved under it's own fat and left in the refrigerator) but I'd like to be able to pressure can it, so I can ship it all over the country as Christmas presents.
|
|
#
?
Nov 25, 2014 21:05
|
|
|
I do some fermenting bed-based pickling as well as brine. Would some recipes/how-to's on that be welcome here? (I'd have PM'd OP but...) Mainly I do nukadoko, miso, and sake-lees beds.
|
|
#
?
Dec 5, 2014 17:30
|
|


|
I think it would be appropriate and welcome.
|
|
#
?
Dec 5, 2014 22:59
|
|
|
So, I just binged this thread and I have a few questions, most of which are probably stupid, but I wanted to make sure I was reading correctly. This is assuming pickles and brines and acidic content and not meat products or anything. After getting the ingredients for pickles and whatnot ready to go, safe handling of the jars goes: Sanitize the empty jars, the rings, and the lids, by boiling in water for 20 minutes. Dry everything Fill the jars with whatever using wide mouth funnel and fill to recipe recommendation, packing tightly Wipe the mouth of the jar clean with a damp paper towel Set the lid on the jar without touching it with your hands, because bacteria/microbes/whatever Apply ring to jar and tighten with just hand strength Place hand tightened jars into boiling water that covers by an inch or two - this can be done in a stock pot and as long as the jars do not touch the bottom of the pan. This is the "waterbath" Boil the filled and sealed jars for 5-30 minutes depending on recipe guidelines and the size of the jars Remove from the boiling water using tongs, set in a cool, dry place and let sit for several hours You can test the seal by removing the ring and lifting by the lid. If it sticks, it's sealed. Assuming all the above has been done properly, your food has been preserved from nasty microbes/bacteria. Pickles and other fermenting things should be left to sit in this state for a few weeks at least so to be at the optimum flavor, but they will keep for months stored in a basement. Refrigerate after opening, and they'll be good for a few months. Do I have that all about right? For the handling of the lids, are they magnetic? And could I use gloves to put the lids on or should I use something else? And on to recipes, does anyone have a good pickled garlic recipe? And I saw back on like page 4 or 5 someone had mentioned beer jelly. What kind of beers would be good for this and what would be a good application? My first thought goes to ham, but I don't see it going well on bread/toast.
|
|
#
?
Dec 19, 2014 20:49
|
|

|
CzarChasm posted:Sanitize the empty jars, the rings, and the lids, by boiling in water for 20 minutes. Dry everything You don't need to sanitize the rings, they don't come into contact with the food. You also should NOT boil the lids. In fact, you don't even have to heat them at all anymore (you used to have to keep them in hot/barely simmering water, but Ball just changed their guidelines). You still want to wash them in soapy water though. Also, you can sanitize jars in your dishwasher. And I don't think you have to boil anything for 20 minutes... 5 minutes it probably plenty (if you go the boiling route). Using the dishwasher also helps keep the jars hot before packing. I'm not sure what you mean by hand strength. But it's most commonly called "finger tight" which is probably less than "hand strength." You really don't want to tighten them at all, just screw them until the ring is in contact with the lid, and maybe another quarter turn. Really the rings are just there to keep the lid in place in the bath. That's it. Also, picking up the jars by the lid is an ok way to test, but you don't have to. If the button is depressed after 24 hours, it's sealed. Remove the rings for storage. Yes, they're magnetic, and they make little magnet wands specifically for picking up lids and placing them on the jar. I don't know anyone that wears gloves while canning. Just wash your hands. The waterbath is used to seal but also to make the food in the jars safe. Between salt, vinegar, and boiling for pickles, anything it might pick up from your hands during packing won't live.
|
|
#
?
Dec 19, 2014 21:21
|
|


|
So, I want to make coconut rum soaked pineapple for a Christmas gift. Pretty much everything I've seen online is all about marinating the pineapple in the rum overnight, then straining it and using it in different recipes, but I want the end result to be a jar of booze and fruit that will be shelf stable for at least a couple months on its own. Does anyone have advice on how to not get people sick with this? I would guess that the amount of alcohol and sugars/enzymes would stop most bacterial growth, so do I even need to do anything beyond sanitizing the jars and lids? Would water bathing the jars turn the pineapple to mush?
|
|
#
?
Dec 20, 2014 04:50
|
|

|
RedTonic posted:I do some fermenting bed-based pickling as well as brine. Would some recipes/how-to's on that be welcome here? (I'd have PM'd OP but...) Mainly I do nukadoko, miso, and sake-lees beds. Please do.
|
|
#
?
Dec 20, 2014 04:57
|
|


|
CzarChasm posted:Do I have that all about right? Get thee to the National Center for Home Food Preservation: http://nchfp.uga.edu/publications/uga/using_bw_canners.html. Also helpful is the Ball Blue Book, which I think has a pickled garlic recipe. They're both great resources and also have some nice recipes (I recommend the NCHFP pickled bell peppers). Others have already mentioned it, but you only need to wash the rings and lids with warm, soapy water. I've been following the new recommendation of not simmering the Ball brand lids and have not had any seal issues, so far. If your processing time is under 10 minutes, you'll want to sterilize the jars first (10 minute boil). This is usually no big deal, since you need to get the canner to a boil anyway.
|
|
#
?
Dec 22, 2014 17:40
|
|
|
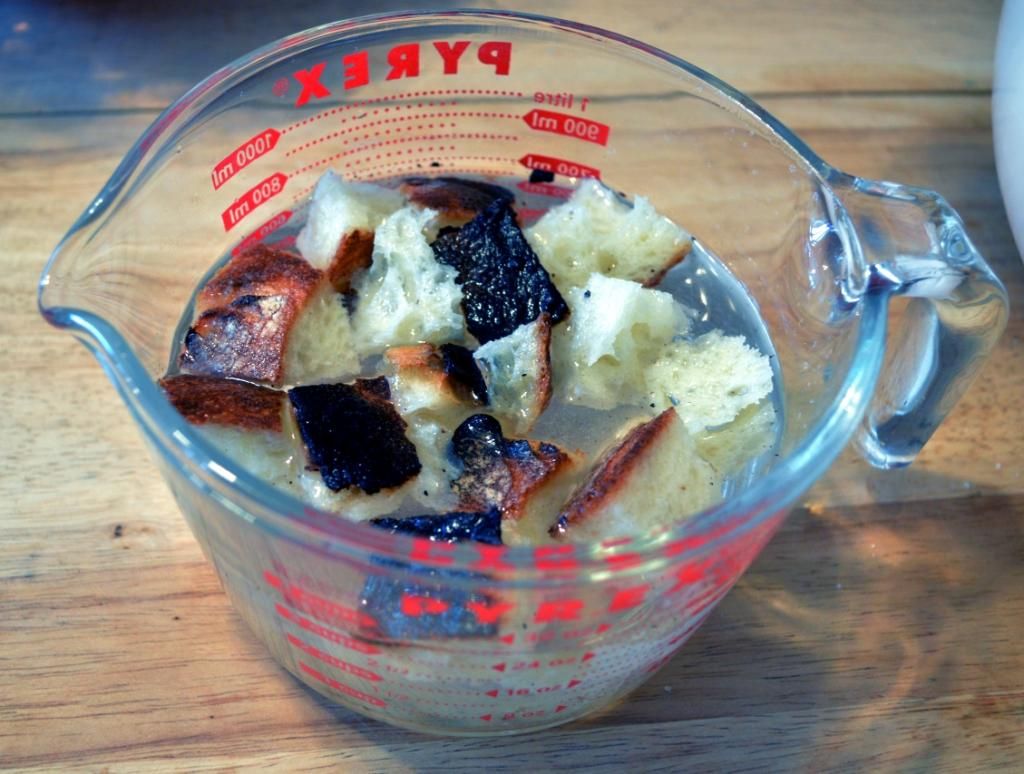
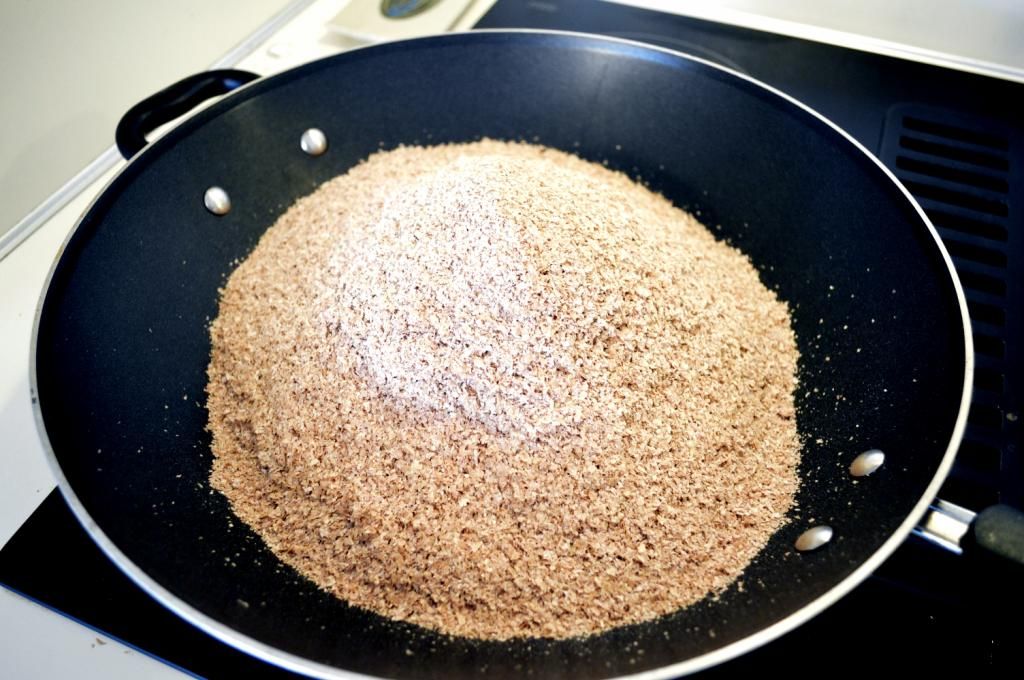
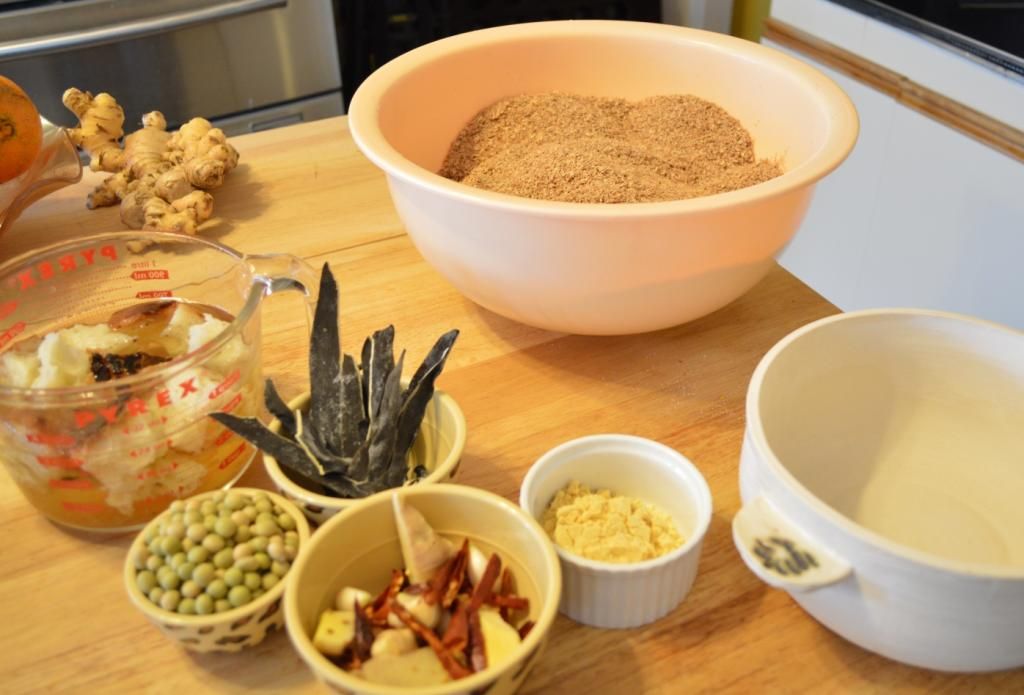
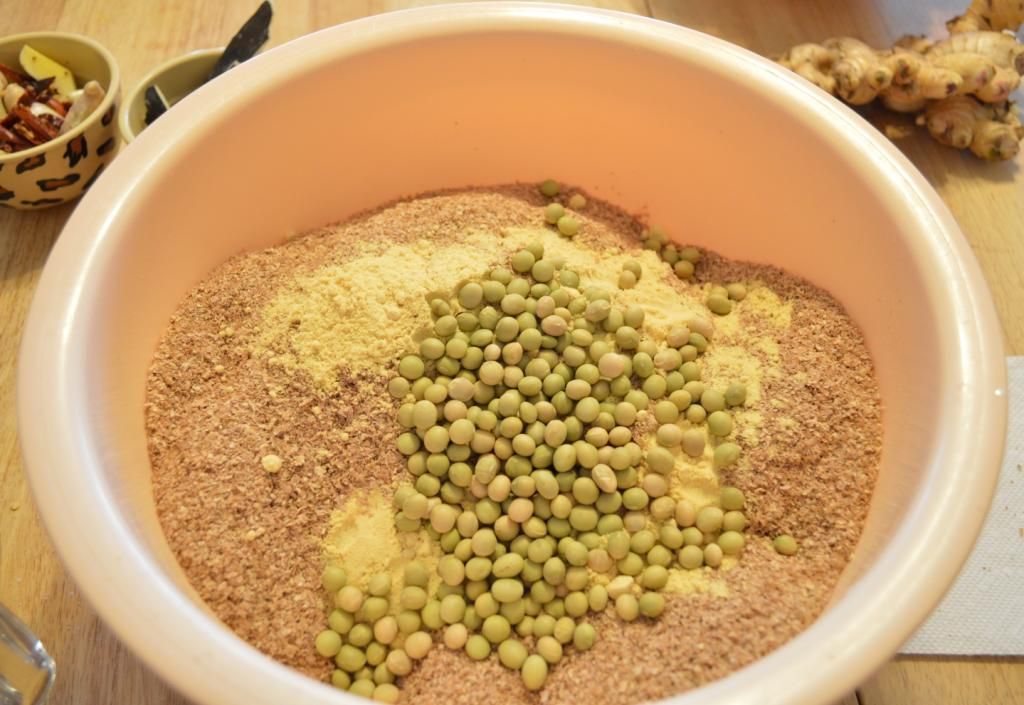
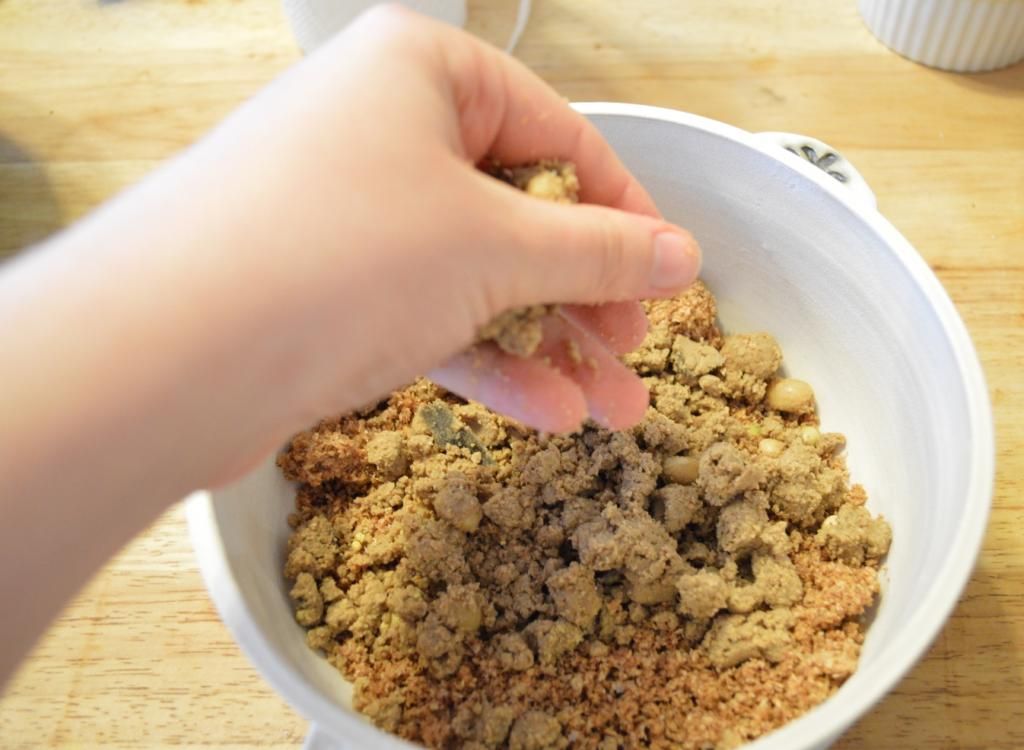
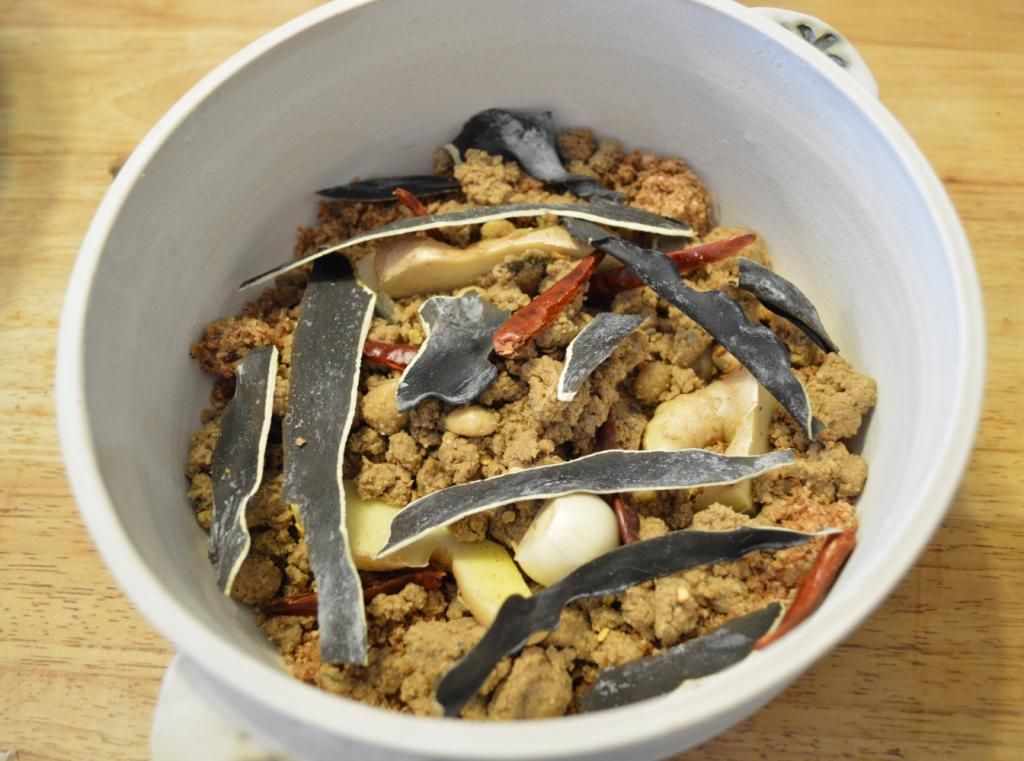
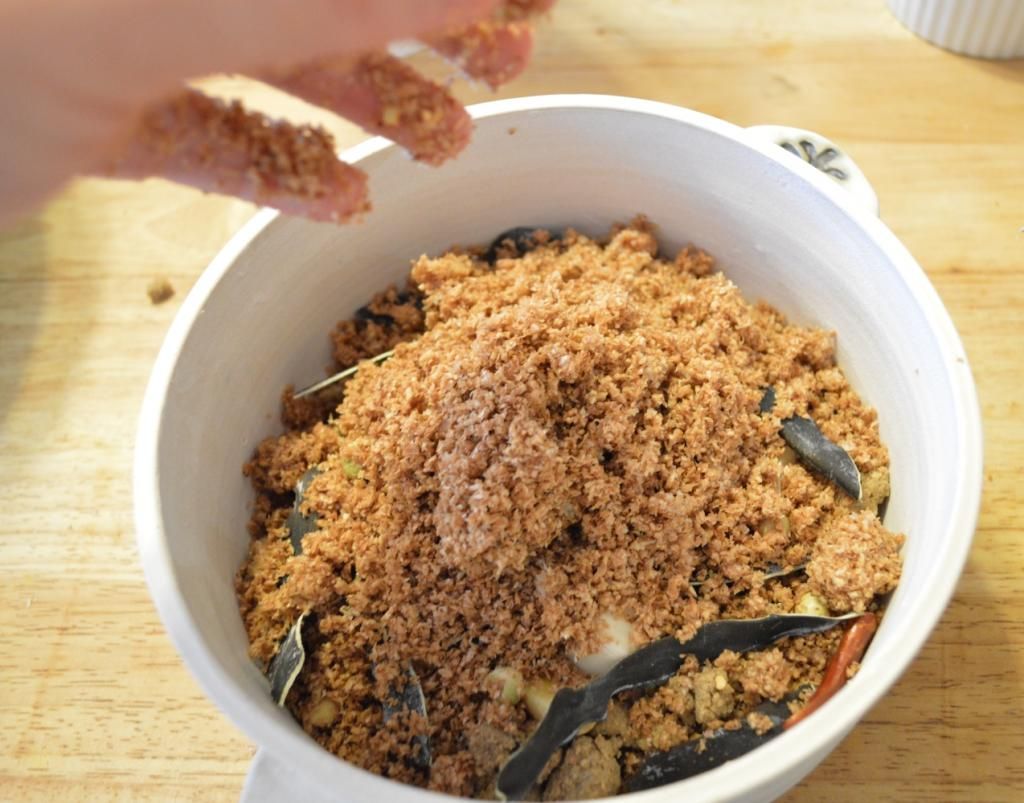
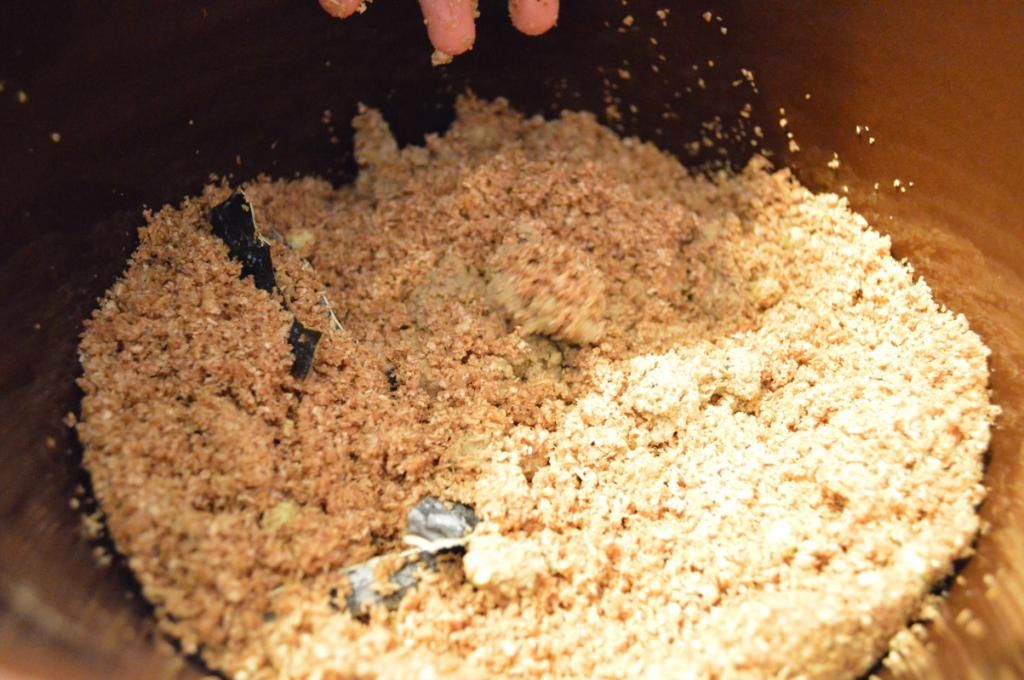
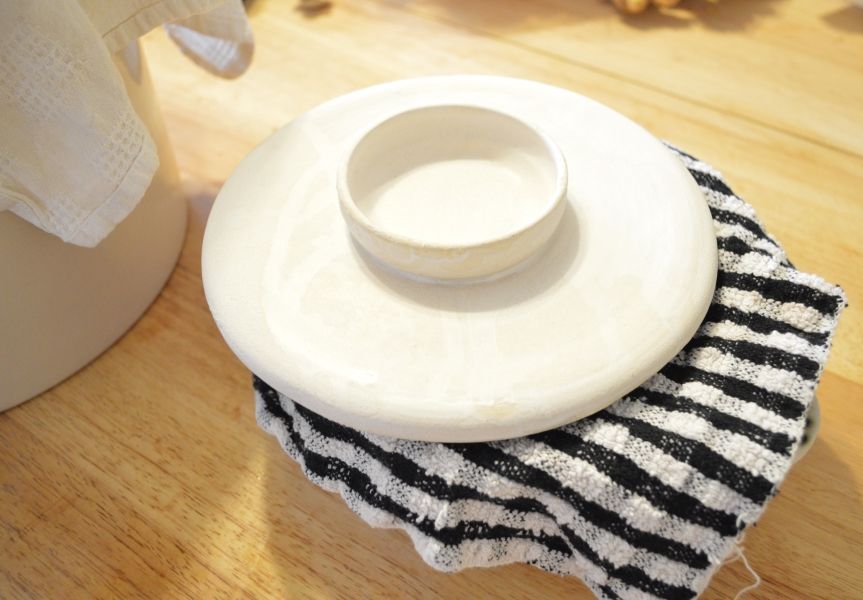
 This cat wants to tell you about rice bran pickling in Let's Cook: Germs Edition. Doing this write-up took me a while, but here goes. Like I said before, this does not really involve brining or canning, but it is preservation! Just in case anyone minds, a slightly different version of this post is going up on my personal blog in the near future. There are a lot of pictures because I decided to take the chance to practice using a camera. I'm pretty bad, but guided mode is great! If anyone has some tips on how I can improve my photos for future pickleposts, I'd be grateful. I've tried to make this clear enough for a total beginner to understand and follow, so some things are probably over explained. (Also, special thanks to Agent Cooper for schlepping my stuff in and out of the cellar.) Nukamisozuke - Rice Bran Pickling Part 1 As far as I have been able to discover, rice bran pickling is unique to Japan. I could not find any instructions or discussions pointing to native nuka-style pickling in Korea or anywhere in China/Taiwan. Nuka-style pickling appears relatively unknown in the US until recently--it seems to have blown up online this last summer, which was wonderful since I could actually troubleshoot this recipe at last. Nukamisozuke (nuka = rice bran; miso = fermented paste; zuke = preserved/pickled/fermented) is a pickling technique which uses a fermented bed of rice bran with added salt. It's a lactic pickling method and, once you have your bed going, it pickles your fruits and vegetables (and even meat and fish) very quickly--we're talking hours. Despite the name, there is no miso added to the bed. You could certainly add some for flavor if you like, but then your pickle would be more of a misozuke and less of a nukazuke. The "miso" just refers to the fermentation and paste-like consistency of the pickling substrate. Numamiso is the pickling substrate, nukazuke/nukamisozuke refers to the items pickled in the nukamiso. Nukadoko is another way to refer to the pickling bed. The bed is alive during the whole process. This is a perpetual pickling substrate that with five or so minutes of time each day can live for decades and be shared with friends and family. In our house, we refer to it as a pet. It gets stirred once or twice a day, and if we are leaving for more than one or two days, we actually take some trouble to store the bed so that we can take it out when we return and get back to picklin'. The goal is to maintain active colonies of friendly yeasts and bacilli which impart a good flavor to your pickles. This pickle does require more time investment than pretty much any other method, but the result (daily fresh pickles!) is worth it, in my opinion. If anyone reading has made takuan, you might notice some strong similarities between the methods. 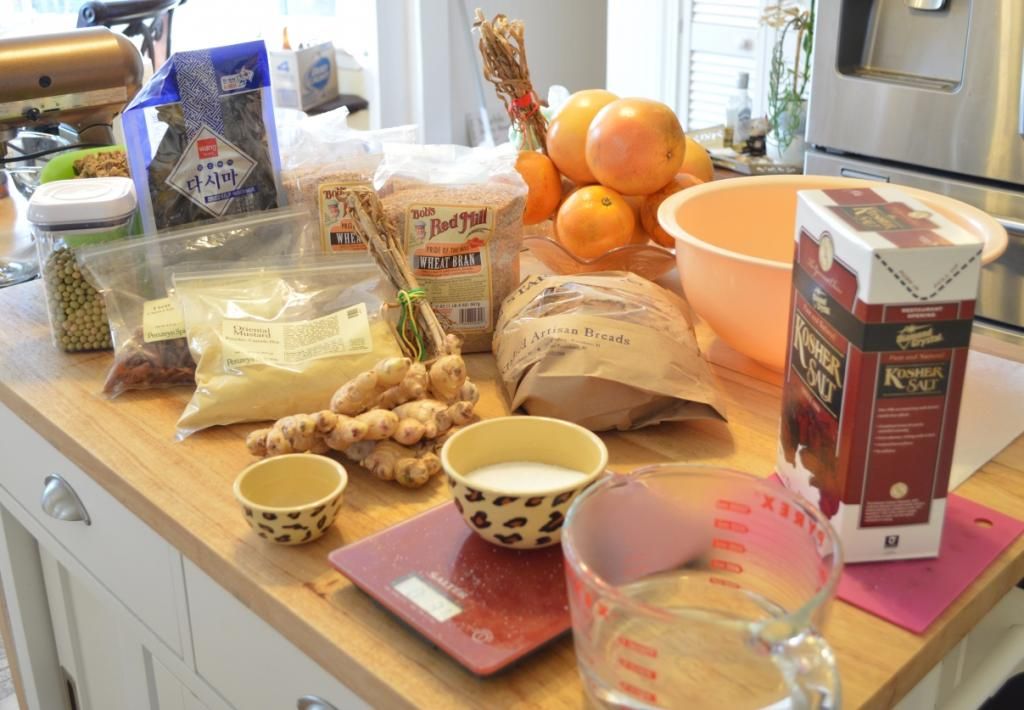 To prepare a basic bed, you'll need the following:
The few recipes I found early on were all for huge portions of nukamiso, but some writers have been kind enough to specify the basic proportion: salt to rice bran. If you live in a temperate climate, you should start with 12-13% salt to the mass of your dry bran. If you live somewhere colder, you can scale that down closer to 10%. If you live somewhere warmer and you need to slow down fermentation, you can go anywhere from 15% - 17%. Hitting 17% is going to result in a really salty pickle, though, so I wouldn't start that high. Ikuko Hisamatsu, who wrote the wonderful Quick & Easy Tsukemono: Japanese Pickling Recipes, starts out with 15%. I found that to be a little too salty for my tastes and it inhibited the bed's start. After that, it's one part water to one part bran for the most part. Wheat bran is much fluffier than rice bran, so I felt the need to add more liquid while using wheat. I found that other people felt the same way. If your bran is really dry, you may find that you add more water on day one or so. Amounts for a modestly-sized nuka bed:
Stirring once a day every day is crucial. In hot weather, you should even consider stirring twice a day (say, once in the morning as you go about your bidness, then once in the evening when you want to fish out your dinner pickles.) Stirring allows you to incorporate air into the nukamiso mixture. This helps keep colonies of anaerobic bacteria such as lactobacilli in check, given that air is bactericidal and also carries competitive microorganisms. You want populations of anaerobic bacteria, but they cannot be permitted to grow out of control. Stirring regularly helps balance this. Troubleshooting weird bed conditions and preparing various vegetables for pickling in the bed will come in part 2. Also, if any goons in the US are interested in trying this out and would like some nukamiso starter, send me a PM. I'll gladly ship a little tupperware of mine to anyone who is interested in having a quick start to their own nukamiso pickles.
|
|
#
?
Jan 11, 2015 02:24
|
|

|
I was just thinking about this as a project for my new pickle crock. Do you pickle fish too?
|
|
#
?
Jan 17, 2015 16:51
|
|

|
mizbachevenim posted:I was just thinking about this as a project for my new pickle crock. Do you pickle fish too? I have not yet tried it! I do intend to, though. Taking some of the ready to roll nukamiso aside and putting your fish or meat in that is likely the best way to go. I do not know if I would reuse the nukamiso afterwards, but since you need to periodically feed your bed anyway, you'd have more soon enough to give it another shot. I have not found much writing on using this to pickle fish and meat, which naturally makes me really curious to try it for myself, but I'm also cowardly when it comes to poo poo like potential food poisoning. The pickles from a nuka bed aren't long-storage pickles--they're more similar to quick pickles, so you have about 3 days to eat them once they're ready. Sorry about the delay in part 2. I definitely have not been waiting for a persimmon to ripen so I can peel it, dry the peel, and show that as part of a section on additional seasoning agents.  I think I'll have that ready for tomorrow. I think I'll have that ready for tomorrow.
|
|
#
?
Jan 17, 2015 17:11
|
|
|
I may hit you up for some starter once I build up the courage. I've had that book for nearly a year, but the prospects of starting from scratch just makes me want to put it off. Maybe I should invest in a Nippon mail order bride, or get a hooker to stir it for me. My hand flora probably won't do...
|
|
#
?
Jan 17, 2015 18:45
|
|
|
Hey, hit me up any time! It's not hard to start from scratch though, either, and I'm sure your flora is fine. The starter/test vegetables you add also help with that, and you're making a nice environment for any airborne germs to waft in and settle down, too. Even stirring isn't burdensome. My problem is that I tend to forget. Out of sight, out of mind. I'm actually rehabbing a batch at the moment (so that lends itself nicely to a comprehensive write-up on fixin poo poo). I guess I gotta evangelize a little bit.  The vegetables I've pickled in it have come out crisp, more intensely flavored (plus just a bit nicely salty/sour), and with a little translucence that makes brightly colored vegetables almost jewel like. If I had any radishes right now, by god, those would have been the first photo. Another cool thing is that you can pickle a lot of stronger greens this way. I wouldn't go with a succulent green like spinach, but so far, turnip, radish, beet, and mustard greens have taken the treatment well. So have kale and cabbage. I dig them out, rinse the bran away, chop them up, and sautee with just a little sesame oil. It's great. Long pickled (or overly soured) other veg get similar treatment. The vegetables I've pickled in it have come out crisp, more intensely flavored (plus just a bit nicely salty/sour), and with a little translucence that makes brightly colored vegetables almost jewel like. If I had any radishes right now, by god, those would have been the first photo. Another cool thing is that you can pickle a lot of stronger greens this way. I wouldn't go with a succulent green like spinach, but so far, turnip, radish, beet, and mustard greens have taken the treatment well. So have kale and cabbage. I dig them out, rinse the bran away, chop them up, and sautee with just a little sesame oil. It's great. Long pickled (or overly soured) other veg get similar treatment.
|
|
#
?
Jan 18, 2015 02:31
|
|
|
Anyone ever make soda jelly? The recipe I at looking at calls for 12 ounces of soda boiled one minute with 3 cups sugar. Then a 3 ounce pouch of liquid pectin in and back to a boil for another minute. Then ladle hot into the usual sterilized jars and water bathed for five minutes. Does five minutes sound good for four-ounce jars? The Blue Book lists 10 minutes for half-pint jellies and I assume it would be best to do the same if I use eight-ounce jars? I'd love to be the rear end in a top hat handing out Moxie and Irn-Bru jellies on Hogswatch 
|
|
#
?
Jan 22, 2015 19:29
|
|

|
Butch Cassidy posted:Anyone ever make soda jelly? It won't hurt it to process for 10 minutes, I'm sure. I'm assuming it only calls for 5 minutes because of the acidity of soda. I'd probably just process it for 10 minutes to be on the safe side.
|
|
#
?
Jan 22, 2015 22:19
|
|
|
Yeah, I have a feeling boiled acidic soda should be fine, but felt it safer to ask when the recipe writer prefers the old "slap a lid on it and let nature fake its course on the counter" method with hot water bath as an alternative.
|
|
#
?
Jan 22, 2015 23:55
|
|
|
Butch Cassidy posted:Anyone ever make soda jelly? I did a root beer jelly once. It kind of tasted like root beer candy but needed more flavor. If I did it again I would root beer extract.
|
|
#
?
Jan 23, 2015 06:32
|
|
|
What if you upped the soda and reduced to your goal volume? Or scored some syrup from a restaurant to drizzle in and boost the flavor? And you remind me the local brewpub makes root beer and it would probably make a neat gift as a gimmmicky local ingredient jelly. Luckily, it's a cheap recipe so I should be able to dicker with it before prepping gifts.
|
|
#
?
Jan 23, 2015 14:54
|
|
|
Part 2 of nukamisozuke. I'll add in some pictures later; unfortunately, I can't upload them right now. Took me a few weeks to get a day with nice light, and now I can't even show what I did. Adding Flavor The basic recipe is a solid basis on which to build a good pickling bed. Given enough time, everything you add at the start will mature and change in taste over time. The vegetables you pickle also add to the flavor of the bed.
Maintenance The importance of regularly stirring your bed cannot be overstated. Stirring is the primary mechanism that prevents an infection of unwanted microorganisms by permitting oxygen to touch more of the bed. Oxygen exposure also helps the fermentation and leads to better flavor. Technique is more like breaking something up with a spatula than whisking stuff around. Dig your hands in deep, get down to those corners, bring them up, and destroy the clods. Try to keep the sides of your container relatively clean so as not to invite bad guests. Keep the top of the bed smoothed out (not pressed flat) to help a bit with this as well, and to make inspecting the surface easier. As I wrote before, your hands should be clean and have no lotions or other potions applied. Those will contaminate the bed and cause off flavors and who knows what sort of gnarly poo poo. From time to time, you will need to add more nuka, salt, and potentially water (depending on local humidity). This is just to replace the nukamiso lost from stirring and removing vegetables. Vegetables get washed before and after adding to the bed. Storage For short-term storage, remove the nukamiso from its container and put into (clean) doubled plastic bags. Tie loosely, then put in the refrigerator. Your nukamiso will survive this for about a week. Once you return it to its (clean) home, make sure to stir it frequently for the next few days, as the surviving bacteria need to get a little kick-start to re-grow. For long-term storage, make sure all vegetables and vegetable scraps are removed from the bed. Take out any garlic cloves or ginger knobs for good measure. Add extra bran to get the nukamiso thick and to balance moisture. Pat down the nukamiso and clean the inner sides of the container well with a moist cloth. Spread a double (or triple, depending on hole size) layer of cheesecloth over the nukamiso surface. Cover with about 1 cm of mustard powder, and then cover that with enough salt that you cannot see the yellow mustard anymore. Cover with a drop lid (or a plate that fits inside your container) and cardboard/thick cloth. Store in a cool, dark place until you are ready to retrieve the nukamiso. This will keep for months. To reinvigorate a hibernating bed, take the lid off, then carefully remove the cheesecloth, taking care not to spill salt and mustard. Discard. Take about an inch off the nukamiso's surface, as that's going to be way too salty for flavor and pickling. You will need to add more bran and other seasonings to the bed, and might need to adjust salt and water content. Stir twice a day for a while until the bed has regained a nice smell. You'll be doing tester vegetables again just like when you first started. As soon as those taste okay, you can get back to picklin'. Troubleshooting My bed is watery! Buy a new mattress. Failing that, add a handful of beans to the nukamiso. Soybeans will absorb water and slowly enrich the flavor. Other dried beans are also acceptable. If your bed is really wet, give it a good stir, then add a clean sea sponge on top. Squeeze it out (into a sink) as it wicks away moisture. Another option is to give the bed a stir, smooth the surface, then make a hollow. Set a sake cup or similar small cup into the hollow. A watery bed will quickly make the vegetables taste too sour and will take on a bad smell. The problem is pretty easy to correct, so take care of it quickly. My bed is sour! This and wateriness are the most frequent issues. Beds usually sour because they are not being turned frequently enough compared to the ambient temperature and the nukamiso salt content. The higher the temps, the more often the nukamiso needs to be stirred. Any bed can benefit from a twice a day turn, but it becomes necessary in the summer if you do not have the blessing of central air. If your bed gets a little sour, stir more and the problem will correct itself. But the bed is really loving sour, you say? It smells a little alcoholic, you say? Then sterner methods are required. In addition to stirring more, you have a few more tools to wield. More salt, more mustard powder, umeboshi, and dried eggshells can help solve this problem. Start by adding a palmful or less of salt and a Tbsp or two of mustard powder. Stir those in. Mustard powder will kill microorganisms, and depending on the acidity of your bed (which is what you detect as a sour smell or taste), it may raise the pH. Calcium in dried eggshells will raise the pH. This counteracts the sourness and renders the bed less hospitable to lactobacilli. You want lactobacilli in the bed, but keeping that population in check is important to your food's quality and safety. Umeboshi also has a high pH, so that contributes to balance and also flavor. Since they are salt pickled, umeboshi will also add more salt to the bed. Again, salt's role is controlling bacteria colonization and growth rates. I just rehabilitated a bed which had gotten a little of a solvent smell. It is once again smelling earthy and slightly sweet rather than like proto-moonshine. It took a week of turning before and after work, adding salt, mustard, and eggshells. A note on prepping eggshells: just the leavings from breakfast eggs or whatever will do fine. Rinse them out in the sink and pop them into the oven on 200 for a while. I leave them in for a couple hours. Then crush them and add to the nukamiso. My bed is moldy! I actually have not encountered this issue. However, guidance from other sources all concur that if it is surface mold, you can take the surface off (go down about an inch to remove mold filaments). Then add more salt. This mostly occurs if you have not been stirring frequently enough or if your salt content has gone down too far. I forgot some pickles in there! poo poo's hella sour now, isn't it? This can lead to excess water in the bed, too. For the soured vegetables, there's a save! Wash them and slice, chop, or julienne. Soak them in clean, cool water to draw out the excess salt. Taste after about 15 minutes. If it's good, you can stop here! Stirfry: For soured vegetables, prep as above, then stir-fry with a little sesame oil, garlic and/or ginger. Salad: Prep as in first line, then mix with toasted sesame seeds, some ginger, and/or other furikake. Add a little rice wine vinegar and/or soy sauce. I've minced up over-pickled radish and used it in vinaigrette. Works nicely! I got bugs!  Theoretically, your bed can still be saved as long as any larvae have not penetrated beyond the first inch. The issue is similar to the moldiness: remove the first inch of surface, add more salt and stir. If bugs have penetrated further, dispose of the whole bed. In the future, remember to secure a linen tea towel or some layers of cheesecloth over your bed's opening. Bugs are not welcome. Theoretically, your bed can still be saved as long as any larvae have not penetrated beyond the first inch. The issue is similar to the moldiness: remove the first inch of surface, add more salt and stir. If bugs have penetrated further, dispose of the whole bed. In the future, remember to secure a linen tea towel or some layers of cheesecloth over your bed's opening. Bugs are not welcome.Some old school households use nukamiso started by somebody 30 years ago, so this is really a project you can do for a long, long time.
|
|
#
?
Jan 27, 2015 21:00
|
|
|
Does anyone see a problem canning with tea? Specifically, I had the idea to make a meyer lemon marmalade (or jam) and use black tea to make it an Arnold Palmer jam. I have no idea how this would turn out, but I also don't see many (or any) recipes for waterbath canning with tea added/steeped in the ingredients. It seems like it would be fine if I use a regular marmalade recipe, and just soak the tea with the overnight lemon soak, but I don't know. I can't imagine the tea would mess with the pH much, and if it's lemon jam/marm anyway, that it would make any difference.
|
|
#
?
Jan 28, 2015 00:01
|
|
|
I don't see why there would be any issues with a tea jam.
|
|
#
?
Jan 28, 2015 07:22
|
|
|
 I was feeling all depressed over it being winter and so far from canning season, then hit on the idea of making jam and marmalade.  The pictures don't show up as well as I'd hoped, but the golden is grapefruit jam, and the darker is blood orange marmalade. I've never made marmalade but it came out great, I really enjoy the sweet and sharp sour/bitterness of it. In all I got a little over 2 pints of the jam, and a pint of the marmalade. I think I need to get more blood oranges, I'm using it on everything.
|
|
#
?
Feb 4, 2015 01:12
|
|

|
Man how did I miss this thread? I've been making sauerkraut and jam all winter. I have two buckets of sauerkraut fermenting as we speak. Tomorrow I make strawberry jam. I even made this picture because jamming is awesome:  Chicken in Black posted:Blood Orange and Grapefruit Interesting flavors, the only ones I've made so far have been strawberry and pineapple, with pineapple being my favorite.
|
|
#
?
Feb 5, 2015 08:34
|
|

|
Rand alPaul posted:Interesting flavors, the only ones I've made so far have been strawberry and pineapple, with pineapple being my favorite. Pineapple jam is so ridiculously delicious and underrated. Try pineapple and mango, or pineapple daiquiri with lime and rum. Carrot cake jam with pineapple, carrots, pears and raisins is also a good pineapple use.
|
|
#
?
Feb 5, 2015 08:47
|
|
|
My mom is canning chicken in a pressure cooker at 15lbs for 75 minutes. How much will we die of botulisim?
|
|
#
?
Feb 9, 2015 18:18
|
|

|
I still have a ton of jalapenos and habeneros left over from summer. I did a bunch of candied jalapenos, jams and jellies with them but I am at a lack of what to do next with them. Anyone have any good pepper related recipes I can can?
|
|
#
?
Feb 9, 2015 18:23
|
|


|
Suspect Bucket posted:My mom is canning chicken in a pressure cooker at 15lbs for 75 minutes. How much will we die of botulisim? If it is a pressure canner and the jars are pints, the Blue Book gives its blessing.
|
|
#
?
Feb 9, 2015 18:26
|
|
|
Butch Cassidy posted:If it is a pressure canner and the jars are pints, the Blue Book gives its blessing. Nope, cooker. No gauge, only does 15lbs. Pint jars though.
|
|
#
?
Feb 9, 2015 18:30
|
|
|
15 psi is the goal in pressure canning. The problem is that regular pressure cookers lack a gauge to prove that they are making the full 15 while many don't make the goal pressure. I, personally, wouldn't worry if they stored without rings and exibited no cap bulge. But would promptly get the matriarch a pressure canner. An aluminum presto will provide stalwart canning service without breaking the bank and provide guaranteed pressure and be roomier for bulk canning.
|
|
#
?
Feb 9, 2015 18:42
|
|
|
Butch Cassidy posted:15 psi is the goal in pressure canning. The problem is that regular pressure cookers lack a gauge to prove that they are making the full 15 while many don't make the goal pressure. Awesome. She was looking at some other ones that were like, 200 bux and shaking her head. The Presto 23 Q looks great. She did discover how easy and effective it is to foodsaver salad though. In a mason jar, cut cukes last for WEEKS. So she's got a pretty positive track record with food experiments.
|
|
#
?
Feb 9, 2015 20:13
|
|
|
The bigass pressure canner is also great for gallons of pork stock after a pig roast. Make it quickly in the pressure canner, split to smaller stock pots and can a shittonne of gelatinous magnificence.
|
|
#
?
Feb 9, 2015 20:21
|
|
|
Butch Cassidy posted:The bigass pressure canner is also great for gallons of pork stock after a pig roast. Make it quickly in the pressure canner, split to smaller stock pots and can a shittonne of gelatinous magnificence. I AM doing a whole pig for my birthday later on... As in, buying a pig, butchering it, and breaking it down to freezer and smokerable pieces. I dont have enough friends to eat a whole roast pig. I could definitely do delicious stock things with the bones and bits. Unless any of ya'll want to come to my birthday party.
|
|
#
?
Feb 9, 2015 21:07
|
|
|

|
| # ? Apr 25, 2024 05:11 |
|
|
Suspect Bucket posted:I AM doing a whole pig for my birthday later on... As in, buying a pig, butchering it, and breaking it down to freezer and smokerable pieces. I dont have enough friends to eat a whole roast pig. I could definitely do delicious stock things with the bones and bits. If you are in Arkansas I'm on my way.
|
|
#
?
Feb 9, 2015 21:51
|
|