

|
DKII posted:People like Est more in a split vote for some reason. Also the women get all of the stat boosts.  by the day. by the day. quote:No two polls had the same number of votes, either, because that makes sense.  Seriously that is kinda weird, who the hell votes in one poll but not the others?
|
 #
?
Mar 29, 2015 21:25
#
?
Mar 29, 2015 21:25
|
|


|

|
| # ? Apr 24, 2024 18:19 |
|
|
Finished recording the update, but didn't get to finish writing it. Here's a sneak preview instead (large image file): (preview removed due to update being posted below) DKII fucked around with this message at 21:23 on Apr 5, 2015 |
|
#
?
Mar 30, 2015 07:32
|
|

|
Chapter 4, Part 14: Dragon Crater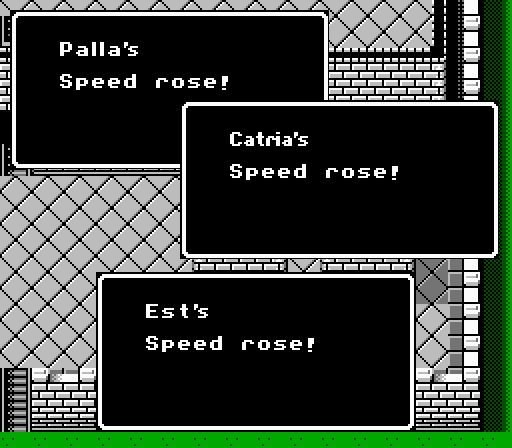 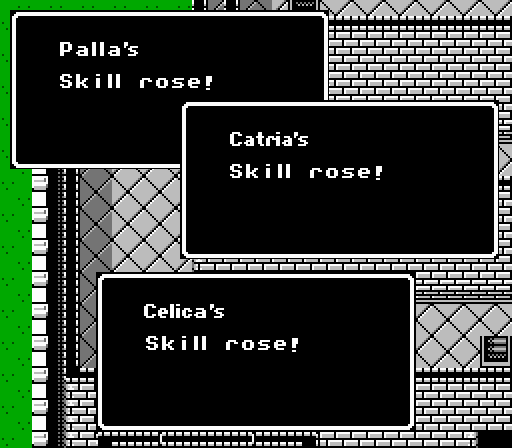 Before we start with Alm, Celica still has some things to take care of. The first two shrines get spread out amongst the top women of the team. 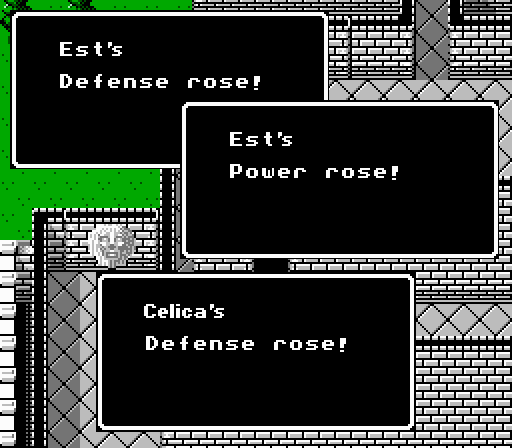 Est takes a hit from each of the shrines on the top floor, with Celica also picking up some Defense.  This is Celica's point of no return. If you want to grind up extra levels, trade items, or go back for promotions, you need to do it now. 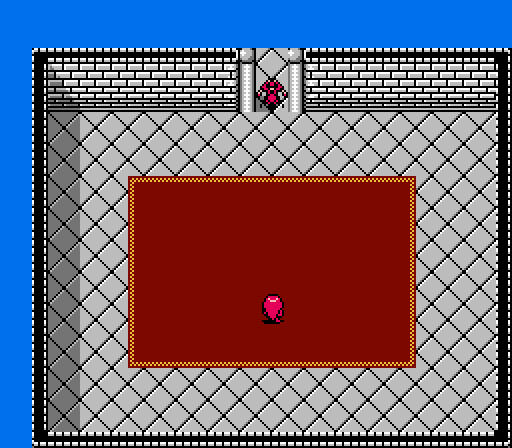 The exit closes behind Celica in the next room. Waiting is a random enemy shaman.  Okay, not so random.  Celica, you just killed this guy like three updates ago, keep up. Also of note: There's no side effects to having killed Judah out in the swamp, the game just continues on as if you hadn't. Since, you know, you're not supposed to be able to do that.  I'm Lord Doma's top servant: Judah, head priest of our Lord. I'm Lord Doma's top servant: Judah, head priest of our Lord. If that's so, then please, I beg you, free Lady Mila! If that's so, then please, I beg you, free Lady Mila!At which point Judah promptly apologizes and lets Mila go. It's a very anti-climactic ending, but these early NES games are kind of hit-and-miss in that department.... Heheh... What a panic you're in! Look into this crystal of mine. You've dearly missed seeing that face, yes? That's right. It's Alm. Why don't I let you watch him struggle?Ok, so not really. Judah's just a dick like nearly all early video game villains.  With that, we're dumped back to the world map, where Alm's waiting in Rigel Valley, on the other side of the town. Celica's watching through Judah's crystal ball, I guess. Let's watch Alm struggle!  Alm's headed for Dragon Crater, a location not actually marked on the map.  - Chapter 4 Part 14 Battle 1.gif) Sorry for the large image, but you can actually see some of the screen shaking here. Now picture that except much faster and longer and that's what actually happens in the game. Also note that both the entrance to and exit from the crater get blocked off at the end there, as a group of dragon zombies appear and immediately attack.  Five dragon zombies - not too tough. The main trouble here is that the dregs of Alm's army are on their own in the bottom-left corner - they won't last long there if more than one enemy comes after them. Turn 1  Of course, since this battle is an ambush, the enemies move first. Two dragon zombies head south, two head east, and the other apparently can't decide so just does nothing.  Since the lower group is in a lot of trouble, Silk sends Claire down to help.   Claire's a one-woman dragon zombie-wrecking machine.  The other dragon zombies here can only reach Claire.  In the northeast we blockade our saints and hope for the best. Turn 2  Ryuto's a favorite target with his rather low Defense, but I stuck the Holy Shield on him so the dragons can't actually hurt him. The AI apparently doesn't realize this.  Operation Claire Bait is a success, and she easily counter-kills her attacker. 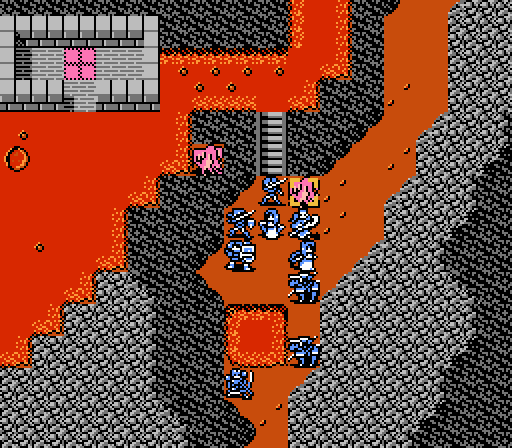 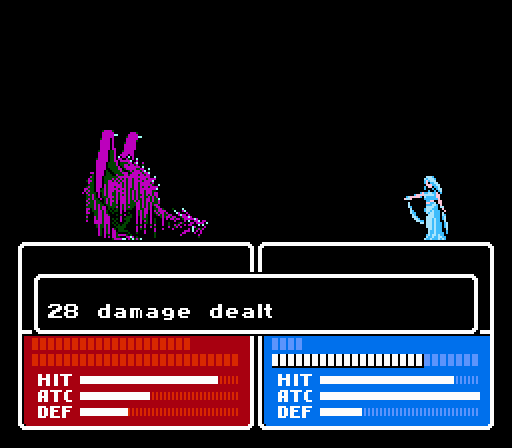 Our turn now; the Saints are prime attackers in this map, thanks to the Angel spell. Silk gets in more damage in these attacks than in the rest of the game combined I think. 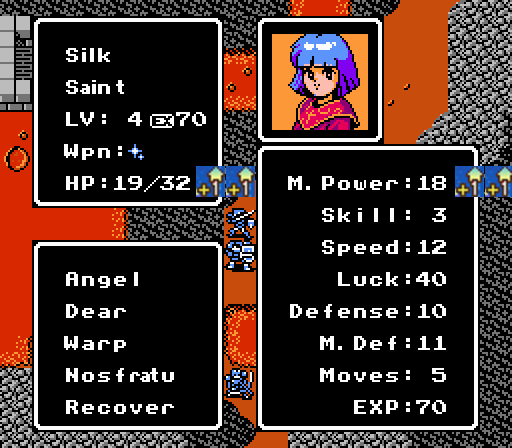 She's actually grown up rather well for what's primarily a healer class. 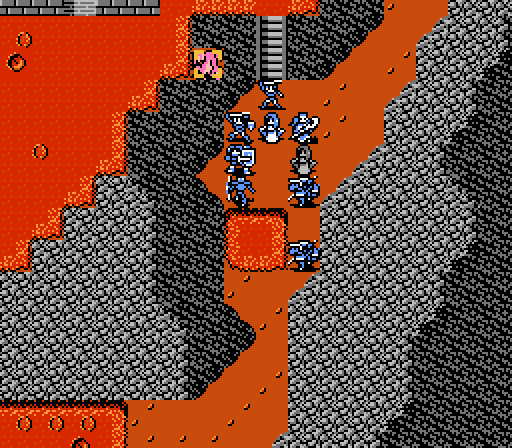  Teeta's not quite as strong or as fast as Silk, so can't get in two attacks and needs a little help from Python and his Holy Bow first, before killing the remaining dragon zombie in the area. 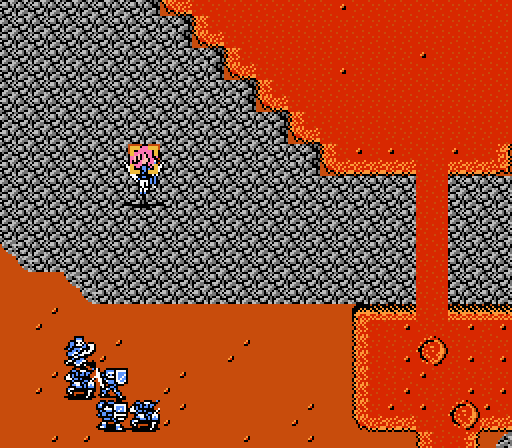 And Claire takes out the last dragon zombie in the map.  Well that wasn't so hard, I'm not sure what the fuss was about. 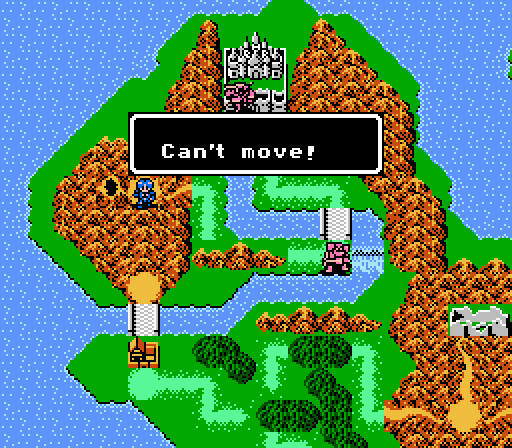 Back on the world map, if Alm tries to move, he just gets this helpful little popup telling him he can't, due to the entrance and exit both being blocked. Celica's stuck in the castle so we can't move her, either. So what to do? 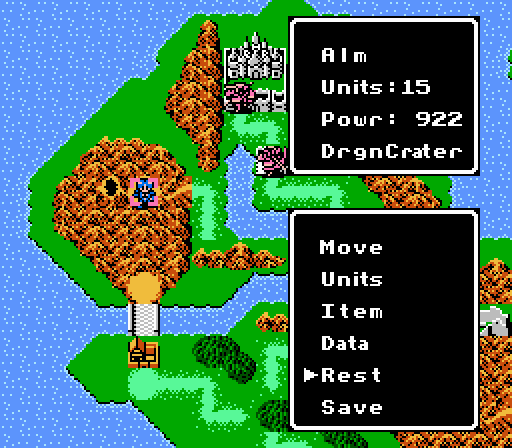 Well, that's what this 'Rest' option is for. Alm basically just 'waits' on the world map, giving up his 'turn'. Before that though I take the time to rearrange my army and some of the items, because I know what's about to happen when I pick that option....  After resting, we get a handy popup telling me how many enemies remain and how many turns I've spent on the world map. The turn count is so you can figure out how long you've been stuck here...  More dragon zombies! As before, they immediately attack:  This time around there are seven dragon zombies. And more of them will be headed for the southwest group, too. I severely underestimated how much stronger I needed to make that group, as a dragon zombie will reach it on the very first turn. Turn 1   Gray is attacked right away, before I can really set up or anything, and gets double-attacked. Already he won't survive another attack like that.  I may have snuck Gray the Angel Ring between battles, though, so he's actually able to go another round. He actually gained enough Speed that he'll be the one getting in two attacks now (at least with a lightweight fireball).  Five dragon zombies assault the southern group. Going to be a rough one.  Python takes a couple shots at the nearest dragon zombie, but otherwise the northern group doesn't do anything more than set up to receive a couple attacks.  So Silk learned the Dear spell a couple levels back. If you're not hurting for XP (and really, we aren't) then this battle is a good opportunity to use it, as it'll wipe out most/all of the dragon zombies immediately. You just won't get any XP for them. We're going to be doing things the hard way, though.  And so Silk sends Teeta down to reinforce the south.   Claire wipes out a dragon zombie, while Teeta gets the Angel Ring from Gray and goes after another.  Useful levels today, as now Teeta has enough Speed to double-attack with Angel against the dragon zombies. She doesn't have enough Defense to deal with many attackers, though, so we'll need to block her off.  I gave Cleive the Holy Shield this time, and he trades scratches with the dragon zombie. 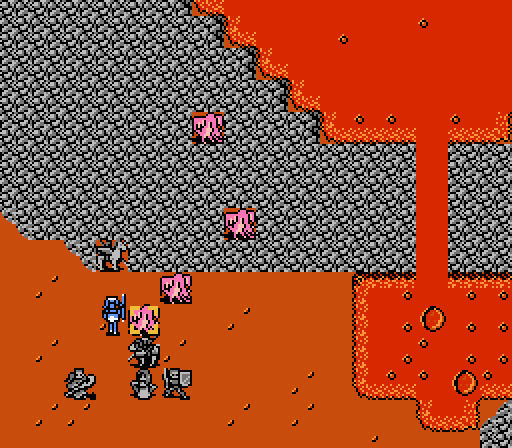 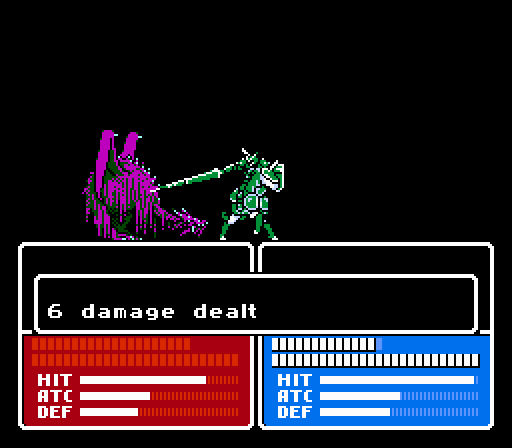 Teeta didn't actually kill her target, so Zeke gets his first action and finishes it off. 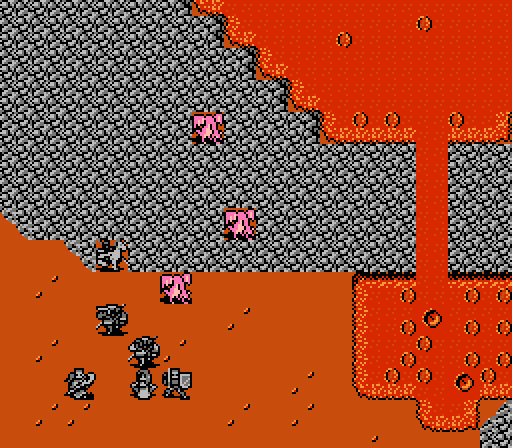 This formation should allow only one dragon zombie to get to Teeta, which is all she can handle. Cliff took the Angel Ring from Teeta, since he's at 99 XP. 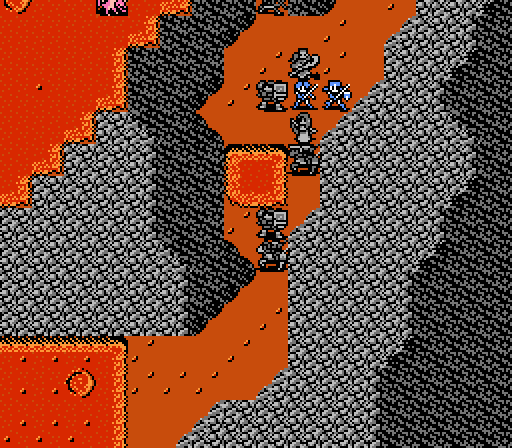 Ryuto's going to be bait again in the north, though he'll actually take some damage this time. Really the biggest struggle on this map is tring to fend off the dragon zombies while only gaining levels with the Angel Ring - Alm and Dyute have been waiting around the whole time. Dragon zombies are worth a lot of XP. Turn 2  Just like Ryuto last map, here Cleive is able to use the Holy Shield to hide his low Defense and draw in the dragon zombie to another scratching battle.   And Ryuto is targeted again in the north. He takes some damage but only a single attack.   This dragon zombie would apparently rather go after Cliff, who after a great start to the game has really fallen behind.  More Defense will help him out a bit, but he really needs either more Power or a more useful sword than the Bolt Sword.  The second dragon zombie in the north can't quite reach Python.   And Teeta draws in her target. She not only barely survives, she actually misses one of her counterattacks.   Our turn again, and Force finally gets involved with the Speed Ring. Good time for a crit.   I actually can't attack with Python anymore without getting him an Angel Ring-free level, so I send Ryuto up there to distract the other dragon zombie in the north. He lands a nice Excalibur crit but it still barely makes a dent.  This formation is designed to hide Silk and force the dragon zombie to attack Ryuto again.  Of course I immediately bust that formation to have Silk warp Dyute down to the south. Time to break out the big guns.   Dyute also has the Angel spell, so she's even more of an insane killer here than normal. And once Cliff gives her the Angel Ring, she has free reign to wreak havoc. Not quite a one-shot kill, but this dragon zombie is a bit higher level than normal (note the higher starting HP - 49).  MORE POWER. The innocent face of a sweet psycho killer. Give that girl some Defense and she'd be unstoppable. 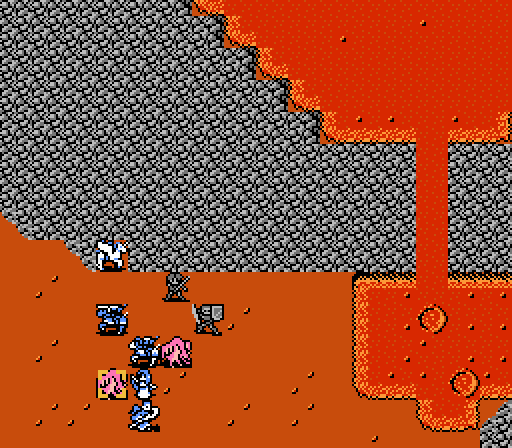 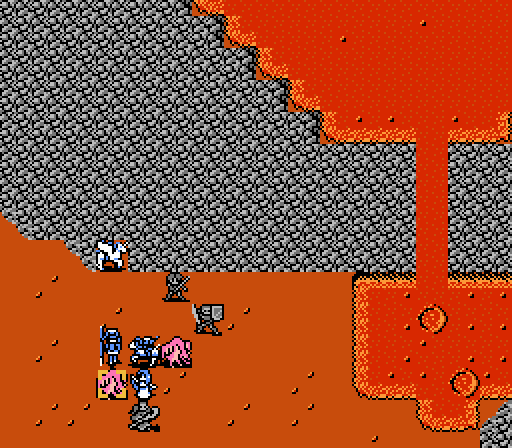 Gray and Zeke are able to team up to take out Teeta's attacker. 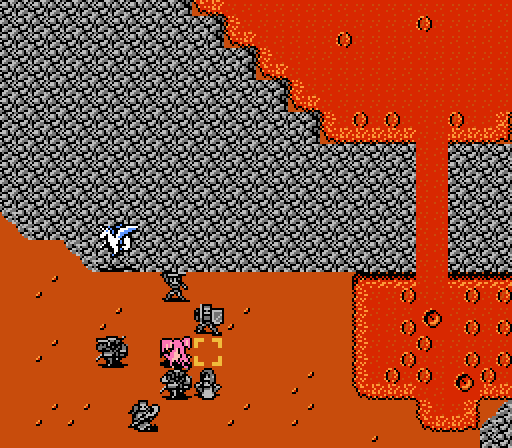 That leaves one dragon zombie and one super falcon knight to take it out. Except Claire is one attack away from a level so I have her sit around and take the Angel Ring instead. 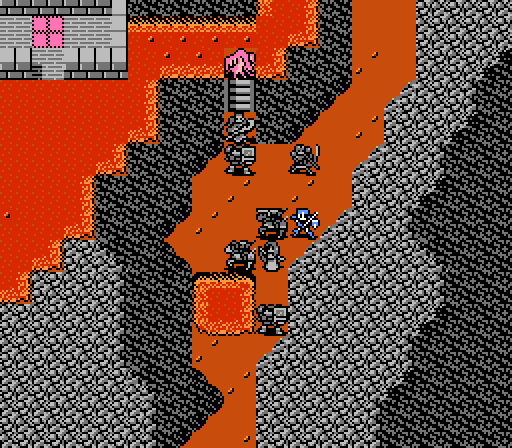 No, I didn't forget about re-protecting Silk, either. Turn 3  Bad move, dragon zombie.  - Chapter 4 Part 14 Battle 2.gif) Dyute kicks rear end with a sword, too. 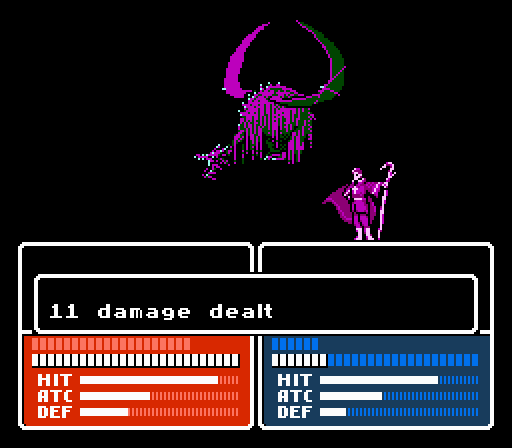 Ryuto's not going to be able to take too many more of those.  With the southern battle over, Teeta uses her last bit of HP to patch up Ryuto for another round of taunt-the-dragon. 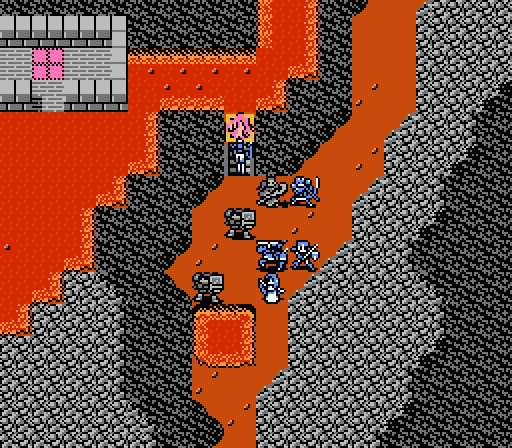  Force is now also on the can't-attack-without-gaining-an-Angel-Ring-free-level list, so Robin grabs the Holy Lance and bites into the last dragon zombie, bringing it down to just 1 HP remaining. That's right, Robin. Even his sorry rear end can do some damage with an effective weapon, and he somehow dodged the counterattack as well. 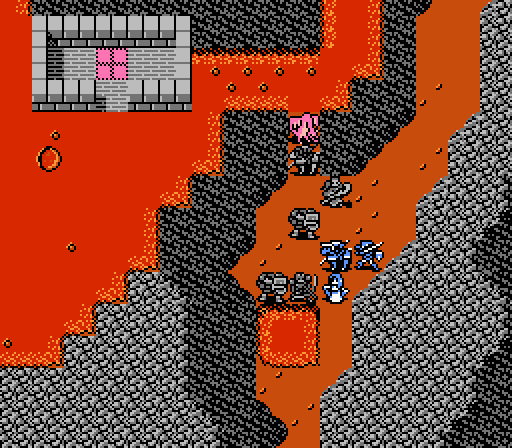 I literally have no one left up here who can take that last 1 HP from the last dragon zombie without gaining a level that I don't want to gain without the Angel Ring because I'm a horribly OCD min-max'er. So I block off Silk again and wait another turn. Turn 4 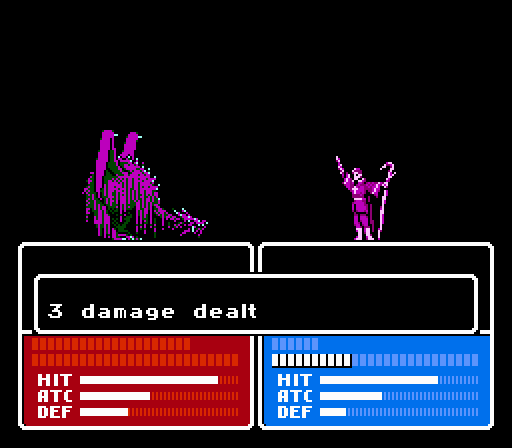  The dragon zombie helpfully suicides on Ryuto. What, you didn't think we were done, did you?  After I take the time to try and make a stronger southern group, more dragon zombies creep on Alm. Remember, this whole update started with Celica being forced to watch Alm suffer.  And we're up to ten dragon zombies now. Eight of which will be headed for the southern group. Joy. At least I was smart enough to put Dyute in the southern group this time. Turn 1   Dyute is attacked first, but no sweet counter-kill for her this time.  Seriously eight dragon zombies go south. Where I can only place five units.  Claire's an easy choice to swiftly eliminate an enemy, and she doesn't have to worry about getting swarmed since her Defense is higher than others nearby.  Claire is saving my rear end in this whole update.  Dyute is close to another level so she grabs the Angel Ring from Claire and sits waiting to be swarmed next turn.  Cleive and Matilda form up to guard Teeta in the corner.  And Force is sent down to help out the southern group as well. I have one main strategy down there - Dyute and Cleive each have 10 Defense, so will be the primary targets of any dragon zombie attacks. Dyute has the Angel Ring so can counterattack to her heart's content (as long as her HP holds out), while Cleive has the Holy Shield so can draw the dragon zombies into scratch battles that don't provide much XP. So Force is sent to be an extra high-Defense body that won't distract the enemies. 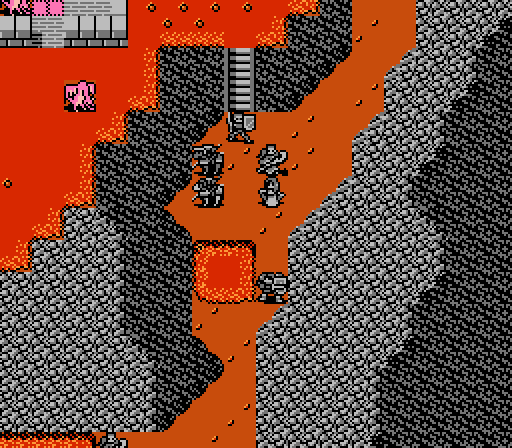 I don't have as much of a plan for the northern group, but there are only two dragon zombies there so I'm mostly just hoping it works out. That group is mainly made up of units without much XP so that they won't have to worry about needing the Angel Ring. Turn 2  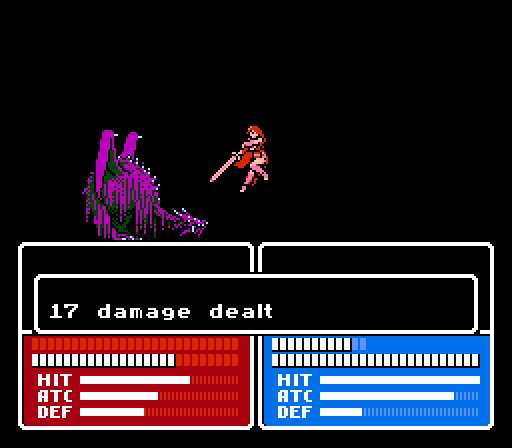 A monster level 9 dragon zombie is the first to attack Dyute, with a capped 52 HP. She dodges the attack and gets in two strong counterattacks but still leaves a lot of HP behind.  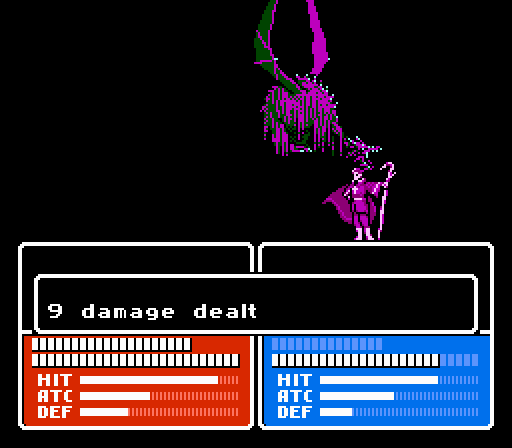 The mage drawing in the northern dragon zombies is actually Gray for this battle, because Ryuto is too close to gaining a level. Gray's not as good at it, taking two attacks from a slightly higher-level (and thus faster) dragon zombie. 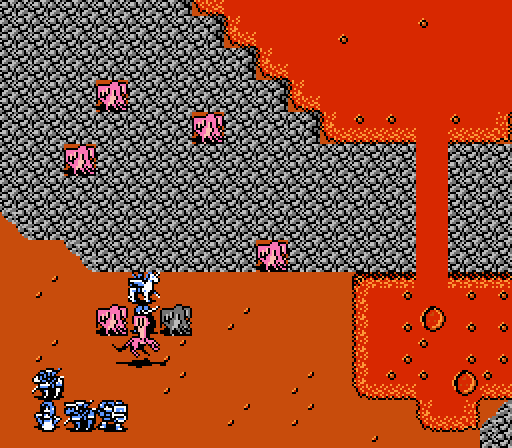  Dyute does a bit more damage to a dragon zombie that is "only" level 5, but they're still giant HP soakers. 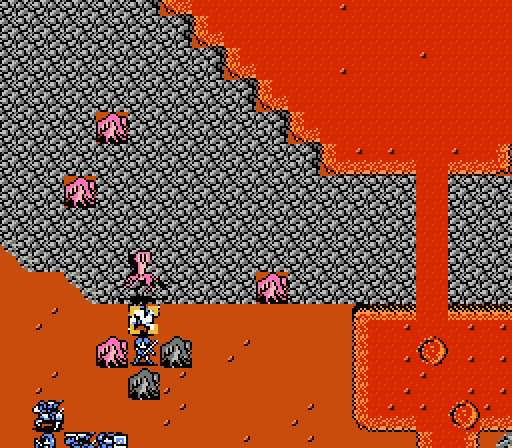 Claire is attacked by a dragon zombie that can't get to Dyute or anyone else. It ends poorly (for the enemy). 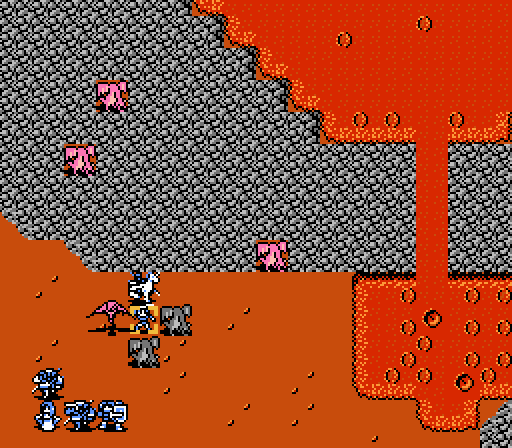 The dragon zombie that had initially attacked Dyute, does so again. He doesn't survive another round.  Unfortunately that opens up another slot for the next dragon zombie to also go after Dyute. She's running low on HP now, but fortunately she doesn't counter-kill this one so she's fully blocked off for the last attackers. 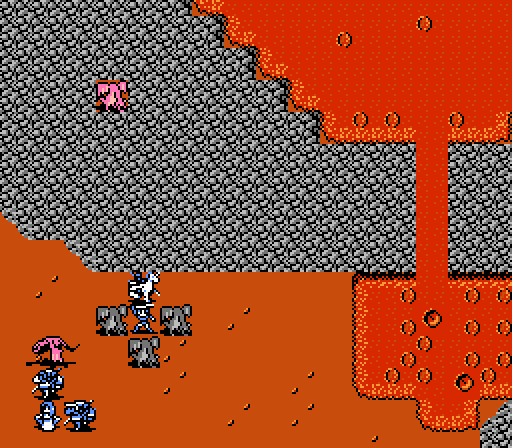 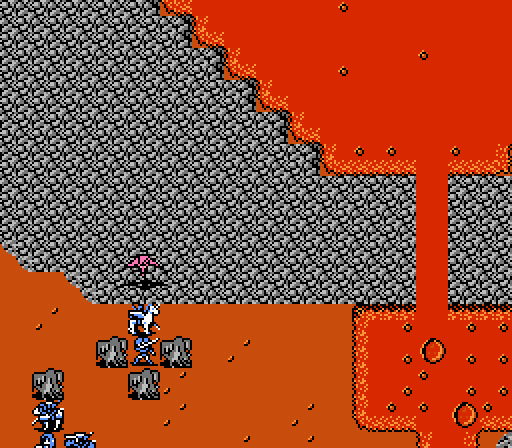 The final two dragon zombies here go after Cleive and Claire, respectively. Cleive stands there like a wall while Claire racks up another kill. Only four enemies left in the south.  Finally on the player phase, Claire starts off by wiping out the only full-health dragon zombie in the area.   Teeta uses Physic to give Dyute enough HP to survive a couple more attacks. Dyute then turns around and zaps the high-level dragon zombie to atoms. Just two dragon zombies left in the south, and Dyute has enough HP to take attacks from both, so that battle's practically already won. 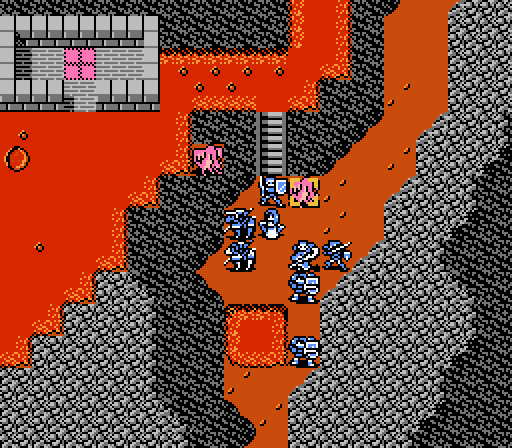  The north isn't going to be as easy, despite the numbers being on our side, since I sent the Angel Ring and all of our best units south. But the turn starts well, with Gray softening up a dragon zombie with Arrow and then Zeke using the Holy Lance to grab the kill. As a third-tier unit Zeke is only getting 11 XP per kill here so he's actually in a good spot to clean up. 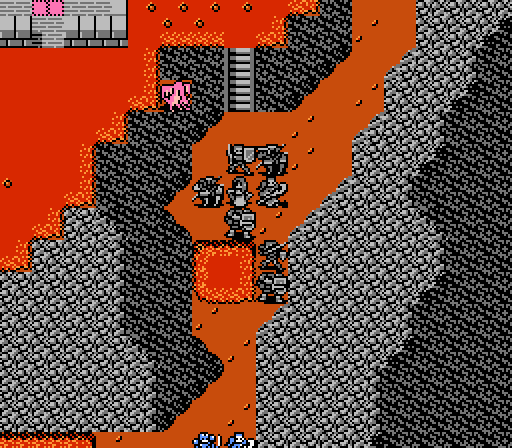 Silk is tucked away, leaving Gray exposed as bait again. Turn 3 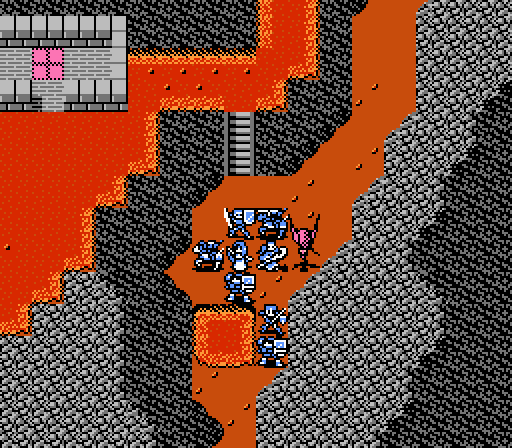 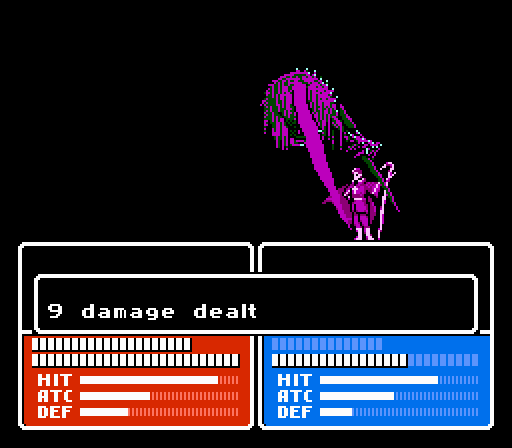 Gray takes another two attacks for the team. Would it really hurt him to land his counterattack, though?   Dyute counter-kills the remaining dragon zombies in the south, as expected. 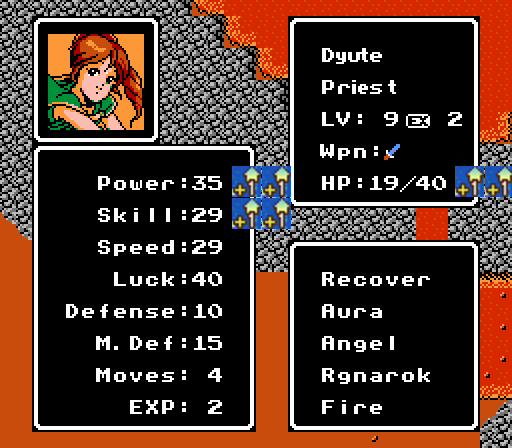 She's actually very close to capping Power, which I didn't think would be possible in this playthrough, especially on a unit that only gets one promotion. 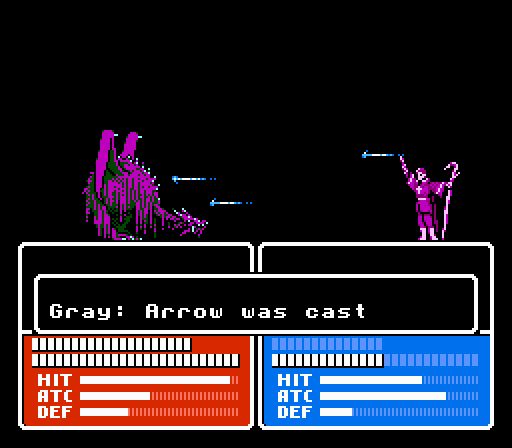  The last dragon zombie falls to the Gray-Zeke combination. 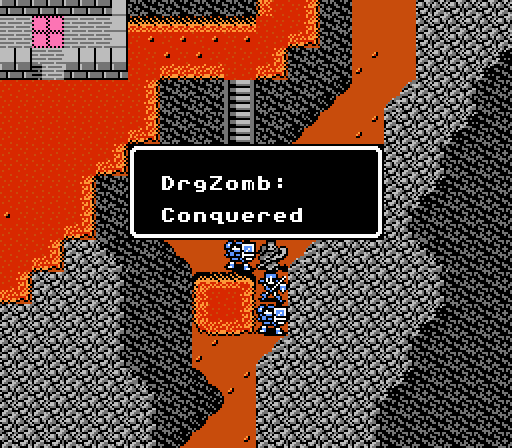 And that's three ambushes fought off. I actually did a bit better on this battle than on the second one, with the right lineup and strategy down south making all the difference. 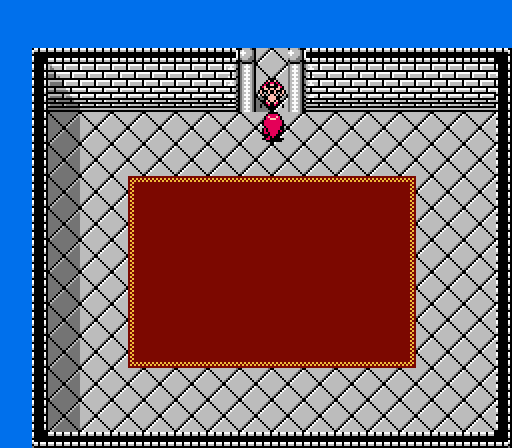 Meanwhile, at the top of Doma's Tower.... 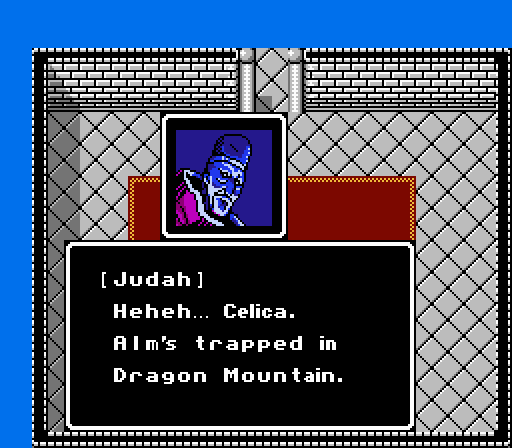 Follow me if you want to save him. If you sacrifice yourselves to Lord Doma, Alm's path shall again open up! Follow me if you want to save him. If you sacrifice yourselves to Lord Doma, Alm's path shall again open up!Judah's still a dick. 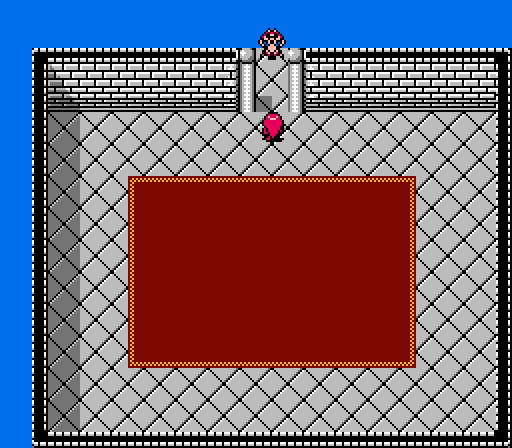 He walks through the opening, leaving the way forward open for Celica. There's no way out, so just go through the opening. Music: Battle Final Map - Enemy  And Celica is apparently dropped/transported/??? into a cave. The music that plays here is actually from the final battle, Celica is just starting a bit early.   There's nothing to the north, and the door to the south won't open (that might be where we came from?) so the only way forward is to the right.  There's another side path to the southeast, but nothing on it. You could've at least put a treasure down there or something, come on.  Judah waits alone in the northeast. Take the time to put your best ten units at the top of the roster and get your items straightened out, as you won't have another chance. Then talk to Judah. Music: Battle Final Map - Player 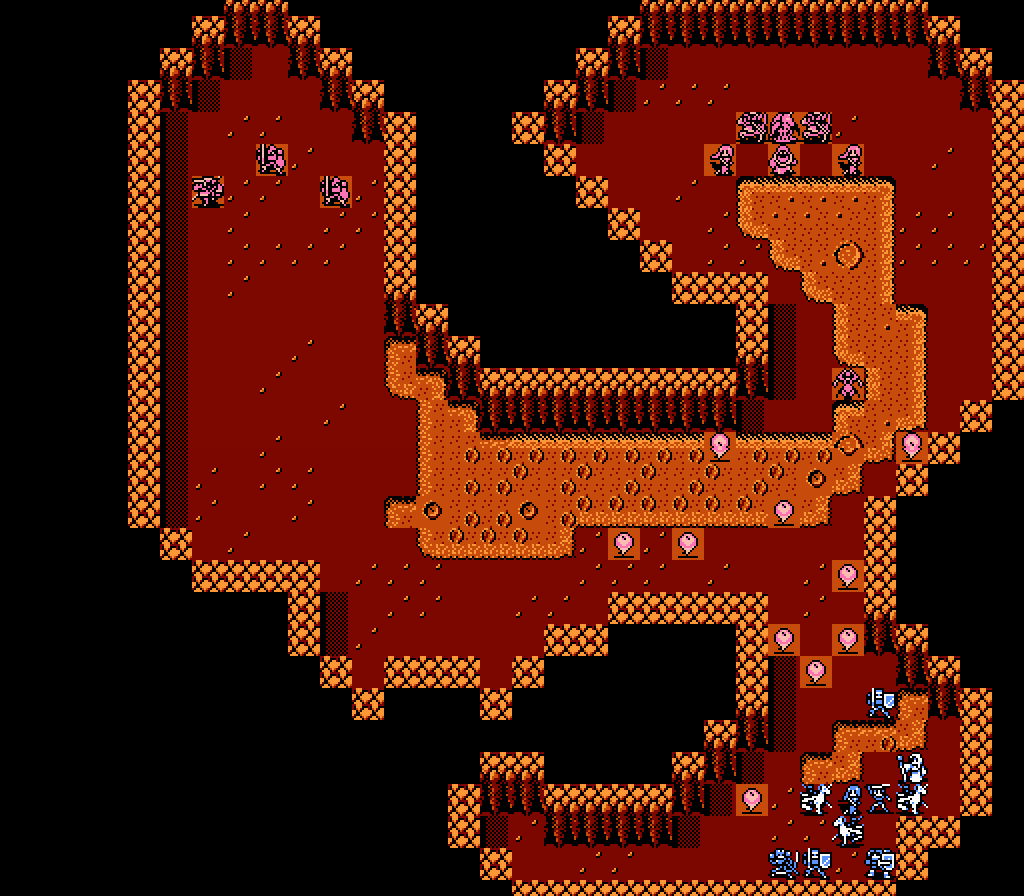 And Celica starts the final battle. She is surrounded by bigle monsters, with a healthy does of third-tier enemies waiting in the back ranks, plus a strange-looking unit we haven't seen before. 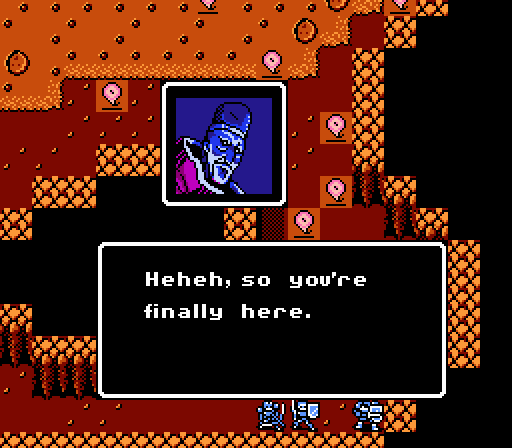 This is Doma's Altar, our site of human suffering. Thus, I shall kill you slowly and painfully. Your pain will be Lord Doma's magnificent feast.... This is Doma's Altar, our site of human suffering. Thus, I shall kill you slowly and painfully. Your pain will be Lord Doma's magnificent feast....Bad guy motivations weren't particularly complicated in early video games.  The screen fades to black, and we're thrown back out onto the world map with Alm. The avalanche has been cleared away, and he's free to move again (in either direction). Three battles stand between Alm and victory, as far as he knows, while Celica is suffering at Doma's Altar. There a couple different ways this chapter can play out. Our timing happened to be pretty good since we've been alternating updates between the two armies. If you decide to play Alm's half of the chapter first, though, you're in for a nasty surprise - he gets stuck at Dragon Crater until Celica reaches the top of Doma's Tower, and every time Celica moves on the world map, Alm faces another ambush. Potentially infinitely if Celica just wanders around without much urgency. If Alm's army is unprepared or hasn't been gaining enough levels - tough luck. Also, the number of dragon zombies in each ambush keep increasing after the third one. So if you played all of Alm's battles first, you just screwed yourself pretty hard. Likewise, if Celica gets way ahead of Alm, she'll stay stuck at the top of Doma's Tower until Alm faces three ambushes at Dragon Crater, no matter how long it takes him to get there first, but that's a bit less of a downside. I think the optimal way to deal with the ambushes is to get Celica to the front door of Doma's Tower, walk Alm into the first ambush, and then have Celica clear Doma's Tower in one turn so that Alm is immediately freed. He might still have to face a minimum of three battles, though. Next time: 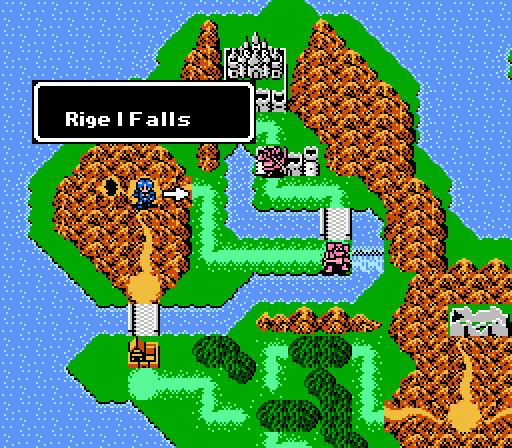 Alm continues his mostly-unprovoked invasion of Rigel with a battle by a waterfall.
|
|
#
?
Apr 5, 2015 21:42
|
|
|
What's the maximum number of dragon zombies you can encounter? Also, can you show your army utterly annihilating the maximum number of dragon zombies you can encounter?
|
|
#
?
Apr 7, 2015 18:51
|
|

|
These are stats that rival loving 3rd Promotion Sages in Fire Emblem: Radiant Dawn, in a game where most units are barely peaking over 20 in any given stat 
|
|
#
?
Apr 7, 2015 19:22
|
|

|
Discendo Vox posted:What's the maximum number of dragon zombies you can encounter? Also, can you show your army utterly annihilating the maximum number of dragon zombies you can encounter? I've seen as many as 13 in Hafl's LP. Most likely it goes up to the max number of units which I think is 16. A battle with that many wouldn't really be any different from the third round in the last update, just Dyute and Claire counter-killing stuff a bit less agressively, with other higher-Defense units for positioning.
|
|
#
?
Apr 8, 2015 03:14
|
|
|
Haha, drat. So if you led with Alm you could be stuck in Dragon Zombie hell for quite a while. I suppose you'd at least get one more battle for purposes of the cutscene?
|
|
#
?
Apr 10, 2015 04:14
|
|


|
Glazius posted:Haha, drat. So if you led with Alm you could be stuck in Dragon Zombie hell for quite a while. I suppose you'd at least get one more battle for purposes of the cutscene? If Celica shows up at Doma's Tower after Alm's already been trapped, the conversation with Judah starts straight from the 'follow me if you want [Alm] to live' part.
|
|
#
?
Apr 10, 2015 06:40
|
|
|
Ok so I tried to record the next update, got madly over-aggressive and failed spectacularly. I'll try again next weekend. :/
|
|
#
?
May 4, 2015 07:16
|
|
|
Chapter 4, Part 15: Rigel Falls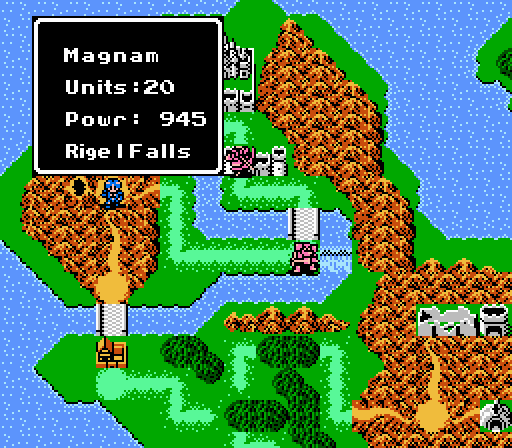 Strong and numerous armies await.  The enemy is divided into four groups, which we can use to our advantage. Our scrubs are isolated in the upper right, but we should be able to keep them out of the way. Turn 1 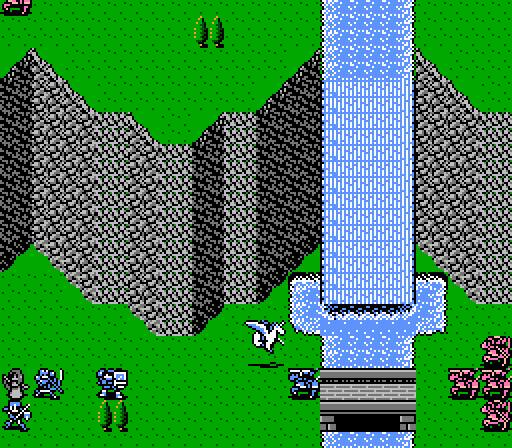 Zeke's going to hold the bridge, with support from Claire. They're both at low XP so will hold out while everyone else gains levels on the other side. 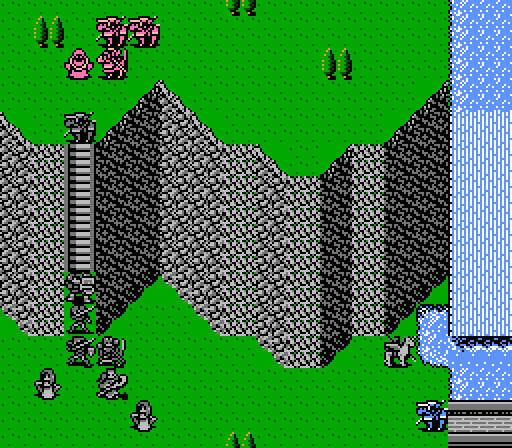 Meanwhile Matilda rushes to the top of the stairs with the Angel Ring to fight off the other enemy group.  Oh and the scrubs retreat and hope no one notices them.  The enemy group holding the river retreats. A single bow knight wanders east but he won't actually be a problem.  Gold knight on gold knight action at the top of the stairs.  - Chapter 4 Part 15 Battle 1.gif) That's how cavalry fights each other, right? Take turns backing up a few steps and charging while the opponent remains stationary? 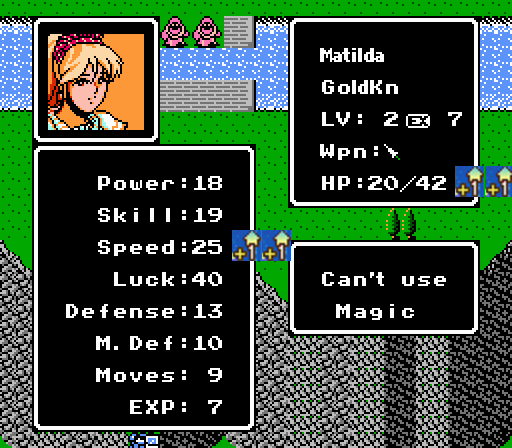 At least she got something out of it.  More of the same from the other gold knight. 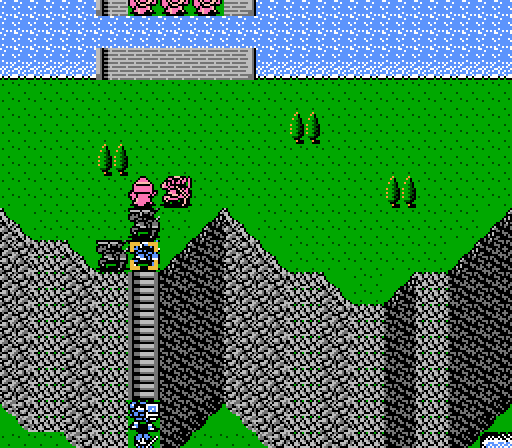  The wizard somehow lands an incredibly lucky hit against Matilda's 65 magic evasion (with her Luck set to 40 by the Angel Ring and her Speed now at 25). Seriously, look at that low hit rate - it's at 5% right there.  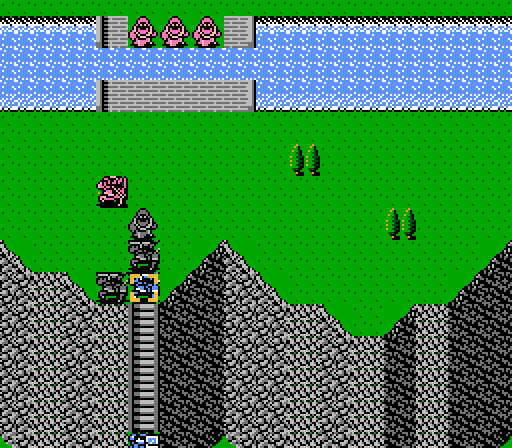 The bow knight isn't so lucky. 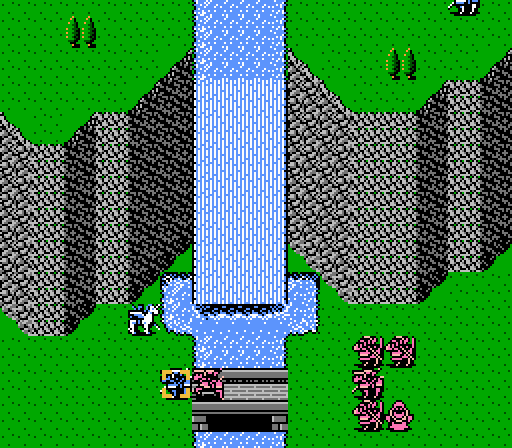  More gold knights on the bridge, but I secretly gave Zeke the Knight Killer. Unfortunately he missed one of his counterattacks. 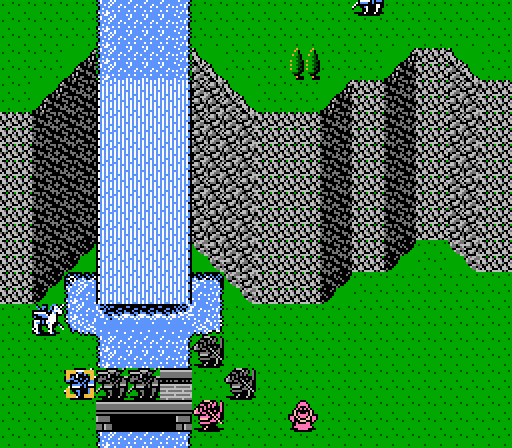 Zeke also fights off three arrows from the bow knights, dodging one and taking 2 damage from each of the others.  All the wizards keep casting this spell every turn, so any enemy that we don't kill outright with a counterattack will be fully healed by the start of the next turn. Turn 2  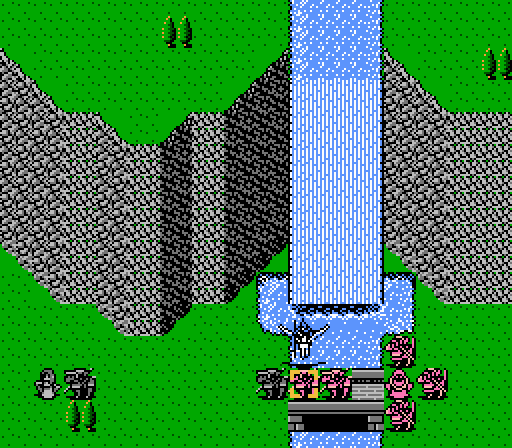 Matilda retreats to be patched up by Silk, as pictured. Then Zeke and Claire team up to take out the lead gold knight on the bridge.  I overreact a bit and send Dyute up to wipe out the wizard. Force is holding the chokepoint with the Angel Ring this time. 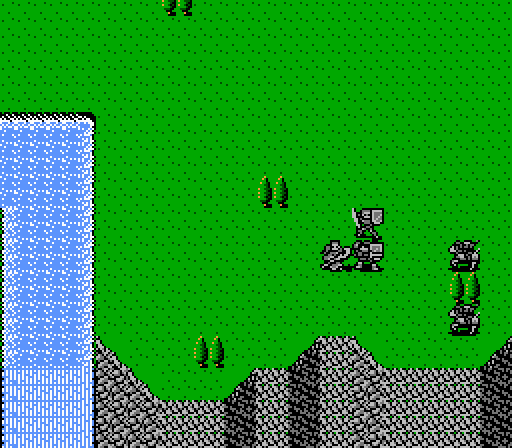 And the scrubs keep retreating. That's the last you'll see of them this battle.  The bow knight parks on a tree, where he'll stay for the rest of the map.   Force holds the line. He's not really there for his offense, anyway. 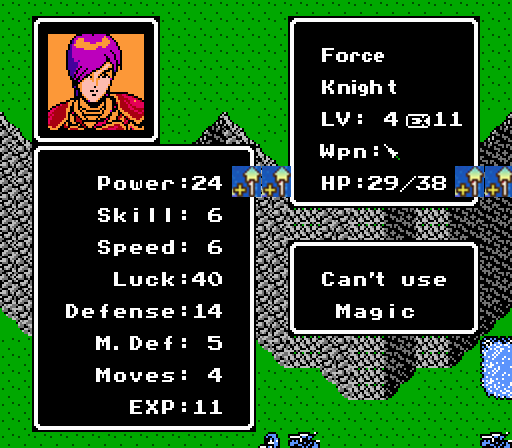 Not for lack of trying, though!  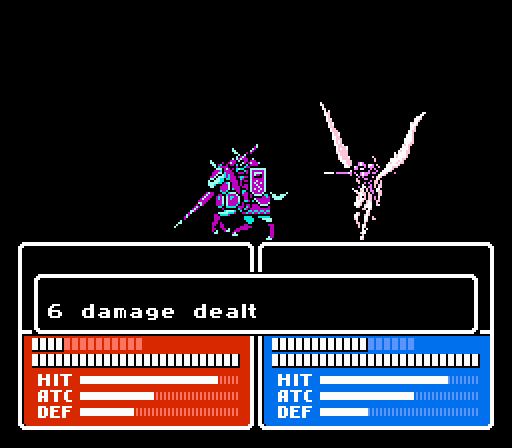 The gold knight goes after Claire, and actually gets in two attacks against her, but only one connects.  The three bow knights also go after Claire, and she doesn't manage to dodge any of them. Seriously, what kind of pegasus/falcon knight are you? 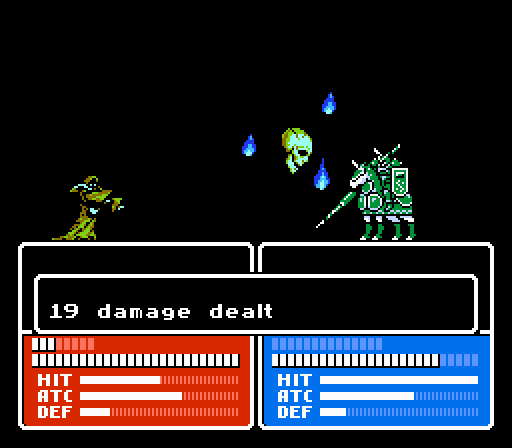 Zeke takes a shot from the death laser. At least this hit was just losing a coin flip. Turn 3 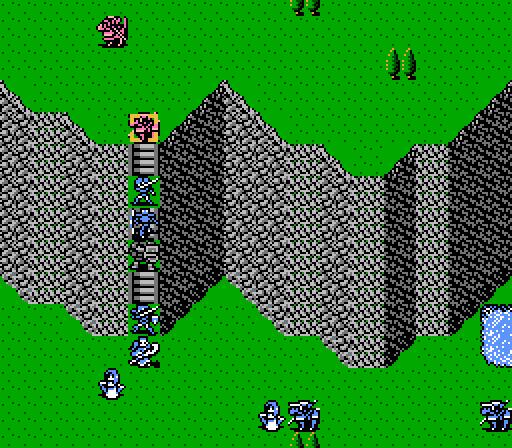 Python can't do much damage to the gold knight, but he did just pick up the Angel Ring from Force and he only needs 1 XP for a level so why not.  It pays off with a great level, more damage and more accuracy. Just needs some more Speed.   Dyute wipes out the gold knight knight and will hold off and likely counter-kill the other gold knight on the enemy phase. 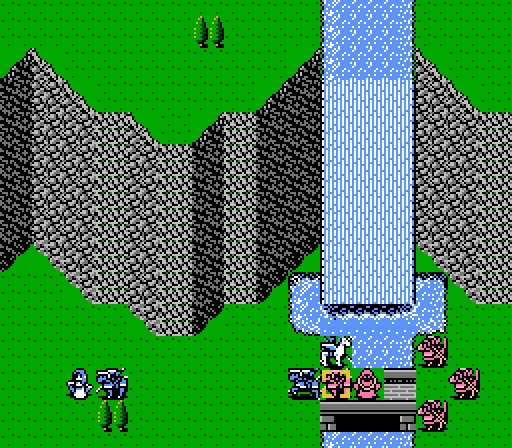 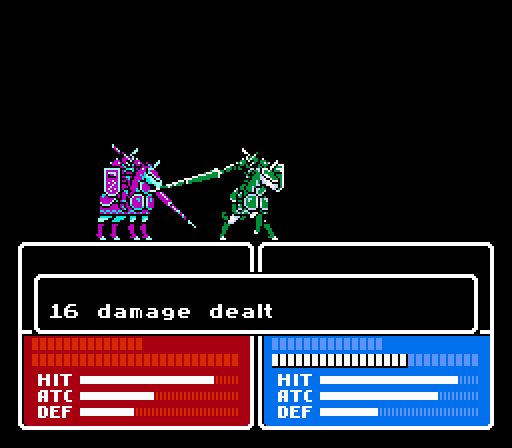 Down on the bridge, Zeke uses the Knight Killer to take out his fellow gold knight.   That frees up a space for Matilda to run in and attack the death wizard, with Claire finishing it off. No lucky hit for the wizard this time, either.  We've got a line forming on the stairs. Still holding back to try and control the XP gain though.  Apparently the boss witch can summon more witches. Fantastic. That shaman can also summon gargoyles, though I haven't seen any yet.  That boss witch looks pretty nasty, and Aura can really hurt us if we let it. Fortunately she doesn't have much Speed or Defense.  Now on the enemy phase, a gold knight moves from the river to suicide on Dyute.  The bow knight tries to do the same, but Dyute misses with her second fireball.  Back down on the bridge, the three bow knights all shoot at Claire again, and all hit again. She got healed up by Teeta though so she's fine. Turn 4  I forgot to show off the other boss earlier, so here's a peek at Magnam, power-baron. The usual magical assault will take care of him. 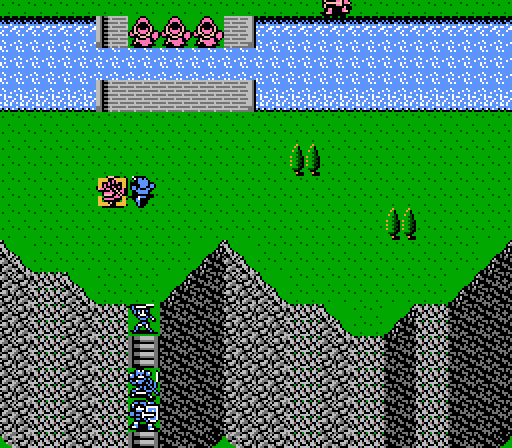  It's Alm's turn for some XP now. He gets 90 XP from finishing off the bow knight.  It's a good day for levels. I think Alm's new class should've been ninja. 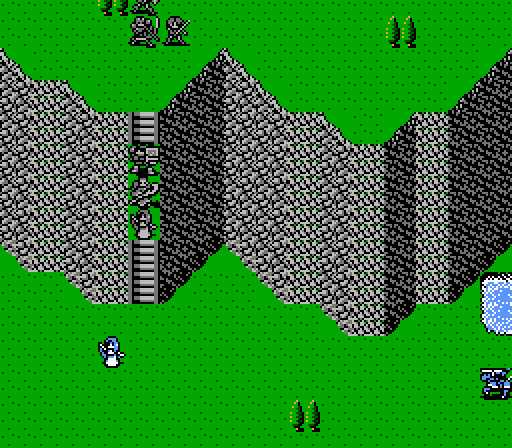 Dyute and Python join Alm on the upper plateau, with the others following close behind. 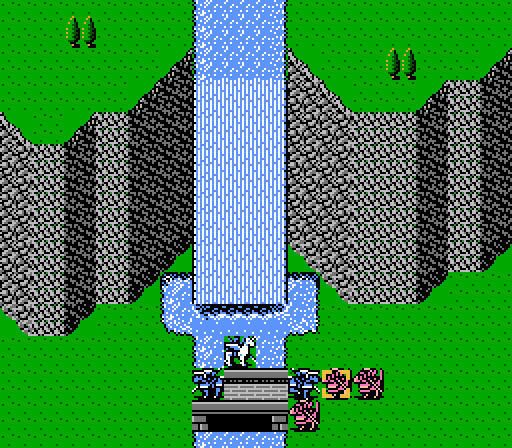 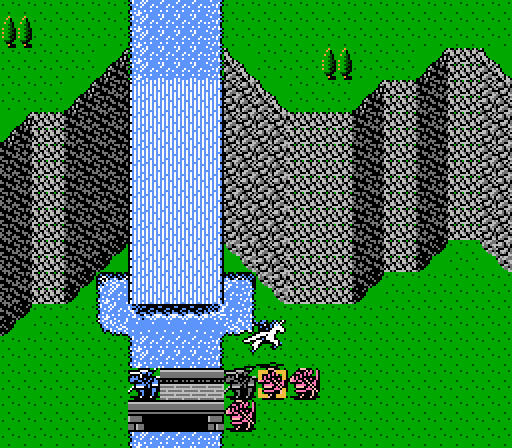 Meanwhile, the lower battle continues with Zeke and Claire taking out a bow knight.   Matilda's got the Quick Ring right now, but it's not helping her damage at all. 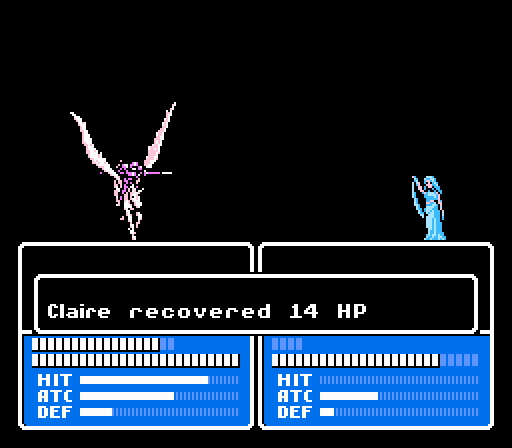 Claire is so high maintenance. 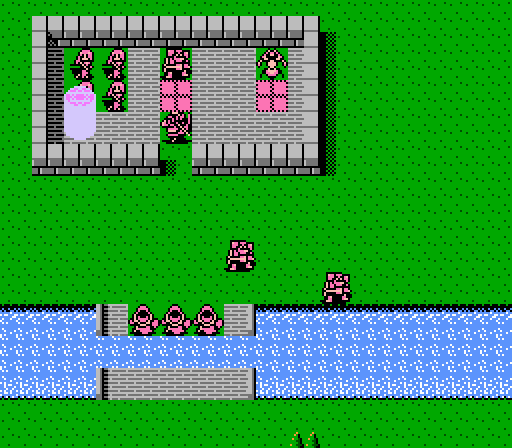 Oh good, more witches. At least it's only two each time so far. 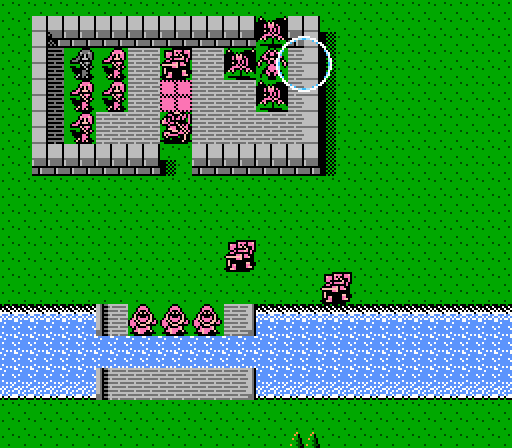 Four gargoyles join the party, too. 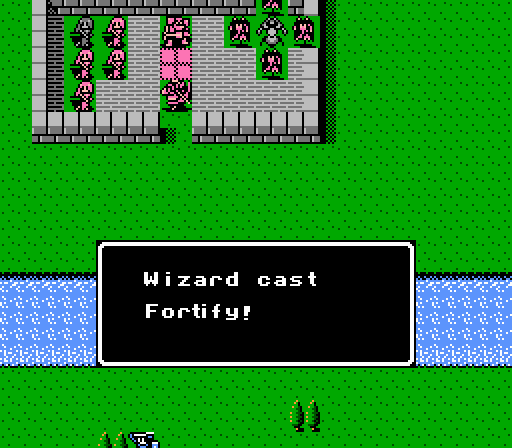 If you're wondering, we can actually get this spell for ourselves. Teeta just needs a couple of levels. I should probably prioritize that. 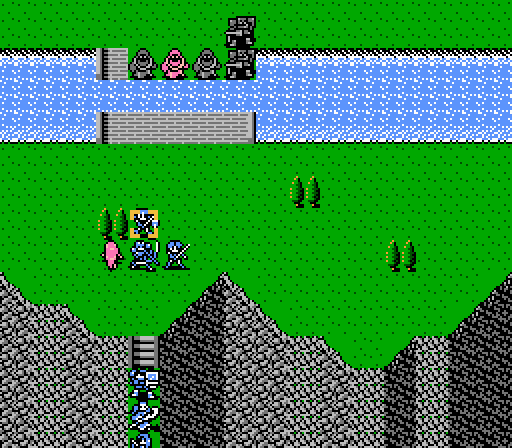 One of the witches teleports out to attack Alm. Now, Alm gained a bow upon promotion. However his counterattack rules are a little strange. Alm can only counterattack with the last weapon he used - in this case, he attacked the bow knight with the sword at the start of the turn, so he can't use the bow to counterattack the witch here. Not sure if that's intentional or an NES programming limitation, but it hurts us here either way. 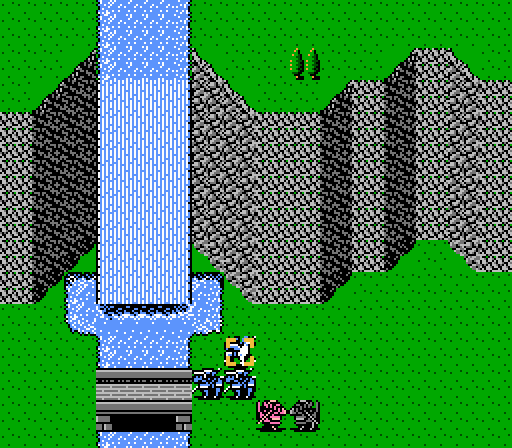 The two remaining bow knights by the bridge shoot at Claire again. She actually dodges one this time. Turn 5   Zeke is close to gaining a level, so he stays put to block the bridge and gives the Knight Killer to Matilda so she can get in some extra damage. The move immediately pays off, with Matilda finishing up with a kill on her second attack. 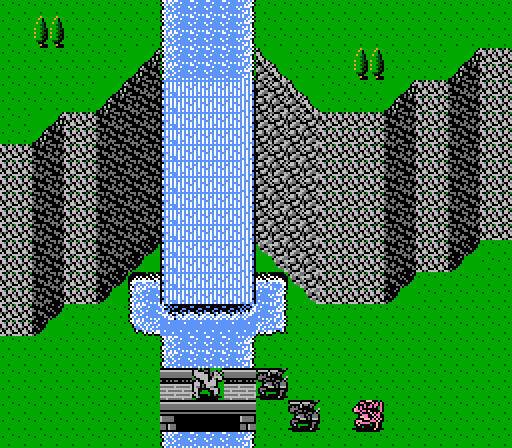 Claire moves over to the bridge since she's more of a magnet than a finisher at this point. Her presence will keep the last bow knight close so that it can attack her again on the enemy phase. 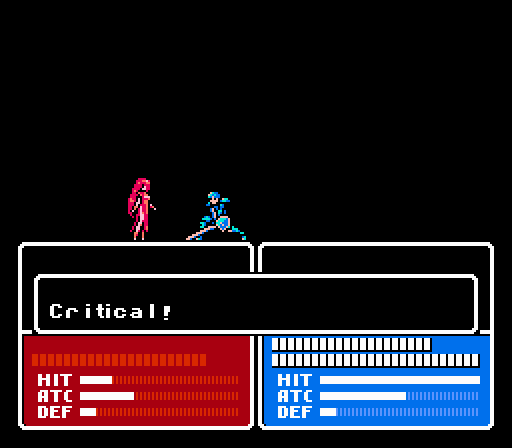 Alm wipes out the witch with a completely unnecessary critical.  And another great level for him. He's almost at the HP cap now.   The holy bow burns the evil wizard but can't quite get the kill.  We're all up the stairs, time to fight over the river. There's no bridge on this one, though.   A bow knight moves out of the fort to shoot at Alm, but misses. On the other end of the map, the Claire-magnet is effective. 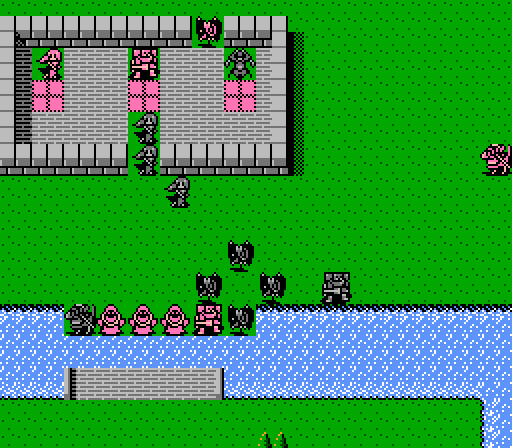 A single gargoyle is summoned. The witches decide to walk out of the fort rather than teleport. The other gargoyles do their usual flying thing. Turn 6 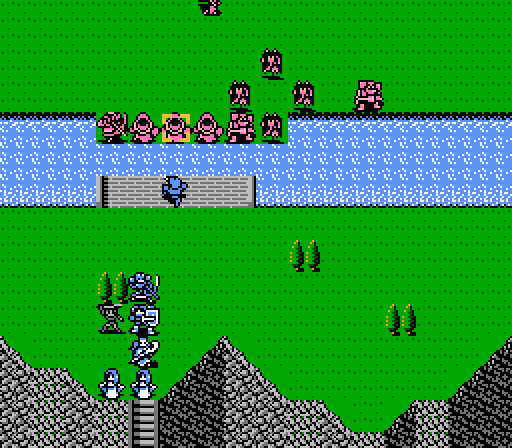 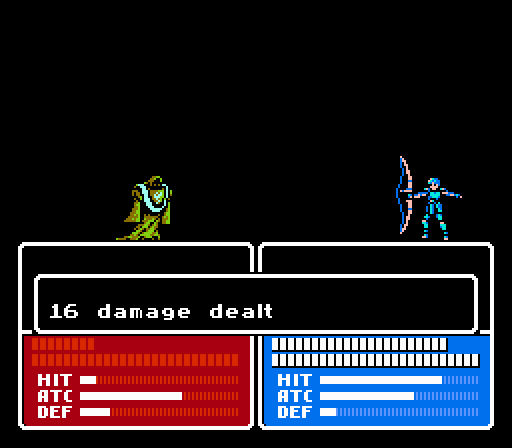 Time for Alm to go on a murder spree. He switches to the bow this time and murders a wizard. Now he can counter-attack all he wants on the enemy phase. 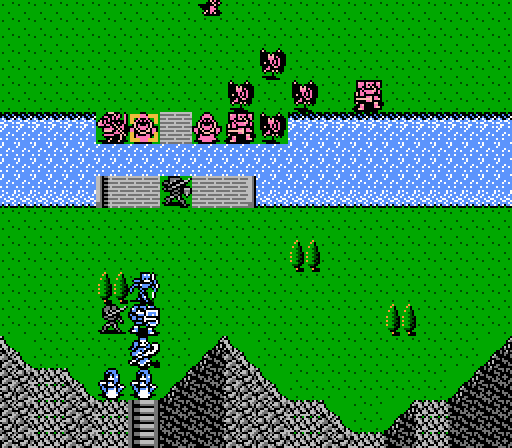  Python finishes off the wizard from last turn. Even the Fortify spell can only heal so much, after all. 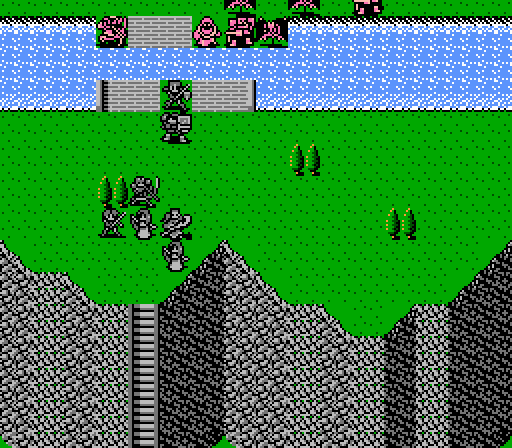 The others hang back just out of gargoyle/bow knight range. 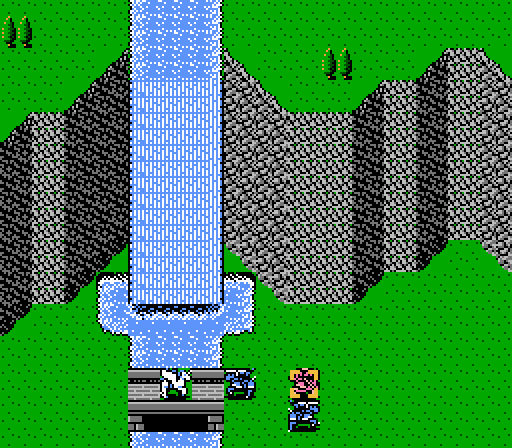  Matilda and Claire finally finish off the last of the bridge group. Zeke's got the Quick Ring and hustles back to rejoin the main army.  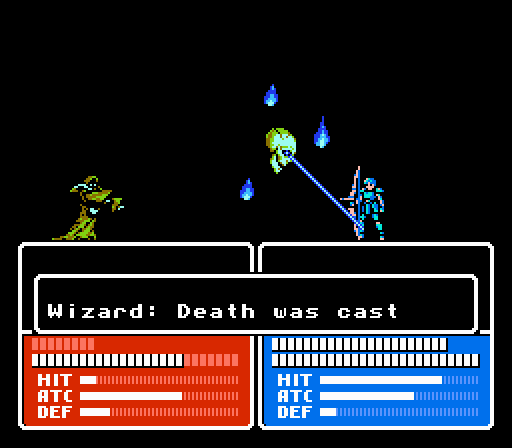 The last of the wizards thinks it's a good idea to attack Alm. Sorry, that micro-hit rate isn't going to strike twice here.  Even without any special weapons, Alm's Power is impressive. Granted he's only shooting a paper wizard, but still. 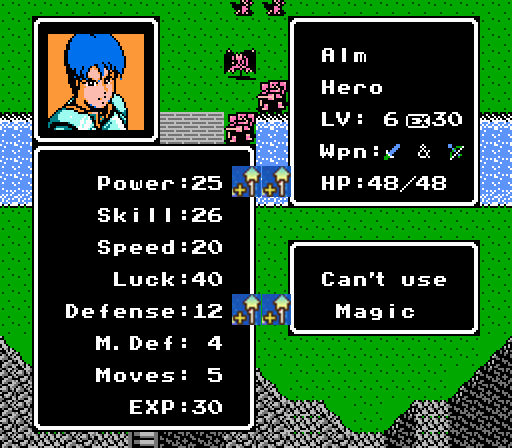 Now he gets a bit more strength and more toughness to go with it. 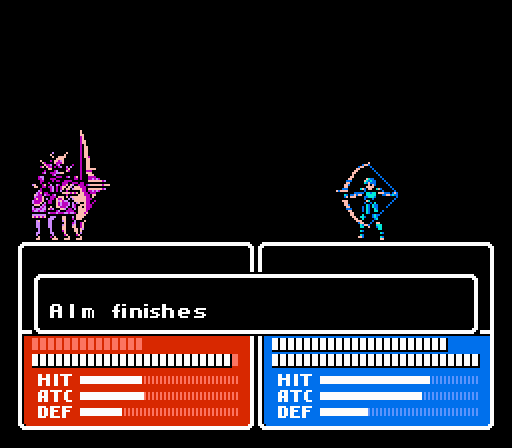 Alm gets in another 30 damage in countering the bow knight, but the enemy has a fat stack of HP. 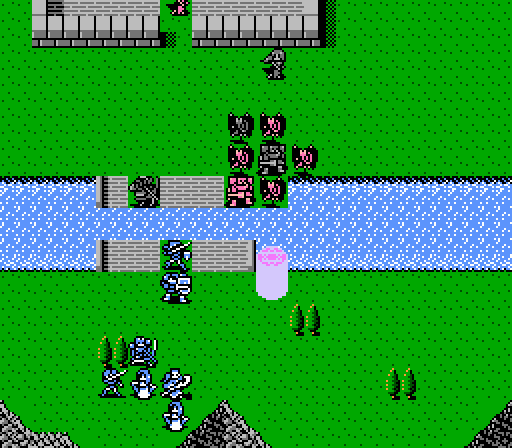 One of the witches teleports in and also suicides on Alm. 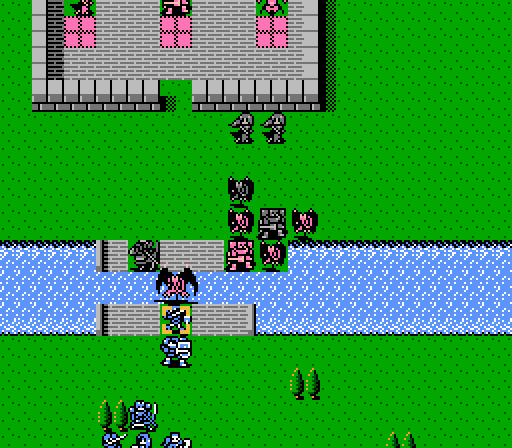  Imagine this happening four times, as Alm takes out all of the gargoyles single-handedly. Well that didn't actually happen - he missed a counterattack on the fourth gargoyle.  Well there was bound to be a dud eventually. Turn 7   It's finally Ryuto's turn for some action. Alm hands off the Angel Ring, and Ryuto shoves a lightning bolt up the bow knight's posterior.  Well that level's pretty useless. 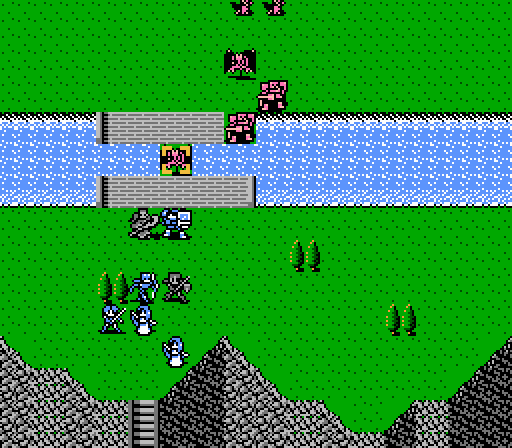 Meanwhile, Python takes out another gargoyle. 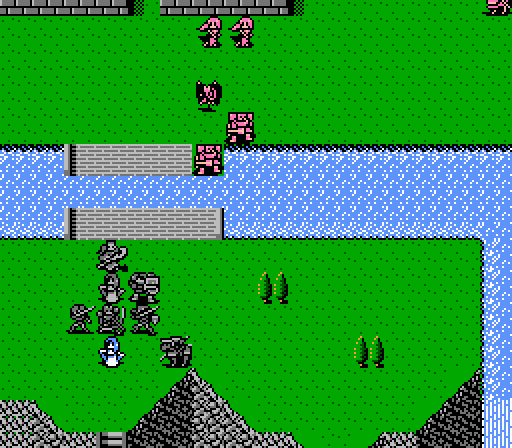 Zeke reached the plateau already. That last gargoyle can only reach either Ryuto or Force - guess which one it'll choose? 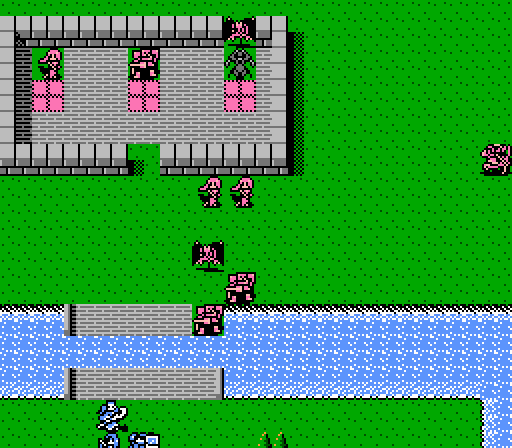 The shaman doesn't seem to have much juice this map - again only a single gargoyle is summoned.  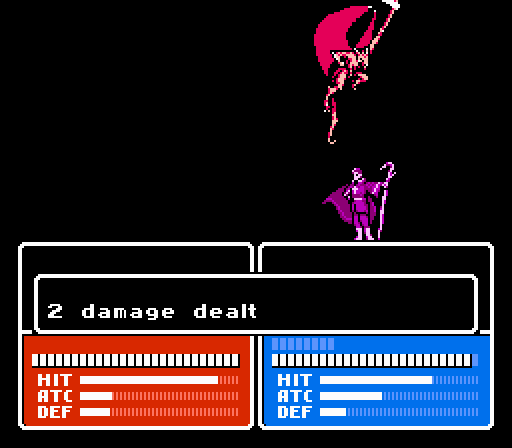 Ryuto misses his counterattack but only takes a couple scratches from the gargoyle.   Apparently when Alm doesn't attack, that counts as switching to his sword. The witch singes him a bit and he can't counterattack. Turn 8   The Angel spell, still effective against monsters.  We now have a healer with 20 Power.   Alm takes out the witch, sticking with the sword this time.   Ryuto and Python together cripple one of the barons, and without any more wizards providing healing, it'll stay crippled for at least another turn. 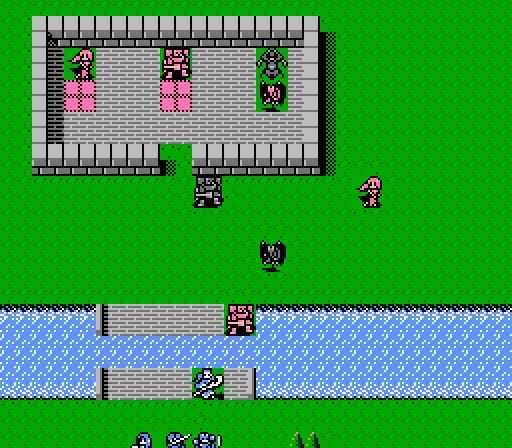 Oh, hey, it's a single new gargoyle. Again. Welcome to the party.  I'm not really sure what this witch is doing. I think she's confused because she can't walk over the river, and whatever script her teleporting is controlled by hasn't triggered yet. Turn 9 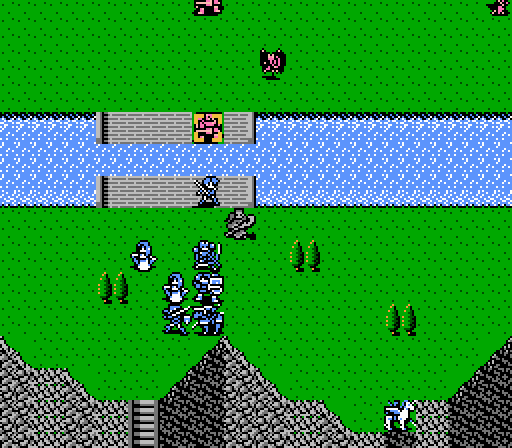  Now that's what a one-shot kill looks like.  She's actually getting close to the stat cap for that Power of hers. 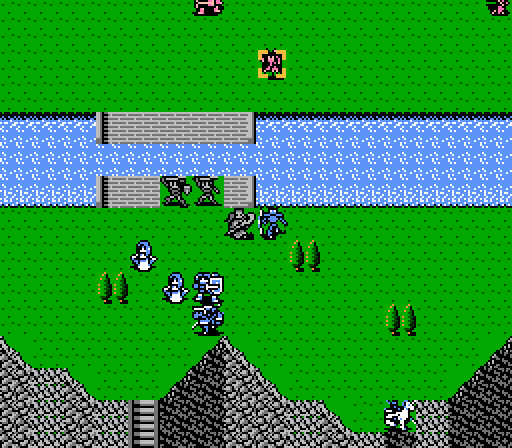  The holy bow - effective against monsters and super-accurate. Win-win. 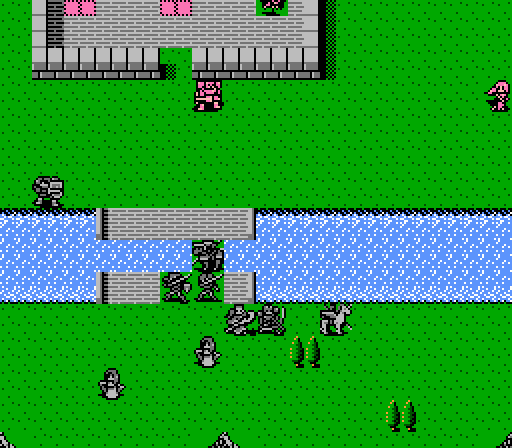 Units that can walk on water: Gold knights, mercenaries (and their promotions), and Alm and Dyute. Silk is going to be stuck on warp duty the rest of the map. Turn 10 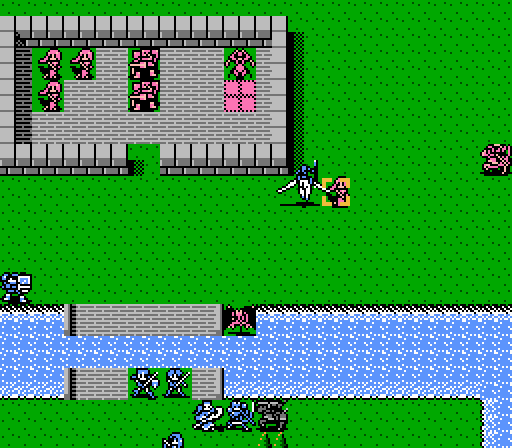 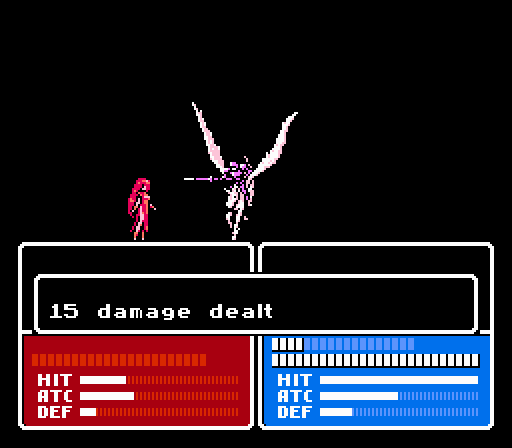 The witch headed back our way after Force was warped across the river, since I guess she considered him to be a better target. Really though that just let Claire get in range to wipe her out. 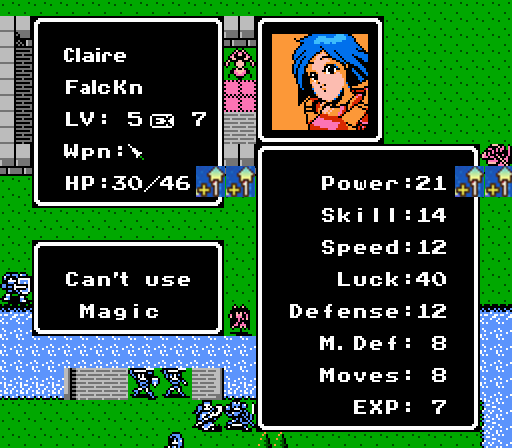 And even more Power. Still oddly low on Speed though. 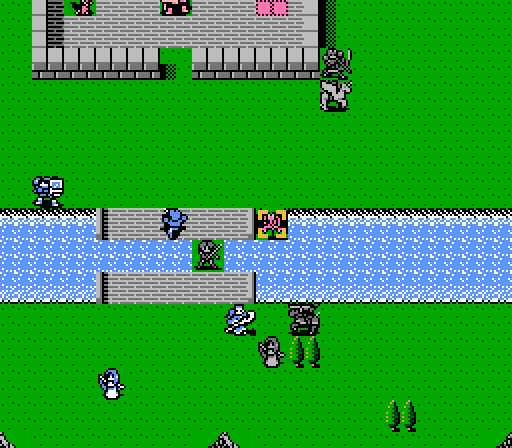 Alm and Dyute begin their crossing, with Alm shooting down a gargoyle along the way. Zeke actually went back to give the Angel Ring to Claire at the start of the turn. Also Silk sent Python up to join Claire, where they'll work on the bow knight who's been hiding in a tree all battle. 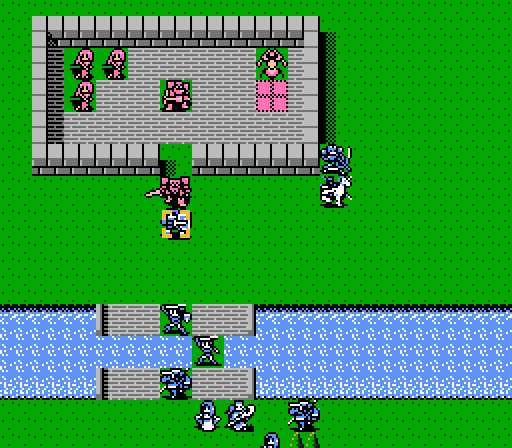 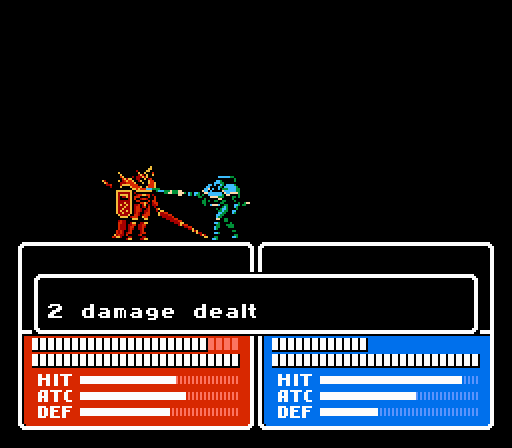 Force lures out the baron-boss, Magnam, for an exchange of ineffectual blows. Magnam missed, partly because Force is extra dodgy with the Quick Ring back in his hands. 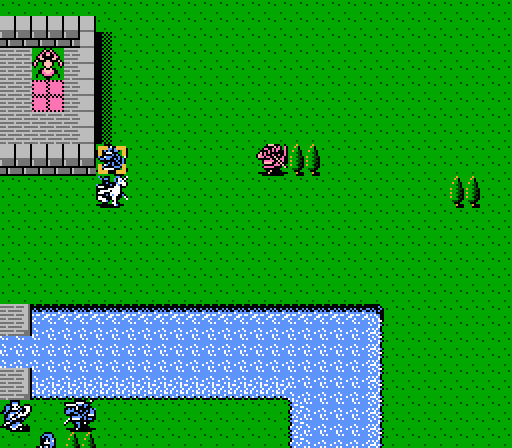 Python's main job this turn was to make sure the bow knight left the tree. So, mission accomplished. Turn 11  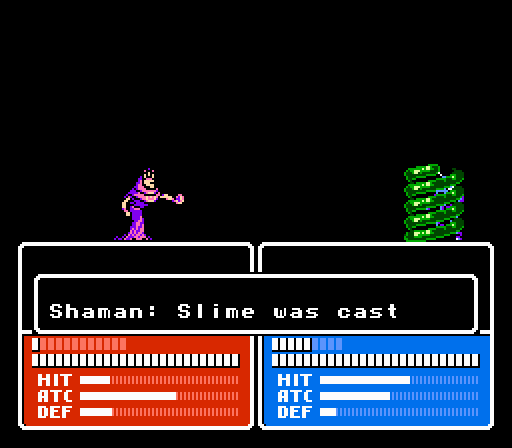 Python's got the Angel Ring now, and while he's not strong enough to do much with the bow knight he can pepper the shaman with arrows without worrying too much about the slime attack landing on him. 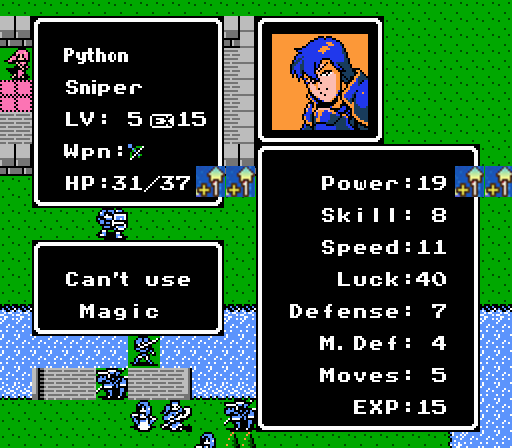 He's doing his best to work on that strength problem, too. 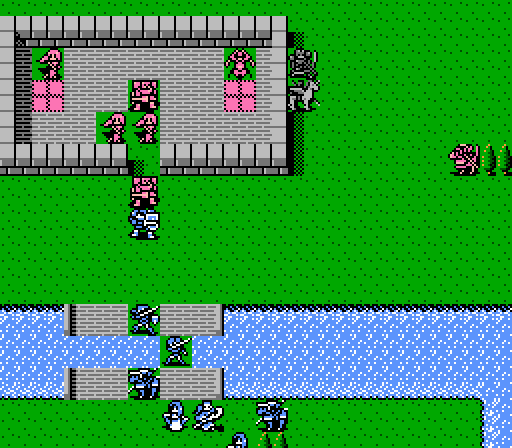 Afterwards, Claire flies over to take back that Angel Ring, so she can fly it over to someone else later.  Meanwhile, here's how you one-shot a boss:  - Chapter 4 Part 15 Battle 2.gif) I think Ragnarok speaks for itself. 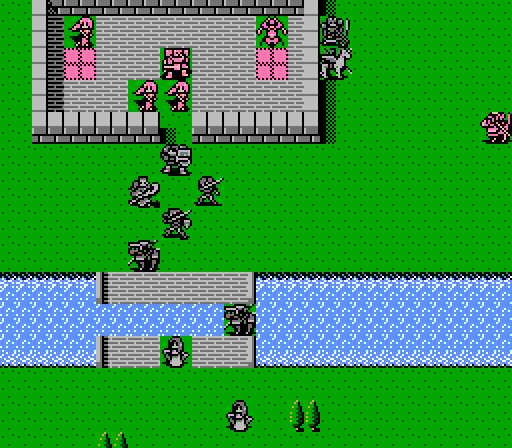 Force blocks the exit to the fort but I don't want him getting in range of the crazy boss-witch. Ryuto also gets warped over, leaving just the two healers stuck behind.  Getting to the healing tile is enough of a reason for this witch to launch a lazy fireball at Claire. Also, she misses. 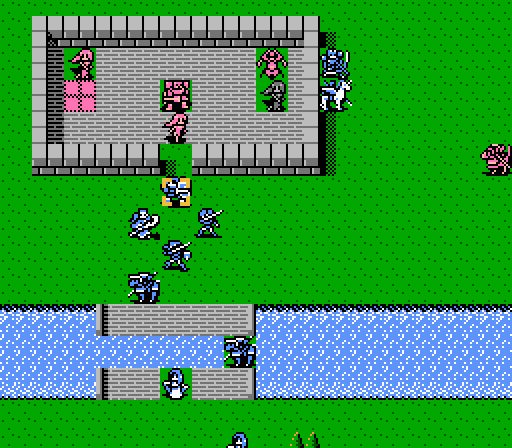  Force also dodges a fireball. The 40 Speed from the Quick Ring actually helps both his physical and magical evasion.  Oh, right, forgot to deal with the bow knight while I was busy getting Python a cheesy level. Well, guess who Dyute's going after next? Turn 12   Matilda's made it all the way into the fort from back on the wrong side of the lower bridge. She celebrates by disemboweling a witch.   Python ignored the bow knight right next to him and turns another witch into a pincushion. That's also on fire.  Dyute doesn't even need her magic to do away with the bow knight.   Alm punches a hole in the last baron's armor, but it doesn't do much damage by the time it gets through that Defense.  I could send Ryuto in there, but I'm pretty sure the boss witch would Aura him into next week.   Instead I'm going to let Matilda take that hit. Or not take it, as is the case here. She may have taken the Quick Ring from Force when I put her in that spot.  Turn 13   Time for Alm to live up to his Hero class. He's got the Angel Ring so I'm not too worried.  - Chapter 4 Part 15 Battle 3.gif) Didn't even need to dodge. That's one way to avoid taking hits.  Alm's biggest weakness is still his Defense, but since it makes him a magnet and prime counter-killer I'm okay with that right now. He's got more than enough HP to tank a few hits, anyway.   After a couple of scratches from Matilda, Ryuto finishes off the baron with a flourish and a blade made out of wind.  I could finish off the shaman right away, or....  Some more XP pinatas. Not that gargoyles are really worth much anymore. 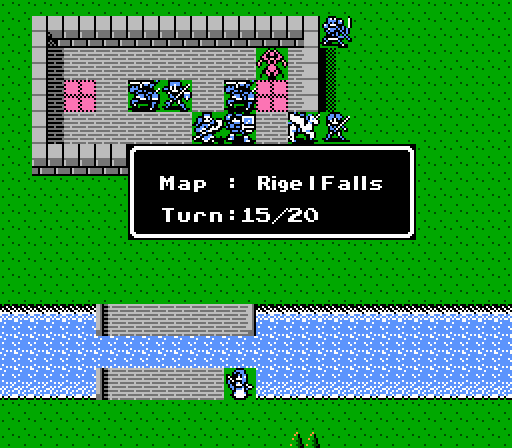 A couple turns later I realize that I'm glad I didn't dawdle along with the rest of the map. Just 20 turns is a pretty tight limit for a map of this size and complexity. I obviously didn't have much time for grinding here, but the results are in:  I'm not sure anyone's been in more need of Defense and actually gotten it.  Ryuto becomes marginally more useful. I wonder if he resents his ultra-powered sister at all.  Zeke gets a somewhat lovely level. Almost everyone has at least gotten HP this map though.   Finally on the 20th turn, Matilda gets the final blow in on the shaman. 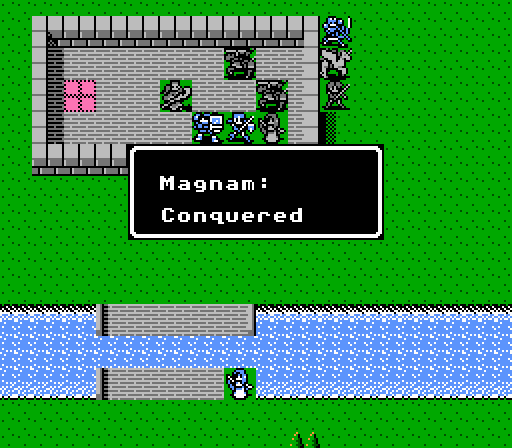 And the long slog that was almost two months in the making is finally complete. 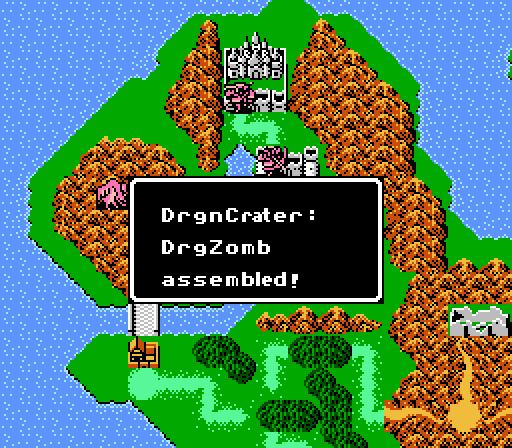 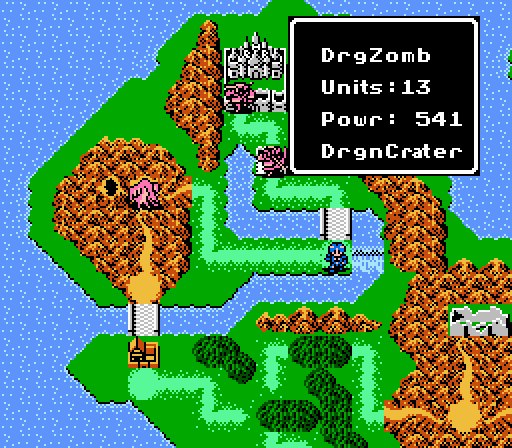 Back on the world map, the dragon zombies continue to pop in every turn. But I think we can outrun them to the end of the chapter at least. If you were wondering, there are now 13 of them in the group, so I'm glad I'm not still stuck there.  Next time: 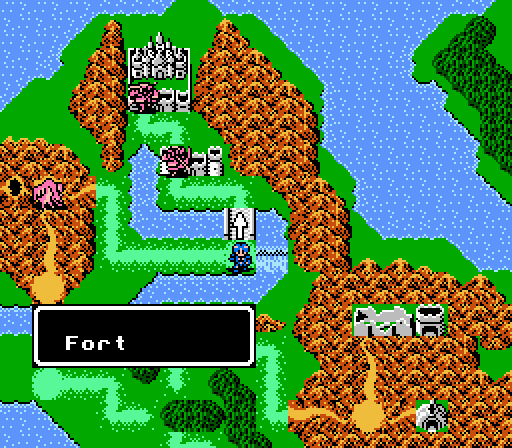 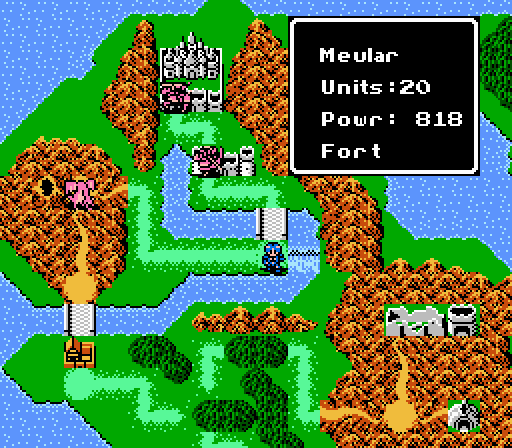 Alm takes Rigel Fort, the last obstacle before King Rudolf himself. DKII fucked around with this message at 05:31 on Jul 9, 2015 |
|
#
?
Jun 1, 2015 00:35
|
|
|
My god, Dyute is still MVP of the team. If she keeps this up I don't see why you'd need an army, just send her, a healer and Alm (because he's the Lord) and destroy everything.
|
|
#
?
Jun 1, 2015 01:22
|
|

|
DKII posted:He switches to the bow ... Now he can counter-attack all he wants on the enemy phase. That, uh... that is not a sentence I thought I would ever hear in a Fire Emblem LP.
|
|
#
?
Jun 1, 2015 03:36
|
|
|
I like that the map was built around units being able to cross that little river. I imagine it's kind of crap terrain to get caught in?
|
|
#
?
Jun 1, 2015 09:37
|
|
|
Glazius posted:I like that the map was built around units being able to cross that little river. I imagine it's kind of crap terrain to get caught in? Terrain only affects physical evasion, and in that respect water isn't any worse than the grass tiles, giving a 0% evasion bonus. The indoor floor tiles give 20%, and other special tiles like trees and hills give 30-40%. Graves give a whopping 60% for some reason. Also sorry for the late update - I actually had it recorded three weeks ago but it took forever to find time to write it up afterwards.
|
|
#
?
Jun 1, 2015 15:45
|
|
|
Chapter 4, Part 16: Rigel Fort Only a couple stops left on Alm's invasion tour of Rigel. Today we're stomping through some random fort. 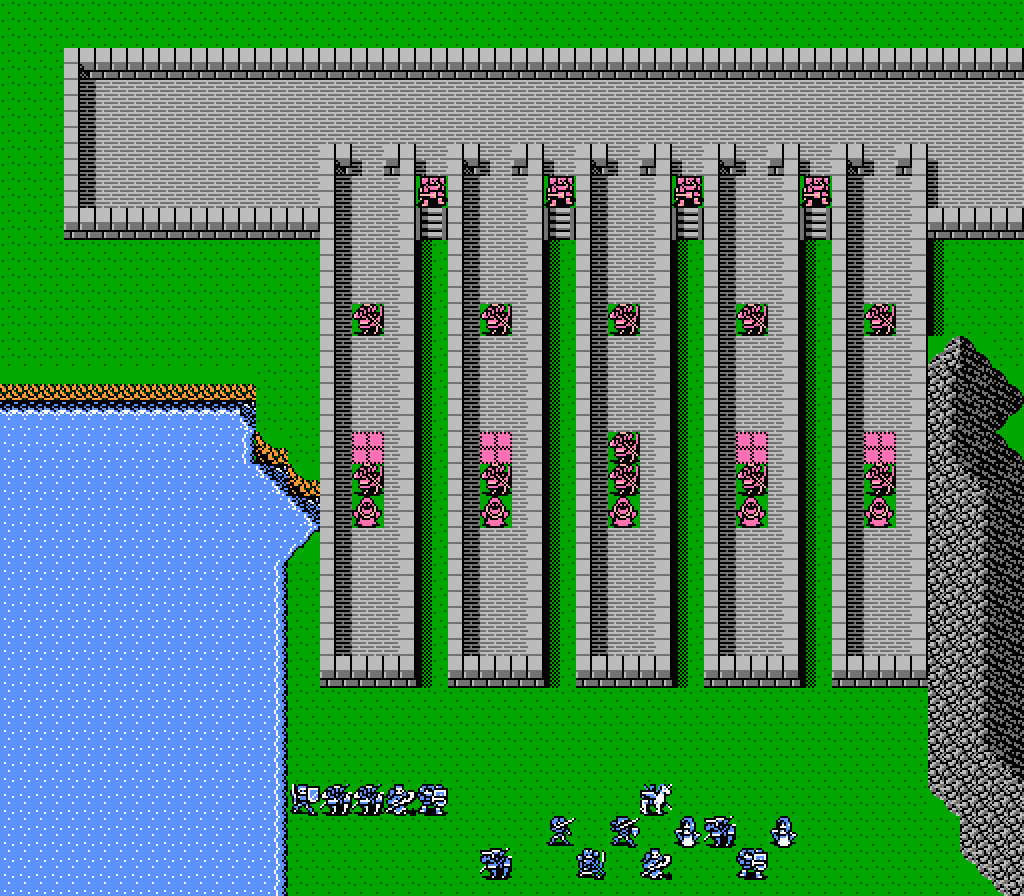 Right, so a bit of a gimmick map here. Rush up some long corridors while being pelted by ranged attackers, with barons blocking the chokepoints at the end. Strategy is pretty simple - stick to one side with most of the army, and warp certain key people up to the top directly.  The extra bow knight in the middle is the boss, Meular. He's a bit stronger and tougher than the rest of the bow knights but the extra Speed is the real problem as he's fast enough to double-attack many of our units. Turn 1 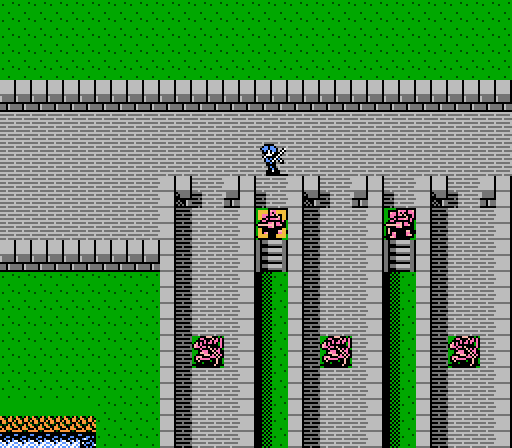  Of course Dyute is the first one sent inside the fort. And that's one baron down. 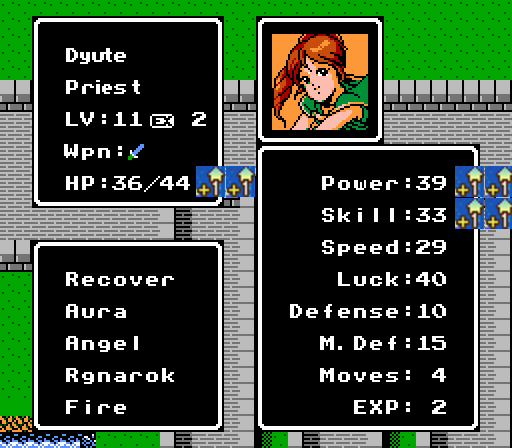 Still kicking rear end. 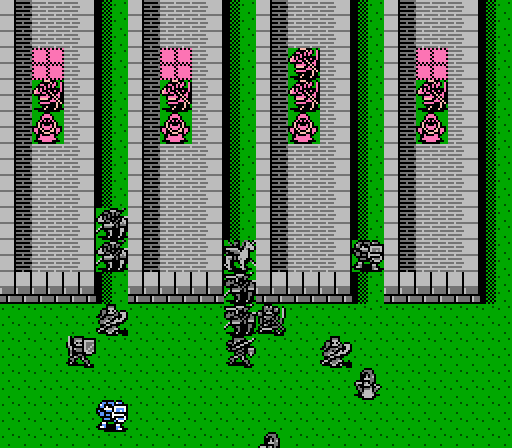 Everyone else enters the gauntlet.  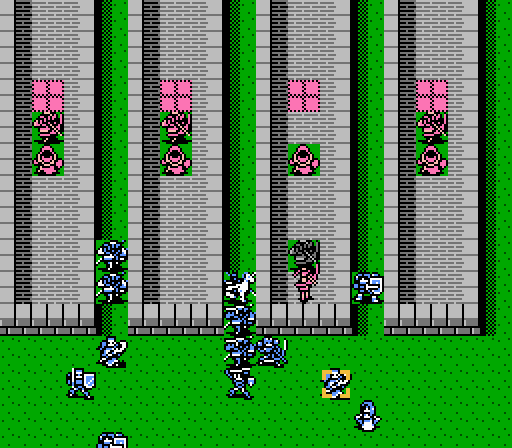 I forgot that bow knights have extra range (up to 5 tiles) and two of them almost got Ryuto, but he had just enough HP and Defense to survive. 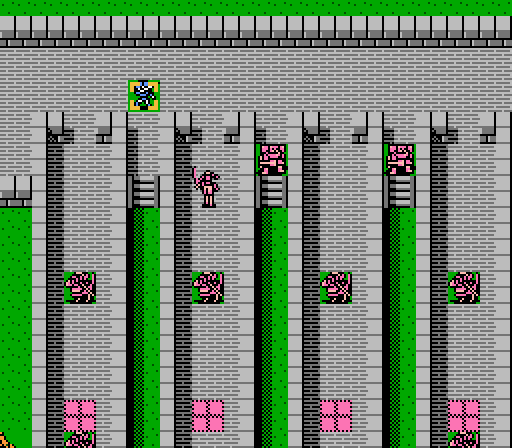 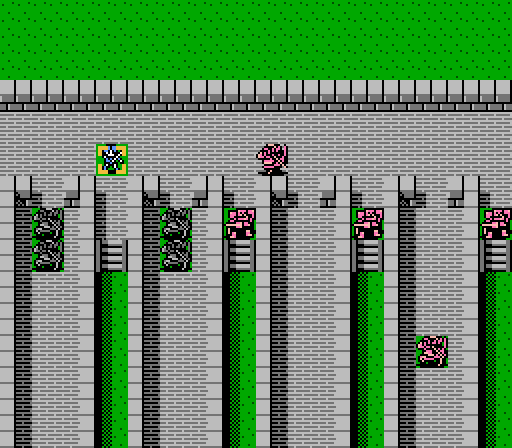 The  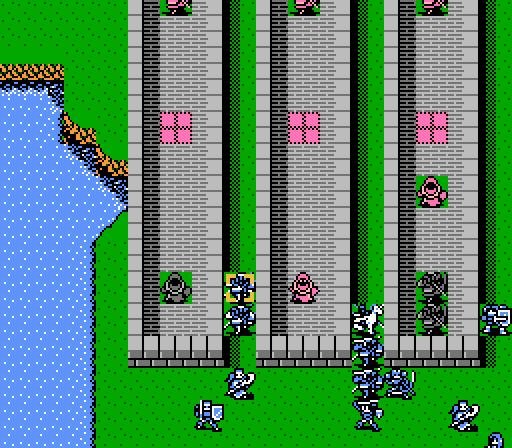 Cleive draws in the wizards' attacks by virtue of having the lowest Magic Defense around.  That's why I gave him the Magic Shield, to make sure it'd be very unlikely he'd be hit by any of them. 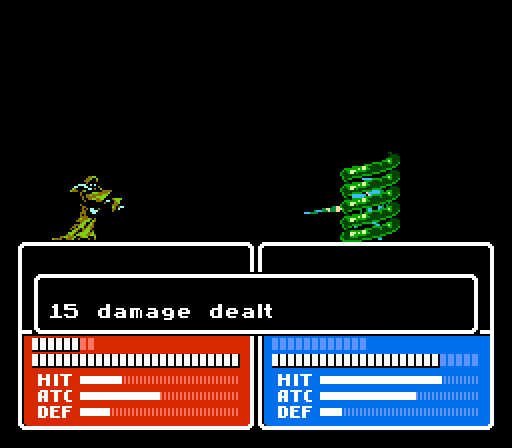 Force doesn't fare as well, but he's got plenty of HP to soak up the damage. Turn 2 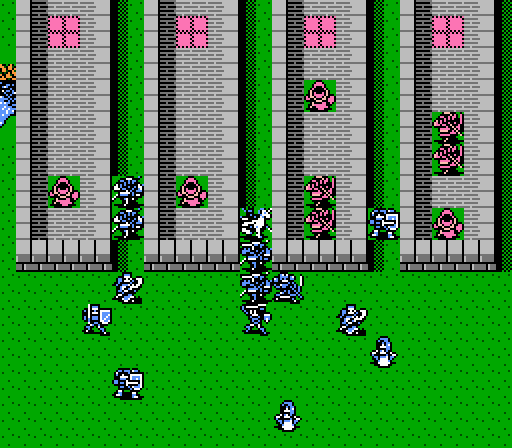 Kind of a mess down south, with four wizards and four bow knights harassing us.  Dyute's got five bow knights and a couple barons all to herself right now. One of those barons is immediately wiped out. 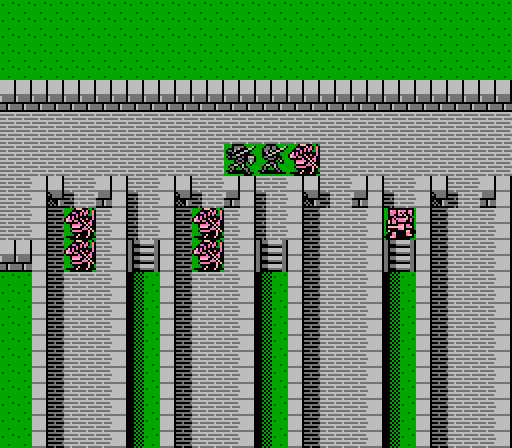 Alm gets sent up to support Dyute and grabs the Angel Ring from her while he's there.  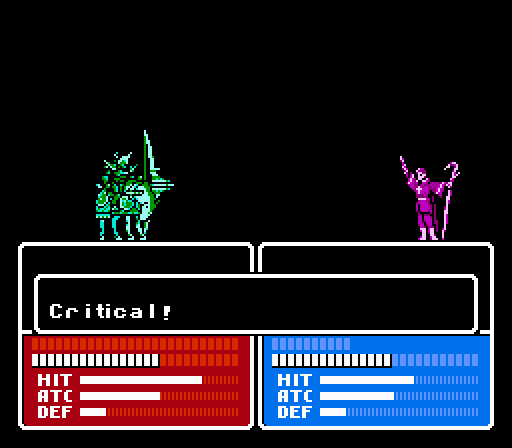 Ryuto gets in a lucky shot of critical lightning to take off most of the boss's HP. The counterattacks leave Ryuto at just 1 HP so Teeta heals him up. 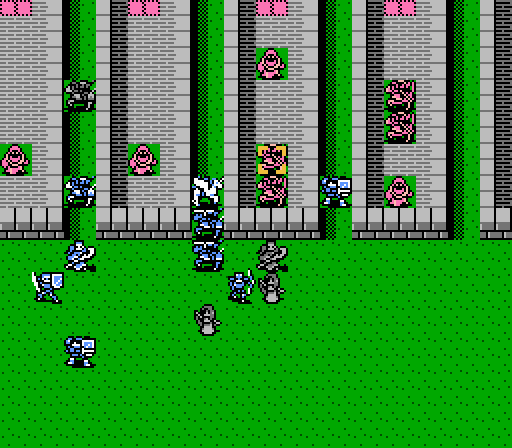 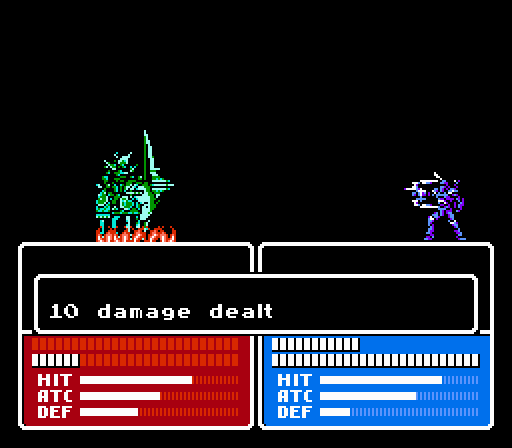 Python chips in with some more damage and also takes two counterattacks.  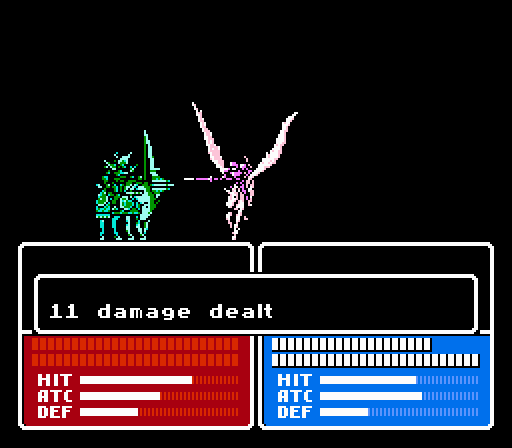 Unbothered by simple obstacles such as walls, Claire flies in to finish off the boss. 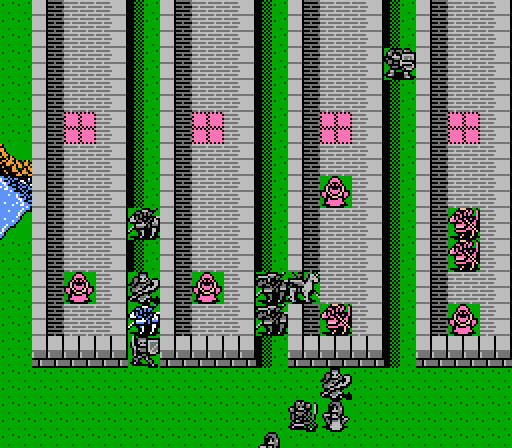 Everyone else lingers at the entrance - going in too far would draw too many of the bow knights back, and it's better if Dyute and Alm keep them distracted since they can handle it. 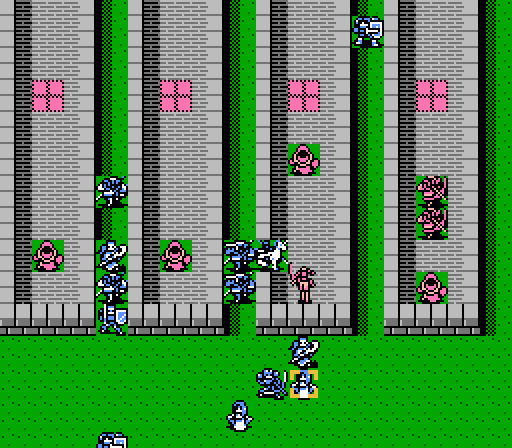  I left a bow knight in range of Teeta, but she manages fine. 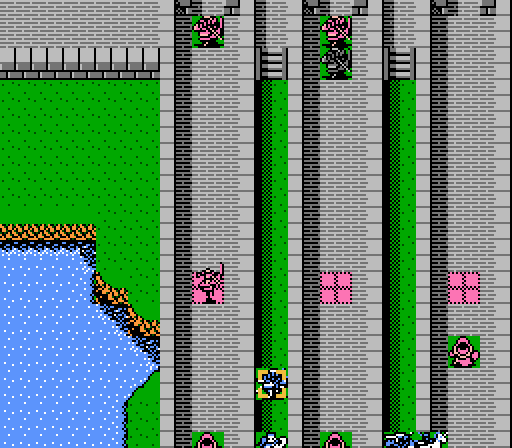 Four of the bow knights stayed up with Dyute, while one came down to shoot at Cleive.  One of the wizards got in a lucky hit on Cleive. The Magic Shield doesn't actually nullify magic, it just sets the hit rate to 10%.   Back in the middle of the arena, Zeke dodges some bands of slime.  Another bow knight joins Dyute's party from the far right, but he misses (as did all but one of Dyute's attackers this turn). Turn 3  Still kind of a mess down here. Can't get rid of the ranged units fast enough to allow our melee units to charge up the corridors very well.  Meanwhile, another turn, another dead baron.   Alm pulls out his bow and kills off a bow knight with a crit. 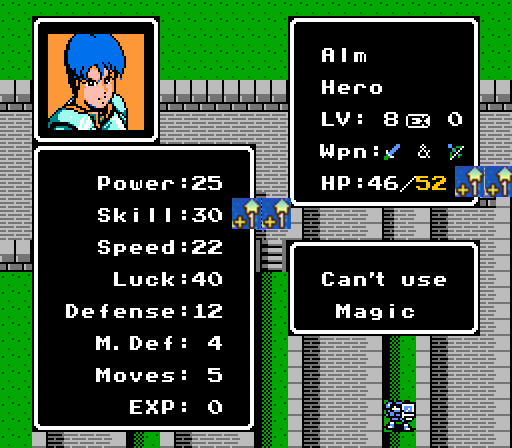 And he's reached the HP cap (gold color added for effect).   Force is the first one through the gauntlet on his own legs, thanks to the Quick Ring, and the nearest bow knight feels the pain.  Python gets warped up top as well, but spends his turn grabbing the Angel Ring from Alm rather than actually attacking anyone. 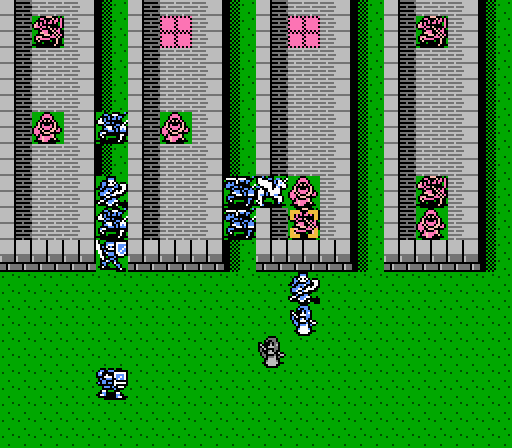 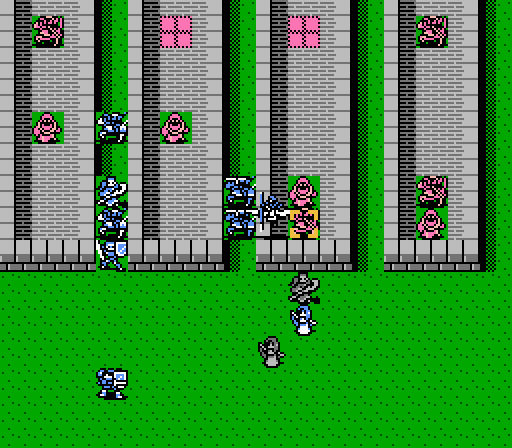 Ryuto and Claire take out another bow knight, leaving only the wizard free in the middle rampart.  Zeke and Matilda are now free to begin their own charge, while on the far left Cleive leads a slower group through the wizards.   One of the wizards decided he liked the recovery tile more than he liked attacking Cleive, so attacked Robin instead. He was able to dodge the attack anyway.   The center wizard stayed put to attack Claire, but with no better luck.  The wizard on the far right decides to be a dick and heal up the enemy army. Fortunately I don't think I'd left too many wounded units around, been going mostly for single-turn kills.  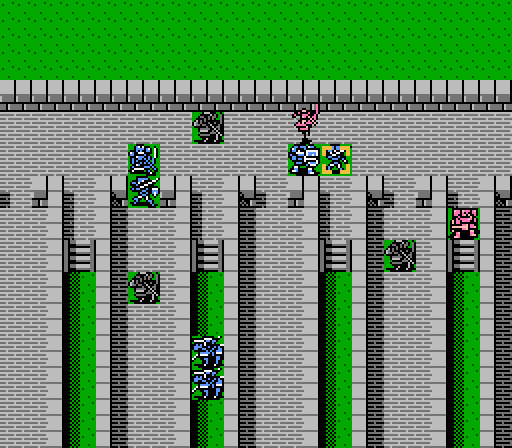 The bow knights continue to chase Dyute around the map, actually bringing her down to 10 HP here. The enemy in the second shot stayed a little too close, however, and died from a pair of fireballs in exchange. Turn 4 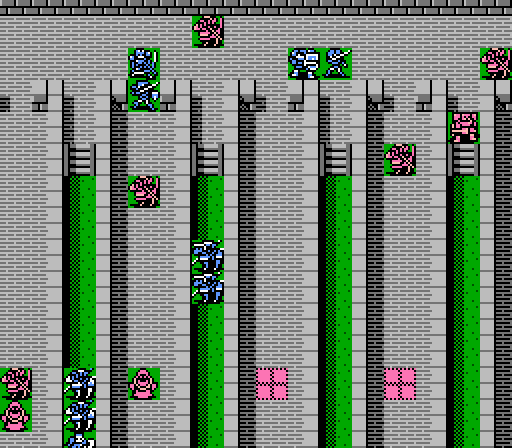 The battle has devolved into something of a free-for-all, no formations anywhere really. 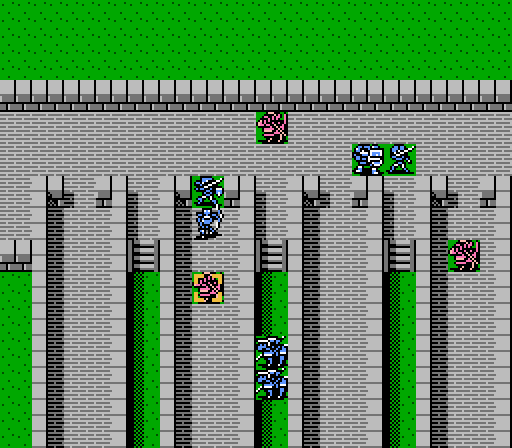 Python scratches up the nearest bow knight in exchange for a modest sum of XP, just enough for a level.  He's actually packing a decent strength behind his arrows now. Still one of our weaker units straight-up but the five-range attack is tactically right up there with Claire's flying and Silk's warping. 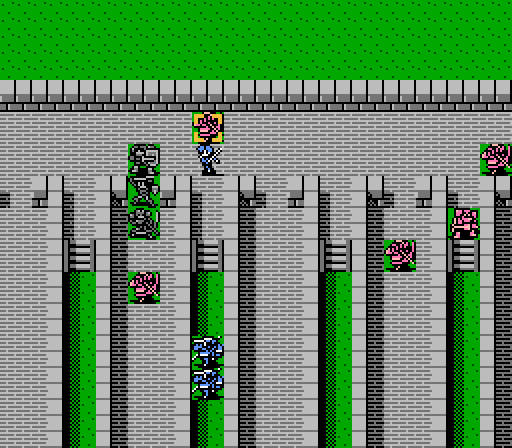 Dyute takes a break from baron-killing to clean up a loose bow knight instead.  Zeke and Matilda form up inside the fort. There's two bow knights still on the top-right (only one shown here), and one wounded one left on the top-left side.   Claire has just enough juice to one-round kill the center wizard, completely clearing out that spoke of the fort.  Ryuto warps up to join the others inside the fort, healing Dyute when he arrives.  Robin makes it almost inside the fort, with Cleive still trying to hold the wizards' attention until someone can get over and finally kill them. Gray heads back outside to possibly catch a warp next turn. There's still two wizards and two bow knights on the lower-right side of the map as well.  Cleive keeps doing his anti-magic act during the enemy phase.  Dyute fights off three bow knights this turn, and the extra healing she got is more than enough to keep her upright. Turn 5   Now that we finally have a concentrated force, we can really take it to these bow knights. Python and Force start out with weakening attacks. 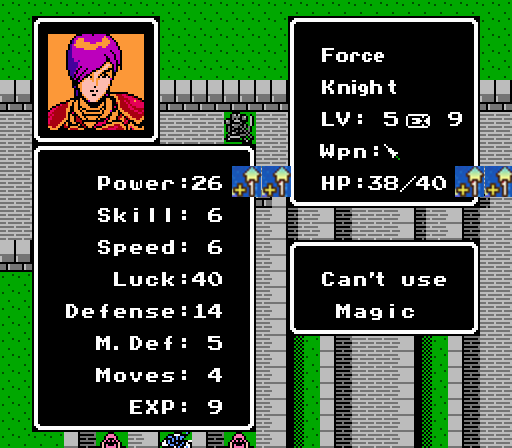 Force even got enough XP for another level. When he's got that Quick Ring on he's quite deadly now.   Ryuto finishes off one bow knight, while Matilda and Zeke take out another, leaving just the one bow knight on the north end of the map. Alm and Dyute juggle some items around. 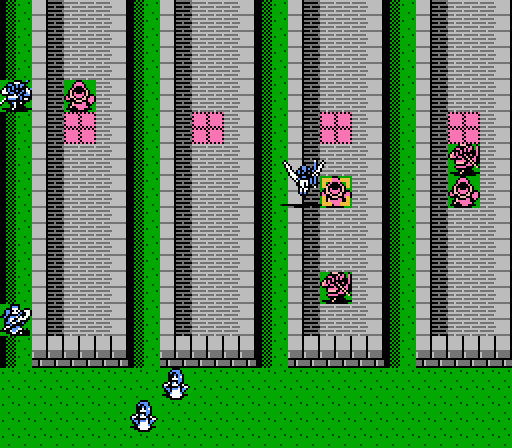 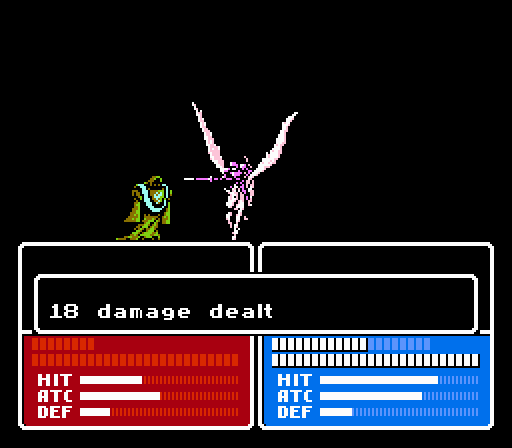 Claire finally starts tending to the lower-right enemies, taking out a wizard. 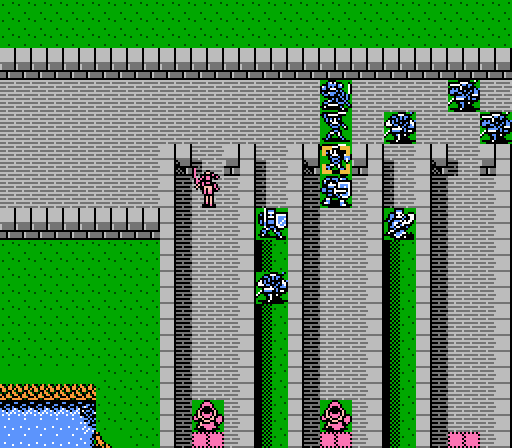  On the enemy phase, the last bow knight on the left side comes out after Alm, while the last one on the upper right can't reach Dyute so settles for Ryuto. No real threat from either one at this point.  Cleive continues his wizard-bait act, moving further north to draw them in range of the rest of the army. Turn 6   Claire starts off the turn by killing yet another wizard. Only the two charmed by Cleive remain. 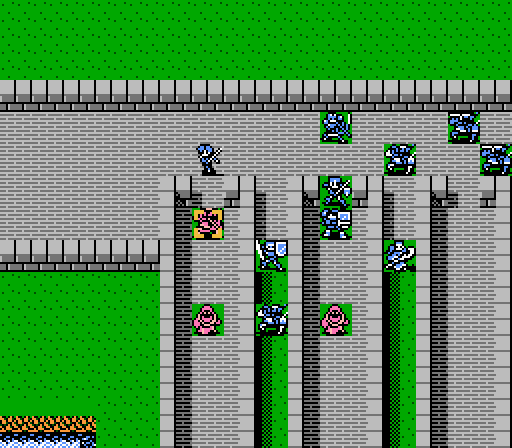  Dyute wipes out another bow knight with one shot. That's about 130 damage in that crit. 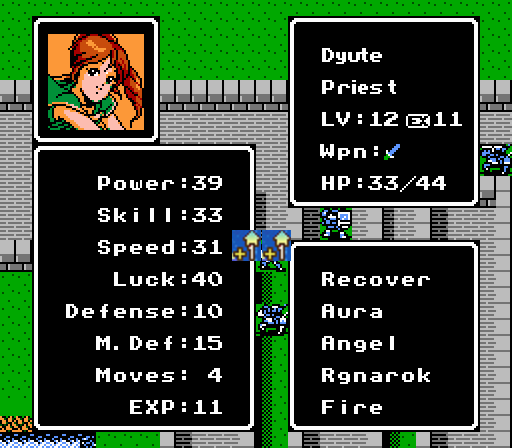 More Speed is kind of wasted on her at this point, but I guess it at least makes her more dodgy. That evasion has come in handy this map with all the bow knights swarming her only to miss most of the time.   Someone finally gives Cleive some relief, as Alm takes care of a wizard here.  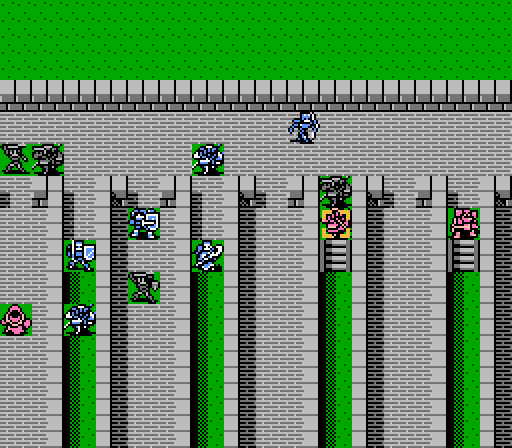 Another bow knight falls, this time to Zeke and Python. 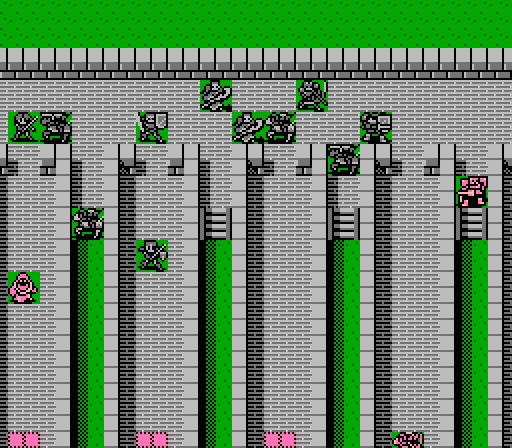 Almost everyone is inside the fort now, and for enemies we just have two bow knights chasing Claire around, a wizard chasing Cleive around, and a baron who's still guarding the entrance even after we've already taken over the fort. 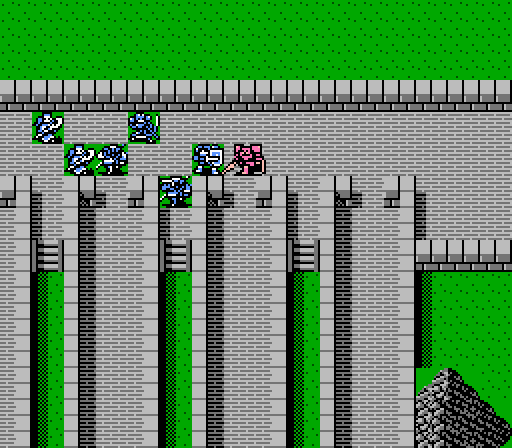  The last baron finally moves to face Force one-on-one. That Quick Ring isn't just for double-attacks, though, as it also greatly helps Force's evasion here. Force also counters for 16 total damage in two attacks.  The last wizard gets in a final hit on Cleive, but it's far too late for that to matter. Turn 7 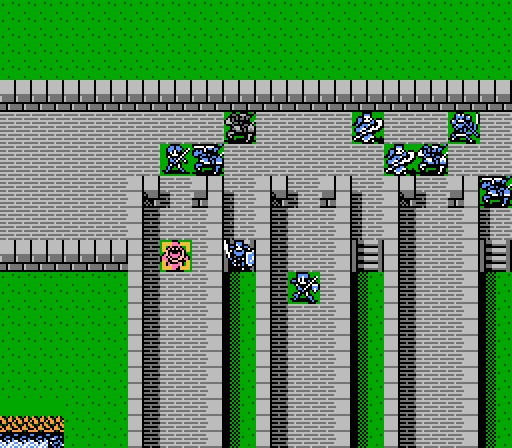  Cliff finally sees some action, softening up the wizard for Matilda.  As with Dyute, more Speed doesn't really help Matilda much in terms of getting in that second attack anymore, but more evasion doesn't hurt.   Ryuto and Gray magic the baron down to just 2 HP remaining.  Zeke is able to land the final blow on the baron.  Claire is leading the bow knights up to the rest of the army.  One moves up to attack Claire, the other eyes a more fragile target in Ryuto. No one's in any danger here, though. Turn 8   Zeke and Claire take out one of the remaining bow knights.   Ryuto and Gray once again soften up their target with some magic.   Freeing up Robin to land the final blow.  What do you know, another crappy level for the crappy starting unit. I guess there's a reason we haven't been using him, even with the Angel Ring he kind of sucks.  And the last obstacle between Alm and slaying the king of Rigel has been removed. 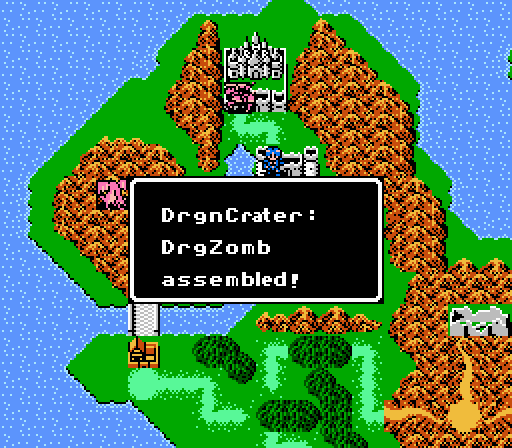 Back on the world map, another dragon zombie forms up to block off any retreat. Guess we're only going forward from here. Next time: 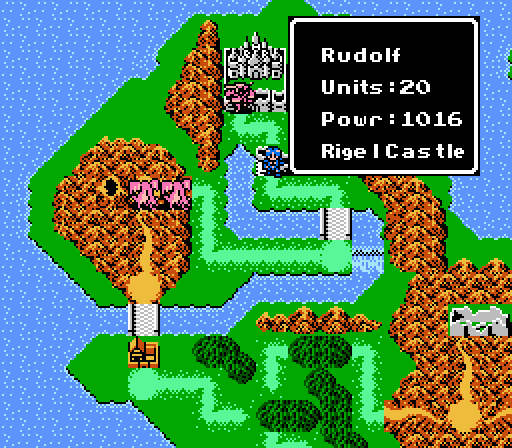 It's the final showdown with King Rudolf.
|
|
#
?
Jul 6, 2015 00:29
|
|
|
Dyute's stat spread would not be out of place in FE: Awakening and that's kind of insane.
|
|
#
?
Jul 6, 2015 11:24
|
|


|
Glad to see this thread back. It's still weird to feel the series try to get its footing with its permanent unbreakable weapons and crazy stat boosts.
|
|
#
?
Jul 6, 2015 15:18
|
|

|
X_countryguy posted:Glad to see this thread back. It's still weird to feel the series try to get its footing with its permanent unbreakable weapons and crazy stat boosts. Yea sorry it's been hard to stay focused on this thing but I'm too close to the end now to give up ")
|
|
#
?
Jul 6, 2015 15:40
|
|
|
Black Balloon posted:Dyute's stat spread would not be out of place in FE: Awakening and that's kind of insane.
|
|
#
?
Jul 6, 2015 22:21
|
|
|
That was a pretty interesting level concept, even if a doom pegasus trivializes most of it.
|
|
#
?
Jul 8, 2015 11:13
|
|
|
As an FYI, you seem to have a missing "img:073" from the Rigel Falls update.
|
|
#
?
Jul 8, 2015 19:21
|
|
|
Discendo Vox posted:As an FYI, you seem to have a missing "img:073" from the Rigel Falls update. Thanks - the image was actually there I just pasted the link in wrong and didn't remove my self-note about where to put it.
|
|
#
?
Jul 9, 2015 05:32
|
|
|
(Joke update moved to be the first part of the real update below)
DKII fucked around with this message at 05:22 on Aug 17, 2015 |
|
#
?
Aug 2, 2015 20:38
|
|
|
Ah, the "screw this poo poo" update, one of my favorite kind of Fire Emblem updates.  It's always funny to see how Warp can completely break the game.
|
|
#
?
Aug 3, 2015 08:17
|
|

|
I do like XP as a consideration in that kind of battle - if you're cool with where you are you can just cut the bullshit and grind on the world map or something.
|
|
#
?
Aug 4, 2015 20:32
|
|
|
Real update is coming in a few minutes, just wanted to post a 'warning' that I kept the previous 'joke' update as the first portion of the real update, so don't be fooled thinking it's 'only' the same stuff as before.
|
|
#
?
Aug 17, 2015 05:23
|
|
|
Chapter 4, Update 17: Rigel Castle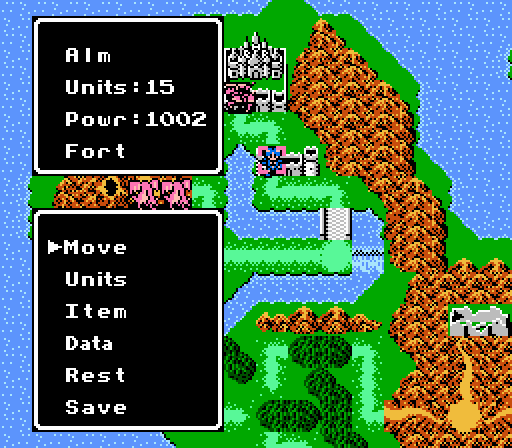  Time to take it to Rudolf. We've got almost the same total army power and are only outnumbered by 1/3, should be no problem.  As usual, the game tries to screw us by forcing us through a shooting gallery before we can get into the castle proper. We have enough tools in our kit now to deal with that kind of problem, though. The bow knights, gold knights, and barons are a mix of level 1 and level 5, all pretty strong but nothing we haven't faced before by now. 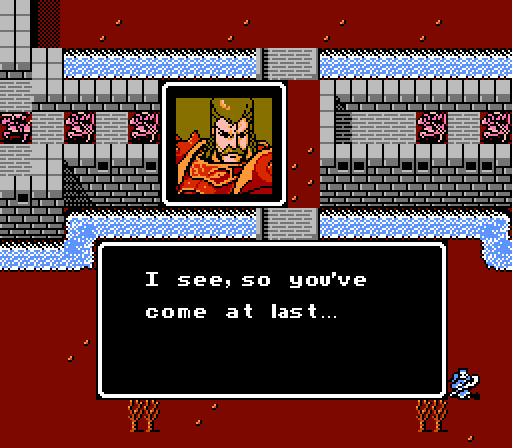 Rudolf is a bit of a talker.  I leave this to fate now as a knight of Rigel. Men! You have fought well thus far! However.... The Rigelian Empire's time has ended. Hear me, all of you! This is my final request. If I should fall, don't interfere. Those remaining should surrender courageously. Do not feel disgraced! Is that clear? Don't die in vain! I leave this to fate now as a knight of Rigel. Men! You have fought well thus far! However.... The Rigelian Empire's time has ended. Hear me, all of you! This is my final request. If I should fall, don't interfere. Those remaining should surrender courageously. Do not feel disgraced! Is that clear? Don't die in vain!Not going to be winning any awards for most motivational battle speeches, that's for sure. 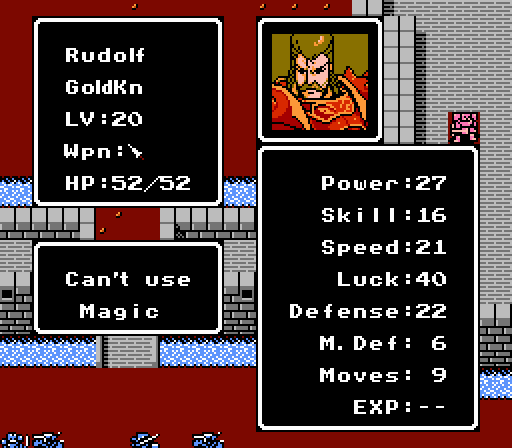 Rudolf is tough. That Defense is very difficult for anyone but Alm or Dyute to scratch, and while his Magic Defense is low, he's holding an Angel Ring which combined with his high Speed gives him a 61% magic evasion. If only we had someone with a high-damage, high-accuracy spell, who could attack twice and would only need to get in one hit.... 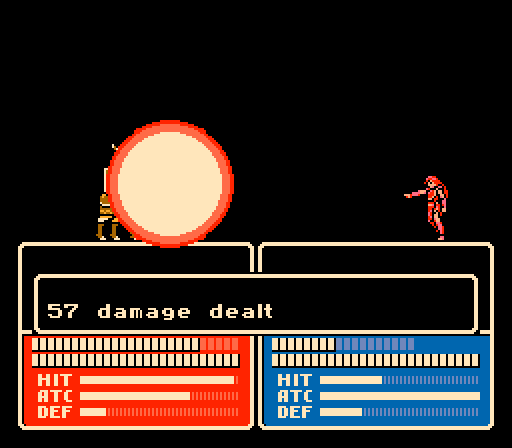 Oh, right, we do. Courtesy of a warp from Silk, the Magic Ring for extra range, and Dyute's mighty Ragnarok spell and near-capped Power. 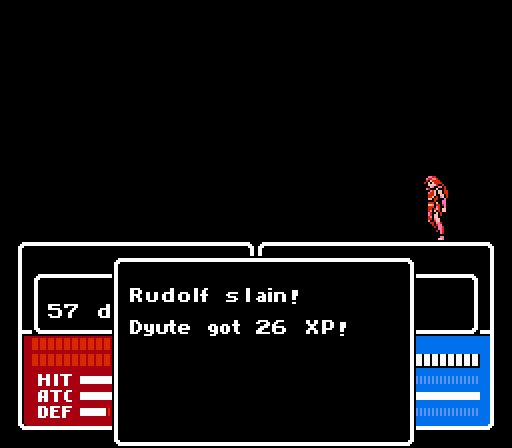 Thus ends chapter 4. Okay, not really - massive waste of XP if nothing else, but if you want to cheese the battle and you've leveled up a tactical nuke like Dyute, here's a good time to use it. Let's rewind a bit.... Turn 1 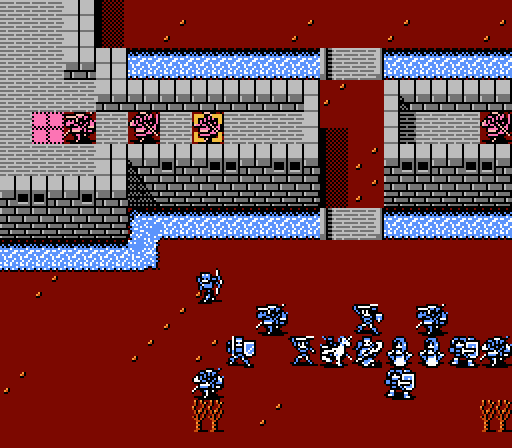  To start, Python and Claire team up to take out the first bow knight. Silk gave Claire a little Warp-push. 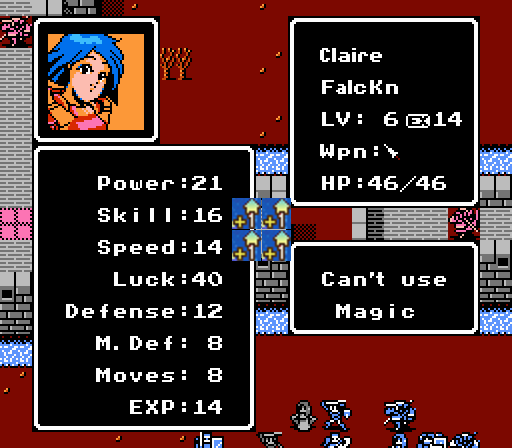 Claire's Speed is now on par with the gold knights on the map, which will let her tank a bit more than normal here. 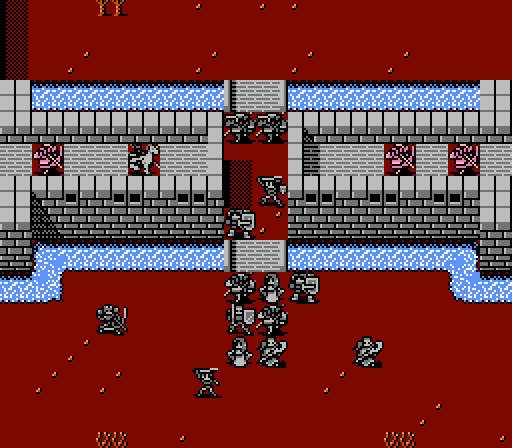 Everyone else starts a little gauntlet run. 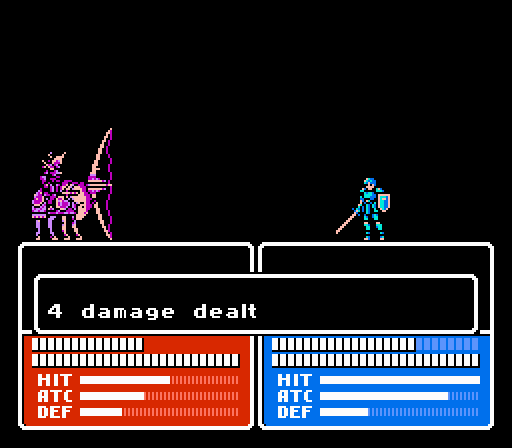 The two bow knights on the right attack Alm on the enemy phase, but they're not much of a problem.  Claire draws in all the gold knight and bow knights on the left side, though only one of each can actually reach her this turn. That'll leave the top of the castle open for invasion later. She got a counter-crit on the gold knight, too. Turn 2  Python tries to start another double-team on the next bow knight, but misses one of his attacks. So instead of contributing another attack, Claire flies down to give the Angel Ring to Python.  More moving through the gate and courtyard. Zeke and Matilda have reached the castle entrance at the top, and Ryuto got himself warped up there directly.  On the enemy phase, one bow knight goes for Cleive and the other attacks Luka - not much damage in either case.  With Claire leaving the walls, the gold knights moves back to the top of the map. Three of the bow knights stay and attack Silk, Python, and Claire in turn. Turn 3  Time to set up to wipe out the enemy units on the left side.   Dyute's only role in this mission is taking out the two bow knights on the right side, and she starts with a massive fireball here.   Another team-up for Claire and Python, with another courtesy Warp from Silk.  Python's a great ranged attacker at this point. His Defense is still pretty low but he'll be able to hold the wall for one turn at least.   The second bow knight on the right side has a death wish, apparently. But Dyute missed one of her attacks, and the second "only" did 36 damage out of 40 HP.   Matilda and Force hold the line on the north end, fending off the gold knights and a bow knight.   The two bow knights on the lower left move out of Python's range to attack him, with one hitting for 11 damage. Turn 4  The enemy troops on the left side are now effectively split, so it's time to grind them down.  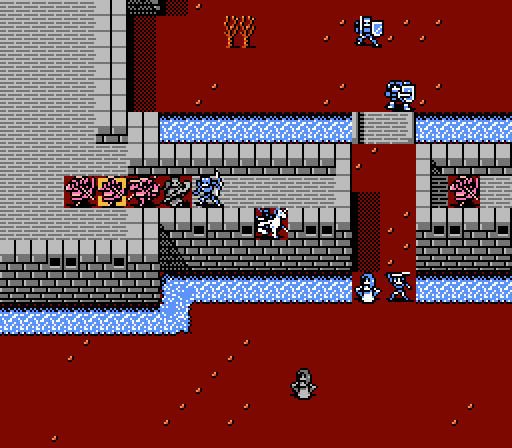 Gray gets warped on top of the wall, and softens up the bow knight for Python. 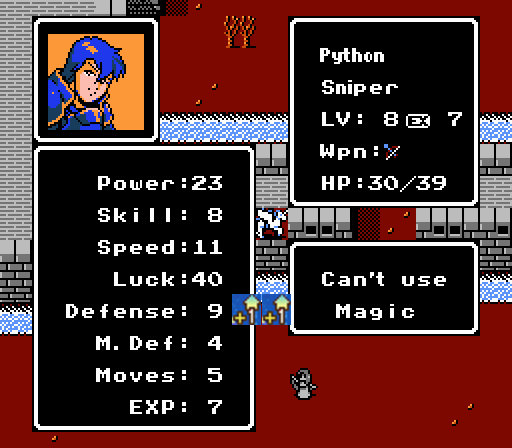 And Python gets a bit more Defense to help hold the wall. 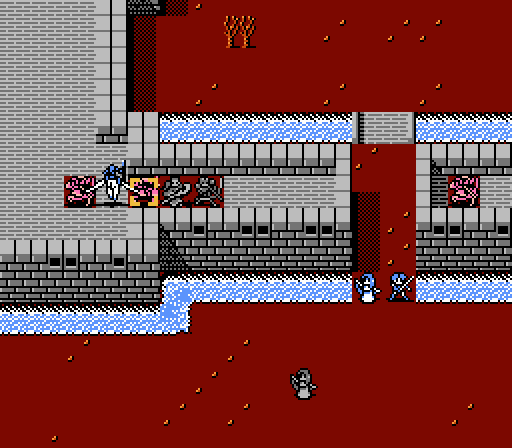 Claire traps the gold knight and gets in some scratch damage.   Matilda moves up to attack the bow knight, and Alm back-fills the line to finish off the gold knight.   Ryuto and Zeke move in to finish off the bow knight. It's now much easier to bottle up the remaining gold knights, since they don't have any ranged attacks. 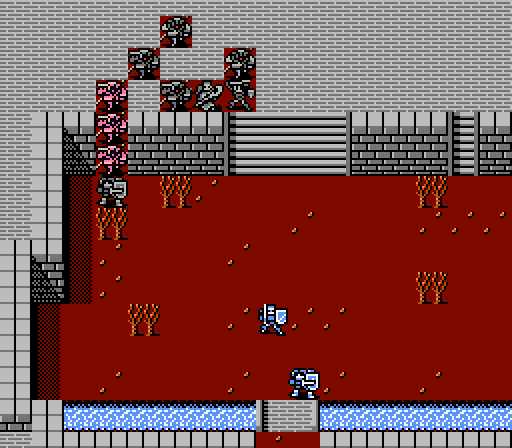 Robin closes up the line, and Force attacks the gold knight in front of him but misses both attacks. 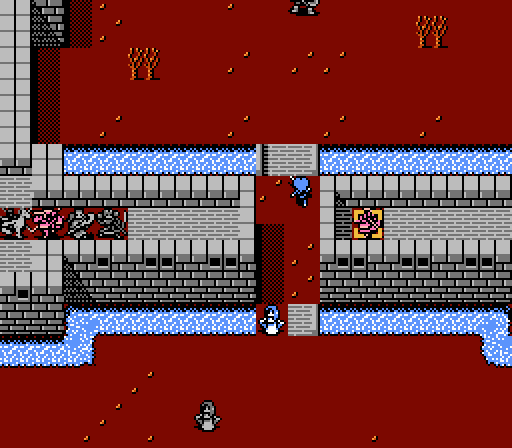 The bow knight can't survive another round with Dyute, and the gate is now clear for Teeta and Silk to pass. 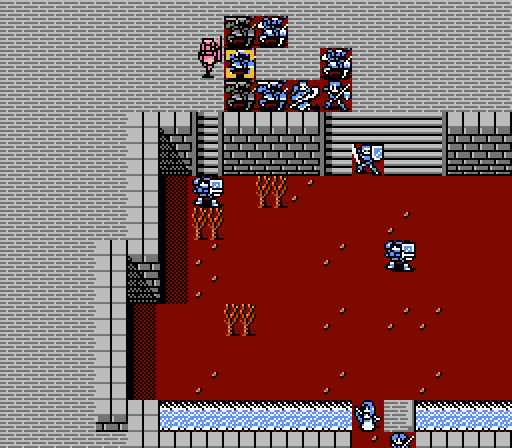 The three gold knights remaining in the upper left attack Robin, Matilda, and Zeke but without much to show for it. 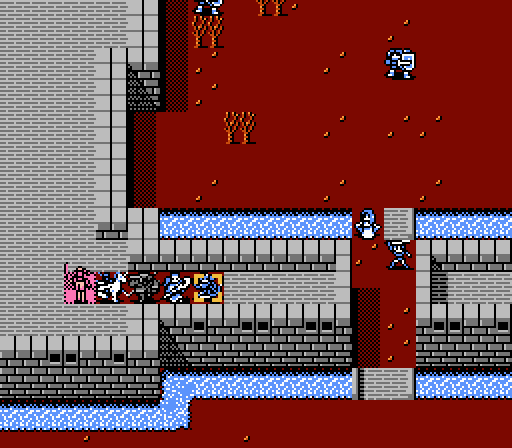 I was worried about Gray getting double-teamed, but the gold knight went after Claire instead (since the gold knight has a much lower Magic Defense, and wanted to avoid Gray's magical counterattack), and the bow knight went after Python who couldn't retaliate from that distance. Turn 5   Claire and Gray are able to finish off the gold knight, leaving just the bow knight behind now. Python spent the turn giving the Angel Ring to Gray, because:  Killing a third-tier class gives a lot of XP, and Gray finally took advantage with a great level.   Up north, Zeke and Matilda take out one of the gold knights.   Alm and Force weaken the other two gold knights, but I don't have anyone available that can finish them off without gaining a level, and the Angel Ring is still with the southern group.   The enemy phase begins with Robin taking two big hits from one gold knight while Zeke dodges two hits from the other.  Gray likewise makes an arrow miss. Turn 6   Some more item swapping gets the Holy Bow back in Python's hands, while Claire prepares to fly north with the Angel Ring in hand. The bow knight takes 32 damage from Python in two attacks.  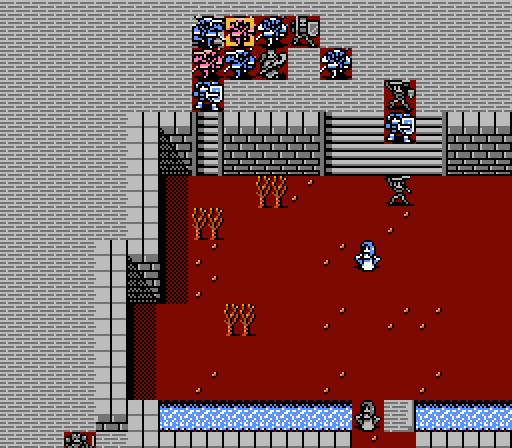 The west side of the map is pretty much under control now, and the enemies on the east side seem content to wait for us to approach, so we're free to take things slowly here and milk the XP. Here Cliff gets a free hit in on a gold knight before Matilda finishes it off while moving into a position to protect Robin. 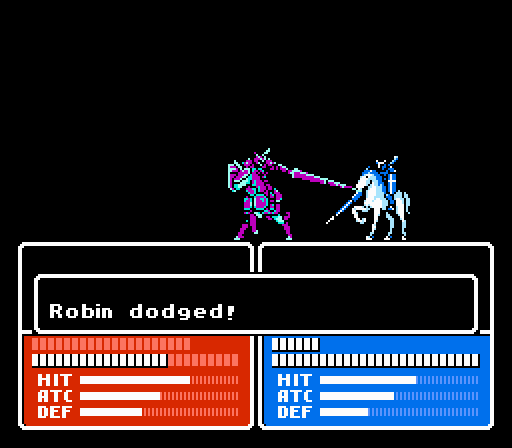 I then moved Robin back in front to take the gold knight's attack, because I was worried anyone else could counter-kill the gold knight and gain a level without the Angel Ring boost. Kind of a silly concern at this point but it adds an extra layer of challenge for me.  And down south the bow knight goes after Claire this time, but misses again. Turn 7  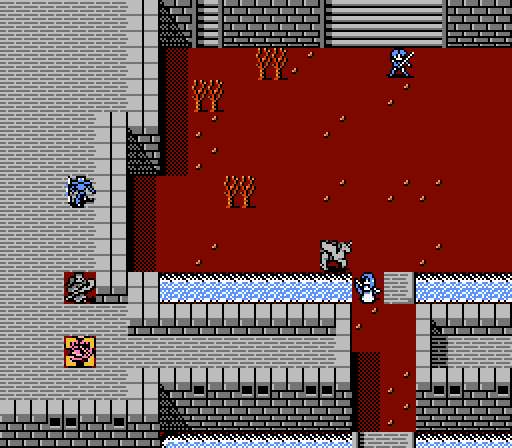 Gray misses a chance to finish off the bow knight, as Python hits only one of his attacks, leaving the bow knight with 13 HP.   Force and Matilda finish off the last of the gold knights. Time to head east, now.  Silk warps Claire into the new formation, and Alm receives the Angel Ring.  I made a mistake, though, and left Silk in range of the bow knight. Fortunately she's fast enough that she only got hit once, for 8 damage. Turn 8 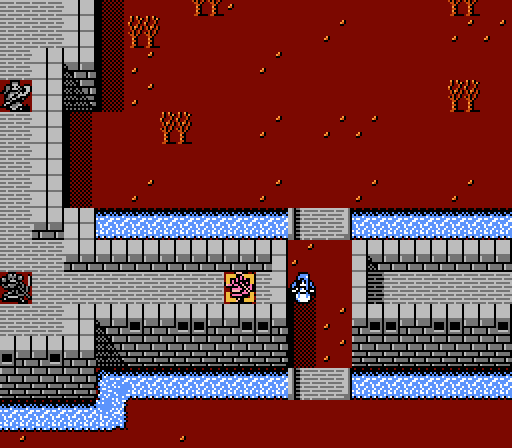 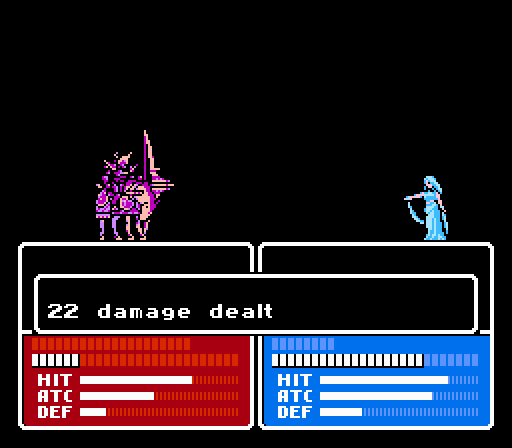 I decided it would be fun to have Silk take some revenge on the bow knight. Only one attack for her, though, so the bow knight lives another turn. 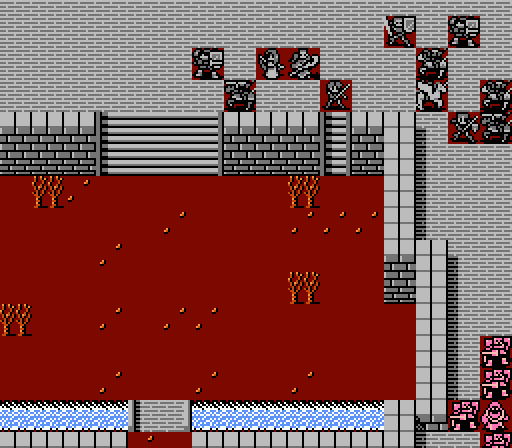 Meanwhile, slowly approaching the final enemy group. Turn 9 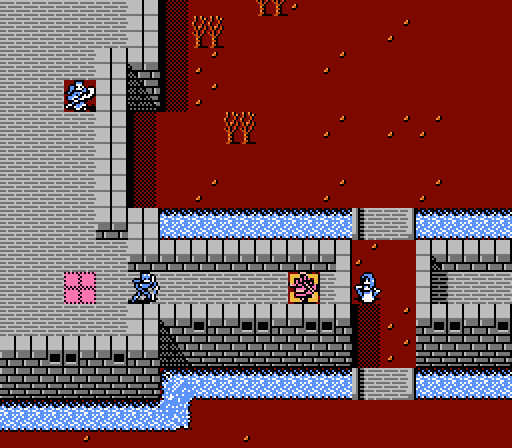 The bow knight went into retreat mode, but the healing tile was blocked, so it just did nothing last turn. It could've moved back and attacked Silk but the AI is a little weird in this situation. In any case, it's easy for Python to finish off the bow knight now. Turn 10   So it turns out that the barons and wizards won't move until someone gets into their attack range. The problem is that Rudolf has 9 Movement and thus has a greater attack range than any of the other enemies. We want to kill Rudolf last, so I'm going to warp Alm to the wall as a decoy.  At the same time, I'm going to draw out a single baron to control the XP Flow.  On the enemy phase, Rudolf leaves the rest of his army behind to go after Alm.  Chapter 4 Part 17 Battle 1.gif) If you didn't catch that, instead of Rudolf attacking the text "Why won't Rudolf attack?" is displayed. A fair question. So Alm's safe; the biggest risk will be killing Rudolf too early now.  Alm even gets a great level out of it.  Epic baron-on-gold knight action, as Matilda draws out a single enemy.  Teeta deals 30 damage to the baron. After several turns of uninteresting back-and-forth with luring out the barons and wizards one at a time....    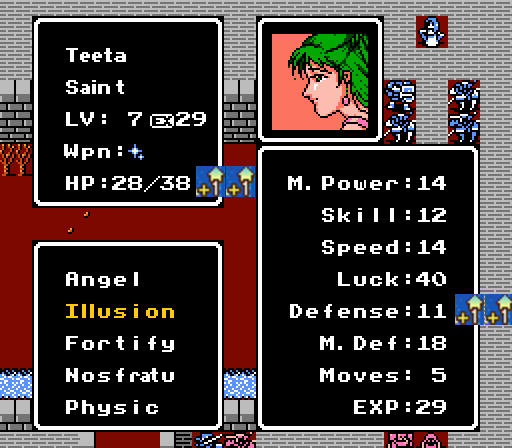 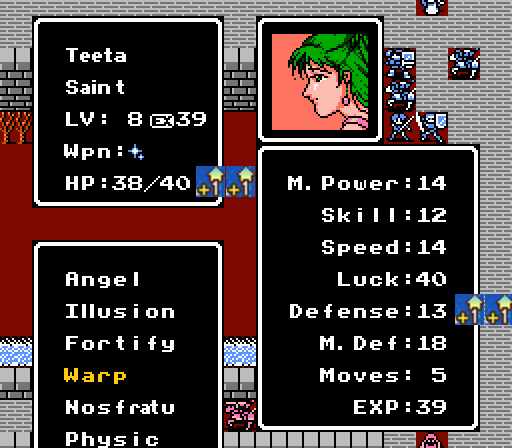 I fed almost all of the XP to Teeta, and she didn't let me down. She's no longer a defensive liability, and picked up a couple of great spells in Fortify (heals the entire army) and Warp (which we've seen extensively on Silk). She also gained Illusion, which we've seen on Jenny in Celica's army. Jenny's version summons a handful of soldiers; Teeta calls up a small group of pegasus knights, marginally more useful. Teeta's also gotten so many spells that her spell list is too big to fit on the screen. Oops.  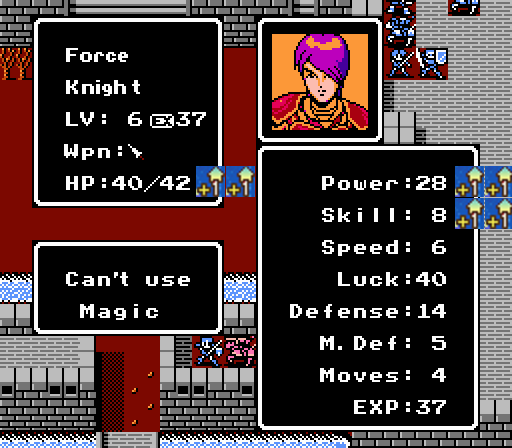 With Teeta maxed out on spells, Force takes a turn and takes out the second wizard for a level of his own. Pretty good one, too. 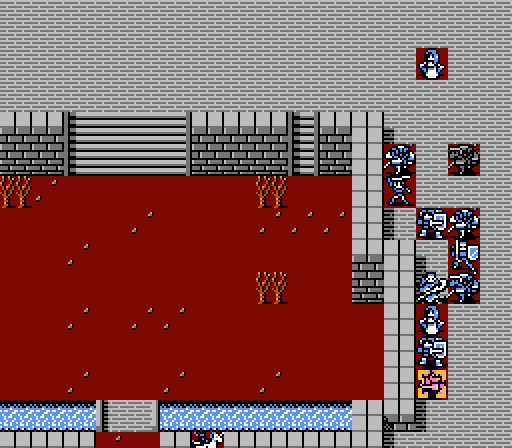  Force then lures in the last baron, and Ryuto calls forth some lightning to get himself a level. Not as good, but he does pick up the Arrow spell.   After Zeke and Matilda whittle the baron down to just 1 HP, Luka is able to grab the kill. He's now got as much Defense as Force but only a bit more than half the Power, not very useful overall really.   And with every other enemy down, Alm's free to finish off Rudolf.  Prepare for a lengthy death speech. Was it no mistake entrusting you to Sir Mycen after all? You figured it out by now, right? Your full name is Albyne Alm Rudolf. My...only son....Guh.... I have a last request.... Use 'Falcion', the holy sword that sealed Mila.... Defeat...the evil god...Doma....Surprise! Alm is Rudolf's kid. That's why Rudolf wouldn't attack him. It doesn't really explain anything about why Rudolf was invading Sofia or anything else that was going on, though.  Oh, and we get another Angel Ring. That'll make swapping around who gets to gain levels a little easier going forward.  A decent level to finish off the Chapter 4 finale. Next time:  Inside Rigel Castle.
|
|
#
?
Aug 17, 2015 05:33
|
|
|
Why is Alm Rudolf's son and why does it matter
|
|
#
?
Aug 17, 2015 06:28
|
|
|
Chapter 4, Epilogue: Rigel Castle II The first chapter of the game ended with Alm storming and capturing the royal castle of one of the nations of Valencia. The fourth chapter ends the same way, this time with Alm slaying his father, Rudolf the First, the king of Rigel. For some reason. 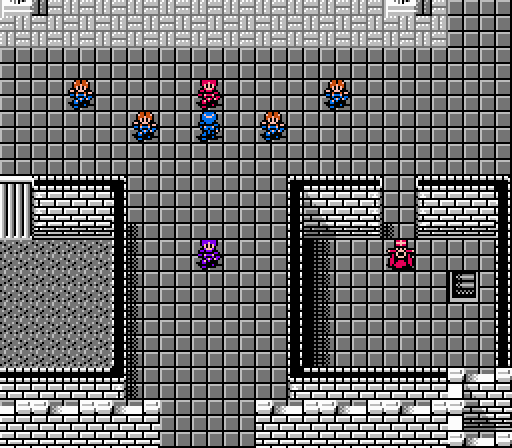 Let's skip the guy right in front of us for now, and talk to everyone else.   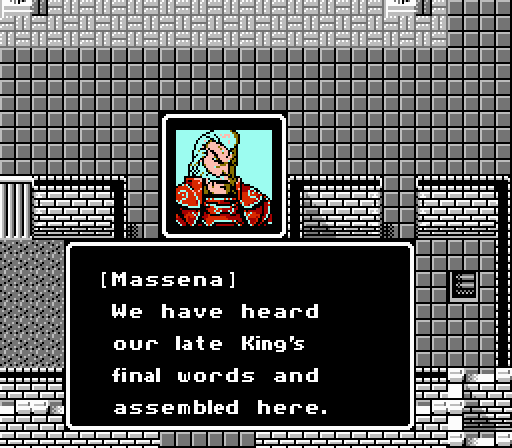 Alm's got his own guard force now. They'll never be seen again.  The other random guys here all say the same thing. 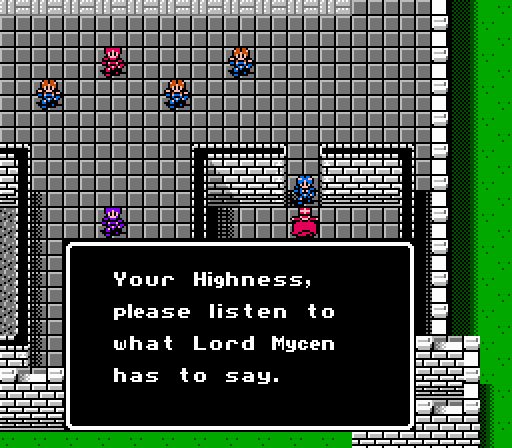 This guy won't let us pass until we talk to Mycen, whom I guess is the one guy we haven't talked to yet. Spoiler!  Alm's a little slow on the uptake, here. Though to be fair he just found out he killed his dad, who had previously invaded his homeland for some yet-to-be-defined reason. 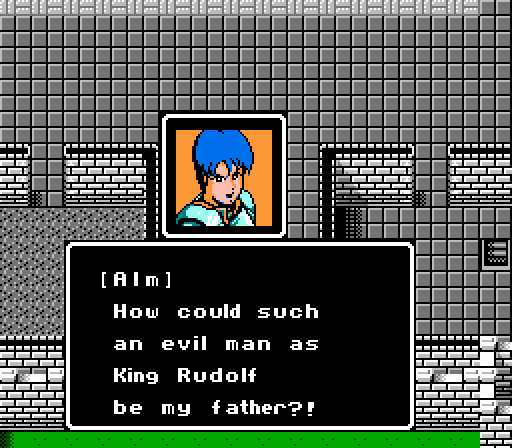 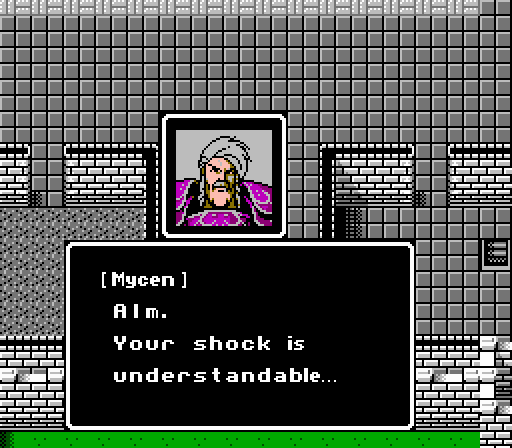 Also, how is Mycen here? Did he just skip the whole game while we were fighting our way across Sofia and Rigel to be here waiting for us? Was he hiding in Alm's army all along as some kind of tag-along?  Thanks to Alm becoming both patricide and regicide in one swing.  And Alm asks what we're all thinking right now. Here's the answer:  Don't cry, Alm.... Let me clarify your father's actions. Valencia became divided because of the gods. They have involved themselves too deeply with mankind's affairs. As a result, the people have lost balance and head for ruin. After some consideration, Rudolf posed as a destroyer to instigate the advent of true heroes in Valencia. I was told this when he placed his newborn child into my hands: "This child will consign himself to hell's fire!" I couldn't refuse him. And so, I left all to fate. Alm, you mustn't let Rudolf's sacrifice be in vain. Go underground and slay the evil god Doma! Don't cry, Alm.... Let me clarify your father's actions. Valencia became divided because of the gods. They have involved themselves too deeply with mankind's affairs. As a result, the people have lost balance and head for ruin. After some consideration, Rudolf posed as a destroyer to instigate the advent of true heroes in Valencia. I was told this when he placed his newborn child into my hands: "This child will consign himself to hell's fire!" I couldn't refuse him. And so, I left all to fate. Alm, you mustn't let Rudolf's sacrifice be in vain. Go underground and slay the evil god Doma!Whoa, okay, lots of exposition there. So, the gods are too involved, so Rudolf decided to seal Mila away with the holy sword Falcion. (Not to be confused with the Falchion, I guess, which was Marth's holy family sword from the first game. Ok, they're probably actually supposed to be the same name, but it's totally a different sword.) By the way, we didn't actually receive the Falcion in that battle - it's still somewhere else. As a result of Mila going away, crops failed for several years in a row (as mentioned in the second chapter's prologue) and people started eating dirt or something. Then I guess Rudolf couldn't face Doma directly or something, because instead of facing up to the other god, Rudolf decided to invade Sofia to try and force someone else to fight back and take over for him. I'm not sure what his plan would've been if Alm hadn't fought back or been killed along the way, but I guess there's only so much you can expect from the story of an NES game. 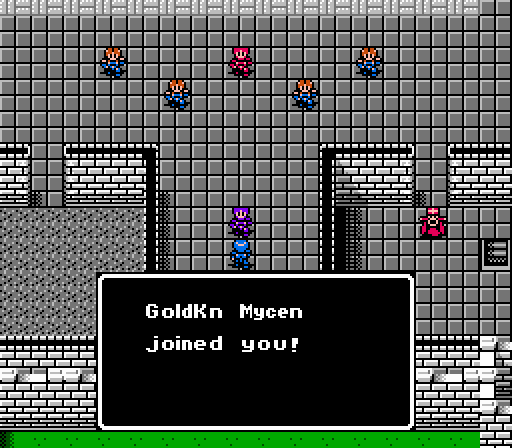 Oh, and Mycen joins us. What's that actually mean, you ask? 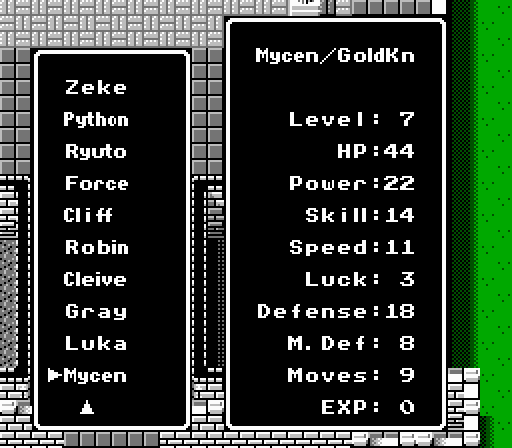 He's actually not terrible - that 18 Defense is the best on the team, and his 22 Power is respectable. His Speed is unfortunately low, but Mycen is definitely more useful than half of our current army. His growth rates are almost nil, but how many more levels could he be expected to gain in this last chapter, anyway? The first game had a similar character named Jeigan - an older advisor-type to the main character, with a promoted class and higher stats than anyone else at the start of the game, but with growth rates so terrible that the rest of the army quickly outpaced him. It became something of a theme in later games, though later incarnations were never quite as useless in the long run. In Gaiden, Mycen represents the 'Jeigan' archetype, but turned on its head - he joins at the very end of the game, and his starting stats are good enough to contribute to the final team right away. Unless you've been over-leveling a team full of Dyute-like monsters, anyway.  Thus ends the fourth chapter. New Characters Mycen is the last character to join, but if you haven't been grinding up your characters by repeating random battles endlessly, he can still be pretty useful with high HP, Power, and Defense. He makes for a strong, mobile tank - just don't expect him to ever really improve.pre:Stat Base L7 Growth HP 44 20 Power 22 5 Skill 14 5 Speed 11 5 Luck 3 0 Defense 18 5 M. Def 8 0 Moves 9 0 Quality 68 20 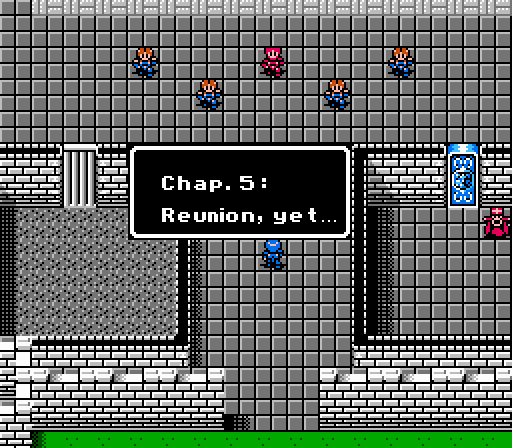 Alm heads to Doma's Tower to finally reunite with Celica. DKII fucked around with this message at 07:02 on Aug 17, 2015 |
|
#
?
Aug 17, 2015 06:53
|
|
|
DKII posted:He's actually not terrible - that 18 Defense is the best on the team, and his 22 Power is respectable. His Speed is unfortunately low, but Mycen is definitely more useful than half of our current army. His growth rates are almost nil, but how many more levels could he be expected to gain in this last chapter, anyway? This is actually not correct. I mean, what Jagen is is correct, but Mycen is very much not one at all. Mycen falls into a totally different archetype (because Fire Emblem is a very unoriginal franchise, so basically everyone you get is a copy to some extent of an old character): the Gotoh. That is, a character who joins at the very end of the game with very high stats, so you aren't hosed in the last battle if you killed off your entire team or something. For western players, Athos from FE7 or the Laguz royals in 9 fall into the same category. If anything, Mycen looks very underwhelming in comparison to those, but I guess he'd still be useful in this game with terrible growth rates.
|
|
#
?
Aug 17, 2015 16:58
|
|
|
Yea I meant more that the game tries to fake you out with him by introducing you to him early like that's going to be his role, and then when he finally joins he's actually decent.
|
|
#
?
Aug 18, 2015 08:09
|
|
|
Blaze Dragon posted:This is actually not correct. I mean, what Jagen is is correct, but Mycen is very much not one at all. Mycen falls into a totally different archetype (because Fire Emblem is a very unoriginal franchise, so basically everyone you get is a copy to some extent of an old character): the Gotoh. That is, a character who joins at the very end of the game with very high stats, so you aren't hosed in the last battle if you killed off your entire team or something. For western players, Athos from FE7 or the Laguz royals in 9 fall into the same category. I'd say he's a combination of both, a Jeitoh if you will. I mean, he comes late in the game (which is what defines a Gotoh) with not a lot of room to grow (which is a Jeigan element) and with high enough base stats to be useful when he joins (which can be said of both archetypes).
|
|
#
?
Aug 22, 2015 08:23
|
|
|
Chapter 5, Prologue: Underground Time to start the final chapter. 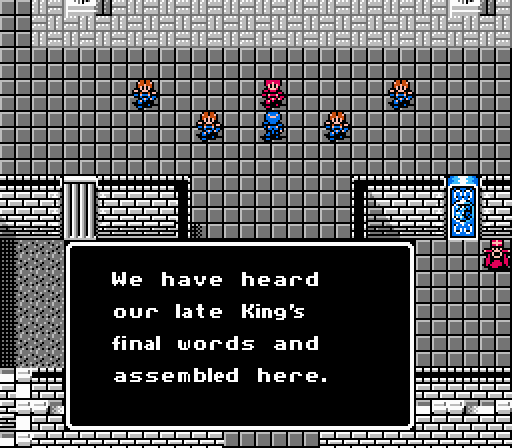 These guys don't really have anything different to say. I guess they'll protect the castle from the zombie dragons that were following Alm around at the end of the previous chapter, because they sure aren't coming with us. 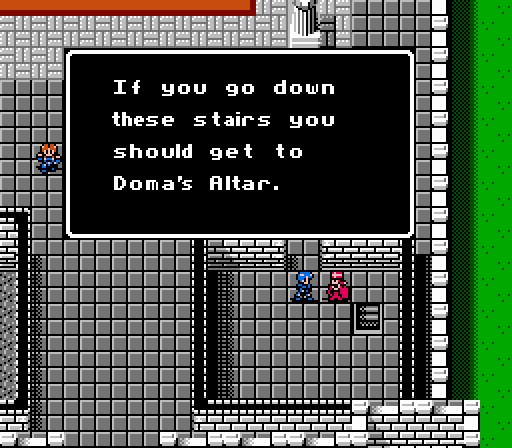  Your Highness, please take care! Someone built a tunnel all the way from the basement of Rigel Castle to beneath Doma's Tower. And in case you weren't sure about these stairs leading to the end of the game, you get a final warning. Any more grinding or promoting you want to do, take care of it now. 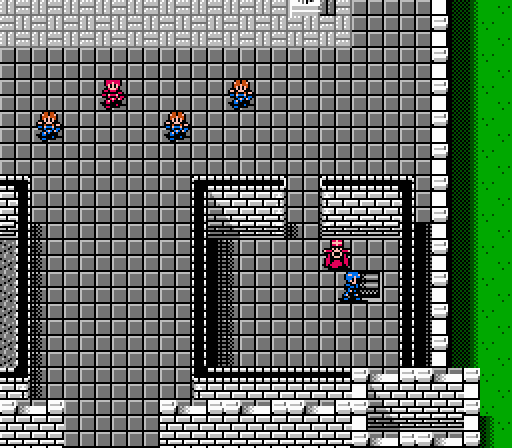 We've got no time to lose, Celica's been trapped at Doma's Altar for months now with the slow pace of my updates. 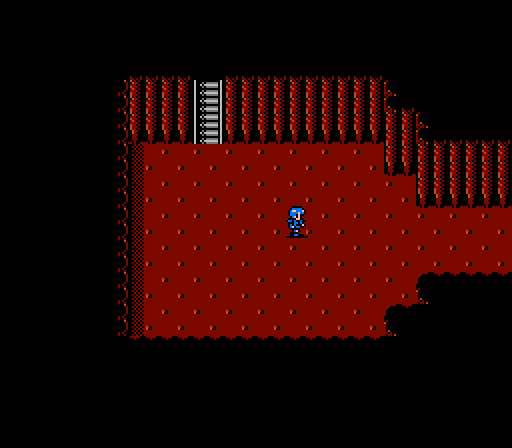 A rather nondescript cave awaits us.  - Chapter 5 Prologue Scene 1.gif) Advancing into the next room causes the ceiling to collapse behind us somehow. I'm starting to think those Rigel folks weren't actually all that happy that Alm killed their king and took his place.  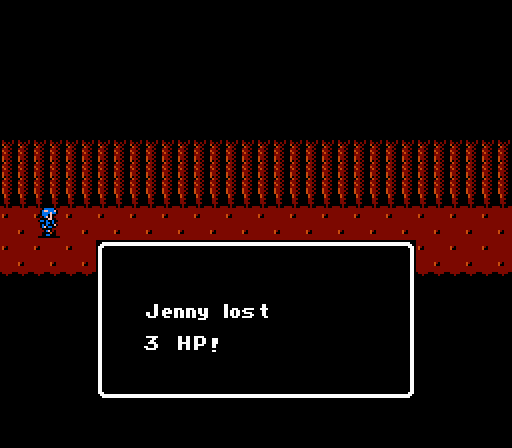 As Alm moves along through this area, these messages will pop up. As you might suspect, when we do eventually reach the final battle, the condition of Celica's army will be affected by how long Alm took to get there. These messages only start once Alm has passed the point of no return, so you're not penalized for leaving Rigel Castle to do some more XP grinding.  The screen actually scrolls a little bit before giving way to another identical passageway. It's a long way from Rigel Castle to Doma's Tower, you know. 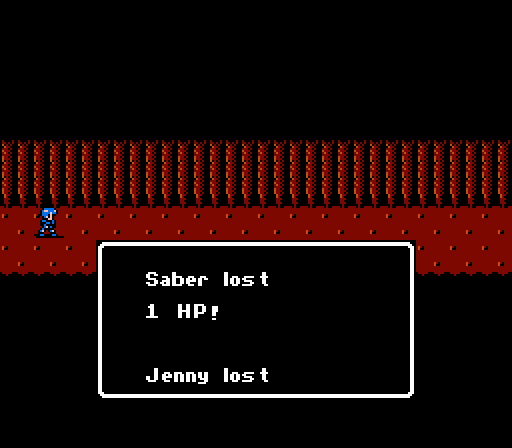 There's probably a formula to how often these show up. It's about once per screen. This time two people got hurt (Jenny lost 4 HP).   A couple more long hallways later, and we see some walls that look a little more finished. The gaps on the bottom of the screen can't actually be entered, but we'll see the other side of that room soon.  The next room contains more dark alcoves and a treasure that we can't reach. Plus Leo takes some damage. 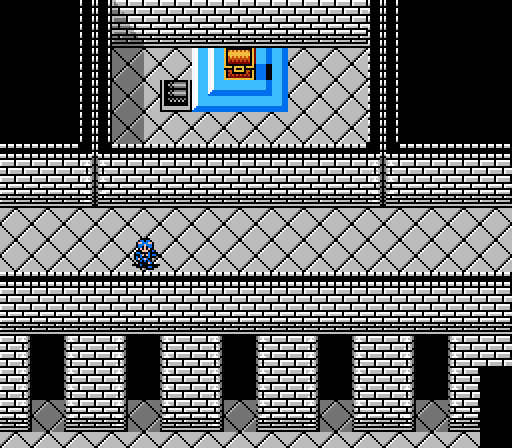 I take the time to double-check that none of the alcoves hide a secret entrance. No way to go but forward. Final Map (Opponent)  That cave looks somewhat familiar. We also get some new music for the final chapter. 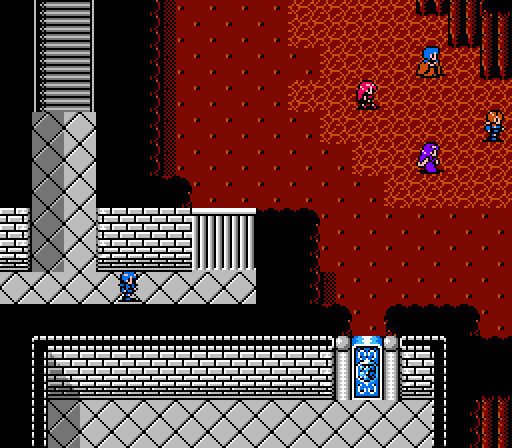 Approach the gate for a brief cut-scene.  - Chapter 5 Prologue Scene 2.gif) I did say brief. 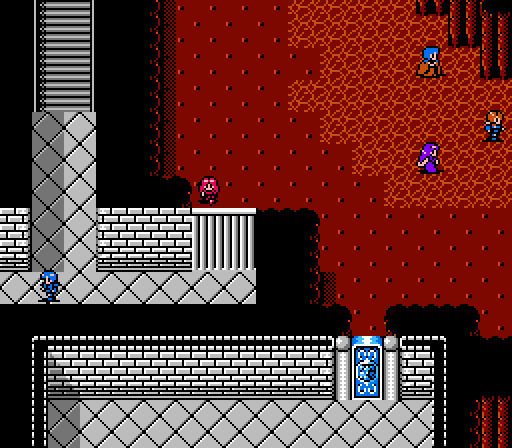 Still only one direction open to us. 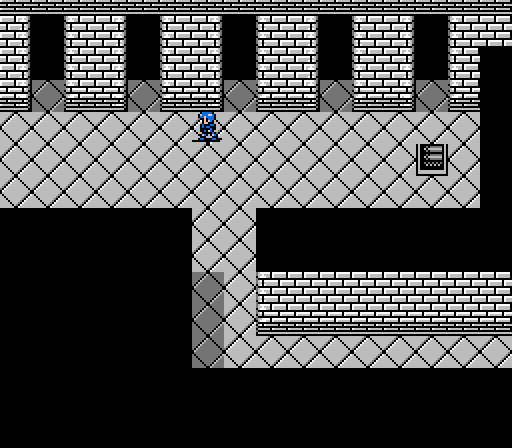 It's the lower half of that room we passed through earlier! 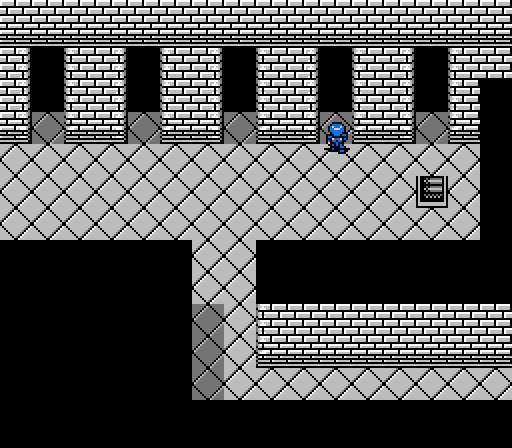 Up here, there's a secret. 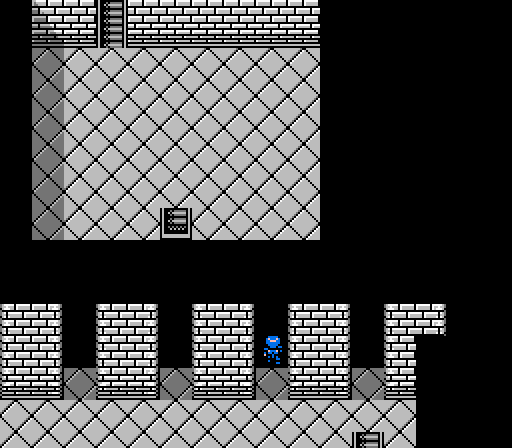 We're taken inside the walls of a different screen. 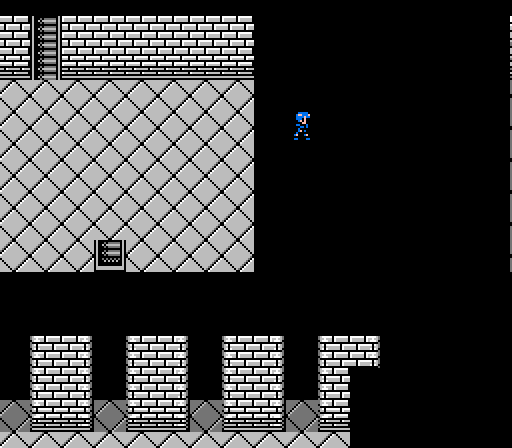 Go up, right, up, right.... 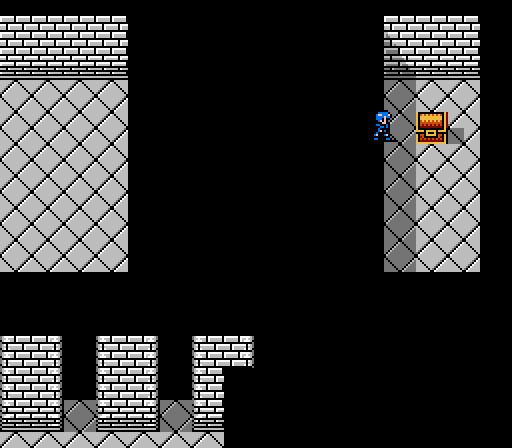 Secret treasure!  Oh hell yes. The Gladius (sometimes called the Gradius) was one of the super-weapons of the previous game. Here it's got 15 Might, 100% Hit Rate, and 0 Weight, and can also be thrown for a 1-2 tile range just like in the last game. A nice little easter egg to find at the end of the game.  None of the other alcoves are hiding anything. You can safely ignore the stairs, for now, too. 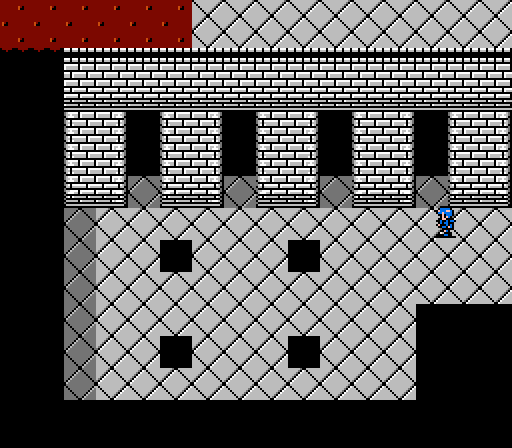 To the left, we have more alcoves, and four holes in the floor. The alcoves are just for show. The holes in the floor take you deeper into the dungeon. We need to find a way to get to Celica, and hopefully recover the Falcion along the way. Next time:  The Final Dungeon.
|
|
#
?
Aug 23, 2015 20:57
|
|
|
So you basically just found Ragnell. Sweet.
|
|
#
?
Aug 24, 2015 05:24
|
|
|
Do the legendary weapons here have an on-use effect, like in FE1?
|
|
#
?
Aug 24, 2015 16:16
|
|
|
So you're on a timer in this entire final dungeon before Celica's party gets mulched? Wow.
|
|
#
?
Aug 25, 2015 02:25
|
|
|
Edward_Tohr posted:Do the legendary weapons here have an on-use effect, like in FE1? Items can't be 'used' in this game directly, they're either weapons or passive-effect items like the shields and rings. Alm's sword gives the normal healing effect that so many items have in this game, but that seems to be it. Various weapons are effective against certain enemy types. The Gladius is really strong, accurate, and light with extra range but doesn't seem to have any effect beyond that. Glazius posted:So you're on a timer in this entire final dungeon before Celica's party gets mulched? Wow. It's a pretty long timer, between the size of Celica's army and their HP pools at this point, but adds that little bit of extra tension. I think the 'timer' suspends while Alm's in a battle, but we'll find out next update.
|
|
#
?
Aug 25, 2015 15:53
|
|
|
Chapter 5, Part 1: Final Dungeon First Floor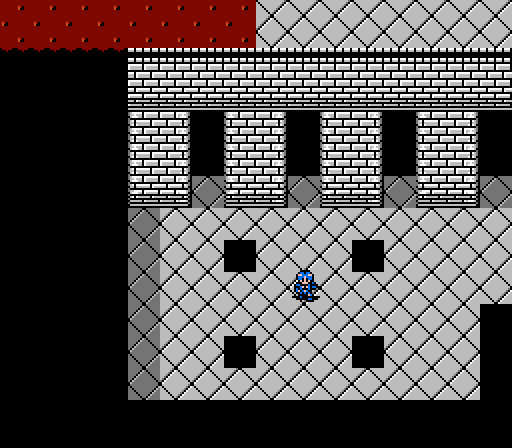 Time to jump down a dark pit to find the Falchion and a route to Celica. 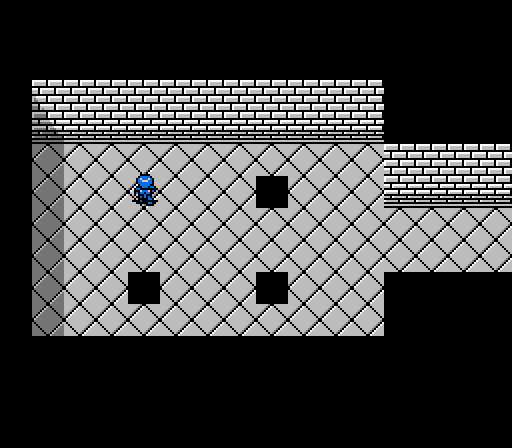 Pick the upper-left hole, and you'll fall through a single level to the first floor. That's where we're going to start this dungeon. 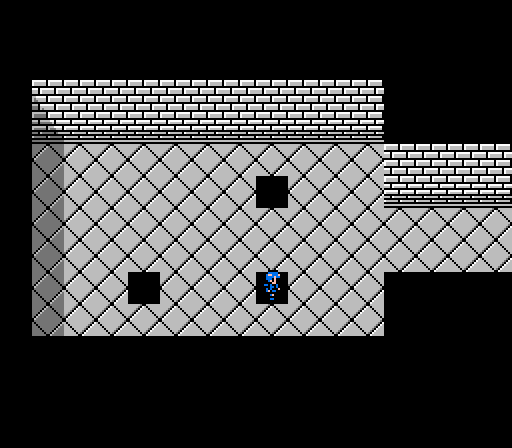  Other routes fall a bit farther. 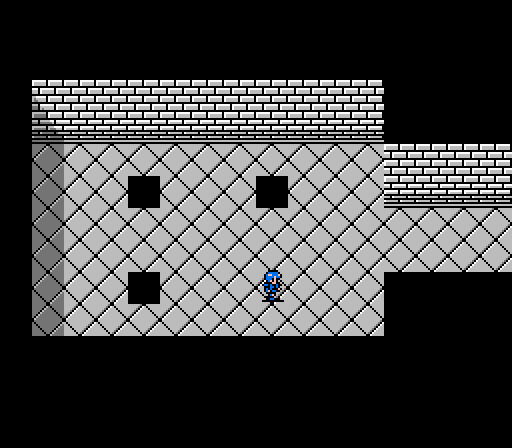 Picking the lower-right hole leads to the third floor. The upper-right and lower-left pits keep falling. 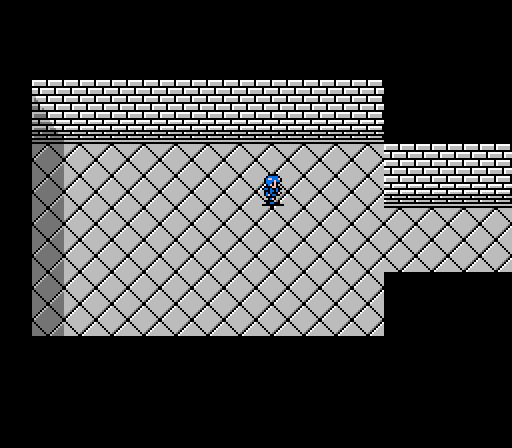  At the bottom is a large room containing nothing but a set of stairs leading all the way back to the top. With Celica's party frequently taking damage the whole time, you don't want to spend a bunch of extra time running through the basement and climbing back up. 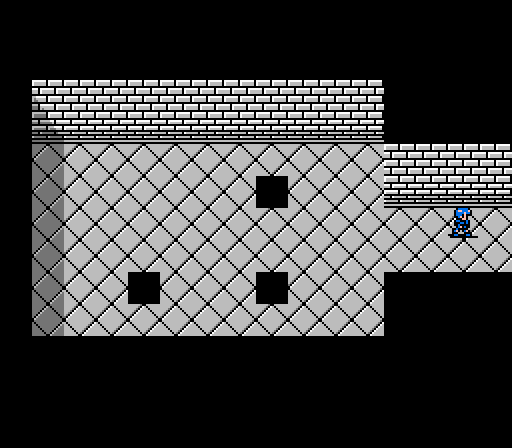 Anyway, we can choose between the first floor and the third floor here, and there's a battle on each. Technically the optimal path is to go to the third floor first, but I didn't figure that out until after recording the battle for the first floor so you're stuck with that one here. 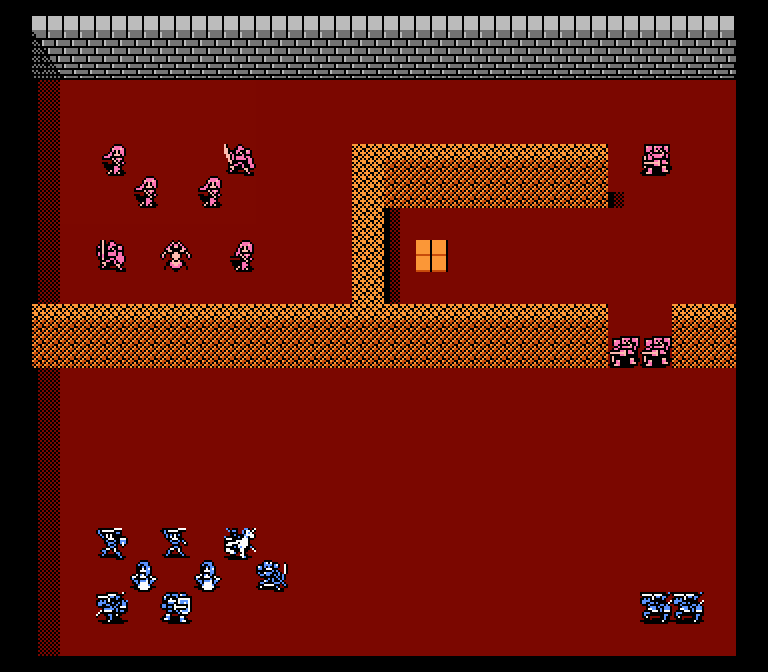 A small map facing a small army. We've only got ten units ourselves; I think that will be the case for the rest of the game. i 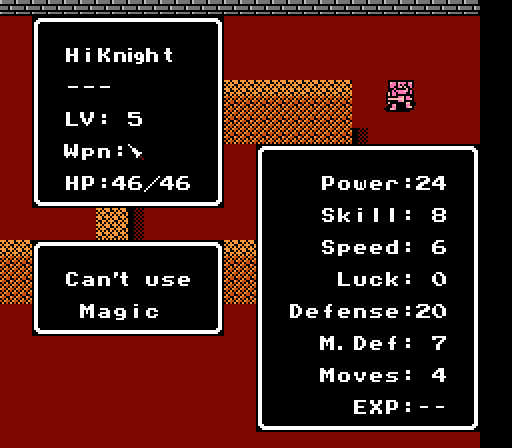 There are three high knights on the right side, and while they're tough they won't hold us back for long. 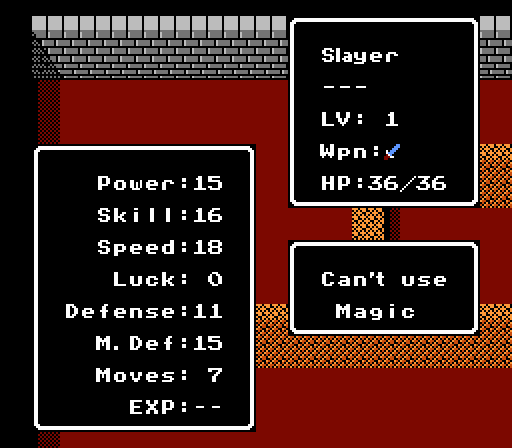 The left side has two vanilla slayers, four lightning-witches, and another summoning shaman. It's not much for a 10-v-10 battle. 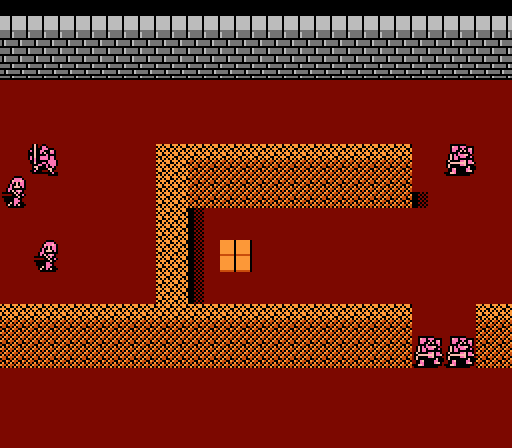 The walls here are impassable even by flying units, so we have a ready-made chokepoint and two gold knights ready to clog it up. There's also a tile that looks something like a healing tile, but it's the wrong color. Turn 1 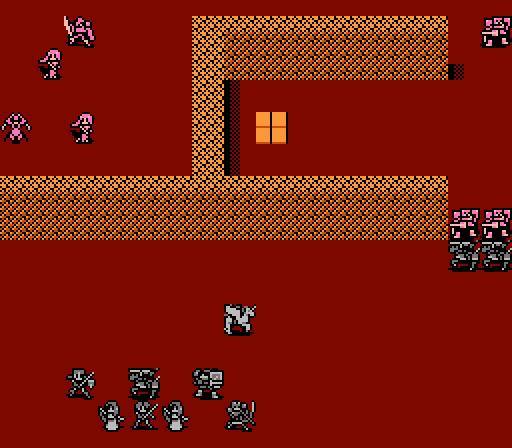 Matilda and Zeke hold the gap in the wall, while the others advance. We've got the usual suspects for the battle: Alm, Dyute, Claire, Python, Force, Silk, and Teeta from the regulars, along with newcomer Mycen. 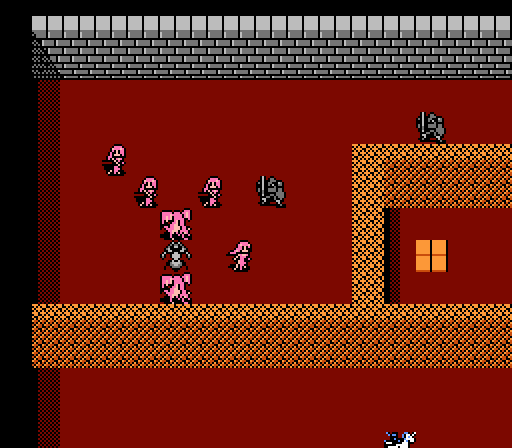 The shaman summons dragon zombies. Alm's army conquered that difficulty back in the mountains. 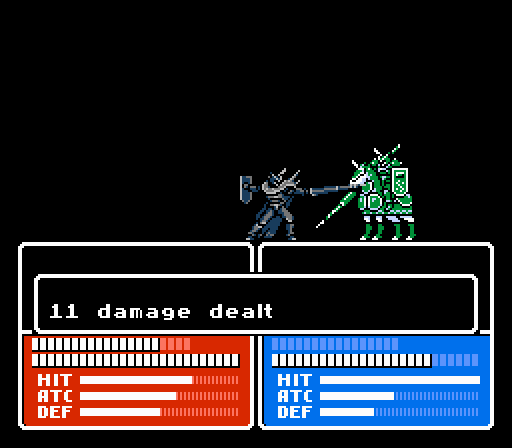 The high knights hit hard and don't take much damage in return, but I have a few different solutions for them. And that's without even getting Dyute involved. Turn 2  Matilda and Zeke keep scratching at the high knights for some scraps of XP. They're both close to a level and they're both holding Angel Rings now.  And Matilda gets just enough XP for her level, adding even more Speed. 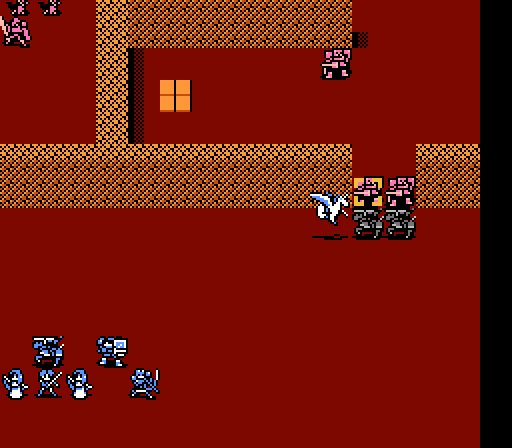 Claire might not be able to fly through this wall, but she can use the Gladius to get at the high knight anyway. 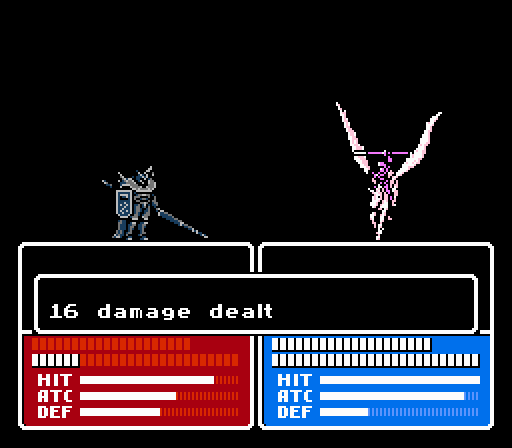 She uses it to good effect for 32 damage, but it's not quite enough for the kill.   Teeta tries out her new spell. Fortify is expensive but so worth it. Some flashy healing sparkles later, and everyone gets HP except for Teeta herself. 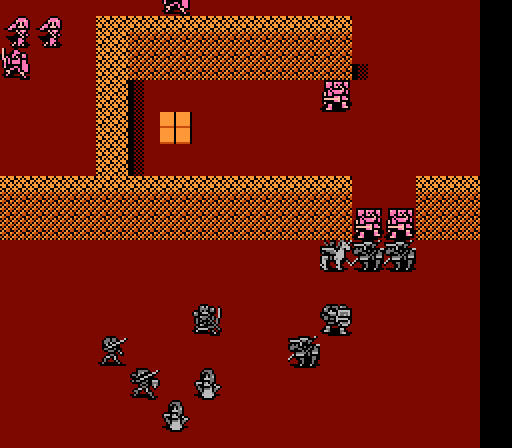 And everyone else continues to advance.  Two of the witches teleport down on the enemy phase, with one missing Alm and the other electrifying Force for 11 damage.  The high knights keep attacking Matilda and Zeke, but they're tough and I have a strong long-distance mass-healer now. Turn 3 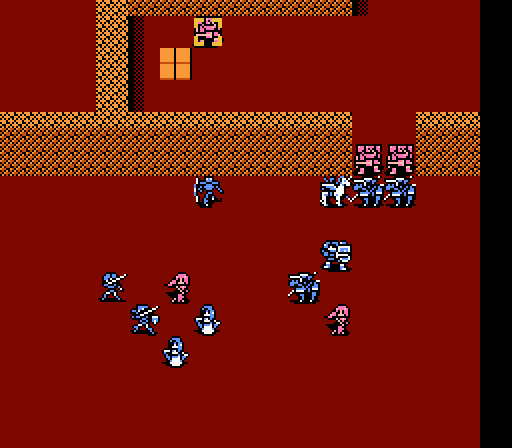 I don't really want that high knight to reach the strange tile, so Python moves up to harass him. The walls that are too tall for the fliers still let arrows through. 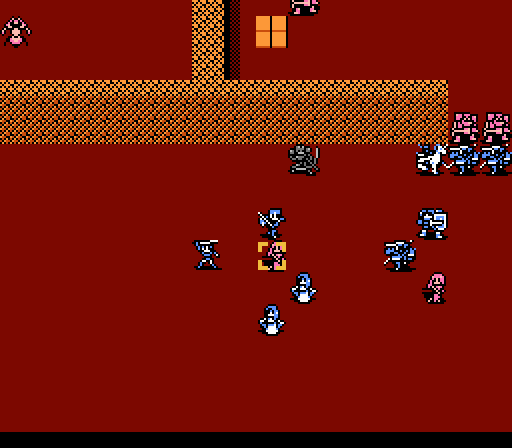  Alm and Mycen make short work of the witches, who weren't really much of a threat back in the third chapter and certainly aren't a problem now.  Claire softens up another high knight with the Gladius.   Matilda moves over to hand off the Angel Ring to Python. Zeke and Force then team up to take out the two high knights, but Force misses.  Zeke pulls off a level with the kill, but it's not a very helpful one. 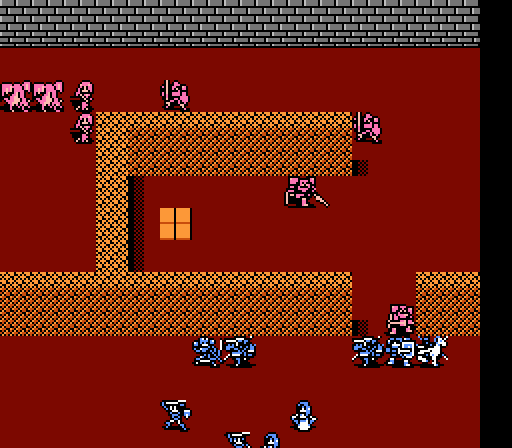 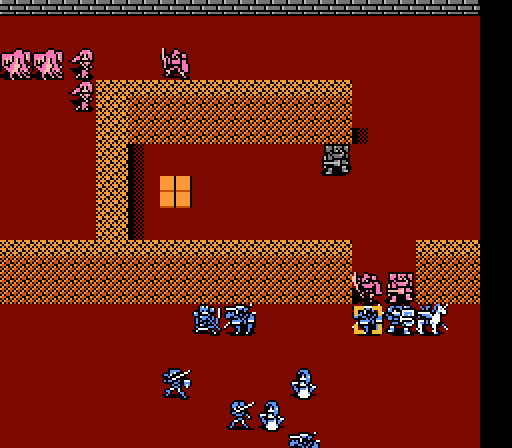 On the enemy phase, the opening in front of Zeke draws the third high knight away from the tile. The slayer then closes the gap, but can't do much against Zeke's high Defense. 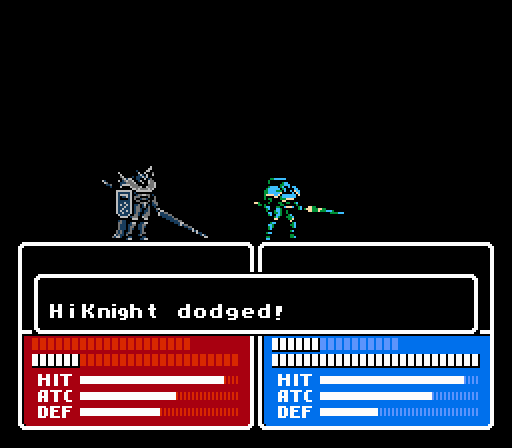 The wounded high knight attacks Force, who misses yet again. 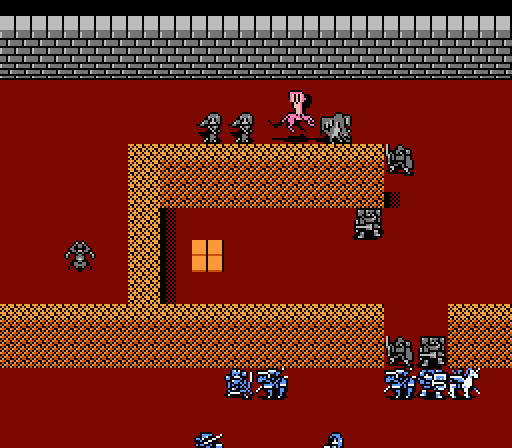 The dragon zombies have to take the long way around the walls as well. Turn 4 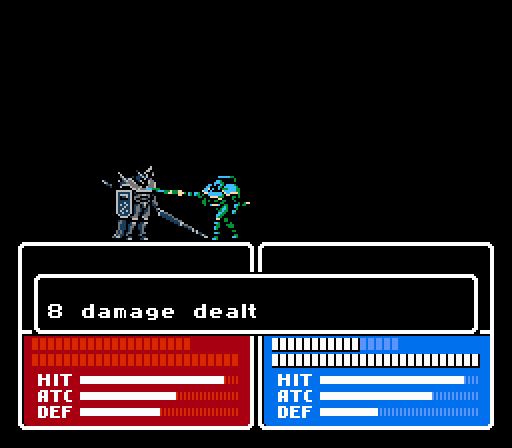 No missing this time.  Force has quietly become quite the powerful, uh, force. 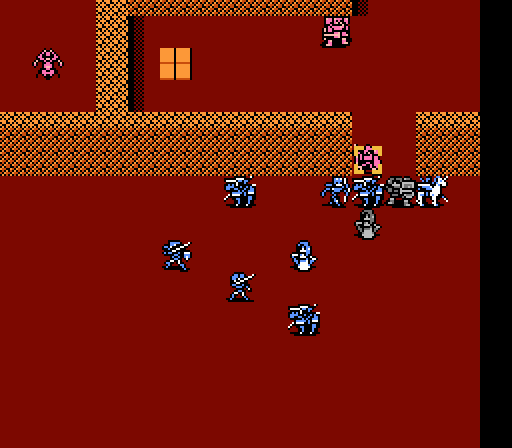 Silk weakens the slayer a bit with her Angel magic, giving Python the opportunity for a kill and a level. 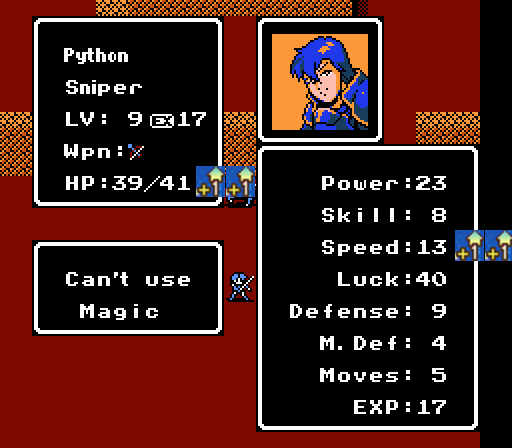 He's fast enough now to double-attack most enemies.   Claire is flying death with the Gladius in hand. 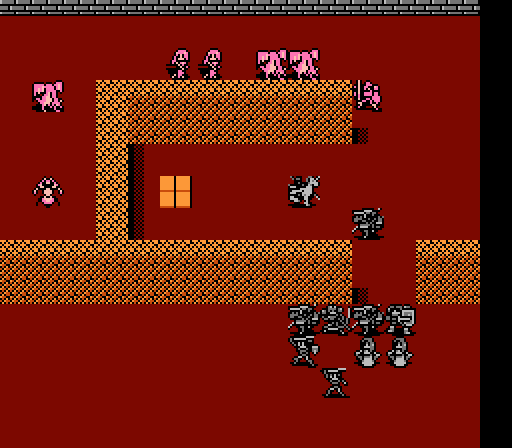 I leave most everyone back to hold the gap rather than rush through right away.   The other slayer goes for Claire on the enemy phase for 6 damage, but suffers a massive 25 damage counterattack.  Oh good, eight more dragon zombies.   Claire's pretty good at fighting those. Look at that maxed-out attack.  This is not a replay - a second dragon zombie suicides on Claire to round out the enemy phase. Turn 5 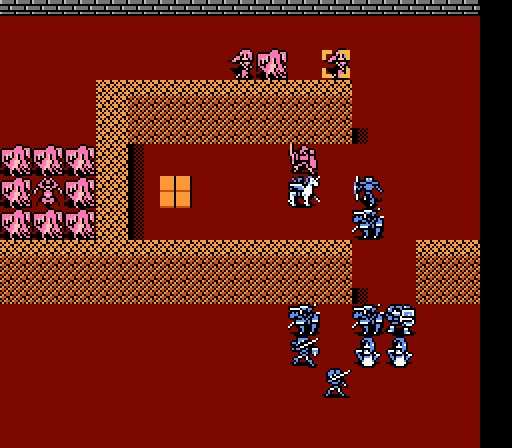  Witches get stitches. Actually stitches won't help this one, she's dead.  Might as well keep Claire doing what she's good at here. 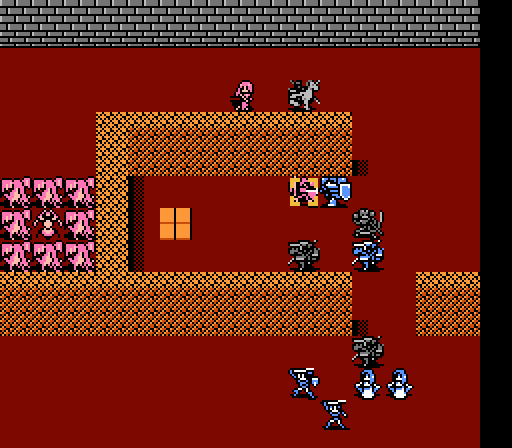 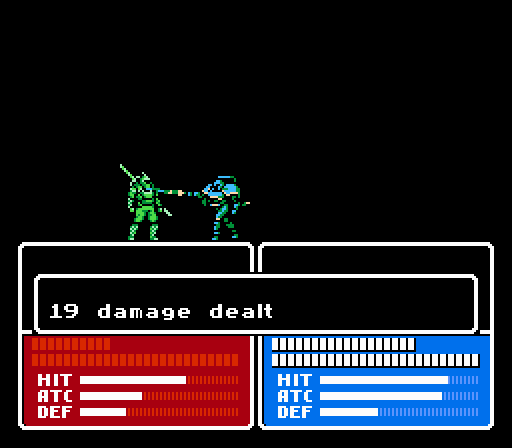 A knight against a slayer is normally a bit of a mismatch, but Force has a lot of Power now and can rely on the Quick Ring for a second attack if needed. 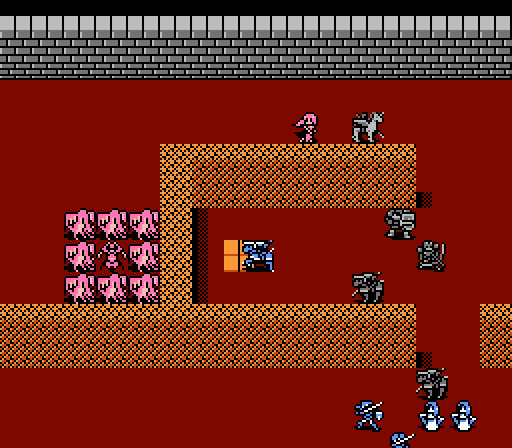 I wanted to see what would happen if I sent one of our units to the strange tile. Nothing did. And it doesn't look like an enemy unit is ever going to get there. So let's play the what-if game....  - Chapter 5 Part 1 Battle 1.gif) If an enemy unit steps on the tile, a switch sound activates, the screen shakes for a bit, and the front wall is replaced with a 5-tile-wide poison swamp. So if you had your army up against the wall banging against those high knights, good luck dealing with that. Fortunately the enemy AI is easily manipulated, and will head towards one of Alm's units if there's an open space for attacking, even if they can't actually reach in one turn. 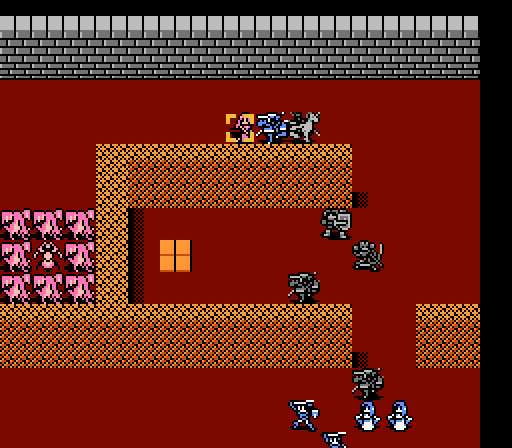 Back in reality, Mycen rides up to take out the last witch. Turn 6 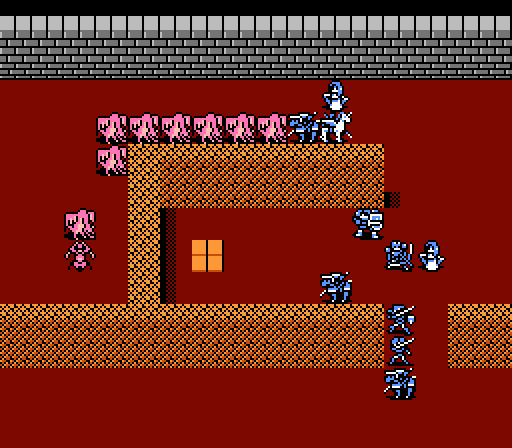 Just an infinite number of dragon zombies and a dragon zombie-summoning shaman stand in our way now. And since this is an indoor map, there's no turn limit. That means.... 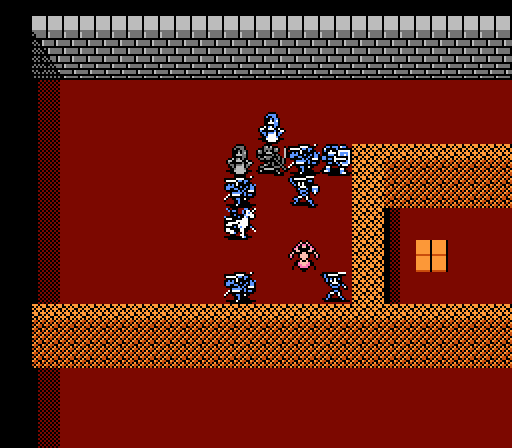 It's time to farm for a ton of XP until I get bored. Here's a level montage: 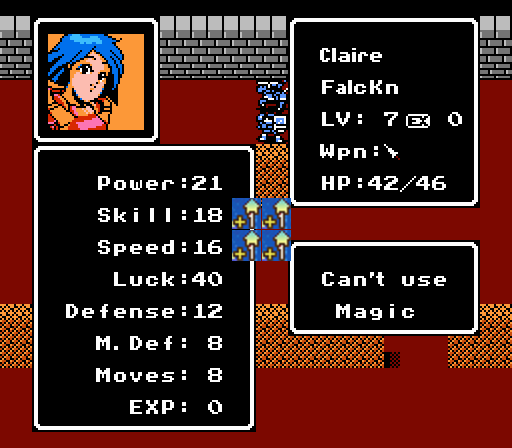  Claire and Dyute are fed a level each, and Dyute caps Power.   Python and Matilda also get a level each. If I could find a promotion shrine somewhere in the final dungeon, Python could be promoted into a bow knight now.    Force picks up three levels, gaining even more Power. He's eligible to promote to the baron class now.   Two levels for Teeta, who's now surprisingly sturdy for a healer.      Yes that's five levels for Silk, who picks up Illusion magic to go with some extra Magic Power and Speed. Being able to use Angel to wipe out dragon zombies was very helpful for the healers. I'll try out Silk's version of Illusion later, if I remember, but I'm told that it summons something called "dark fighters".   Finally I force-feed two levels to Alm, and they pay off with great gains. Alm hits 38 Attack Power when holding the Regal Sword now - if he had more Defense, he'd be pretty unstoppable.   After the battle, we're left in an empty chamber. Just keep moving to the right. 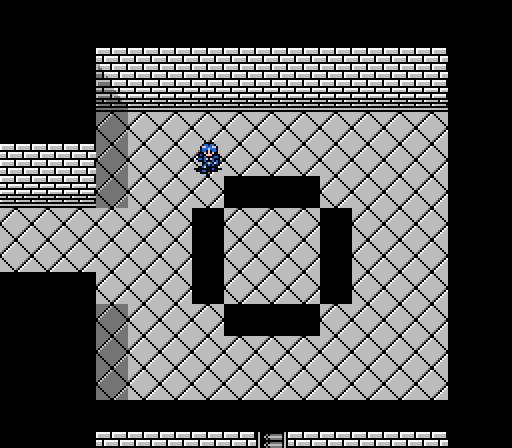 Despite the extra holes, the light maze here doesn't actually get more complicated. But that'll be for another day. Next time: 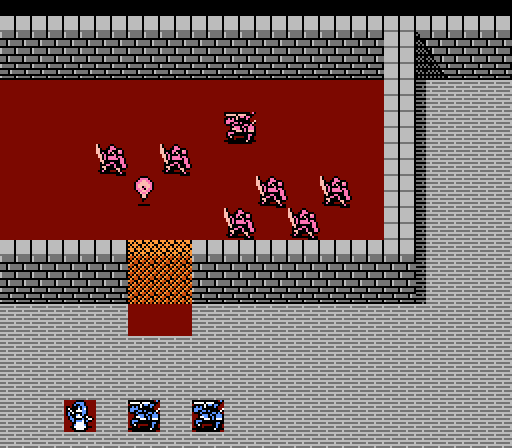 The second floor awaits.
|
|
#
?
Sep 28, 2015 06:27
|
|
|
In this chapter: Dyute grows into an even bigger badass. Somehow. Seriously, that 40 power. So cool. I think by this point Dyute is clearly the God unit of this LP, like Mist back in Fedule's FE9 one.
|
|
#
?
Sep 28, 2015 17:39
|
|
|

|
| # ? Apr 24, 2024 18:19 |
|
|
40 power, plus the strongest spell in the game (Ragnarok = 24 Might), plus enough speed to double-attack a lot of enemies with it (31 Speed vs Ragnarok's 20 Weight). Not much in this game can withstand one 64-Magic Attack strike, let alone two.
|
|
#
?
Sep 29, 2015 15:13
|
|