

|
Shadar and the White Witch also seems like the characters that, after being maligned for so long, basically stopped caring if people view them as evil.
|
 #
?
Jan 25, 2015 21:54
#
?
Jan 25, 2015 21:54
|
|


|

|
| # ? Apr 19, 2024 10:16 |
|
|
Since Pea says Nazcaa has a big picture of a birdie, I'm going to go out on a limb and guess that A) the picture is on the ground itself, meaning B) Nazcaa is probably more appropriately a reference to Nasca, Peru with the Nazca lines.
|
|
#
?
Jan 26, 2015 10:12
|
|
|
"Nausicaa" the movie is good, but kind of low-tier for Miyzaki. The comic its based on however, is absolutely fantastic, and it was Miyzaki's big pet project for 12 years. There's a steeply-priced but great seven-volume edition of it you can get on Amazon.
|
|
#
?
Jan 27, 2015 04:23
|
|
|
How much new content did they actually add to the game for the remake? Now that we've moved firmly into the remake exclusive white witch content, about how far are we into the game? Like, we only have a short way to go to finish the remake's padding, or are we, like, only halfway through the whole game?
|
|
#
?
Jan 27, 2015 05:07
|
|
|
We have 2 videos left before the main game is done, and 10 screenshot updates before I've done everything. Speaking of which, next screenshot update is tomorrow of the last sidequests before the endgame.
|
|
#
?
Jan 27, 2015 06:03
|
|

|
Thanks for the clarification on JRPG item talk. I think that the obsolescence of items isn't often intentional, it's just when you have a character who can heal with a spell that you can recharge mana at an inn for pennies, why spend money on healing items? In addition to the ever-present "Well but what if I need it later?" mentality that most people have regarding consumables. The games that I've seen have items actually get used do so by incentivizing you to use items and/or making items competitive with magic. Skies of Arcadia as you mentioned, you have items that can replicate spells, excellent early on when your MP is low and you can't replenish it in dungeons. And of course there's a character special move that renders you immune to all magic- great to protect yourself from mage enemies but you can't heal with magic. But items still work. The one game though I've encountered that's gotten me to use items more than any other is The Legend of Heroes: Trails in the Sky. It does this by firstly having no character be a designated healer. Each character who can use magic, due to how the magic system works, can use healing spells if you allocate their magic system towards it. However, for quite some time you're unable to access a spell that heals more than 200 HP, and damage and power quickly surpasses the point where that's useful. Items on the other hand, can heal upwards of 600 damage as well as cure status ailments. In addition, to get you to use items in the first place, most healing items are food. You can make food yourself from ingredient items which are easily available at shops and some monster drops... but only after you've eaten that food once. So you've got the incentive to use them a first time, if only just to learn how to make more, and then actually making them tends to be easy, just a matter of buying some cheap ingredients and using some of the drops you've probably got sitting around in your inventory from fighting. And as I mentioned, there's no food that I've found yet that only cures status effects- all food will heal you at least a little as well, making it that much more appealing compared to a spell that will only cure HP. And some foods will buff you with extra strength or defense, etc. It's really well done.
|
|
#
?
Jan 27, 2015 15:58
|
|
|
Screenshot Update 9: Manna Manna It's the last stretch before the endgame, and we've got a ton of sidequest-y things to do first! These first seven screenshots are actually from before we fought Shadar - everything else is from after we cleared the Black Crystals from the three kingdoms. We begin, as always, with our merchant friends.     They were never heard from again. Also we get an alchemical formula for (I think) a new gun for Swaine. One of the parts was dropped by Porco Loco in the previous video, but another, Blowpipe, we won't see until we've gotten to the final dungeon. 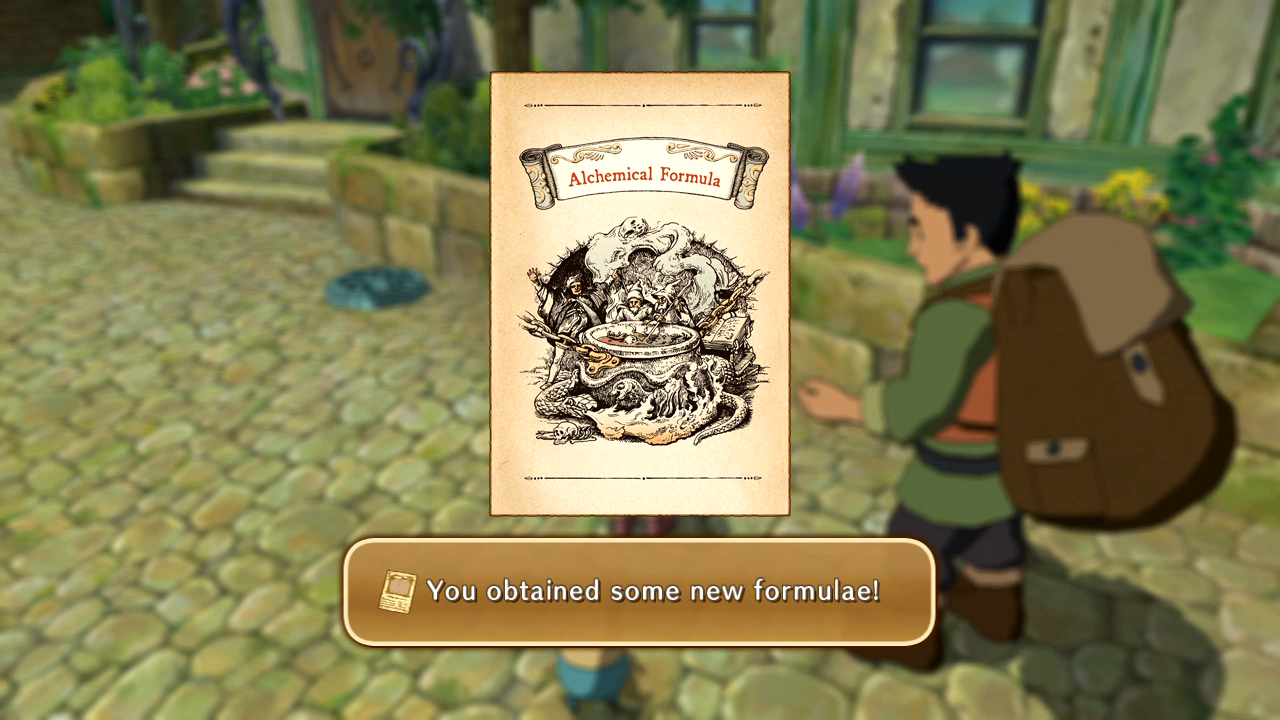 Prior to fighting Shadar, Old Father Oak eschewed giving us anything useful like an item, instead opting for sheer positivity. 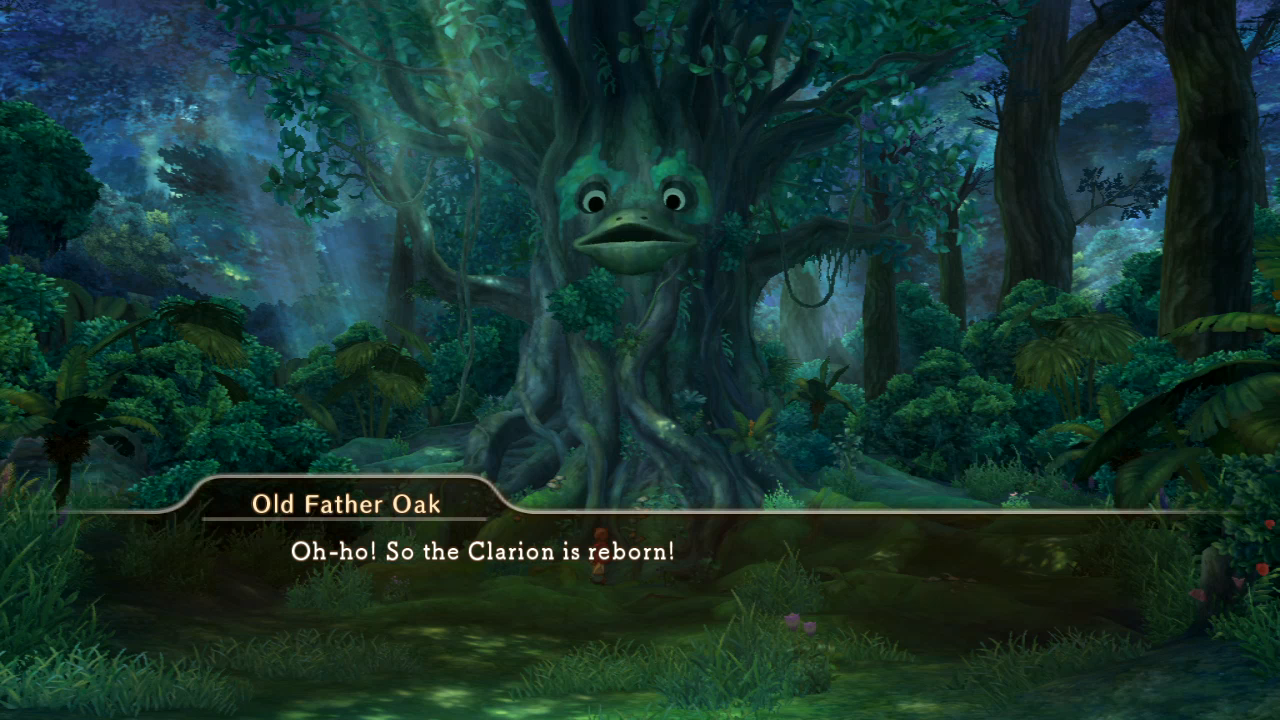 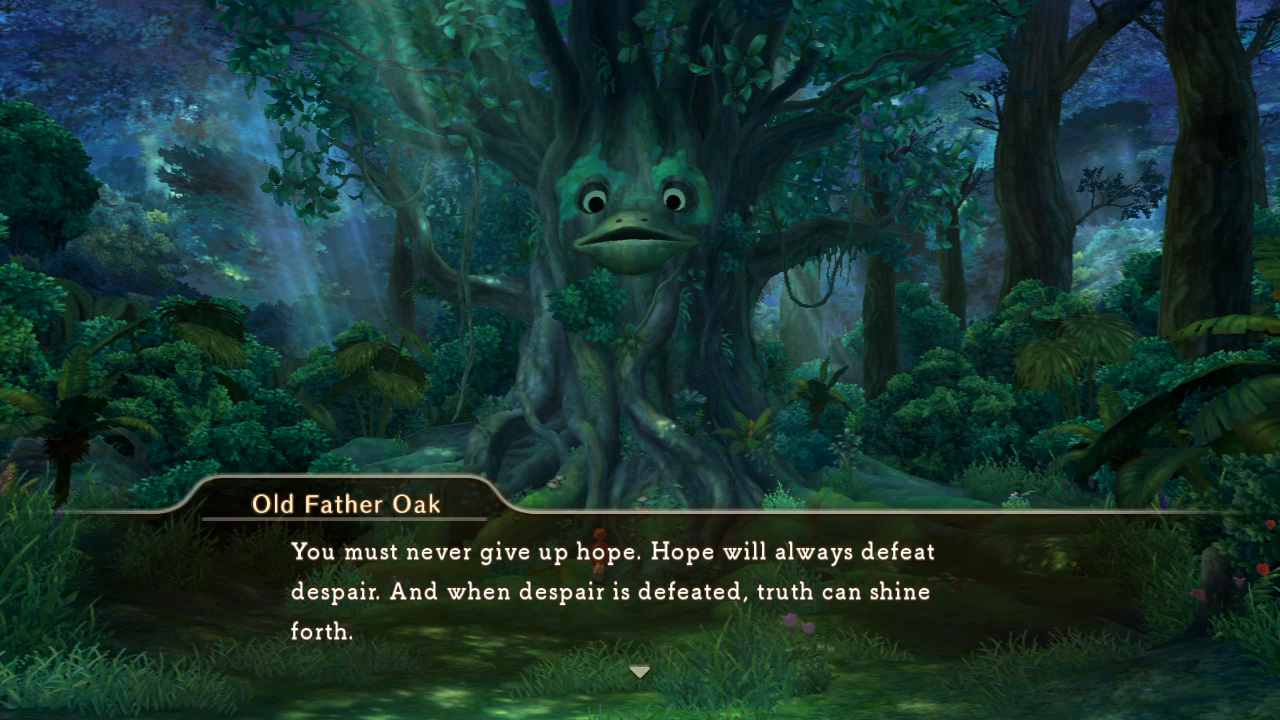 Jumping into post-Manna content, we get into a rare non-Bounty Hunt bounty hunt. This guard has lost an important symbol of his job to a monster hiding out in the overworld, and we need to follow its tracks to find it. 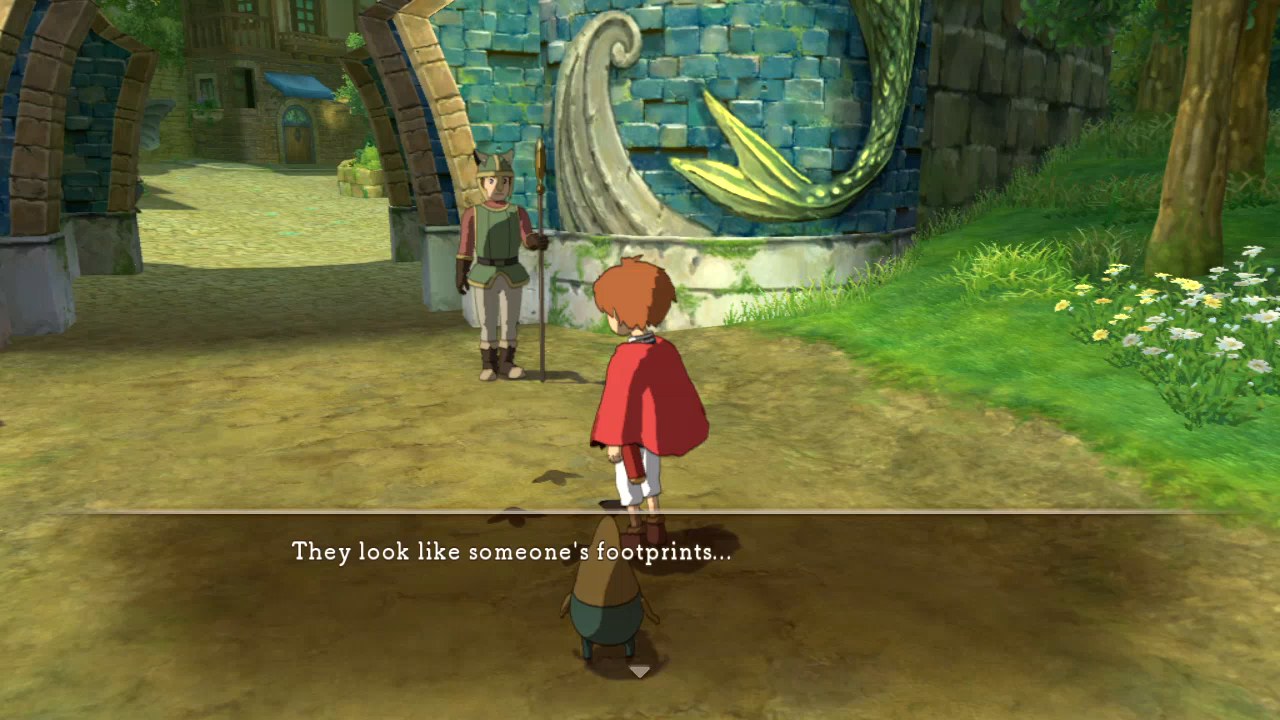   Inspecting the tracks will guide you in the general direction of the next set of footprints. If you've played Don't Starve, it's sort of like hunting Koalefants, except the monster isn't going anywhere.  Been a long time since I've needed to use Bridge. And it ain't the last time, surprisingly enough!    After briefly losing track of the trail, we come across a likely suspect. Drippy certainly seems confident, and I mean, it is a cat.     Bugger. Yep, if you look closely at the myriad sets of footprints around the area, they are of different monsters. It's possible to forget what the tracks we're supposed to be following look like and end up killing an innocent monster. Luckily, the real one we're hunting is actually close by.   Hence why I call this one of the rare non-Bounty Hunt bounty hunts. He's basically the same as his cousins.   I.E.: More health than difficulty. I also give Shiro?! a chance to fight again, and he finishes the big guy off handily.   Our reward is another Radiant Blade, which as mentioned earlier recovers a small amount of health whenever it successfully lands a hit. I give it to Dumple, and it basically makes me immortal in standard monster fights.  Here's a weird one. It's this guy again, and he's in need of another model.   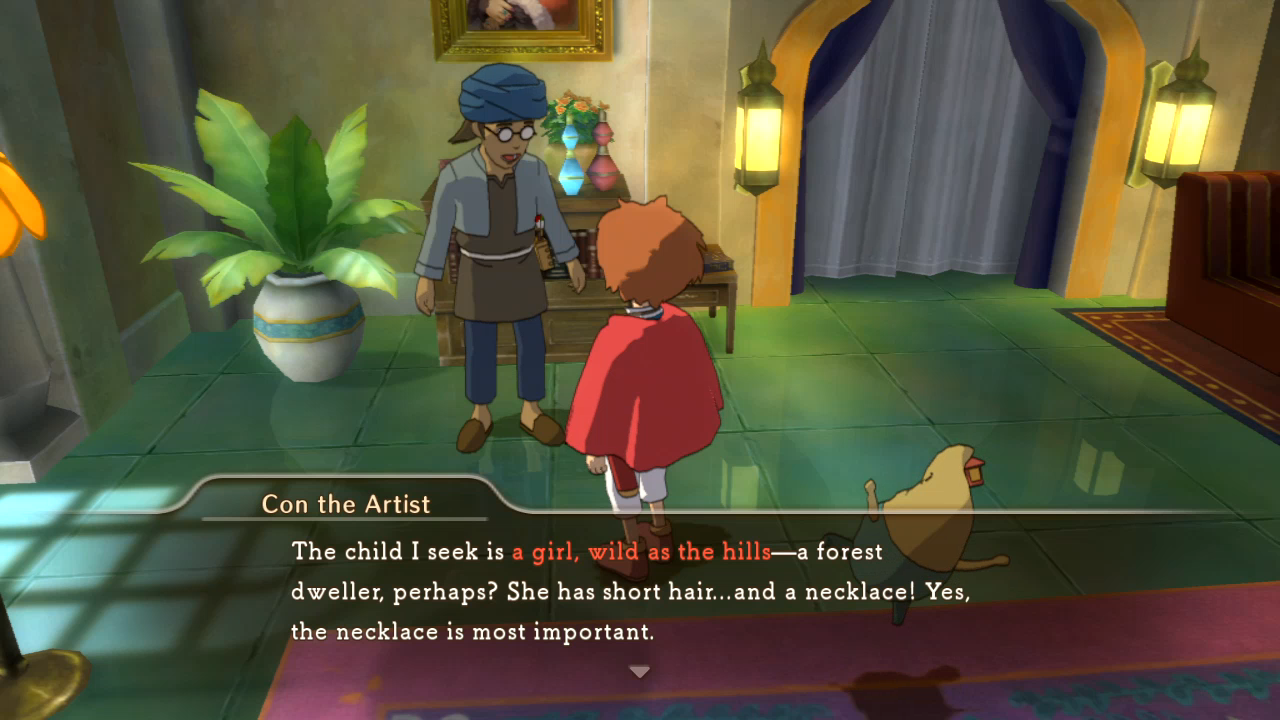 We'll get to that in a bit, but it's time to play delivery boy. Since we've seen almost all of the areas in the game (with NPCs), it's time for the game to give a reason to go back there. 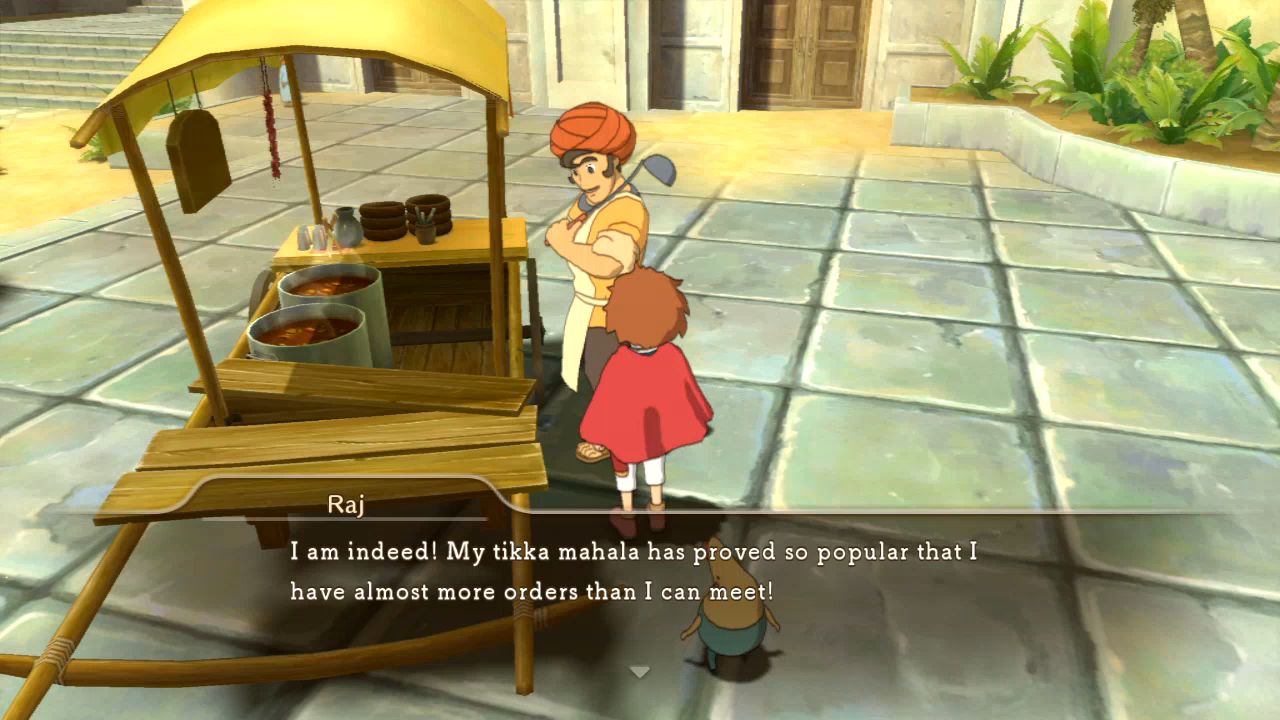  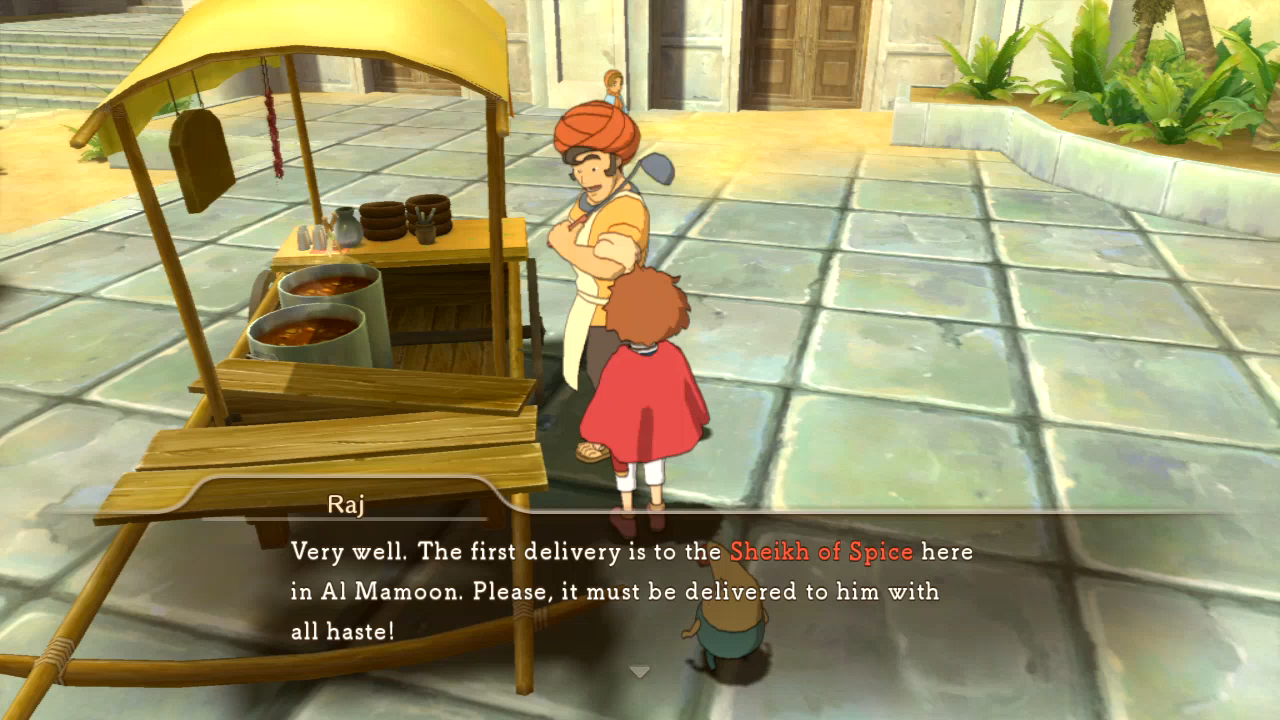 The first few are pretty simple and of people easy to find. 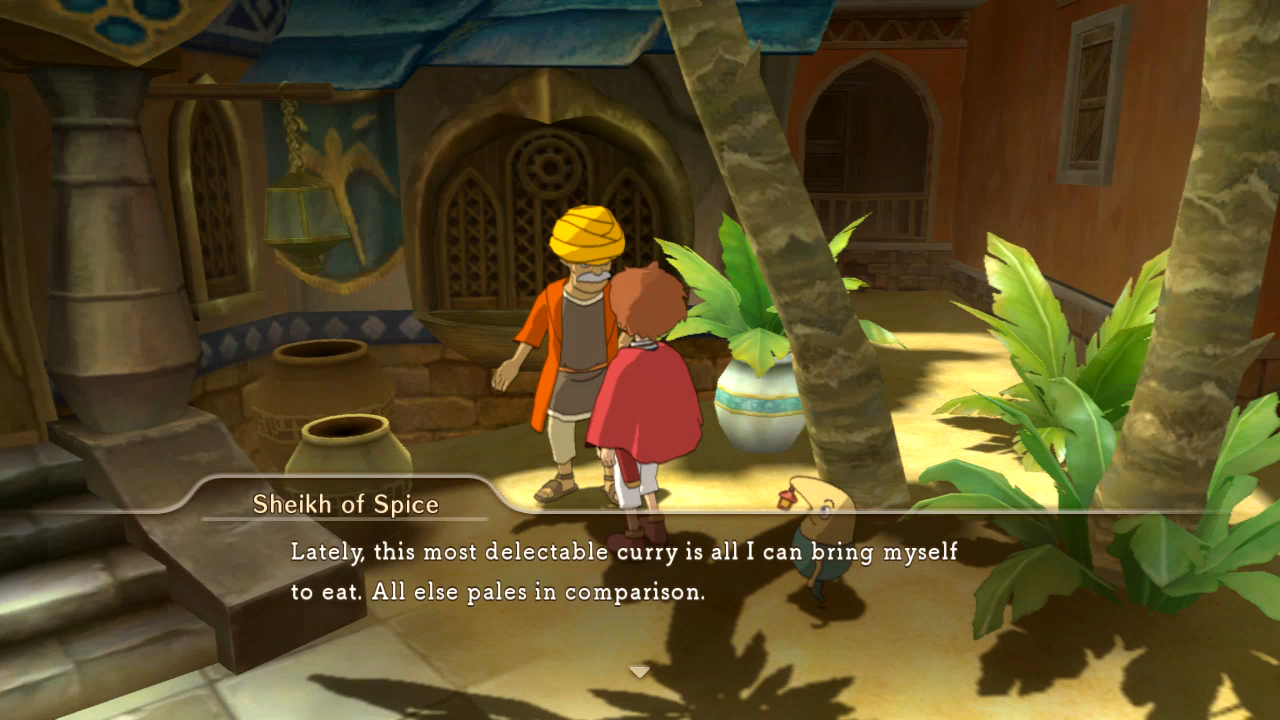  ...who is hiding all the way in the back of the cove. Jumping back to Con's sidequest, the girl he's looking for is in a forest far south of Yule and West of Old Smoky on Turtle Crag Island.  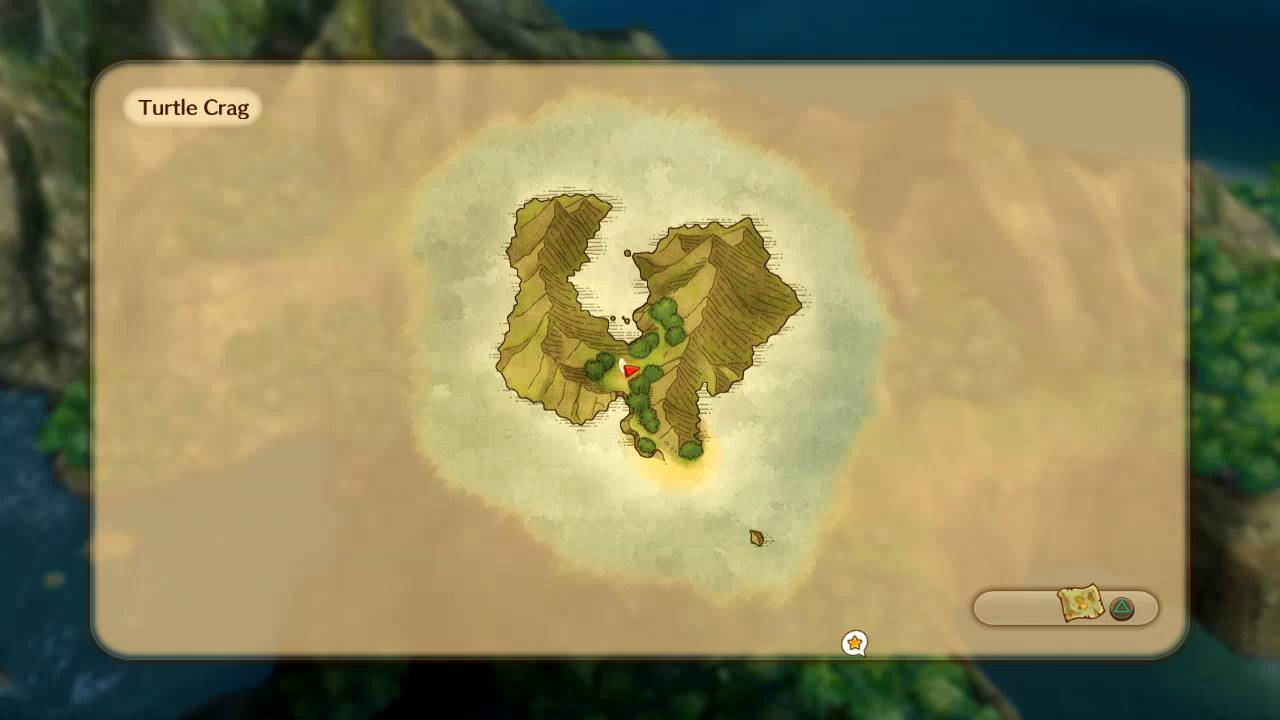 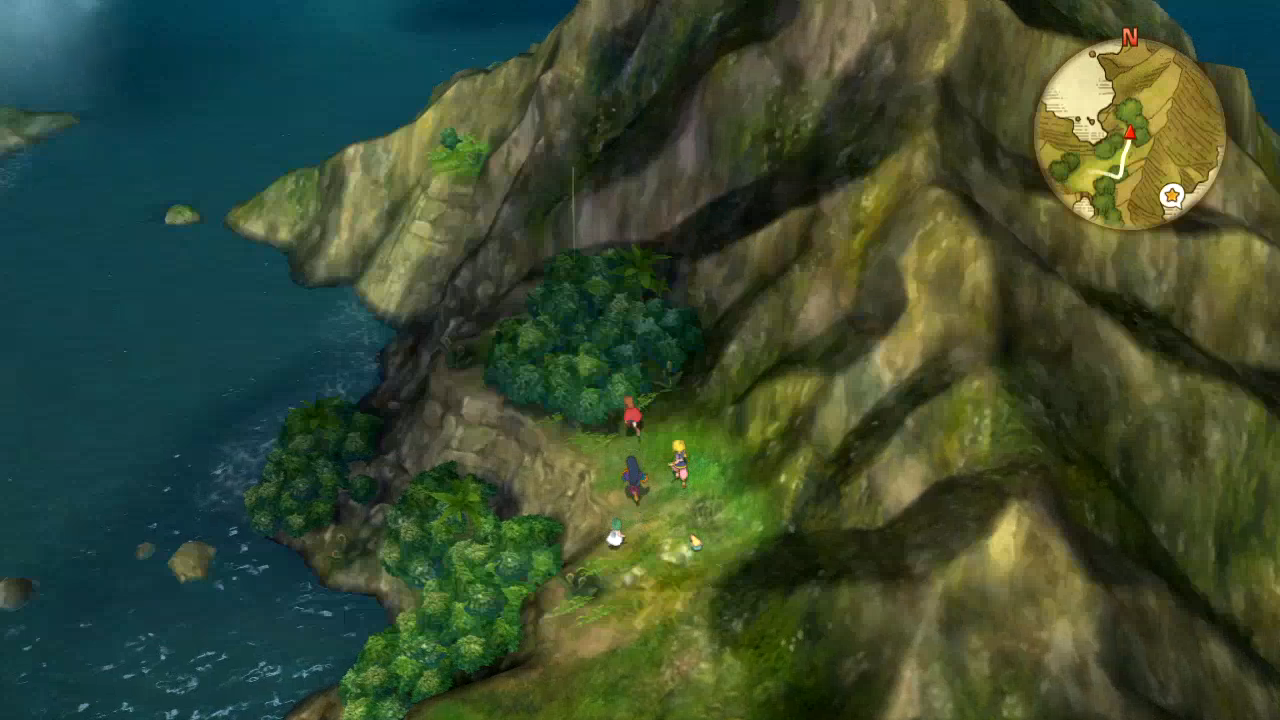  That's her on the left, but like every forest, there're chests to open first.  I could only find the one though. Peculiar, 'cause every other forest has at least two. 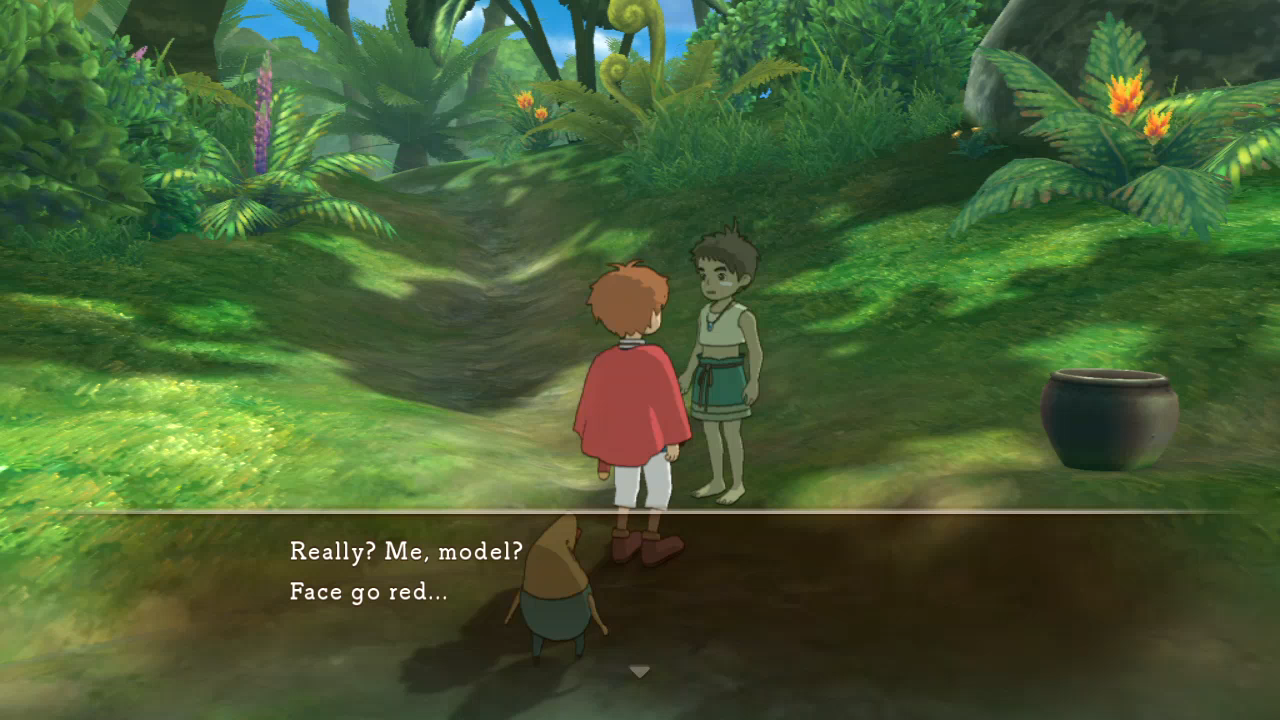  Once you've talked to her, you warp immediately back to Con, and the reason this is a weird sidequest becomes clear.    Please don't do that. You're younger than Oliver. 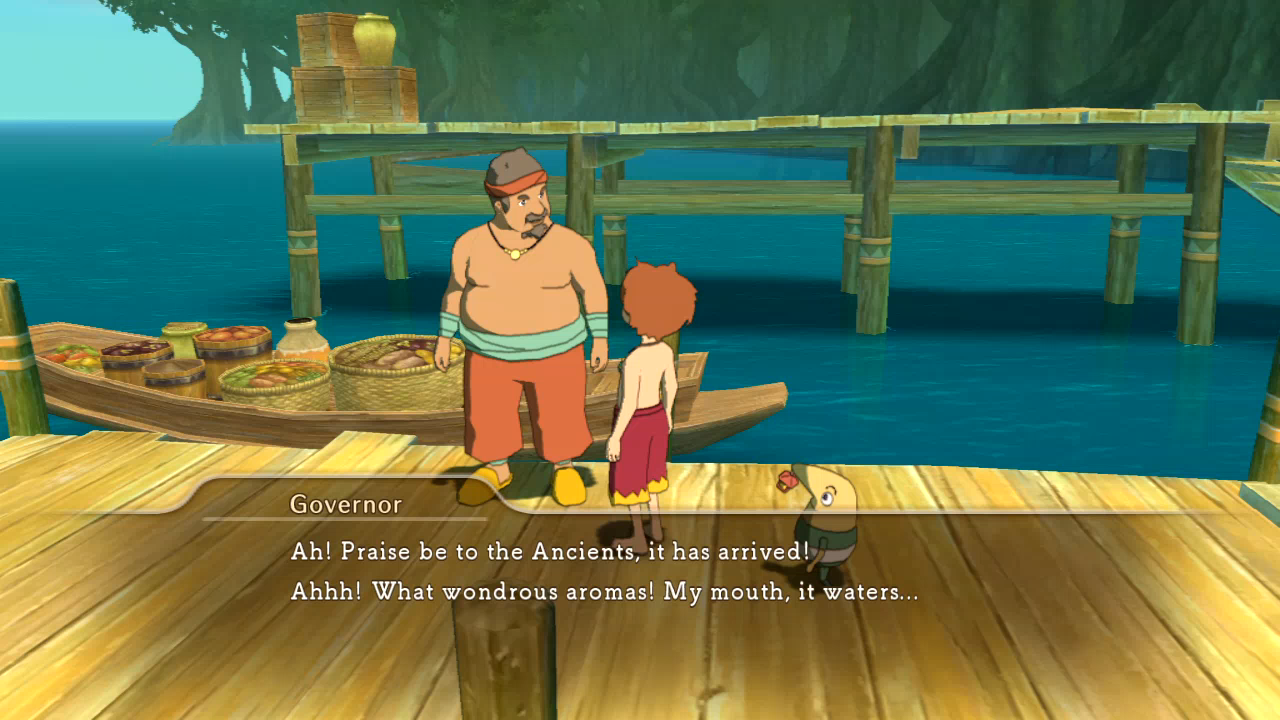 Thanks for being as far away as possible, rear end in a top hat.  Next curry goes to the guy Swaine strong-armed in Hamelin, but first I check on this dozy guy wallowing about outside Swift Solutions.   This is another multipart quest. The first two parts are items to help the guy wake up.   Go figure, the first one doesn't work. Actual sleepiness isn't a status ailment, fella. (Then again, he's been sleepy for over a year. Seriously.)  Since I lost control of my life. Also grab yet another purple chest I forgot about. There's more hidden in the tribal forests that I forgot, and I will get those in future screenshot updates.  If you don't have a cappuccino with you, they're purchasable from the peddler in Perdida. Good item to have anyway, if you've got the money for it - by now you'll have way more magic and magic-draining spells than Strong Coffee can possibly replenish on its own.    He must be like me. Caffeine doesn't seem to affect me at all.  I just so happen to have one already. I don't realize this until after I've finished this sidequest, so we'll come back to it. It's time for more curry. 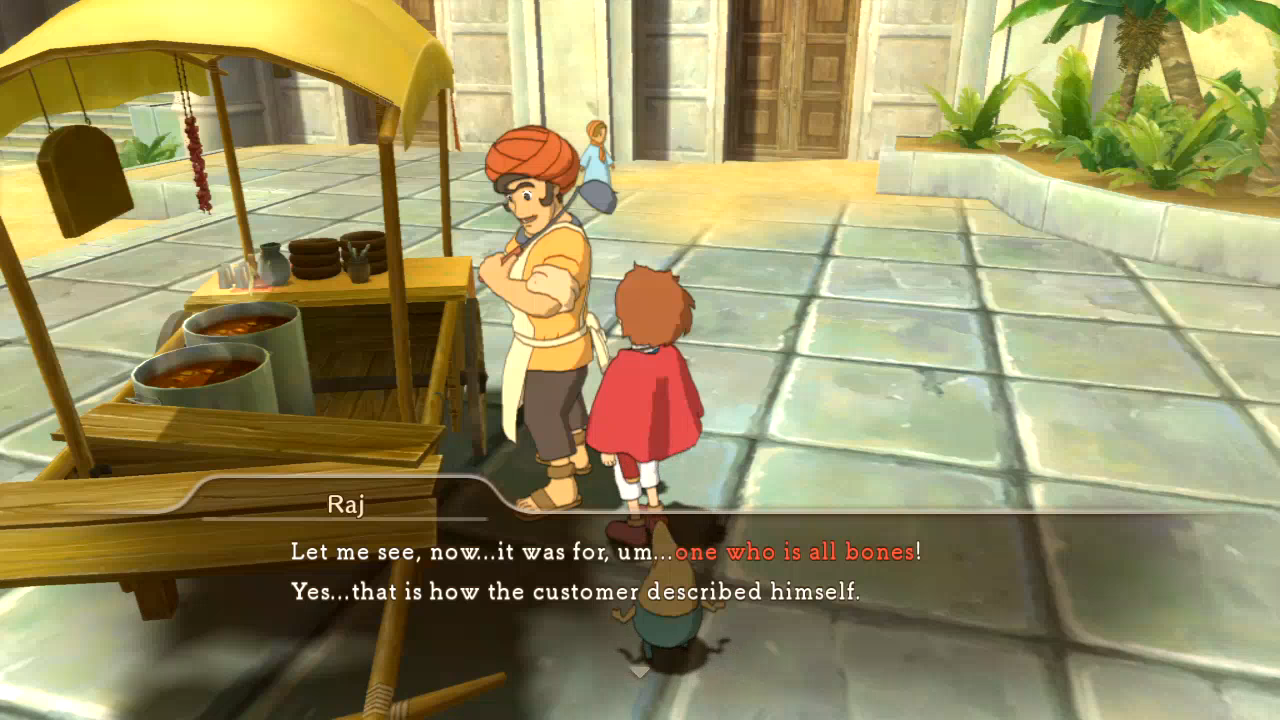 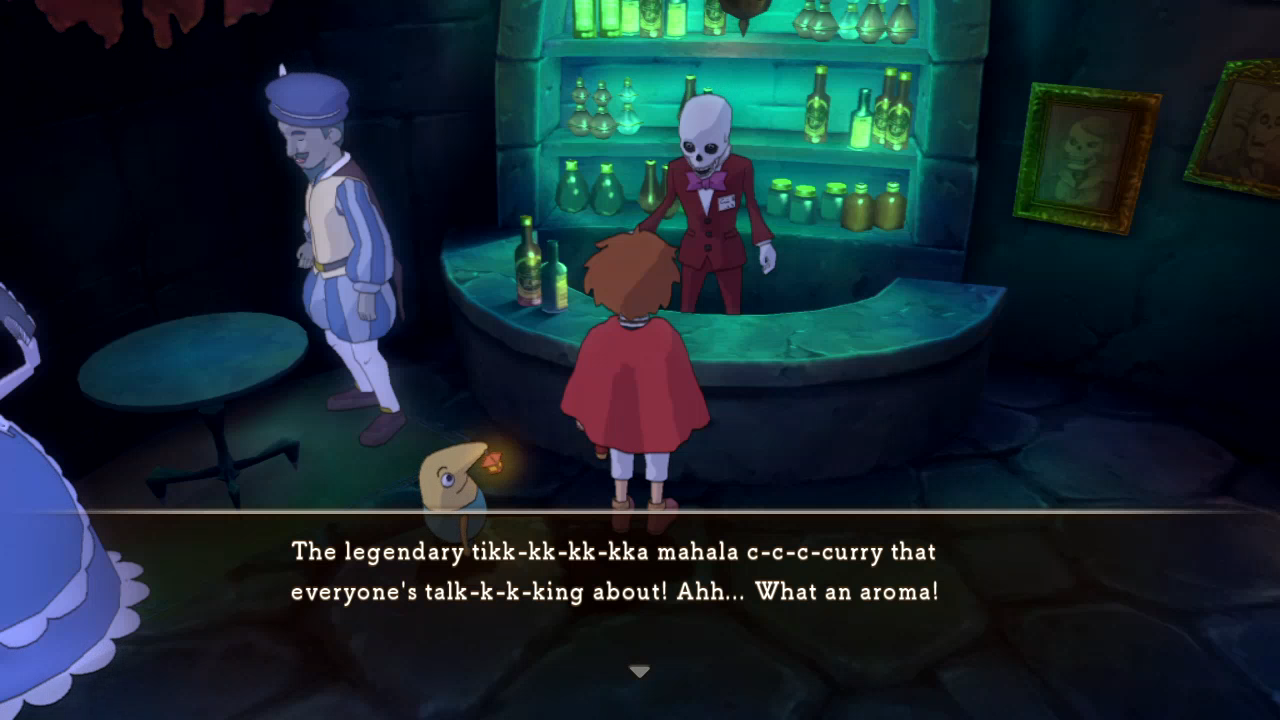 I thought the customer was the skeleton hiding in the mine East of Hamelin, but it's actually this bartender hiding in the back of the Casino. 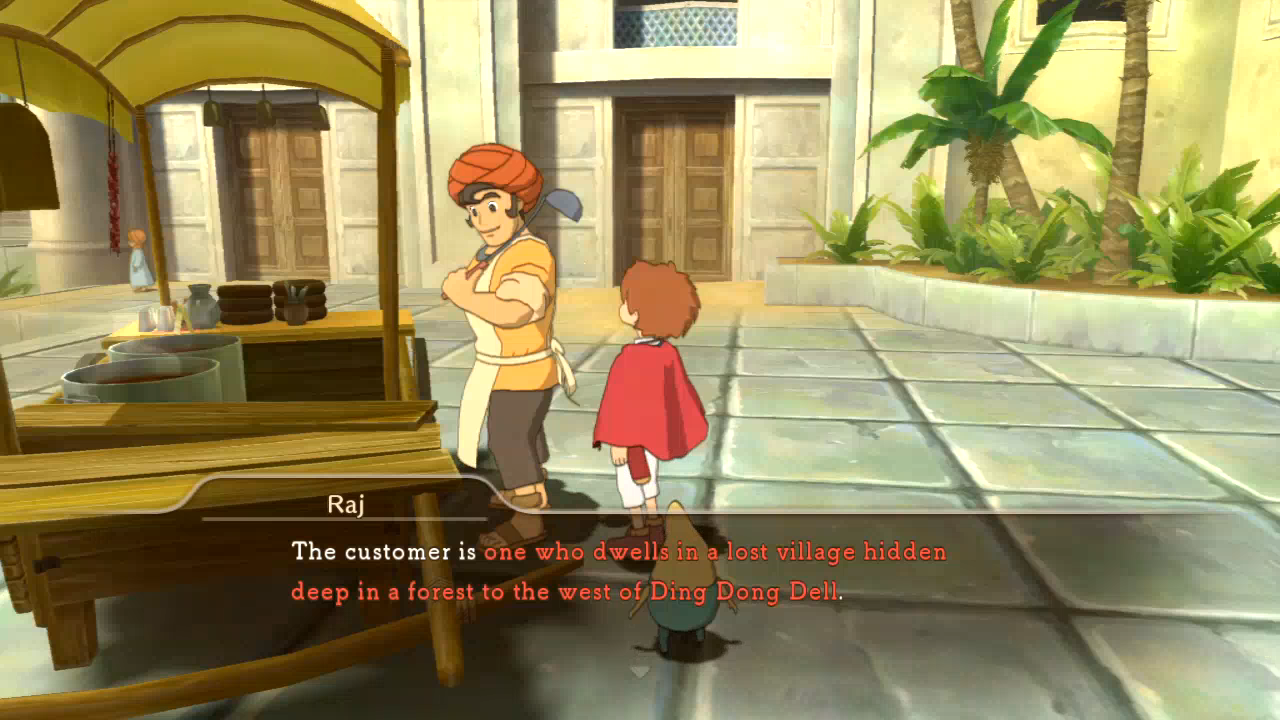 Off to yet another forest we haven't explored yet, and I will be exploring all of them by the end of the LP. This one is actually right behind where I killed the Puss in Boats earlier. 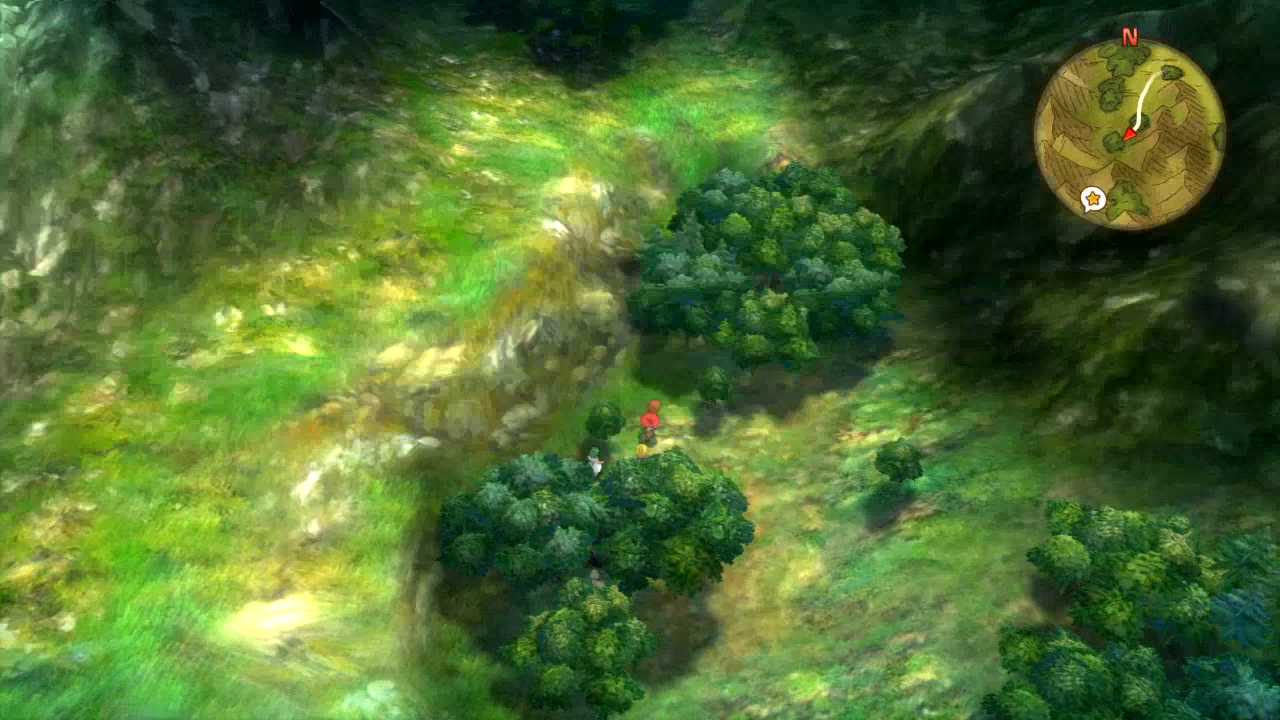  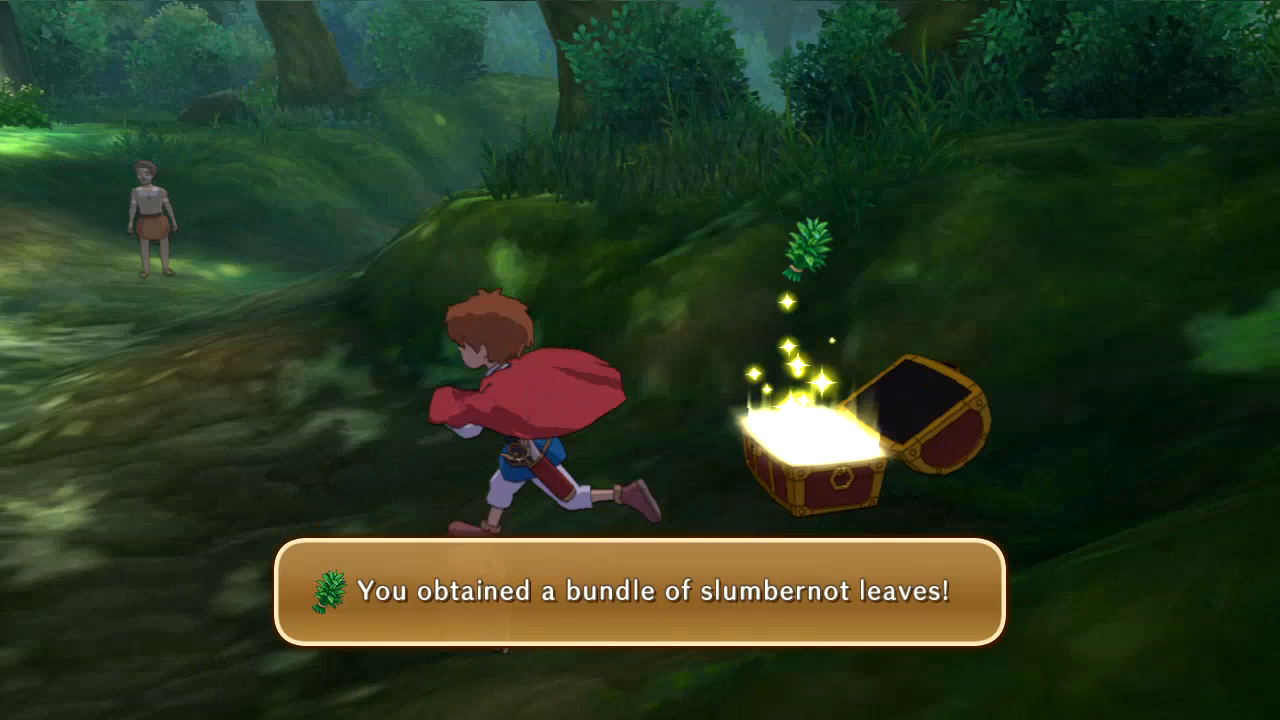 And that's it for Raj and his curry. 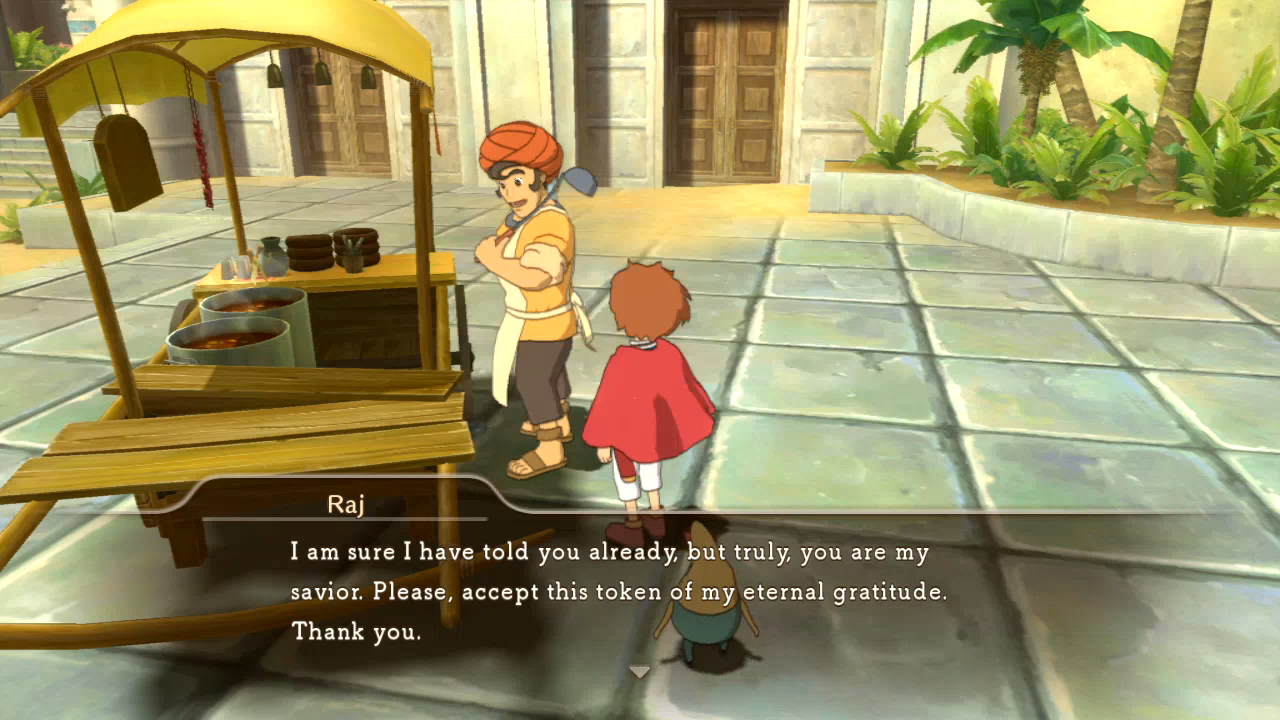 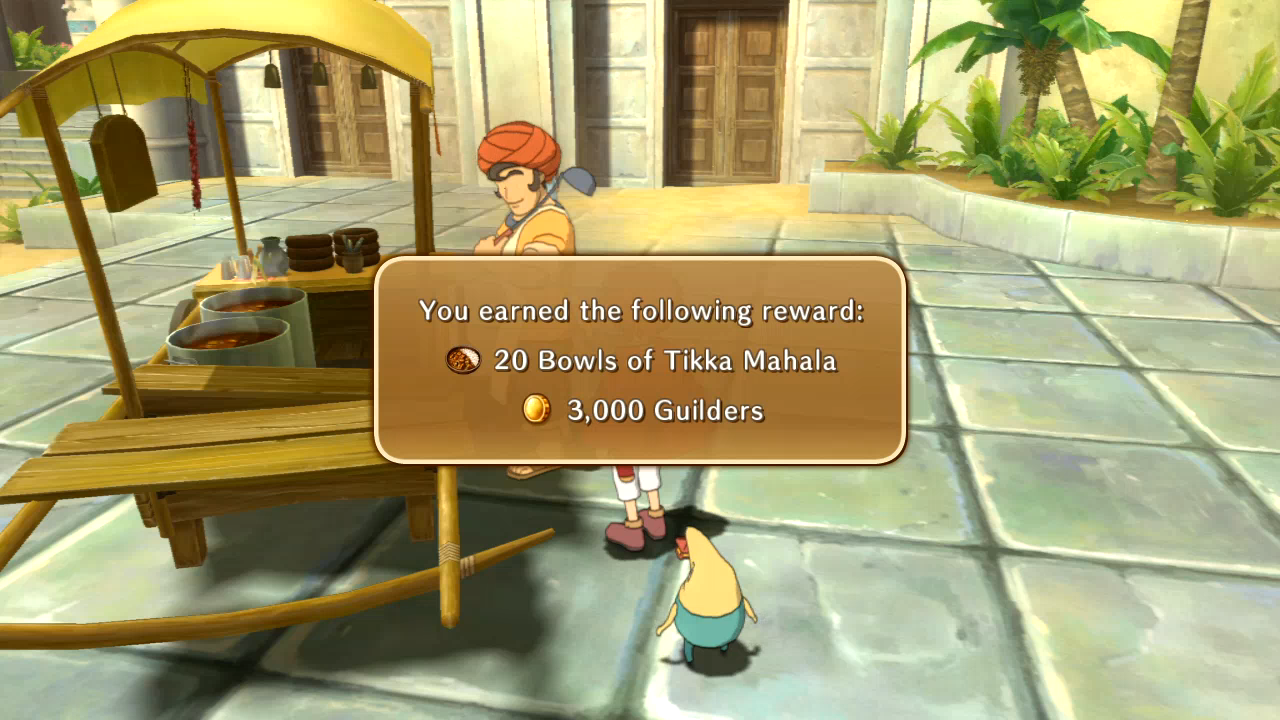 If you don't remember it from earlier, Tikka Mahala is an excellent healing item. I don't know if I use it much for the rest of this LP, but it's a good thing the game has stocked me up with it now. It's a big help for the loving cannons that are the bosses we'll be fighting in the final area. 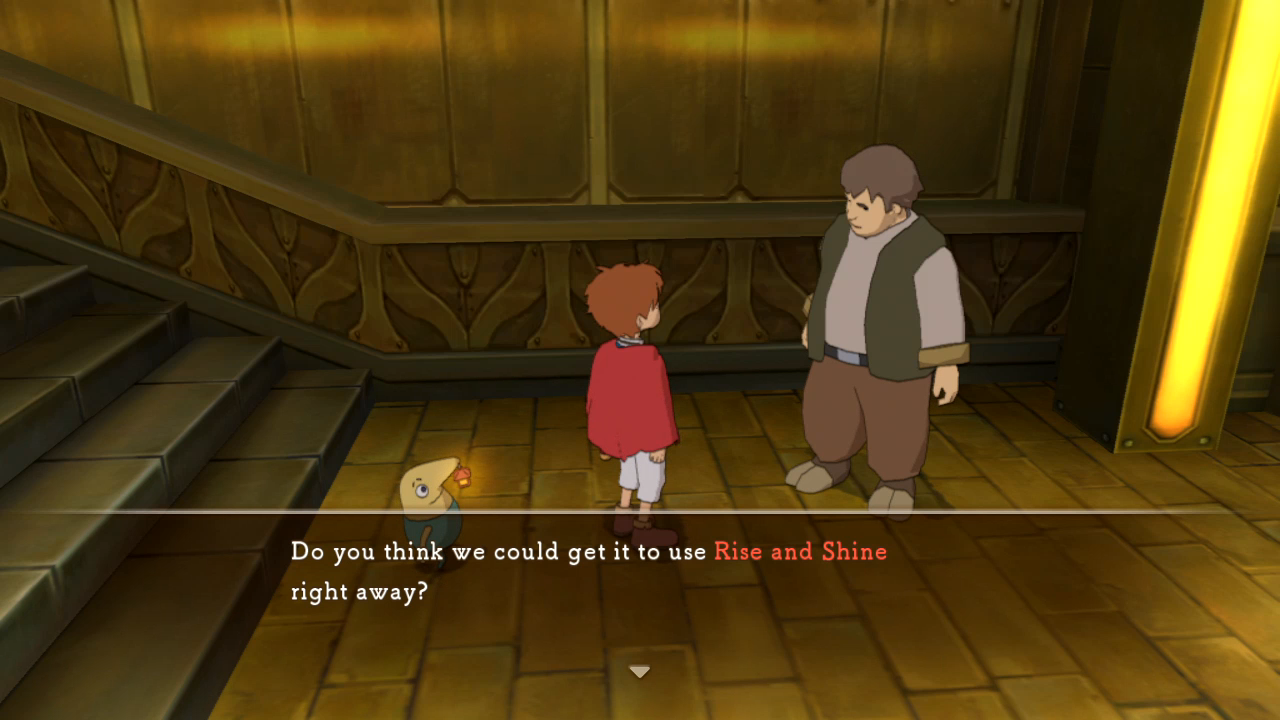 Like I mentioned, I didn't know I already had a familiar that knew Rise and Shine, so I had to level up my KAEPORASS (the owl) to level 7, at which point he learns it naturally. 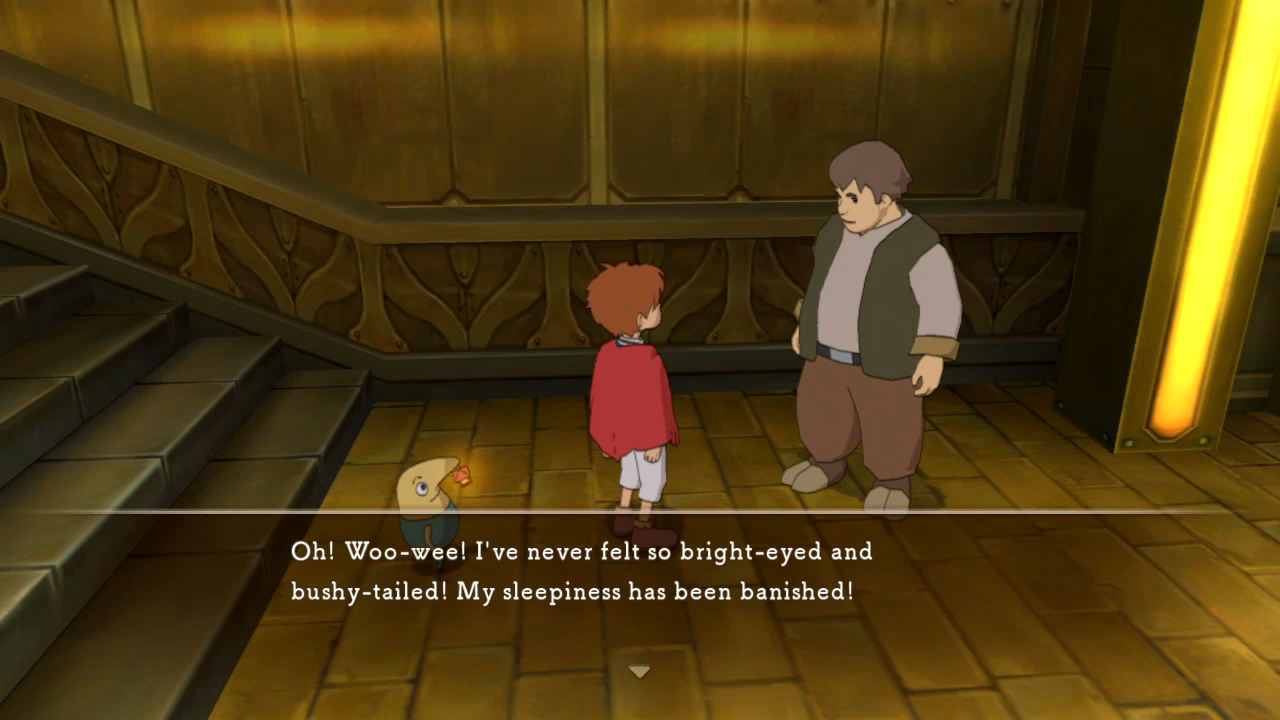  I take the chance to grab the other most useful Merit Reward at this point in the game. 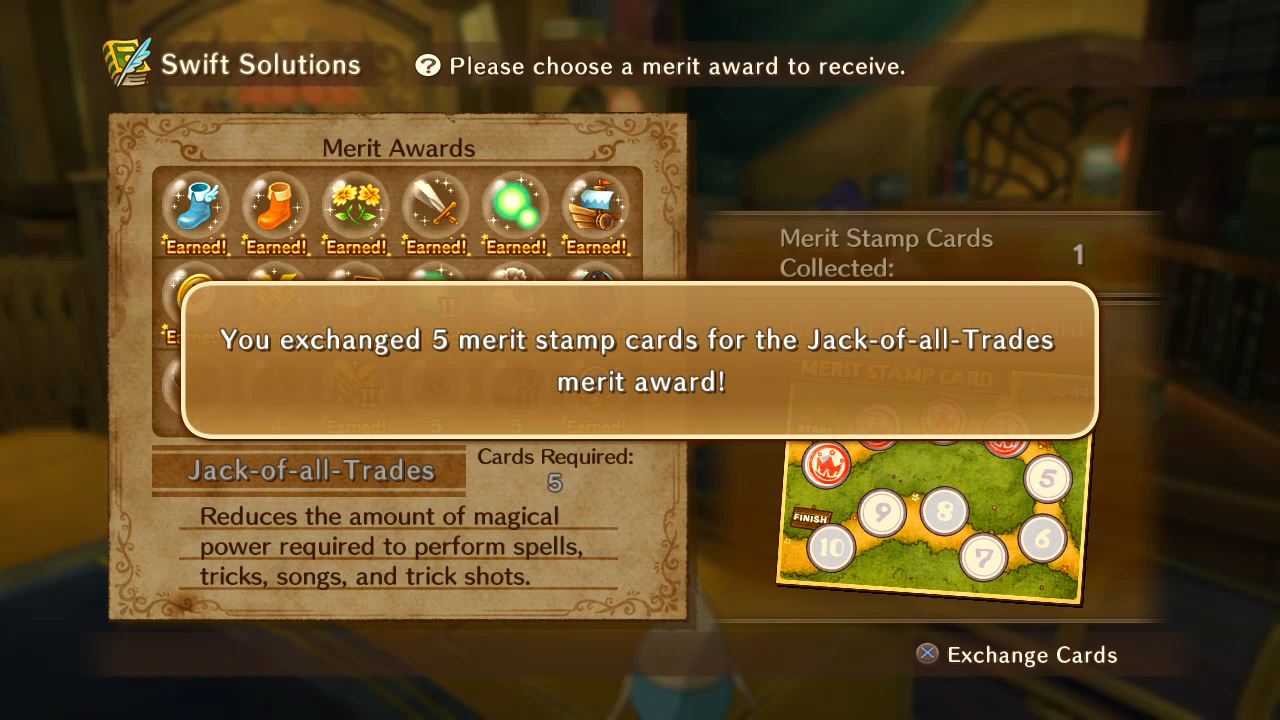 The reduction in magic cost is small, only around 1-4 MP, but the benefit adds up quickly, especially if you already got Jack the Giant Killer to boost Oliver's stats +100. Post-Manna, Old Father Oak has one last present to give us.   He has one more set of dialogue for right before we fight the final boss, but this is the last instance of him giving us anything. 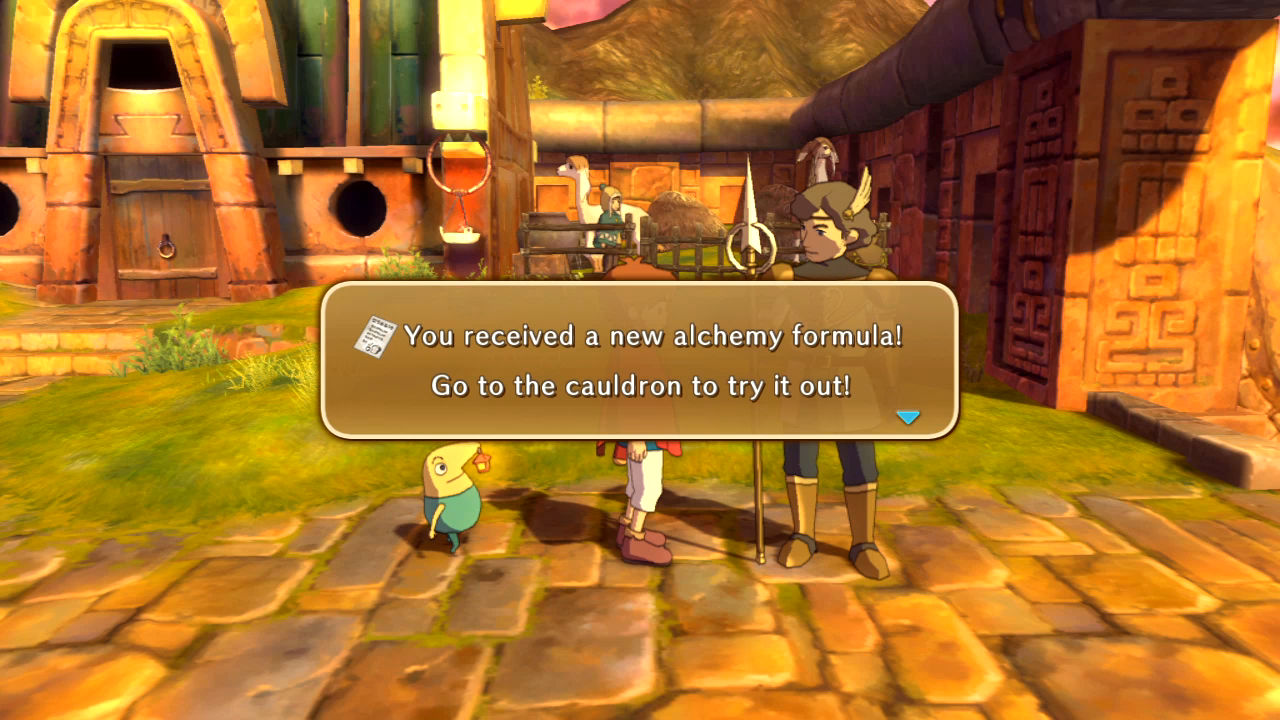 I accidentally came across another weapon alchemy formula, this time for a new harp for Esther (which I also can't make yet). The Xanaduvian guard at the entrance of Perdida will give it to you after he dumps his relief at Khulan's recovery on you. Which I didn't record because getting the formula caught me off guard.  Decided to grind outside Perdida for a bit, since much to my dismay, the much better grinding spot of the Miasma Marshes gets closed off after you kill Shadar...  ...Or it was the better grinding spot, until I discovered this guy. This is the Tokotoko I mentioned in the videos. They're rare monsters with not a lot of health...   ...have a tendency to run away from fights if you don't kill them quickly...   ...and do that to your experience bars. Yep, the Tokotoko has inexplicably the most Exp of any monster including most bosses, excluding its own metamorphosed form that can be found in the final dungeon. So I spend almost all of the rest of the grinding I do in this LP right here outside Perdida. Funnily enough, its baby form, the Toko, can be found on the islands West of the Summerlands, and the amount of Exp they give is piddling.  Also grabbed this guy, because Tomodachi Life reference. Which was in-itself a reference to this LP. We've come full circle. 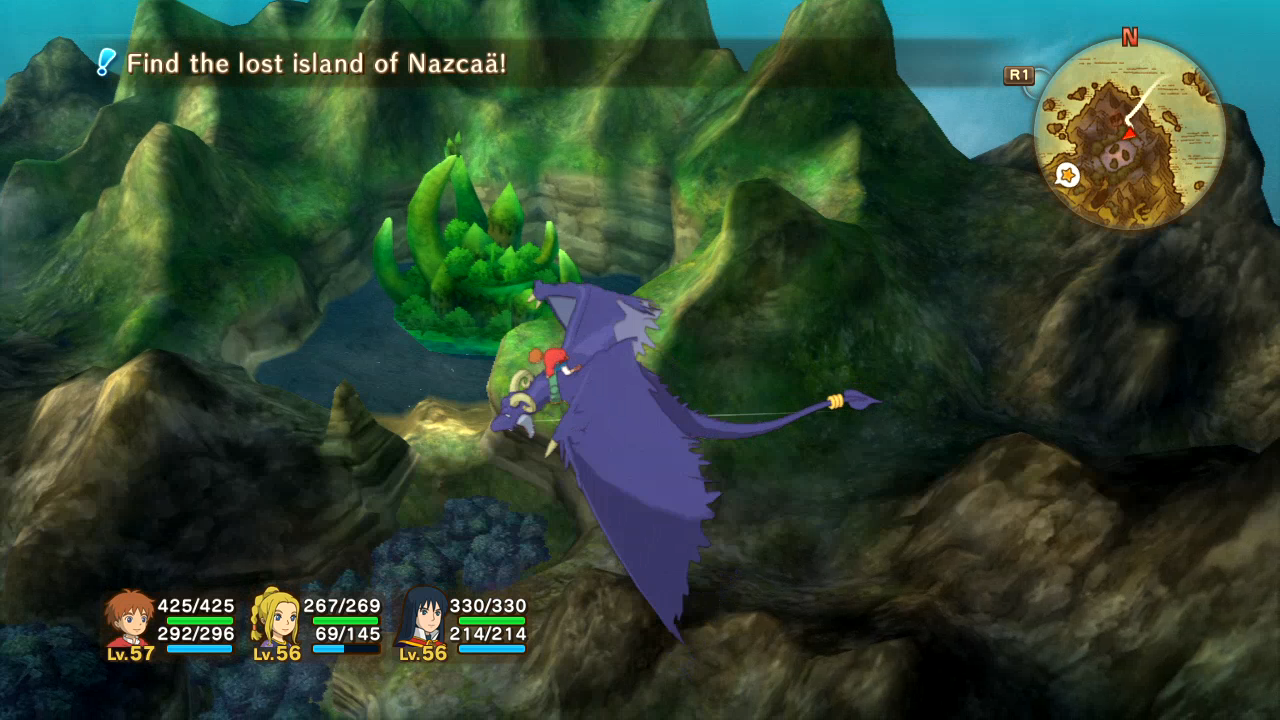 One neat thing, despite Miasma Marshes and Nevermore being locked again, we can see Nevermore in its pretty green form now when you fly over with Tengri. Next I grab a green chest I missed in a previous excursion into the forest East of Ding Dong Dell.  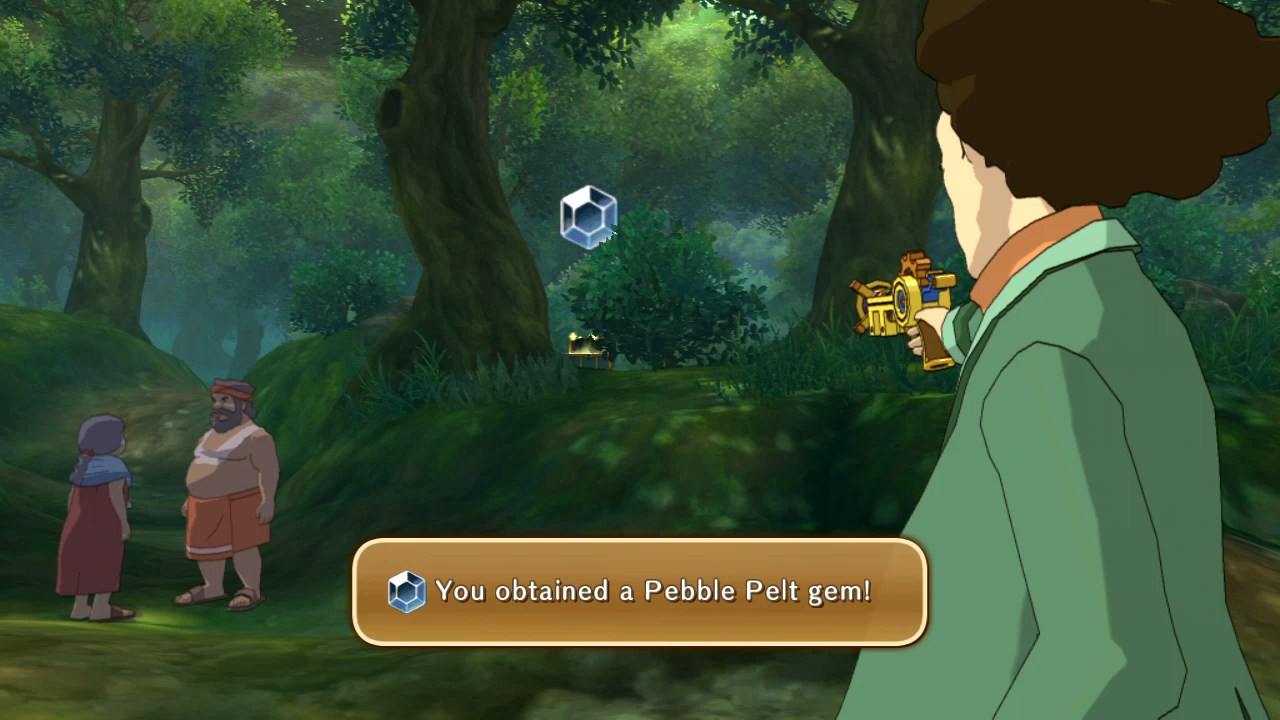 Then I move to another missed forest chest East of Castaway Cover. 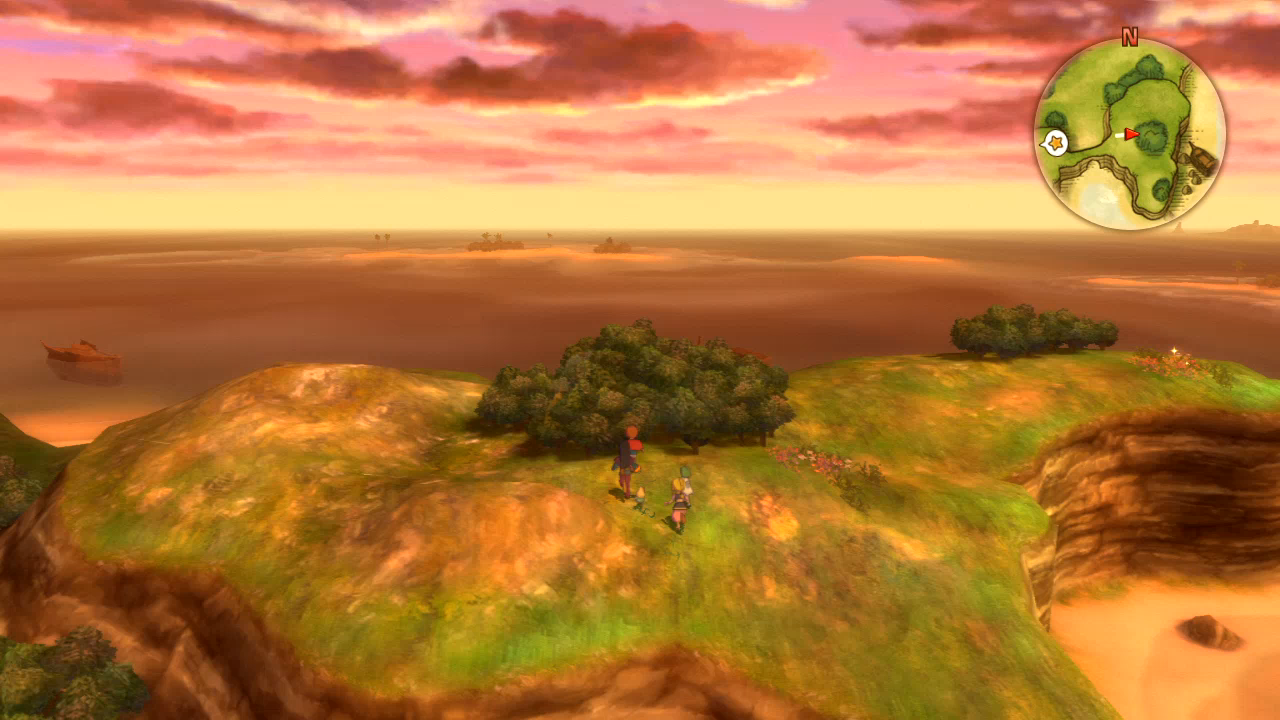  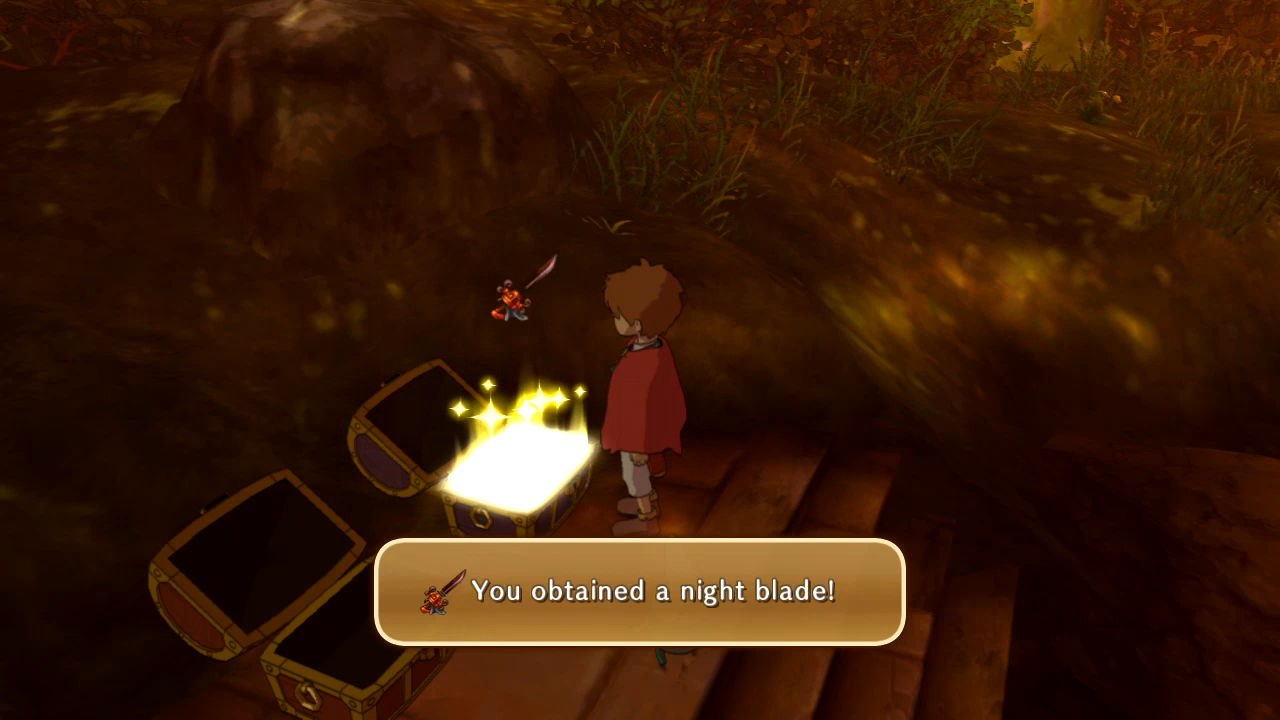 Night Blade is the opposite of Radiant Blade, damaging the user as well as the opponent. I forgo using it. Another forest we haven't seen yet is right by Old Smoky, on a tiny island you need Tengri to reach.   It's surprisingly the most bustling (and well-lit) of any forest we've seen yet.   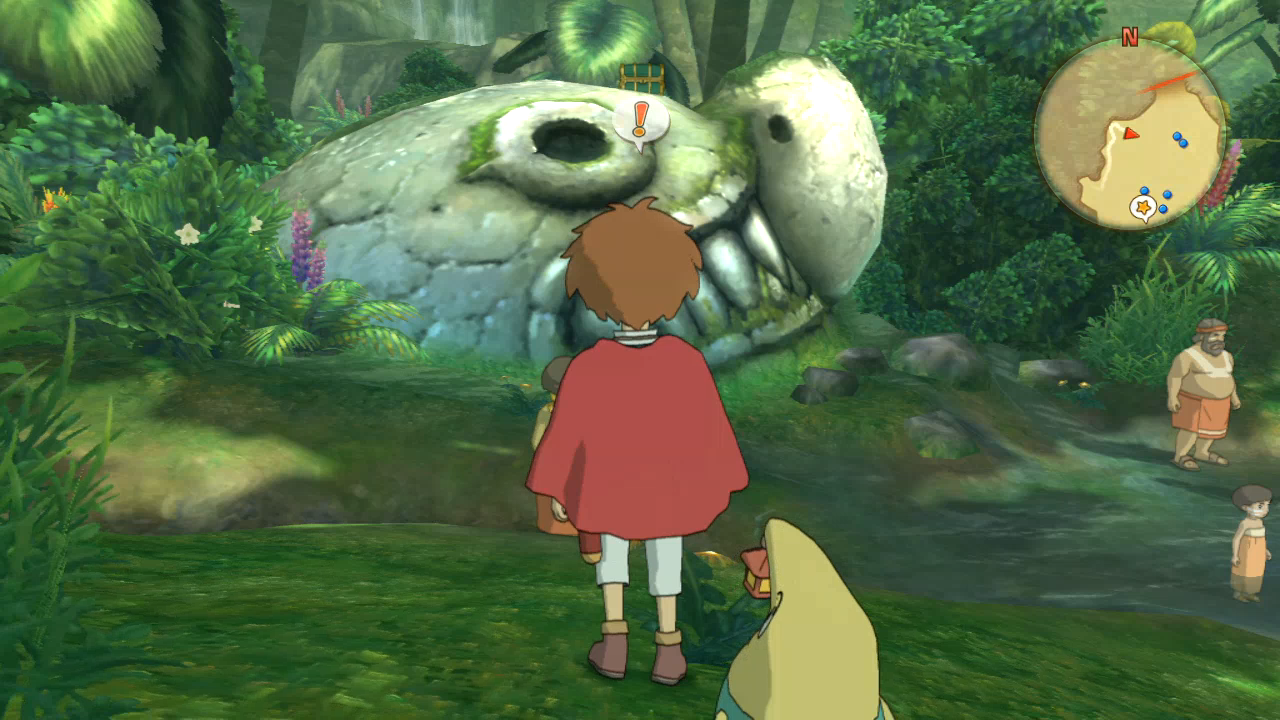 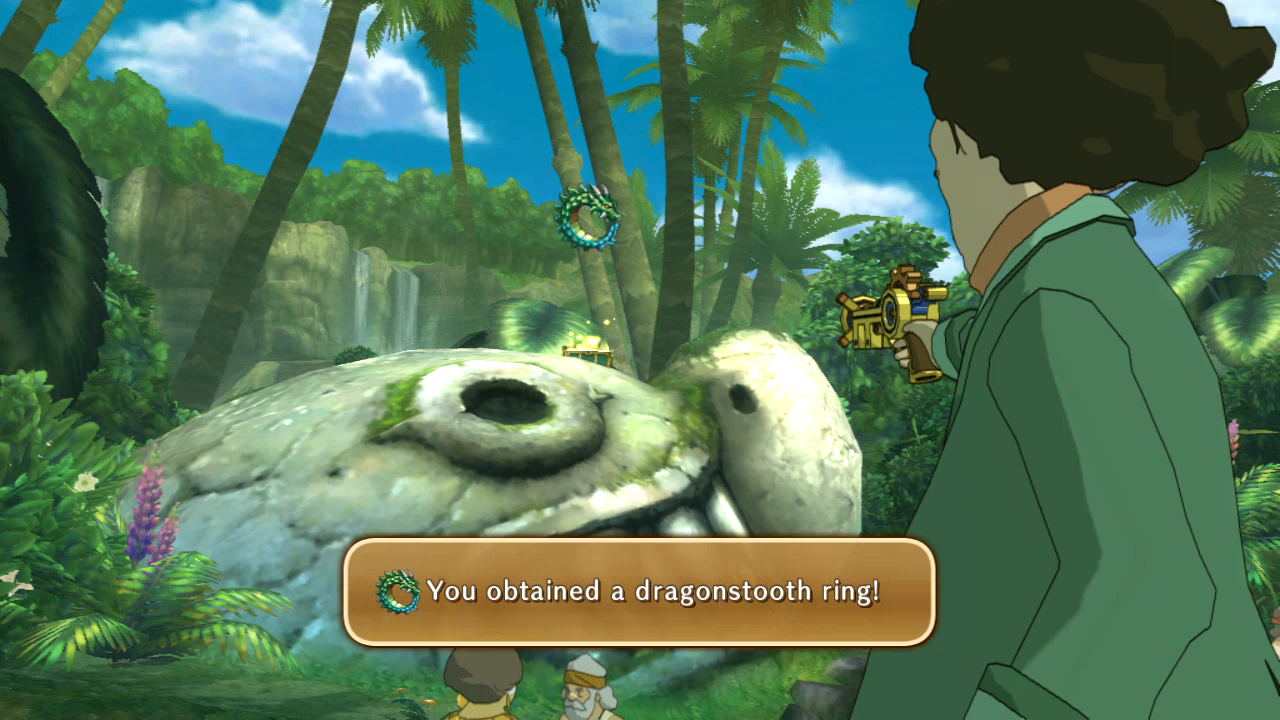 Next new forest is perhaps the most interesting of them all.  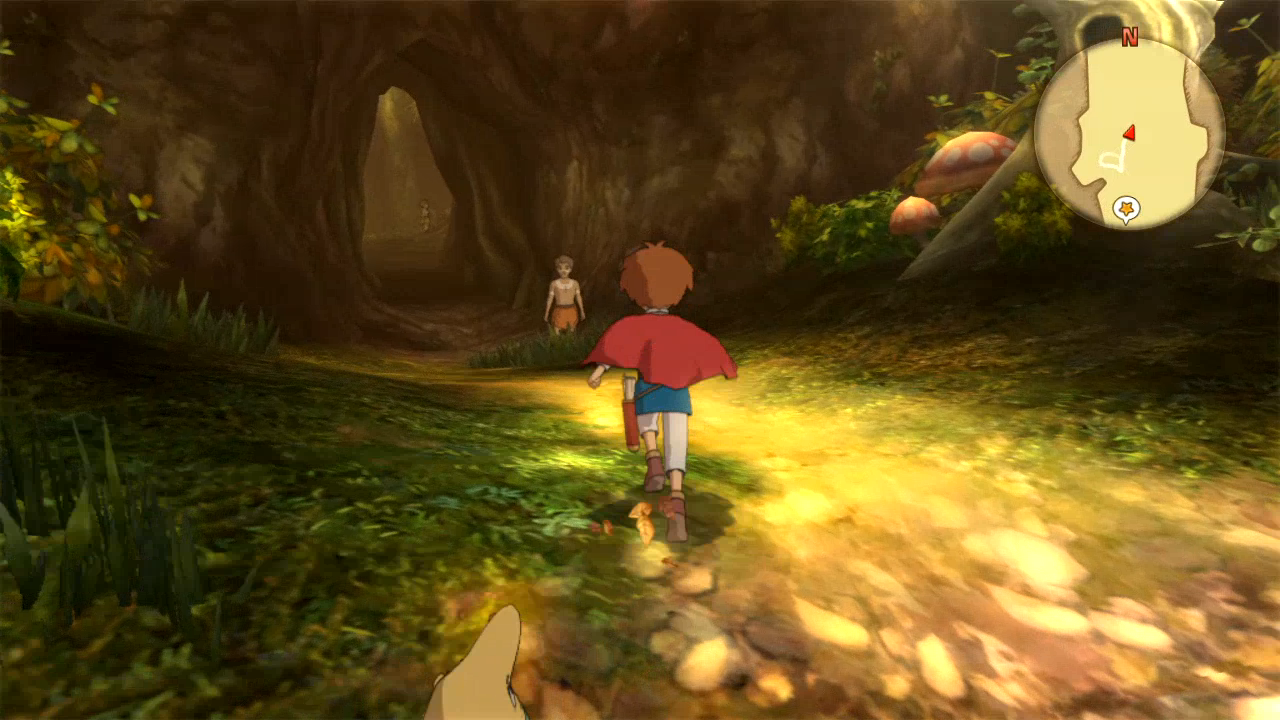 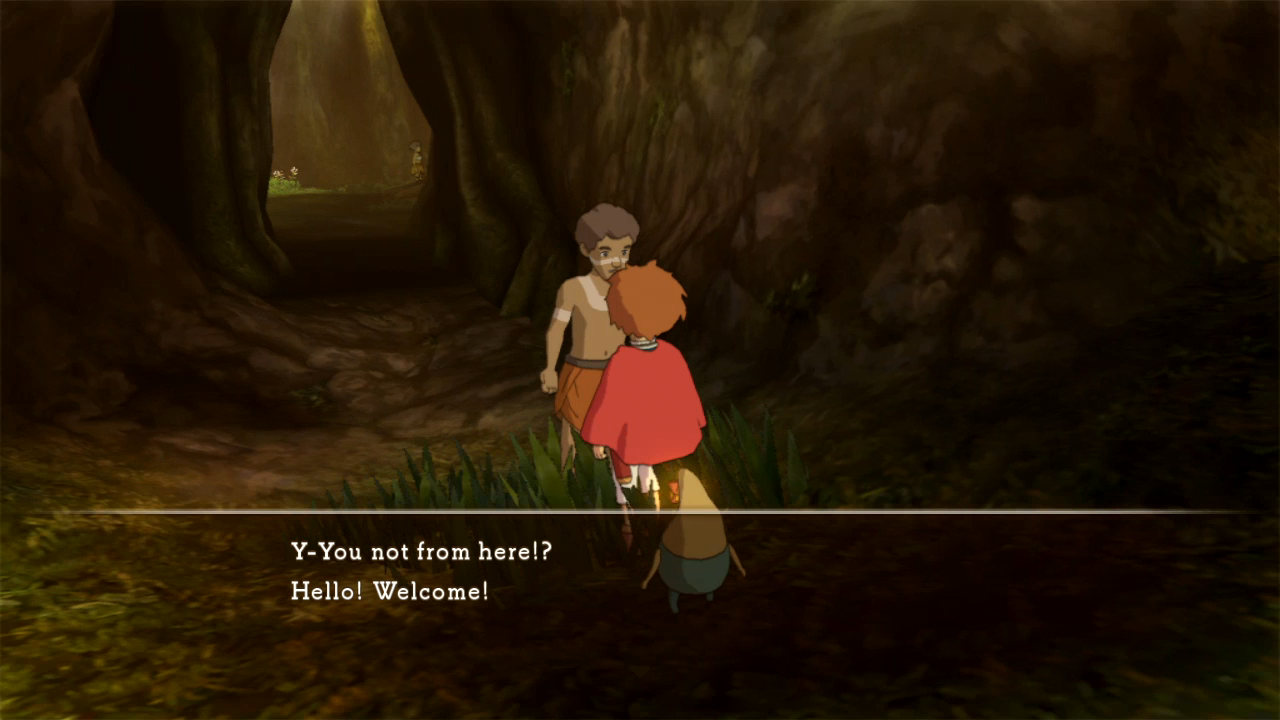 It's actually a cave cut into the side of the mountain, and it's filled with fairies talking with a woman who has apparently had access to Oliver's world. 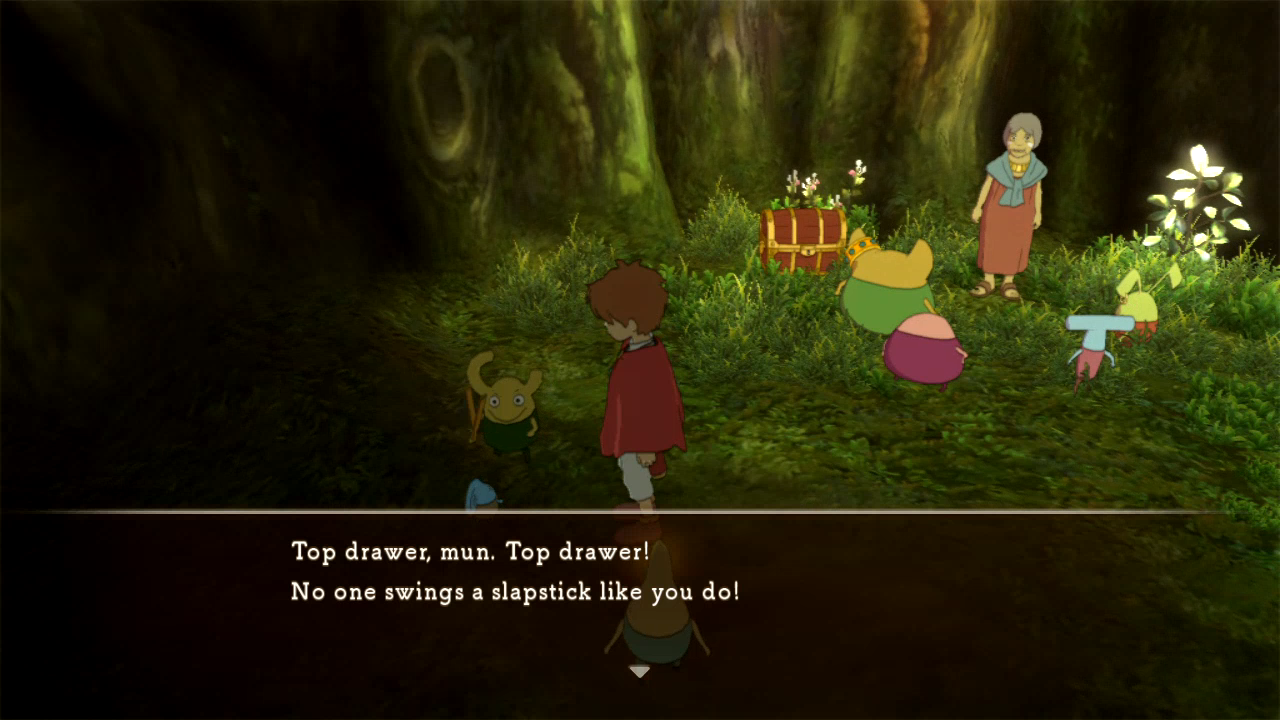 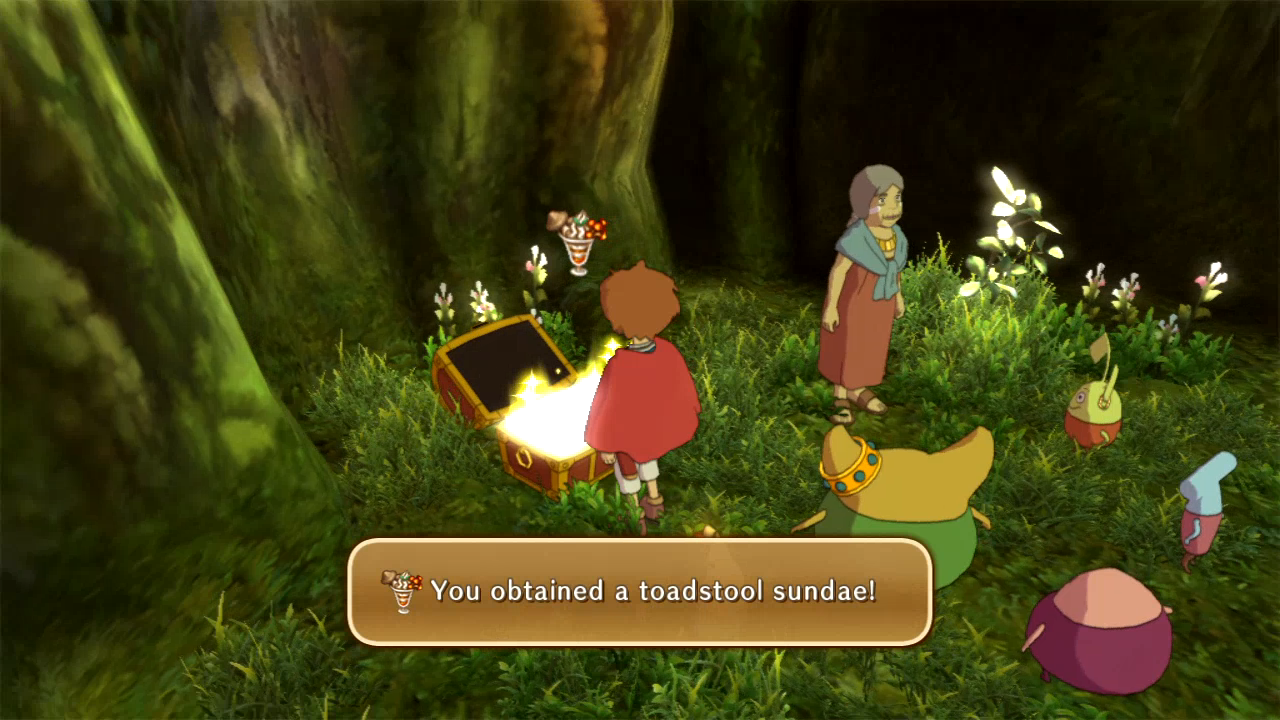  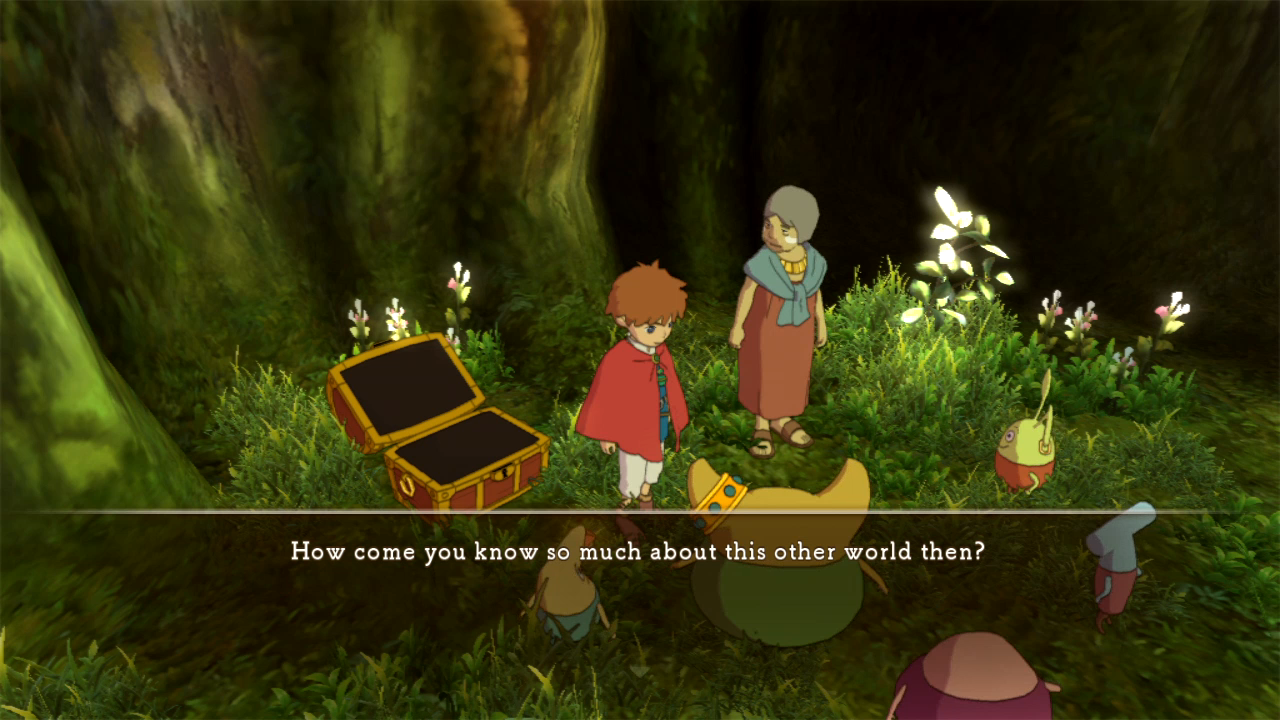 There's also this double act in the making. 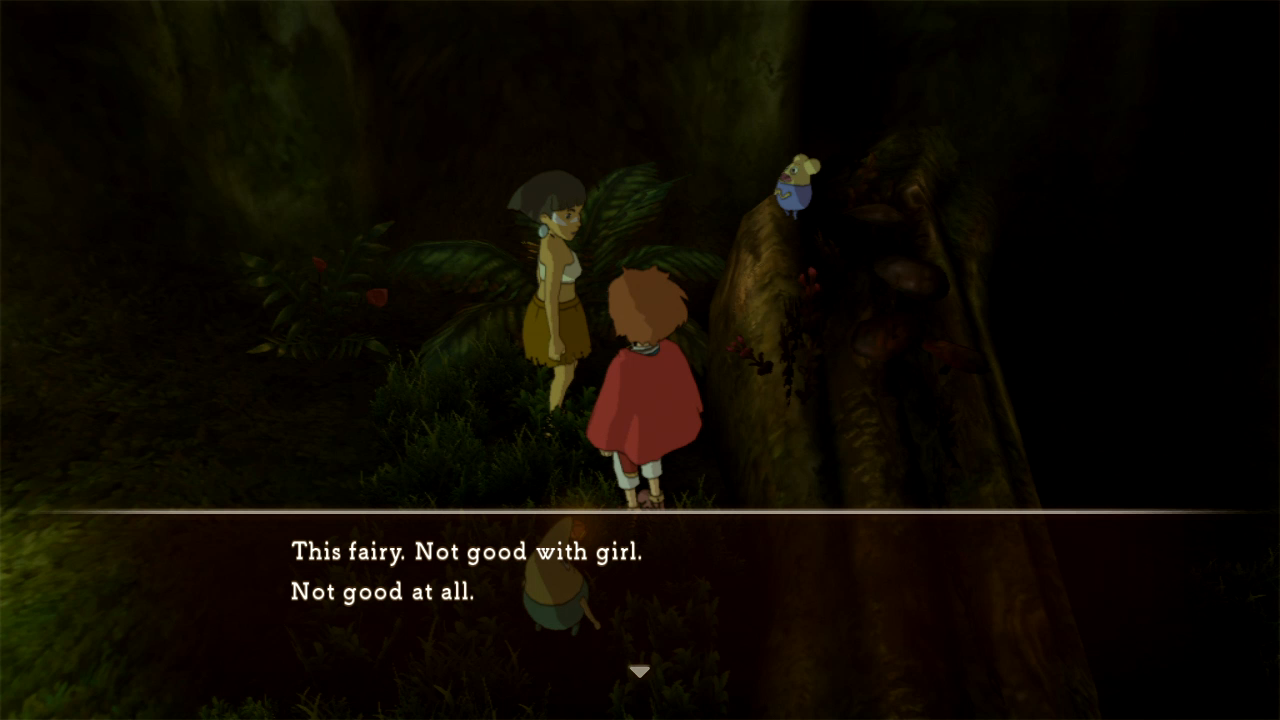  That makes two things in Ni no Kuni that are actually funny. 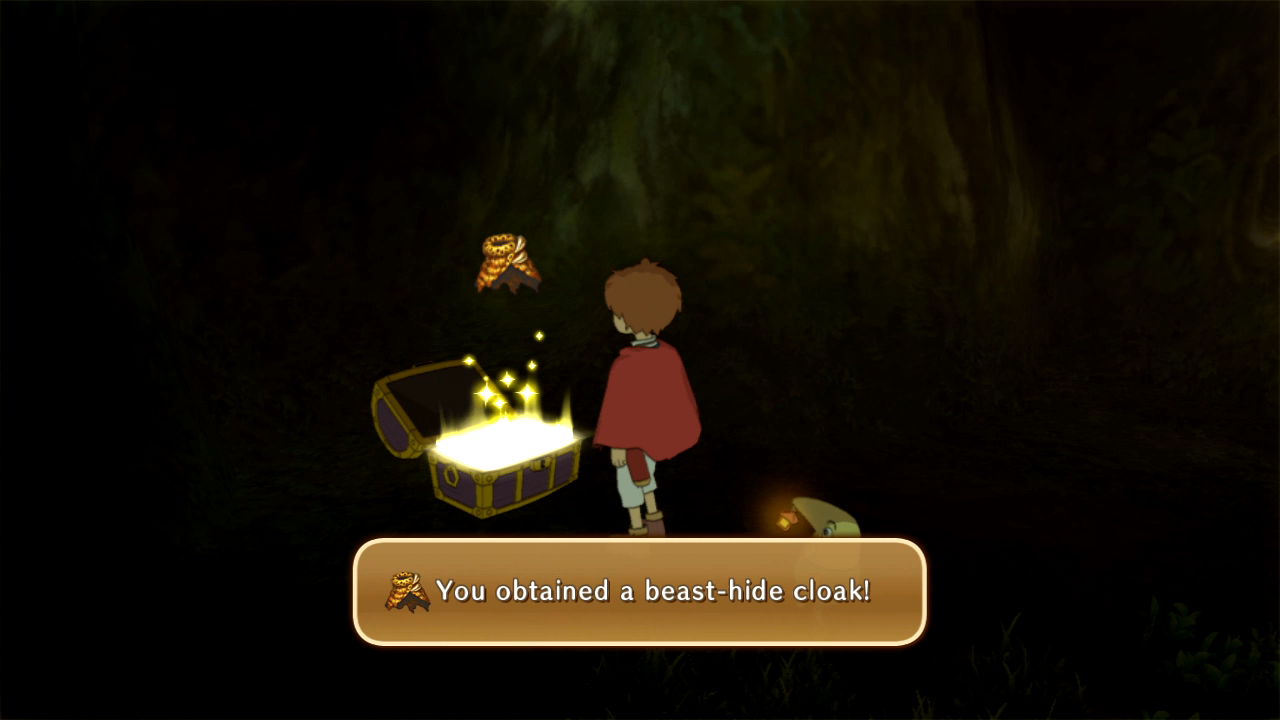 Grab the purple chest, head back to Billy Goat Bluffs for some more Tokotoko hunting, and... 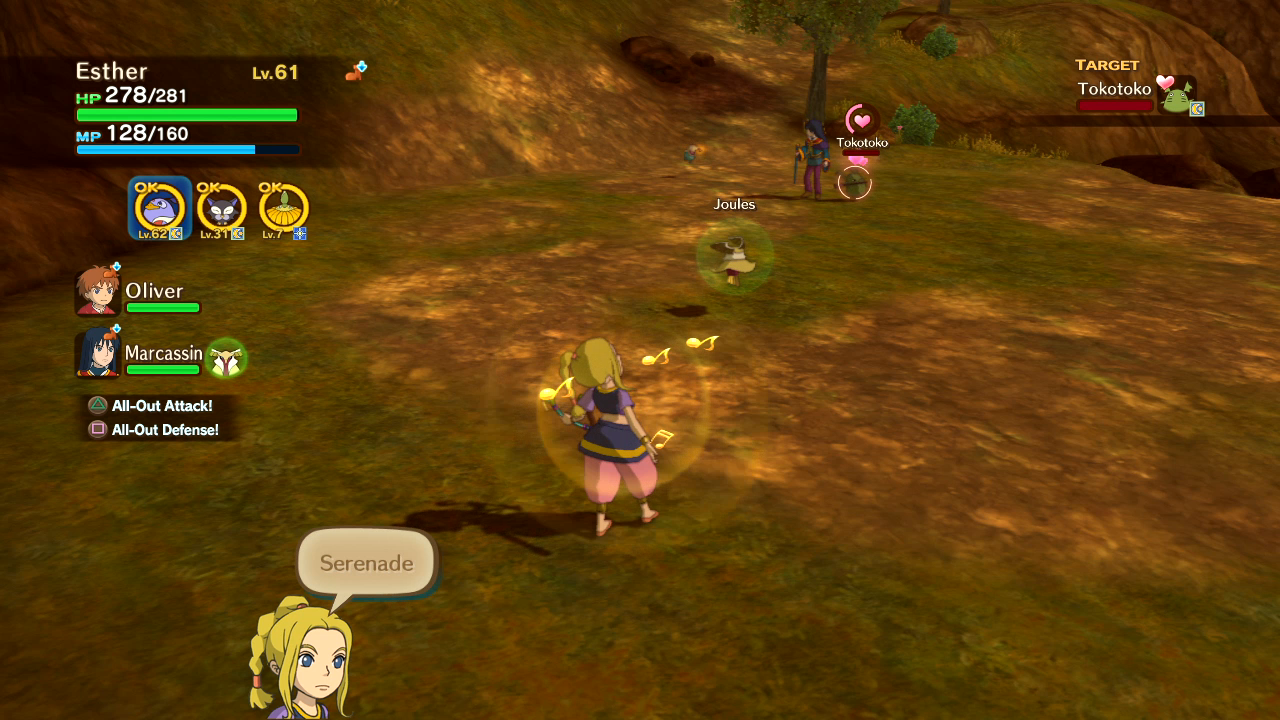 COME TO MAMA!  I appreciate that you still get Exp when you capture the monster instead of just when you kill it. 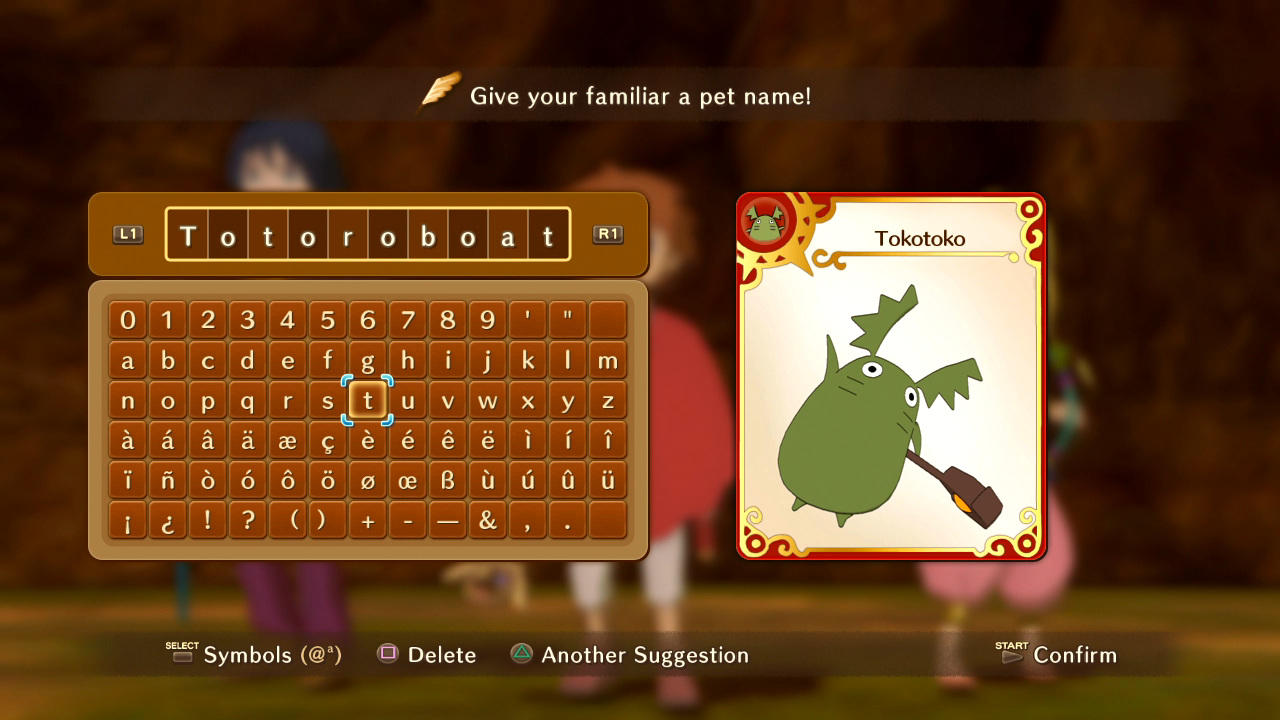 Not that it looks like Totoro. I just amused myself too much with the pun. 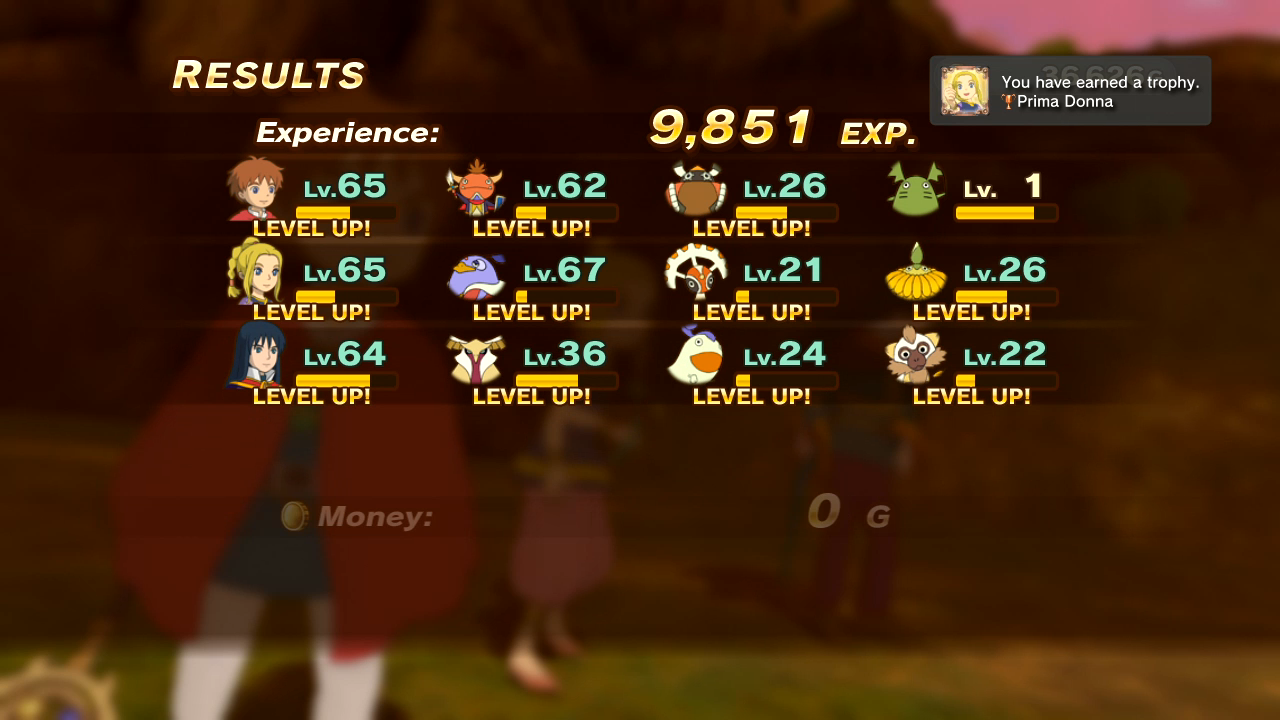 And the last thing for this update is a surprise achievement. Once you've leveled Esther to 65, you unlock the last of her special abilities, which nets you the Prima Donna achievement on PSN. Oliver and Swaine have their own all-ability achievements as well, but I already got Oliver's in my first playthrough of the game, and I unlock Swaine's later in the LP. Next time: Nazca� and The Ivory Tower
|
|
#
?
Jan 28, 2015 04:29
|
|
|
I honestly found myself using items more in this game than I ever did in any other RPG. MP always seemed to be in short supply, and that meant healing often was too. by comparison, I think I can go a whole game of Final Fantasy VIII without using an item once.
|
|
#
?
Jan 28, 2015 09:35
|
|
|
morallyobjected posted:I honestly found myself using items more in this game than I ever did in any other RPG. MP always seemed to be in short supply, and that meant healing often was too. by comparison, I think I can go a whole game of Final Fantasy VIII without using an item once. The game seems to really encourage players to use items given how freely it'll give them out from some side quests. By the time you finish the game, Oliver's going to have swilled down so much caffeine he'll be such a jittery mess he can't even pronounce his spells properly!
|
|
#
?
Jan 28, 2015 17:14
|
|
|
The first stage of the toko line gives a lot of exp too, but not at this point of the game (you can reach the island they spawn on as soon as you can use the boat, I believe).
|
|
#
?
Jan 29, 2015 03:54
|
|


|
Travis is currently recovering from a throat infection, but the last two videos will still be done this month, and likely the whole LP will be finished in March. In the meantime I'm starting another semi-solo LP project (a'la Survival Kids) of two Harvest Moon games, Tale of Two Towns for the DS/3DS and Hero of Leaf Valley for the PSP. Go to my thread for Ocarina of Time 3D to leave a suggestion for the name(s) of my characters for the LPs - to keep things focused, let's keep the discussion of it off this particular thread.
|
|
#
?
Feb 2, 2015 09:48
|
|
|
   I'll try to stream Ni no Kuni DS again soon, too. Been focused on streaming Tomodachi Life this week.
|
|
#
?
Feb 14, 2015 00:03
|
|
|
Never mind. Computer keeps crashing. I will try again tomorrow, same time. ThornBrain fucked around with this message at 03:14 on Feb 16, 2015 |
|
#
?
Feb 16, 2015 02:50
|
|
|
Got my computer working again and was able to record a second stream of Ni no Kuni DS. This time, Tokyo-based patron Benjamin sits in with me and Travis and helps us through the Well.
|
|
#
?
Feb 18, 2015 20:25
|
|
|
I stand by my statements that the hint they gave was pretty rubbish, and Drippy's suggestion of "Guess that wasn't right. Why don't we go look for a hint?" cemented his position as one of the most useless characters in Ni No Kuni.
Princess Futon fucked around with this message at 05:23 on Feb 19, 2015 |
|
#
?
Feb 19, 2015 03:18
|
|
|
   Thus concludes the main LP. The post-game sidequests will follow in 9 separate screenshot updates, which I will endeavour to post at least three or more per week. Don't want to linger on the LP for too long. We've found out that the DS version is at least as long as this version, so I will not be streaming it for more than one or two more times. We're not done with videos overall, though.
|
|
#
?
Feb 20, 2015 22:44
|
|
|
That boss fight looked fun. Also, question, if this world was created by Oliver, does that mean it was just an escape for him to get over his grief?
|
|
#
?
Feb 21, 2015 04:17
|
|

|
Okay, I was not expecting that!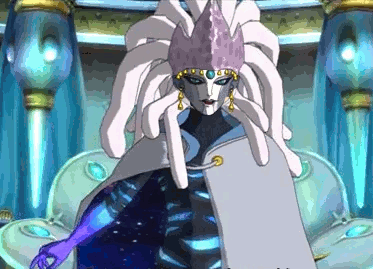 I kinda wanted to see the White Witch pull out a gun and end it all during Oliver's utterly schmaltzy speech, you know, if they were going the dark comedy route.
|
|
#
?
Feb 21, 2015 06:01
|
|
|
I missed your art contributions, Melaneus 
|
|
#
?
Feb 21, 2015 06:09
|
|
|
ThornBrain posted:I missed your art contributions, Melaneus I miss being not lazy
|
|
#
?
Feb 21, 2015 06:21
|
|
|
Sweet jesus suddenly douche council!  I was NOT expecting that to pop up after you beat the white witch. That was actually legitimately really creepy looking I was NOT expecting that to pop up after you beat the white witch. That was actually legitimately really creepy looking
|
|
#
?
Feb 21, 2015 07:16
|
|
|
I find it hilarious that when you got Drippy Tears you said it was worthless and yet during this playthrough, he manages to use it when it's needed most.
Chimera-gui fucked around with this message at 08:19 on Feb 21, 2015 |
|
#
?
Feb 21, 2015 07:56
|
|
|
Dude the witch's second form was fuckin' boss. If I was in charge first thing I'd do for postgame content would definitely be "put that on the boss summon list". Invoke or whatever the spell was.
|
|
#
?
Feb 21, 2015 08:35
|
|
|
While I liked your theory of everything being in the protagonist's head, that only makes sense in this version of the game, doesn't it? The entire White Witch thing was tacked on to the DS version, if I understood you correctly.
|
|
#
?
Feb 21, 2015 15:56
|
|


|
ThornBrain posted:Thus concludes the main LP. The post-game sidequests will follow in 9 separate screenshot updates, which I will endeavour to post at least three or more per week. Don't want to linger on the LP for too long. We've found out that the DS version is at least as long as this version, so I will not be streaming it for more than one or two more times. We're not done with videos overall, though. "Cassiopeia, why? Why do you have to destroy the world?" Because she's literally gone insane from a combination of isolation and depression Oliver, we saw this. Also dear sweet lord, are we really going to have a freaking nine year old somehow heal literally centuries of festering grief and misery? Christ on a cracker, that's bad form Japan! "You're so kind Oliver." Yes, so kind. Invalidating the feelings of others is the best way to show you care. Is there a reason I keep seeing this sort of message, or things similar to it, in Japanese media? Cause I've been noticing it more often lately, though that might just be because I'm looking for it and more aware of it now. This sort of "Hey, yeah things are poo poo, but get over it already and learn to deal with it!" Also congrats on finishing the videos of your first JRPG. You know what you guys should do to celebrate? You should get back to your roots. LP a game that really, I think, defines Thestrawhatno. Bomberman.
|
|
#
?
Feb 21, 2015 23:34
|
|
|
Post-Game Screenshot Missions 1: Monster Mash With Cassiopeia defeated and a special save file made, it's time to get to climbing the mountain of post-game material!  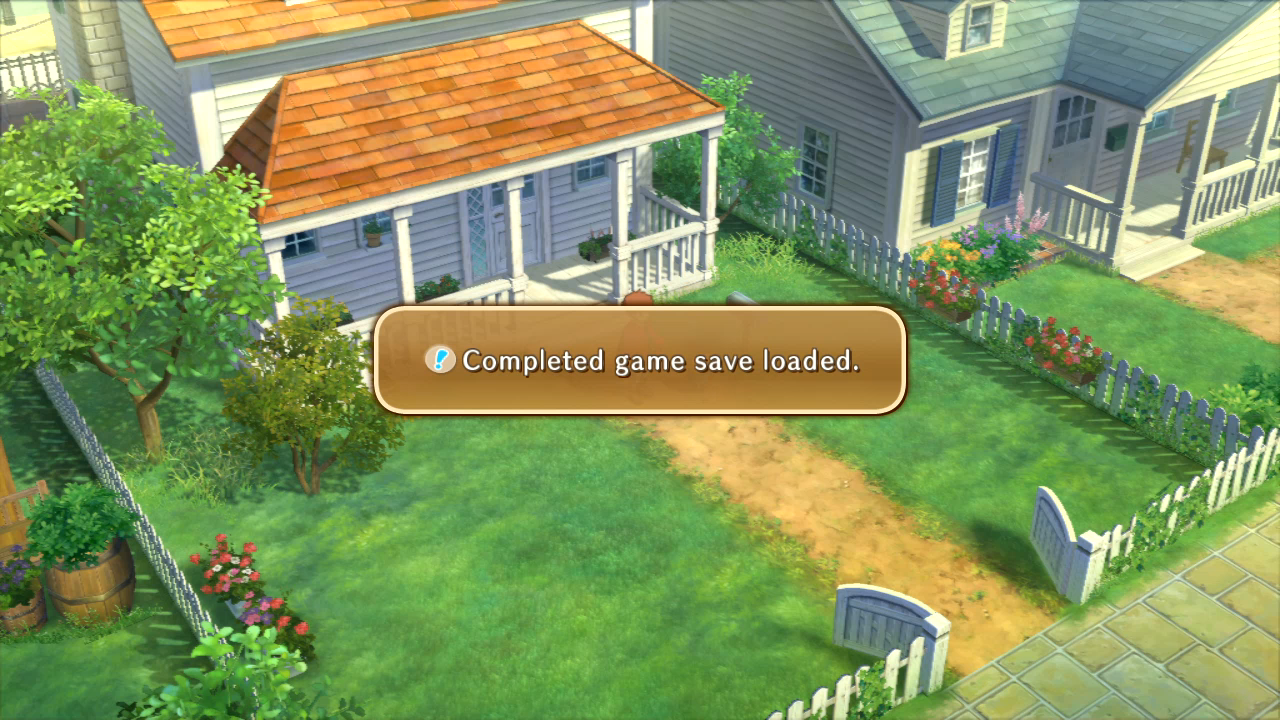 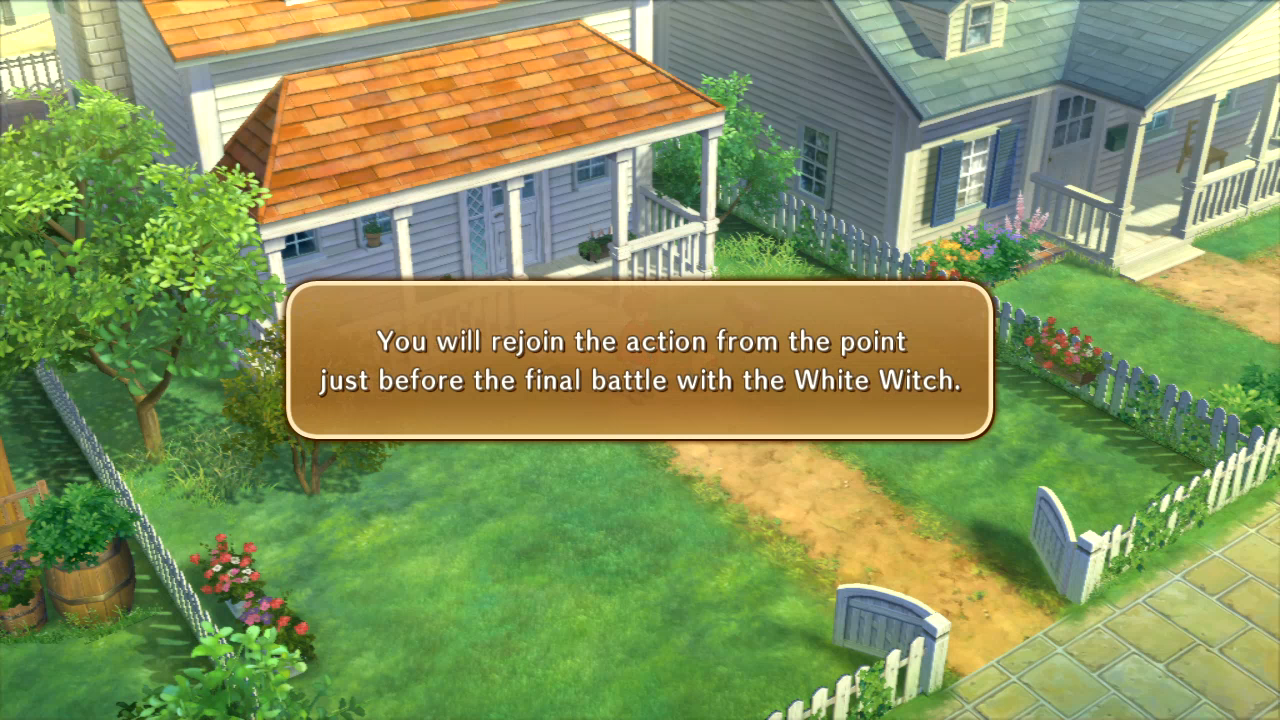  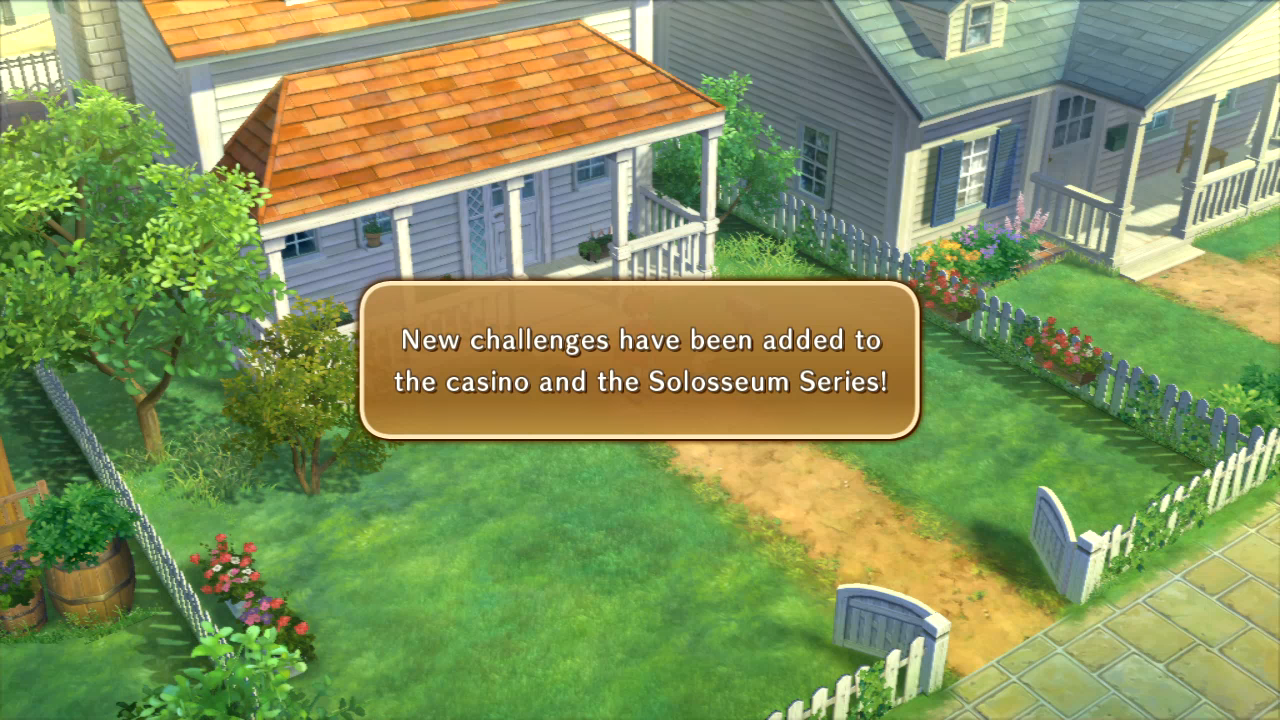  We'll touch on the casino a little bit down the line, and the Solosseum will have its own two-part set of updates nearer the end of the LP. 'Cause it gets hard as balls.  You have no idea. 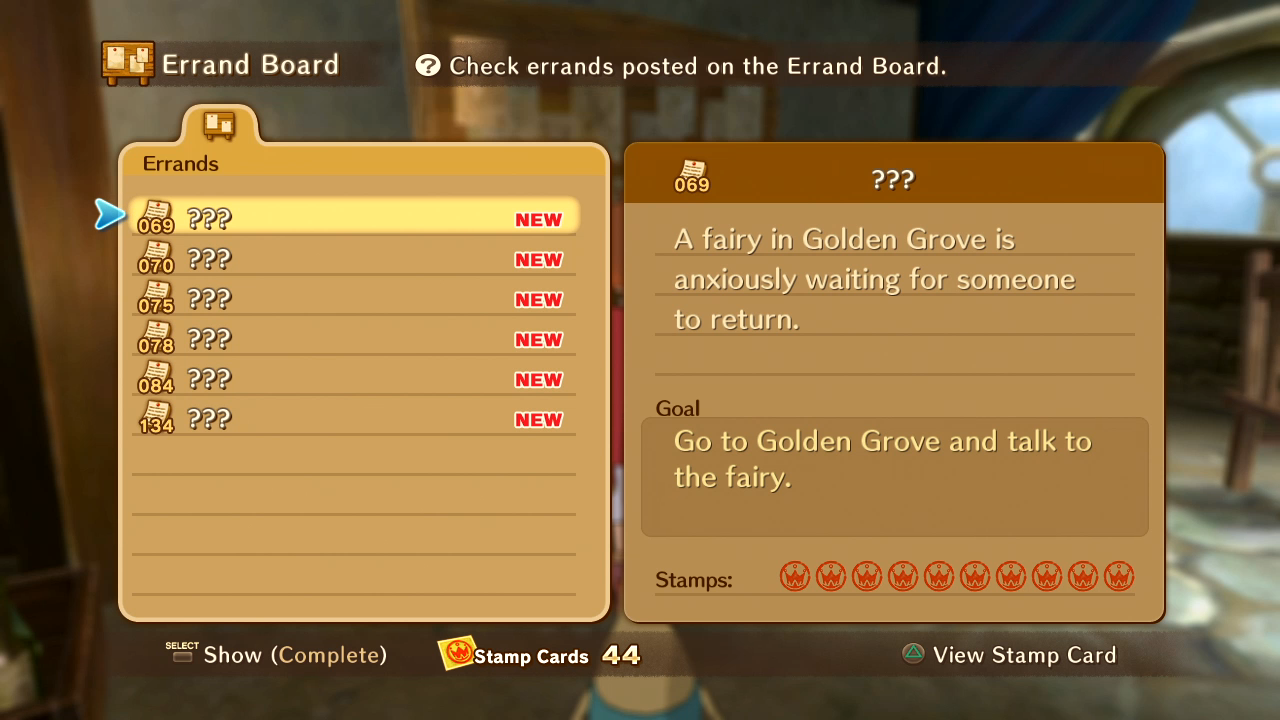 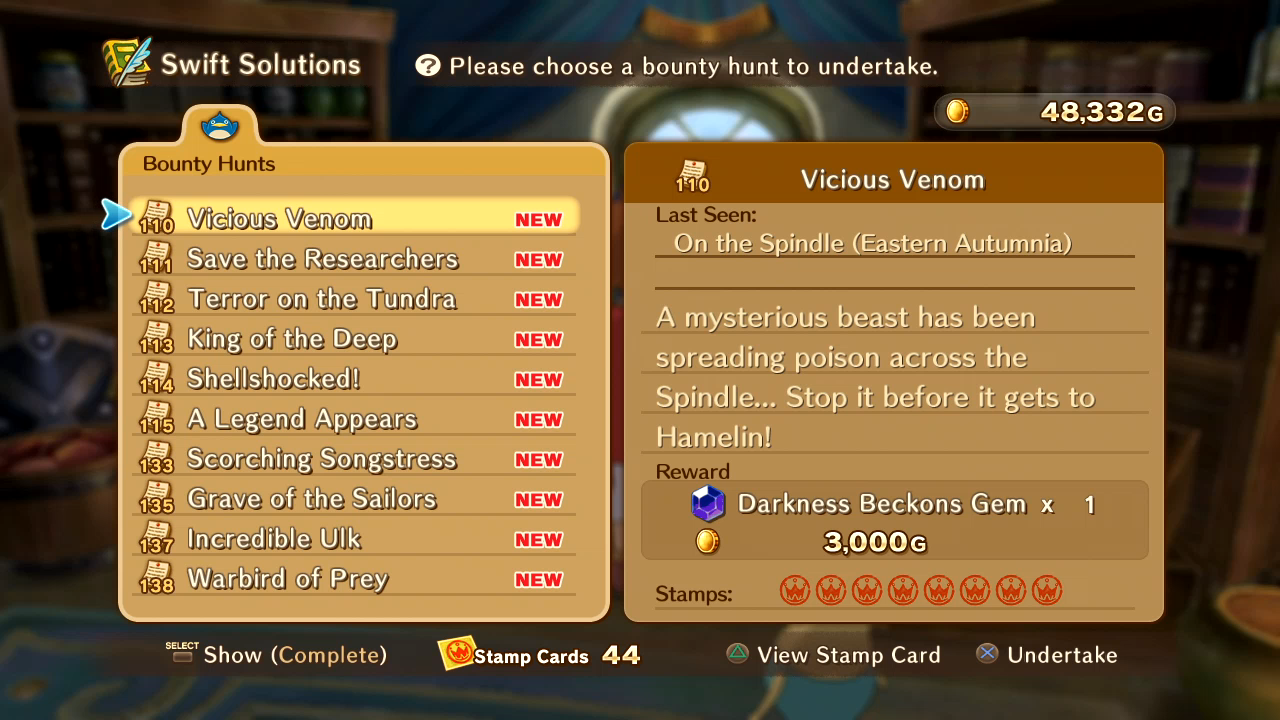 This is just what they give you to start. We unlock more as we finish the quests and bounty hunts. This particular update will focus on the bounty hunts, but since I recorded all of these next 9 updates at roughly the same time, there might be some back-and-forth with other disparate elements like chests or what-have-you. 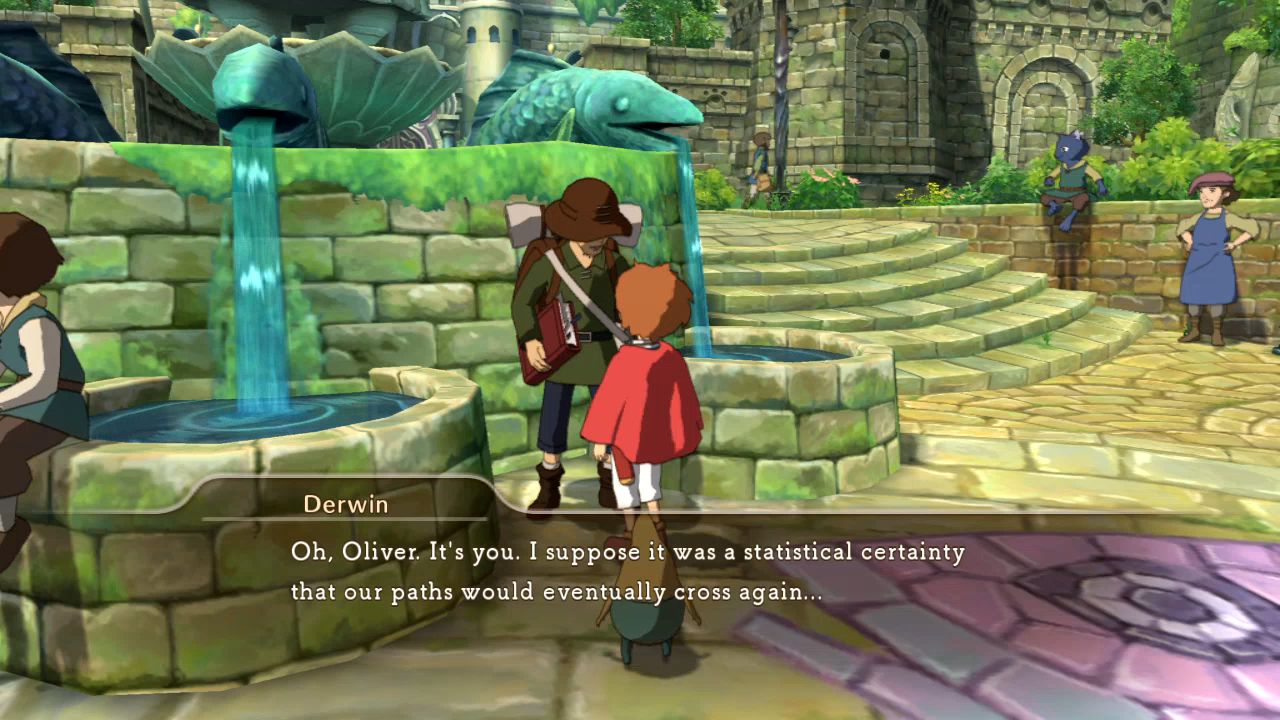 However, in another strange mix of the two, it's time to never see Derwin ever again.    Derwin sends us out to places between towns that are easiest to get to on Tengri (like you're surprised). If you're not sure where the location he gives you is, open up the map and it will give you your location's name. Jack Frost's Playground is south of Yule.  Before that, though, I came across one of the bounties up behind the Deep Dark Wood. It's an Ulk, one of those guys that nearly trampled us in the very beginning of the game!  They have fuzzy chests.  They also gently caress you up pretty easily. 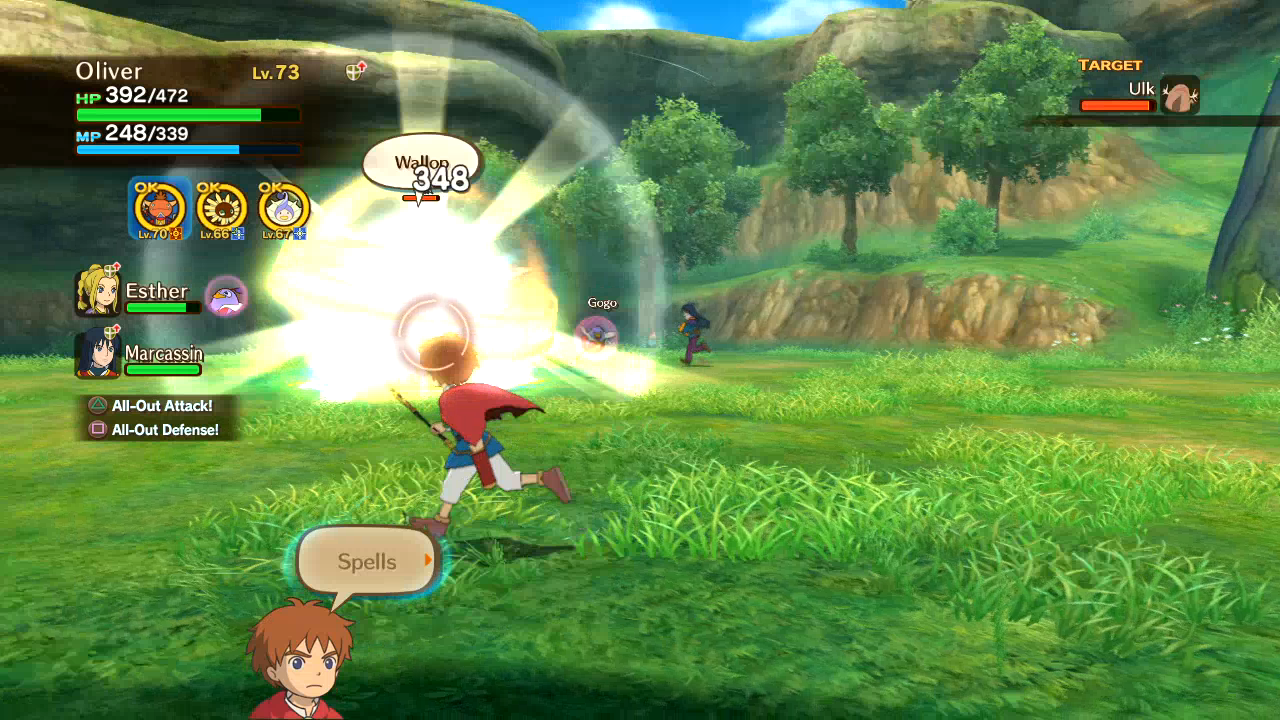 Many of our fights today are high-HP, low-difficulty. The Ulk is an exception, as it also has the attack power to back up its defense. It's two special attacks are Wallop, which flies in a straight line, and Incredible Ulk, which homes in on you and is such a bad pun that it makes puppies die.  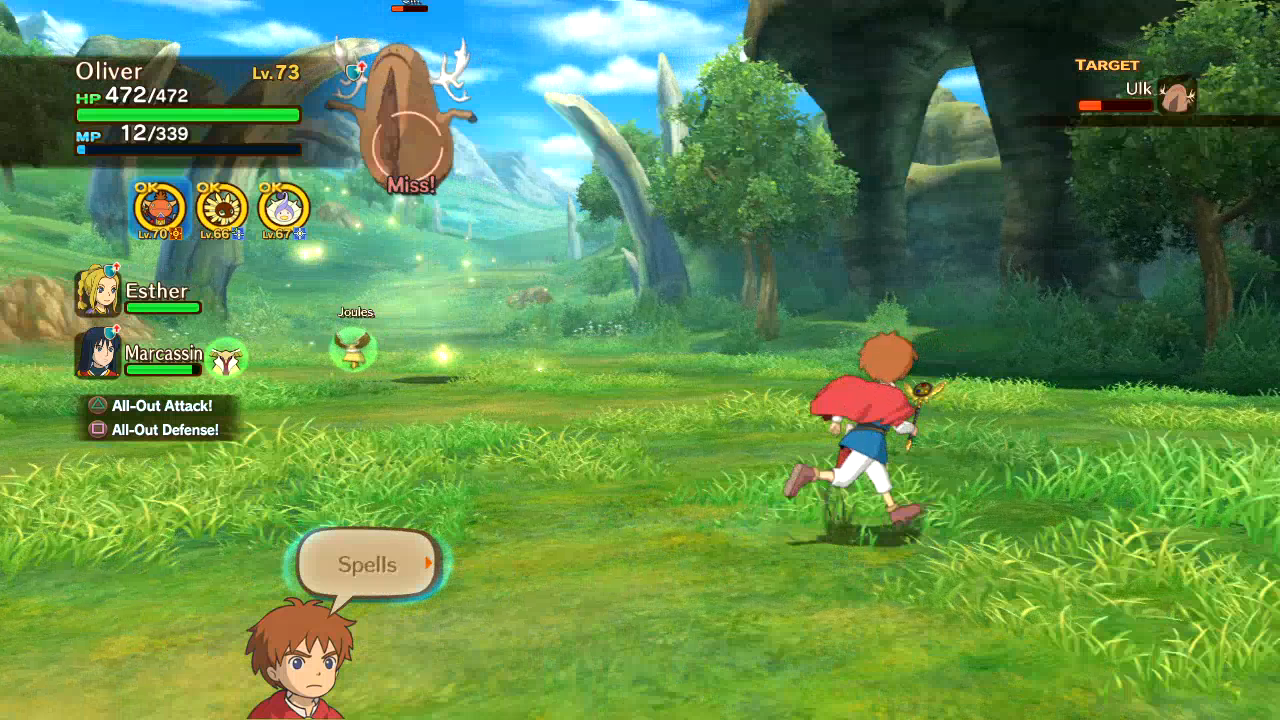 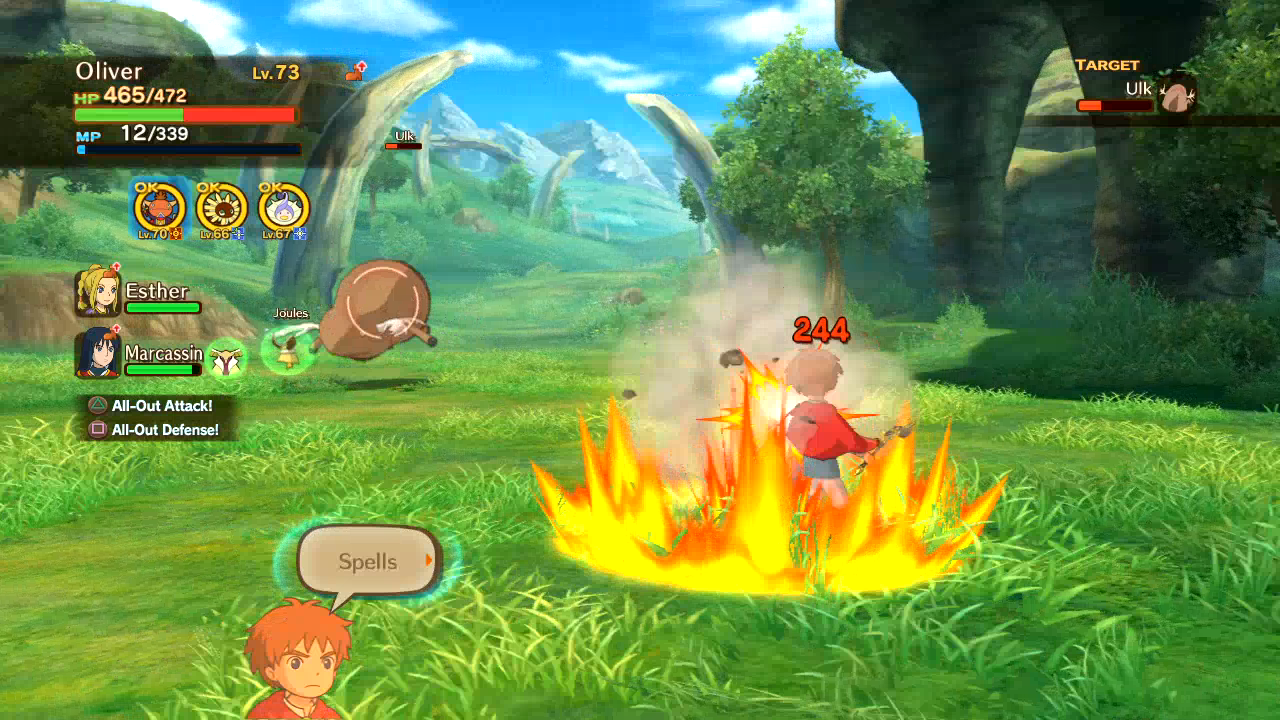 Powerful and graceful. 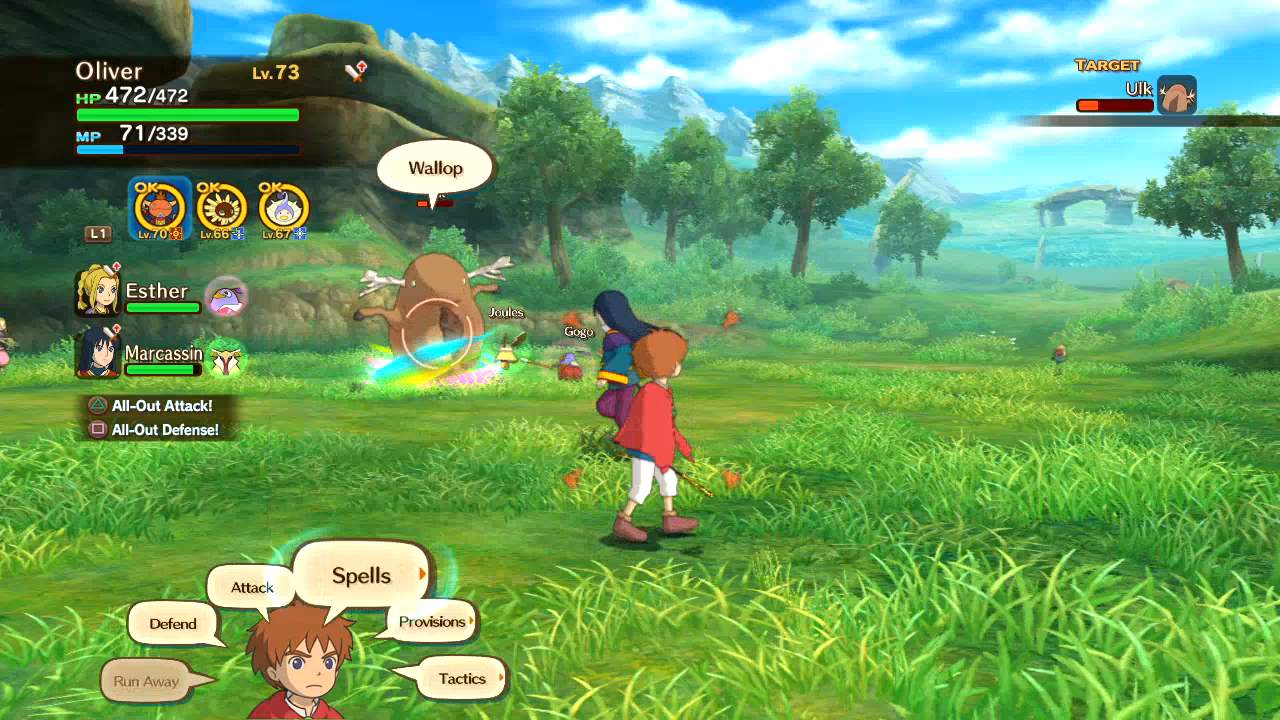  Wallop not so much.  There will be a long trend of long or tough fights ending anticlimactically. Thank you Jules.  Since the bounties are spread out across the game world, I'll be popping back and forth between fighting them and turning them in at Swift Solutions. You'll notice that I do not get merit reward stamps for this fight! Only a few post-game missions and hunts do, since there's only a few merit rewards left, but they give you 8-10 stamps when they do.  Next fight is the last time we fight one of the magma singers.  She brings nothing new to the table. 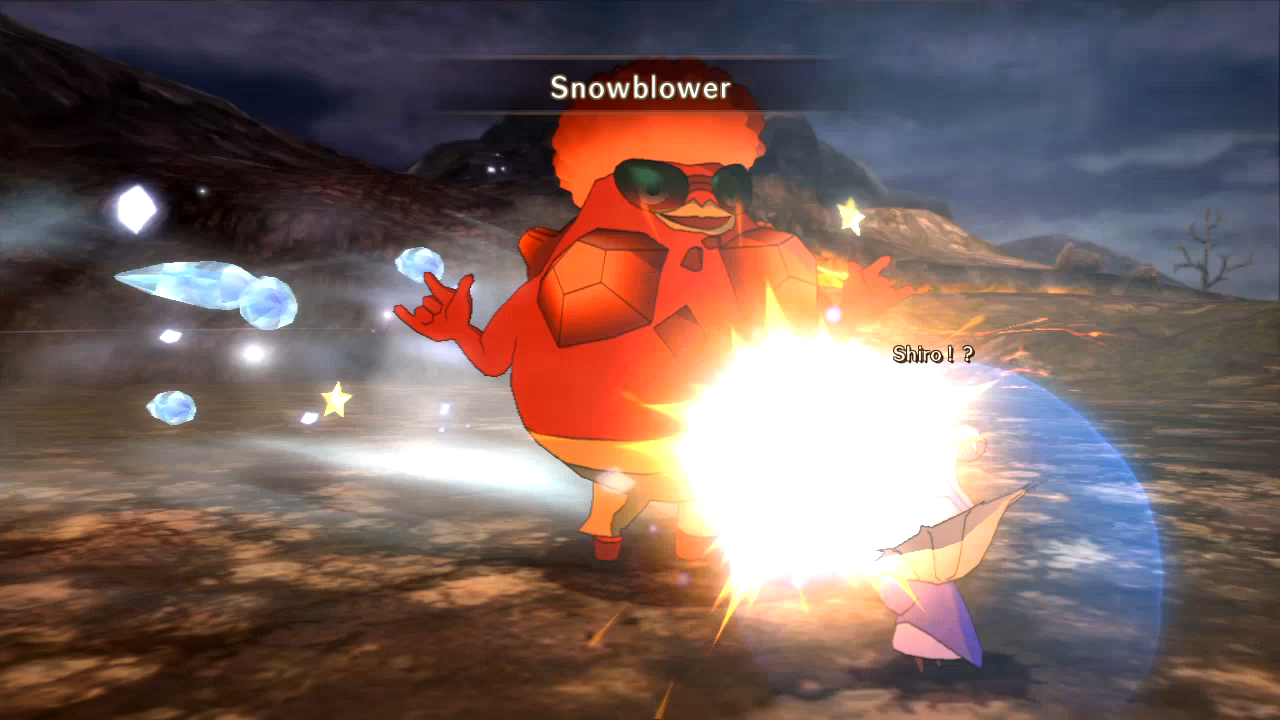 Except for a pair of sweet shades. And a chance for Shiro to ice-burn her crotch. She also has a lot of health but low difficulty, so the fight stretches long enough for her to drop some Golden Glims. I figured we should finally see what Shiro's and R's special moves are. Shiro's is a team heal.    And R's is...  worthless.   Gogo and I end up finishing her off handily. While heading to turn Magmadiva in to Swift Solutions, I finally notice this side path that I've never taken in the entire LP.  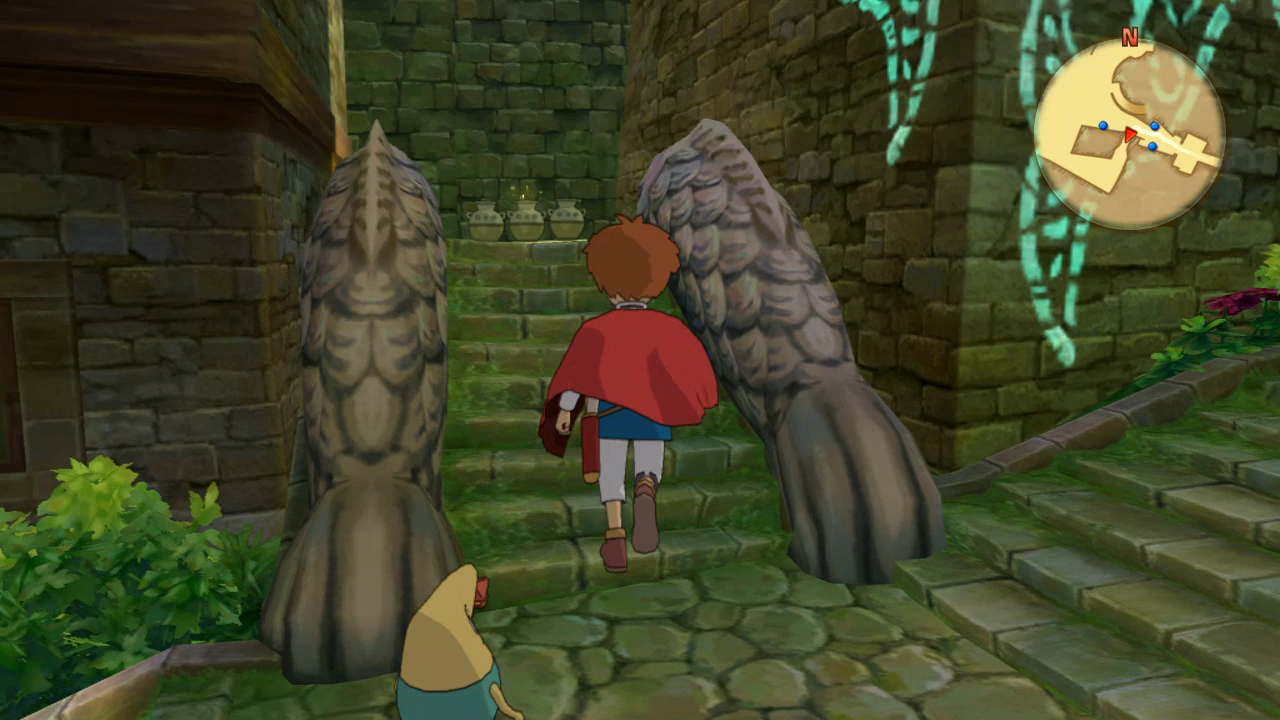  I hope you weren't waiting in too much anticipation for that. 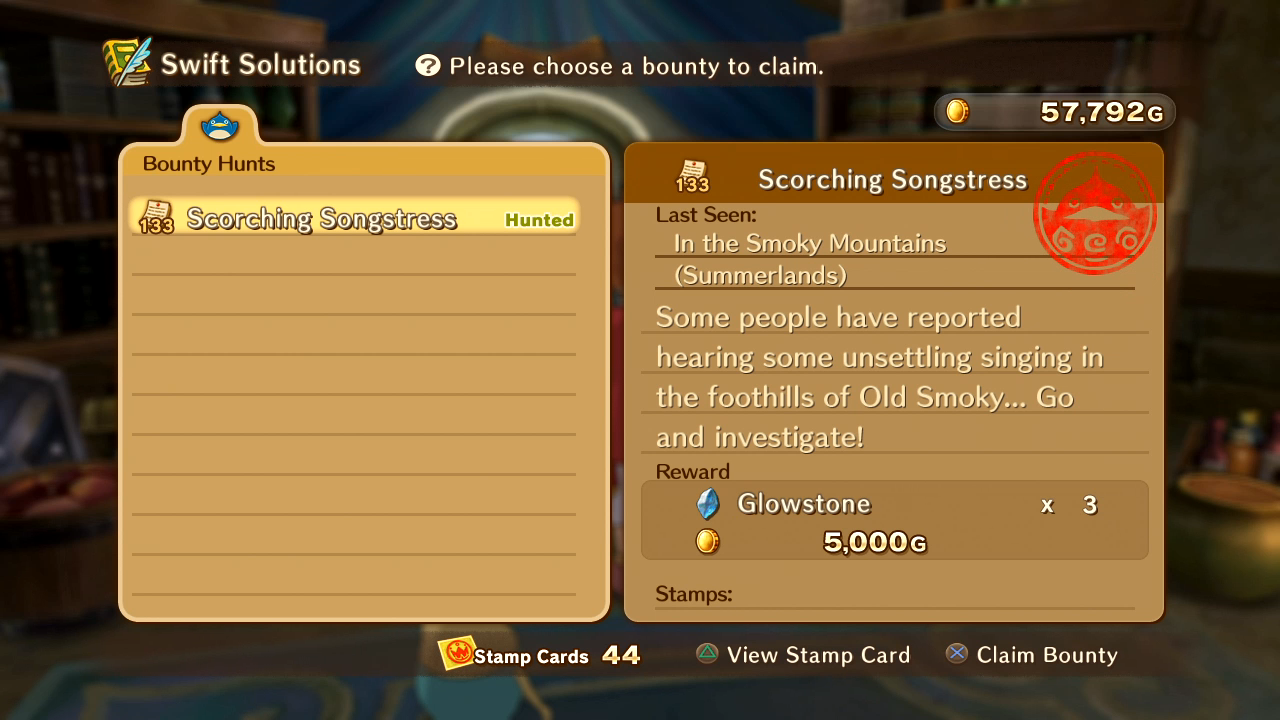 The items you get for most of these bounties are used in alchemy and are decently rare otherwise. Some of them you can get from the monsters in the Ivory Tower.  Derwin's mission also has us fight new types of monsters we've already fought before. If any part of this LP teaches you how lazy the devs got with the special monsters, this one will.   Mornstar his face. And every other monster we face today, for that matter. Nothing seems to be resistant to it. 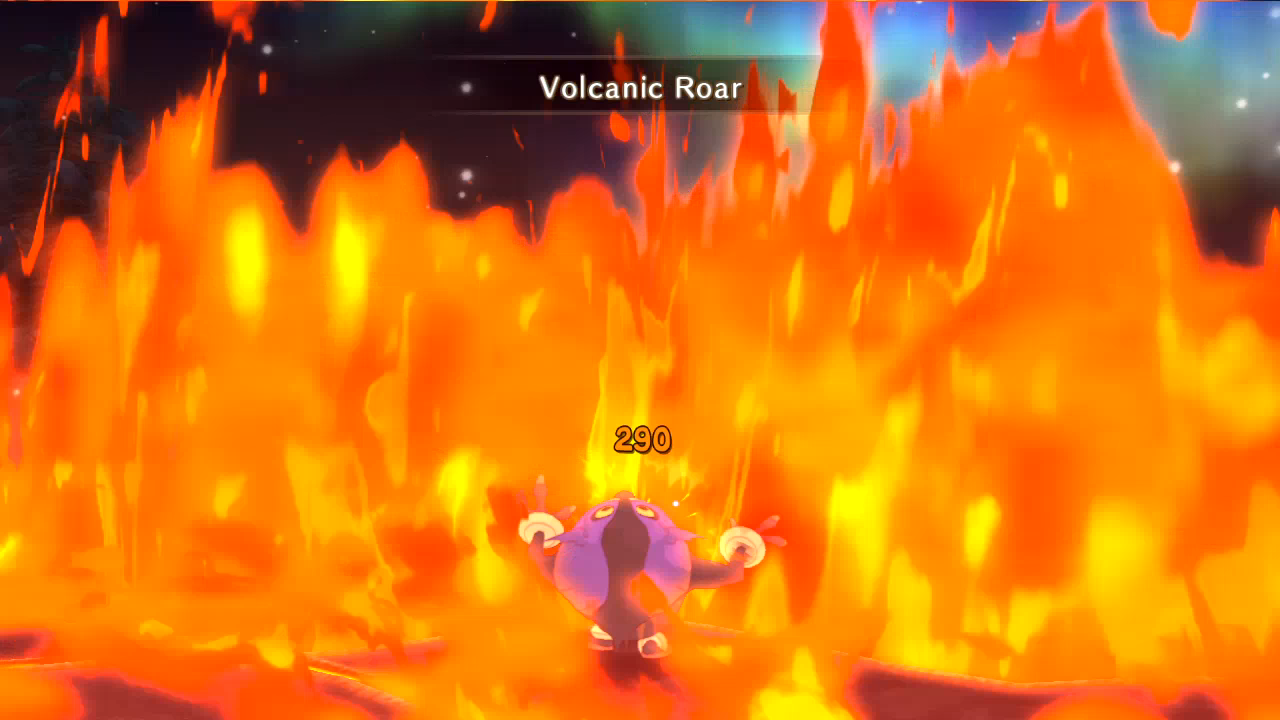 It is weak to fire though, so I scream at it a bit. 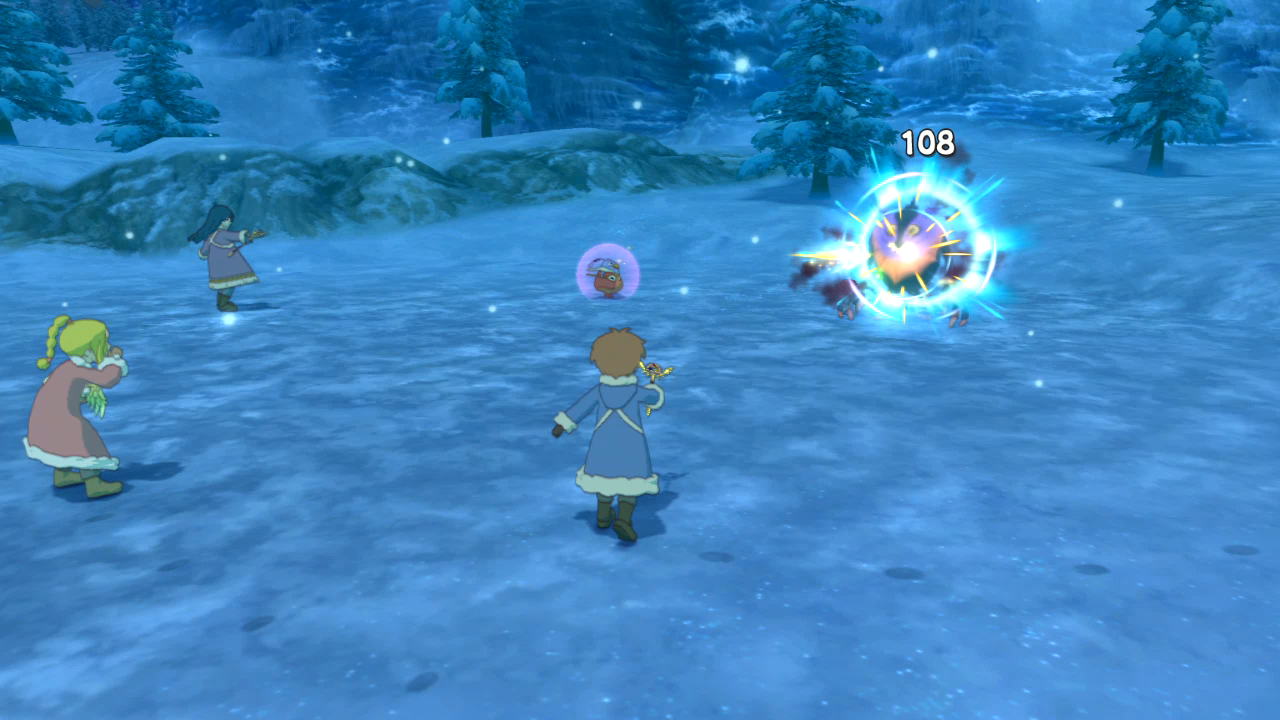 And then finish it off with a light-slap. After each of these three fights, Derwin himself appears out of nowhere to congratulate you and then tell you where the next one is.  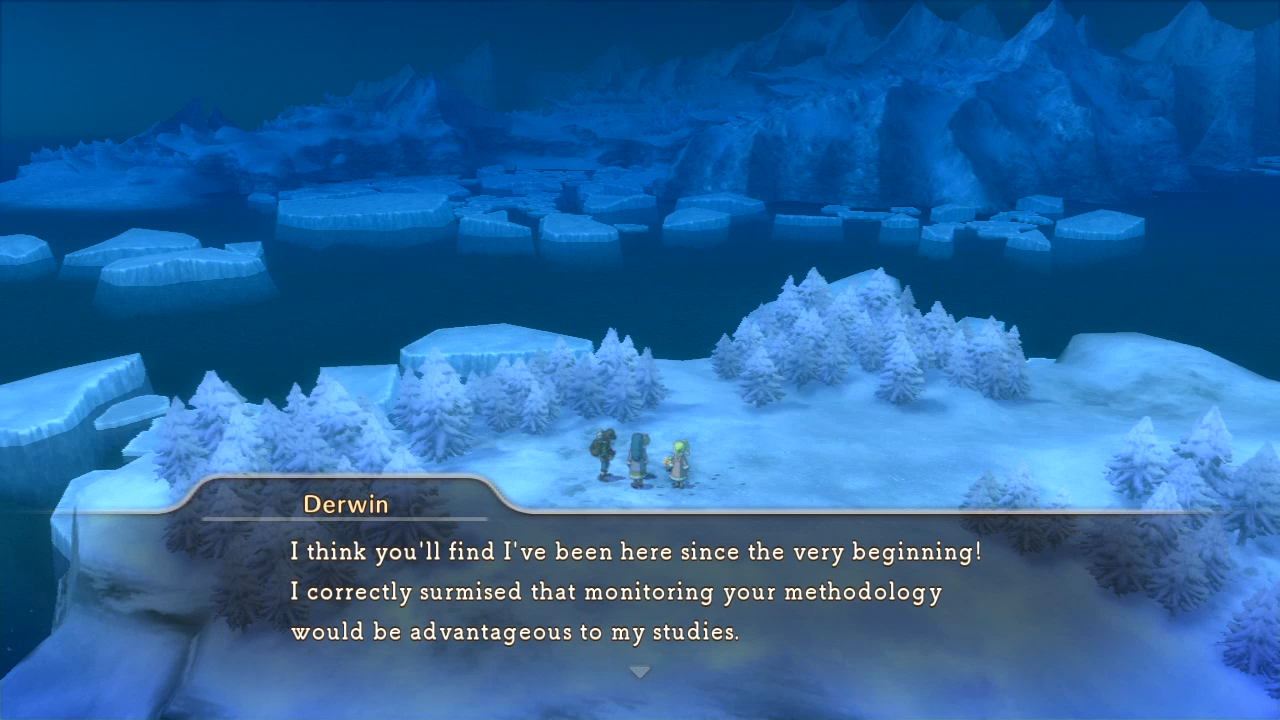 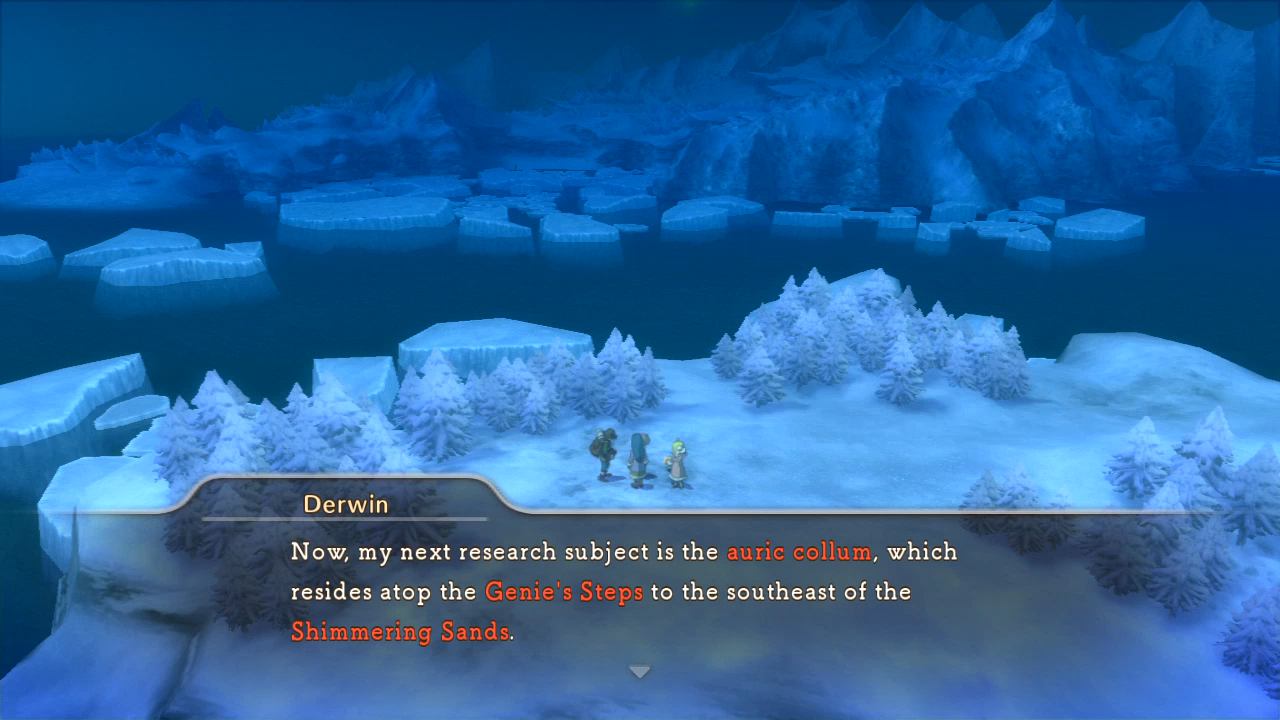 He then disappears, and the next miniboss spawns. Well done to you if you kill one of these monsters and then try to find him in Ding Dong Dell. 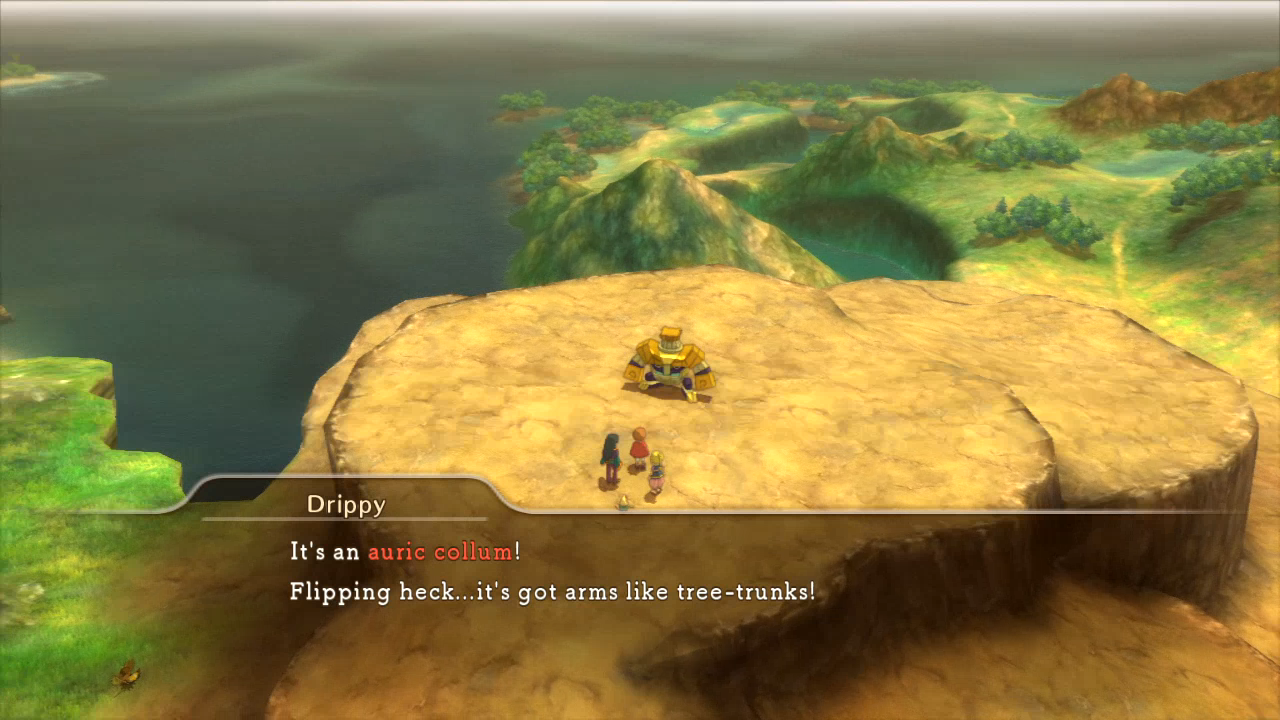 Our next guy is in the mountains between the Vault of Tears and Al Mamoon. It's another statue guy. 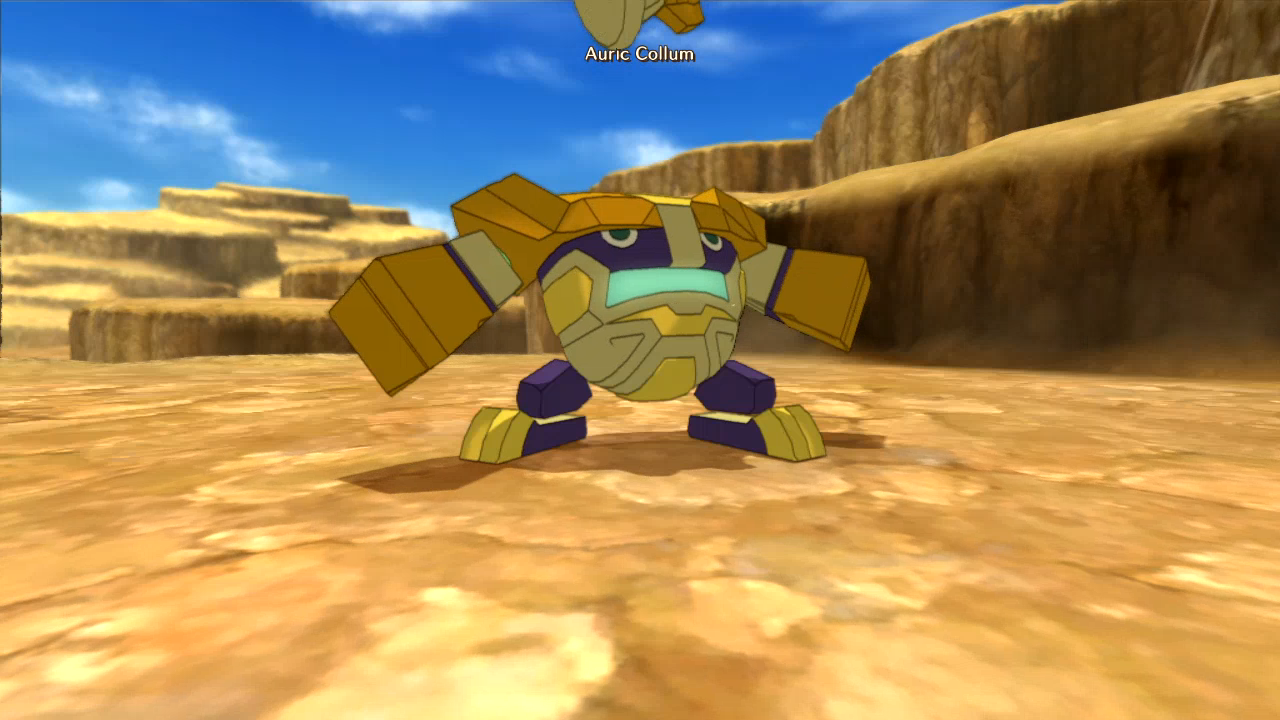 Like its cousins, it's weak to storm attacks, so I unleash some of my old friends on it for the majority of the fight. 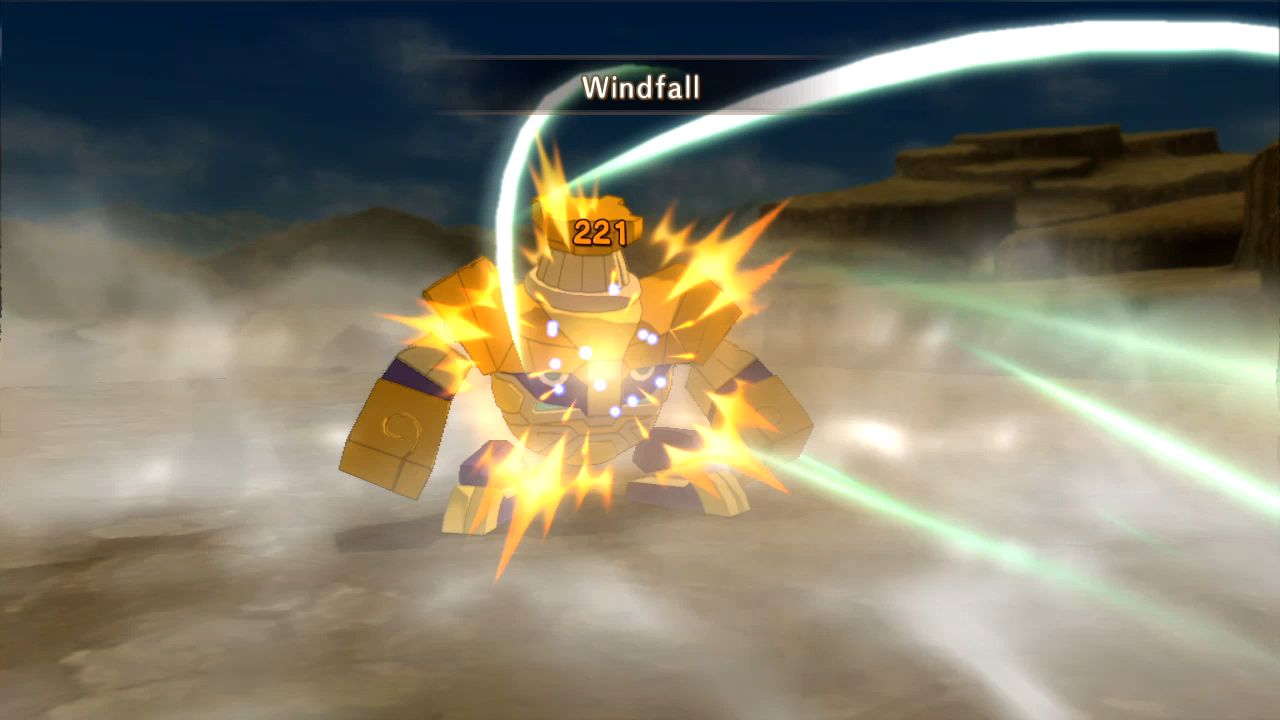  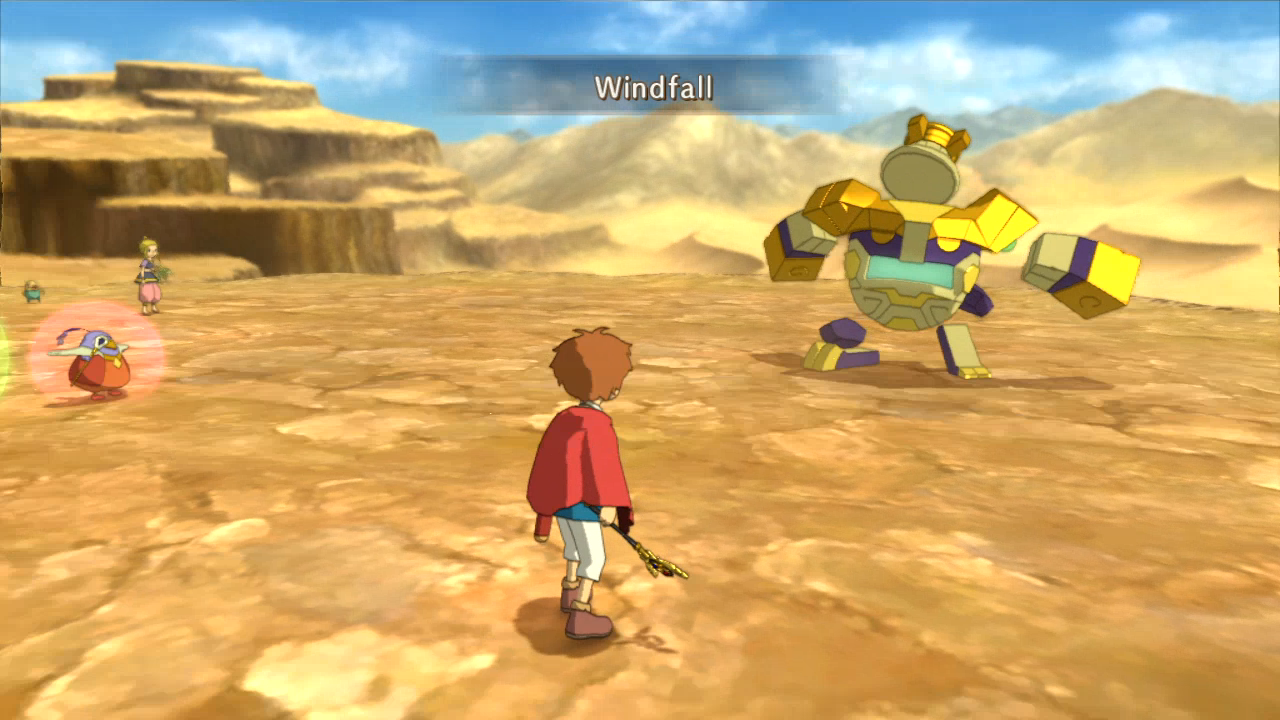 Being overpowered should be more satisfying than this.   Autumnia is so dreary that even its puns are depressing.  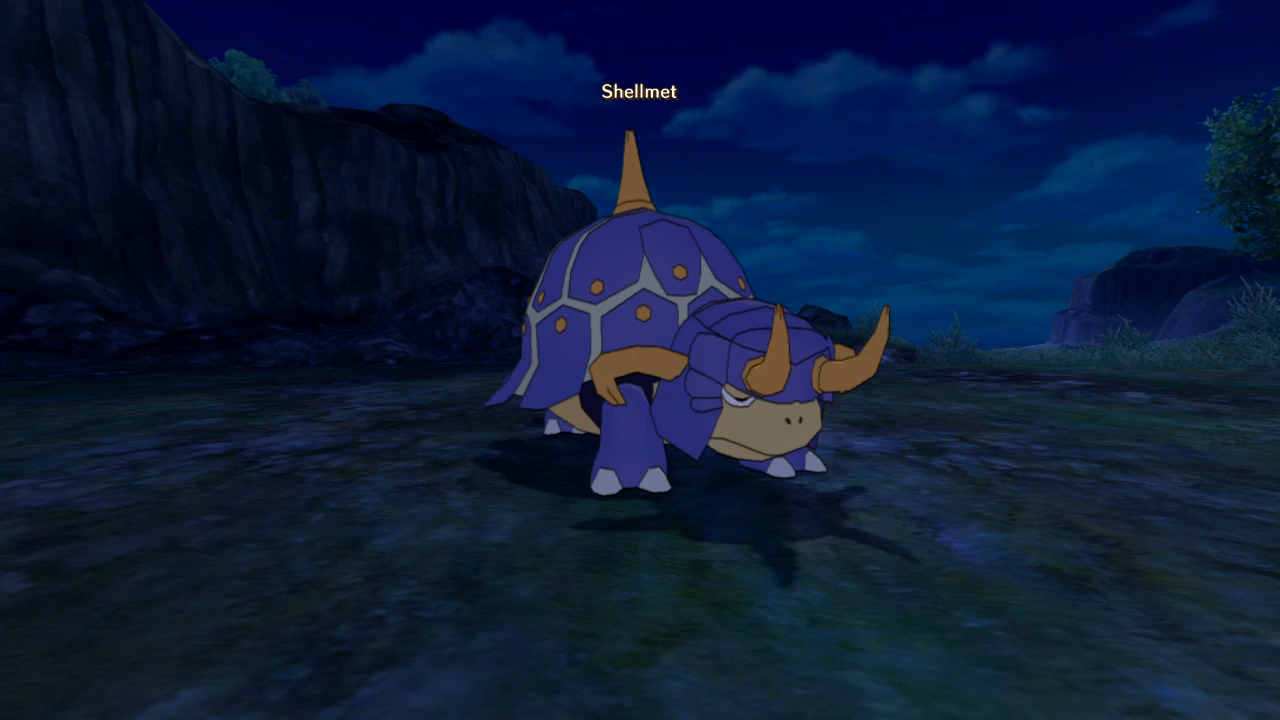 That's the saddest yet most hardcore turtle I've ever seen. Sadcore.  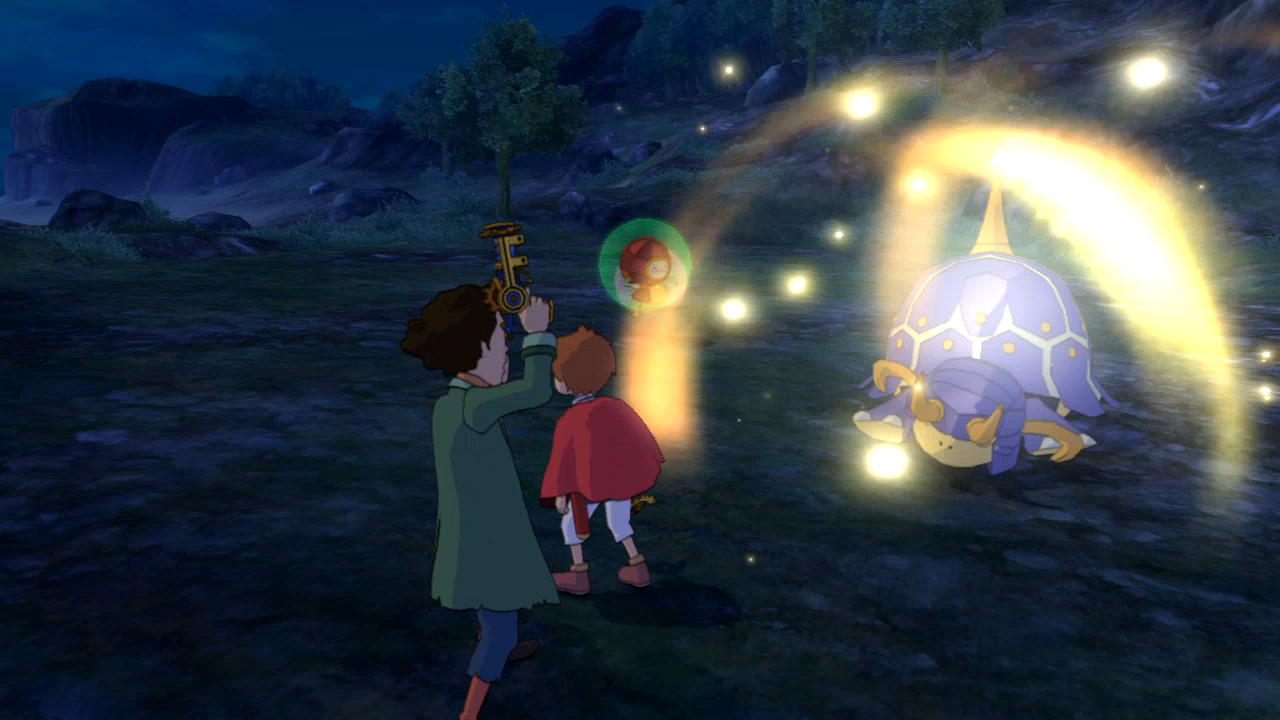 Mornstar it to death. 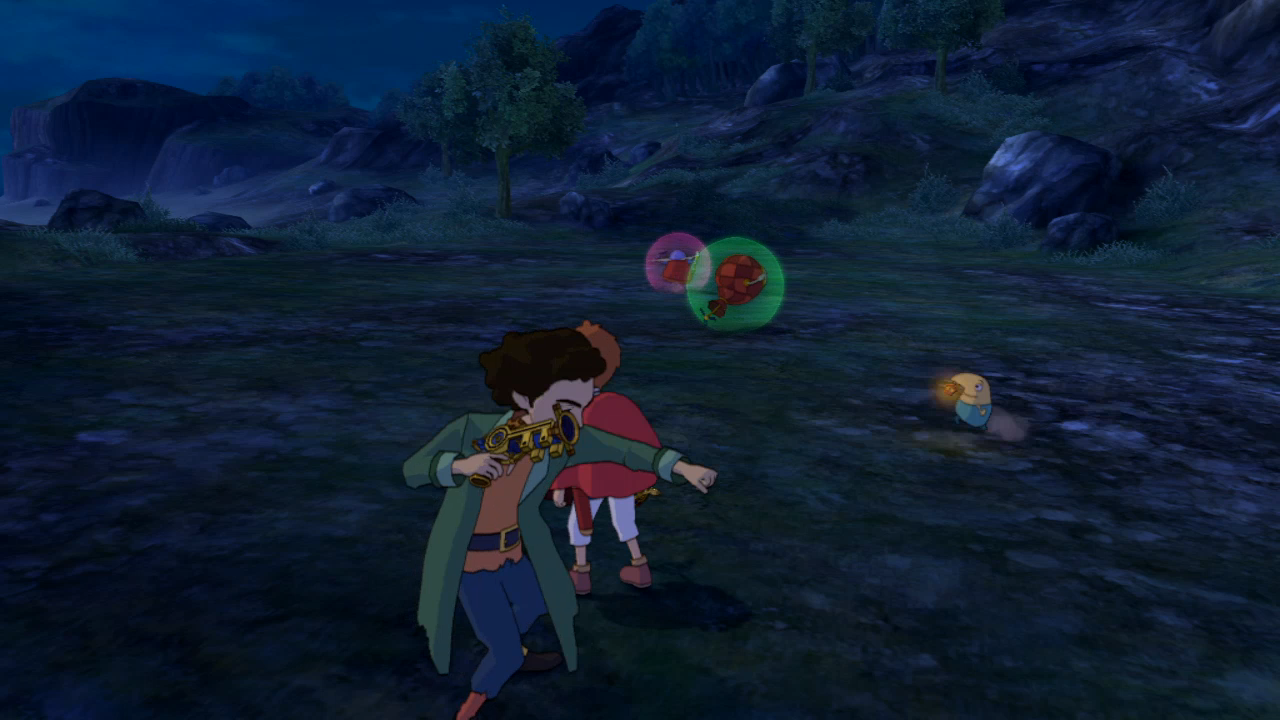 Swaine is psyched 'cause I finally switched him back out. For every single fight I've done so far, including all the ones I've cut out or saved for later screenshot updates, Marcassin has used Ward constantly. Well done game for finding a way to make me hate a character I like.    Whoa mama. These are familiar tickets - we take them to the Temple of Trials and exchange them with Solomon for familiars we can't get anywhere else. In fact, you'll recall we fought the Lumberwood as one of the unique bounty hunts! You'll also recall I said we got the Dinoceros from the Solosseum; my bad, you actually get it from Derwin, but I turn all of these in at the Solosseum anyway. Also yes, we never see that twat Derwin ever again.  Returning to Ding Dong Dell yet again (which I go back to the most for these fights due to the cheapness of the inn), I talk to the Familiar Retreat Rep, who once again has some post-boss rewards for us.   Thanks, sweety~ Yes, I've half-mindedly started thinking of this guy as Olivia. Blame Travis. And Olivia.     Good stuff, but little of which I ever use.  Next bounty is another Collum, right next to where you appear when you warp to the Ara Memoriae.    Shine a light. 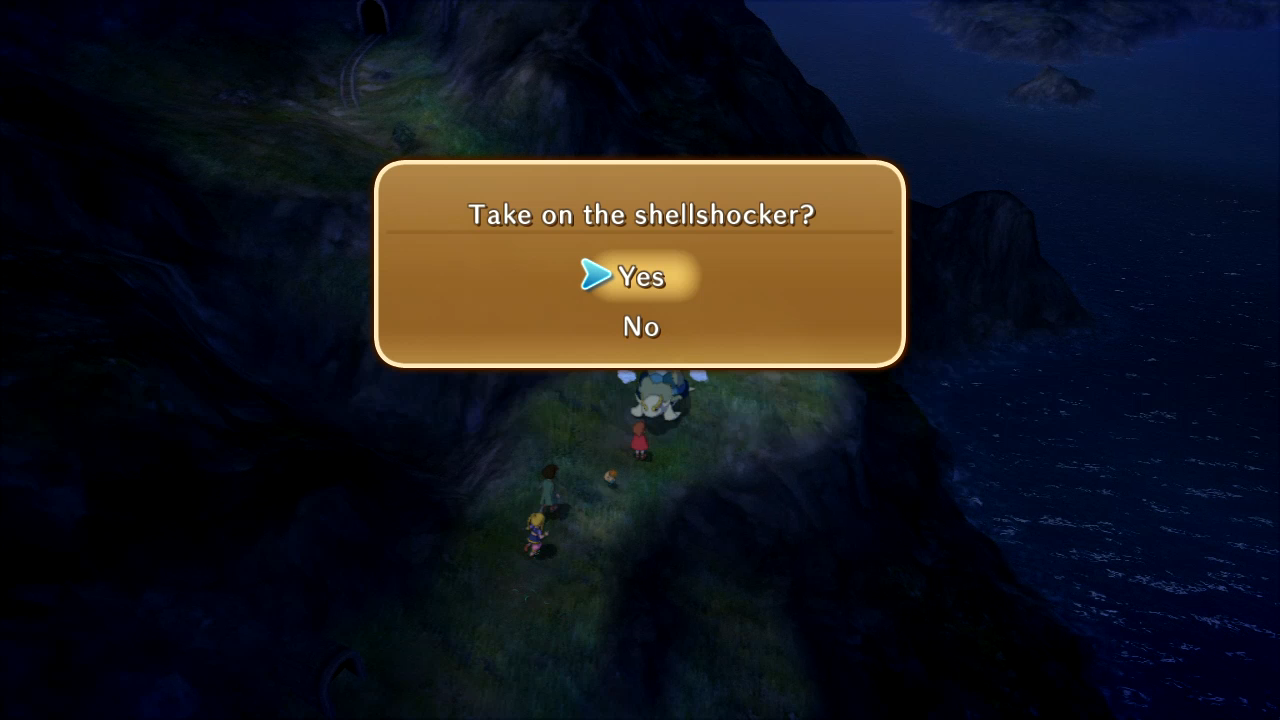 Another bounty is east of Hamelin, in front of the mine I wandered into previously with that lone skeleton and all the barrels of rum. 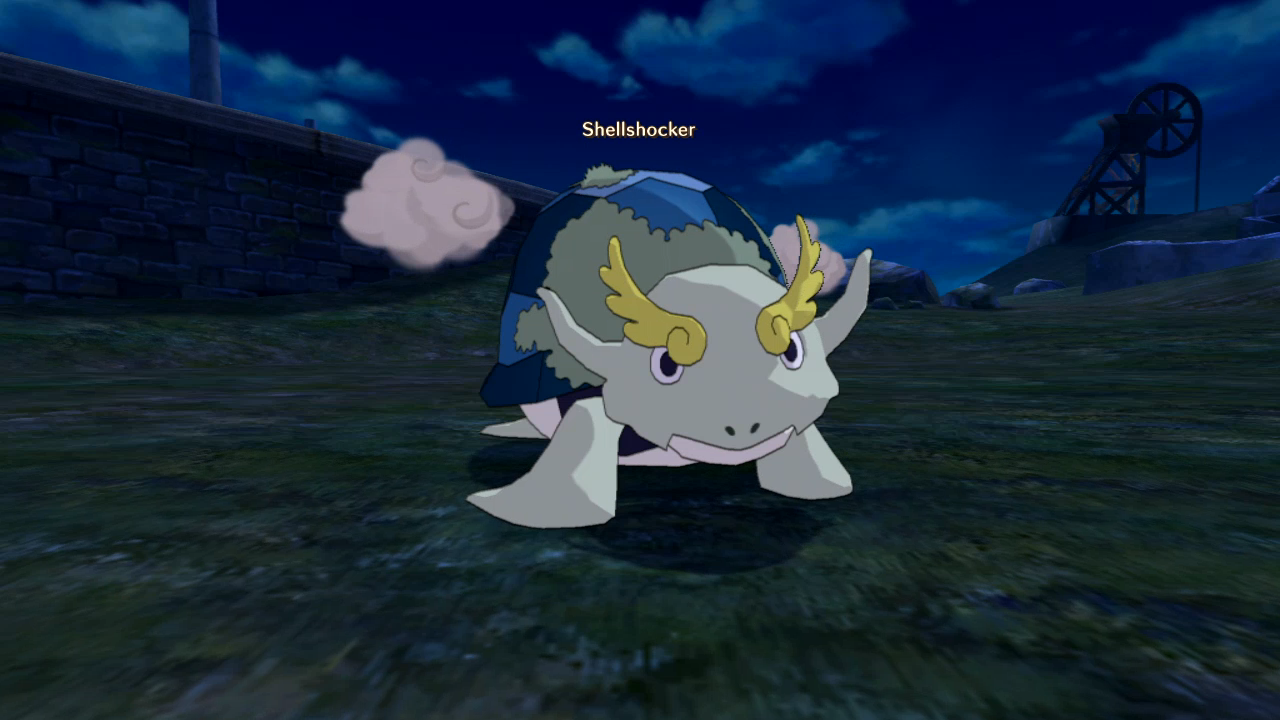 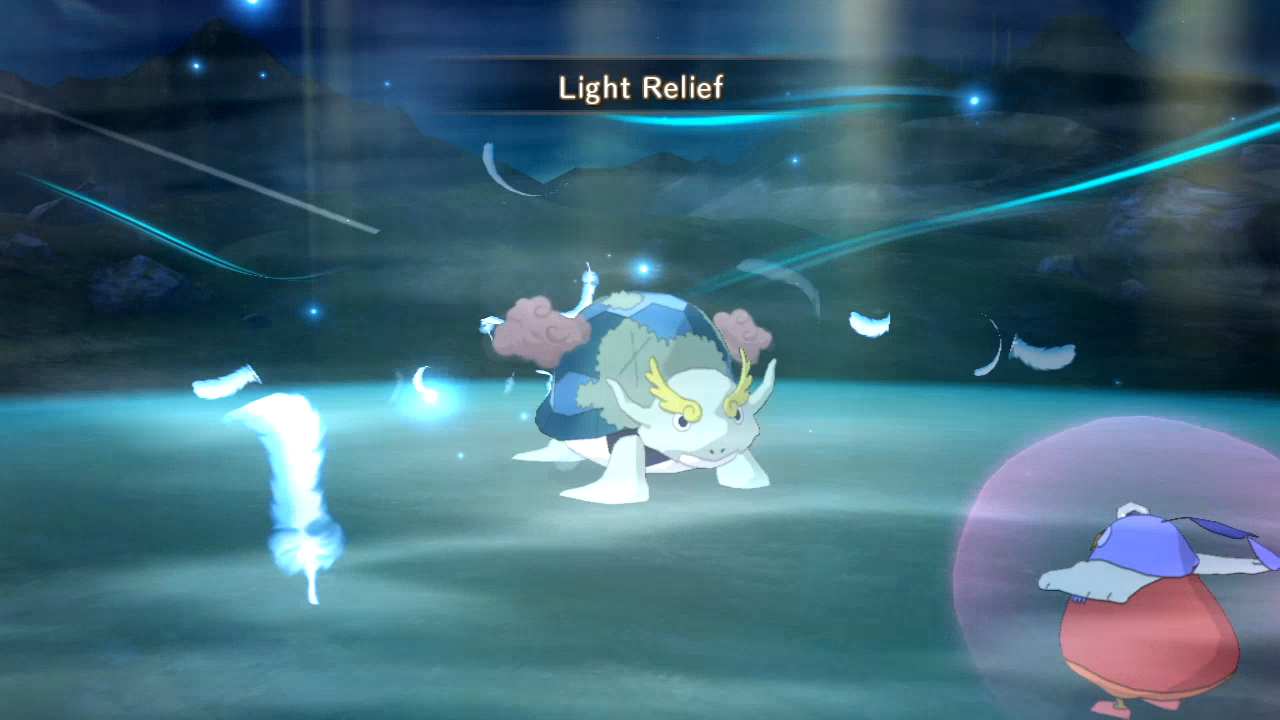 Shellshocker's only special move is this, which didn't appear to heal it or increase its defense in any noticeable way, so I'm not exactly sure what it did. 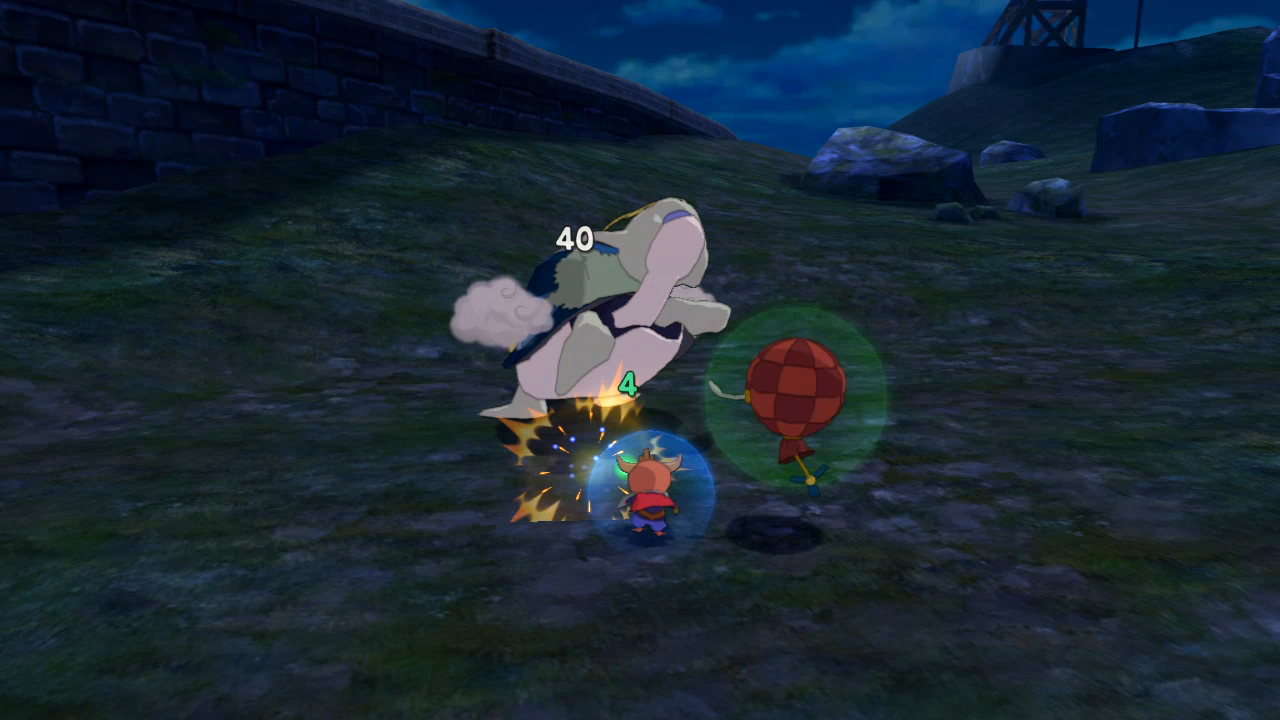 Bop!   I noticed that the bounty hunts that actually give stamps also give you items you can use immediately. The stampless bounties give you alchemy items. Makes me wonder why these particular fights were given these rewards. It's not like any other bounties aside from the Ulk are interesting or unique, and these two certainly weren't either.  In the bottom-left corner of the overworld, I came across an island I hadn't been to before.   It's an island full of NPC familiars! They each have mini-quests of sorts that you undertake for rewards, but they don't get added to your journal.  This is the only familiar I ultimately don't help. Sprockets are incredibly rare drops, and I don't have the patience for rare drop-based missions. Keep that in mind for a later update.   These swords are easy to get. The Cawtermaster in Ding Dong Dell sells them.    Luckily I already have the cakes they want.     Maybe one of these days I'll actually use these Sage's Secrets.  This Toko hangs out in the back, looking over his little friends like their leader. The joke here is that you use Nature's Tongue to talk to these creatures, but he still talks to you in "toko's".  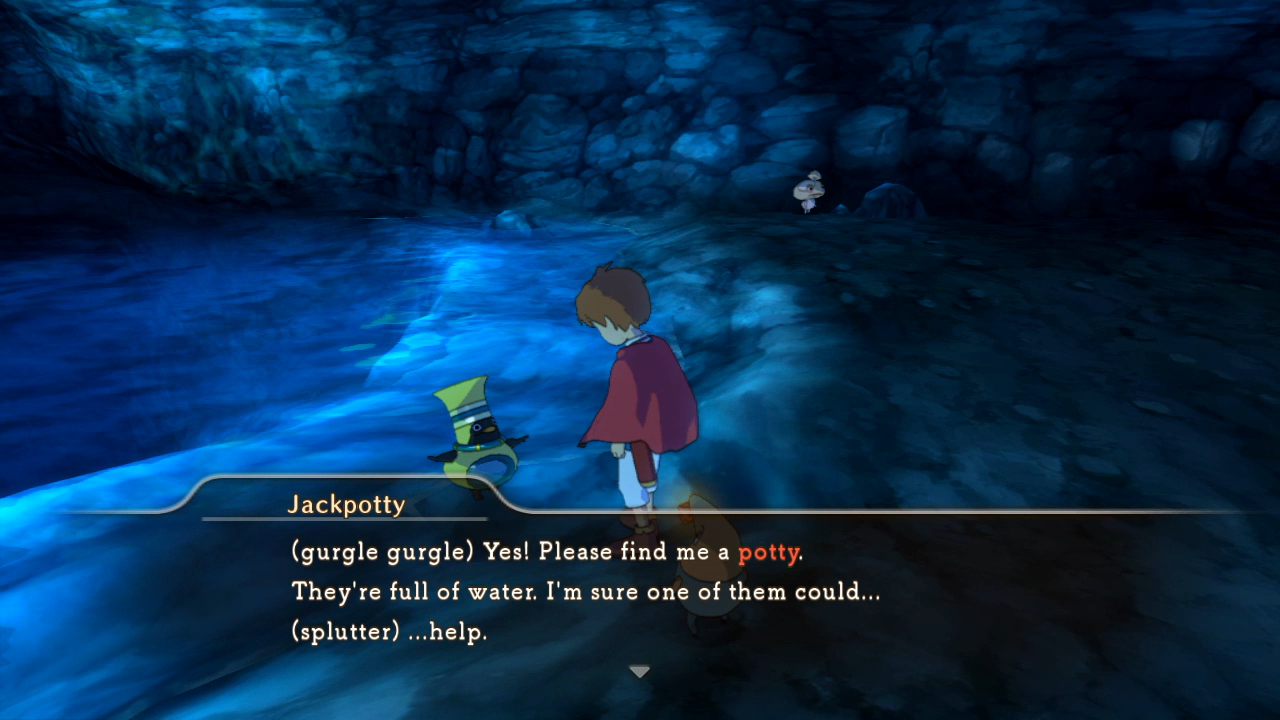 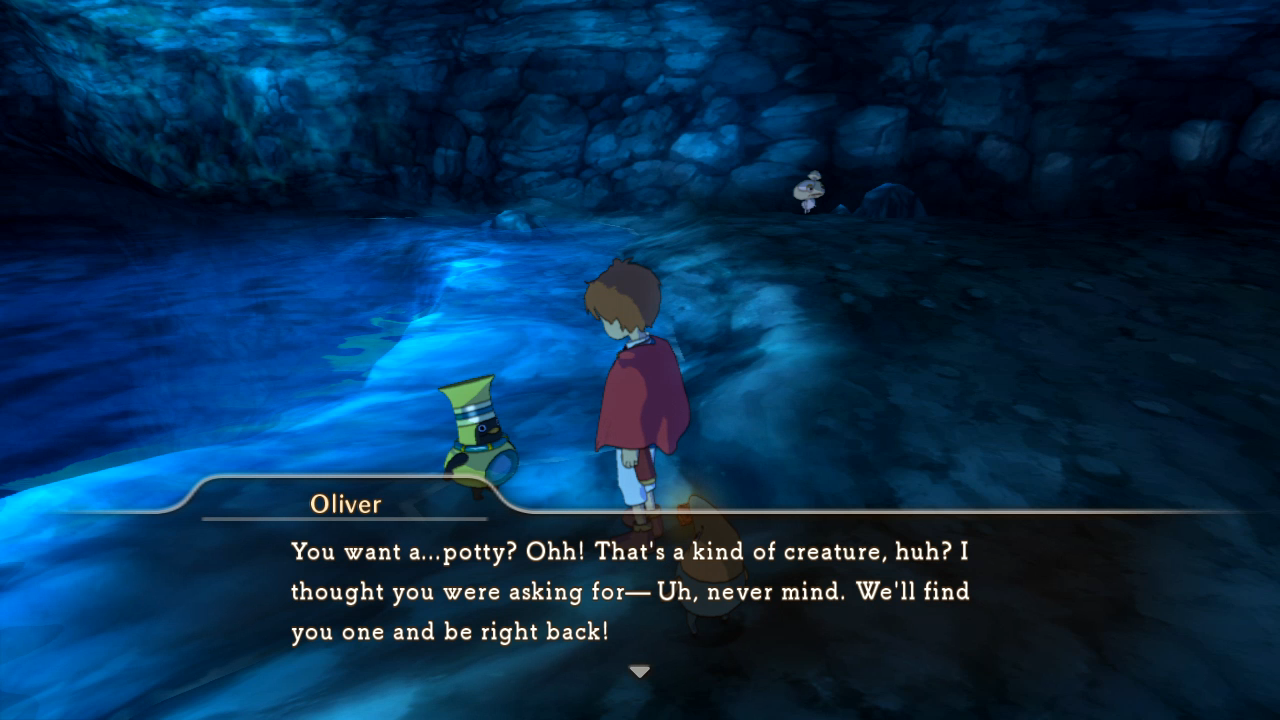 Actually kind of funny toilet humour! 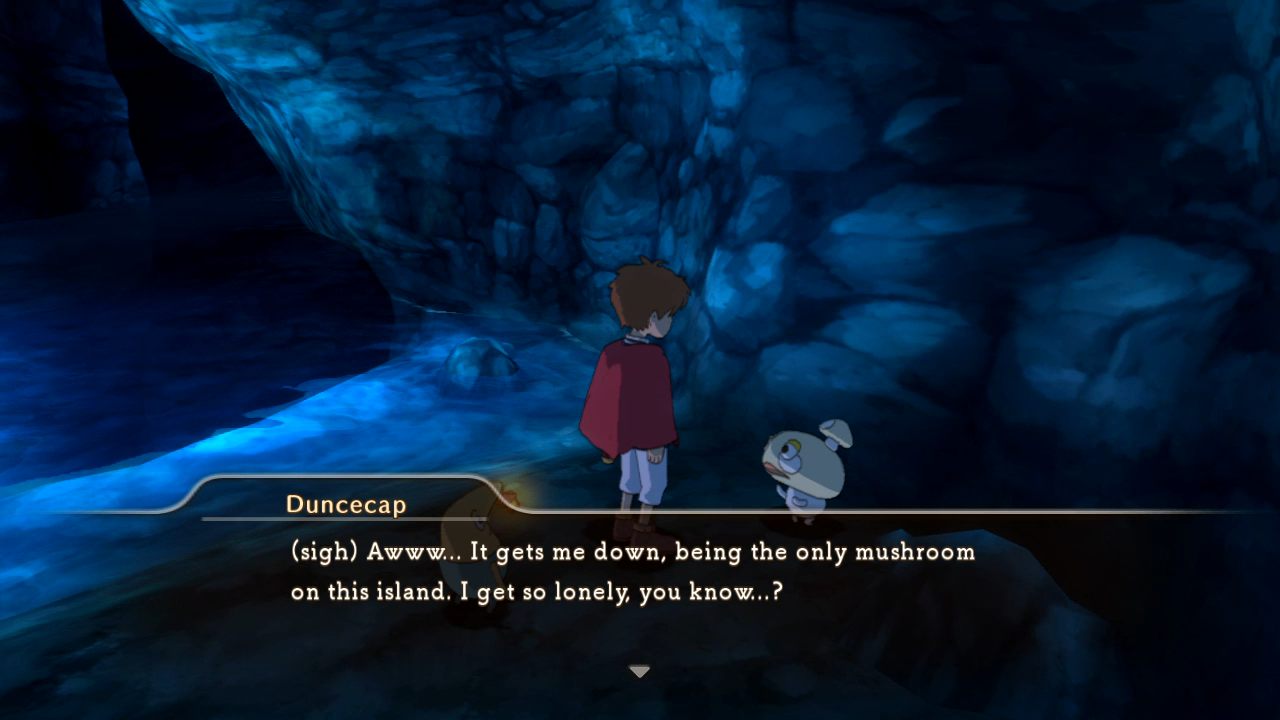 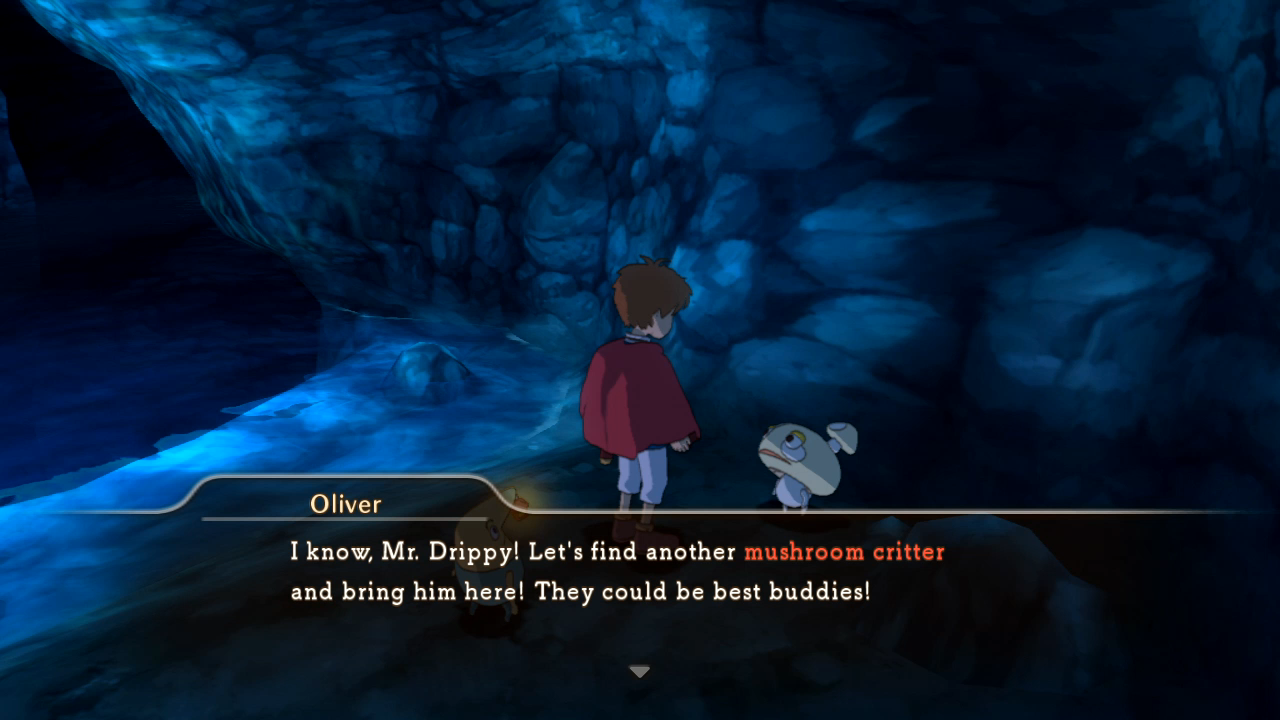 Luckily I already caught a mushroom type monster outside of Perdida while grinding Tokotokos. I still need to recover it from the retreat though.  Just as I leave the cave, I run into the reason I came to this island in the first place: a bounty hunt whale.  loving die.   Thank you.  Dropped by Al Mamoon to see how the distance between the inn and Swift Solutions compares to Ding Dong Dell, and I grabbed Murdoc here in the meantime. I was listening to Gorillaz a lot while recording these.   Jack-o'-Lantern II sounds like it'd be quite useful for those rare drop-based quests. An Adam Ant comeback album sounded like a good idea too.   I'm buying swords for cats. Something seems wrong about this.  More like Smoggy Fuk.   Shine a light.  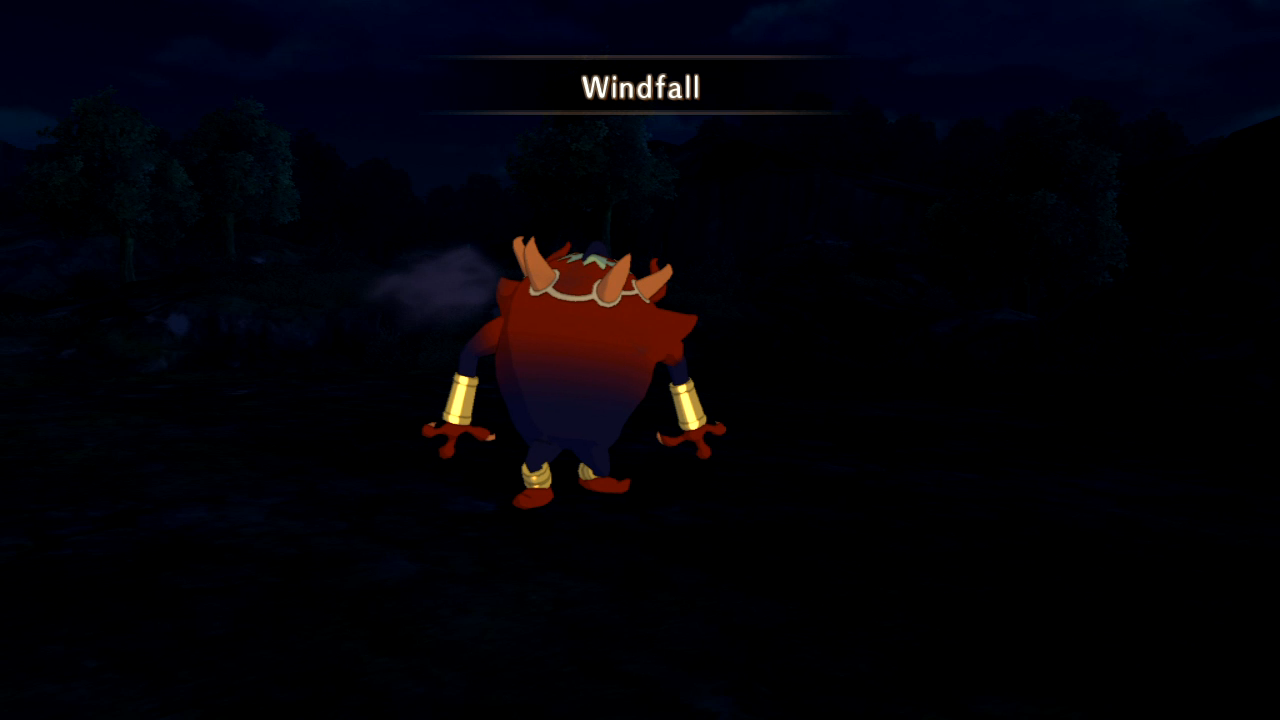 And break a wind. 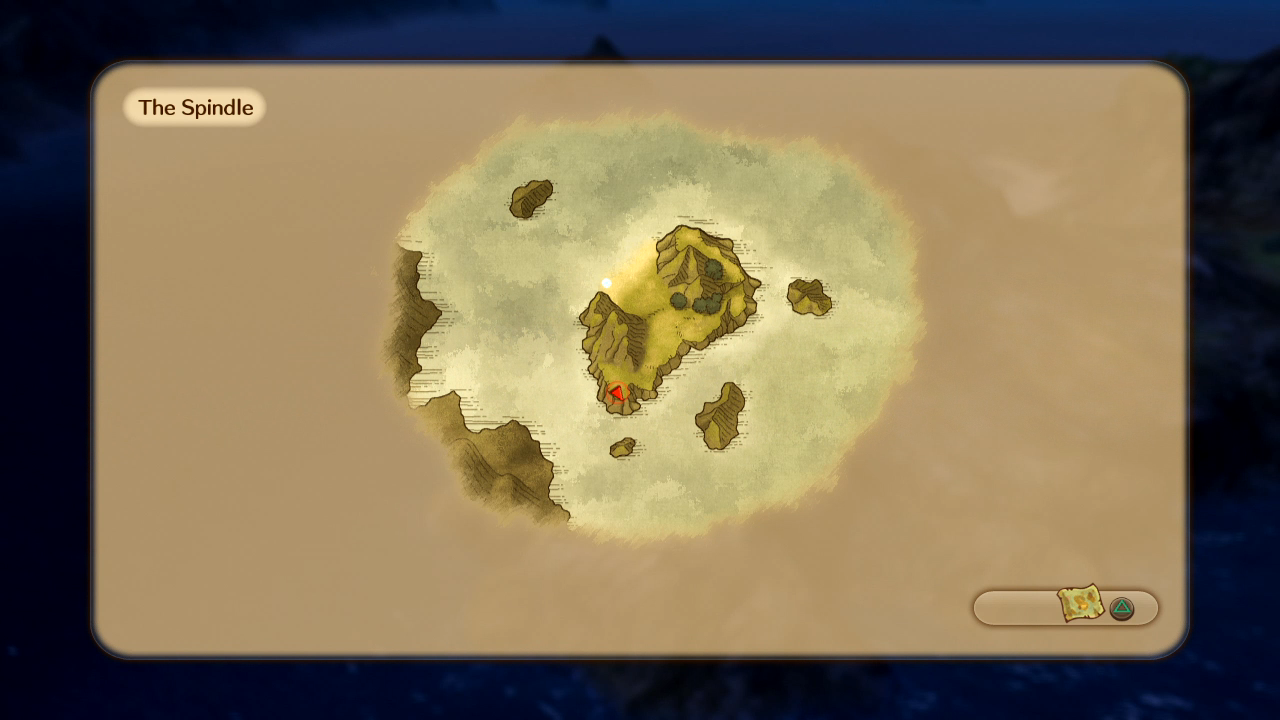 There's a few bounties surrounding this island, The Spindle. It's right nearby where we fought the Shellshocker earlier.  The Lone Shark yet again requires us to use the boat instead of Tengri. 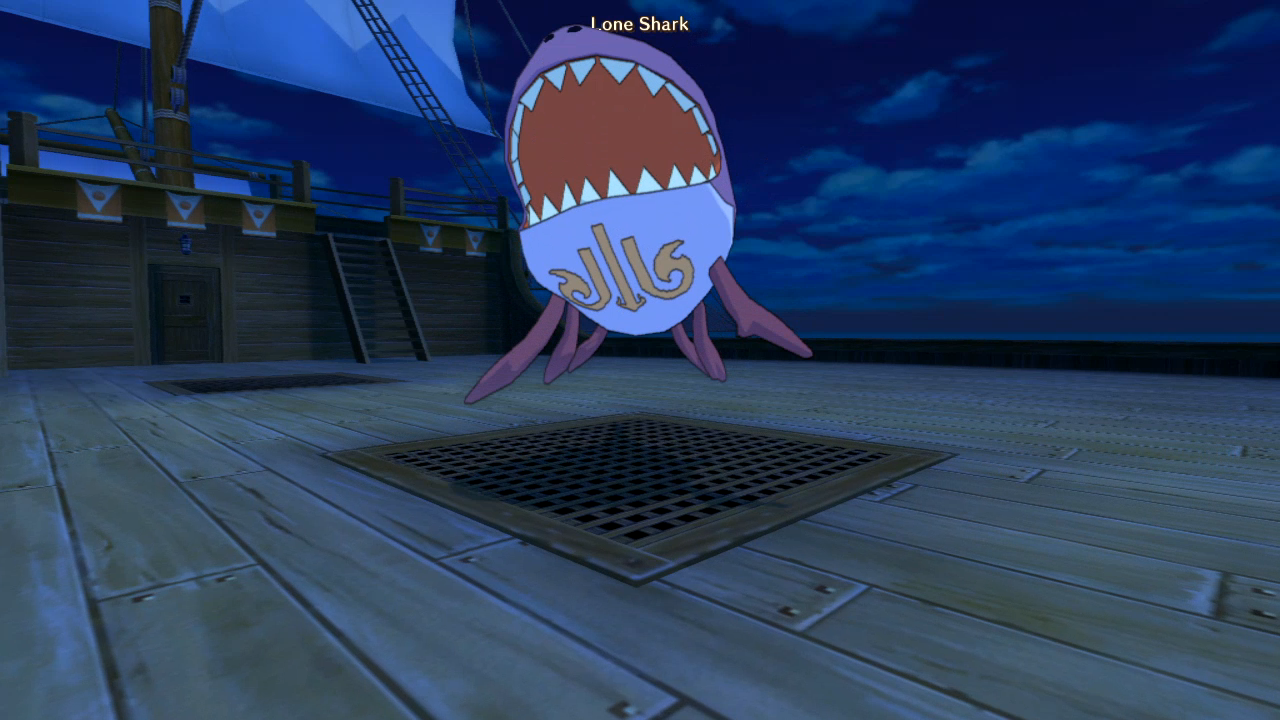 Okay, I actually like that pun. The darker the better. 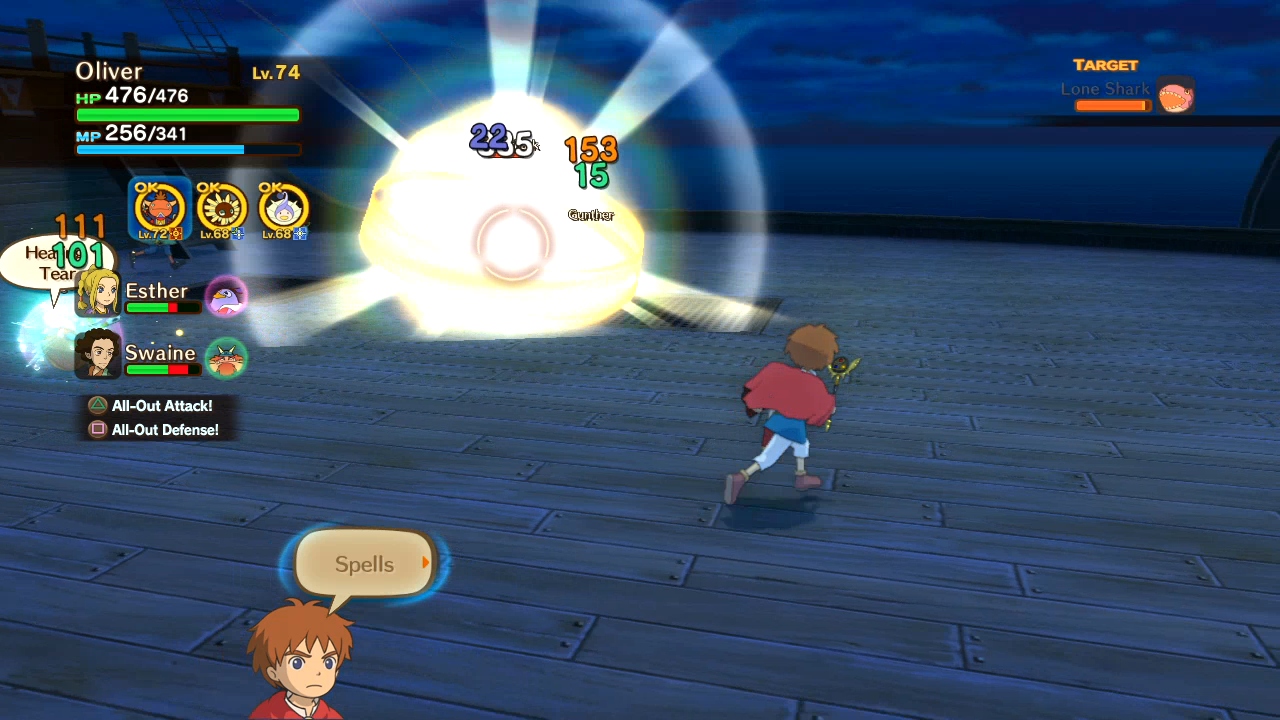 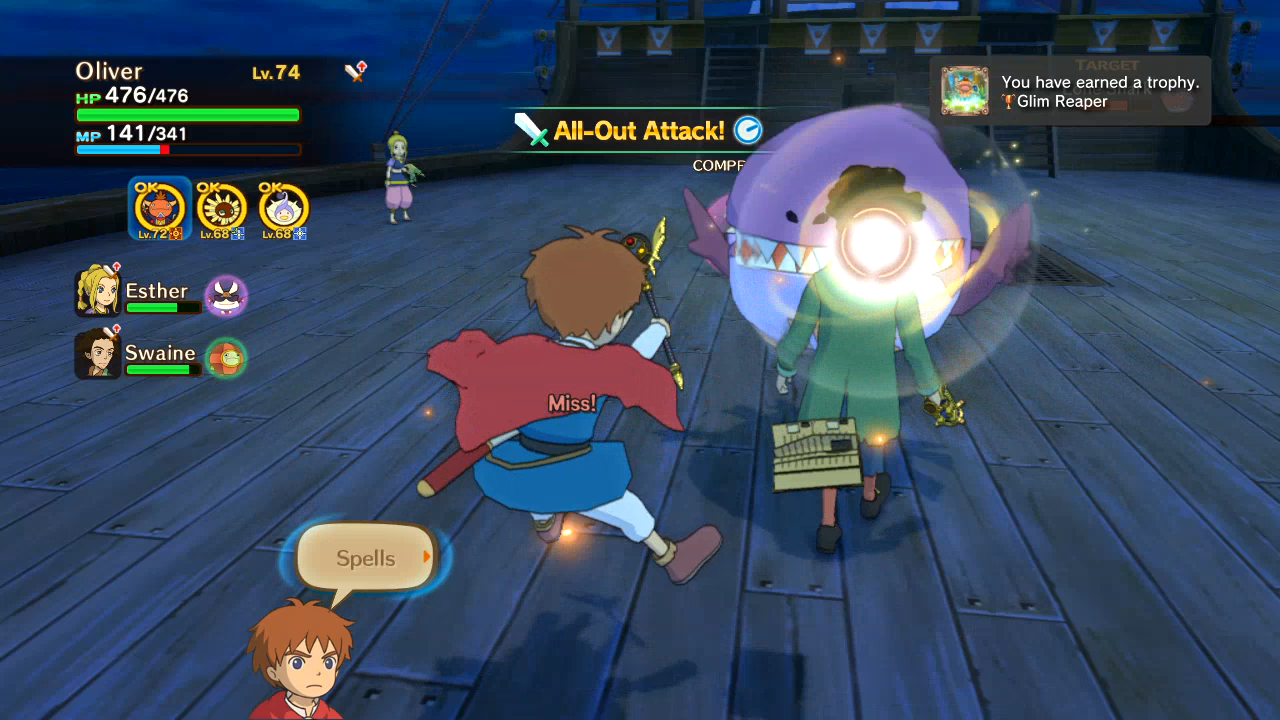 During the fight I earn the Glim Reaper trophy for the fuckton of Glims I've collected this entire LP. 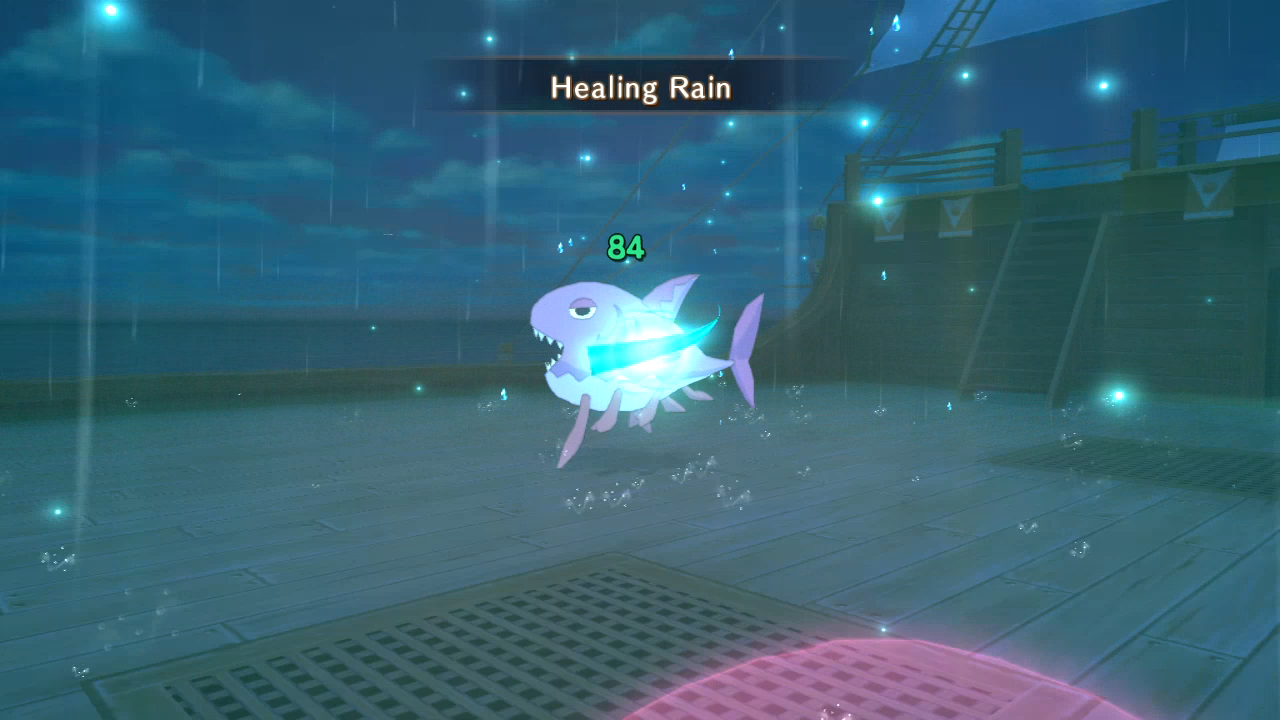 Sharky occasionally delays the inevitable by healing itself, but not nearly often enough or strongly enough to offset all the damage I do.  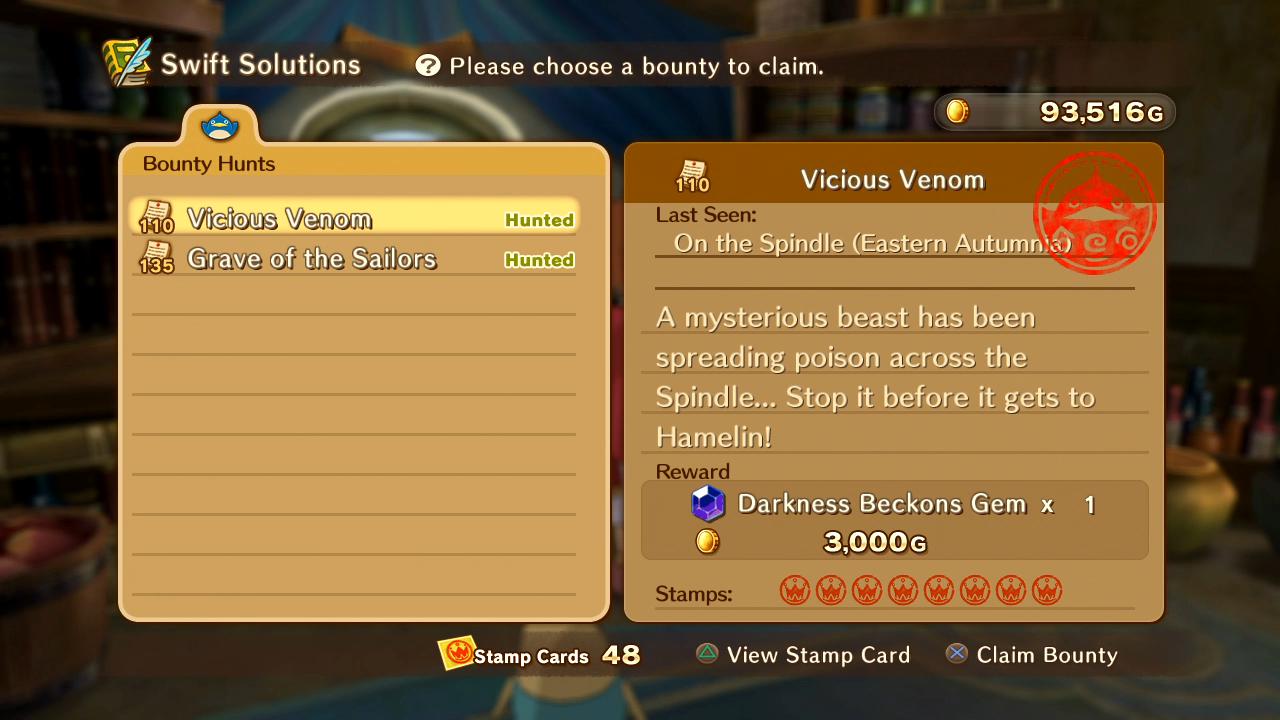 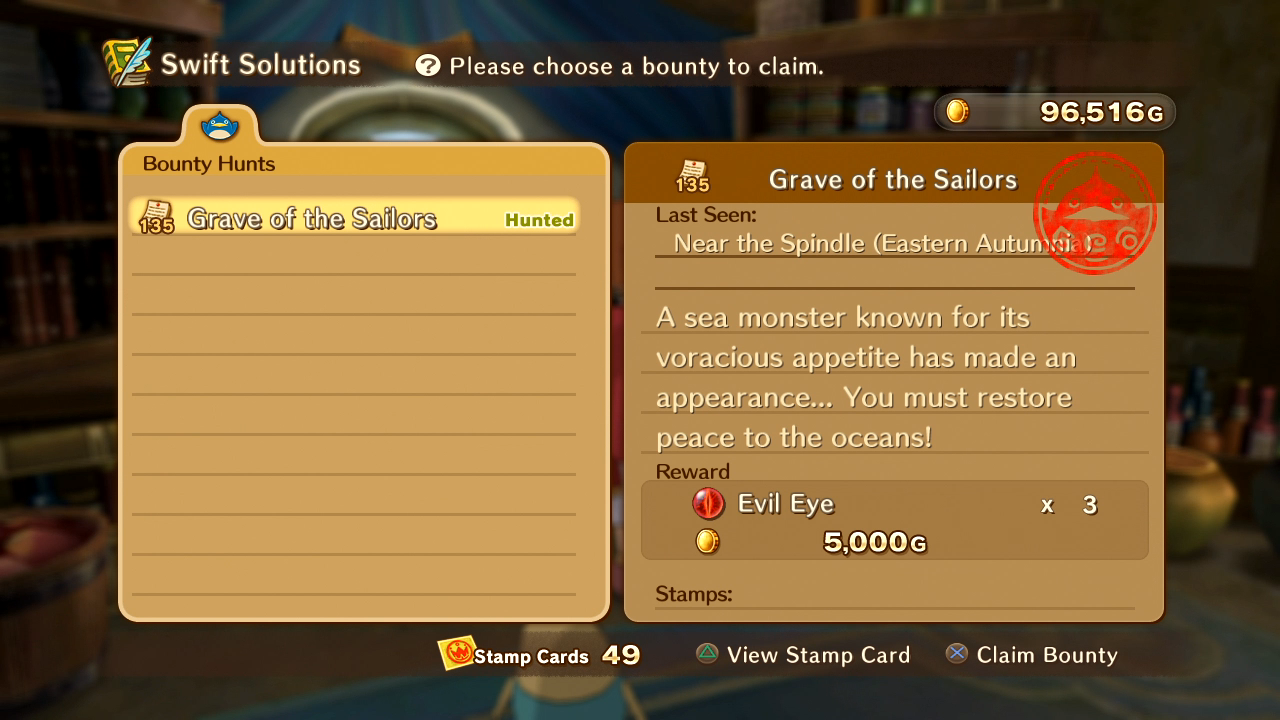 Still slightly baffled by the boss/reward decisions made here. It's like the stamp fights are intended as "the ultimate" of that particular monster line, but we're still fighting new versions.  On the other hand, we do get a new, interesting, and decently challenging bounty with this guy.  Warbird is a tough and tough-looking bastard who likes to Nix you...   ...and steal your gilders. 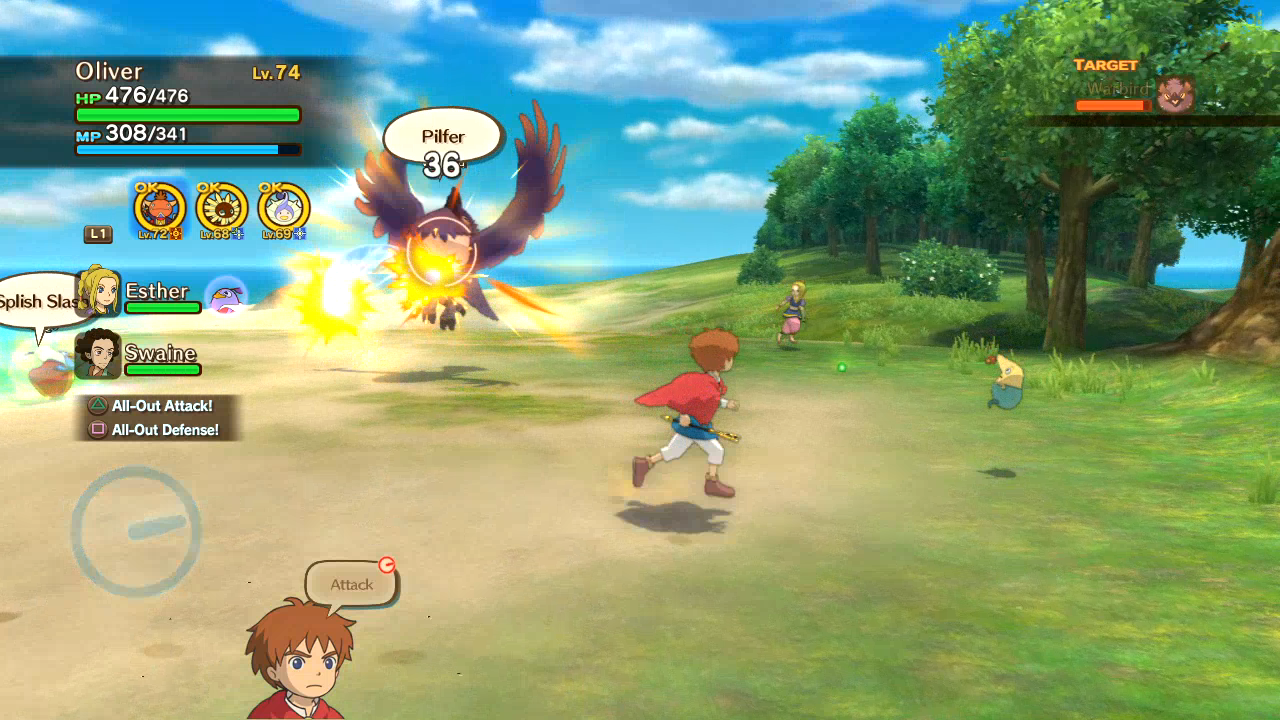  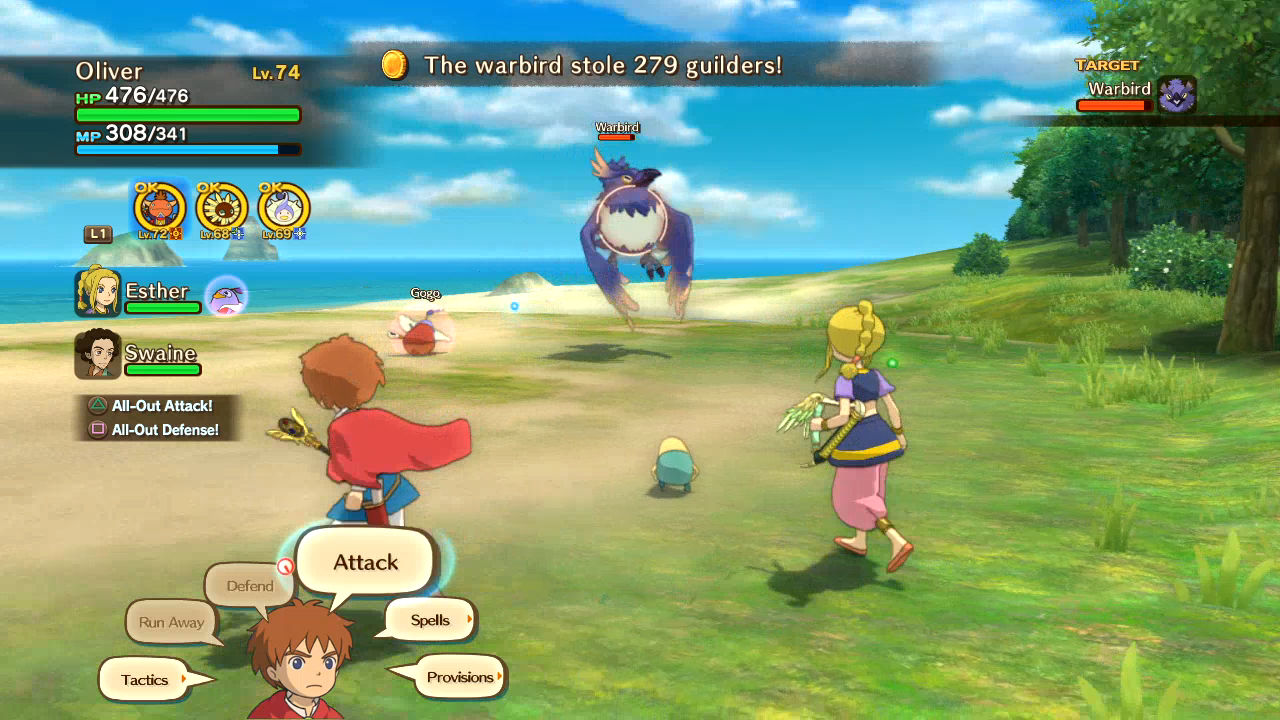 And no, you don't get back what he steals after the fight. At the very least I think I earned enough to offset the loss, but it's still a good way to make me want to kill you quickly. 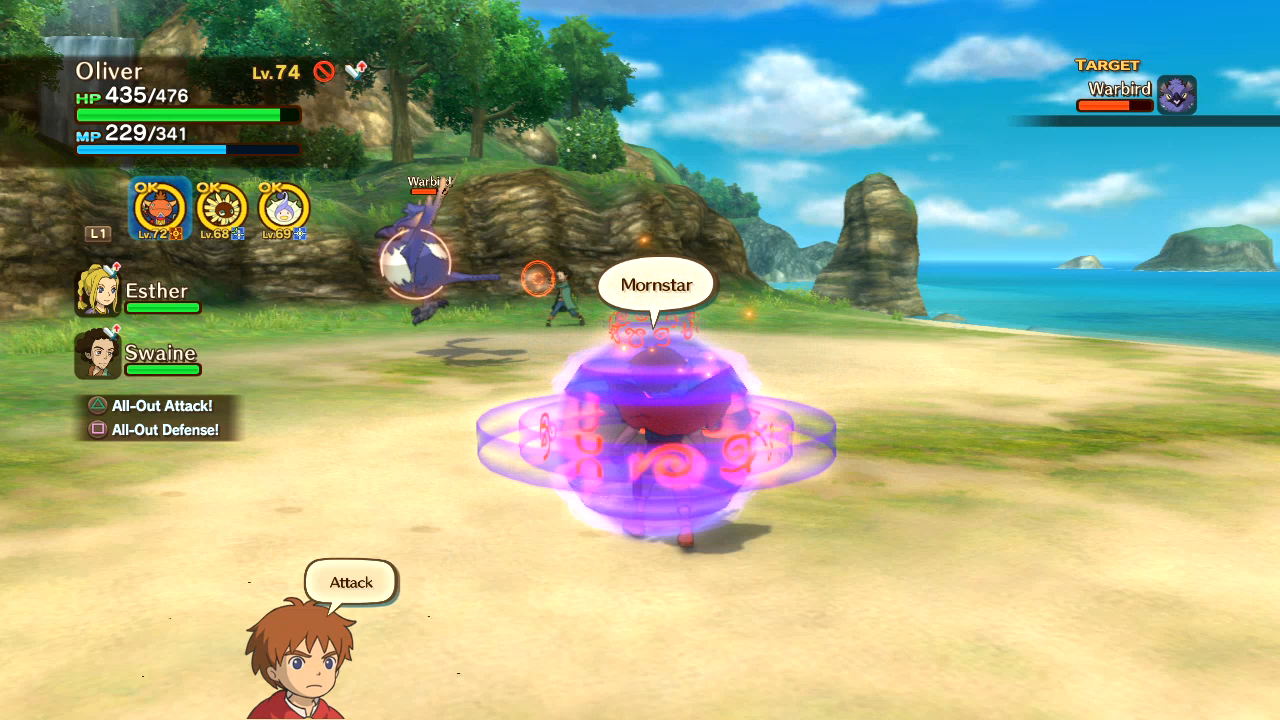 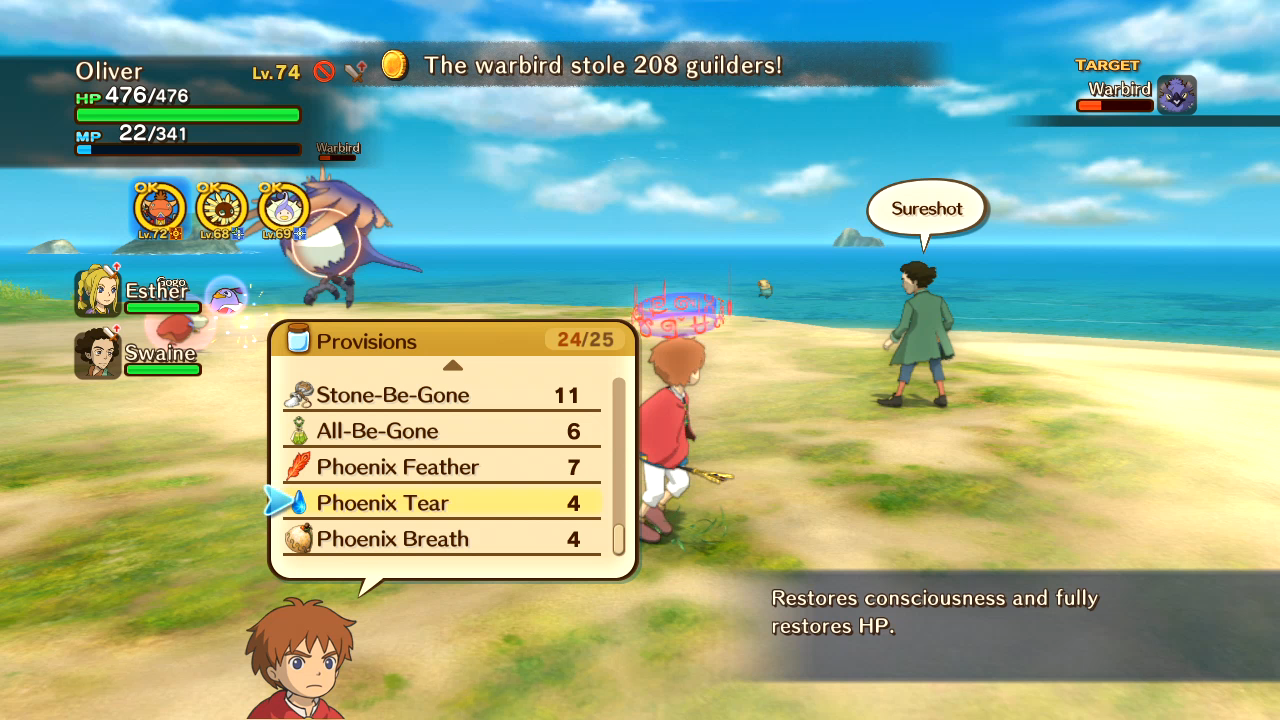  Respectably tough, but we never see another of his kind again. Genocide!   Yet another Collum, though strategically placed on Solitary Isle, that one island we can only reach with Tengri. 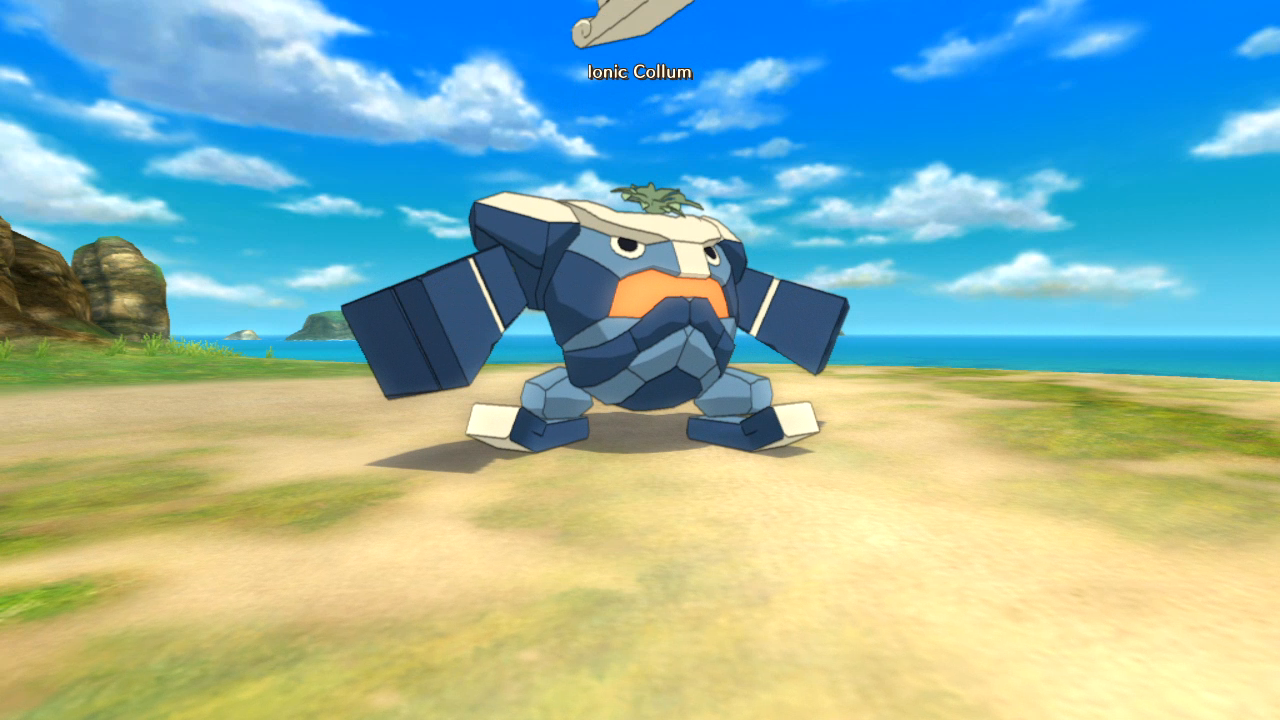 "I'ma kick your rear end!" 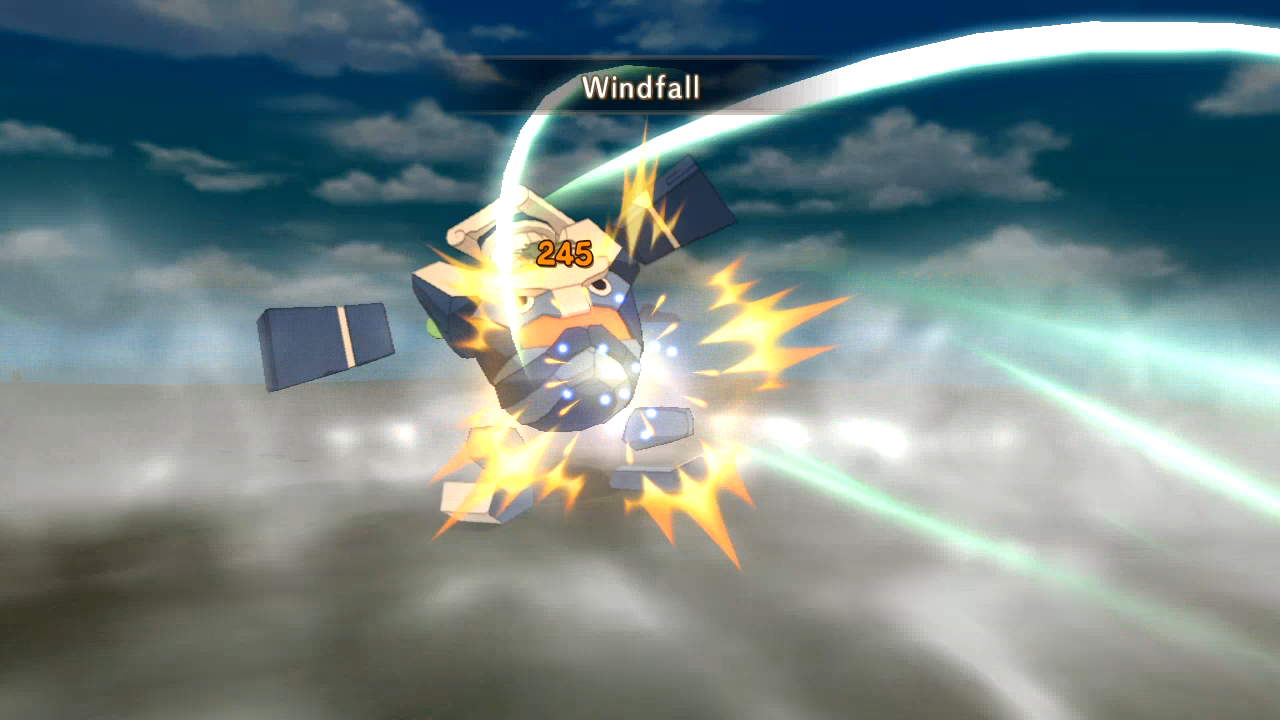 "Oh no! AIR!" 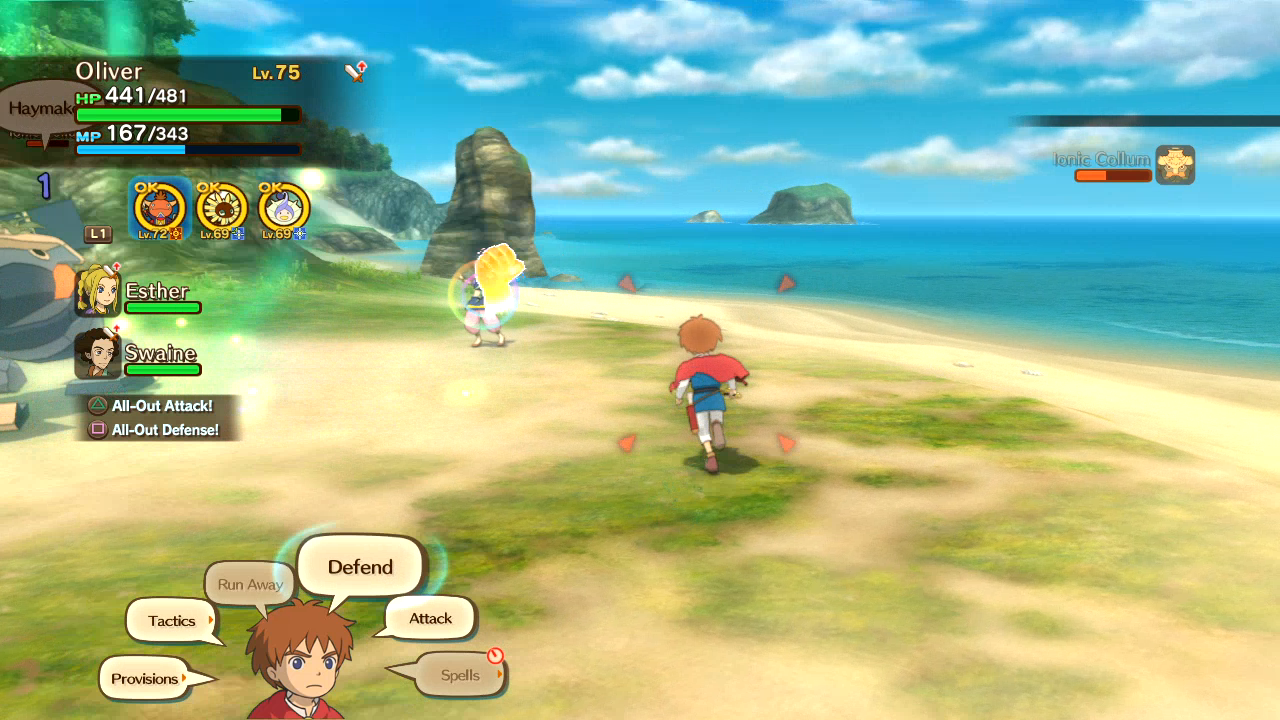  At the very least he knows "Haymaker", which is a decently strong attack if you don't dodge it.  Throughout these recordings, I combed my way throughout every single map in the game that I could to sniff out all the chests and things I missed. In the process, I drop by Old Father Oak for his very last bit of gift-free dialogue. 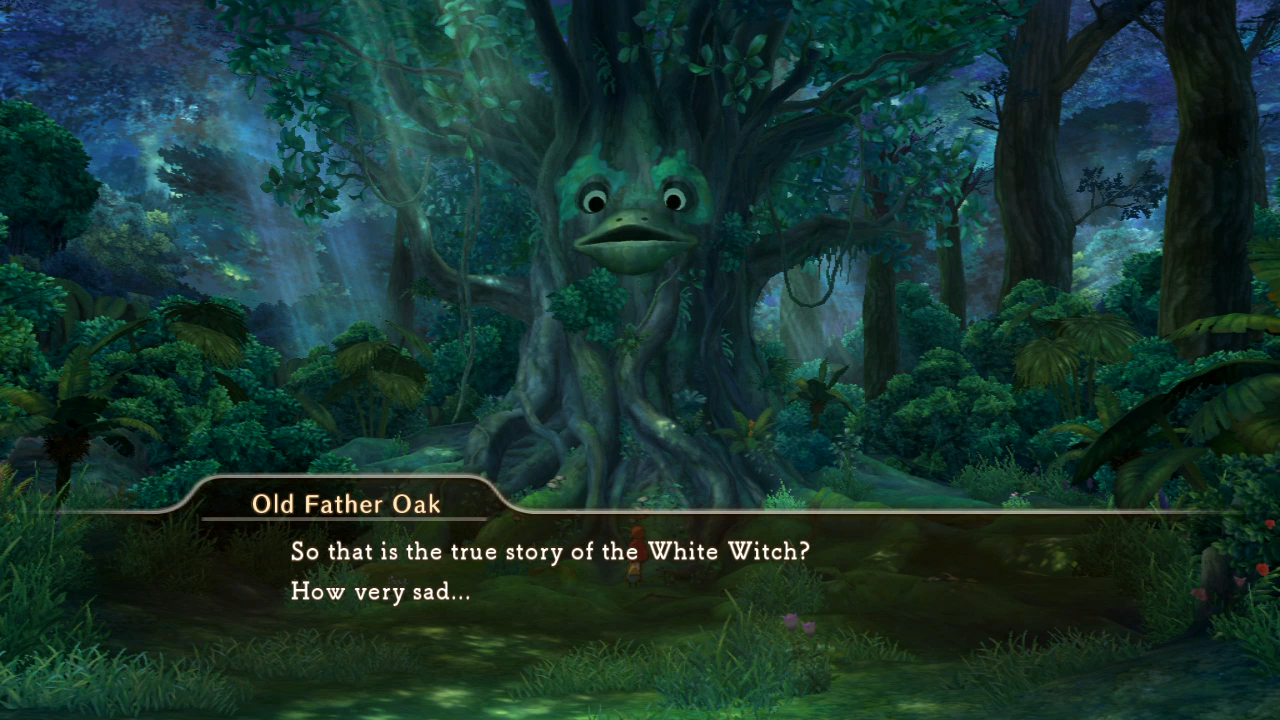 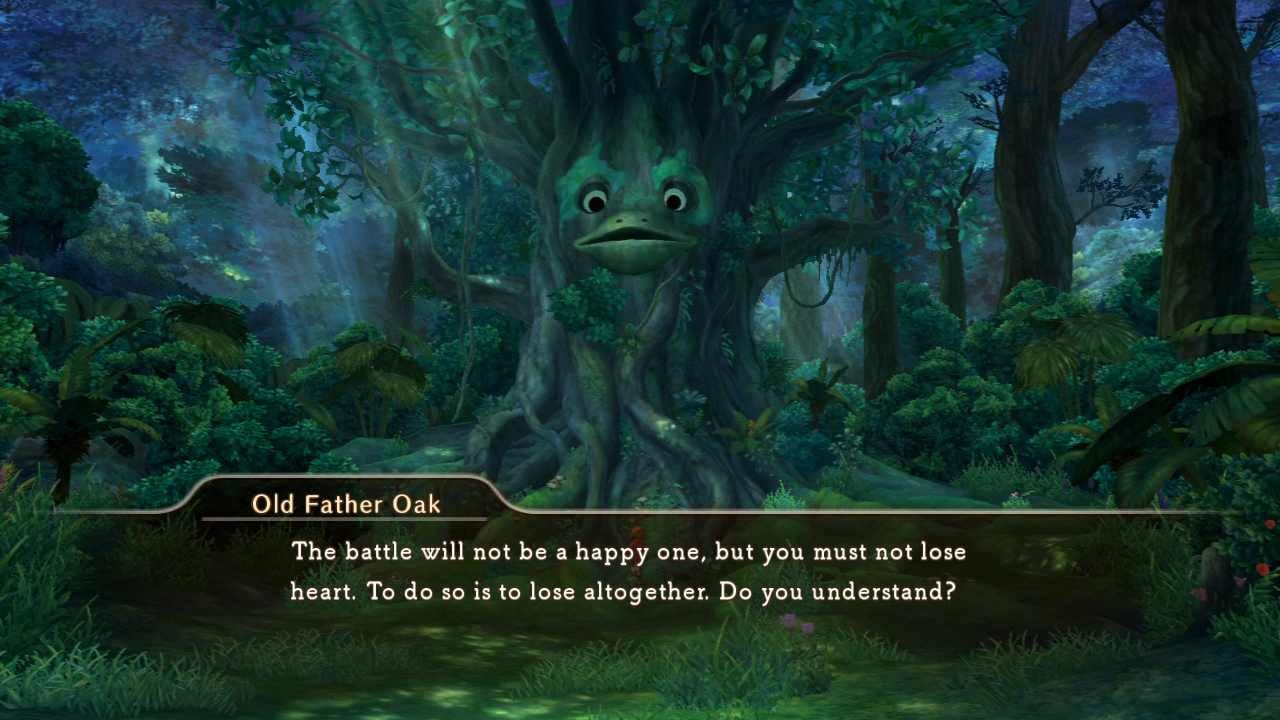 Good thing I already won. Now give me another Nostrum. More like Old Fucker Oak. 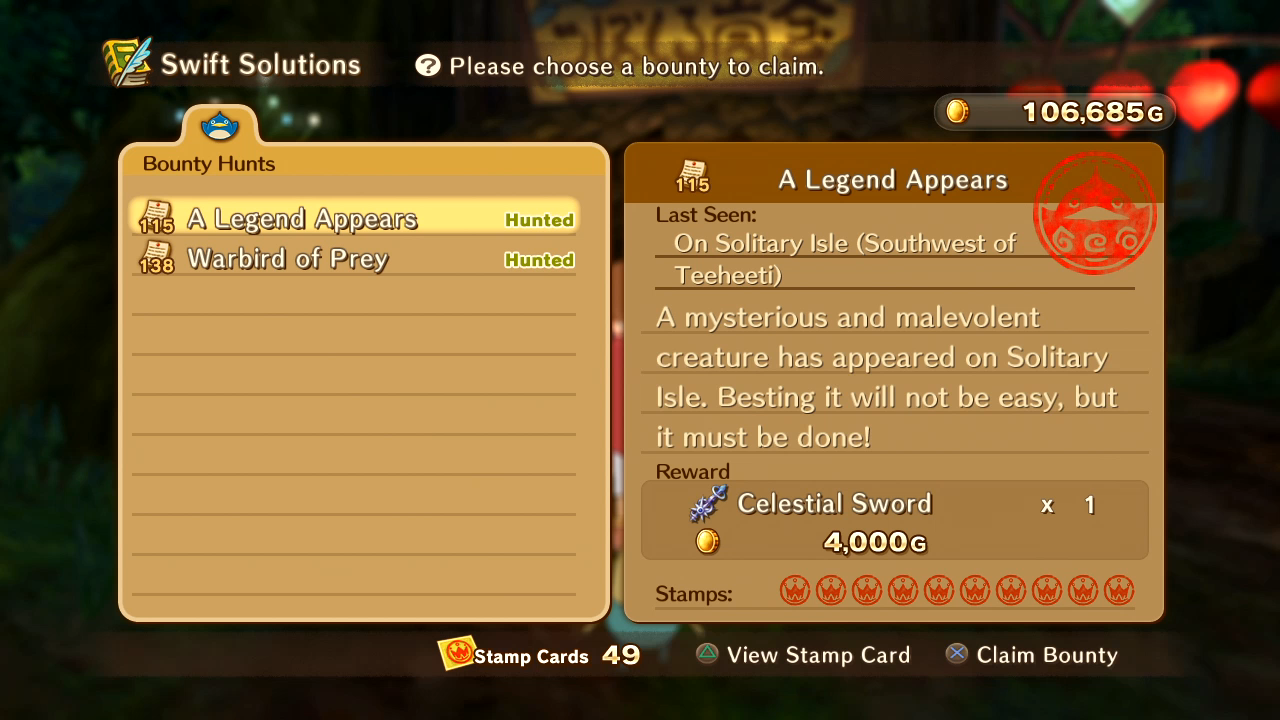 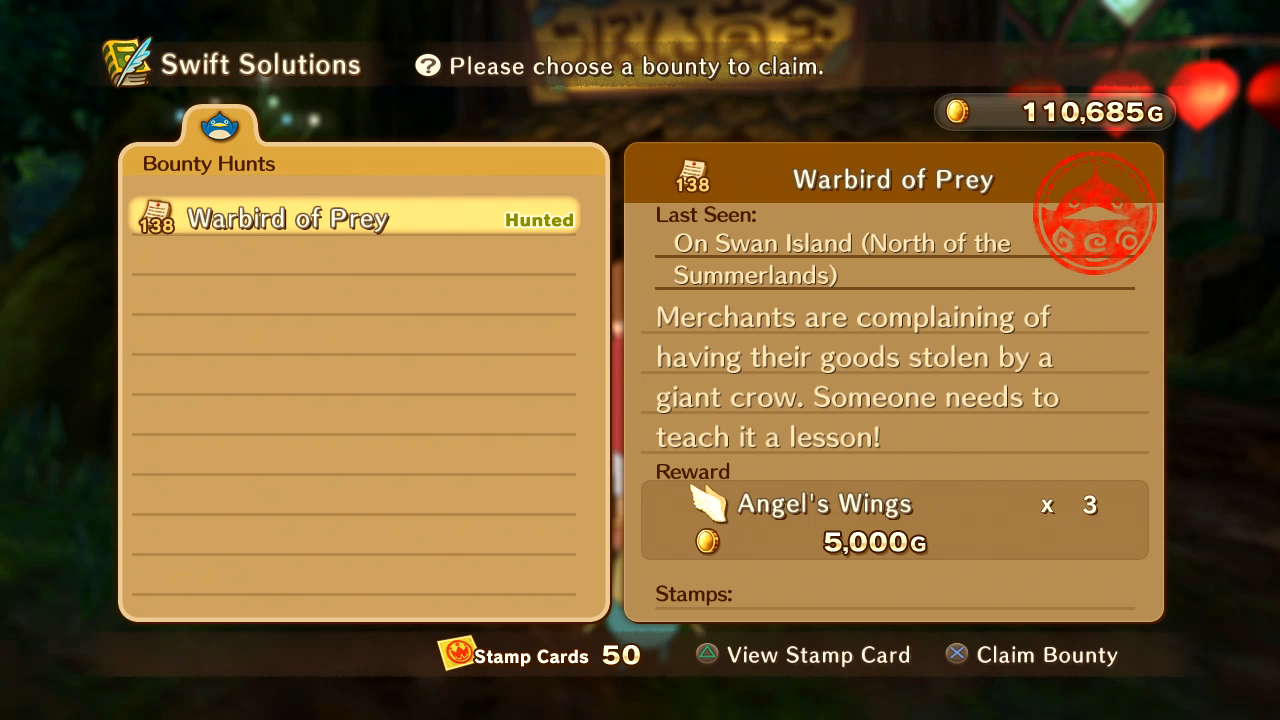 Even if the fights themselves are underwhelming, turning in bounties is always satisfying.  Yet another bubbly blubber guy nearby Yule, this one on Scrooge Island.   Dumple gets a brief chance to shine. 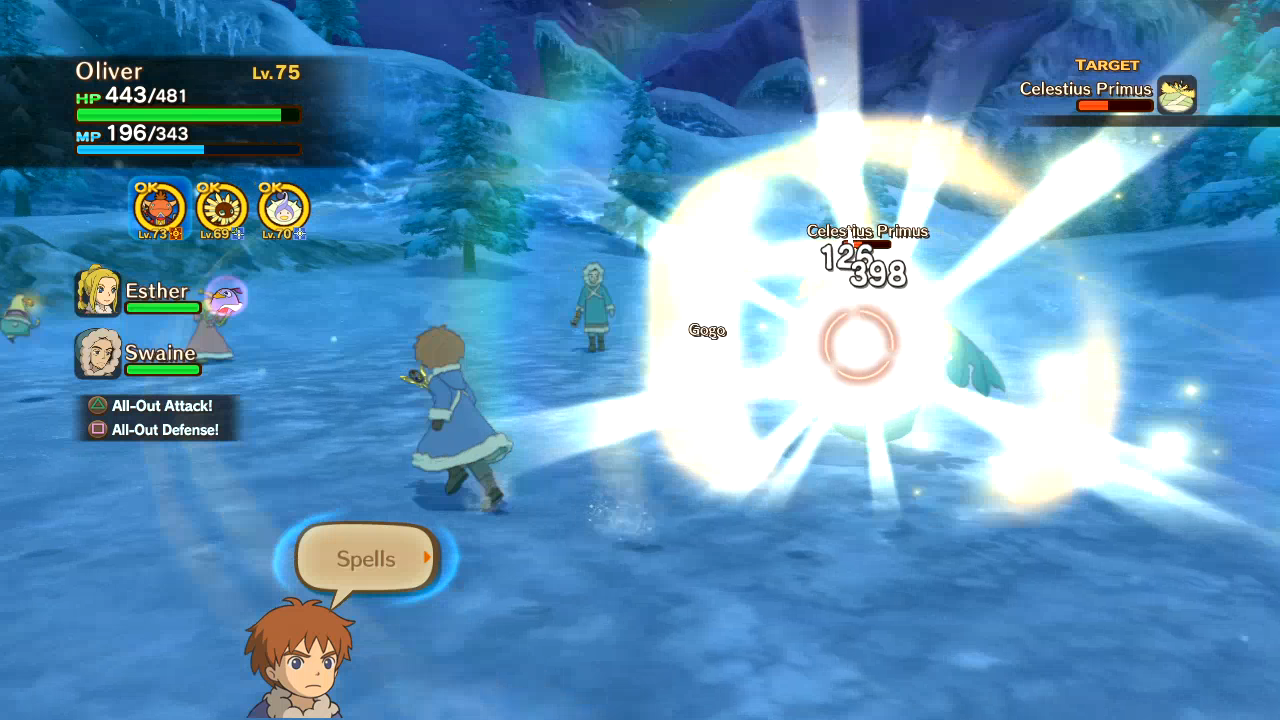 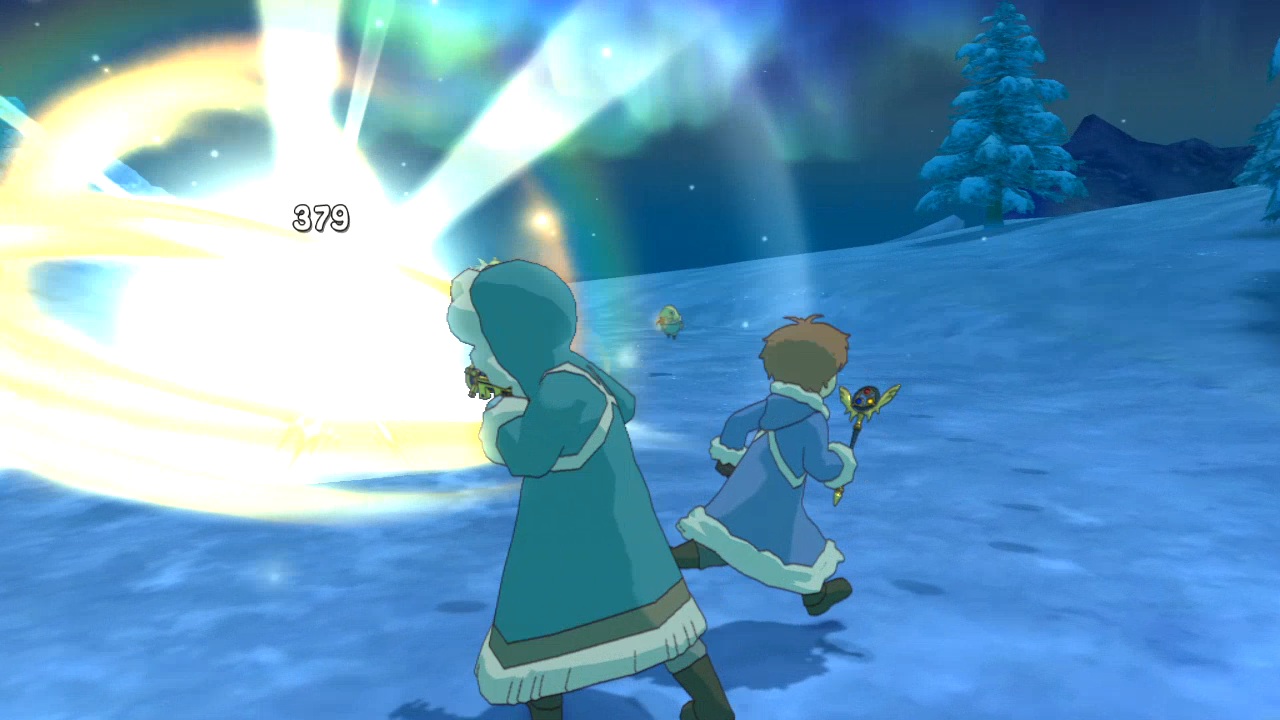 Then I do the rest of the shining myself. 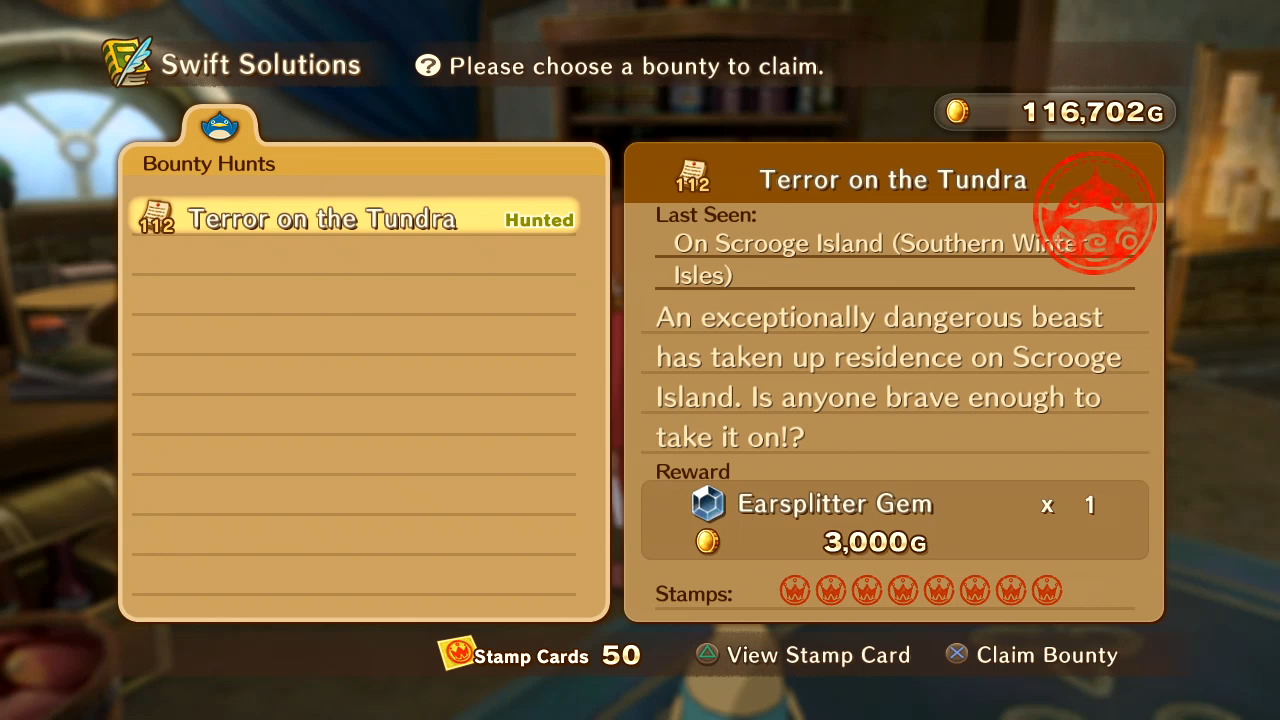 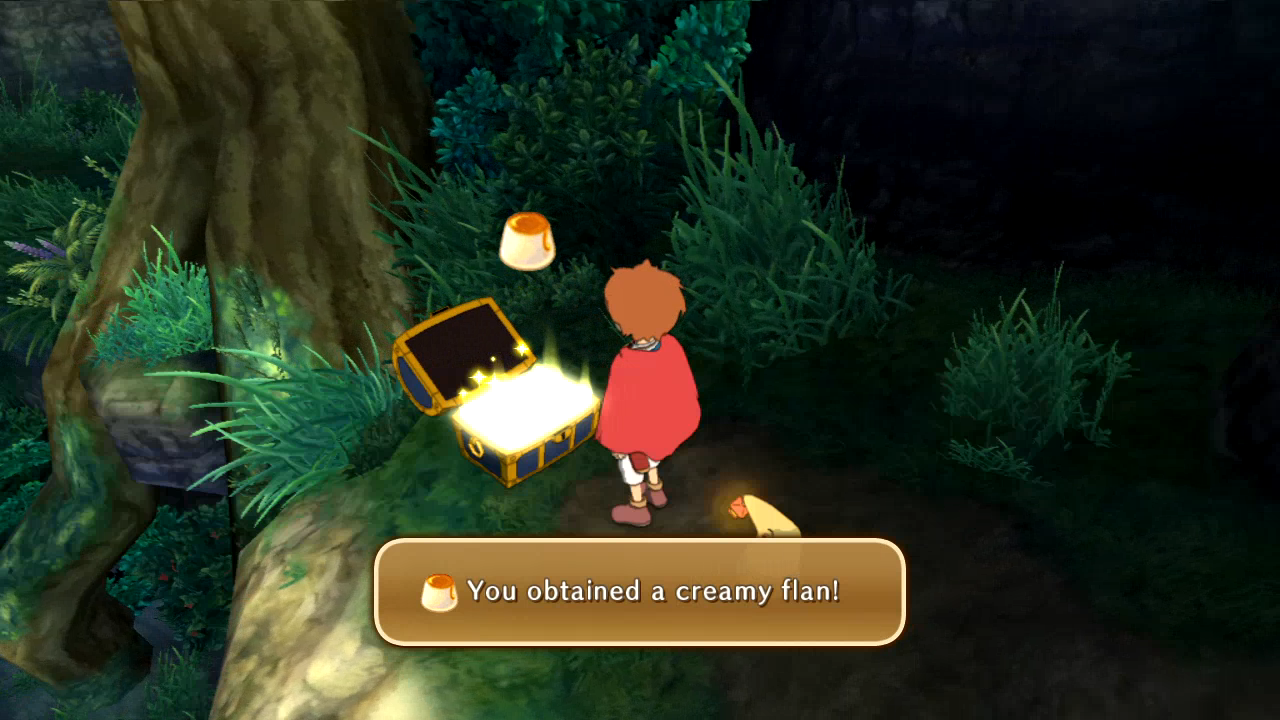 These last several screenshots are from much later in my recordings, but I make my way through Deep Dark Wood back to where I fought the boss, in the meantime grabbing these last two chests I missed. 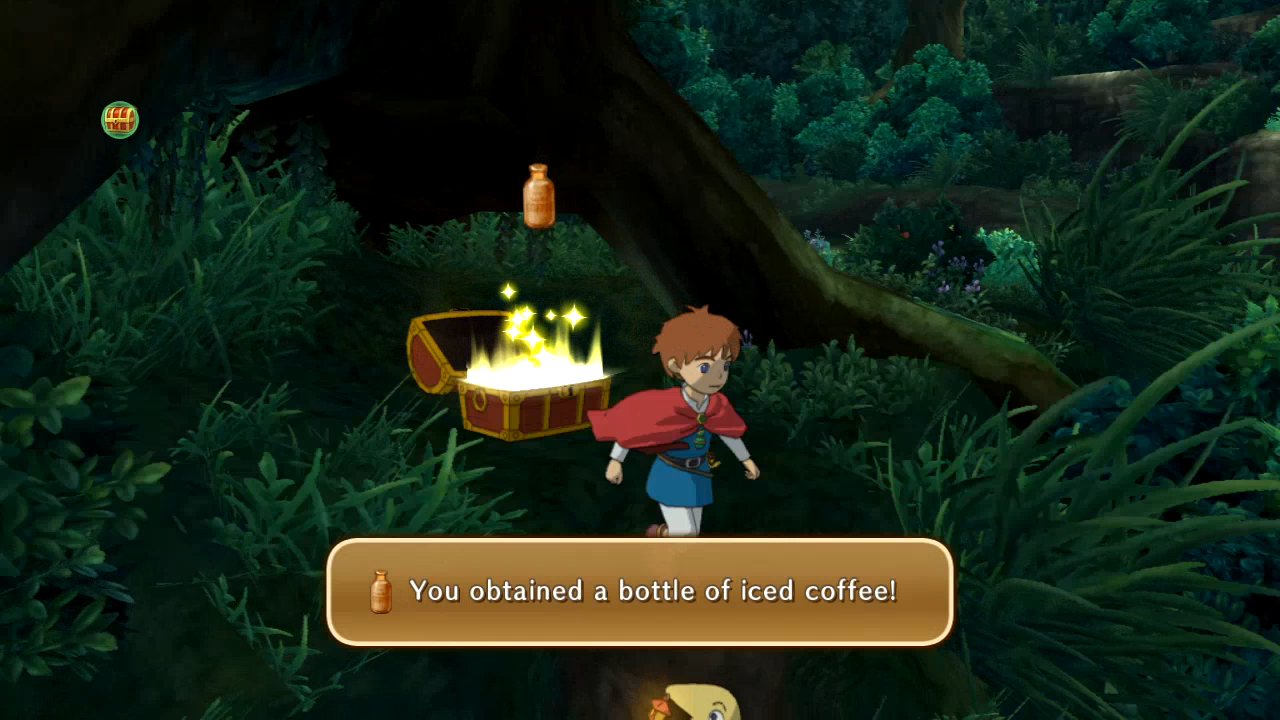 It's been so long since Iced Coffee was useful. Ah, memories. So why even am I going back to the boss-  Wha-...? 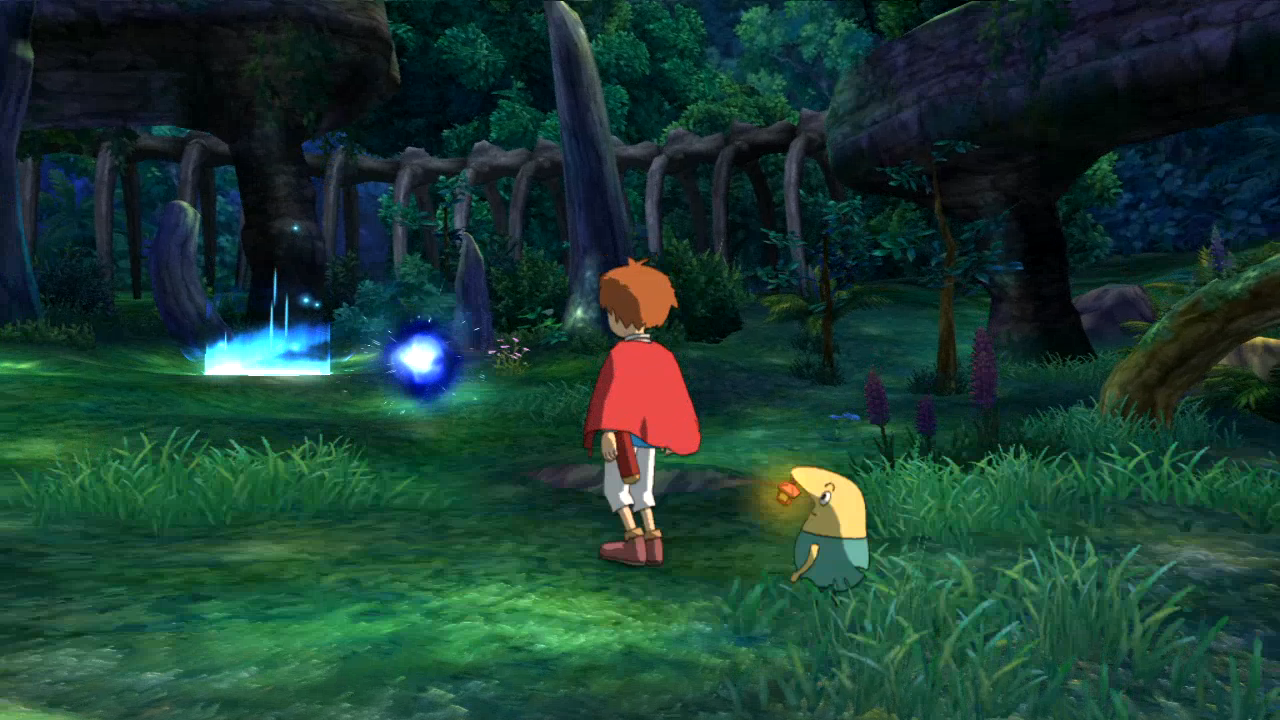 Stay tuned for boss refights in upcoming screenshot updates! Next time: Post-Game Sidequests! ThornBrain fucked around with this message at 03:14 on Feb 27, 2015 |
|
#
?
Feb 27, 2015 03:10
|
|
|
iirc, Dinoceros and Lumberwood at least can be found in the wild. The former appears along the cliffs in the desert in some places and I think the latter rarely spawns on that exact same island you were on. They're both a bitch to capture though. Also, you should have been giving swords to cats the entire game, that cat familiar is really good 
|
|
#
?
Feb 27, 2015 09:12
|
|
|
Post-Game Screenshot Missions 2: Continent Hopping While the previous screenshot update focused on bounty hunts, today's will be the first of two focused on the post-game sidequests. The second will come next Saturday, right before we tackle the Solosseum. But first, a blue chest I missed in Perdida.  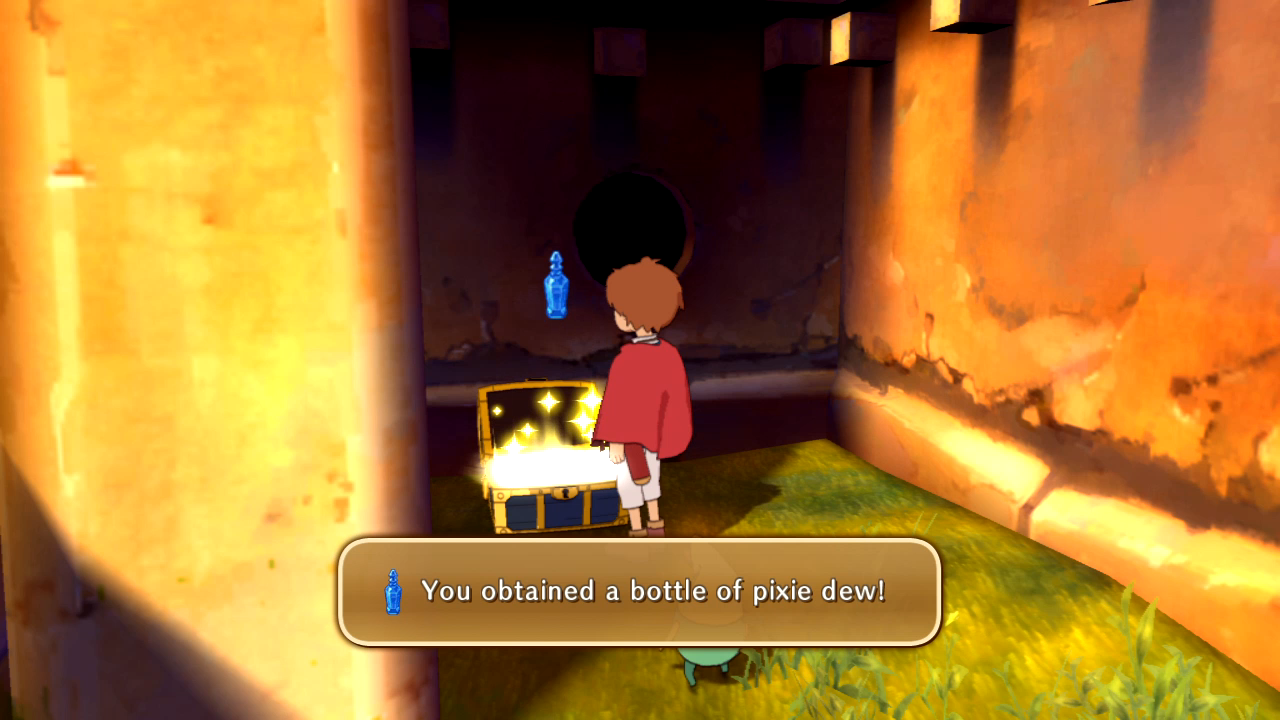 The quest that will take up the biggest chunk of today's update involves this One Piece-referencing kid from earlier. If I didn't show him, it's because he was another broken heart sidequest, but once he's dealt with he talks about sailing the seas to become the King of the Pirates with his crew of friends.  His quest is an actual search for treasure with a real treasure map! 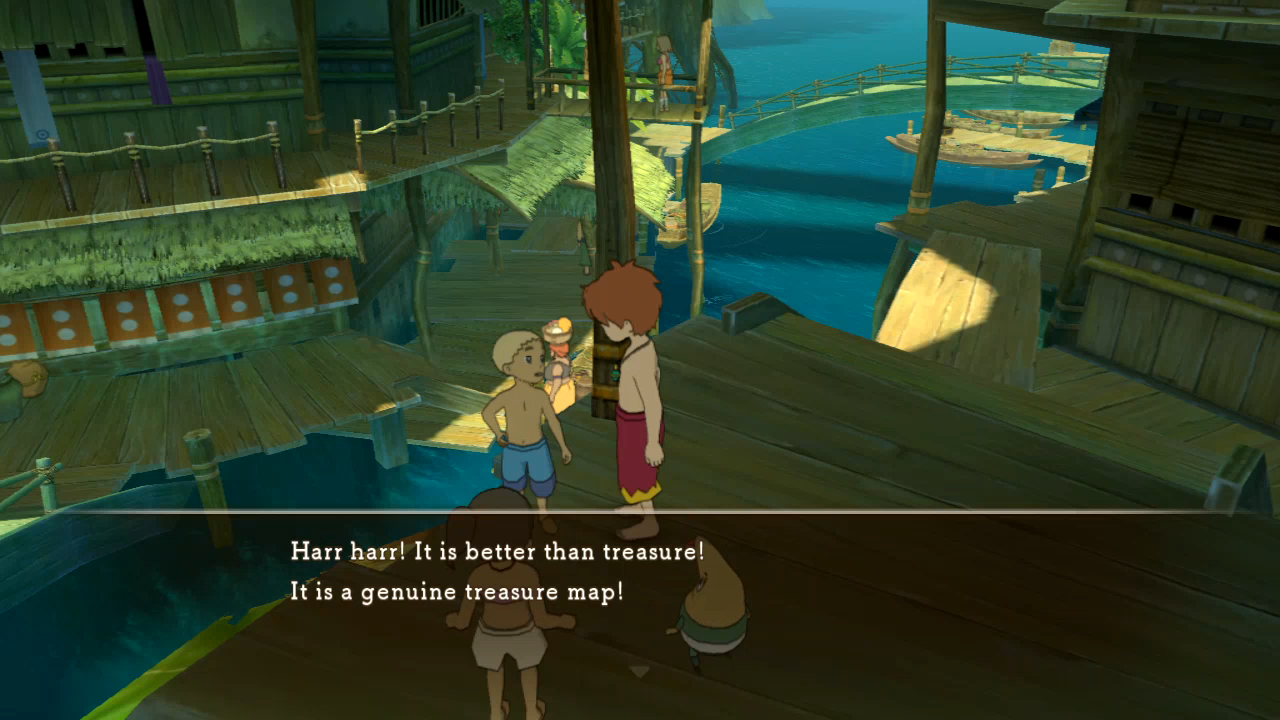 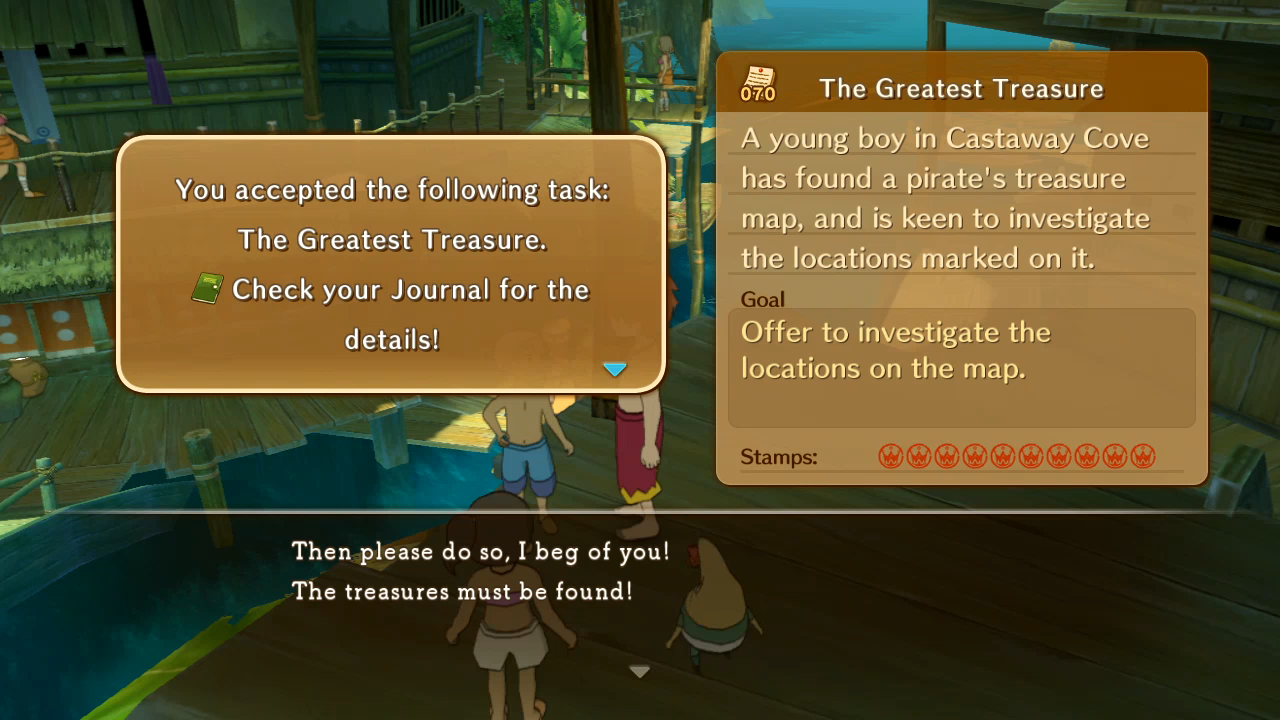 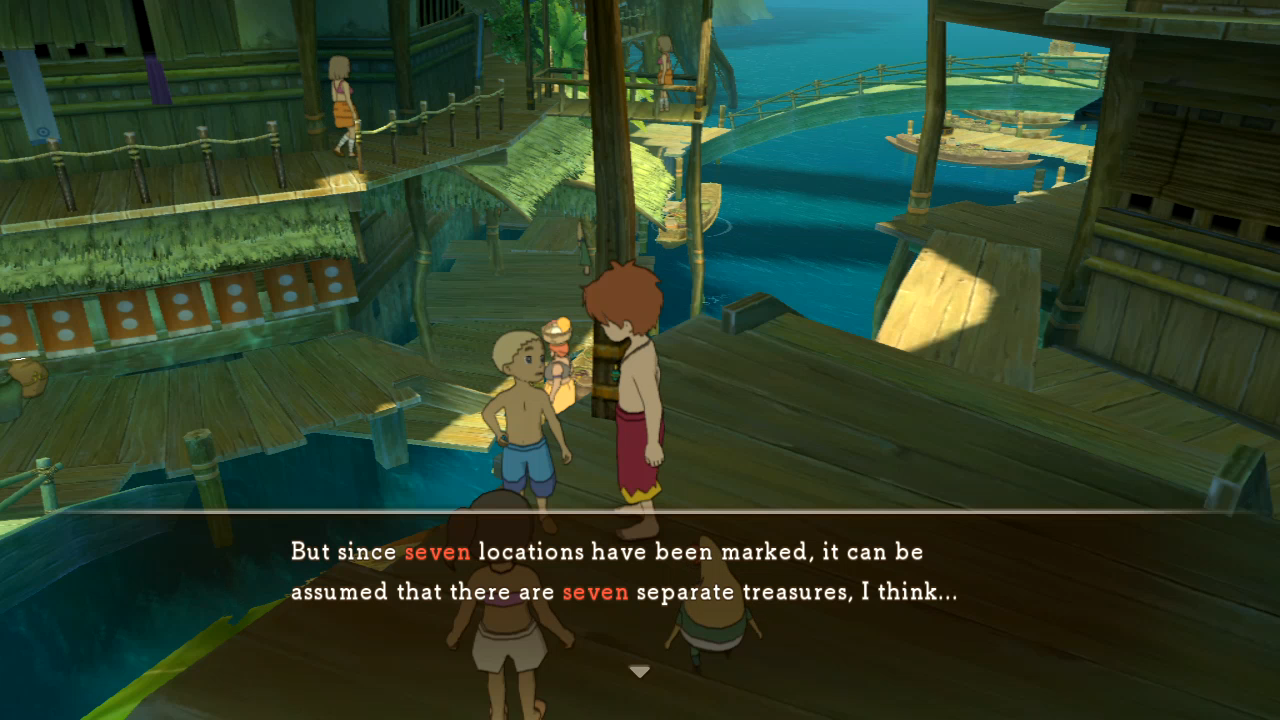  You may recall from the videos these small square monuments dotted around the landscape. Our mission is to find all seven of them and recover the treasure from them. If you don't know where they are, the Castaway Cove locals will either directly tell you what island it is on or give vague directional/climate/landscape hints. Most of these are small islands that you need to check your map while standing on them to know what they're called, but you can also just fly around on Tengri until you find all of them. Which isn't as easy.  Also this poo poo again. This isn't the last we'll see of the rich guy, but this is the last update with him. This time he's left his journal on Nazca�.    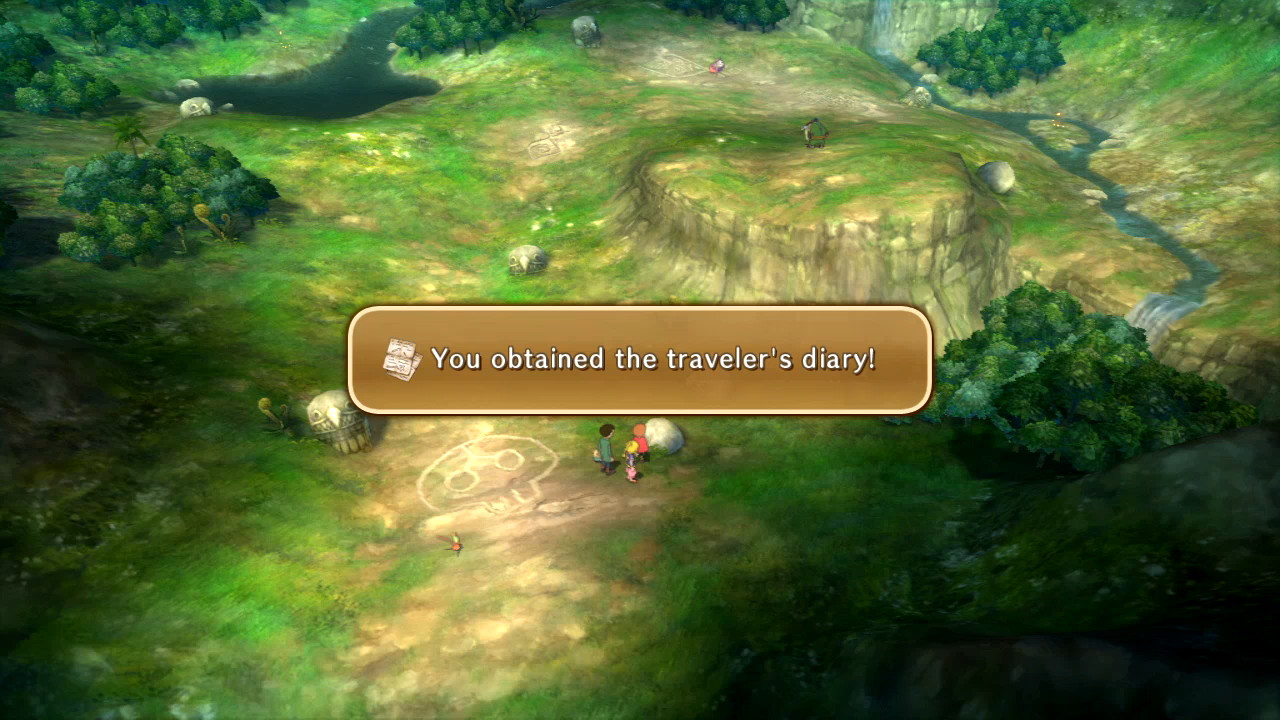 The diary isn't far from Ara Memoriae. It also isn't far from having overstayed its welcome. 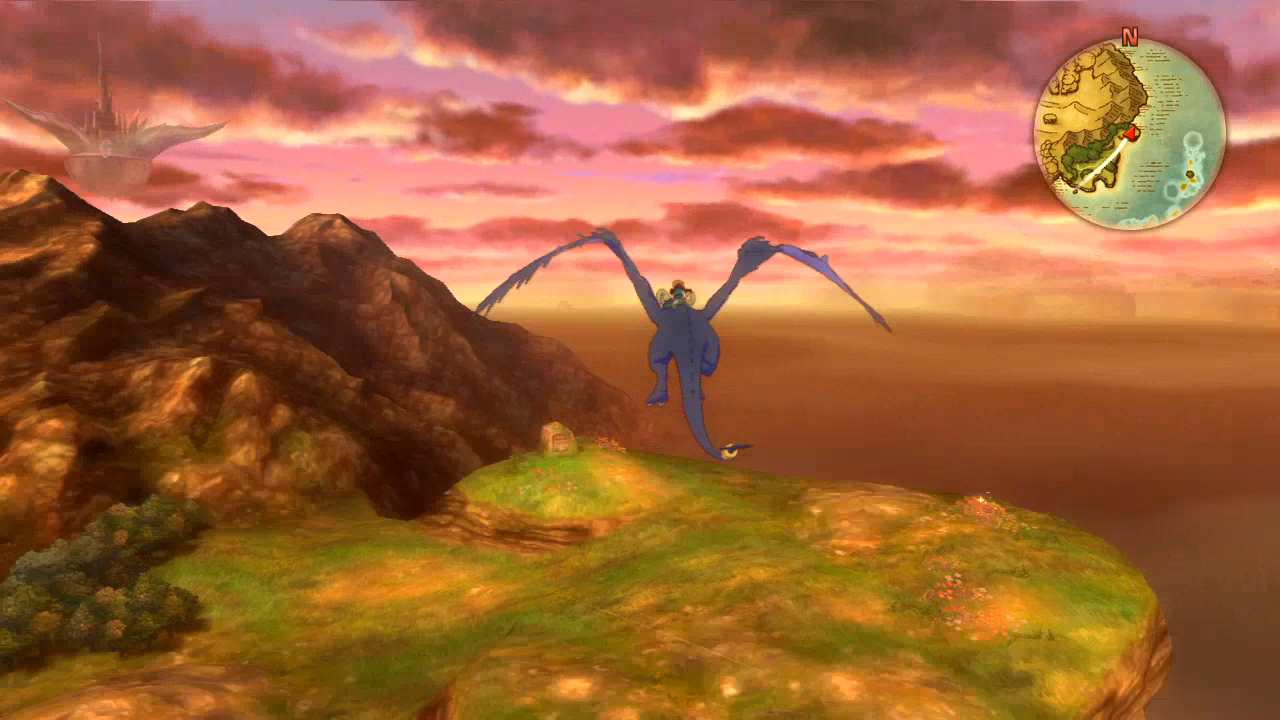 The first monument is the one you'll most likely recognize from the videos, due east from the Vault of Tears. This is also probably the coolest screenshot I've ever taken. 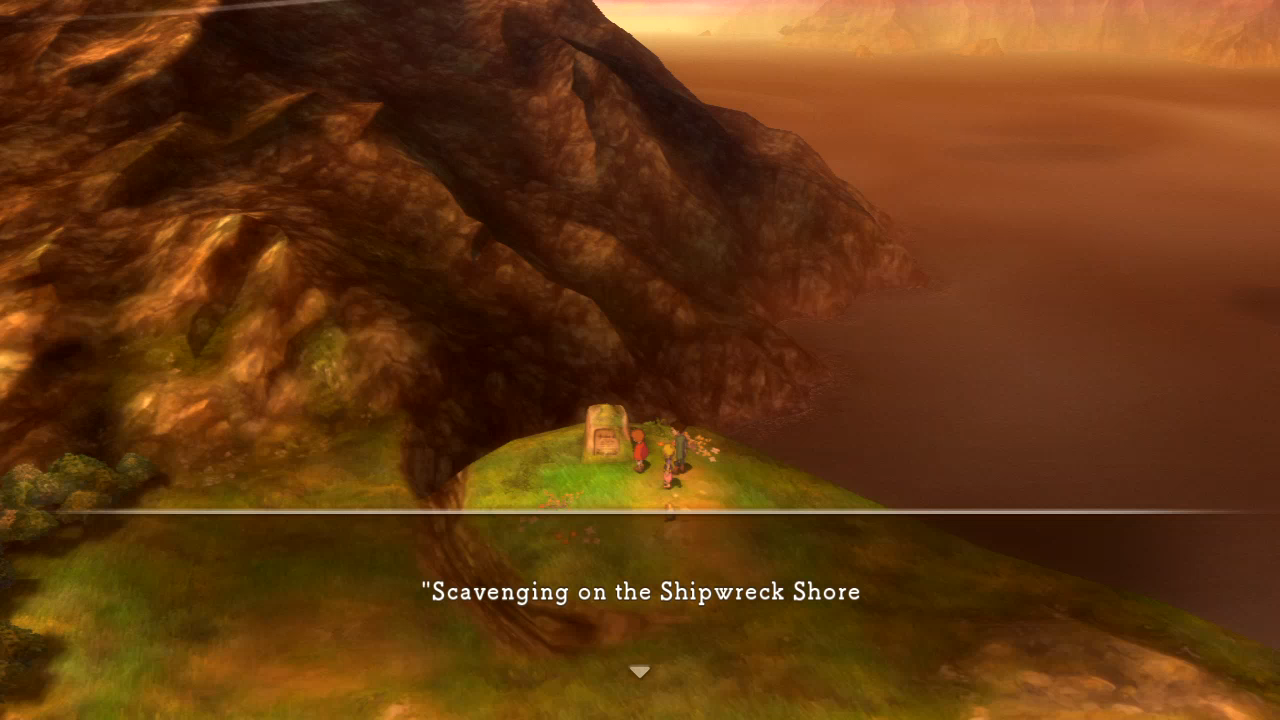 However, instead of treasure we find etched journals of the pirate crew The Castaway Corsairs, who found and took the treasure generations ago. I won't show all of the text, but some of the entries can be quite funny. 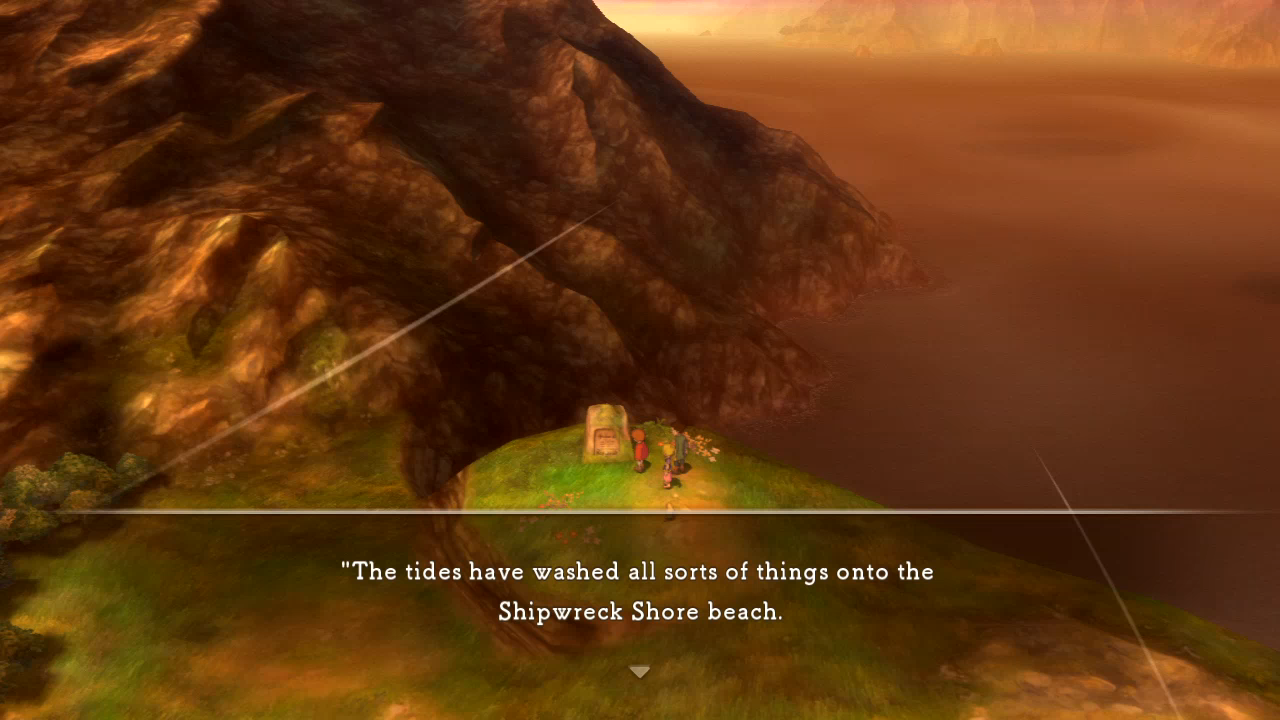 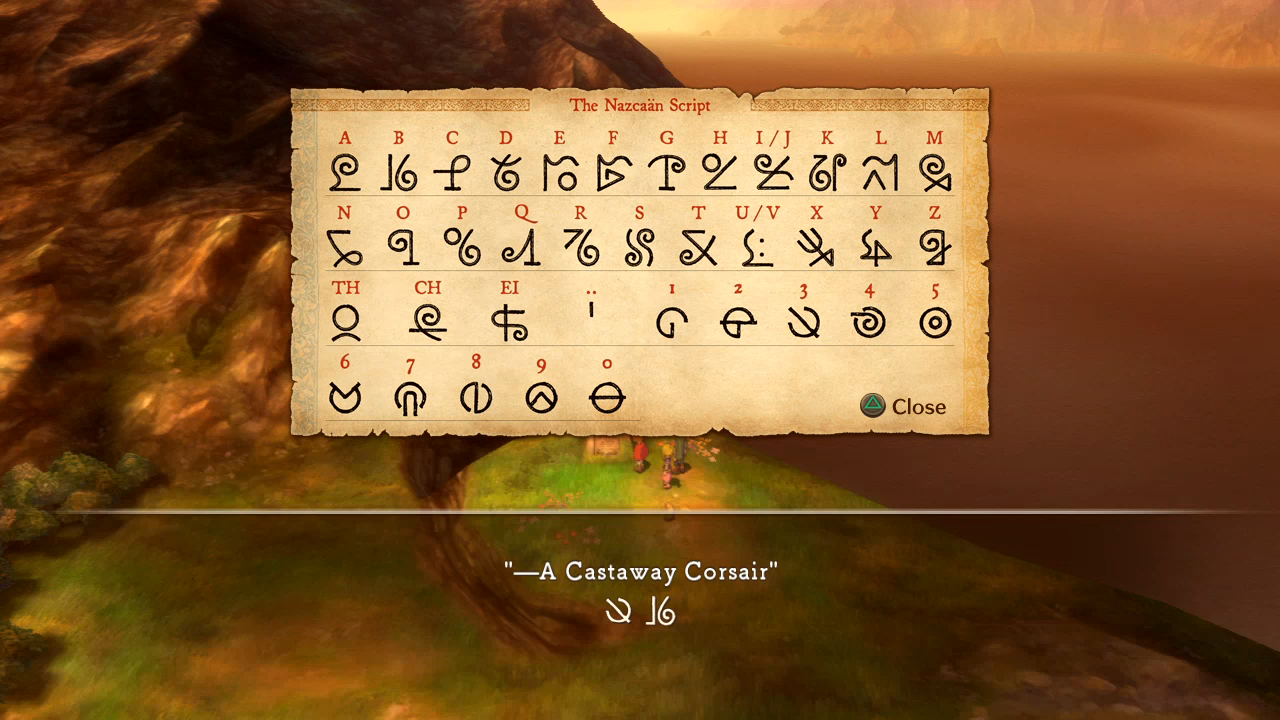 Every monument ends with a pair of Nazca�n symbols. The first corresponds to a number, and the second to a letter (usually).  I've already cleaned out the hidden chests from this area.  Next monument we reach is on Billy Goat Bluff. You can do these in any order - this is simply the one I took. 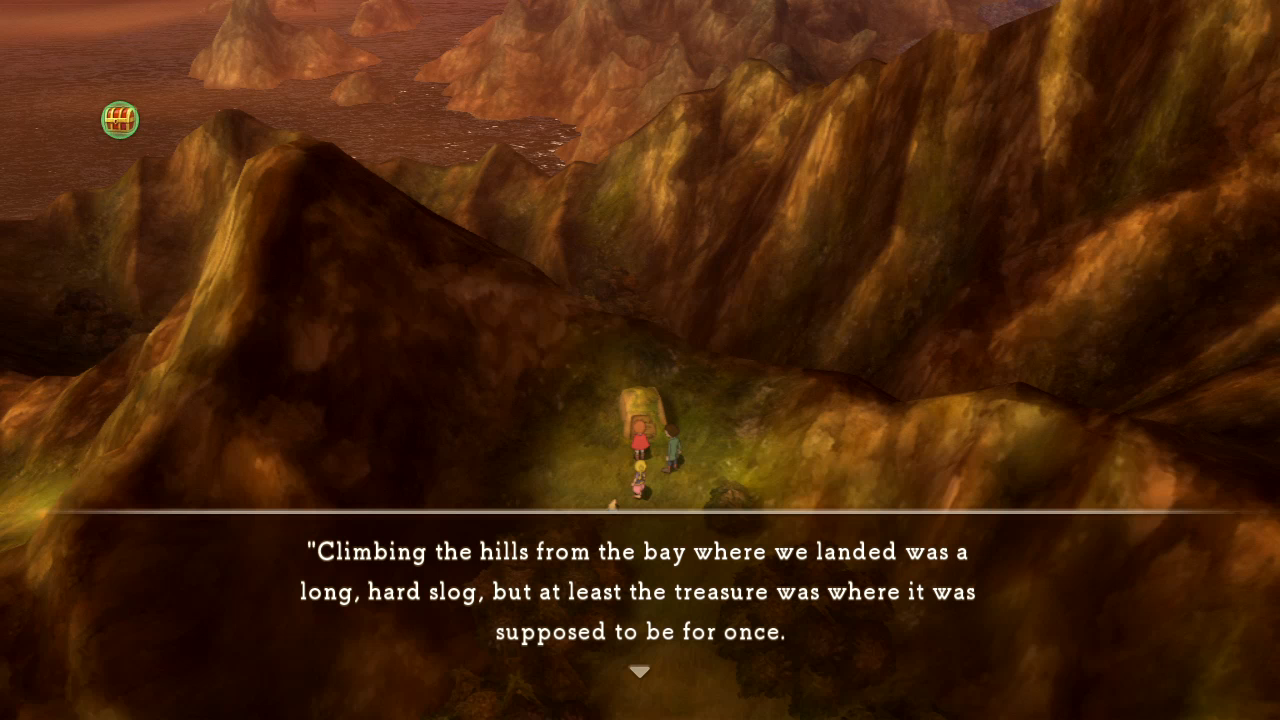  Next is on No Longer Mine, right where we fought Sadcore Turtle.    To my surprise I next come across a monument I'm not supposed to go to just yet.  Yes, turns out there's really eight of them, and even though the answer to reading this one is a spell I already have, status quo is a jealous bastard. 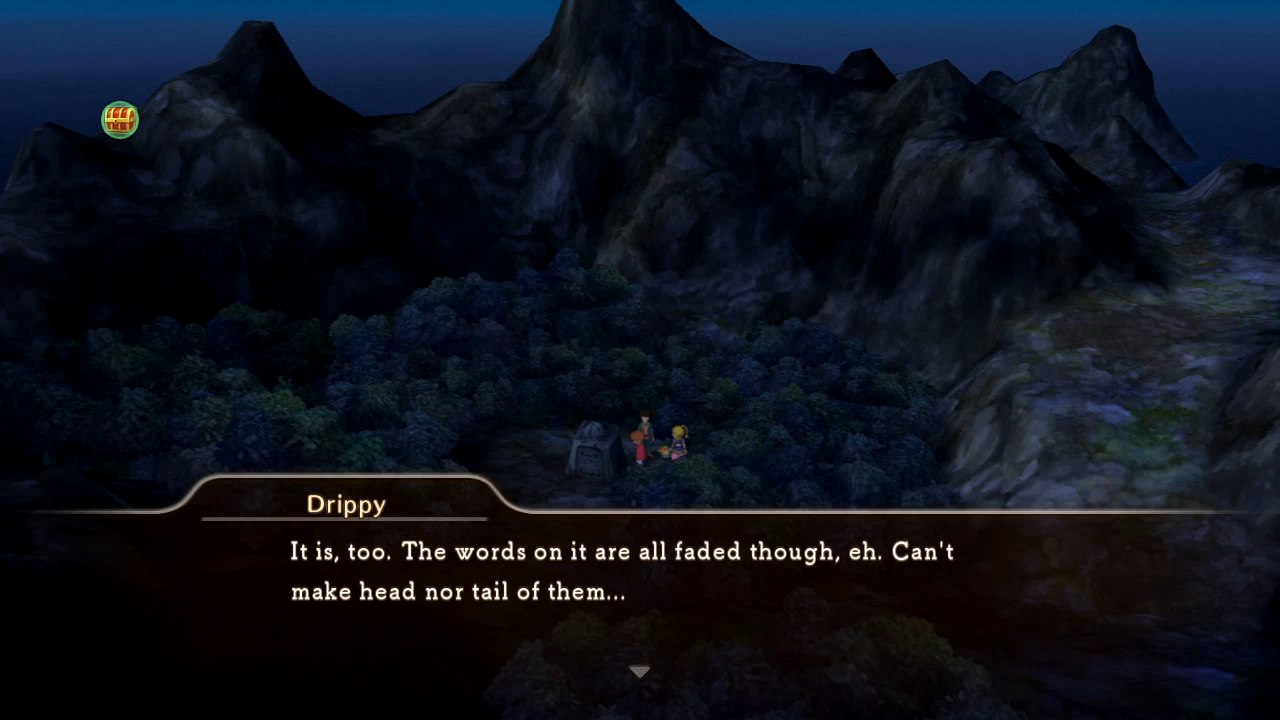 Next (allowed) monument is on Swan Island.  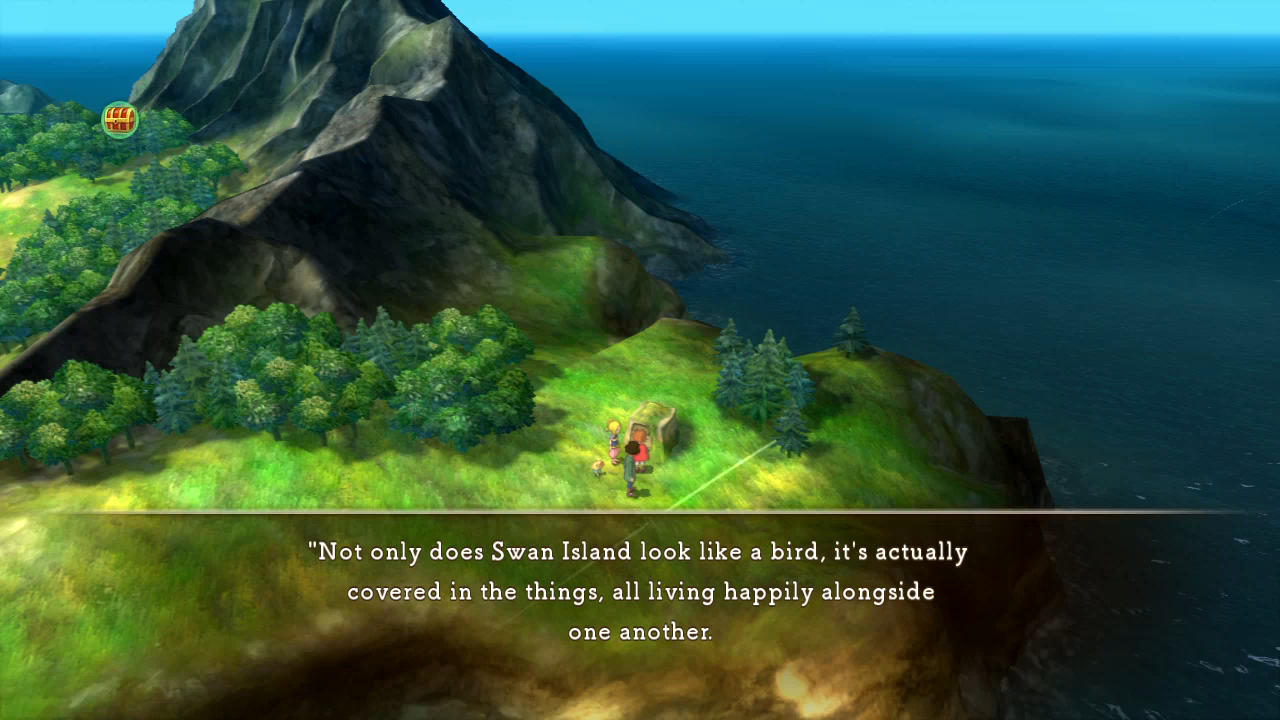 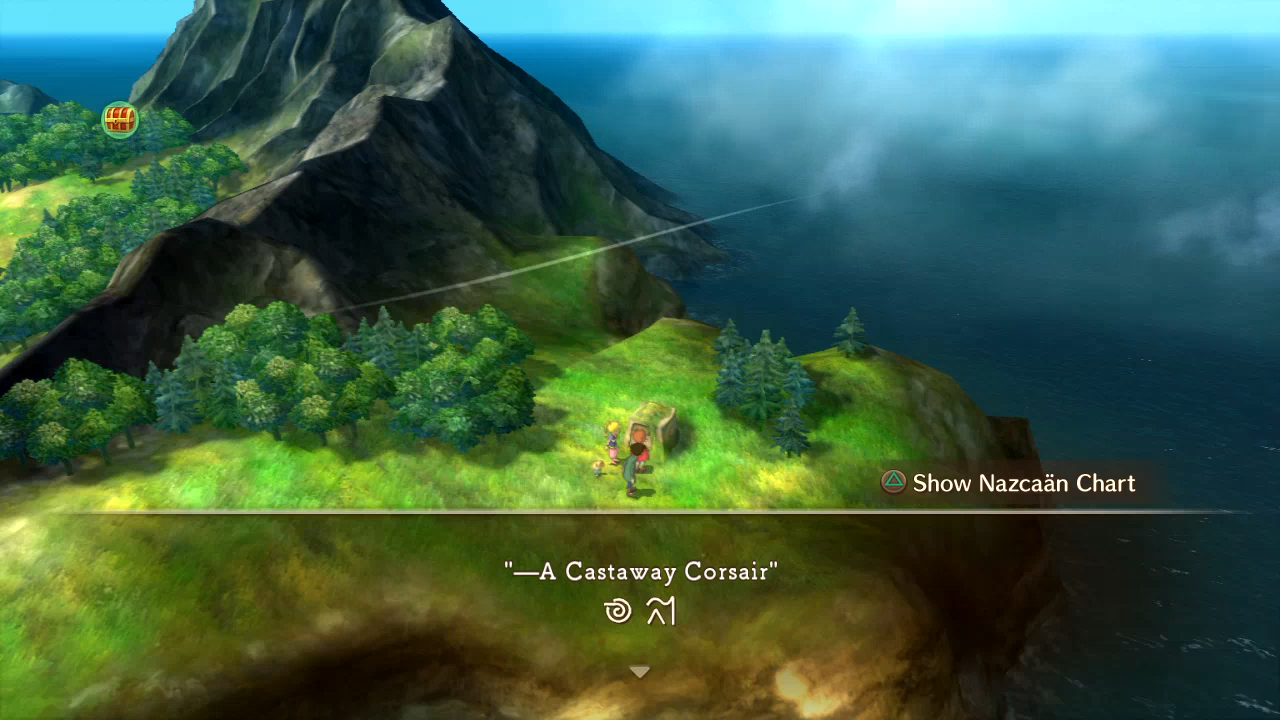 While trying to find one of the snow island monuments, I earn myself the Treasure Hunter trophy for collecting every hidden chest on the overworld.   Next monument is just southeast of Skull Mountain.    *Mocking horn*  Next monument is on the island west of Old Smoky. This one's probably the funniest.     Heading back to Castaway Cove to get a refresher on where the last monument is, I also give the gentleman his diary back for the penultimate time. 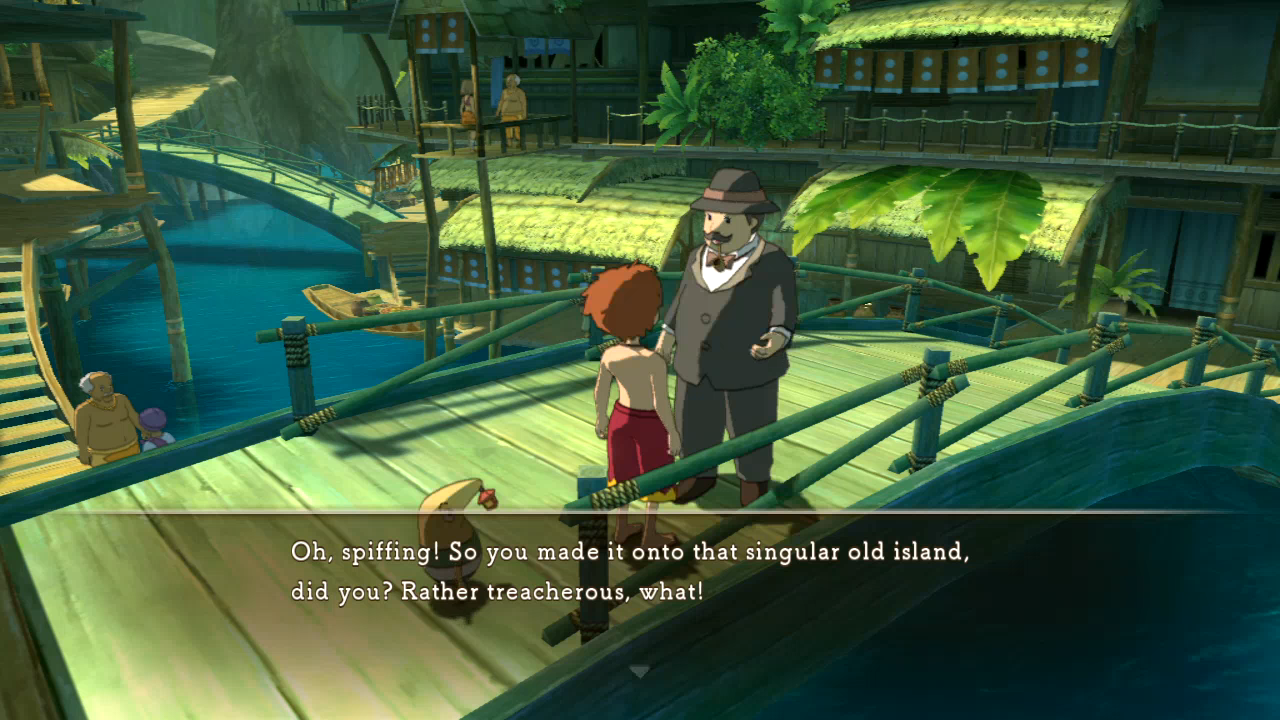 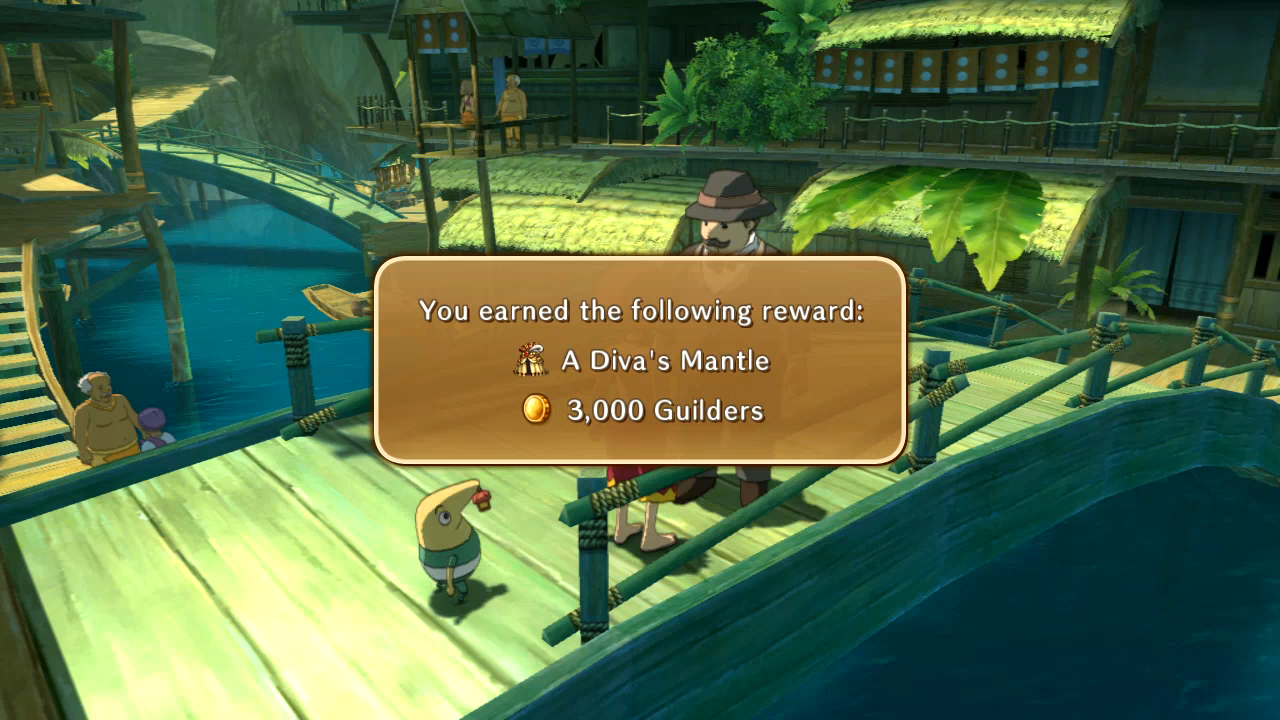 Believe it or not, his final quest is actually interesting and opens up the world of Ni no Kuni considerably. Yeah, never thought we'd see the day. 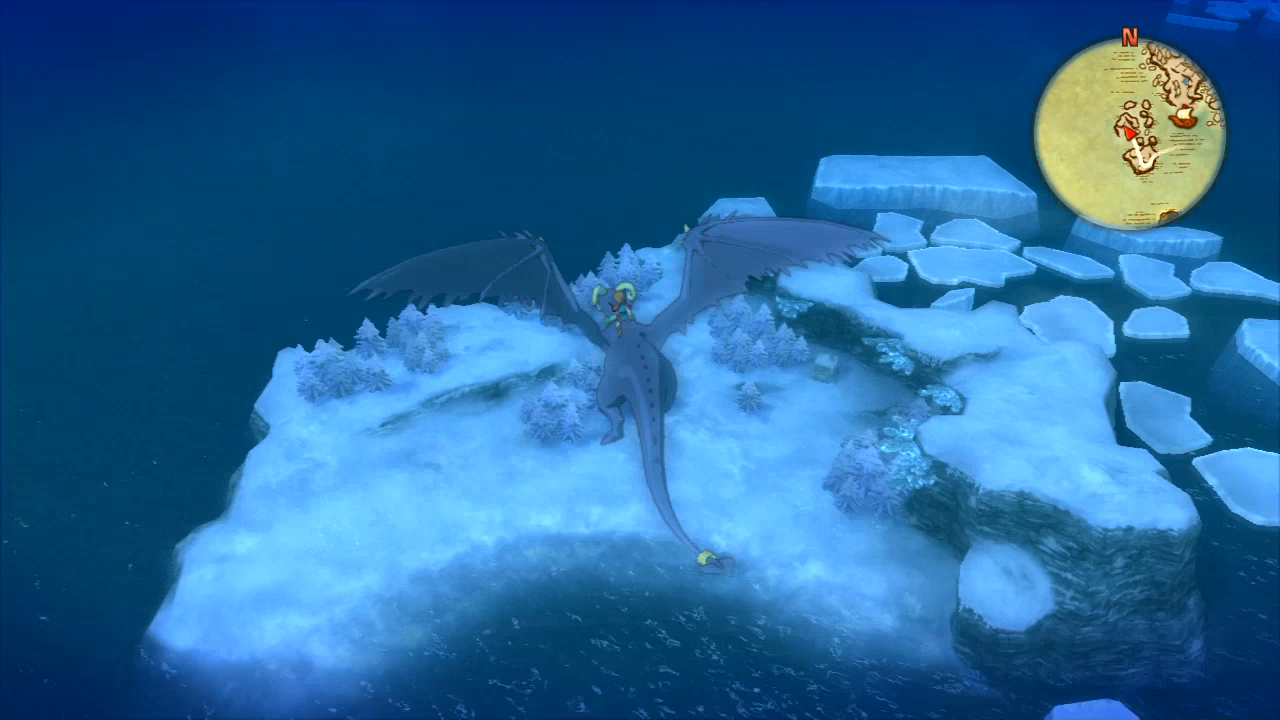 The final monument is hidden stupidly well on the island of Tiny Tim. 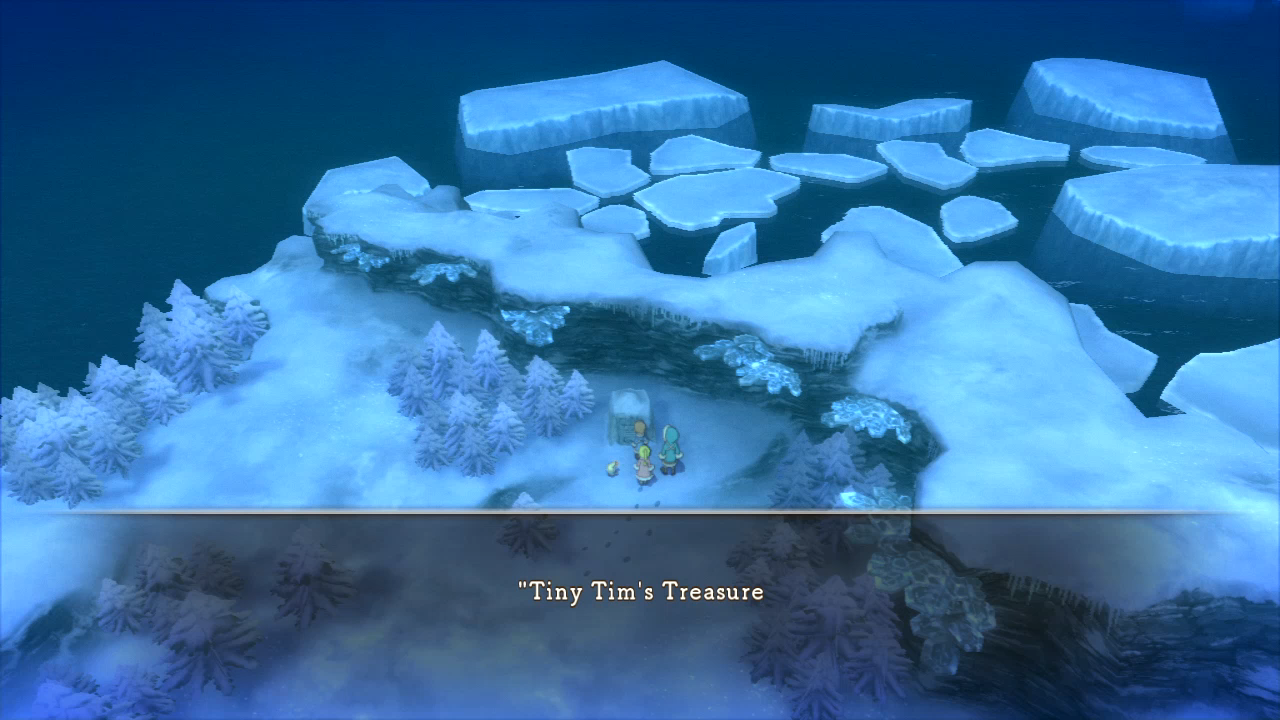  I forgot to screenshot the final two letters, but it doesn't matter, as you'll see. You don't need to memorize them. 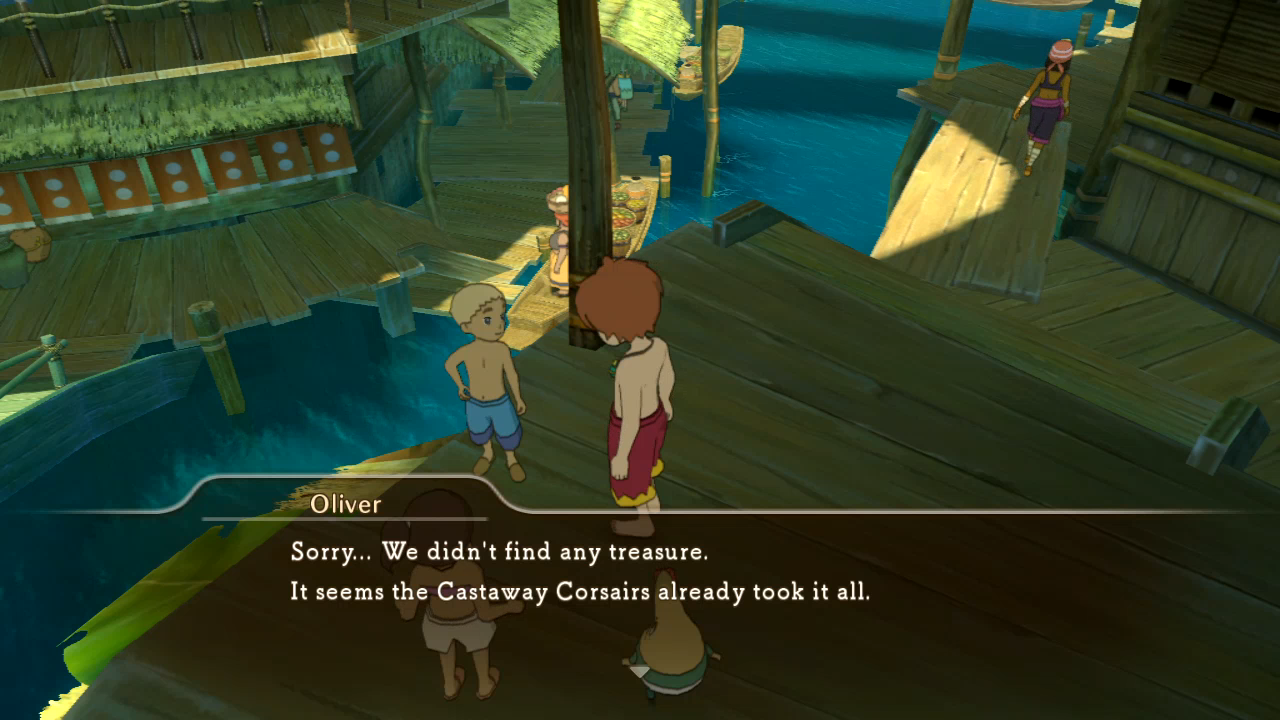 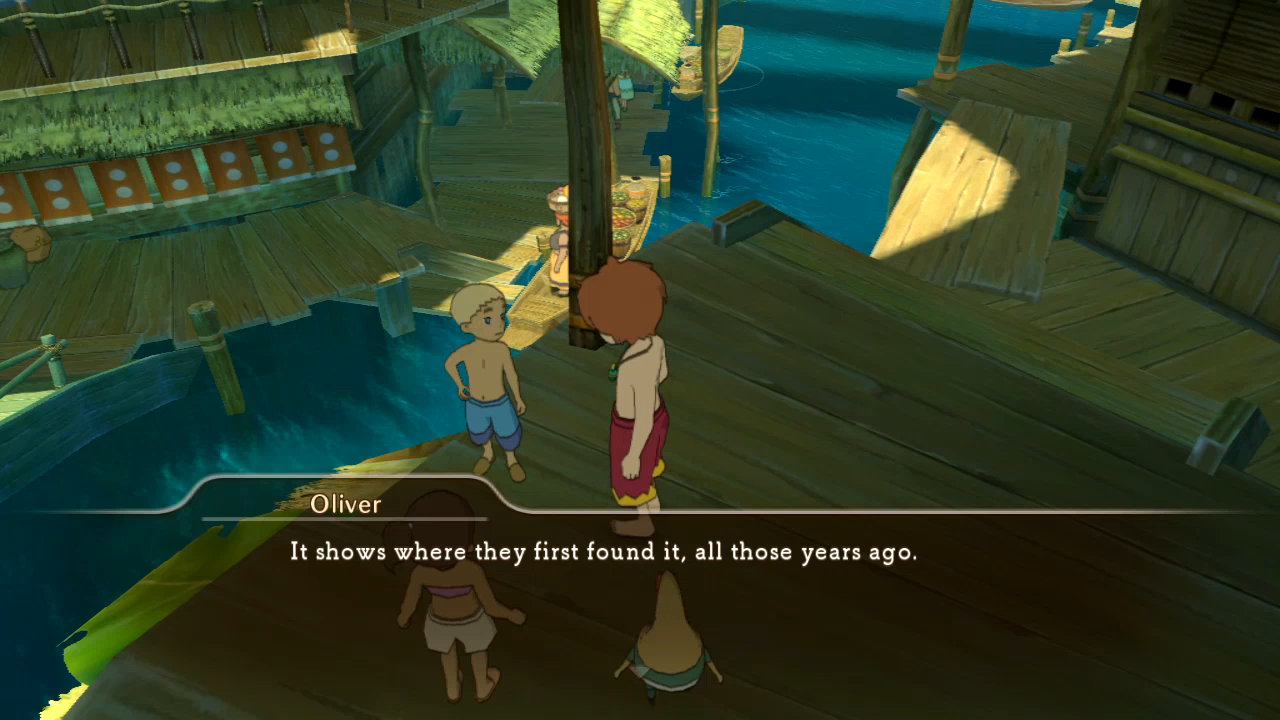 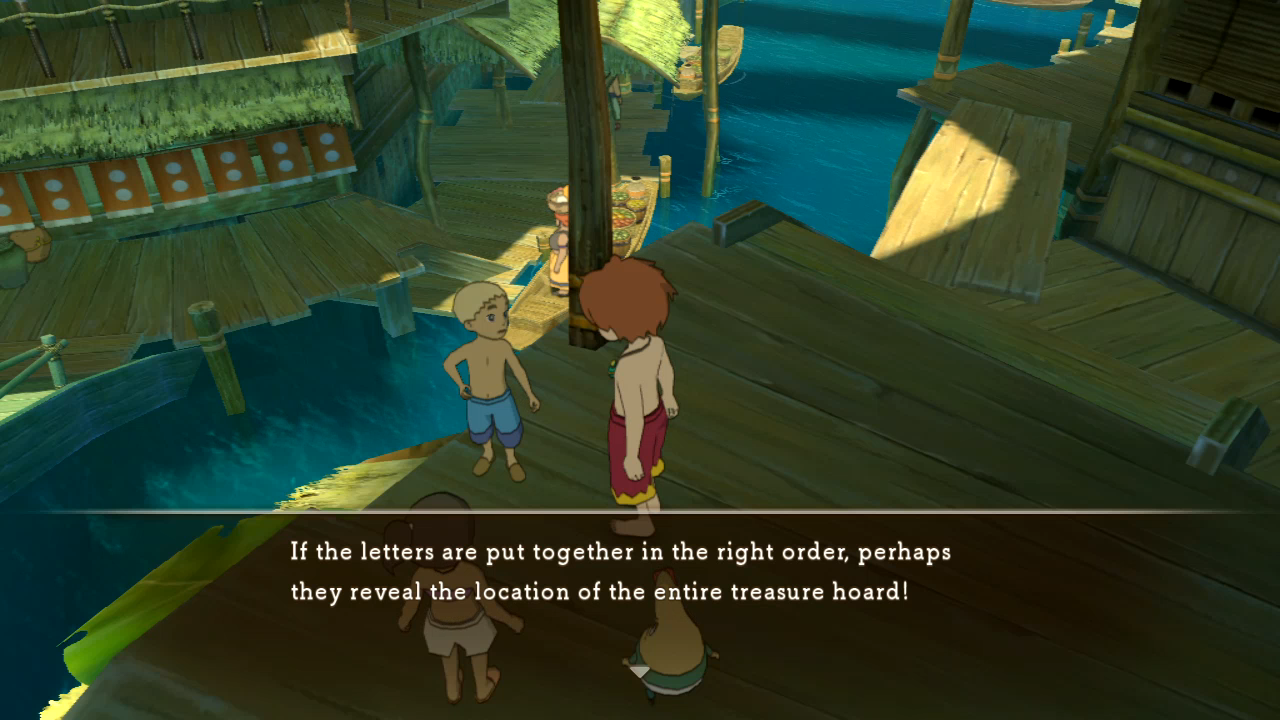  The answer to the riddle is pretty clever. The second symbol correlates to the letter of the answer, while the first symbol refers to that letter's position in the answer.  Thus we get 1-K, 2-U, 3-B, 4-L, 5-A, 6-I, 7-3. Or, Kublai the Third. 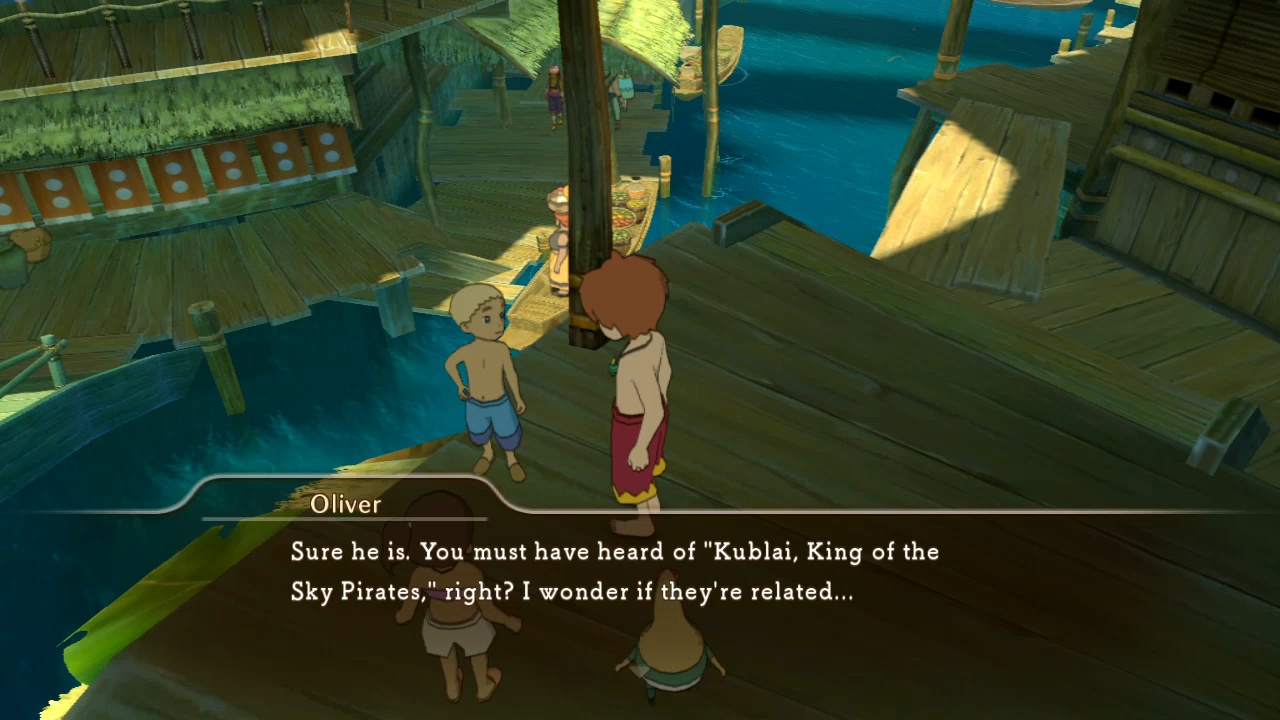 Let's go beat the family history out of him!     And now the game allows Oliver and Drippy the common sense to use Rejuvenate on the monument we saw earlier. It's on the island the Black Porpoise's crew was circling before we fought them, the interior of which only Tengri can reach, and this isn't the last time we'll be visiting it.  Who's ready for disappointment?!      Ni no Kuni.    Drippy once again shows his rare ability to know what's up.  They sure started off with a bang. And a gurgle. And a heart attack. 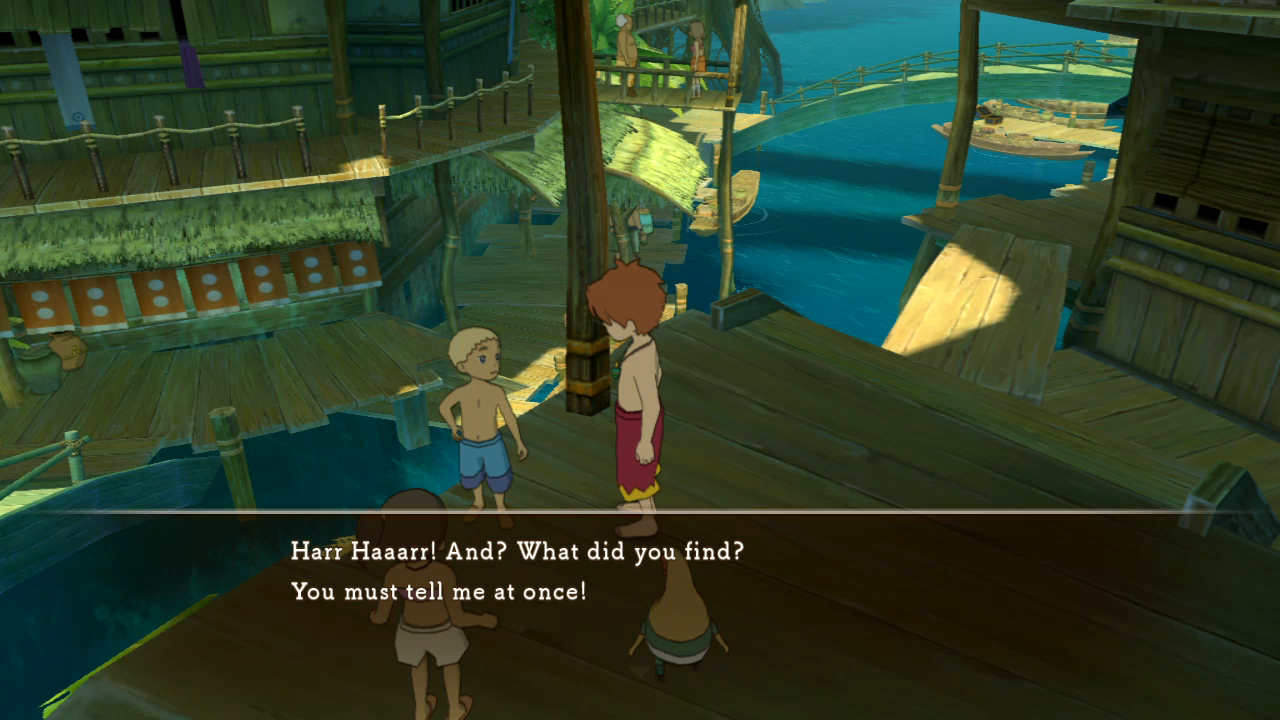 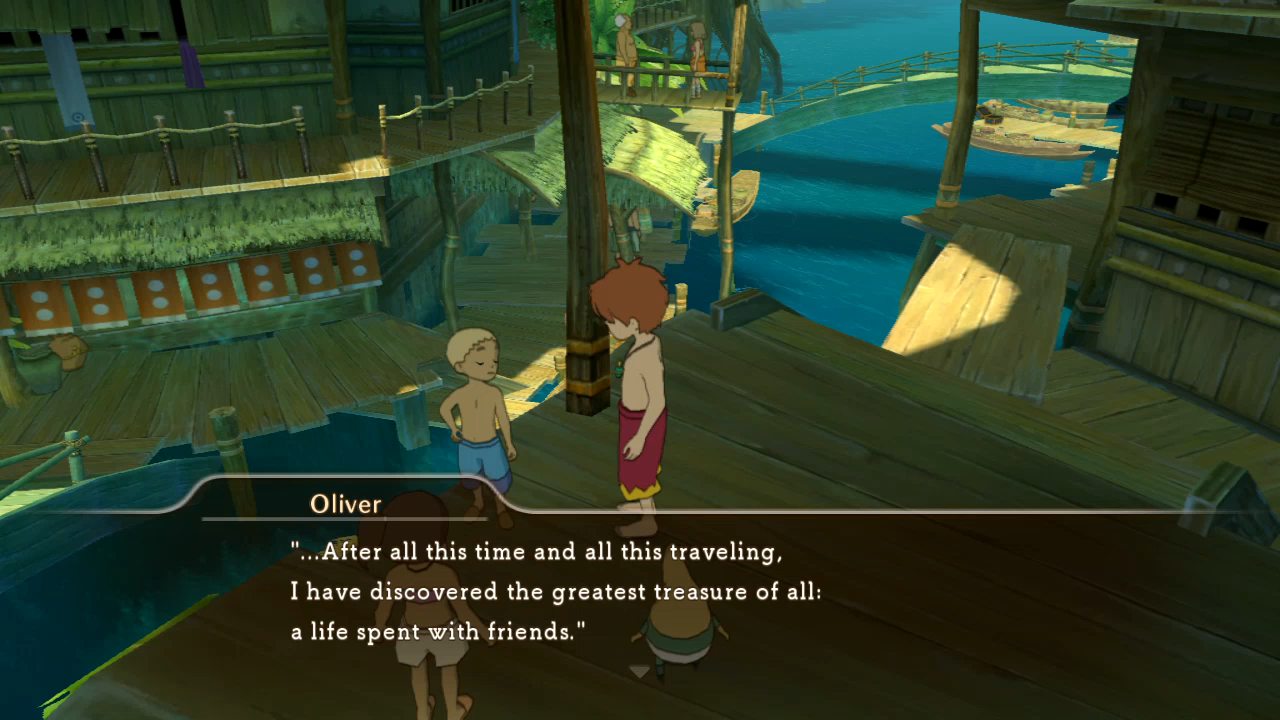   Children's morals will never not be rooted in truthful disappointment. Definitely a British localization.   The kid takes it well. He ought to; he did gently caress-all work.  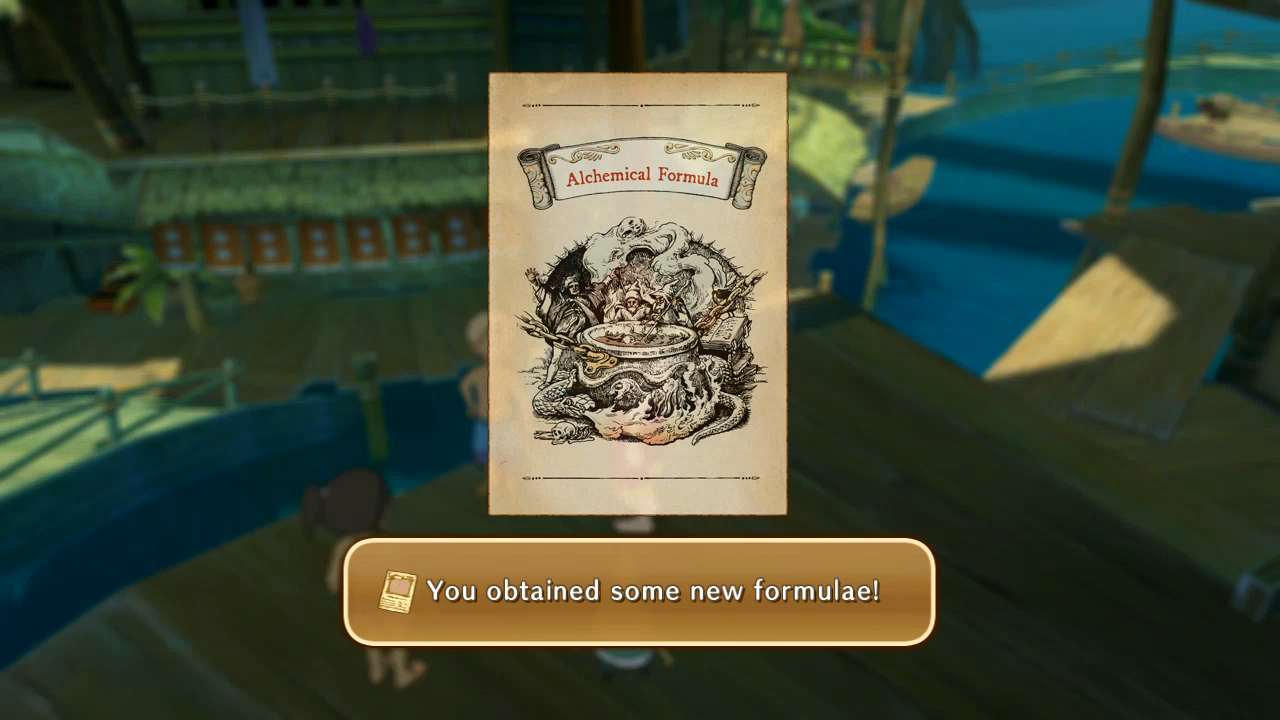 I also pick up the last merit reward I will get in this LP. 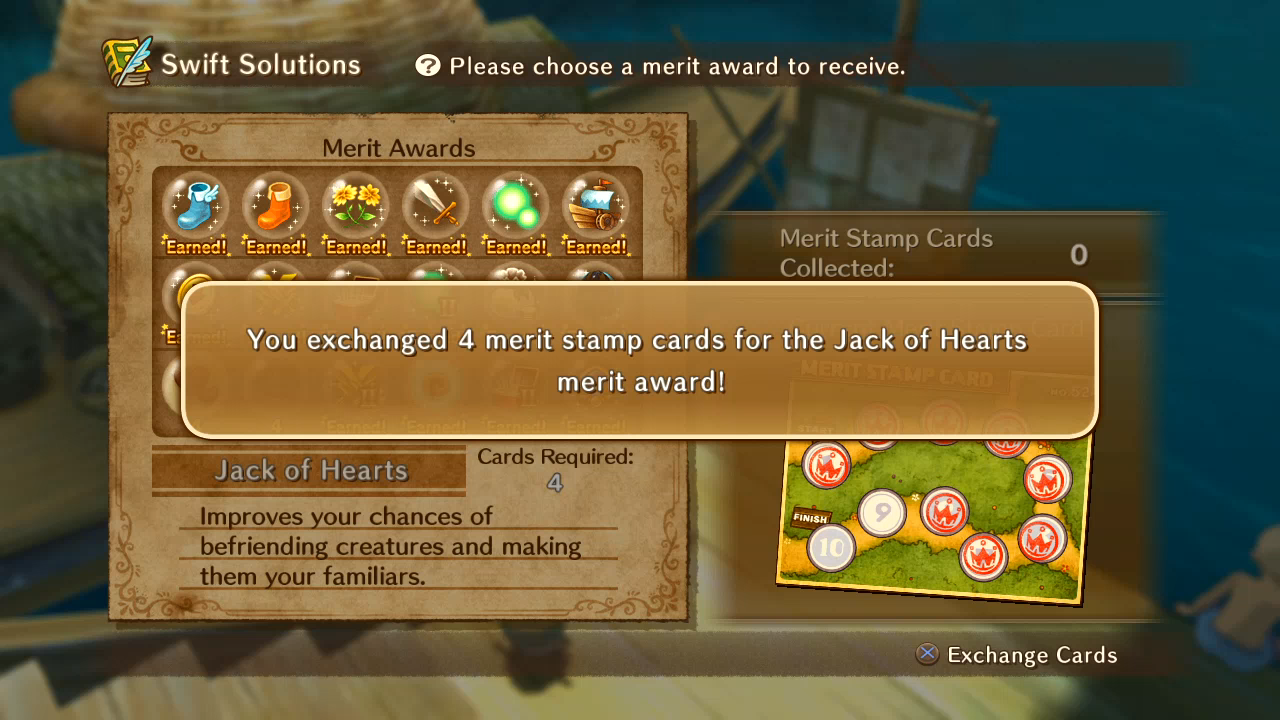 It was either this or healing while I walk, and I'm not hurting for healing items. Why don't I eventually get all of the merit rewards? Well...  ...remember the guy hanging out in this cave? It involves him.  Grabbing the purple chest, which was tempting me particularly strongly earlier in the LP. The guy hanging out here is called the Alchemist, and he sends you on a quest to alchemize a new weapon to test your skills. 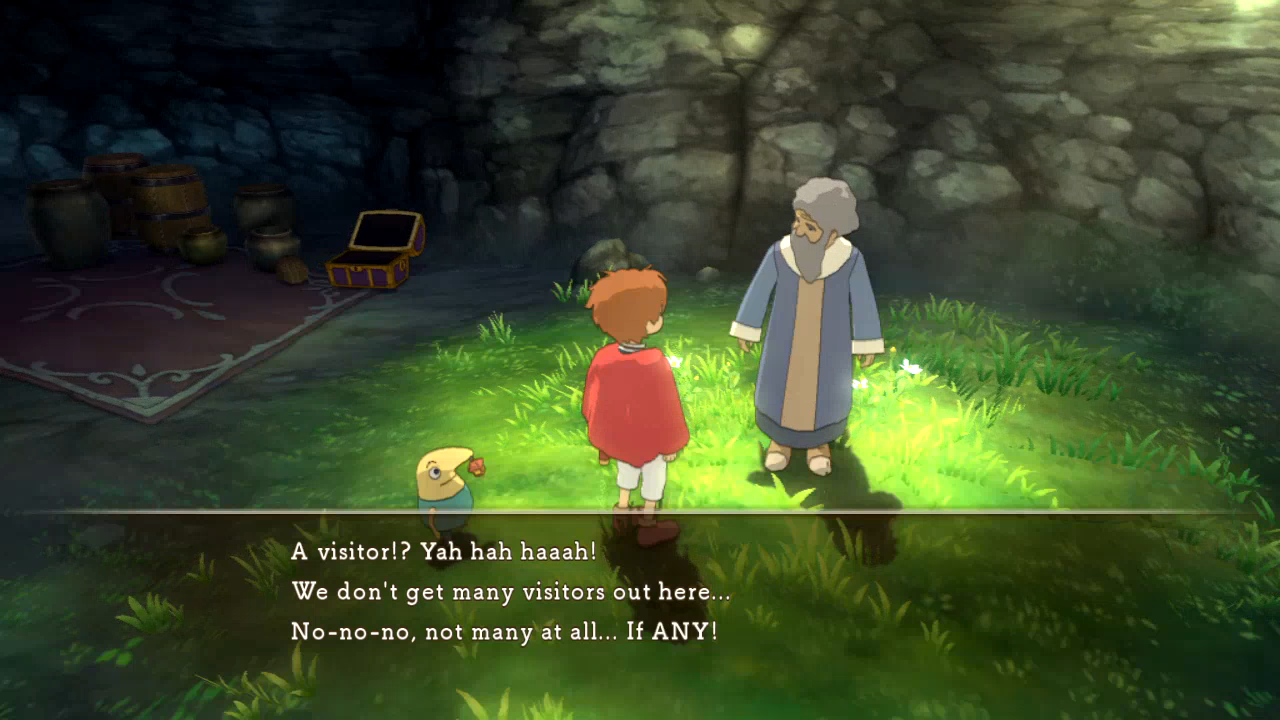 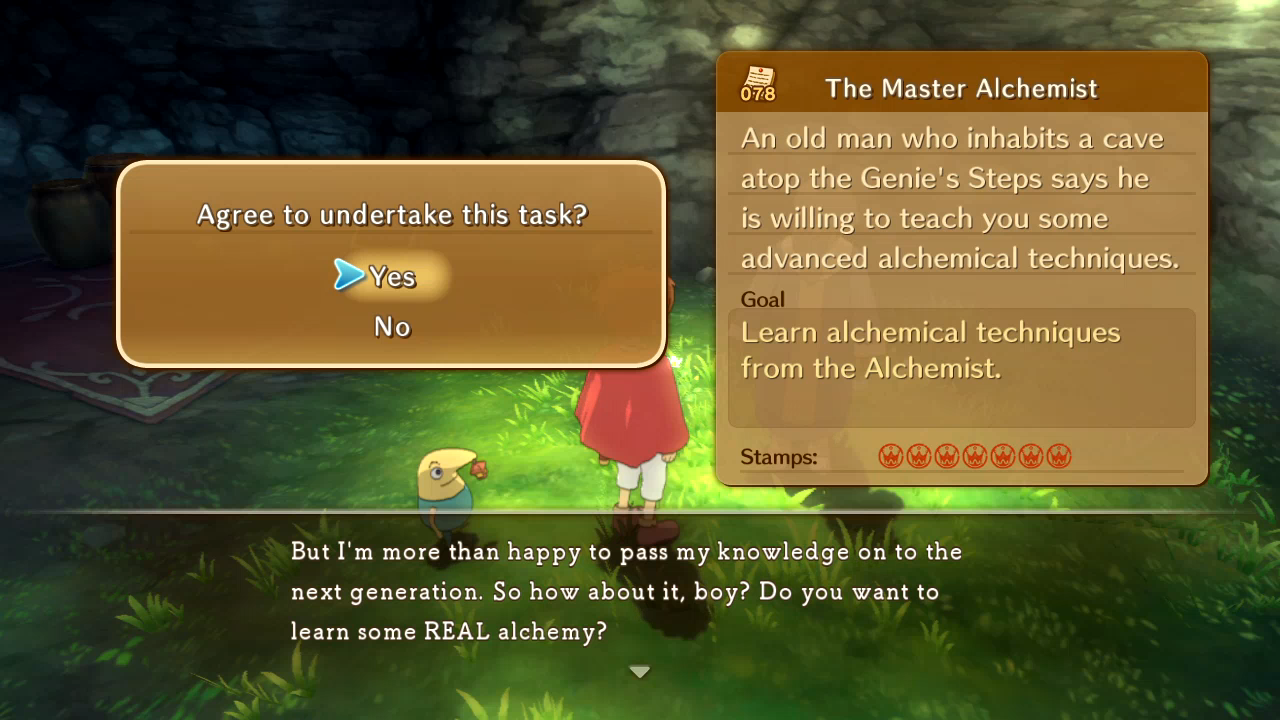 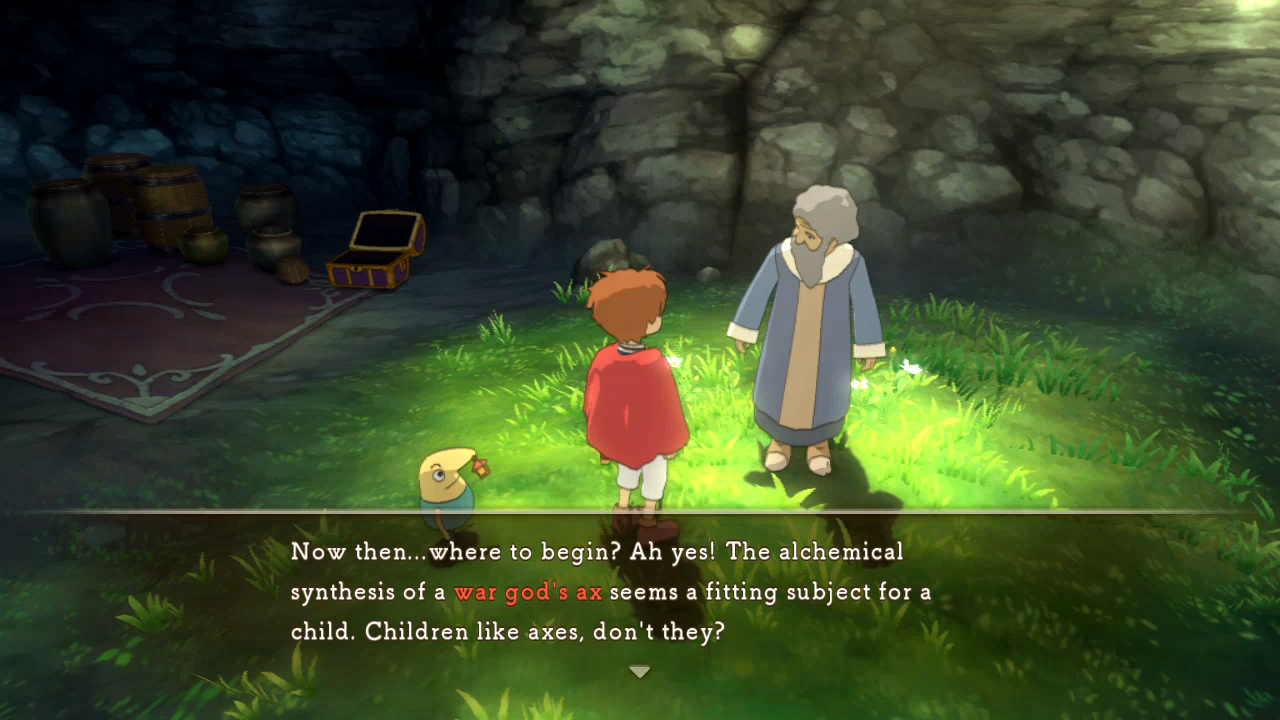 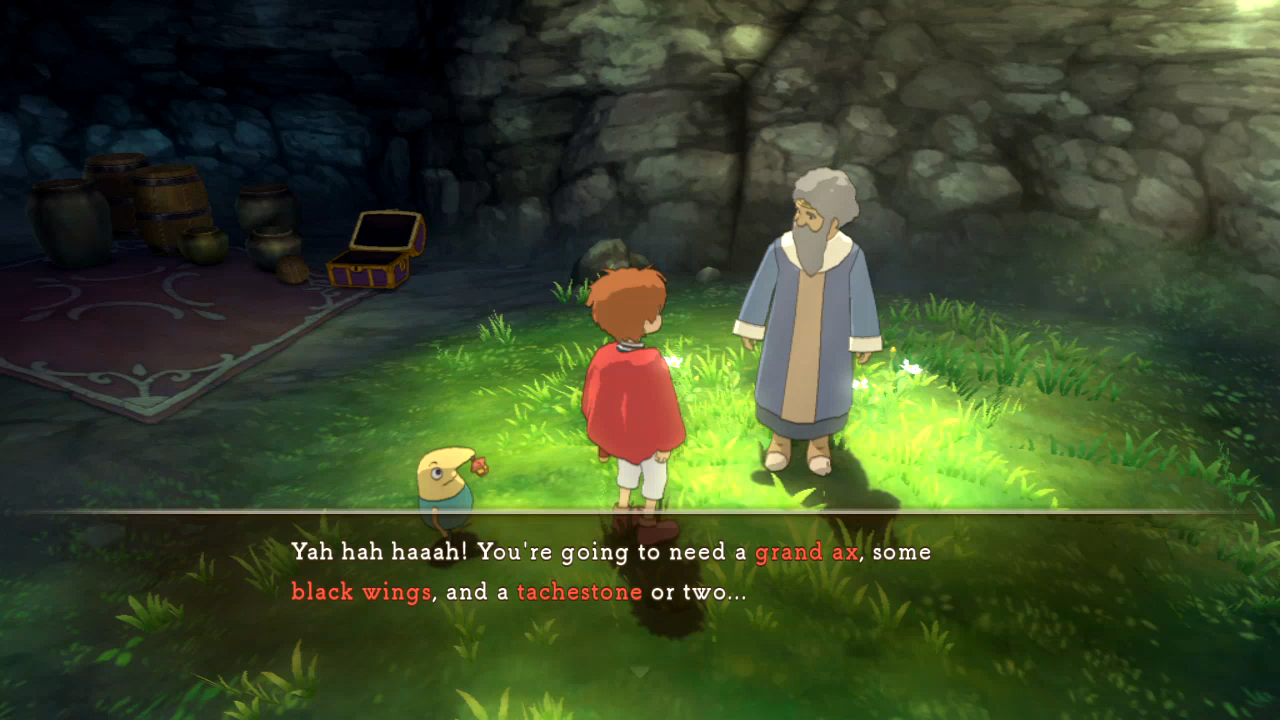 The War God's Ax isn't hard to make. But that's only the first part of the quest.  Heading back to Ding Dong Dell... 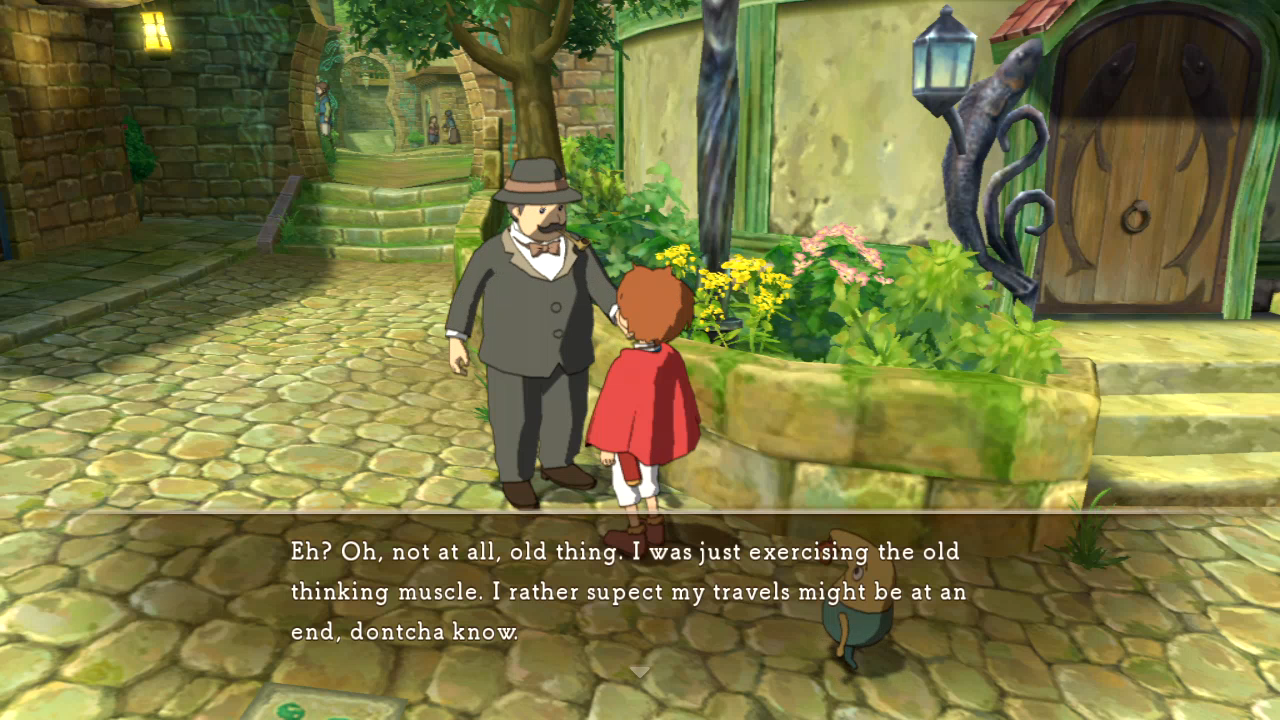 I'm quite ready to be done with you. 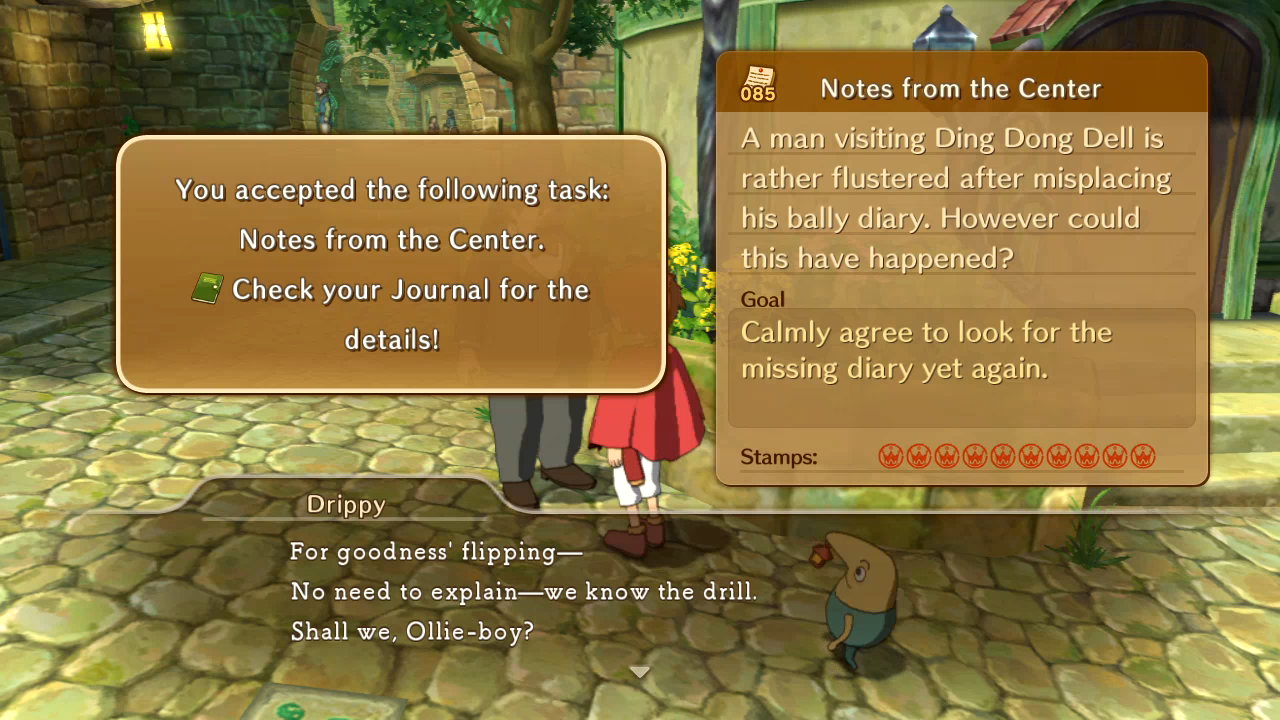 At least the game's sarcasm at this guy is funny.   This last quest to find the gentleman's diary is only unlocked in the post-game, and it opens up a hidden path south of Ding Dong Dell and east of the Golden Grove.   Inside we have a new forest area. This one is actually marked on the map in your Wizard's Companion, but it confused the hell out of me when I went searching for forests because you can only access it with this sidequest.    Uhh... you're worried about the door?  It's a forest, so of course there's a couple chests to grab.   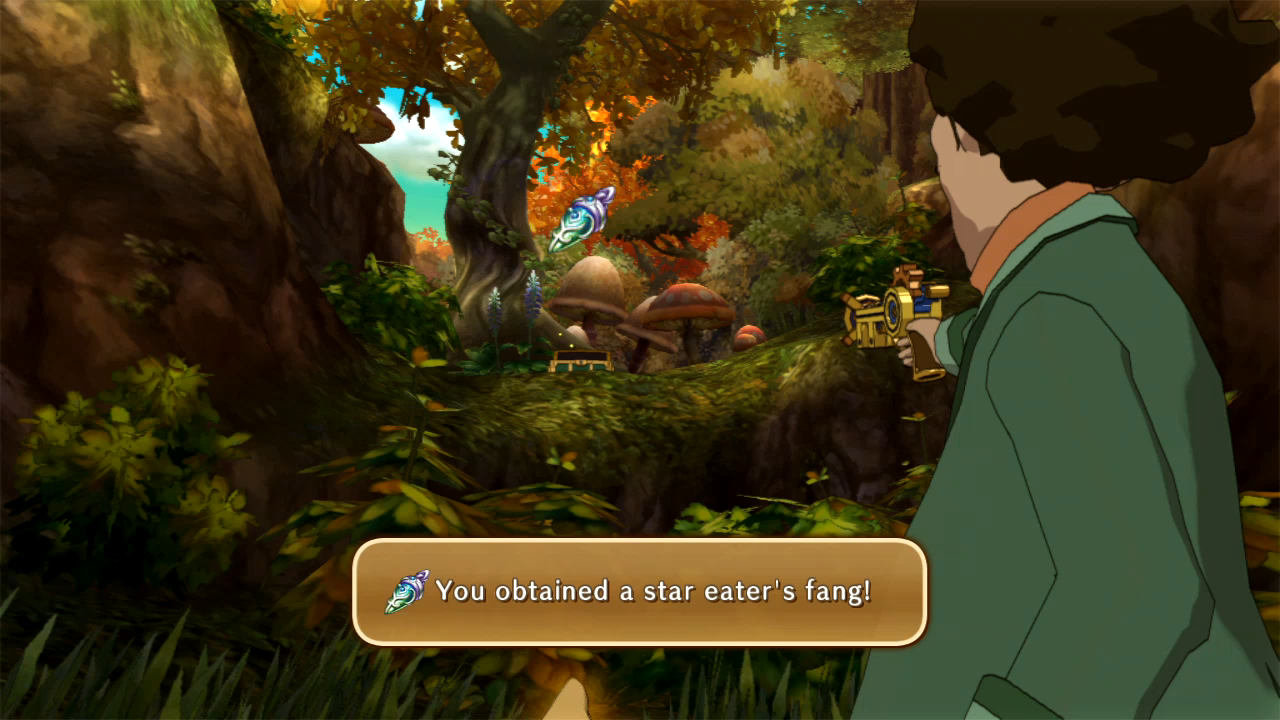 And then this guy. 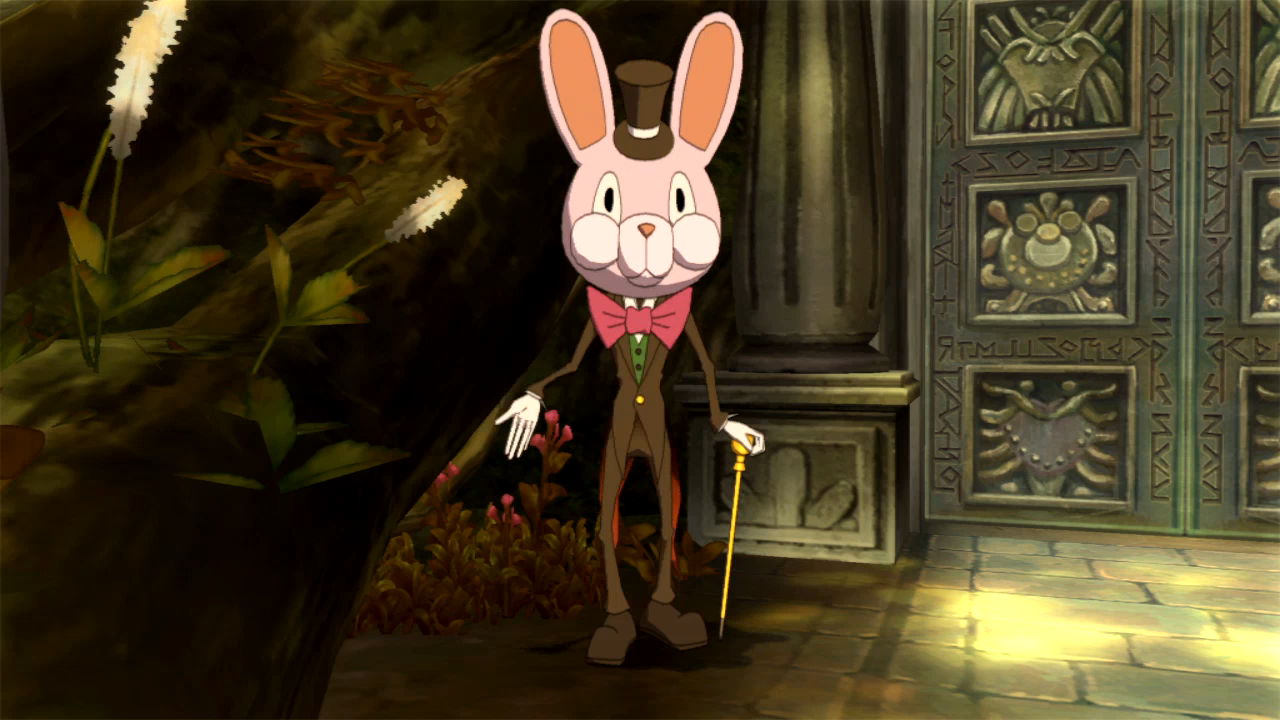 This guy is the most baffling yet oddly fascinating character in the game. He doesn't exactly start out that way, though. 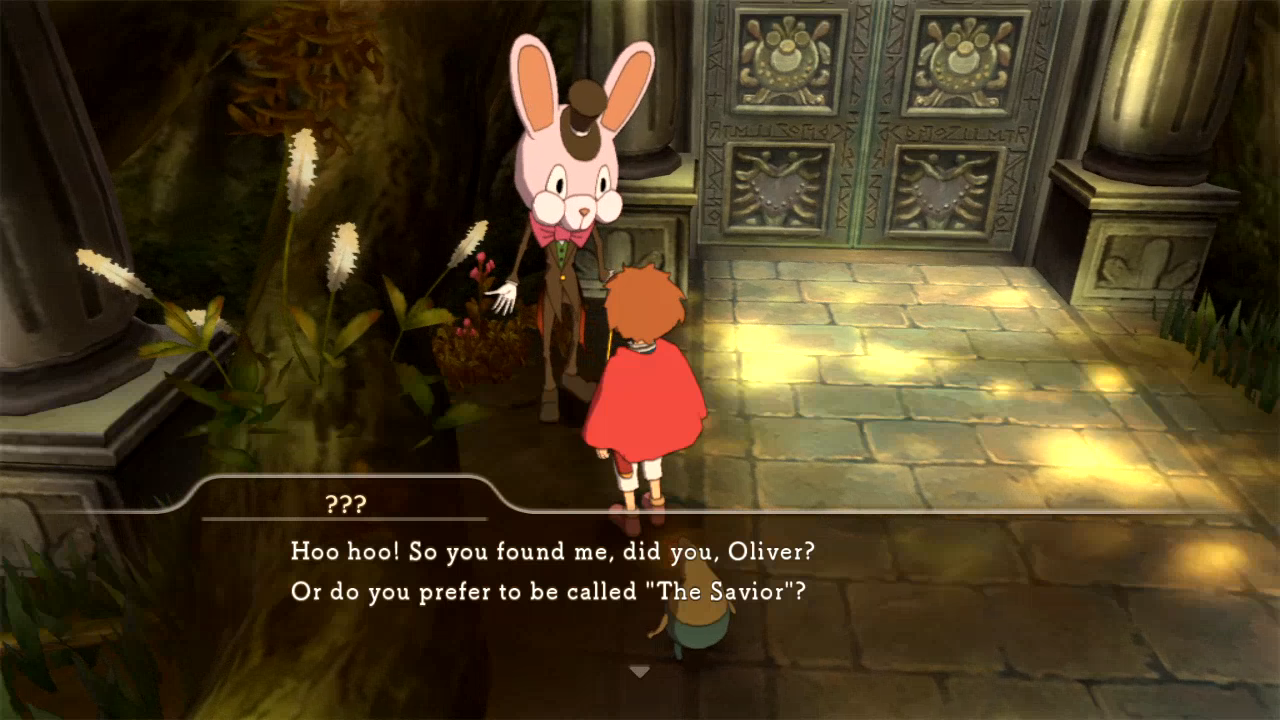 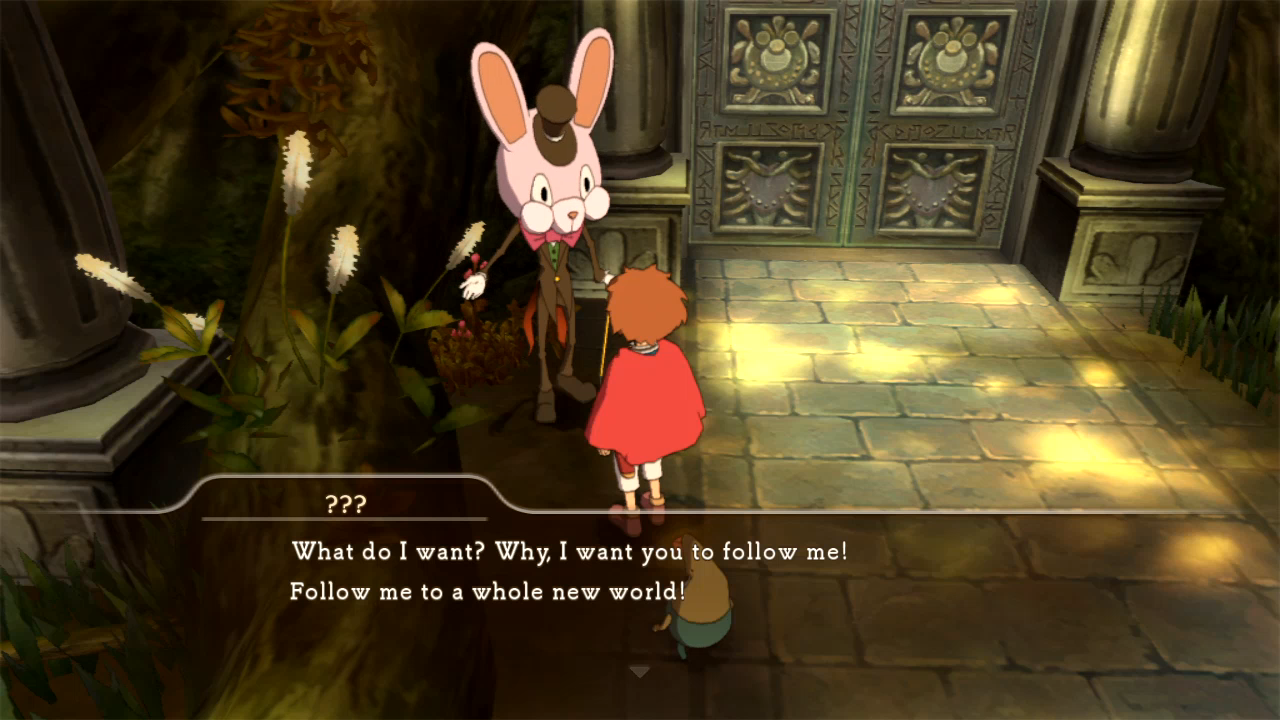 If you're wondering why he has a big rabbit head, Alice reference I guess. 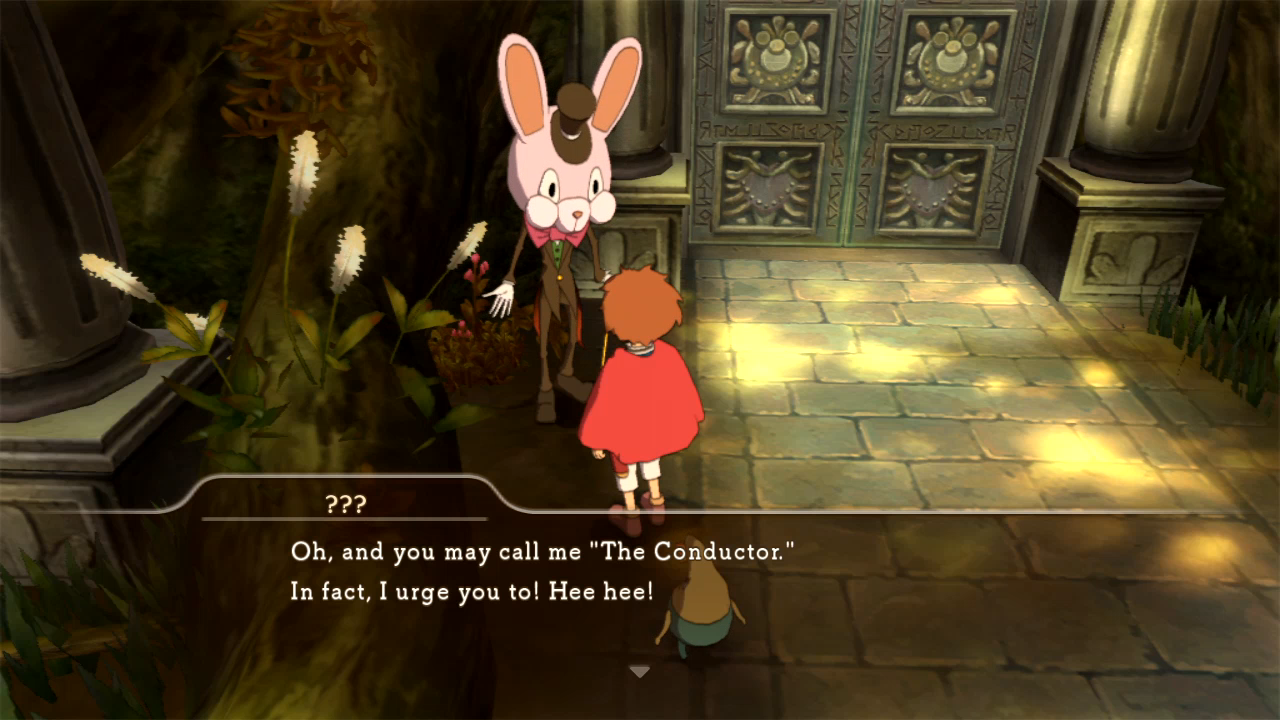 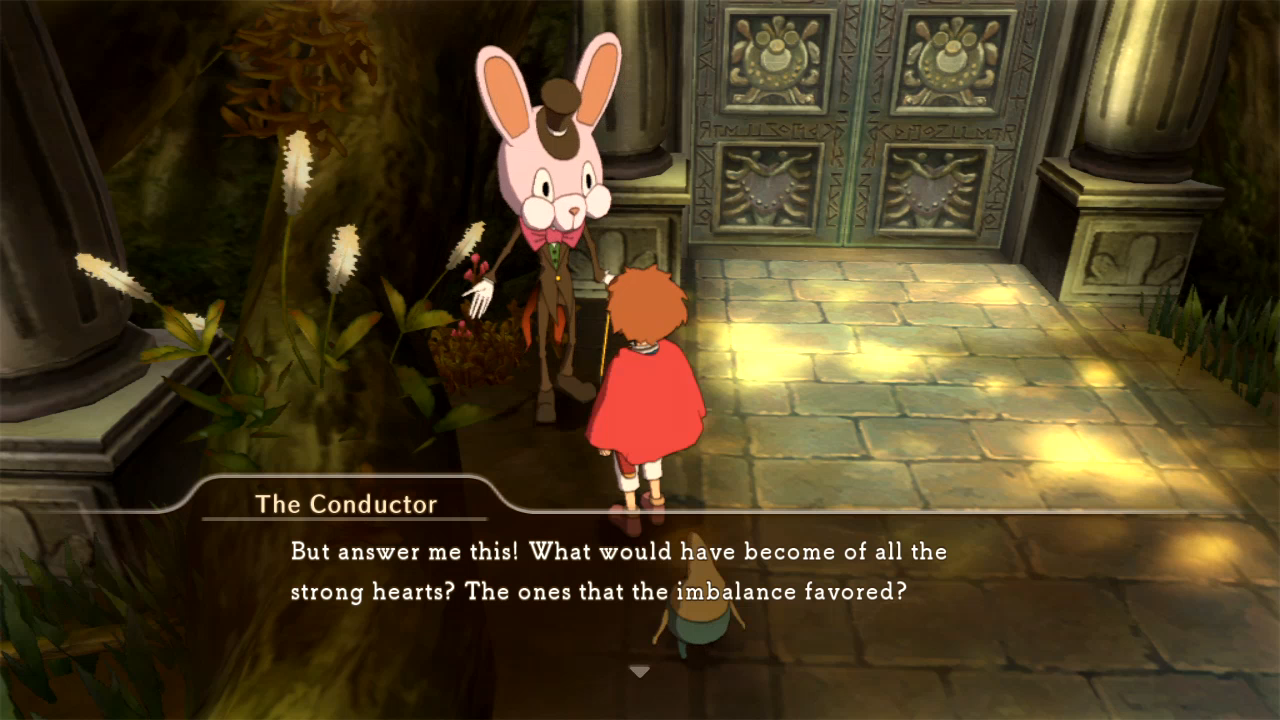 The Conductor is interesting because he is one of the few characters fully aware of Oliver's ability to travel worlds and heal broken hearts. His sidequest is a sideways response to this. 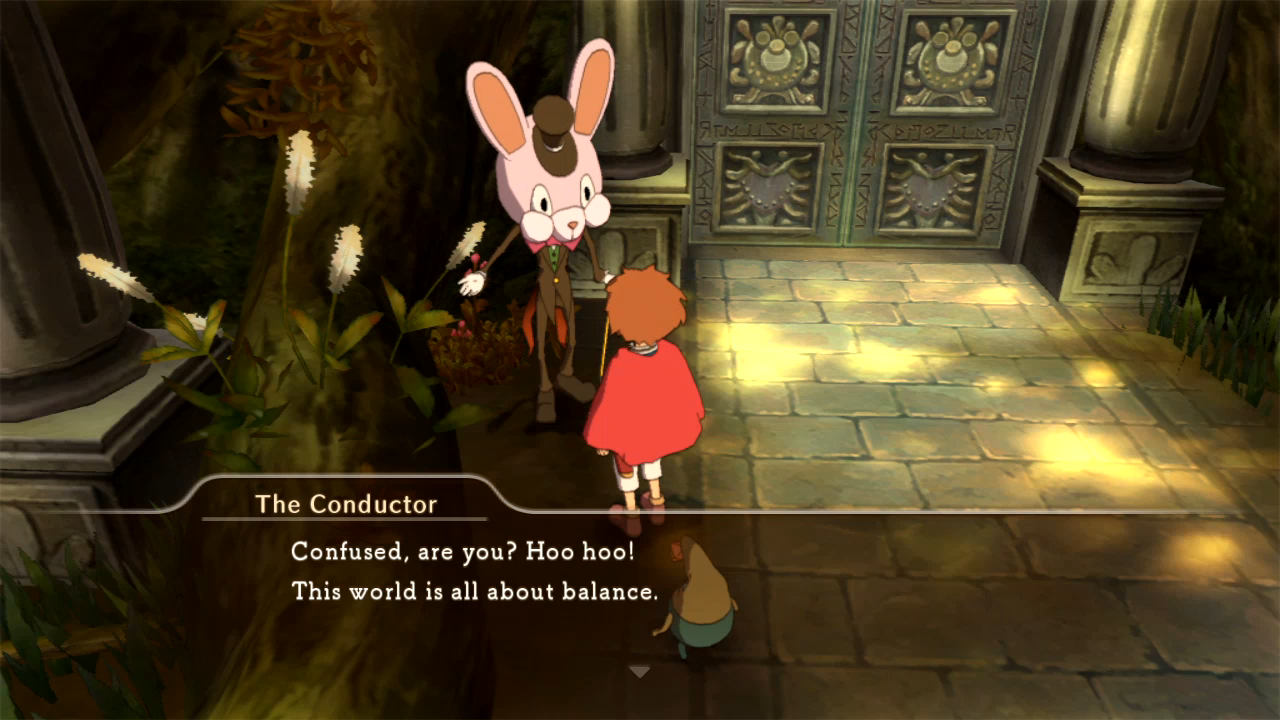 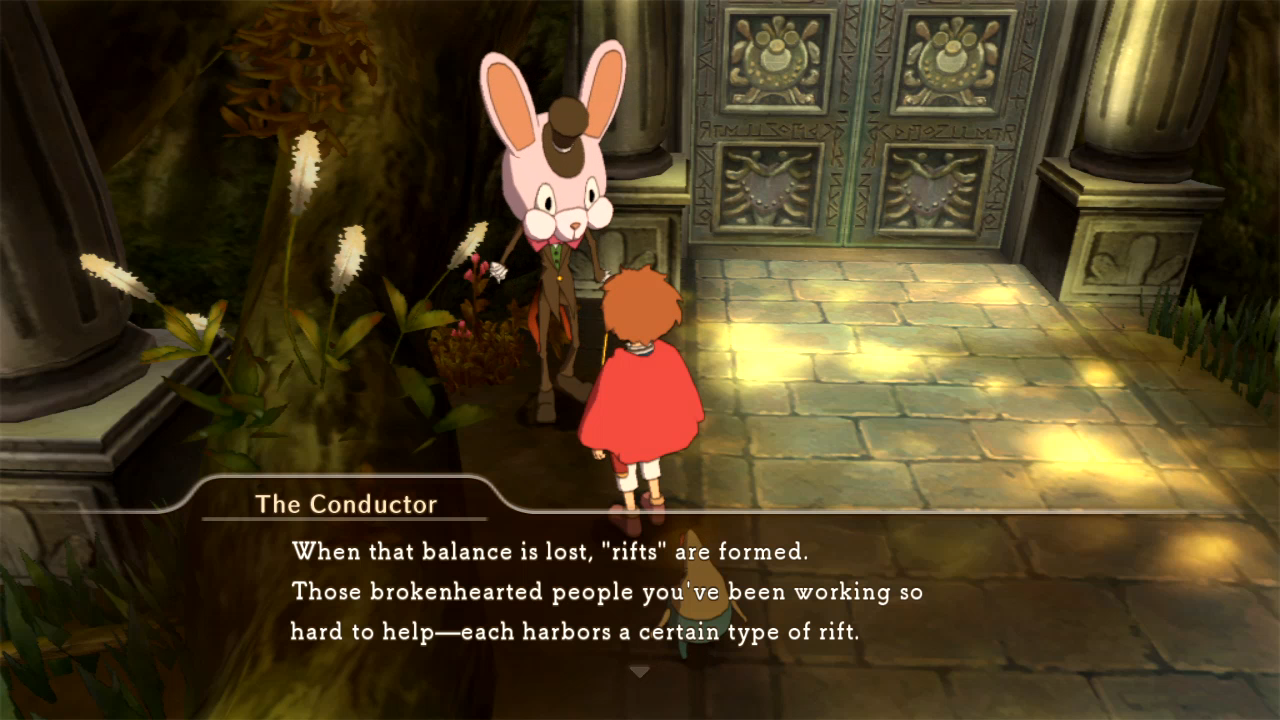 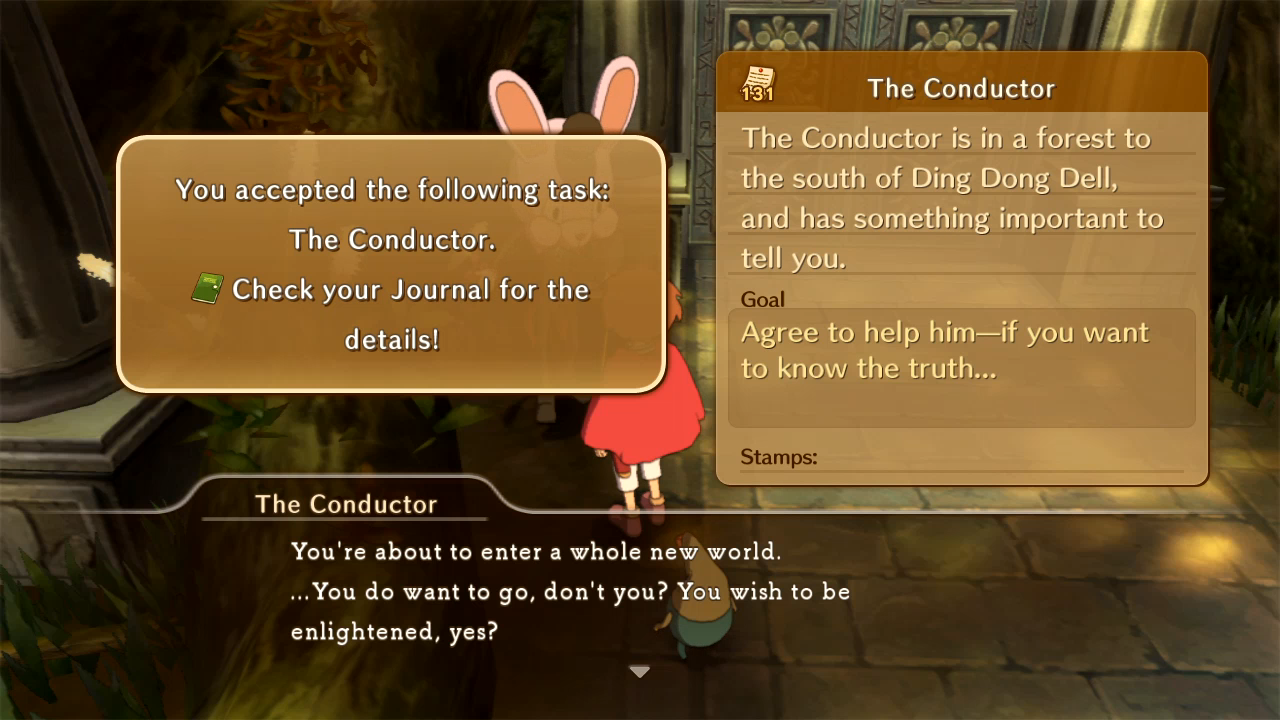 Don't get too excited. 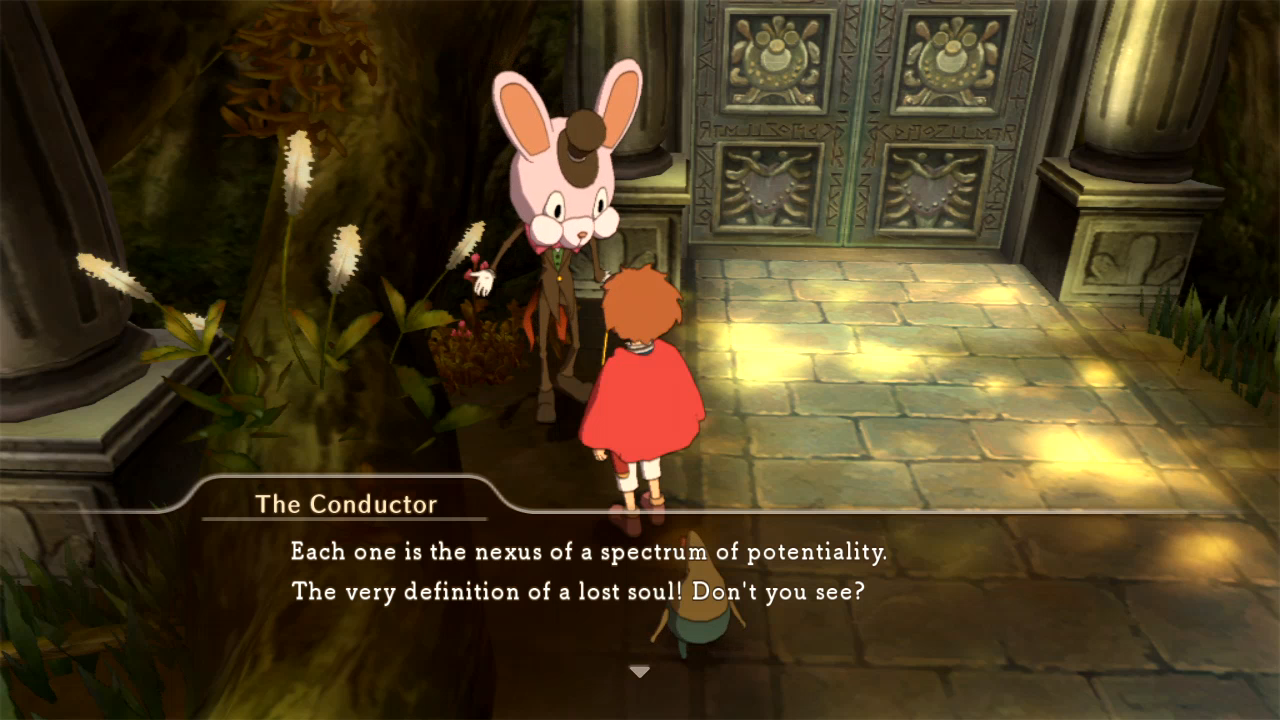  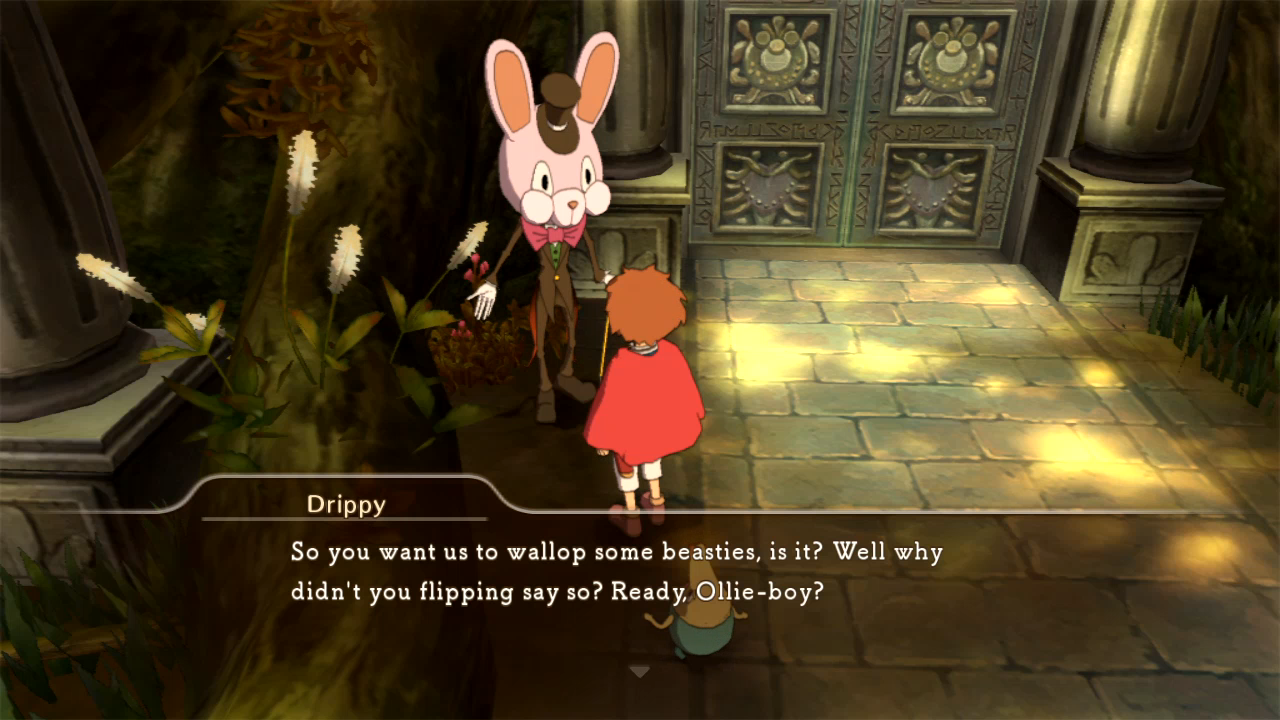 Boss refights! Yes, The Conductor sends us out to fight tougher, uglier versions of most of the bosses we've fought so far. That's why he's not immediately likable though; boss fight fatigue is as strong as ever with these. 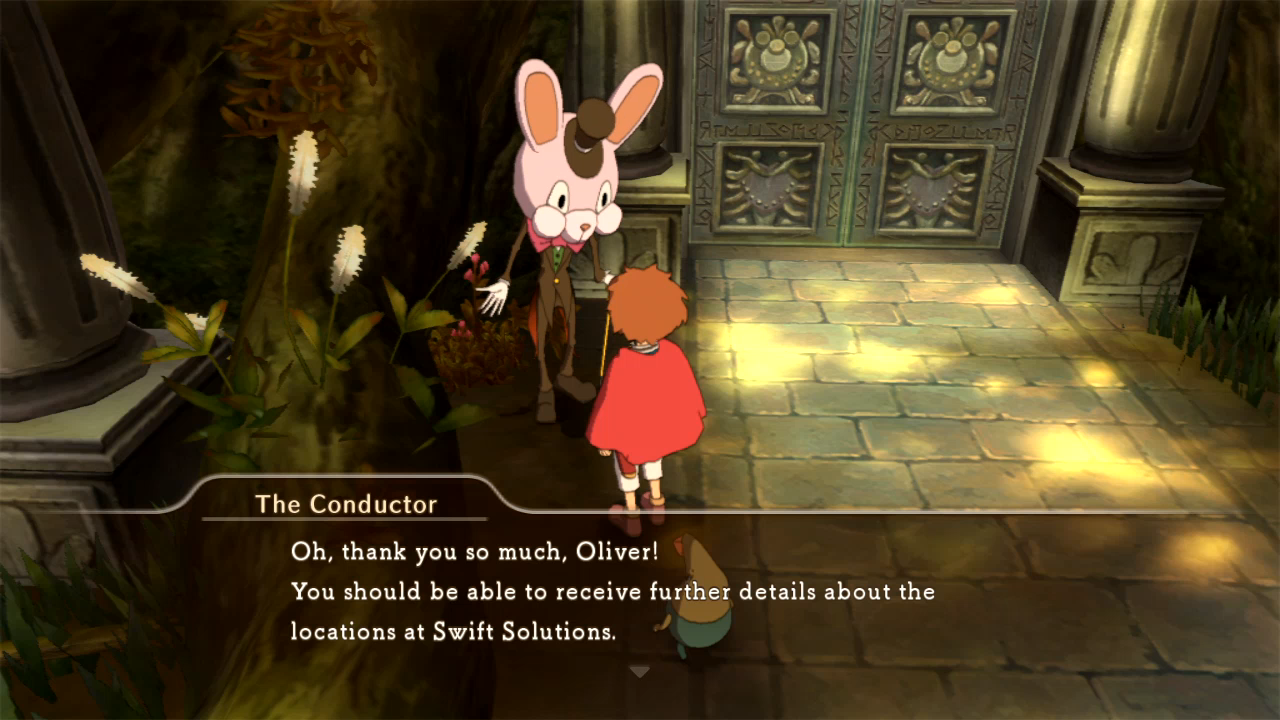 His quest is really just a trigger for the bosses to be acceptable as bounty hunts. We have to go back to Swift Solutions and accept the hunt before the bosses will appear. 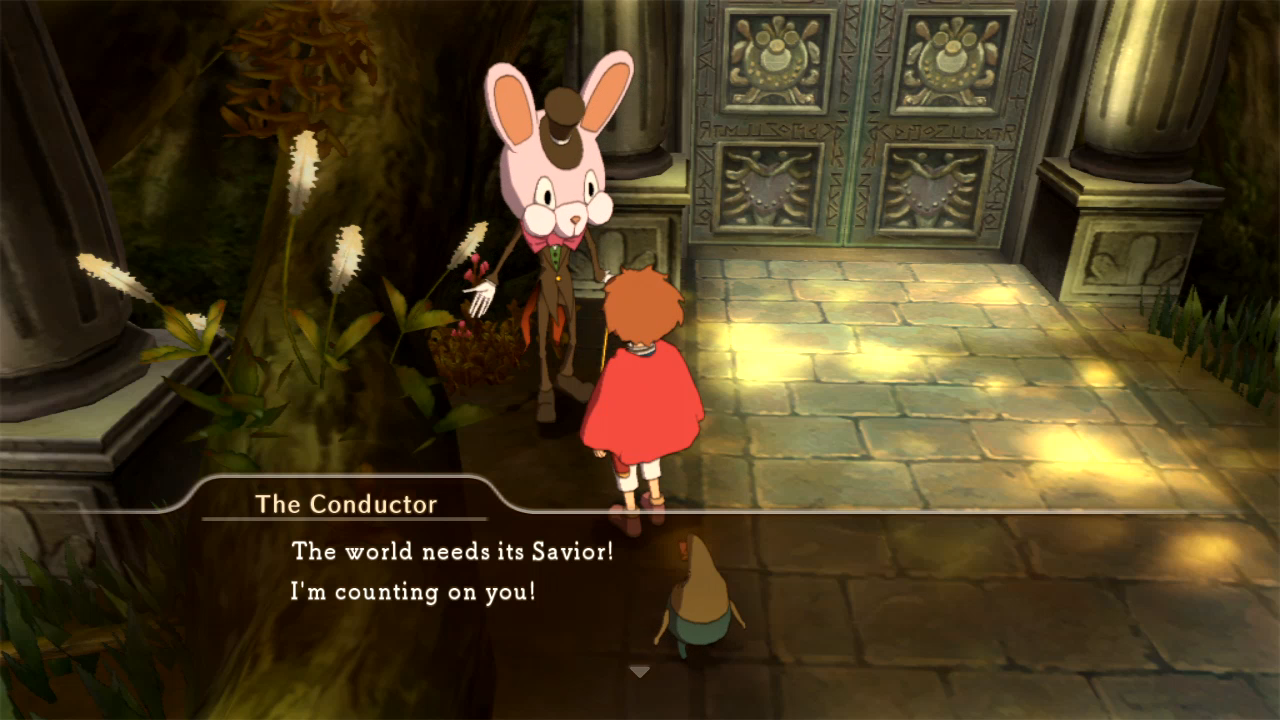  He never leaves Ding Dong Dell, FYI.  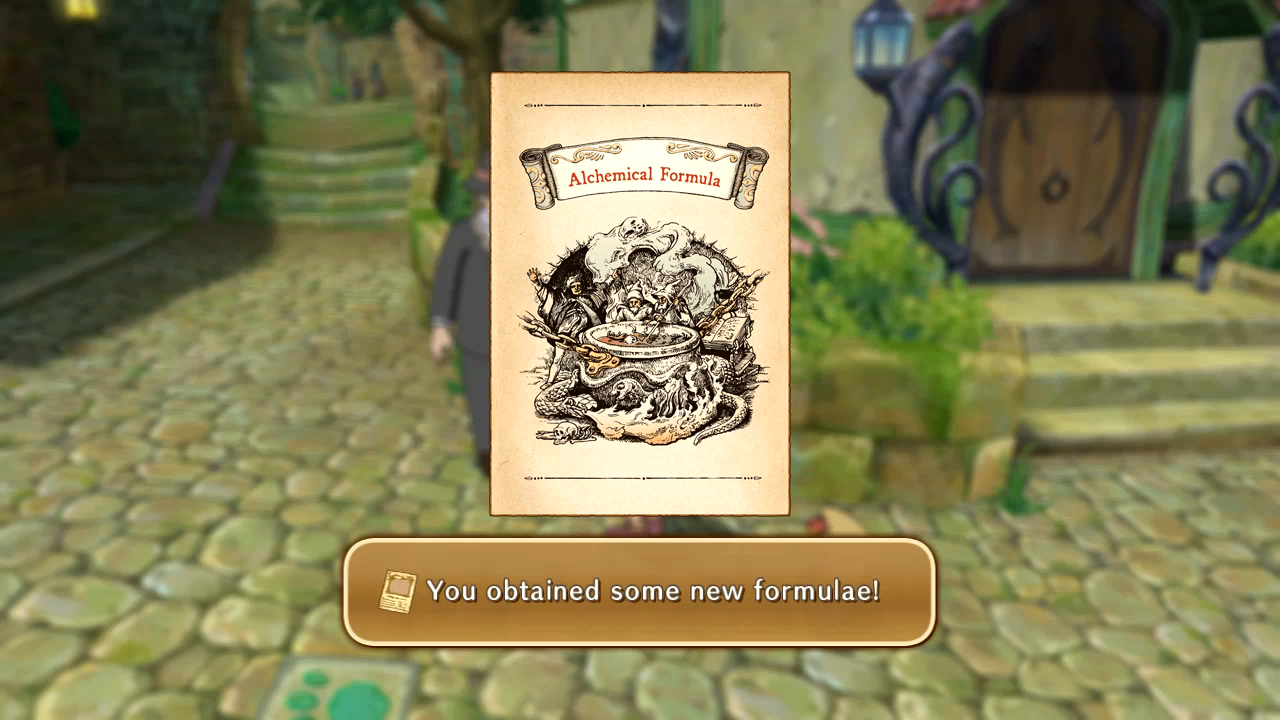 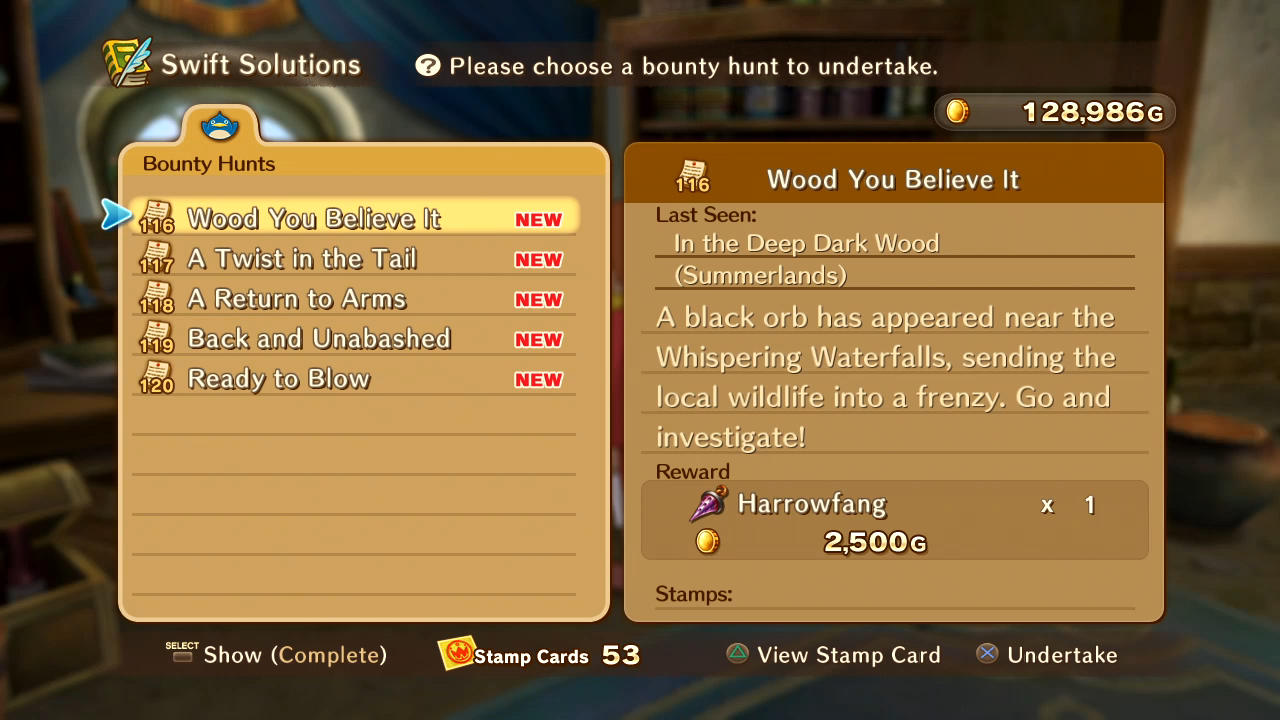 The Conductor's battles don't all open up at once. We fight a handful of the bosses at a time, then we go back to the Conductor, and he tells us that even more rifts have appeared. Since that's ultimately a crapton of boss refights, his sidequest will be split into three updates of their own, the first of which will be next update and the last two of which will close out the LP. In the meantime, a few loose ends to tie up. 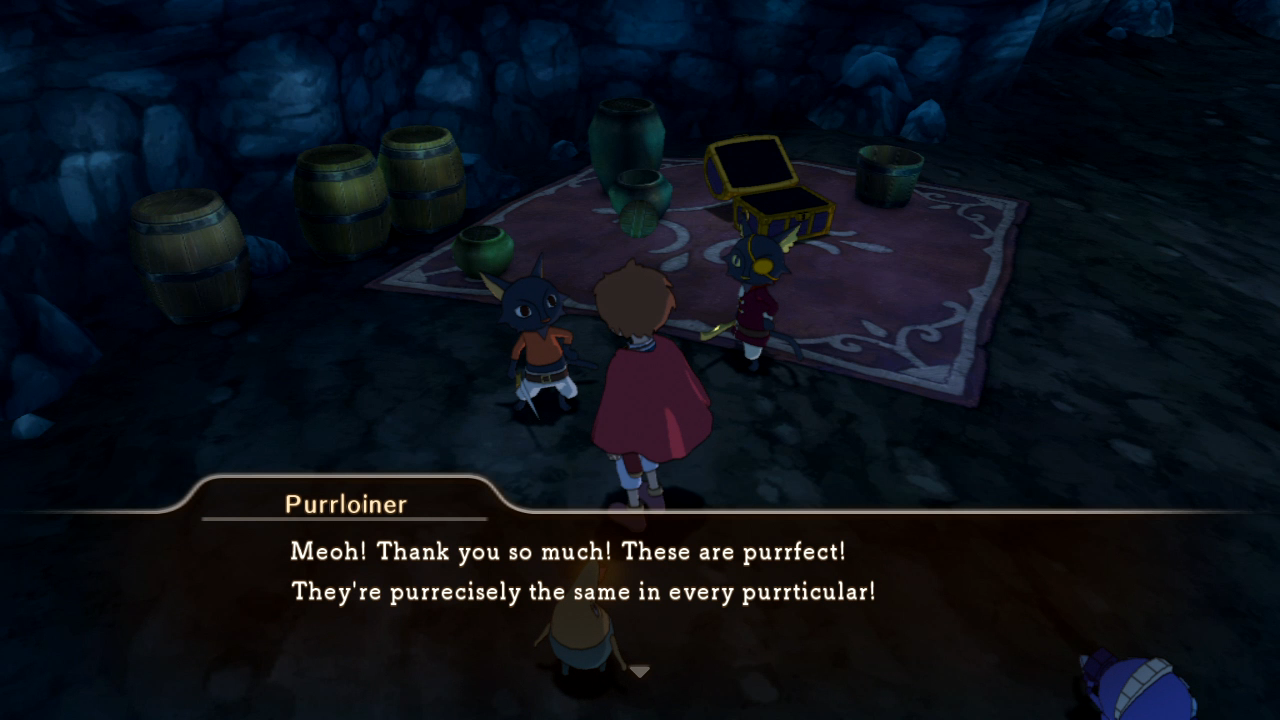     D'aw, I like you Duncecap.  Not so much anymore.  Okay, I like you again. And to close today's update, one of the more hilariously hidden green chests, lying in the water behind our Jackpotty friend.   Next time: The Conductor's Battles, Part 1!
|
|
#
?
Feb 28, 2015 22:45
|
|
|
Post-Game Screenshot Missions 3: The Conductor's Rifts 1 Jumping headfirst into The Conductor's boss refights. Since I'm already in Ding Dong Dell, I go after Hickory Dock. 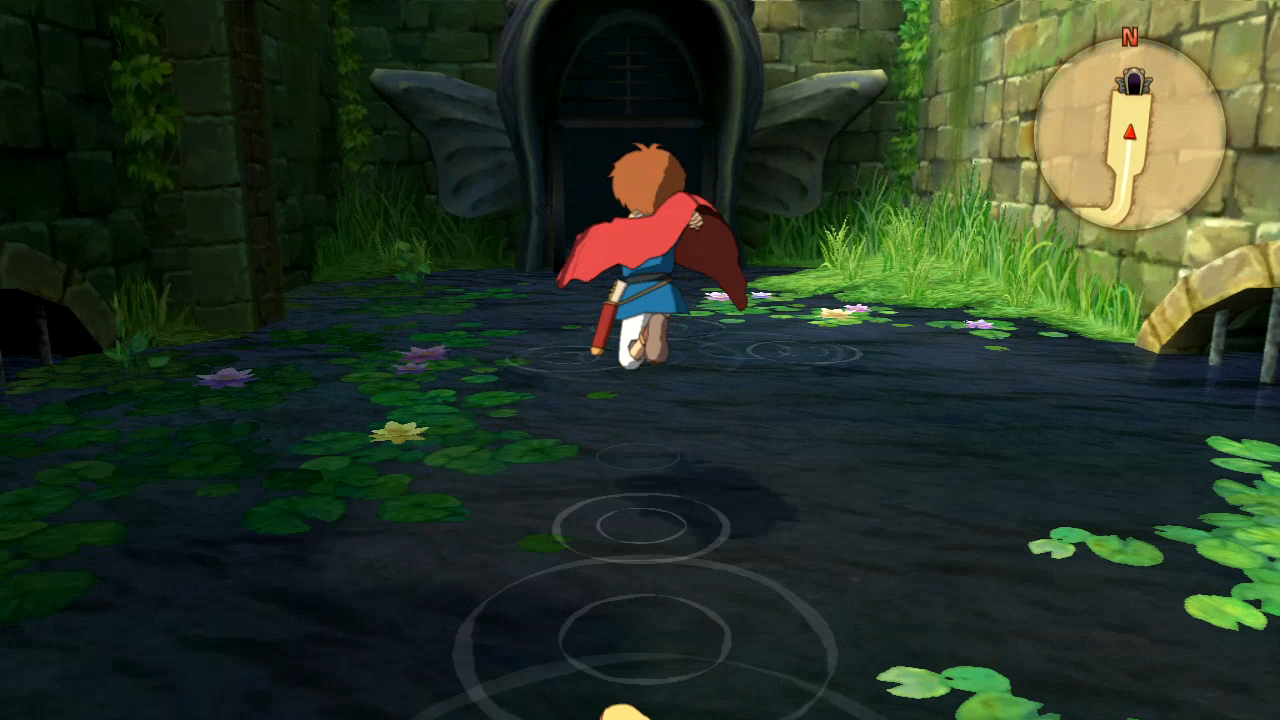 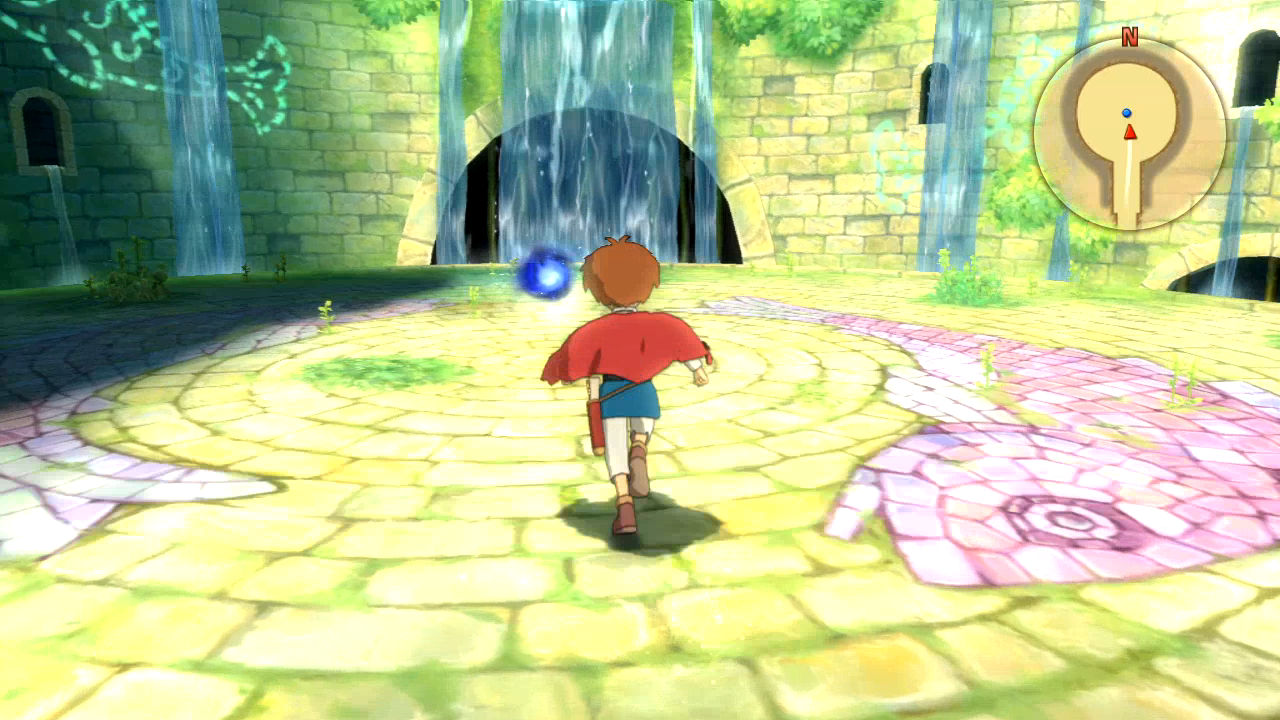 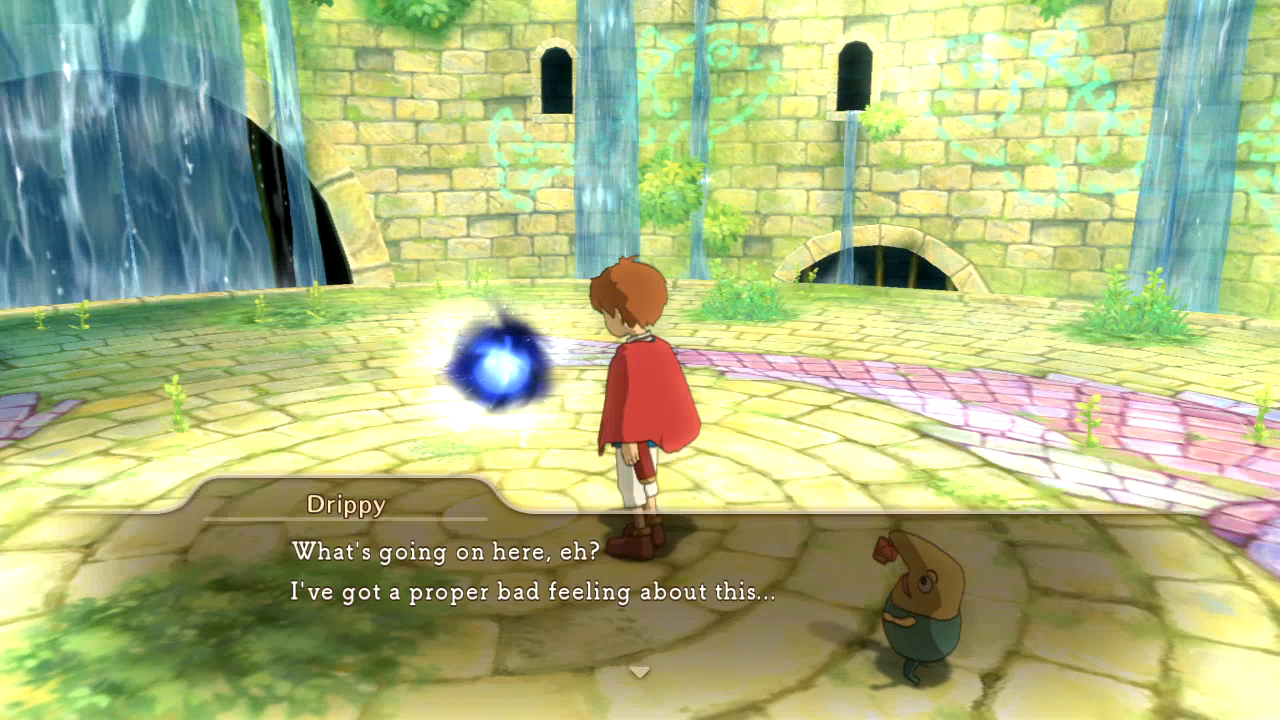 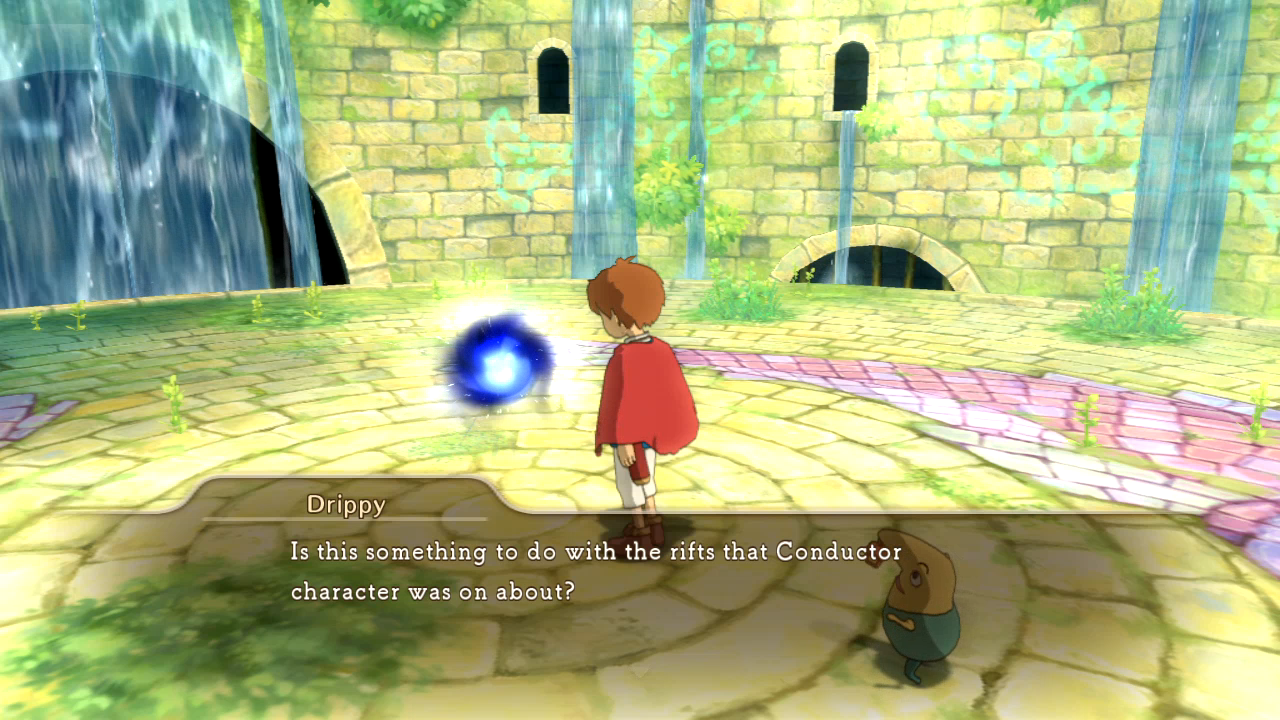 The fights are like every other bounty hunt in that you need to initiate the battle yourself, though these bosses appear as black orbs. The first fight you do might surprise you.   Yes, "Dickory Dock". Every refight is a recolour and renaming of the original boss, and they're much harder hitting and have higher HP.  This in itself is not a problem.  All of the original bosses special moves and usually their gimmicks still apply. Dock still uses Tailspin to confuse me constantly, and defending against it doesn't seem to work ever. 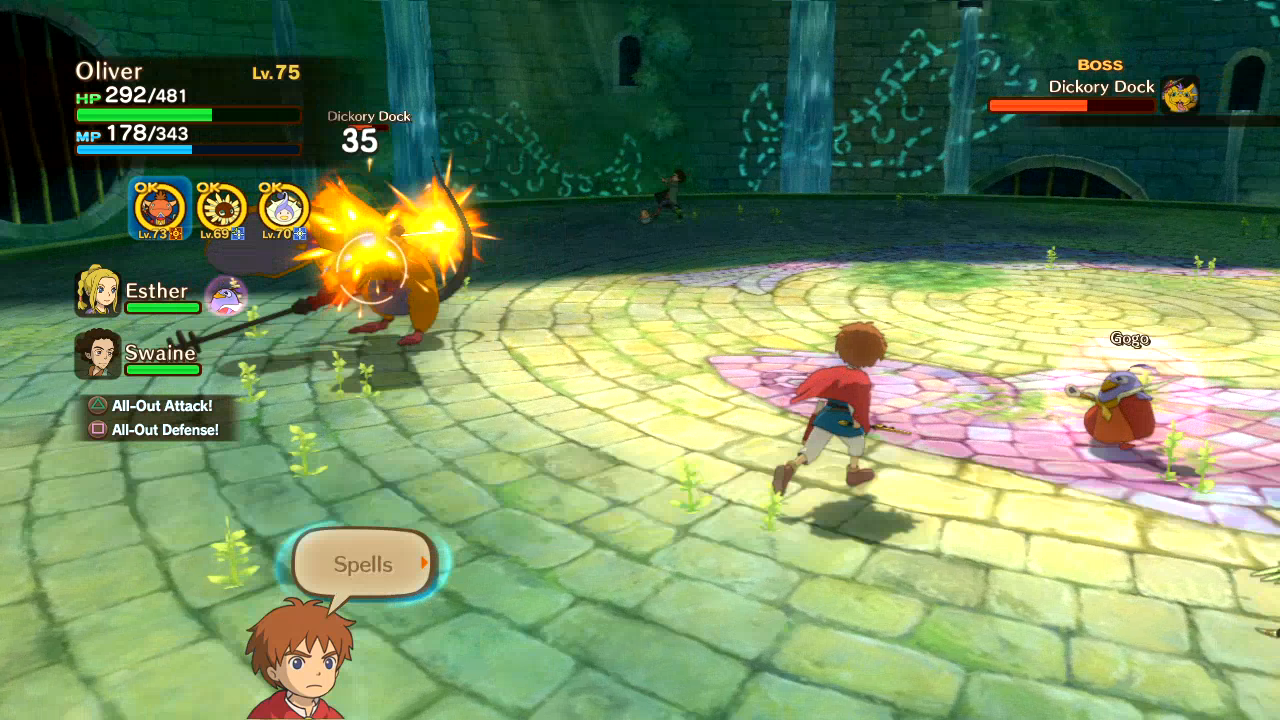 The nice thing about this though is I'm able to take on bosses I had to do on my own with all three companions. And they're leveled enough that they actually help out a good deal. I'm sure not healing anyone myself.  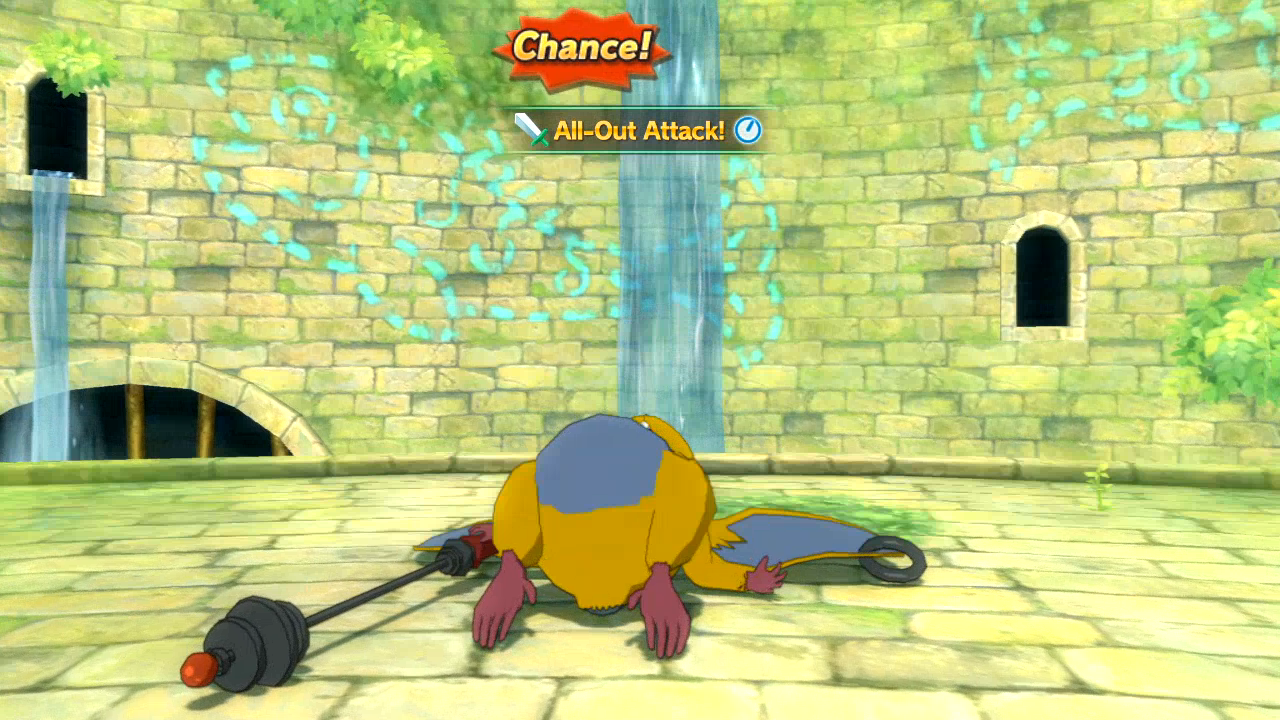 Since the battle takes a bit longer, Dock has more opportunities to knock himself out. Once he's nearly done, Gogo and I just smack him to death. 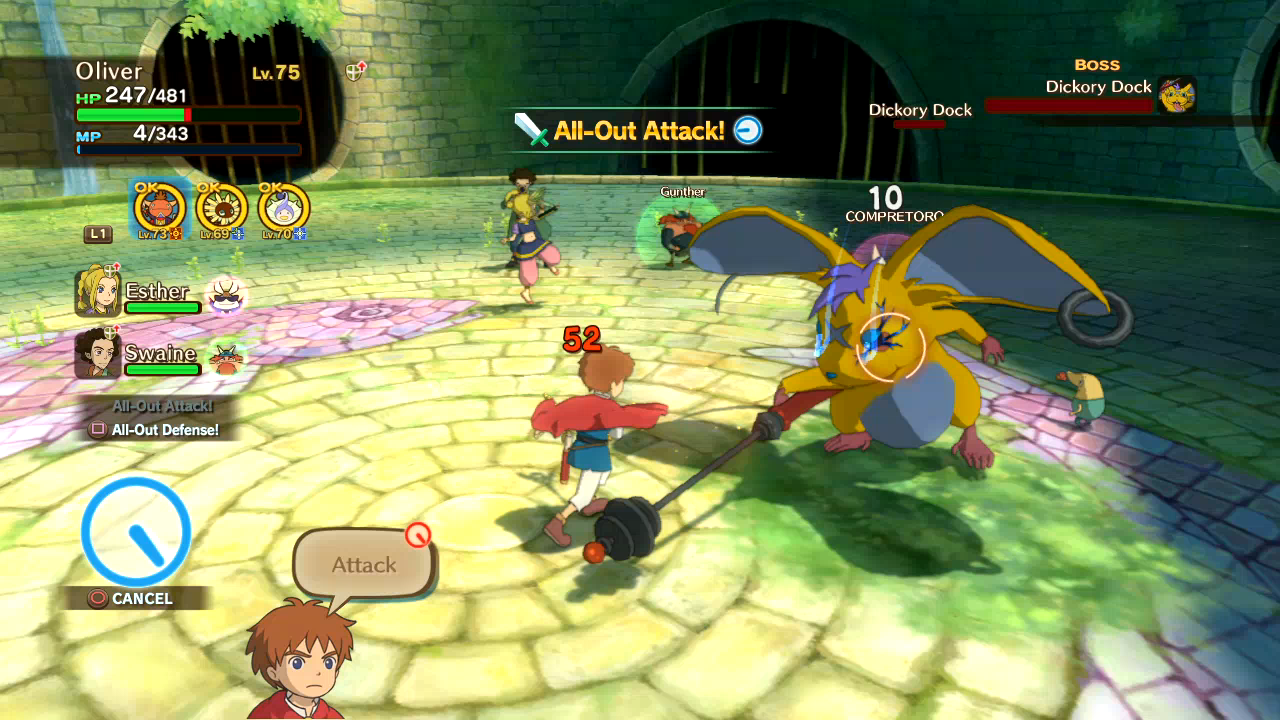 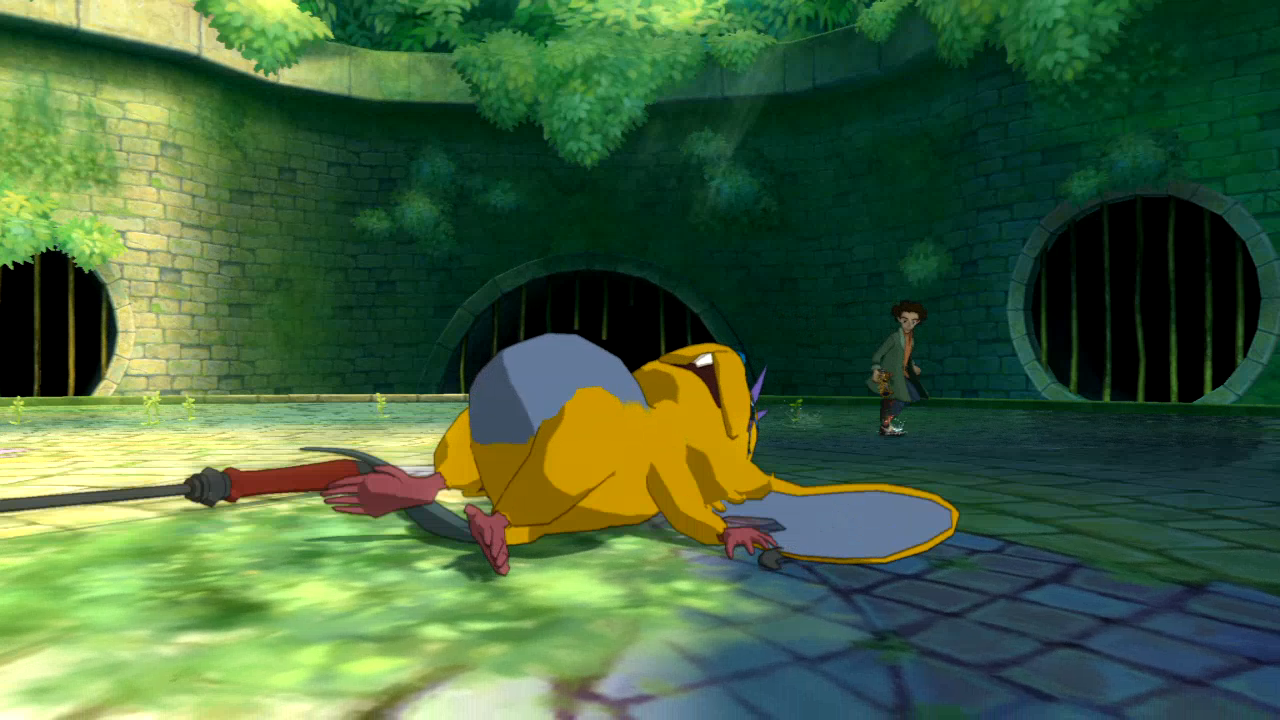   Satisfying murder.  Now we can head back to Swift Solutions before going after the next boss. Thankfully most dungeons have warps in the boss arena that take you back to the entrance. Alternately you can use Vacate.   I also metamorphose Yeto, because I had a brief interest in actually caring about familiars while recording the post-game stuff. 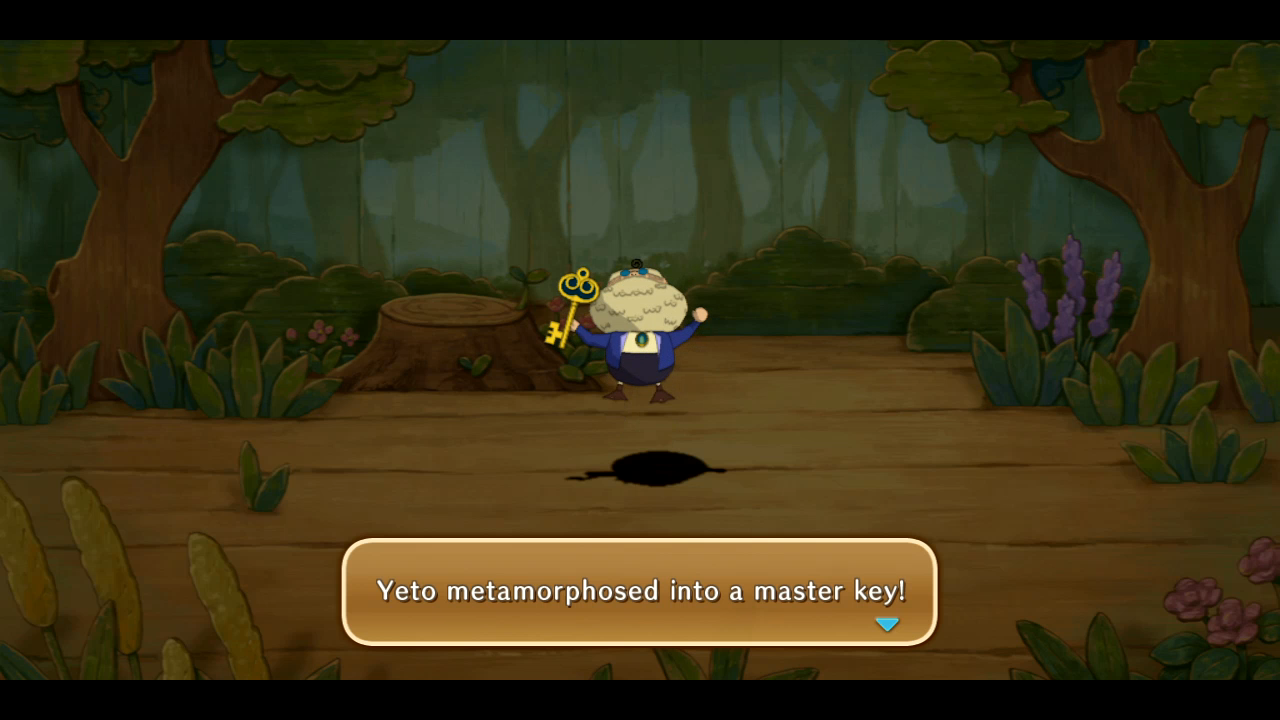 Before heading to the next boss, a sidequest has opened in the Ivory Tower that will take us multiple updates to get all the way through. Some sidequests will be like that, though not as obviously as the rifts or the Solosseum. I just record them and add them to the updates as they come along.    The cow lady? She hasn't guided poo poo since we met her.    I like the idea that Cassiopeia can bring to life benevolent illusions, not just malevolent ones like the Zodiarchs. 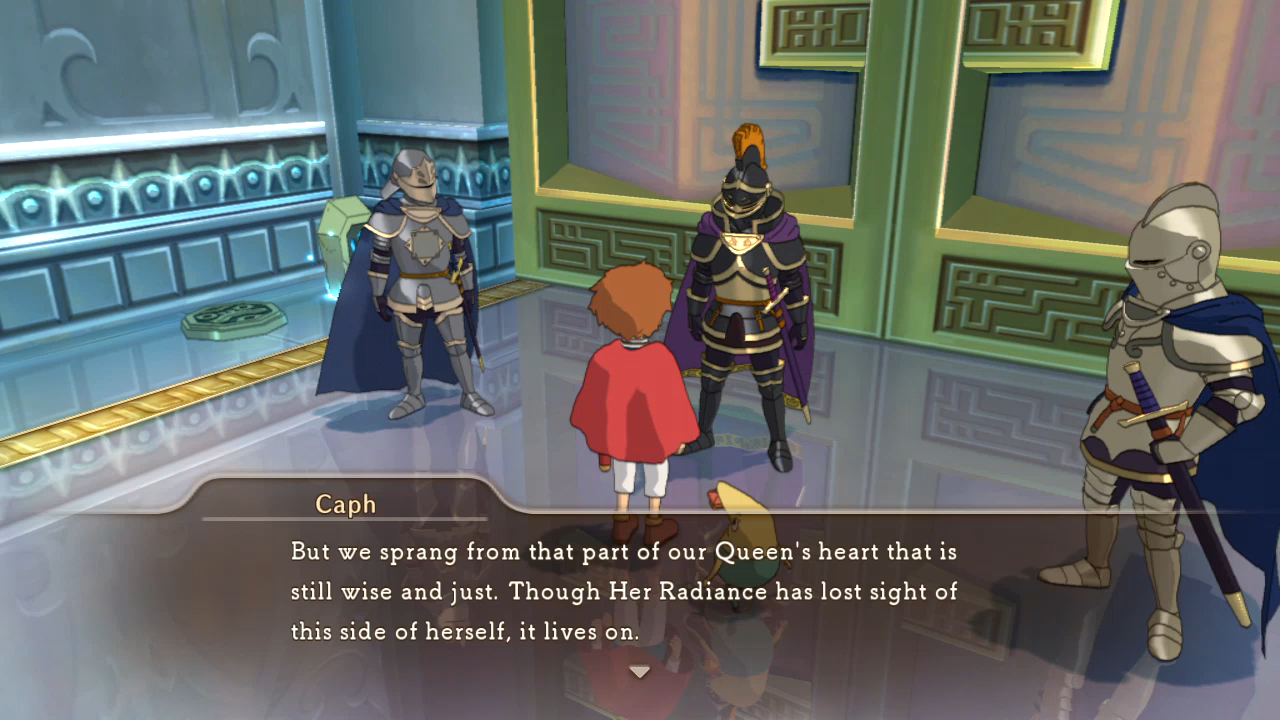 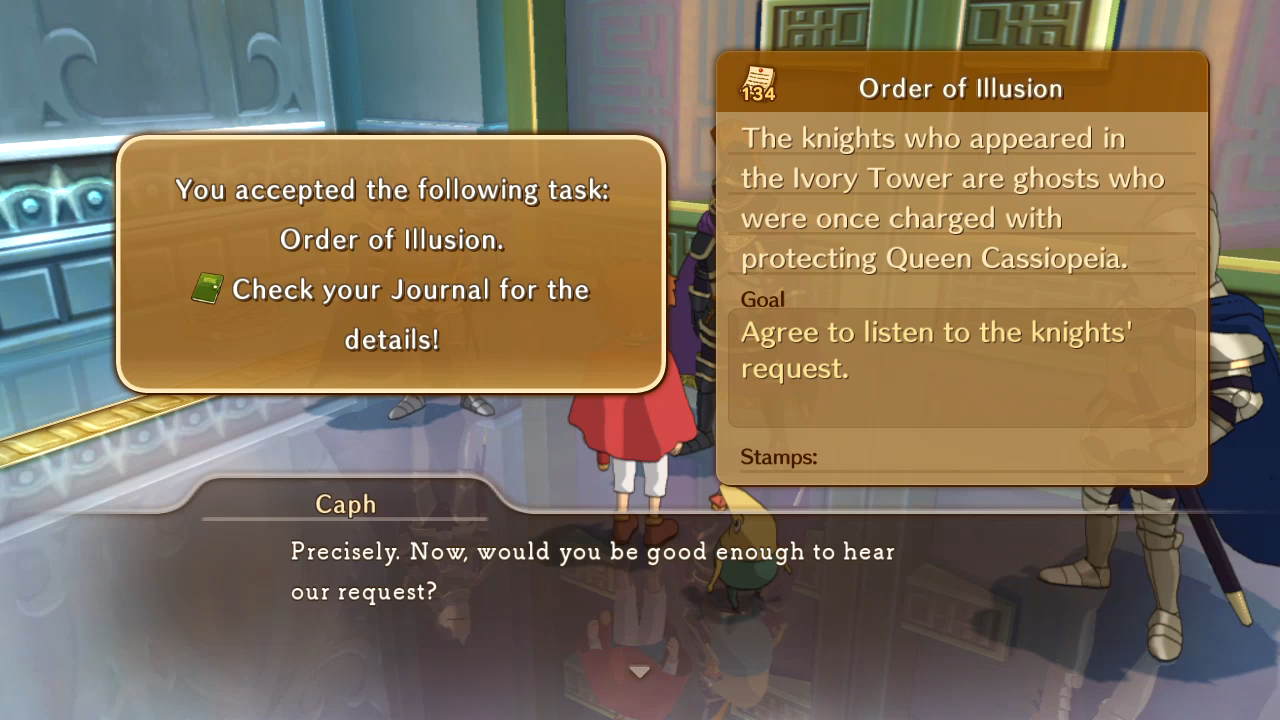 Getting used to vague mission summaries yet? Someone in Level-5 was determined as all gently caress to drag the dialogue out. 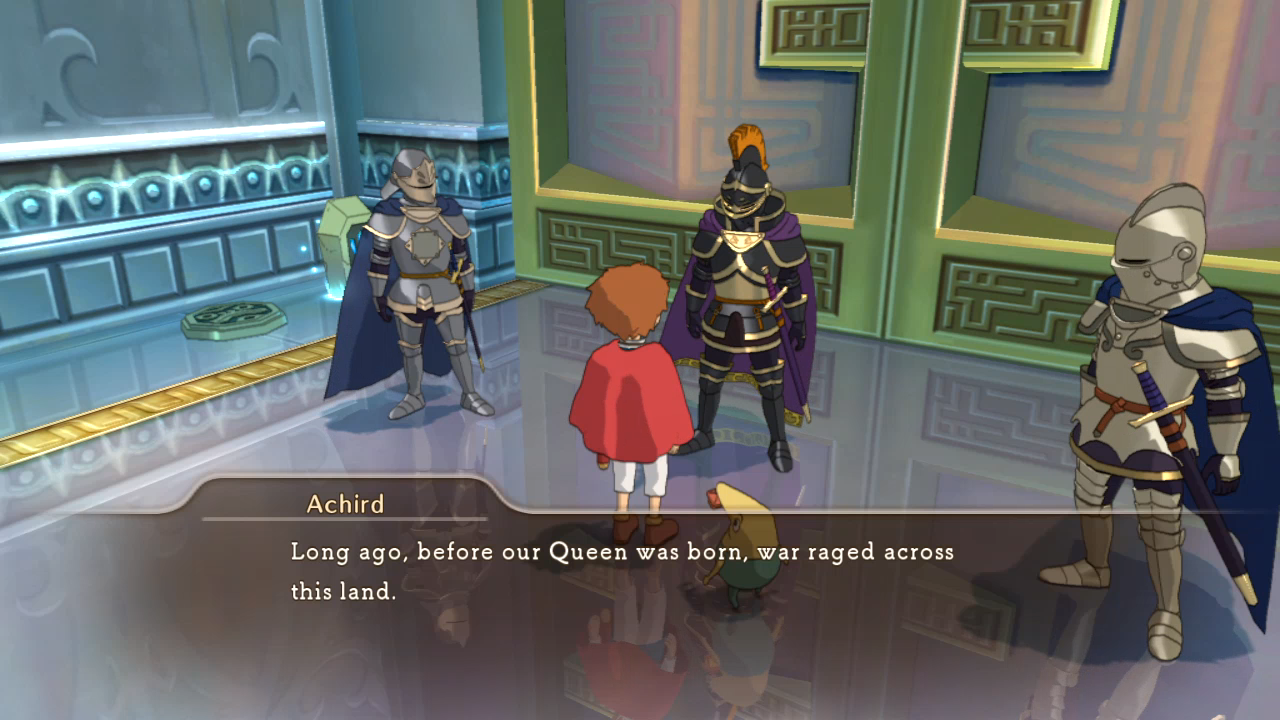 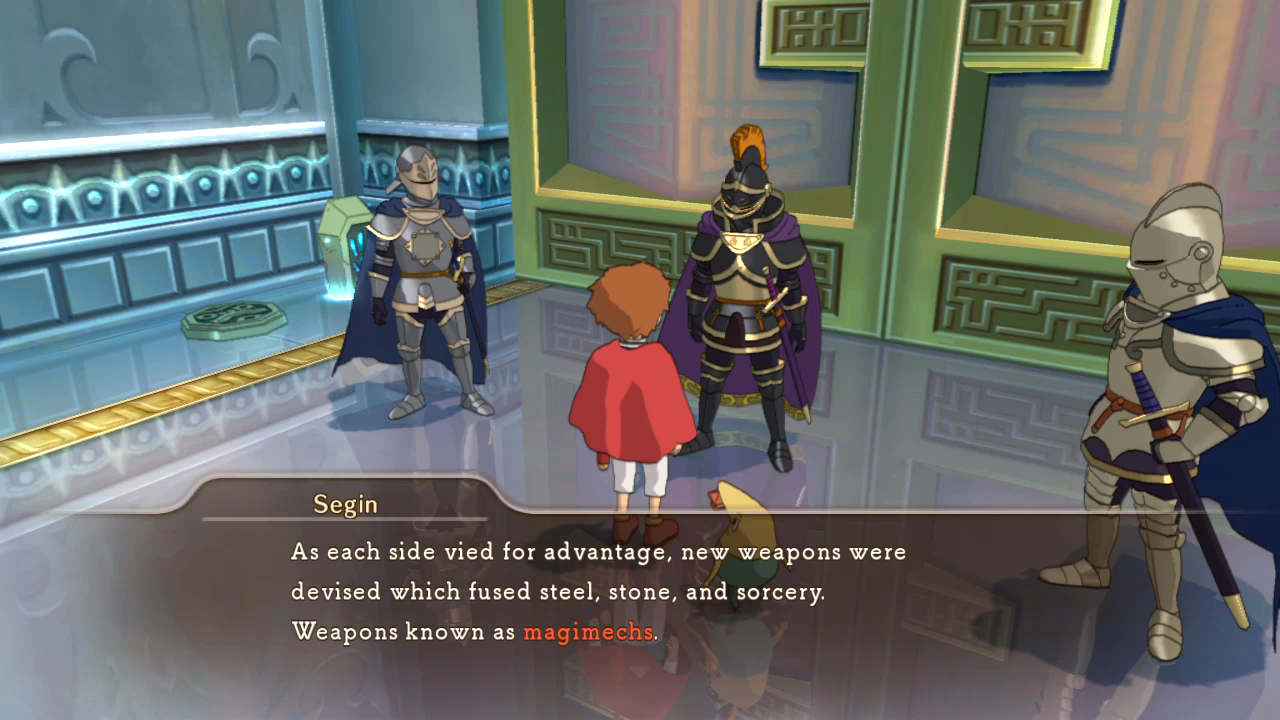 We are not fans of magimechs.  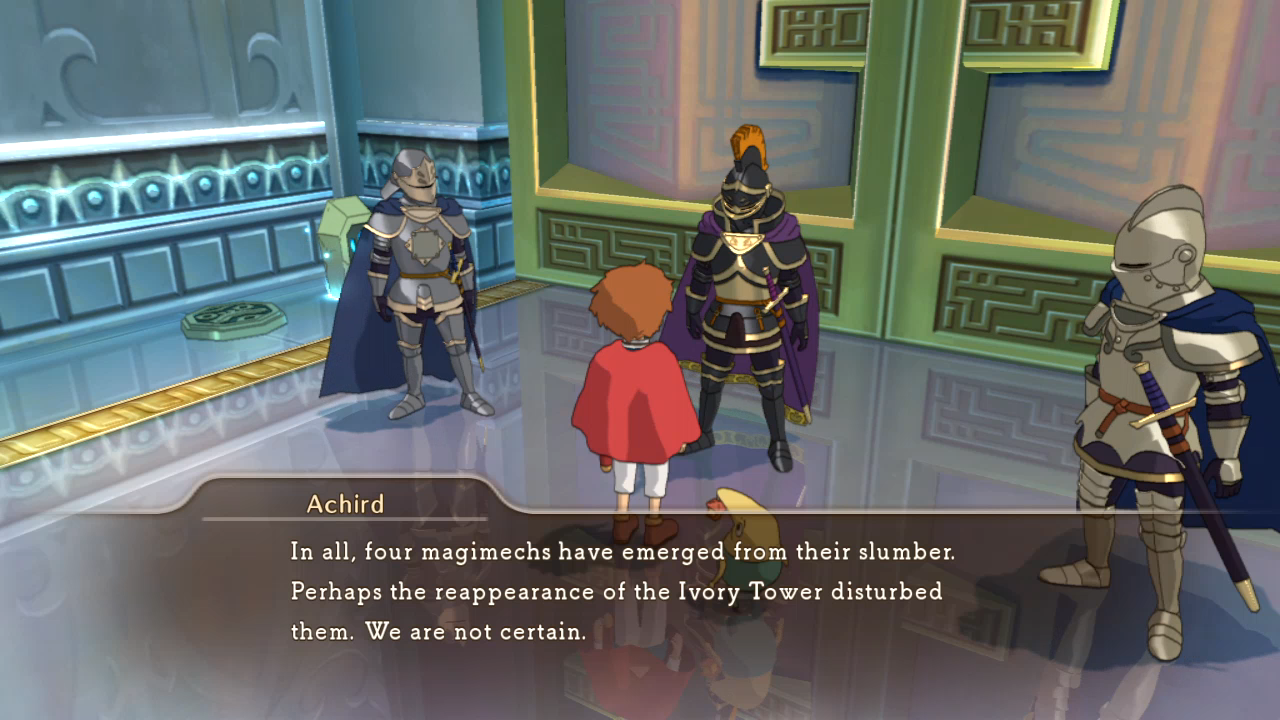  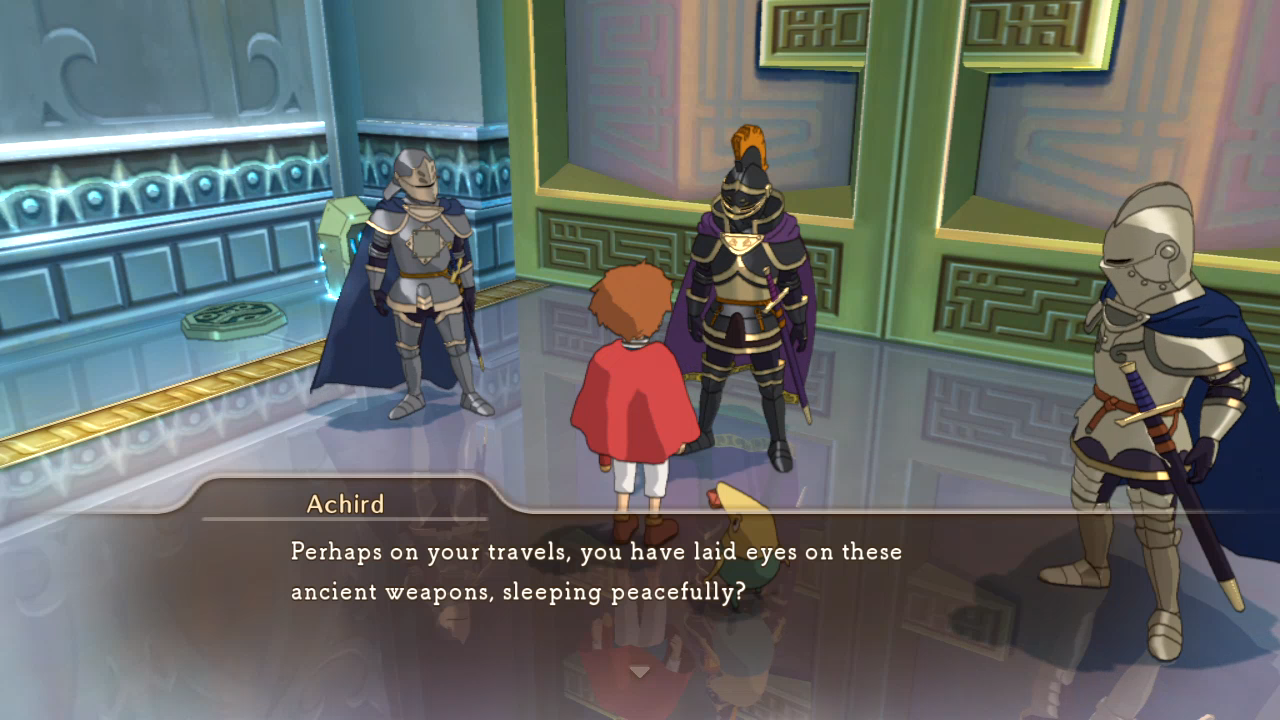 You'll recall seeing the dormant magimechs from early videos like the Golden Grove and Old Smoky. Starting this sidequest activates them for battle. 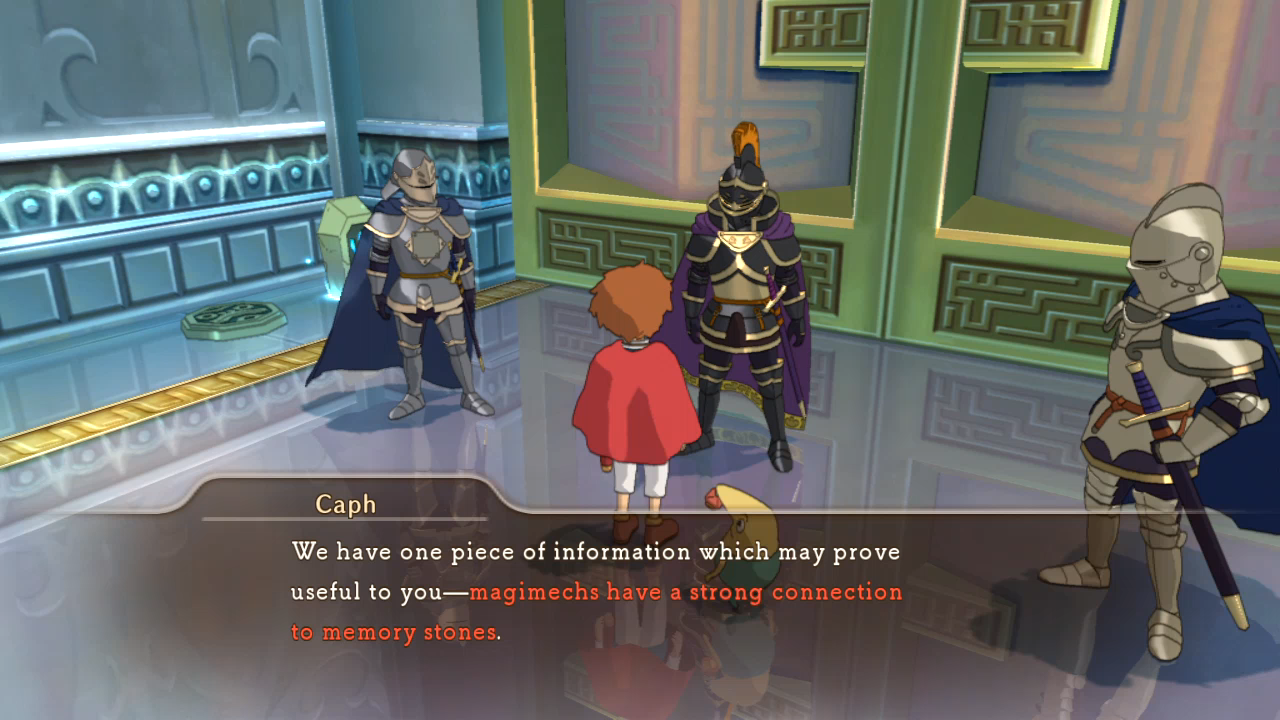 That's not as useful as they probably hoped. Memory stones are the stones where we save and heal, FYI, and since there's only four magimechs (two of which are a good distance away from the nearest memory stone), you'll likely have a long search ahead of you if you haven't already seen all four. 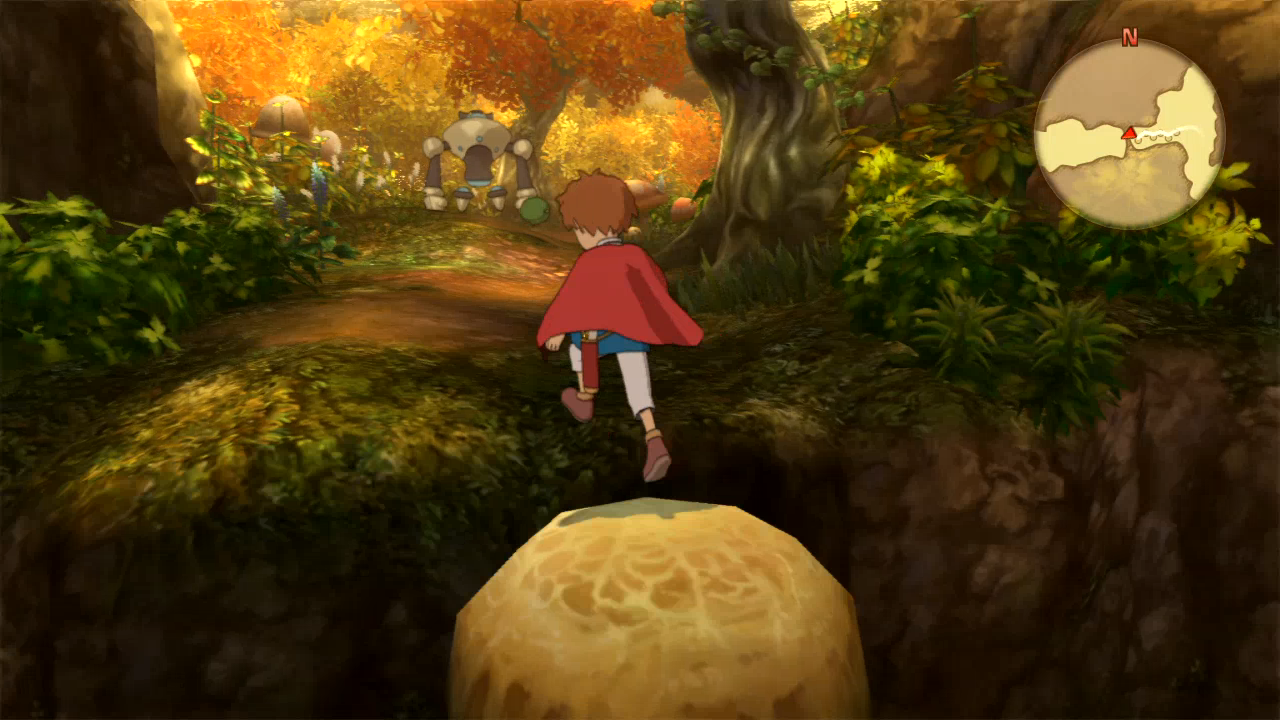 Golden Grove is our next destination for the boss refights, so we'll also take out the first magimech we ever saw. 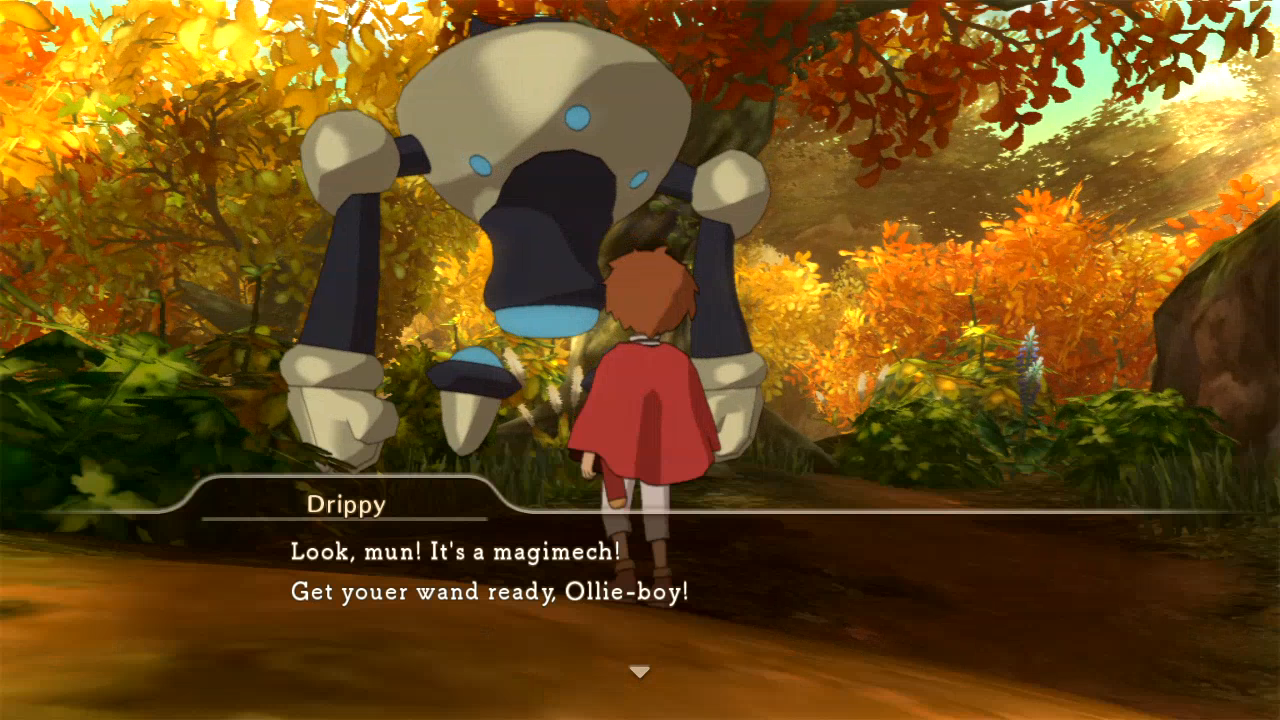  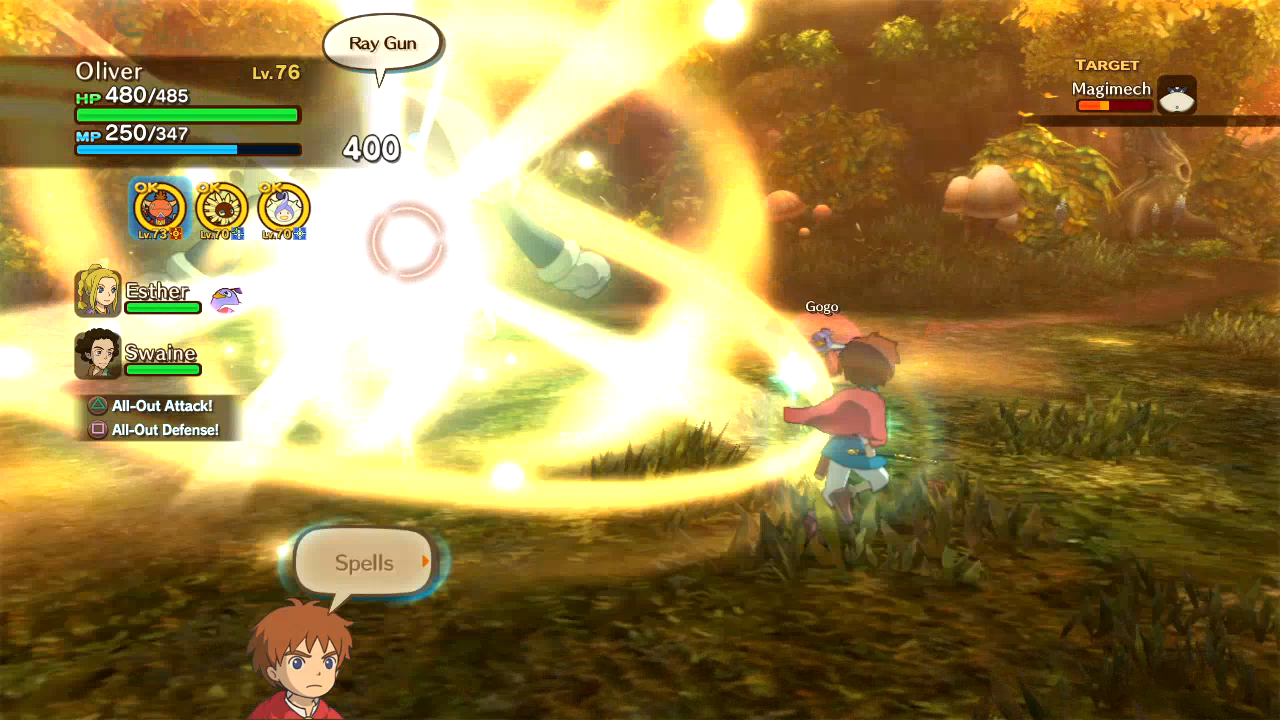 It goes how you'd expect. 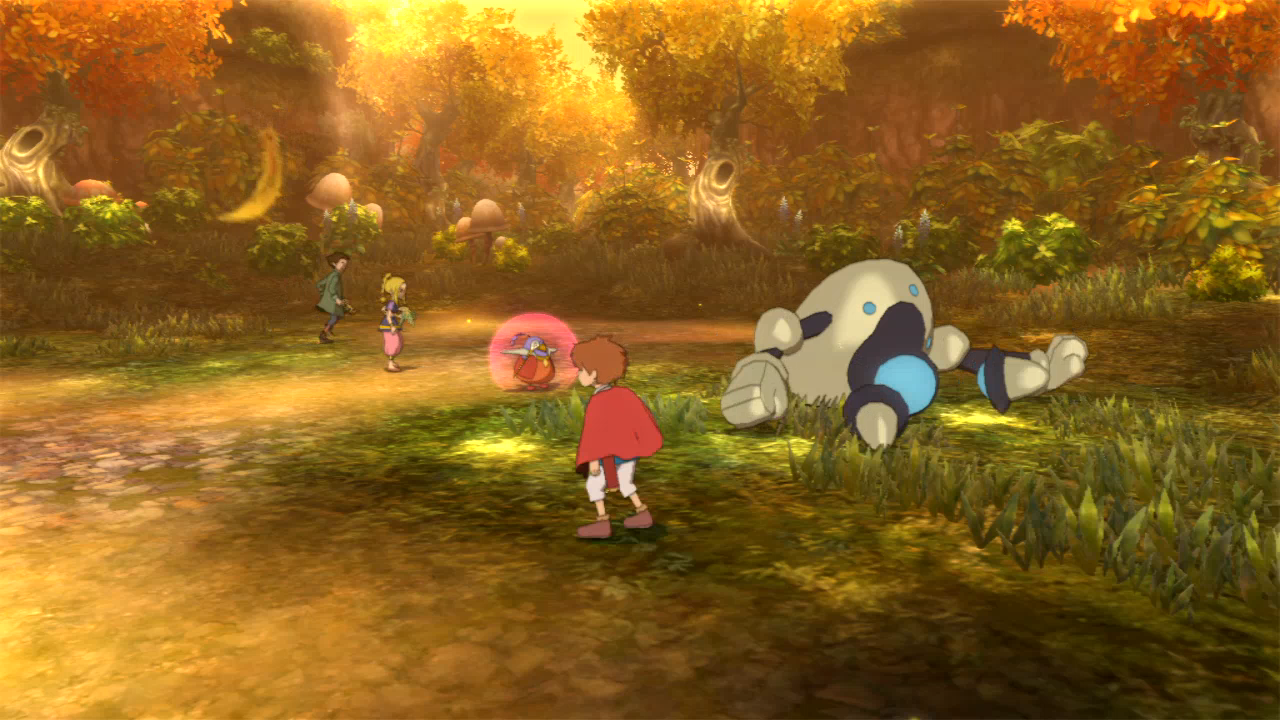 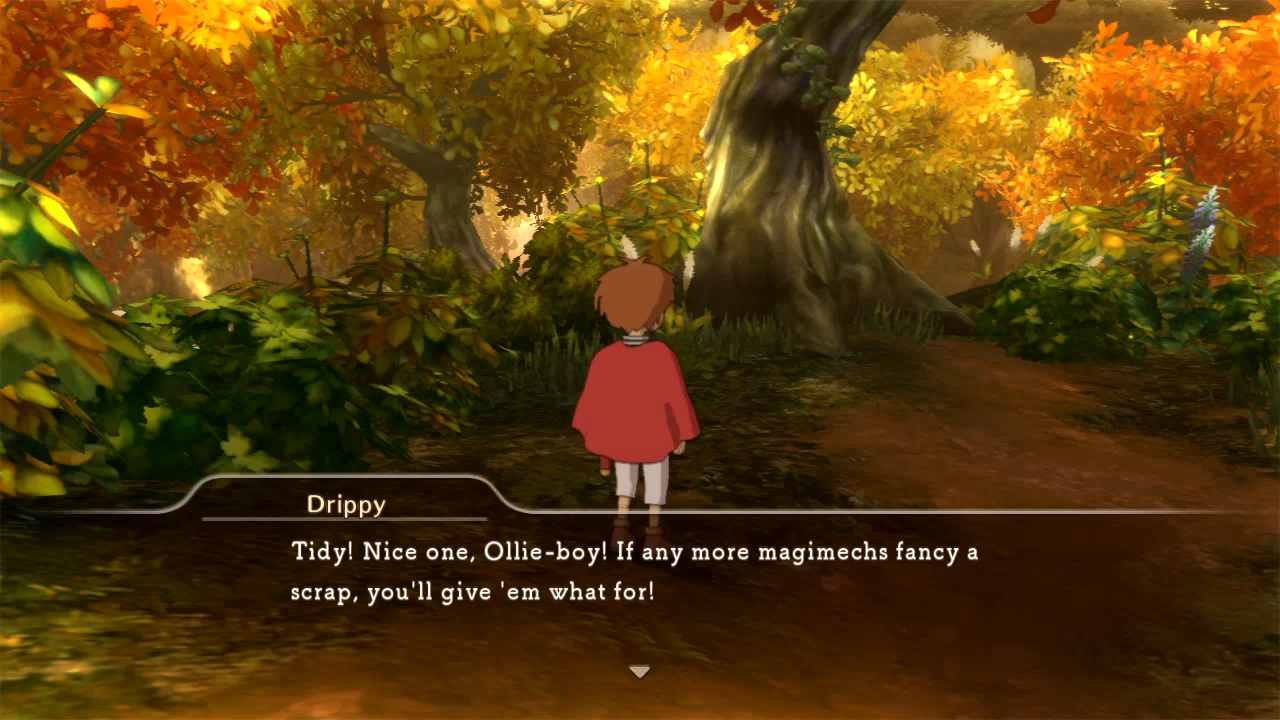 A new addition to some areas after you've beaten the game is golden enemies. These are much tougher enemies closer to your current level, they drop rare and better items, only certain enemies will have golden versions, and it's not uncommon for the golden enemy to not even be native to the area.   For instance, we've never seen a Psychophant or any of its relatives in Golden Grove.  Cut Loose will easily take care of the usual enemies in this area, so let's see how the Golden enemies stack up in comparison.   Only a chunk. I like the addition of these enemies for the most part. Makes going back through the old dungeons a little less boringly easy, though I don't always want to bother. From hereon-out, I'll show quick examples of the golden enemies I come across, but we'll skip their fights.  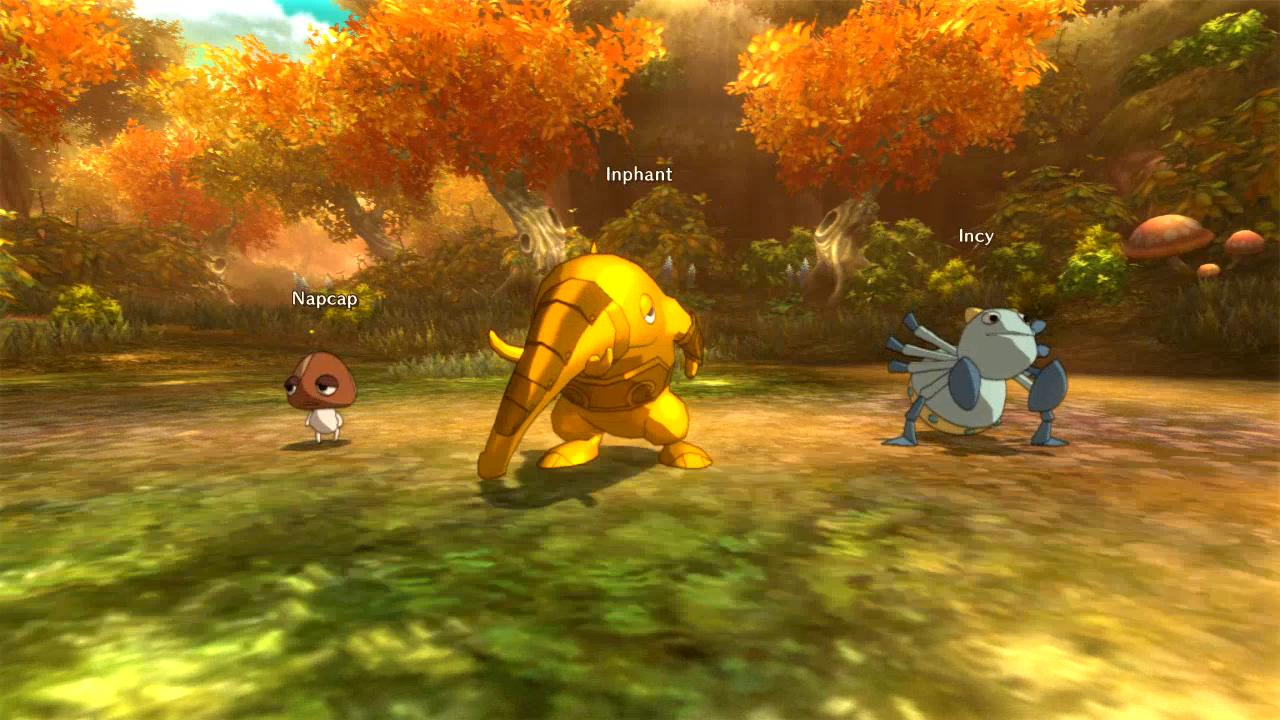 We've made it to the boss arena, but that fairy we helped out earlier is still hanging out here.  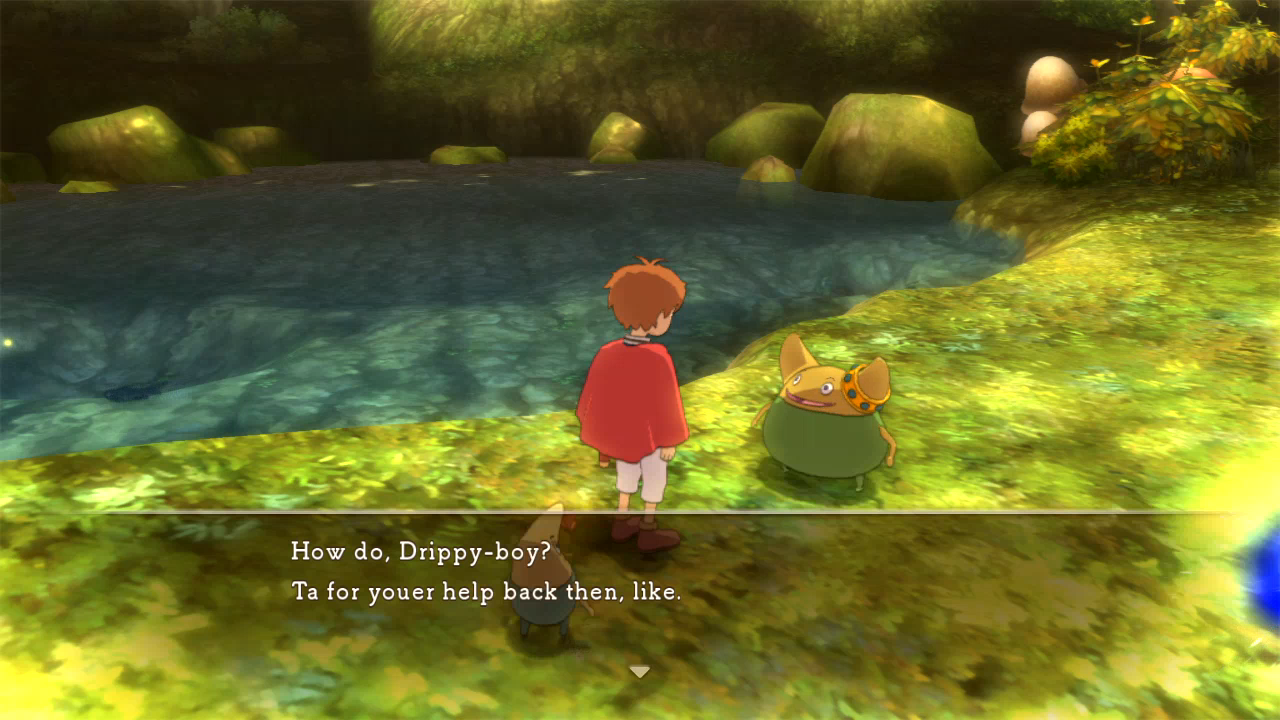 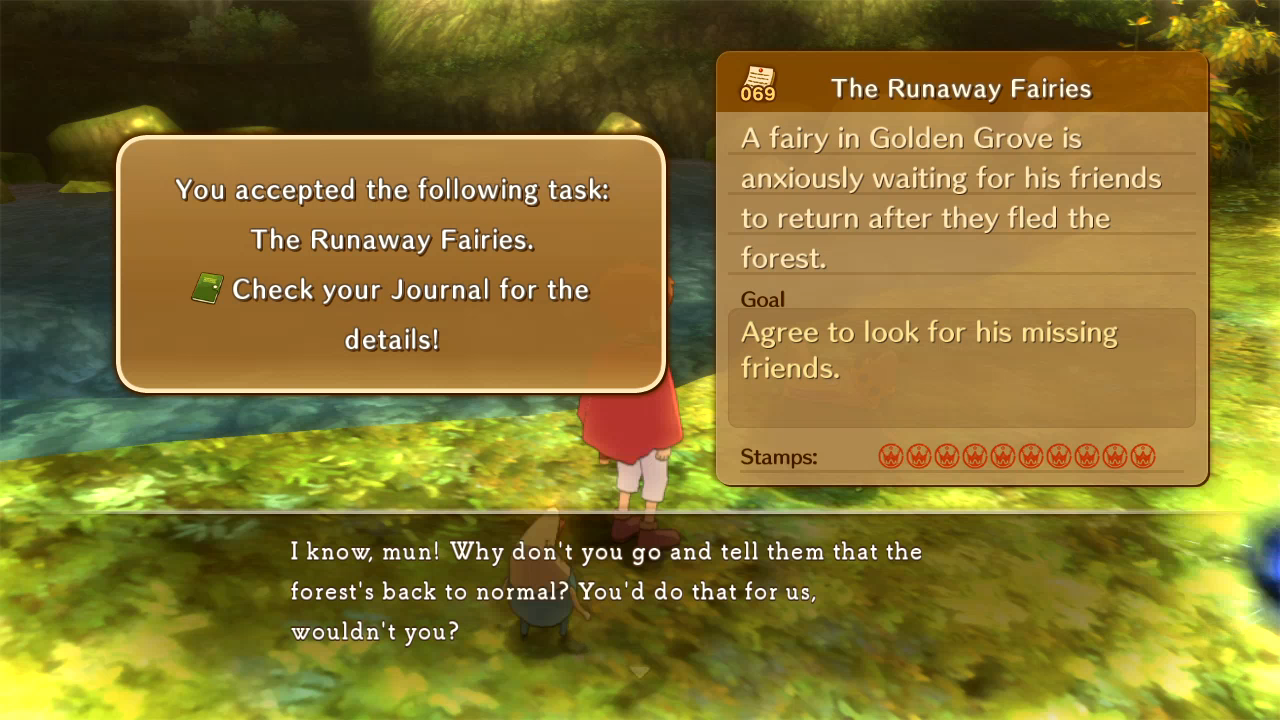 This is another sidequest that will stretch for multiple parts. Mostly because I forgot to do it until the boss fight near the first fairy.  No, he's not passing a stone. He's using his special powers to tell us where to find his friend.  That's right in front of Skull Mountain, which is the location of a later refight, so we'll fetch that fairy when we get to that.   They didn't even try that time.  Badiataur (which was harder to type out than I expected) likes to use Everblade constantly in this first half. 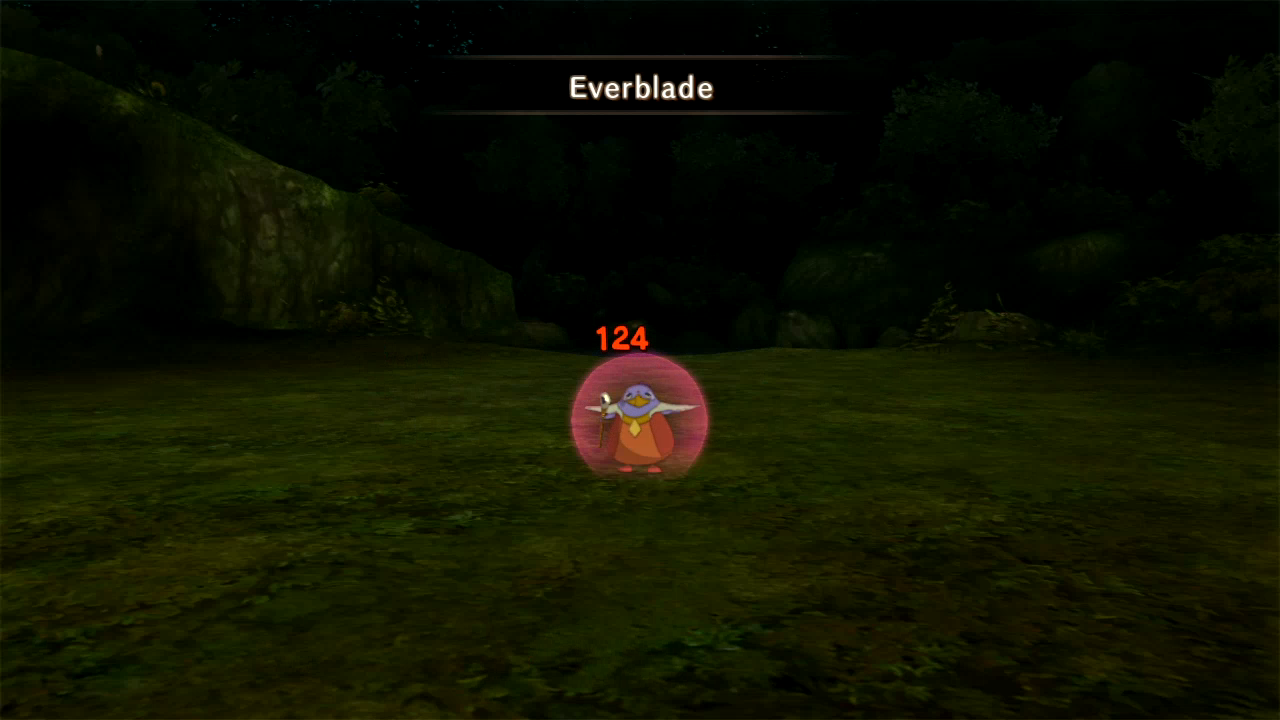 I'm always amused when Gogo gets hit. It's just innately funny. 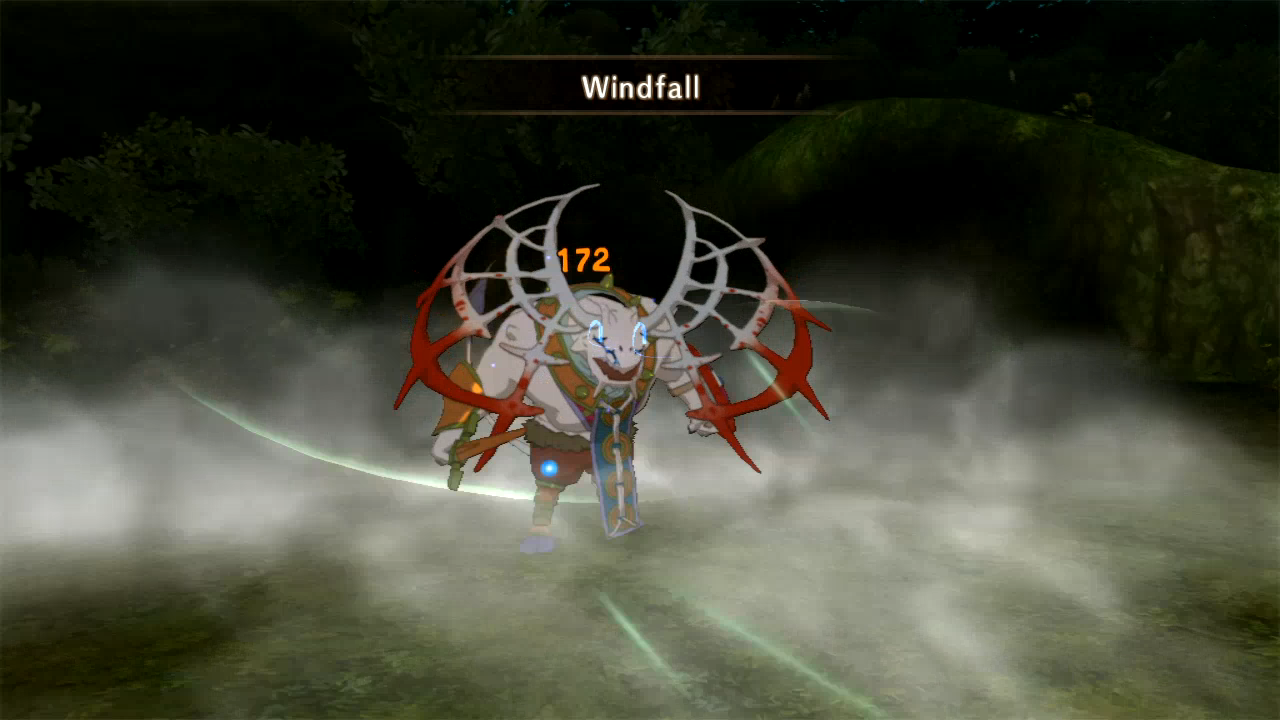 He's weak to storm damage, so I Forest Guardian his face a little.  Meanwhile Swaine continues to steal some pretty good poo poo from these bosses. Fun fact: we also get that shield as a bounty reward for this fight. 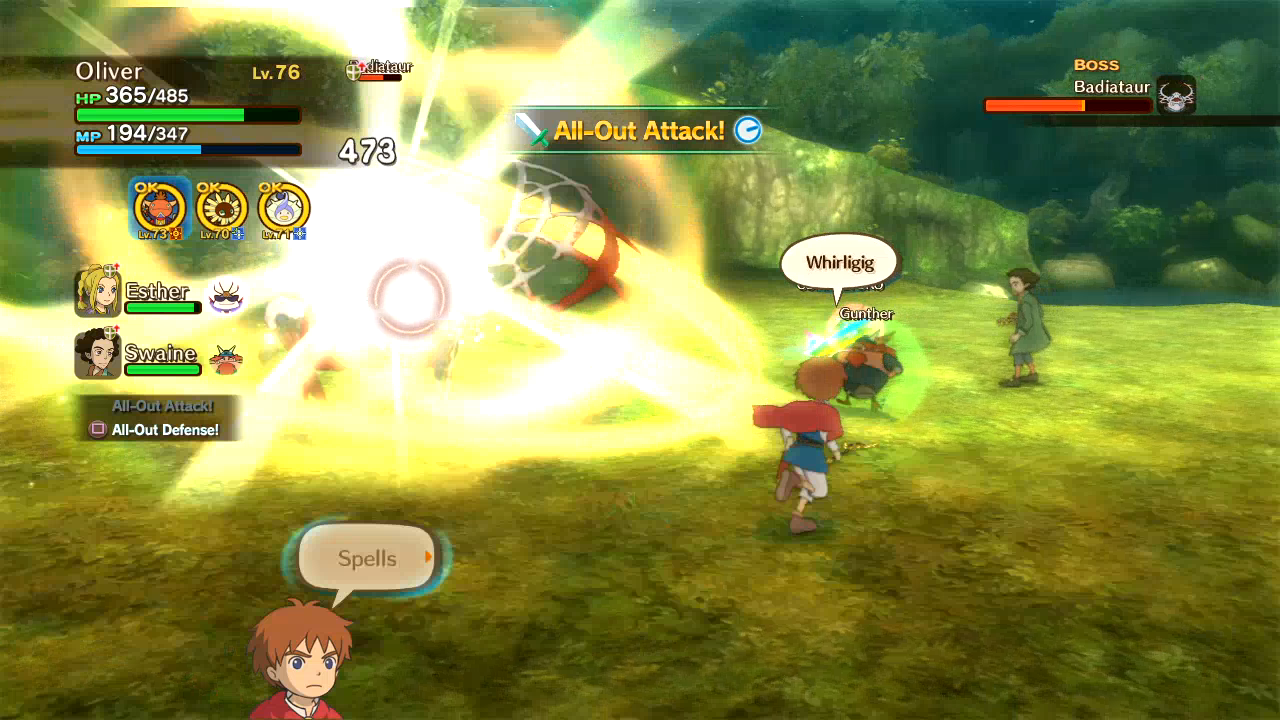 Eventually the fight devolves into more Mornstar. Until... 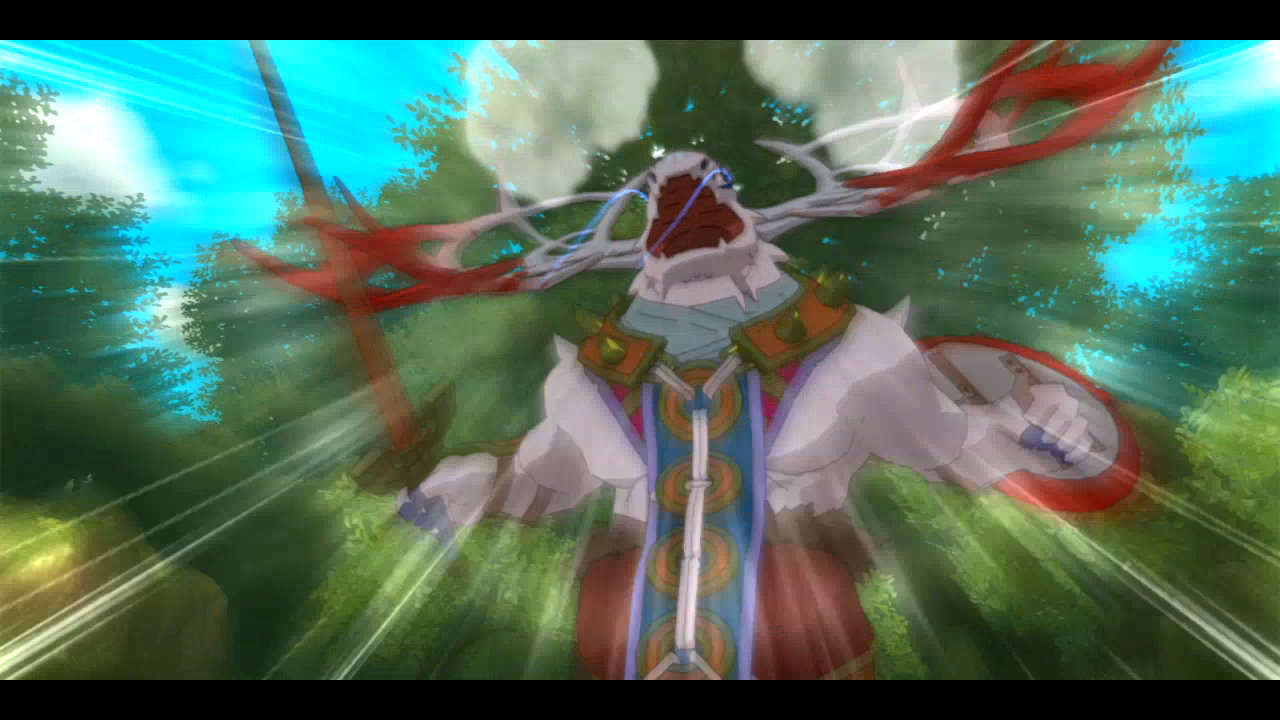   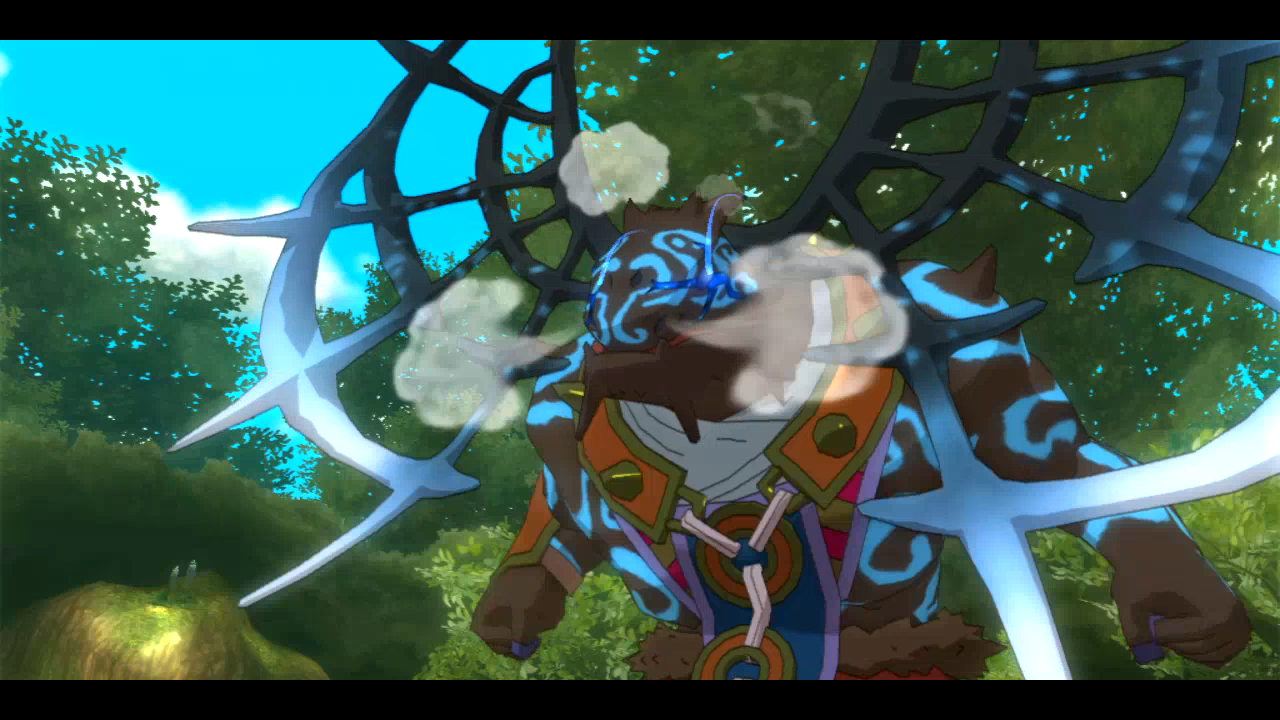 The full-body colour change is a pretty nice touch, along with the usual glowing trail eyes. 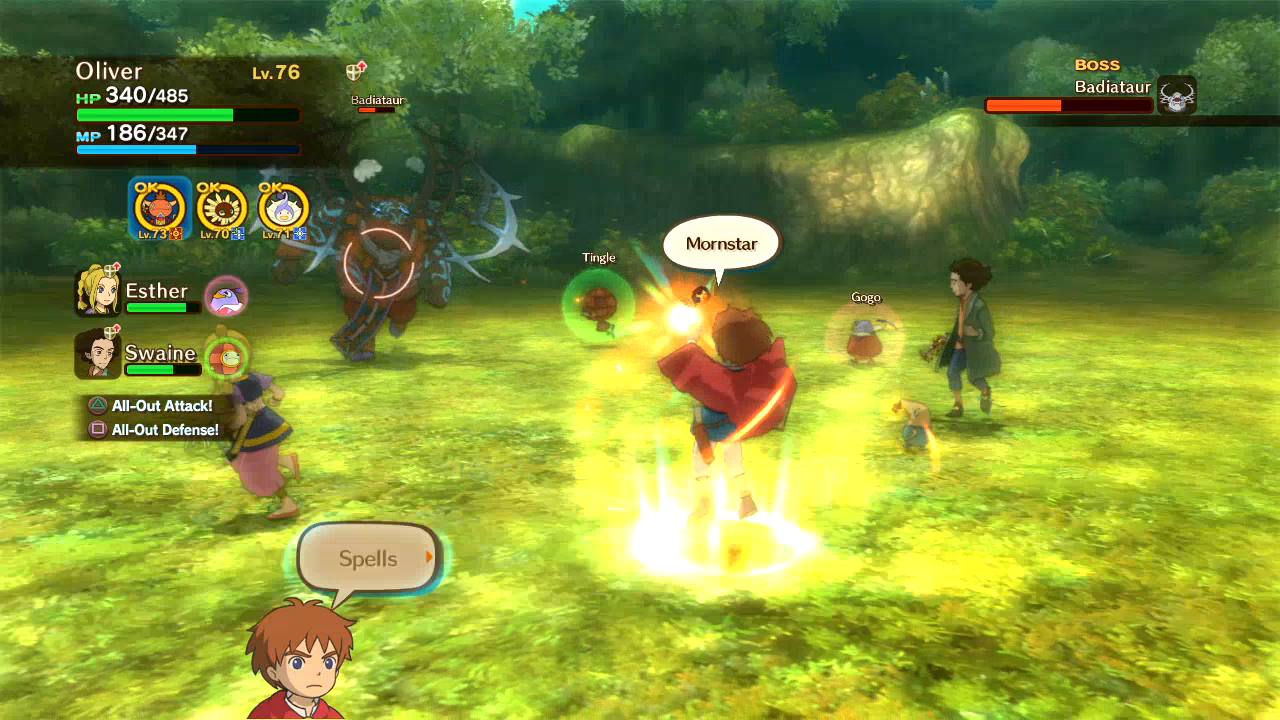 But I still Mornstar.  His special attacks at this point don't usually head in my direction, so this half turns out easier than the first. 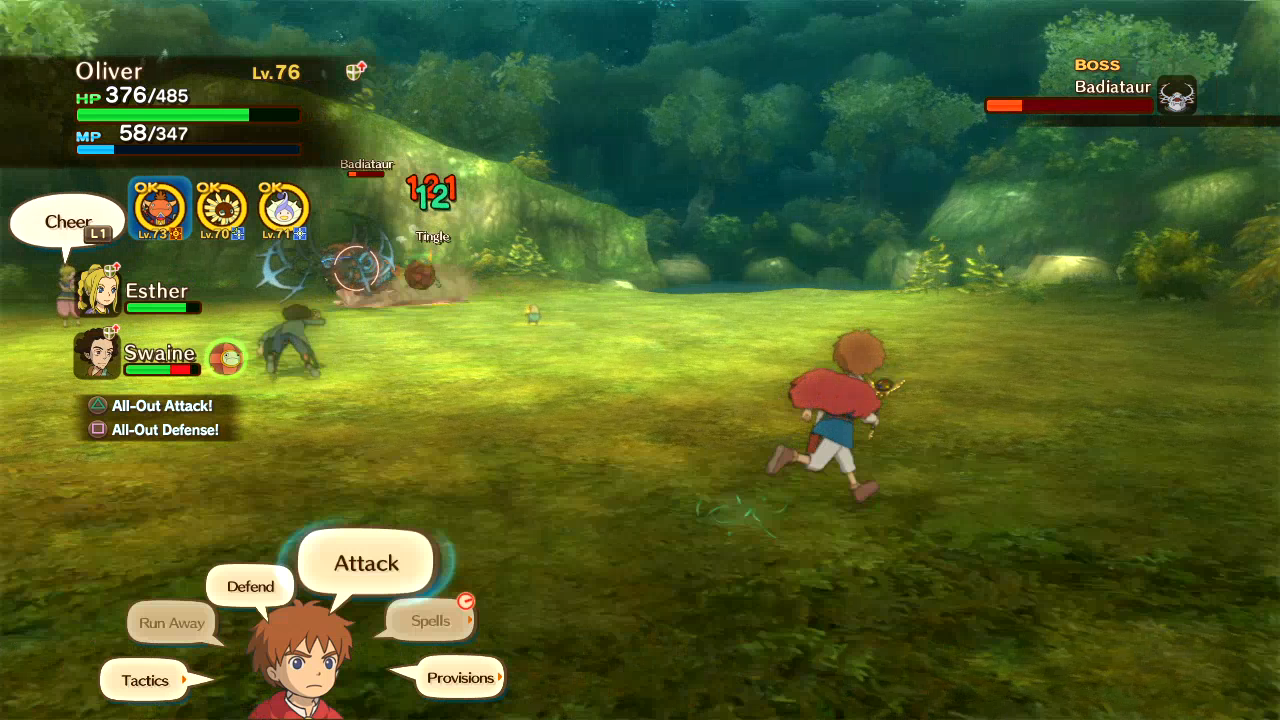  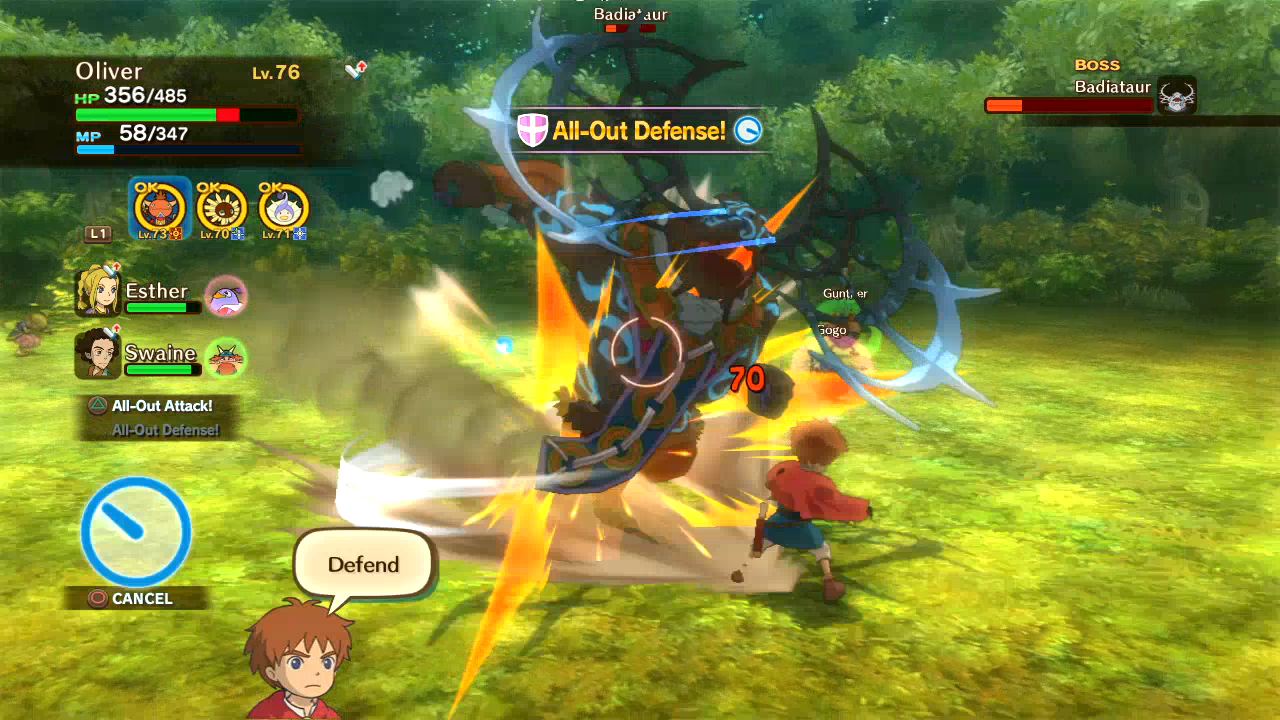  Haha gently caress off Gogo.  And he's down. Note that Drippy decided that, since we had two people fighting along with us this time, he didn't need to bother with being useful in any way. Knocking the boss out with his own shield again might have been unfair, granted.   Our next stop is the Deep Dark Wood, with new golden enemies.   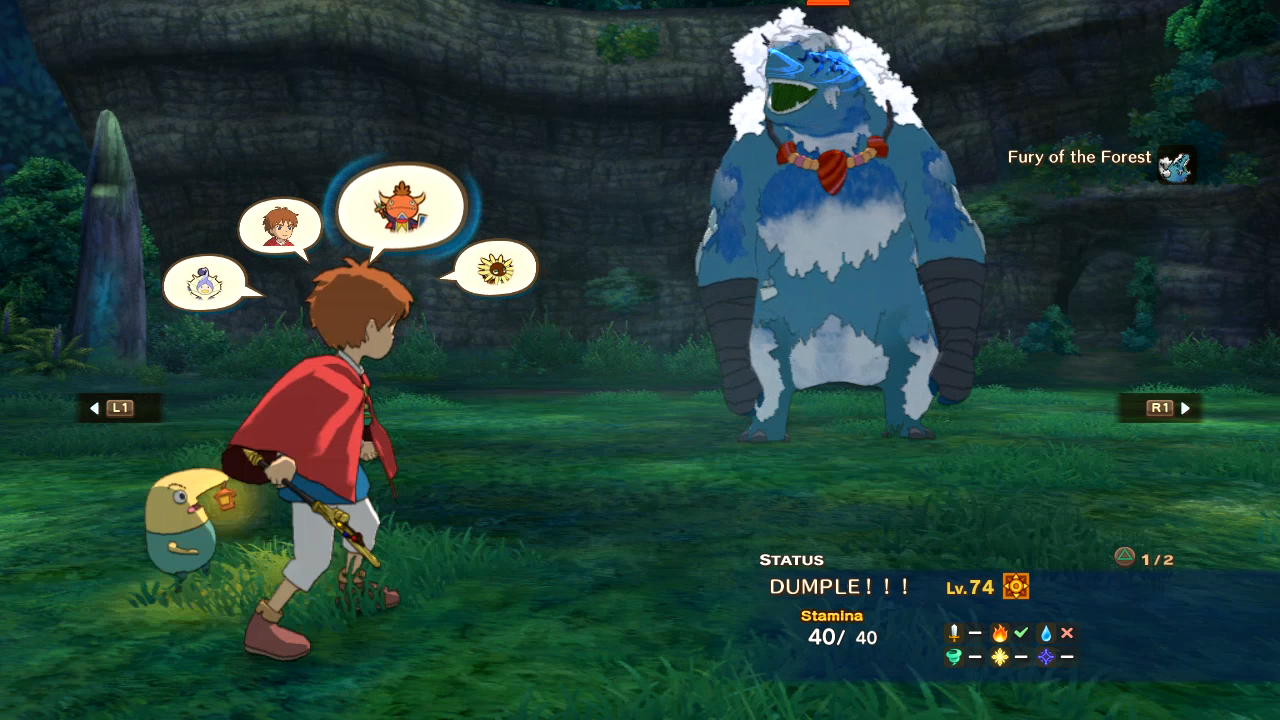 I'm liking how more obviously evil these versions are.  I also like how this screenshot looks like I sent him to Hell. 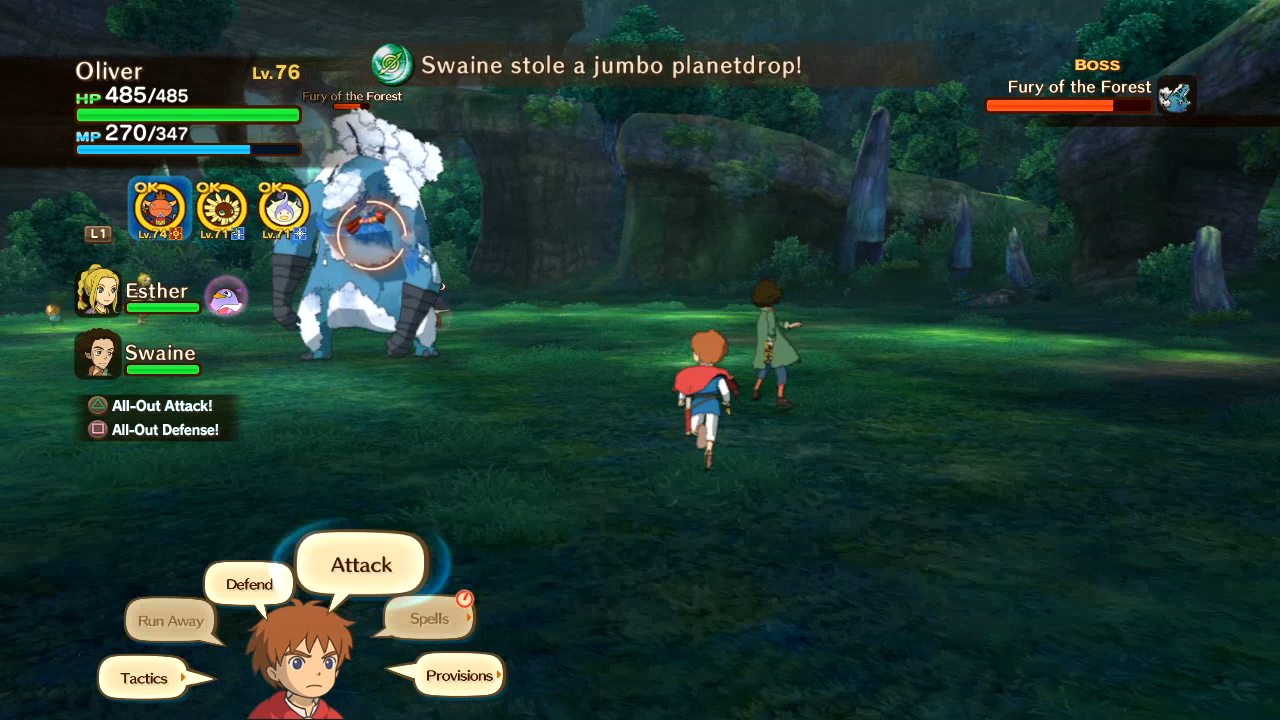 I think I was out of Jumbo Planetdrops when Swaine stole that, so good on you, inexplicably helpful and not-always-dying friend. 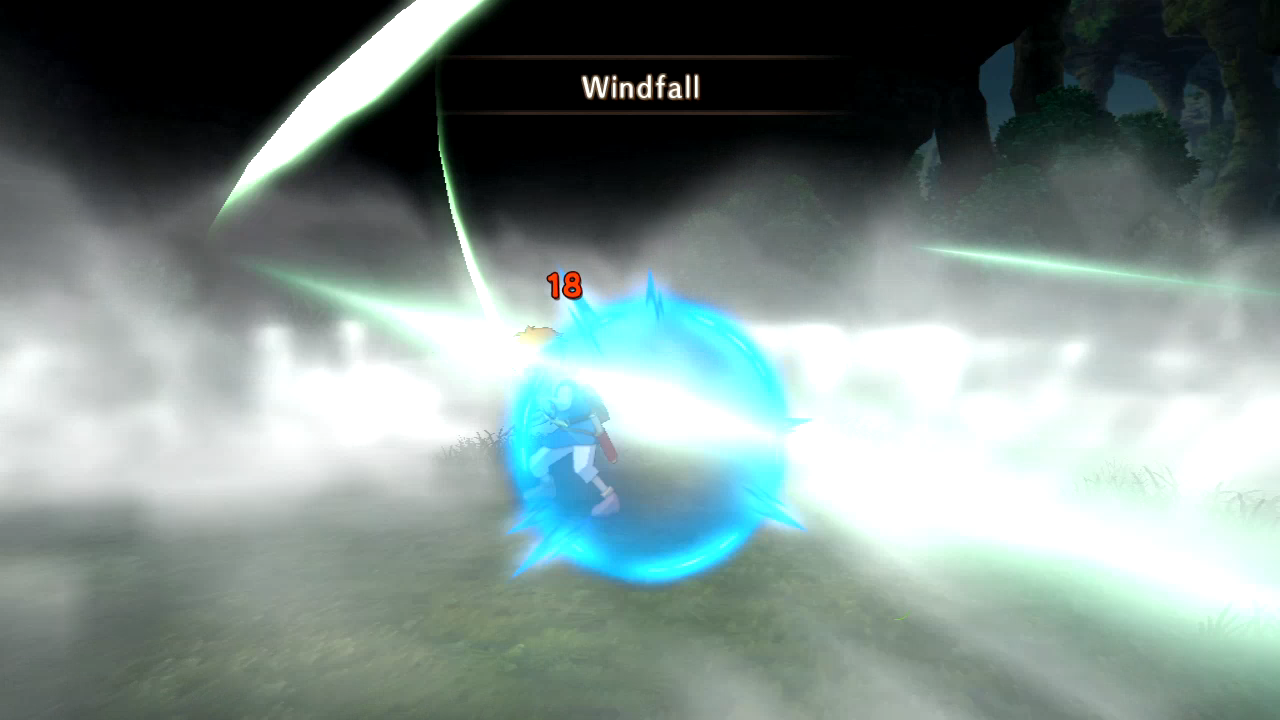 Fury uses Windfall a lot, but more than that, he uses Bellow to stun me first, and then uses Windfall to knock me over while I can't react. 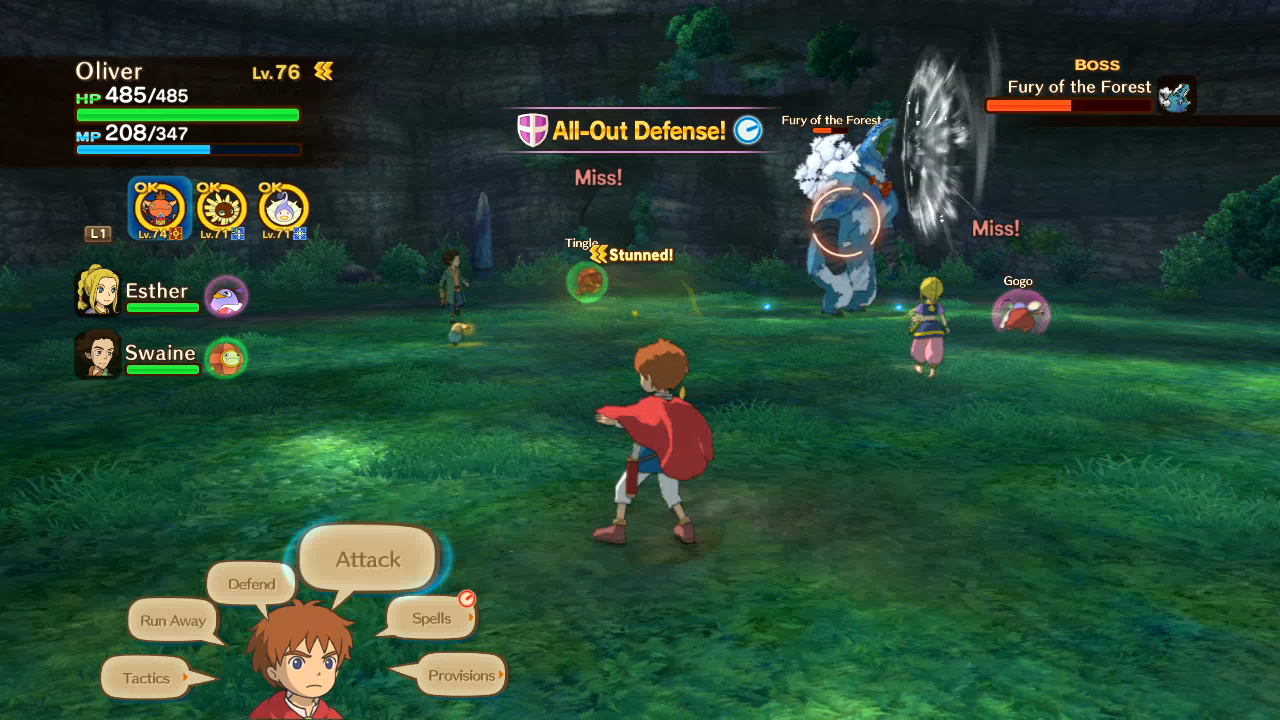  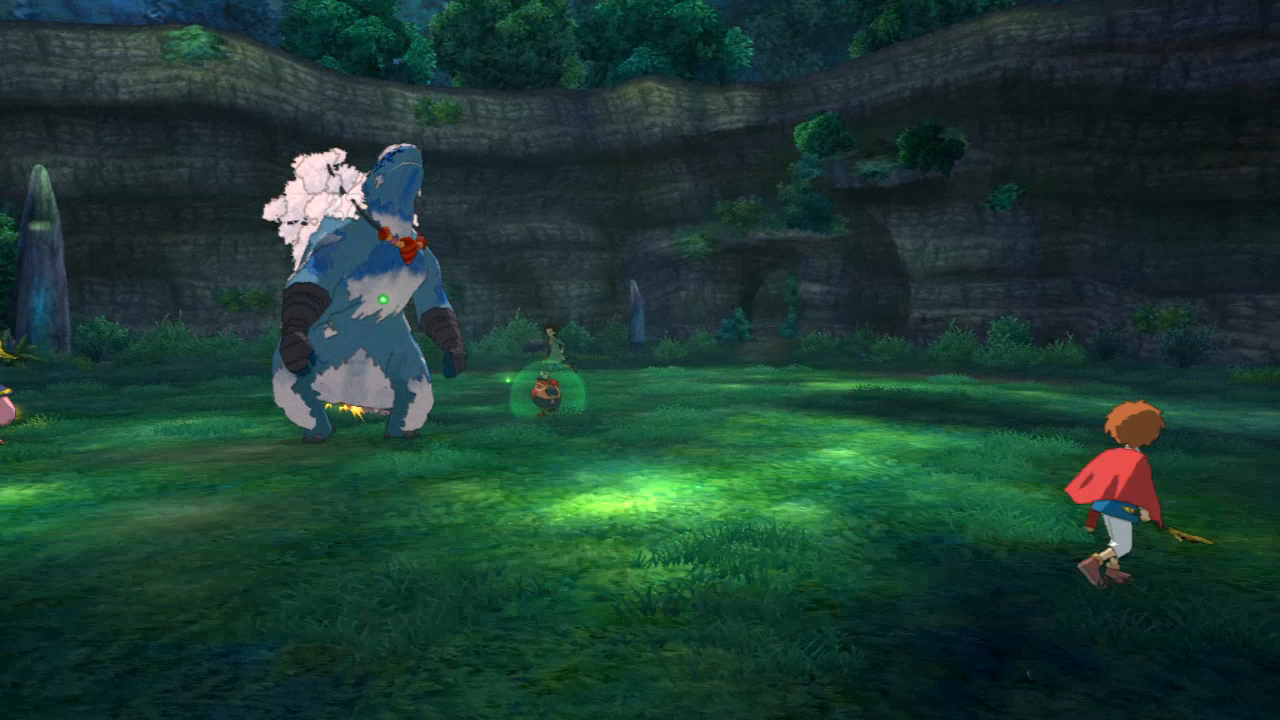 Doesn't do significant enough damage, though, and he goes down without much fuss. 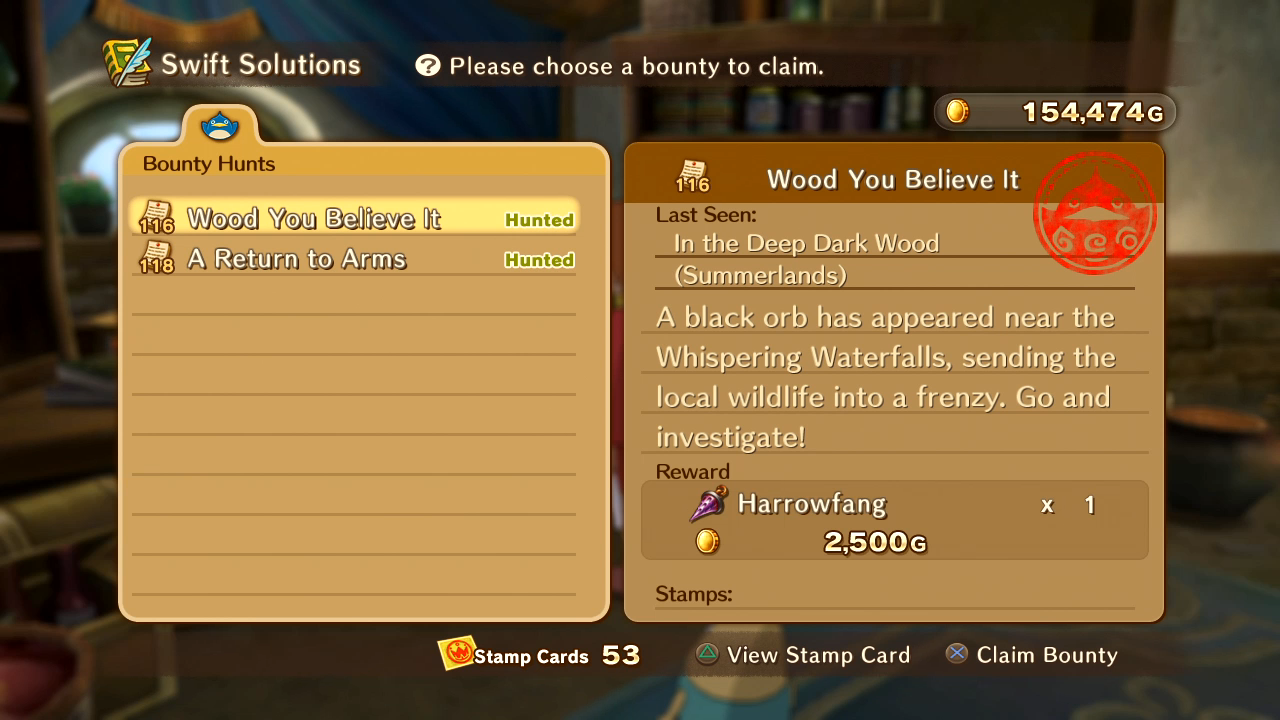  Heading up Old Smoky, we seemingly frighten this magimech in a private moment. 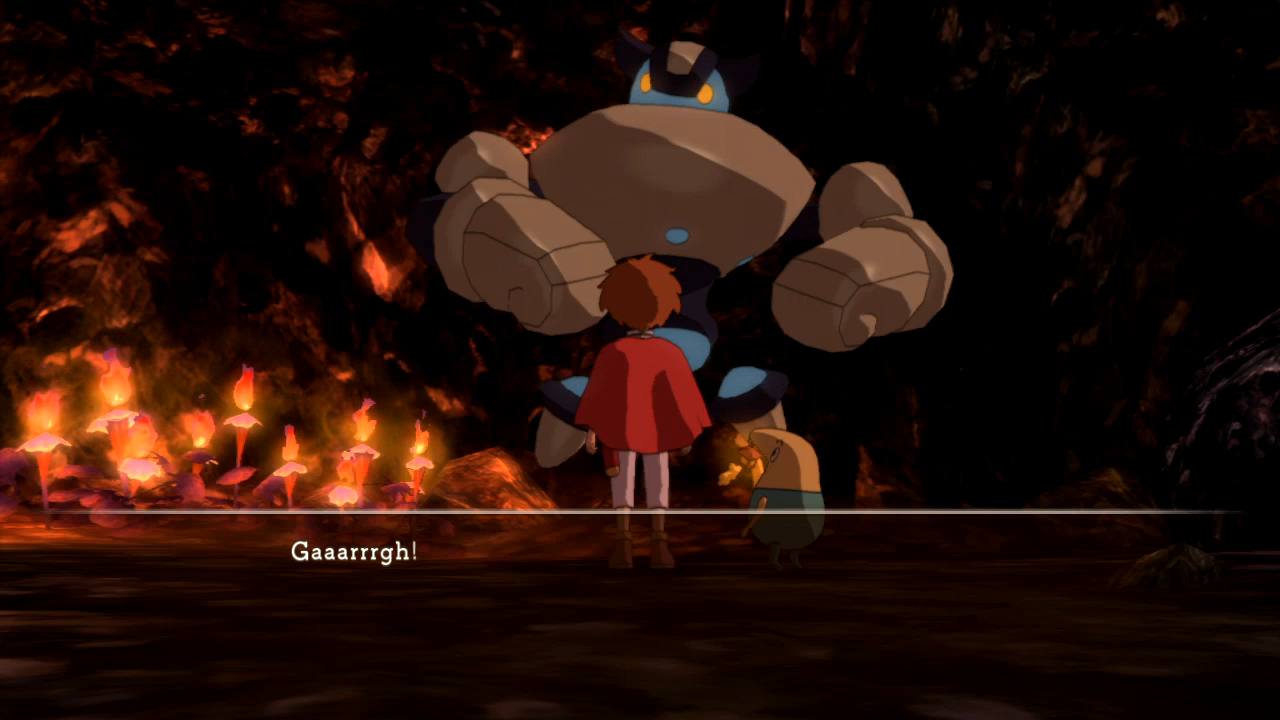   Drippy fills the spot of a pop-up dialogue box saying "Two down, two to go!", plus about 10x more words as always. 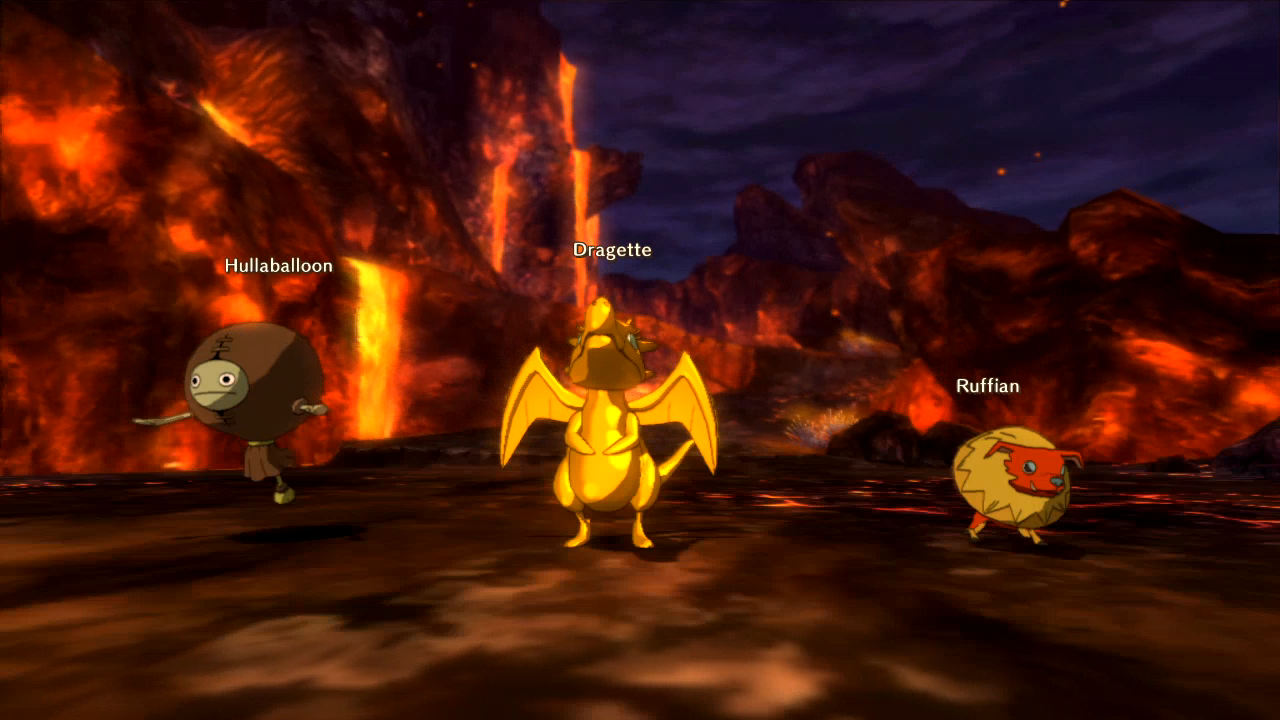  I found a new way these old areas can suddenly become almost-challenging: having enemies attack you from behind while you're trying to run past them, and suddenly having a golden enemy appear in their ranks. 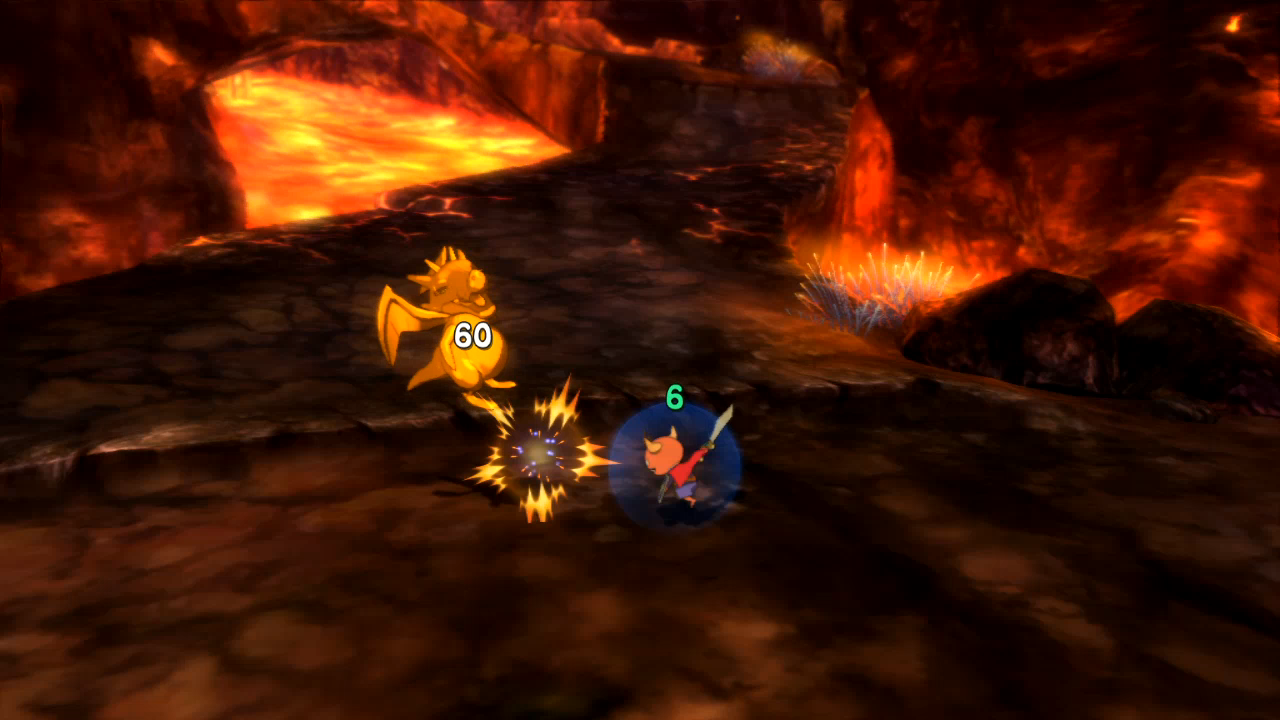 These Dragettes and Draggles were particularly tougher than expected.   Oh, um... Well done camera work, I guess. 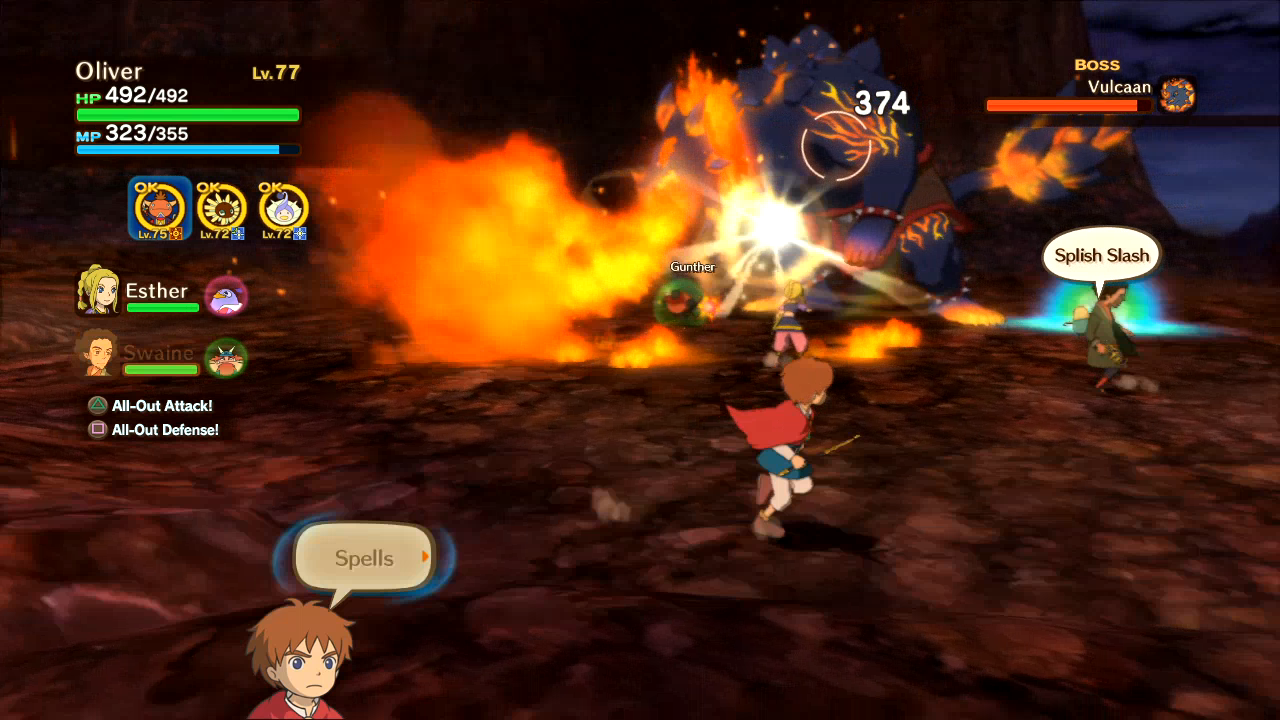 Vulcaan doesn't use Volcanic Roar nearly as much as he probably could, instead simply blowing fire onto the ground while I pelt him from a distance. Of course Swaine and Esther run right into it. 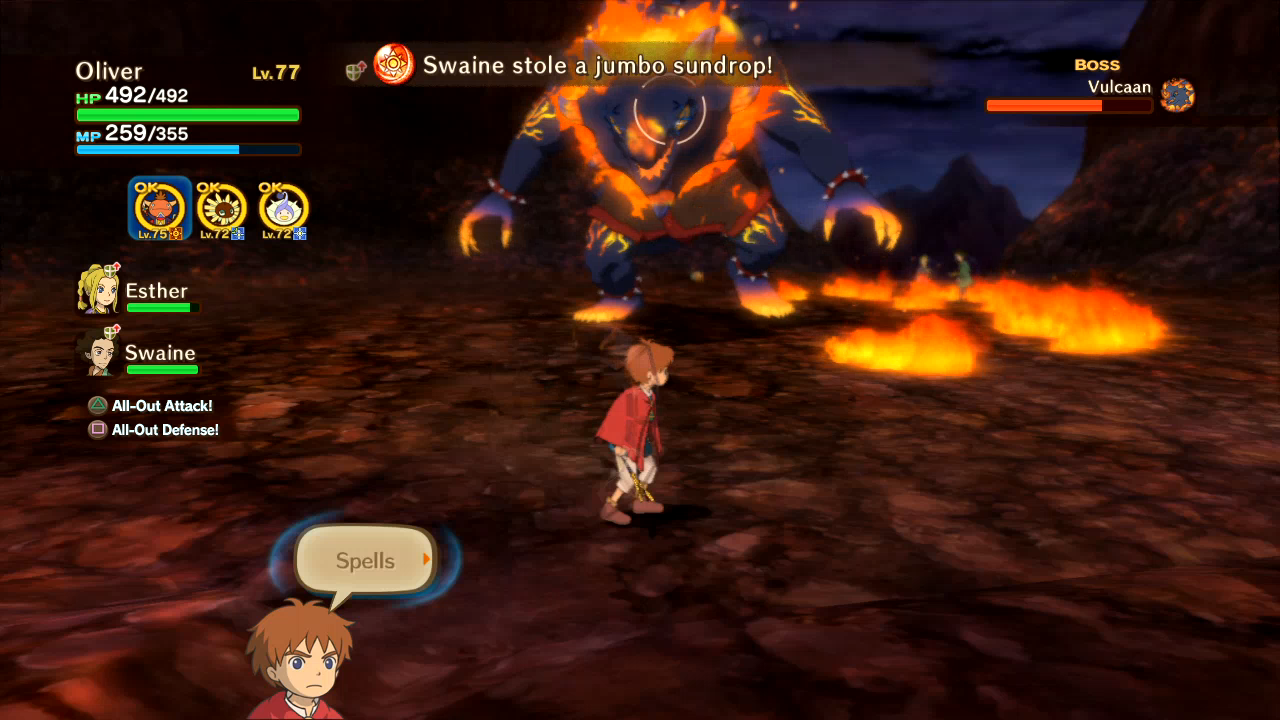 That one I don't think I was low on. If anything I had a surplus. 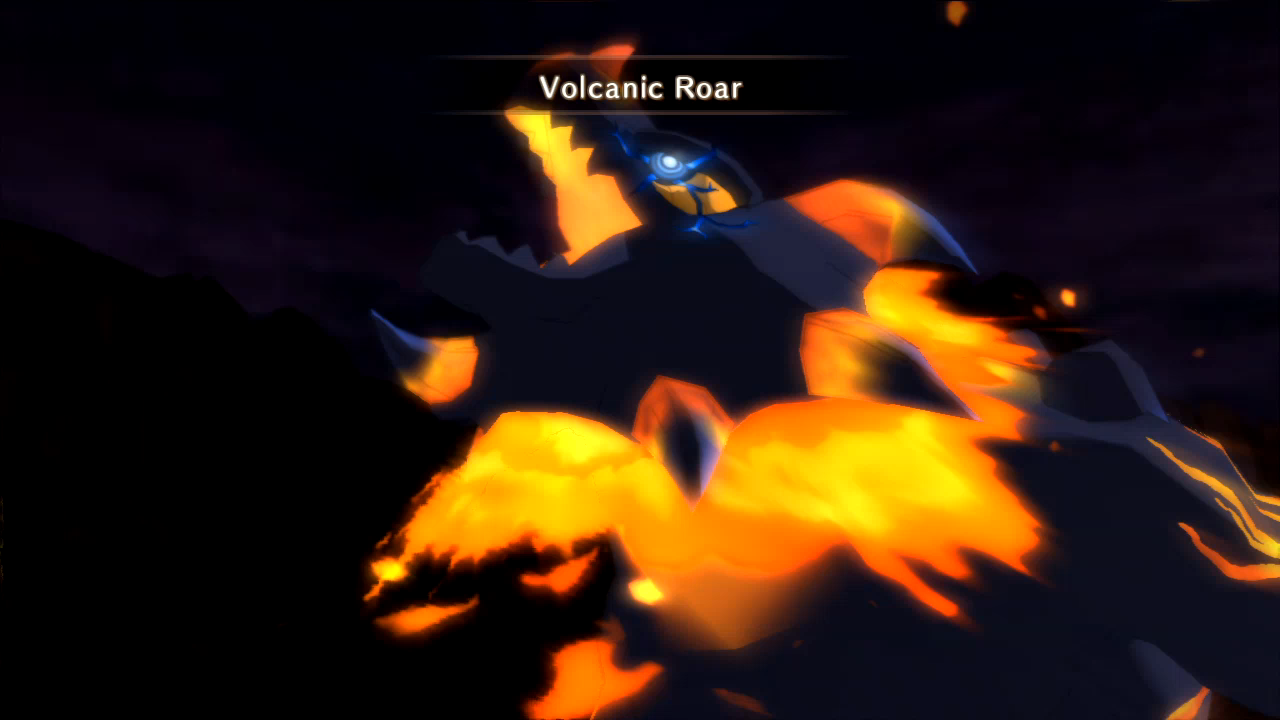 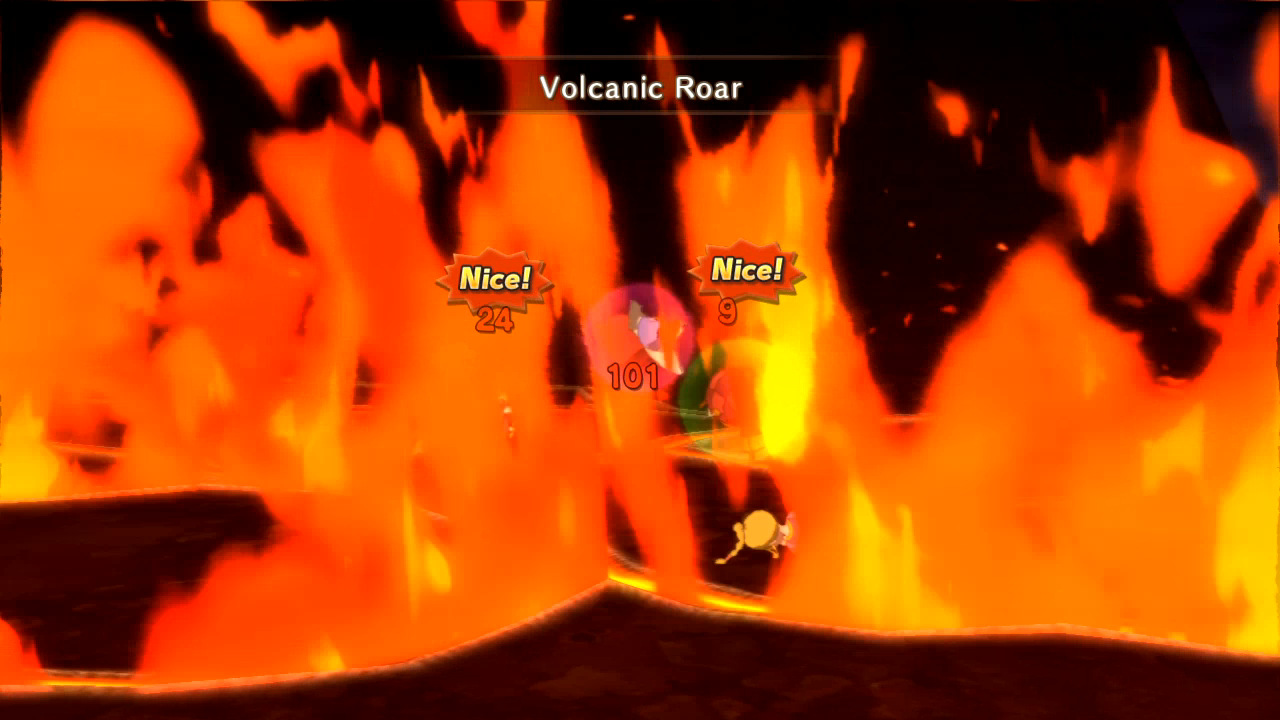 Esthers choice of defensive familiar continues to be poo poo. 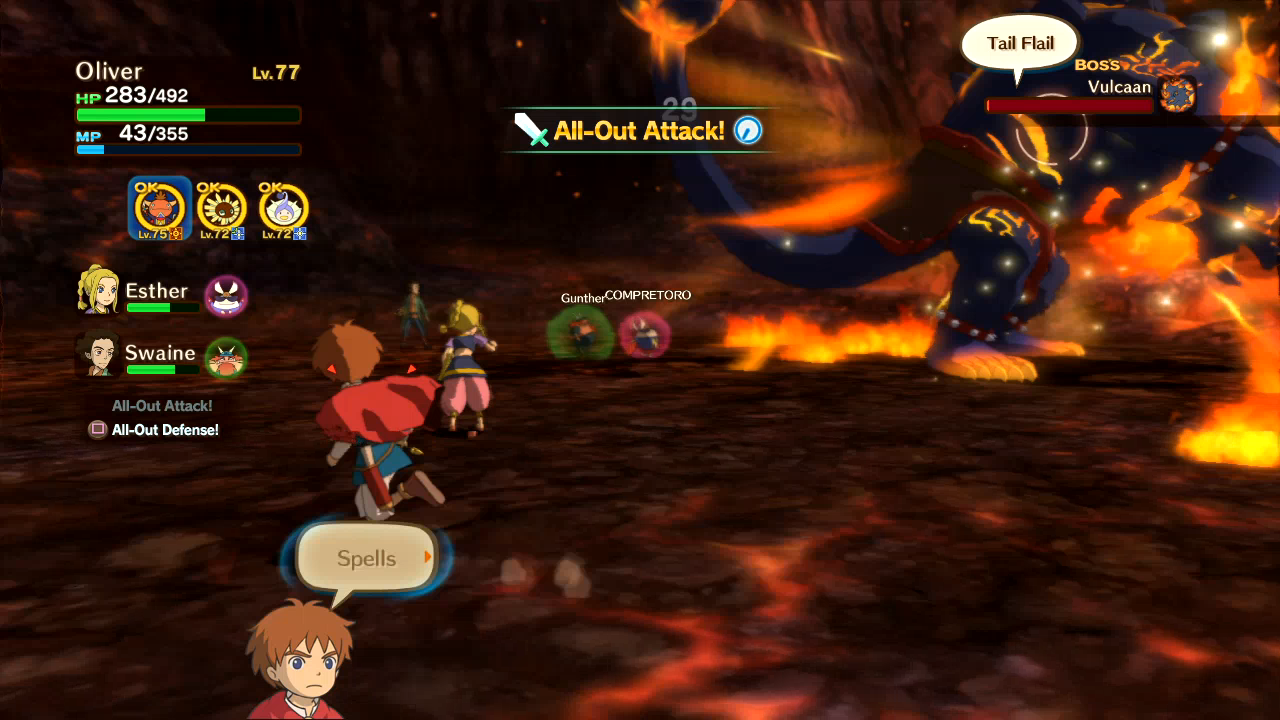 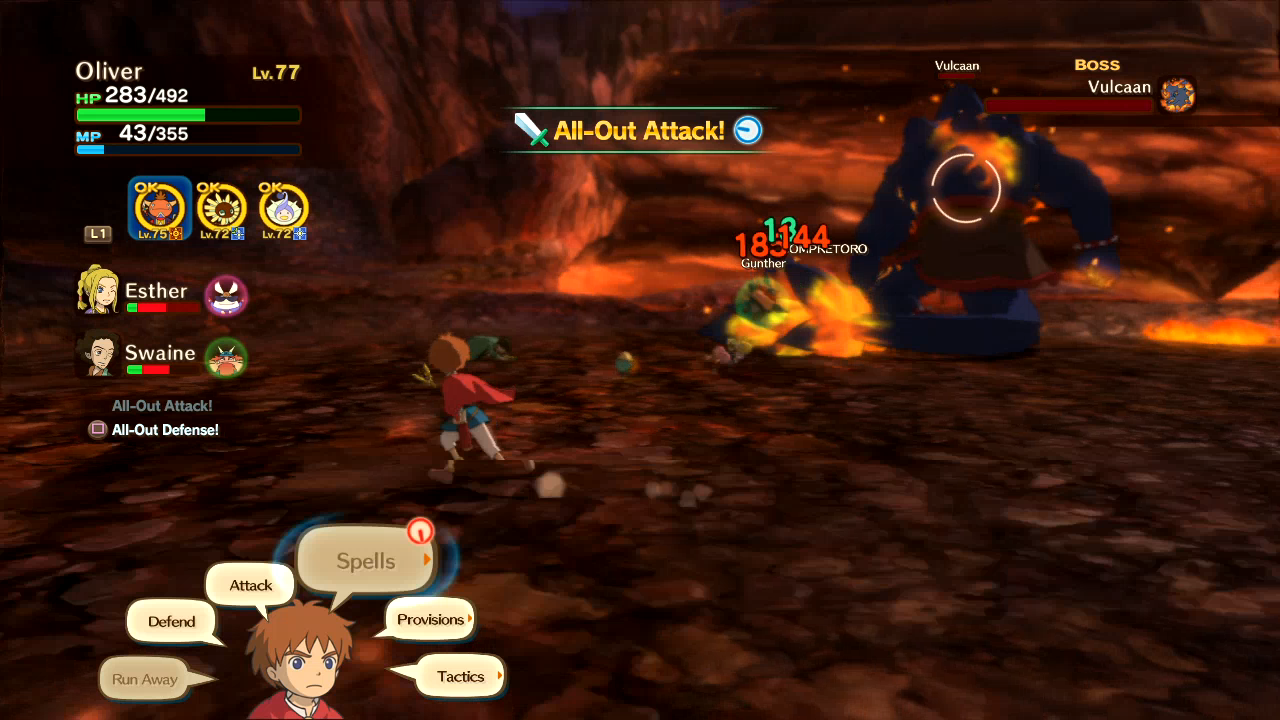 Pretty sure he only used Tail Flail once, and it hit these two pretty hard, but way too late for it to matter. 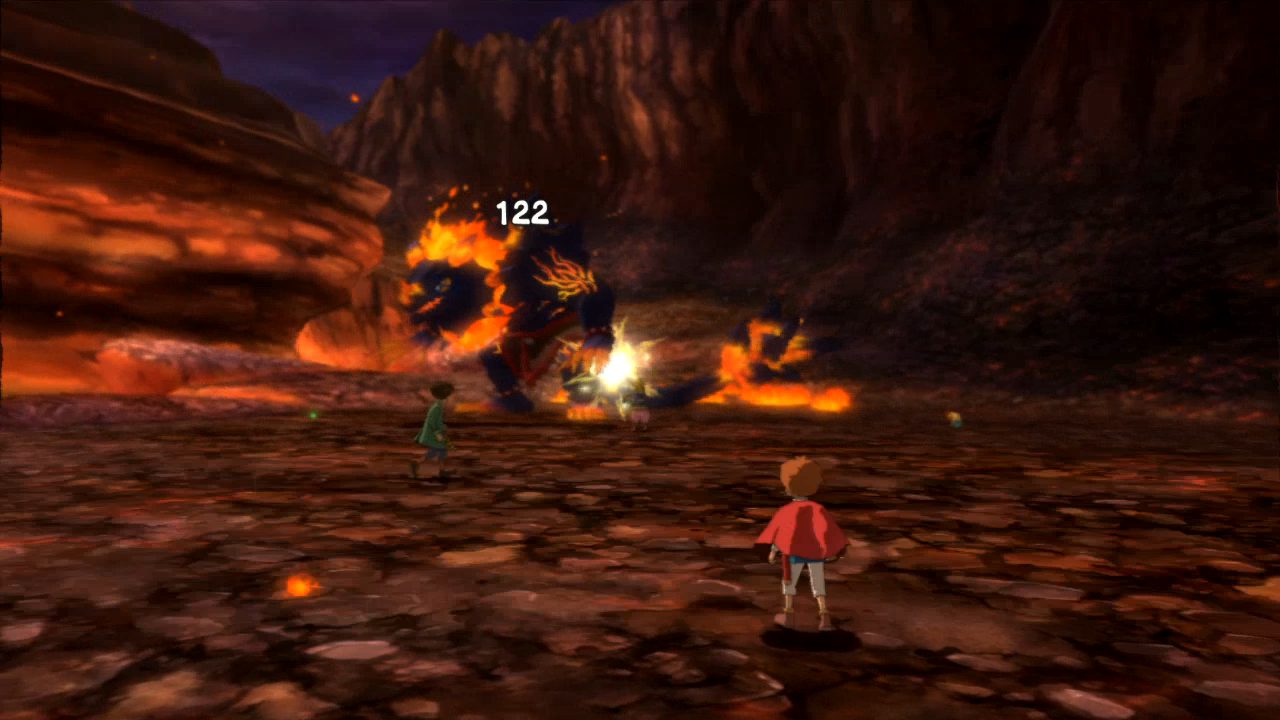 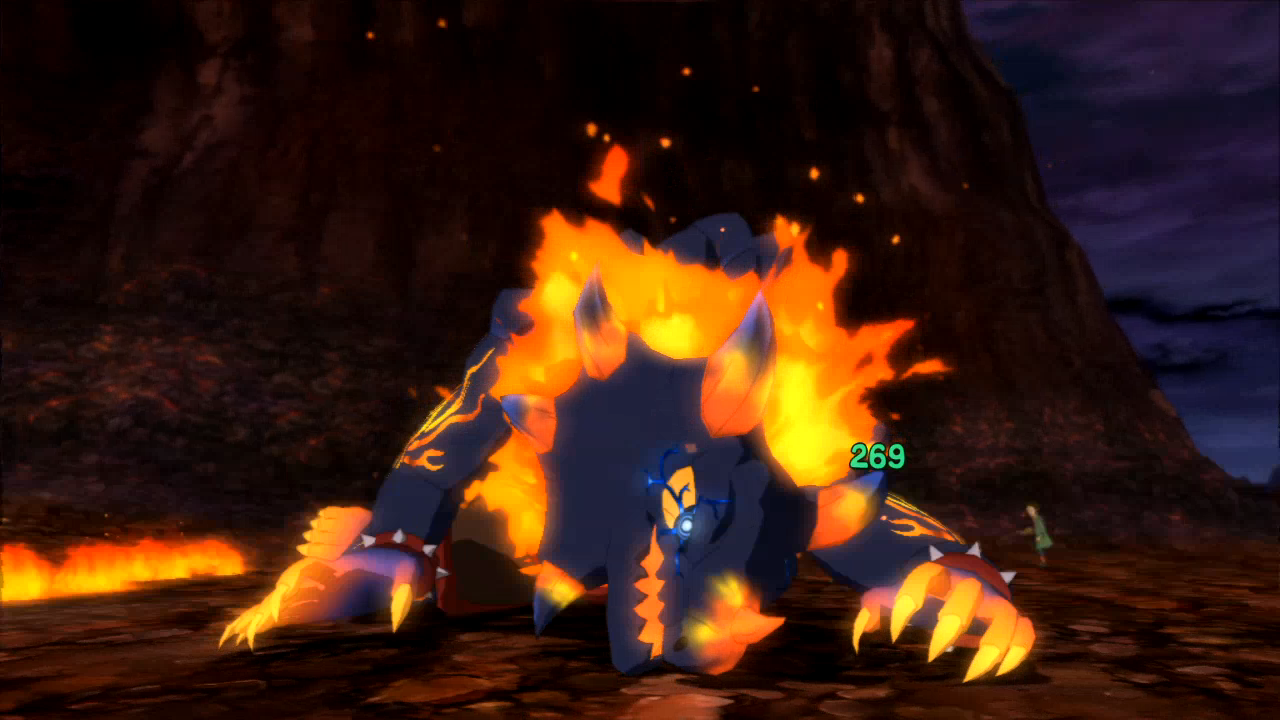  Two old friends randomly decide to appear on the Iron Wyvern, long after we forgot that Drippy gave them a mission they didn't do. Well, here we find out why.  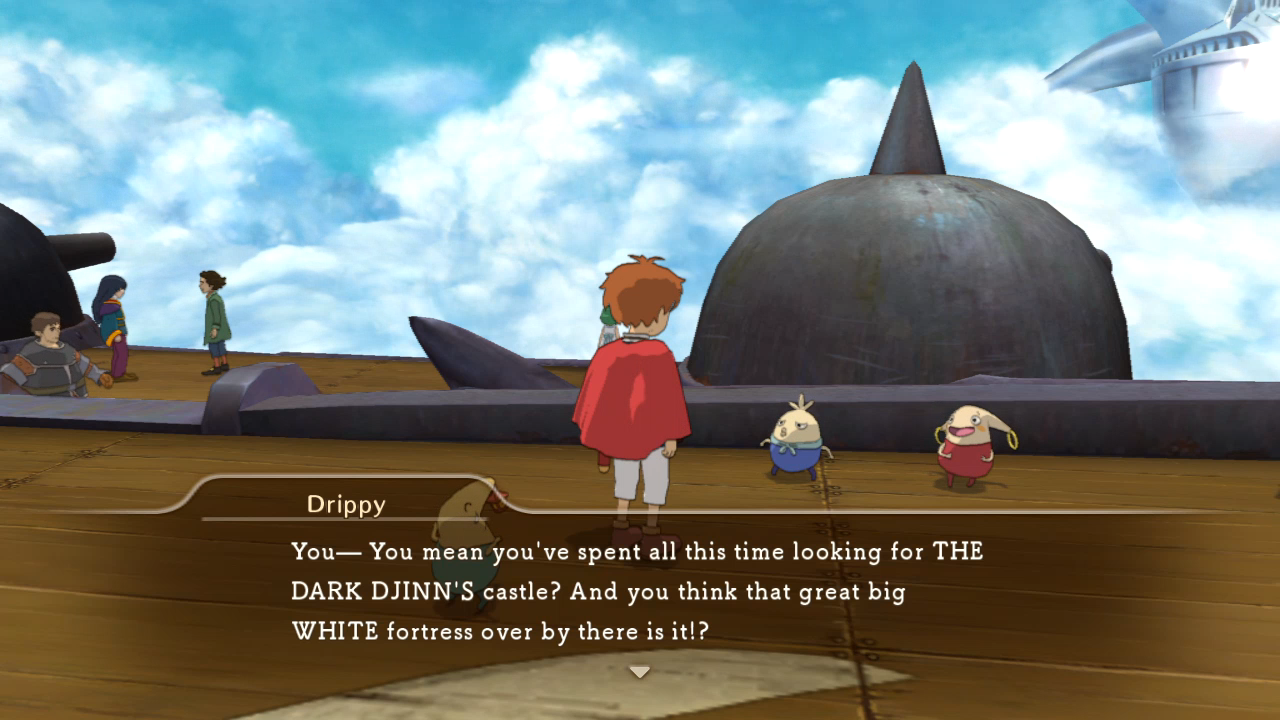 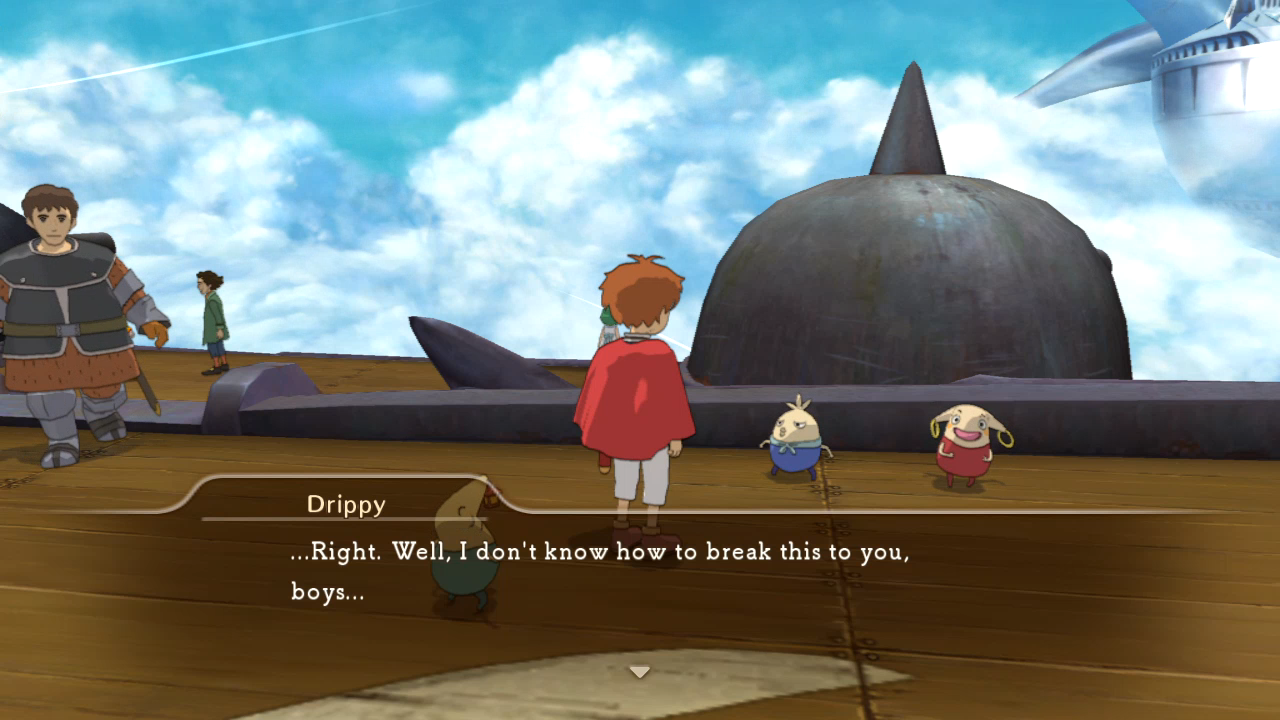   Ever-positive Oliver decides that maybe Useless and Worthless can still do something for them.   Hooray! They sell strong and expensive equipment.  Well, it's expensive anyway. Yeah, we've gone so far and leveled so high that the familiars you care about won't need their weapons. Their Nix Gnashers will probably be good accessory additions to your human characters, though. Plus, this isn't the last time we'll be talking to them; now that their shop is open, they're eventually going to need some new stock.  Our final rift fight for this update is hiding behind Solomon in the Temple of Trials.   Ways you can tell they didn't give a poo poo, #494.   Smashura is just as tough for us now as he was for us back then. Devastation can still gently caress us up, but thankfully he spreads it out between his other two attacks that don't hit me.  I'm guessing Smashura stole that from the Hamelin guard waiting in the hallway.  I felt these battles were lacking some irony.   That's about as much damage as he is doing to us, which I guess is acceptablee.  Esther times this buff perfectly. 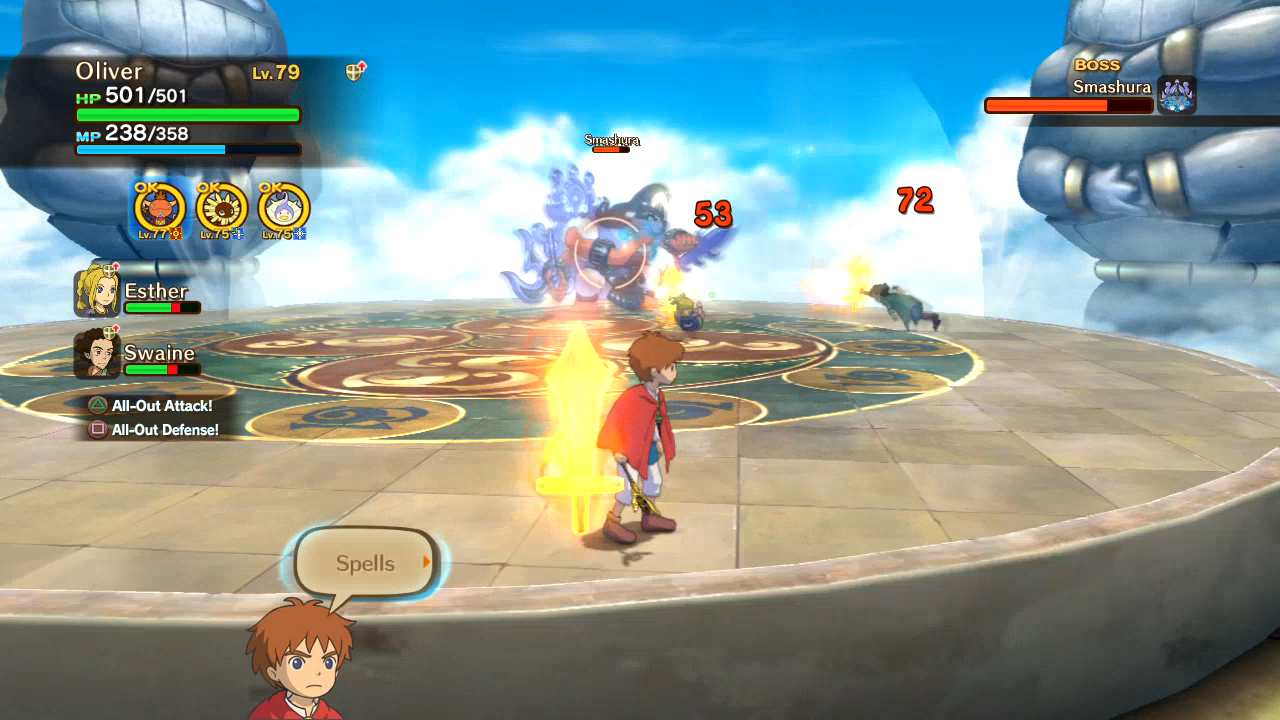 That probably saved them a chunk of health, but it would have saved them all of their health if they just got out of the way. And that's why I hate buff spells in this game. 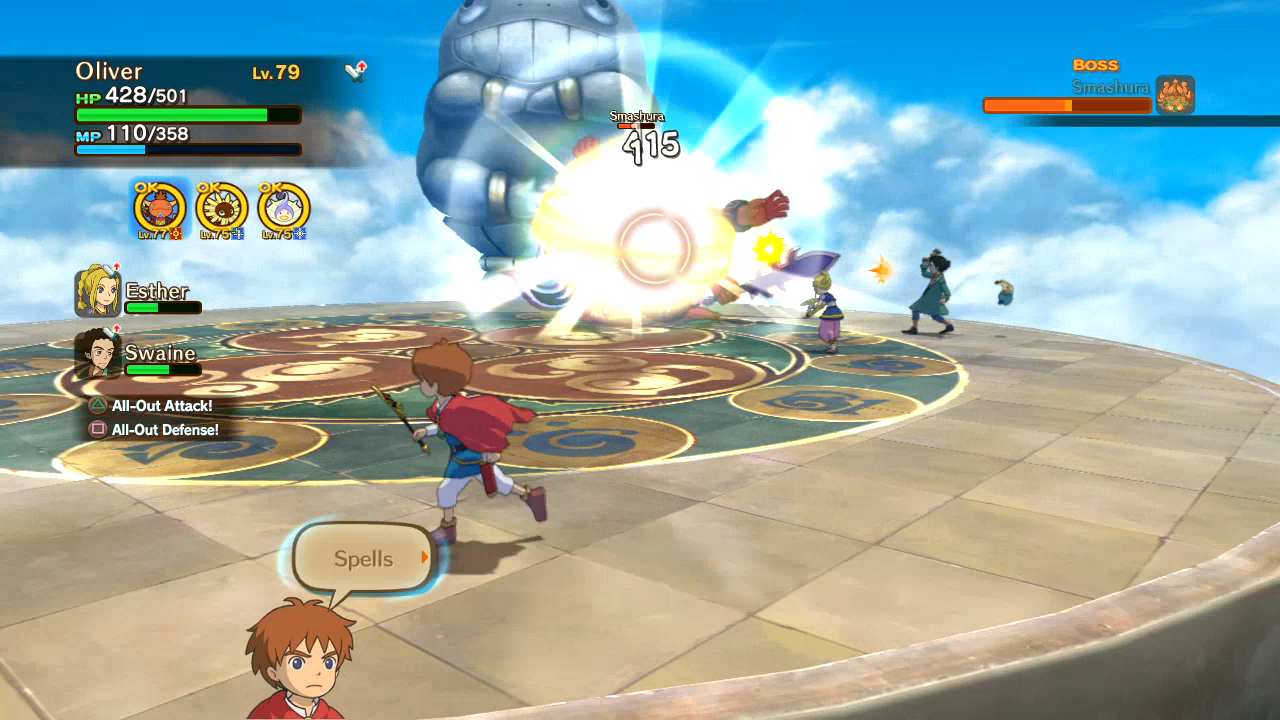 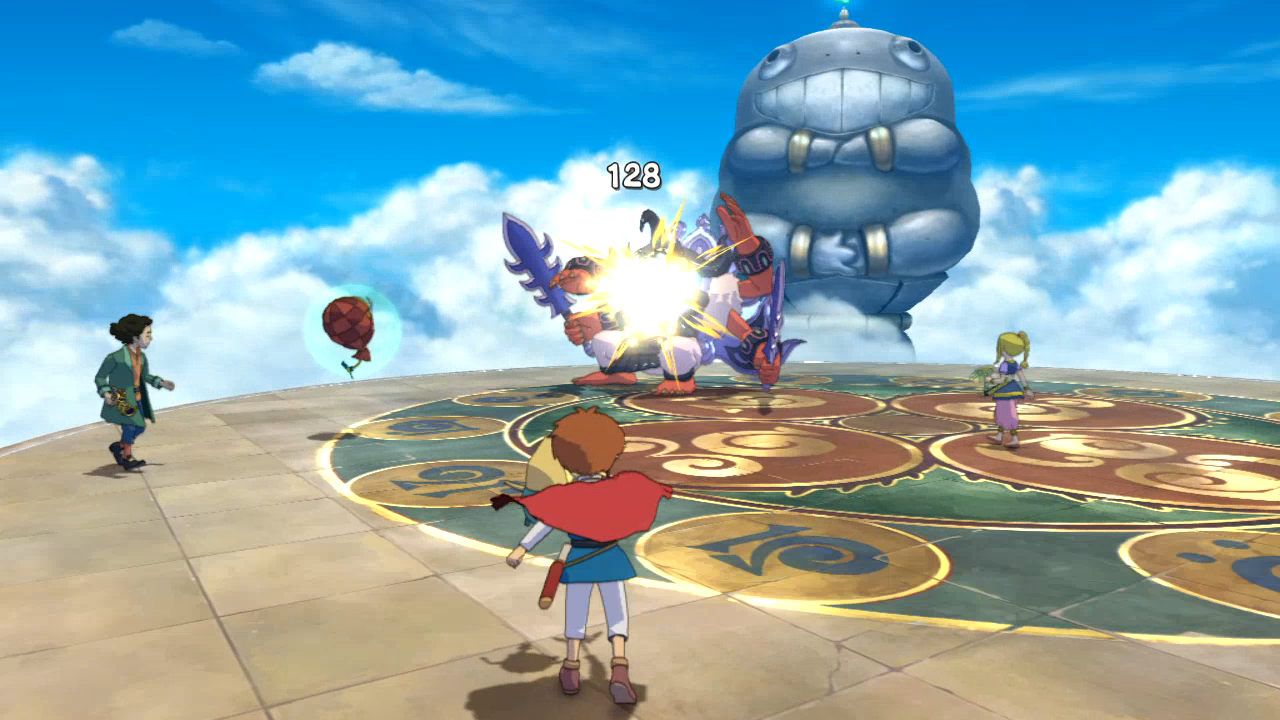 The fight concludes how you expect. 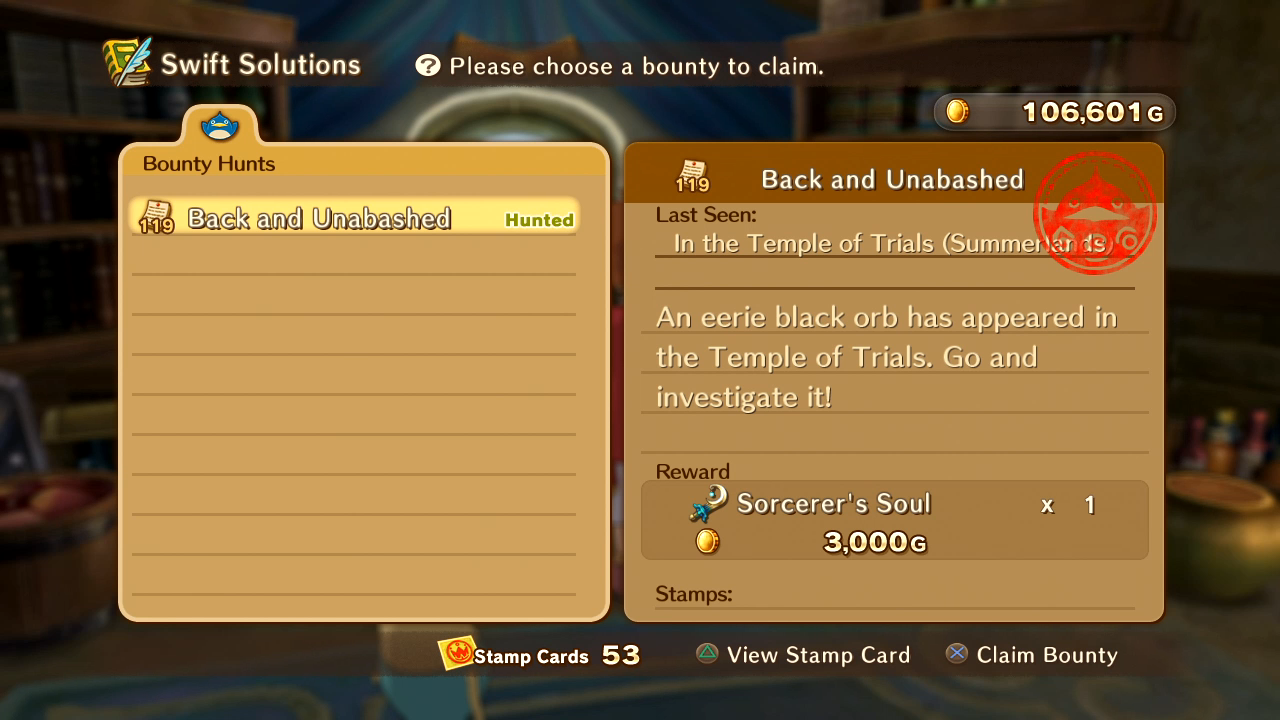     Motherfucker.   MOTHERFUCKER. And now you see why these will have to wait for the last two updates. Next time: Saying Goodbye to Horace!
|
|
#
?
Mar 2, 2015 21:23
|
|
|
...god drat. That is a poo poo-ton of boss refights.
|
|
#
?
Mar 3, 2015 08:21
|
|


|
Well, the game had a poo poo-ton of bosses. You know, I think with a little more polish, Ni no Kuni's story could've been amazing. It's a shame it didn't turn out that way, but I gotta admit I still like it for the most part.
|
|
#
?
Mar 4, 2015 04:59
|
|
|
Post-Game Screenshot Missions 4: Horace This is the only sidequest that deserves its own update and will have transcribed dialogue, because it expands the backstory and world of Ni no Kuni far more than anything that happens in the main game, and it's proper interesting stuff. But to get to it, we need to catch up with our old buddy Horace. When we last met him he was headed to Yule, and we find him staring at a flowerpot in the mayor's house.   You haven't left this house in months.    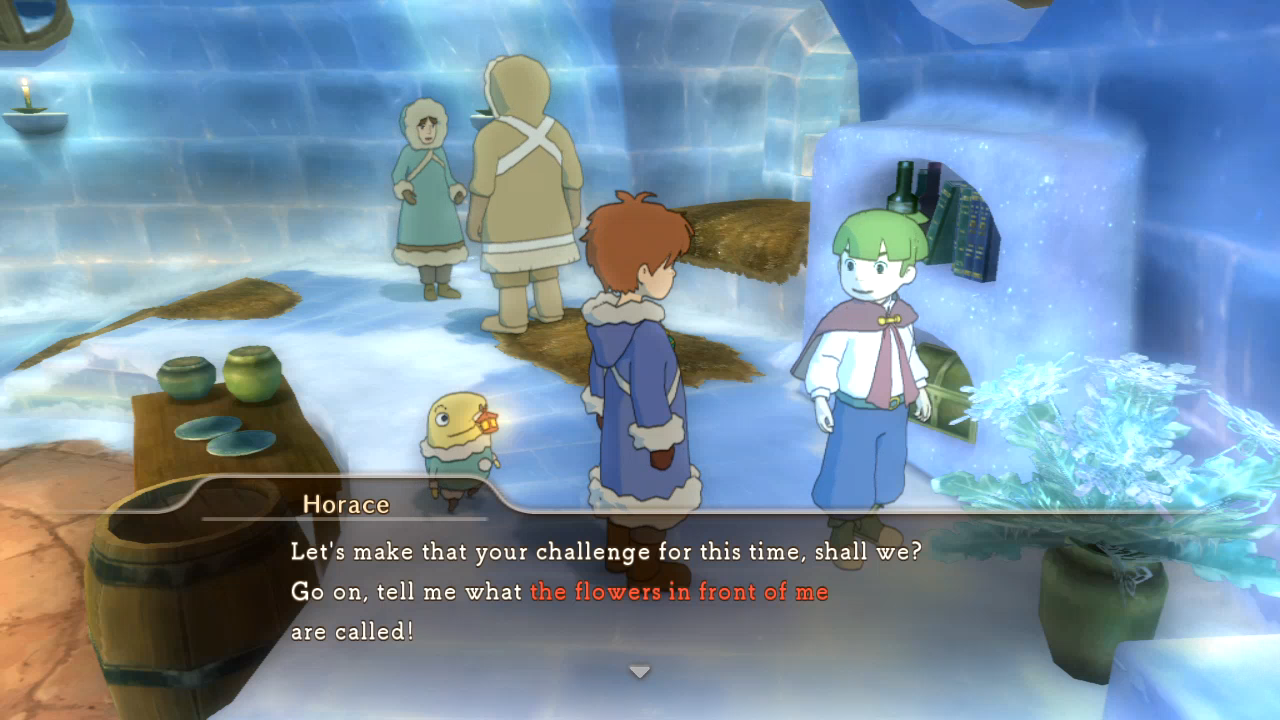 We've gathered these flowers before on the overworld. 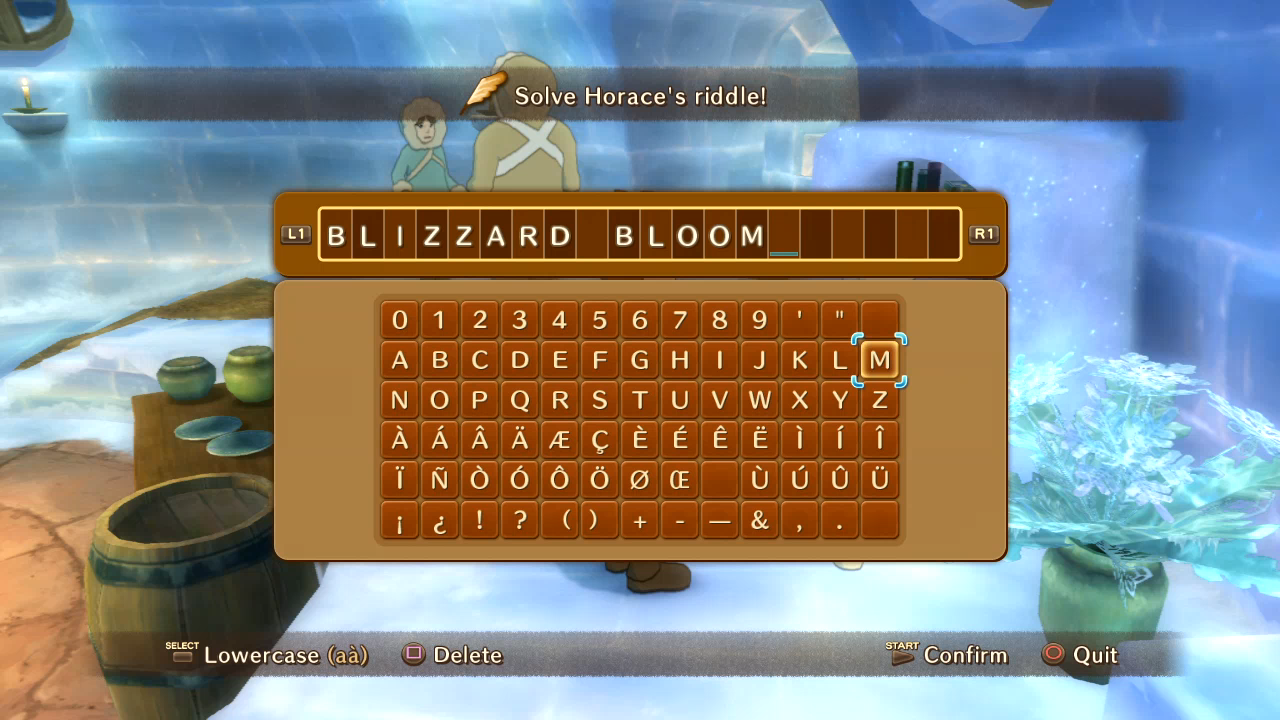  Cloudburst is a nifty spell, if limited in use. It nixes weaker enemies, but there's little benefit to it at this point, and it doesn't do as much damage as I'd like. 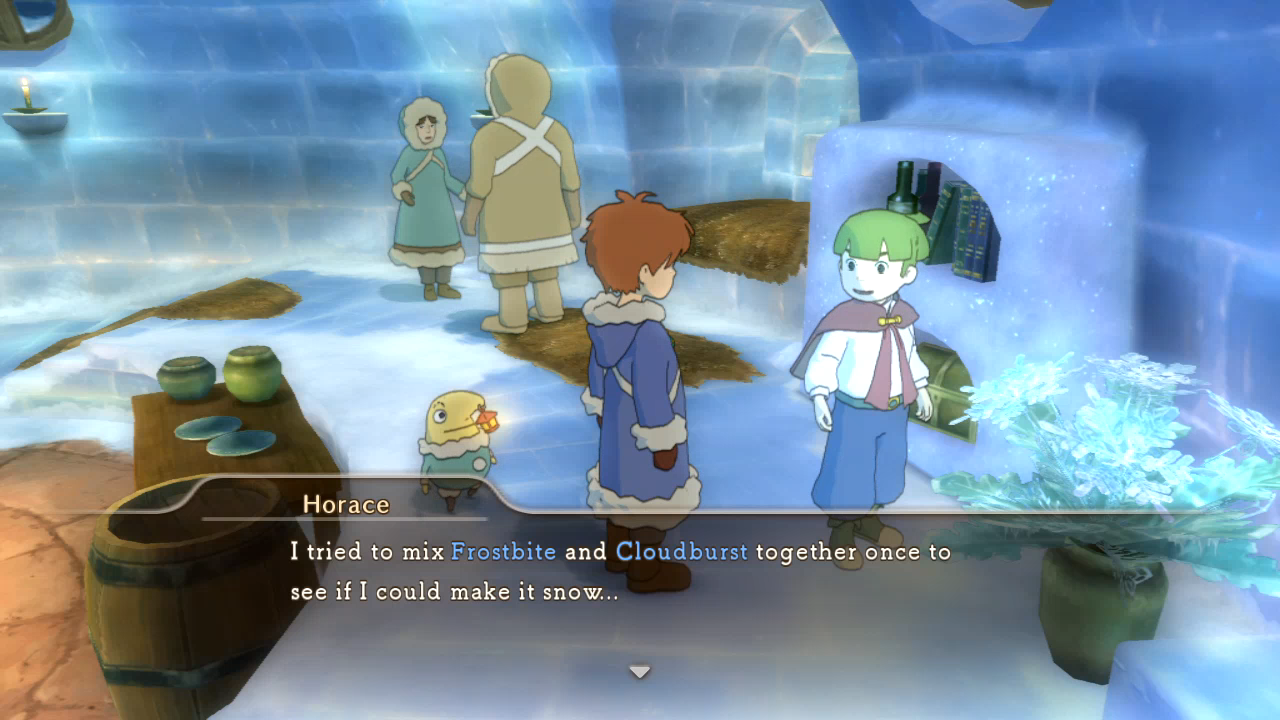 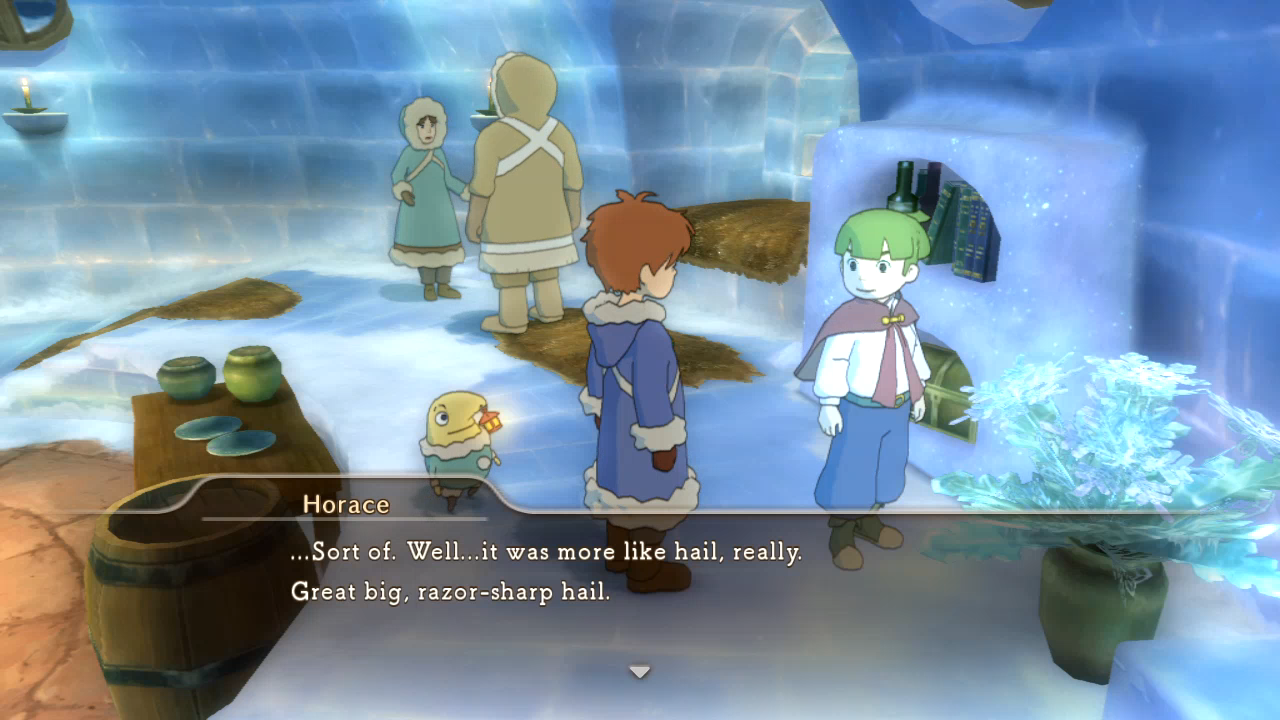 I wish we could actually fight Horace. He'd make an interesting opponent, but we never go head-to-head with the guy himself. 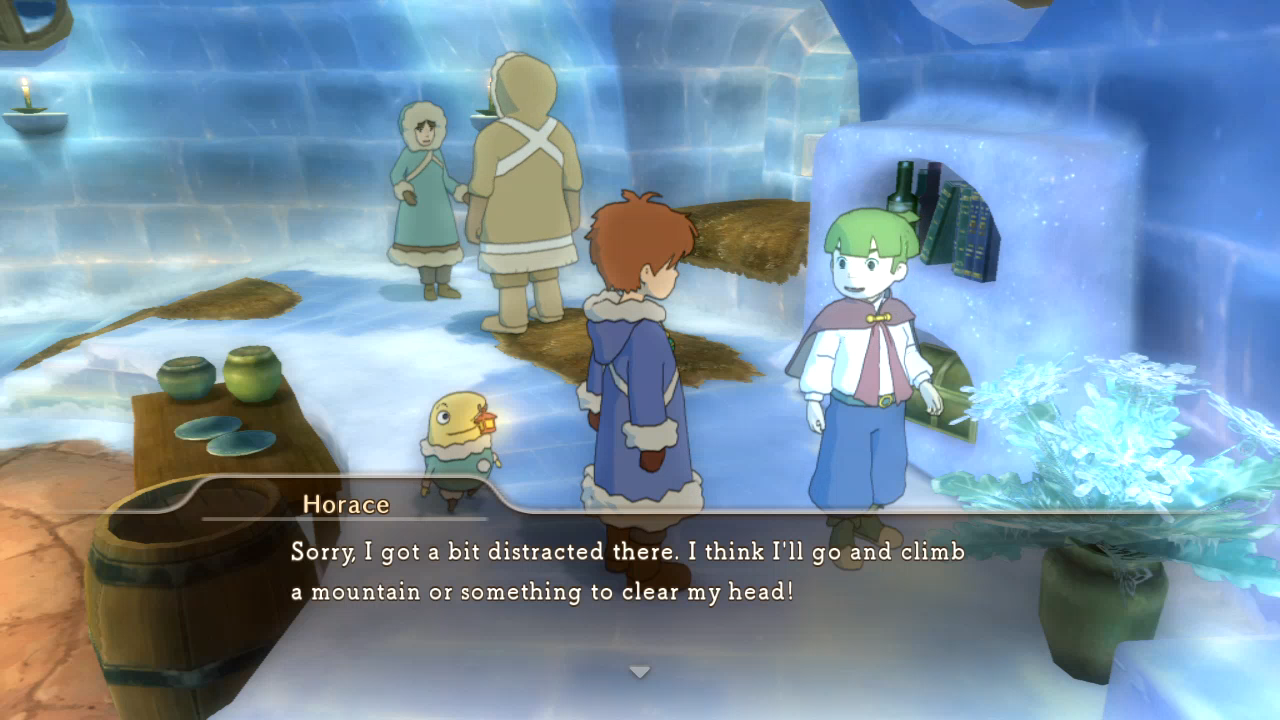 Once we leave, since we already beat the main story and this is wrapping up loose ends from before the endgame, he immediately spawns in the Perdida Swift Solutions.  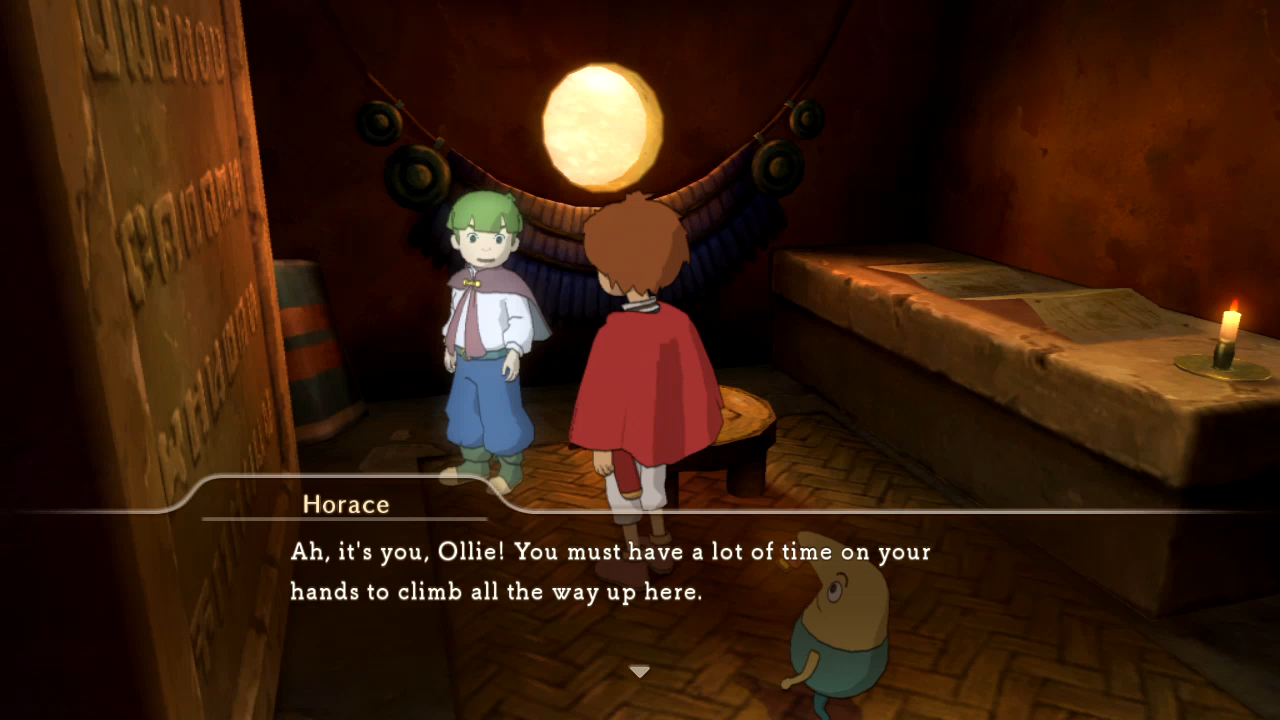 Yeah, all those 10 seconds from warping here to walking up to you.  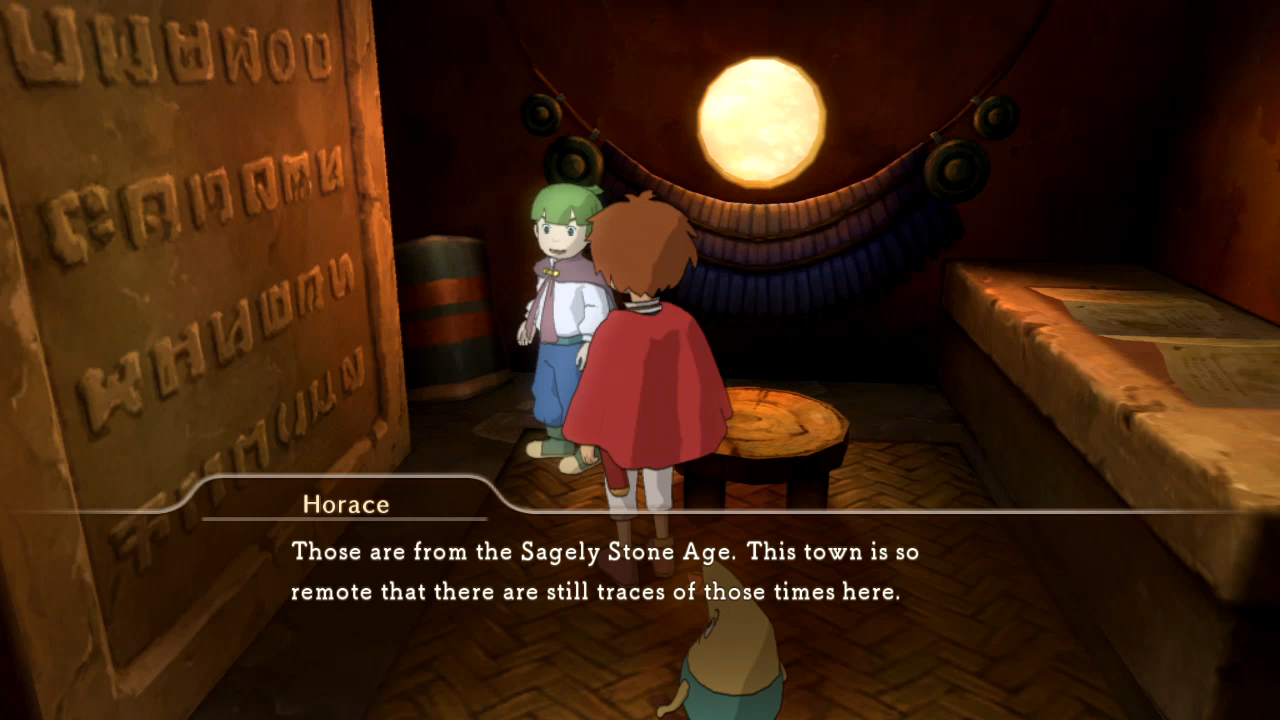 We'll learn a little bit more about the Sagely Stone Age in this part, though not as much from Horace necessarily.   This question is bullshit. You'll never be so engrossed in the Nazca�n alphabet to tell any of the letters apart in the Wizard Companion's world map, let alone pinpoint the one that only shows up once there. 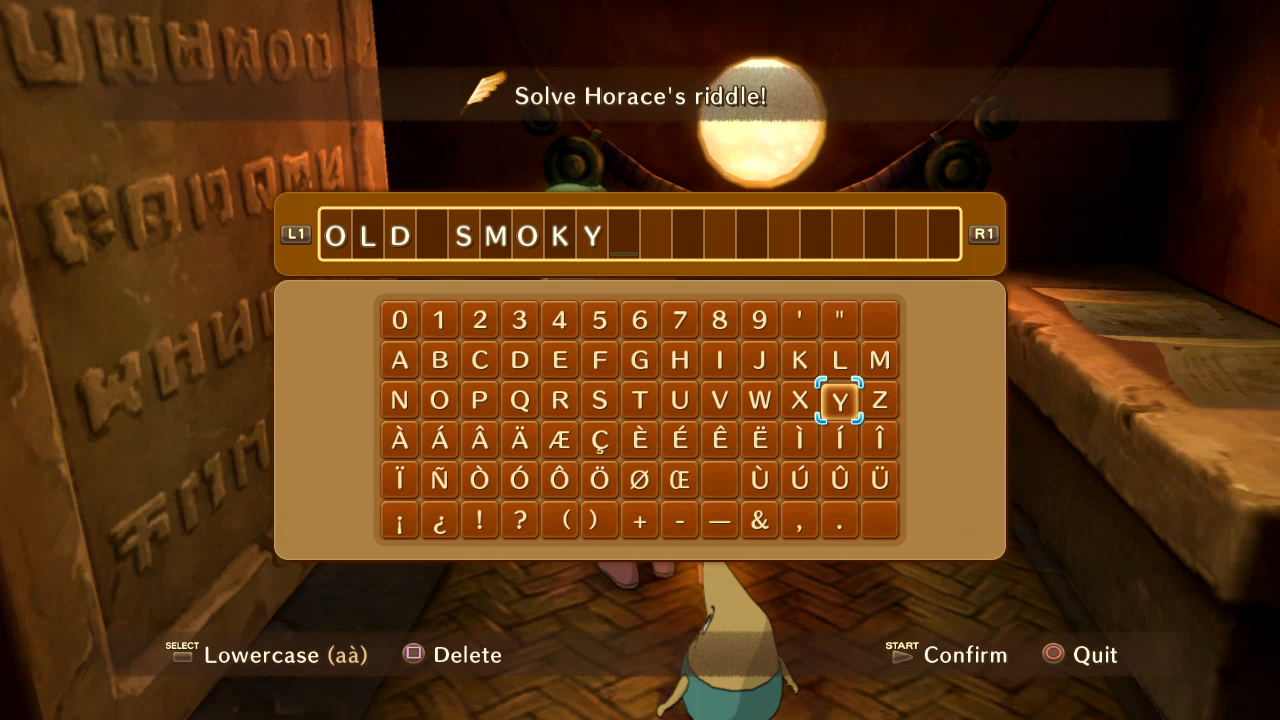    Veil hides our scent from monsters outside of battle, and it is an excellent spell for going back to areas where you don't want to face any of them, as they cannot detect you at all. Also allows you to sneak up on weaker enemies that run away too easily if you're hunting them, and it losts a long time.   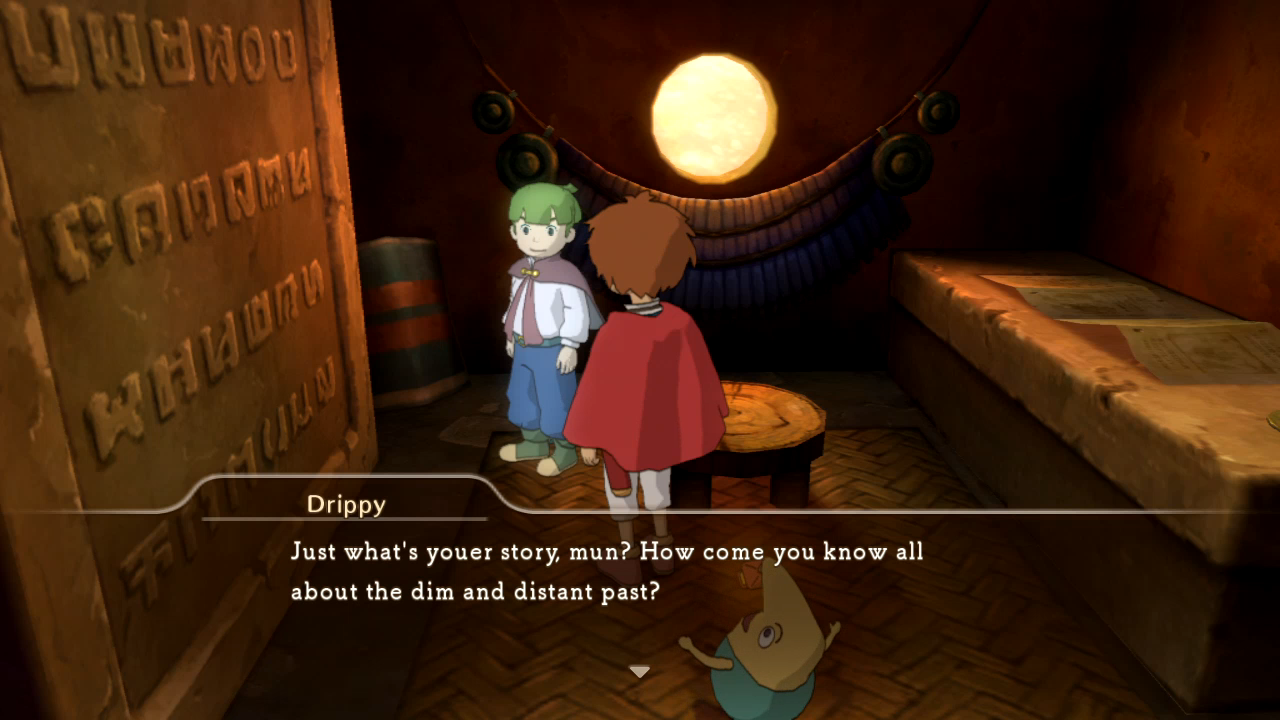 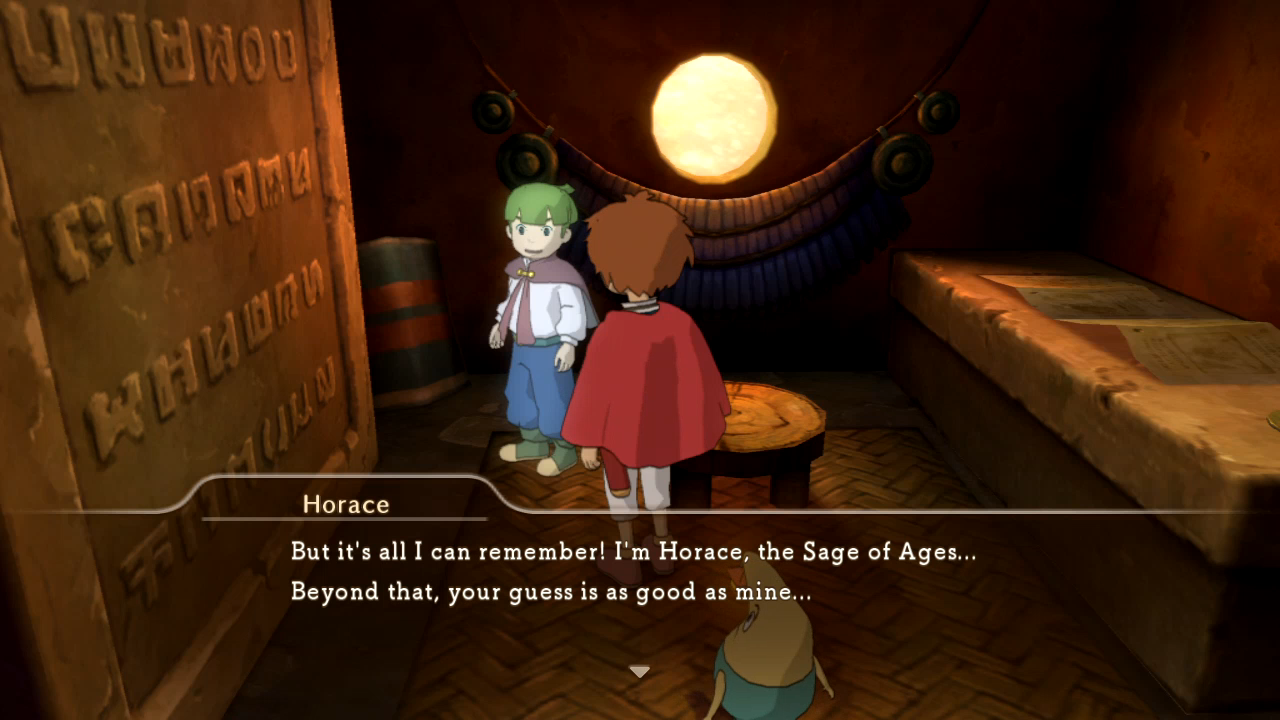 This update goes into much more interesting areas than simply learning more about Horace, perfectly interesting and worthwhile as I'm sure that would be on its own. Even without knowing much about him, Horace is a likable character that I'm glad gets to stick around throughout our adventure. 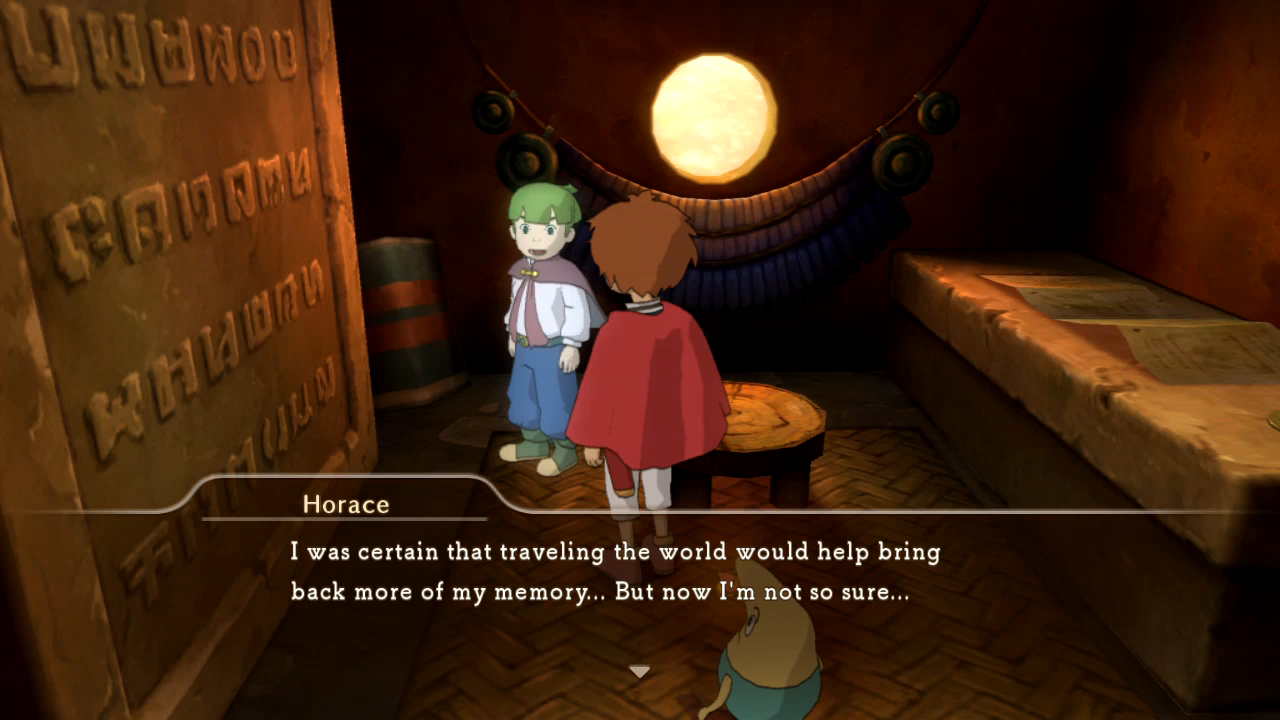 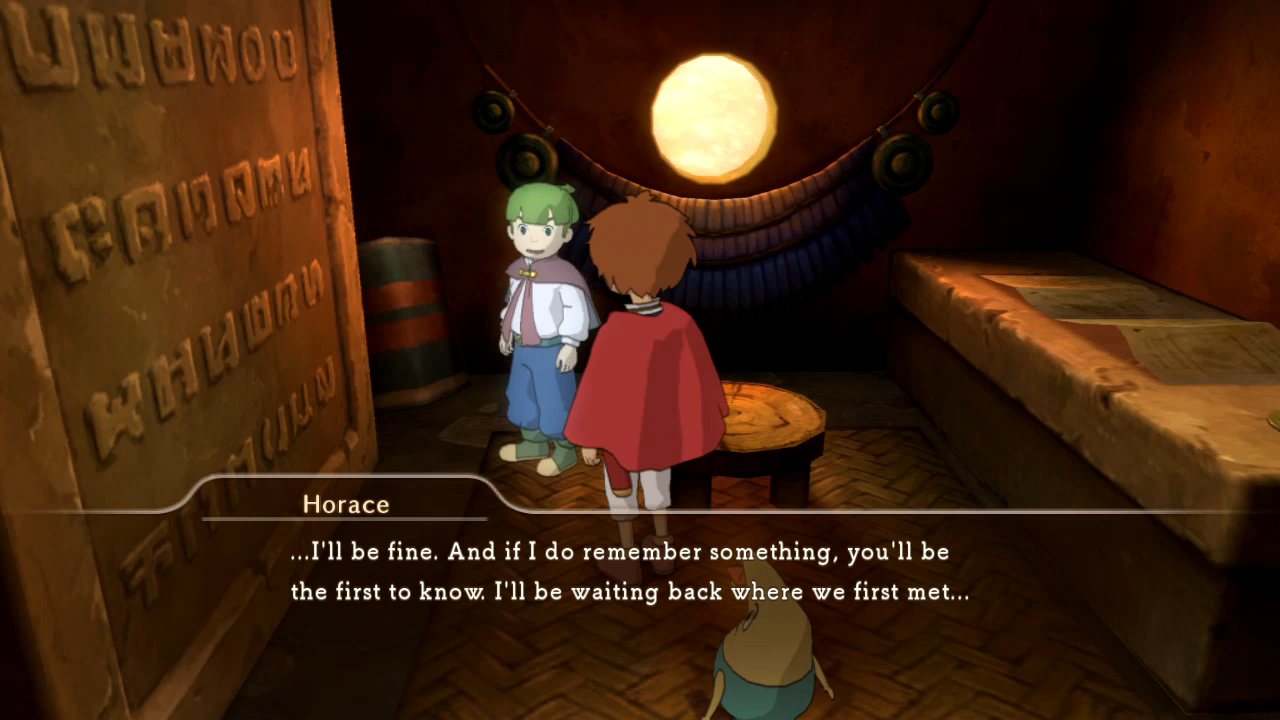 Through the magic of existing outside of time (read: the game expecting us to solve his riddle before we kill Shadar), Horace immediately remembers something important and spawns beside the gravestone where we first met him. 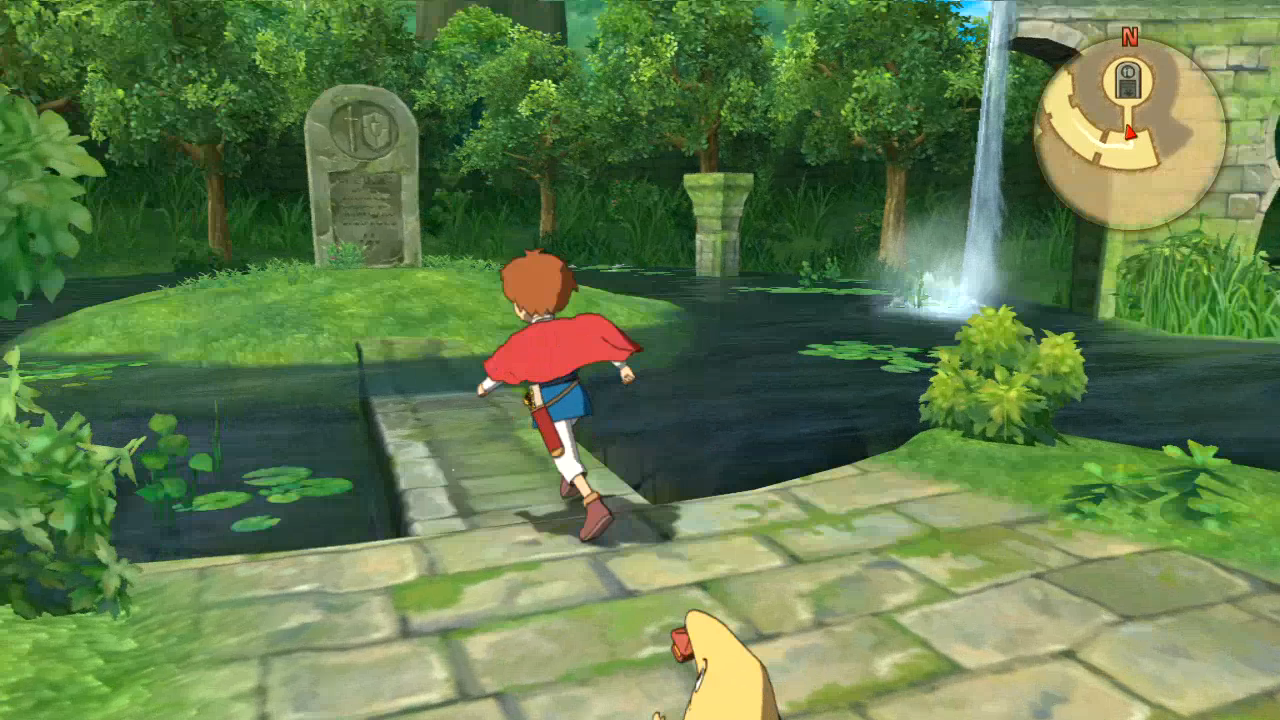 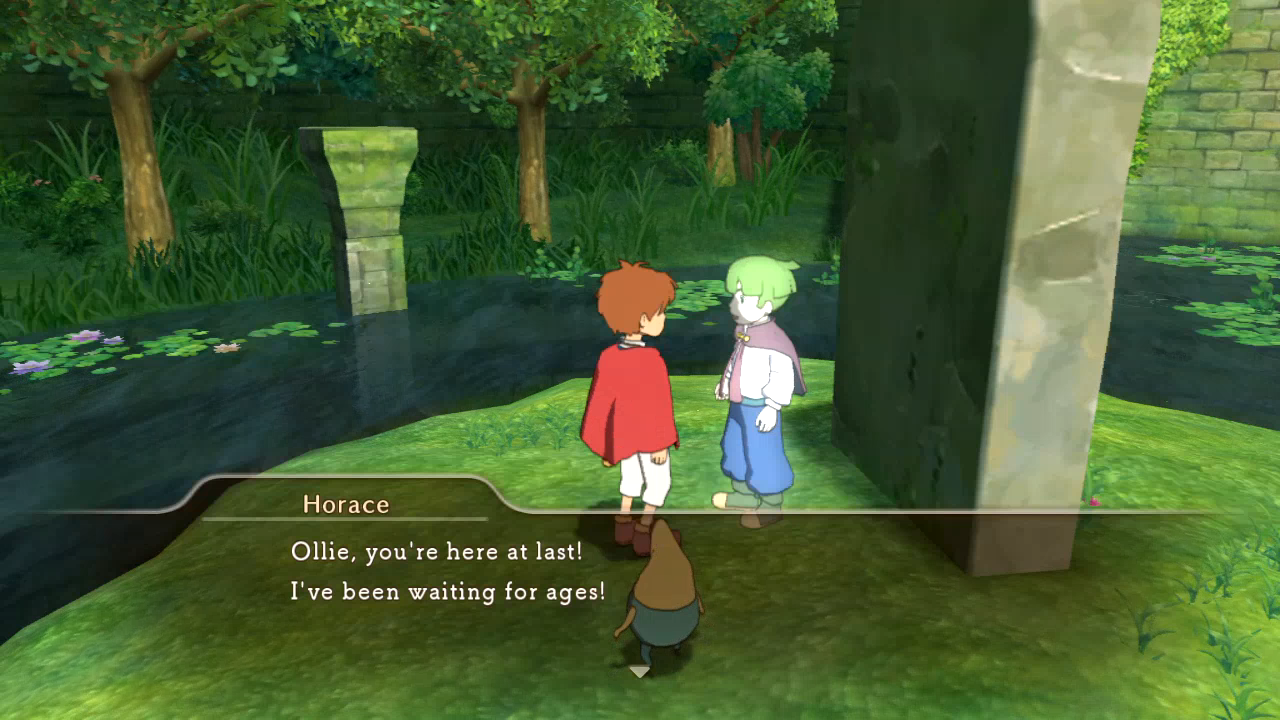 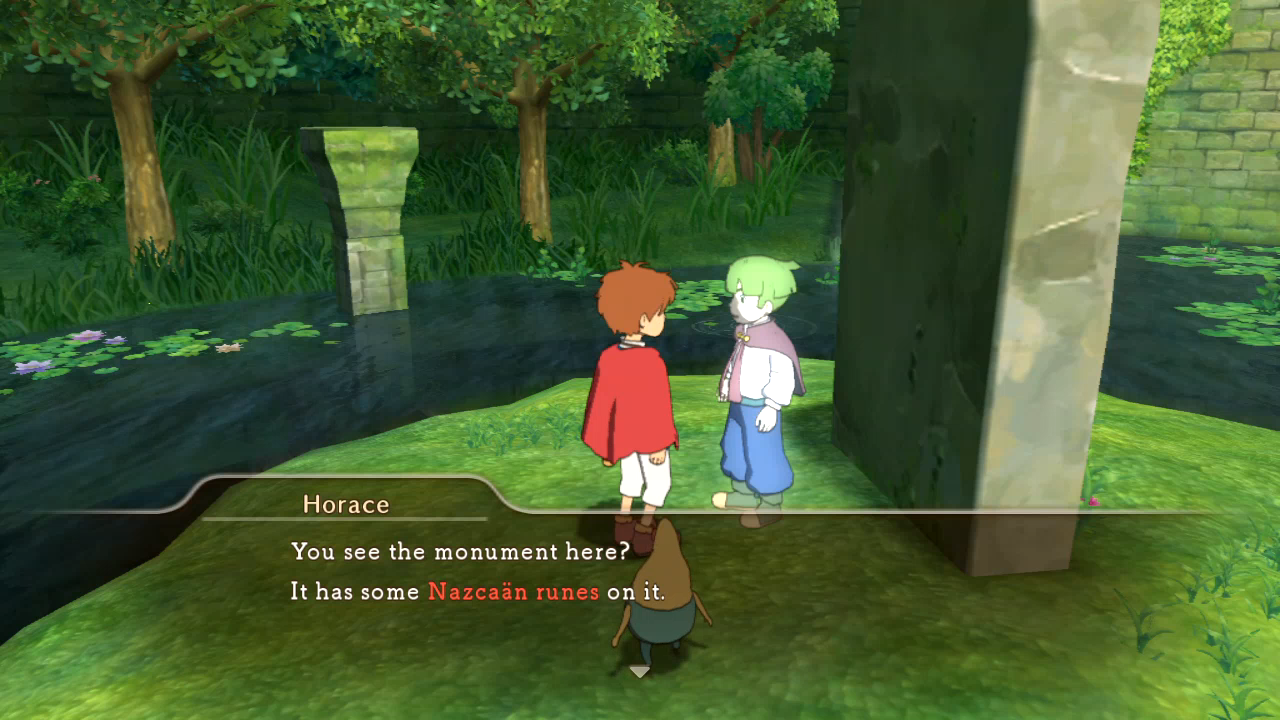 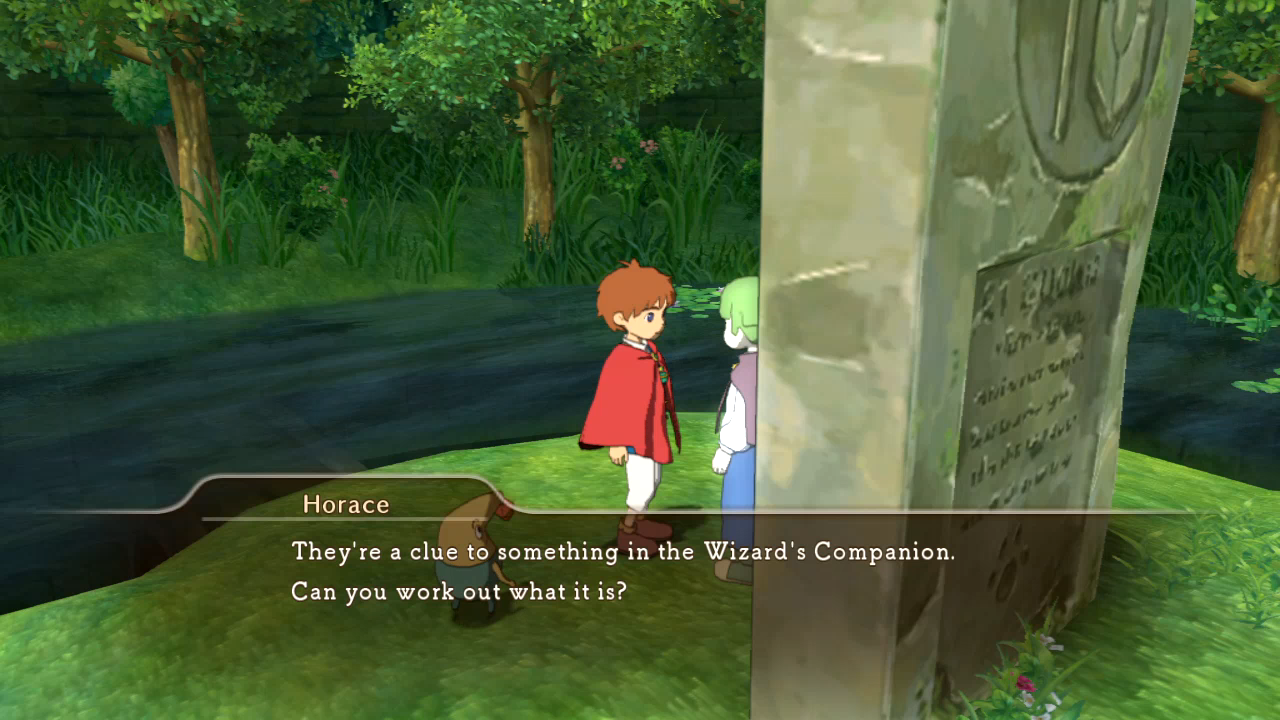 I can't be bothered to actually figure out what it says myself, but props to the writers for a pretty clever explanation for something here. 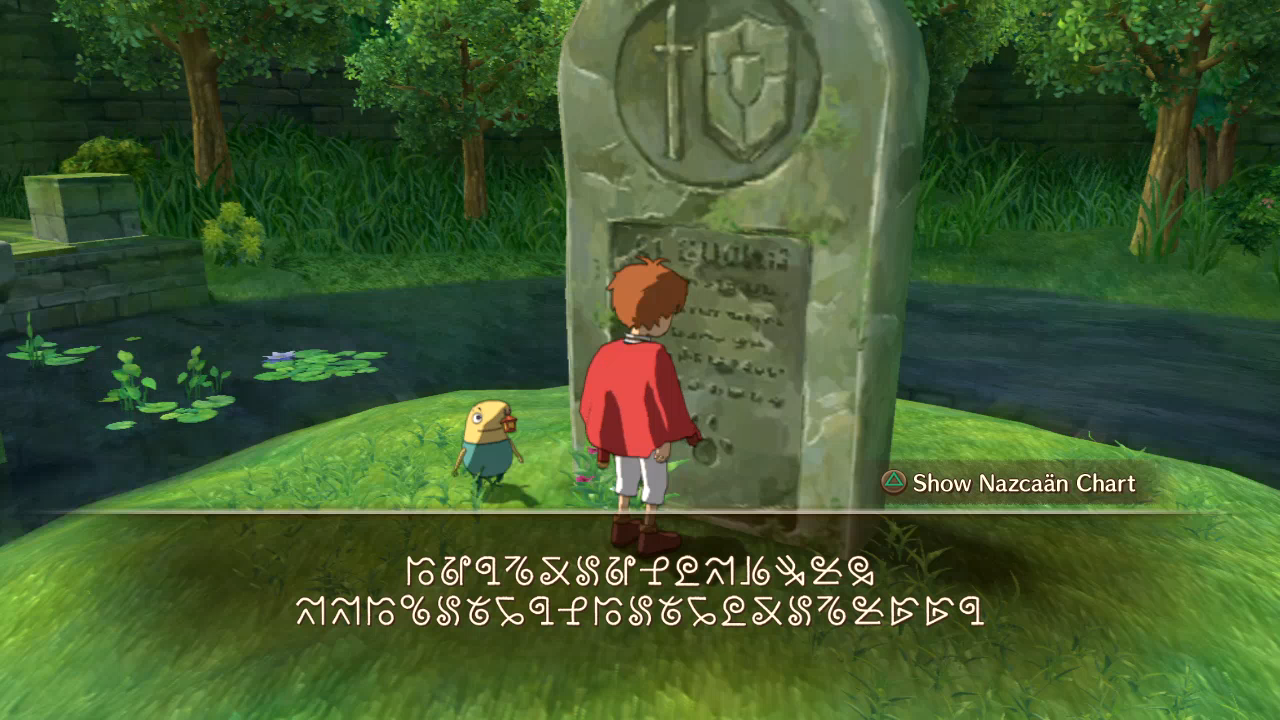  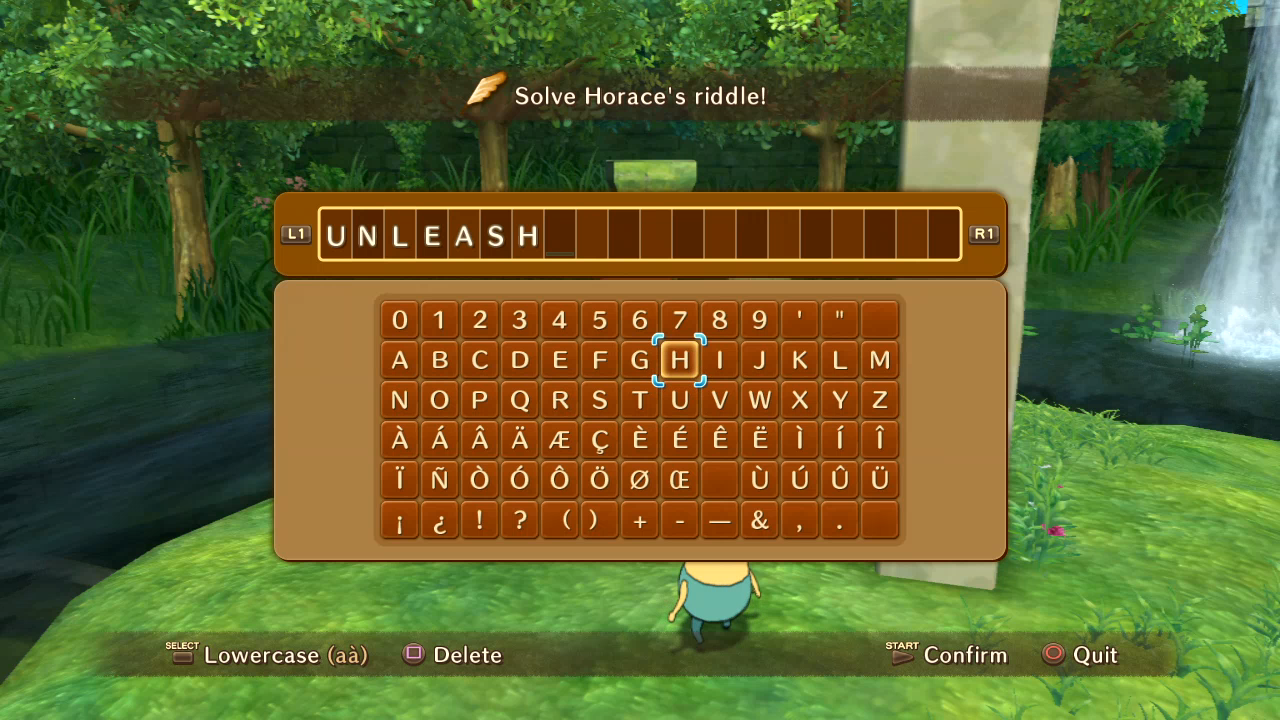  That makes Unleash even more awesome to me: they're not just summons anymore - they're interdimensional familiars! 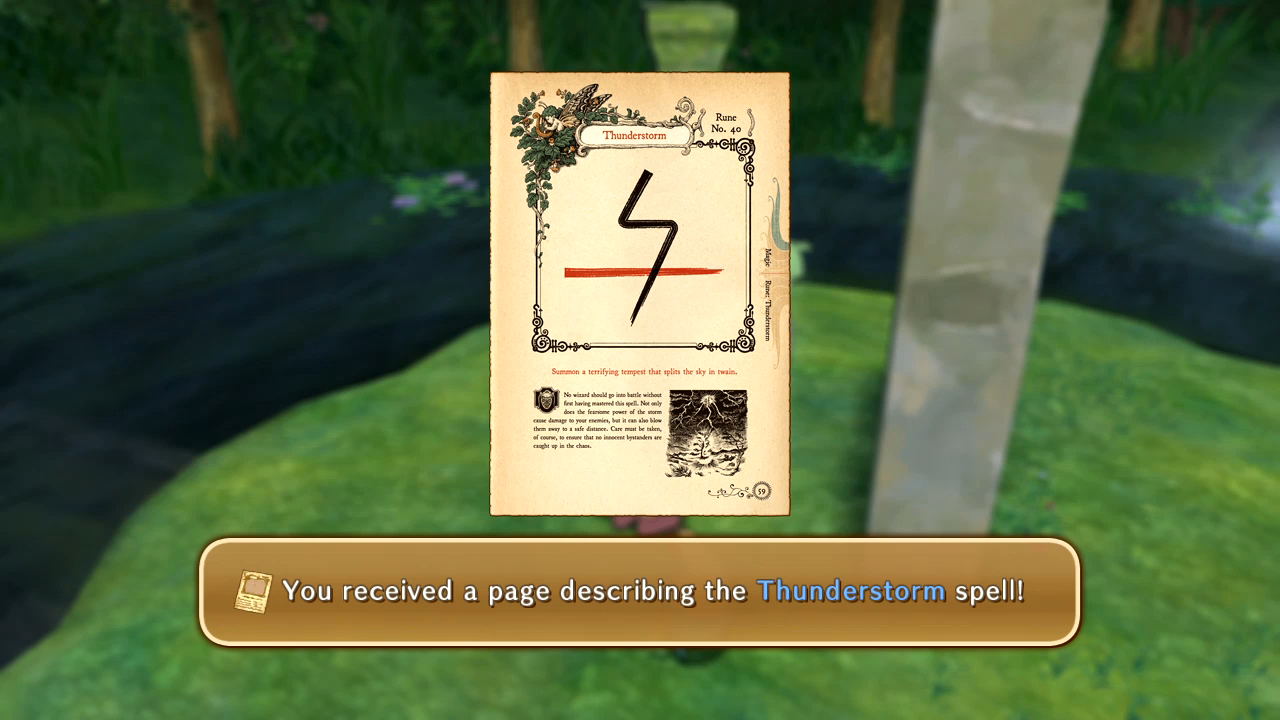 Speaking of awesome, Thunderstorm is the unsung best spell in the game. It hits hard, can cause confusion, and it knocks smaller enemies back - which frequently causes them to drop glims. Let's just say, look forward to how I use it in the second half of the Solosseum. 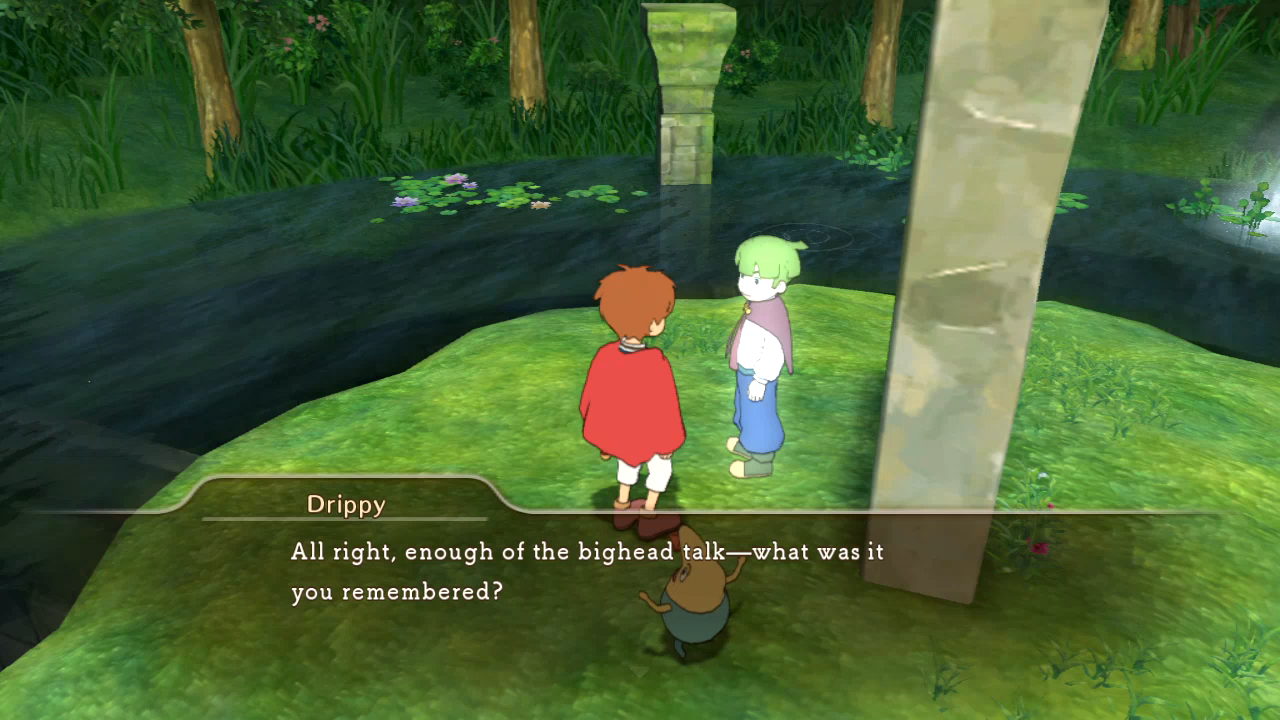 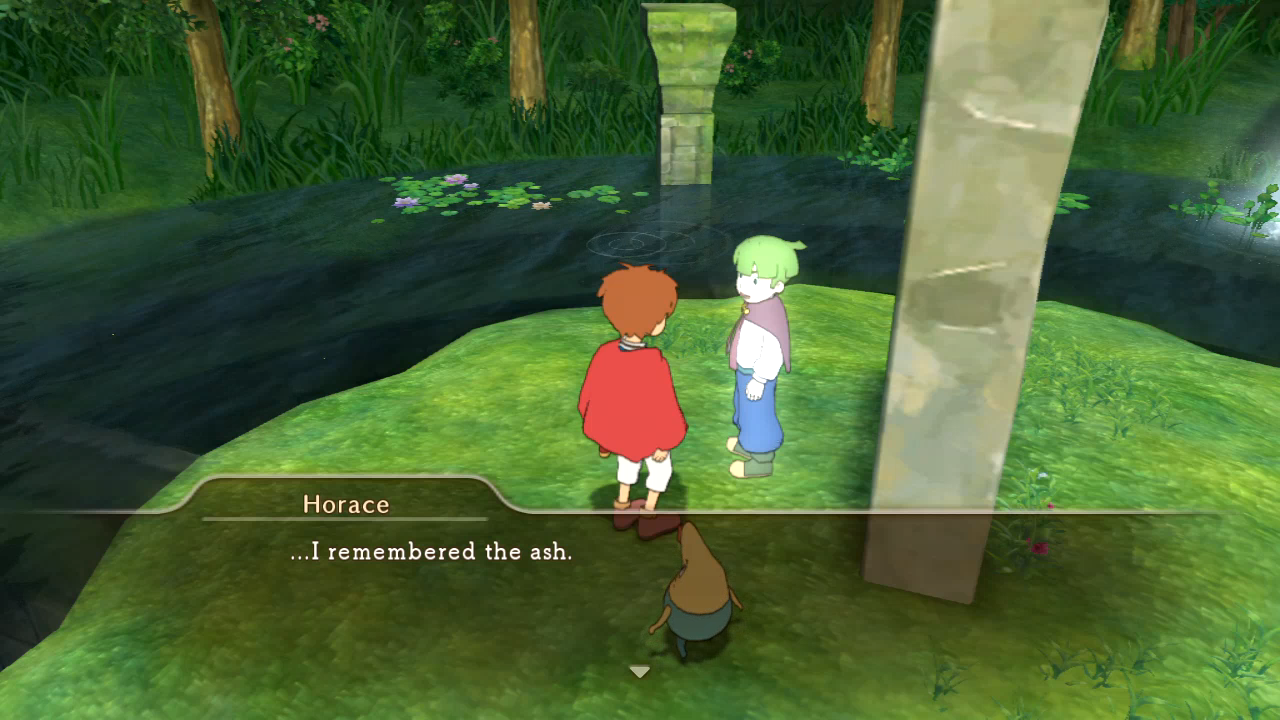 Oh gently caress. This is the point where I will start transcribing almost all of the dialogue, which will be in italics. It's engrossing stuff, but I'll be leaving out little things like Drippy's completely unnecessary interjections which only amount to a paragraph-length "Holy poo poo!" Oliver: "Ash!? You mean... Horace: "So you know about the white ash that fell here too, do you? That ash - the manna - it turned all the people into horrible monsters. And when I saw it, I remembered... That was how I died, too." "A long, long time ago, the same ash fell... It killed us all... ...But that's all I remember." "I heard that the big stone here was a monument to the Sage of Ages. So I thought if I came here, it might help me to remember. But I don't think this is where I died. There's something else I need to remember. Something more important... I'm going to carry on traveling. I need to find the place where I died." "If I can find it, I think I might remember everything. I have to try... See you again soon." Aw, Horace. 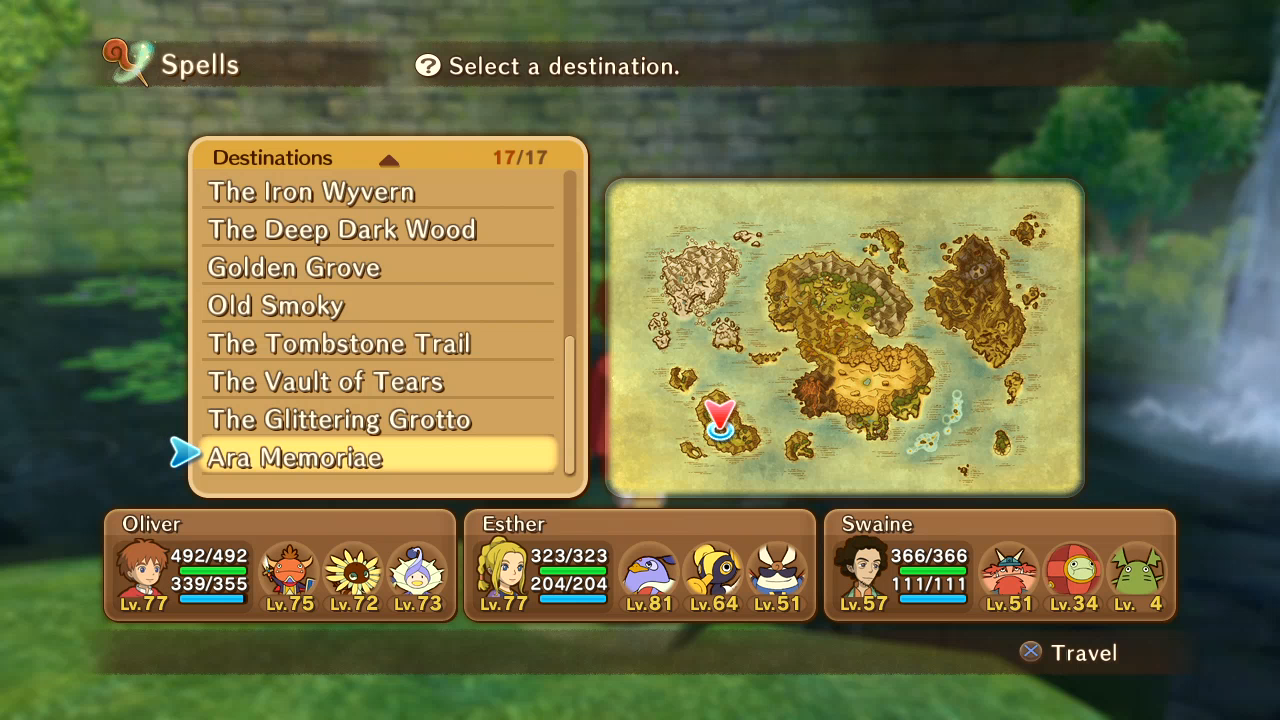 At this point, the game triggers a new mission, which requires us to go to Ara Memoriae. Last time we were there, we had an interaction with another certain green-haired person. 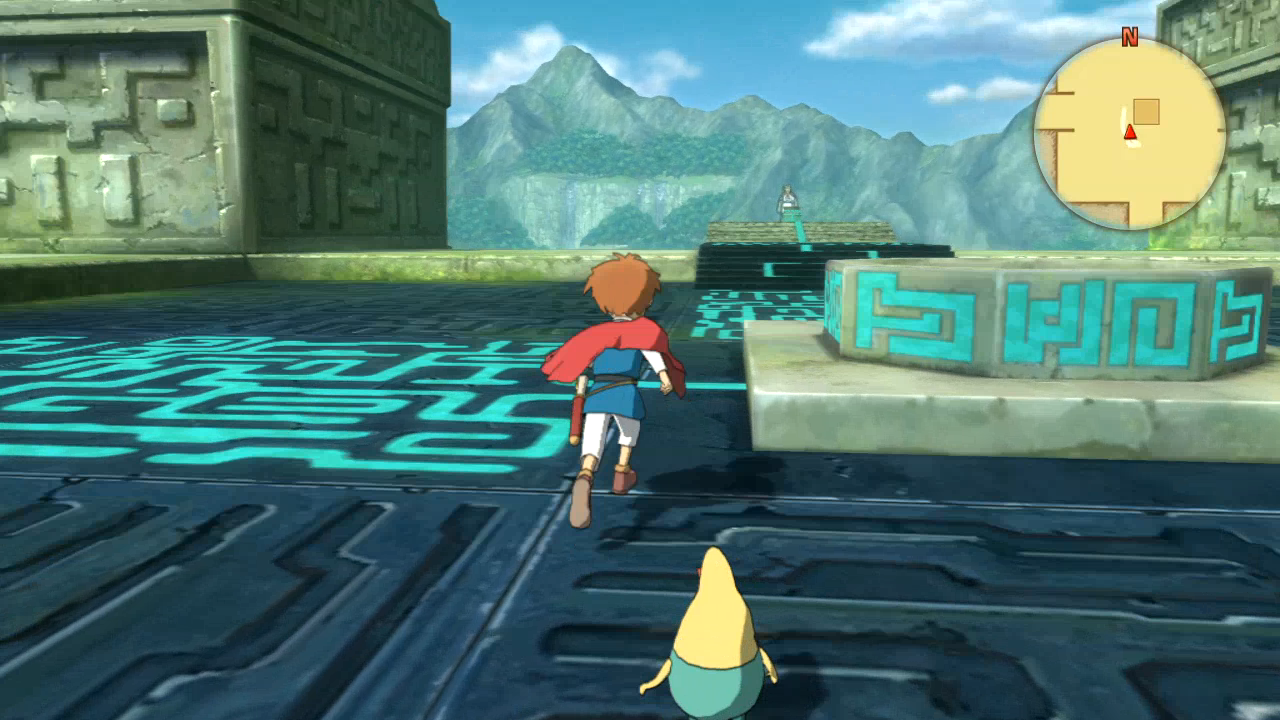 Wait.  Who the hell are you and why did you eat my ghost friend? Oliver: "...Huh!? S-Sorry, Sir... Have we met?" ???: "Heh heh! You really don't know? Well, I suppose I have changed my appearance somewhat since we last met." "Oliver, I have been waiting or you. I have a tale I dearly wish to share with you." "There was once a kingdom where we now stand. A mighty king united the surrounding lands and established his realm here. This king treated all his subjects equally, be they humans, animals, or magical creatures. A new era of peace was dawning... ...Or so it seemed. But there were those who despised the king. Covetous souls who envied his power. They plotted against him, sowing discord throughout the kingdom, and in so doing set Nazca� on the road to ruin... But there my memory becomes hazy. I cannot recall their names, nor even their outward appearance. Were there...twelve? Even now that my amnesia has been cured, their faces remain hidden to me." 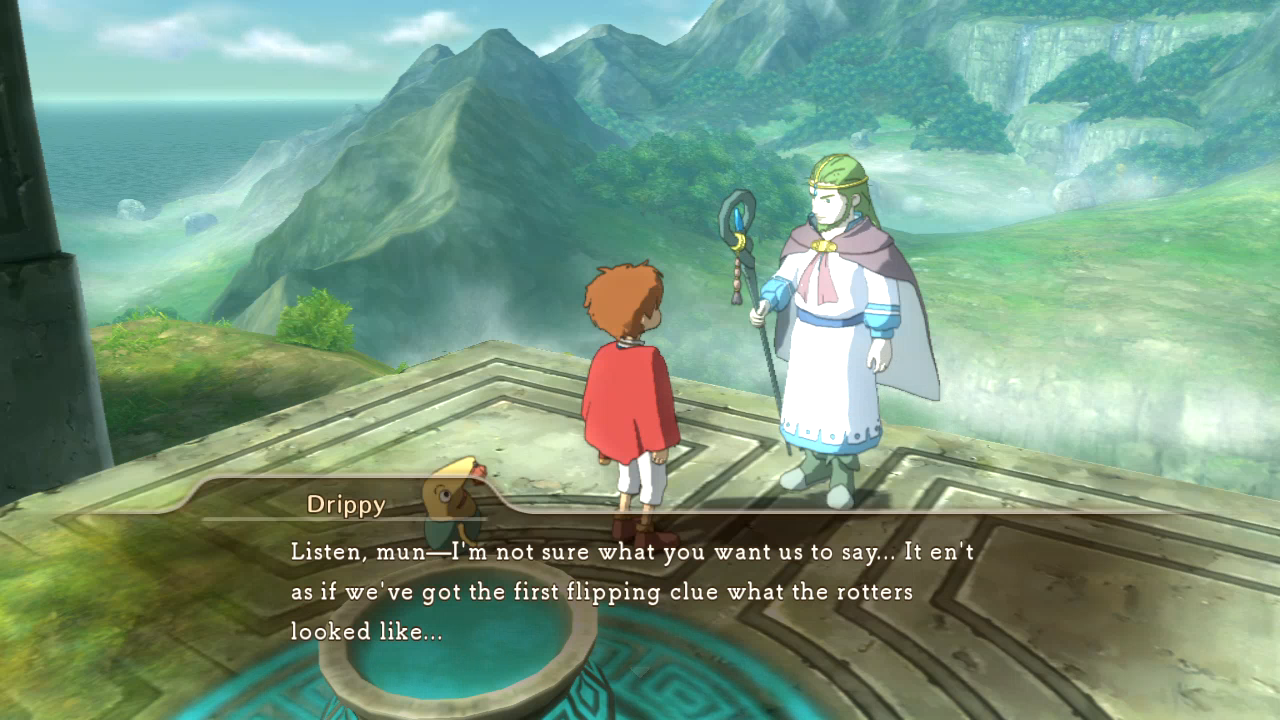 ???: "I know that, but I also know that I recorded my fears about them somewhere. I left a message...a warning, so that when people saw them, they would know to beware. But where...? ...Wait! Yes! I hid it in a magical tome that would never age or decay...The Wizard's Companion!"   This is kind of a disappointing answer. 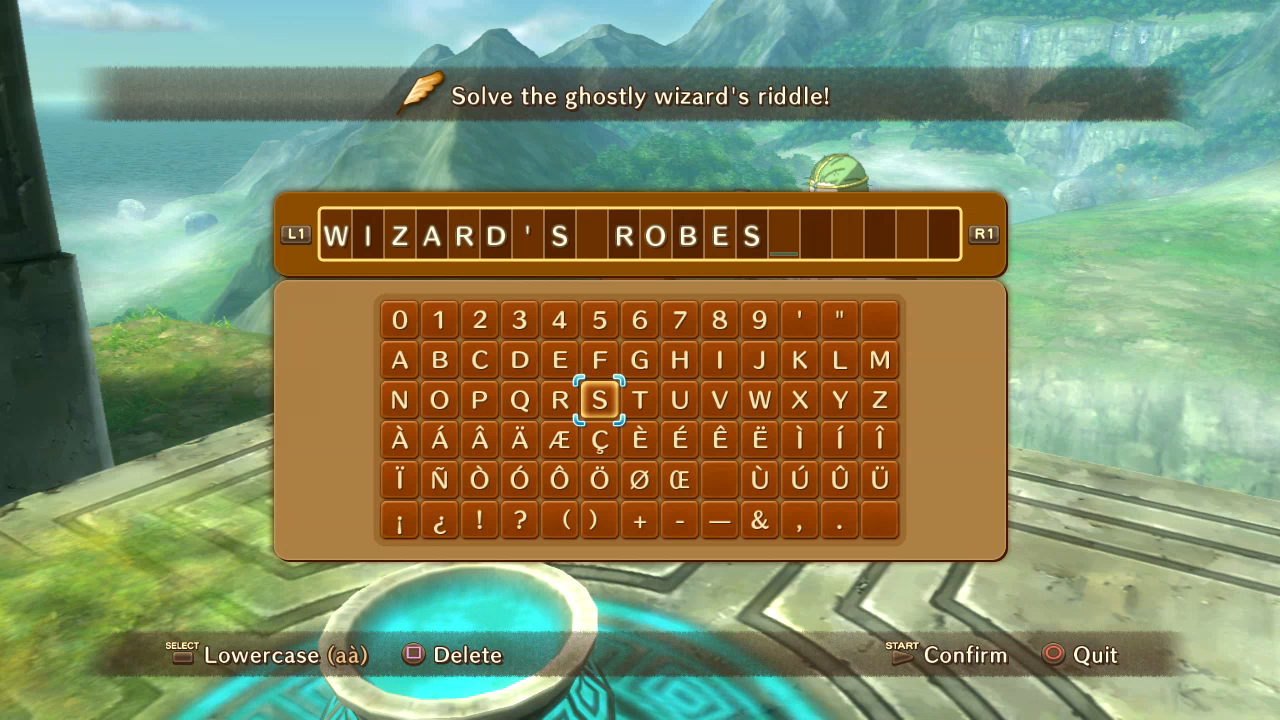 What a complex thing to forget that wizards wore. 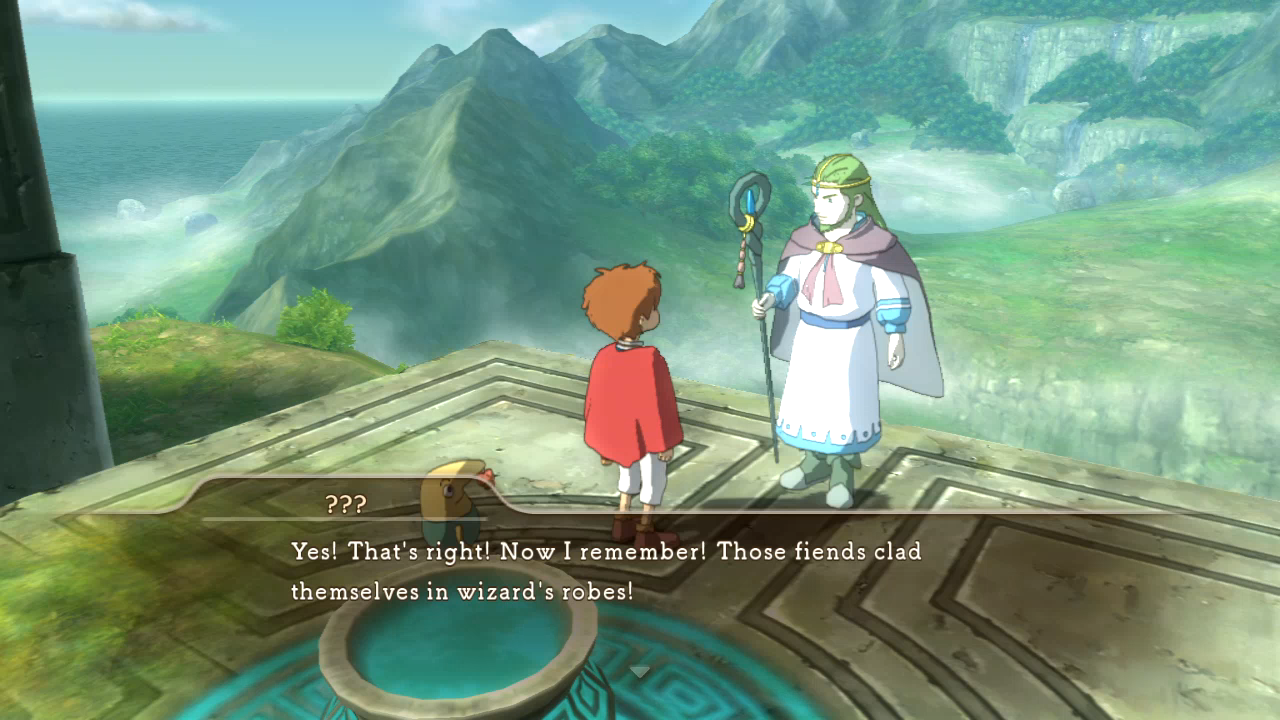 "I can see them now, deep in deliberation... They were the Council of Twelve! Each member was given the title of... ...Zodiarch. A-And that is not all..." "I was...there. All those millennia ago... I swore fealty to the Wizard King. Yes. I now remember. I was a sage of Nazca�..." Oliver: "You were!? But that means- Did you know Cassiopeia!?" ???: "Wh-What? How do you know that name? Cassiopeia... Queen Cassiopeia... It was so long ago... I have sensed her spirit at times, over the years. It is unmistakenably her... But I know not what befell her."  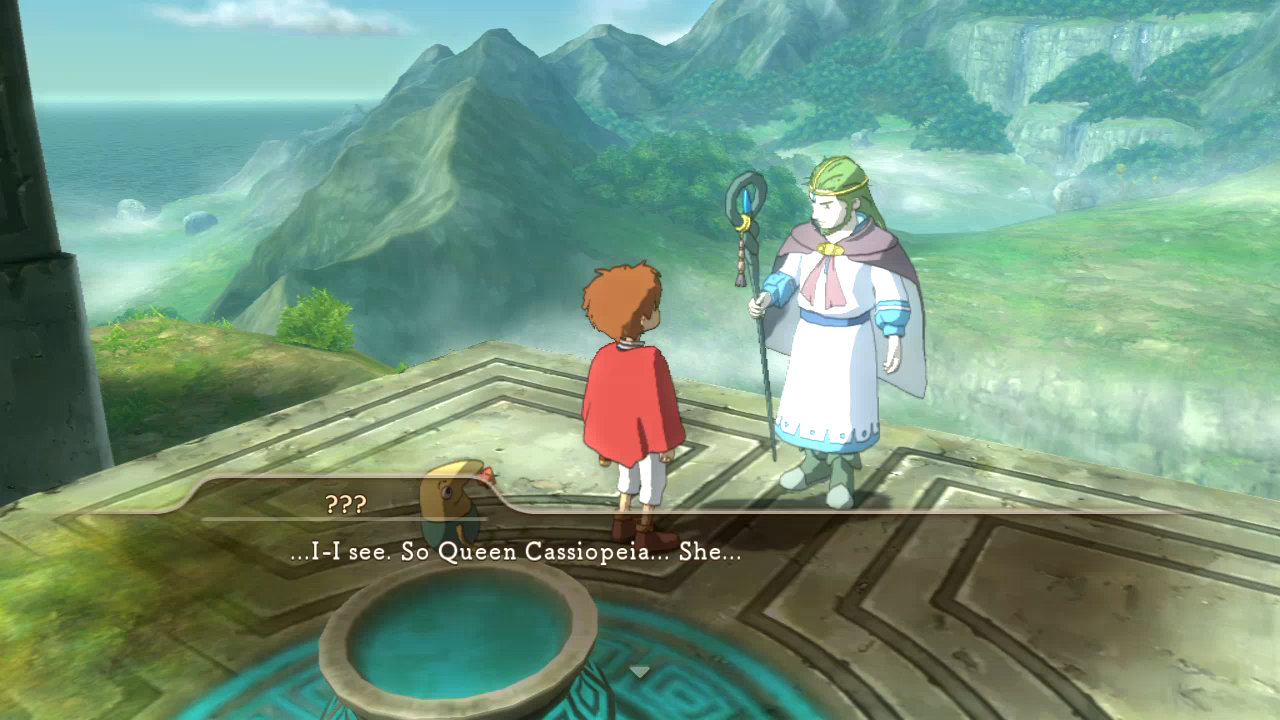 "...She gave in to the darkness. And that ash I saw fall on Ding Dong Dell - that was her doing?" "But Oliver, you really might be the one to save her. The Wizard King entrusted you with his wand, after all." 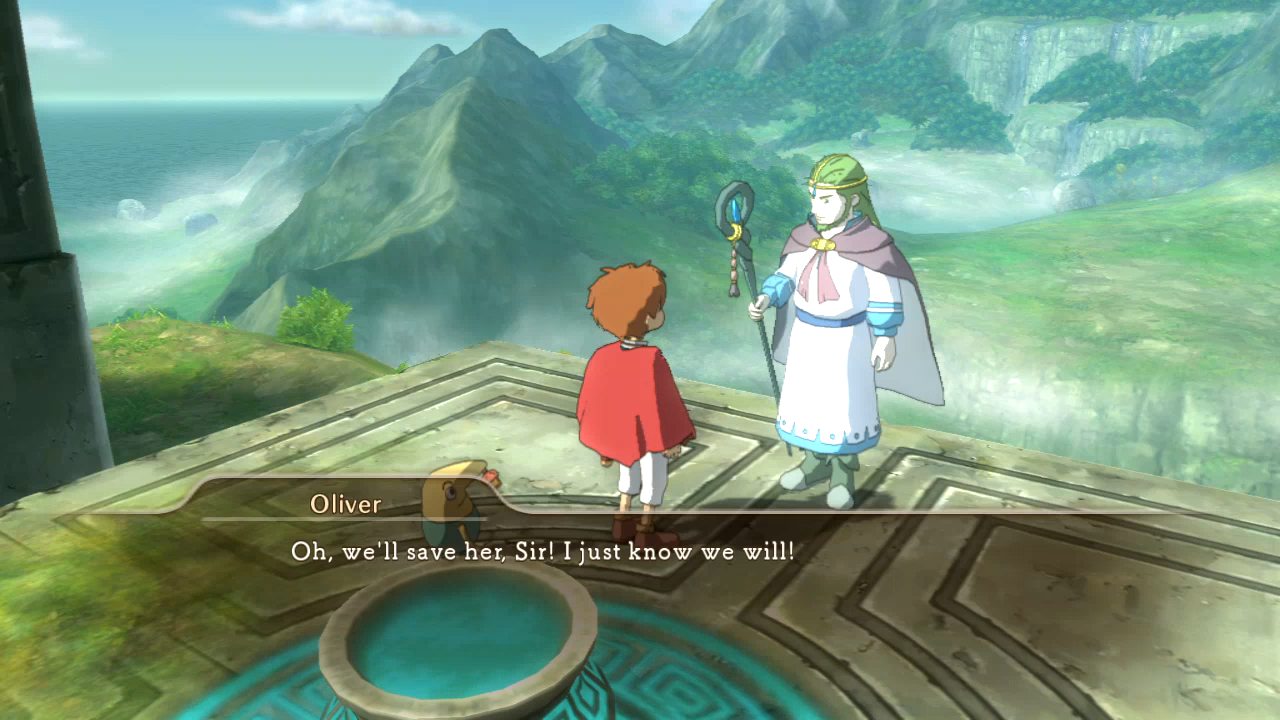  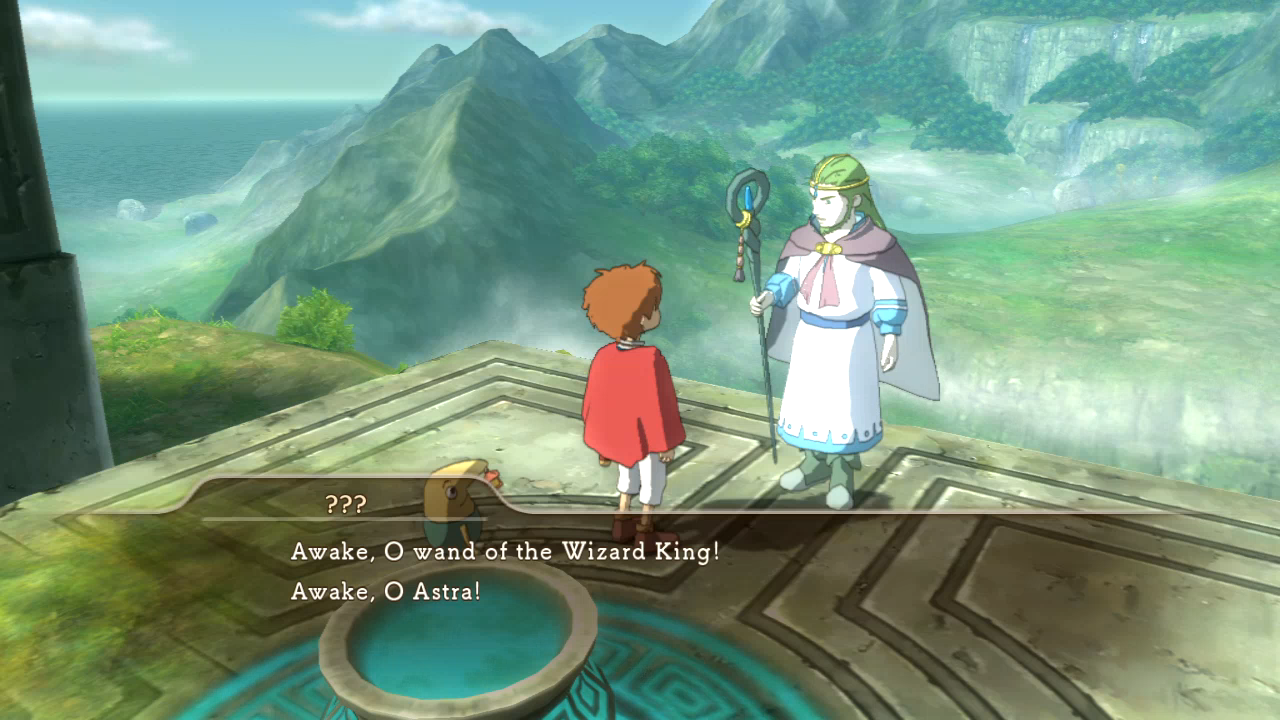  Here I emit joy sparkles, as we indeed get a big badass spell to go along with our big badass Wizard King wand! Astra is basically the light version of Evenstar: light magic that hits everyone in the field, and it does the most damage out of any of our spells. No enemies are resistant to light, after all.  Since that was the last of Oliver's spells, I get the Magic Master trophy.    Hu-buh-jubbah-WHAAAAA?! he forced out as unconvincingly as possible.  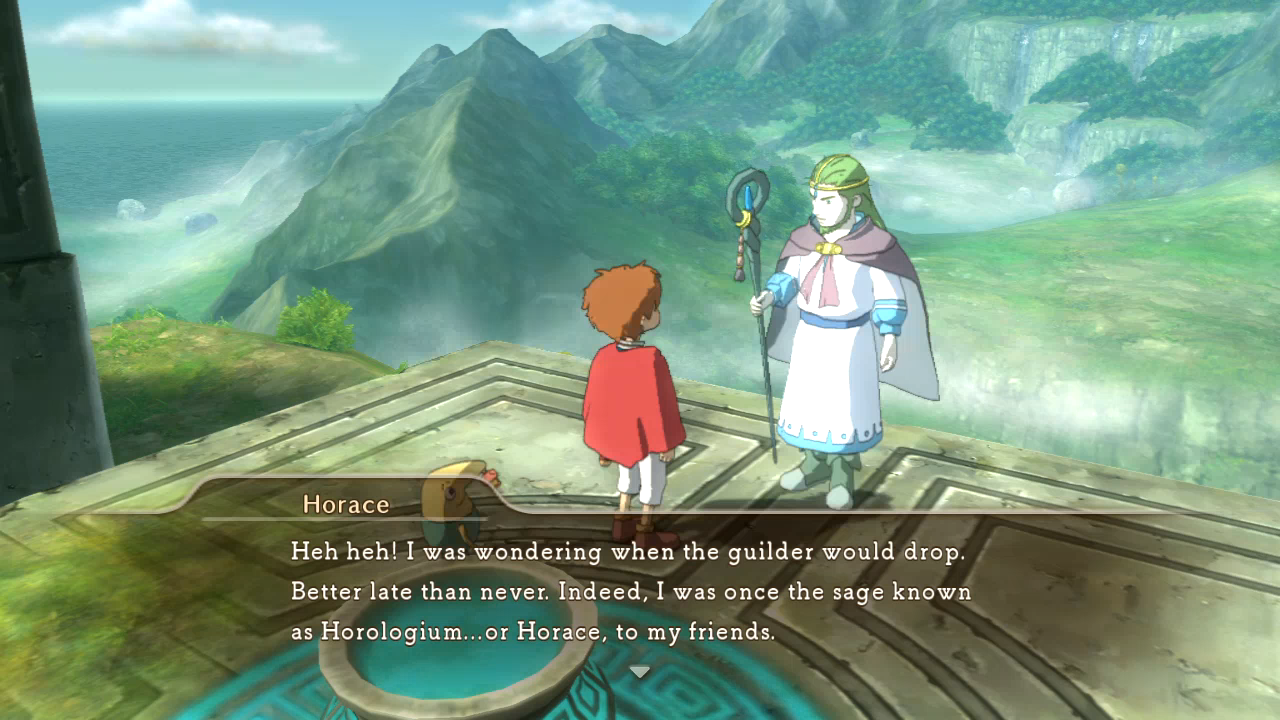 Let's stick with Horace... Oliver: "Wow. So does this mean you finally got your memory back?" Hagablaga: "Indeed it does. And I have much to thank you for. Now, there is little I can do to save Queen Cassiopeia in my current state. I am afraid that I must humbly ask you to do all in your power to free her from the darkness." Oliver: "Sure thing, Horace! We'll save her! You see if we don't!" Whorace: "You are a brave and pure-hearted warrior, Oliver. I will pray for your success." 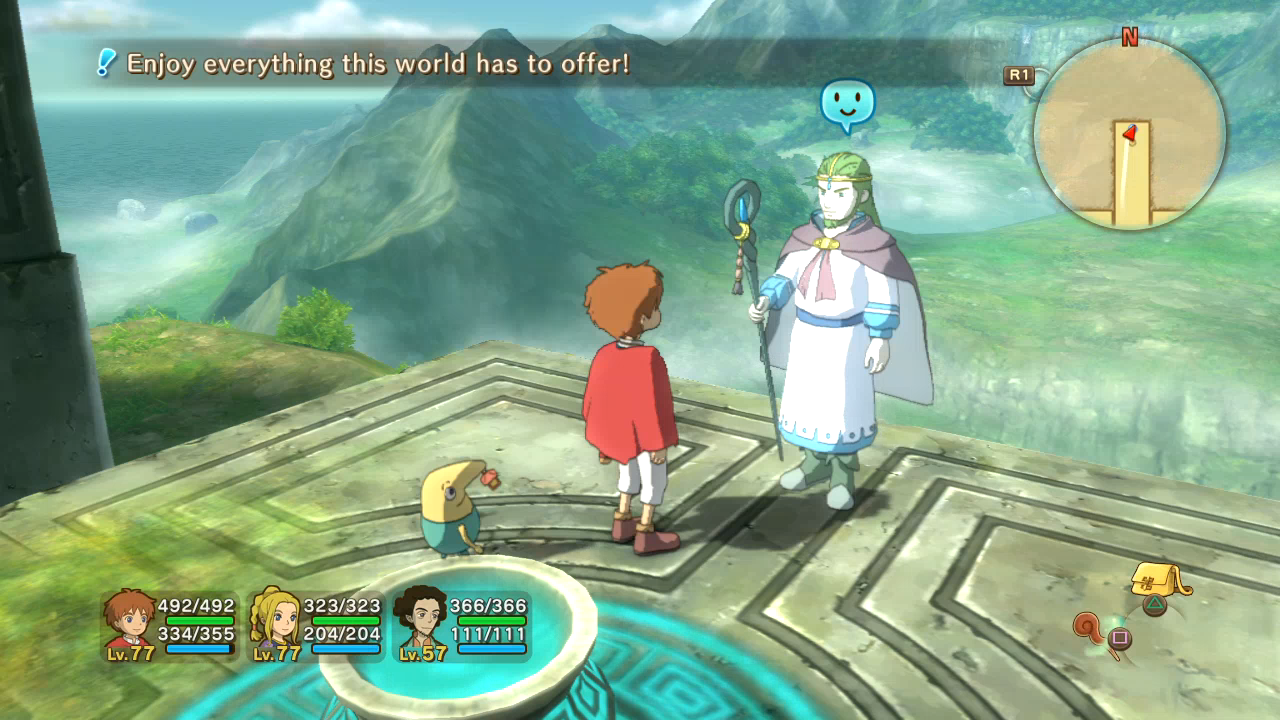 Oh, Horace isn't done just yet, though.  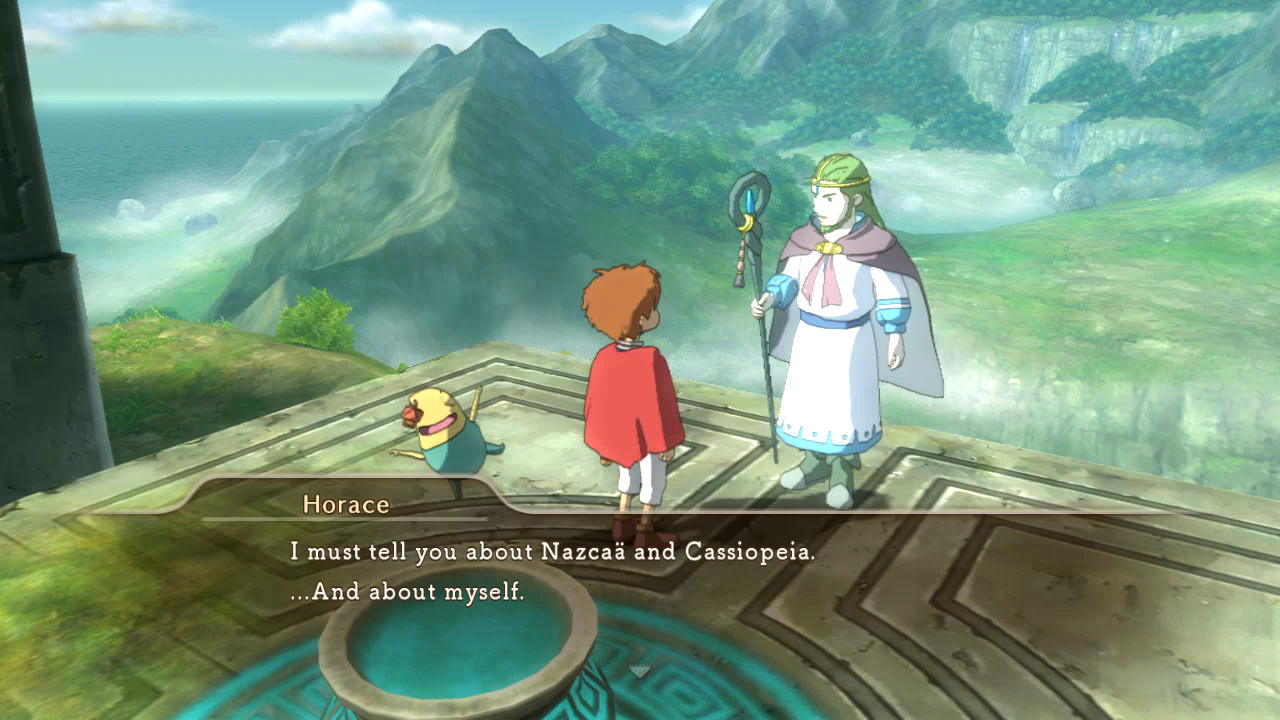 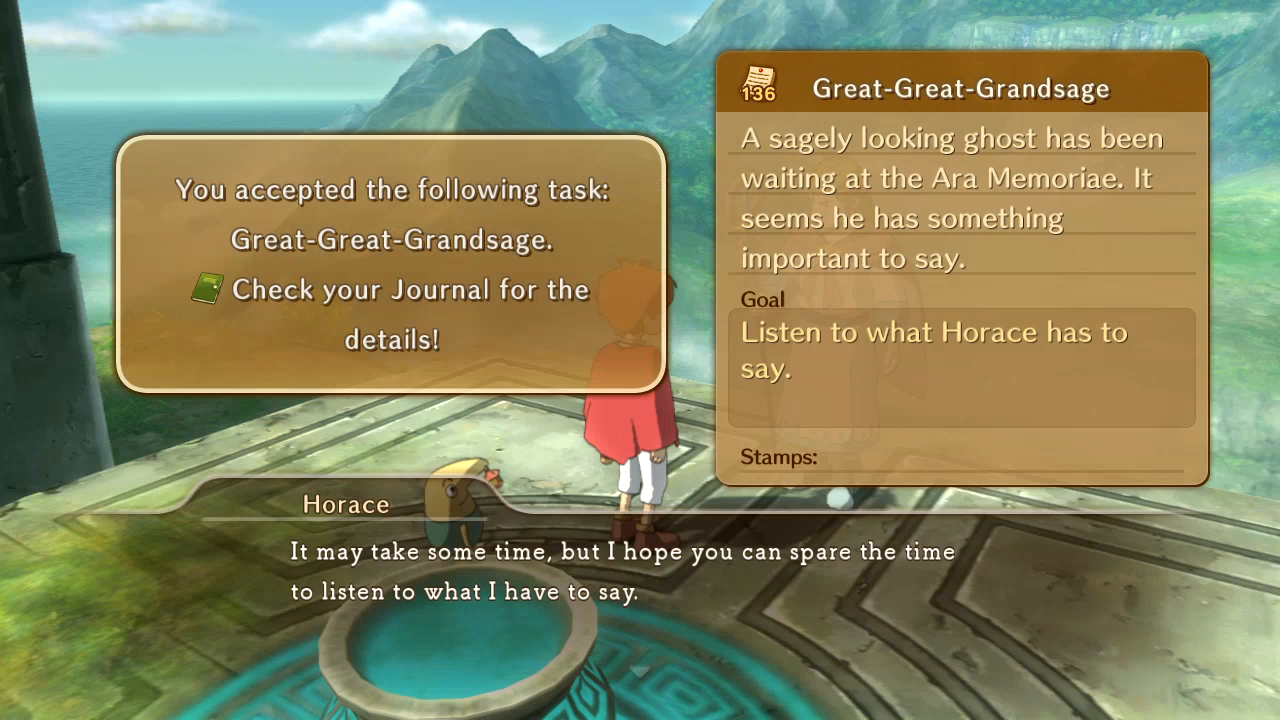 All things considered, this might be my favourite sidequest, if only for the storytelling, worldbuilding, and emotional aspects. I'm a sucker for a well-told story that adds to a history and/or mythos of a unique world. Horace: "Thank you, Oliver. Our story begins here long ago, where the kingdom of Nazca� once flourished. Though it may appear bleak and barren now, in those days, it was a mighty empire that combined mighty magic with advanced technology. It was a prosperous realm where poverty and pestilence were all but unknown, and its people enjoyed a life of peace and plenty. But man was never wont to count his blessings, and greed soon reared its ugly head. In spite of all they had, the populace demanded more. Friends turned upon one another, families were torn apart, and each citizen strove to better his own lot and outdo his neighbor." "It led to a series of conflicts that would span centuries. The Wizard Wars. But the course of history was changed with the arrival of a single wizard..." "This wizard wielded not one, but two wands. His mastery of magic was unparalleled, and he soon turned the tide of the war. Through his power, the bitter conflict that many thought would never end was brought to a conclusion in the space of mere days." "He was lauded as a hero by all the peoples of the world, and his reward was the crown of Nazca�. Thus did he become the Wizard King." Oliver: "The Wizard King... Cassiopeia's father..." Horace: "The very same. Now, shortly after peace returned to the world, the Wizard King hid one of his wands in the distant land of Autumnia. He sealed it away, that it might never be used for evil. Which brings me to my latest puzzle. It has been some time since I last posed you a question, has it not?"   Horace's questions become less about knowing how to read the Wizard's Companion and more about basic memory of the game.  "I wonder how the valley where it was sealed fares... In those days, it was filled with the most beautiful flowers... ...Let us continue our tale there."  And then he lazers away to Tombstone Trail. The very end of it. This is why I don't count this quest as a favourite for all of the fun combat or exploration I do.   You'll recall that Tombstone Trail is home to one of the magimechs we've been hunting down, and it's right on the way to Horace.  This guy is gonna be our guinea pig for testing our new spells. 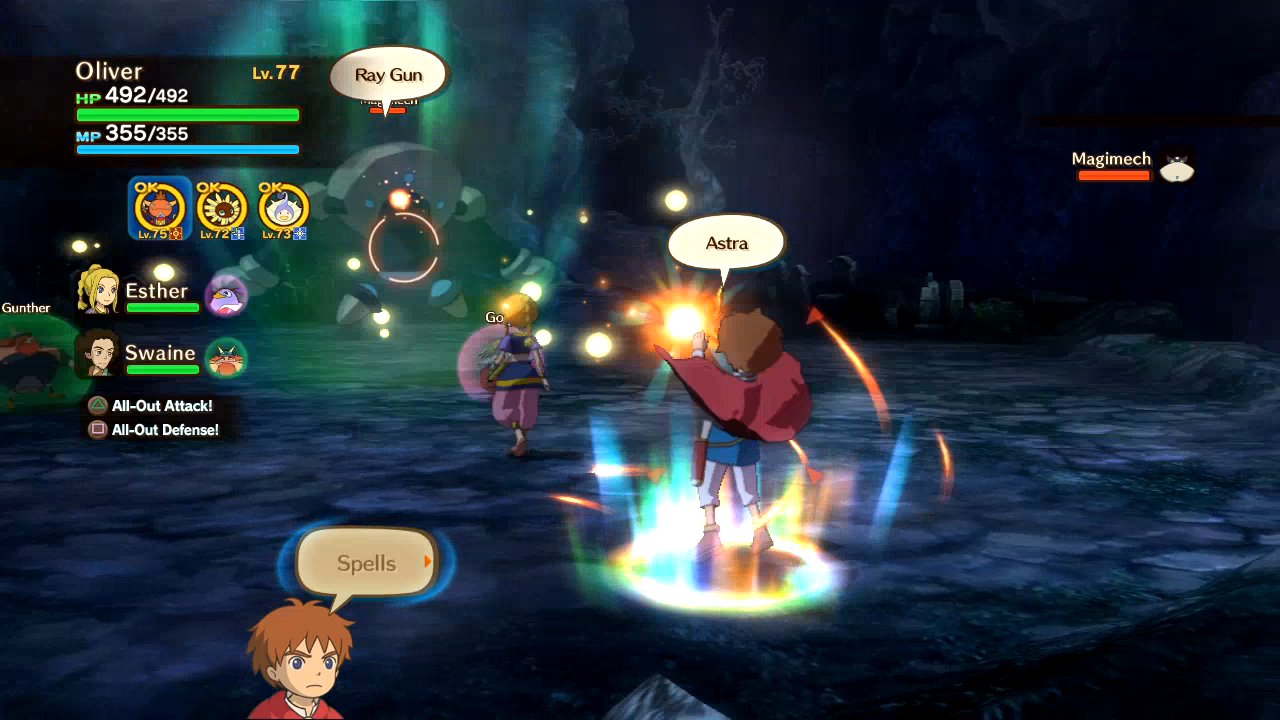 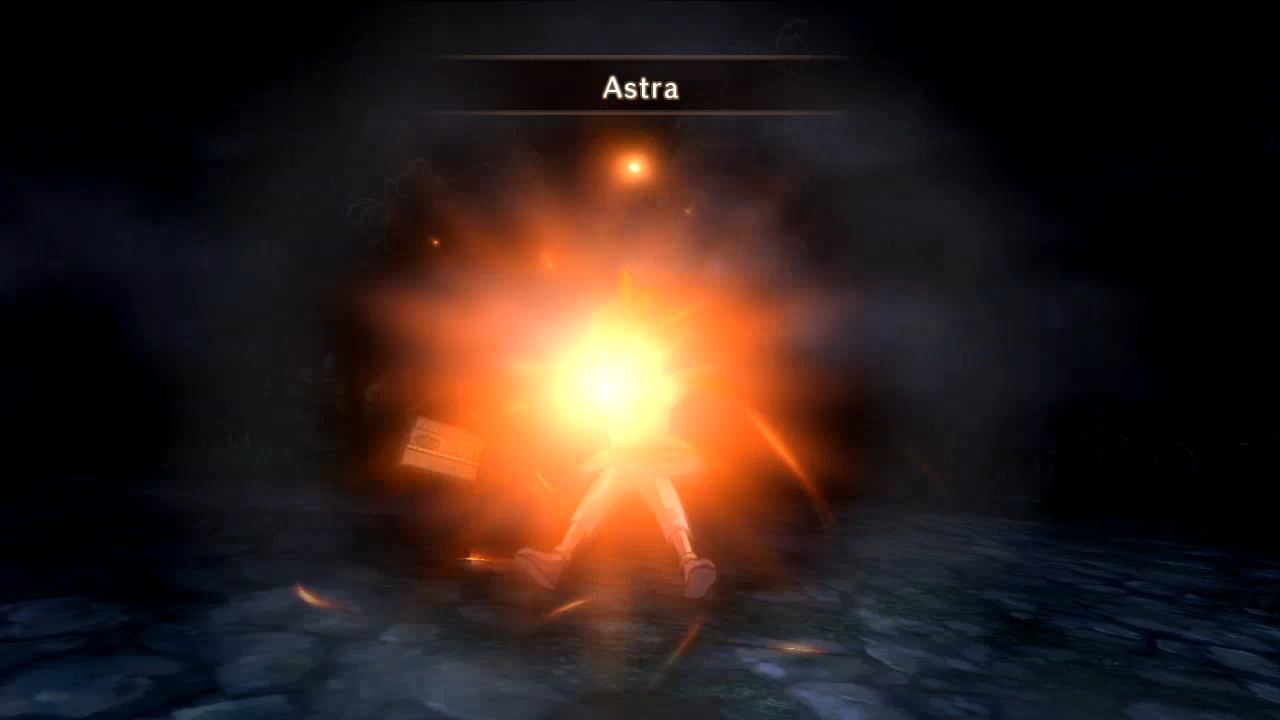   Astra's big. 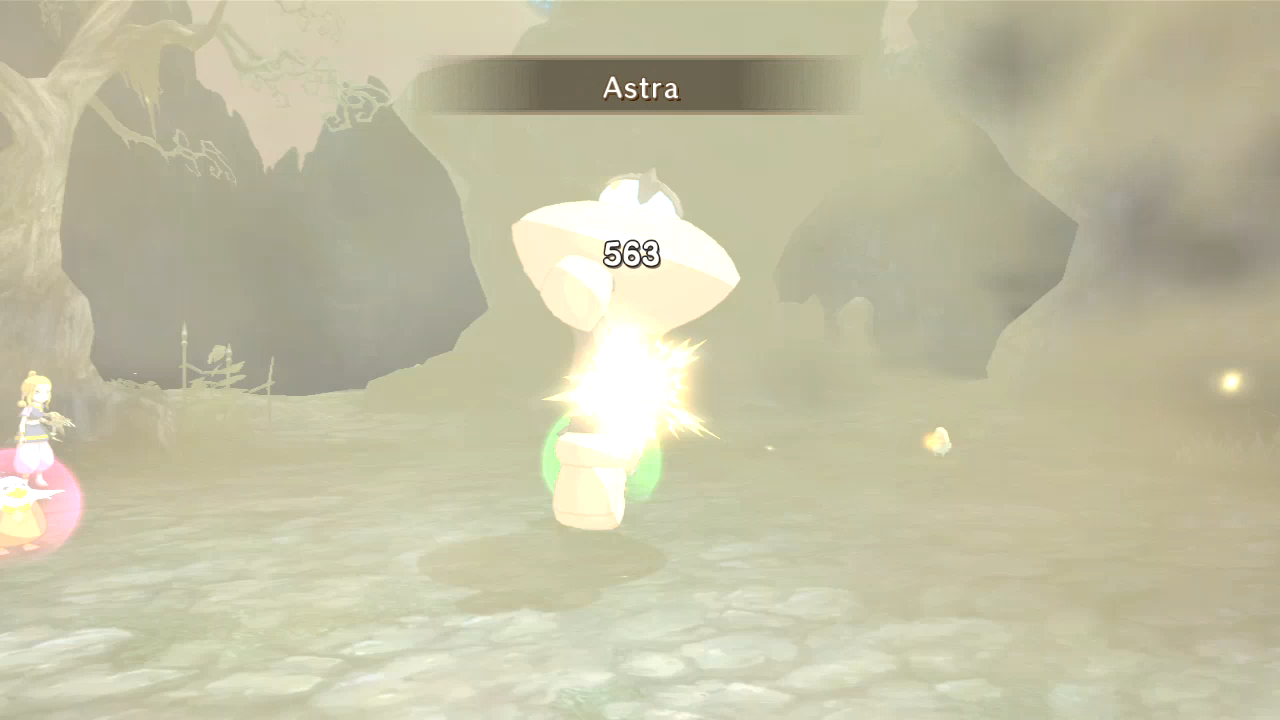 And drat strong. Costs a fuckton of MP though, so I primarily save it for multiple enemies. 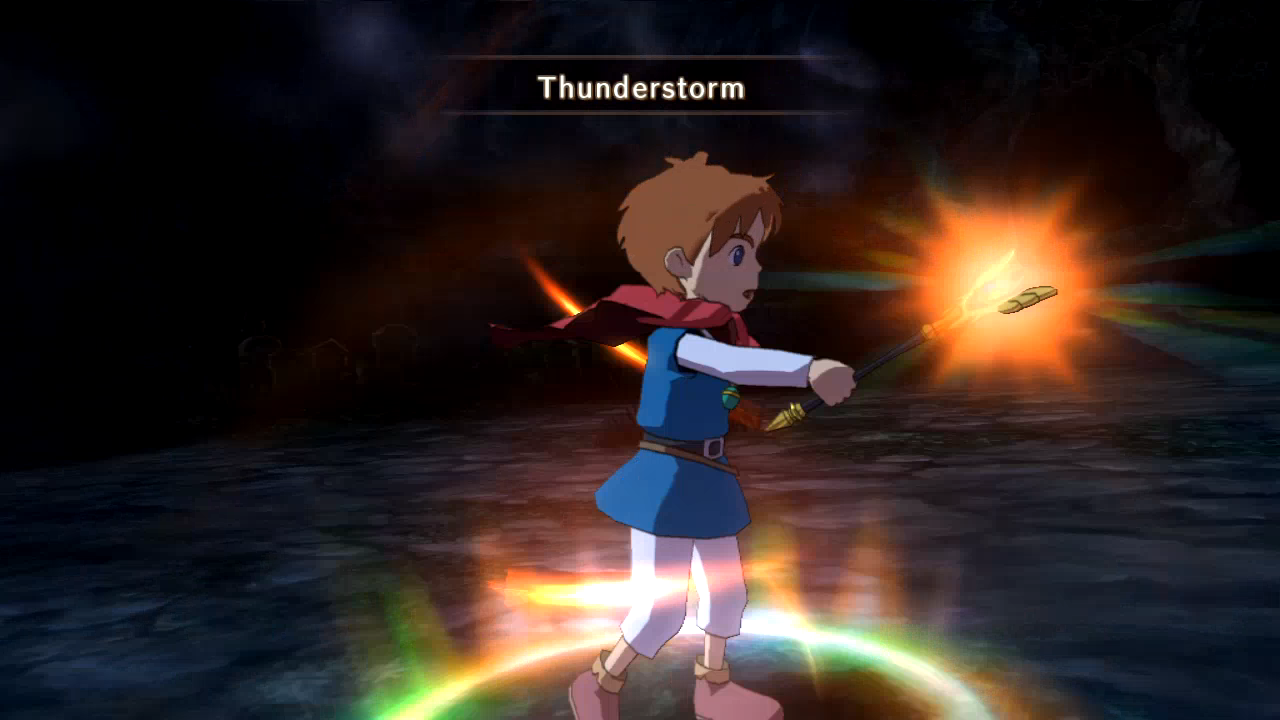 Not so costly is Thunderstorm, which only costs 18 MP. You'll also see the benefit of that when we get to Solosseum Part 2. 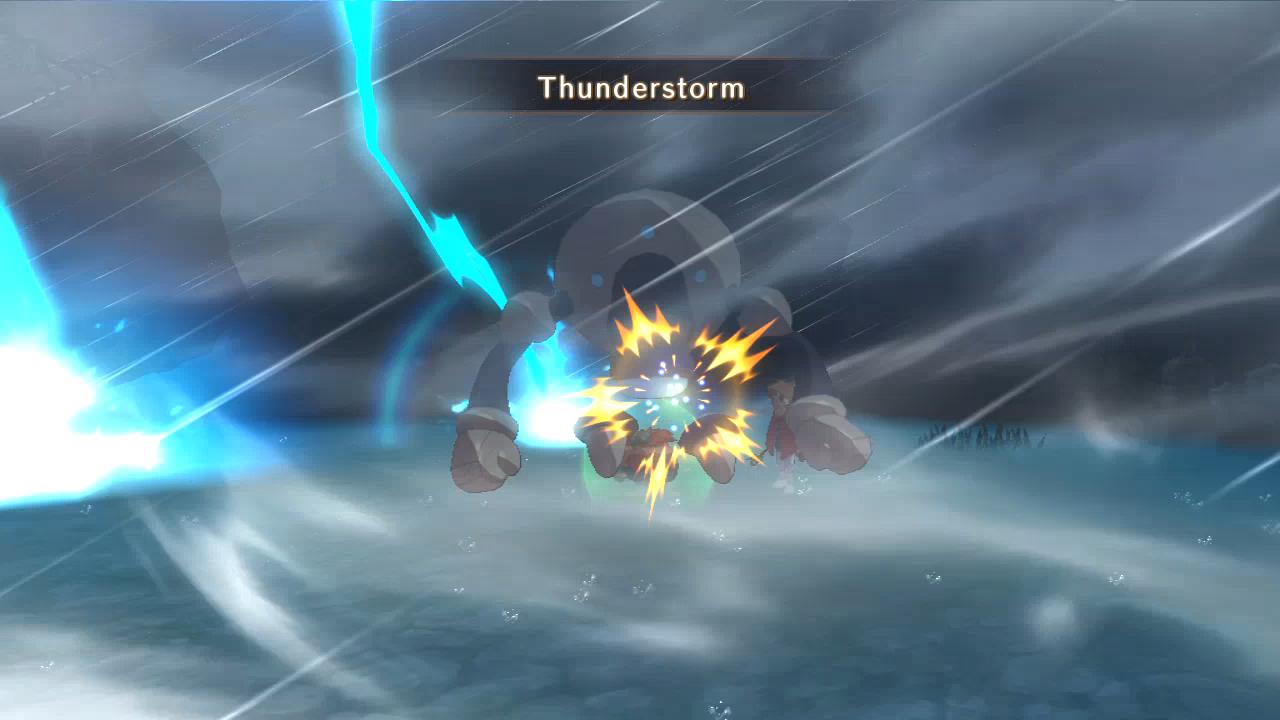 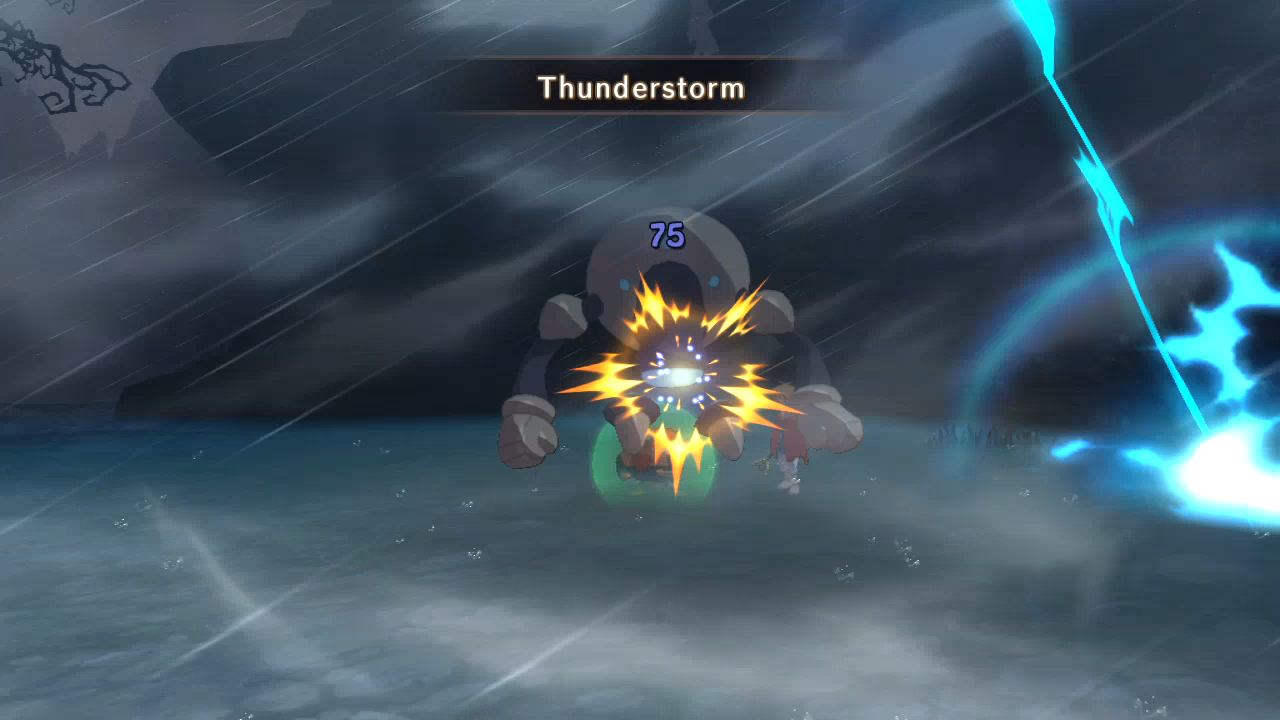 I also give Cloudburst a shot, but since the magimech is a special enemy, good luck getting the Nix effect to take. 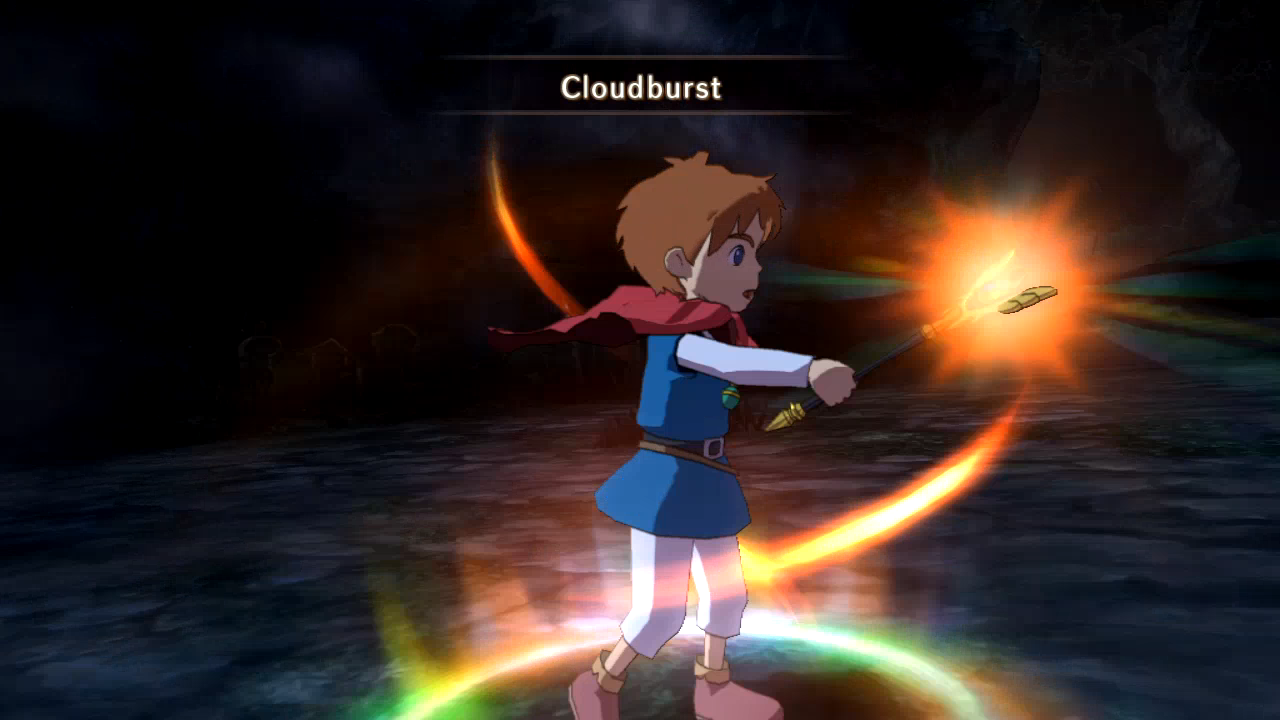 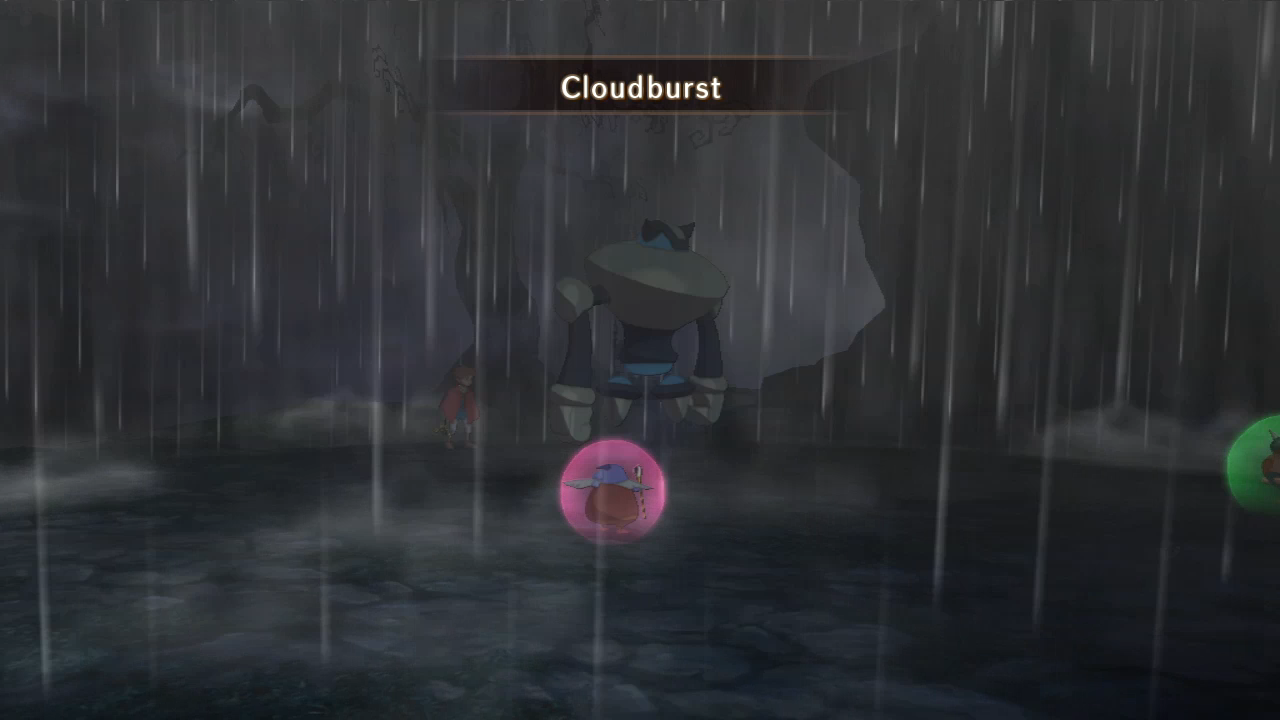 This might be the single most depressing screenshot I've ever taken.  Go figure. Back to the usual standbys.   On the way I also run into more gold enemies.   I especially wanted to get the gold Toko, but it ran away too fast. Why yes, I did completely forget about Veil until the end of this update!  You'll notice there's no black orb here. I hadn't unlocked the rift yet, so I have to come all the way back here a third time later on. 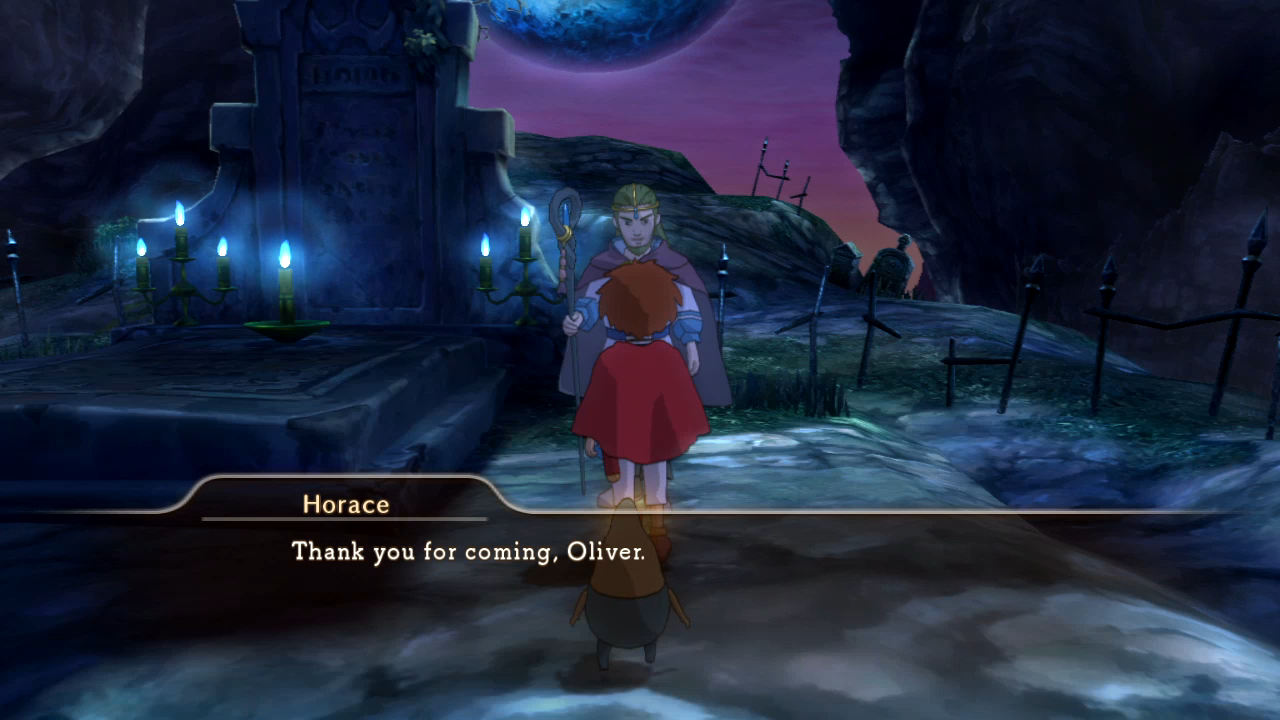 "This valley changed so much. It was once a place of beauty, awash with flowers of every color... No matter. What is done is done. Now, let me continue my tale... The Wizard King ascended the throne and won great renown as a just ruler, treating all his subjects equally, be they human or otherwise. They, in turn, repaid him by rallying round their new monarch, and together they rebuilt the ruined realm more swiftly than any had thought possible. "It was then, with the kingdom all but rebuilt, that he chose three servants from among his subjects... A swashbuckling sea captain to represent the race of men, a great wolf to represent the animals, and a serpent lord to represent the creatures. Each was wholly devoted to his master, and did all that the Wizard King asked. But of the three, the serpent lord was the wisest, and the most committed to his master's cause. He was known as "The King of the Cobras" - and what a mind he had. Ah, to think of how he was then... This seems as good a time as any for your next question... You have encountered these three servants on your travels, but can you recall the name of the mighty snake you faced?" 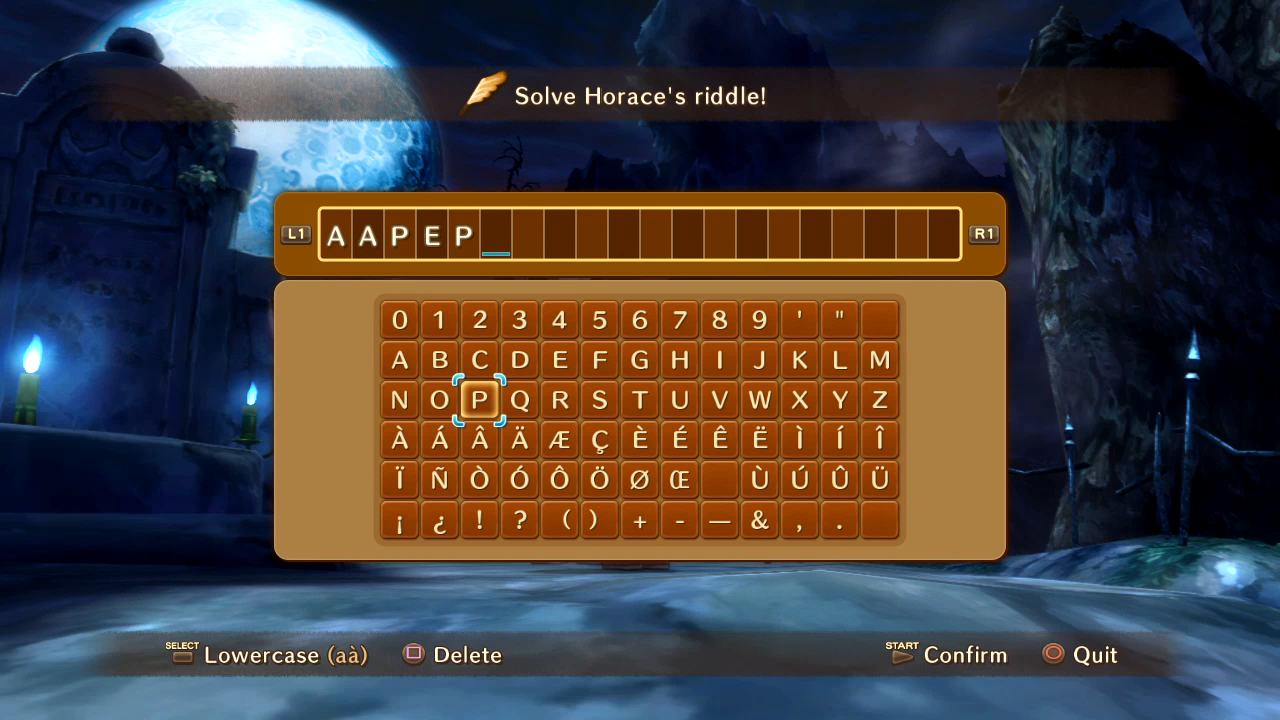  "Though the three servants achieved so much, their reward was to be chased without dignity from the kingdom they had helped to build... But perhaps that is a tale for another day... ...Yes. We will continue our tale in the very ruins where you faced Aapep. I will tell you of how the Wizard King's three most loyal servants were driven to the path of evil." We'll learn a surprising bit about Aapep as well during this, which makes him very sympathetic. I'm always for that - he was just a generically evil character up until now, though you could infer things about him due to his carrying one of the Wizard King's Mornstar stones. 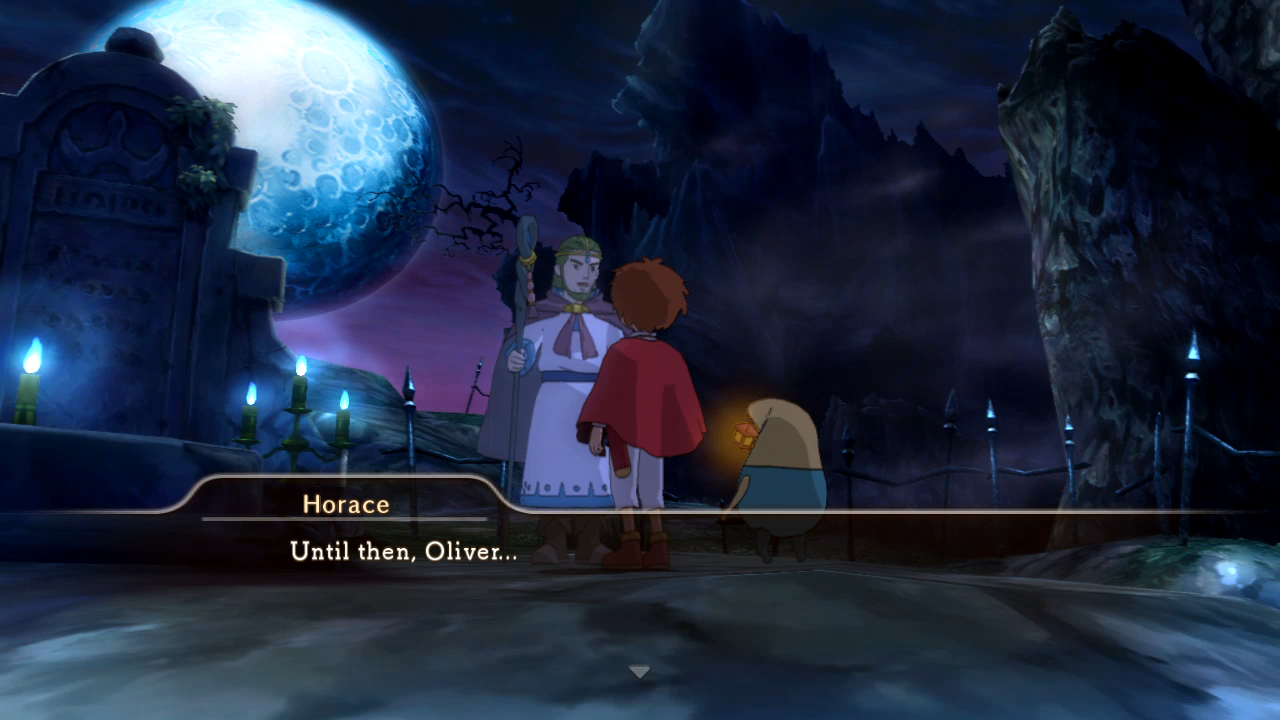  Off to the Trail of Tears, where I run into another gold version of the Toko family!    BEAT UP THE NERD  Cock.    "Below the King, at the head of the Nazca�n government, sat the Council of Twelve, a group of lords known as the "Zodiarchs." They were responsible for the day-to-day running of the kingdom, and were supposed to be the ruler's closest advisors. But the Wizard King's rise to prominence was a source of consternation for the Council, who feared his great power and the loyalty he commanded amongst the Keepers. And so, as soon as Nazca� was rebuilt, and stability restored, the Zodiarchs conspired to assassinate him. And their conspiracy was a success... With the Wizard King eliminated, the Council had complete control of the kingdom. The King's infant heir, Queen Cassiopeia, became no more than a puppet. To compound their villainy, the Council successfully implicated the Keepers in the assassination, and they were banished from Nazca�... Aapep lost all faith in humanity, and soon the power of the stone in his possession began to corrupt him, transforming him at last into a servant of evil... Indeed, it was he who reduced this once great city to the ruins you see before you now." Drippy: "That's bad, like, but you've got to feel sorry for him, en't it? Being framed for murdering youer mate would be enough to make anyone go off the rails." Horace: "Perhaps... But Aapep possessed great wisdom. None could have predicted that he would suffer such a spectacular fall from grace... Speaking of predictions... Yes. Open the book." "As you may or may not know, it's authors were able to see into the future. Turn to the final page. A prophecy is written there. A prophecy of what would become of a certain individual. That person's name, too, is hidden there."    No, I didn't bother. Pea doesn't deserve it.   "I remember when she was a kind little girl who loved flowers above all else... ...But that is a story for another time. If you are interested, I plan to visit a cave that lets one see into the past... I wish to see the old Cassiopeia once more..." "When you have discovered its location, come and gaze into the past with me. Until then, Oliver..."  We've indeed been in such a cave, about halfway through Glittering Grotto, and thankfully Horace waits for us at that location rather than at the boss arena again.    "Queen Cassiopeia loved nothing in the world more than flowers, and her every free moment was spent tending to her garden. Her castle was always bursting with color, with beautiful bright flowers of every imaginable hue. Cassiopeia grew to be a splendid, spirited young woman - everything her father could have wished for, and all that I had always hoped she would become." "This talk of flowers and gardens...it reminds me. You have a wand made from an old stick, do you not?" Oliver: "Oh, you mean the wand Pea gave me?" Horace: "That wand was a gift from the Wizard King and I to the young Cassiopeia." "On it, we engraved our most deeply held wish for the princess's future... Ahh, it was so long ago..."  SANCKIFY  Oh. Whatever.   "But what befell the realm after the Wizard King's untimely demise put paid to any such wishes... The Council of Twelve devoted themselves solely to personal gain, and thought nothing of the plight of the people. If only... If only I had done more..." Oliver: "What do you mean, Horace?" Doodle-doo: "I said that I would tell you the truth, did I not? There is something I must confess to you. Something I did. An act for which I can never forgive myself... Come to the Ivory Tower, to the chamber where the Council sat. There, I shall tell you everything."   Well, I guess the best thing to make me feel for a character is to make me feel bad for them. I'm a depressing rear end. Our last magimech is deeper in the grotto, however, so I must venture further in to take it out.    What a coinkydink! Or however you're supposed to spell that. I ended up running all the way to the boss arena to teleport out anyway, FYI. Why yes, I did also completely forget about Vacate!   Yep, you didn't really think a non-challenge like the normal magimechs were all we had to fight for this quest, did you?   Still not a challenge at our levels.      This gives you another idea of how big the overworld actually is, and how Oliver and friends are just resized so that they cover more ground. Nazca�n cities don't look very far from each other from our perspective, but they're ages away.  I do a little bit of fighting on my way to Horace, mostly to kill this Tokotocold. Like its younger relative the Tokotoko, this one actually does give us a monstrous amount of XP.  That's more like it.  After getting sick of fighting all the magimechs, I finally remember Veil.   It's a straight breeze through to the Zodiarchal chambers.  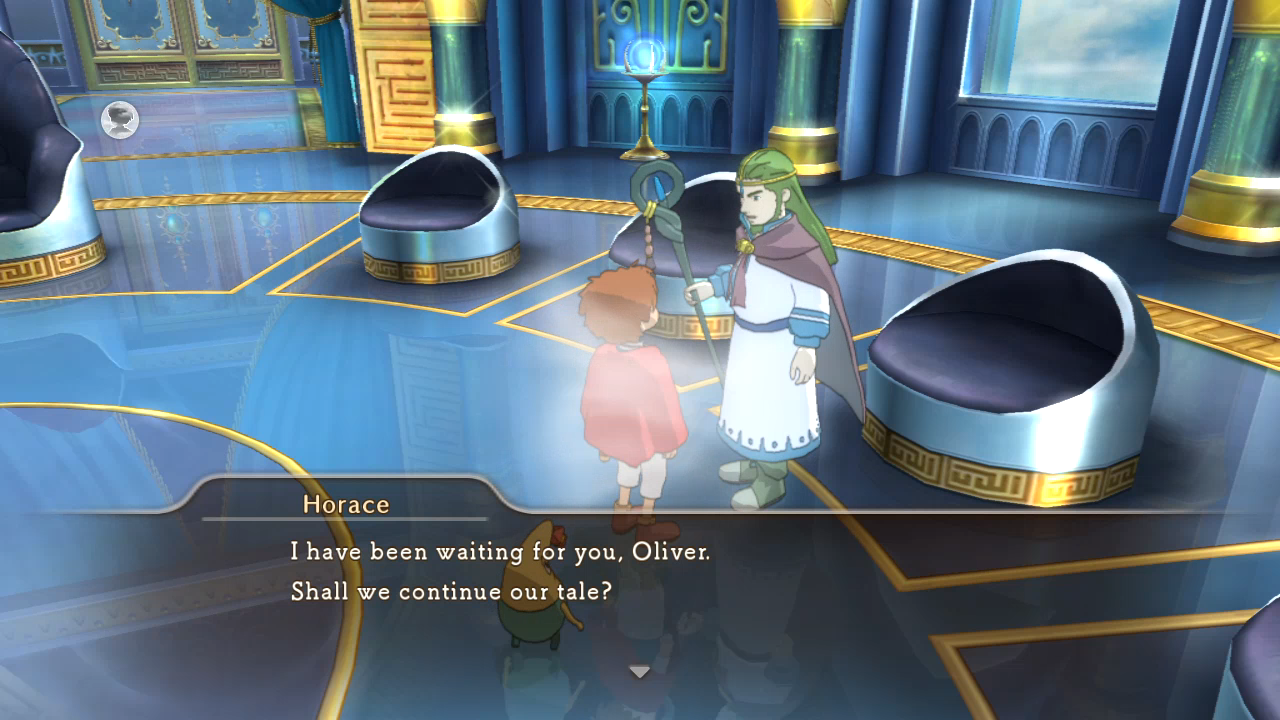  "I often think of those days... How long has it been since I was last here, I wonder?" "In the years after the Wizard Wars, I occupied the tenth seat on the Council, taking the Zodiarchal title of "Gallus." Oliver: "G-Gallus!? But isn't that-!? You know! ...Him!" Horace: "Ah, yes. The Wizard King's ruse. Even in death, he strove to protect his daughter... That was later, of course, after my seat had become vacant. But we are getting ahead of ourselves! ...When I sat on the Council, to my undying shame, I failed to notice the plotting of my fellow councillors. Ah, I who thought myself so wise... They disposed of the Wizard King and his three servants, then turned their attention to any who might yet stand in their way. And they considered me an obstacle to their complete domination of the kingdom. Sensing the grave danger I was in, I fled Nazca�. I intended to bide my time. To rally forces loyal to the crown, and return to exact my revenge on the Council... But the choice I made was wrong. I should have remained at the Queen's side." Drippy: "But you couldn't, could you? Those rotters in the Council were gunning for you, mun!" Horace: "It is a risk that I should have taken. By leaving, I sealed the fate of an entire kingdom. Allow me to explain. In addition to my duties as a Zodiarch, I had been charged with educating Queen Cassiopeia in the ways of magic. I took it upon myself to create a compendium of spells and arcane knowledge which I presented to the young queen." Oliver: "...A compendium? You mean like a...spellbook? ...Y-You mean...!?"   The Metal Gear fan in me loves when characters are connected in weird little ways. I like that our old friend Horace wrote the book that's been at our side this whole adventure.  "I wrote the Wizard's Companion to aid Queen Cassiopeia in her magical education. But little did I know that this book would lead directly to the disaster that befell Nazca�." "In my desire to create a tome fit for a queen, I included all manner of arcane magic...including the Forbidden Spell. But I failed to inclue detailed notes on the rights and wrongs of using such potent incantations... And I fled the kingdom before I could teach Queen Cassiopeia of the perils of the Forbidden Spell. I was so busy brooding on what manner of revenge I would exact on the Council that I failed in my duty of care to the Queen. That is how she arrived at her fateful decision... That is why she did not know the true power of Manna... It is my fault that Nazca� fell, and that Queen Cassiopeia was transformed into the White Witch. How could I ever make amends for what I did? It was...unforgivable. Reduced to a spirit, doomed to roam the world for all eternity, how could I ever save that poor girl from her fate?" Way to make me feel bad and empathetic to a character I already liked. No, seriously. Way to go - too little too late maybe, but any bit of good characterization and emotional impact is only a point in this game's favour. "That is why I must humbly ask you to right my wrong - to save the Queen. You are the only one who can, Oliver." "You have my thanks. And I have some alchemical forumulae for you. Formulae to include in the Wizard's Companion. I pray that they will aid you on your quest."   I know my scent is technically masked right now, but I certainly look smelly.  We combine the Mirror of Truth with our very first wand, the old stick, to make an even better wand!  Already beat her, mate.  As for these other two, we get the items to make them in later updates.  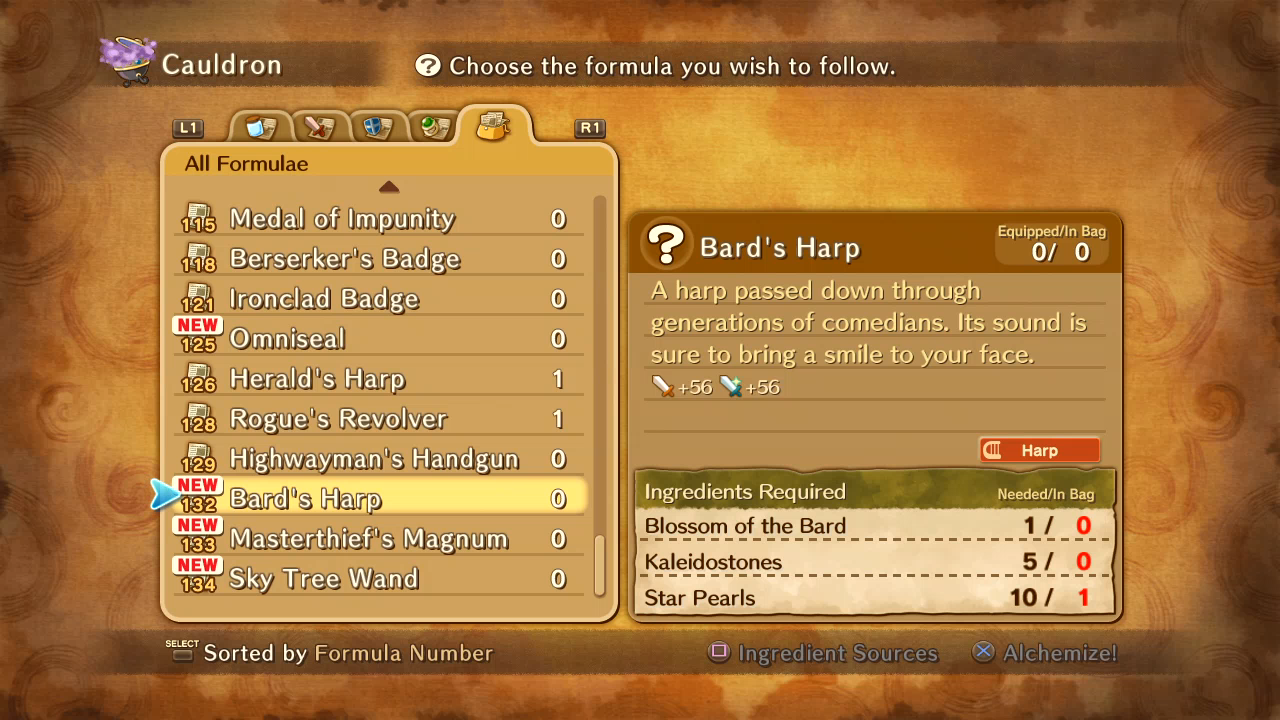 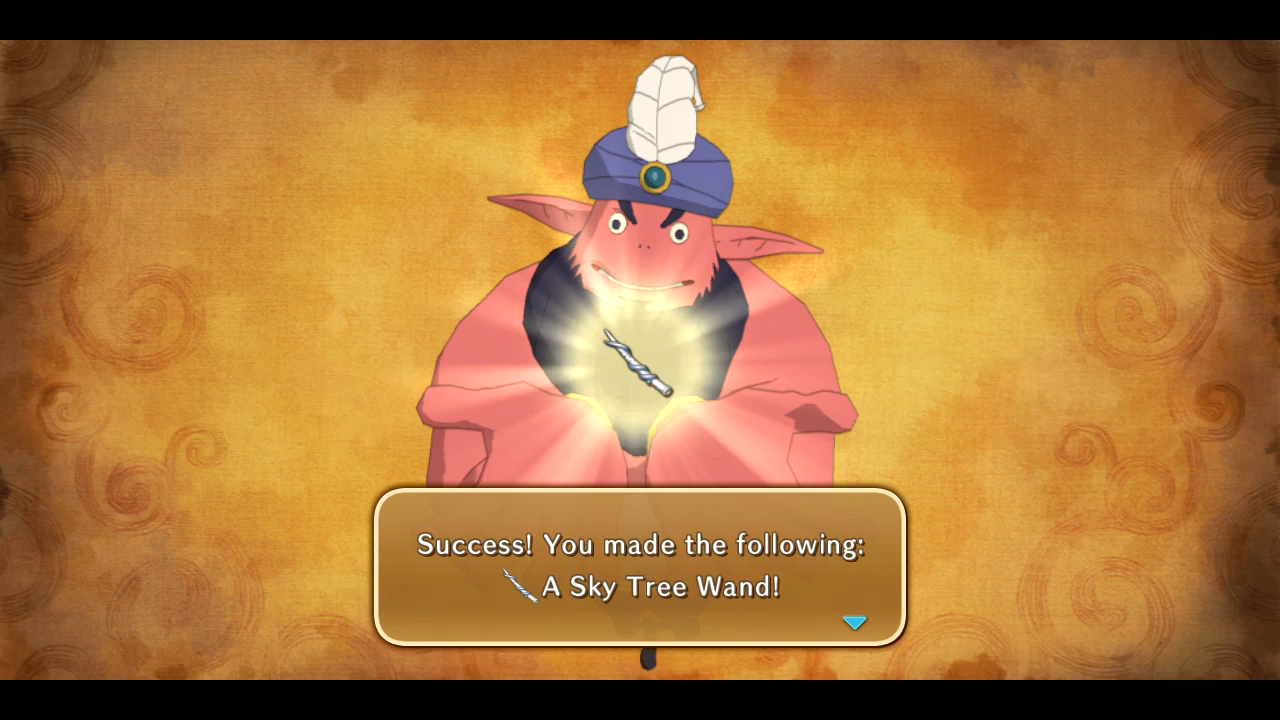 Wahey!  It sucks! Yep, the Sky Tree wand is a melee wand. Neither Oliver or Marcassin should be doing melee for anything other than an anticlimactic finisher. 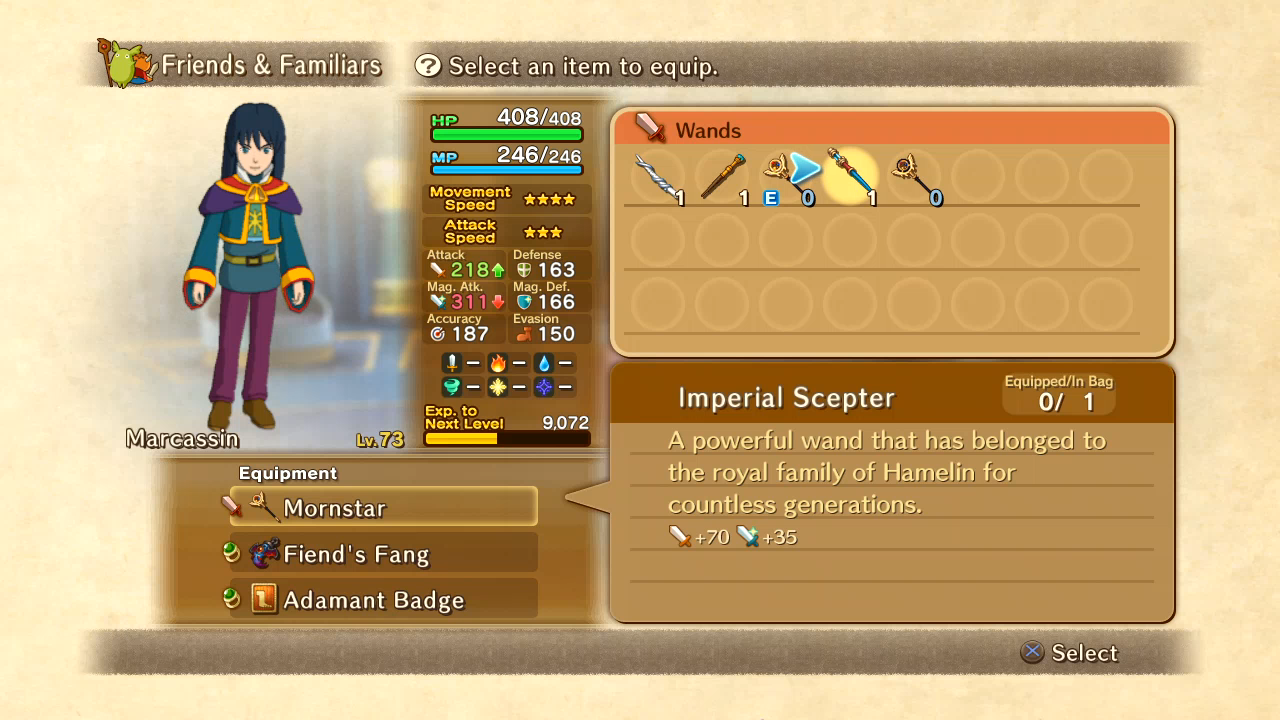 At the very least it's better than Marcassin's old scepter.  Bye forever, Horace! Next time: More Postgame Sidequests!
|
|
#
?
Mar 6, 2015 04:07
|
|
|
About the bounty rewards, I believe that the quests that didn't reward stamps were free DLC in the Japanese release.
|
|
#
?
Mar 6, 2015 07:39
|
|
|
Wow, that is some genuinely interesting backstory from Horace. I'm surprised and impressed. How early could you have done this stuff though? It looks like some of those spells would have been super useful to have had earlier.
|
|
#
?
Mar 6, 2015 07:45
|
|
|
Screenshot Missions 5: Fairy Hunting It may not have been obvious up to this point, but I recorded most of these disparate screenshot updates at the same time, but I separated the footage into updates that are as thematically close as possible. For example I refought the Skull Mountain boss right before I talked to the fairy there, but I've saved the fight footage for the later Conductor update, while I'll be talking to the fairy today. Just to let everyone know in case you notice any anachronisms. Today we'll be focusing on the last of the various side quests remaining before we head to the Solosseum. First, the Nazca�n spirit guards told us that some magimech masters have reawoken on the Nazca�n continent. 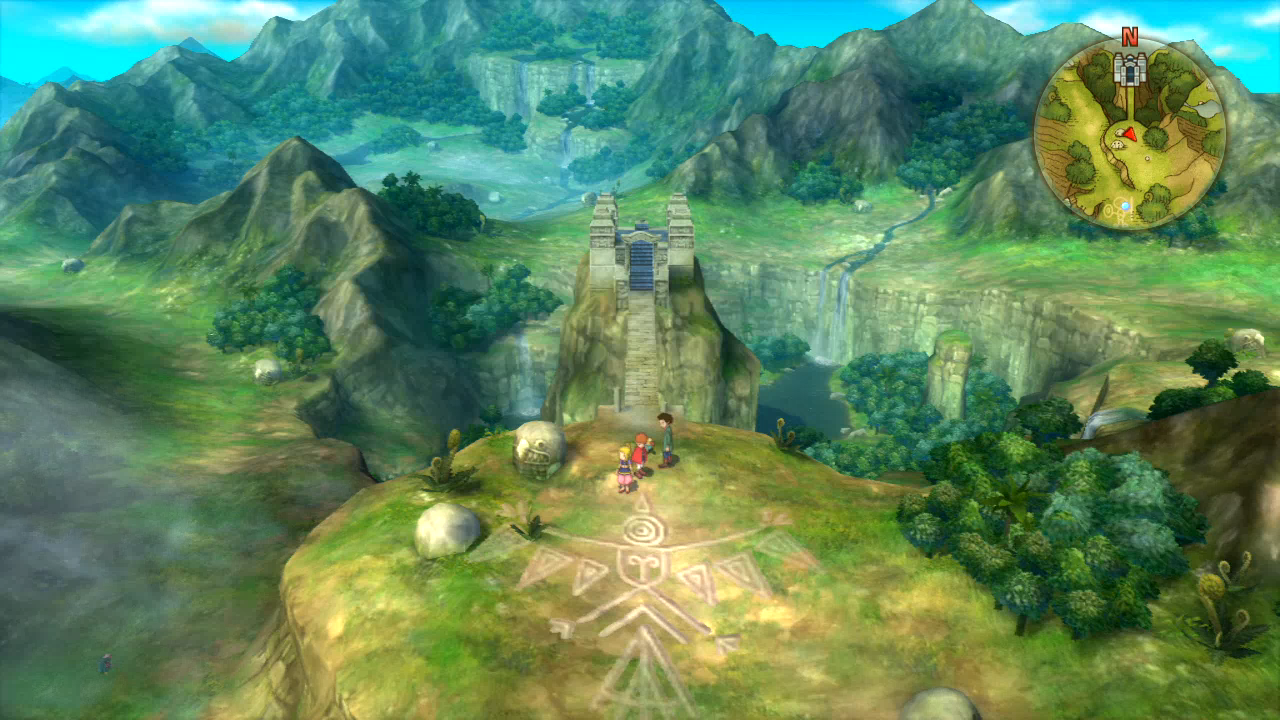  The first is right next to the Ara Memoriae, nicely fitting in with the site being the former seat of the Nazca�n kingdom.  They appear to be distant cousins of Scrapper. 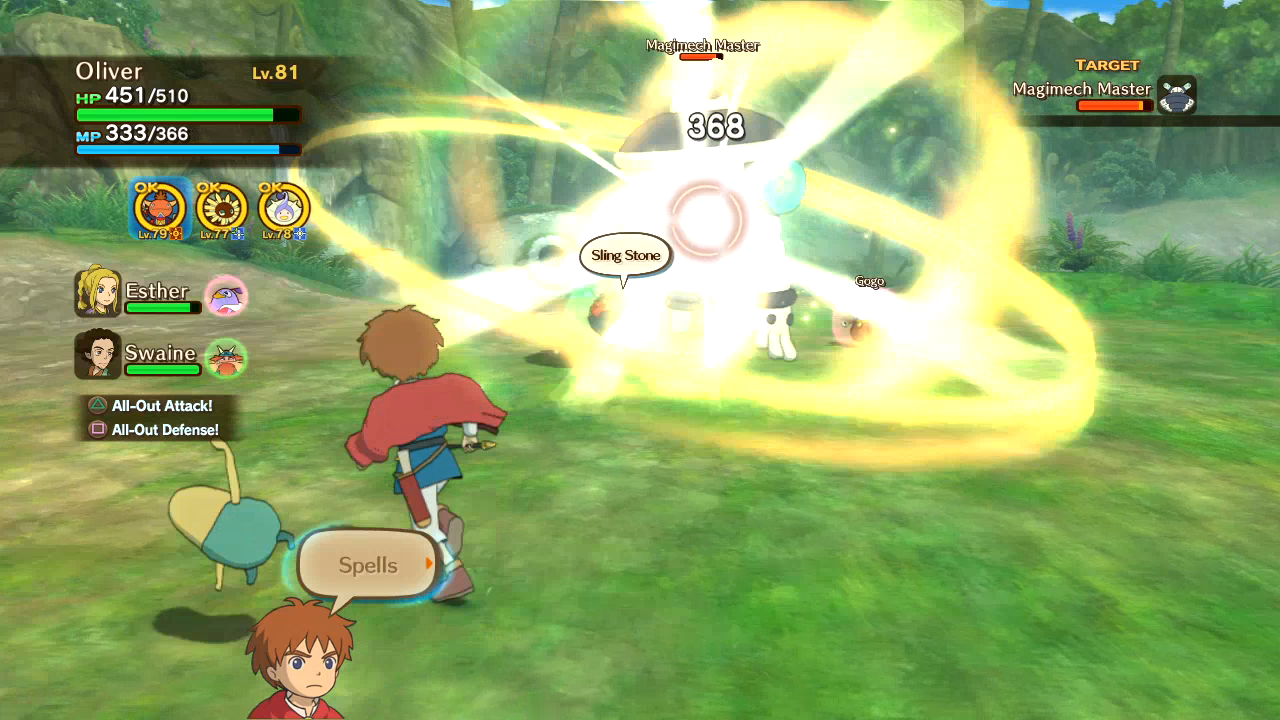 And by this point they're not much harder than the magimechs we fought earlier.  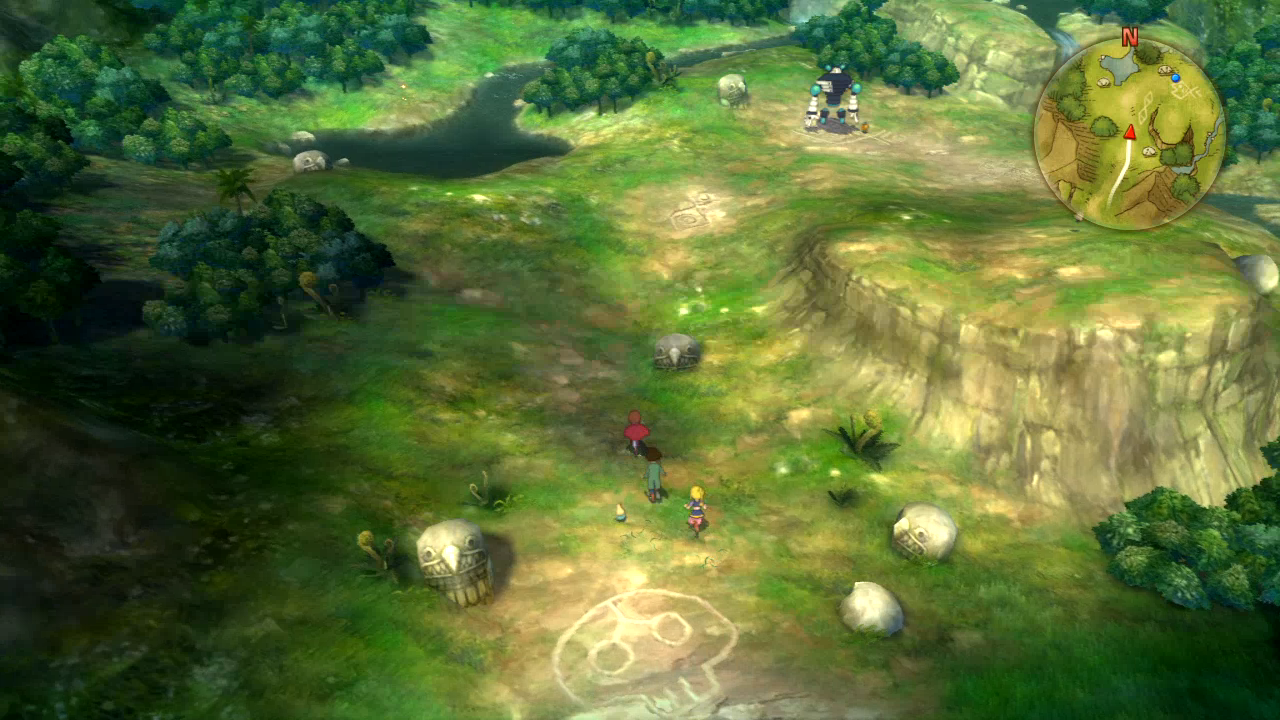 Next one is just past where we found the gentleman's diary. 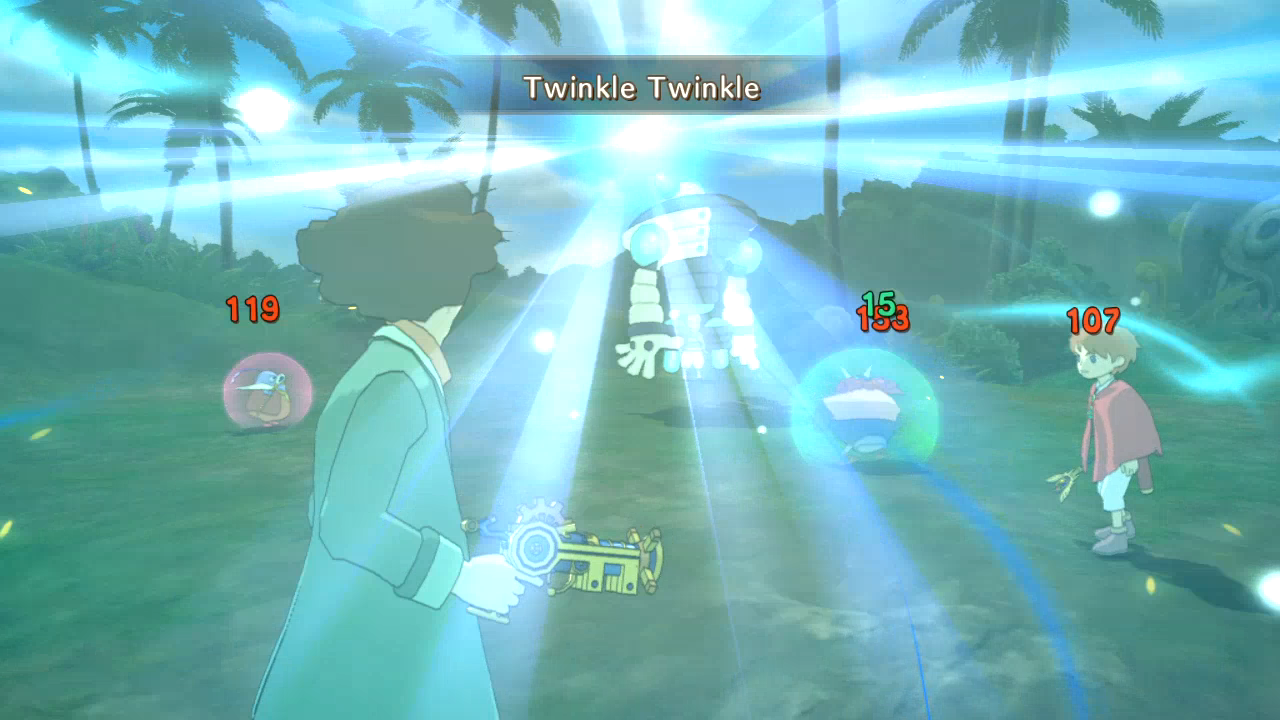 Twinkle Twinkle still sucks. 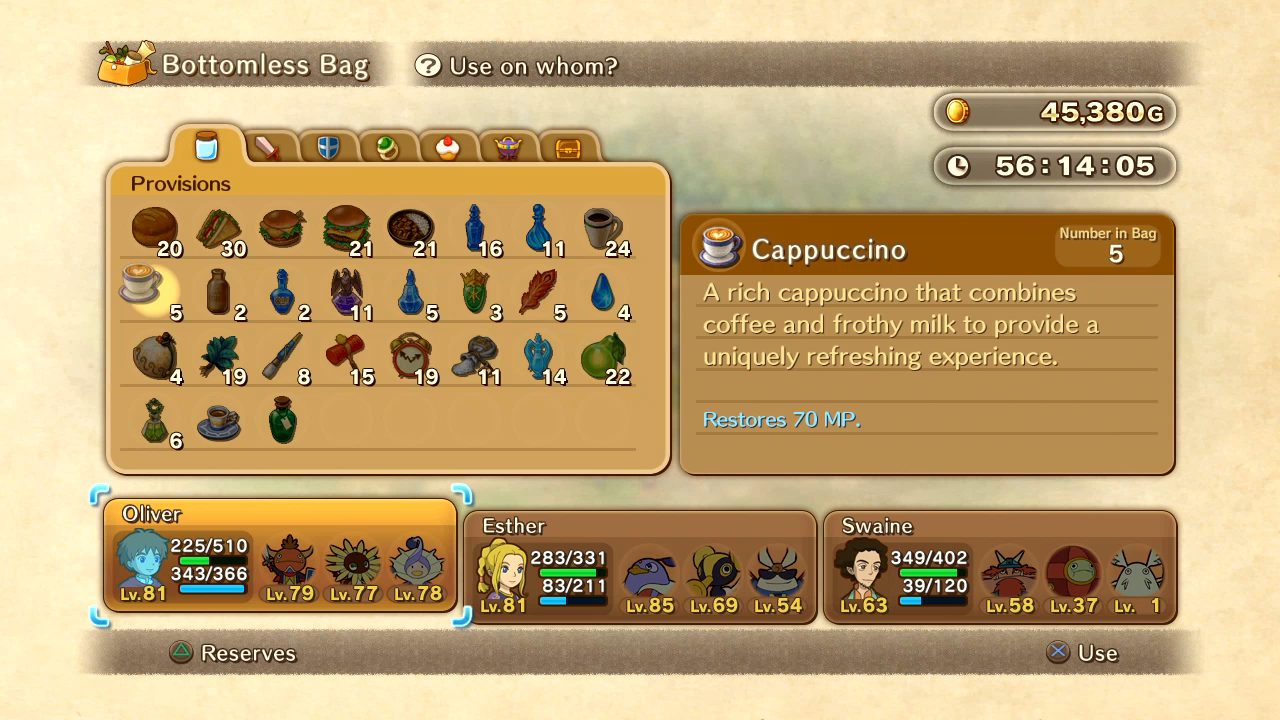 Since I'm so far into the game, I'm less worried about hanging onto recovery items, so I've started using them more liberally. Yes, even the other two get healed. The last master is nearby the first Tengri landing pad. 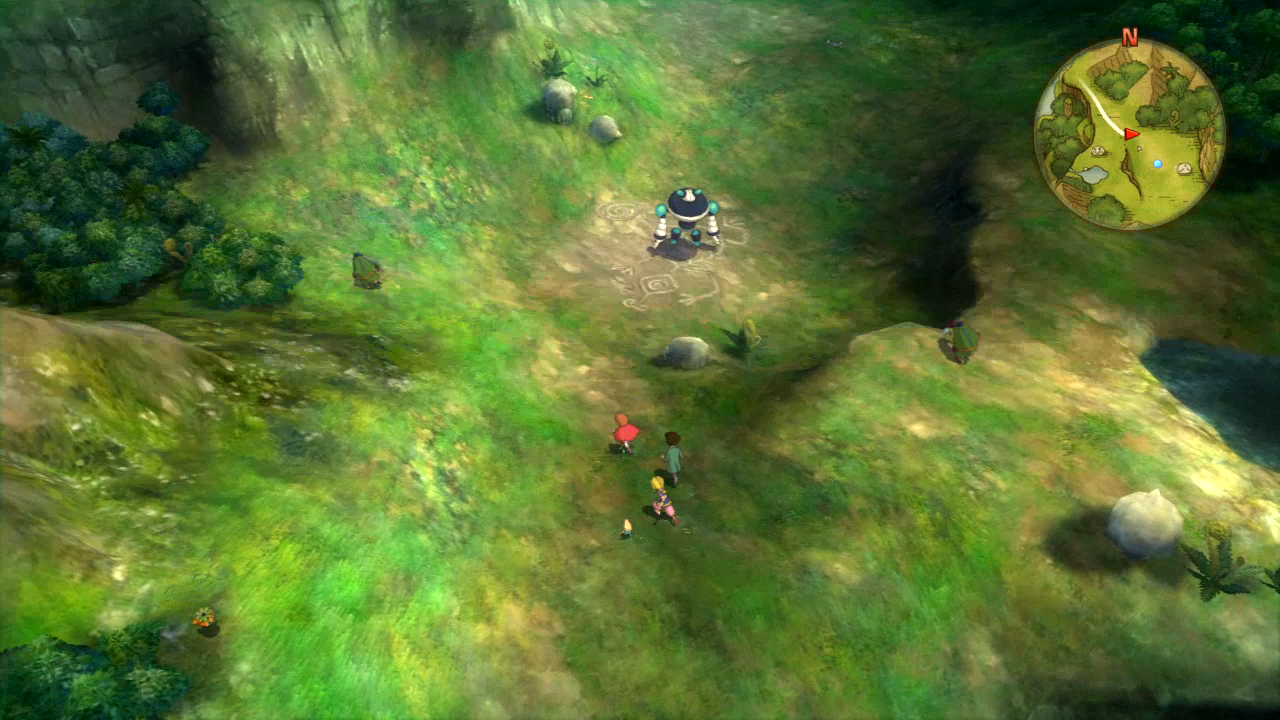 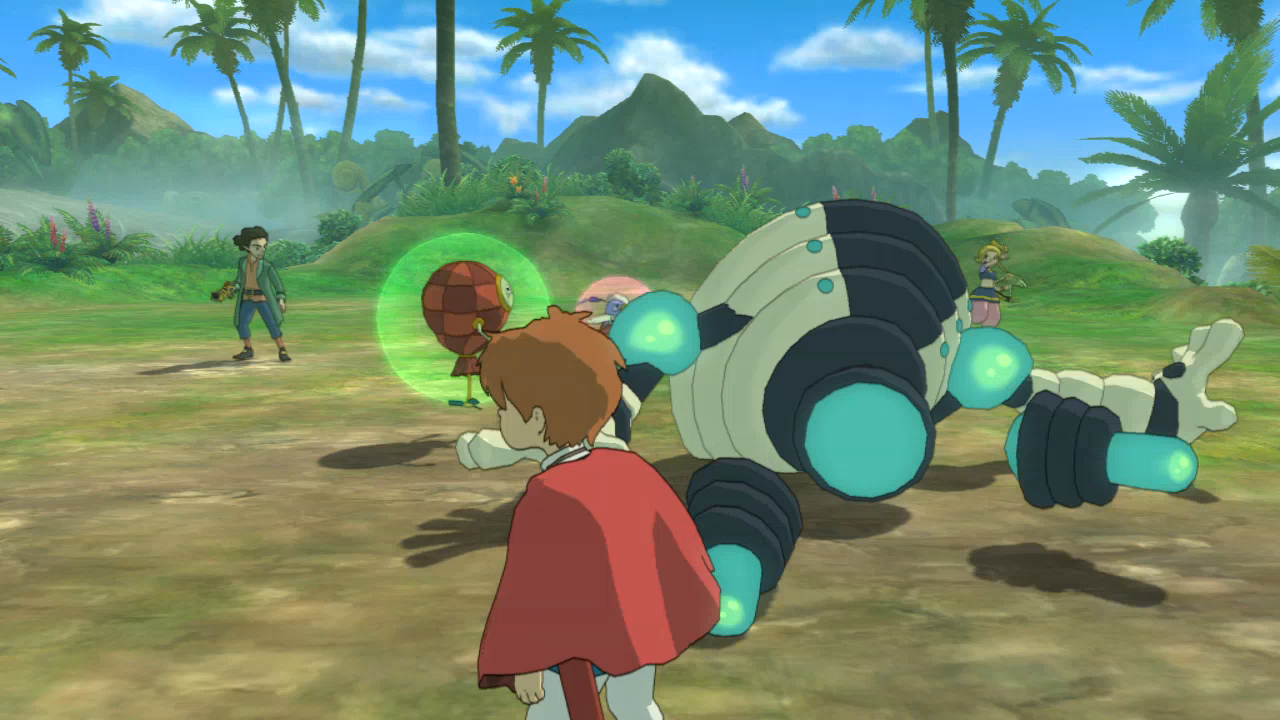 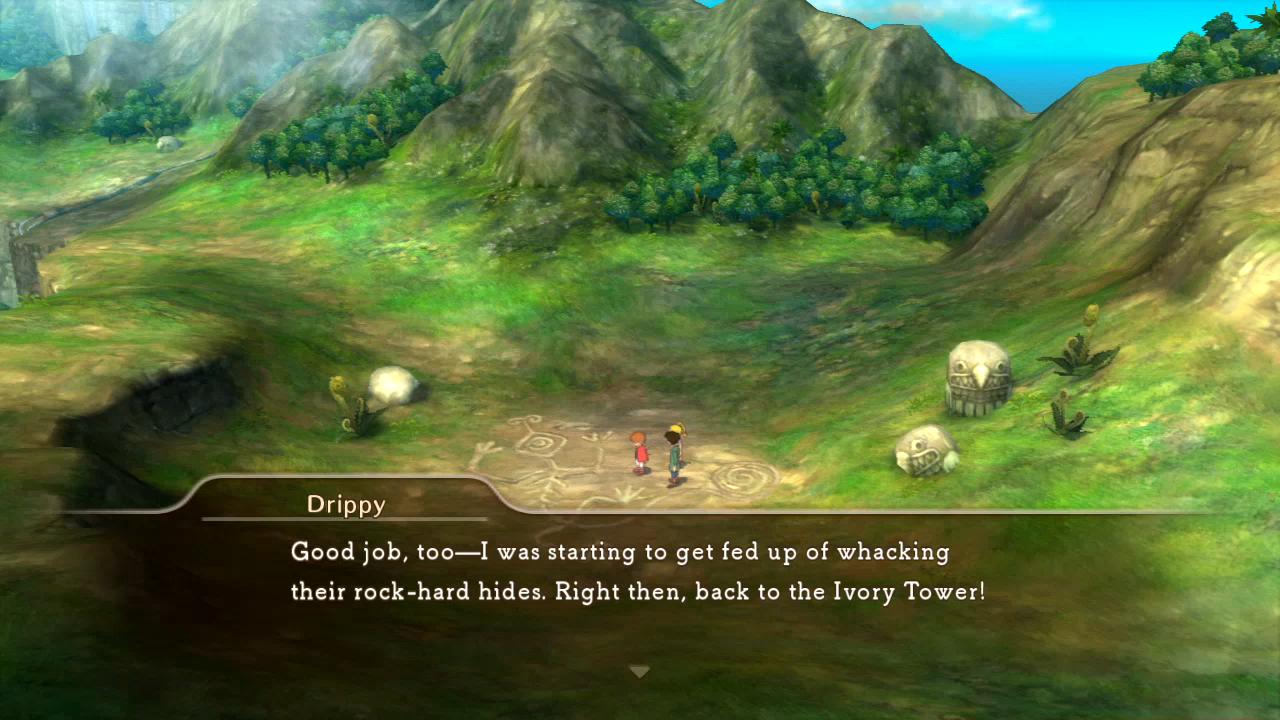 HEAL, GODDAMNIT!  Do not talk to these guys until you do! 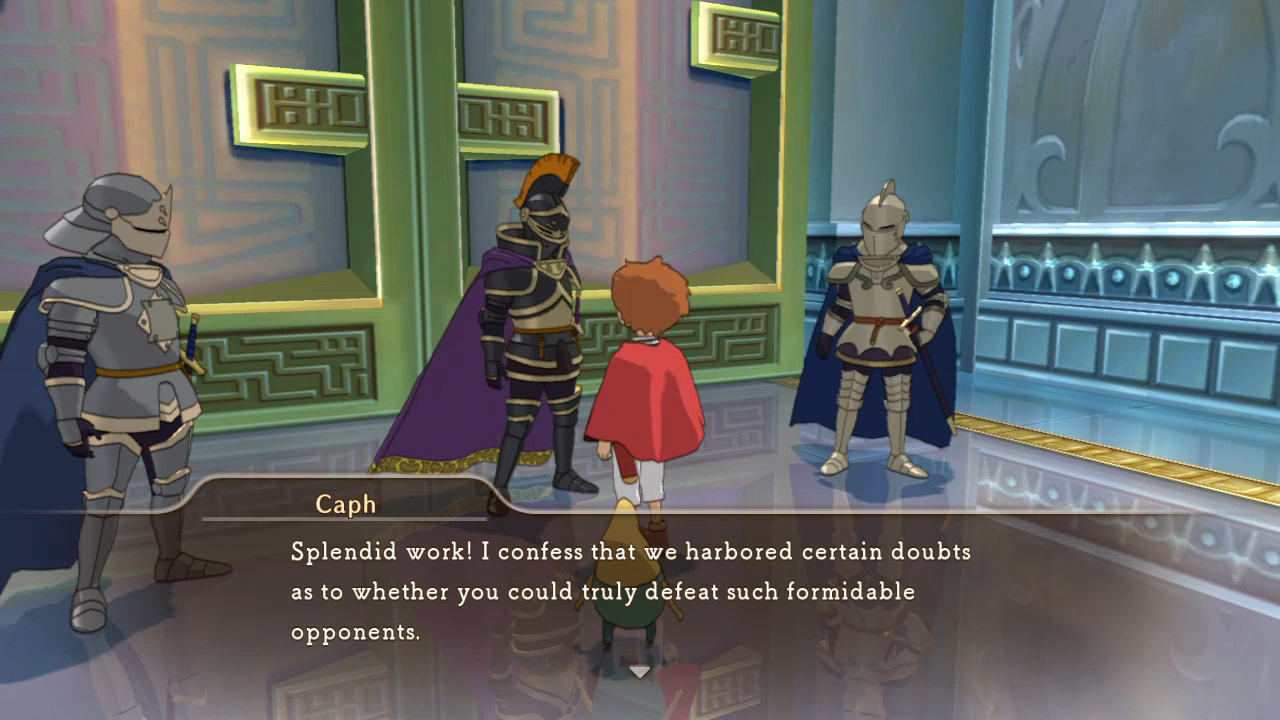   While not nearly as lore-expanding as Horace's quest, I do like how this adds a human element to these robots.  Fuckers.  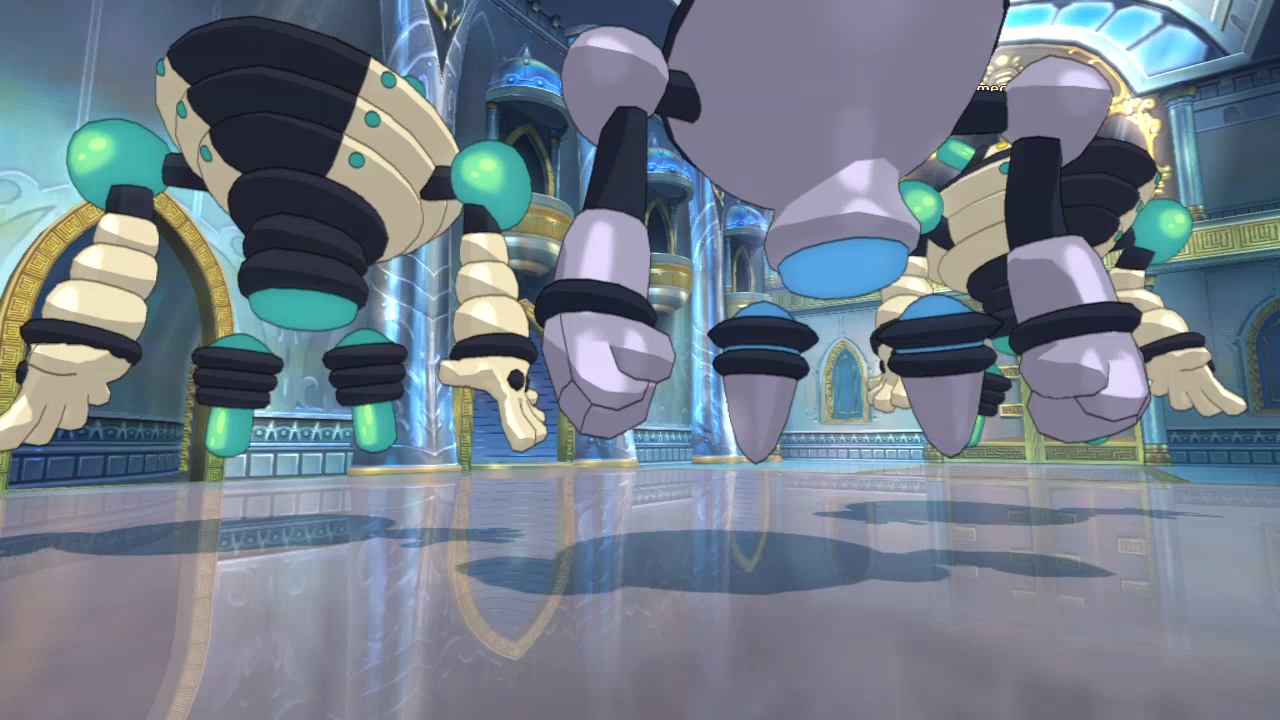 Great enemy/camera placement, game. One Manic Magimech (the second-hardest one of the line) and two magimech masters. This fight is benefited by keeping Oliver moving and letting your allies do some damage so that the magimechs aren't always on you. They move relatively slowly, so distance is always helpful, especially if you're going to be using Astra. 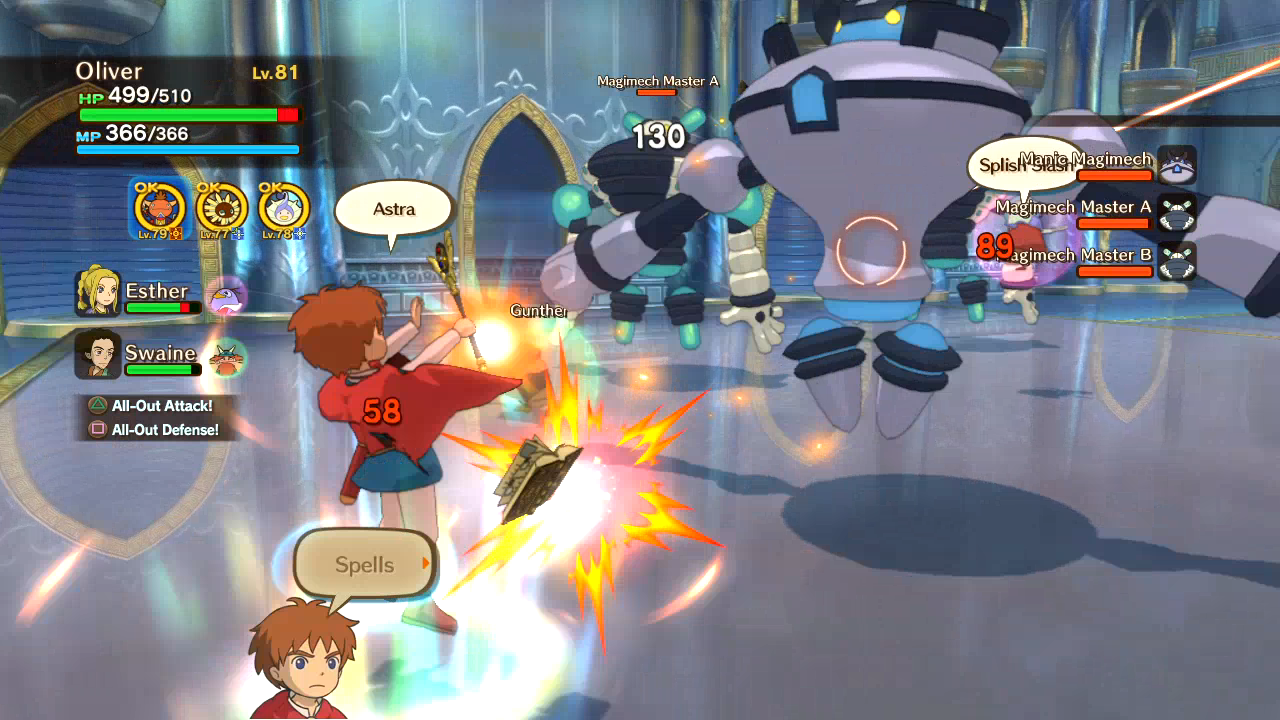  By now, you better be using Astra. 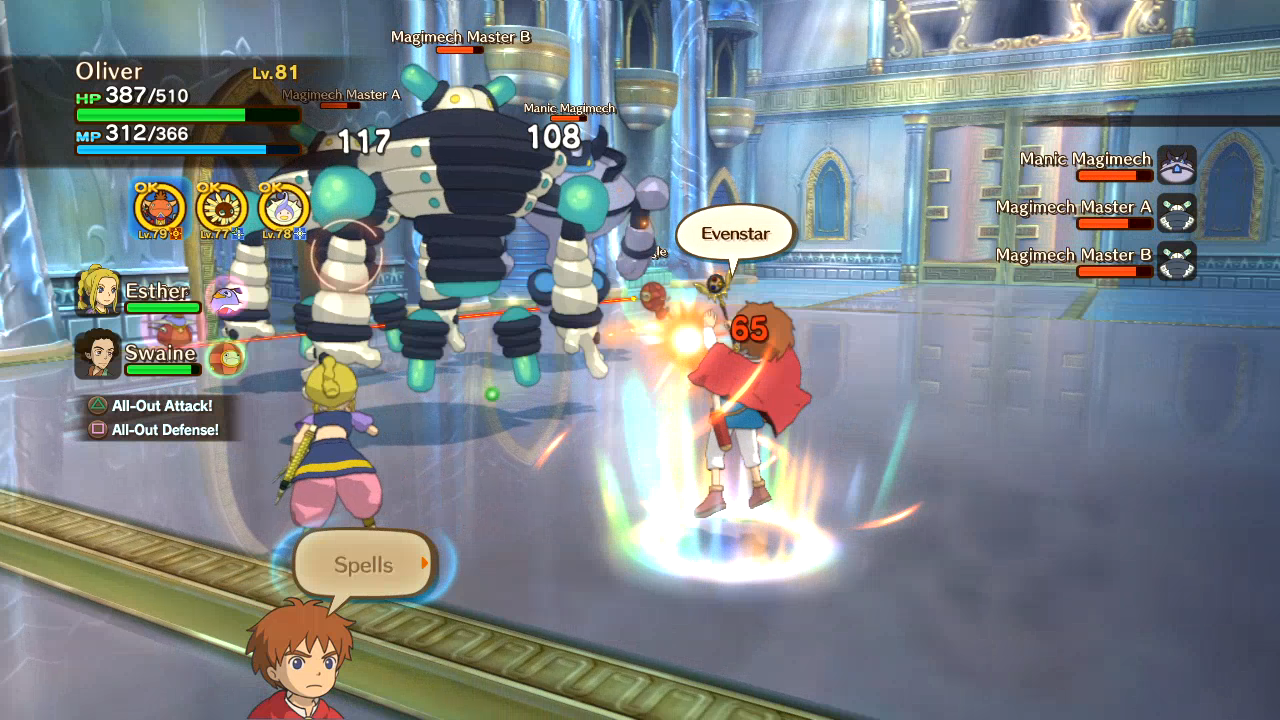 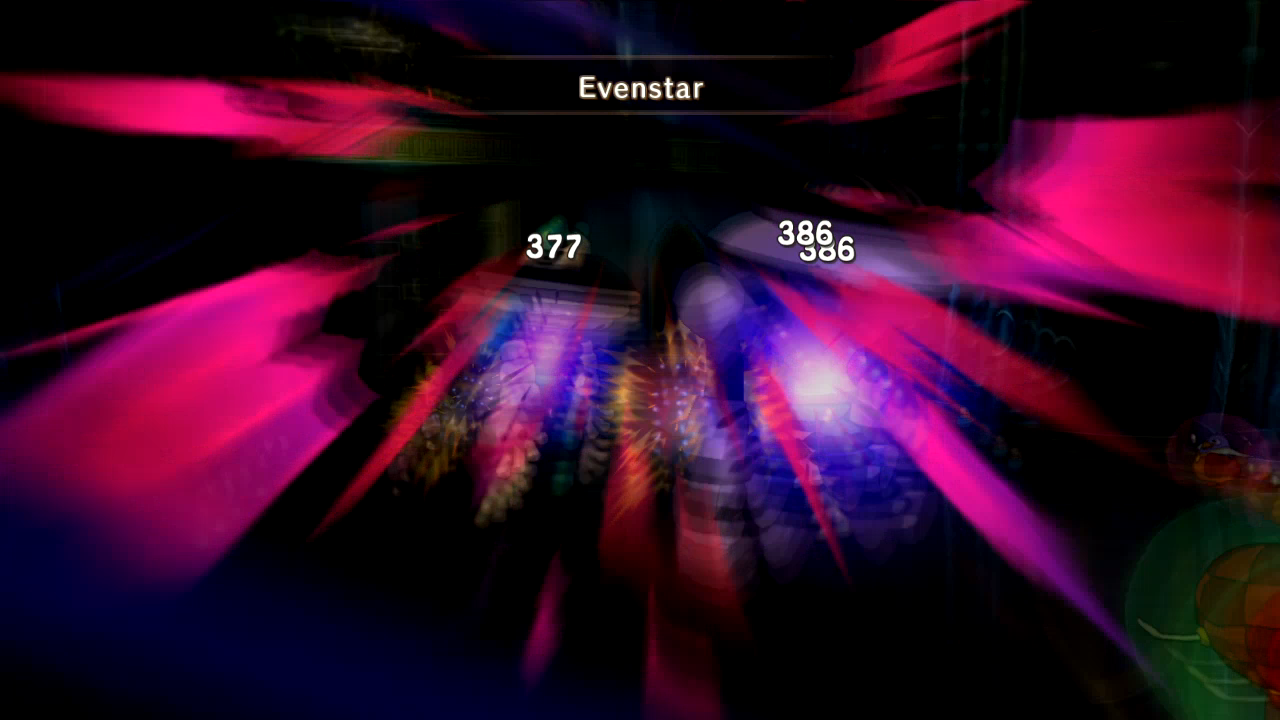 Evenstar doesn't nearly hold up, even if it's less magic used. This is more of a "do damage fast" fight than a "conserve magic" fight.  Here I get into a tight spot: either my Astra will cast first and take the guy doing Twinkle Twinkle out, or he will cast first and I'll lose the spell until it recharges.  Luck was on my side.    A few more Astras and the last two go down together. 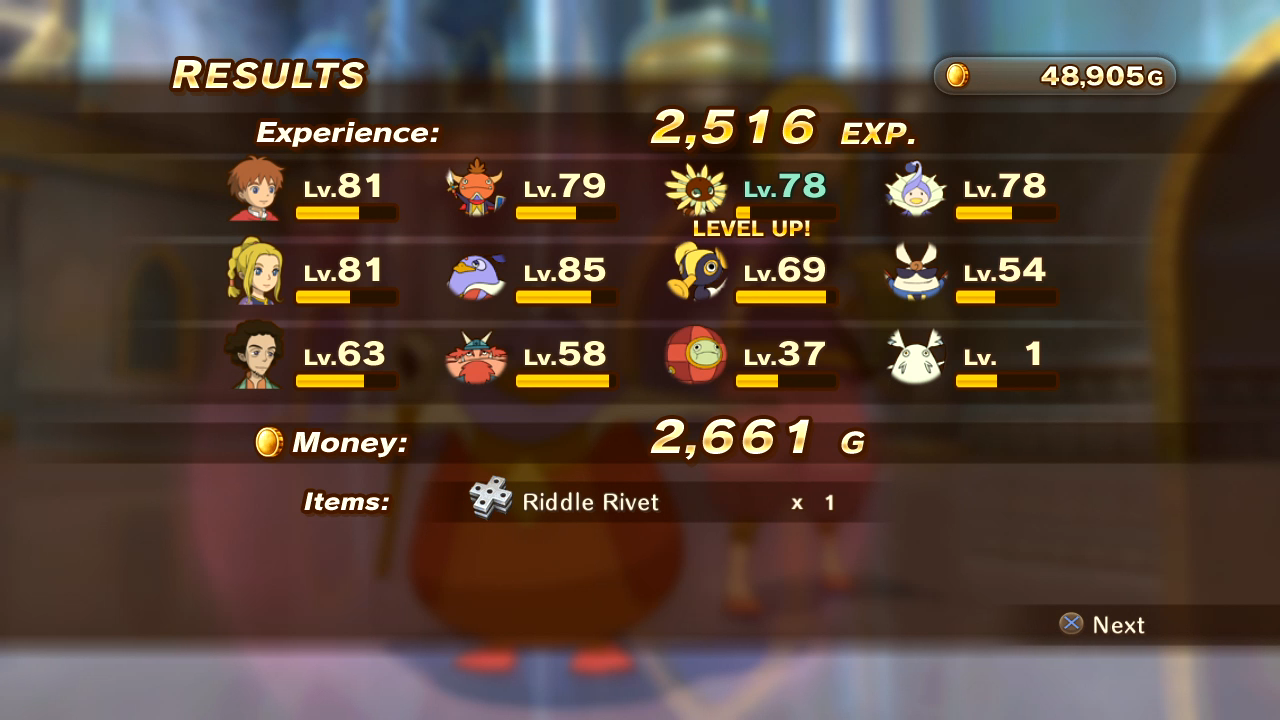 I get the Riddle Rivet for that fight, which is used to make Swaine's best gun. 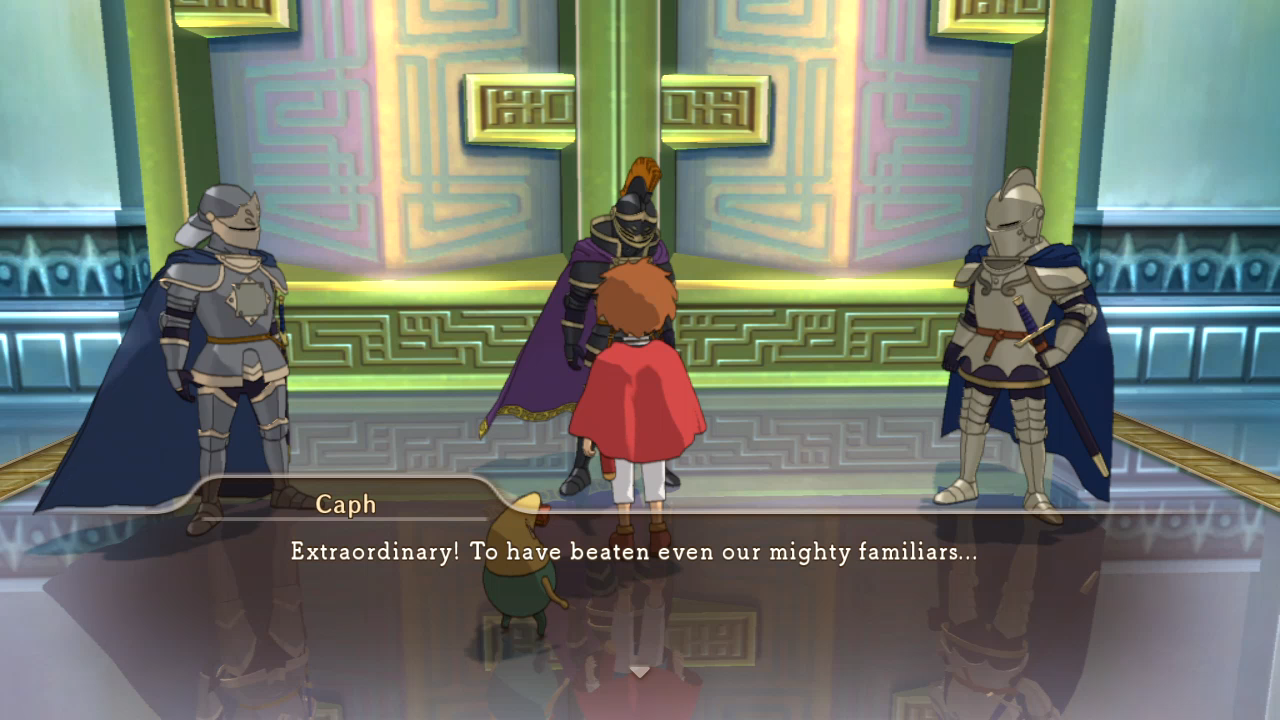  Goddamnit, they're not only hiding things from me but now they're liars. 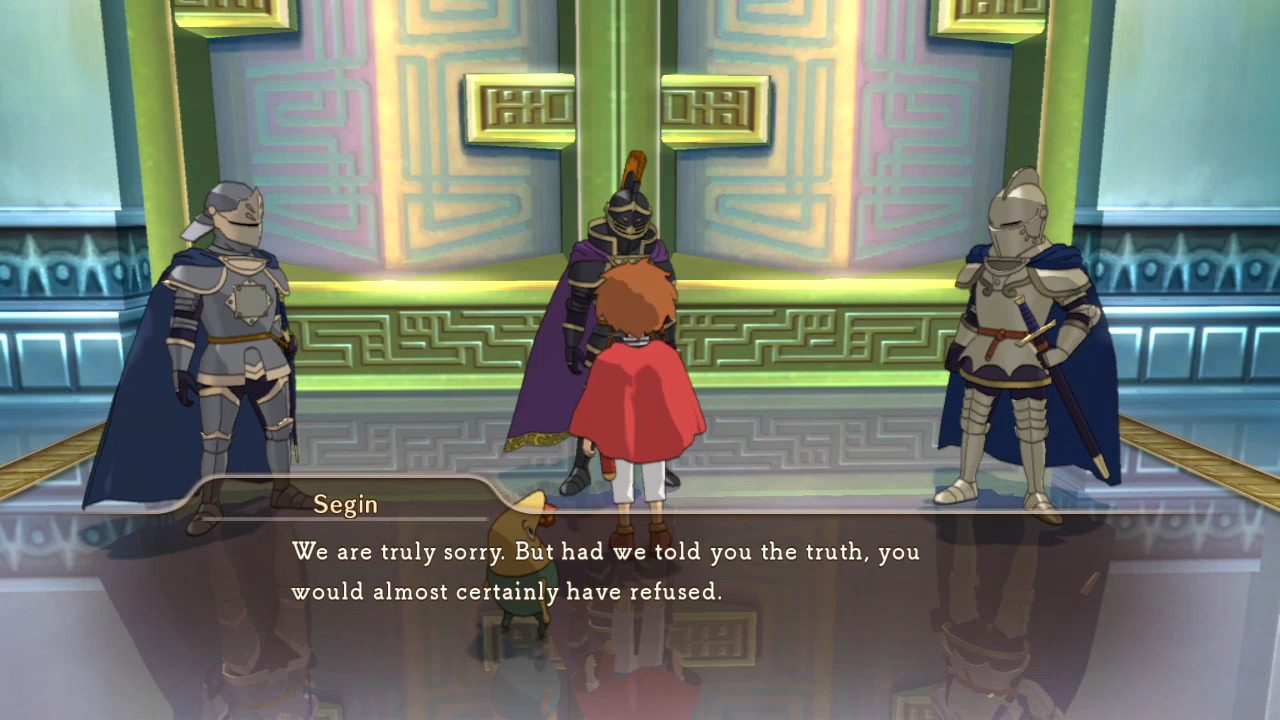 It's a sidequest with rewards. Of course we would have. No other monsters posed a real threat, no matter what the bounty hunt description said. 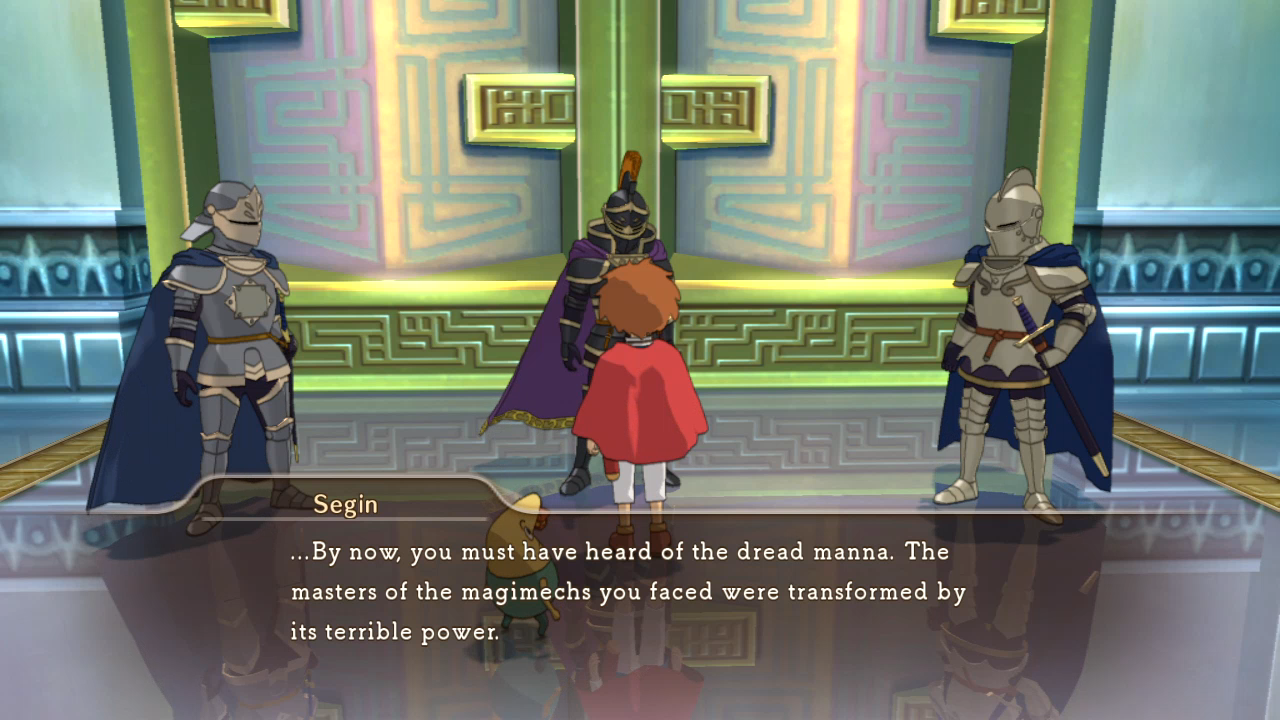 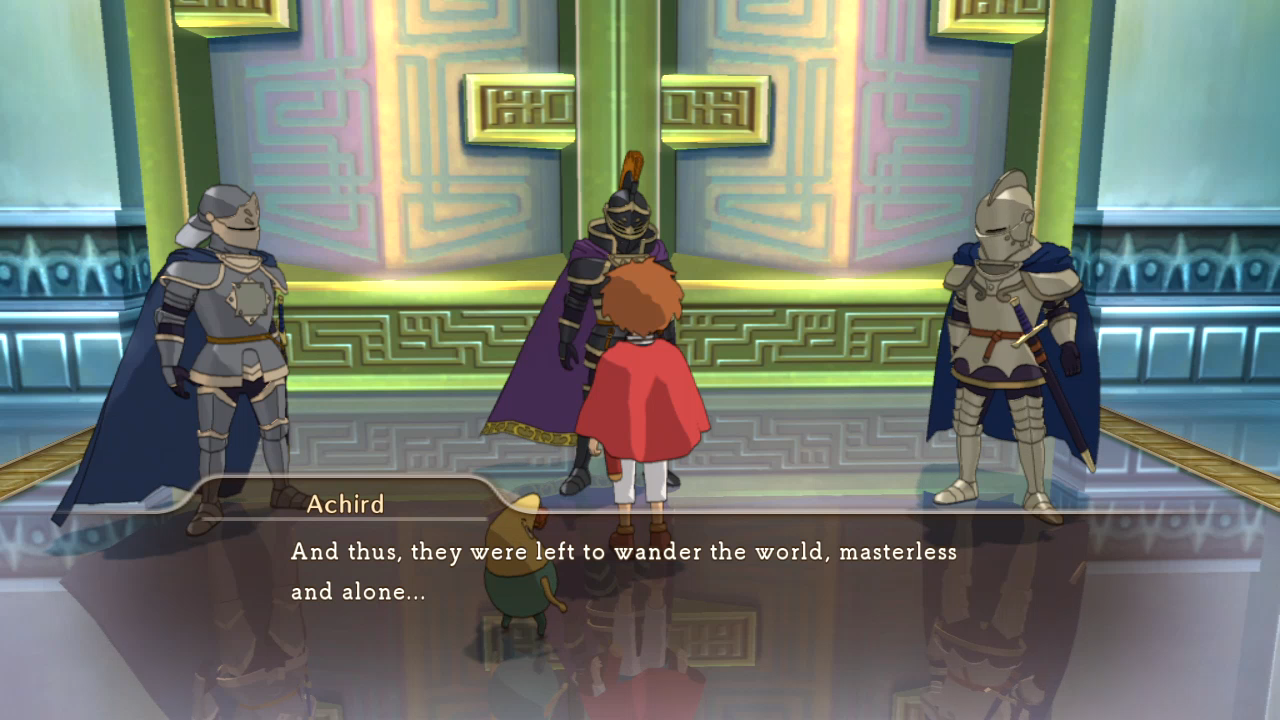 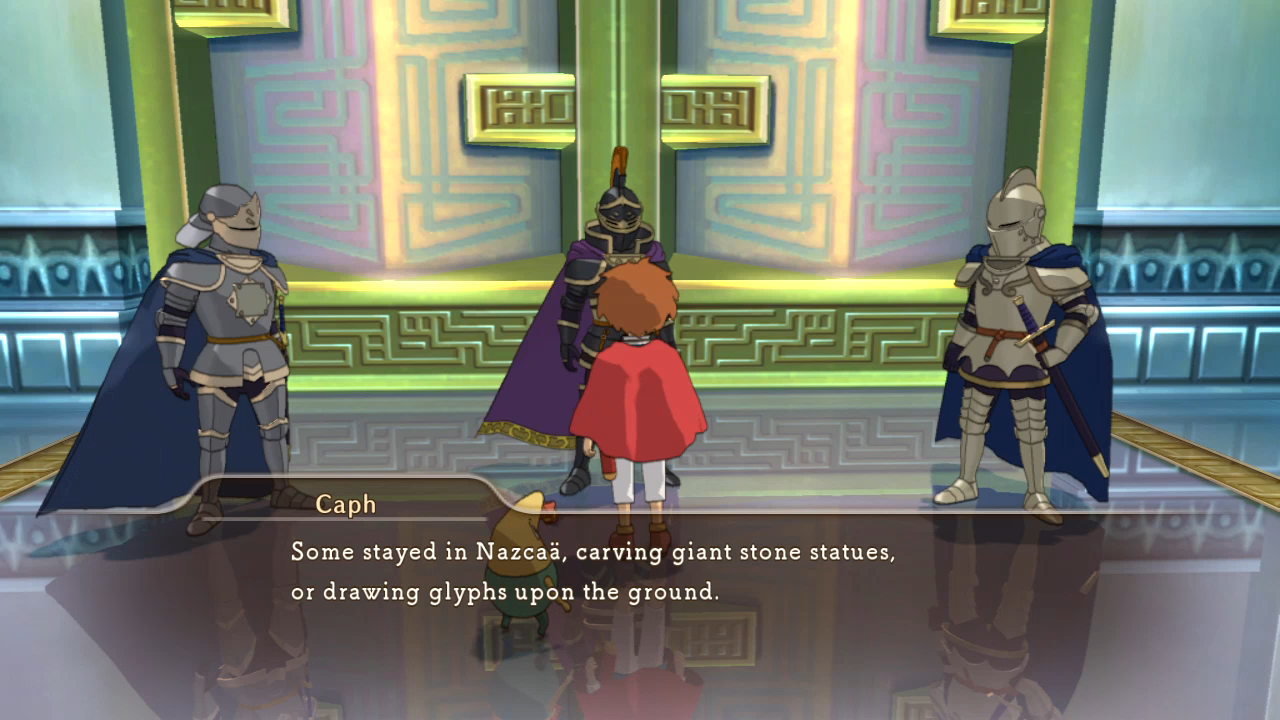 Not sure if I like this bit of information or not. Makes the ancient civilization of Nazca� less fascinating when it wasn't the populace that made the statues or drawings, but the robots that were left behind when they all died. It's interesting on it's own, sure, but it takes away a bit of Nazca�'s character, and we only get so much of that. 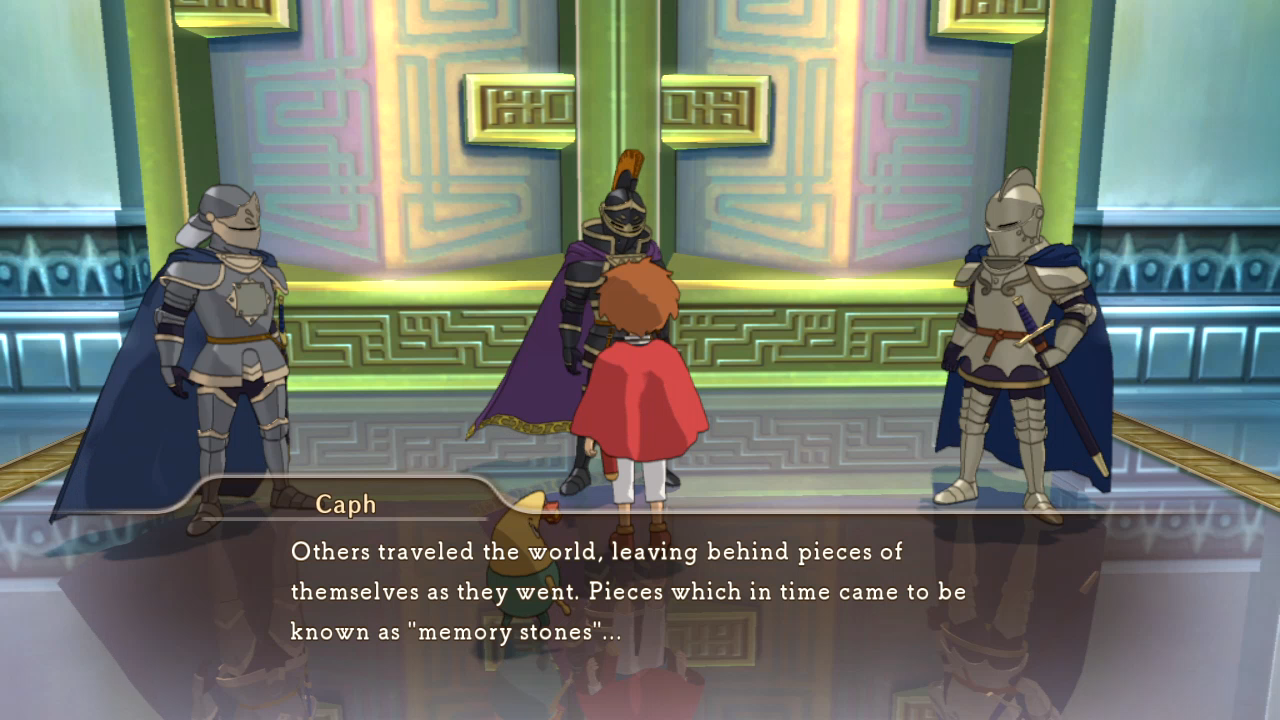  I do like this though. Worldbuilding! 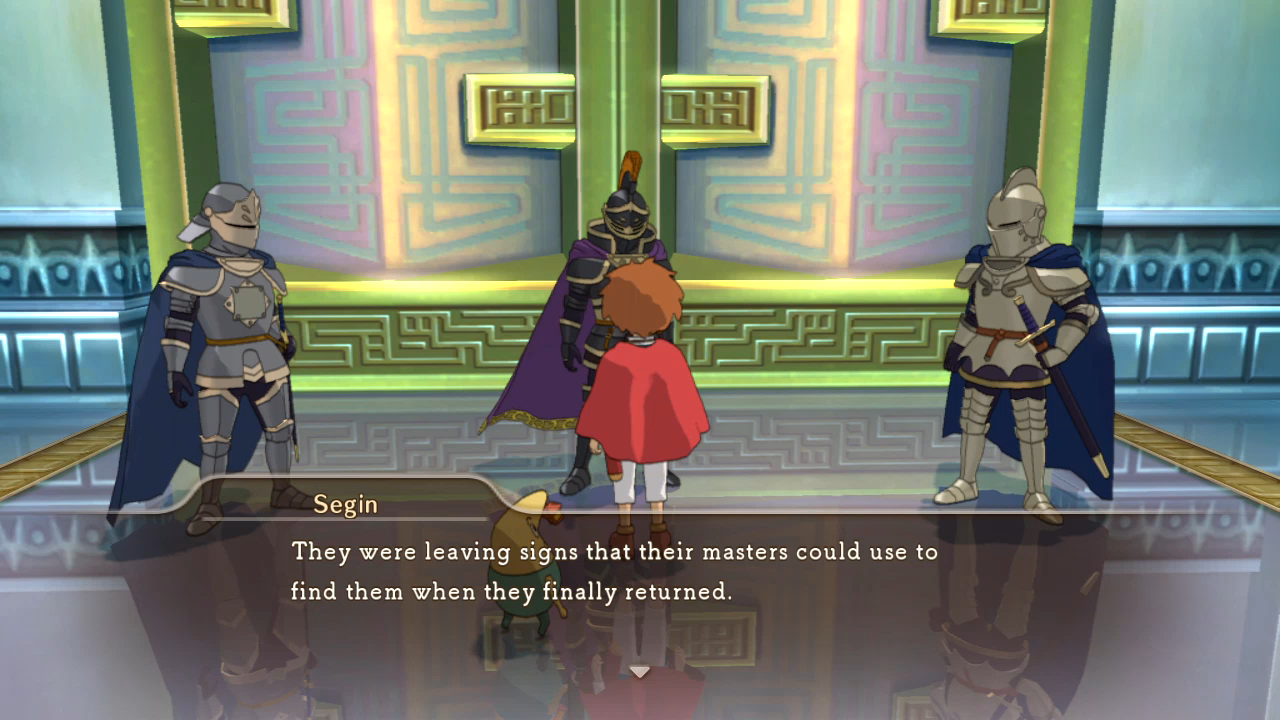  And sadnessbuilding! 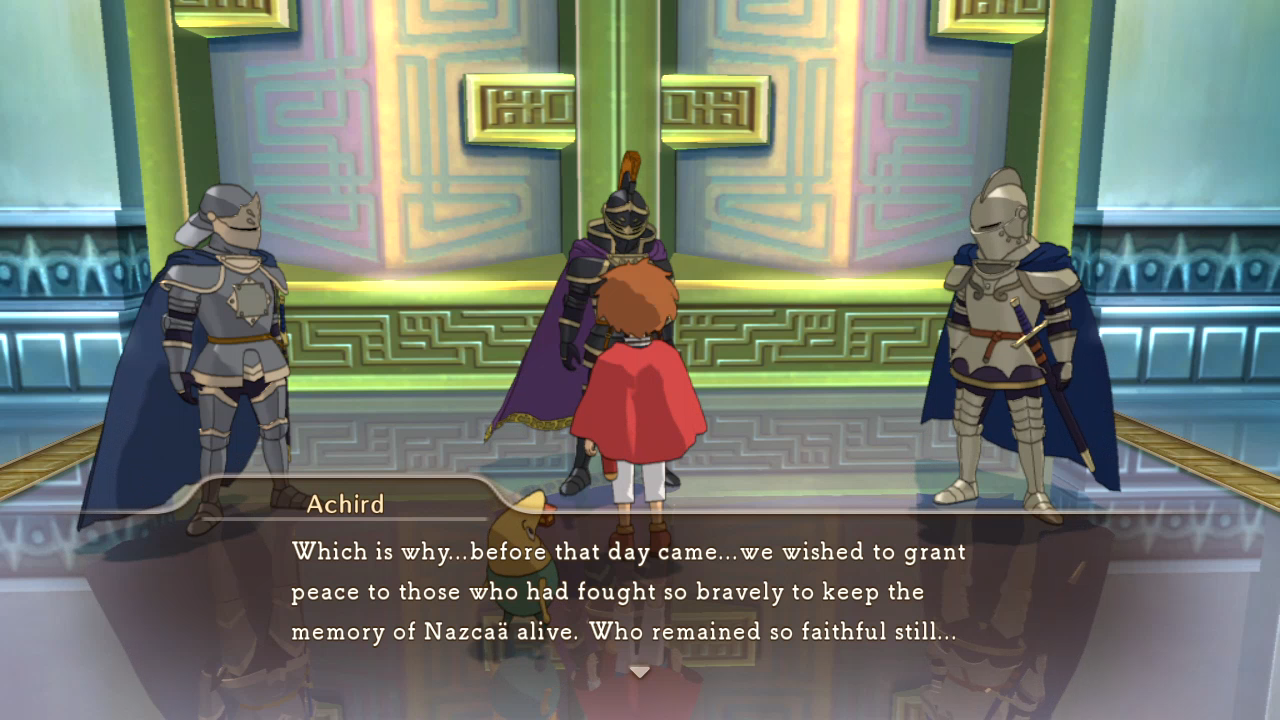 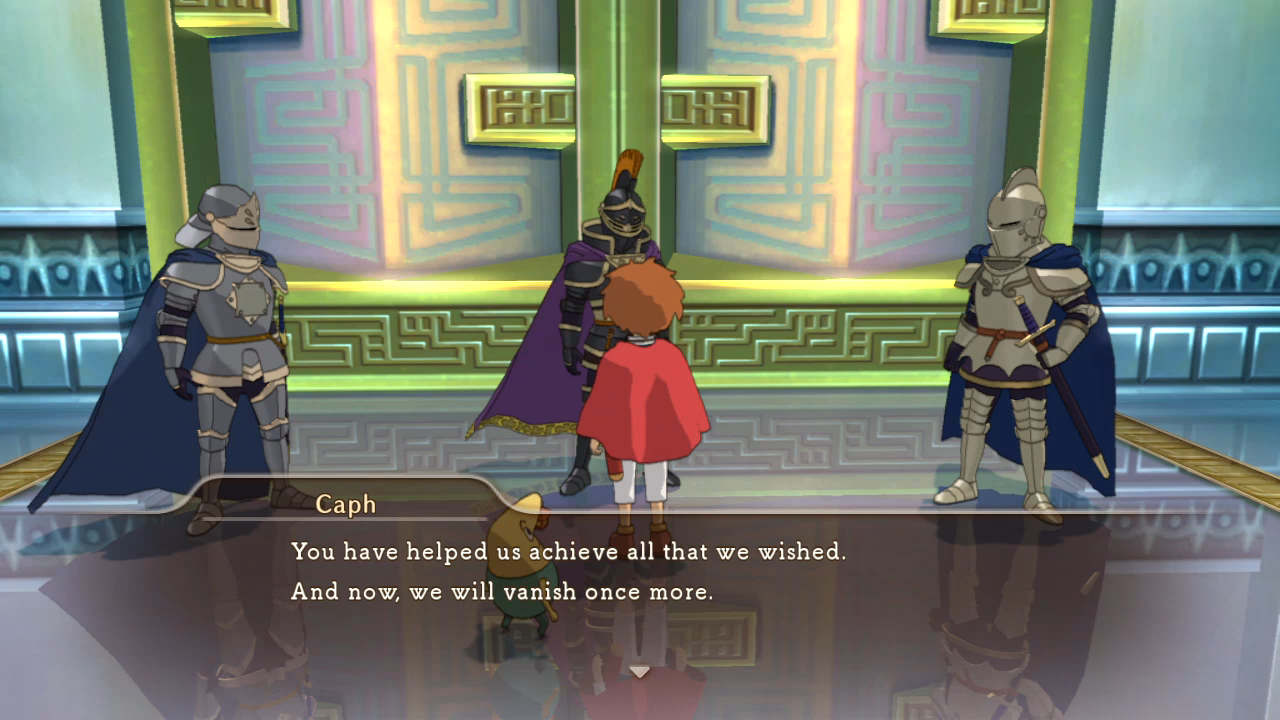 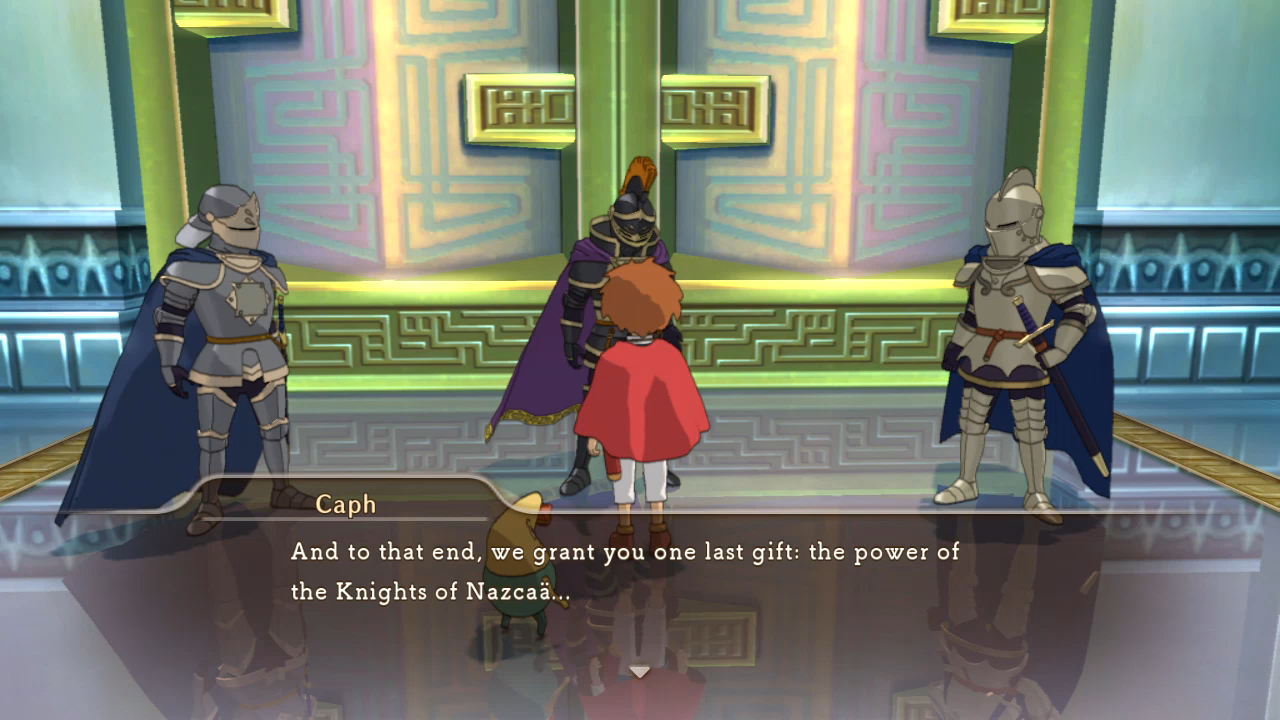 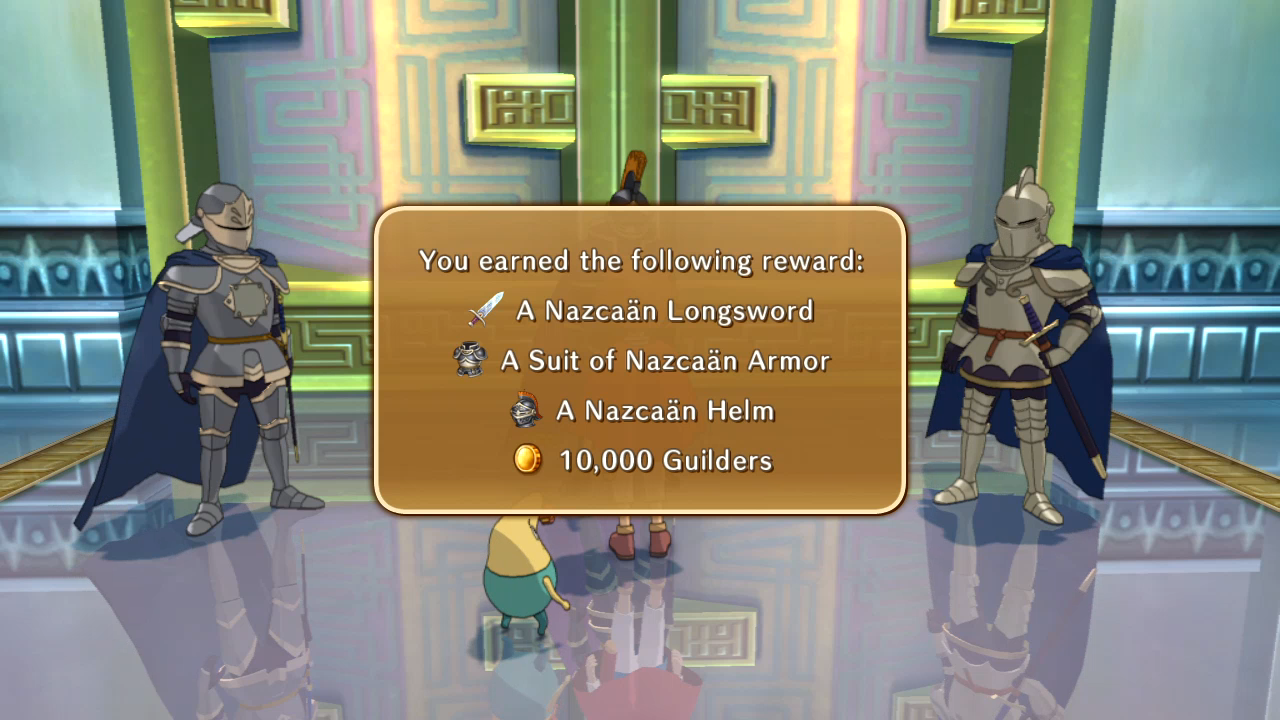 As thanks, we get some of the best familiar armour and the best non-healing familiar sword in the game.   Remember, this is post-game material, but the game still acts like we haven't fought Cassiopeia.  I give Dumple the sword, since I won't have much more use for him healing himself anymore. 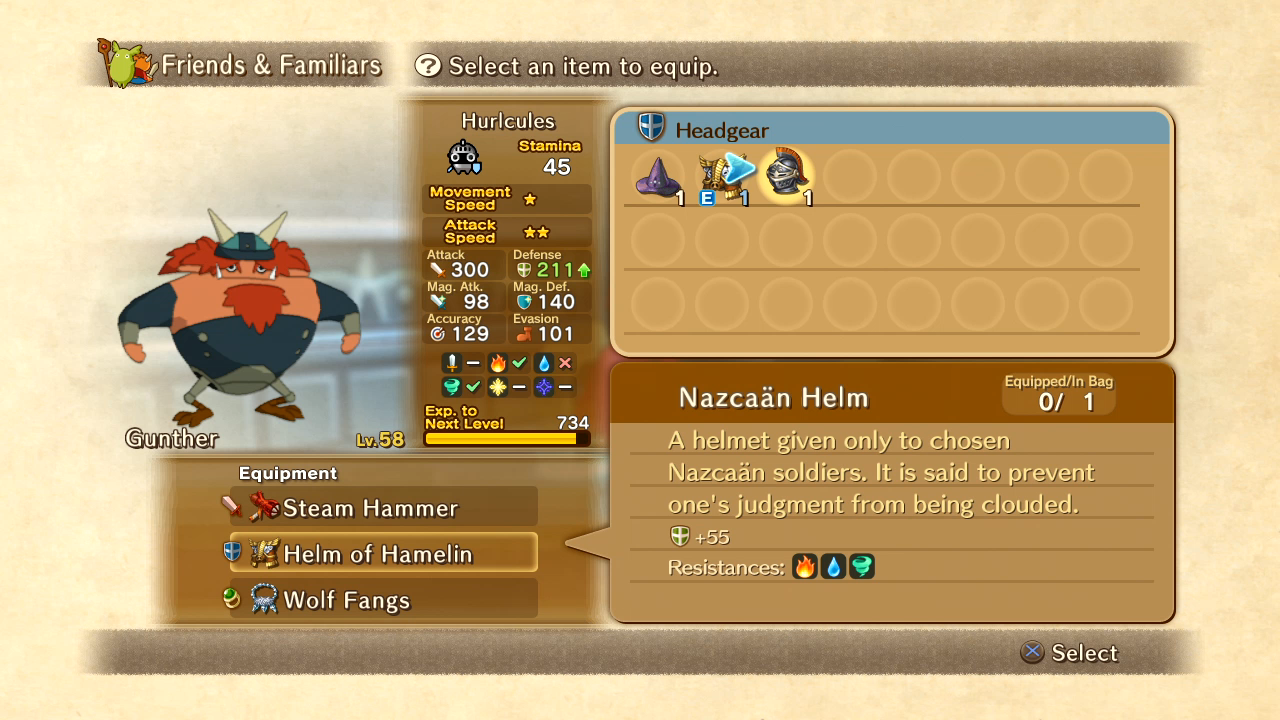 Gunther gets the helmet, which also comes with multiple elemental resistances!  And Tingle gets the armour, which also has the resistances but comes with the usual loss of accuracy that every armour has. Teleporting to the Iron Wyvern, Smily and Surly aren't having much luck with their weapon shop.    Seeing as this is a race of comedians, expect the weapons we get to be stupid as all hell.    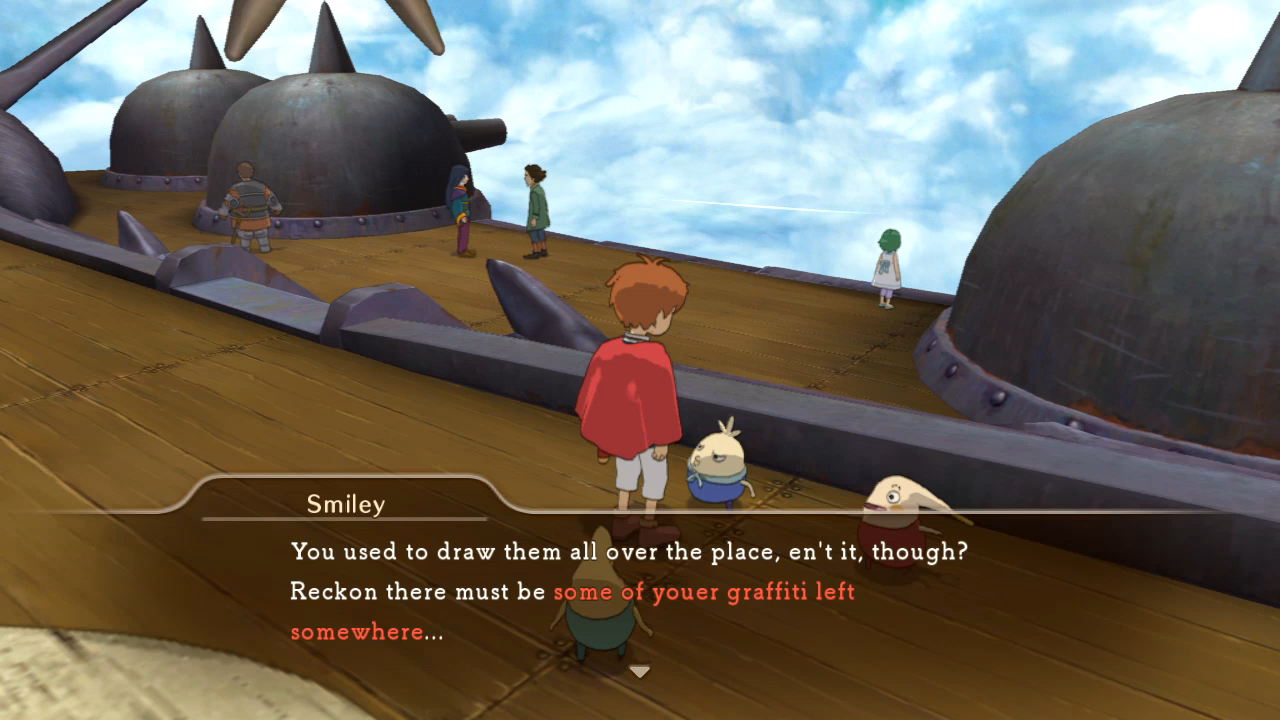 That's four hints for three items, two of which involves Drippy's mam. The first only requires us to talk to this specific fairy sitting in front of the Fairyground stage.  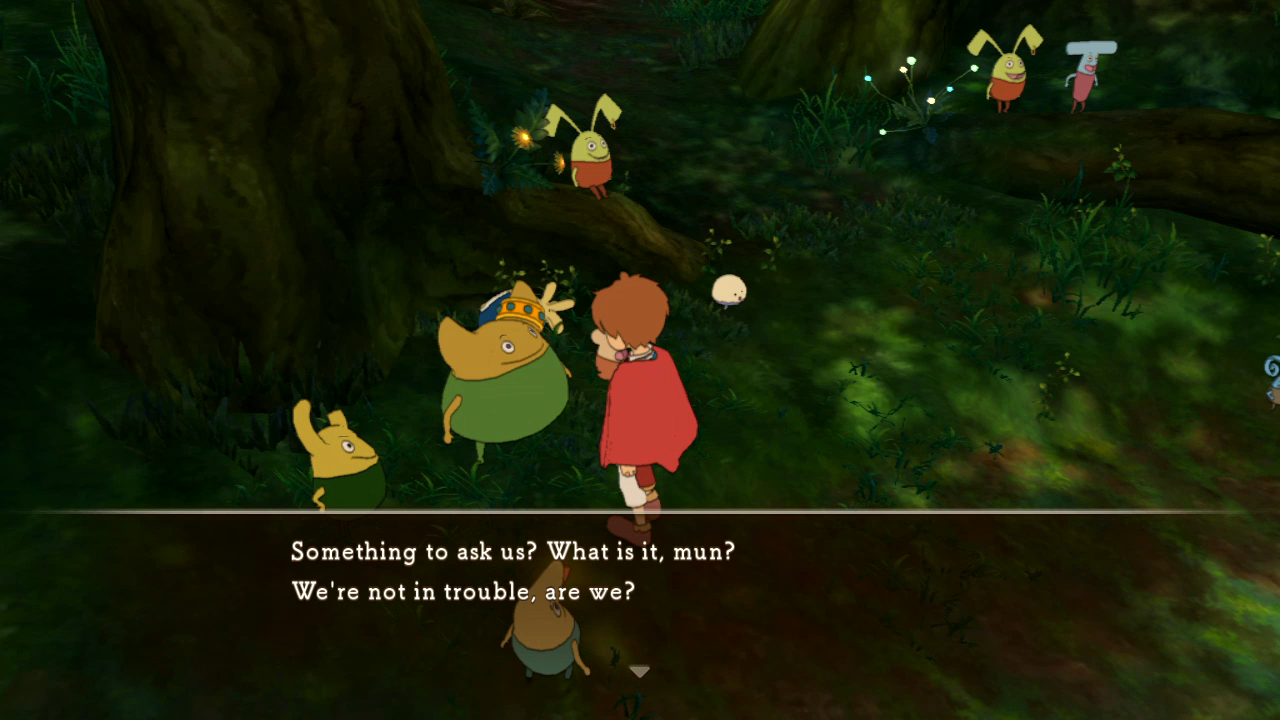 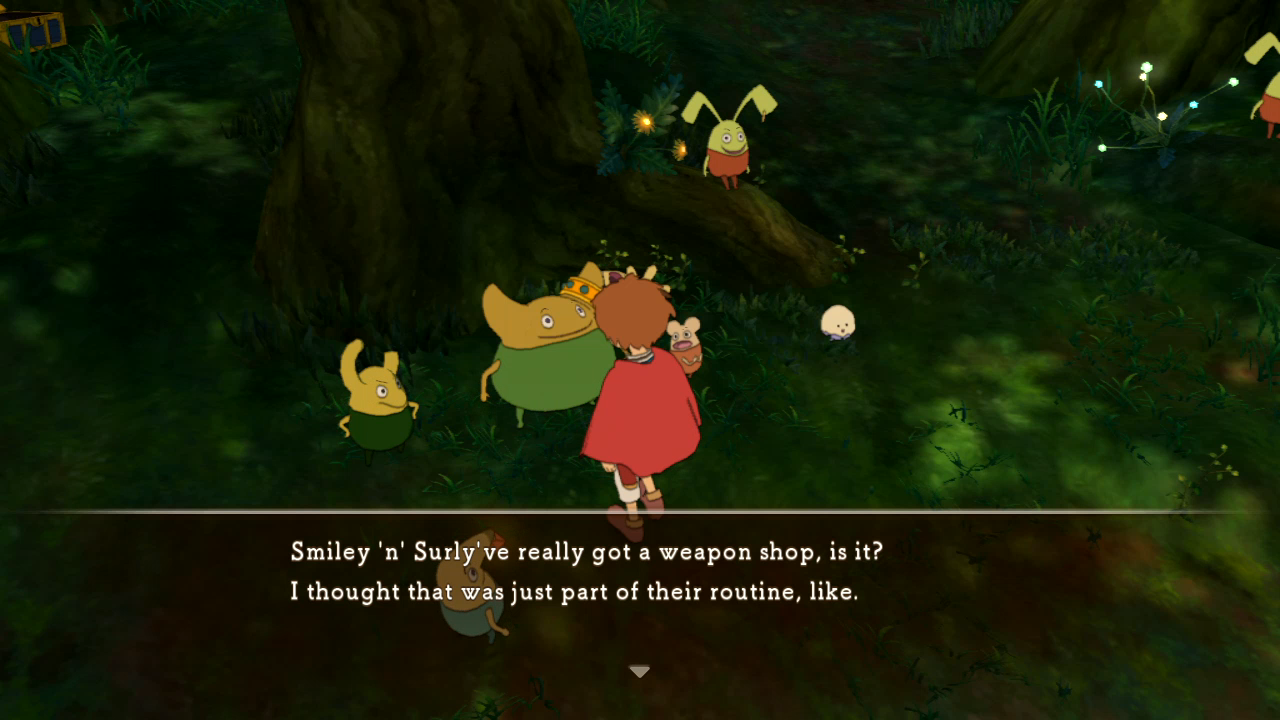 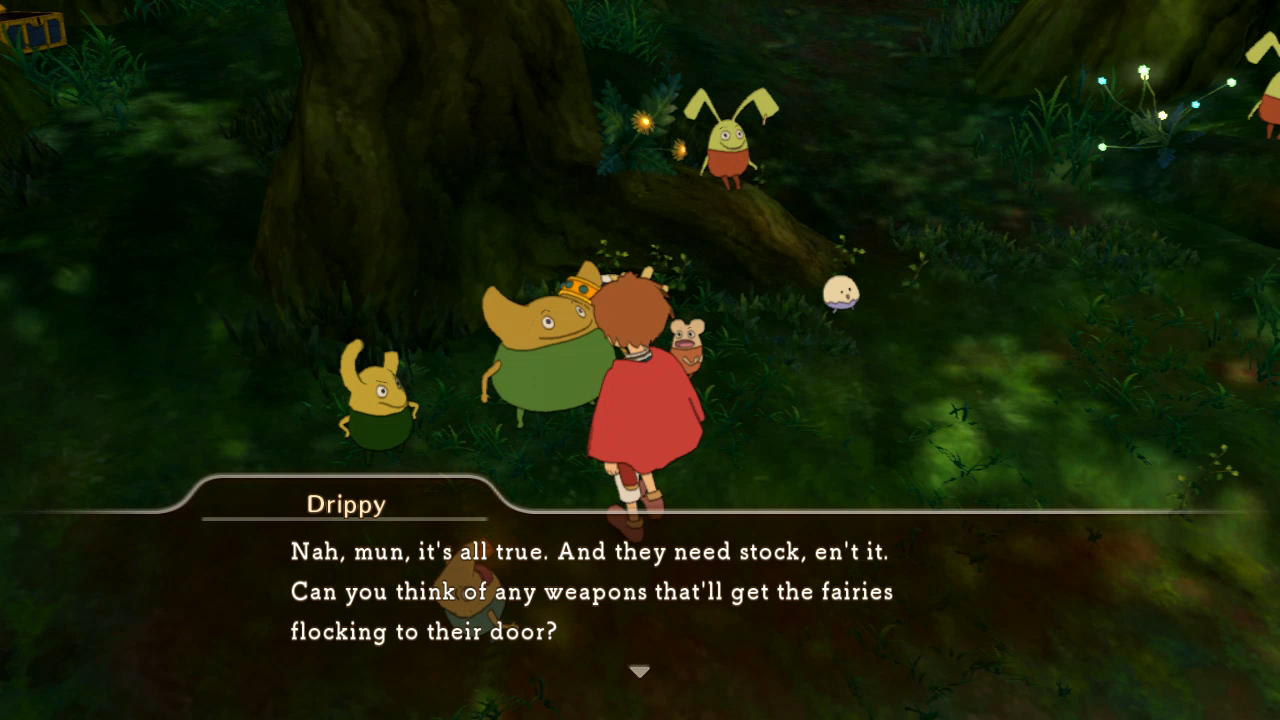 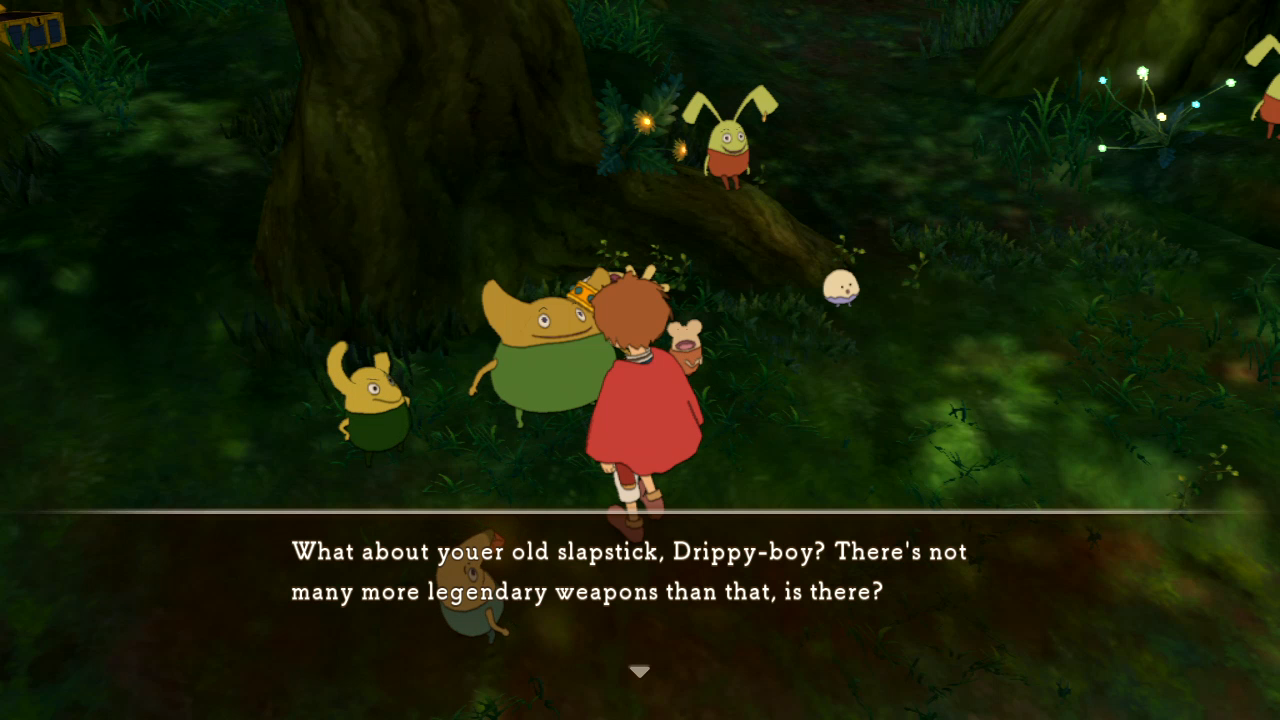 Note that we're only getting ideas, not the weapons themselves. Drippy ain't giving up that slapstick he never once used or referenced. 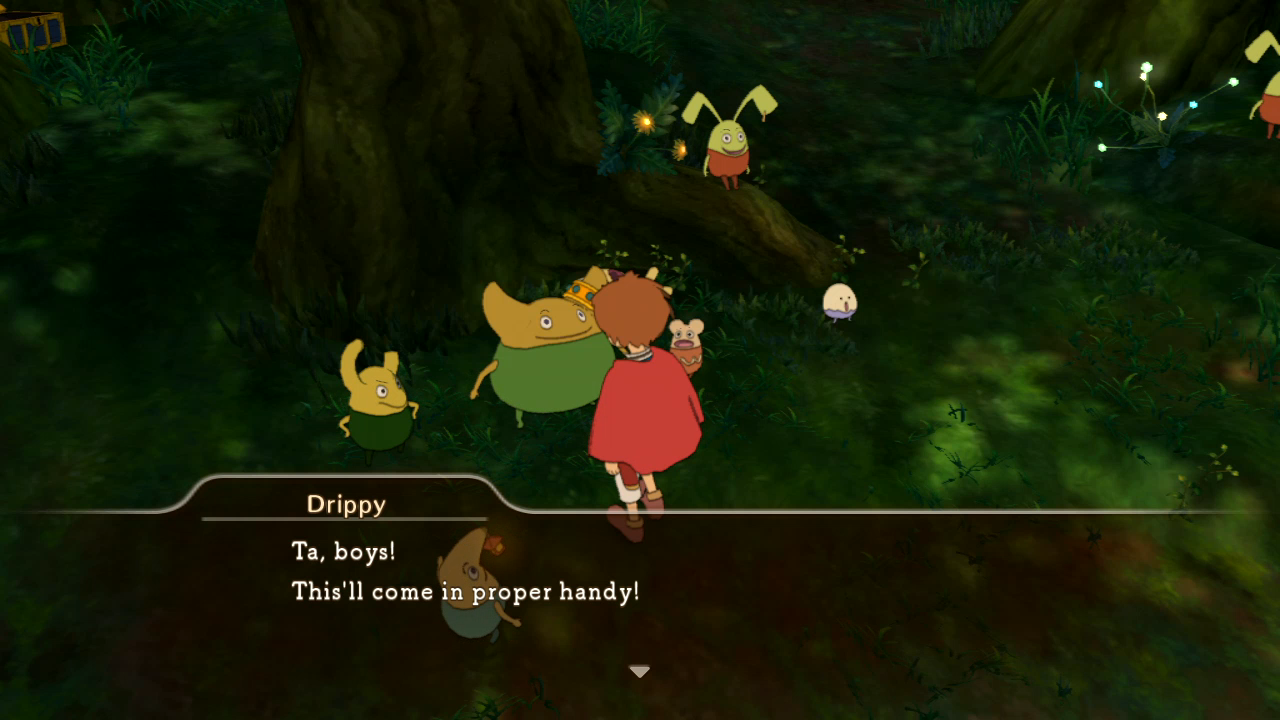  That sounds grosser than was probably intended. 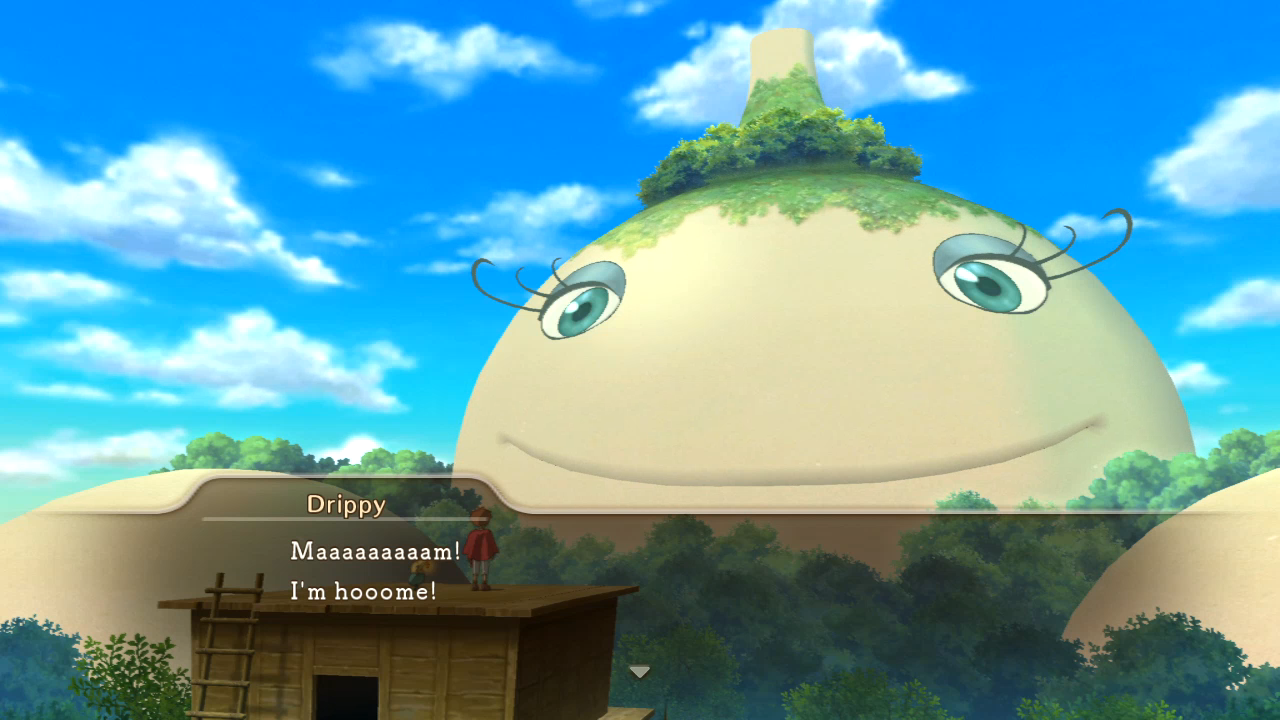    Funny how most of the fairies are actually pretty funny, just not the one we're stuck with this whole game.   The third idea requires us going back up Mam, which you can do by taking this sidepath east from her platform.  It takes us right into the teacher's lounge, which I'm just going to assume means she doesn't have a real digestive tract. Also, I'm guessing Mam ate a magimech at some point, or else I don't know how the memory stone got in here.  The room we want is at the far left end of the hall.      Is the right answer, Oliver. 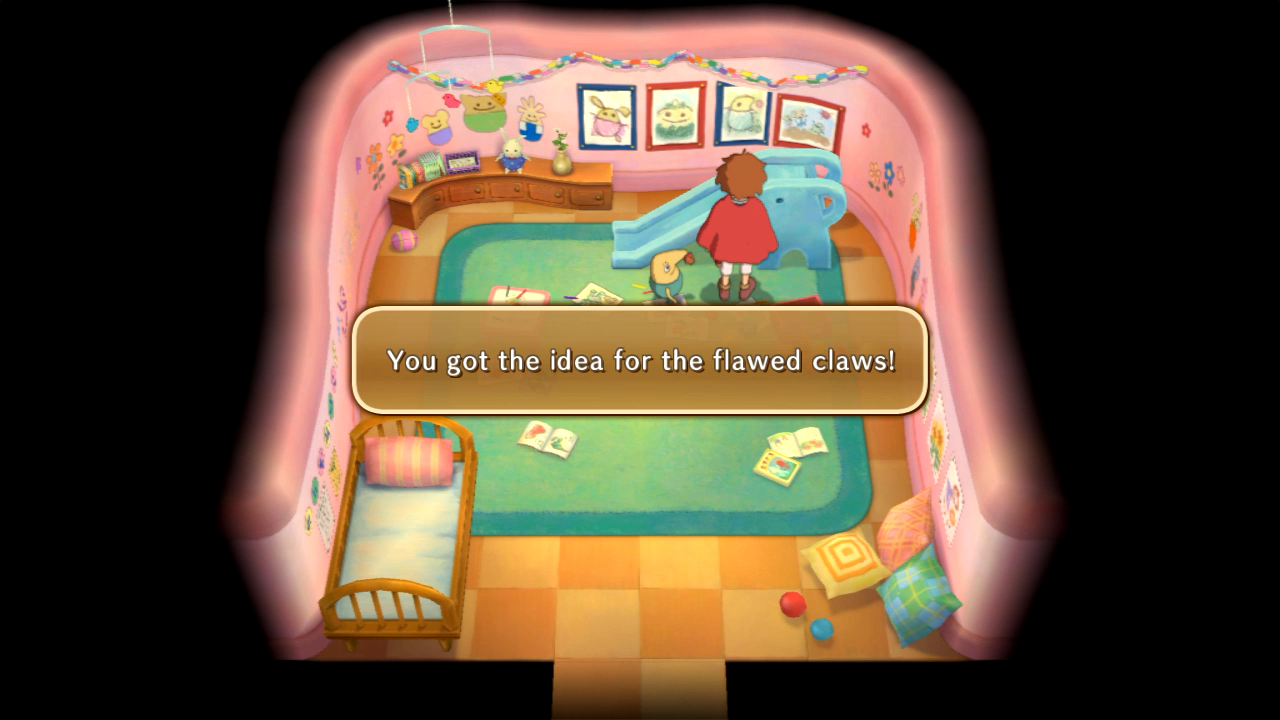 Recently Travis found a listing for gloves with spikes inside them, so real people have actually thought of this stupid-rear end idea.    "What child trauma?" 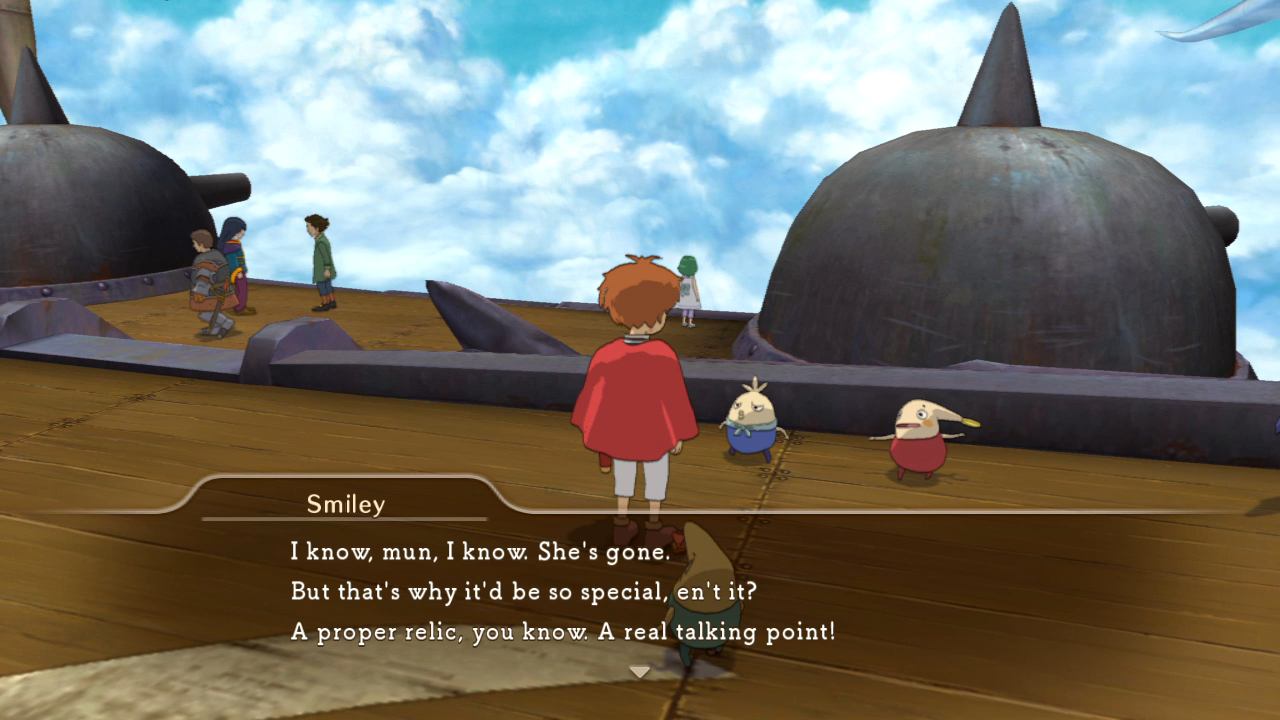 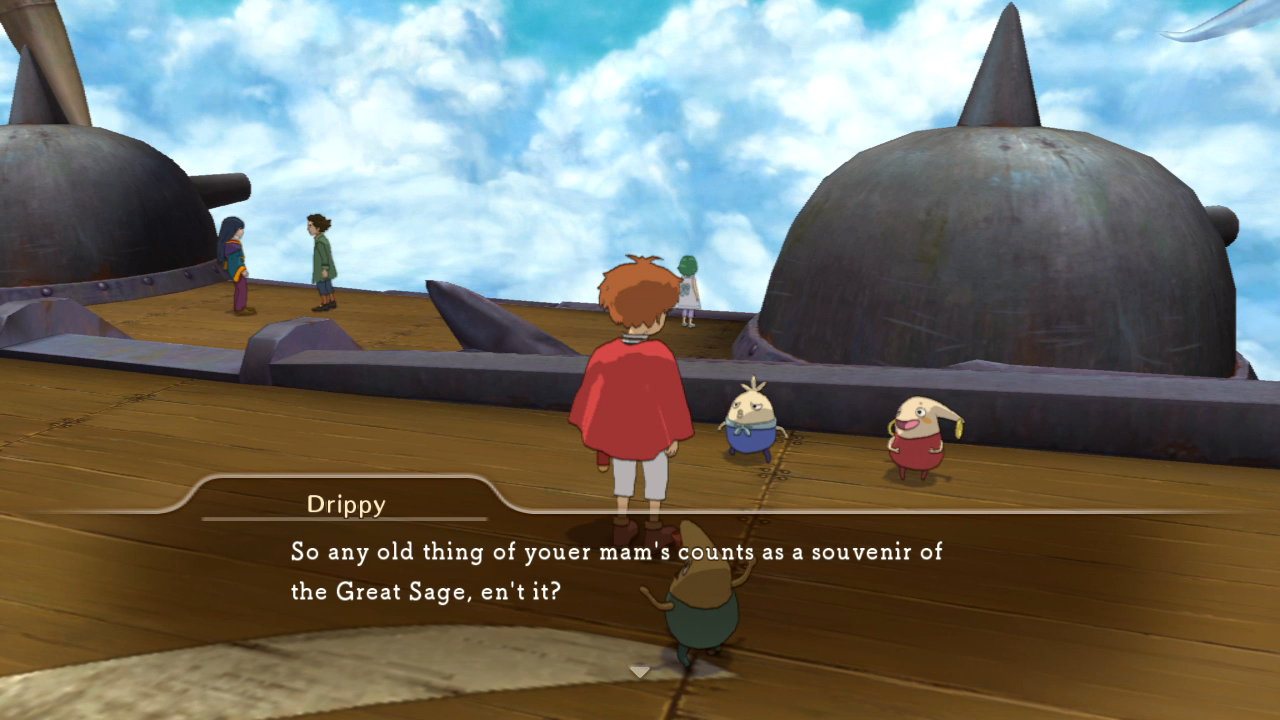 "I know I traveled with her, but that doesn't mean I respected her!" The item we want to find will be in your house's kitchen, on the counter. 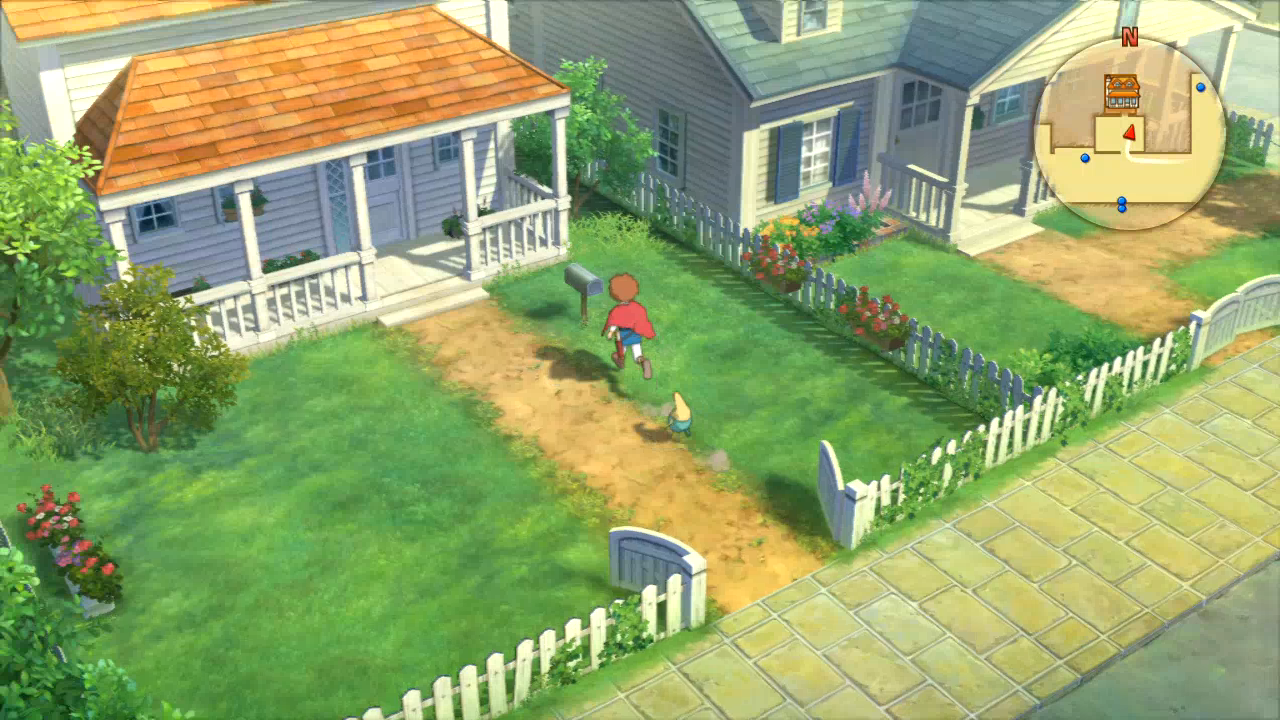  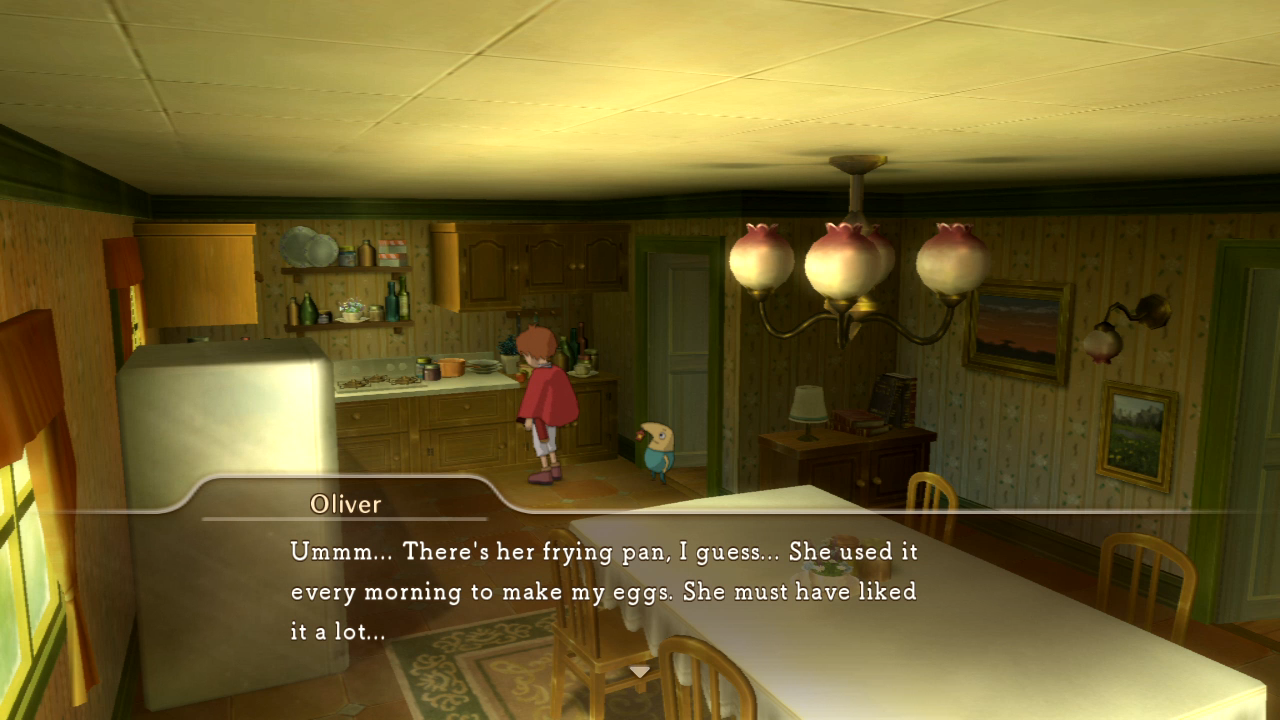 At 13-year-old-cum-7-year-old-logic, I guess. I use my infrared oven a lot; I don't hold sentiment for it.    Okay, apparently Mam does have a digestive tract. And the ability to cook.(?!)  I love how in entertainment, characters from different cultures can't infer things based on the name. "What can you tell me about this 'hot plate'?" "What is... 'football'?!" 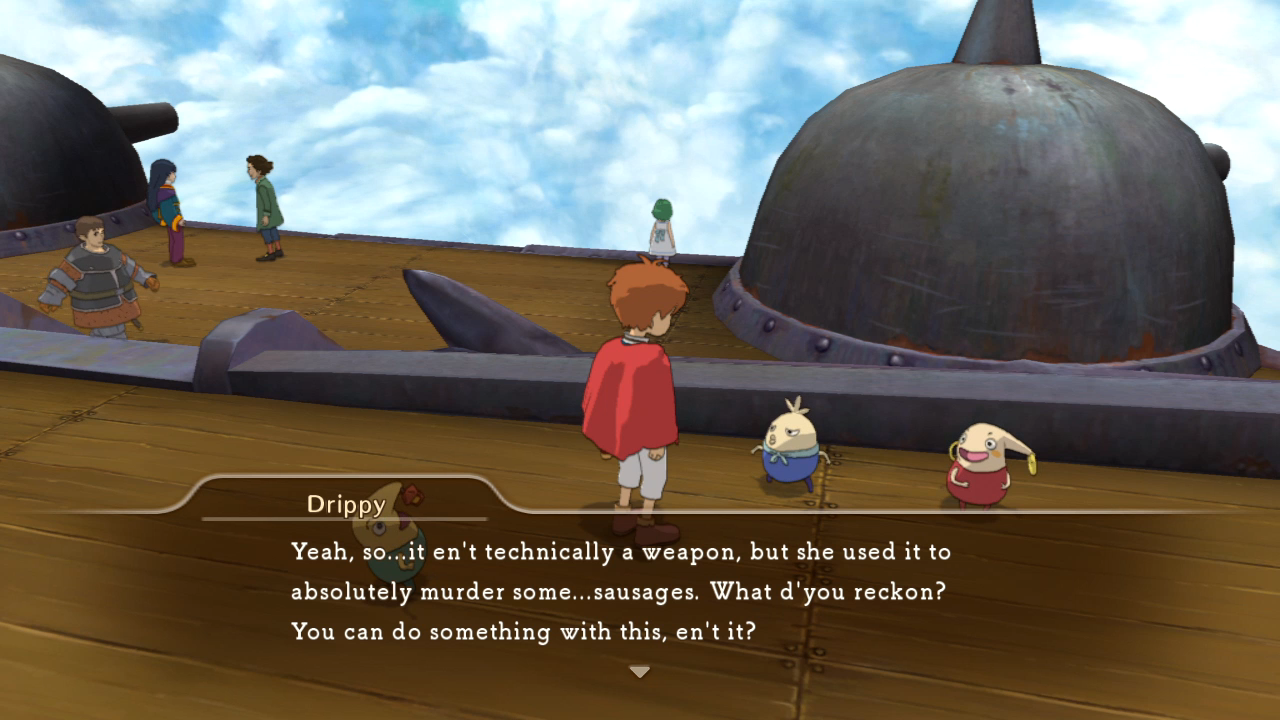 Drippy says two things in a row that are actually funny. We really are near the very end of the LP. 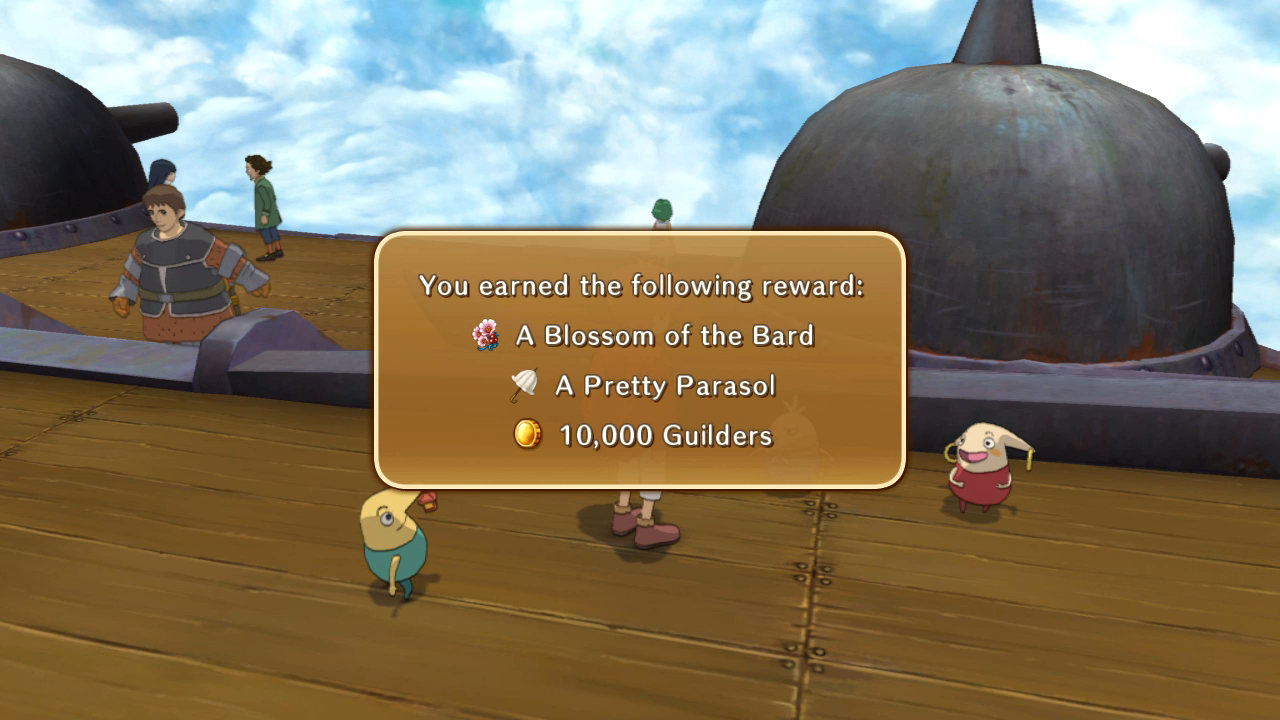 The Blossom of the Bard is used to alchemize Esther's best weapon. 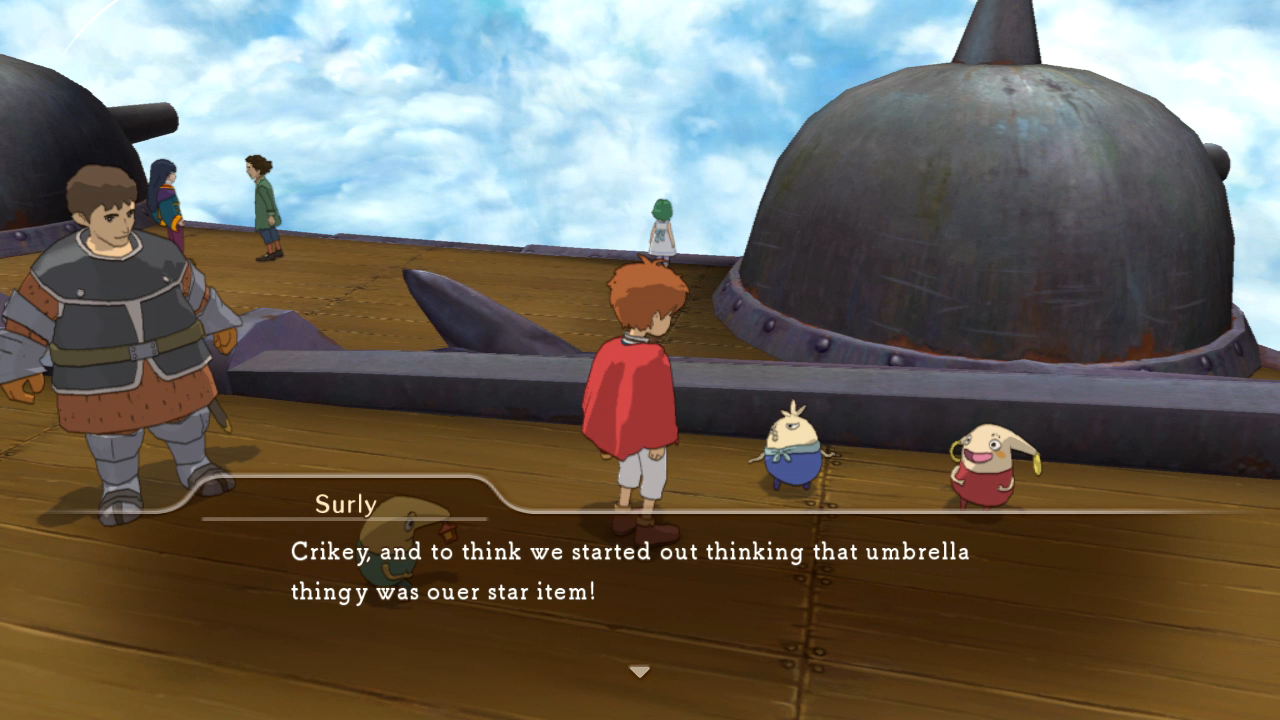 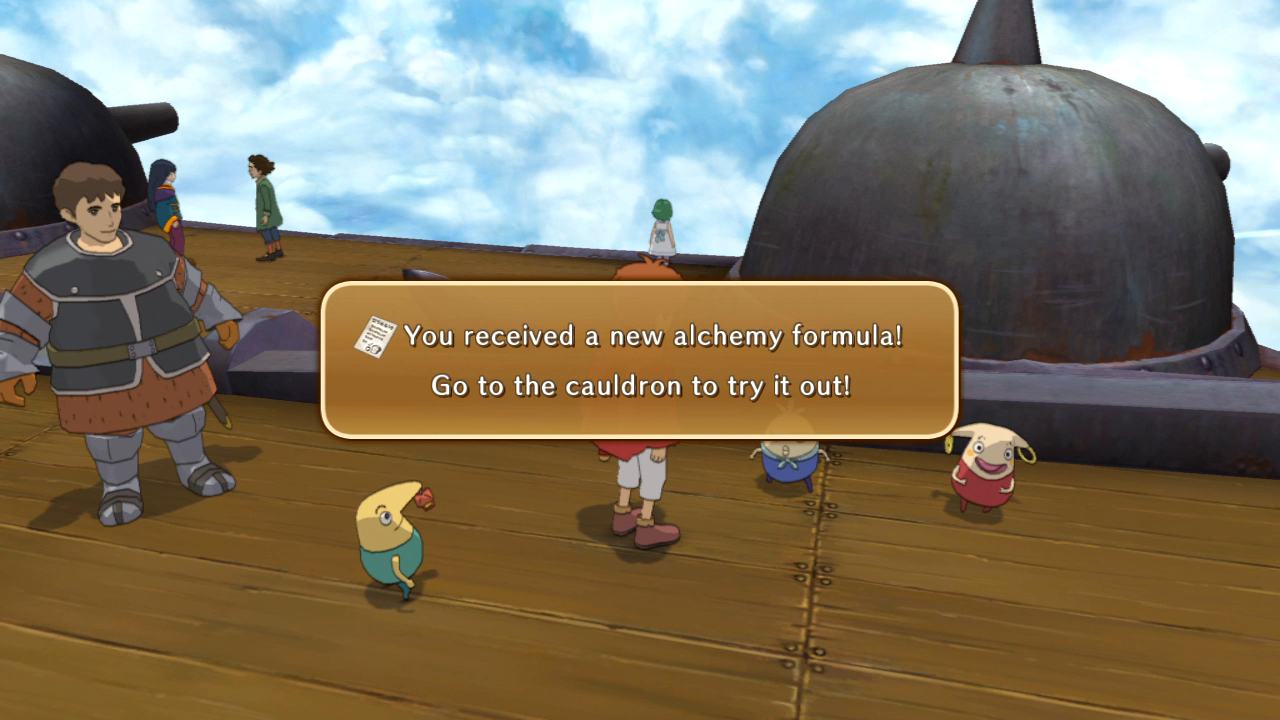  You'll notice that the special weapons we got these guys are all stupid expensive, but it's because they're actually pretty good weapons. Soppy Slapstick has some drat good magic attack. I love that it counts as a blade.  I love even more that Mom's pan counts as a hammer. And that it was supposed to be a souvenir of Alicia but is only advertised as being from some random Motorville mother.  Lullaby Lance is also pretty good, but the sleep effect wouldn't be of much use to me.  And the Flawed Claws have some massive attack, but none of my familiars can use it, and taking damage is just stupid on its own. ...Is it covered in "countless spikes" because there doesn't appear to be any?  While I was on my way to Hamelin for a Conductor fight, I ran into this woman again, and since we found Khulan, she has something for us.   I hope you punched your parents before you died. 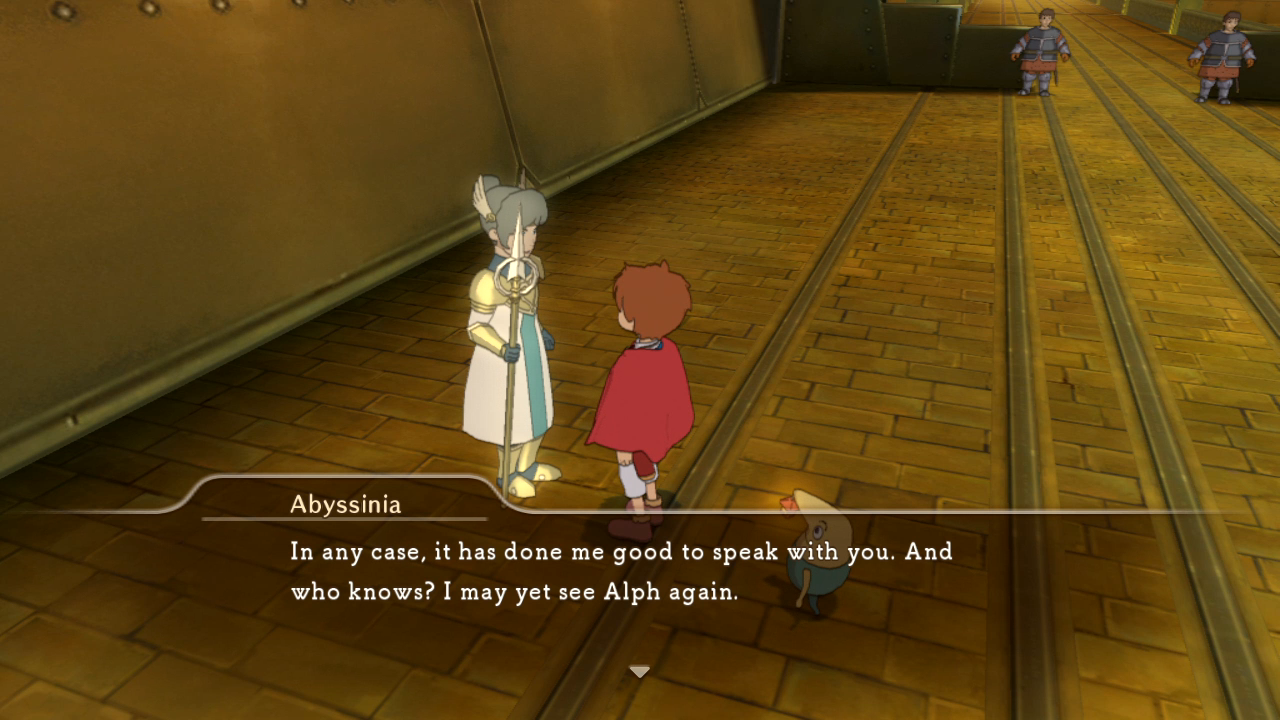  Yayyyy I don't need that.  Time to find the fairies scattered around the world and send them back to Golden Grove. The first is directly in front of Skull Mountain.    Every time you talk to a fairy, you automatically teleport back to the Golden Grove to get the location of the next one. 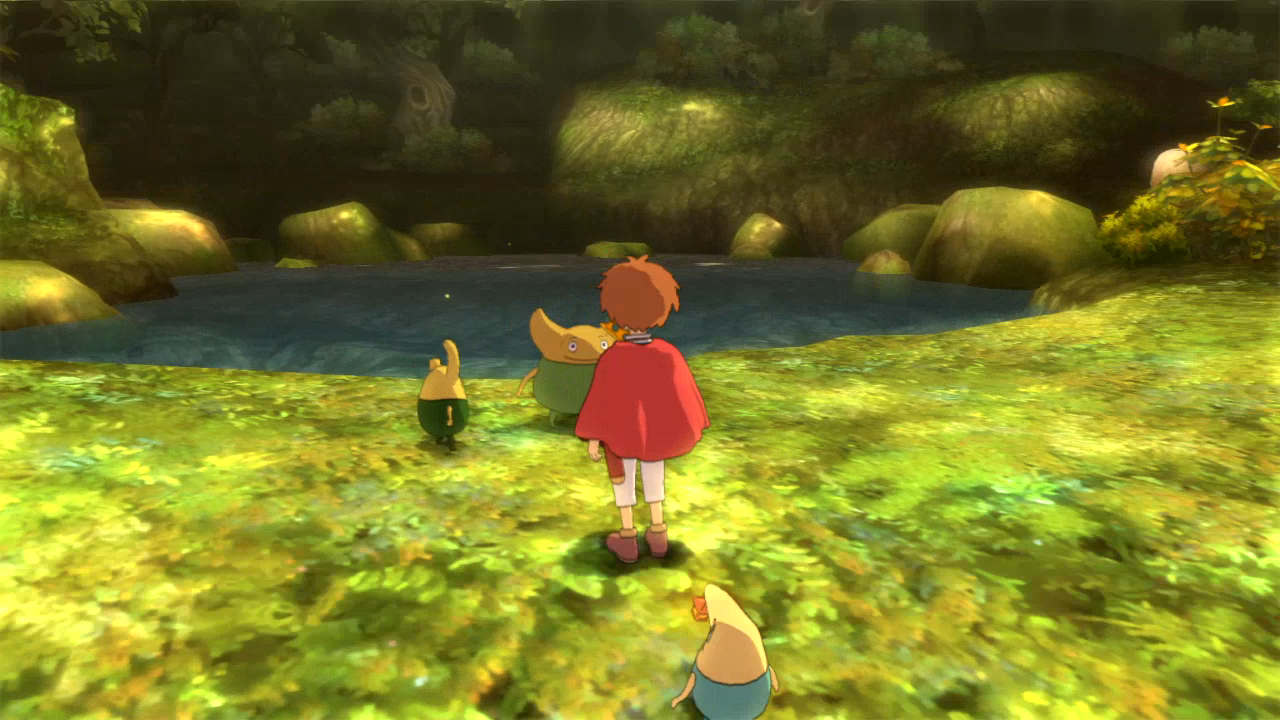 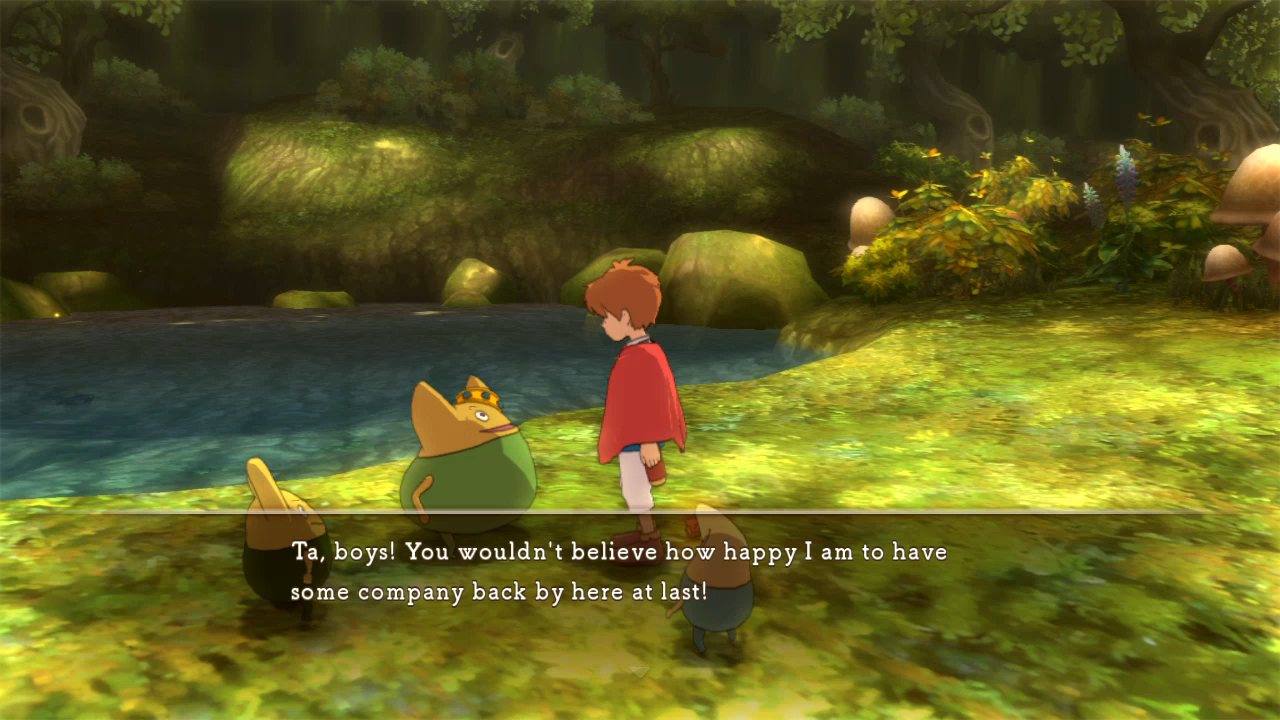  That's definitely the Vault of Tears again, but this fairy is pretty close to the entrance. I expected him to be in Prince Ali's cell.  That's him near the bottom; the other blip is the Aapep refight.  His face is hilarious.     How loving fast are these guys? You're nowhere near the forest!  Oh! This is the first (and last) time one of the other world's inhabitants finds their way into Oliver's world (discounting Alicia and the nightmares), though as we saw before from that old woman in the cave, it has apparently happened with random NPCs before.   Fittingly enough, the fairy is right behind our resident gearhead (read: shithead), Phillip. 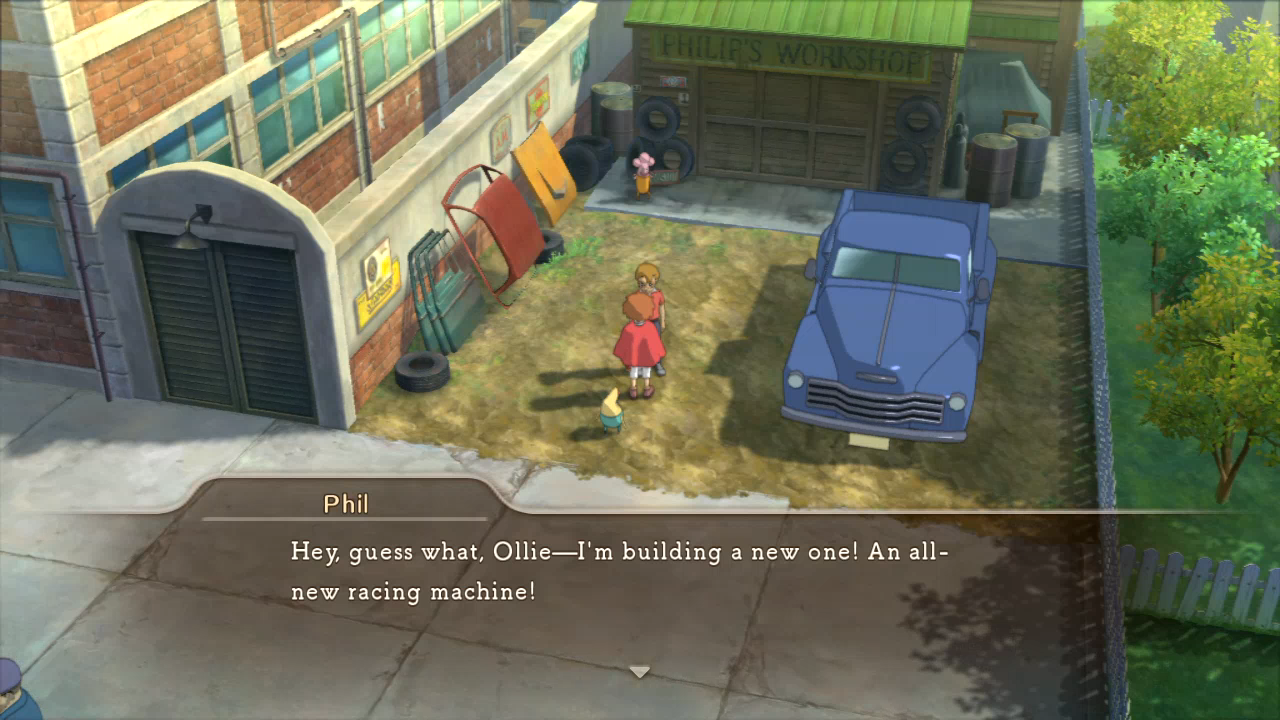 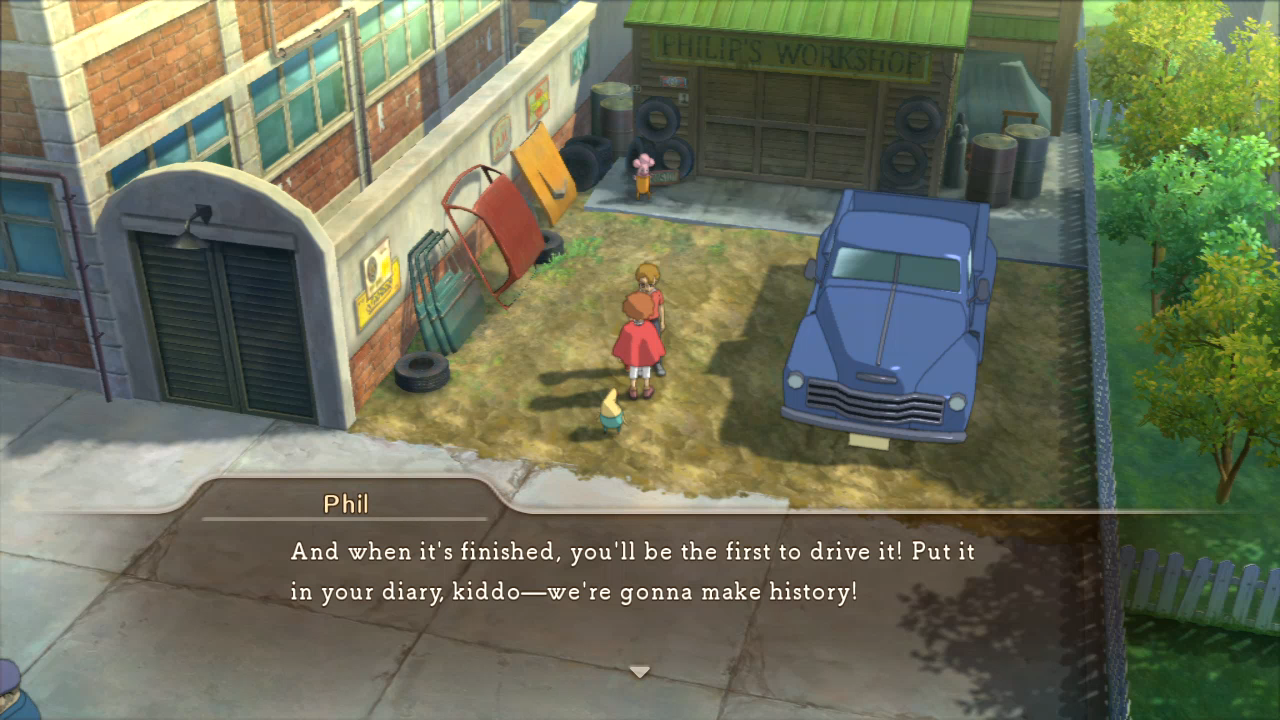 But will we really...? Stay tuned for after the Conductor fights. 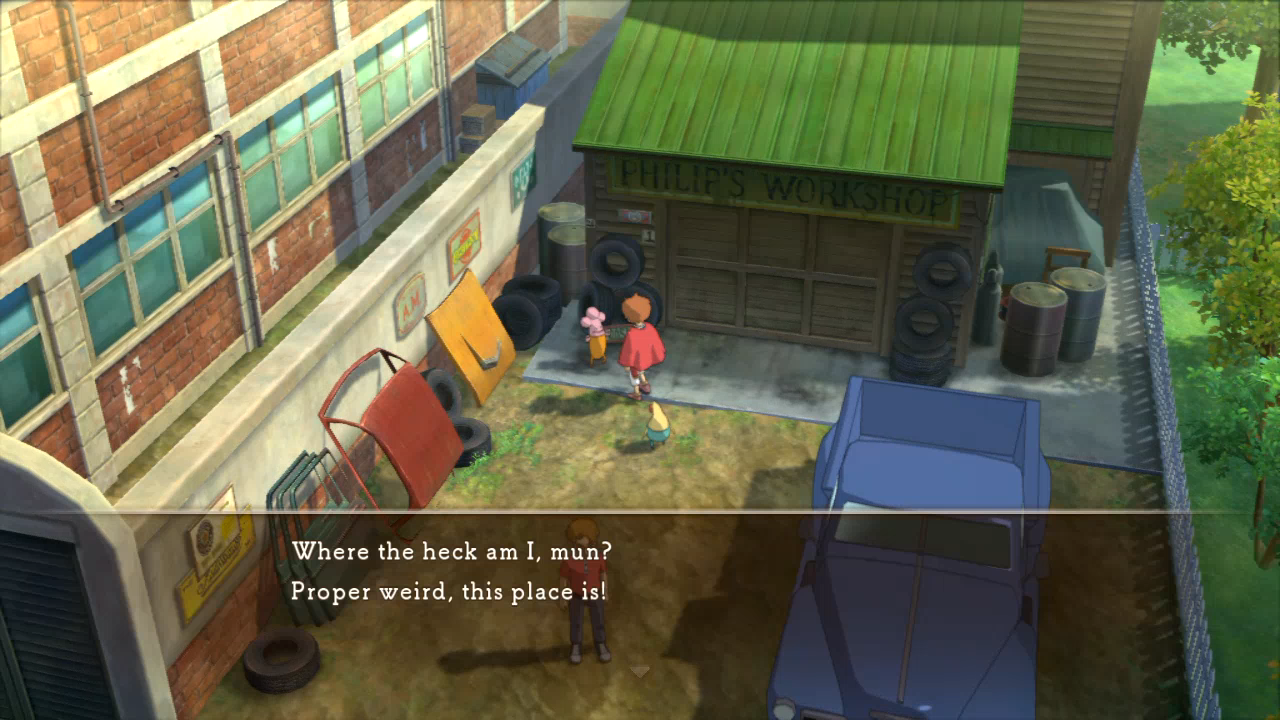 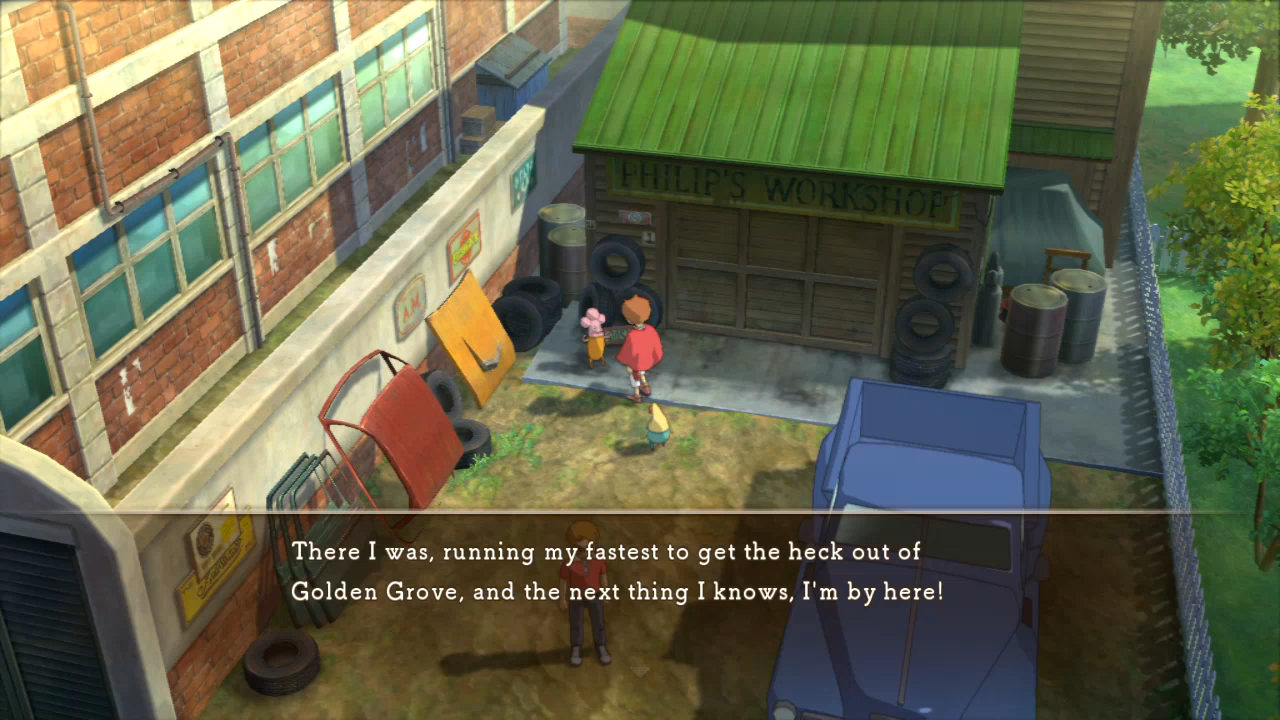  Leave it to the game automation!    I KNEW there was a reason for that cave! I KNEW IT!  As a reminder, it's the cave east of Hamelin.  There's something weirdly adorable about this image, but I don't know what it is. 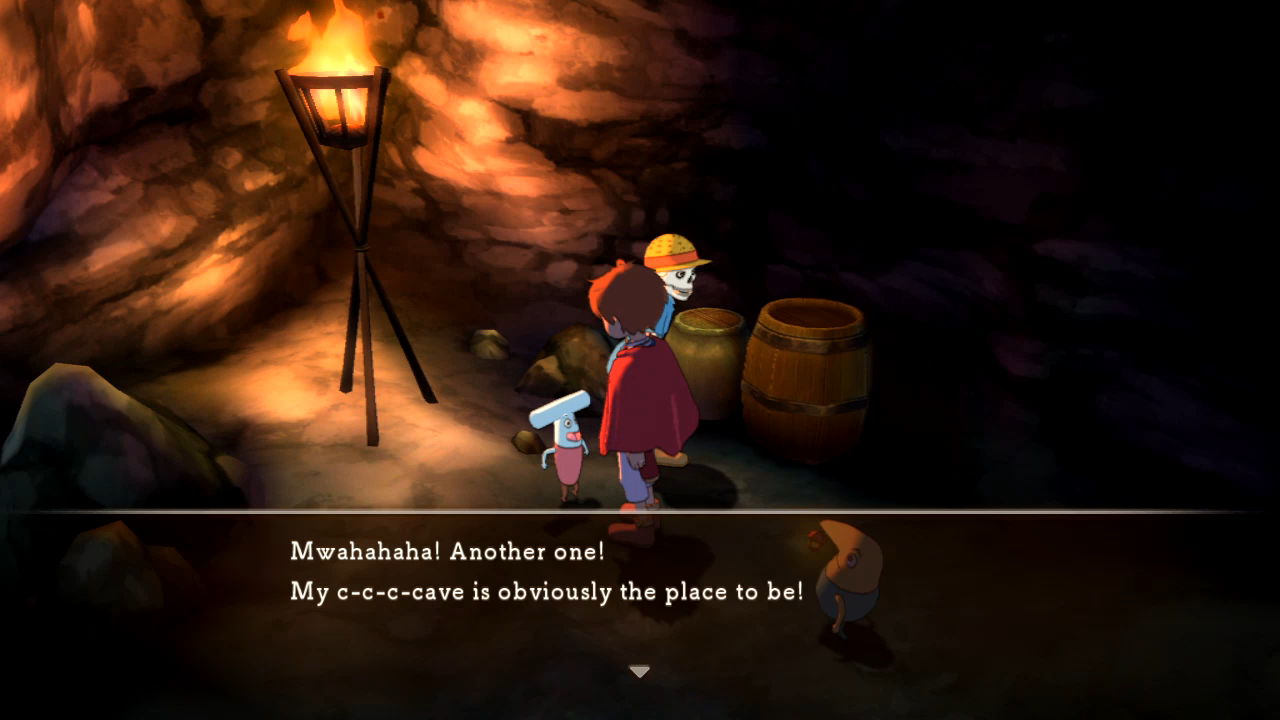  They're at least as funny as Smiley and Surly. 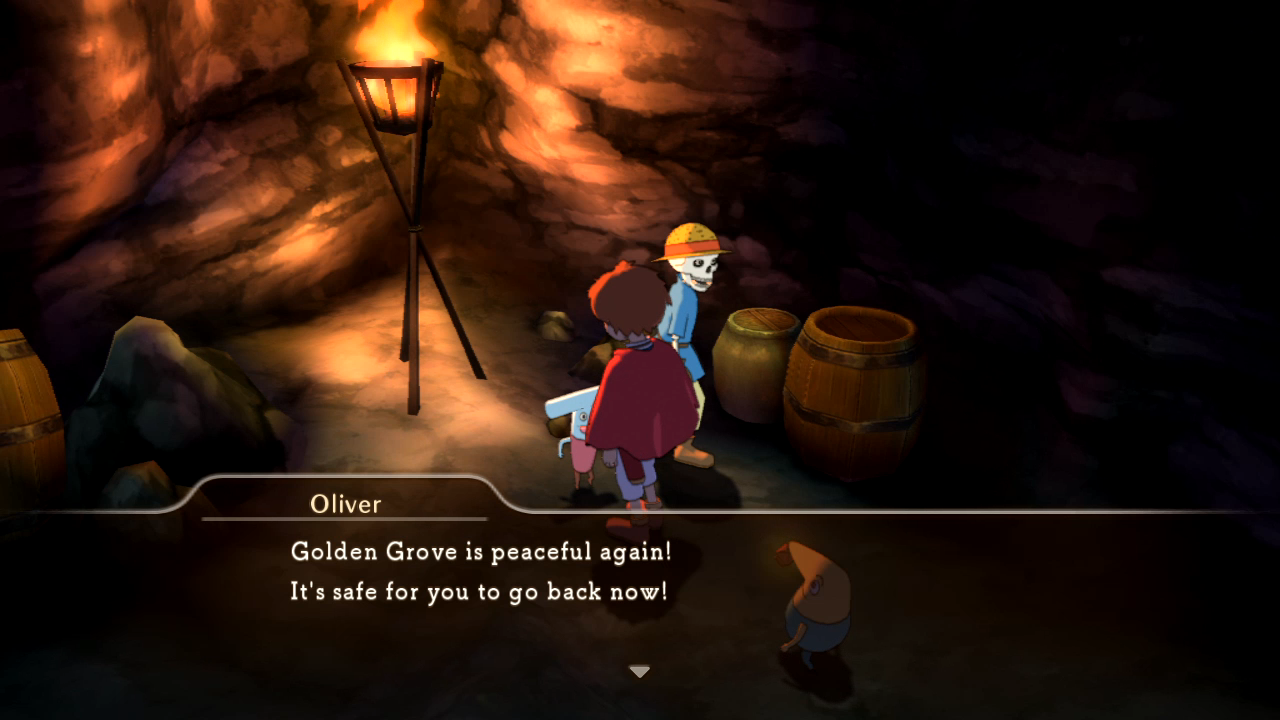 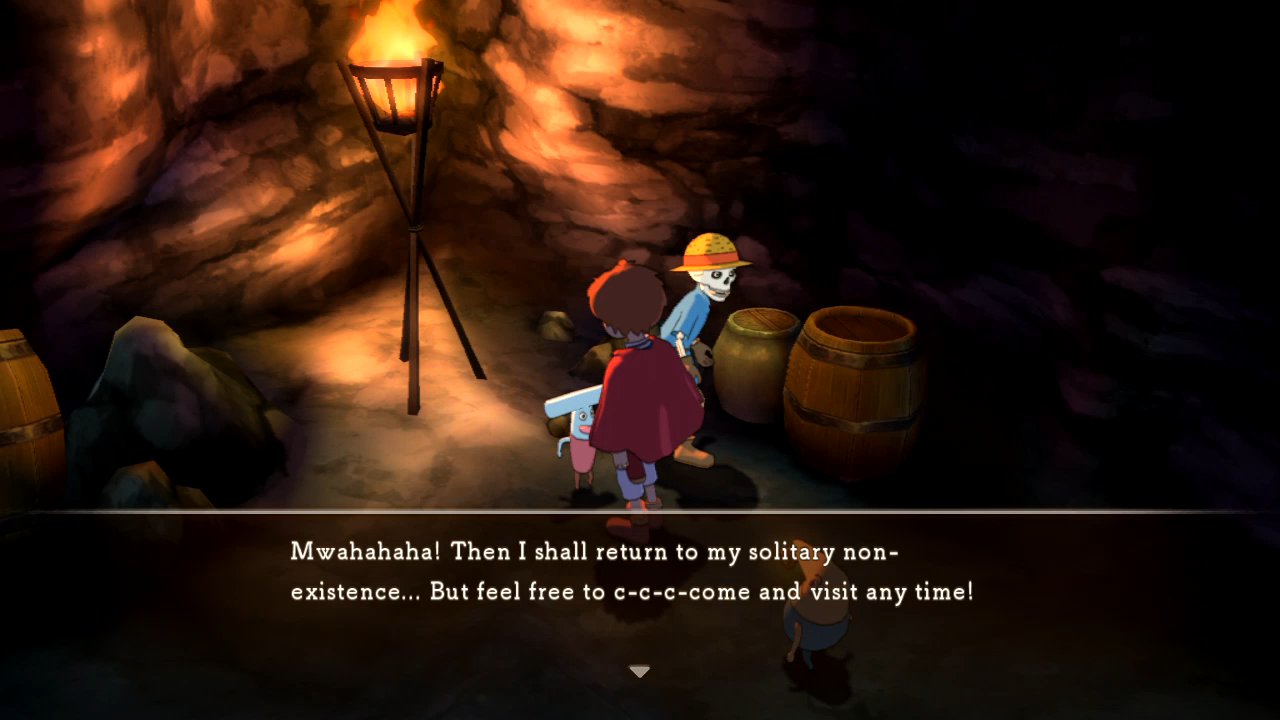  This last guy was hidden remarkably well. The forest he's in is southeast of Yule and hidden amongst the trees. Yes, they literally hid a forest in a forest.   The forest can only be activated in this specific spot. Note the compass.  Yet another fairy mackin' on a tribal girl. But first, robbing her.     Now to save this poor woman.  Or not.     "I not born. Just show up one day."   Shut up.   While doing a bit of grinding for the Alchemist's quest, I level up Swaine enough to get his last attack and the Gunslinger trophy. 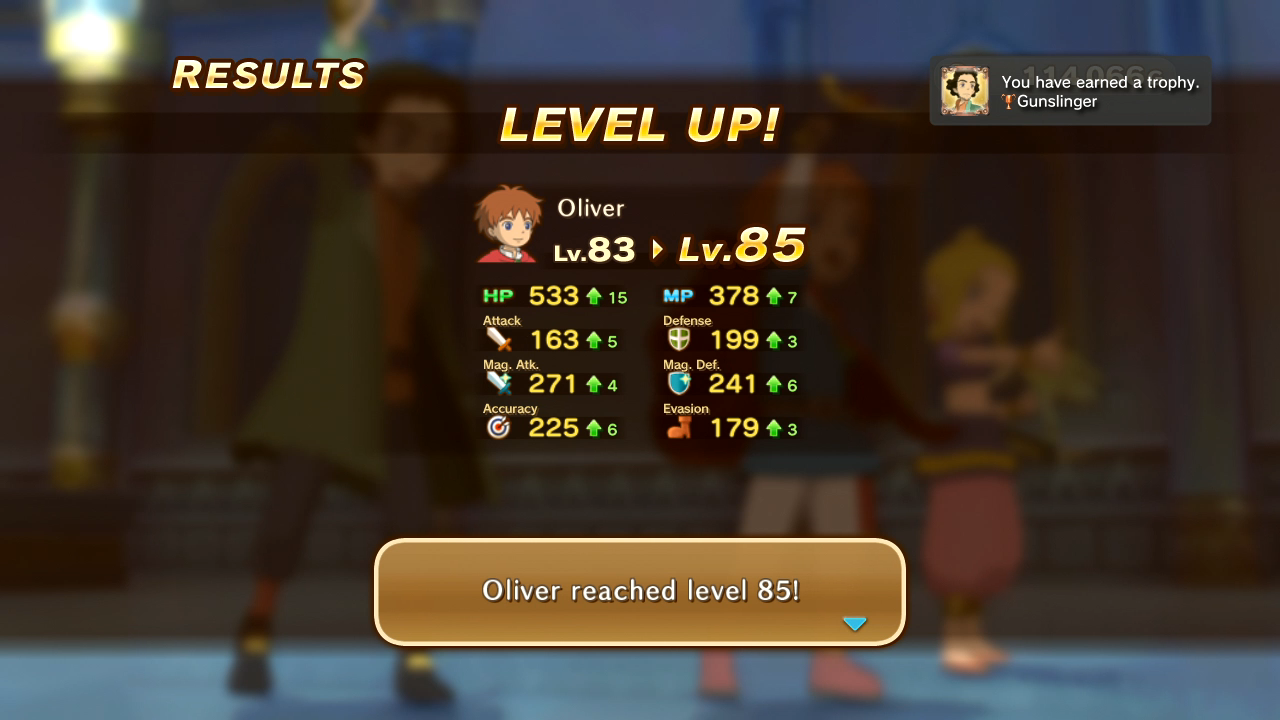 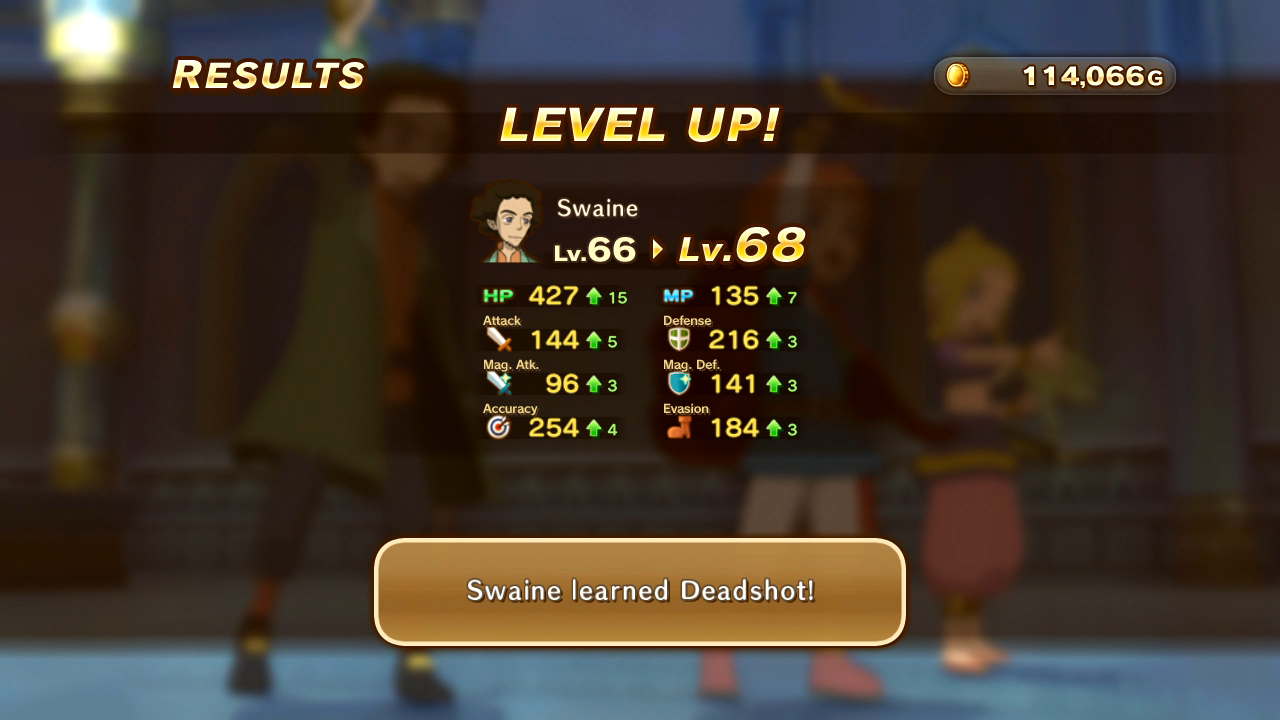 Swaine also gets enough successful steals to get the Man of Steal trophy. 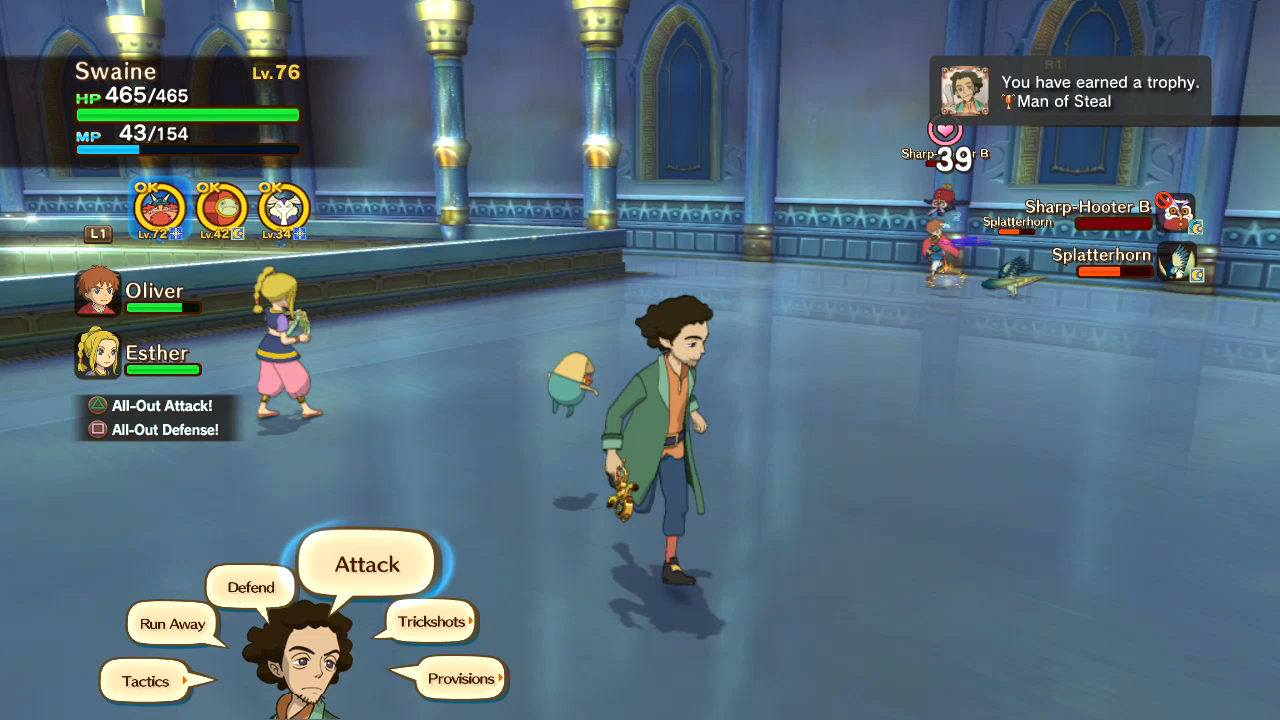 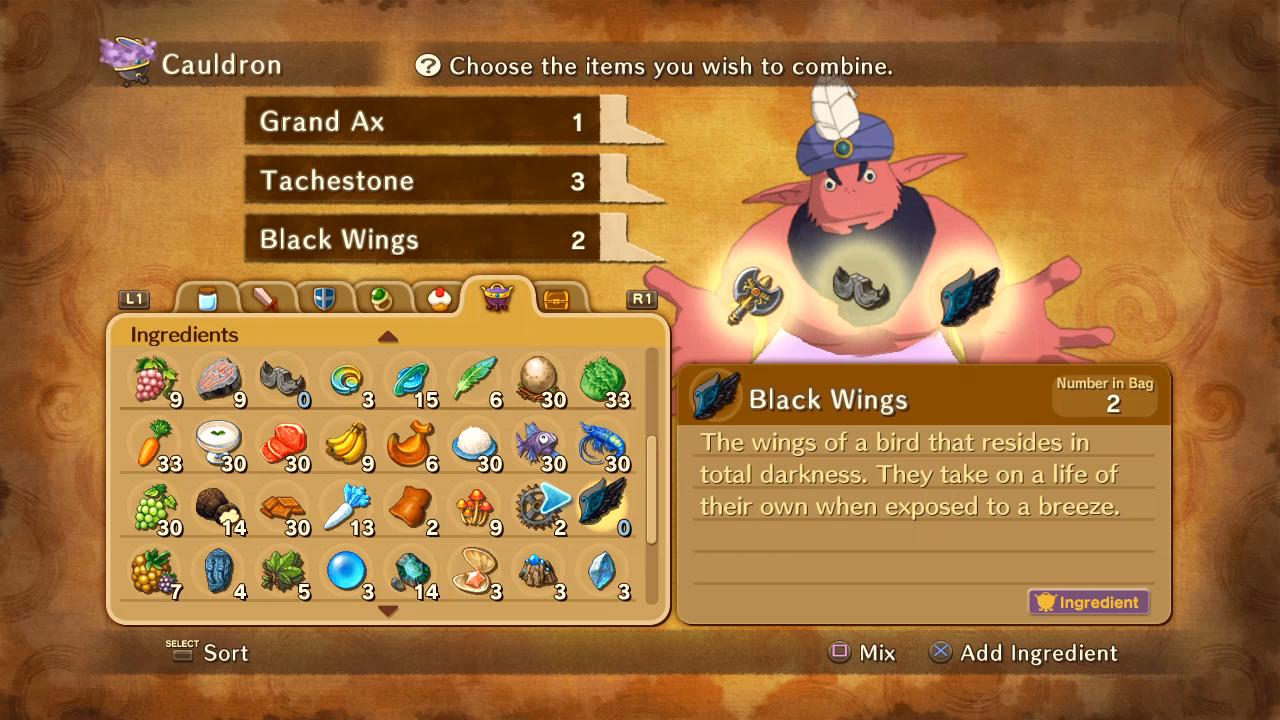 And I got enough items to make the Demon Ax.   Well I am a murderous sociopath. 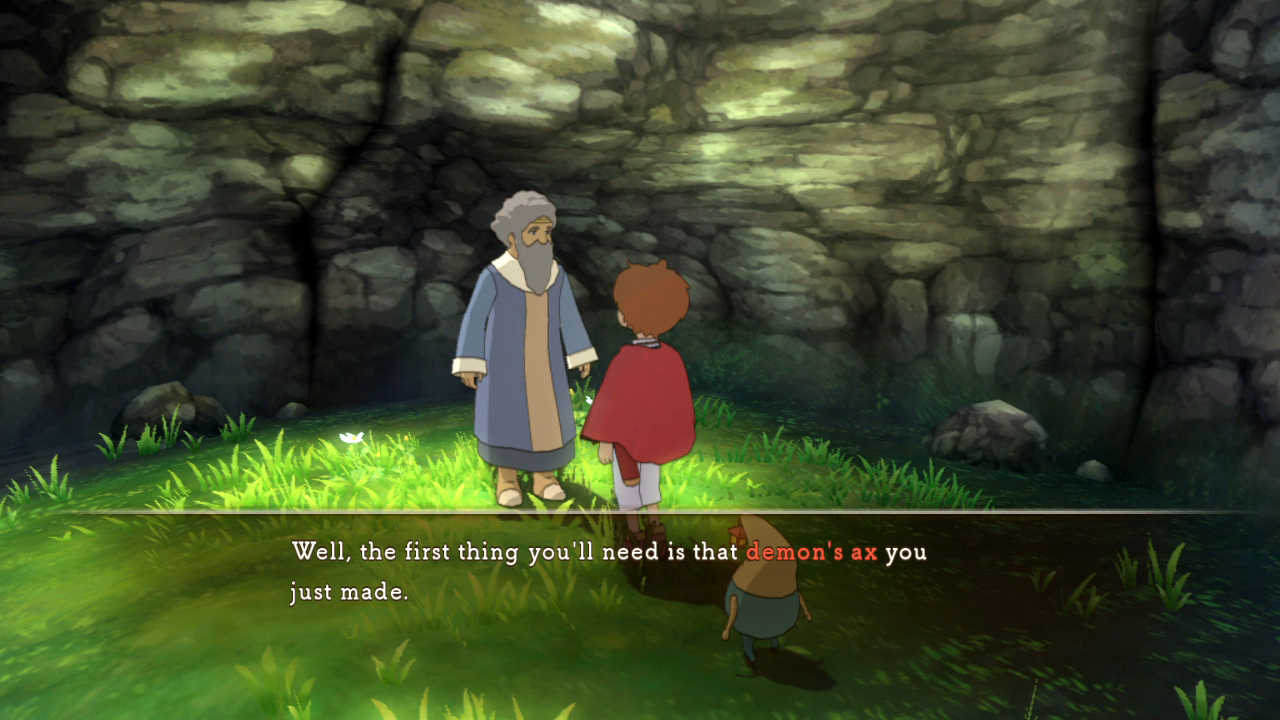 Yep, don't sell it or you'll have to re-alchemize the Demon's Ax all over again.  And here's where I give up. 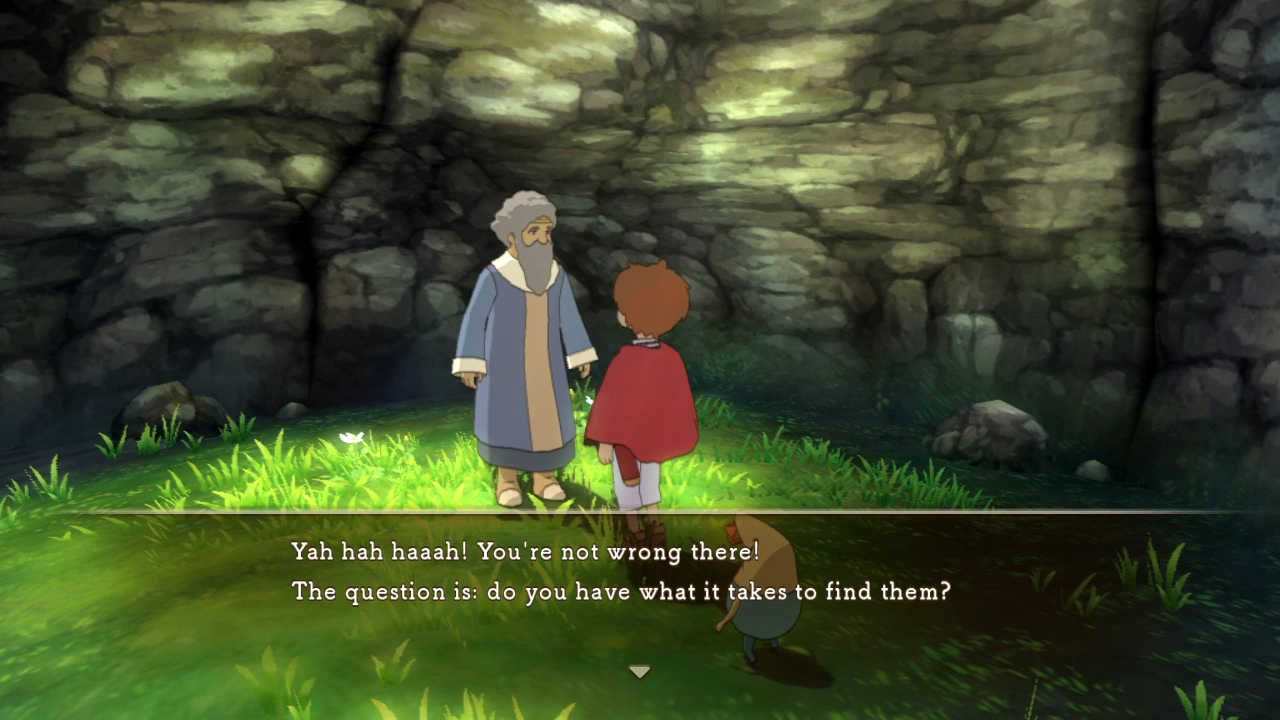 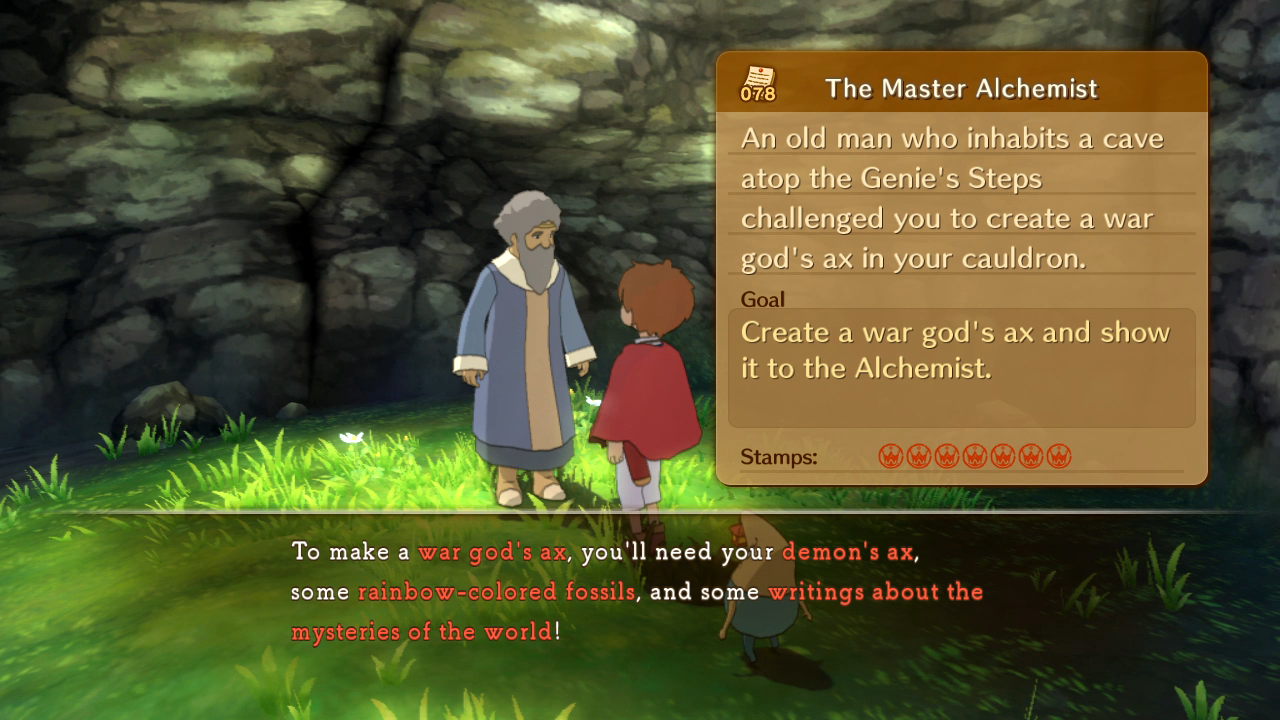 Those two items are rare drops. You get them in a couple quests as rewards, but not enough to make the War God's Ax. You need to go out grinding certain golden enemies for them (for example the Golden Tokotocolds in the Ivory Tower), which means you need a stupid-rare drop from a stupid-rare enemy. Suffice to say,  And yes, I did try. No, it was not worth completing. So, sadly, that's 7 merit stamps I will not be getting in this LP. Do not cry for me, Argentina; this quest doesn't deserve it. Next time: Solosseum Part 1!
|
|
#
?
Mar 8, 2015 01:15
|
|
|
Screenshot Missions 6: Solosseum Ranks E-C Time to take on the "tournament arc"! Want to see these battles in video form? Here's the whole footage for E-C! B-S will also have its footage uploaded in video form. But before we begin, I finally leveled up my Tokotoko to metamorphose it. 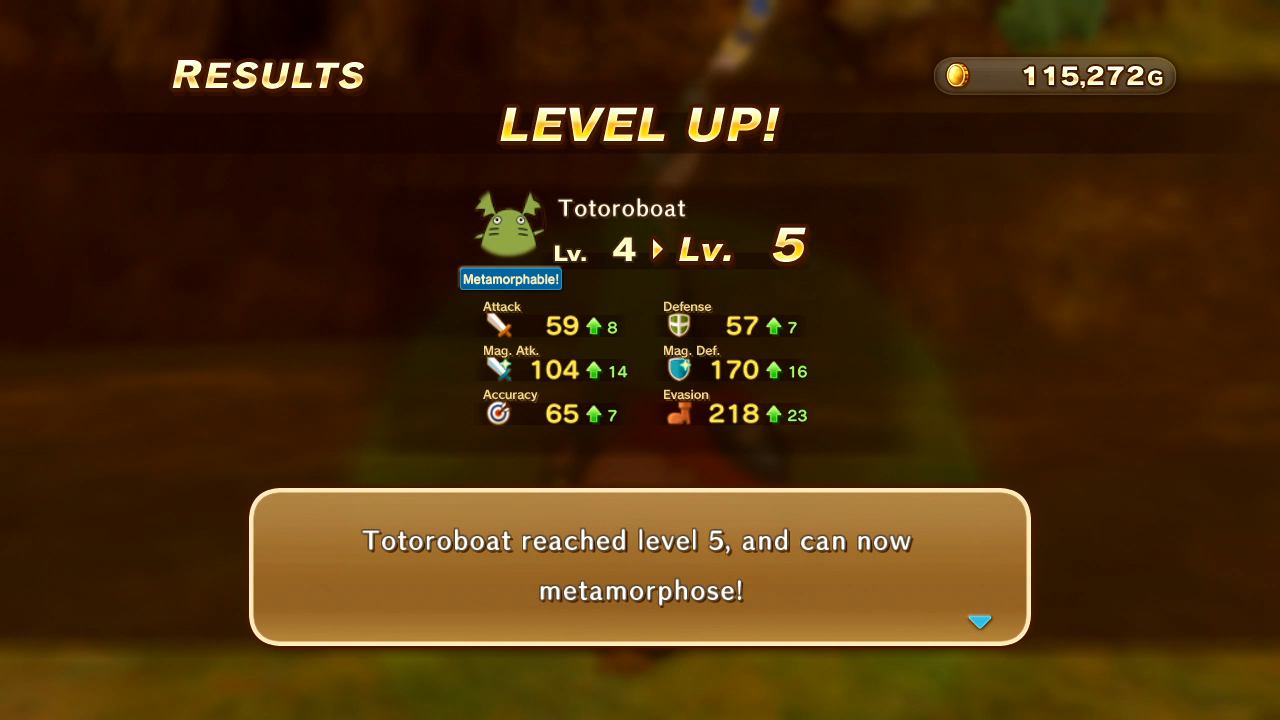  It was weird. I also drop by the casino which, as mentioned in the first post-game screenshot update, has unlocked something new for us.   That's one pun in this game I actually like.   The RIP room is just a theatre, called the Mem-O-Vision, for viewing the game's cutscenes.   Ever wonder what the top tier of casino rewards was? They're now unlocked, and they're tickets to allow you to rewatch a certain segment of the game's cutscenes.   I do like that Oliver just plops down on the couch.   D-Lux scenes are the Ghibli- animated cutscenes.  Story scenes are the CG cutscenes. One very cool thing about the Mem-O-Vision is that they included some extras, like cutscenes that were in the DS version but were left out of the PS3 version. For example, if you watched the first DS stream, you might have seen a Ghibli-cutscene were Drippy and Oliver first step into the Other World, but it was not in the PS3 game. They went ahead and localized it, and then stuck it in here if you buy the Bronze Ticket from the casino cashier.   Everything up through gold is the first arc of the game with Shadar. Platinum is everything afterward with Cassiopeia. 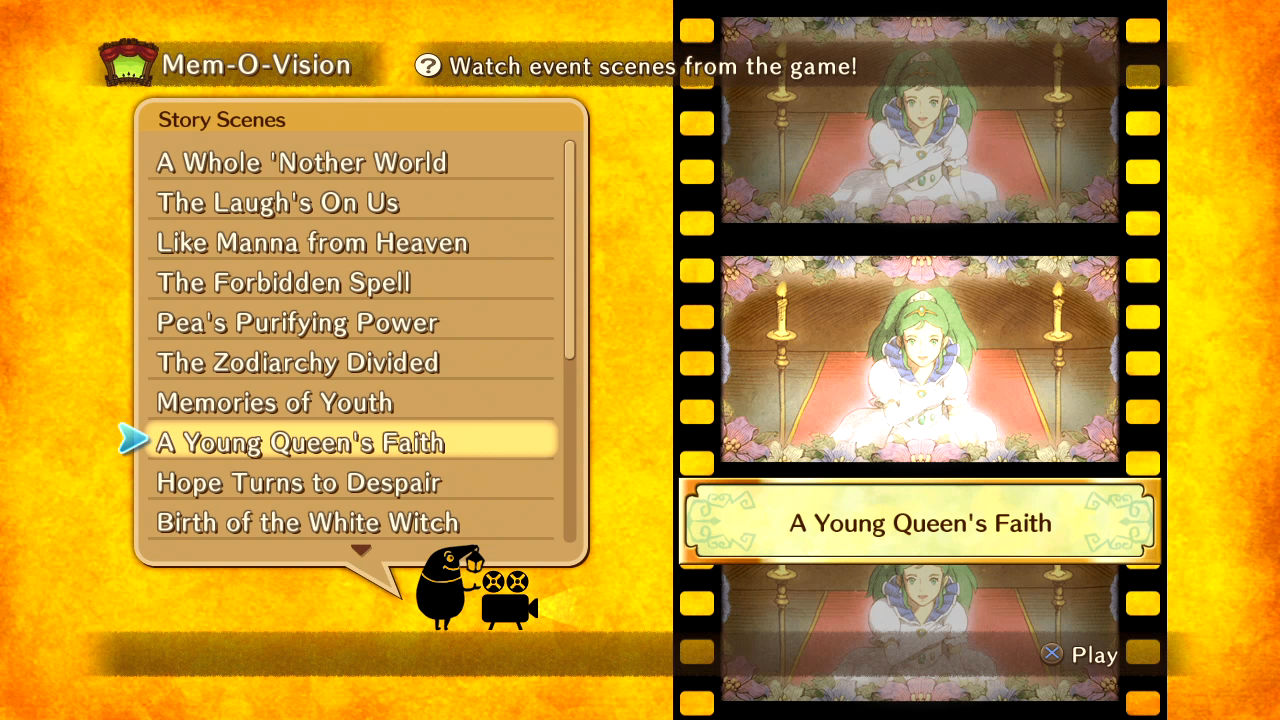 Notice the scene that says "The Laugh's On Us". That's another extra they included in the Mem-O-Vision: the original Japanese version of Smily 'n' Surly's standup routine. It's weird. It has the same setup but involves a long-winded bit of Surly being a water skimmer, the subtitles were translated awkwardly, and they go by too fast to read. The English version isn't perfect, but it's probably funnier for our language's audience. 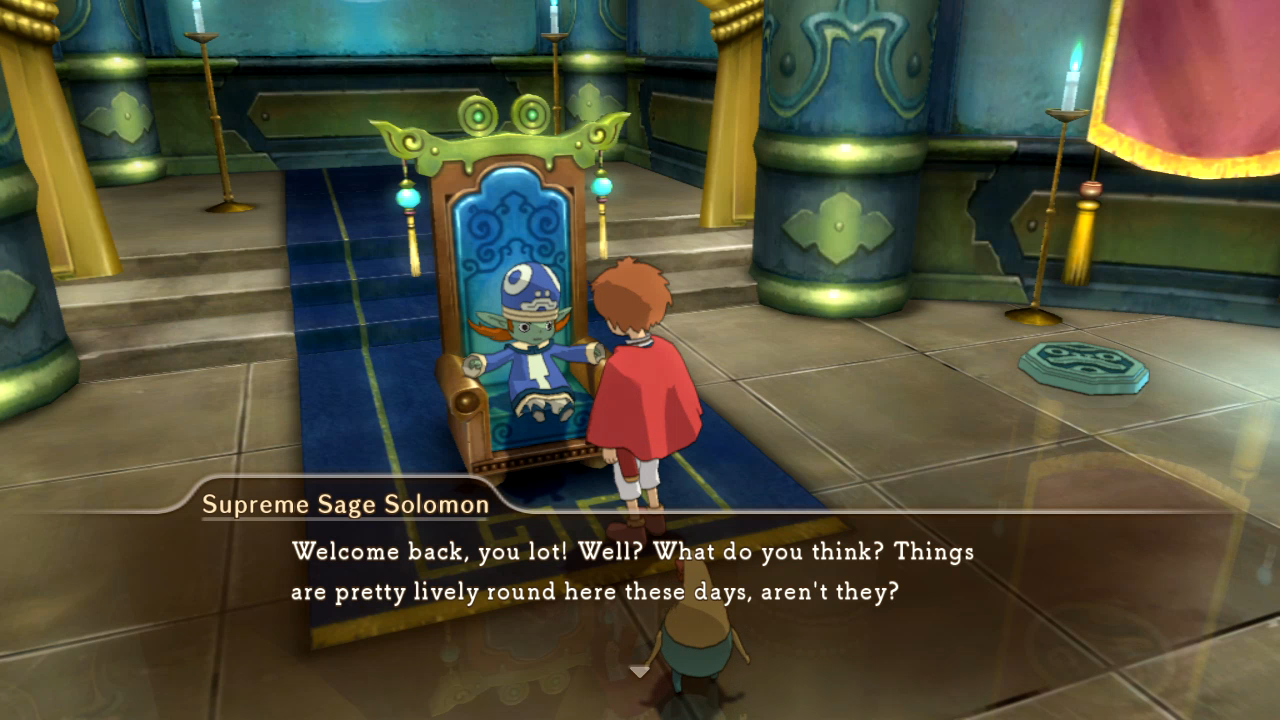 Time to get the show on the road.   Solomon mercifully stays out of the way for the grand majority of this. 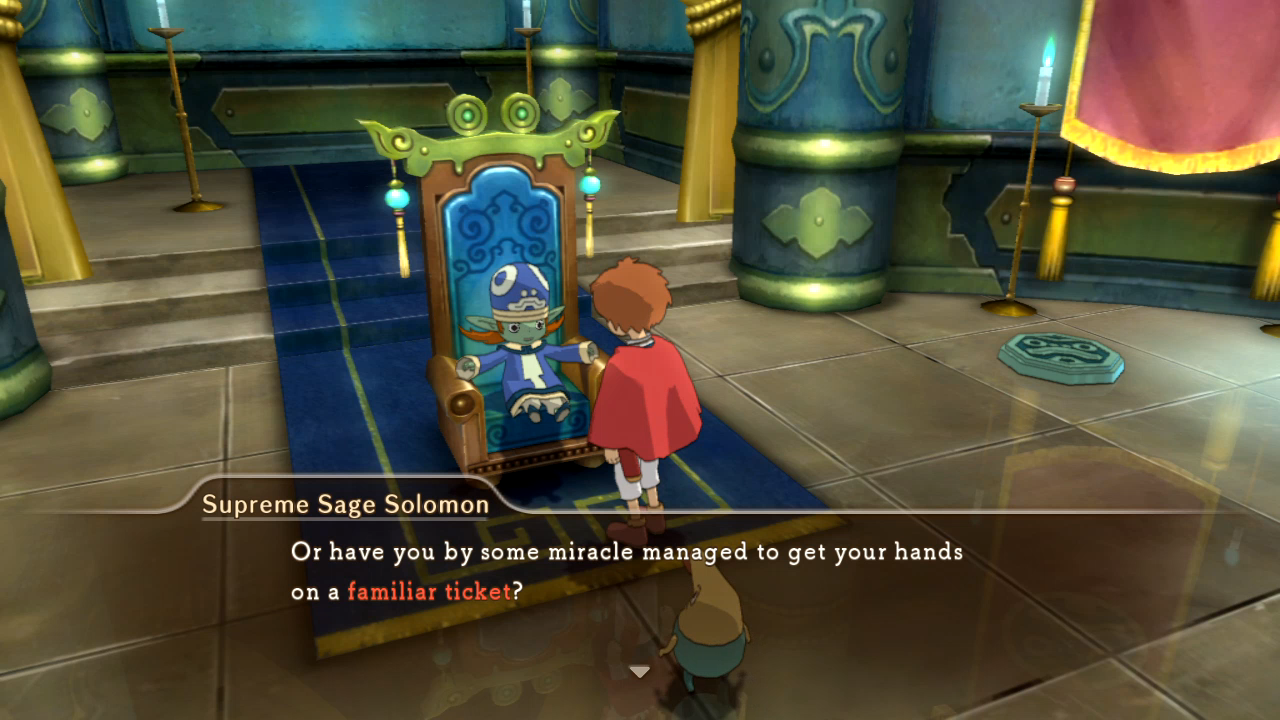 Time to finally exchange the familiar tickets I gathered in the last several months.  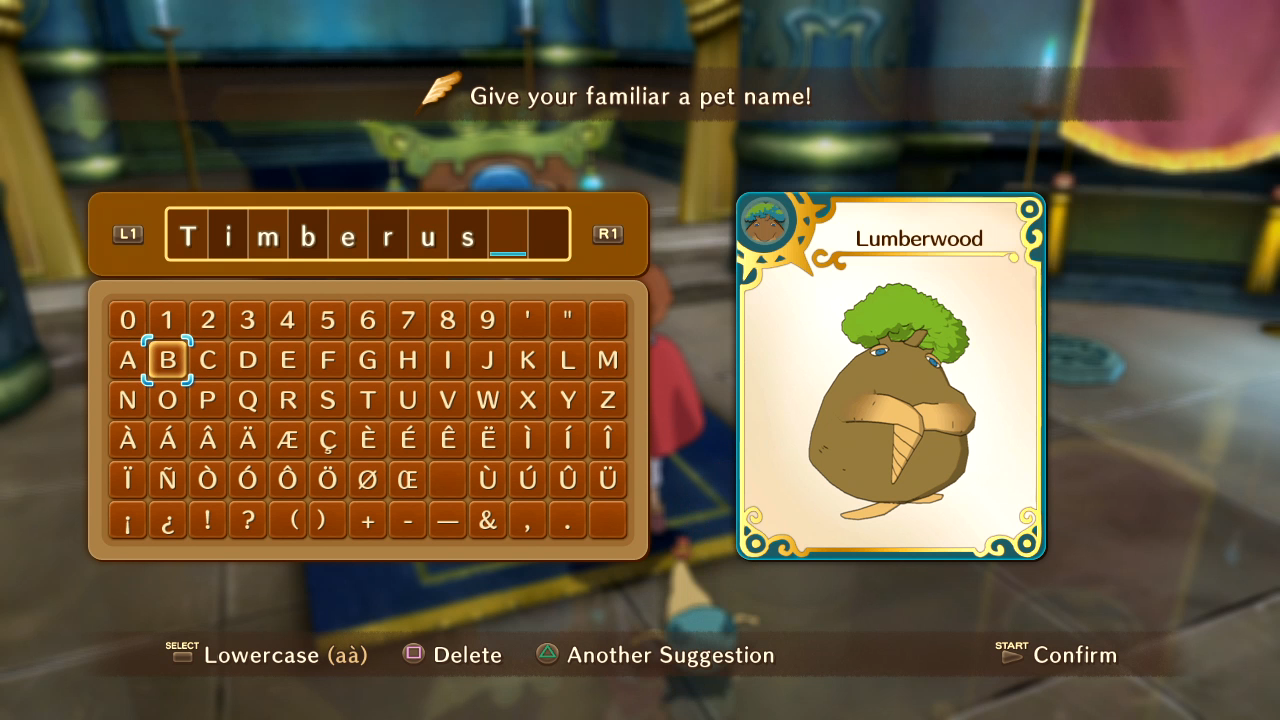 The game's suggestion was fine enough for Timberus. 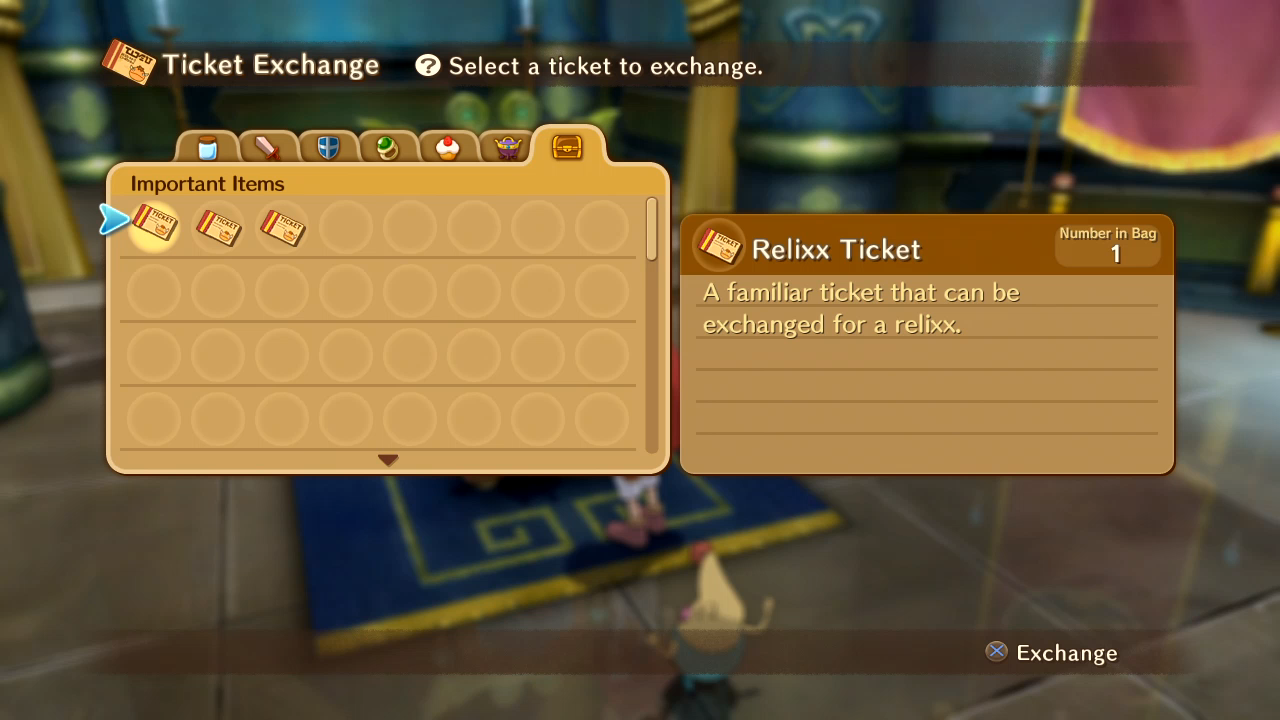 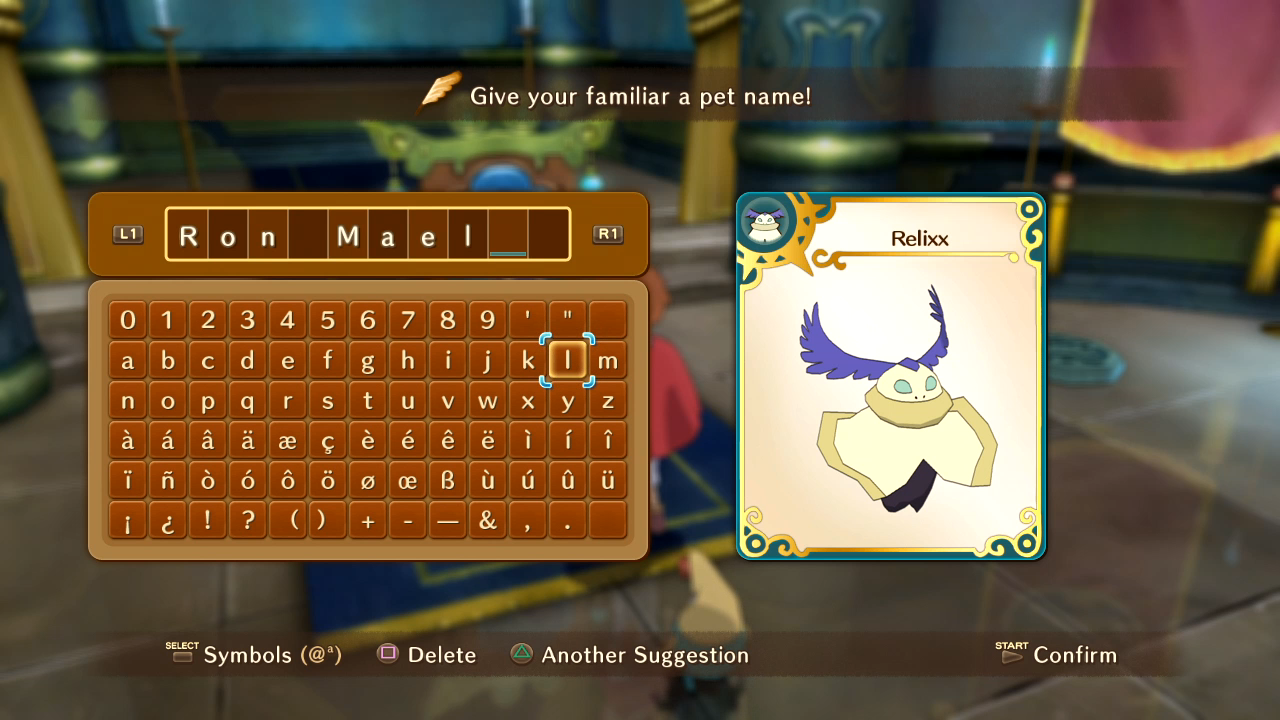 Anyone else excited for the Sparks + Franz Ferdinand album?  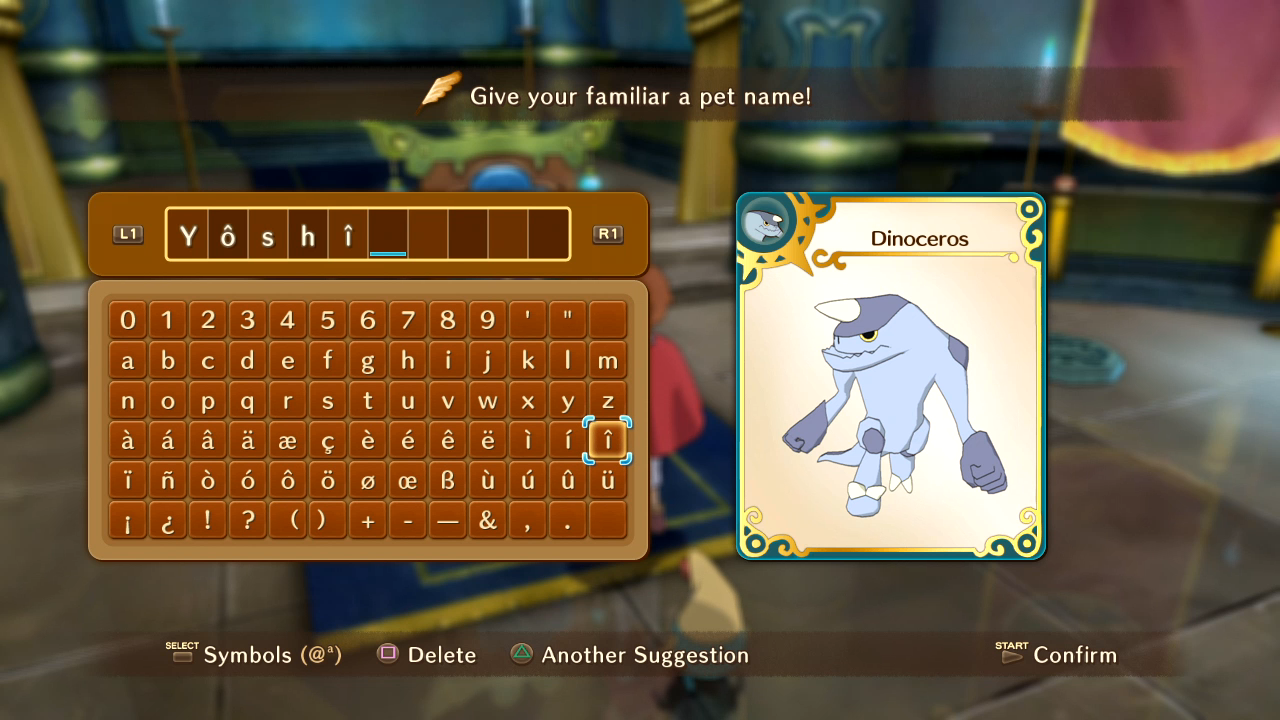 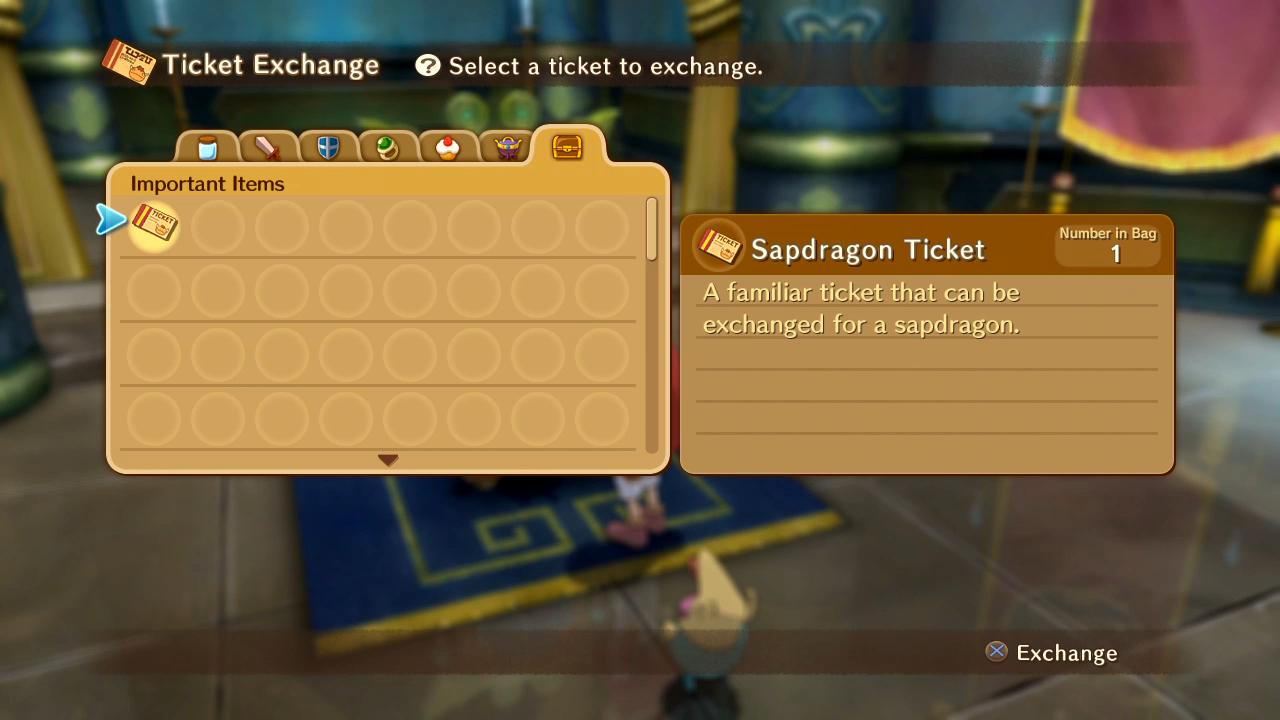 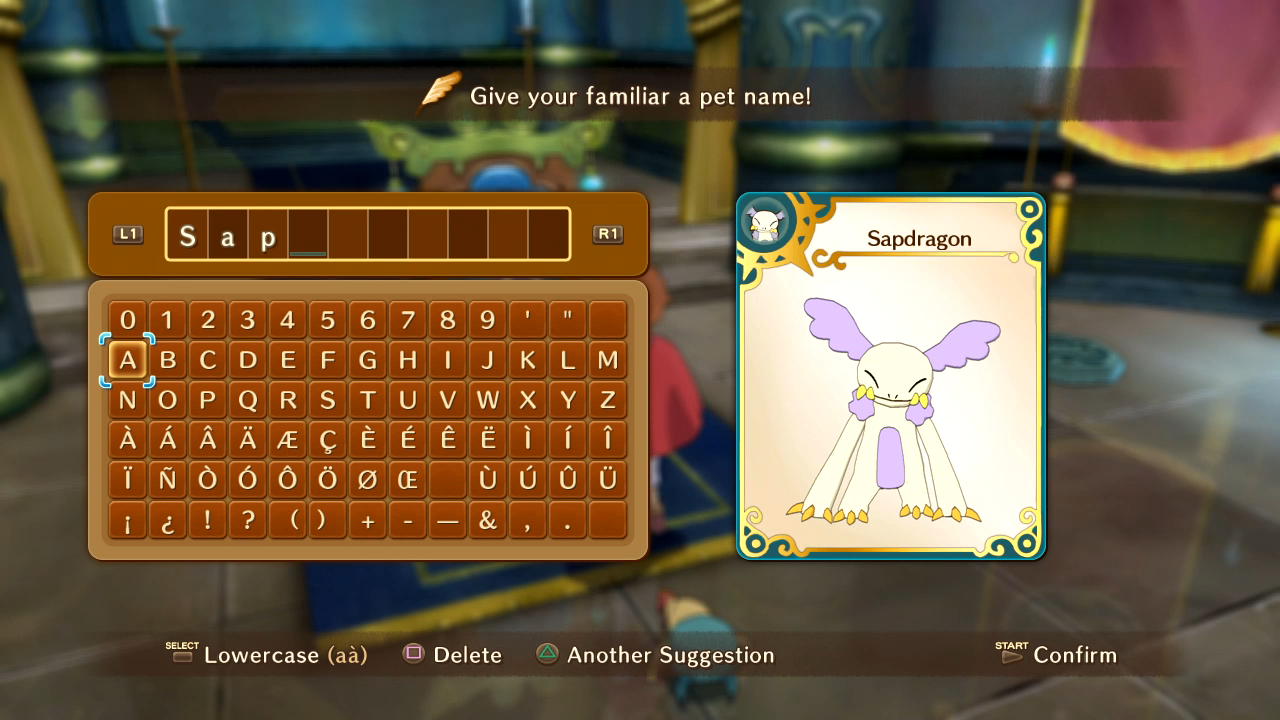 Couldn't be assed. You might have already seen these familiars or their metamorphosed forms in previous updates. I recorded this first part pretty early, but the later ranks were ball busters, so I came back after most of the Conductor fights.   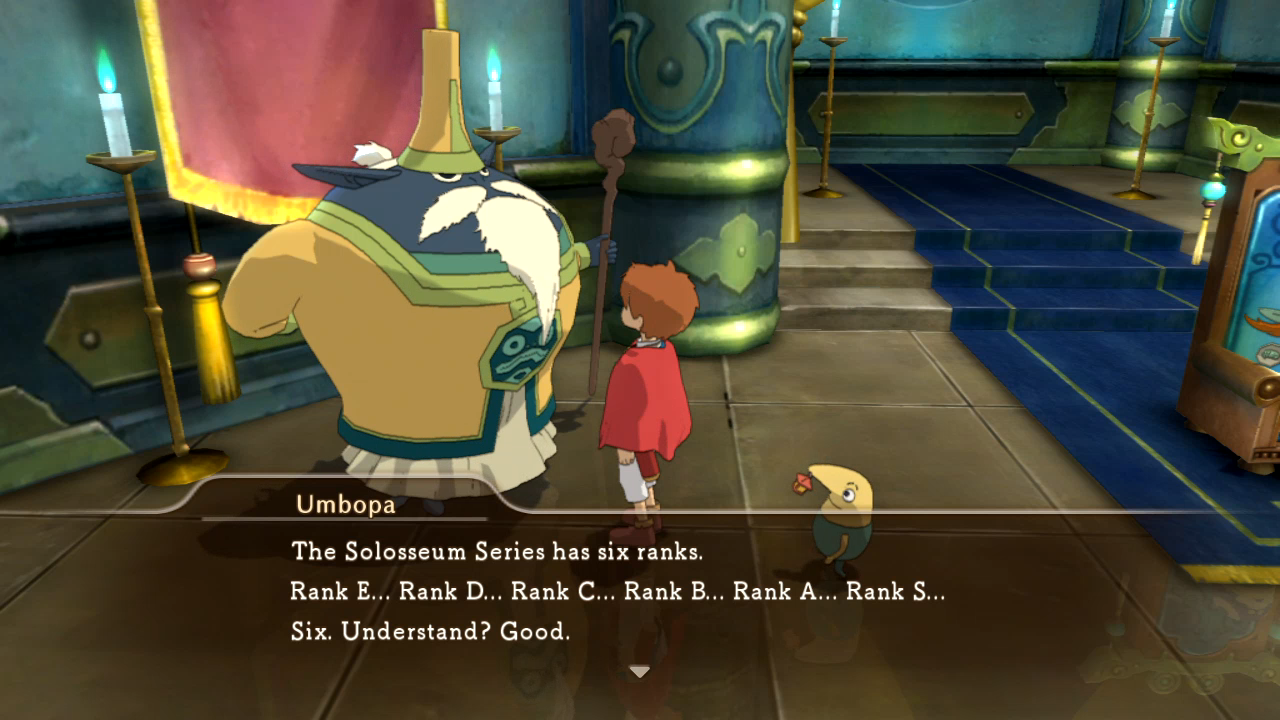  This is the real challenge of the Solosseum. These first many ranks are piss, but once you start fighting monsters that do a lot of damage and take a lot of magic to kill, you're going to need to get creative in order to maintain your HP and MP without items.  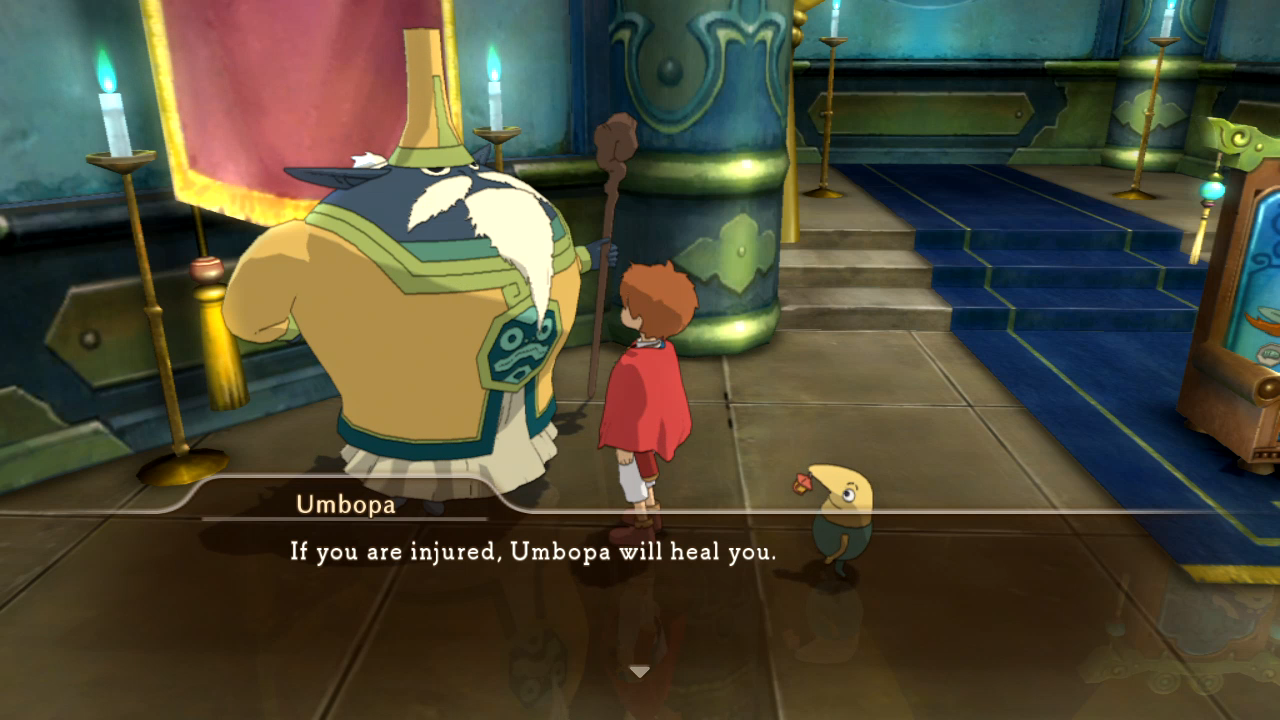 Umbopa will always send you into battle at 100%, thankfully.  We have the same cutscene as when we fought the boss here. 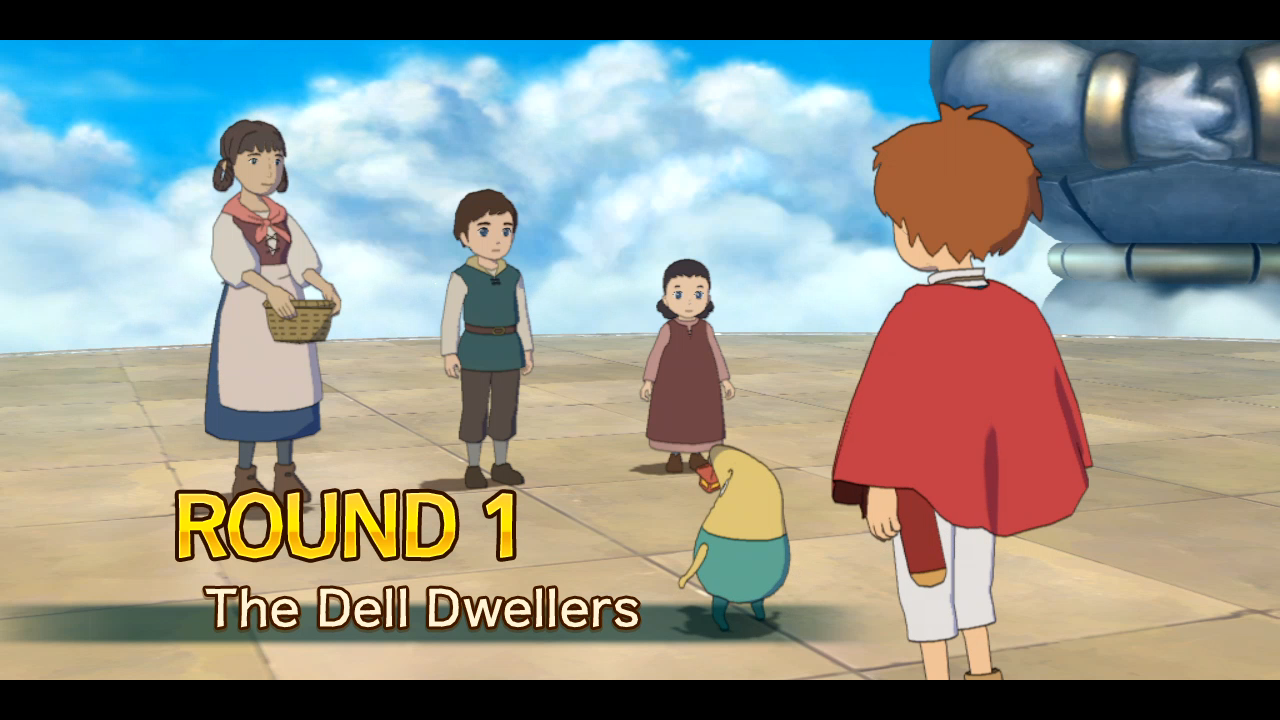 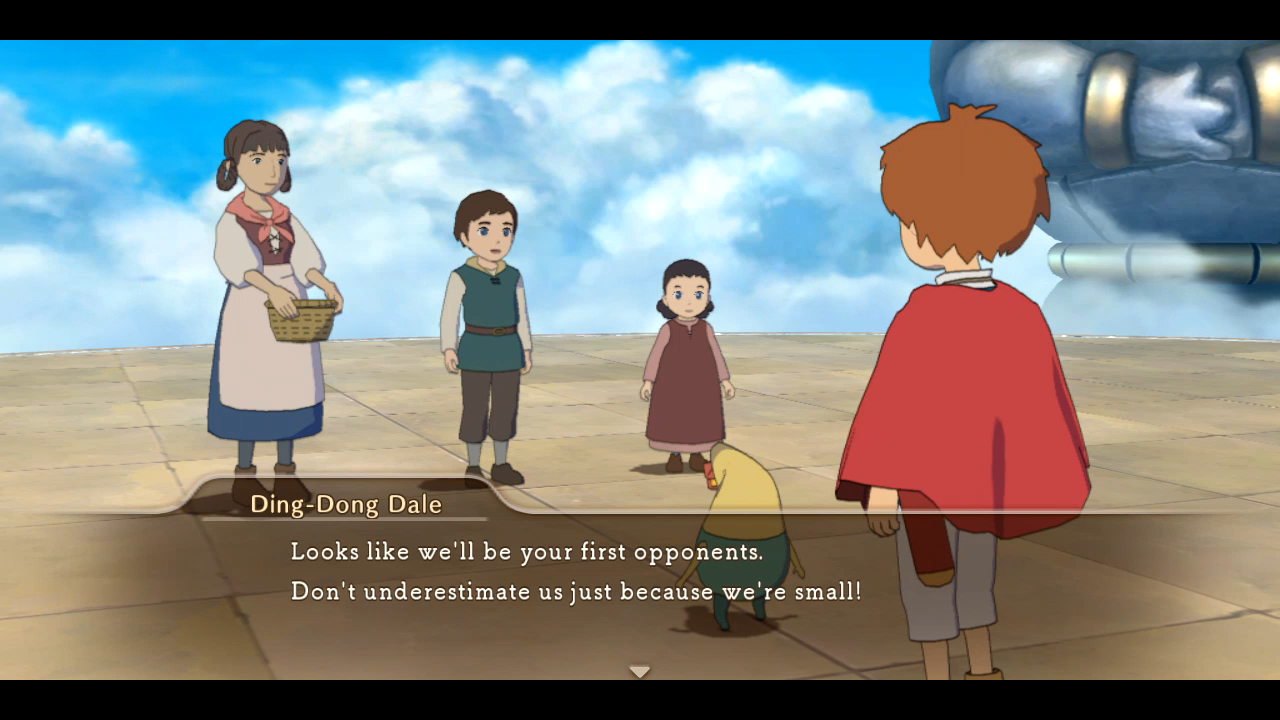 I'll skip most of the pre-and-post-fight dialogue unless I think it's particularly amusing. 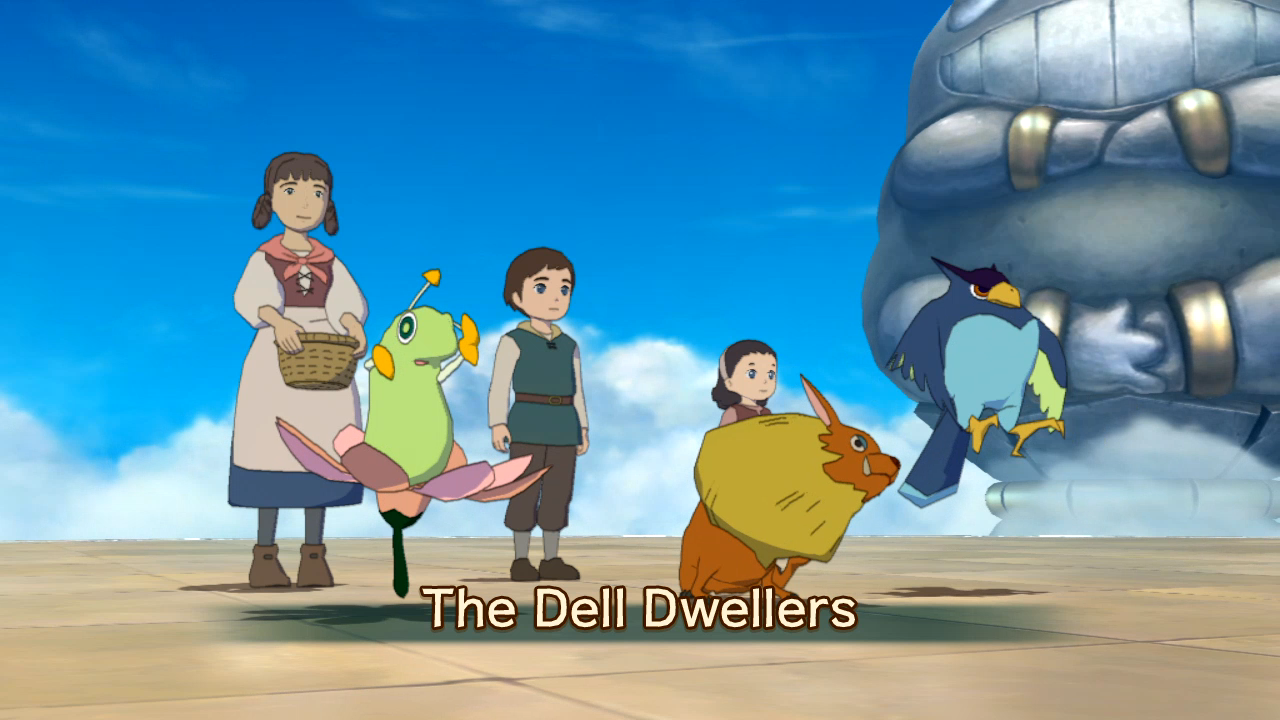 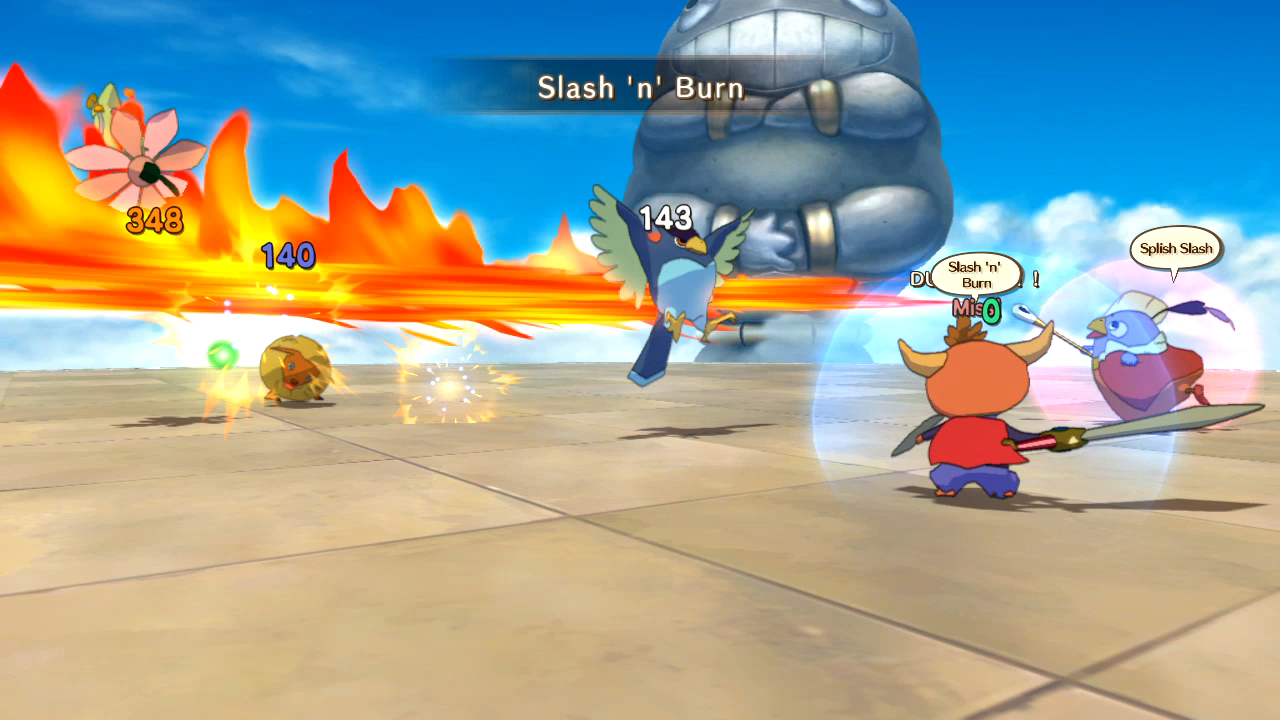 First battle goes well. 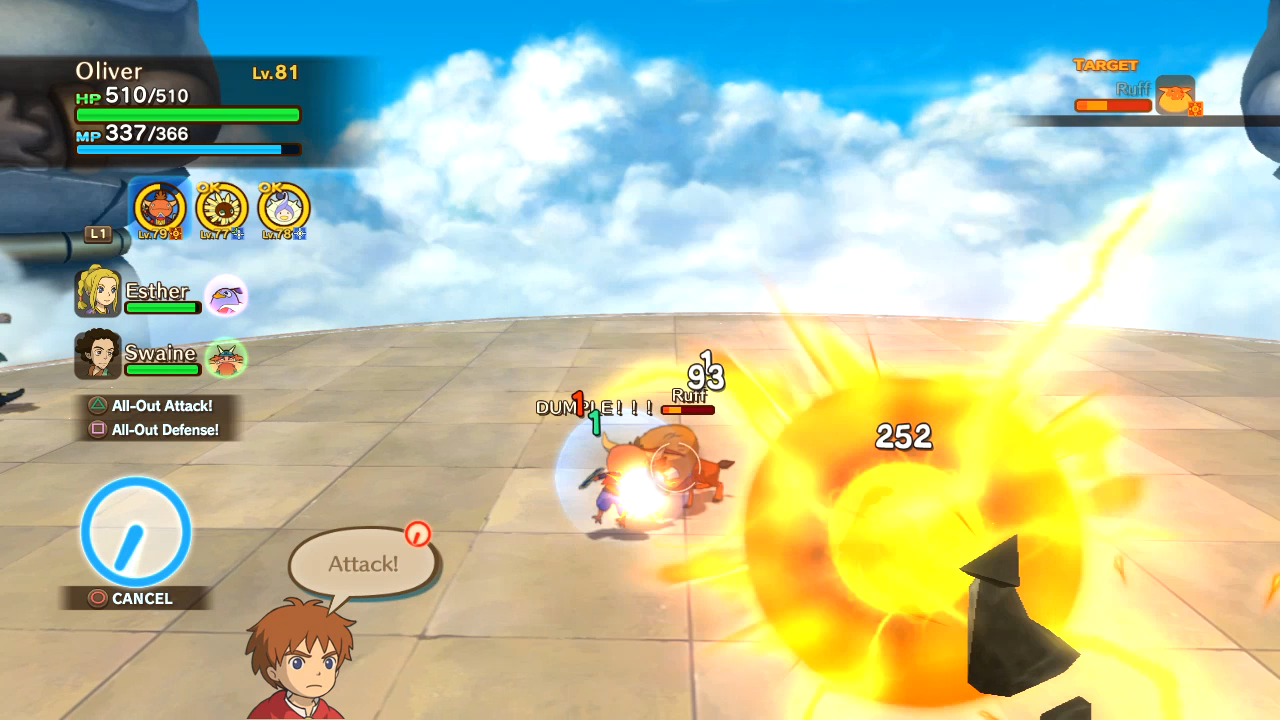  When you beat an opponent, you get a YOU WIN screen, but you don't get any experience, items or money. You only get rewards from the Solosseum when you actually complete a rank. 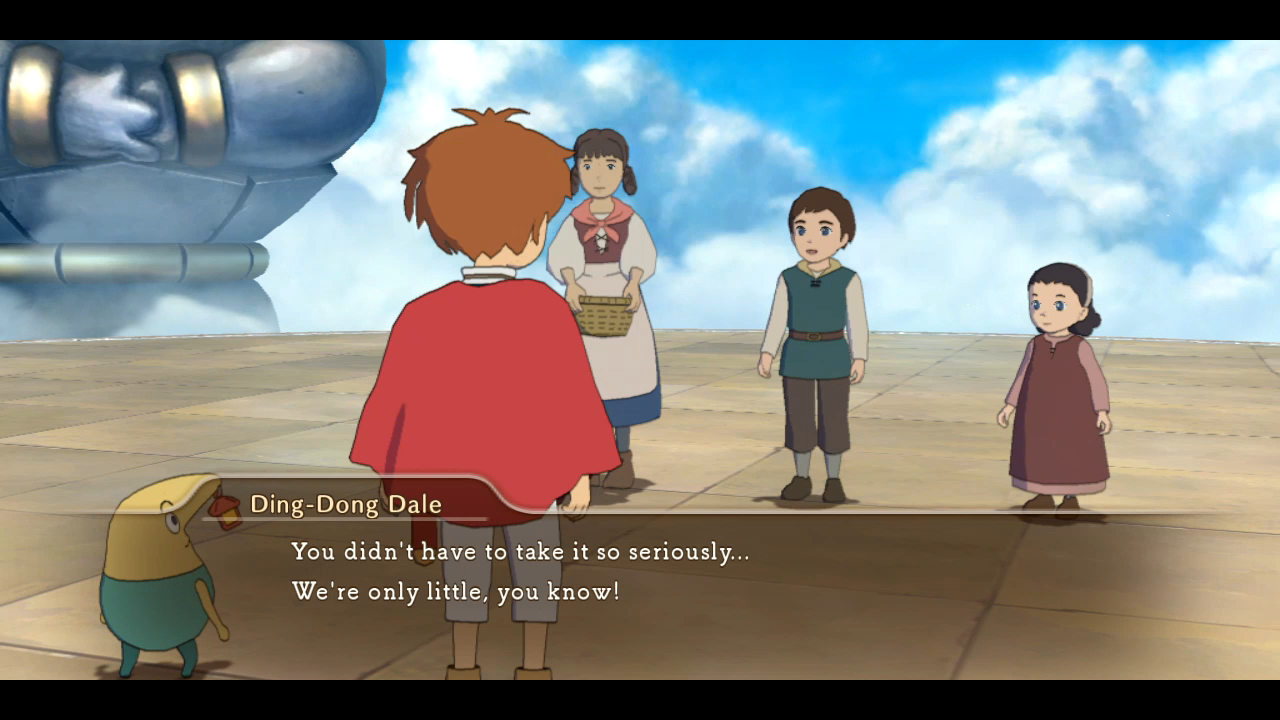 Ah, kid logic.  After the previous opponents wander off screen, the next one taunts you from the left.   Drippy cries tears of joy.   Slash 'n' Burn is my VIP (very important power) for these first many fights.  And I get a trophy for completing 1000 fights! drat, this LP was our longest in every way, wasn't it? 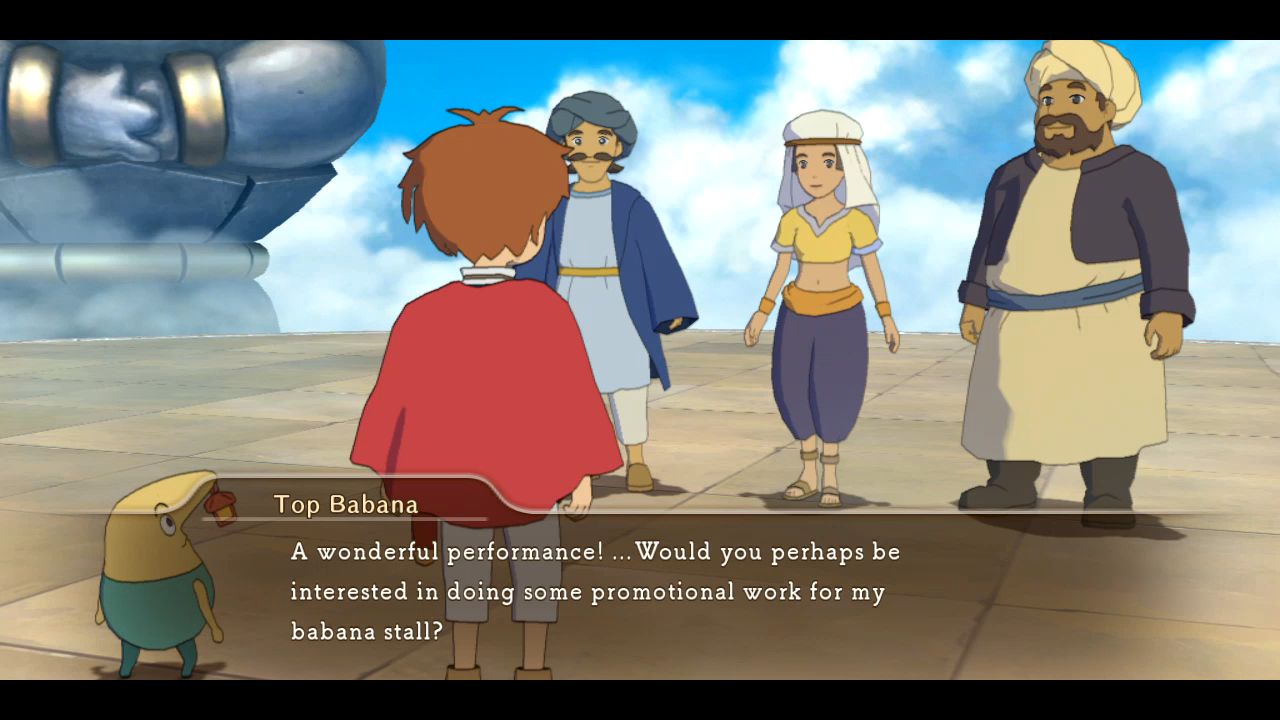 Drippy goes careening after them. 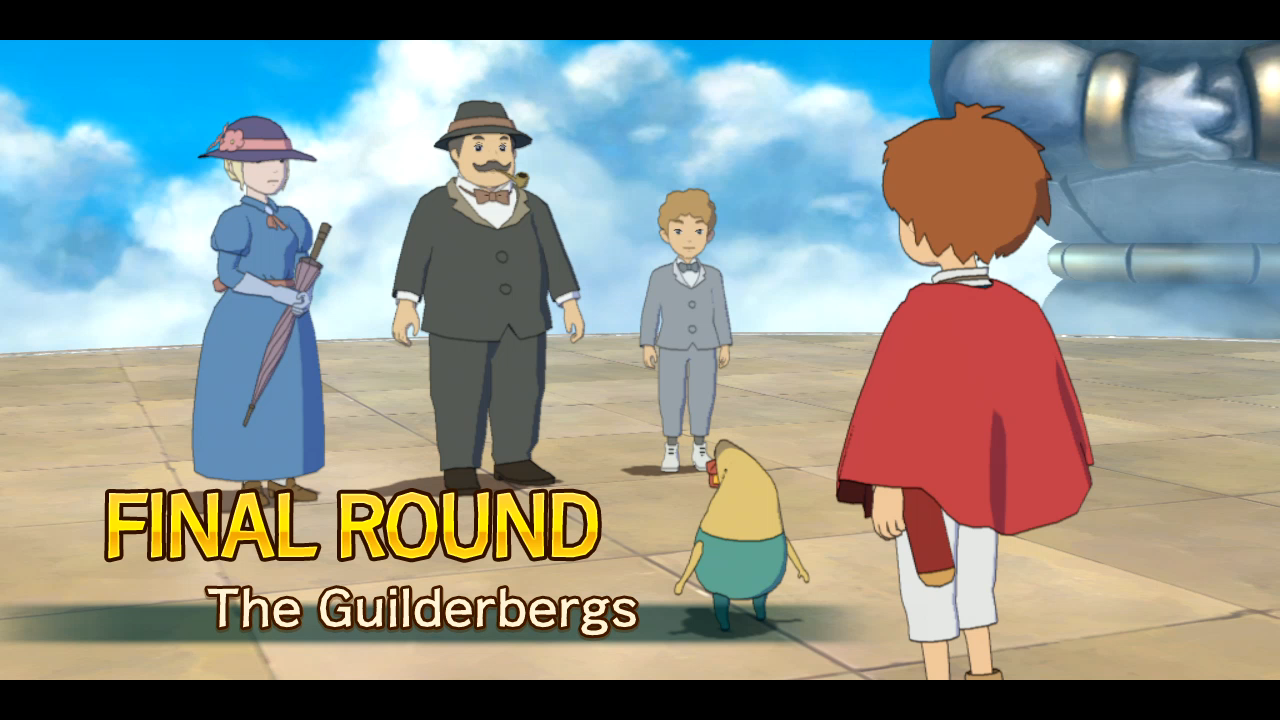 YOU DIE TODAY, OLD MAN. 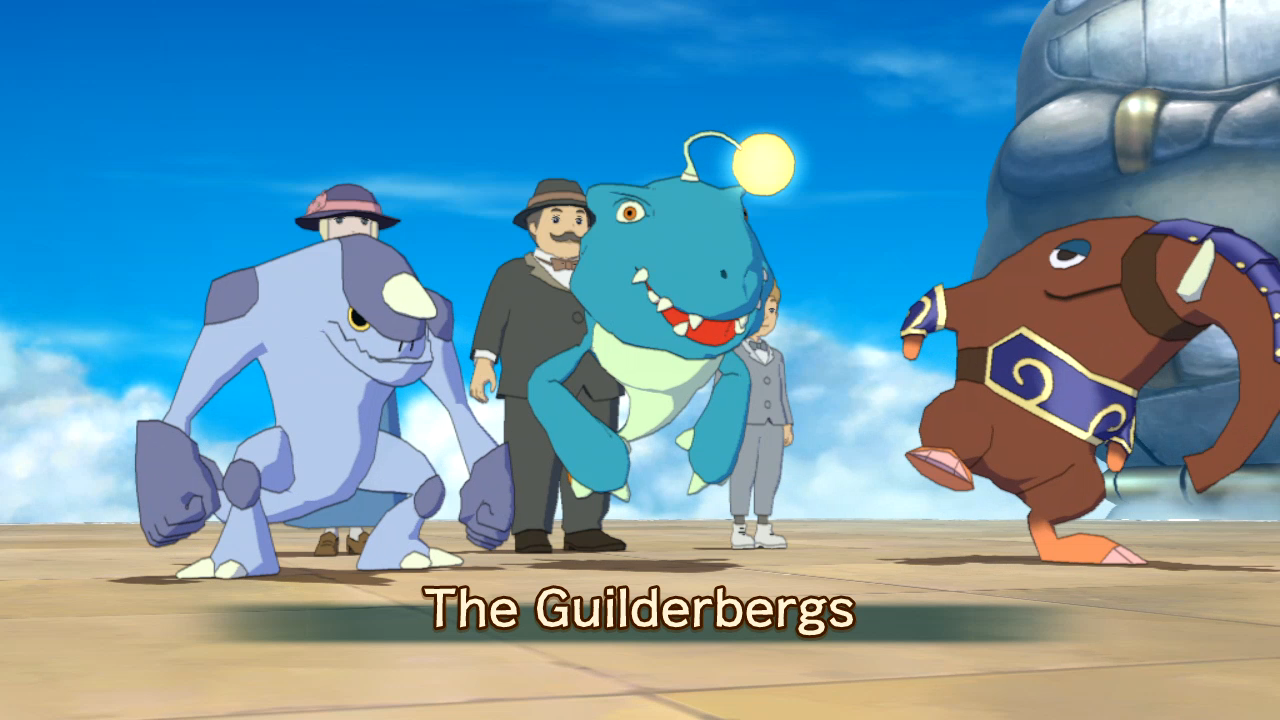  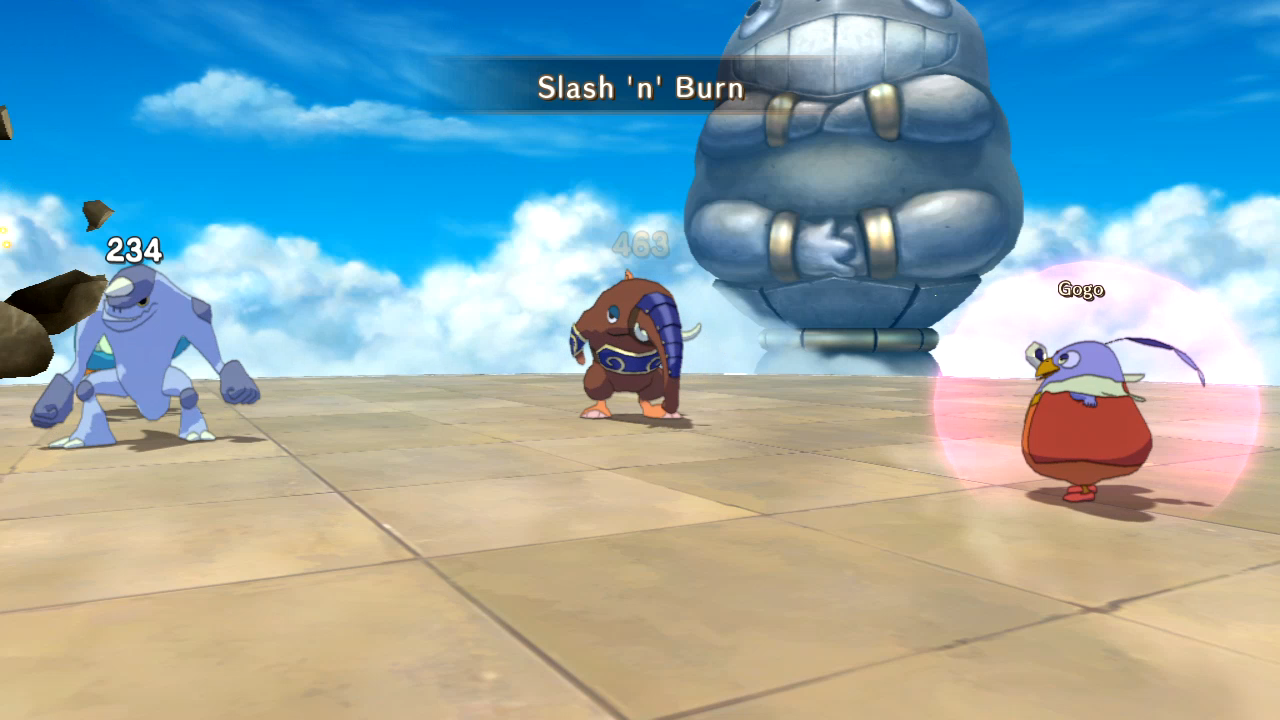 Gunther sometimes acts as offscreen support. 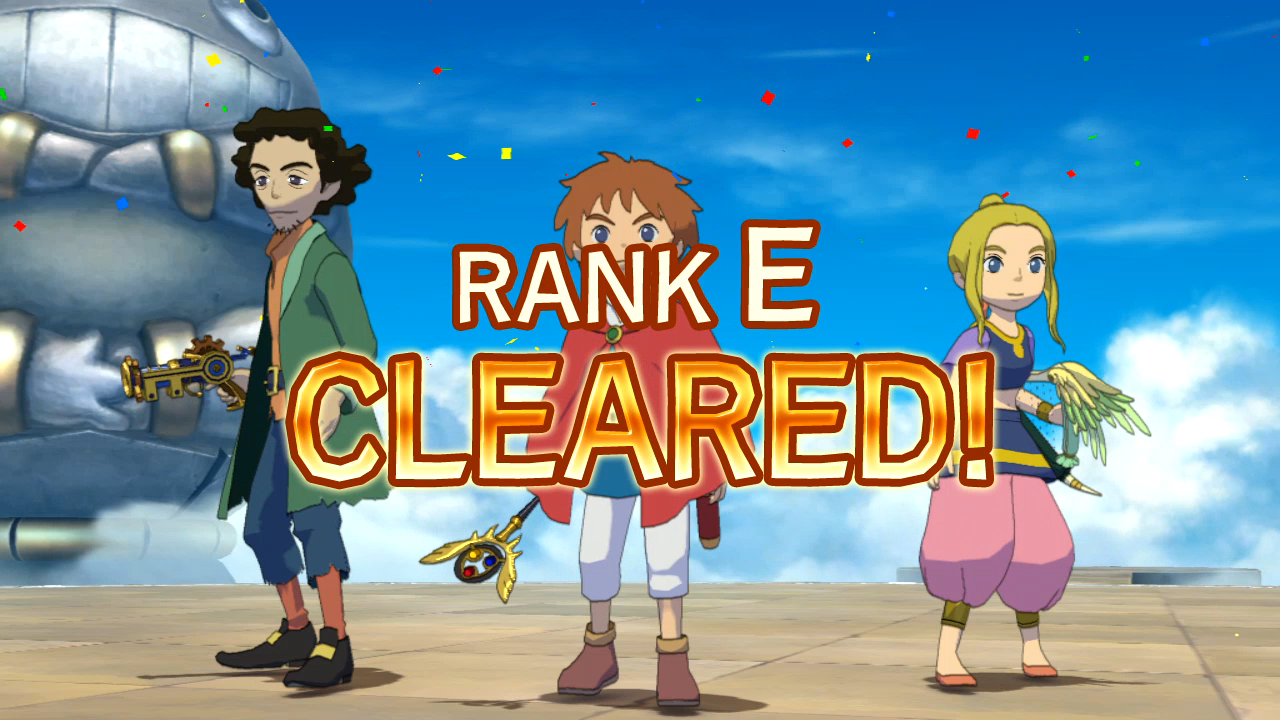 When you clear a rank, you get confetti!  "3x0, suckaaaah!"   I love your derpy face, Umbopa. 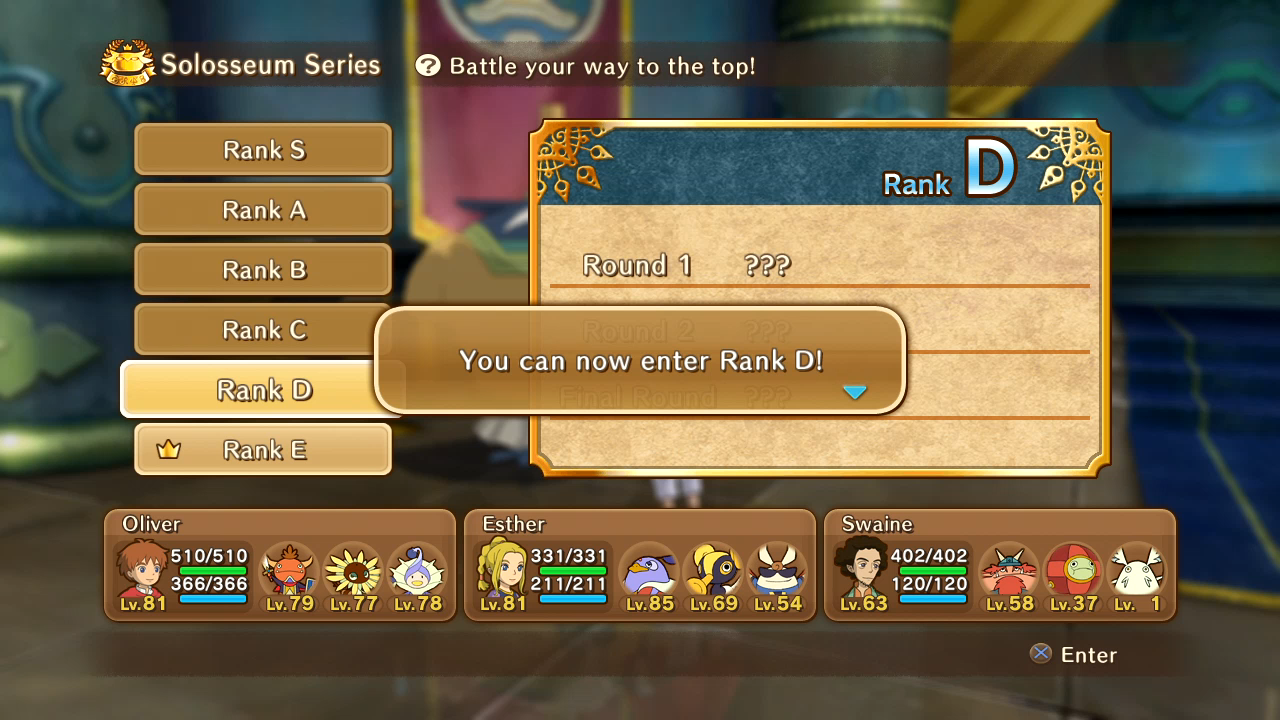 Once you've completed a rank, the one above it unlocks. You can tell which are open or closed by if the tab for them is bright or darkened out.  You can also skip the entrance cutscene. 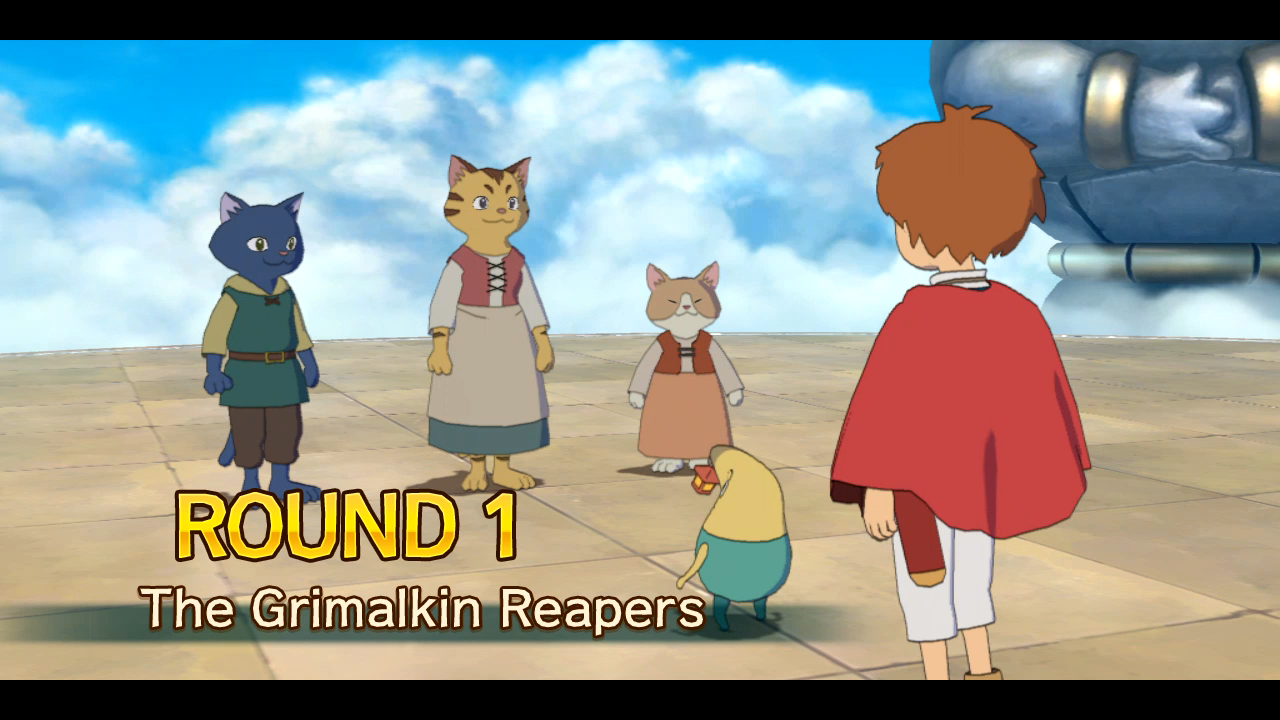 I wanna pet their ears and murder their families.   The fight goes much the same, though one cat uses Smoke Bomb, which blinds but only mildly inconveniences me.  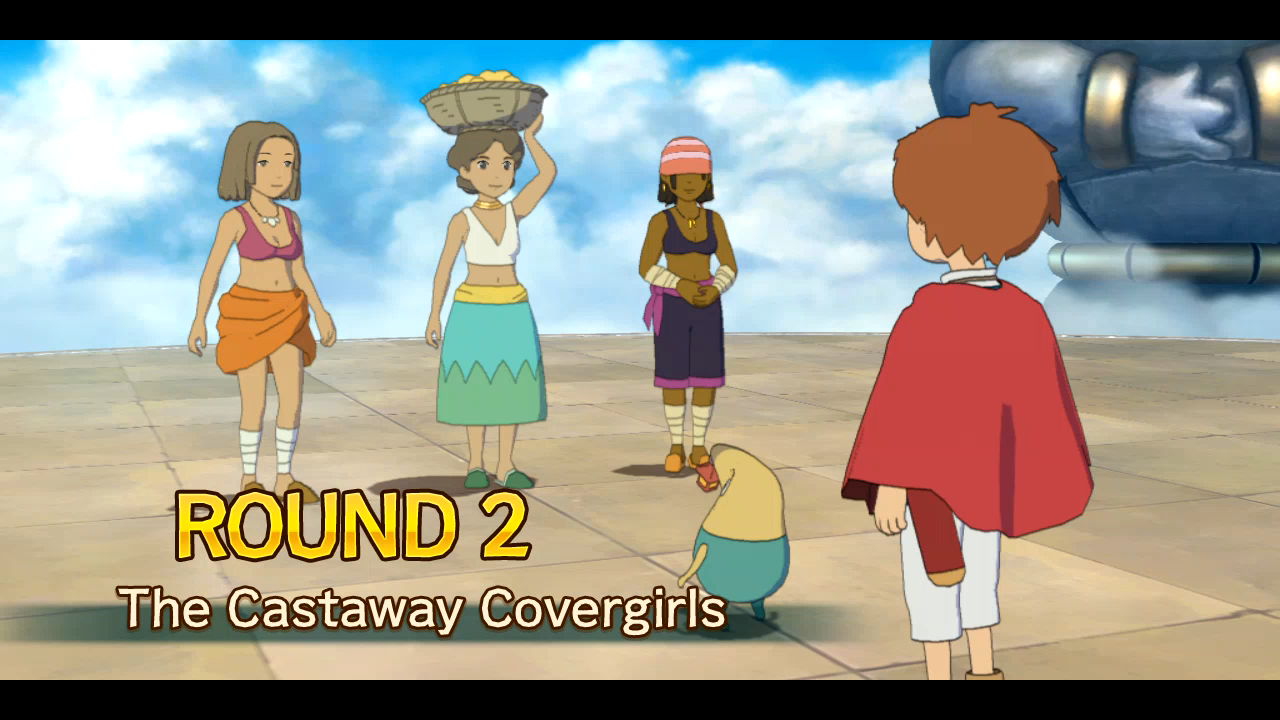 That middle woman is terrible.  Don't tease a 13-year old, Basket Case- oh I get it, she's just an idiot.  Oh look, a bunch of things weak to fire.   The power of unintentional teamwork.  "Physically or mentally. We only expect one at this point." 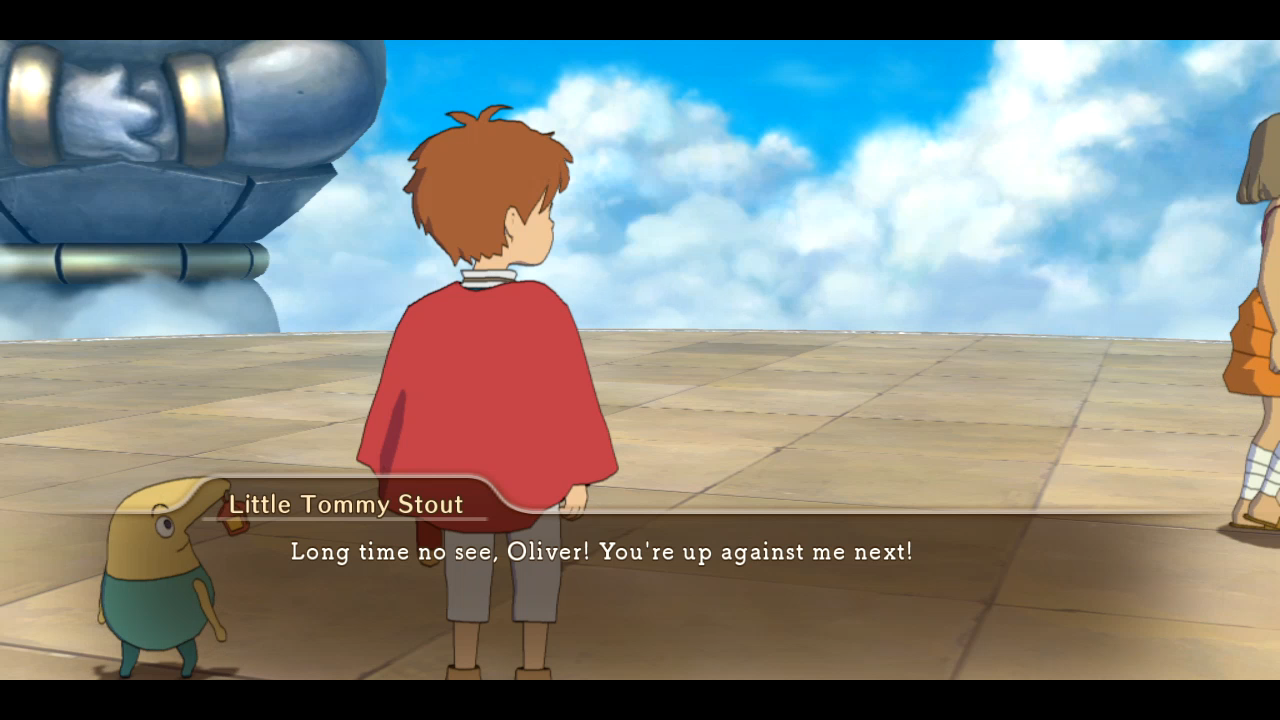 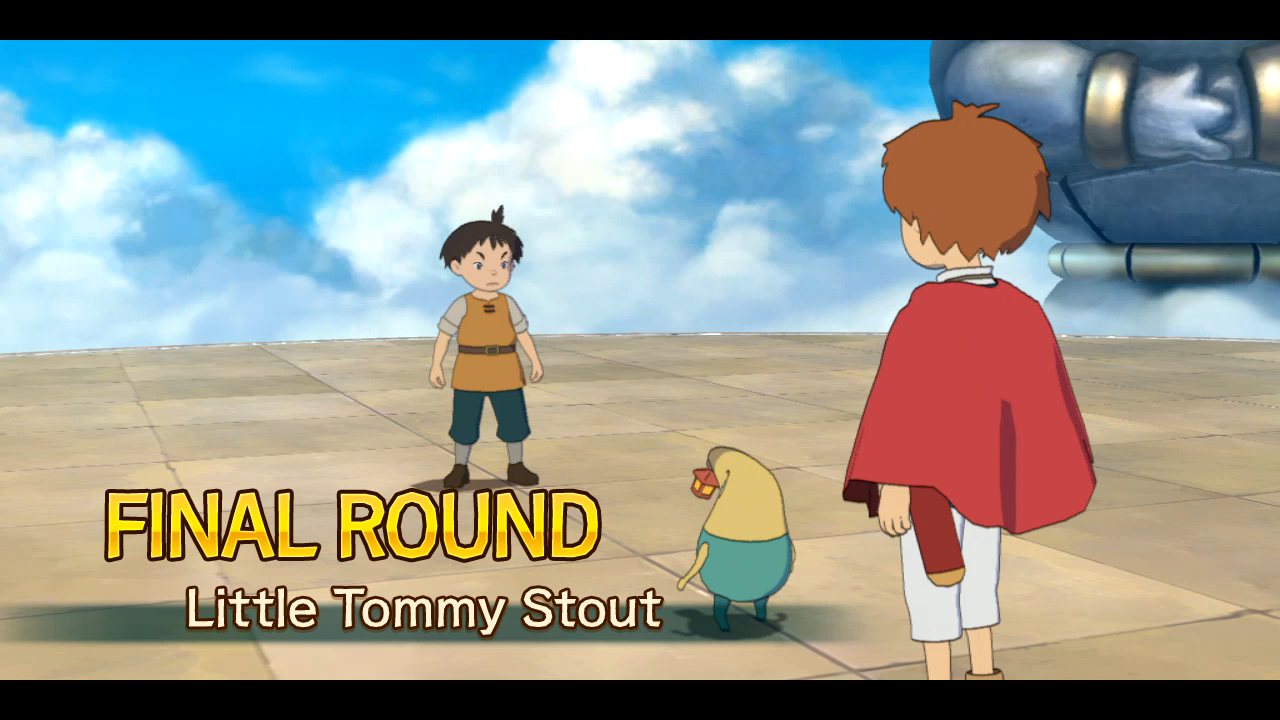 Hey! That kid who gave us that poo poo monkey-cat familiar! 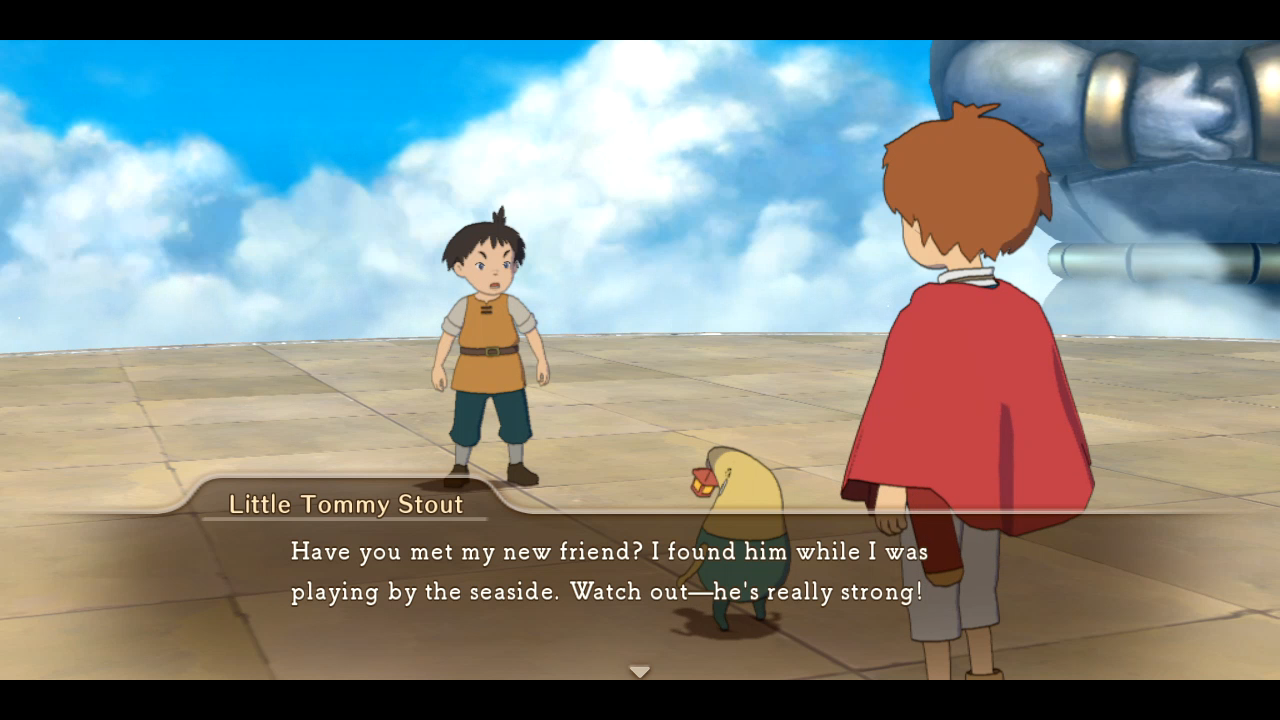 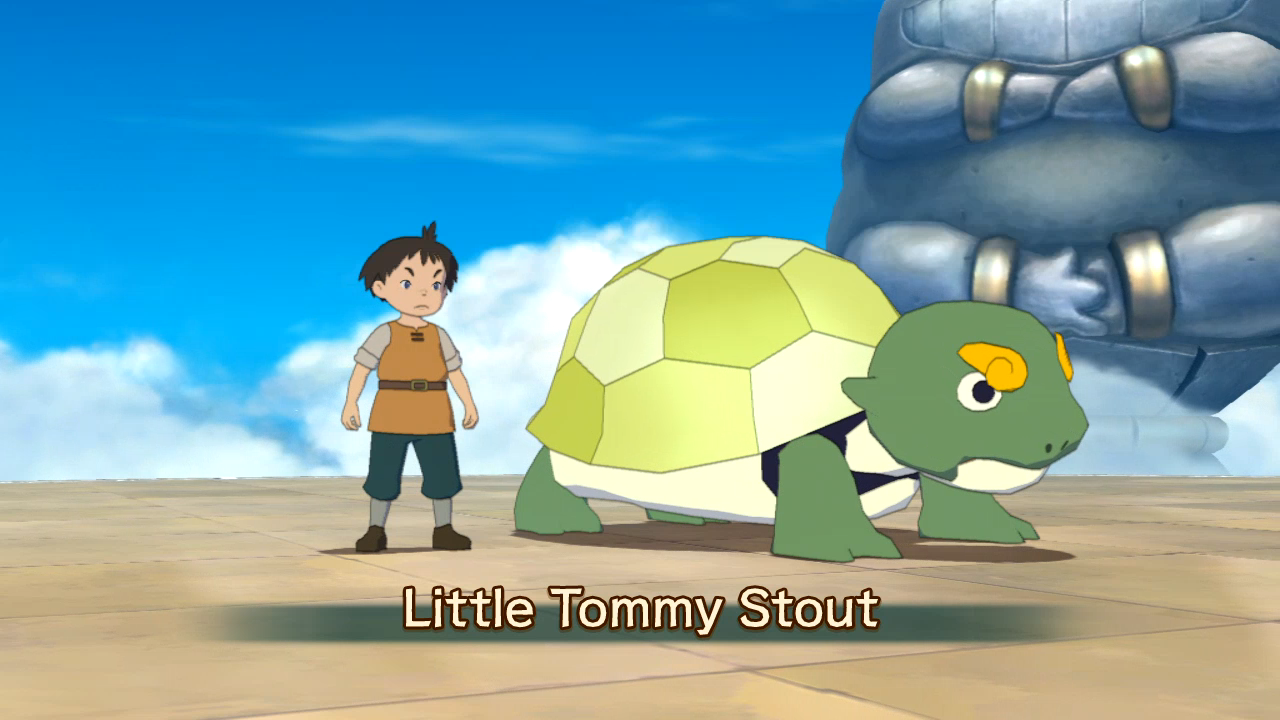 gently caress off, Tommy. Yes, some of your opponents have managed to capture miniboss-type monsters. Meanwhile you only have the chance to get a tree.    He doesn't defend against our light magic very well.  Or a Gunther Bop.    Last rank for today, and it's still a piece of piss.   I legit feel bad for this guy. I don't think he wanted to come here.  I love those dumb little mushroom guys.  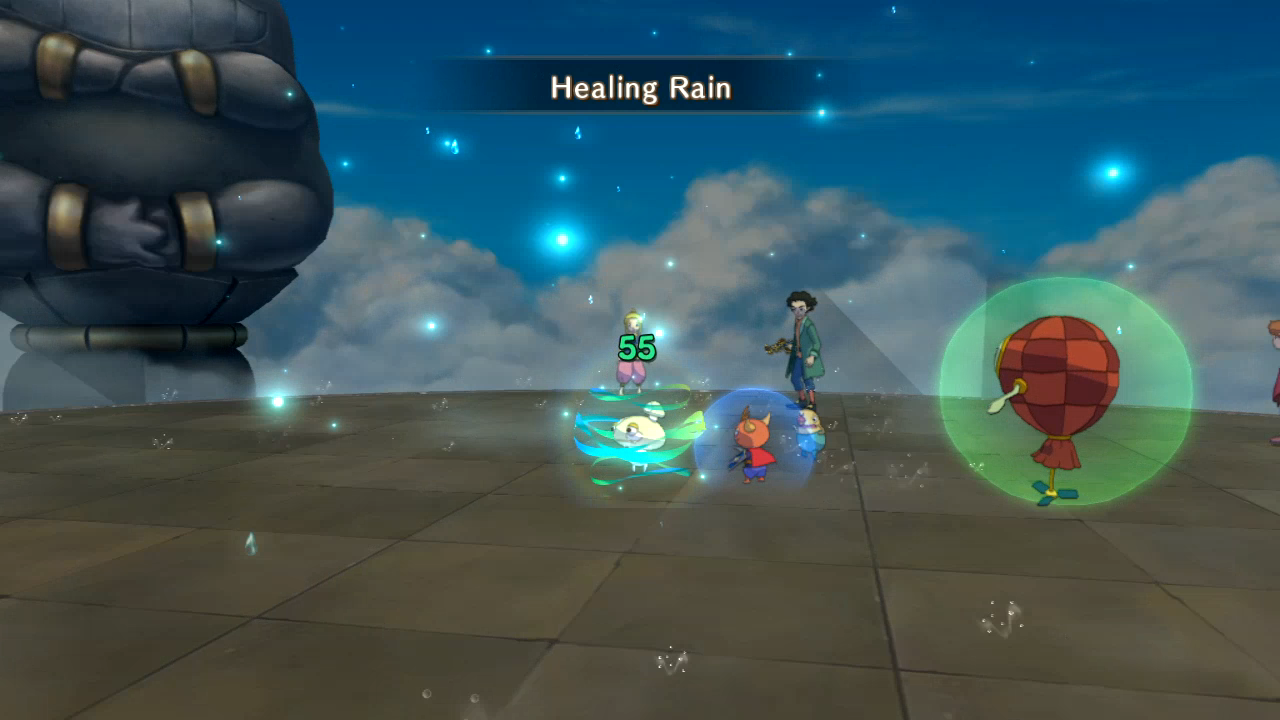 Granted, this one does try to delay the inevitable. 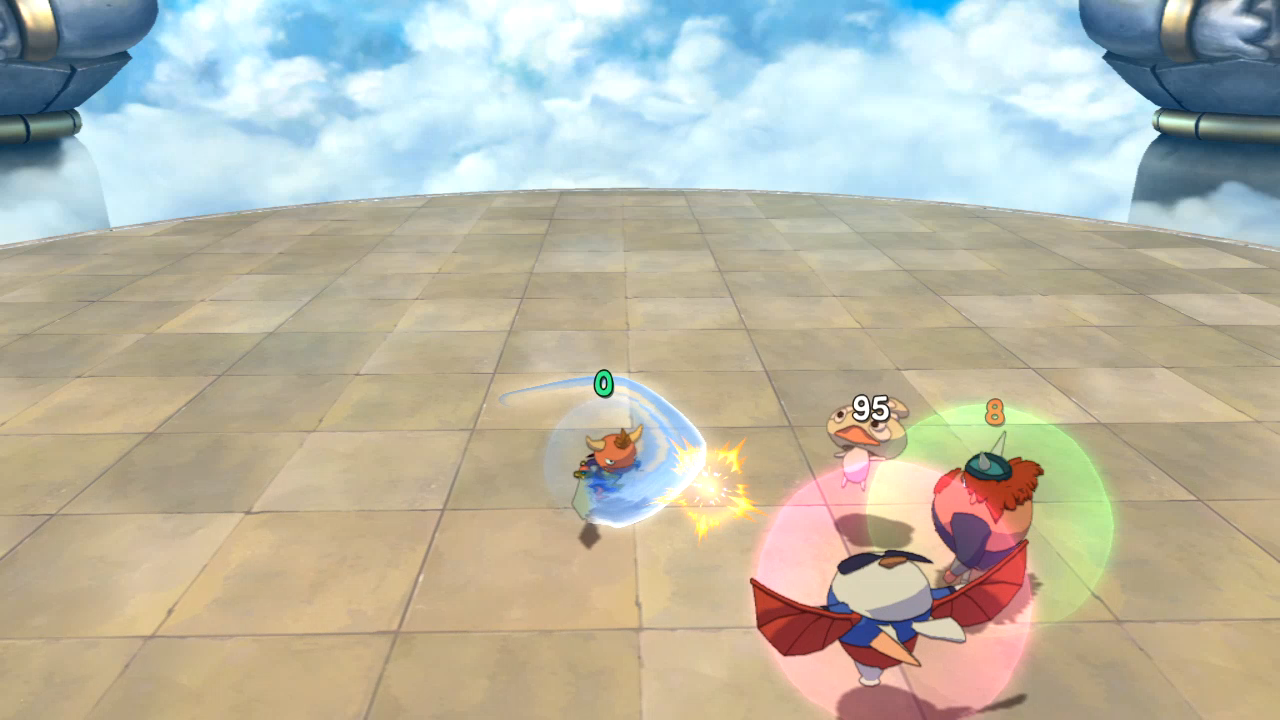 And he has a hilarious death face.  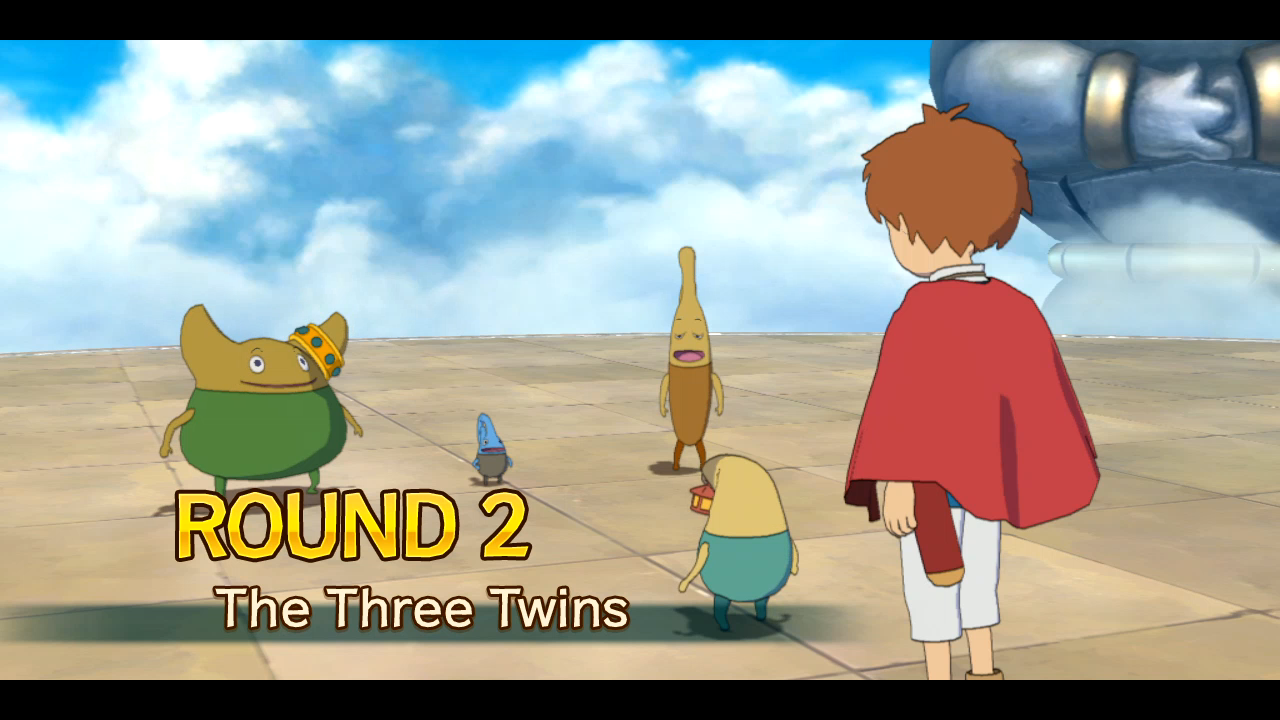 *Wah-wah trumpet* 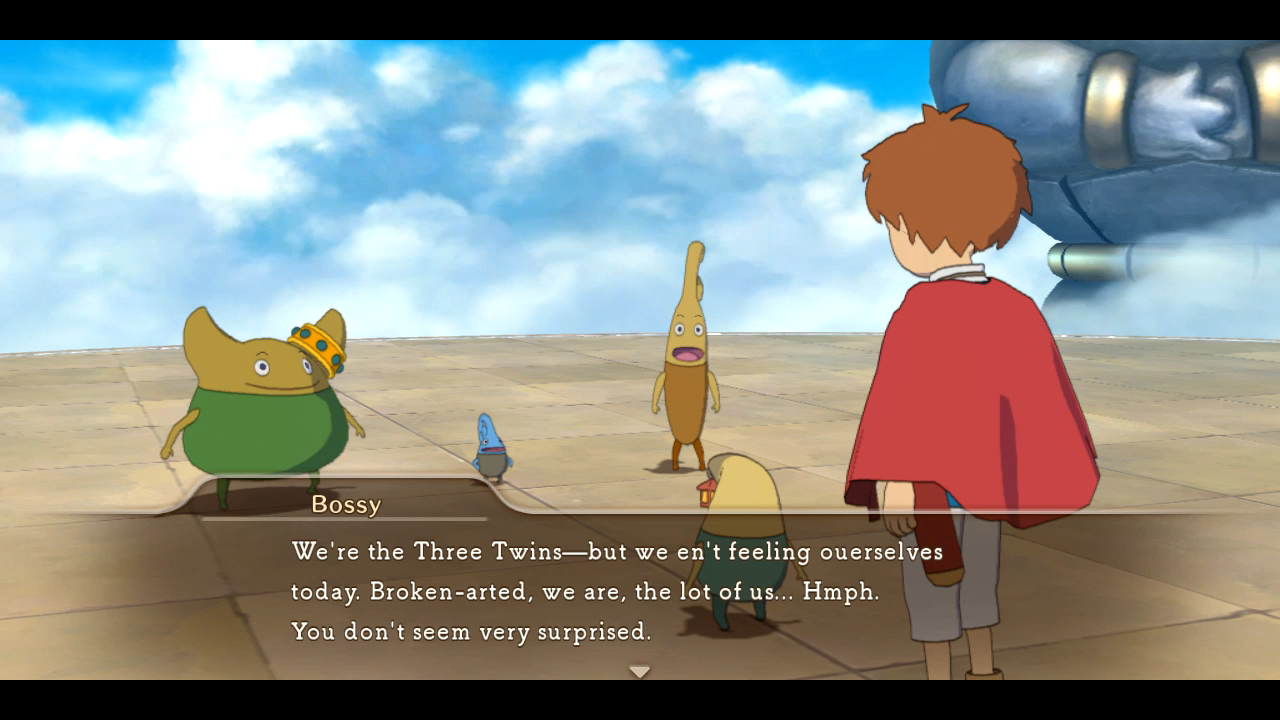 Like I said before, I generally like the fairies. Just not my fairy.  Kill the teenage Shiro!    With fire.  Surprisingly the trumpet duck holds out the longest.  Don't look, Shiro. It'd be too much for you. 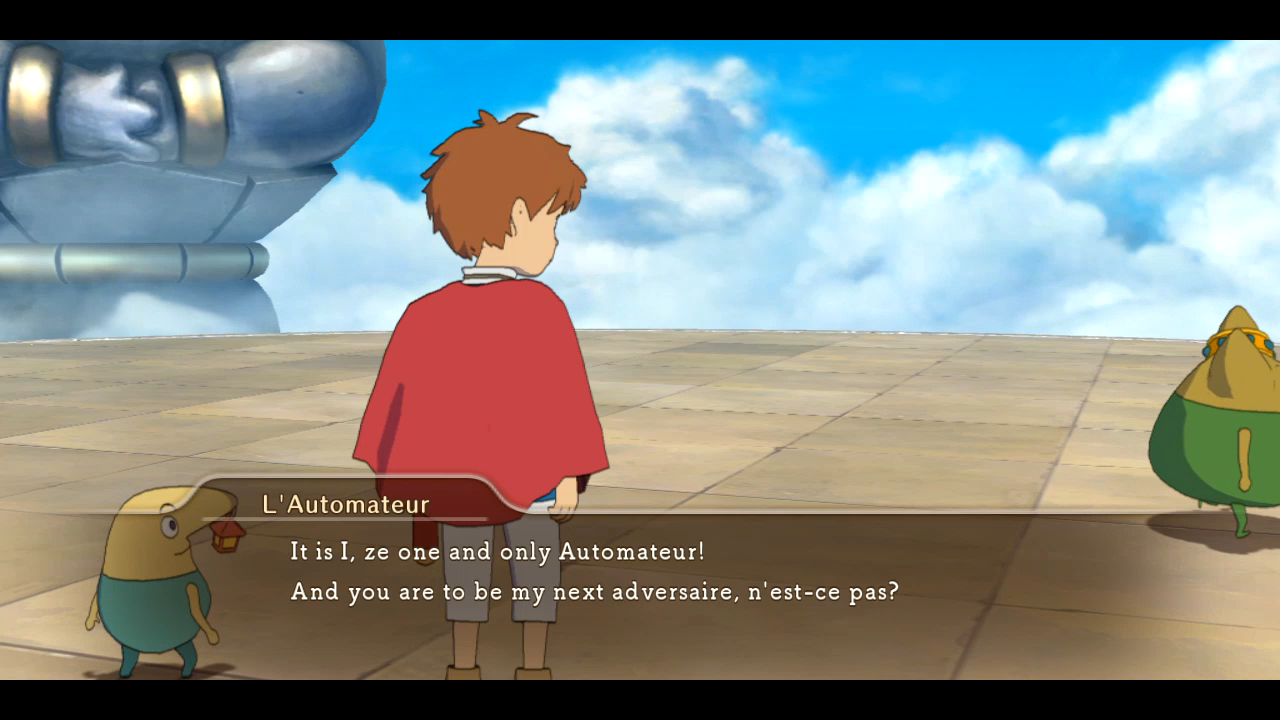 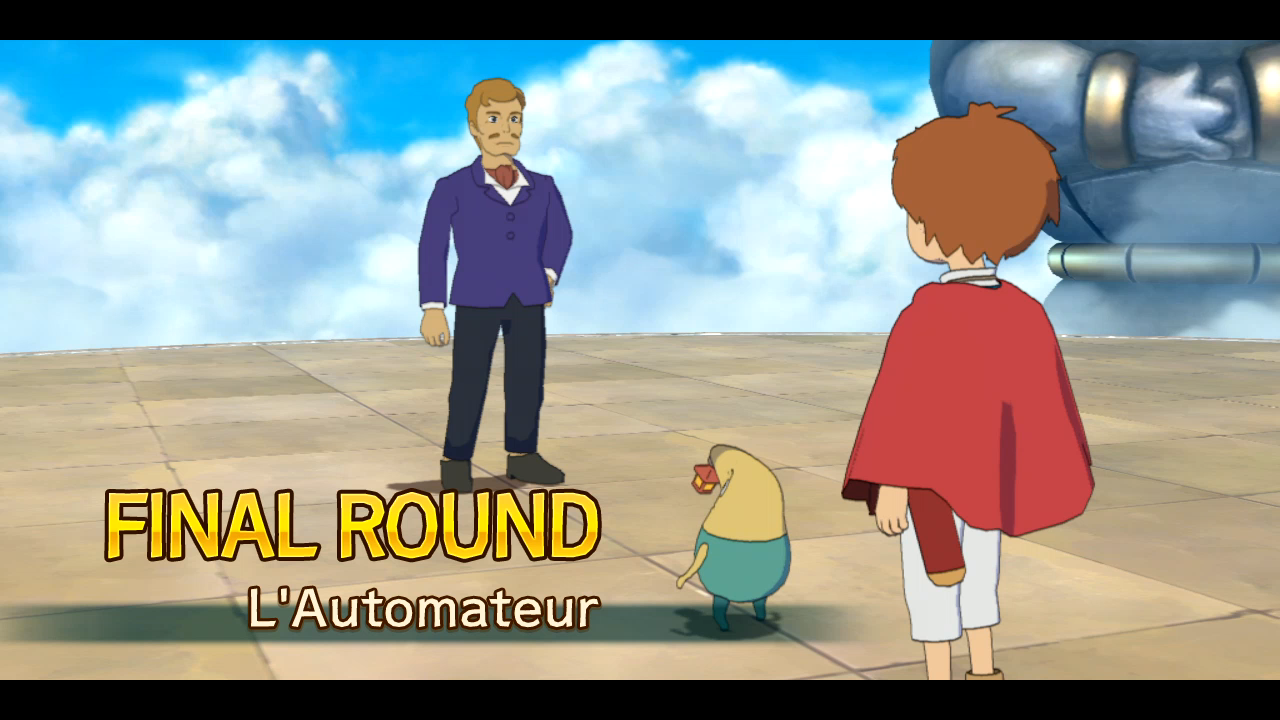 Here's a hell of a Studio Ghibli reference. It's the guy from Porco Rosso.  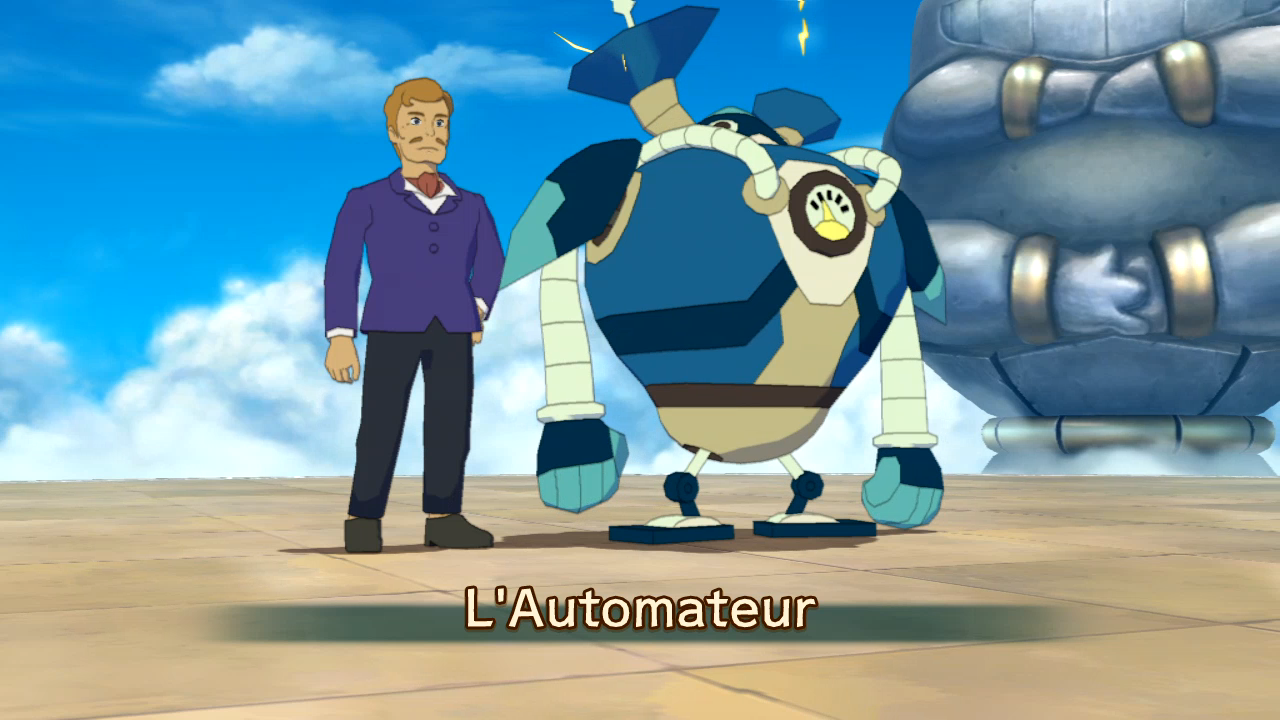 You're taking the piss, right? 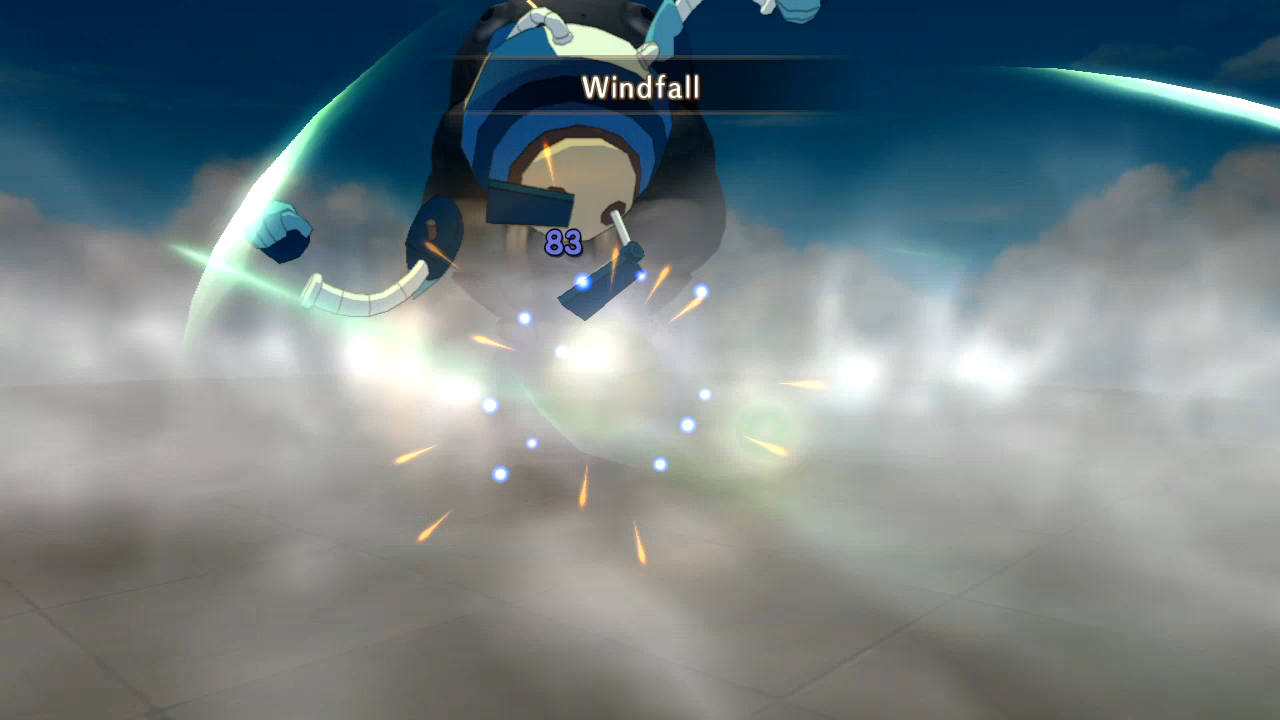   Yeah, this guy didn't go down with much trouble, even with his resistances. I resorted to finishing him off unspectacularly as always.   Perhaps you should have asked the countless other robots I've killed.  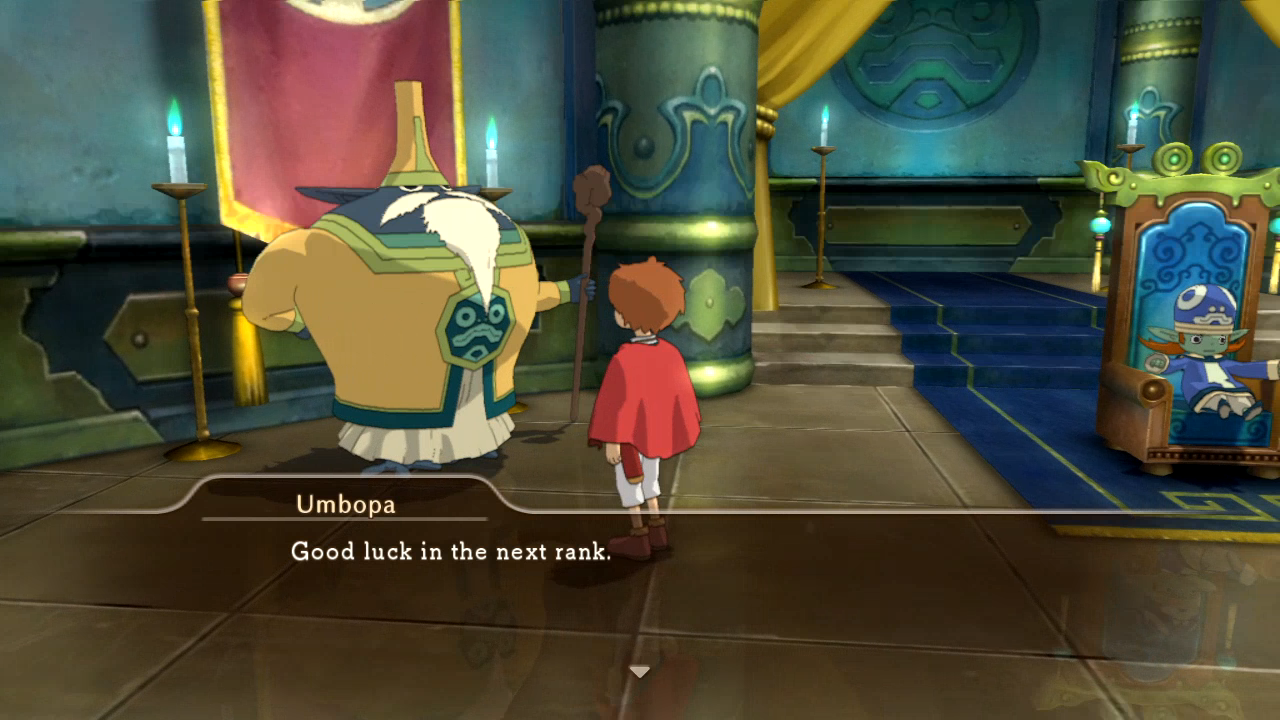 You know what? We might actually need it, Umbopa. Next time: Ranks B-S!
|
|
#
?
Mar 10, 2015 20:43
|
|
|
Screenshot Missions 7: Solosseum Ranks B-S Last half of the Solosseum, folks! Watch the raw video here, complete with me cheesing the latter fights in real-time! Speaking of which, time to get down to Rank B.   D'aww, I can't wait to destroy their dreams.   Dreams destroyed.   My two most-hated attacks crushed underneath my over-leveled rear end. 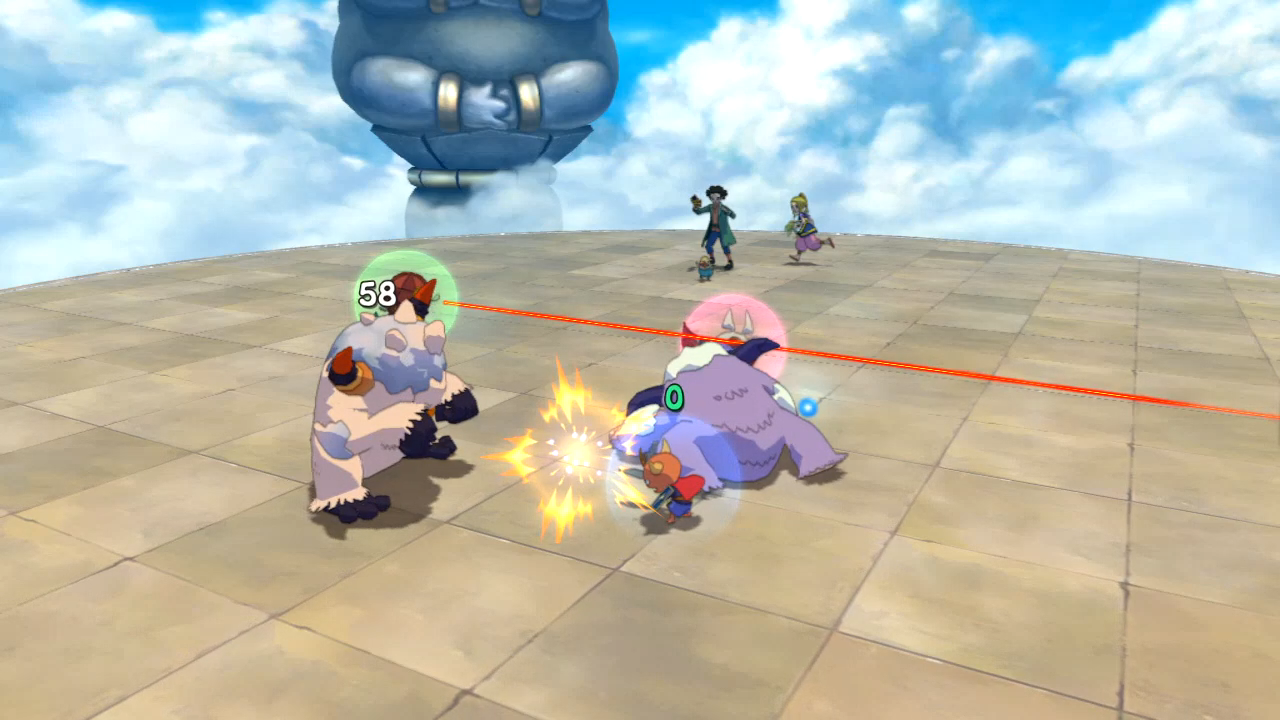 Mama never learned not to gently caress with Tingle. 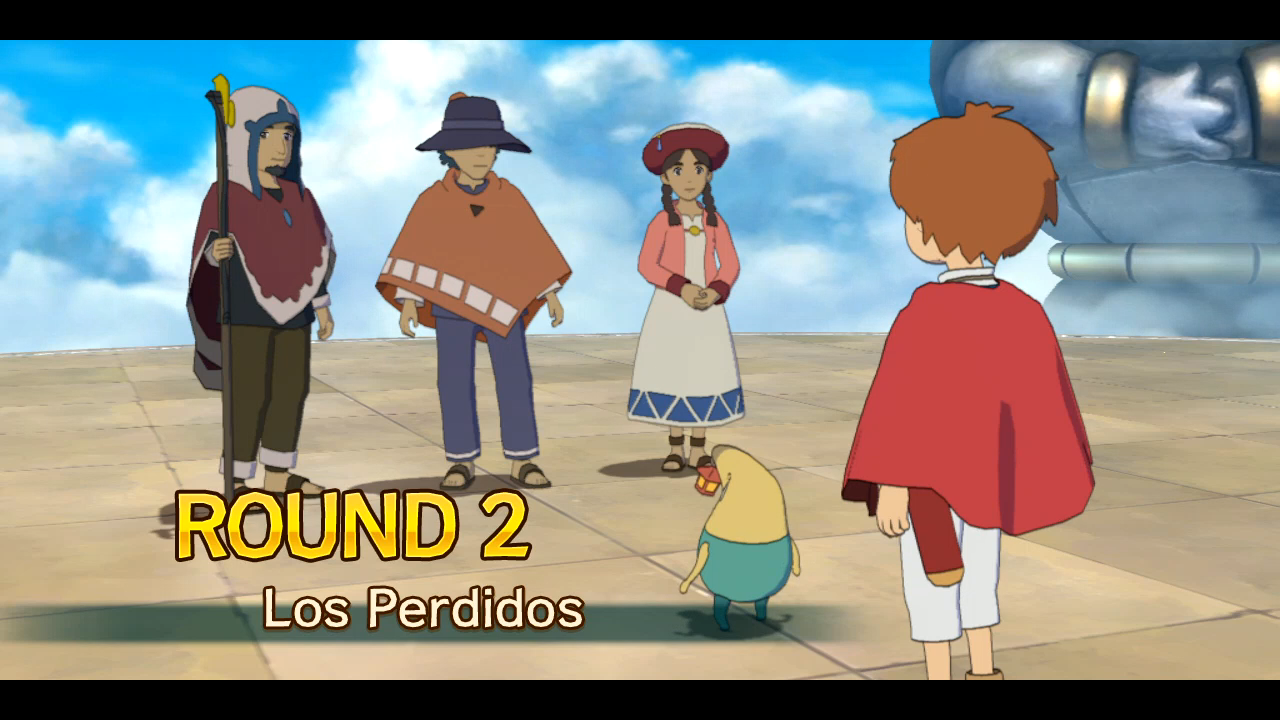 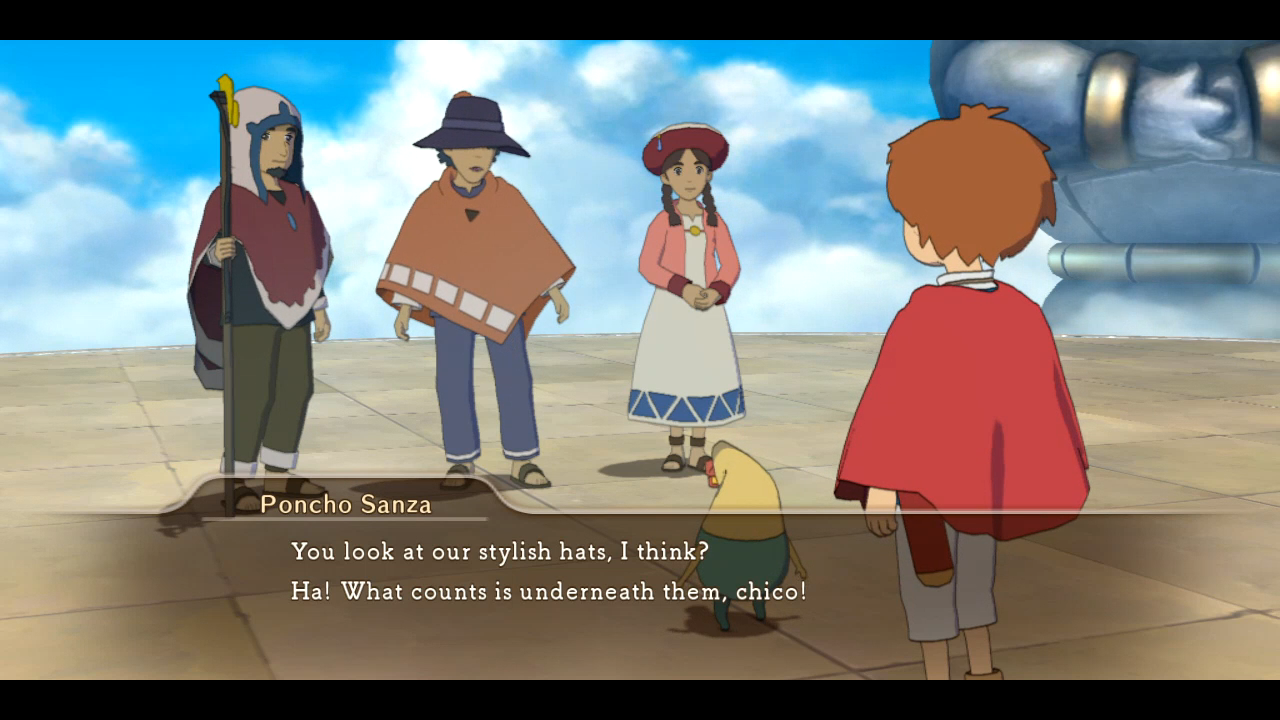 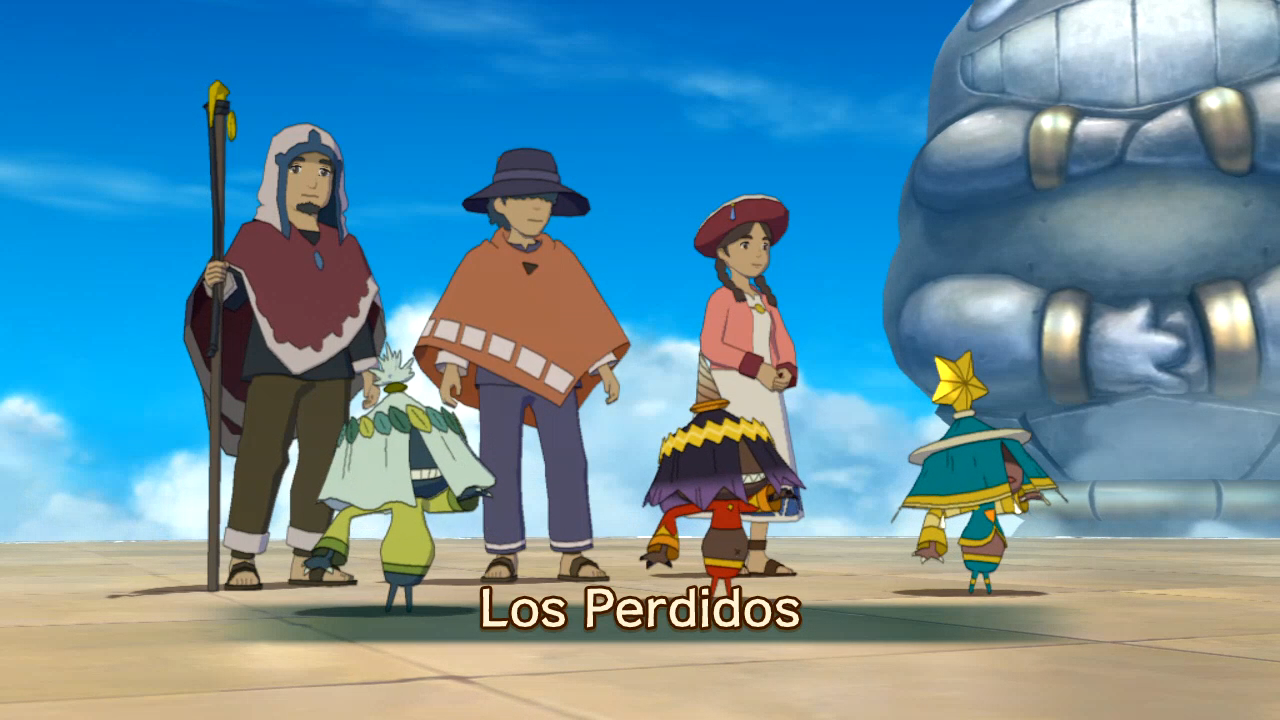 I never associated those creatures with any Hispanic culture, but alright. 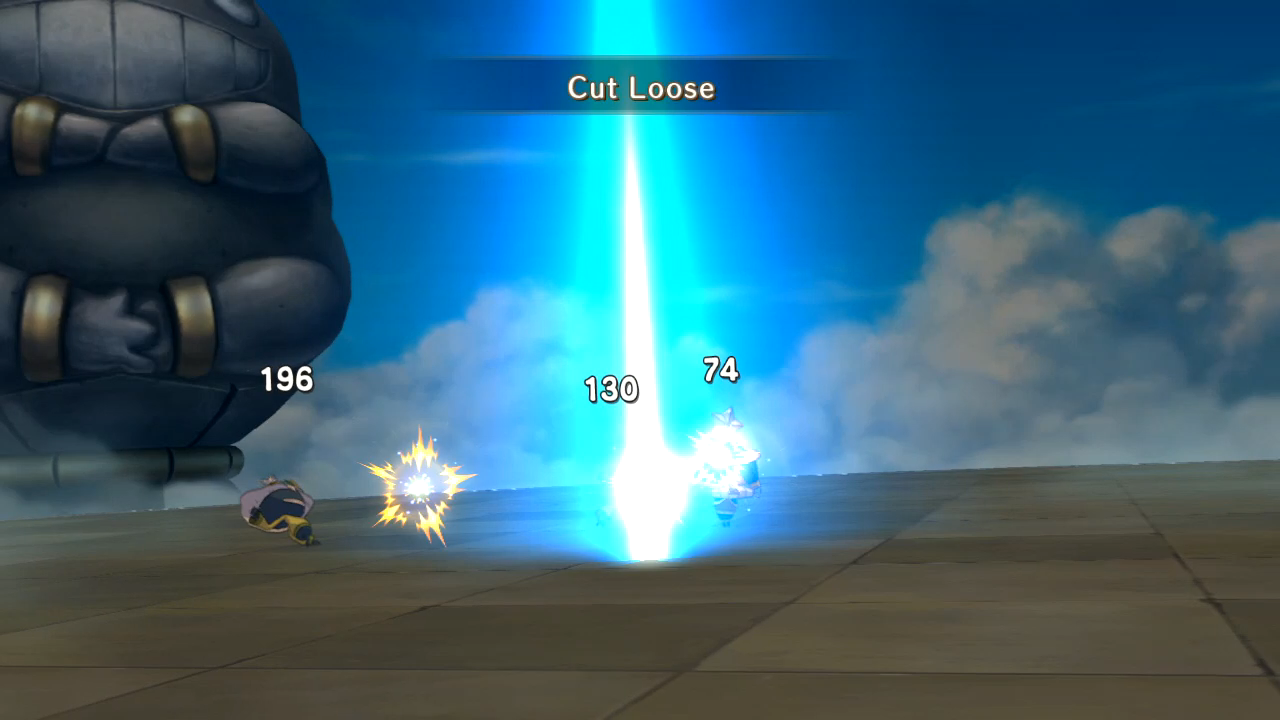 They're not particularly weak to any of Dumple's attacks, so I just send the lot at them. 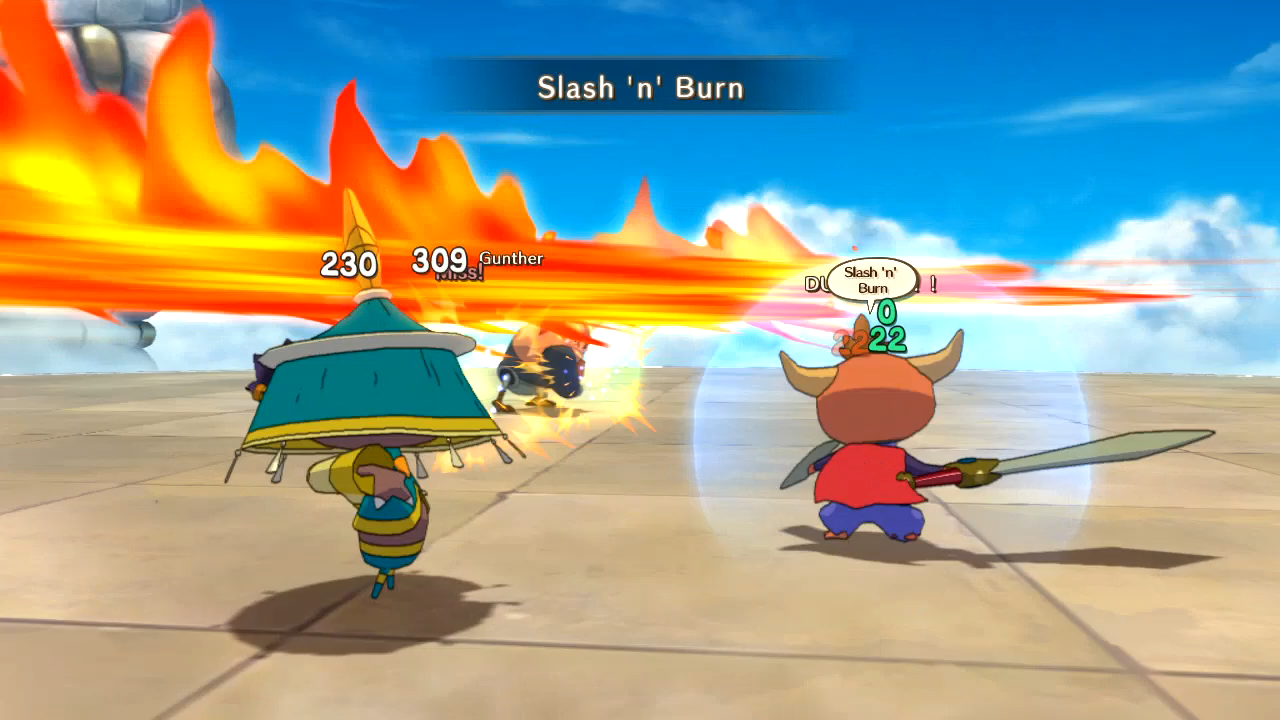    I'm sure Montezuma won that war, too. Lot of help that was. 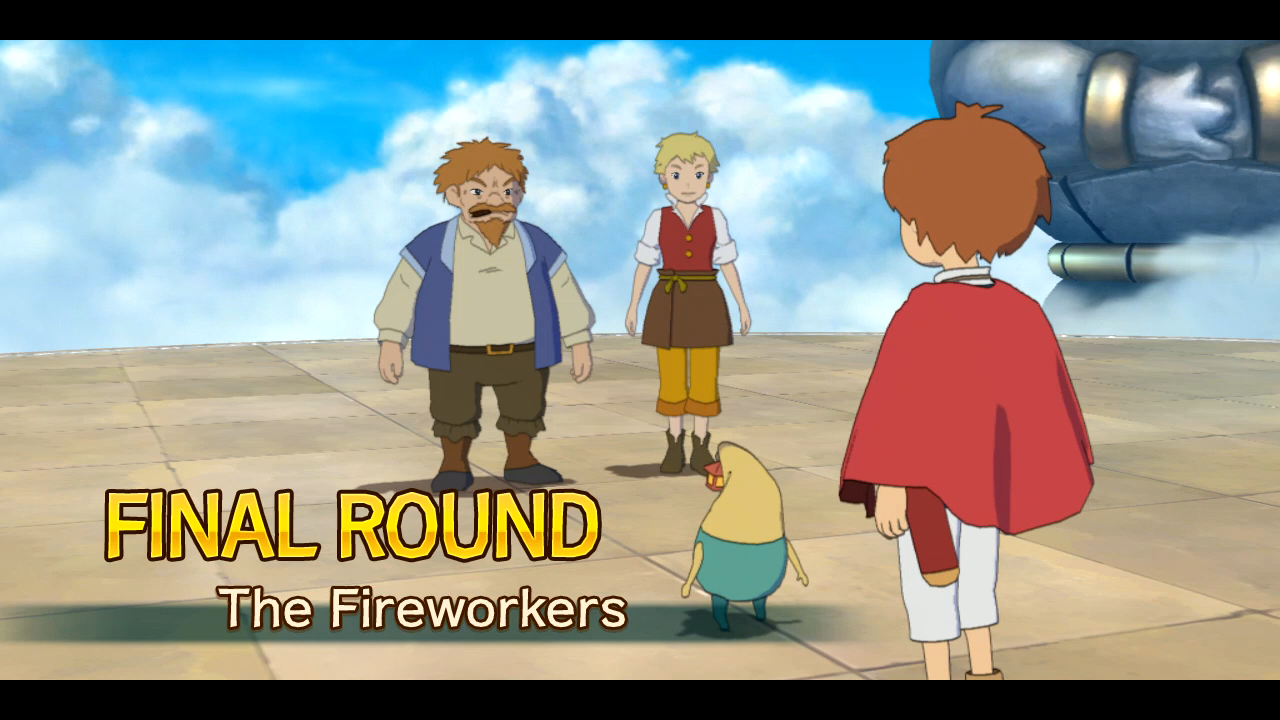 Hey! Two people we only ever saw once in a cinematic.  This makes me think Solomon kidnapped people to make them fight in the tournament.  ...Not that they need to be that concerned. These are decently tough familiars.  To most people. I switch out Dumple for Oliver for most of the Solosseum, and I experiment with my spells a bit more here.    Astra once again a standout, but keep in mind it costs way too much magic to be used for anything other than the final fight in a rank. Remember: we can't use items, and Drippy doesn't do anything, so any magic we recover must come from glims dropped by the enemies.   Let's bop it!  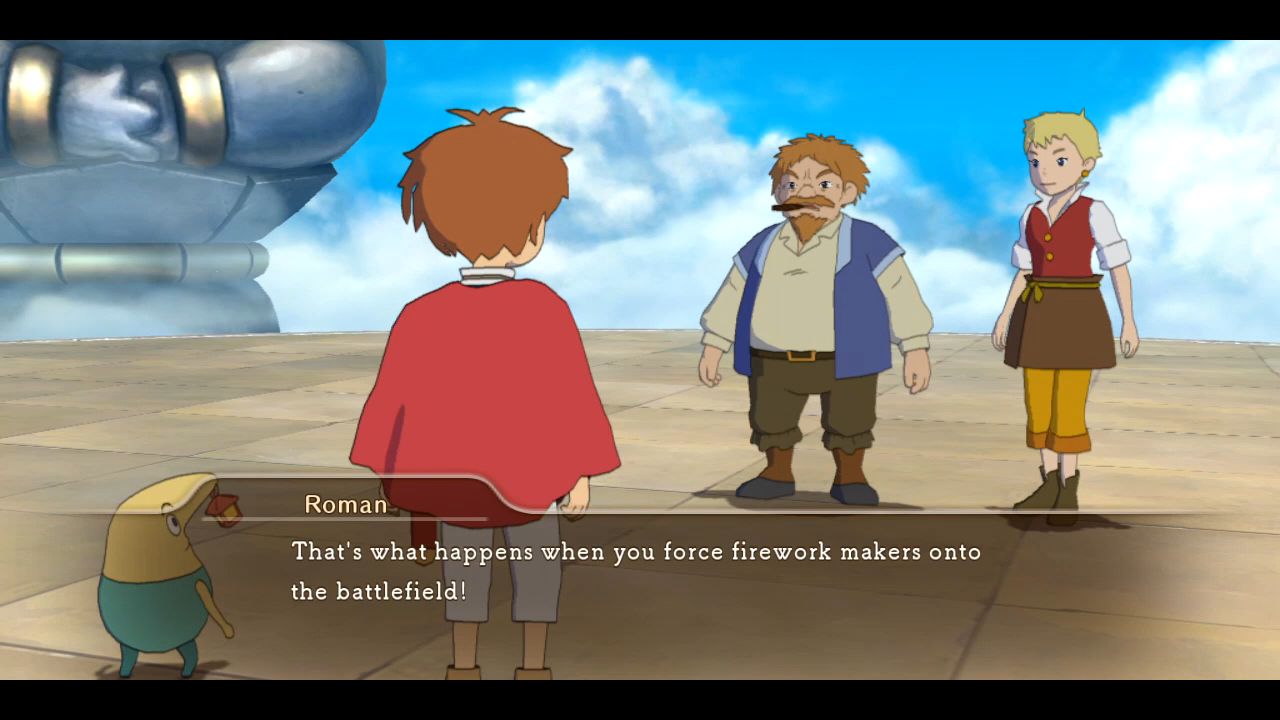 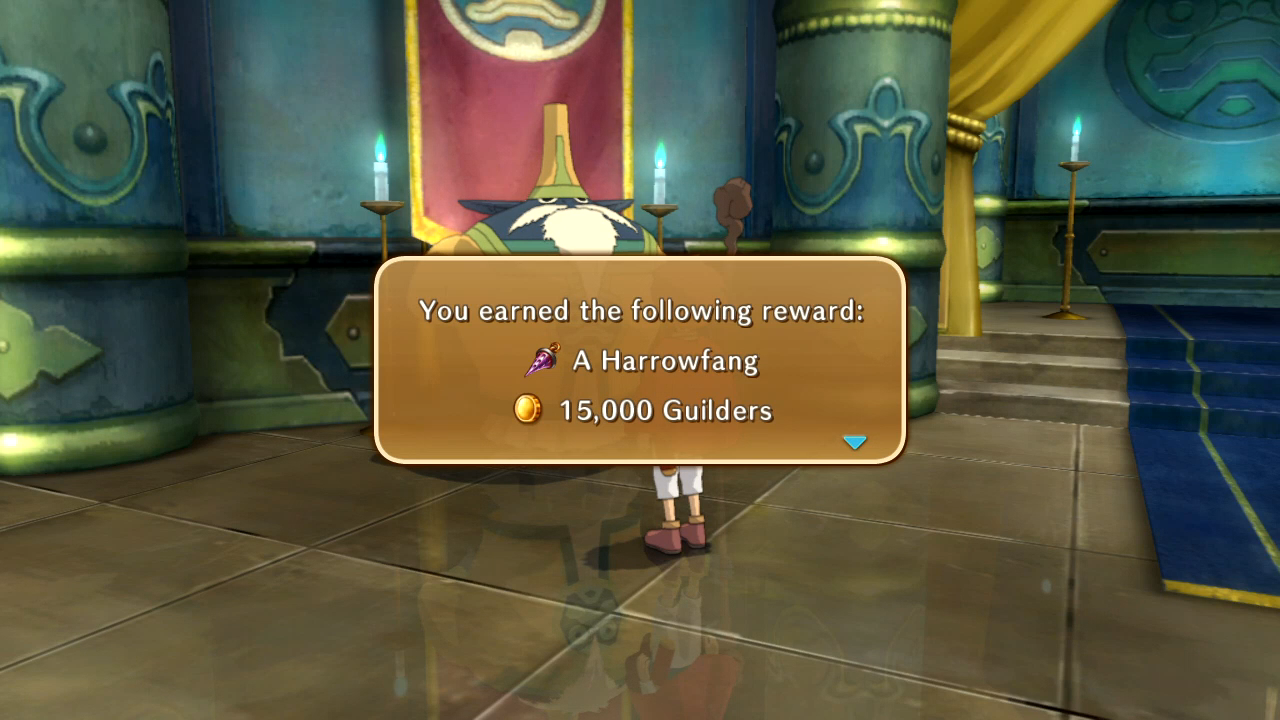  Time for the Solosseum to actually get tough! 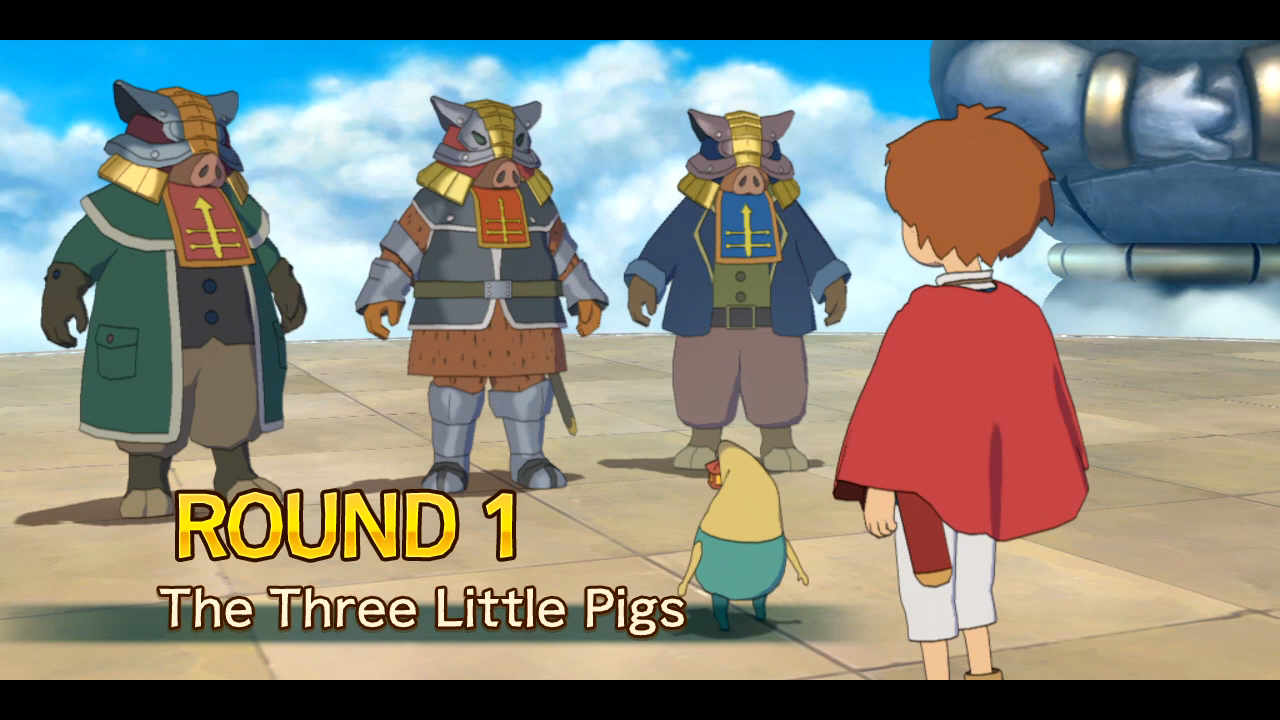 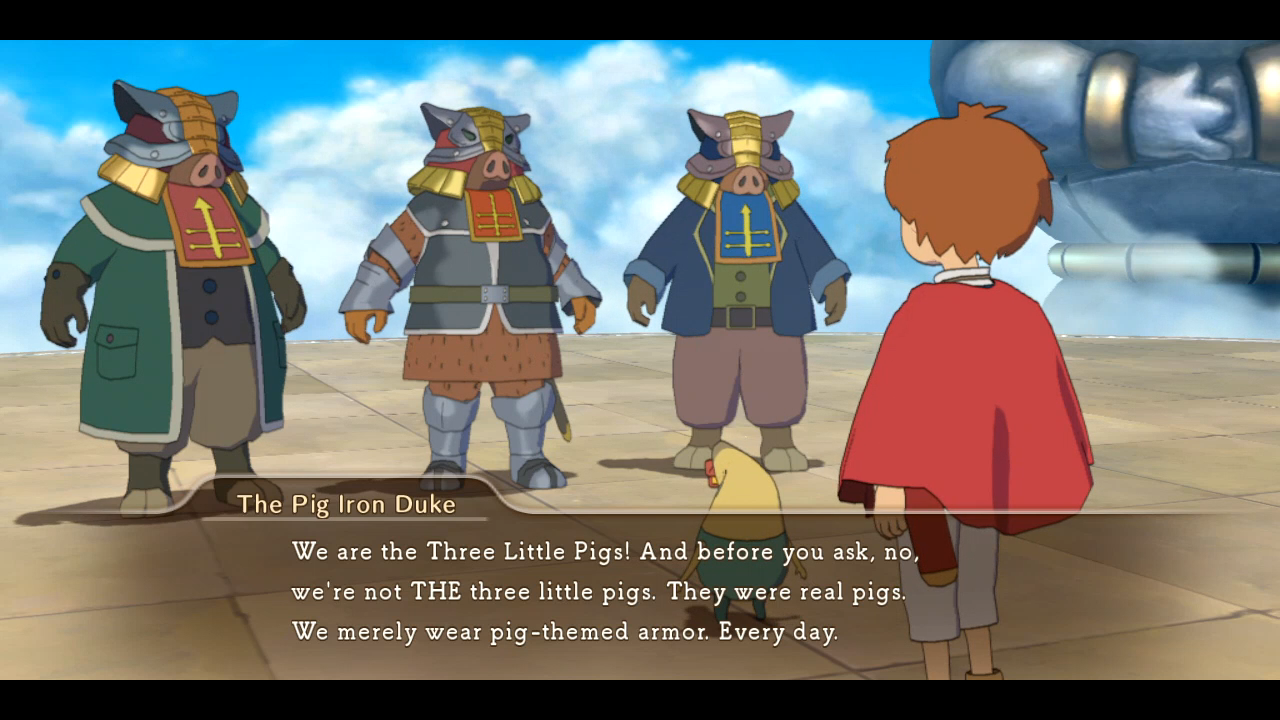 I like most of our opponents. Some of them have pretty good dialogue. 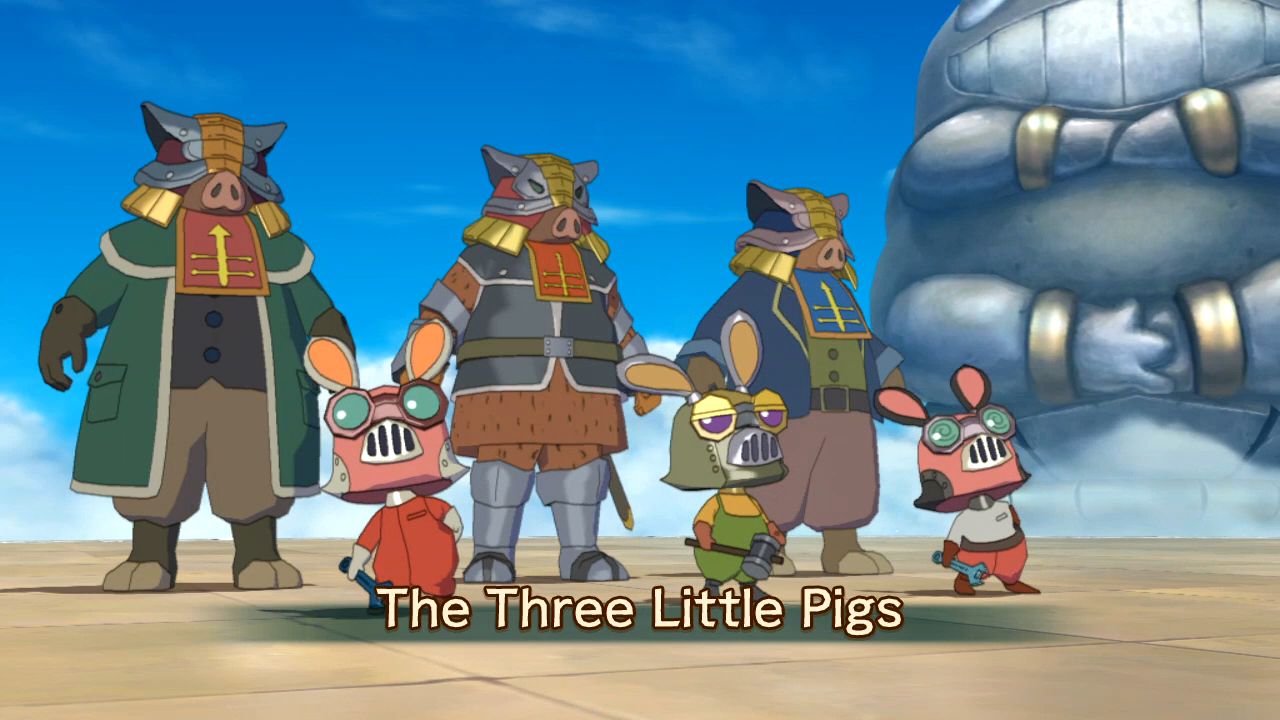 Boars would have made more sense, but okay. Robots are weak to storm, so ZAP THEIR ASSES!  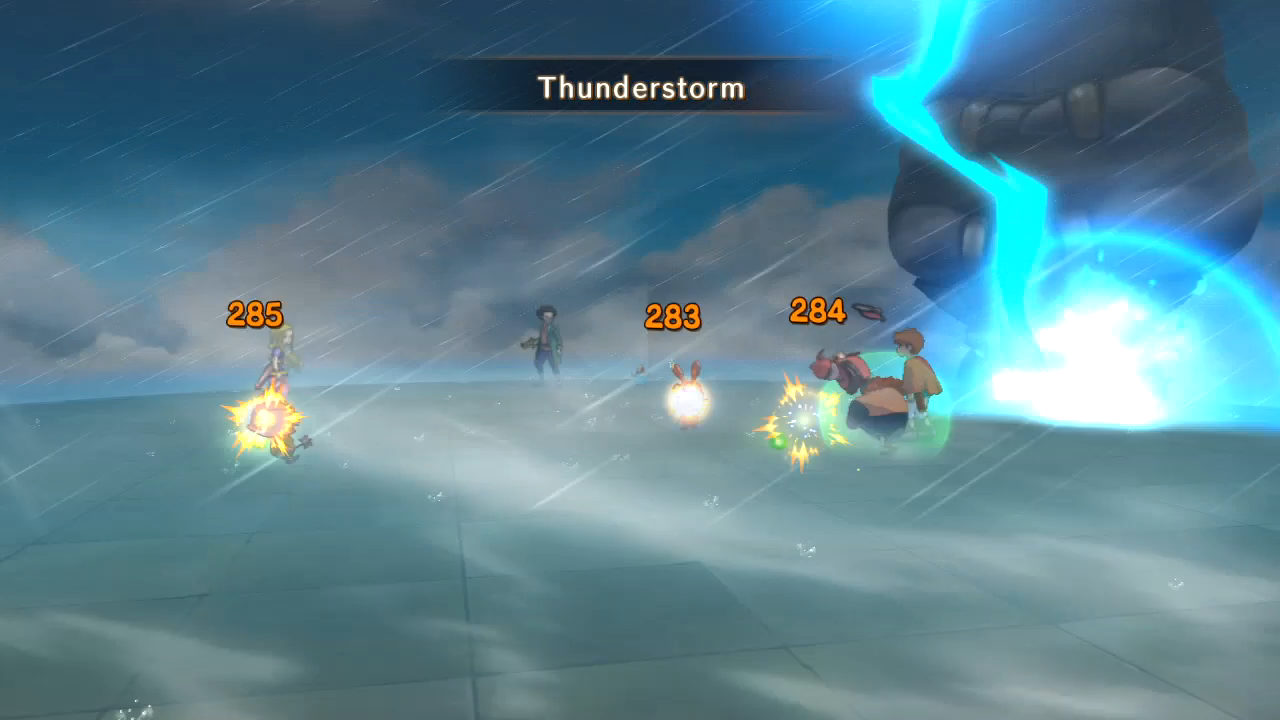 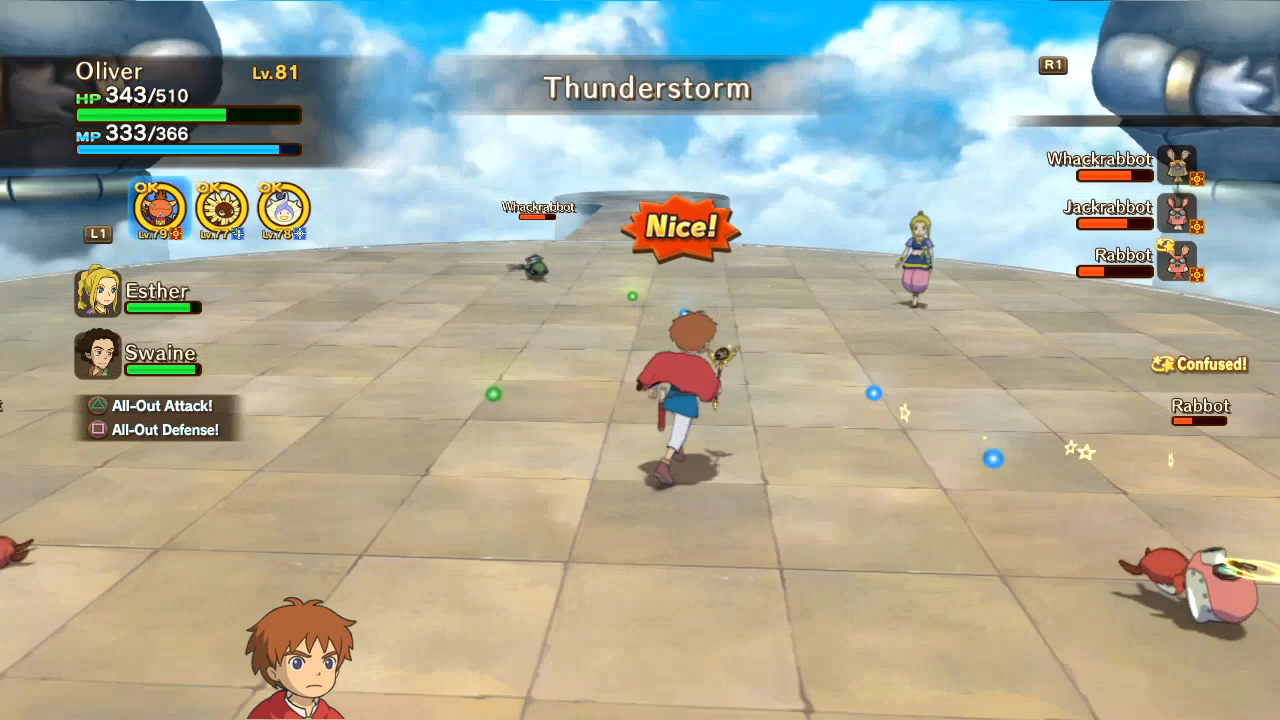 And here's how I learned to cheese the Solosseum. See all of those glims? Every time you use Thunderstorm on regular monsters, it knocks them back with a "Nice!", like if you'd countered an attack or used Pulse. More often than not, this causes them to drop health and magic glims. By this point even the smallest blue glims give around 20 magic, and Thunderstorm only costs 18 (with the reduced-magic Bounty Reward). That low cost for decent damage, fast casting time, ability to disrupt their special attacks if you do it fast enough, and the chance to confuse the monsters makes Thunderstorm a tournament breaker. In other words: Use Thunderstorm -> Never run out of magic -> Win the Solosseum. 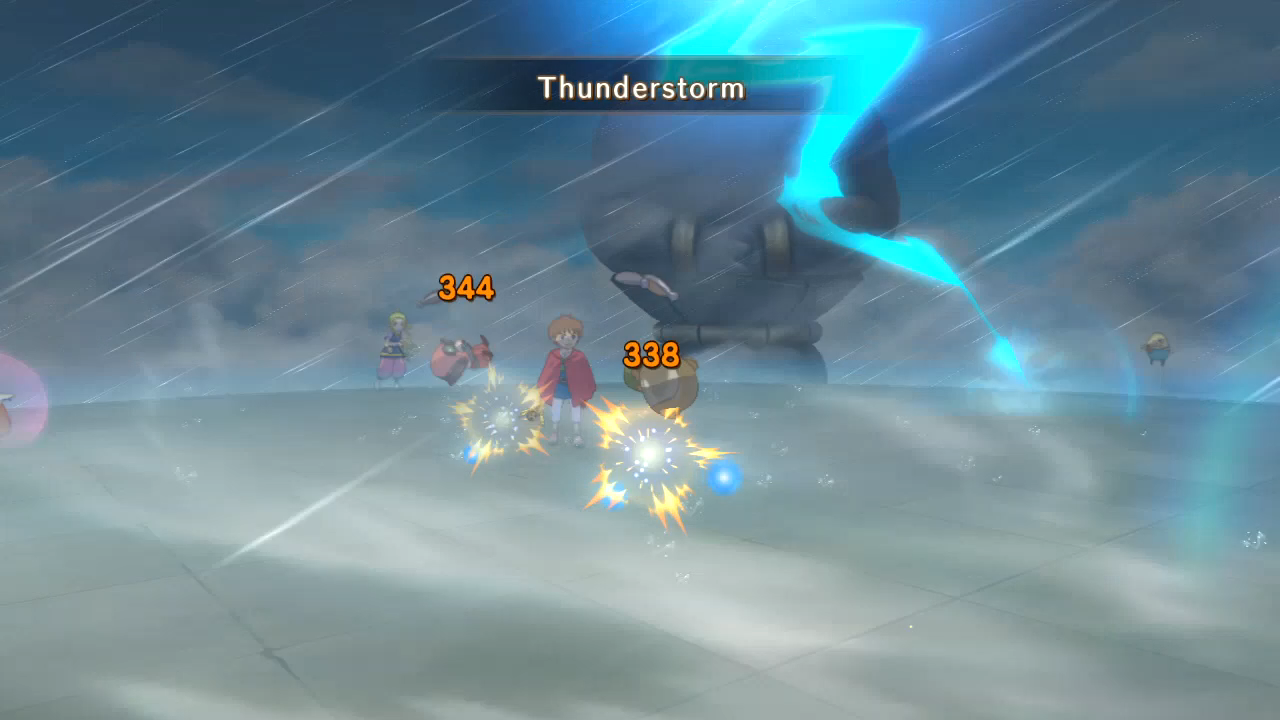 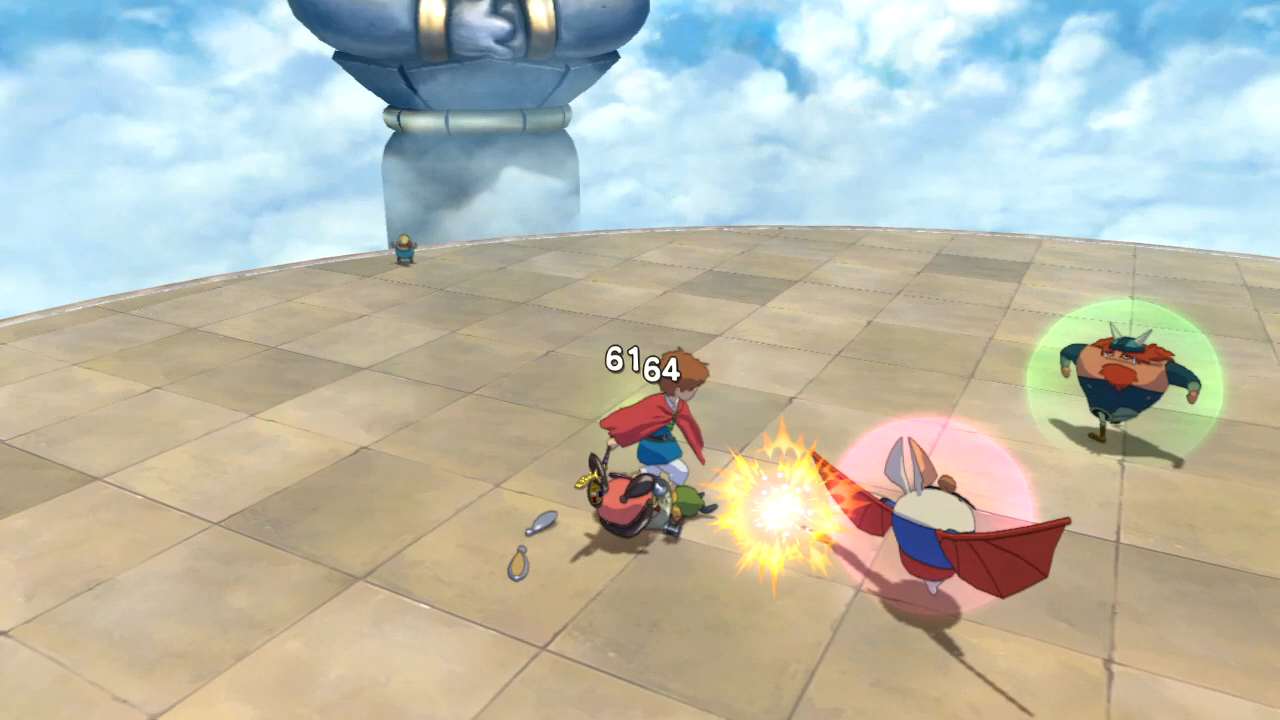 When their health is low and there's only one monster left, you can go back to the anticlimax slap. 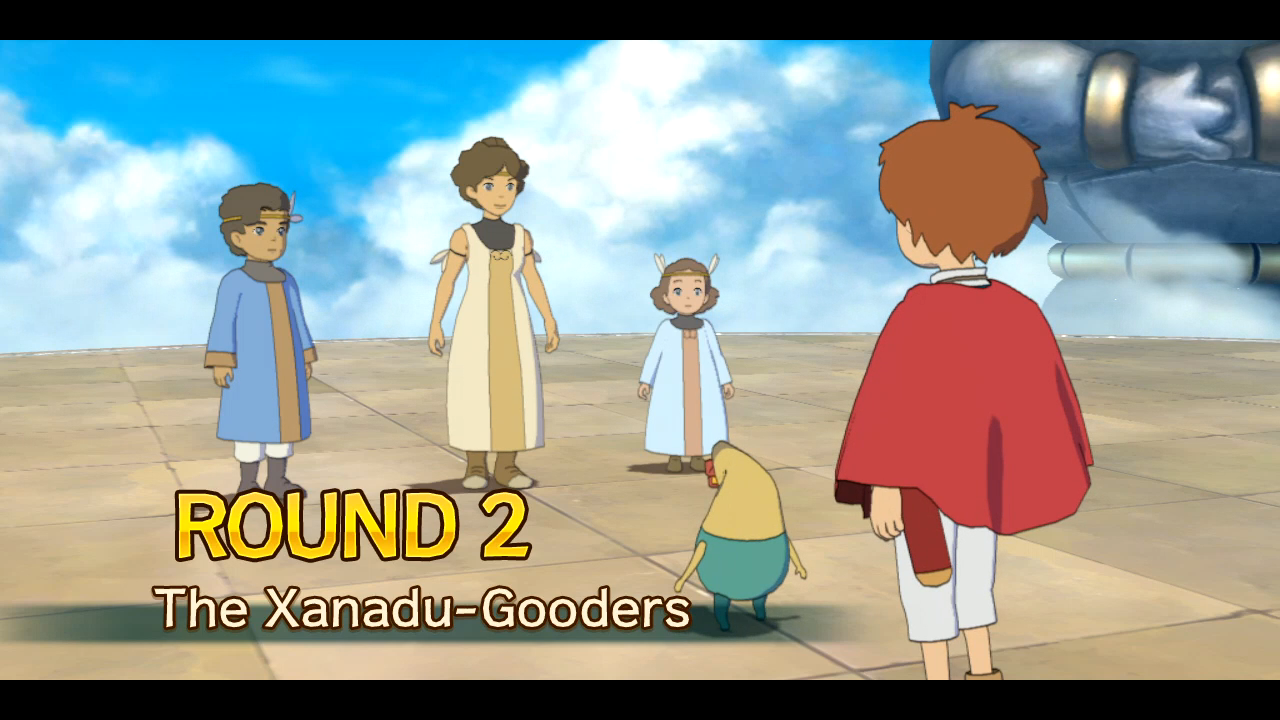 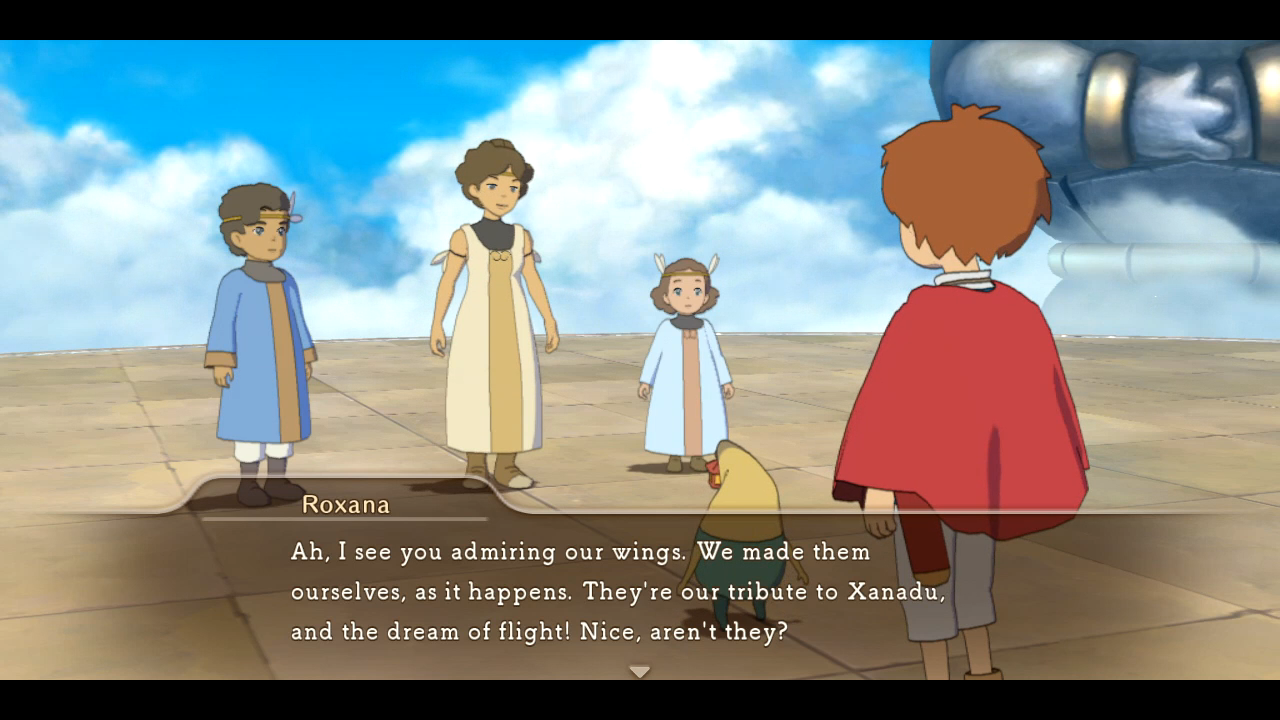 They look like leaves, mam. Try saying that five times fast. 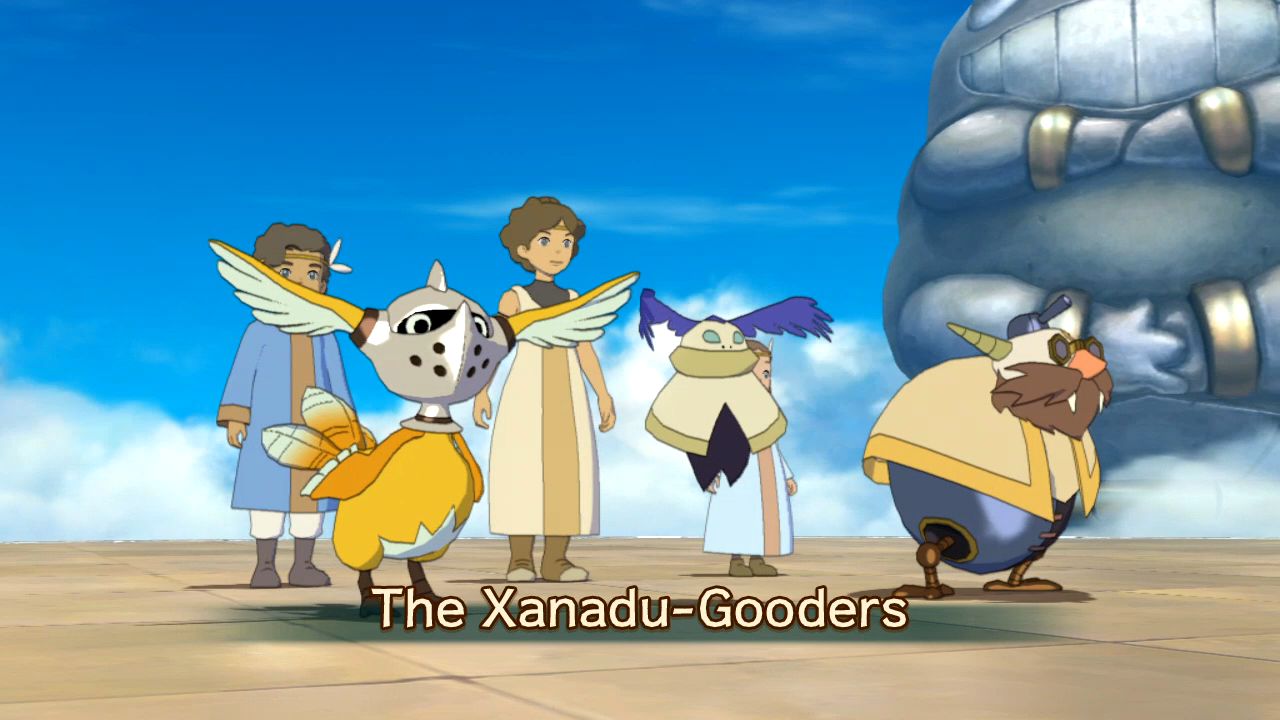 Good lord, that dude on the right. He's called a Big Daddy, and he's as much a gently caress as his Bioshock namesake. 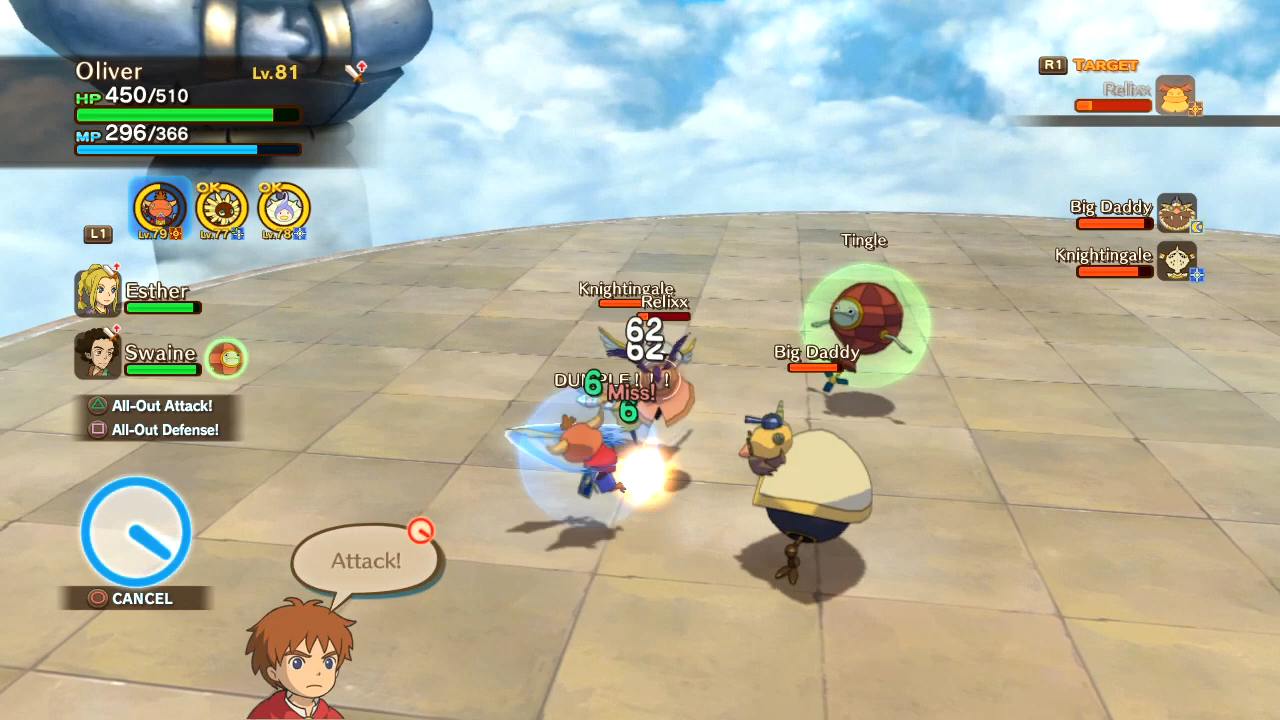 Going after the healers first. 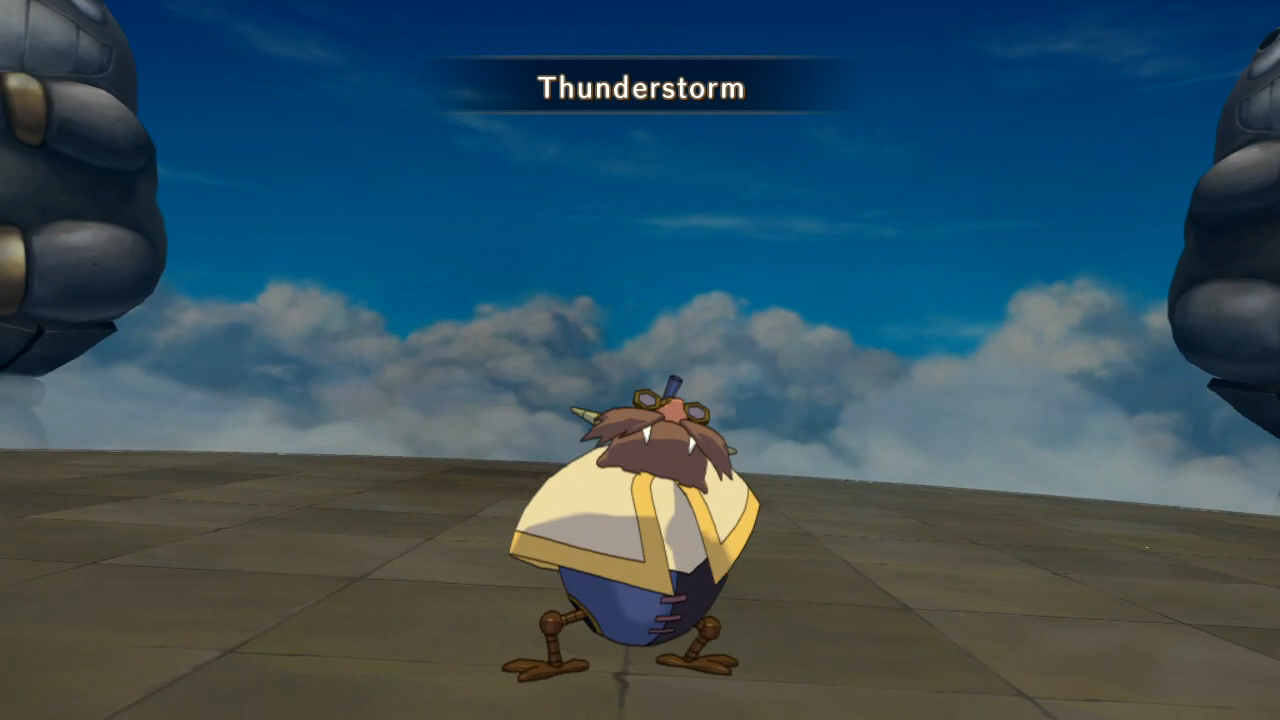 Then it turns out Daddy has the same idea I have. 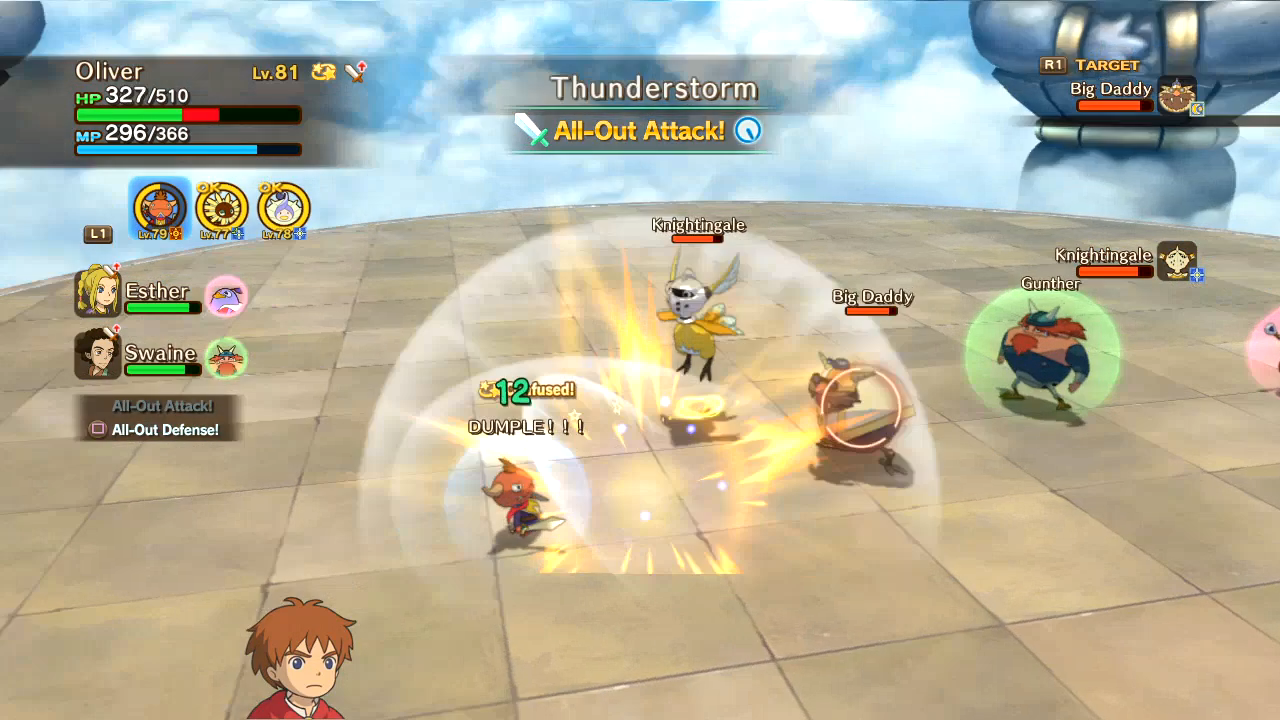 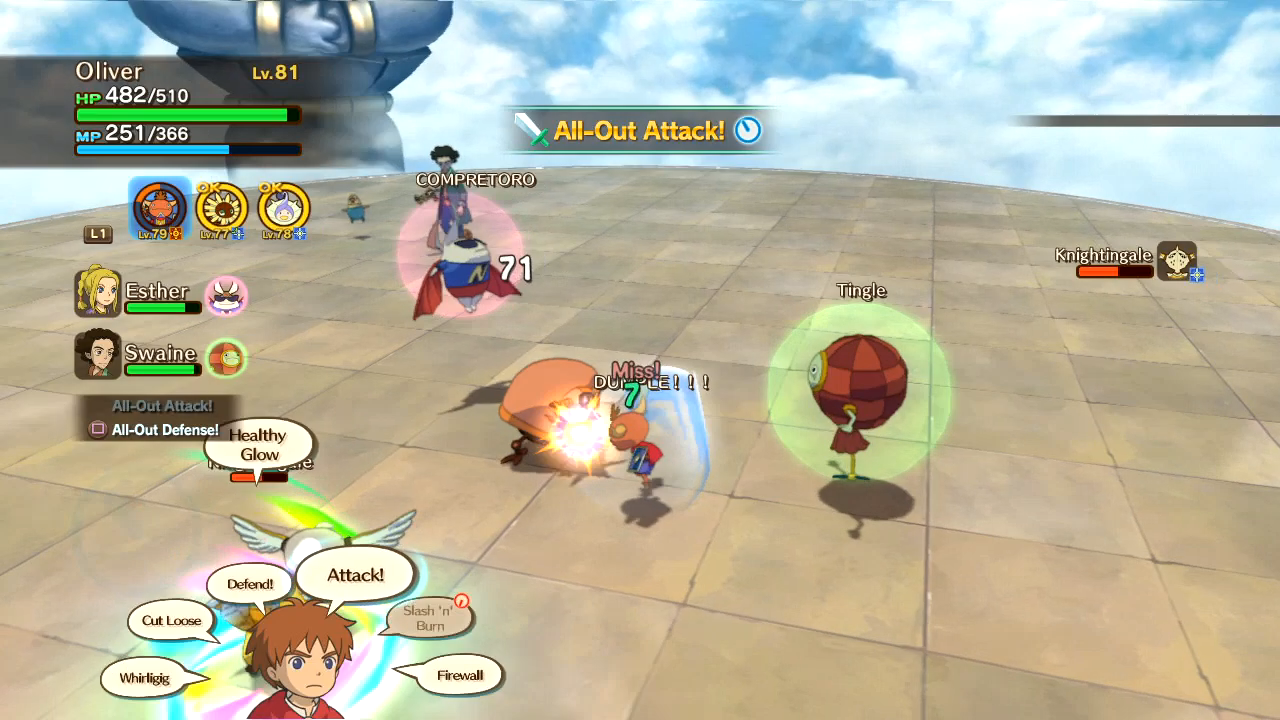 I decide that the healers have taken second priority. 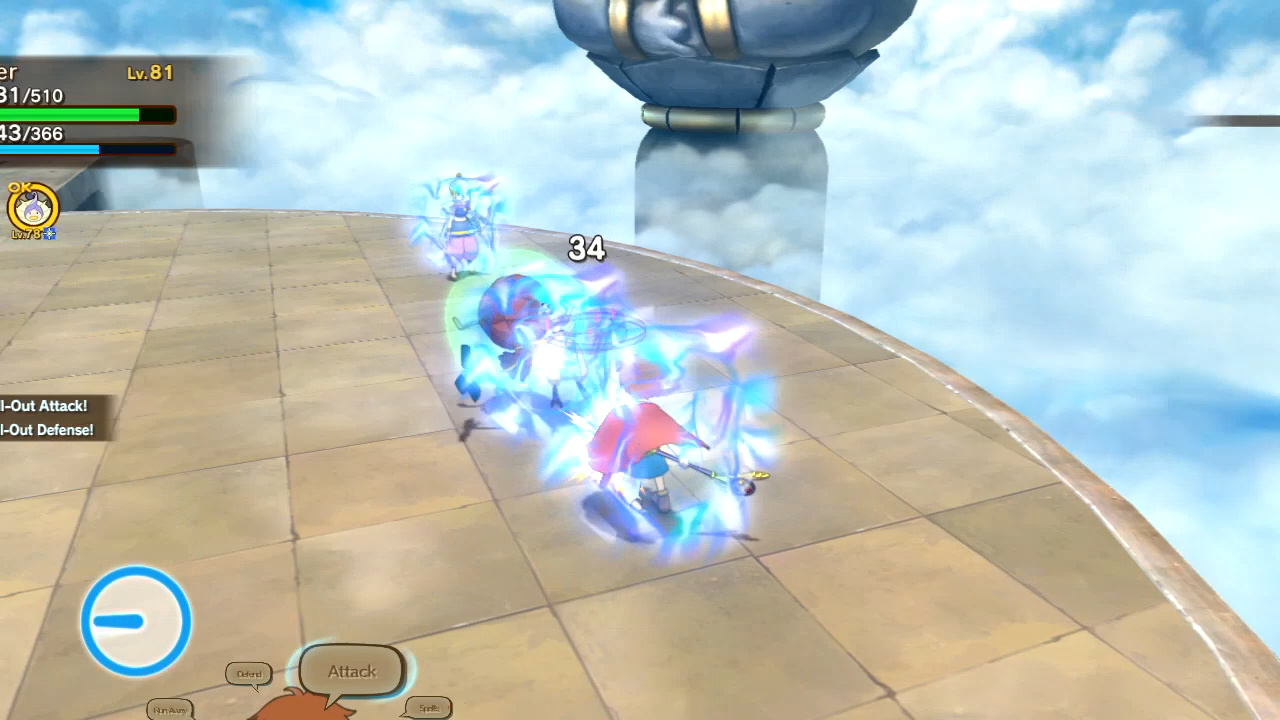 I finish off the last one just in time for Esther to waste magic on buffing everyone. 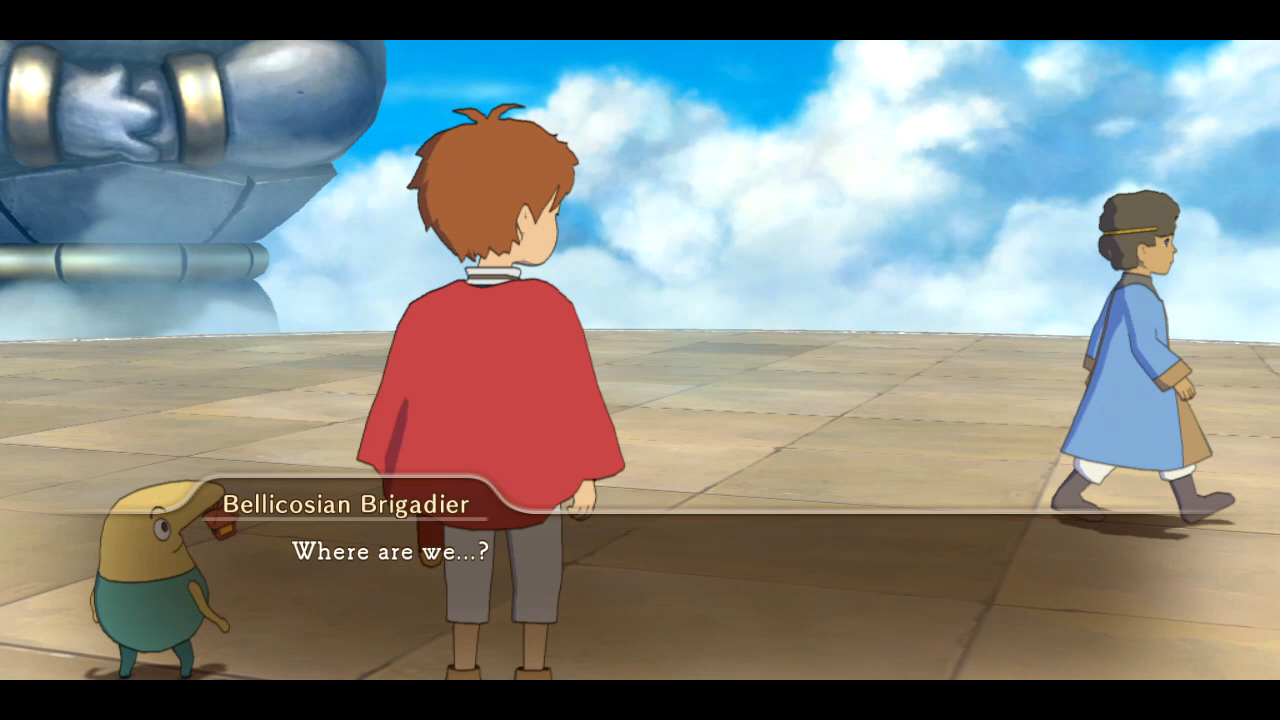  Okay, now Solomon is just loving with people. You'll recall Bellicosia was the nation that Lucien (Shadar) was from. They're kinda obliterated from history. Also they were cunts, so let's kick their asses. Note that it says "Round 3" and not "Final Round". 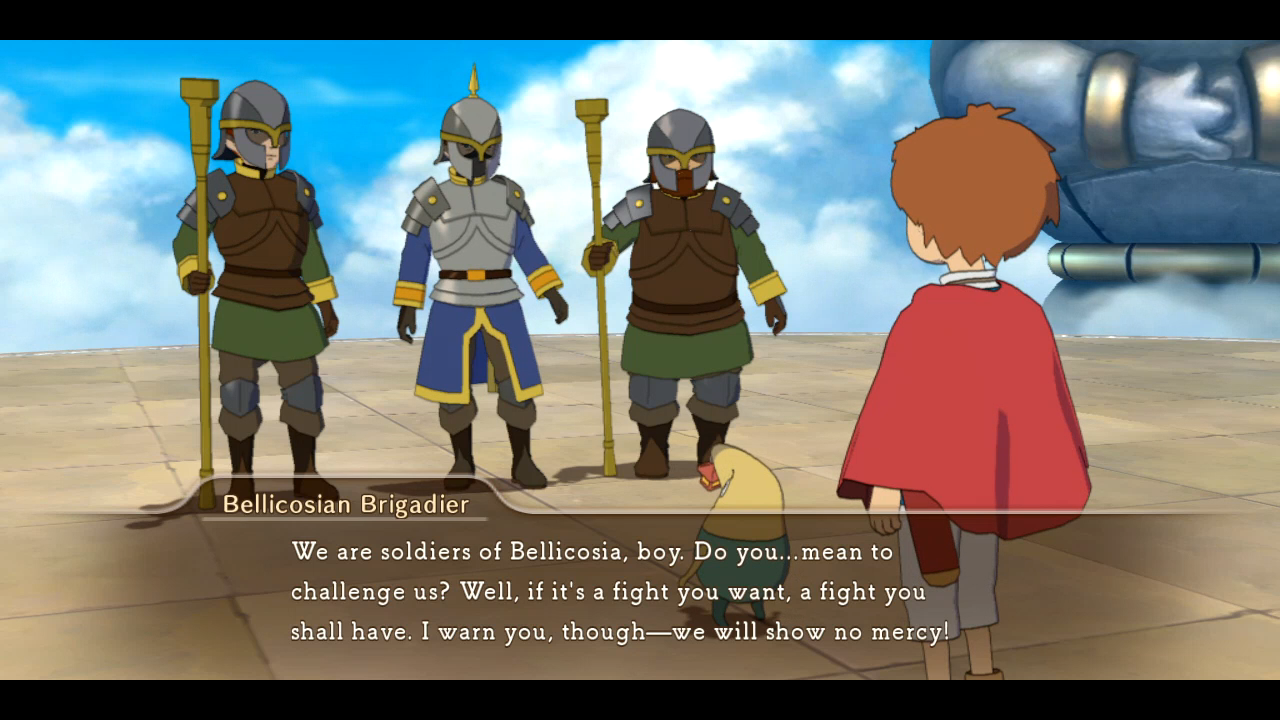  I expect a tougher fight than I get here. 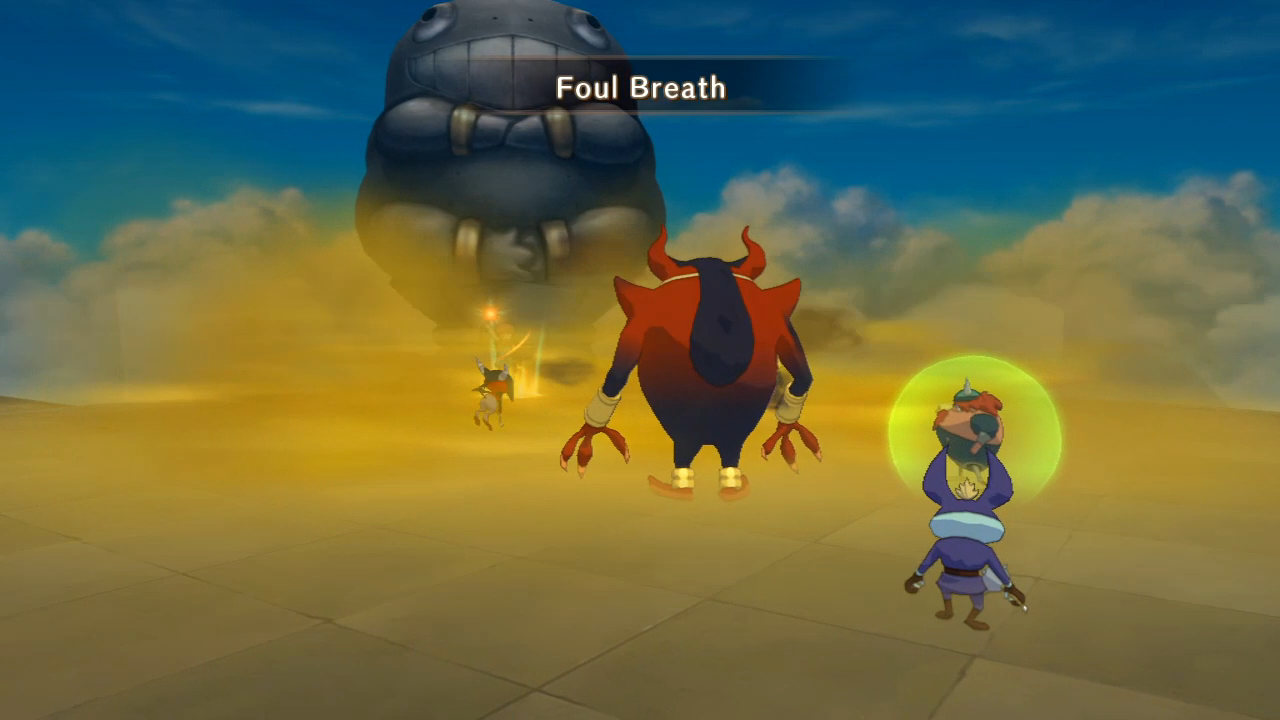 And the big guy certainly tries, starting off the fight with an all-around debuff. 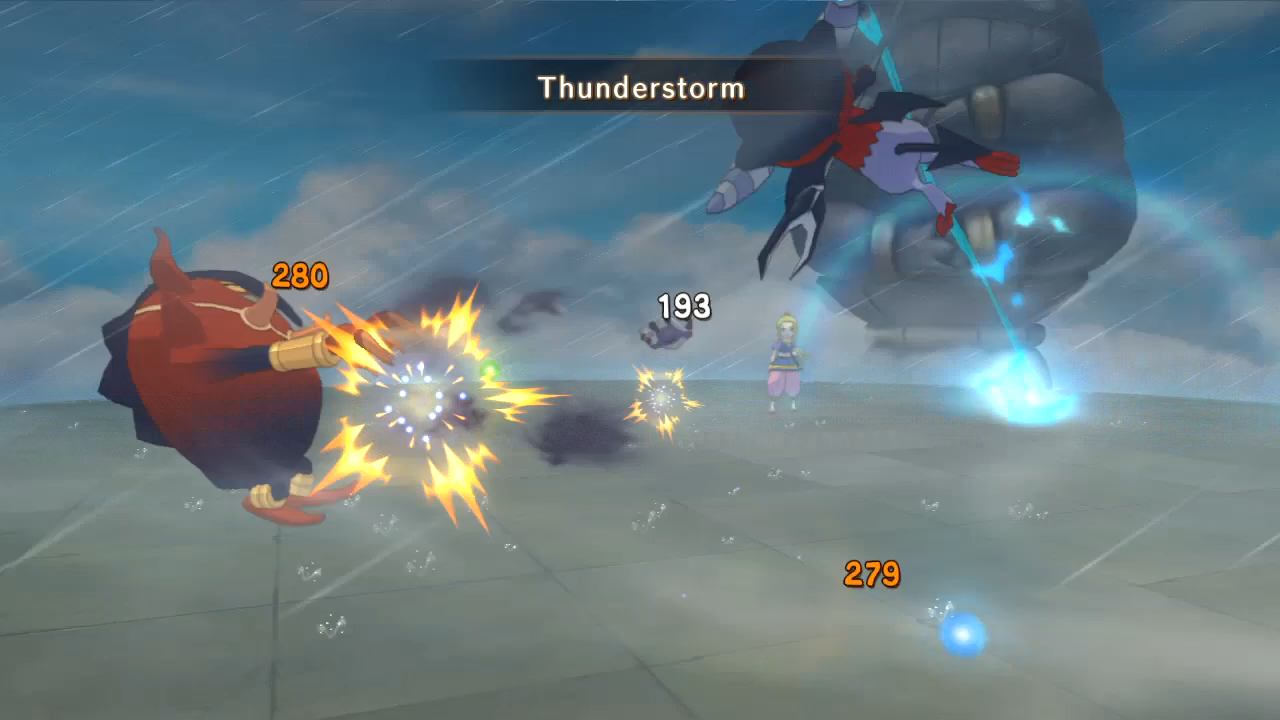 But then I Thunderstormed. Even if one or more of the monsters is resistant to storm damage, it's still worth doing the attack for the glims. The fact that these two are weak to it is just a bonus. 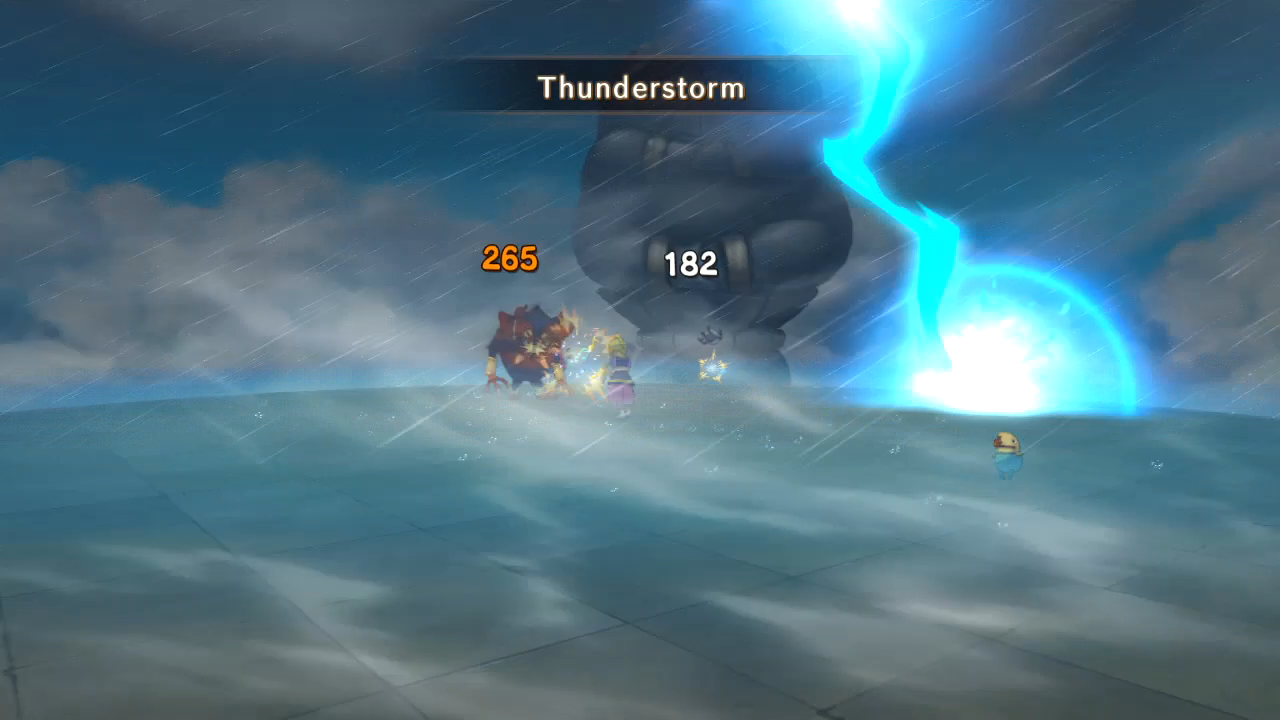 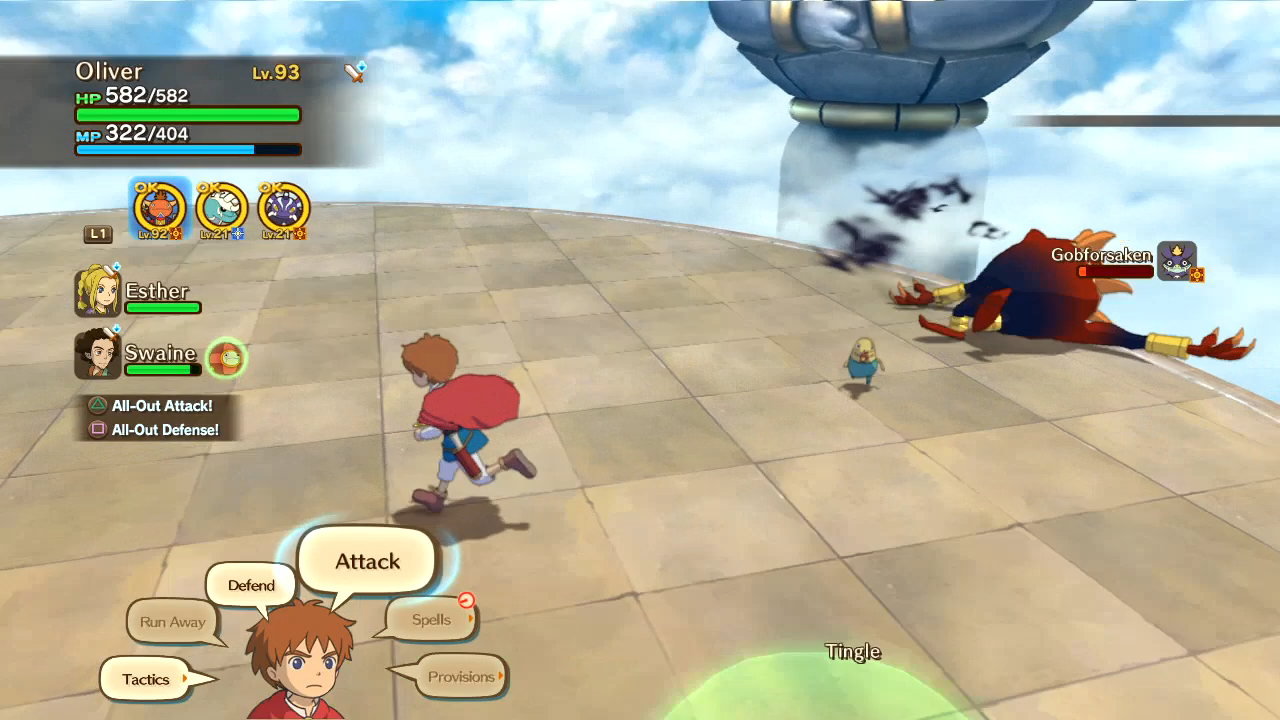 The tiny, non-weak-to-storm goblin holds out the longest. 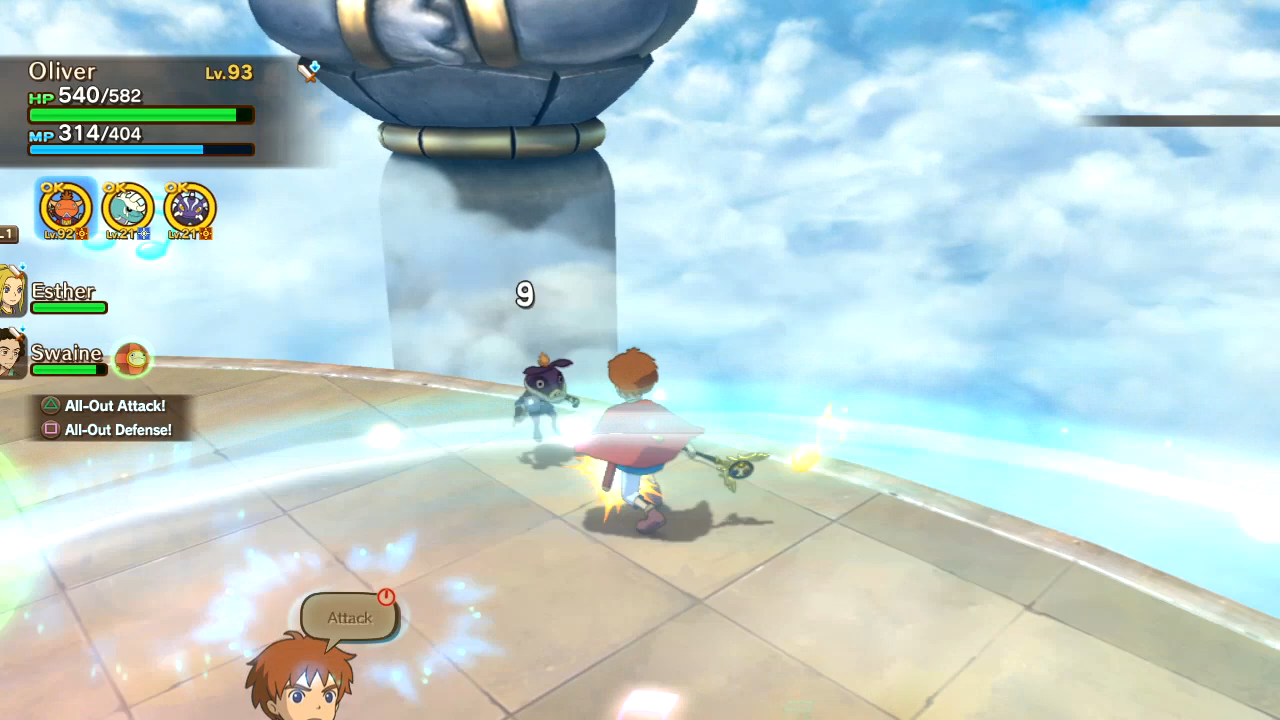 So he gets a warrior's death. 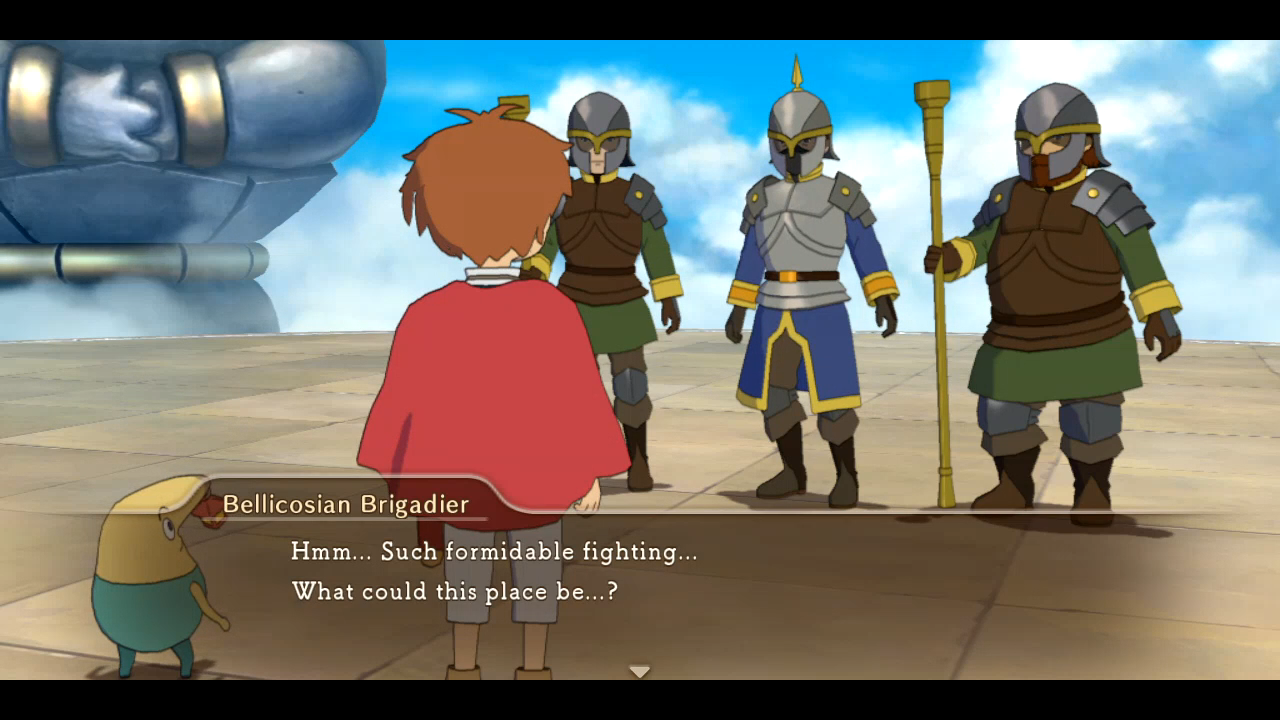  And here I got blindsided the first time I did the Solosseum. Ranks A and S have four rounds, not three. And the fourth rank is a bastard! 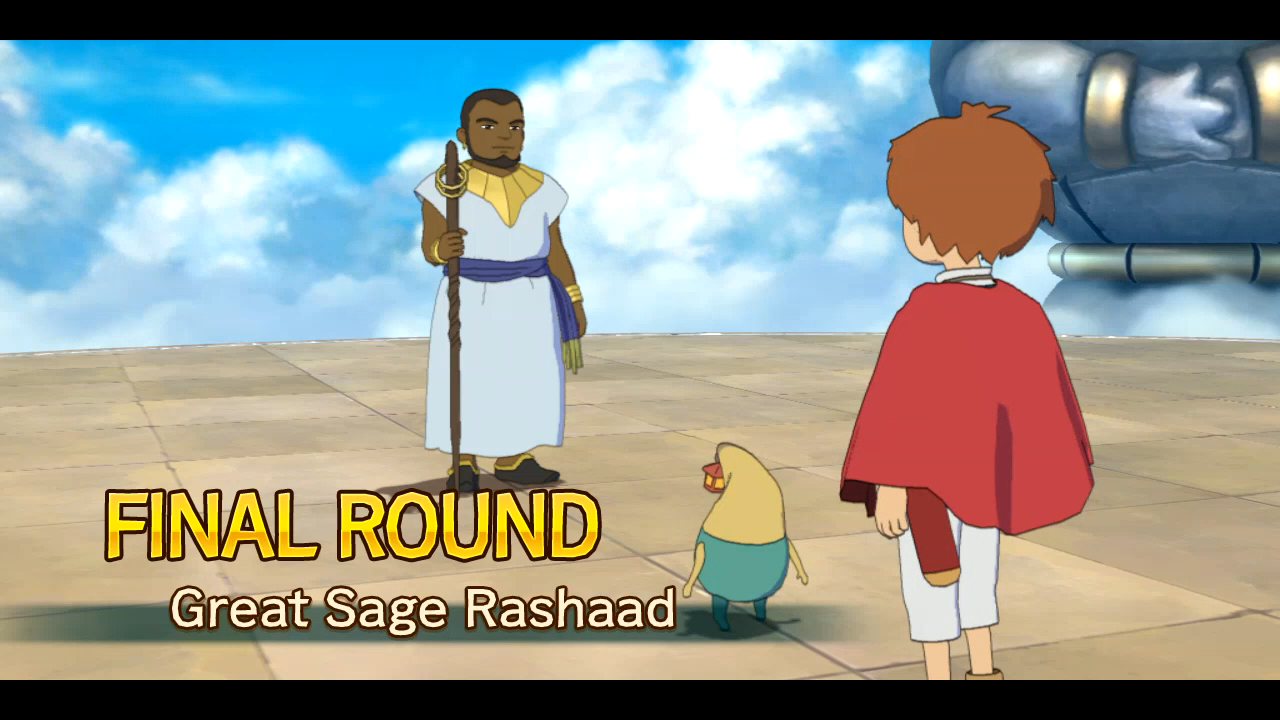 One cool thing though, we're seeing more familiar faces these last several fights. 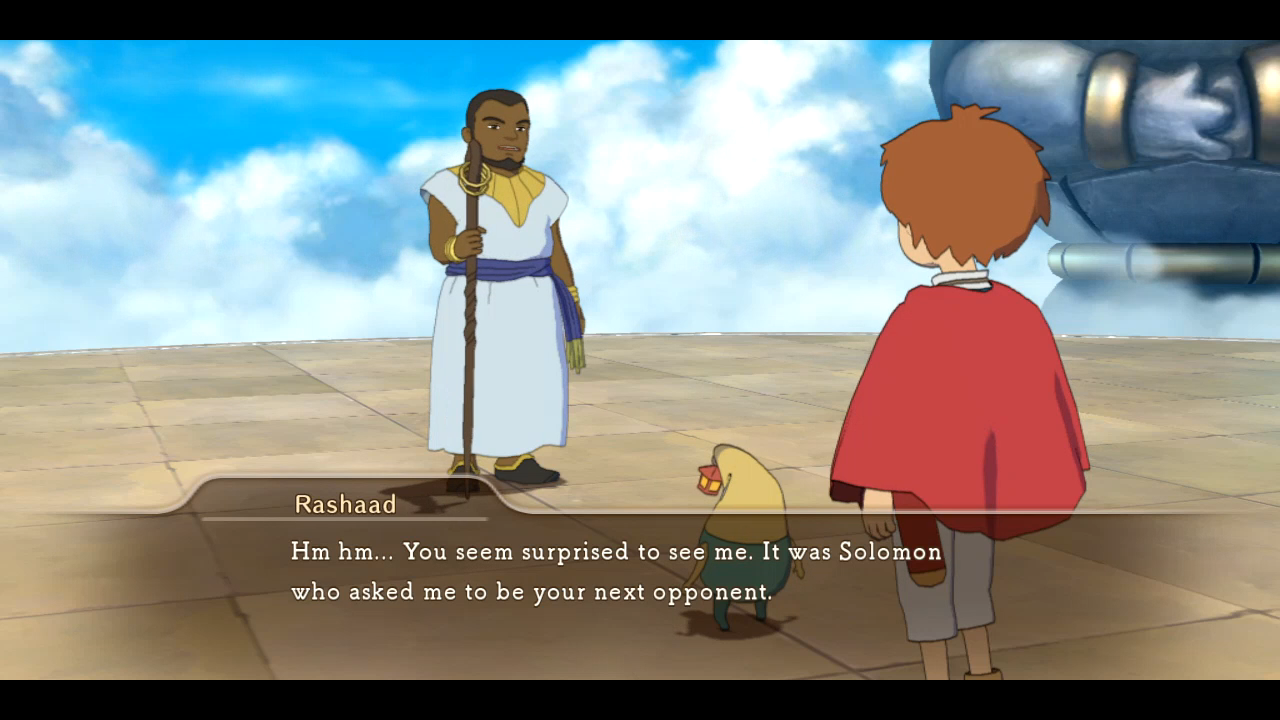   Nice bit of continuity there. These are fully metamorphosed versions of the three familiars Solomon offered to us early in the LP.  The trumpet duck jumps into the fight headfirst.  Oh yeah, Travis, he's great.   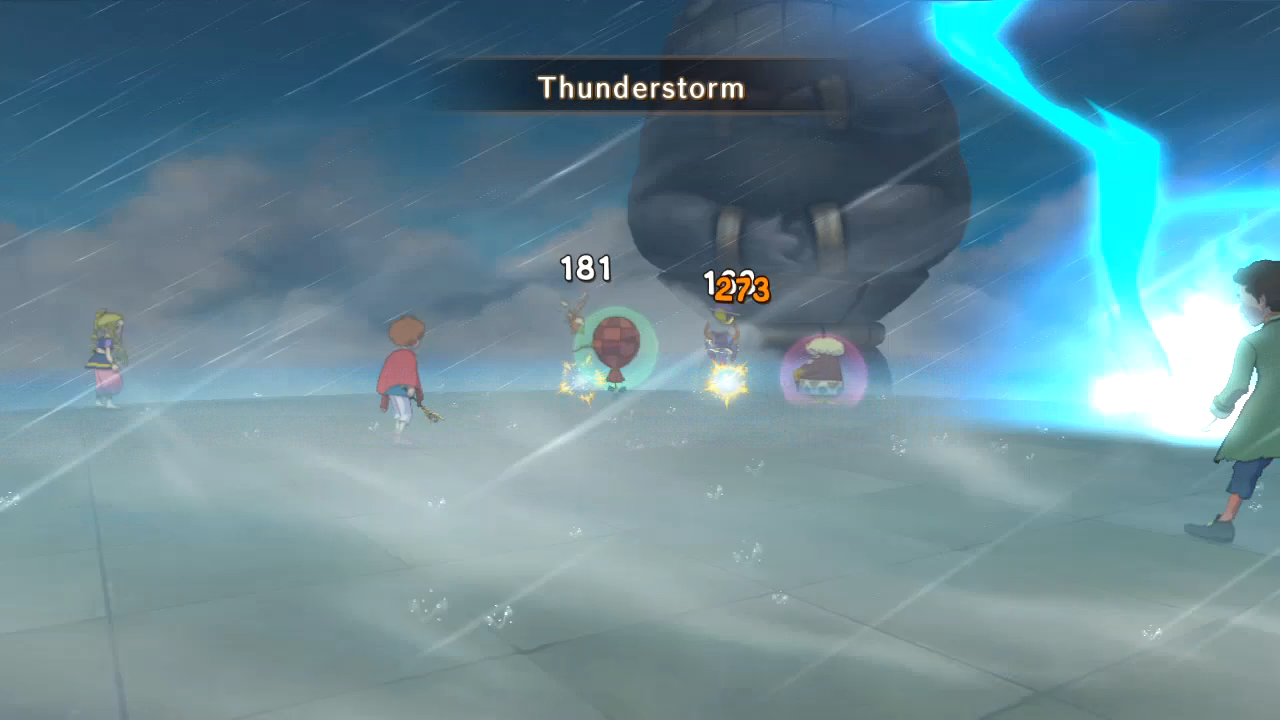 These fights might blend into each other, fair warning. 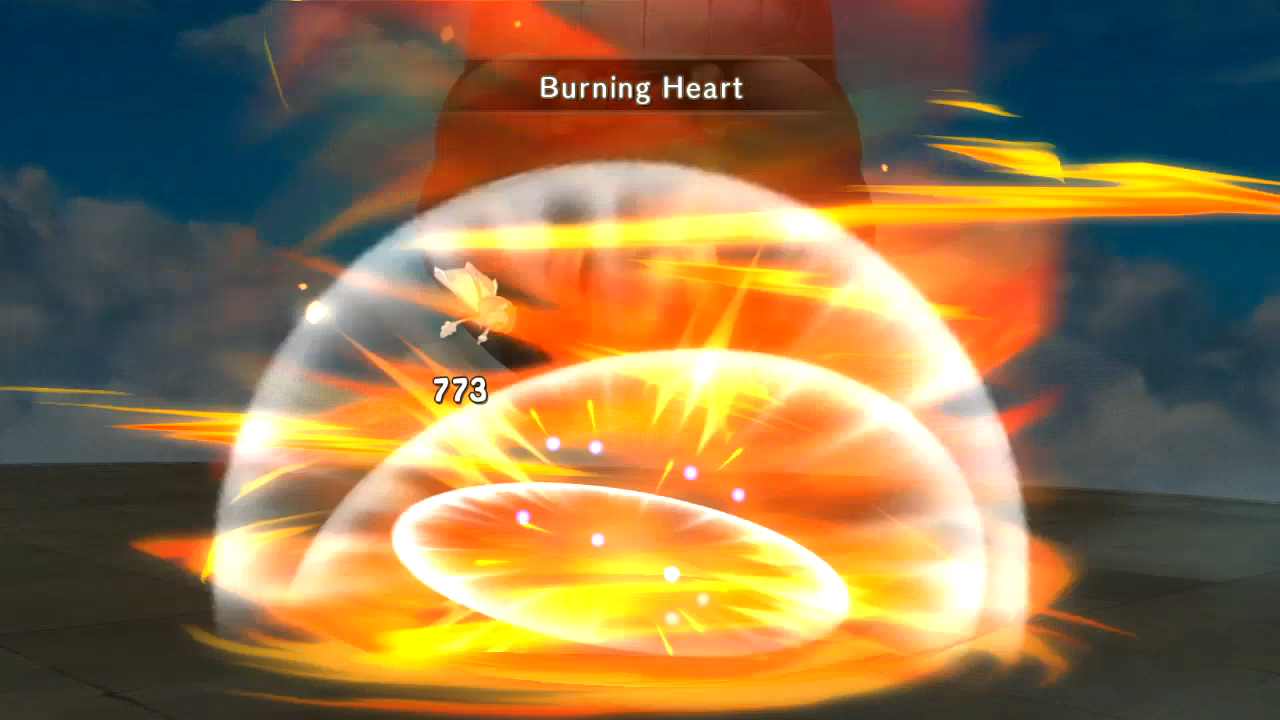 In multiple ways. 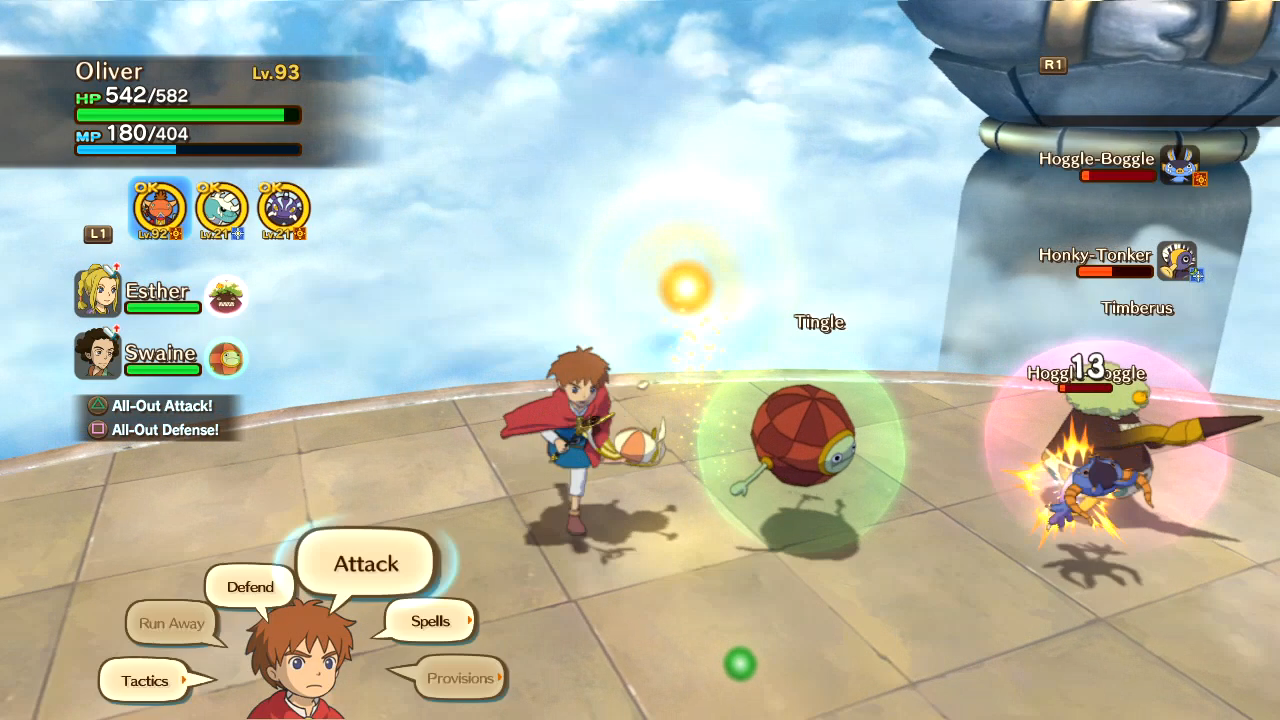 Immediately after I take out the Naiaad, I get another gold glim. 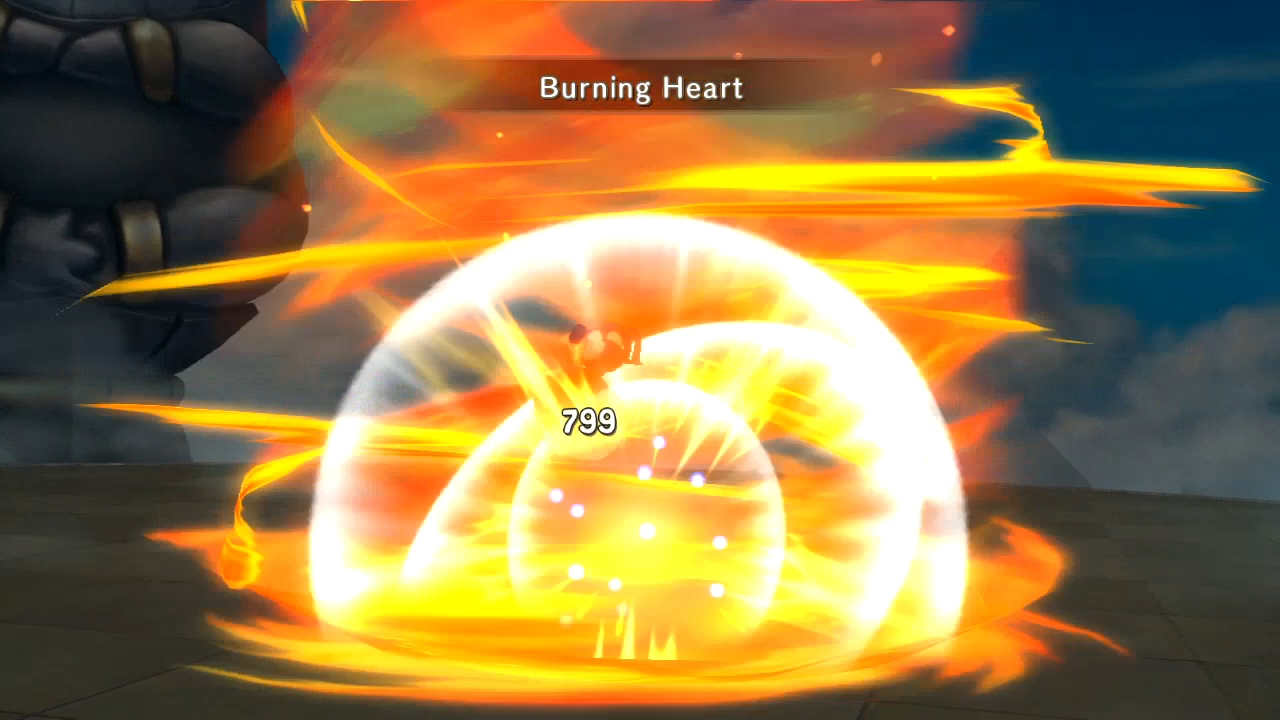  poo poo, I think they're learning.  Not succeeding, but...  And we close out Rank A with a good old Mornstar.    Heart of the Muse is an alchemy item. You'll notice a lot of reward items you get very late in the game are for alchemy.  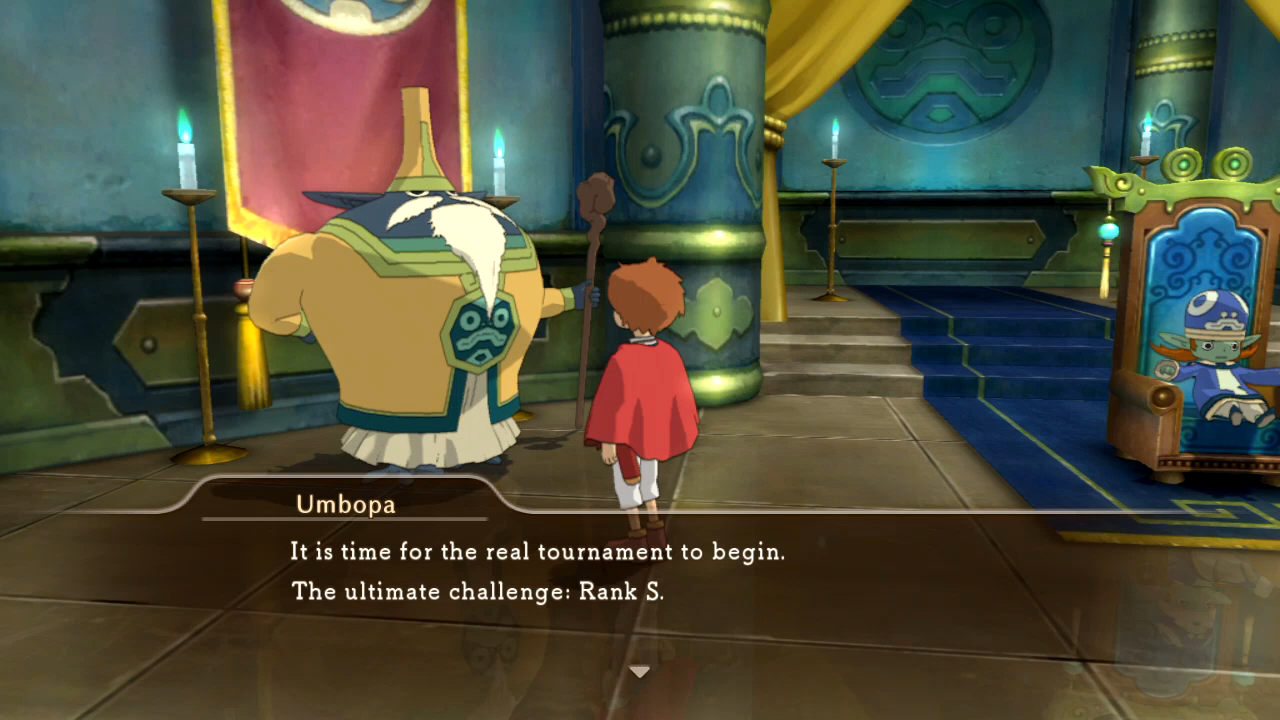 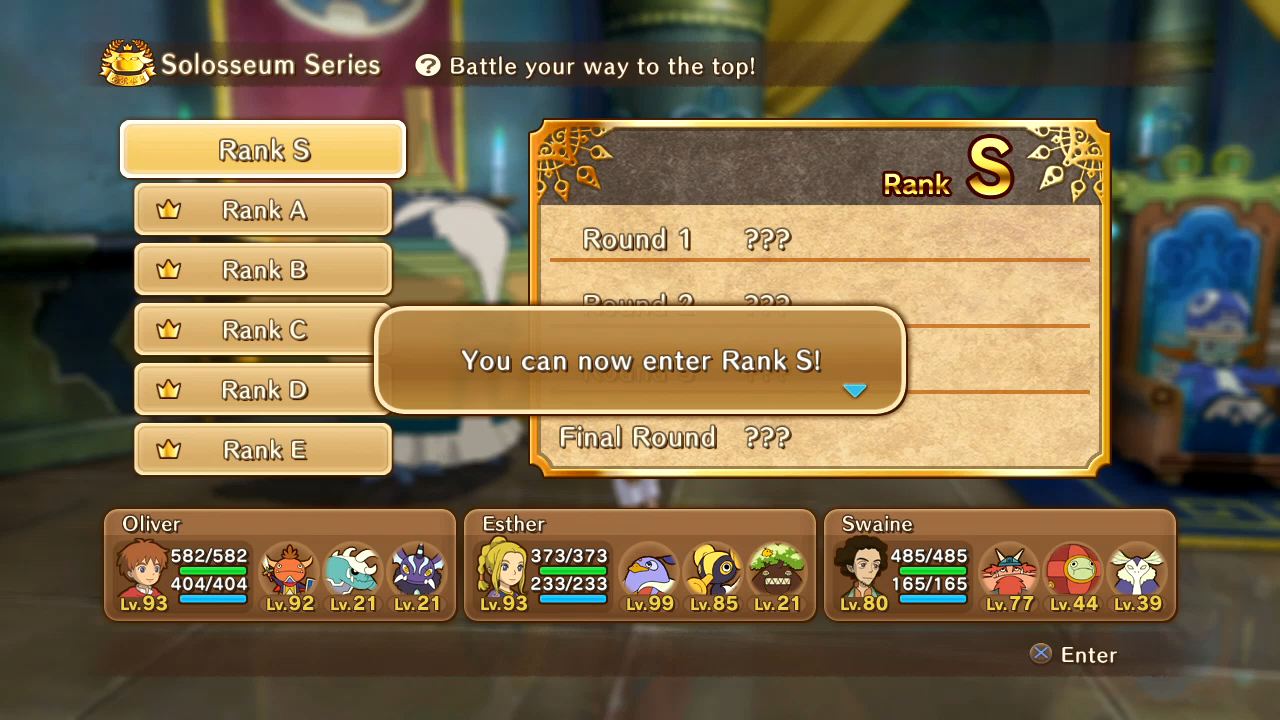 I'm so ready to make a mockery of this.  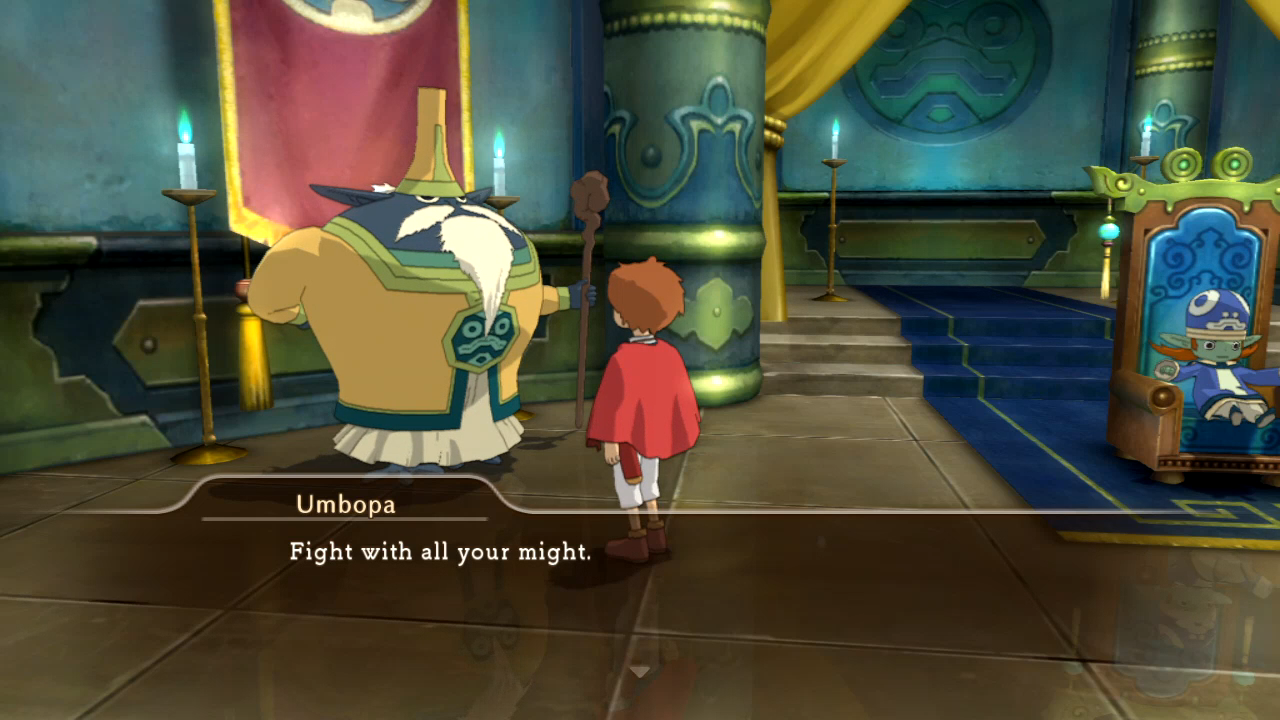 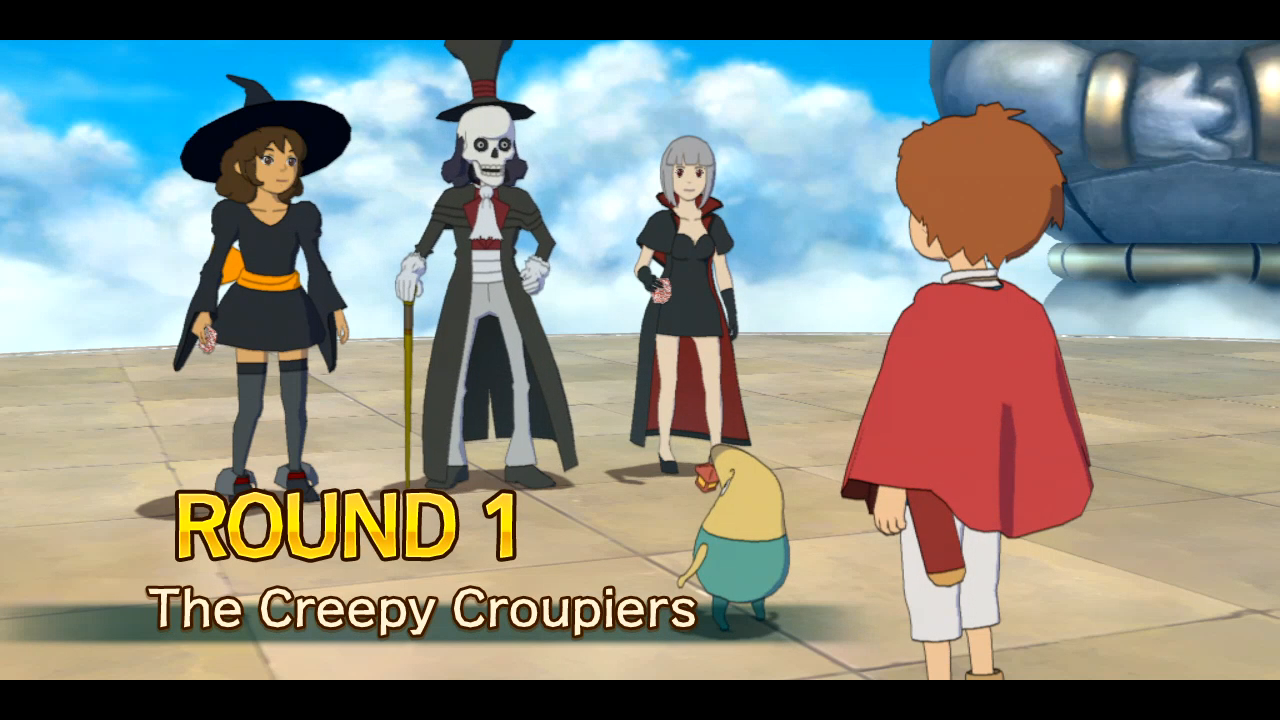 I dedicate this asskicking to Travis and his eternal grudge against the girl on the left.   What a shock.    Eh, resistant or not, Burning Heart still knocks a good chunk off of anyone. 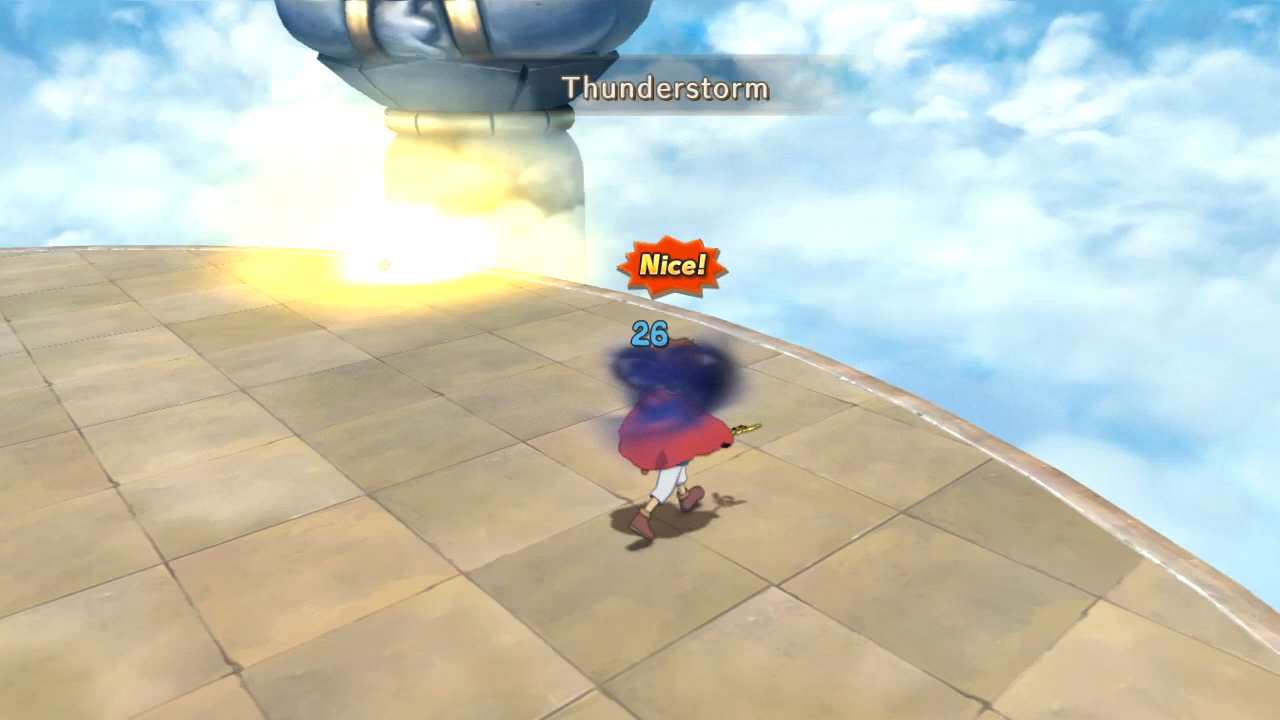 I got blinded at some point, but Oliver's magic hits no matter what. 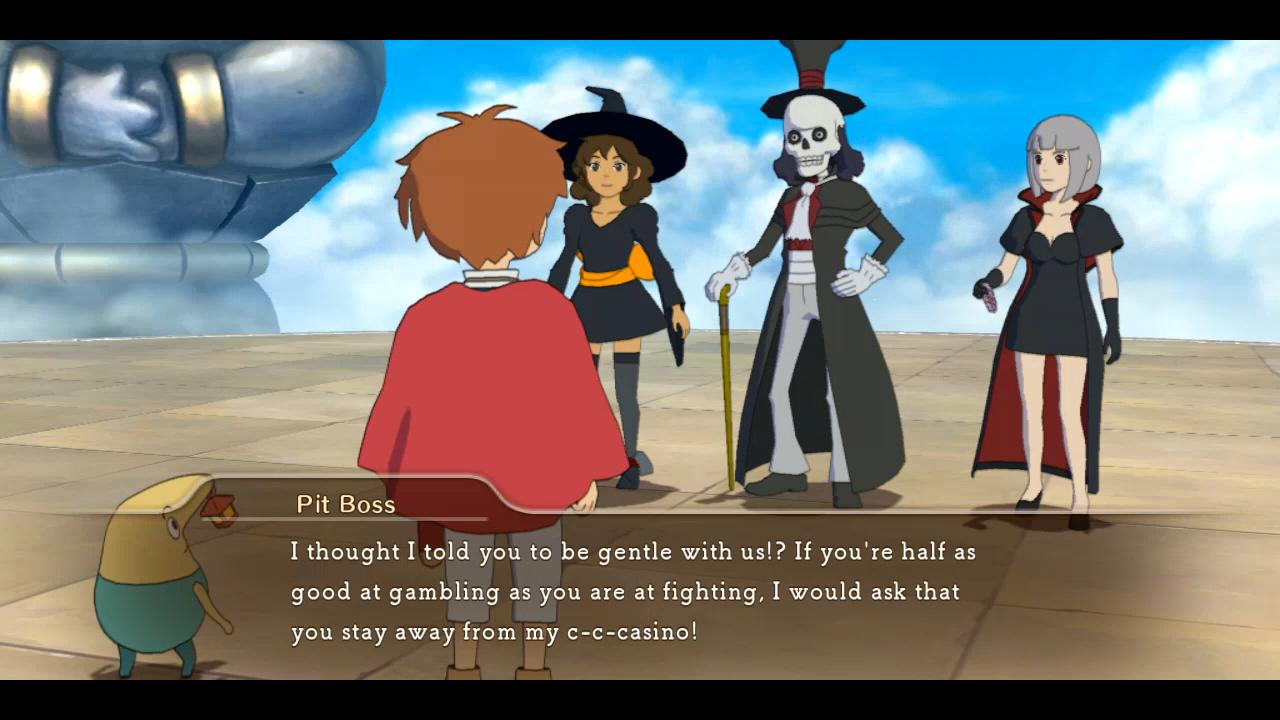 Literally only ever went there again to check if my knowledge of the Mem-O-Vision was accurate. 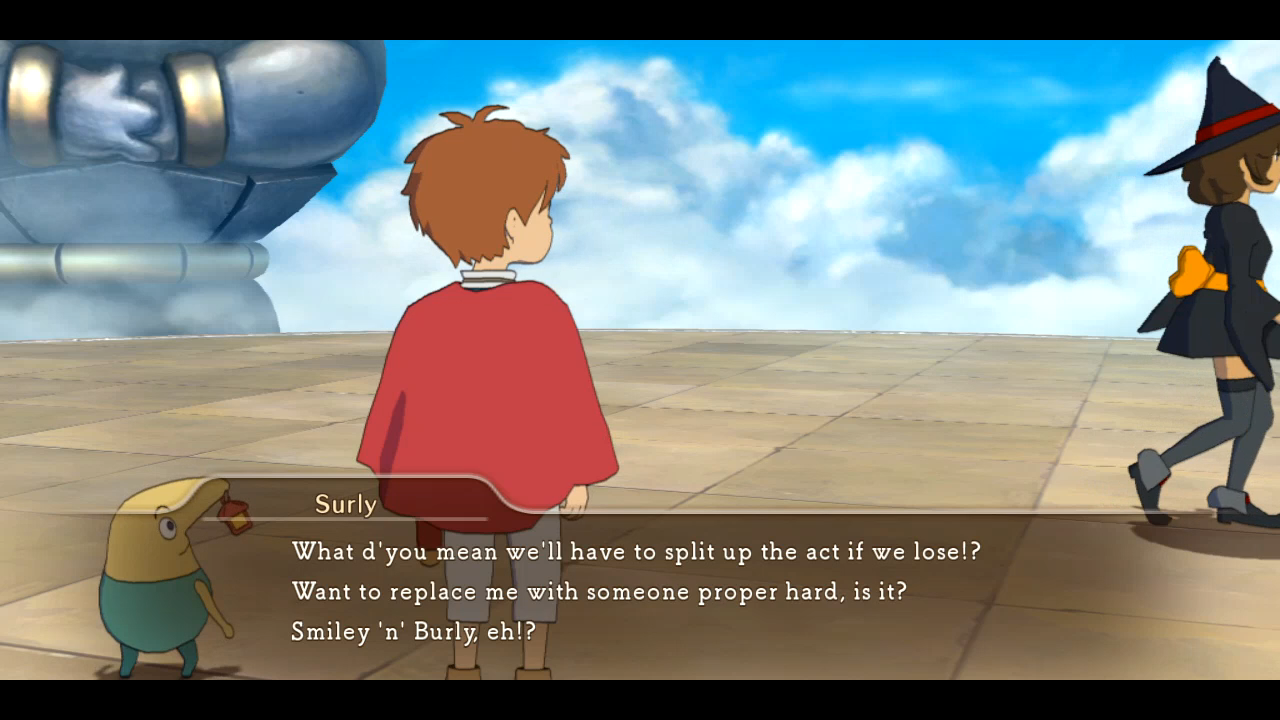 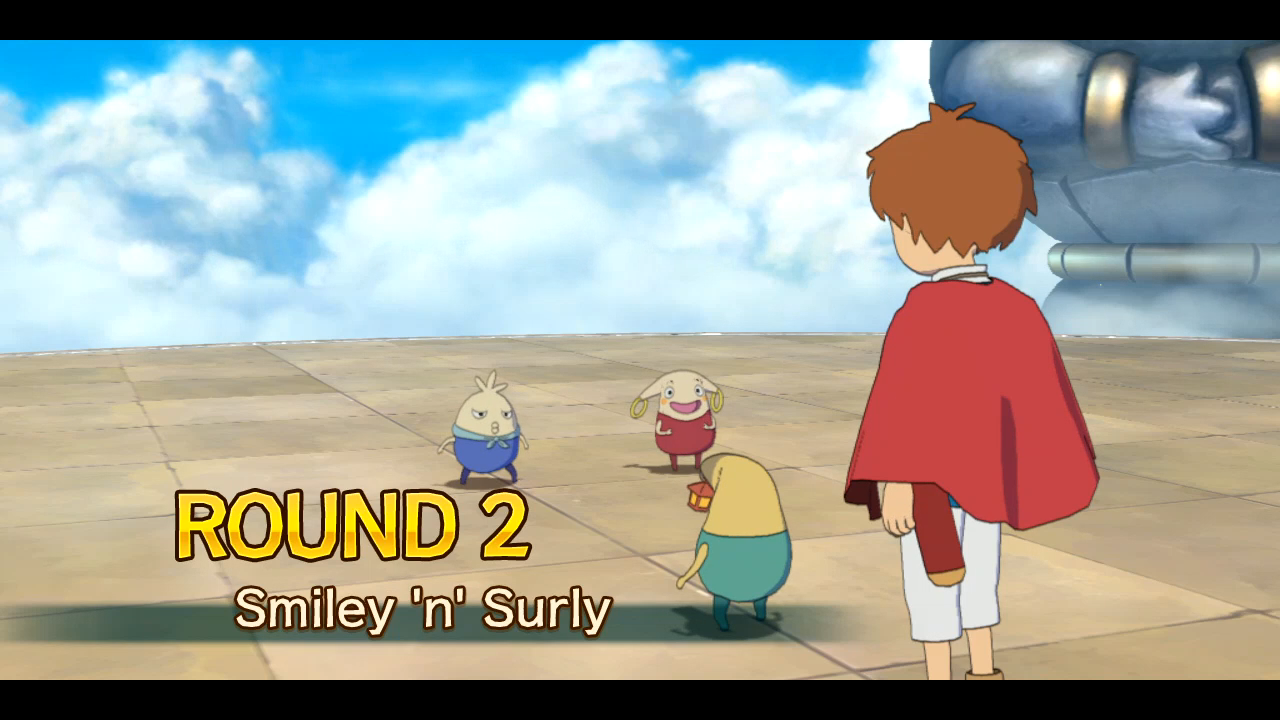 The right camera angle can make any smiling fairy look hilarious.   This is the dorkiest fight we've had yet.     It's also much less exciting than the last one or the next two.  The tree has some freaky rear end evolutions.  Surprised Smily doesn't say anything. Just staring off into space like a poor put-upon moron.   Yay! My favourite character finally enters a fight. Sadly it's only with his familiars. Fighting Horace himself would be a much more interesting battle.    This one's gonna be proper tough. Not just because the magimech has a lot of health, but because I still need to ration my magic since this isn't the last fight, and...  ...it's resistant to storm.  I still get some glims out of the other two monsters...  ...but they don't last long. This is where things get tense.  My new most-hated attack is still here, and he likes to use it a lot.  I give a Mornstar a try.  And I'm immediately reminded why that's a bad chance to take.  It can cast Twinkle Twinkle faster than you can cast Mornstar. So that's 32 magic gone for nothing. 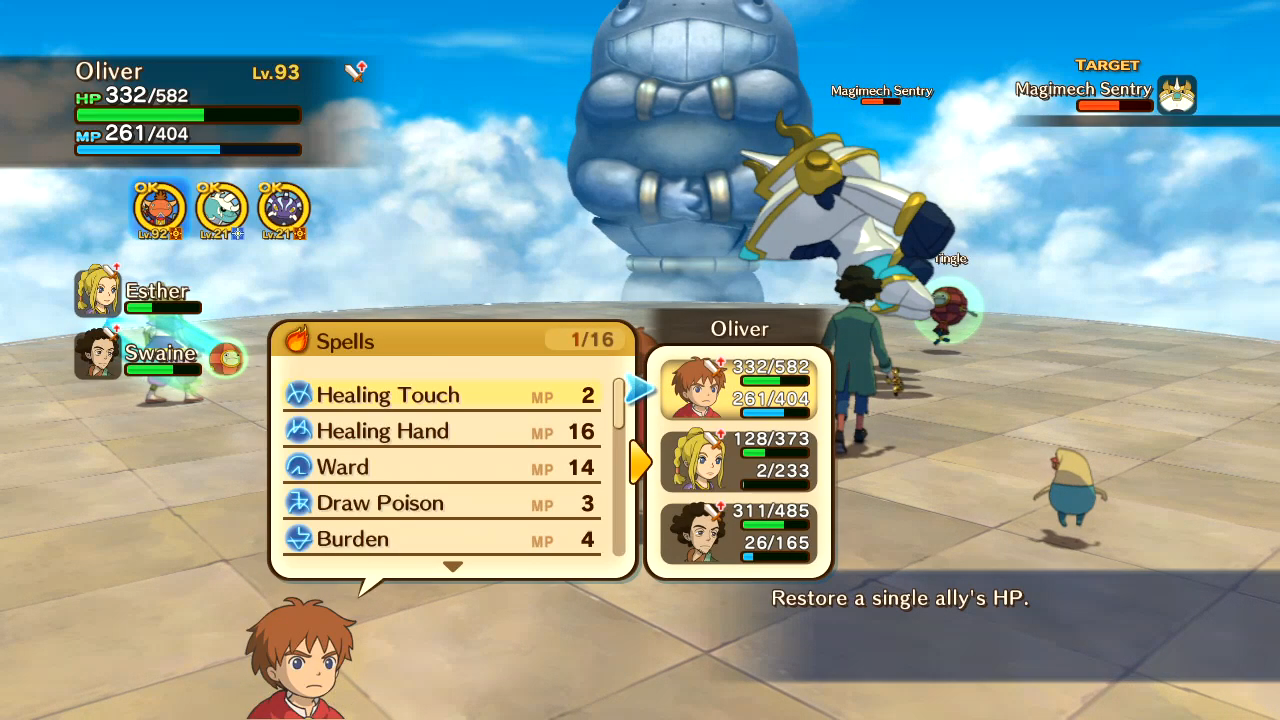 Esther's completely out of magic, so it falls on me to keep myself and my team healed. Their familiars have been remarkably helpful (in comparison to if I was fighting by myself), so it's not undeserved.   Here's how to land a Mornstar: wait until it's already casting a spell, then you cast yours. That'll give you enough time to hit it before it's ready to cast another spell. I'm still doing the most damage, so it's always focused on me.   Oh. poo poo. Speaking of fighting by myself.  I finish off the fight safely enough, but I'm running on half, my teammates will start the final fight with 1 HP each, and I have only a split second to heal them before they die again. This one's gonna be a doozy.    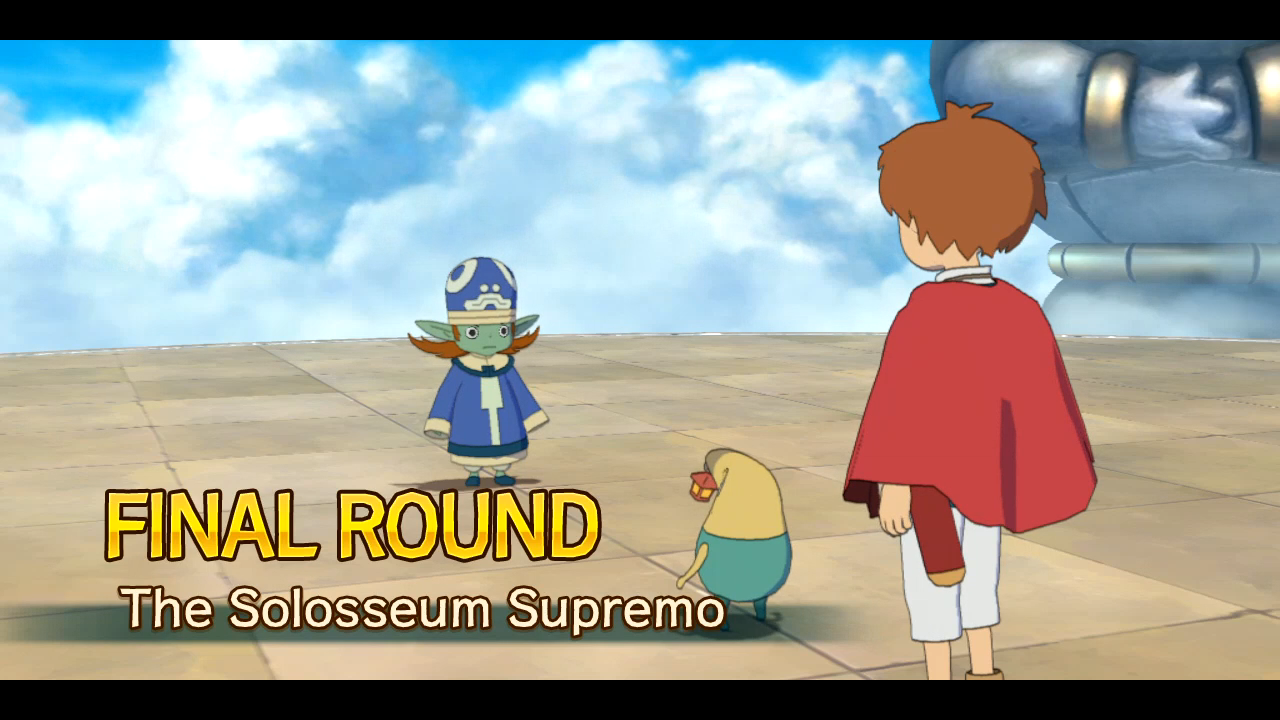 Final fight is the big cheese himself. 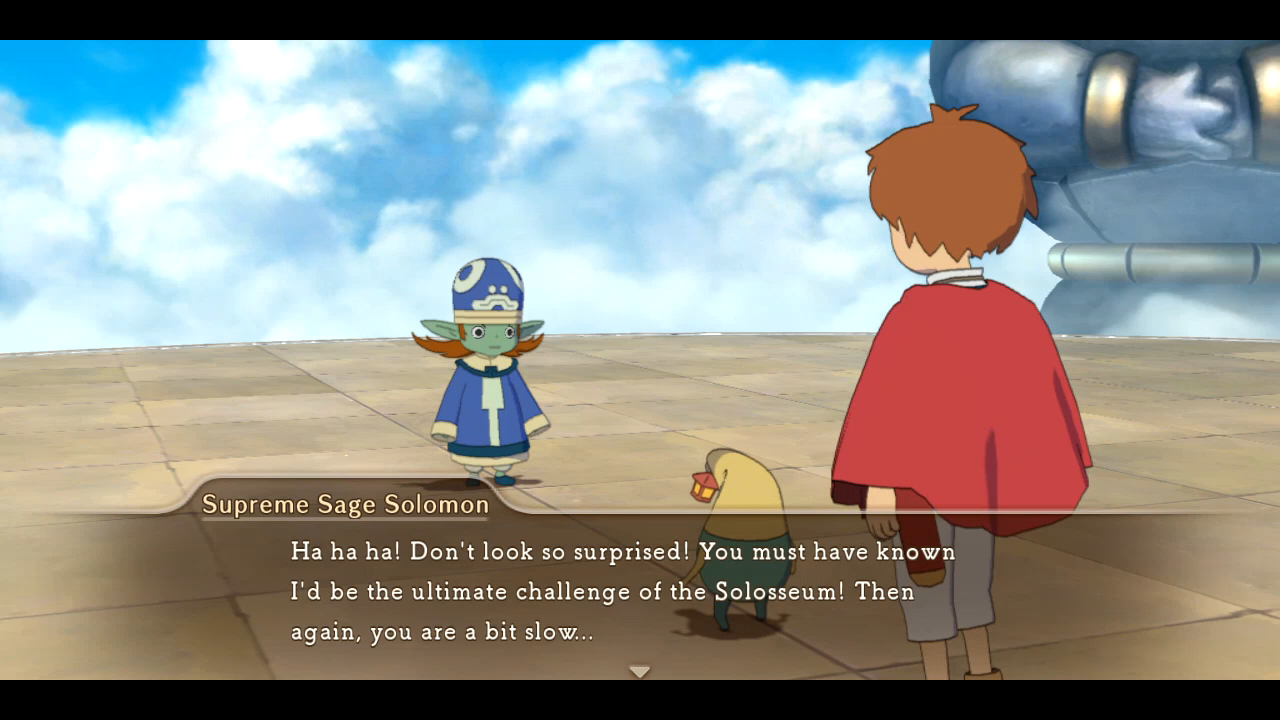 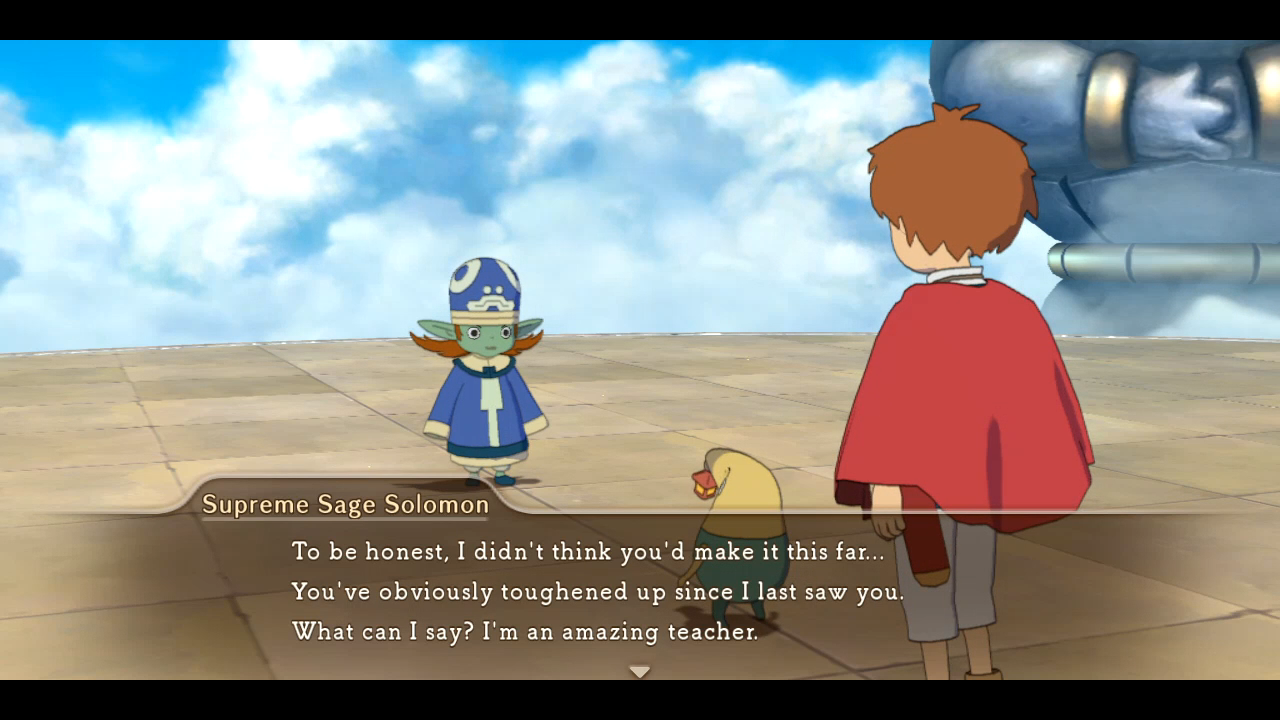 Killing your pets will be the highlight of my day. 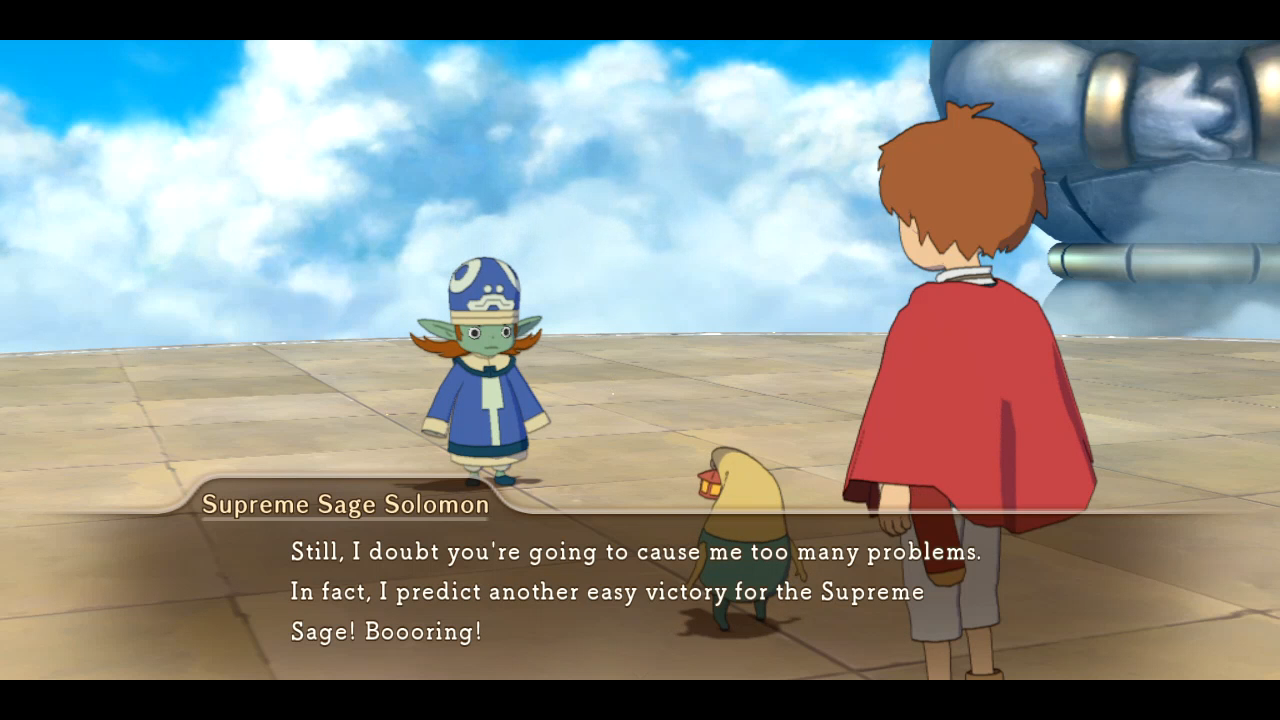 I'll never understand developers who insist on making characters that no one will like. 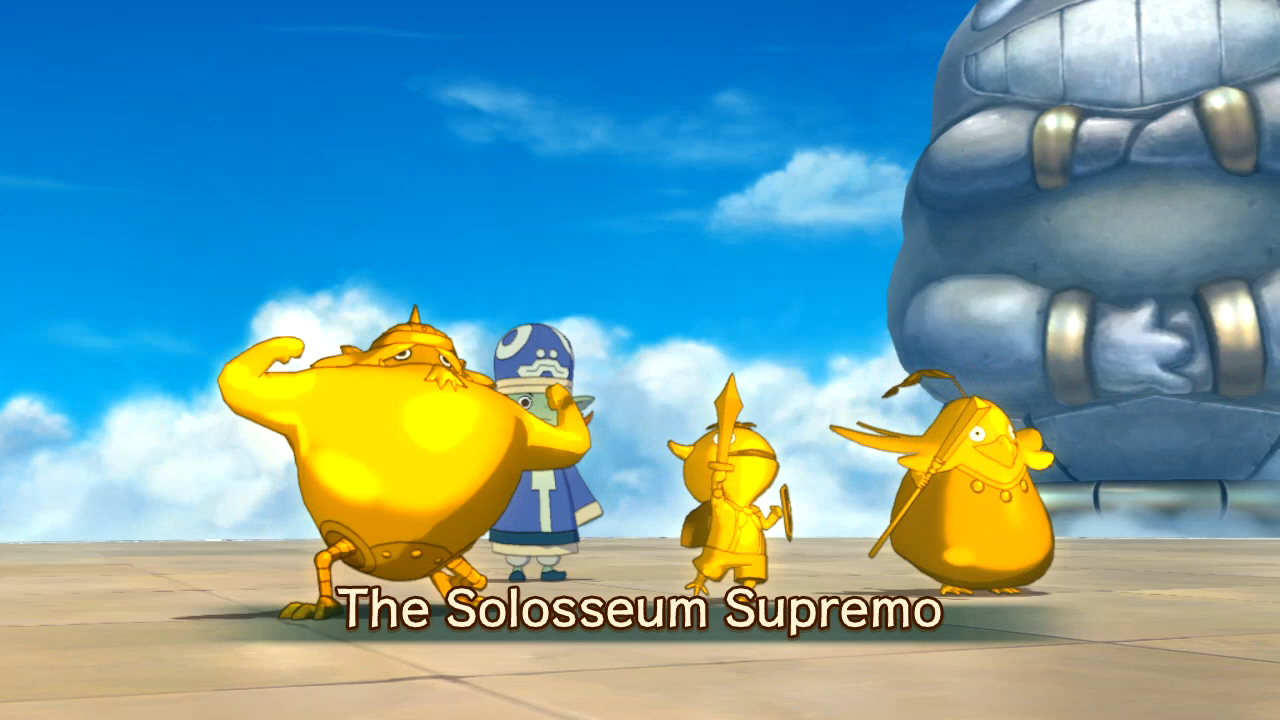 Oh poo poo. Here we go. Golden versions of Oliver's, Esther's, and Swaine's first familiars. 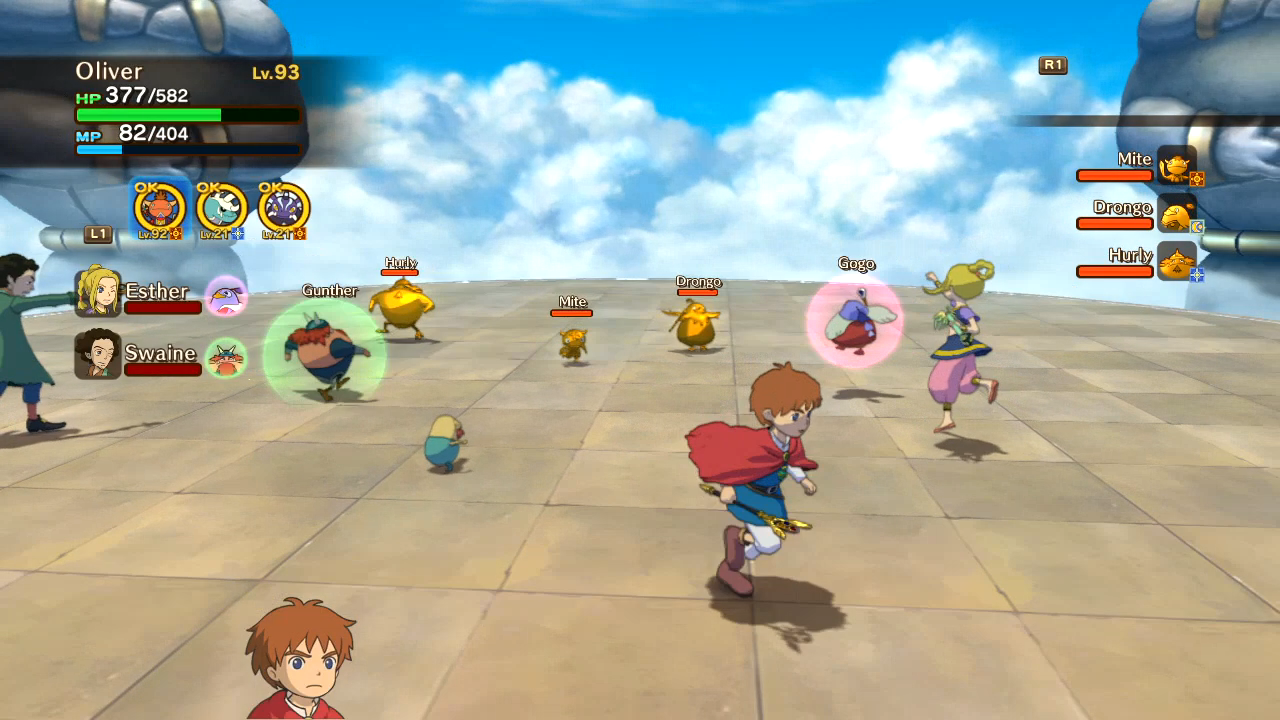 First thing I do is pathetically attempt to save Esther. 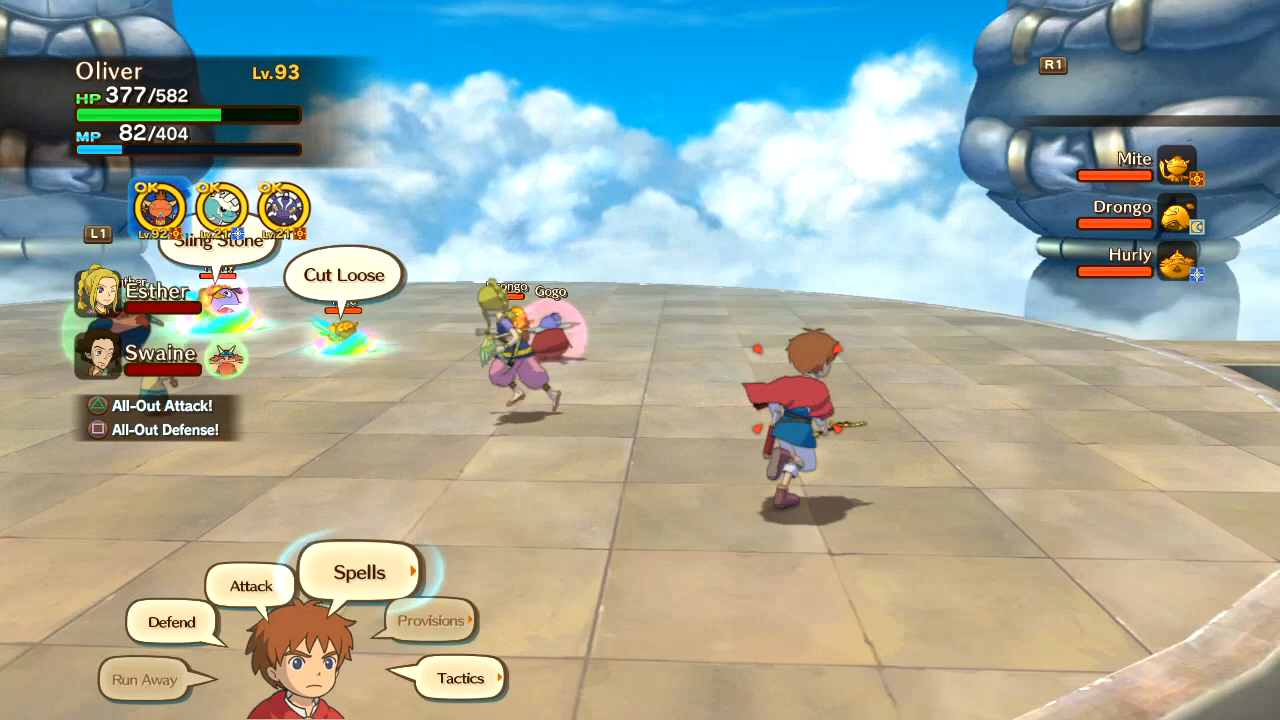 But Golden Dumple nips that bud even faster than I can. 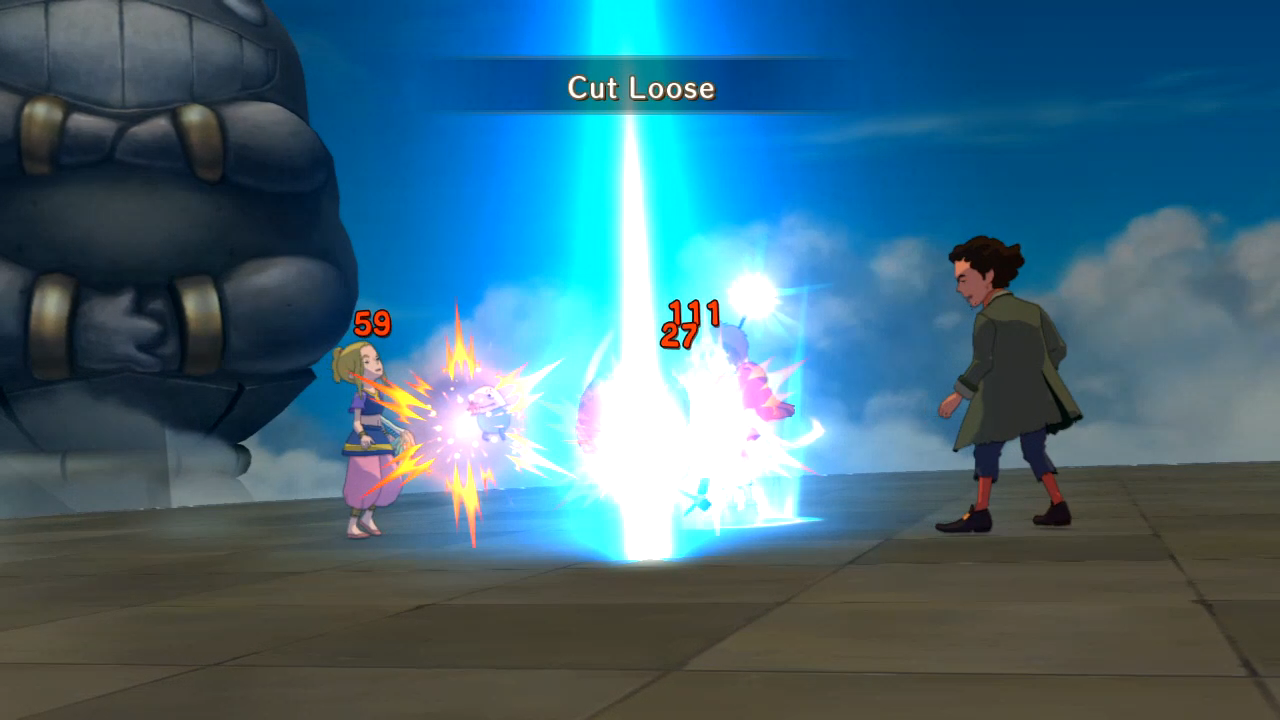 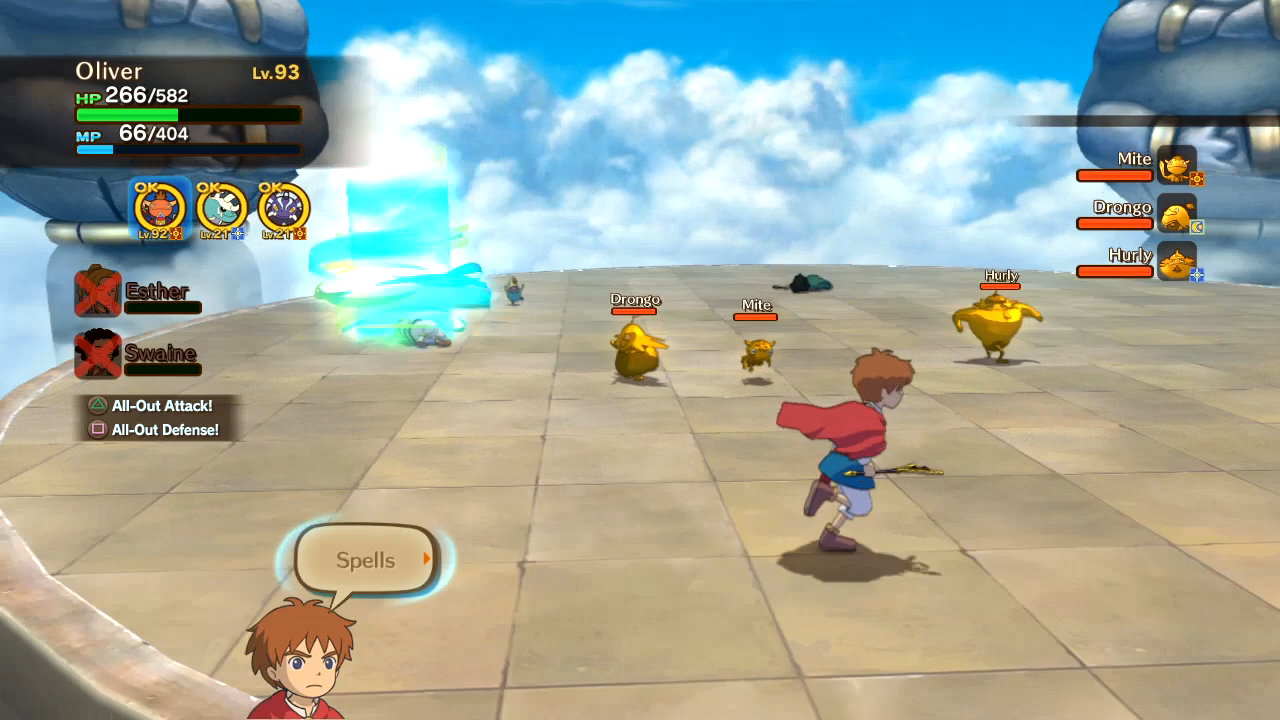 Aaaand I'm alone against three golden monsters with half my health and only 66 magic. 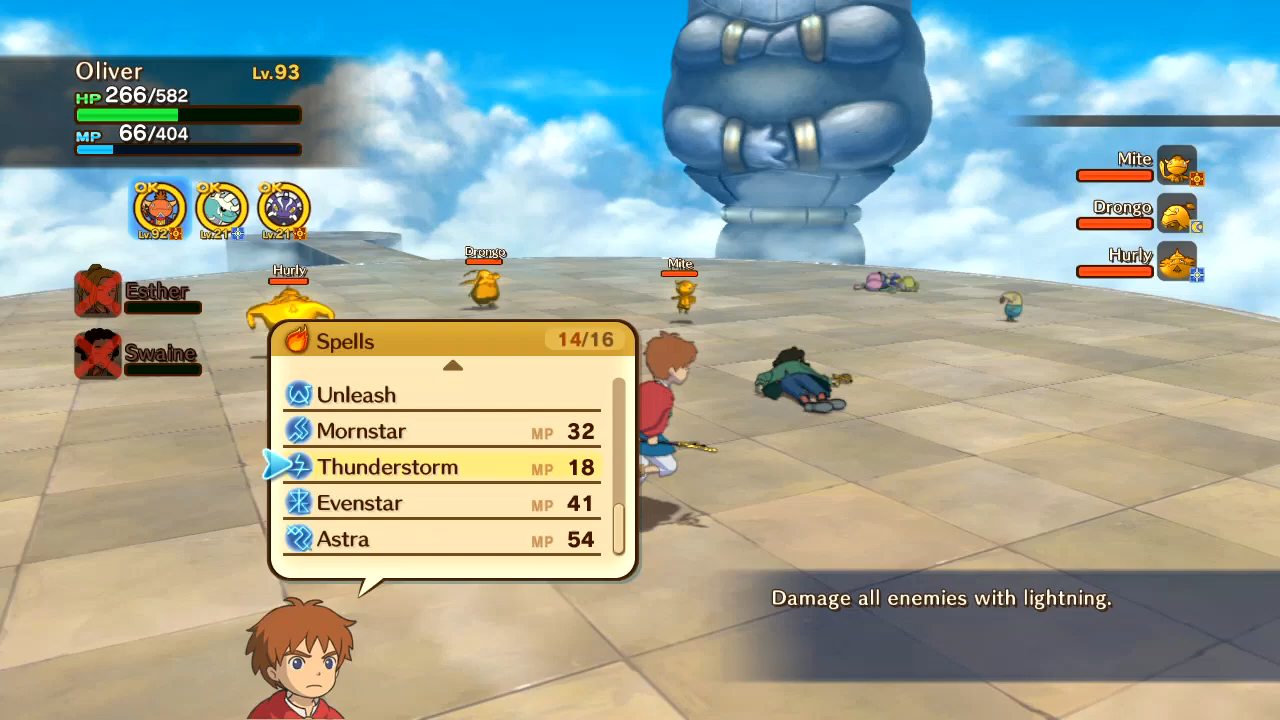 The Ghost of Johnny Thunders, save me.  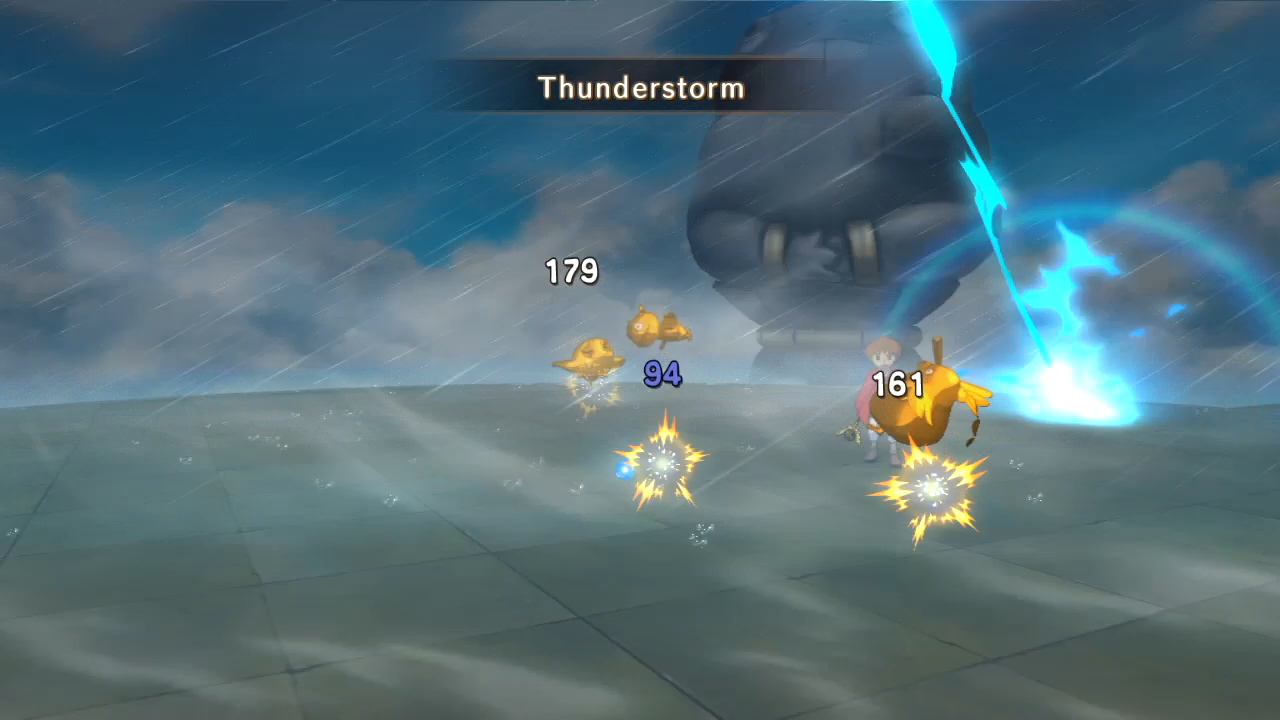  Suddenly I realize...  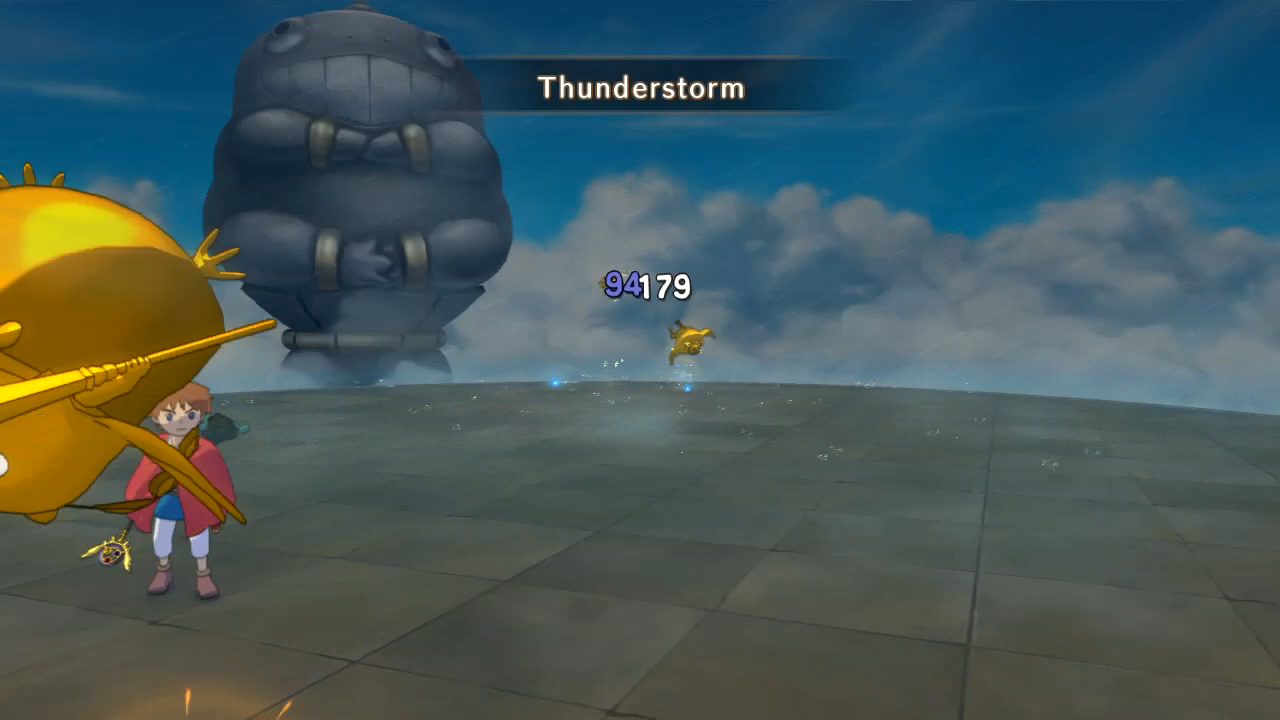 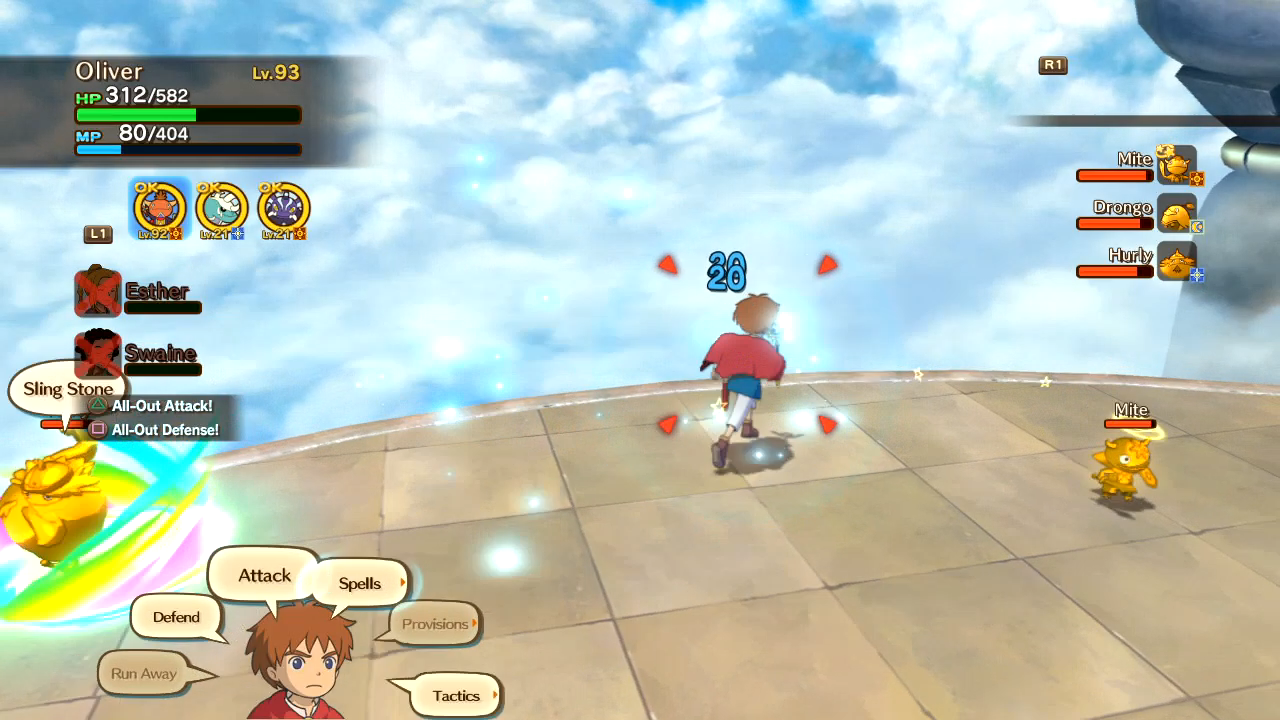 ...I can finish the very last Solosseum fight all by myself. 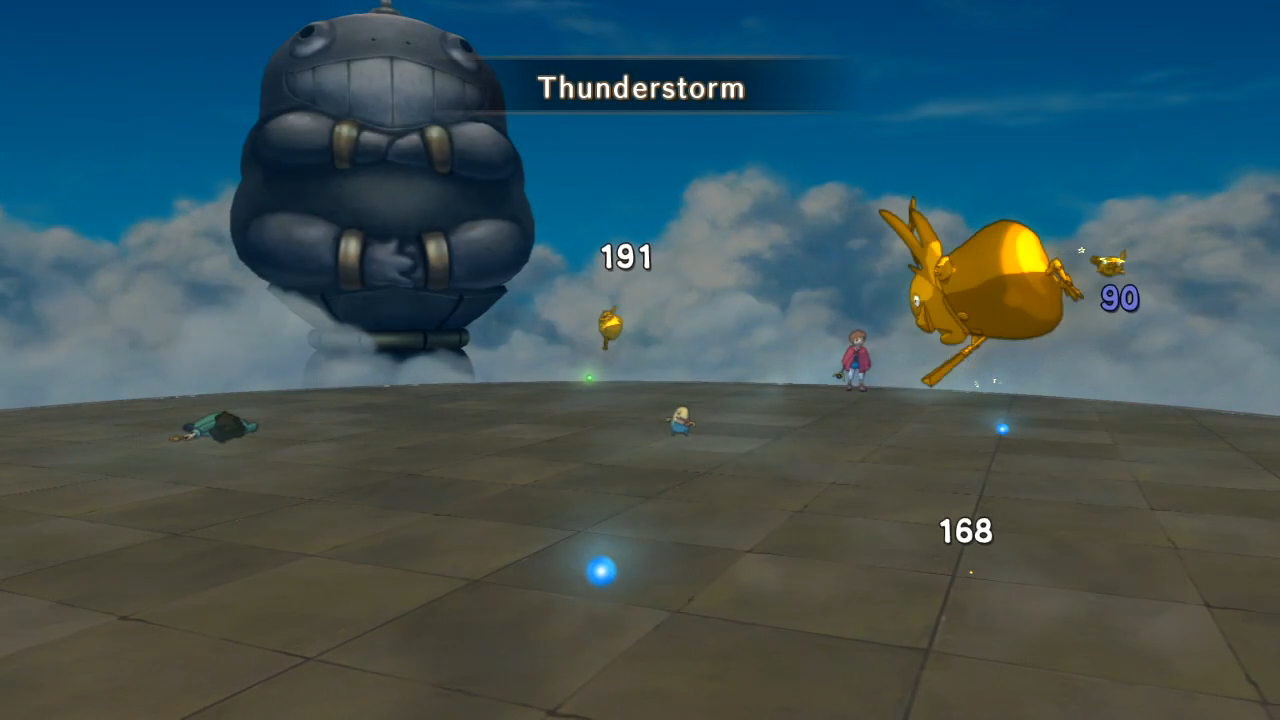 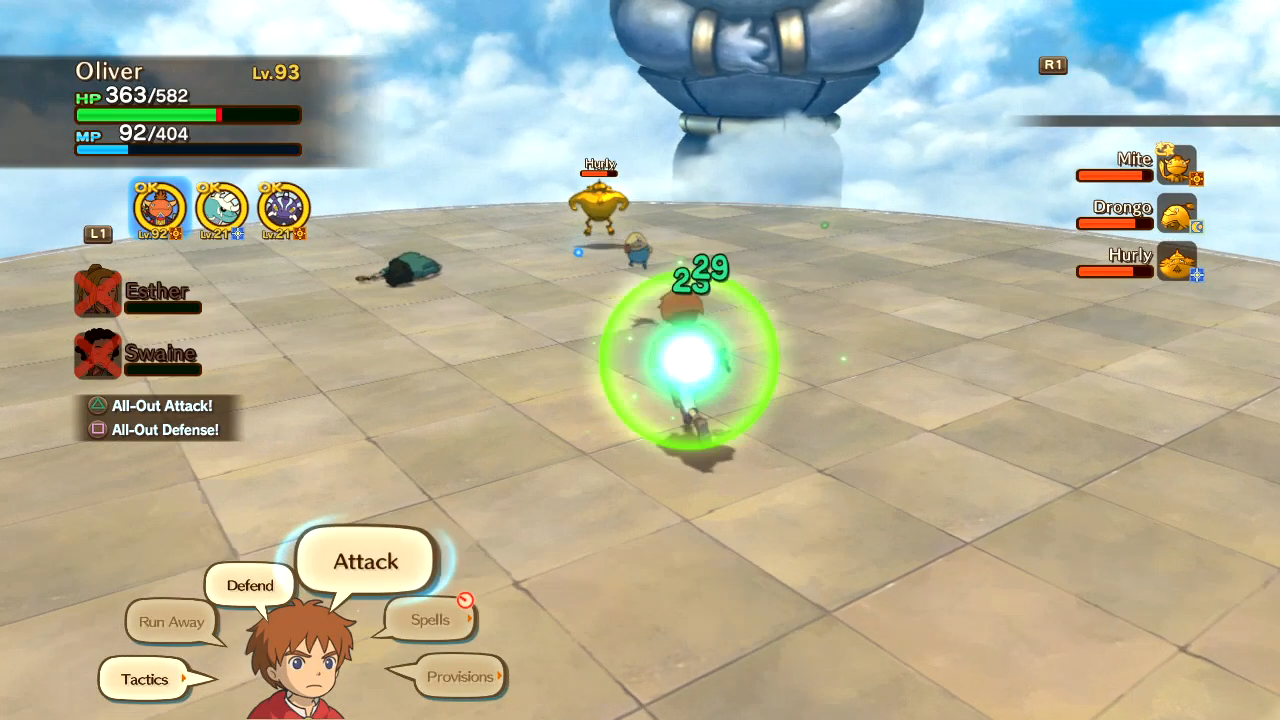 Take note of both my health and magic.  It isn't long before I've gained back more of both than I started the fight with. 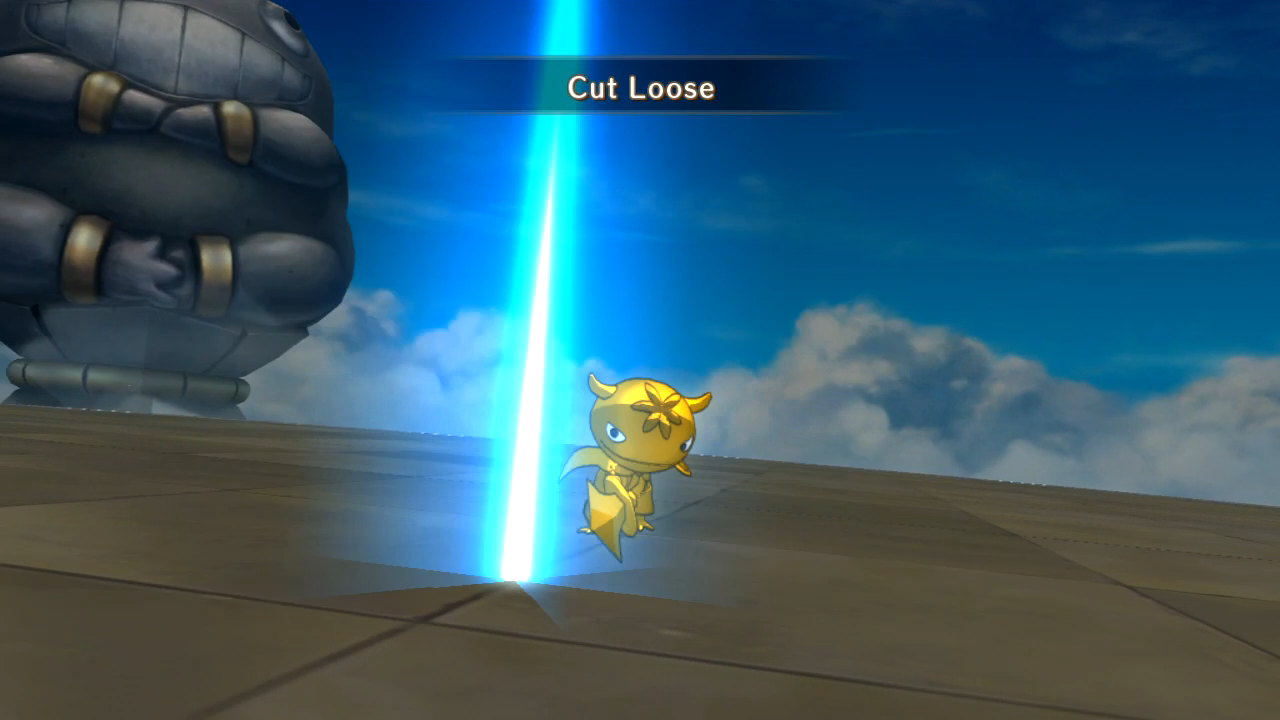 The monsters don't use their special moves very often either, with the Golden Mite doing Cut Loose the most. But even though they all do a decent chunk of damage...  I'm able to consistently maintain my stats throughout the battle. And that's how you exploit Thunderstorm to cheese the Solosseum!   Be very careful, though. Things can quickly take a turn for the worse, such as, for example, if you happen to get a golden glim...  ...and while trying to cast Burning Heart, the Golden Drongo hits you with a Thunder Spark...  ...and you get confused. I'm stuck here, letting them wail on me, until they smack me hard enough to focus again.  I'm all the way down in the red before I can retaliate again.  And then I get supremely lucky again. 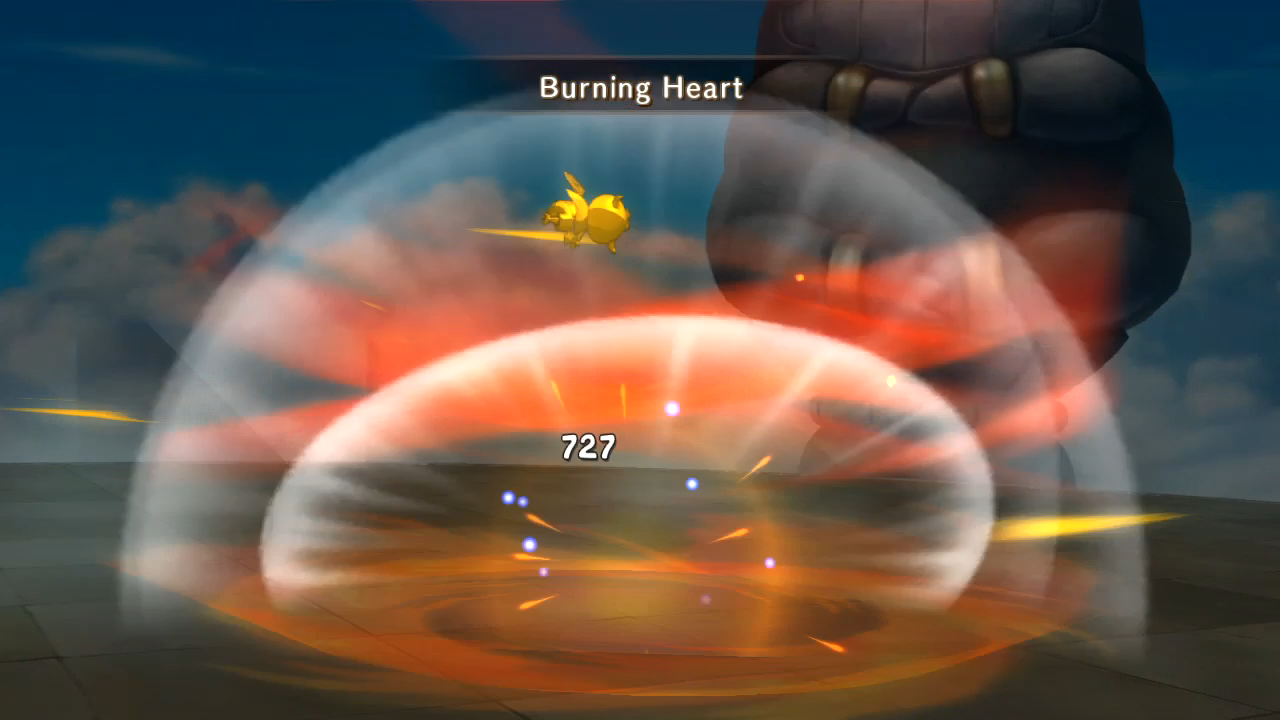 Payback's a bitch. 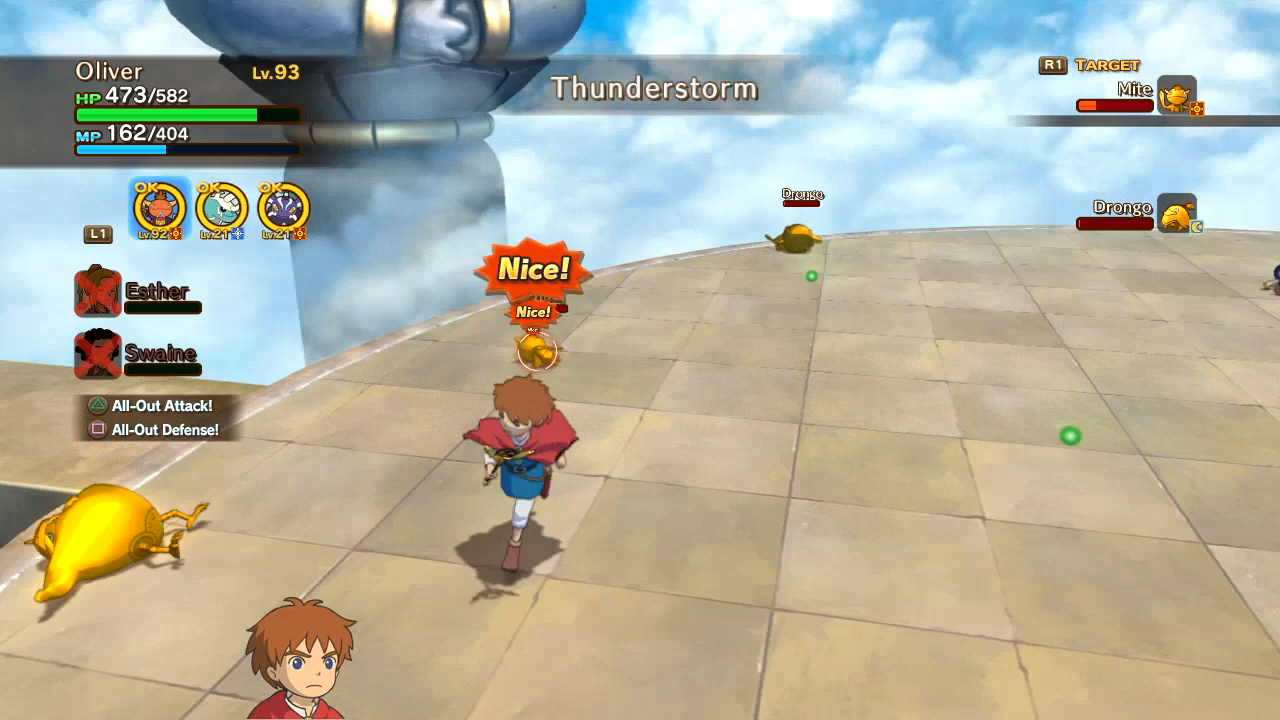 The Hurly is the first to go down, followed by the Drongo. 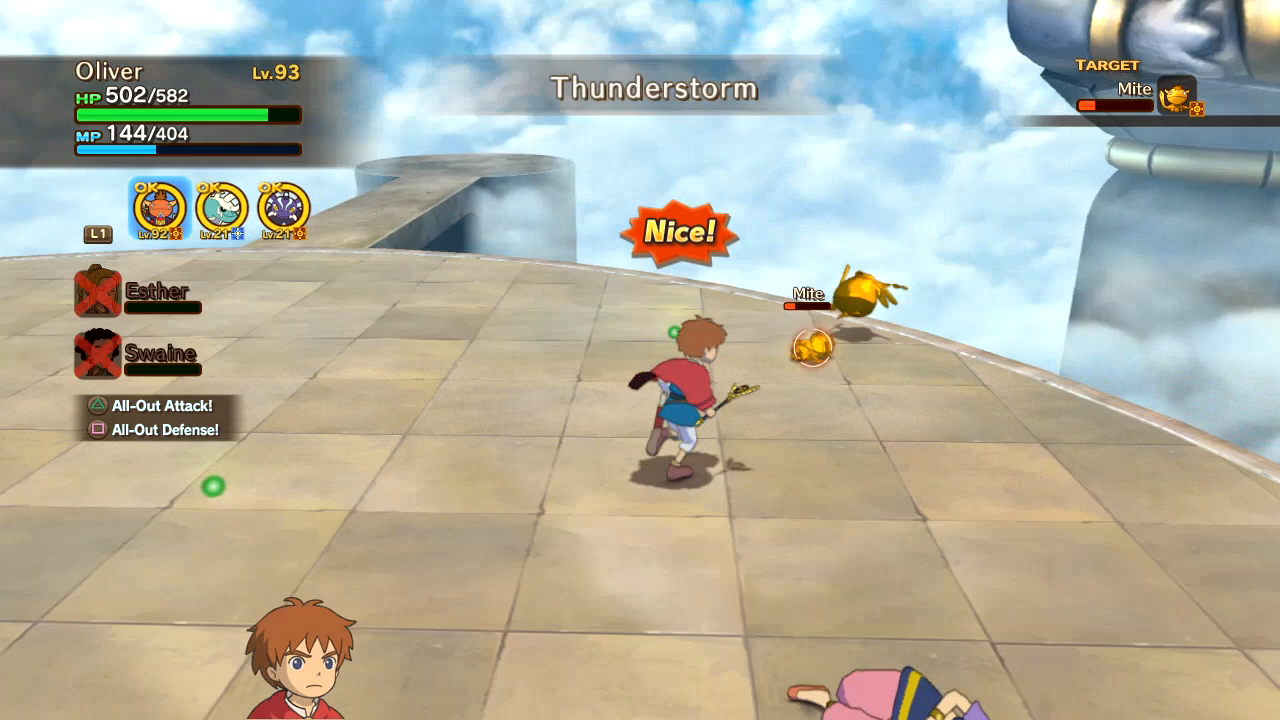 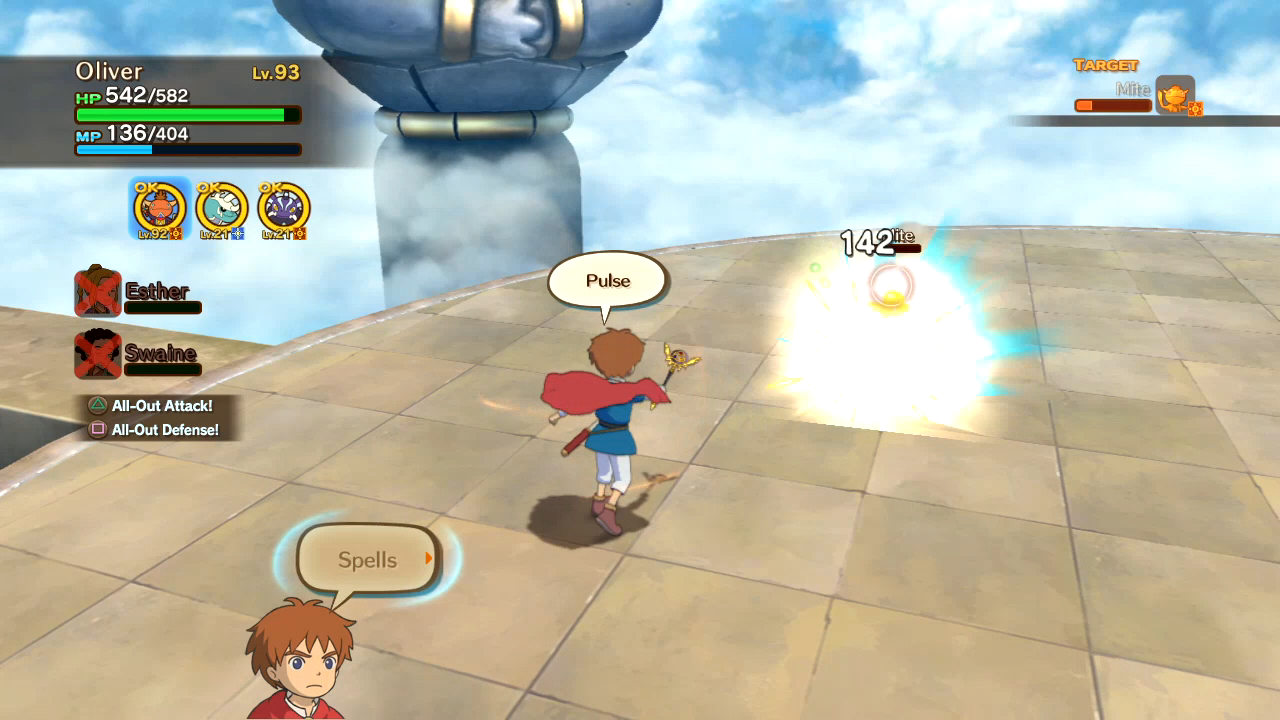 With the Mite left and less chance of getting good glims, Thunderstorm isn't as economical, so I try a few other spells.   Piss. Cinematic attacks continue to be Mornstar's bane.  Another reason to skip Thunderstorm for finishing off the Mite: it's resistant to it.  On the plus side, the Mite was easily confused by it for the entire battle. Either it would go after its friends and do a bit of damage for me, or it would immediately attack itself in order to snap out of it.   It goes for the latter, giving me enough time to...  ...waste my magic. 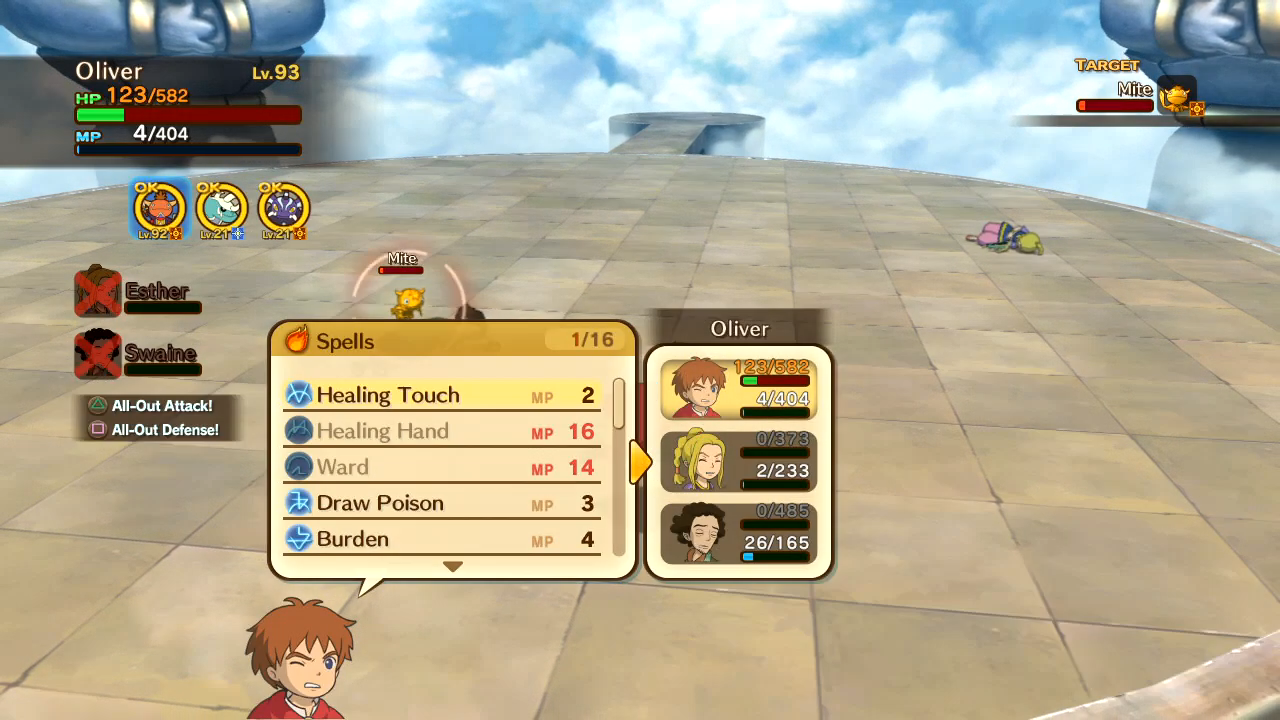 I'm reduced to healing myself up with my last 4 MP.  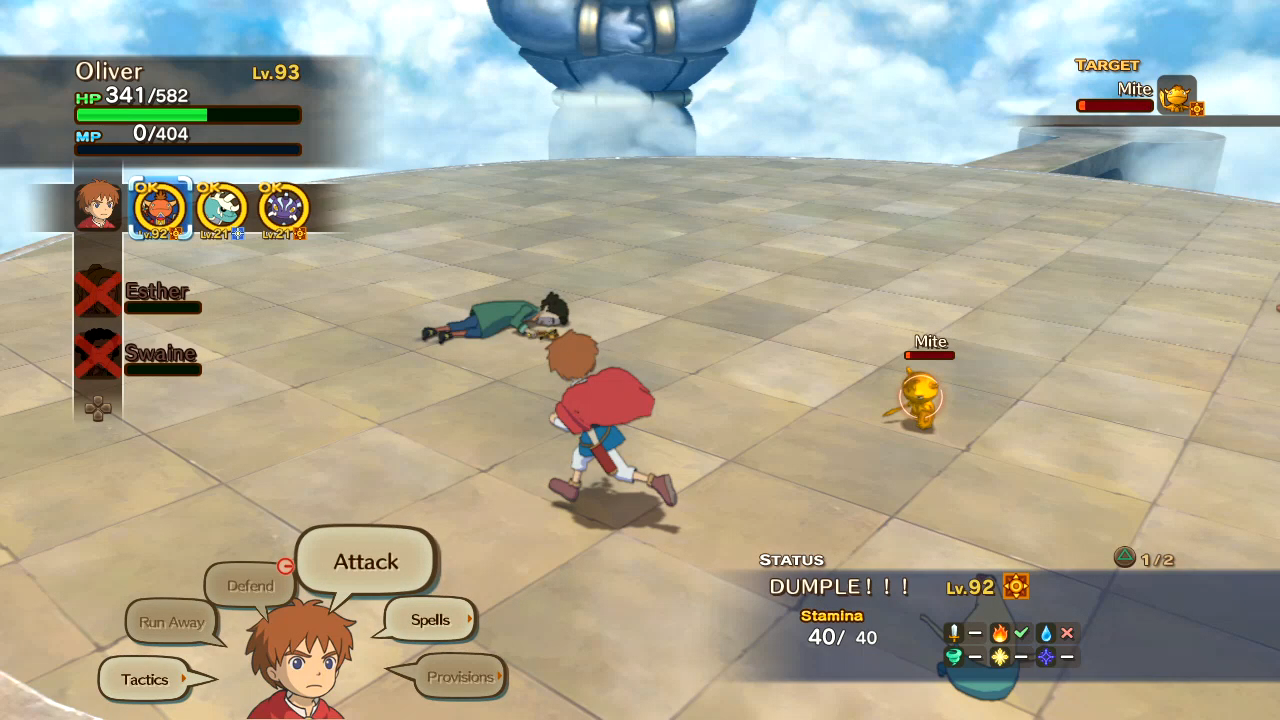 The Mite has a lot of health, but I've managed to whittle it down to it's last chunk. It's time to literally fight Mite with Mite. 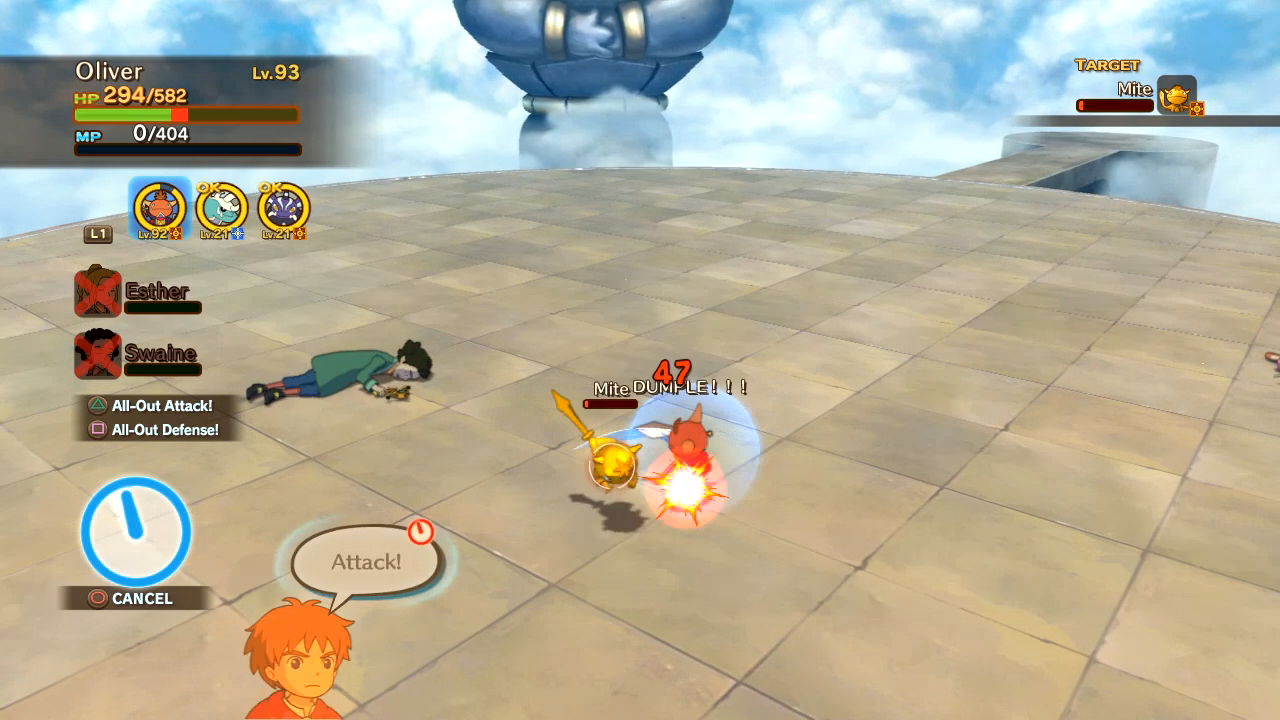 It's a tense battle (that I cheesed 90% of the way)... 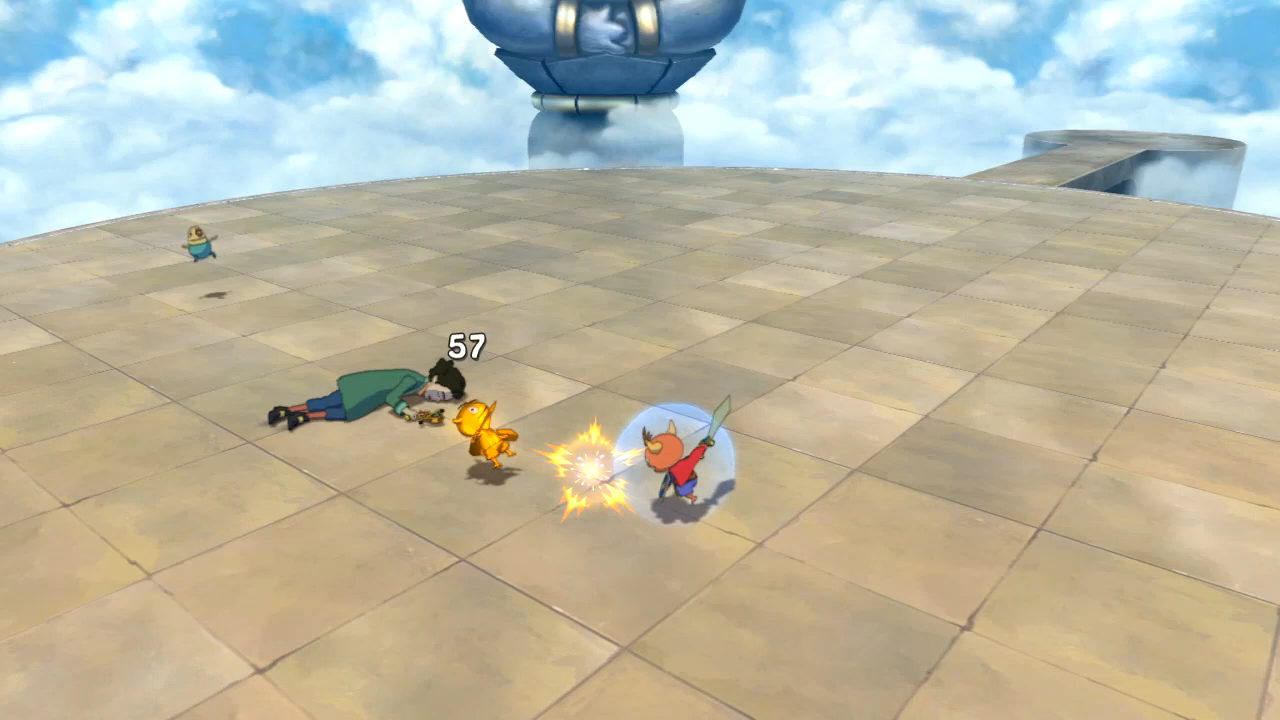 ...but ultimately the most satisfying battle of the entire LP.  Where the gently caress did you two come from?!       "And won useless PlayStation thing."  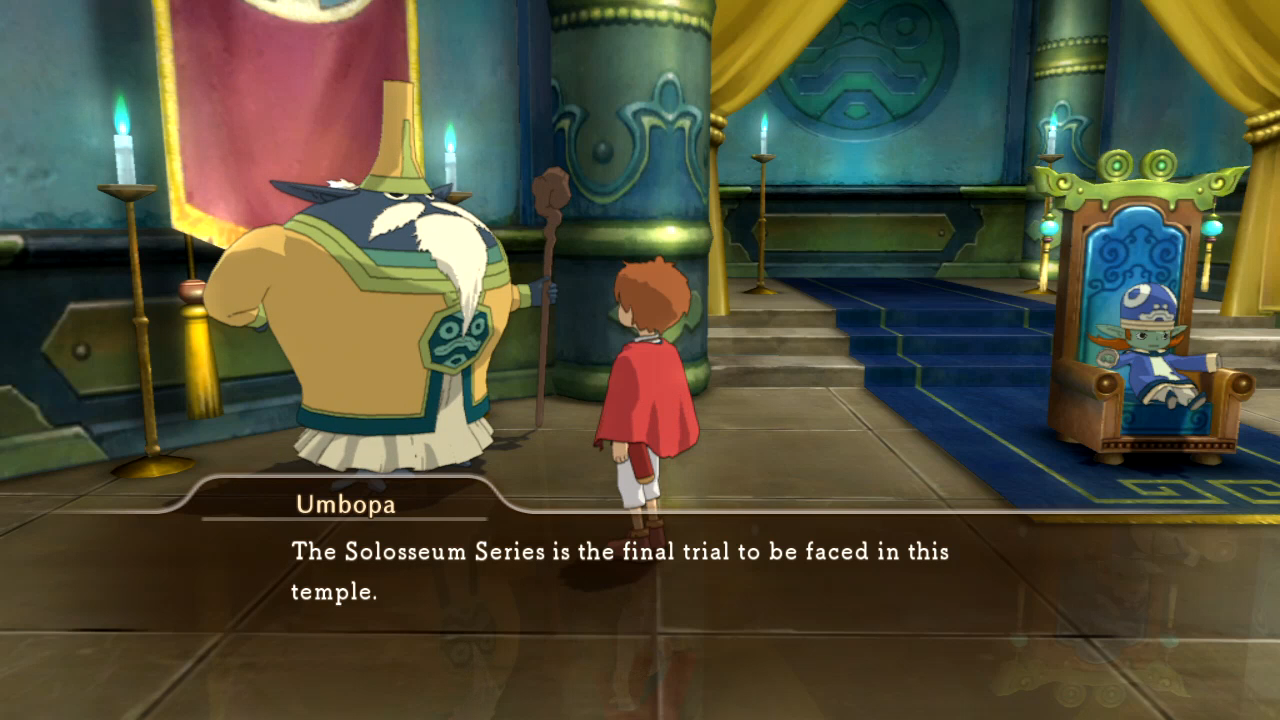 In an interesting twist, the Solosseum was technically the last trial of the Temple of Trials. Man, they give you a huge grace period between trials.  Ollie boy's a sage! 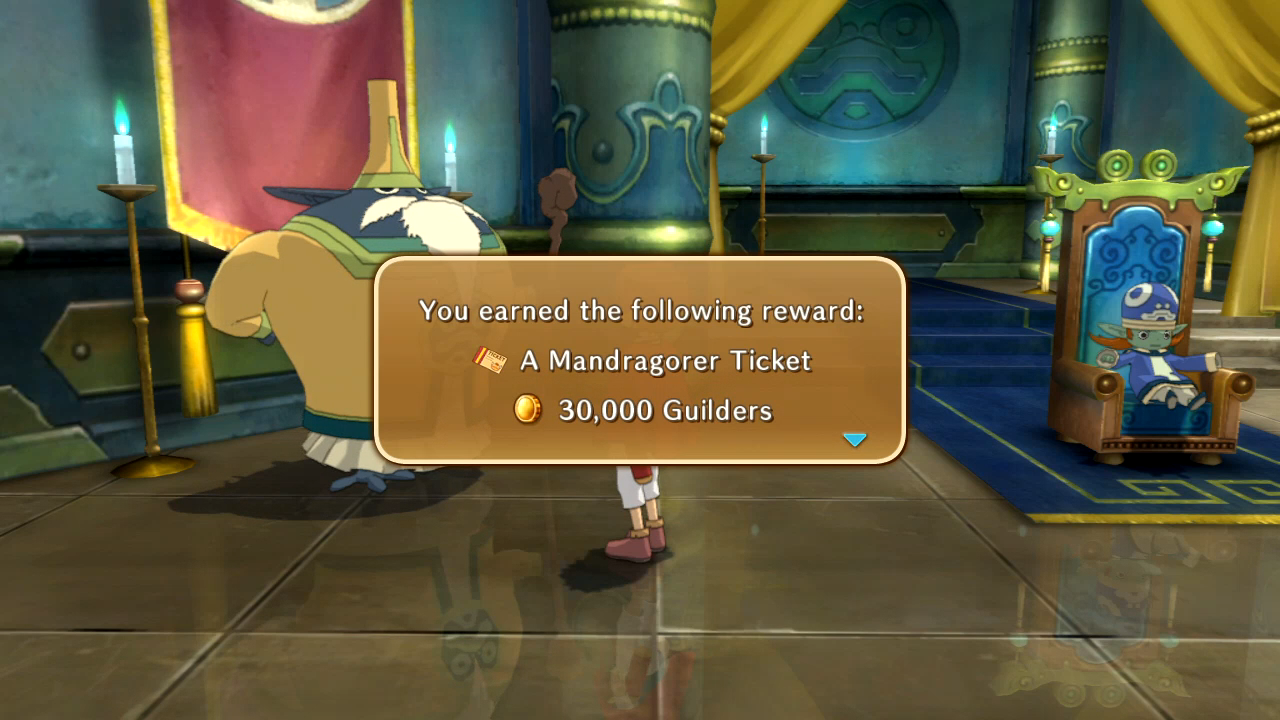 Our last reward is a familiar ticket for a monster that doesn't appear anywhere else. 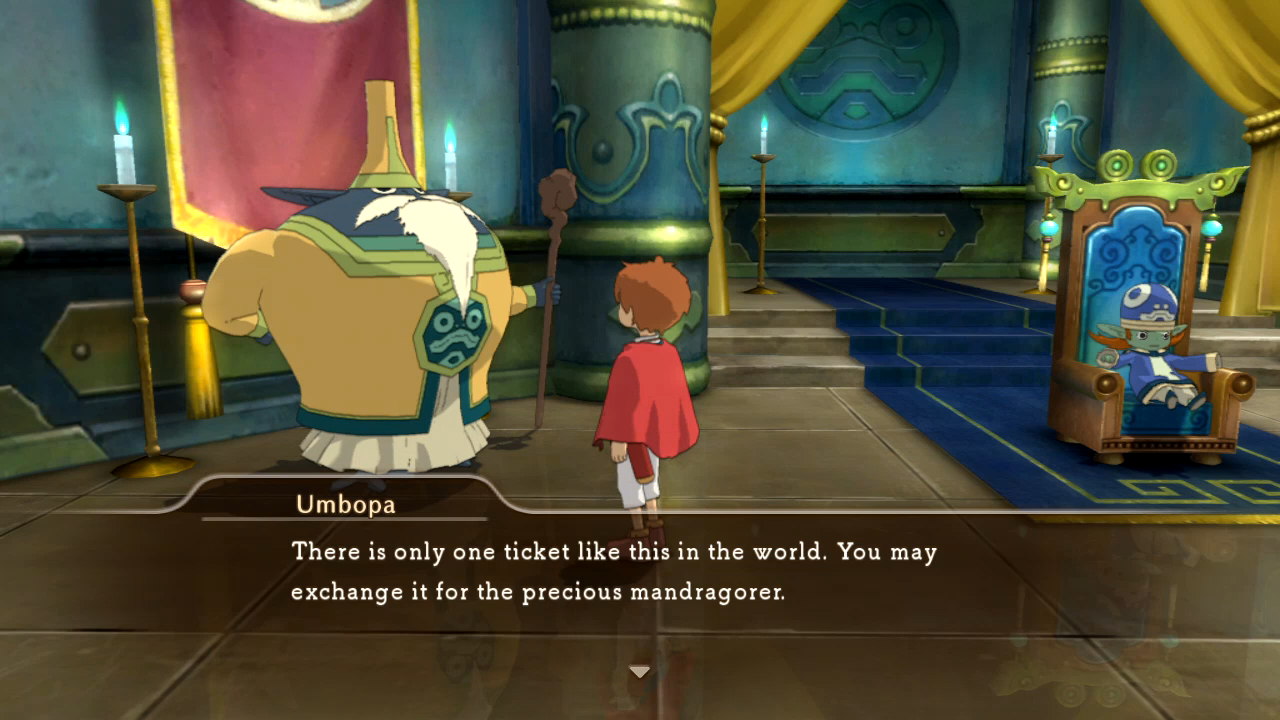 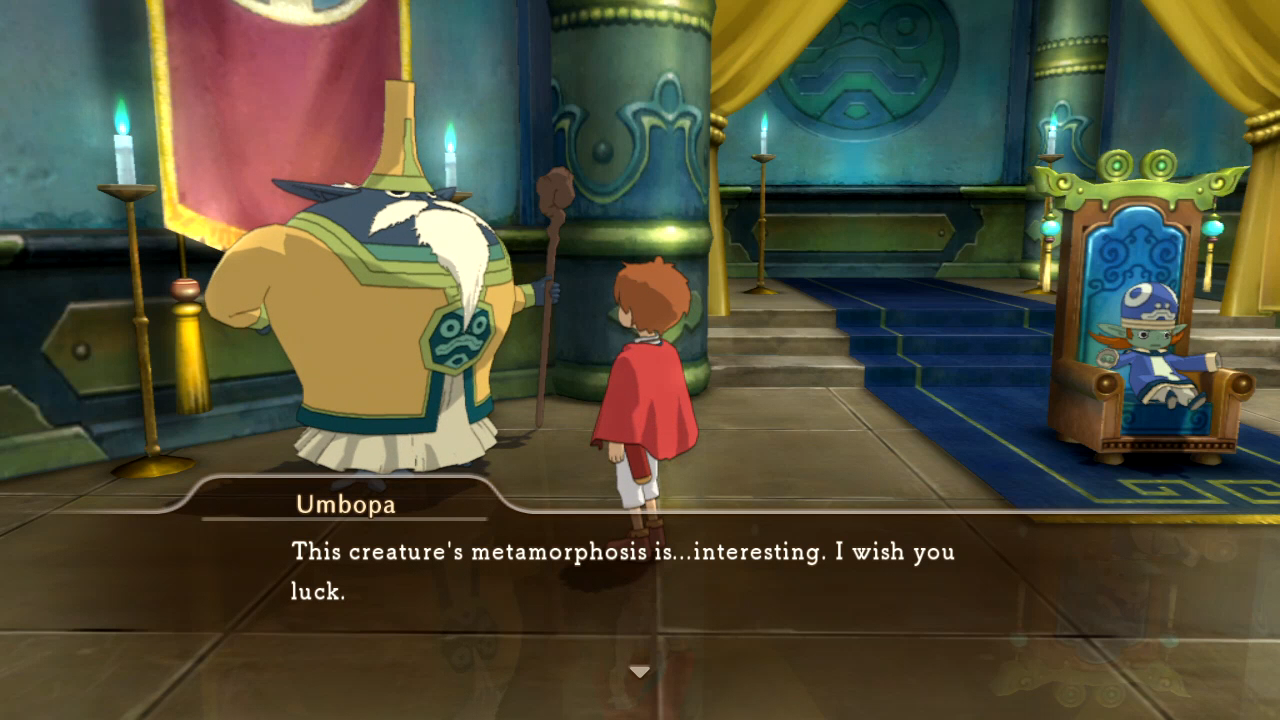  It looks like a dork. 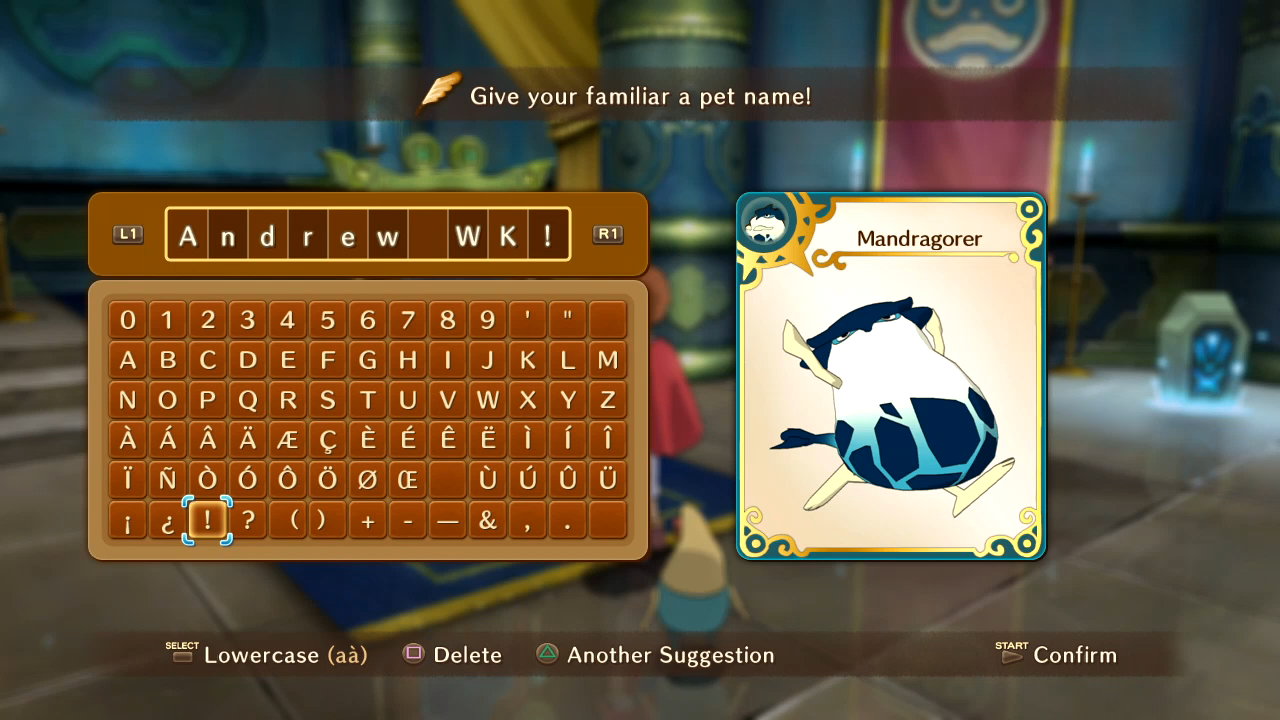 Let's name it after one! 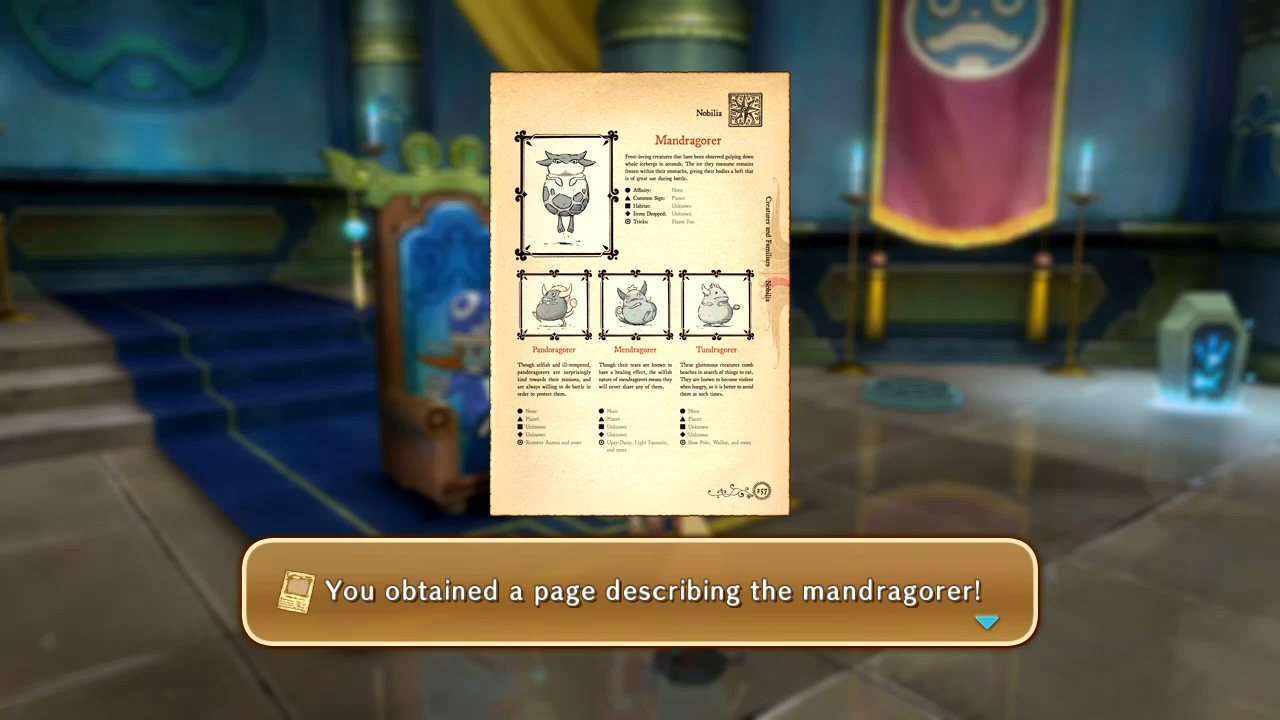 Since the monster doesn't appear anywhere else, only now do we get the Wizard's Companion page on it. 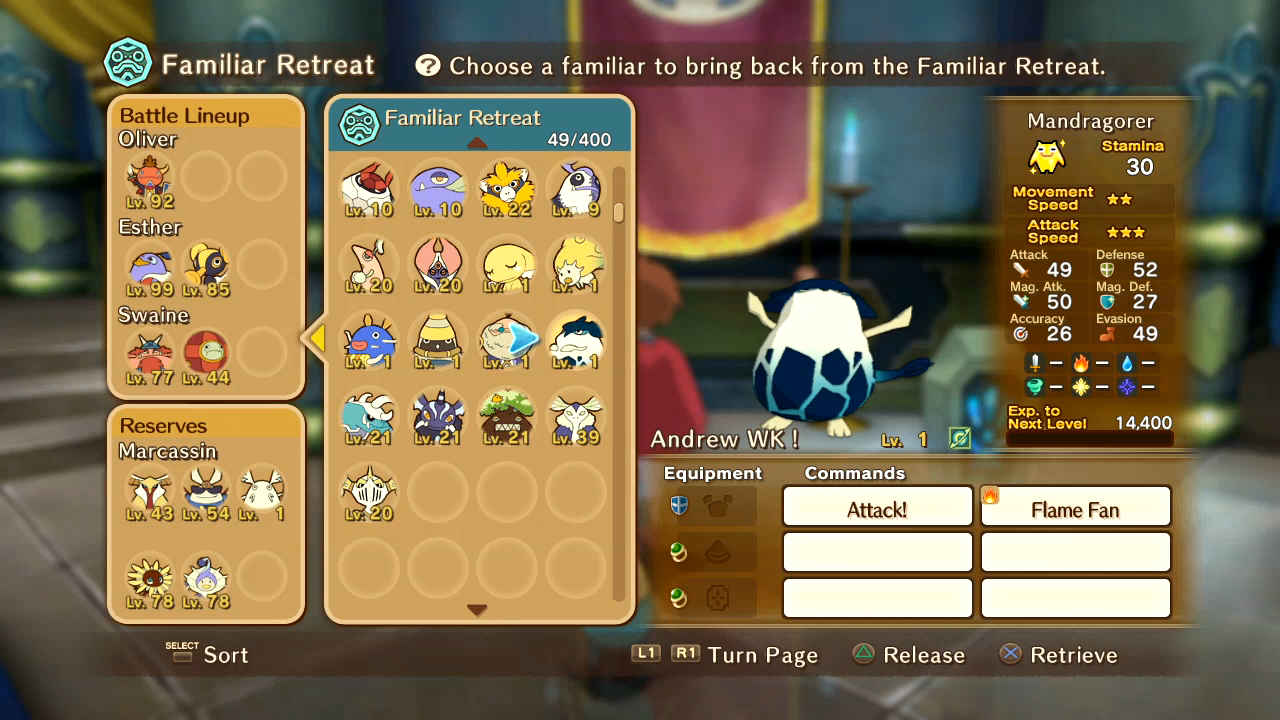 He's so chubby. 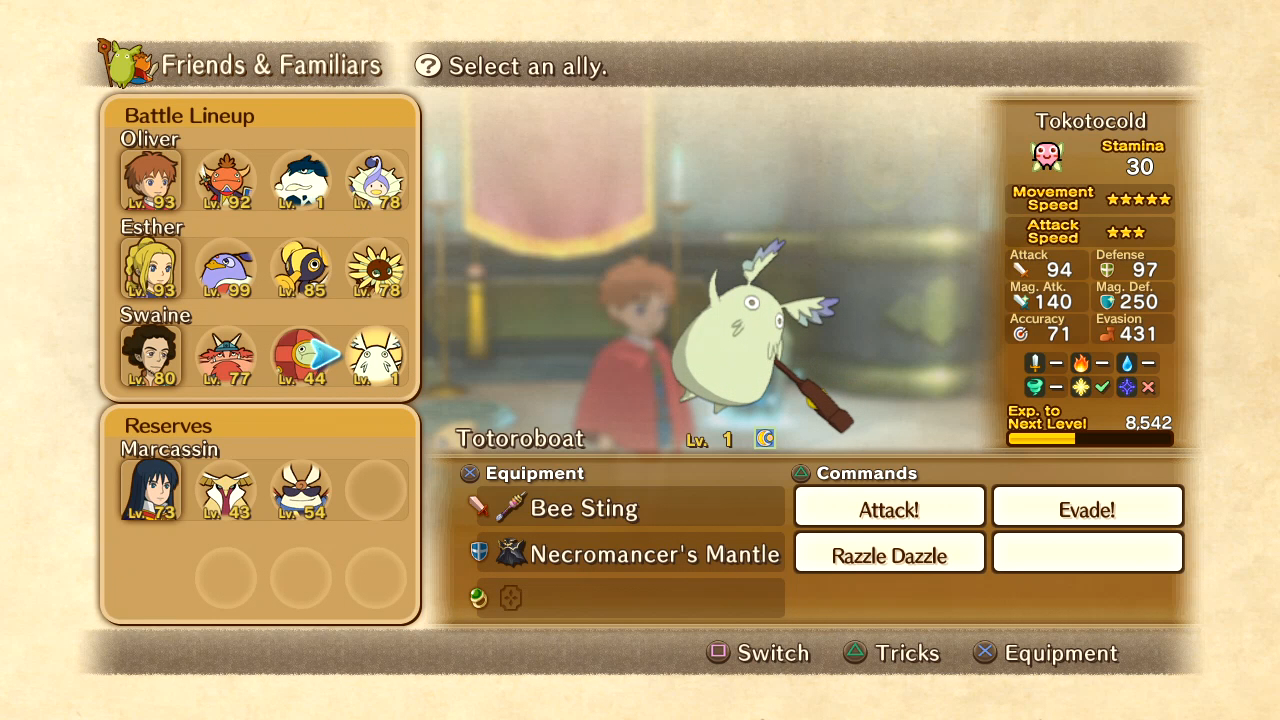 And there we have our lineup for the last fights of the game. Next time: Conductor's Battles, part 2 of 3!
|
|
#
?
Mar 13, 2015 04:07
|
|
|
Man, this page full of screenshots is murdering my internet. Well, I guess that last fight just proves Mornstar-ing the crap out of everything isn't always the answer. (As an aside, Mornstar is a very sinister sounding name for a light-based thing. And yet I love it.)
|
|
#
?
Mar 13, 2015 14:41
|
|
|
KieranWalker posted:Man, this page full of screenshots is murdering my internet. Yeah, mine too. We should probably try to push this to a new page. Well it's Mornstar and Evenstar, aka morning star and evening star. That part's not so bad. But morn sounds like mourn, and that does have negative connotations. I think my favorite part of these last few fights was how many of them were finished off with an unceremonious donk on the head.
|
|
#
?
Mar 13, 2015 20:02
|
|
|

|
| # ? Apr 19, 2024 10:16 |
|
|
I Think you mean an unceremonious bop on the head. But hey, now that the obligatory tournament is out of the way we can all look forward to seeing the even more tedious refights of already tedious bossfights!
|
|
#
?
Mar 13, 2015 21:30
|
|
