

|
 Let's Play Pacific General The Game As I've said before (in previous LPs), the 5-star Series published by SSI in the 1990s was a seminal work for casual wargaming. It incorporated a broad unit roster, a branching campaign tree with alternate history paths, and the signature feature of building up a core set of units with experience over the course of the campaign. The combat system was complex enough to require some strategic skill, but simple enough to allow battles to be played in a relatively short amount of time, without too much detailed knowledge required. By the mid-90s, the series had already covered the European portion of World War II from the German and Allied sides. They then shifted into other realms, producing the less popular Fantasy General and Star General. But the war in the Pacific had yet to be covered, largely because the system had been designed mainly for land and air units. It would need significant tinkering in order to simulate the naval engagements in the theater in a way that allowed the core campaign flow to work. Such work was underway, but at the same time, development was also ongoing for an updated version of Panzer General, which would become Panzer General II. As a result, despite the many improvements and additional features to the original engine, when Pacific General was released it became a developmental dead end. Indeed, it appears as though the project was either rushed out (to avoid being too far behind on an apparent 'old' game) or simply didn't get as much attention as the new PG 2. What did come out included a lot of interesting new stuff for the system, but without as much polish on the game as a whole. Notably the campaign had hardly any branching paths, and was rather short to boot. Several of the units on the roster had wonky stats, and there was a fair amount of stuff (like units and maps for European scenarios) that seems to have been part of big plans that were never implemented. The LP Now I can't honestly say that this one is a hidden gem, because I've never actually played it before. Unlike the Allied General and Panzer General LP, I'll be going in blind to these battles (about all I know is what choice I want to take to get the campaign I want, and more or less where the branches lead). If I do end up losing, I won't show off that whole battle, but I will likely recap my efforts in some way. As always, units (and that means some ships this time) are available for naming/claiming by goons. I think the limit in this version is 20 characters. Note that the Japanese side will have fewer core ships for naming (I'm going ground-based), but there will still be some in the core; aux ships can always have a name tossed on as well, but it won't last between battles. I will not be purchasing all varieties of the units, but there will be unit highlights in each post that will cover them. I also have the hope that I can show off the game's own scenario editor at some point. This is the GoG version of the game, which as far as I know is the original game (or the DOS version?), with no modifications to the unit roster or any other files. This also means graphics are limited to 640x480, and will be smaller and a bit uglier, especially for the strategic maps. PG Forever (which is what I used for the previous LPs) never even attempted to implement the updates to the engine, which is a shame. Even Panzer Corps seemingly left those ideas behind. I will be playing both sides in this one; one campaign each. The game includes both a Japanese and American campaign. As I tend to proceed chronologically, the Japanese one will begin first, in China. The post after the next one (which will have the update list and unit roster) will give a brief overview of some of the major changes to the system, as well as describe how I present the unit information in the spotlight section. Kangra fucked around with this message at 05:55 on Jul 27, 2017 |
 #
?
Apr 24, 2017 18:19
#
?
Apr 24, 2017 18:19
|
|


|

|
| # ? Apr 19, 2024 23:48 |
|
|
Update List / Unit Roster This post will have links to the updates, and contain the core rosters for each side. pre:Date Japanese Campaign American Campaign 1937 August 13 Central China September 3 Central China October 1 Central China 1939 May 1 Southeast China June 12 Southeast China July 31 Southeast China September 11 Southeast China 1941 December 8 Singapore *December 25 Burma *December 29 Burma 1942 January 2 Singapore *January 2 Burma *January 11 Burma *January 16 Burma January 22 Singapore February 9 Singapore April 12 India April 14 India April 15 India June 6 Midway 6 (part 2) Midway August 9 Guadalcanal August 12 Persia August 13 Persia August 14 Persia October 18 Guadalcanal December 13 Guadalcanal 1943 February 16 Australia February 17 Australia February 18 Australia February 19 Australia June 21 Solomon Islands June 22 Solomon Islands June 23 Solomon Islands 1944 February 1 Marshall Islands February 2 Marshall Islands February 3 Marshall Islands June 15 Marianas Islands June 30 Marianas Islands July 18 Marianas Islands** July 19 Philippine Sea July 20 Philippine Sea July 20 (part 2) Philippine Sea ***September 12 San Francisco ***September 12-13 San Francisco ***September 13 San Francisco ***September 14 San Francisco ***September 15 San Francisco October 12 Hawaii '44 October 13 Hawaii '44 October 14 Hawaii '44 October 15 Hawaii '44 October 20 Leyte Gulf November 9 Leyte Gulf November 29 Leyte Gulf December 19 Leyte Gulf 1945 February 19 Iwojima February 21 Iwojima February 24 Iwojima April 5 Okinawa April 12 Midwest April 14 Okinawa April 15 Midwest April 16 Midwest April 17 Midwest April 19 Midwest May 2 Okinawa May 14 Okinawa November 5 Coronet November 12 Coronet November 22 Coronet November 26 Coronet **This update includes time 'after' the Philippine Sea battle, which follows it in the campaign. ***Similarly to Burma/Singapore, this comes in the campaign after Hawaii. Japanese Core pre:Unit Name Unit Type [Transport] Exp(Lost in) Named/Claimed by Land Units American Core pre:Unit Name Unit Type [Transport] Exp(Lost in) Named/Claimed by Land Units Kangra fucked around with this message at 18:14 on Aug 15, 2018 |
|
#
?
Apr 24, 2017 18:20
|
|
|
In this post I'll give a brief overview of the combat mechanics, and point out what's different between this game and the previous ones. I'll also talk a bit about unit spotlights. Mechanics Overview Combat resolution: When two units fight, they both attack each other. To determine which unit goes first, the initiative values are compared. Experience and a random value determine the final initiative; a few other factors can affect it, based on unit type and in some cases who is making the attack move. If there is a tie, combat is simultaneous, with both sides attacking at their initial strength. Winning the initiative is often the key to beating an evenly-matched opponent. Pacific General adds a 'massed attack' rule for gaining an initiative advantage. For every friendly unit adjacent to the unit being attacked, the attacker gains one point of initiative. This makes encirclement attacks on tough units more realistic and less like besieging a castle. It also means that you're going to do better in combat by keeping units grouped. Once initiative is determined, each unit resolves its attack by subtracting the opponent's defense value from their own attack value. The differential is used to determine a die roll modifier. Then, for each strength point the unit has, one die is rolled and the modifier is applied [in this game, we cannot see the die rolls]. Other factors such as experience, terrain, and weather can contribute to the die roll modifier. When the adjusted die roll is high enough, it will inflict kills and/or suppression. Each kill causes the loss of a strength point. Suppressed strength points do not contribute to that unit's strength for the current combat only. This means they are normally only relevant for the unit that did not win initiative. If a unit has all its strength points suppressed, it is forced to retreat to any open adjacent hex. Units that have no retreat hex will surrender. New in Pacific General are special combat results for 'capital ships' (a set of naval unit types that also includes submarines). In addition to inflicting kills, combat may inflict 'wounds' to a ship, and there are also 'critical hits'. Wounded points recover slowly over time, reflecting the ship's damage control abilities. Critical hits cause a wide array of status affects that depend on the unit type, and they usually persist for a number of turns. Capital ships cannot receive replacements during the battle, but can use a 'Repair' action. Repairing takes up the whole turn and improves wound recovery while also reducing the duration of critical hit status effects. In the campaign, kills on a ship may only be repaired once the battle is over. There is one significant change that also affects the course of the campaign: a chance to update and purchase units 'between' battles. Units no longer need to store up overstrength at the end of a battle. In fact, doing this is cheaper than purchasing the elite reinforcements during battle, so it's best to keep all units in the fight. Sometimes units must be purchased in this part as well, since during a battle, units can only be placed at certain locations (another change from the previous game) and some naval maps do not even have placement hexes. As far as I can tell, elite reinforcements up to normal strength are still automatic and free between battles. The biggest change in the engine for Pacific General, however, is this: Units no longer have to move and fight in a single action. In fact, it's even possible to move in multiple segments (although this is really only usable for units with a high movement allowance, as it costs MP to deselect and select the unit again). This makes attacks less of a confusing puzzle and more like a wargame; the units you want to fight can get there and attacks can be more coordinated. On-screen, units that have completed their movement will be indicated with a red outline around their strength (units that can still move also show up highlighted on the strategic map, which is a nice feature for seeing what remains to be done). Another major change relates to how victory in the battles are decided. Gone are the hidden turn count time limits forcing a rush to get a Major Victory. Instead, there is a system that uses Victory Points (VP). VP come from controlling certain objectives, and are also earned by destroying enemy units (prestige awards remains separate, and that system seems to be unchanged). The balance between winning and losing then depends on the VP level, and in some battles that margin depends on how much of the enemy force is destroyed. Scenario turn limits still exist in order to bring the battle to an end, but it is possible to check the score during any turn to see who is winning and by how much, another welcome change. Special Abilities The last change is that units have their special abilities indicated, and there are some new ones, granting combat modifications, or allowing for special actions on the unit's turn. Here's a list of special abilities. Those marked with a * are ones I don't note on the unit description, because they are described by other statistics. *ADA Support - Ships that can use their anti-air guns for attacking (similar to Air Defense units) Banzai - In combat, if the opponent's defense is 4 or more points greater than this unit's attack, the Banzai unit gains +4 to Attack and -4 to Defense. Bunker-Killer - When fighting Fort units, unit ignores entrenchment and gets a +4 to Attack. Engineer - Ignores enemy entrenchment, and when on a river, the unit acts as a bridge. Fearless - Unit will not retreat as a combat result, and instead loses a point of strength. Frogmen - Submarine units that are immune to depth charge attacks. Guard - Unit is more likely to force a retreat result. Guide - All adjacent units (and this unit) pay the clear terrain movement cost for jungle, bamboo, and forest hexes. HQ - Purchased units may be placed next to this unit. [Only found on Fort units, which cannot move.] Kamikaze - Unit is removed after attacking. Night Optics - Unit can ignore spotting reduction at night, and always wins initiative against units that do not have Radar. No-buy - Unit cannot be purchased, presumably. Although other indications may be that this is merely a feature for the AI, to avoid having it purchase unrealistic numbers of cheap units. [The special is mentioned in the in-game glossary, but not in the manual.] *Paratroop - Unit has 'airborne' transport type and can unload from air transport on any land hex. *Pure Tac - Unit cannot make air-to-air attacks. Radar - Ignores combat & spotting penalties during night turns. Ranger - Immune to Rugged Defense, and has a greater chance of triggering Rugged Defense when attacked. Sonar - +20% chance to detect a submerged submarine. Torpedo Bomber - Can make a one-range naval attack if both this unit and its target are in ocean hexes. Unit Spotlights For this LP, rather than showcase the units in a end-of-year report, I'll be giving unit highlights at the end of each update. Generally one unit from the ground forces, and one unit from the air/naval forces will be chosen. The in-game stats of the unit will be given, along with the real-world description and an assessment of what the unit is like in the game. Bear in mind that I don't have a lot of experience with these units in particular, but knowing the system, I can make a pretty good guess even for units I don't end up using. Here's how the unit information is displayed: Name of unit - The unit is given its real-world name, often with a link. Links are provided primarily to give an image, but where possible, they will give some sort of detailed information on the unit. PG Name - Name used in the game Type - Type classification for the game, such as Infantry, Bomber, Air Defense, etc. Type is used for certain special rules. Effective Date - Month/Year the unit is first available in-game. This seems to match real-world initial production dates more often then 'widely available' dates. If a second number is given (with no slash), that is the year it is withdrawn; slashes will indicate inception date of updated variations. Value - Mainly used to determine the VP/prestige awarded to the enemy for damaging or eliminating it. This also has an effect on the unit's cost and the cost of replacements. Cost - Purchase cost in prestige. Spot - Spotting Range, in hexes. Move - The unit's movement rate, in hexes per turn. MM - Movement Mode, which affects the movement cost for each terrain type. Trans - The sort of long-distance transport the unit can be put in (distinct from organic transport like a truck). For planes, 'Naval' means that it can be carrier-based. Fuel - Fuel capacity. Not all units use fuel. Using one movement point consumes one unit of fuel, if applicable. Init - The unit's initiative, used to determine who gets the first hit in combat. Range - Range really only applies to artillery or naval units; all other units can only attack adjacent units. Size - Only meaningful for Level Bombers. This represents a base efficiency when strategic bombing (higher numbers mean more enemy resources will be destroyed). SA, HA, AA, NA, DA - Attack values - respectively Soft, Hard, Air, Naval, and Sub [i.e. Depth Charge]. The attack value used depends on the opposing unit. Units with no value listed cannot fight that type. Values in brackets mean that the unit cannot initiate attacks. GD, AD, CD, TD, DD - Defense values - respectively Ground, Air, Assault [Close], Torpedo, and Depth Charge. The defense value used also depends on the opposing unit; 'Ground' counts for surface in naval units. Submarines are the only units with a Depth Charge Defense value, and Assault Defense only applies to land units. Assault defense has been renamed from Close Defense in previous games, but is the same thing (it is used for Rugged Defense, and when infantry makes an attack in 'close terrain', like cities or forests). TT - Target Type. This will be either Hard or Soft for ground units. Air and Naval units are not indicated, as it's a function of their unit type (Submarines are a separate type as well). Ammo - Ammunition capacity. Participating in any combat consumes one unit of ammunition. Specials - When applicable, the special abilities of the unit will be mentioned here. See above for the list of special abilities. Some units have an 'updated' form that arrives at a later date. These are distinct units, but often represent only minor variations. In those cases, I write the values for the models separated by a slash. Values that have no slash indicate that the stat does not change between the models. Japanese naming conventions Vehicle Names: Japanese AFVs are typically indicated with a 'Type', which is a number, followed by a two-syllable designation that indicates what sort of unit it is. The number for 'Type' is the last two digits of the year of introduction. During this period, the military used the Japanese Imperial Year, which counts from 660 years before the Gregorian Calendar starts. 'Type 92' thus means a model introduced in 2592 (1932 AD), and low numbers like 'Type 2' come after the turn of the century (i.e. 2600/1940). In addition to the Imperial Year numbering, there was also a system based on the reigning emperor, which was used for some older units, like artillery. The two-syllable name that follows the type typically gives the unit classification (using an abbreviation) and a design revision designation. The revision designation uses an ordering essentially equivalent to alphabetical letters, so that's what I'll use for the explanatory name. This organized system was only instituted starting with Type 97 Chi-Ha, and descriptive names of vehicles prior to that tend to follow various alternate patterns. When listing a vehicle unit, I'll be giving the explanatory translation of the two-syllable name in brackets afterward. For example: 'O-Ni [Heavy Tank Model D]'. Plane Names: In Western accounts, the majority of the Japanese planes are known by their Allied codename, which was a personal name. Fighter planes were given masculine names, while bombers and other aircraft had feminine names. I may refer to them by these names during play, even on the Japanese side. In unit descriptions I give the manufacturer, military designation, and the Japanese nickname (where I've found one), and then the Allied codename in parentheses. Some of the planes also used a 'Type' designation indicating the year of introduction, similar to the ground vehicles. American naming conventions The US Army used the unimaginative letter 'M' (meaning 'model') followed by a number for nearly all equipment and vehicles. As designs changed, sometimes additional indicators for design revisions were added on. The result however, was an alphabet soup of names that appear to differ only slightly but can represent wide variations on a given base model. Many vehicles (tanks especially) are popularly known according to the code/nicknames of the British, who assigned them the names of former American generals. Those nicknames are typically part of or used as the in-game name, and I'll typically include it for the units that have them. There were a few other abbreviations used to designate vehicles other than tanks, ending in 'MC' for 'Motor Carriage'. There is thus 'GMC', 'HMC', 'CGMC', and 'MGMC' indicating 'Gun', 'Howitzer', 'Combination Gun', and 'Multiple Gun' respectively in front of 'Motor Carriage'. The last two usually indicated half-track vehicles, which had lighter anti-air or infantry-fighting weapons. Kangra fucked around with this message at 06:04 on Oct 13, 2017 |
|
#
?
Apr 24, 2017 18:21
|
|
|
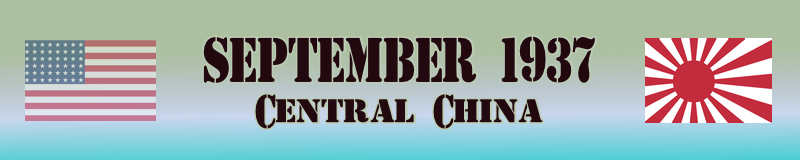
  Our first assignment is the campaign against China. We already have control of its northern territory, but we must manage to take over the cities in the center and southern part in order to proceed with our greater plans for Asia. Central China   Friday, August 13, 1937 Objectives: (Fou-yang [50]), Han k'ou [100], Nanking [200], Shanghai [2x200] OOB pre:Unit Name Unit Type [Transport] Exp Land Units 1.1st Hohei 1936 Hohei 1936[Isuzu] - 2.2nd Hohei 1936 Hohei 1936 - 3.3rd Hohei 1936 Hohei 1936[Isuzu] - 4.4th Hohei HW 1936 Hohei HW 1936[Isuzu] - 5.5th Engineers 1936 Engineers 1936[Isuzu] - 6.6th Kihei Kihei - 7.7th Type 95 Ha-Go Type 95 Ha-Go - 8.8th Ho-Ni 3 Ho-Ni 3 - 9.9th Meiji 38 Imp.75 Meiji 38 Imp.75 - Aux (by qty) 1 Hohei 1936[Isuzu] * 2 Hohei 1936 - 1 Engineers 1936[Isuzu] - 1 Kihei - 1 Type 94 Light - 1 Type 92 - 1 Type 93 Sumida - 1 94 Mtn Gun 75mm - Air Units 10.10th Nakajima Ki-27 Nate Nakajima Ki-27 Nate - 11.11th G3M Nell G3M Nell - 12.12th Kawasaki Ki-10 Perry Kawasaki Ki-10 Perry - 13.13th Nakajima Ki-27 Nate Nakajima Ki-27 Nate - 14.14th Nakajima Ki-27 Nate Nakajima Ki-27 Nate - 15.21st A5M Claude A5M Claude - Aux (by qty) 1 G3M Nell - 1 Ki-21 Sally -  This is the start of the war for us, and we don't have a say in our force composition or deployment. In this case, deployment doesn't matter much, since we will have time to spread out on the way to our objectives. It would be nice if we could have chosen different units, though, because we lack the prestige to just swap them out and will have to make do with some stuff that's not that great. 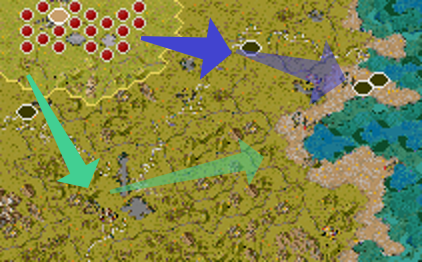 The plan is to send most of the units eastward in a slow march over the Yangtze and then onward to Shanghai. A smaller force will strike southward to Han k'ou in a rapid assault, followed by a swing south and then to the coast to secure the right flank. Air support will be allocated as needed, with the initial bent toward supporting the Han k'ou attack.  Pacific General has some nice artwork for the turn indicators, although some of them can make it a bit hard to read the other text. They come up randomly; I'll likely be able to show off all of them by including just the first turn for each scenario. Axis Turn 1: Aug 13, 1937 Day, Fair (Dry)  We send scouting units ahead, and aside from the expected defenses at Han k'ou no enemy resistance is reported on this side of the river.  We must clear a path for our bombers. The Ki-27's are sent in to take out the Soviet-made planes defending the city.  The rest of our planes are sent to form a protective shield for the advancing forces. Allied Turn 1: Aug 13, 1937 Day, Fair (Dry)  The Chinese avoid our interceptors and send their bombers to hit the ground troops.  Artillery shells begin to fall on our own guns in the south. Note that the guns appear to unload from transport whenever they are attacked. I think this is a real effect of combat, so that additional attacks use the unit's defense, but I haven't yet had a chance to check.  The bombing raids are followed up by the arrival of Chinese armor. The battle is inconclusive as neither side is willing to risk pushing forward with their tanks. Axis Turn 2: Aug 20, 1937 Day, Fair (Dry)  With the enemy fighters eliminated at Han k'ou, our bombers come and pound the defenders holding the east side of the city.  The tanks push away the cavalry, and our foot soldiers come in afterward to wipe out the enemy artillery.  This army is ill-suited to fight armor battles, and it is taking all our efforts just to get rid of a single armored unit.  We finally push the tanks back with our infantry, and gain a bridgehead on the Yangtze. Allied Turn 2: Aug 20, 1937 Day, Fair (Dry)  Enemy bombers keep up the raids, even though they know our fighters are close by.  Our first foray over the Yangtze is repelled.  Then a surprise comes in from the northeast -- a contingent of tankettes smashes into the cavalry guarding our left flank! Axis Turn 3: Aug 27, 1937 Day, Fair (Dry)  A bloody battle at Han k'ou finally gives us the victory there.  The L3 is targeted for destruction with our artillery and bombers. The armored cars are sent to guard the flank.  We may be able to gain an edge at Nanking by surrounding it with enough troops. Some of them are sure to get around the defenses. Allied Turn 3: Aug 27, 1937 Day, Fair (Dry)  The Chinese focus on pushing away our cavalry on the north side.  To the south, some enemy forces are moving forward to meet us, but they do not appear to have many units available down there. Axis Turn 4: Sep 3, 1937 Day, Fair (Dry)  With Han k'ou secure, the troops rush southward, forcing the Chinese infantry to run for the hills. 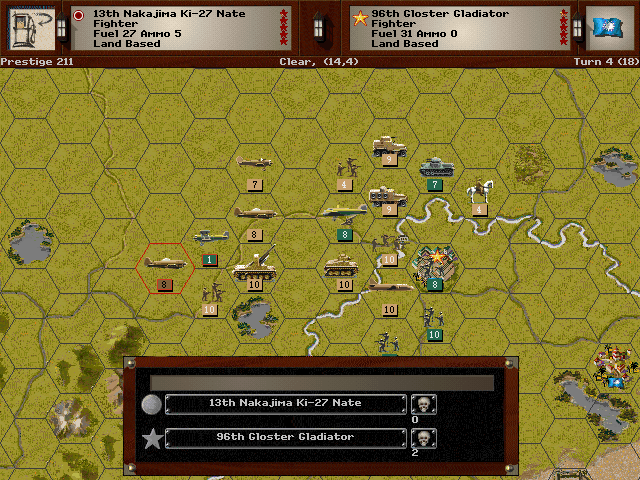 The enemy fighters are finally out of the way in the east.  After sending our bombers to soften them up, the tanks are pushed back all the way behind Nanking.  This frees up our scouts to reconnoiter the whole region north of the Yangtze.  While the fighting at Nanking remains intense, a crossing is made to the south, allowing us to open up a route to the coast. Victory Level: 215-678 (Defeat) We're off to a good start. The advance southward is preceding well enough, and given how tough Nanking is to crack, we should have no problem holding the flank with more units. We could be moving a bit faster, but losses so far have been light, and there's no need to push hard yet.  Unit spotlight For the first spotlight, one of the lesser-used infantry units, followed by the first (and worst) of the planes we have available. Kihei [Cavalry] (note: link is mainly for the pic, the page is in Japanese) PG Name: Kihei Type: Infantry Effective Date: 1/36 Value:6 Cost:72 Spot:2 Move:5 MM:Leg Trans:Air Fuel: 60 Init:2 SA:4 HA:1 AA:0 NA:1 GD:3 AD:10 CD:0 TT:Soft Ammo:7 Cavalry never seemed to form a large part of the modernized (Meiji-era and later) Japanese army, but they were considered a valuable asset. In World War II they were deployed as mobile reconnaissance units, in support of the infantry. For this reason, the cavalry regiments often had tankettes included in their force as mechanized recon gradually took the place of animal transport (at the nebulous scale of this game, the tankettes would be separate units). In-game analysis: Cavalry in this game are not dissimilar to their real-life role, and the units aren't that different for each side. They are most effective as mobile scouts for more combat-effective infantry units. The higher initiative value means they can also work well for hunting down and finishing off soft targets, too. Kawasaki Ki-10 (Perry) PG Name: Kawasaki Ki-10 Perry Type:Fighter Effective Date: 7/36 Value:10 Cost:120 Spot:3 Move:8 MM:Air Trans:No Fuel: 48 Init:3 SA:1 HA:1 AA:4 NA:0 DA:0 GD:3 AD:5 Ammo:4 This was Japan's last biplane fighter. Although its maneuverability was quite good in its day, it didn't have much in the way of offensive power or armor, and was outdated in just a few short years. It did see action in China and the Nomonhan Incident, but was withdrawn and used only for training by the time of the Pacific War. In-game analysis: This might be one of the weakest early-game fighters. It can't really be used as an attacker, and it's only marginally valuable as an escort. The better fighters only cost a little bit more, so there's no point in purchasing one either. Kangra fucked around with this message at 20:29 on Apr 24, 2017 |
|
#
?
Apr 24, 2017 18:47
|
|
|
Awwww yeah! Edit: You better end up with some Ki-61s in your core or else!
|
|
#
?
Apr 24, 2017 22:10
|
|

|
I'd like to claim the 7th Type 95 Ha-Go with the name: My Tanks are so kawaii. Delete all the spaces if needed to make it fit. Thanks. Looking forward to how this goes as I was thinking of possible buying this game in the future.
|
|
#
?
Apr 25, 2017 00:20
|
|

|
I'll take the Ki-10 unit, call it Sabai'sFlyingCircus.
|
|
#
?
Apr 25, 2017 01:27
|
|
|
I'll like to claim a zero or at least any plane we have right now that can be upgraded to one later!  :edit: oh for name I take "wings like katana" 
Thefluffy fucked around with this message at 18:15 on Apr 28, 2017 |
|
#
?
Apr 25, 2017 01:49
|
|
|
Can I claim the cavalry? Call them The Japonies please. 
|
|
#
?
Apr 25, 2017 02:07
|
|
|
Jobbo_Fett posted:Awwww yeah! I might...they don't look that impressive stat-wise for this game. Though they are relatively cheap. I wouldn't be surprised if I pick one up at some point, especially since we're not naval-focused. (I won't even mention the Ki-100, which is a worse deal stat-wise and doesn't show up until too late in 1945 anyway). Everyone's requests are in so far. Turns out the naming limit is 21 characters. Kangra fucked around with this message at 19:29 on Apr 25, 2017 |
|
#
?
Apr 25, 2017 19:24
|
|
|
Kangra posted:I might...they don't look that impressive stat-wise for this game. Though they are relatively cheap. I wouldn't be surprised if I pick one up at some point, especially since we're not naval-focused. (I won't even mention the Ki-100, which is a worse deal stat-wise and doesn't show up until too late in 1945 anyway). Requesting an IJA Air Unit named "Hirohito's Hieneys" and eventually become a dedicated Ki-61 unit.
|
|
#
?
Apr 25, 2017 20:14
|
|
|
Could I have an arty unit named cherry blossoms float, 
|
|
#
?
Apr 25, 2017 20:36
|
|
|
Kangra posted:I might...they don't look that impressive stat-wise for this game. Though they are relatively cheap. I wouldn't be surprised if I pick one up at some point, especially since we're not naval-focused. (I won't even mention the Ki-100, which is a worse deal stat-wise and doesn't show up until too late in 1945 anyway). Could you stick spaces in between the words for mine?
|
|
#
?
Apr 25, 2017 21:06
|
|
|
I'd like to request a Nate squadron: Nathan is my father
|
|
#
?
Apr 26, 2017 19:18
|
|
|
I'd to request the Ho-Ni 3, I want to call it Steel Death.
|
|
#
?
Apr 27, 2017 02:04
|
|
|
Quinntan posted:Could you stick spaces in between the words for mine? Yes, in fact I was wrong about the allowed size. It actually seems to be based on screen space for the prompt, oddly enough. So something like 18 ems is the allowed length. People can just submit it and I'll make it fit. Although apparently using noting but '.' causes the game to crash. The game (or at least the GoG version) is not particularly stable; I'm saving every turn for the LP anyway, but it's probably a good practice. Next update coming soon.
|
|
#
?
Apr 28, 2017 19:22
|
|
|
 We're making good progress in China, and should have no trouble capturing Shanghai before the year is out.  A line of troops is being set up to contain the enemy forces that retreated from Nanking. This will let us keep the pressure with the main force on Shanghai. The remainder of the forces in the south will do as much as they can to clear forces all the way to the sea. Allied Turn 4: Sep 3, 1937 Day, Fair (Dry) 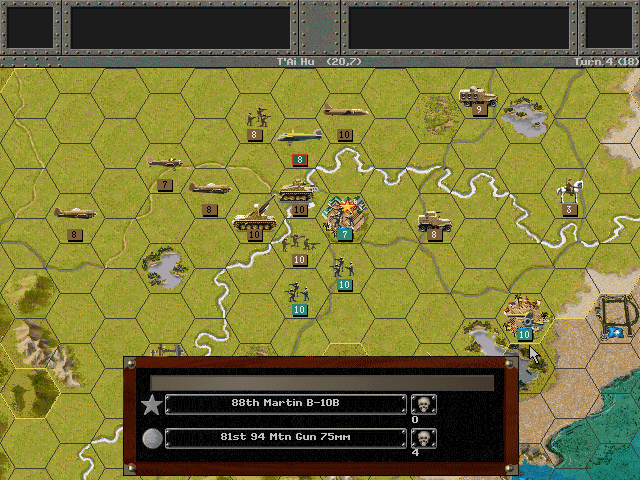 Only one attack is made by the Chinese, but it is a devastating bomber strike that eliminates our mountain guns. Axis Turn 5: Sep 10, 1937 Day, Fair (Dry) 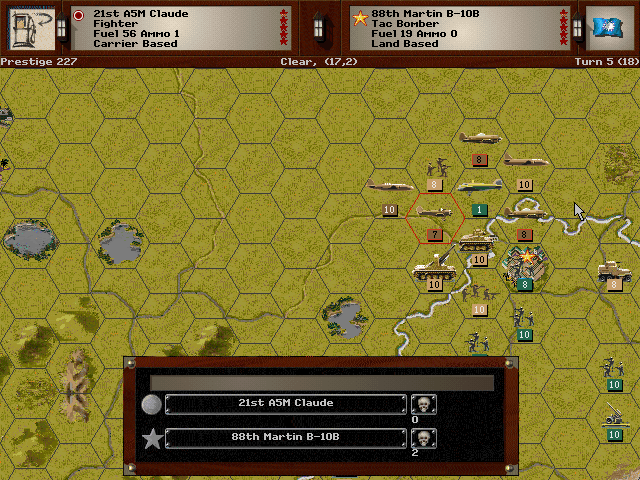 We exact our revenge on the unprotected bombers. 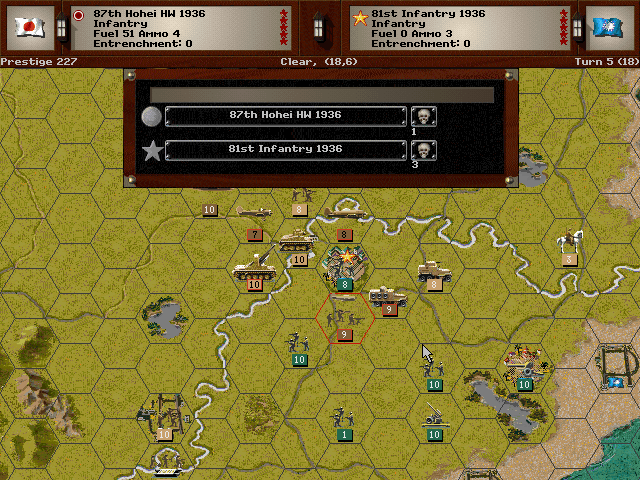 Although Nanking is still too dug in to attack directly, we are able to surround it and push back any relieving forces.  Meanwhile our other units form a weak line all the way to the sea, in order to cut off retreat routes.  Advancement in the south is slower than expected, as we struggle to finish off the infantry in the hilly region northwest of Nanchang. Allied Turn 5: Sep 10, 1937 Day, Fair (Dry) 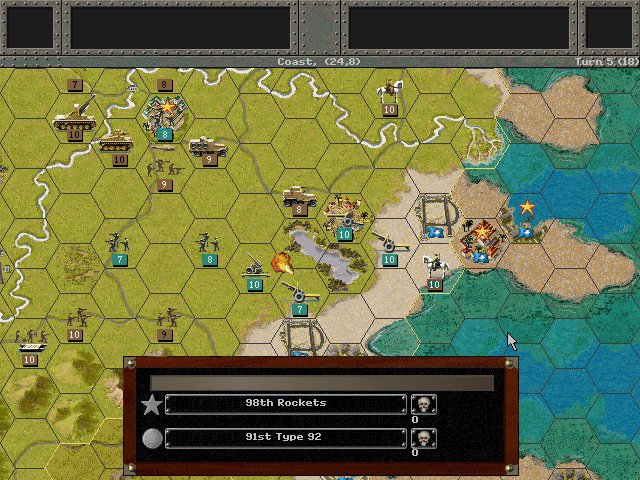 Chinese rockets try to scare off our reconnaissance cars, but they do not inflict any real casualties. 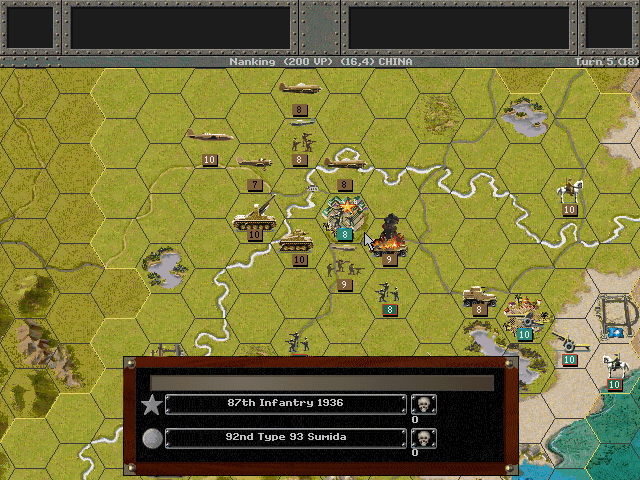 Attempts to break out of the encirclement of Nanking also fail. Axis Turn 6: Sep 17, 1937 Day, Cloudy (Dry) 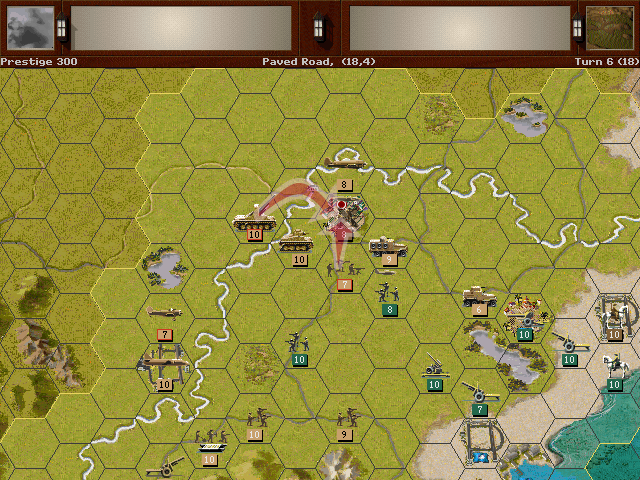 After repeated assaults wear down the defenders, Nanking surrenders at last. 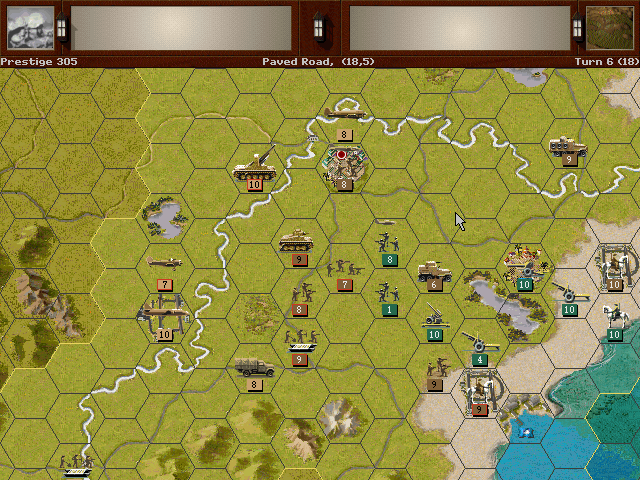 We've managed to cut off Shanghai from the rest of the country. Reducing that pocket is still going to involve a lot of fighting. 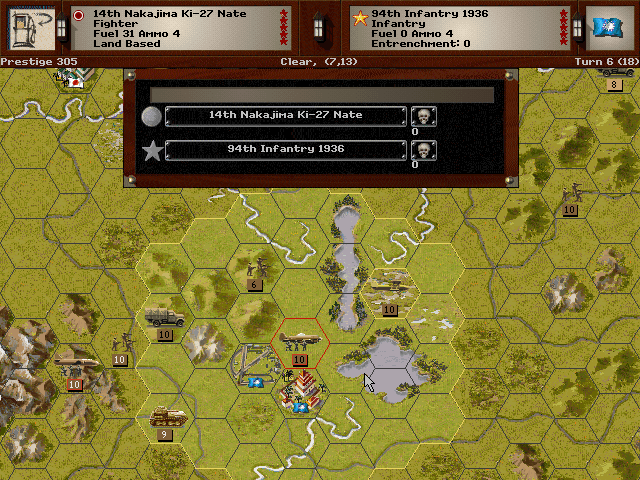 Not all resistance is eliminated in the south, but our army is making its way slowly eastward. Allied Turn 6: Sep 17, 1937 Day, Cloudy (Dry)  Concentrated attacks out of Shanghai force our cavalry to pull back from the airfield before the entire unit is lost. Axis Turn 7: Sep 24, 1937 Day, Cloudy (Dry) 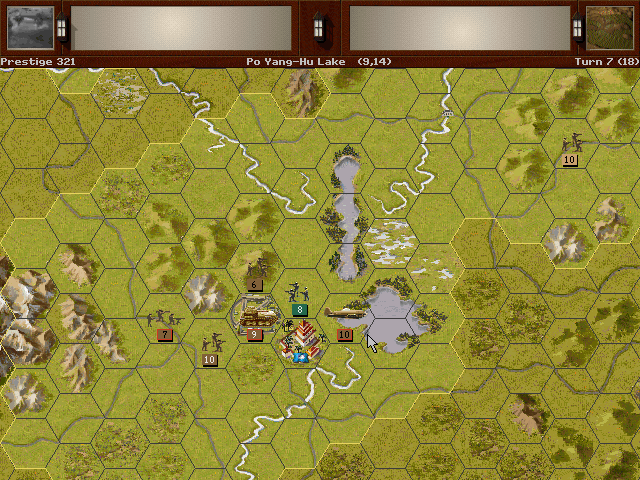 We've managed to capture the airfield at Nanchang, and that should help us finish off the few enemy troops that remain. 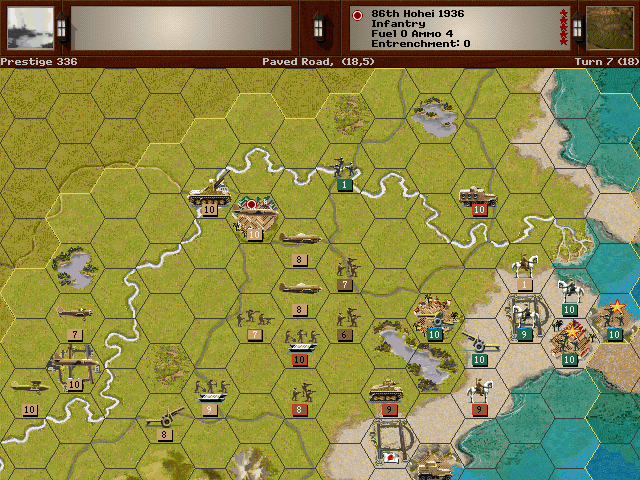 The pressure on Shanghai increases as we begin to approach from the southwest. 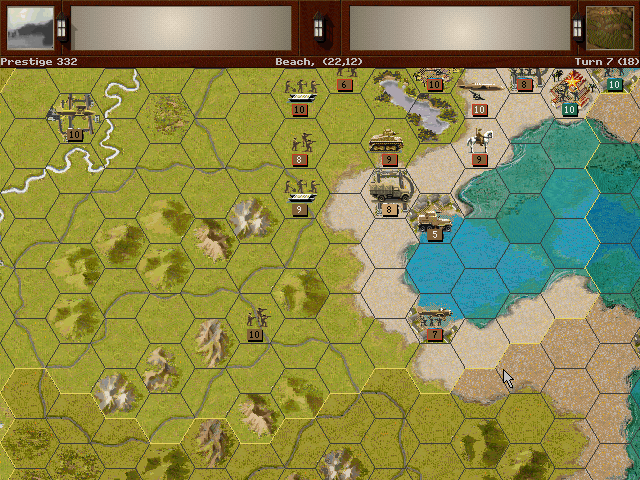 It appears that most of the Chinese forces were positioned to defend Nanking and Shanghai, as little remains elsewhere. Allied Turn 7: Sep 24, 1937 Day, Cloudy (Dry) 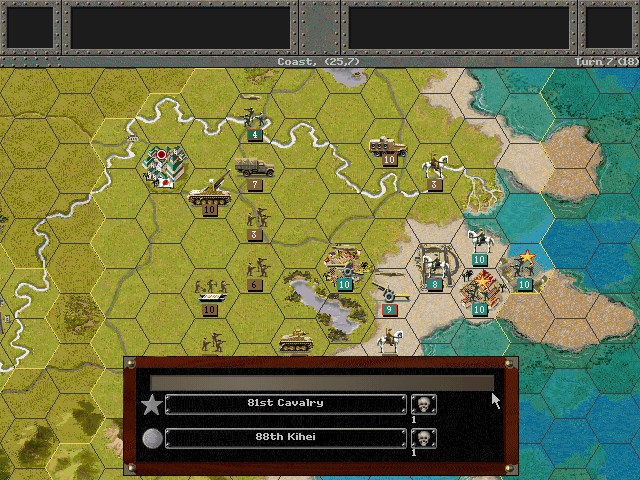 The Kihei on the outskirts of Shanghai are pushed back to the Yangtze.  In the south, a ferocious assault from the Chinese infantry forces us to retreat into the highlands, but leaves half of their number dead. Victory Level: 460-488 (Defeat)  With Nanking secured, we're on the verge of victory. The next month should allow us to tip the balance of victory decisively in our favor. Unit Spotlight This time we get to see our first really good unit, though it's not the first one listed here. Sumida Model P (Type 90 or later) Armored Car PG Name: Type 93 Sumida Type: Recon Effective Date: 7/36 Value:4 Cost:48 Spot:3 Move:7 MM:Wheeled Trans:Naval Fuel: 40 Init:5 SA:4 HA:1 AA:0 NA:0 GD:7 AD:2 CD:2 TT:Hard Ammo:4 Unlike the Type 92 'armored car' (which was a tank), this was an actual armored car. It saw heavy use during the invasion of China, especially around Shanghai. One of the main variants was designed with the wheels set in a way that allowed for travel on railroad tracks, where it could reach speeds of over 60 km/hr. It seems the design really only made it usable in areas with good quality roads or rails, and it did not see much action around the Pacific. As for which vehicle this actually is, there were several similar vehicles, but the 'Sumida' name suggests the Model P (see the link for a further explanation). In-game analysis: Other than the fact that it's cheap, there is no real reason to get this unit. The Type 92 Recon is equivalent or better in all aspects. This thing's best role is putting down infantry or other soft targets, and it's not all that great at even that. But it is less than half the price of the Type 92 for the same scouting power. If you need inexpensive scouting, or are fighting an opponent with no armored vehicles, then maybe it is a good addition to the auxiliary. Usually you can afford something better. Mitsubishi G3M [Type 96] (Nell) PG Name: G3M Nell Type:Tac Bomber Effective Date: 7/36 Value:21 Cost:252 Spot:3 Move:8 MM:Air Trans:No Fuel: 153 Init:4 SA:7 HA:6 AA:7 NA:8 GD:9 AD:8 Ammo:4 The Nell was the result of the Navy wanting a bomber with the same range as a reconnaissance aircraft. A 'medium' bomber was thus produced and adopted in 1935. This plane had the distinction of being the first bomber to cross an ocean on a combat mission (against China). One thing the Nell was severely lacking was armor, and it did not take very many hits to knock one down. Initially the plane was expected to rely on its decently high speed to escape, but by the late 1930s the plane's top speed was no match for newer fighter designs. By 1943, most of the Nells had been shifted into non-combat roles. In-game analysis: This is a remarkably well-balanced unit, all told. While the Nell doesn't have any particular role it excels at, it has decent numbers at every point. It's kind of a workhorse unit, especially given the price, and serves admirably until better, more specialized planes become available. Kangra fucked around with this message at 19:37 on Apr 28, 2017 |
|
#
?
Apr 28, 2017 19:25
|
|
|
Good luck on the next mission! It made me abandon the game in frustration when I played it earlier last year.
|
|
#
?
May 2, 2017 03:41
|
|
|
HannibalBarca posted:Good luck on the next mission! It made me abandon the game in frustration when I played it earlier last year. yeah about that, how are neutral units handled in game? also I assume the diamond icon on cities means bonus objective.
|
|
#
?
May 2, 2017 03:43
|
|
|
Thefluffy posted:yeah about that, how are neutral units handled in game? also I assume the diamond icon on cities means bonus objective. Neutrals are the third side, and they will not engage you until/unless you attack them. Although I think there can only be one neutral 'player', which means that if you attack any one neutral unit, all neutral units become hostile, even those of a differing country. Neutrals in the campaign only stay hostile for the particular battle. One thing I don't know is whether neutrals will go hostile if you merely capture an objective of theirs; it'd be likely impossible to do this in the base game, but custom scenarios could explore that. Yeah, about that bonus objective ... looks like you paid more attention than I did when playing this last night. We'll get to see the result soonish (although I picked the wrong week to start this up, since these two weekends I'm unusually busy, and won't have much free time next week. I don't think there'll be that much of a delay, though; I have less editing to do on the pics so updates are a bit easier to produce than with PGF).
|
|
#
?
May 2, 2017 06:25
|
|
|
 As the campaigning year nears its close, we're closing in on our final goal in central China. If we push hard enough, we can take it. 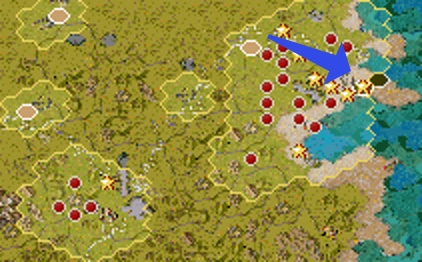 We don't have much more to do here but take Shanghai. Let's get to it. Axis Turn 8: Oct 1, 1937 Day, Cloudy (Dry) 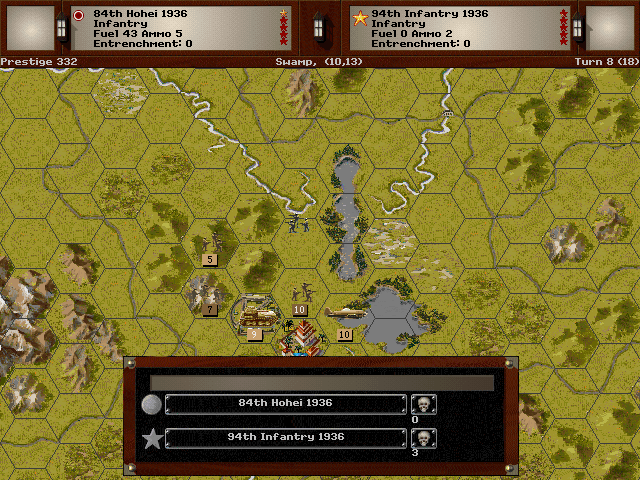 We finally clear out all resistance in the south (The infantry here pushed them back to the river, and a fighter strike handles the rest).  While Shanghai is the main target of our assault, there is some fighting going on elsewhere along the coast.  An enemy cavalry unit is trying to slow our advance. After a day of difficult fighting we manage to push them aside.  The squeeze is on from the south. Our superior forces smash into the Chinese left side. Allied Turn 8: Oct 1, 1937 Day, Cloudy (Dry)  The units in Su-Chou are cut off. They try to fight their way out, but there is little hope of that happening. Axis Turn 9: Oct 8, 1937 Day, Fair (Dry)  As the days grow shorter we continue to press forward to Shanghai. We're clearing out the units in the outskirts, but there is still a difficult fight ahead for the city itself. 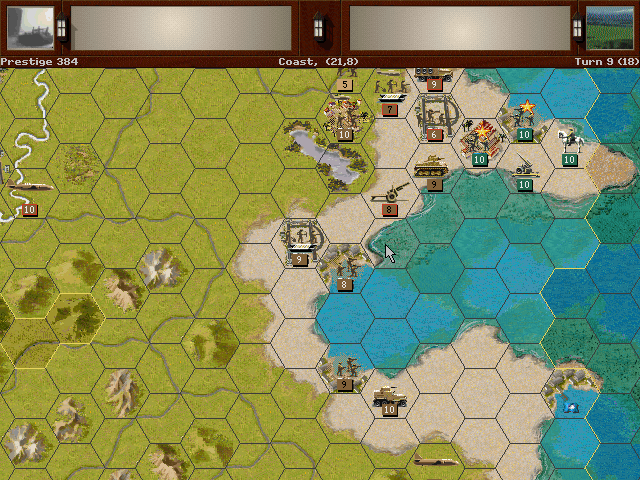 It appears that now there are no other enemy forces remaining in the region. Allied Turn 9: Oct 8, 1937 Day, Fair (Dry) 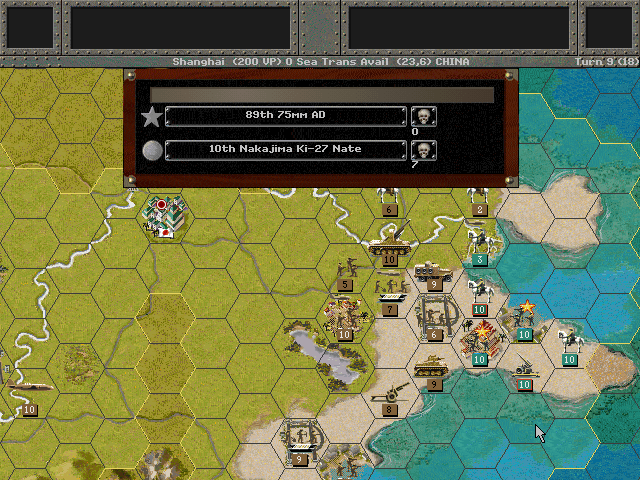 Our fighters pay the price for flying into the range of Shanghai's heavy anti-air guns. 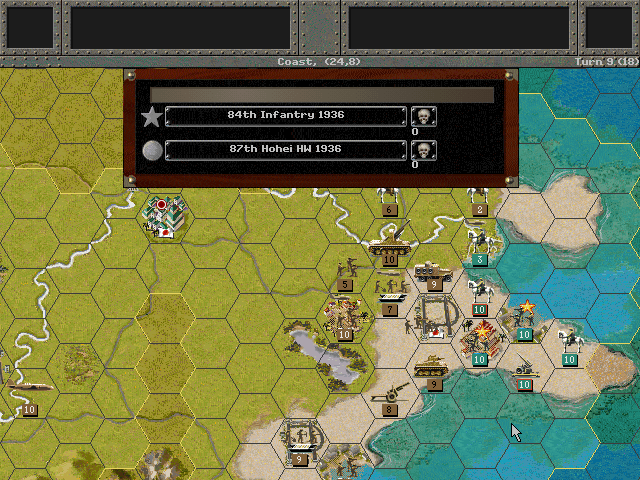 Down at ground level, the city pushes back our initial infantry guard. Those were not intended to be the main assault force anyway. Axis Turn 10: Oct 15, 1937 Day, Fair (Dry) 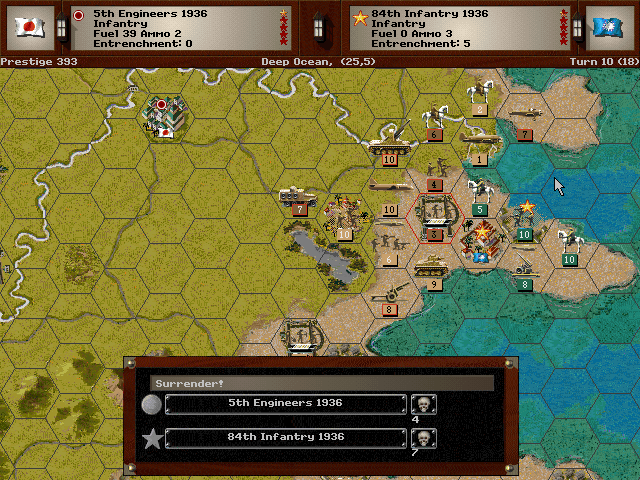 Bombers soften up the city's defenses, and then in a bloody fight our Engineers eliminate a whole unit.  We continue to push hard, leading to unfortunately high losses for our tanks when they try to knock out those anti-air guns. Note: I was desperately trying to reduce the ammo in those AA guns here, in order to keep the heavily-damaged fighter unit that was forced to refuel at the nearby airfield alive.  More territory is claimed along the coast. Allied Turn 10: Oct 15, 1937 Day, Fair (Dry)  Despite their reduced number, our tanks stand firm when the Chinese troops come at them to retake the city. Axis Turn 11: Oct 22, 1937 Day, Fair (Dry)  The south is securely in our hands.  The battle for control of the city lasts a few more days, but at the end of it, Shanghai surrenders entirely.  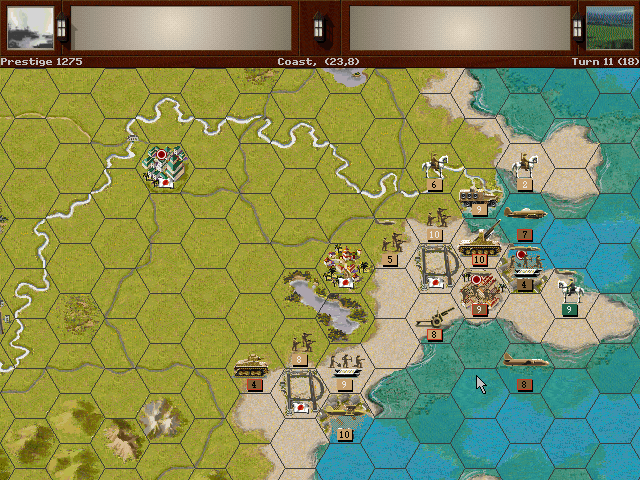 The city has been taken, and almost every enemy unit was eliminated. It has come at a heavy cost for many, but it is a win nonetheless. Final VP: 931 - 88 (Decisive Victory) Ending Prestige: 475 (+800 Victory Award)  Unit Spotlight Type 38 Improved 75mm Field Gun PG Name: Meiji 38 Imp.75 Type: Artillery Effective Date: 7/36 Value:6 Cost:72 Spot:1 Move:1 MM:Gun Trans:Naval Fuel: - Init:1 Range:2 SA:11 HA:5 AA:0 NA:0 GD:2 AD:6 CD:0 TT:Soft Ammo:9 This model was introduced in the 38th year of the Meiji Emperor, or 1905 in the Gregorian Calendar. The 'Improved' version came out in the 1920s, and it's a fairly standard field gun of that era. In-game analysis: 75mm Artillery pieces are typically the least effective (outside of rockets) but when they are the only thing you've got, they'll do the job. Thankfully the separation of movement and combat in Pacific General makes 2-range artillery units actually viable for assaulting fortified objectives. I'd still rather have something with more punch. Nakajima Ki-27 (Nate) PG Name: Nakajima Ki-27 Nate Type:Fighter Effective Date: 7/36 Value:12 Cost:144 Spot:3 Move:10 MM:Air Trans:No Fuel: 51 Init:5 SA:2 HA:1 AA:6 NA:0 DA:0 GD:6 AD:6 Ammo:8 The Ki-27 was the successor to the Perry as the Army's primary fighter. Compared to more modern designs of the time, it was a relatively poor performer, but it did prove superior to most Chinese and Soviet aircraft that it faced in the 1930s. It continued to be used by the IJA into 1941. In-game analysis: In contrast to the Perry, this is an above-average fighter for the early war. It's better on offense than defense, but the decently high initiative makes it likely that it can win the battle; it therefore works well as either an escort or interceptor. All of that said, the A5M4 (Claude) is a better plane that's available at the same time for the same price. Kangra fucked around with this message at 18:34 on May 5, 2017 |
|
#
?
May 5, 2017 18:29
|
|
|
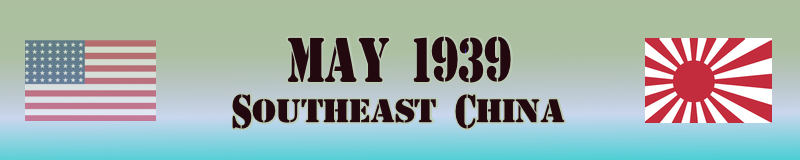 We weakened China considerably in our last campaign, but in the last year things reached a stalemate. It's time for us to deliver a knockout blow. 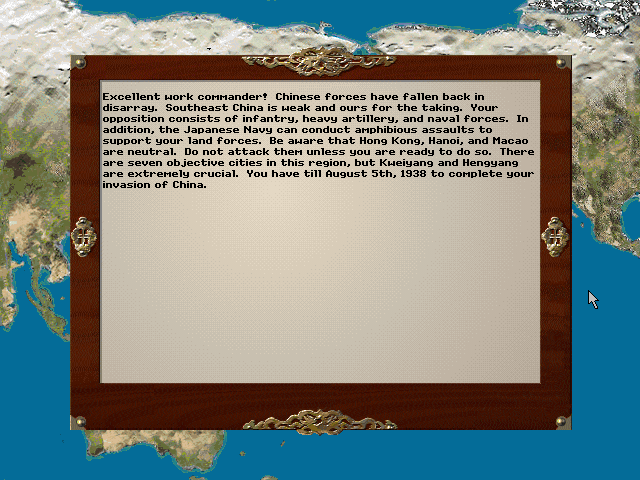 This time, we have the Navy to back us up. The Chinese naval forces are weak, and we'll be making our landings to skirt around the front lines and cut out their feet from under them. 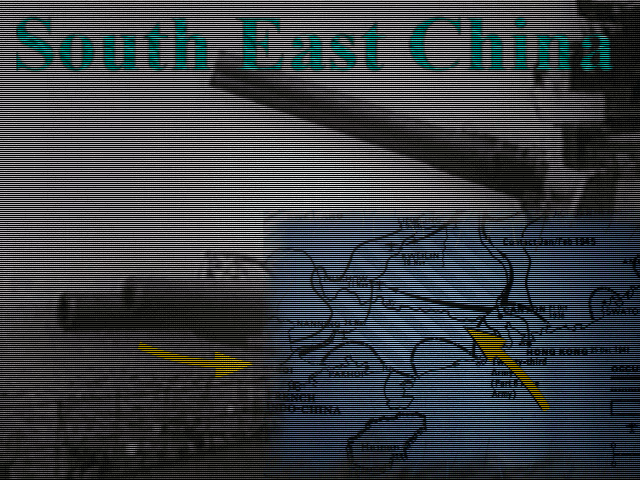 South East China Monday, May 1, 1939 Objectives: (Pescadores x2 [10]), Canton [100], Kweilin [100], Hengyang [300], Liechiewhsien [100], Kweiyeng [100], Kwangnan [100], {Hanoi [300]}, {Hong Kong [500]} There's something new in the game that comes into play in this scenario: Neutral/Multiple sides that can act on their own. Rather than simply restricting units to the borders of neutral sides as in the previous games, they are included as potential combatants. Neutrals will not initially fight with any side, but will immediately fight back against whichever side attacks them. On this map, Hong Kong(UK), Macao(Portugal), and Vietnam/Indochina (France) are the third side. We can seize their objectives for extra VP, but we'll need to fight them for it if we do. Note about this update (and the others for this battle): I forgot to turn off the game interface overlay most of the time, so all the pictures will display the UI buttons on either side. I guess this is a chance to show them off (interestingly, the art is distinct for the Japanese and American sides). OOB pre:Unit Name Unit Type [Transport] Exp
Land Units
1.1st Hohei 1936 Hohei 1936[Isuzu] -
2.2nd Hohei 1936 Hohei 1936 -
3.3rd Hohei 1936 Hohei 1936[Isuzu] -
4.4th Hohei HW 1936 Hohei HW 1936[Isuzu] -
5.5th Engineers 1936 Engineers 1936[Isuzu] -
6.The Japonies Kihei -
7.My Tanks are so kawaii Type 95 Ha-Go -
8.22nd Type 92 Type 92 -
9.Steel Death Ho-Ni 3 -
10.Cherry Blossoms Float Meiji 38 Imp.75 -
11.24th 94 Mtn Gun 75mm 94 Mtn Gun 75mm -
12.23rd Sa-To Sa-To -
Aux (by qty)
1 Type 94 Light -
1 Hohei 1936 -
1 Teishin Dan 1936 -
1 Engineers 1936 -
Air Units
13.Hirohito's Hieneys Nakajima Ki-27 Nate -
14.Sabai's Flying Circus Kawasaki Ki-10 Perry -
15.13th Nakajima Ki-27 Nate Nakajima Ki-27 Nate -
16.Nathan is my Father Nakajima Ki-27 Nate -
17.21st A5M Claude A5M Claude -
18.11th G3M Nell G3M Nell -
Aux (by qty)
1 Nakajima ki-27 Nate *
1 G3M Nell **
1 Ki-21 Sally *
1 Mavis *
Naval Units
19.16th Asashio Asashio -
20.18th Takao Takao -
21.20th Takao Takao -
22.19th Fuso Fuso -
23.15th Kaga Kaga -
24.17th Katori Katori -
Aux (by qty)
1 Nagato *
Starting Prestige: 867 We don't yet have enough prestige to upgrade the core exactly how we'd like, but we do get to fill new slots. We want at least one recon unit, and the Type 92 is also able to function as a light tank, making it the most versatile of that type. More artillery is always better, so we add one of the mobile mountain guns to the core. Finally, it's a good idea to have a spare bit of anti-air on the ground; the Sa-To is a good choice because it can also fight ground units reasonably well, and comes on an armored chassis. Also new in the game: Core units are split between ground/air and naval, with separate slots for each. That means we won't be able to load up on boats unless those slots open up for us. I'm going to indicates this with a : to show ground:naval. Aux units are not split, though it's rare that you'd want naval aux units anyway. In addition, because core units can be purchased in between the scenarios, I'll indicate pre-battle purchases by putting the slot number in parentheses (e.g. this time there were 3 core slots, and we filled them all before the battle). 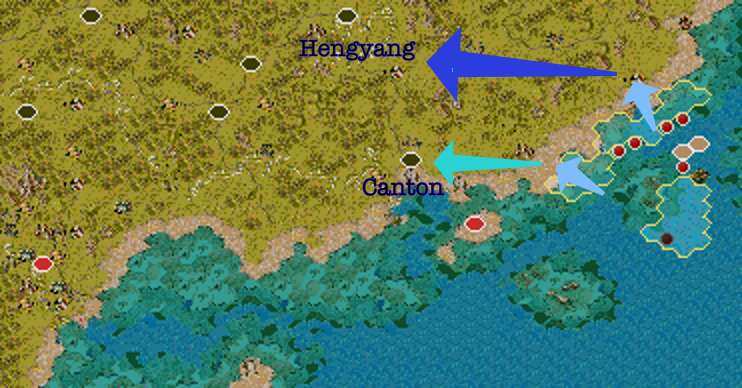 Our plan here is to send the bulk of our force inland, to capture Hengyang first and then go on a continuous march westward. We'll be moving along whatever roads there are to be found in this part of China. Canton is a key port to capture, but with our naval units to cover the assault, it is expected that a small ground force will suffice. Once Canton has been secured, the units there can either turn north to hit the Chinese flank (if this happens sooner), or spread out to clear out the interior away from the main thrust.  The landing area is going to be along a large, mostly empty coastal area around Amoy. The primary force will need to secure this port in order to begin the push inland. The Canton group will be driving west immediately, in hopes of taking the enemy by surprise. We have significant air and naval support, and should enjoy regional superiority in both of those spheres. There is the problem that as we advance, the quality of the airbases declines by quite a bit, so we can only expect the best support in the early stage of the fight. There are two types of airfield now in Pacific General. Paved airfields work the same as in the previous games -- any air unit in that hex or adjacent hexes is automatically resupplied at the end of the turn. The dirt airfields show on the map as smaller and brown, and with those, only the unit directly on the airfield gets resupplied. The only paved airfields on this map are at Amoy, Canton, and our starting island of Pescadores. All the rest are dirt. 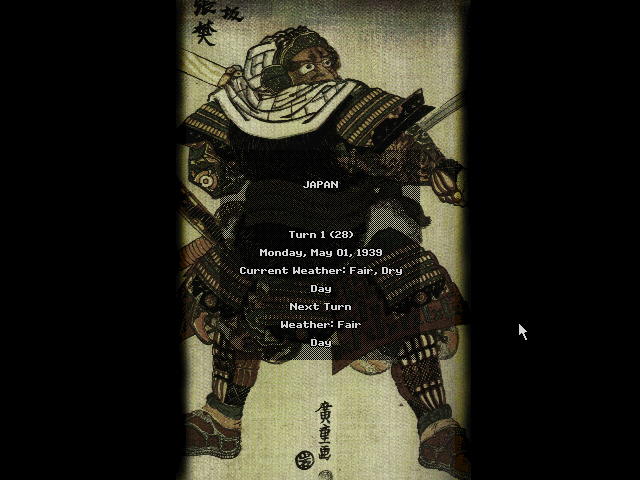 Axis Turn 1: May 1. 1939 Day, Fair (Dry) 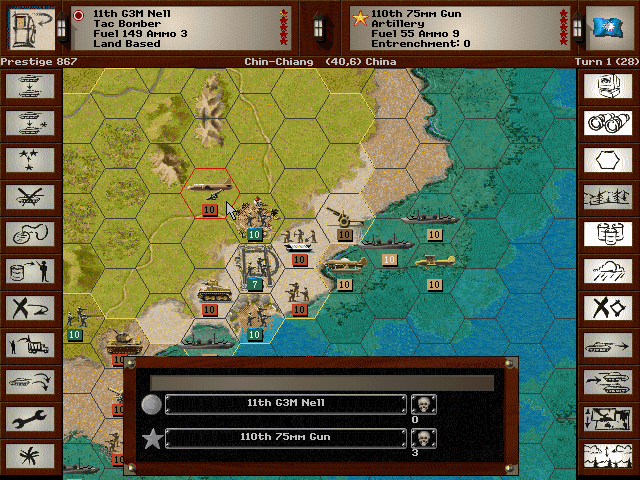 Air raids cover our landings by keeping the enemy from leaving their fortifications. We'll be able to form up unmolested and then assault the city.  The Canton force gets ashore in a quiet part of the coast. Only the Sa-To spots any enemy troops, and that is to the north of this group. Allied (China) Turn 1: May 8, 1939 Day, Fair (Dry) 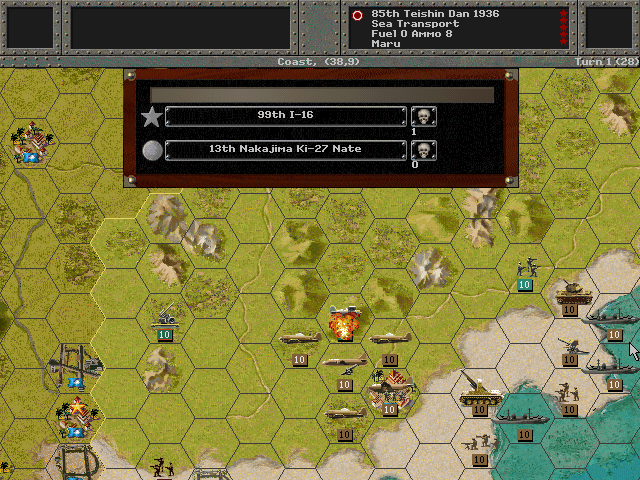 The enemy fighters come to meet us, but their planes are weak, and severely outnumbered. 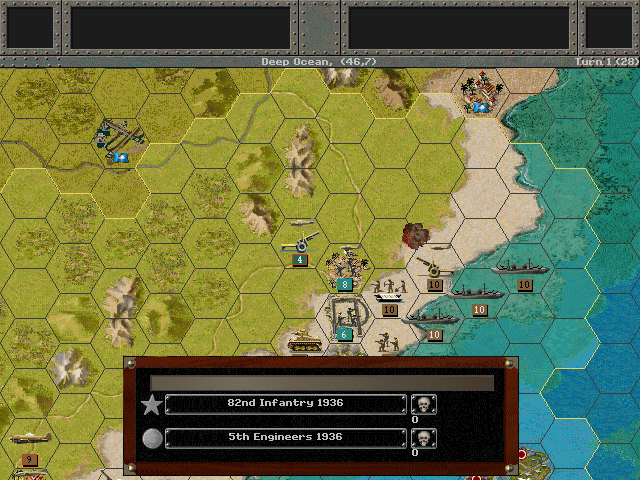 An attempt is made to disrupt the engineers, but thanks to the rapid response from the artillery of Cherry Blossoms Float, their attack has no effect. Axis Turn 2: May 8, 1939 Day, Fair (Dry)  We spot Chinese warships sailing in the vicinity of Hong Kong. If this is all they have, we can deal with them easily. 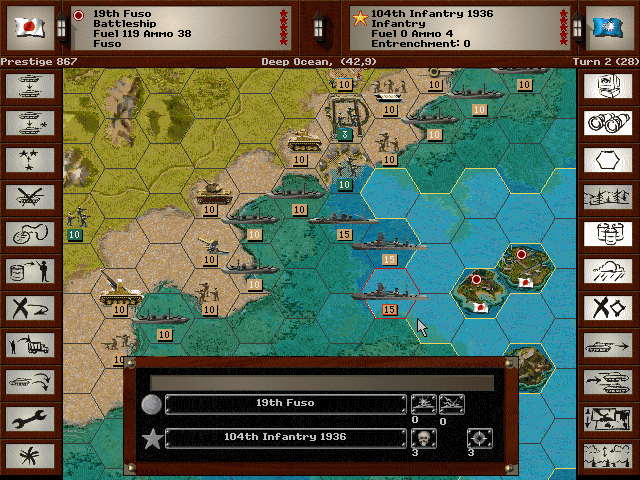 For now, though, we want to use our big ships to support the invasion.  Resistance is all but cleared out at Amoy. The city should be safe to accept supply shipments within a week.  With no real air threats to worry about, the Sa-To proves its worth on the ground by rushing in and smashing the Chinese guns at Shantow. Allied Turn 2: May 8, 1939 Day, Fair (Dry)  The Chinese cruisers harass our forces, but cause no serious harm.  A much more serious threat arrives in the air however - Americans in P-40's supporting the Chinese come screaming out of the skies and down nearly half a squadron of our fighter planes.  A lesser but still worrisome threat shows up on the ground, in the form of well-armored Soviet-model tanks. The enemy forces here seem much better equipped now than they what we saw at Shanghai last year. Axis Turn 3: May 15, 1939 Day, Fair (Dry)  Combined attacks from the air and the ground prove to be the best way to deal with the T-26 tanks.  Fortunately for us, the so-called 'Flying Tigers' put themselves in range of the Sa-To, and it gets the chance to fire into the air as well.  That's a good thing, because our pilots apparently lack the skill to deal with these planes.  Our fleet is cautiously approaching the Chinese ships. We need to be sure of no surprises here. Allied Turn 3: May 15, 1939 Day, Fair (Dry)  The only resistance we're seeing is at Shantow, but Steel Death resists the attacks from the Chinese AT guns. Axis Turn 4: May 22, 1939 Day, Fair (Dry) The weather has been favoring us so far, but the forecast calls for rain now.  Before we lose sight of them, we go after the enemy ships. Fuso cripples the Ning Hai, and then one of our Takao cruisers finishes it off.  With control of the skies, we're able to push forward at Shantow. 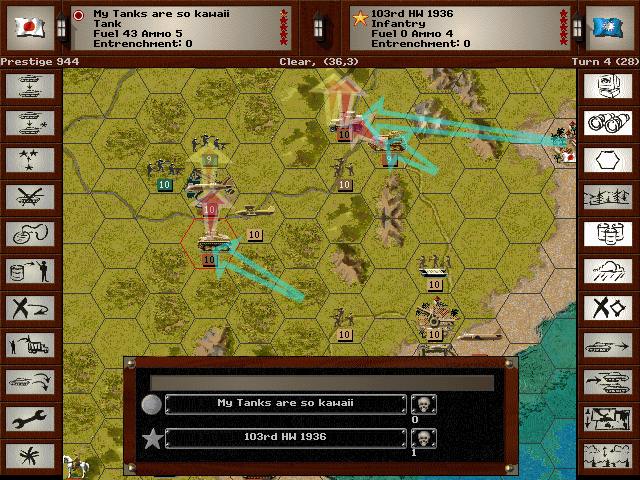 The main force is now advancing up the road from Amoy. Our tanks rush over the roadless territory to make a shock assault that drives the enemy troops off the airfield. Allied Turn 4: May 22, 1939 Day, Fair (Dry) 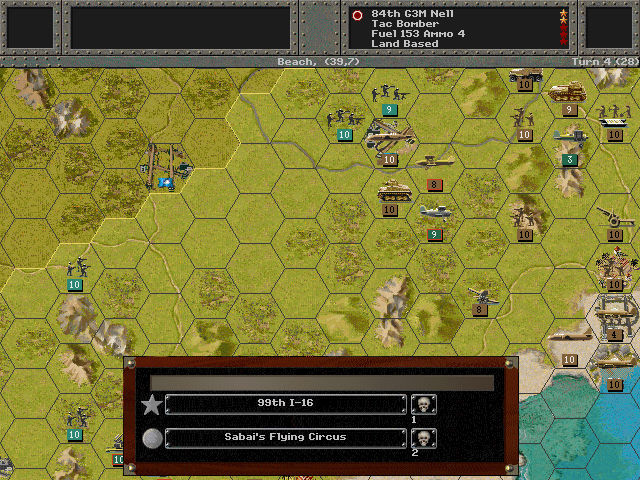 The air battle continues, with the I-16 taking on the Ki-10 in a battle of outdated aircraft. 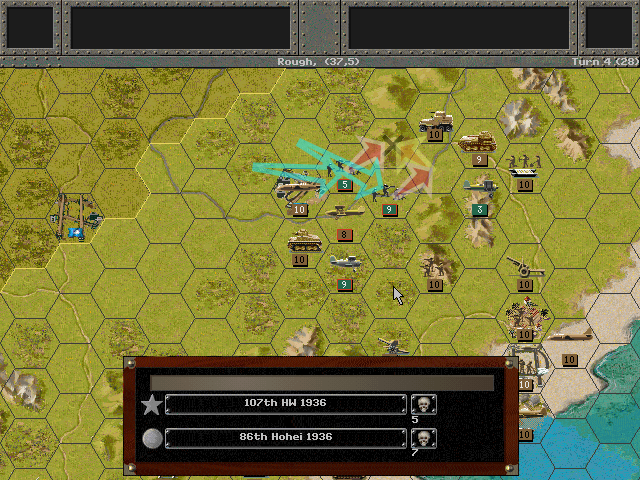 Recovery from the initial attacks out of Amoy is remarkably swift. The Chinese identify our main line of assault and destroy our advance infantry unit. But they do abandon the airfield, allowing our flanking armored units easy access. Axis Turn 5: May 29, 1939 Night, Cloudy (Dry) If you've been wondering why each turn has been indicating 'Day' as well as weather, here's why -- our first Night turn. In Night turns, air combat is disallowed (with a few exceptions), combat seems generally less effective, and there are restrictions on movement and spotting. I like it as an idea to give a forced break in the fight, but it does feel a bit weird given the scale of the game. 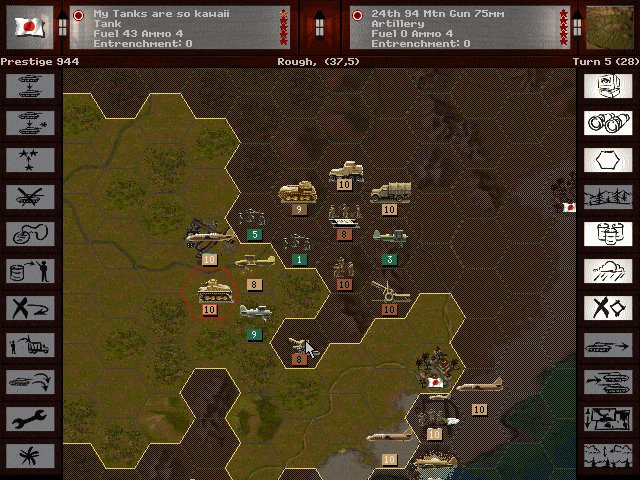 In the night, we manage to surround the enemy forces and weaken them around the airfield at Longyan.  Attempting to make a night landing on a carrier leads to many accidents, and a number of Claudes lost in the drink. This does not lose the entire craft, thankfully, but I did learn it the hard way. Simply not landing at night is the safe option. Allied Turn 5: May 29, 1939 Night, Cloudy (Dry) 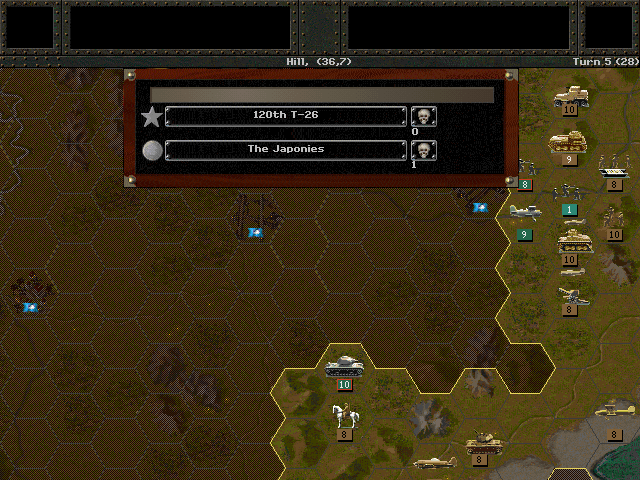 There is some skirmishing around Longyan. On the northern flank the Japonies are discovered by an group of tanks scouting our lines. Axis Turn 6: June 5, 1939 Day, Cloudy (Dry)  We've almost cleared out another airfield. This should let us keep our fighters forward to maintain control of the air.  The push toward Canton has been much slower than desired. Casualties have been relatively heavy, and we'll need to stay clear of the British territory as well. 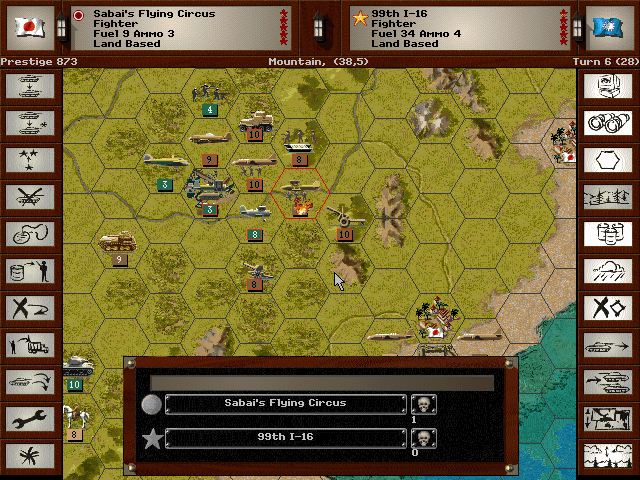 The air battle goes on; Sabai's Flying Circus fails to get a hit in on the I-16's.  The seas are calm; we've cleared out the Chinese ships and can use the Kaga to launch the Claudes wherever they're needed. Some of these ships will now be able to support the attack on Canton. Allied Turn 6: June 5, 1939 Day, Cloudy (Dry)  With the majority of our planes repairing at Amoy or covering the attacks to the north, at Shantow enemy bombers show up, protected by those pesky P-40's.  Our mountain guns are fairly mobile, but they do have to be careful about being exposed to enemy fire. The tanks that had been seen in the south rush along the line and hit them for some heavy casualties. 60 - 937 (Defeat)  Note that night turns have an altered contrast in the overview map, which oddly enough makes them appear lighter than the others. We have definitely set up ourselves up for success in the first stage of our invasion. The troops are all ashore, the enemy navy has been taken care of, and we have the key ports and roads secured. On the other hand, the Chinese are proving to be slightly tougher opponents than expected, so we'll have to work harder to defeat them. Unit Spotlight Type 94 Light Armored Car/Tankette (aka TK) PG Name: Type 94 Light Type: Tank Effective Date: 7/36 Value:5 Cost:60 Spot:3 Move:5 MM:Track Trans:Naval Fuel: 40 Init:2 SA:3 HA:4 AA:0 NA:1 GD:7 AD:2 CD:2 TT:Hard Ammo:5 In the 1920s and 30s, the trend in tank development went from the behemoths of the Great War to smaller and lighter armored vehicles that could provide rapid scouting ability and put heavy guns (as in machine guns) quickly into position to counter enemy infantry. This Japanese model was designed for an infantry-support role; in fact it was originally intended to be be an armored ammo carrier. Its light weight made it rather useful in roadless areas, and it was much cheaper to produce than a full-size tank. It was deployed in high numbers in China. By the 1940s, when it became clear that tanks might need to fight other armored vehicles themselves, these little guys were obsolete. Note: The 'TK' stands for Tokushu Keninsha ('special tractor'). In-Game Analysis: For armored units, these are pretty poor performers. They move okay and have decent defense for the period, but with such low initiative and attack values, they just aren't that good for assaults. At the early stage, they're mostly usable for providing a hard point on the line, but later in the war, these would die too quickly to be combat effective. Takao-class Cruiser (4 built) PG Name: Takao/Takao 1944 Type:Heavy Cruiser Effective Date: 7/37 / 1/44 Value:11/14 Cost:198/252 Spot:2 Move:7 MM:Deep Naval Fuel: 62 Init:4 Range:4 SA:5 HA:8 AA:[5]/[8] NA:18 DA:0 GD:19 AD:10/8 TD:10 Ammo:40 Special: Night Optics, [1944]Radar Built in 1932, the Takao-class cruisers were formidable ships. They had good armament, boasting more guns than their contemporaries, and torpedo tubes on top of that. Additionally they were fast and decently armored. Two were modernized at the end of the 1930s, and another one in 1944. All four served around the Pacific, and only Takao survived the war (and only then because it was captured by the British). In-game analysis: This is almost without question the best early cruiser in the game. Its defense values are tops, and the speed and range are unbeaten. It's a decent price, too. The late war upgrade unfortunately reduces its Air Defense, which is a bummer.
|
|
#
?
May 11, 2017 21:37
|
|
|
Kangra posted:There are two types of airfield now in Pacific General. Paved airfields work the same as in the previous games -- any air unit in that hex or adjacent hexes is automatically resupplied at the end of the turn. The dirt airfields show on the map as smaller and brown, and with those, only the unit directly on the airfield gets resupplied. The only paved airfields on this map are at Amoy, Canton, and our starting island of Pescadores. All the rest are dirt. well poo poo that explains my issues with resupplying air units! 
|
|
#
?
May 11, 2017 22:29
|
|
|
 The battle for China continues into the summer.  With Amoy secured, our forces are moving on westward. We'll need to take control of the airfields and eliminate all enemy troops in the area. Further south, we are getting closer and closer to Canton. Axis Turn 7: June 12, 1939 Day, Rain (Dry) The rain arrives at last.  Since we're unable to get any closer to Hong Kong, the approach to Canton must go through the rough and hilly inland area. We can fight well in the open spaces, but it's going to be tough to dislodge the dug-in troops on the heights.  The rain makes any sort of combat difficult, and these undergunned tanks only manage to flail at each other ineffectively.  This poor weather puts our advance to a stop, as we can't send out any air support missions to spark battlefield success. Allied Turn 7: JUne 12, 1939 Day, Rain (Dry)  Fortunately for us, the Chinese no longer wish to fight and die for an airfield already in our hands. They use the falling rain to cover their retreat. Axis Turn 8: June 19, 1939 Day, Cloudy (Dry)  Our destroyer is scouting the Hong Kong waterways but fails to spot a Chinese cruiser hiding out there until it's almost on top of it.  All our heavy ships open fire shortly thereafter, with the battleship Fuso scoring the best hits.  Back on shore (or above it, at least), the pesky American fighters are back, and we still can't deal with them. Even the Sa-To failed to hit anything today.  The engineers are able to find the weaknesses in the enemy line and undermine their defenses.  The Chinese are attempting to rebuild their line around another airfield. We send the kawaii tanks to prevent them from entrenching. Allied Turn 8: June 19, 1939 Day, Cloudy (Dry)  Luckily for us, those P-40's are the only quality plane the Chinese have at the moment.  Those Soviet-made tanks successfully harass our line as we prepare to advance. Axis Turn 9: June 26, 1939 Day, Rain (Mud)  Advancement will be even tougher in this humid muck, but we do have enough strength to force the Chinese to keep pulling back to Canton.  The harbor is cleared of naval resistance, and our fleet is about to give us the edge even if our planes stay grounded.  Too many resources have to be diverted to deal with those Soviet tanks. This, along with the mud, keeps us from making any sort of move westward. Allied Turn 9: June 26, 1939 Day, Rain (Mud)  The Chinese leave us alone to prepare for a showdown in Canton. Even the planes overhead scout into our territory to see what's going on at our airbases.  Rain, along with the severe reduction in their combat power, prevents the enemy tanks from being a serious threat to us. Axis Turn 10: July 3, 1939 Night, Cloudy (Mud)  Canton is scouted, and we commence with the naval bombardment.  The Type 94 suprisingly turns out to be the only unit that manages to force the enemy tanks out of our lines. Allied Turn 10: July 3, 1939 Night, Cloudy (Mud)  The only activity seen is the enemy planes scoping out our lines in the darkness. Axis Turn 11: July 10, 1939 Day, Cloudy (Mud)  Hirohito's Hieneys score one of the first air-to-air kills against the American fighters. 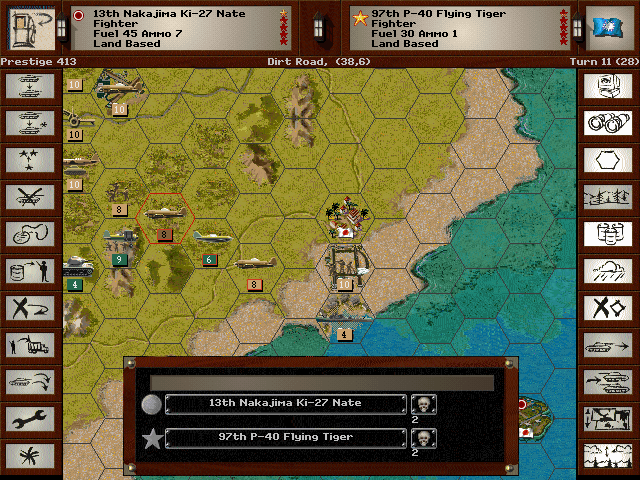 Shortly followed on by the wannabe Zeros, who trade them (mostly) for losses. That of course emboldens...  ...the Ki-10's, who manage to not get destroyed! 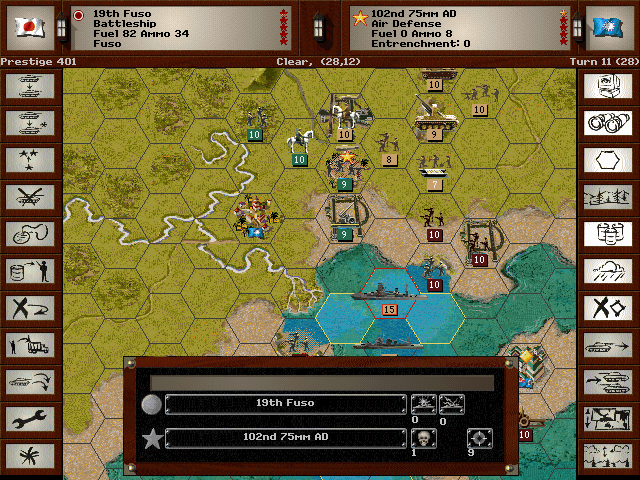 The 75mm flak guns at Canton are not at all like the weak 20mm AA units we've seen so far. The Fuso selects them as its first target. 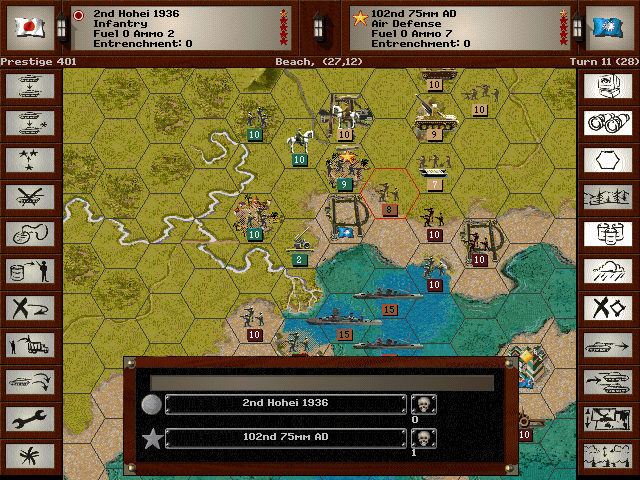 And that allows the infantry to knock them out of position. This will allow even greater support from above. 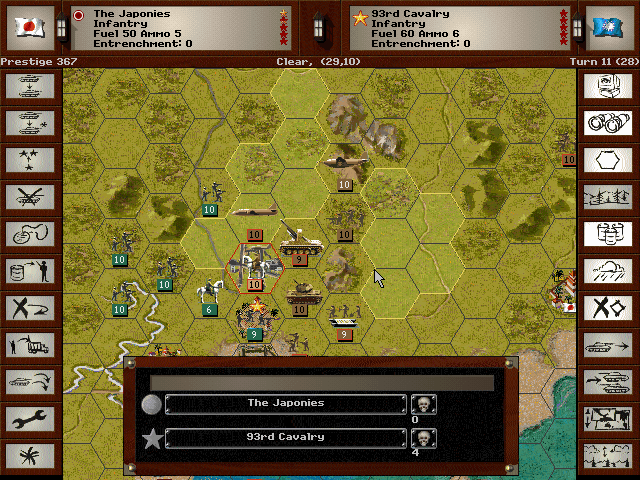 The Japonies drive out a cavalry unit on the opposing side from the northern airfield of Canton. 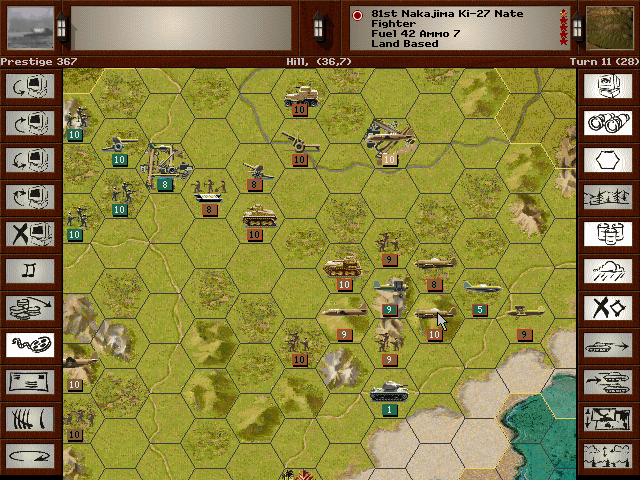 The main thrust is really having trouble getting underway, as units are forced to make their way along a narrow swampy road. Allied Turn 11: July 10, 1939 Day, Cloudy (Mud) 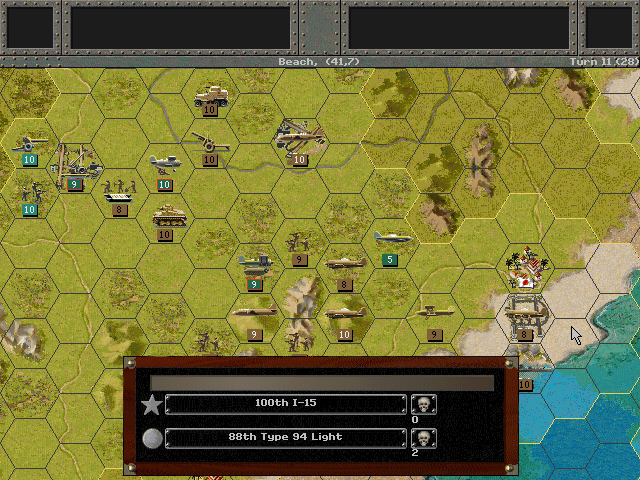 The mostly Soviet-powered air force of the enemy is able to knock us down a few pegs on occasion. 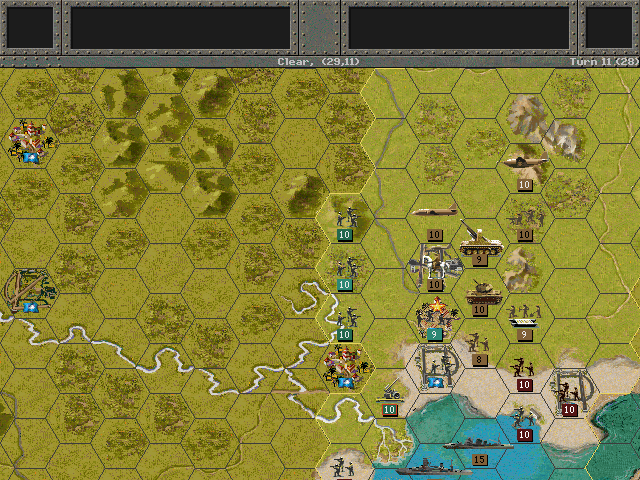 Canton has not been abandoned; Chinese forces rush eastward to defend it. Axis Turn 12: July 17, 1939 Day, Fair (Dry) 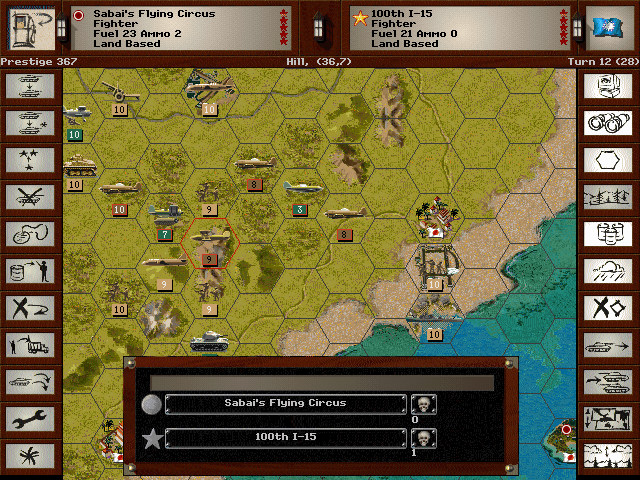 Sabai's Flying Circus takes on a target more its speed than the P-40.  The Nells are finally able to drop their payload to finish off the annoying T-26 unit.  The enemy defensive line is an exposed vee pointed at us, and we are able to use our engineers to blunt its tip.  The first real assault at Canton is repulsed as we realize the city center is full of entrenched soldiers.  We get a good view of the line behind it, and it's clear that we need to capture this spot quickly, and fully rely on our naval guns to keep the battlefield covered. Allied Turn 12: July 17, 1939 Day, Fair (Dry)  The enemy chooses to respond to our attacks by rushing out to meet our lines. The artillery guns take a few hits.  But the engineers stand strong. 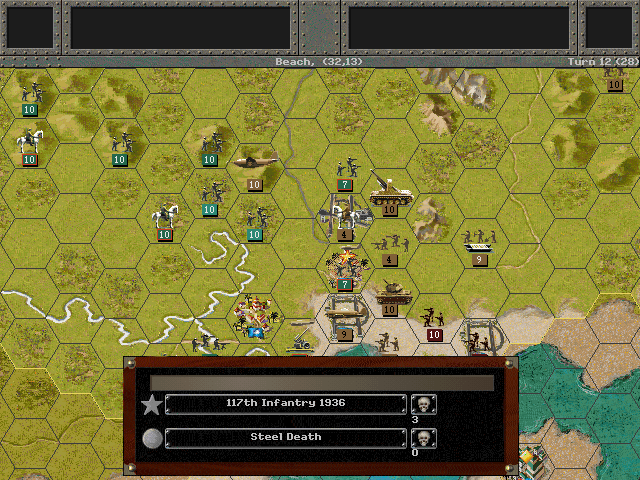 At Canton, the reinforcements rush in to hold the city; they cannot scratch the armor of Steel Death, however. Axis Turn 13: July 24, 1939 Day, Fair (Dry) 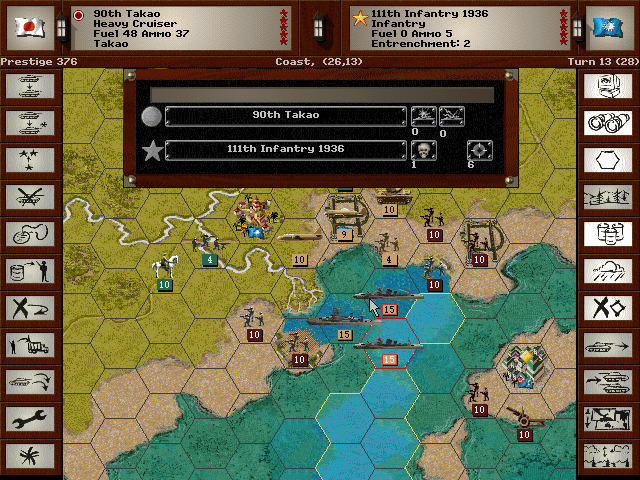 The two heavy cruisers (both Takao-class) and the Fuso are in the best position to shell the enemy positions; the other ships are guarding the Kaga or scouting down the coastline.  After several days of bitter fighting, we manage to take control of the next airfield.  We end up having to pull back from Canton due to a lack of supplies for the troops. Prestige is dwindling, and we have as yet almost nothing to show for two months of combat. Allied Turn 13: July 24, 1939 Day, Fair (Dry)  The Claudes suffer a somewhat humiliating defeat as the I-16's get the better of them.  In comes the enemy cavalry to the aid of Canton. Within the city proper, the defenders make a probing attack. It surprises Steel Death and results in a few lost guns. 100 - 937 (Defeat) Poor weather and unexpectedly high enemy resistance has set back our timetable by several months. If this keeps up, we can't even be sure of taking all of southern China before the end of the year.  Type 97 Sa-To PG Name: Sa-To Type: Anti-Aircraft Effective Date: 7/36 Value:8 Cost:96 Spot:2 Move:5 MM:Track Trans:Naval Fuel: 42 Init:5 SA:3 HA:2 AA:7 NA:0 GD:6 AD:4 CD:1 TT:Hard Ammo:12 I had a hard time locating any information about this unit, but the game describes it as being built on the chassis of a Type 97 tank, and armed with a single 20mm AA in an enclosed turret. I doubt whether any of these were ever fielded, and it may be that there are no extant photographs of them. Either that, or it's intended to be another unit with a different name. Best lead: http://forum.axishistory.com/viewtopic.php?t=53458 In-game analysis: Not that great, but not that bad either. In a campaign it'd be worth it to have one of these, if only to gain experience until the So-Ki comes along. Fuso-class Battleship (2 built) PG Name: Fuso / Fuso 1944 Type:Battleship Effective Date: 7/36 / 1/44 Value:20/24 Cost:360/436 Spot:2 Move:5 MM:Deep Naval Fuel: 123 Init:5 Range:6 SA:7 HA:10 AA:[4] NA:22 DA:0 GD:22 AD:8 TD:10 Ammo:40 Special: Night Optics/ +Radar The Fuso and Yamashiro were originally laid down during World War I. They would likely have been scrapped by the 1920s, but because the Washington Naval Treaty allowed for improvements to completed ships, these ended up being modernized over time. The ships are likely best known for their distinctively tall 'pagoda' superstructure. In the end, the two ships both went down during the Battle of Leyte Gulf in the world's last big battleship fight. In-game analysis: Hands-down, the best battleship available for quite some time, and possibly the best capital ship for the price. It has better defense than anything on the water until 1942, better offensive power than every contemporaneous ship save the American Maryland class, and a faster movement rate than similar heavy ships. It's just a very well-rounded unit. There are better ships later in the war, but this one is tops in every category for a good while, and hardly loses any ground later on.
|
|
#
?
May 15, 2017 18:56
|
|
|
Thefluffy posted:well poo poo that explains my issues with resupplying air units! I figured that out doing a test run by playing about half this scenario, because I wanted to find out how night turns worked. Of course, I failed on actually finding out about night turns as the crashed planes show (and we'll see something else soon as well). I also made a serious attempt to start the American campaign last night (I've tried it once before but gave up after a few turns). Japanese losses were 4 carriers, 1 Hvy Cruiser, 2 Lt Cruisers, 1 Destroyer and almost all their air assets (~12 unit or so). American losses were 2 Hvy Cruisers, 2 Destroyers, and about 3-4 air units. Victory points scored were >500 for the US vs about 150 for the Japanese. This was of course a horrible defeat for the Americans and I only barely escaped court martial, it seems. I'm not looking forward to having to outdo history just to get past the first battle. Kangra fucked around with this message at 19:07 on May 15, 2017 |
|
#
?
May 15, 2017 19:05
|
|
|
Fuso class is also known as possibly the ugliest battleship of WWII. My mom says I'm handsome
|
|
#
?
May 16, 2017 05:10
|
|
|
I'll claim the Claude 21st A5M Claude please and hopefully end up having a glorious career in the Imperial Navy. I'll name it Remember Eniwetok
|
|
#
?
May 16, 2017 20:45
|
|

|
Ok I did a bit of  and found you CAN take cap points without angering the neutrals! and found you CAN take cap points without angering the neutrals! just be careful not to misclick or your cheeky paras will be  'ed in a blink of an eye 'ed in a blink of an eye  
|
|
#
?
May 21, 2017 21:32
|
|
|
Ha, that's a neat way to grab those. I wonder now if it's possible to tweak the scenario in the editor to see what happens if you grab an actual VP spot of theirs. I imagine they might not dare to attack you, but would probably retake it if you leave it open.
|
|
#
?
May 22, 2017 05:39
|
|
|
 Our plans for the summer are quite behind at this point. We are finally at the outskirts of Canton, and need to capture it quickly, or else the main offensive will never proceed with any speed. The main force is still trying to make progress, but it has been slow. We must break through and take Hengyang soon, and then keep going onward.  Axis Turn 14: July 31, 1939 Day, Fair (Dry)  Sabai's Flying Circus finally puts an end to its nemesis. 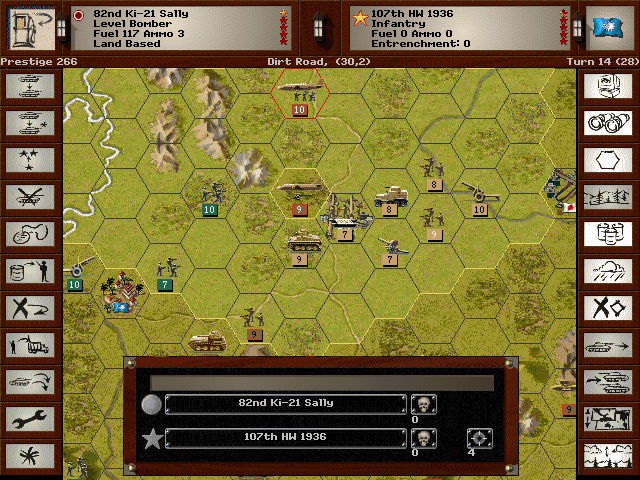 With the enemy fighter squadrons mostly scattered or reduced, bombing raids start afresh on the main line. 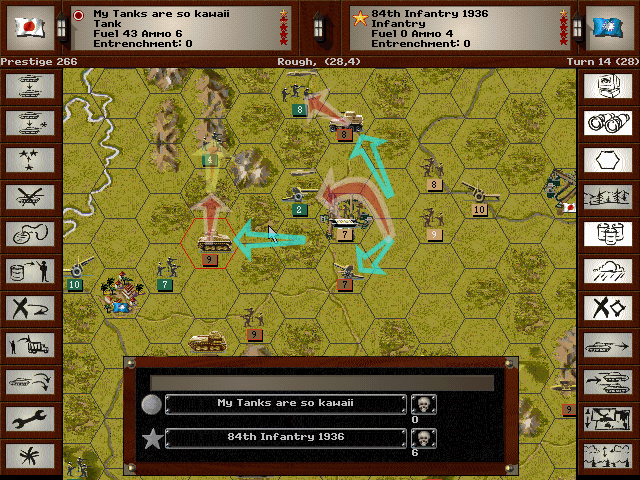 The advance of our army gets underway once more. 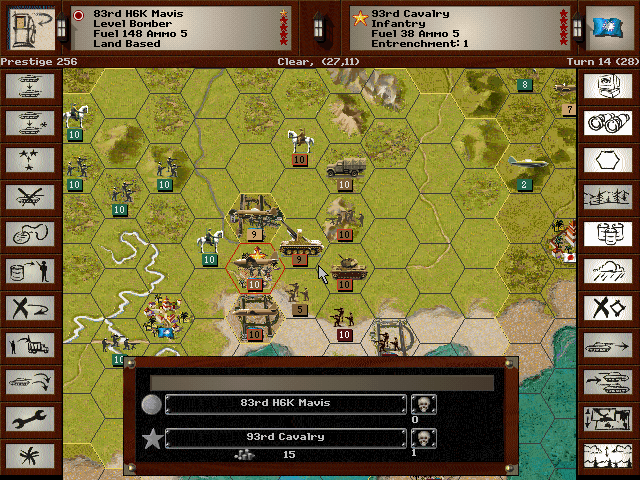 We're still taking a break at Canton. British forces have been maintaining strict borders around Hong Kong, and it's kept us from bringing in sufficient supply to that side of the city. Allied Turn 14: July 31, 1939 Day, Fair (Dry)  The city continues to harass Steel Death. They are withstanding it for now, but just sitting around taking fire is going to hurt morale. Axis Turn 15: August 7, 1939 Night, Fair (Dry)  The break for night lets us move up our troops in preparation for an attack on the provincial capital of Ku Kong. 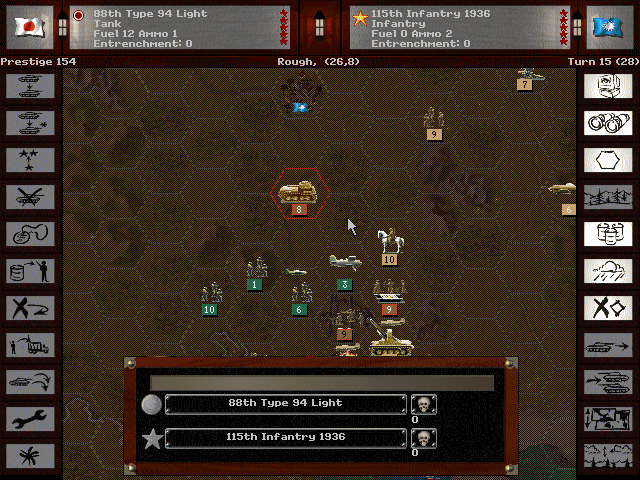 At Canton, conversely, we are already prepared. We surprise the enemy and seize control of the northern airfield, while also hitting hard on their flank to prevent them from retaking it easily. Allied Turn 15: August 7, 1939 Night, Fair (Dry) 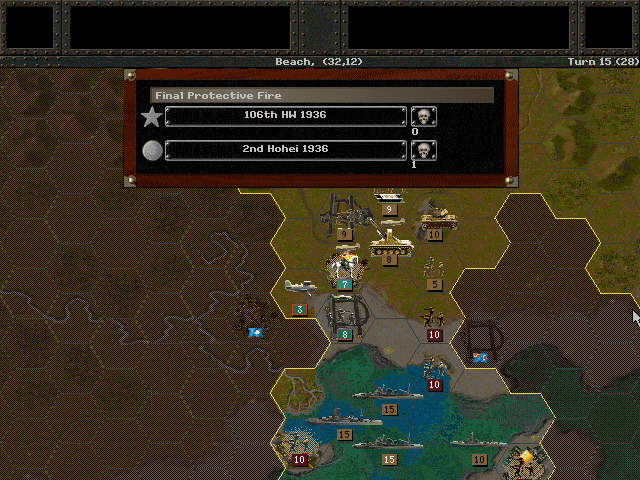 The attempt to retake the airfield fails, as expected. Steel Death keeps the enemy infantry from getting close enough to push us back. Axis Turn 16: August 14, 1939 Day, Fair (Dry) 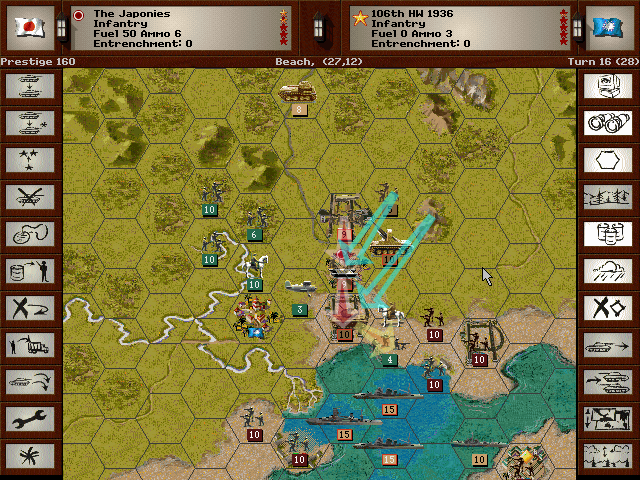 We continue to press the attack at Canton, and take control of the city!  Ku Kong, too, yields to our assault.  Fierce resistance is encountered in the hills to the north, though. Allied Turn 16: August 14, 1939 Day, Fair (Dry) 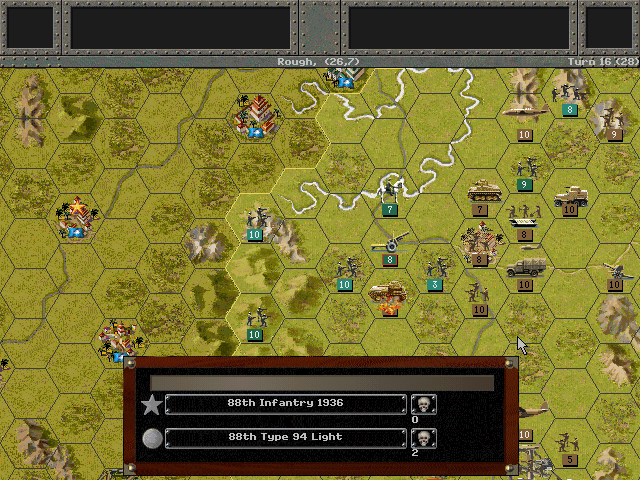 Our light tanks are pushed aside in order to provide a retreat path for the Chinese troops that routed at Ku Kong. Axis Turn 17: August 21, 1939 Day, Fair (Dry)  The push forward over the last week to take Ku Kong left the troops a bit overextended. We take time to rest up so that the crossing of the Leishui and Xiangjiang Rivers can be accomplished rapidly with a strike toward Hengyang.  Canton is secured, and while there are a few enemy units that need to be taken care of, most of this force can assist with the inevitable advance of our army.  Things seem to be back on track with our offensive, when suddenly the whole plan is up-ended. The Nagato had been scouting for any remaining Chinese vessels. She had a surprise encounter at close range with an unidentified destroyer. Unsure of how to respond, the battleship fired on the ship to warn it off. But the shells found their mark all too quickly, and after an explosion below decks, the ship rapidly sank. It turns out to have been not a Chinese ship at all, but the French destroyer La Railleuse (of the L'Adroit class). The European powers decry this as a deliberate act of aggression. We blame the French for patrolling their ships into a war zone. Ultimately, it sparks them to mobilize their forces locally. There's a chance this could end up as a worldwide war! Allied (China) Turn 17: August 21, 1939 Day, Fair (Dry) Luckily for us, the Chinese forces are too weak to do anything. They simply await our inevitable advance for now. Allied (Hong Kong) Turn 17 : August 21, 1939  The British are quick to stab us in the back at Canton, and march their troops against us. Luckily, they don't have anything really able to deal with armor. Still, the shock of the attack takes its toll. Axis Turn 18: August 28, 1939 Day, Fair (Dry) Even though our orders are to liberate these colonies from the Europeans if the opportunity presents itself, we  To build up a secure defensive line at Canton against all comers, we must first deal with the remaining Chinese units. The planes here get to work softening them up.  Some reorganization will be required, but we do manage to clear space. 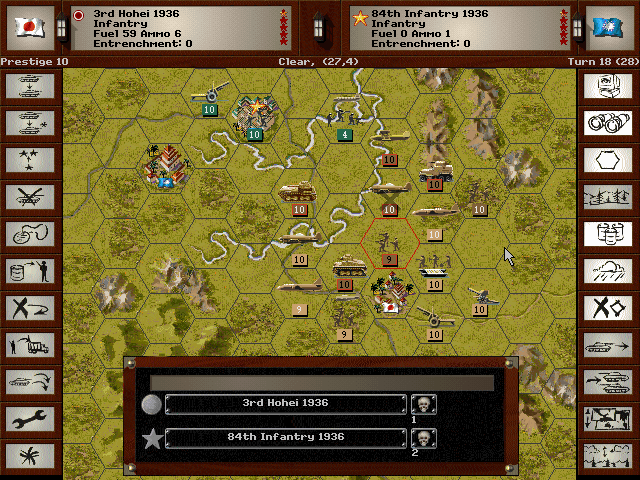 Along the main route, we finally clear out anything that was left on this side of the Leishui River. Allied (China) Turn 18: August 28, 1939 Day, Fair (Dry) 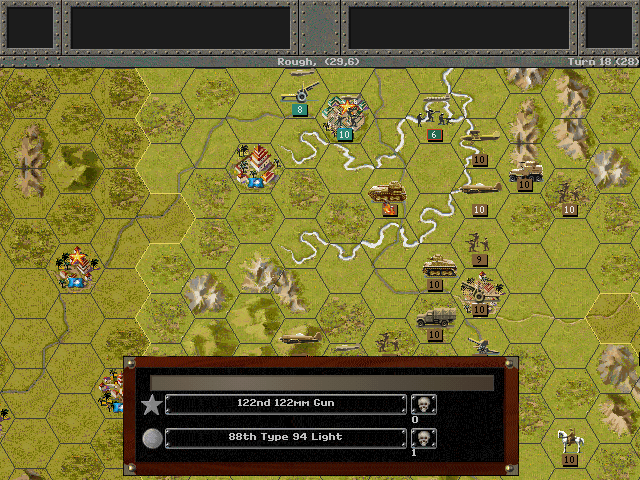 The Chinese have a fair amount of artillery, but we've managed to already hit with enough bombs to render it far less deadly. 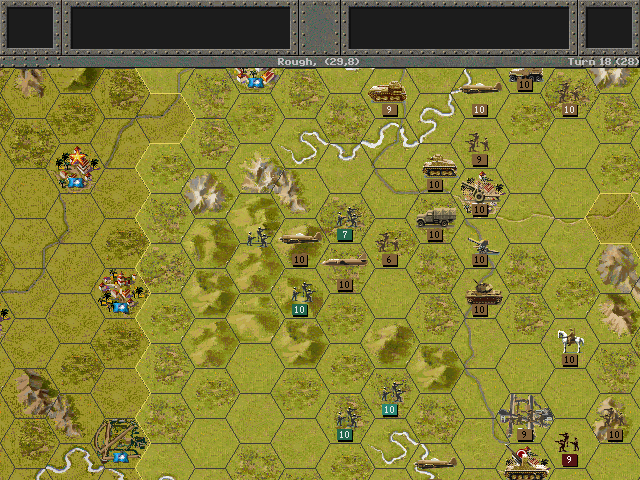 Meanwhile, the Chinese continue to take up positions in the hill country. We cannot afford to leave them be -- if we do, they may march to Canton, or head around into our rear area. Between this and the forces at Hong Kong, it's plain that the main assault group isn't going to be getting any reinforcement. Allied (Hong Kong) Turn 18 : August 28, 1939 Day, Fair (Dry)  For all we know, the Chinese navy has been eliminated, but the French navy is very much present and very enraged. It appears they are also sending up troops from Indochina. It's only a matter of time before we expect they'll be sending many more troops around the world to fight us. It's not like they have anyone else to be concerned about at the moment. 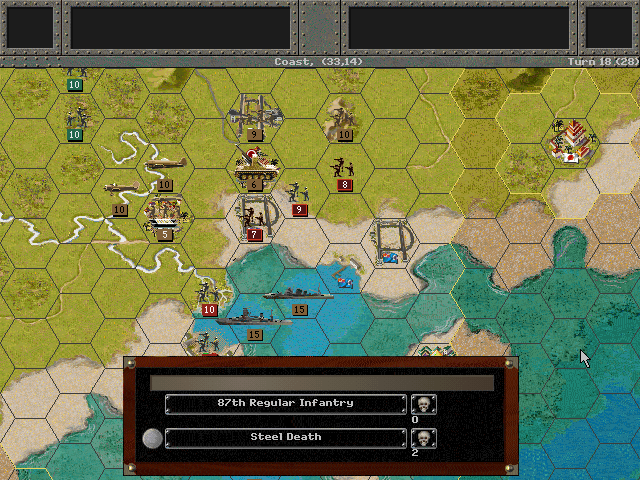 British forces push around the coastline of Canton and team up with the Portuguese from Macao. They knock back the exhausted Engineers at Chiu-Chiang. Axis Turn 19: September 4, 1939 Day, Fair (Dry) 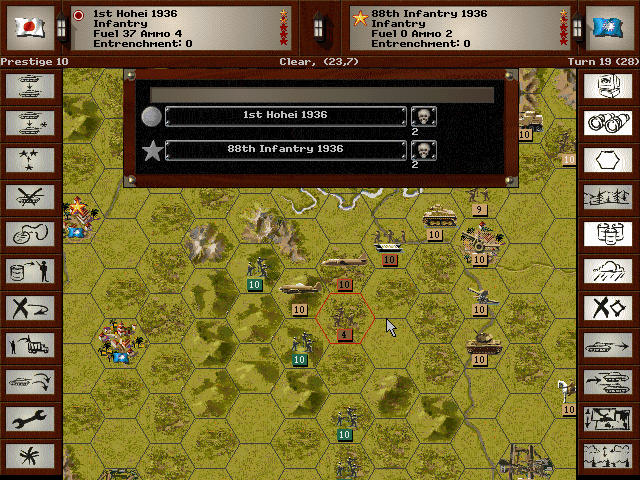 Fighting in the hillsides is bloody, but it does favor our side. The big problem now, however, is that our prestige has plummeted, owing to our snail's-pace offensive and the incident with the Railleuse. 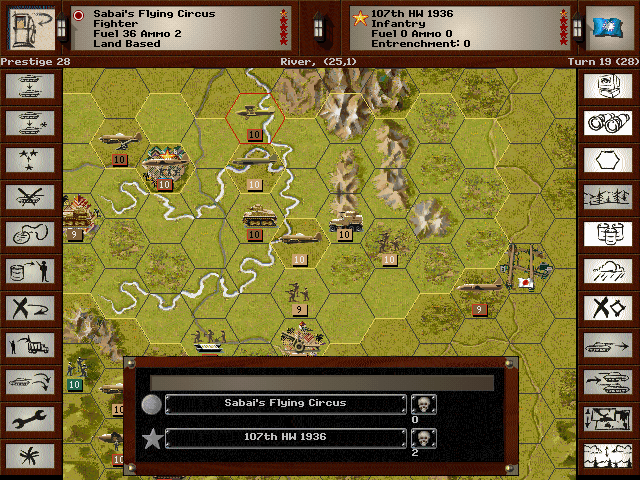 With the enemy air force apparently eliminated, we can use the full power of our planes to really pave the way for the ground forces. Allied (China) Turn 19: September 4, 1939 Day, Fair (Dry)  One attack comes in the hills against our weakest infantry unit. Allied (Hong Kong) Turn 19 : September 4, 1939 Day, Fair (Dry) 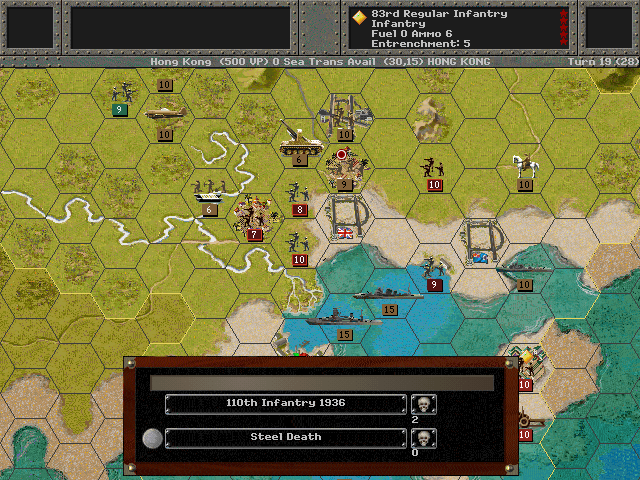 The Portuguese troops don't make any more headway against the armored guns than the British do. News arrives concerning the European powers. Apparently Hitler has decided to start his own little war in Poland, and they've all joined in. Our position in China may well be saved. 313 - 837 (Defeat)  UNIT SPOTLIGHT Today it's two units that we won't get to see much of: One, because it's unlikely we'll ever need it, and the other because we're choosing a path that might not include it (though it will stay in the core, so we may see it in action after this scenario). Type 98 20mm AA Machine Cannon PG Name: 20mm Type: Air Defense Effective Date: 7/36 Value:3 Cost:36 Spot:1 Move:1 MM:Gun Trans:Air Fuel: - Init:2 Range:1 SA:[1] HA:[3] AA:8 NA:0 GD:2 AD:3 CD:0 TT:Soft Ammo:12 The 20mm AA gun was the most commonly deployed Japanese light flak unit of the war. It was easy to transport and set up for fire. It wasn't that effective against serious air threats, but was probably enough to ward off strafing fighters. In-game analysis: It's not that powerful, has a limited range, but it is cheap. I don't like that it has effectively no ground-fire capability. Could be useful to throw up next to an objective in a last-ditch effort to stop air raids. Kaga-class Aircraft Carrier (1 built) PG Name: Kaga Type:Carrier Effective Date: 7/36 Value:30 Cost:540 Spot:4 Move:5 MM:Deep Naval Fuel: 89 Capacity: 5 Init:3 Range:0 SA:3 HA:6 AA:[9] NA:8 DA:0 GD:15 AD:8 TD:12 Ammo:40 The Kaga would have been a battleship if the Washington Naval Treaty had not been in force -- and actually would have been canceled entirely if a massive earthquake hadn't irreparably damaged the Amagi (a sister ship to the Akagi). The Kaga ended up being quite sizable, and despite its relative age it served admirably during the war. It sank when fires set on the deck during the Battle of Midway led to a fuel tank explosion. In-game analysis: A bit expensive for what you get. While it has the highest capacity of any Japanese carrier, it's very rare that you really need that much space. Given the option, the carriers that show up on the roster just a bit later are a better deal. Kangra fucked around with this message at 20:06 on May 25, 2017 |
|
#
?
May 22, 2017 17:45
|
|
|
As far as I can tell the only real way to win this mission is to take Hong Kong and as many Chinese VPs as you can. there is simply too many Frenchmen to kill to get the fortress that is Hanoi. my best guess as to actually take Hanoi is to sneak in paratroopers while the french units are trying to relieve canton and Hong Kong. 
|
|
#
?
May 22, 2017 23:34
|
|
|
Thefluffy posted:As far as I can tell the only real way to win this mission is to take Hong Kong and as many Chinese VPs as you can. there is simply too many Frenchmen to kill to get the fortress that is Hanoi. my best guess as to actually take Hanoi is to sneak in paratroopers while the french units are trying to relieve canton and Hong Kong. Yeah; it may also be possible to drop paratroops very early to snag one of the Chinese objectives and then buy troops to send to Hanoi. Or use the sea transports you start in. (And then we're actually going to see a different outcome in this LP...) Added unit spotlights for the last update; I'd forgotten about them.
|
|
#
?
May 25, 2017 20:10
|
|
|
somehow forgot to bookmark this back at the start of the month and forgot it existed until now (thanks, alcohol!) Glad to see you still have yet to escape the hell of this scenario though.
|
|
#
?
May 25, 2017 23:42
|
|
|
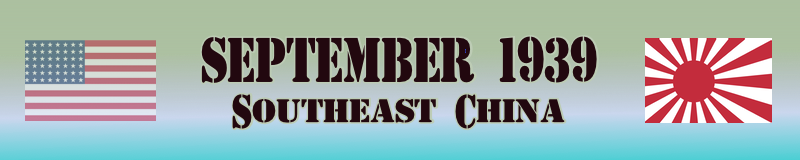 We became bogged down in China this summer, and just as the situation seemed to be improving, we embroiled ourselves in a war with the Europeans. Although we can only hope that they'll be too distracted by their own concerns at home to care about our campaign out here.  The plan is to strike as quickly as possible (once we take Hengyang) westward with the main force. The rest of our troops will form a defensive line to fend off any attackers at Canton, and if necessary fight to guard the flank of the advancing troops. With luck we can at least control the bulk of China before the end of the year. Axis Turn 20: September 11, 1939 Night, Fair (Dry) 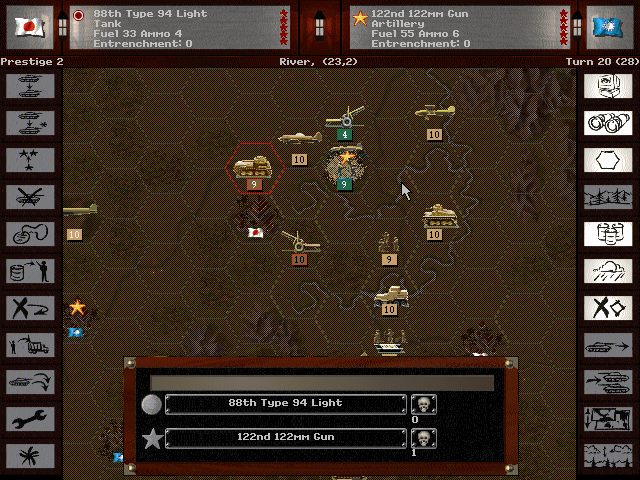 We don't want to attack on this turn, but instead set up for a serious assault on Hengyang. 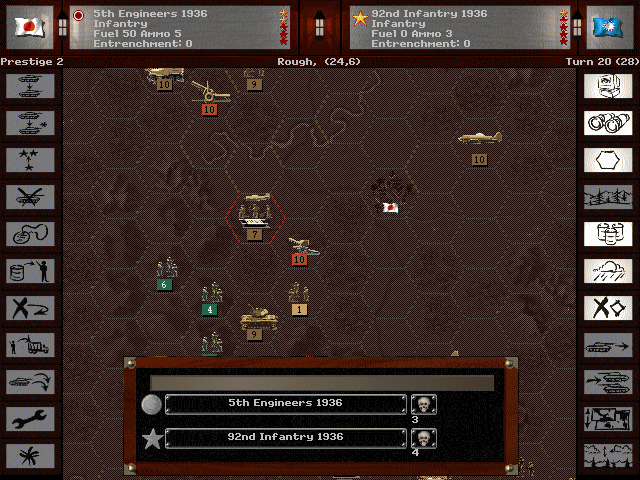 Skirmishing continues in the hillsides. Allied (China) Turn 20: September 11, 1939 Night, Fair (Dry) 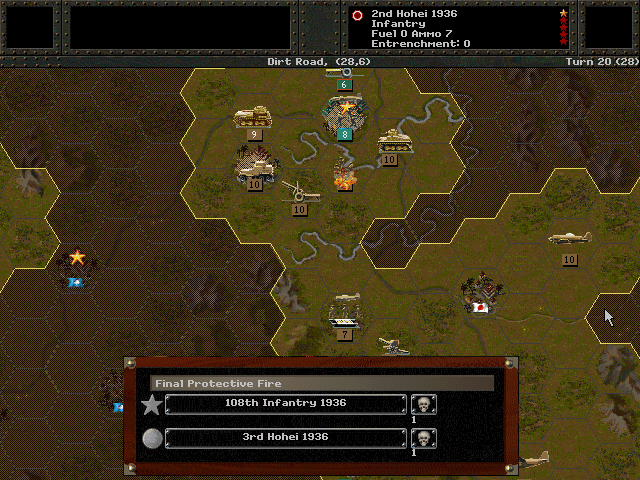 The only activity from the Chinese is to shell our infantry near Hengyang. Allied (Hong Kong) Turn 20 : September 11, 1939 Night, Fair (Dry)  French warships spot the light cruiser Katori in the dim moonlight, but are unable to land any hits.  Chiu-Chang is secured for the British forces as they drive back the Engineers. Axis Turn 21: September 18, 1939 Day, Fair (Dry)  Days of air raids and a series of bombardments from Cherry Blossoms Float causes Hengyang to surrender with hardly a fight.  After a whole summer of fighting, one of the key objectives is finally in our hands. The real question is whether we have any hope of taking any more territory before the year is out.  The Nagato takes up a position to guard our fleet. We will not sink any more of the enemy ships unless they seriously threaten us.  I also learned an important lesson about night turns -- the increased fuel consumption also applies to planes (meaning that any with low fuel will not make it safely to an airbase if they are moved at night). The 13th is lost. Allied (China) Turn 21: September 18, 1939 Day, Fair (Dry) 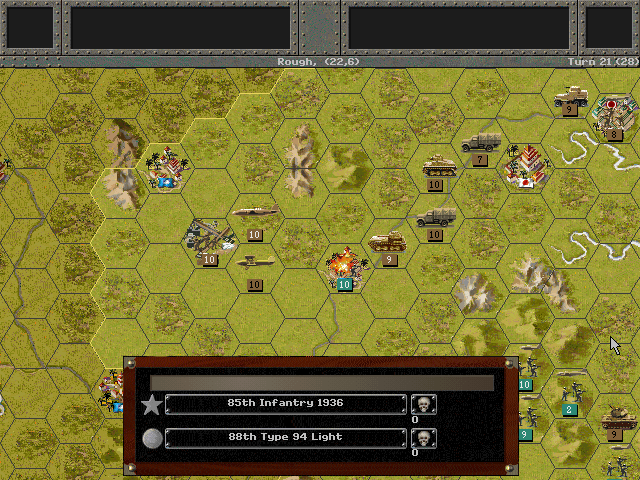 Kweilin wakes up to our advancing army and probes the lines. Casualties are minimal on either side. Allied (Hong Kong) Turn 21 : September 18, 1939 Day, Fair (Dry) 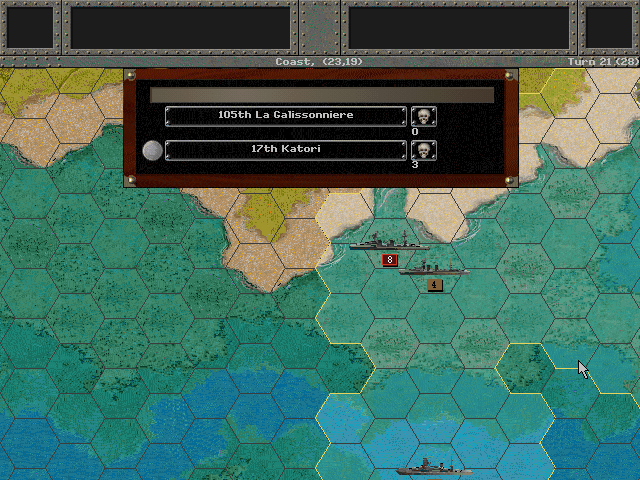 The Katori takes a few more hits. We may need to take action now. Axis Turn 22: September 25, 1939 Day, Fair (Dry) 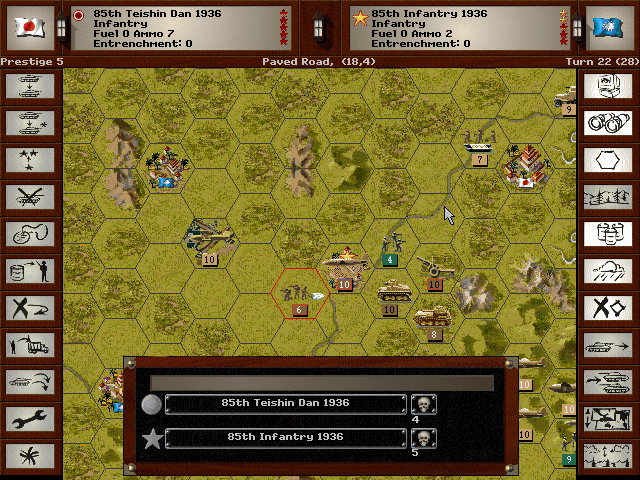 Our parachute troops (the Teishin Shudan) seized control of an airfield near Liping, and hit Kweilin from an unexpected side. 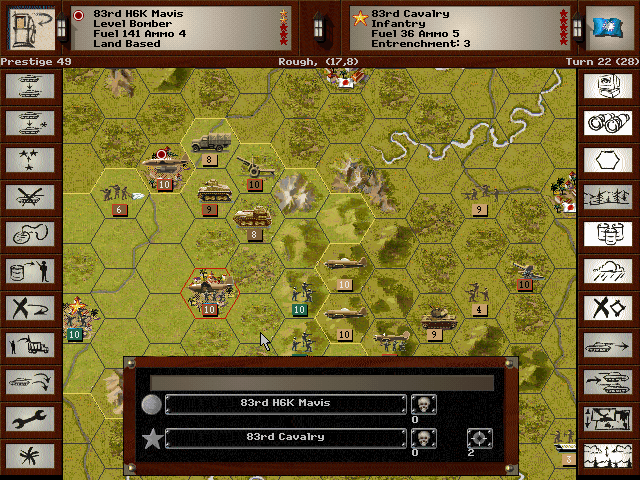 As the core rolls forward, it becomes critical that we pacify the Chinese forces in the hills; they'll be awfully close to what's about to be our rear area.  The Nagato leaves the La Galissonniere crippled as our ships makes it out of there safely. Allied (China) Turn 22: September 25, 1939 Day, Fair (Dry) No action Allied (Hong Kong) Turn 22 : September 25, 1939 Day, Fair (Dry)  The Europeans are far more active in this region now, oddly enough. But their attacks are only hurting them the more. We have not made any sort of offensive combat (although the Japonies captured an undefended Hong Kong airfield as a distraction), and we're still winning easily.  But there are now French troops on the way northward. Axis Turn 23: October 2, 1939 Day, Fair (Dry)  With no enemy armor to oppose them, our tanks are unbeatable.  Although speak of the devil... with luck, we can get control of enough of China that the Europeans will finally leave us alone. Allied (China) Turn 23: October 2, 1939 Day, Fair (Dry)  Much as we feared, the Chinese are trying to halt our advance by raiding us in the weak rear so that we simply can't risk pushing our forces forward. Allied (Hong Kong) Turn 23 : October 2, 1939 Day, Fair (Dry)  Another bunch of Allied soldiers bash their heads against Canton ineffectually. Axis Turn 24: October 9, 1939 Day, Fair (Dry)  While we are running short of airbases to resupply at, air power is ensuring that the advance can come down the road at lightning speed. Liuchewhsien falls easily.  We're also managing to gain control of the dwindling Chinese troops in the hills. 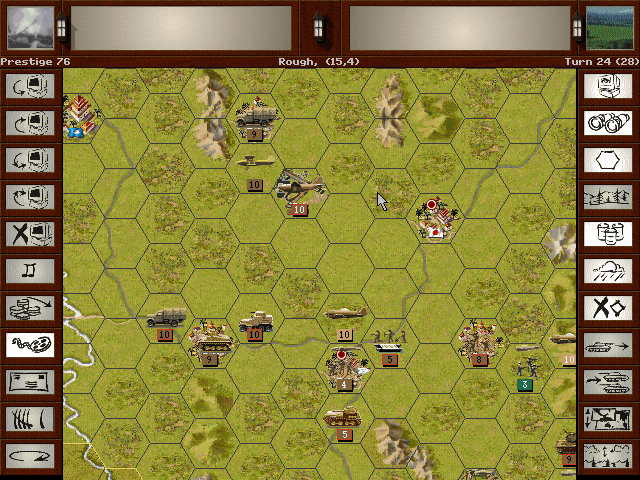 The only chance we have to salvage our reputation from this debacle is to somehow finish this off in style, and we take some risks by letting the transports roll out in front of the scout units. Score right now is us leading 757 - 437, but this is still a Defeat. Allied (China) Turn 24: October 9, 1939 Day, Fair (Dry) Nothing. Allied (Hong Kong) Turn 24: October 9, 1939 Day, Fair (Dry)  The Portuguese simply do not learn. Perhaps they think they can bleed our supplies? Axis Turn 25: October 16, 1939 Day, Fair (Dry) 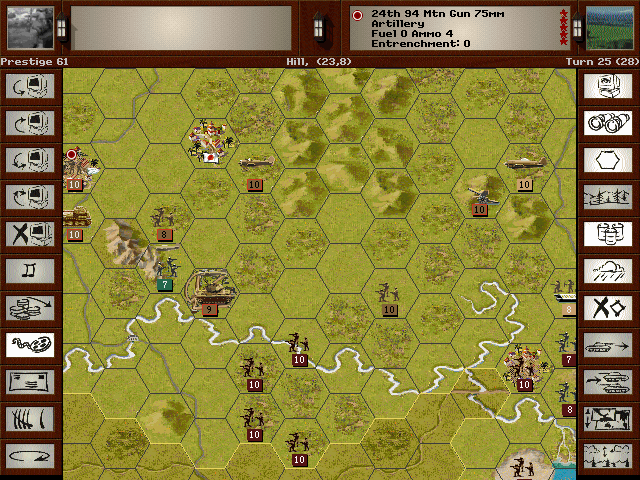 We're clearing out any Chinese forces. The European-backed forces will be halted at the river. 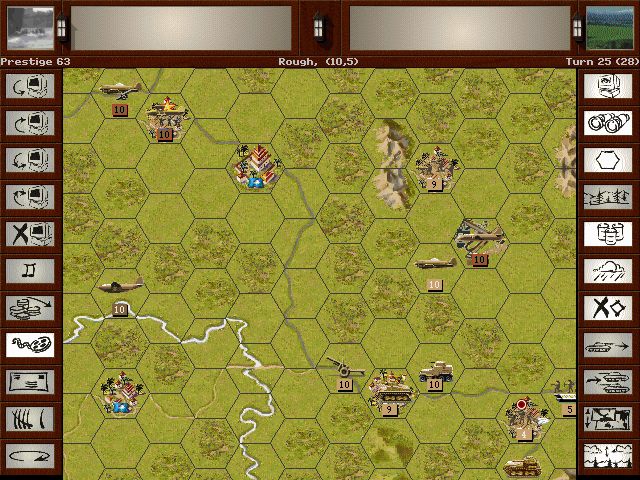 The cities ahead of us are entirely empty; if things continue like this we'll be able to move forward and have a chance to secure the majority of China on schedule, if just barely. Allied (China) Turn 25: October 16, 1939 Day, Fair (Dry) 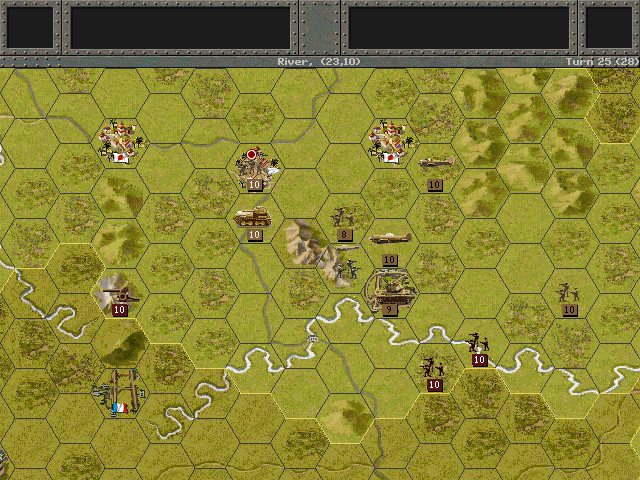 A half-hearted attack is made out of the hills near Guigang. Elsewhere along the front, it is quiet. Allied (Hong Kong) Turn 25: October 16, 1939 Day, Fair (Dry) 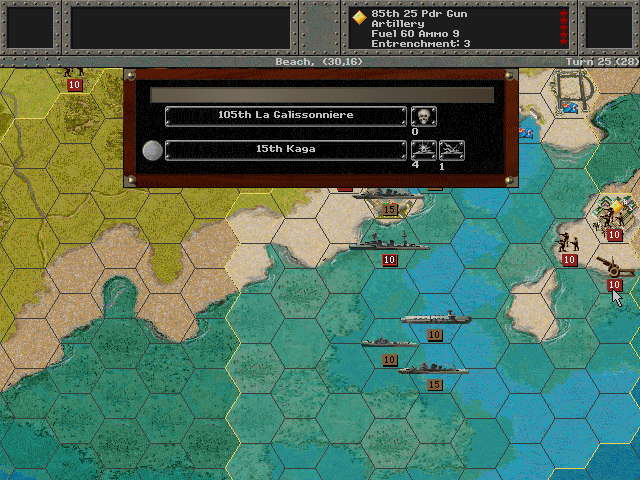 The French seem unperturbed by the pastings they've been given by our capital ships, and a second cruiser makes so bold as to go after the Kaga. Axis Turn 26: October 23, 1939 Day, Fair (Dry) 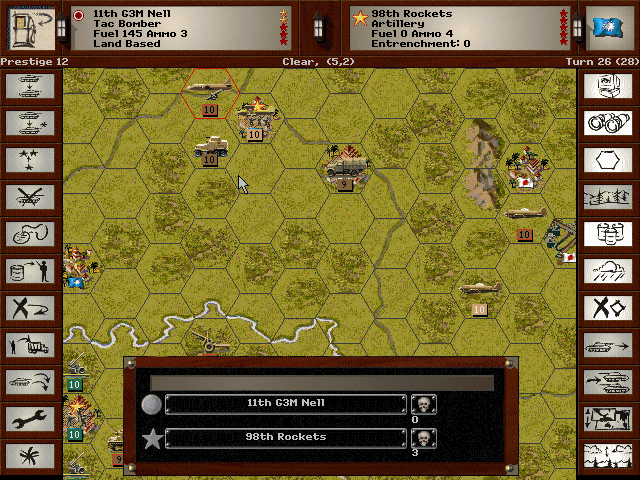 The scout tanks sweep in to hit the Chinese rocket units, and Bombing raids reduce them some more. It should be possible to capture Kweiyang before the end of the month. 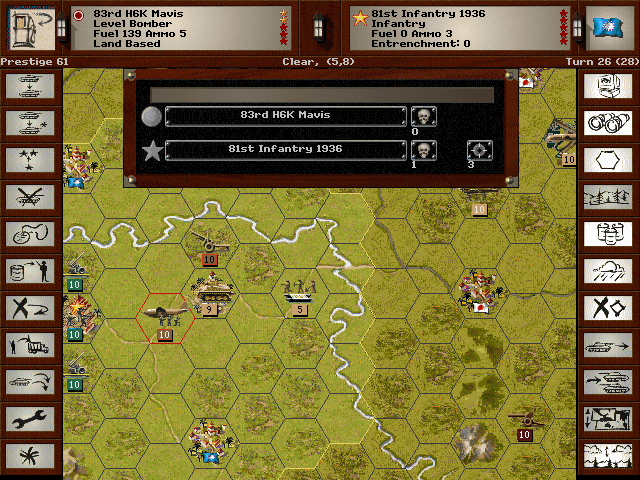 Kwangnan looks to be a bit tougher; they have anti-air guns set up to keep our planes from hitting them quite so hard, and there are more troops along the road to defend it.  Combat at Canton is dying down. The foreign powers have worn themselves out, and with the current situation in Europe, it's unlikely that they'll be interested in sending more troops to the other side of the world. Allied (China) Turn 26: October 23, 1939 Day, Fair (Dry)  Thanks to our first attack, the rockets prove unable to drive back the Type 92 from Kweiyang. Allied (Hong Kong) Turn 26: October 23, 1939 Day, Fair (Dry)  Canton is quiet, but the French seem to be spoiling for a fight now. They've sent guns and infantry northward, and finally engage us. Axis Turn 27: October 30, 1939 Day, Fair (Dry)  Kweiyang puts up a tough fight, and repels the attack of the HW infantry.  Then the Type 92 proves to be too much for them to handle, and they pull out of the city. 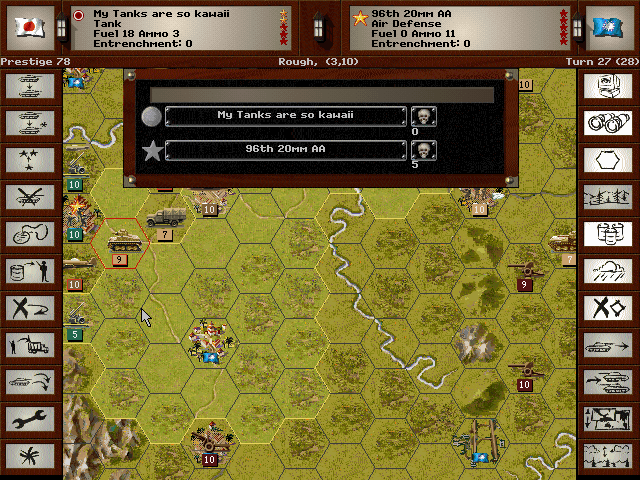 We have reached Kwangnan; rather than hit the city with our relatively weak tanks, we try to get rid of the air defenses, as they form an easier target. But the days are getting shorter and this campaign cannot be sustained for very much longer. 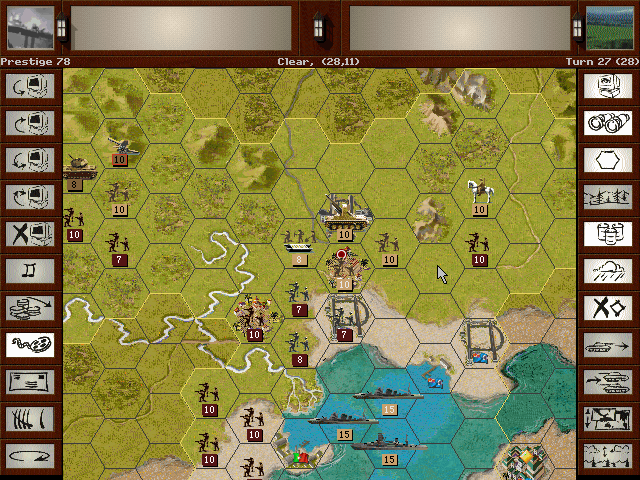 Perhaps we were mistaken about the determination of the Europeans. Yet they cannot keep up the flow of troops for much longer either. We are barricading their ports now. Allied (China) Turn 27: October 30, 1939 Day, Fair (Dry)  The Anti-Air guns at Kwangnan actually prove to be fairly ineffective. Our planes had little to fear. Allied (Hong Kong) Turn 27: October 30, 1939 Day, Fair (Dry) 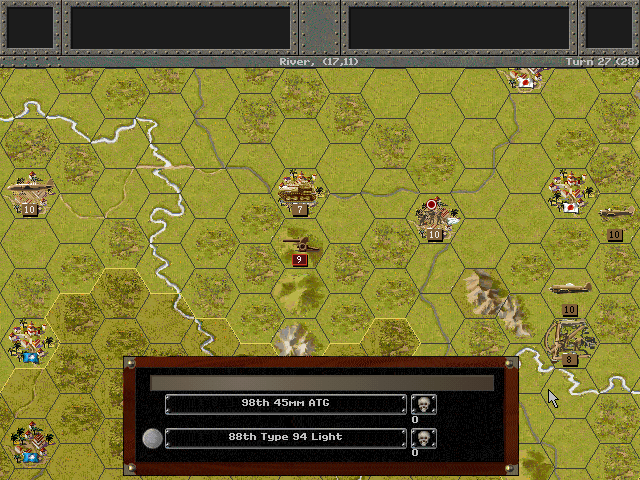 The French continue to push northward, although they don't seem to have a sizable force here. 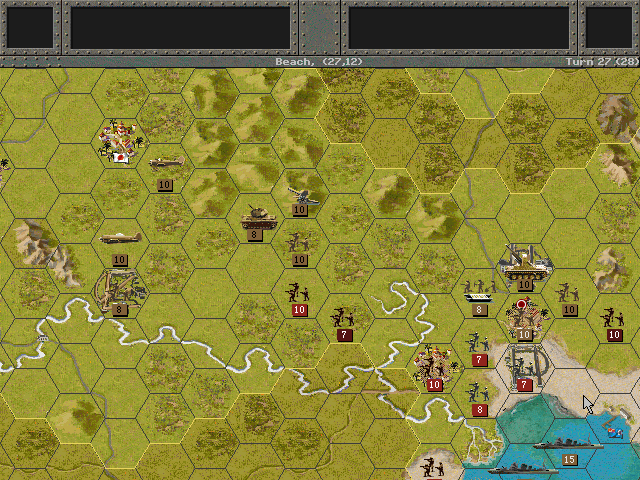 The other foreign troops don't make much of an effort elsewhere. Axis Turn 28: November 6, 1939 Day, Fair (Dry)  We do as much as we can with the bombers and artillery, but the defenses of Kwangnan are quite strong.  In a desperate final battle, the Engineers finally emerge victorious.  Growing restless, Hirohito's Hieneys make some strafing runs against the French ground troops.  The key cities of southern China are ours, but we do need to ensure that the foreign powers aren't going to keep pressing the attack. Allied (China) Turn 28: November 6, 1939 Day, Fair (Dry) China is out of the fight. Allied (Hong Kong) Turn 28: November 6, 1939 Day, Fair (Dry)  Combat continues around Liuchewhsien. This is about the last of the fighting, as they have nothing more behind it. After a few days, a ceasefire is negotiated with the European powers, and they all stand down around Canton, and move back south of the Pearl River.  A few more potshots are taken by the French against the Kaga before the news of the ceasefire reaches them, or so they claim. The question that remains, however, is this: Have we pleased the emperor?  Just barely, the answer is a yes. China is done for, and we might end up better off with a chance to build up the military for another year before engaging the foreign powers again.  Later reconnaissance shows that the French really only had a few guns rolling northward. The Chinese had almost nothing remaining of their army. Victory Level: 1106 - 137 Ending Prestige: 194 (Victory Award +600)  That really was by the skin of our teeth. I wasn't intending for that to work, and I really did forget that you're actually expected to take the other Allied objectives. In fact I thought it was an automatic loss for getting them involved! UNIT SPOTLIGHT Type 92 'Heavy Armored Car' PG Name: Type 92 Type: Recon Effective Date: 7/36 Value:9 Cost:108 Spot:3 Move:7 MM:All-Terrain Trans:Naval Fuel: 40 Init:7 SA:4 HA:5 AA:0 NA:0 GD:7 AD:2 CD:2 TT:Hard Ammo:4 Although the official designation of this was as an armored car, it was actually just a light tank. The name was used because this tank was used by the Cavalry and intended for reconnaissance. Early models were armed with two light machine guns, one in the hull and one in the turret; eventually a heavier 13.5mm hull-mounted machine gun was used. This 'car' did see some action in the early 1930s in China, but suffered from manufacturing problems and never saw widespread adoption. In-game analysis: This is a pretty decent vehicle, all told. Ammunition and fuel capacity could stand to be higher, but the high move rate is a definite plus and the ATV movement type is nice to have. Especially valuable for combat is the high initiative, making this a very capable light tank in all but name, much like in real life. Indeed, those attack values (which seem a bit high given it's real-life armament) make it superior to contemporaneous actual 'tanks' for fighting enemy armor. Since the in-game difference between recon and tanks is minimal (tanks get an initiative bonus against AT), the biggest downside of adding this to the core is [spoilers] that there are no models to upgrade to. Still, it may be worth keeping one around, because with some time to gain experience it's arguably the best light tank on the Japanese roster. Mitsubishi A5M4 [Type 96] (Claude) PG Name: A5M Claude Type:Fighter Effective Date: 7/36 Value:12 Cost:144 Spot:3 Move:9 MM:Air Trans:Naval Fuel: 76 Init:6 SA:2 HA:1 AA:6 NA:0 DA:0 GD:6 AD:6 Ammo:6 As the new era of carrier warfare dawned, it became apparent that the Navy needed a carrier-launched fighter that could escort the carrier-launched bombers to the target. In the 1930s, the A5M was the latest design, and proved to be quite a capable aircraft in China. It was soon to be superseded by a far more famous airplane, however. Many of these that were still around by the end of the war were converted for use as kamikaze aircraft. In-game analysis: Coming in at the same price, this is a slightly better fighter than the Nate. It has a greater fuel capacity, higher initiative, and only gives up a little speed and ammunition. It's really not a bad fighter for how cheap it is (makes for a great way to train up a unit), but beyond the early stages of the war there are likely to be more and more enemies that it may have real trouble getting past. Kangra fucked around with this message at 04:55 on May 29, 2017 |
|
#
?
May 29, 2017 04:52
|
|
|
A victoryis still a victory! And hey, you secured China!
|
|
#
?
May 29, 2017 07:04
|
|
|
 It's been a little while since our last battle, but we're ready to take this war to the next level.  After our success in southern China, we are given the choice of continuing land operations in Asia, or to head up a naval strike against the USA. We choose to stay with the ground forces.  While we've managed to maintain a truce for the last two years, it's gotten to the point that we cannot continue to develop our empire without more resources. Singapore is a crucial city to take -- not only do we need it for our purposes, but most importantly, we need to kick the British out of it. Rather than try to make amphibious landings there, we're going to take the long way down through the Malay Peninsula. Key to our plan is the surprise of the operation. We are not just attacking here, but all around Asia. And just a few hours after our battle begins, the Navy will be making its strike against the American fleet in Hawaii.  Singapore December 8, 1941 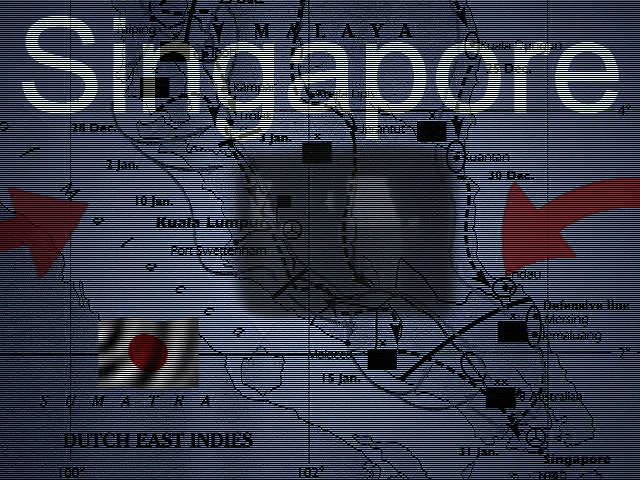 Objectives: (Songhkla [50]), Alorstar [50], Kota Bahru [50], Taiping [50], Trengganu [50], Ipoh [100], Kuantan [80], Kuala Lumpur [100], Kluang [100], Singapore [200x3] Starting VP: 50-1407 OOB pre:Unit Name Unit Type [Transport] Exp Land Units 1.1st Hohei 1940 Hohei 1940[Isuzu] - 2.2nd Hohei 1936 Hohei 1936 * 3.3rd Hohei 1936 Hohei 1936[Isuzu] * 4.4th Hohei HW 1936 Hohei HW 1936[Isuzu] * 5.5th Engineers 1936 Engineers 1936[Isuzu] **.5 6.The Japonies Kihei ** 7.My Tanks are so kawaii Type 95 Ha-Go ** 8.13th Type 97 Chi-Ha Type 97 Chi-Ha - 9.22nd Type 92 Type 92 * 10.25th RA 97 RA 97 (Isuzu) - 11.Steel Death Ho-Ni 3 * 12.Cherry Blossoms Float Type 91 105 [Isuzu] - 13.24th 94 Mtn Gun 75mm 94 Mtn Gun 75mm - 14.23rd Sa-To Sa-To - Aux (by qty) 4 Bicycle Infantry ** 1 Type 94 Light - 1 Type 93 Sumida - 1 Ho-Ni 2 - 1 94 Mtn Gun 75mm[Isuzu] - Air Units 15.Hirohito's Hieneys Nakajima Ki-27 Nate *.3 16.Sabai's Flying Circus Kawasaki Ki-10 Perry * 17.Nathan is my Father Nakajima Ki-27 Nate -.8 18.Remember Eniwetok A6M Zero - 19.11th G3M Nell G3M Nell ** Aux (by qty) 1 Nakajima ki-27 Nate ** 1 Ki-43 Oscar ** 1 G3M Nell ** 1 G4M Betty ** 2 G4M Betty - Starting Prestige: 74 after purchases/upgrades The core is being filled out, this time with the latest tank (the medium-sized Chi-Ha), and an AT gun. The AT gun is mostly added to gain experience, but it may come in handy if we need to hold off any enemy tanks. One infantry gets a 1940 refit; the others will have to wait to upgrade. The Claudes get the first upgrade to the Zero, the best fighter in the world. The reason I upgraded here instead of purchasing was a simple mistake. Initially I misinterpreted the Naval slots as being the only way to buy planes (because on the purchase screen, the air units are grouped with the naval units). It turns out that isn't true. My mistake is going to set us back a fair bit since the prestige has basically been wasted, and we did not start with very much.  The primary target is Singapore; we expect the most resistance to be built up along the western side of the peninsula, and it's also the best route to the southern island city. Resistance is expected to be greater at the larger cities like Ipoh and Kuala Lumpur. Once again we are faced with a lack of decent airfields until we can capture some of those southern targets. As we need to secure the whole peninsula, a smaller, mostly auxiliary force will be moving on down the eastern coastline, and they will also be responsible for keeping track of enemy activity in the interior. 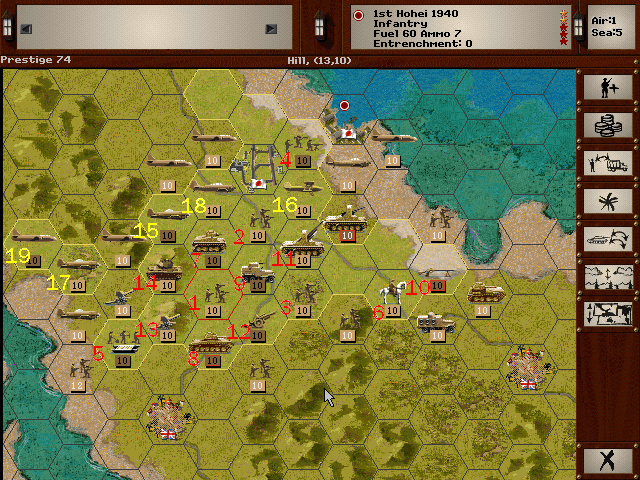 We don't have a whole lot of space to set up on the border, and it will likely be a bit tough to maneuver our forces effectively until we gain some ground. The bicycle infantry will mostly be used as advance forces. Their speed should allow them to get into position quickly and be the first to engage the enemy. This should keep space open for the tanks to work, and also let the artillery come in behind them. Our core infantry will typically be held in reserve, striking at the entrenched positions wherever it becomes necessary.  Axis Turn 1: December 8, 1941 Day, Fair (Dry)  Thanks to the longer range of the upgraded guns of Cherry Blossoms Float, the town of Kangar is easily suppressed, and an attack from the bicycle infantry clears out the enemy troops.  Our tanks form a front line behind which the rest of our forces organize.  Overhead, our pilots get their first taste of combat with British planes. Allied (United Kingdom) Turn 1: December 8, 1941 Day, Fair (Dry)  The enemy artillery guns are much more powerful than what the Chinese were fielding.  Luckily, our new tanks can stand up to them without any losses.  We had attempted to sneak the tankettes around the coastal flank of Yala, but their AT guns have an easy time putting a stop to that plan. Axis Turn 2: December 11, 1941 Day, Fair (Dry)  Air power proves to be key to clearing out Yala.  The Zeros show their ability in the air by eliminating the Hurricanes.  A combined attack lets us move the line up and take a forward airfield, which will be critical for continued progress.  Alorstar then falls to an attack from the Bicycle Infantry. Allied Turn 2: December 11, 1941 Day, Fair (Dry)  The British pull their troops south, using rivers for protection. Overhead, the Hurricanes prove unable to down any of Hirohito's planes. Axis Turn 3: December 14, 1941 Day, Fair (Dry)  The new Oscar fighter is very capable, and it would be a welcome upgrade if it were more widely available (and we could afford it).  Getting through the low-lying territory on the west coast proves to be a logistical mess for us.  The eastern advance makes it to the Kelantan, and halts there as well. Allied Turn 3: December 14, 1941 Day, Fair (Dry)  The Nates lose out in a battle with enemy Buffaloes.  Our Sa-To holds the bridge, but not without taking a few losses. Axis Turn 4: December 17, 1941 Day, Fair (Dry)  The Zero is the best plane in the skies for us.  Our tanks can chew through infantry. It's a good thing the British haven't really employed any armor so far.  The road southward narrows through Butterworth, which will slow our advance a bit. We haven't seen any resistance anywhere else. Allied Turn 4: December 17, 1941 Day, Fair (Dry)  British infantry continue to battle us on this side of the Kelantan.  Maybe I shouldn't have mentioned tanks. The Allied forces push back harder once the armor arrives.  The battle on the western side is much more in our favor. Axis Turn 5: December 20, 1941 Day, Cloudy (Dry)  As the Zeros take care of the enemy fighters, the bombers get to work hitting those tanks.  It turns out to have been a good idea we brought the AT guns; they actually get a chance to fight as well, forcing the enemy back across the river.  The 2nd Hohei have been spending the last month training in the north. Special equipment is issued to them, and they are now full-fledged paratroopers.  Once Butterworth is captured, the light tanks scout ahead and find the next big assemblage of resistance, at Taiping and Ipoh. Allied Turn 5: December 20, 1941 Day, Cloudy (Dry)  Before they get too close to the city, the little tanks come under fire from the guns defending Ipoh. Axis Turn 6: December 23, 1941 Day, Cloudy (Dry) 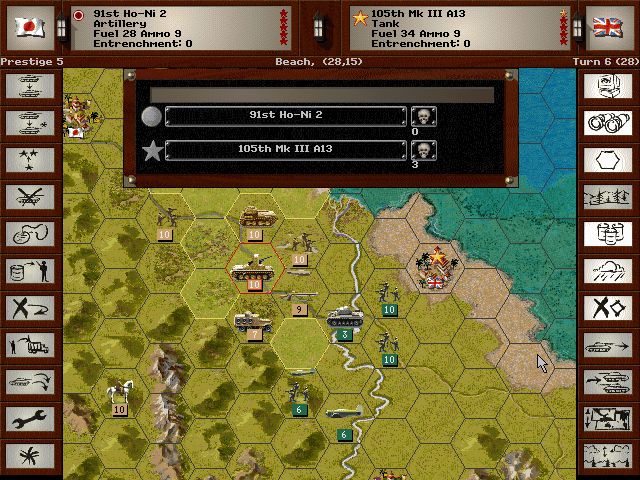 The powerful Ho-Ni 2 blasts those Valentine tanks.  Then the AT guns knock them back again and seize the bridge. 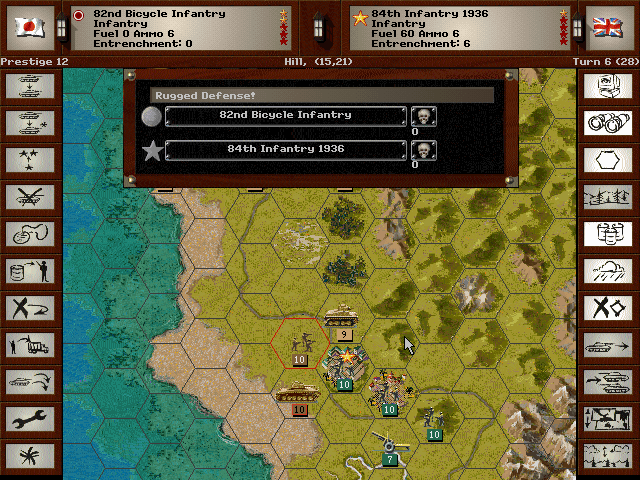 Although the new Chi-Ha tanks were able to drive off the artillery guns, the troops in the city stand firm against our initial assault. Allied Turn 6: December 23, 1941 Day, Cloudy (Dry) 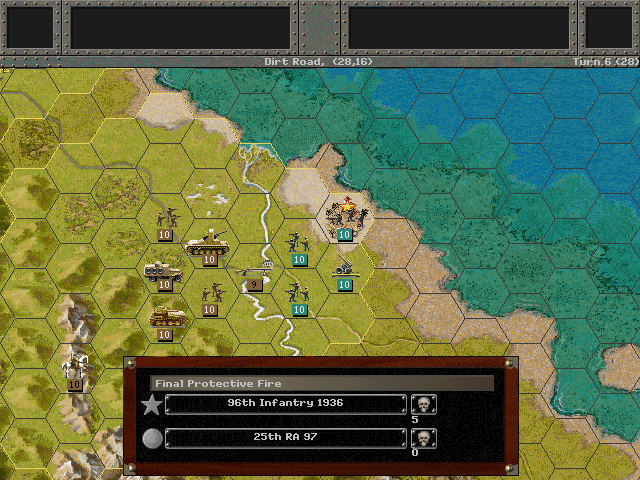 With the artillery covering the bridge, the Indian forces fail to make any headway in their bid to push us back. 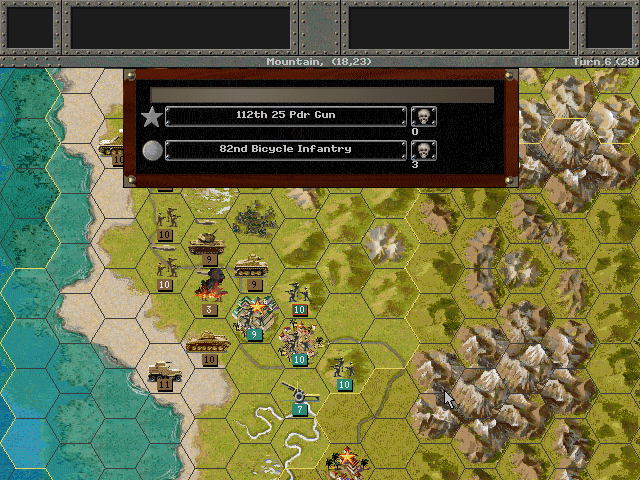 Even after they were forced back from the town, the enemy 25-Pounder guns still put out a pretty good shelling on our infantry. Axis Turn 7: December 26, 1941 Day, Fair (Dry) 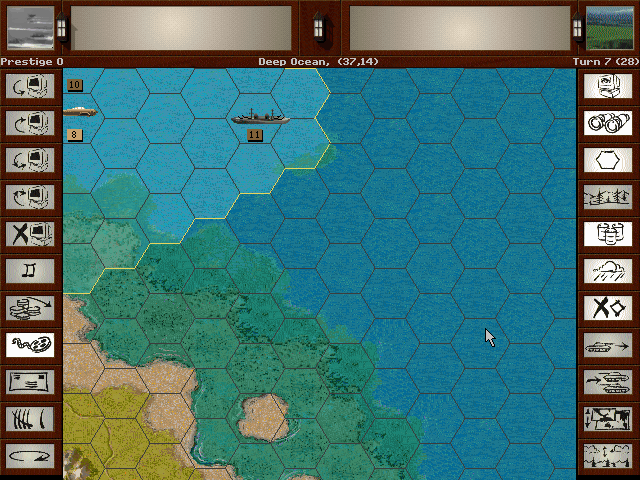 This is our secret plan to capture Kuantan: The newly-trained parachute soldiers are going to land and capture the airfield there. We're sending the 4th HW to make a landing south of Trengganu to support the attack. We have no warships available, so it's a big risk, as we don't know where any sneaky submarines might be hiding. 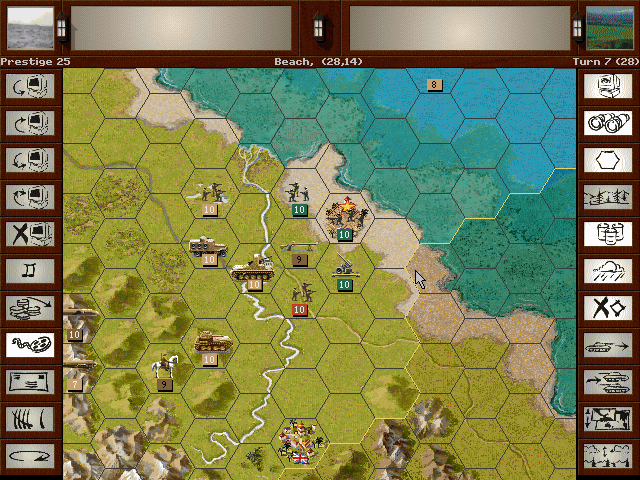 Meanwhile we finally secure a position over the Kelantan. 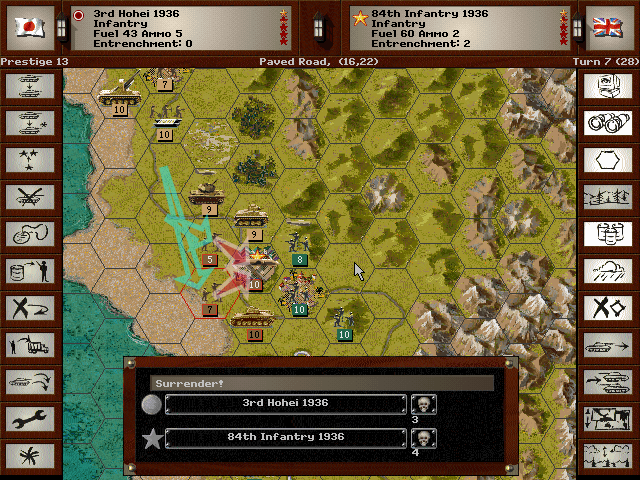 After another tough battle, we do eventually force Taiping to surrender. Significant enemy troops remain in the area, however.  Our core fighters took significant losses when battling the Hawker Hurricanes and Brewster Buffaloes. We don't have enough prestige to bring them back up to full strength yet, so they'll likely be out of the fight for quite some time. Allied Turn 7: December 26, 1941 Day, Fair (Dry)  The British think they can break up our assault force by weakening the artillery. But the well-armored Ho-Ni proves too tough to handle. 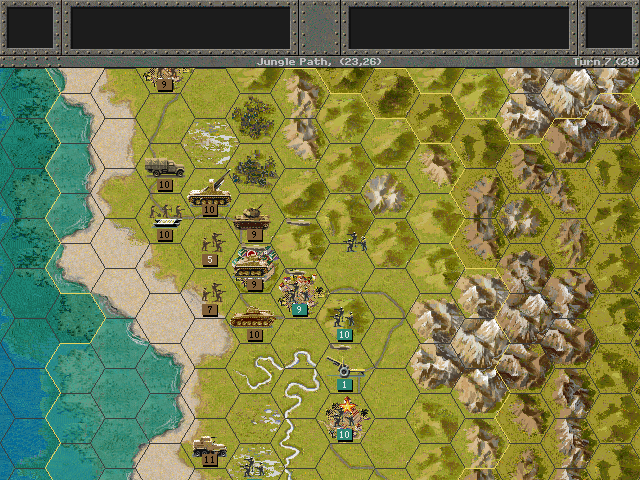 Instead of retreating, the enemy forces spread out into the hills near Taiping. Axis Turn 8: December 29, 1941 Day, Fair (Dry)  We could not pull off the sneak assault without the Zero, as it's the only plane with the range to make it that far south. It does mean they aren't available to intercept enemy planes, and with two of our Nate squadrons out of action, bombing runs will have to be reduced unless the skies are free of opposing fighters. 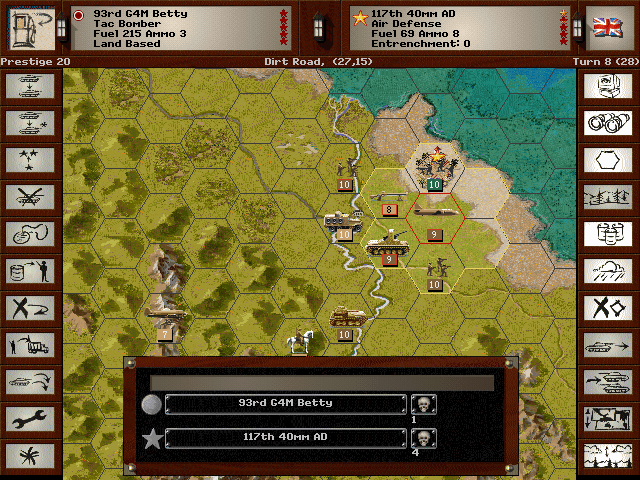 Flak hasn't been a problem; the guns on the ground are typically weak, and we can even attack them directly. 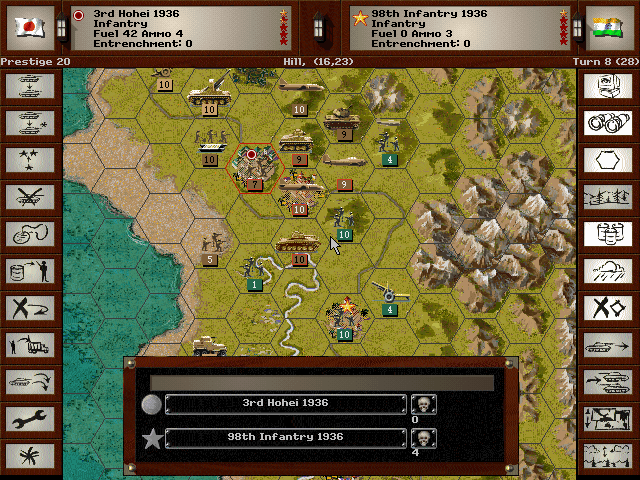 We do push most of the opposing forces out of Taiping, but there are still many in the surrounding region. It's a bit chaotic at the moment. 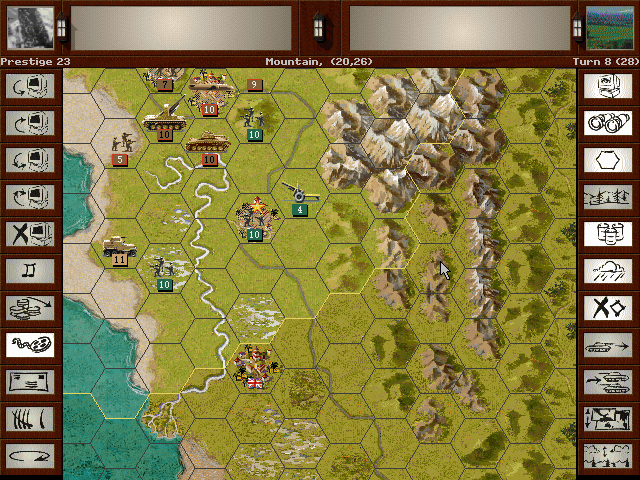 If we didn't have the Perak River to deal with, we could likely rush a few units forward and take Ipoh before the enemy can regroup. Allied Turn 8: December 29, 1941 Day, Fair (Dry) 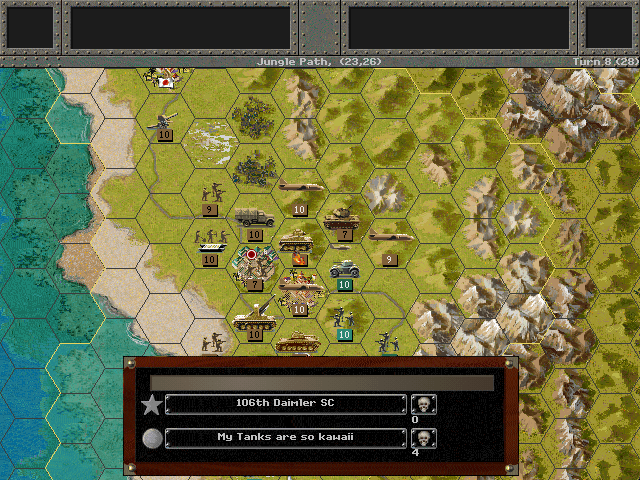 For the first time, enemy vehicles show up on the west side. The may only be armored cars, but their guns do serious damage to our little tanks.  Rather than intercept our bombers, the Buffaloes make strikes against our ground forces. 364 - 1316 (Defeat) The offensive is just getting underway. We're meeting with serious enemy resistance now, but we are making progress. 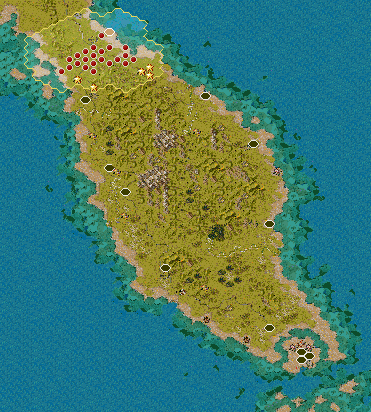 Unit Spotlight One unit is very special for this battle, and the other is one we aren't going to encounter ever. Bicycle Infantry PG Name: Bicycle Infantry Type: Infantry Effective Date: 7/41 Value:9 Cost:108 Spot:2 Move:4 MM:Leg Trans:Air Fuel: 0 Init:1 SA:7 HA:5 AA:0 NA:1 GD:6 AD:10 CD:0 TT:Soft Ammo:7 Special: Banzai While bicycles were used by all sides in the conflict as a low-cost alternative to mechanized transport, the Japanese use of them when fighting their way to Singapore is probably the most famous (and effective) of the war. The vehicles were used mostly in the way that cavalry was at the time - as rapid transport, followed by dismounting in order to go to battle. Bicycles also allow a relatively greater amount of equipment to be carried by one soldier, without an extra expense of fuel or supplies for pack animals. On the Malay peninsula, the ability of the bicycle to travel on poor roads and be carried across streams made the troop movements more nimble, and often the defenders found themselves in danger of being surrounded. The Japanese employed them in China and the Philippines as well, but they were not considered a key component of their strategy. In-game analysis: These are almost identical to regular infantry (of 1940). They simply move a little faster (and have an extra point of air defense to reflect their mobility). That said, a little extra movement can make a critical difference over the course of a battle. For at least a year or so after they show up, they can be excellent on the battlefield to penetrate enemy lines, and later on can be used as a mop-up unit for finishing off weakened defenders. Vickers-L type Submarine (4 versions, 9 L-4 built) PG Name: Vickers L Type:Submarine Effective Date: 7/36 Value:6 Cost:72 Spot:3 Move:4 MM:Coastal/Sub Trans:N/A Fuel: 109 Init:3 Range:2 SA:0 HA:0 AA:0 NA:10 DA:0 GD:4 AD:4 TD:8 DD:6 Ammo:10 The 'L-type' submarine was a design licensed from Vickers after World War I. There were 4 refinements of the design, all made in the 1920s. These were thus quite old by the time of the Pacific War. Subs of the earlier revisions were either scrapped or used for training by then. A few of the L4 types saw action early in the war but were also relegated to training use by 1942. In-game analysis: While these aren't noticeably worse than other early war subs, the Kaidai is available at the same time, and is clearly the better choice. The only thing this has over it is more fuel, and at the rate subs move, that's not an advantage worth bothering over. Kangra fucked around with this message at 01:19 on Jun 3, 2017 |
|
#
?
Jun 2, 2017 20:13
|
|
|
I'm glad I went straight into the Zeke, sadly I'm not looking forward to flying against Hellcats and Corsairs in a few years time. You would be doing me a favour if you could win the war by then.
|
|
#
?
Jun 2, 2017 21:07
|
|
|
Is there a scenario tree or chart based on whether you score a victory or a defeat in a given scenario? I've looked all over and can't seem to find one; I know you can end up taking a historical path to Okinawa or an insane ahistorical path where you storm the beaches of San Francisco, but I'm not sure about the in-between.
|
|
#
?
Jun 2, 2017 21:10
|
|
|
HannibalBarca posted:Is there a scenario tree or chart based on whether you score a victory or a defeat in a given scenario? I've looked all over and can't seem to find one; I know you can end up taking a historical path to Okinawa or an insane ahistorical path where you storm the beaches of San Francisco, but I'm not sure about the in-between. I can't properly answer this as I don't know for sure, but from what I gather, there are no branches for win/loss (there might be jumps though). You do get to choose whether to go land/navy, and that seems to be about it. The lack of a developed campaign seems to have been one major knock against the game, especially compared to the previous ones. As for a full campaign tree, I remember finding one (sketched as an ASCII diagram) in a campaign editor. Back when I was just thinking about this, I did peek a bit to find out if I could pull it off relatively blind. I remember having trouble finding that answer myself. I'm sure someone in the thread probably knows better (and I don't care about 'spoiling' the discussion; mostly I want to be blind for the battles).
|
|
#
?
Jun 3, 2017 01:28
|
|
|

|
| # ? Apr 19, 2024 23:48 |
|
|
was my planes one of those to crash without fuel?
|
|
#
?
Jun 3, 2017 16:07
|
|