


|
 Welcome to my attempt at making a SSLP of Fire Emblem Fates: Conquest! I assume everyone already knows about the Fire Emblem series (it makes up like half of the Smash Bros cast at this point), but Fire Emblem Fates is a turn-based strategy RPG for the 3DS, and the 14th entry in the Fire Emblem series. I've played this game about ten times by this point, and it's probably my favorite Fire Emblem game. I love just about everything about this game except for the story. I will be playing with an HD Fates texture pack, so the game will look considerably better than usual. Also, this is not going to be an ordinary run. I'm going to randomly select one class from every character's default classlist, and change them to that class as soon as possible. I will also be giving myself infinite and free access to heart seals, because the game doesn't provide enough of them early on for this run to work. I've done most of a playthrough like this before, and it was an interesting way to spice up the game. I'm pretty good at Conquest, and I consider myself fairly knowledgeable about its mechanics, so I think I'll be able to make this a fairly informative LP. That being said, I will be assuming that you are at least vaguely aware of how Fire Emblem works, so I won't be explaining the absolute basics. I will also be focusing exclusively on the gameplay, because the story of Fates is a mess that's not worth anyone's time. I'm not exactly sure how frequently I'll be able to update this because my semester just started, but I'll shoot for updates every 1-2 weeks. Rules of the run 1. No grinding or excessive stalling to gain extra experience or other resources 2. No class changing except to a character's randomly decided class or its unpromoted equivalent (which must be done immediately after the character's join chapter) 3. No path bonuses/rewards or DLC 4. No random My Castle events (except for the mess hall) 5. No partner/friendship seals 6. No captured units (though I'll probably still capture some of them for funsies) Audience participation is welcome If there are any particular units or pairings you guys would like to see me use, even if it's an objectively terrible idea, just let me know and I'll see what I can do. Just be aware that the late-game may be incredibly difficult if I end up with a horrible team composition. Table of contents Update 1 Update 2 Update 3 Update 4 Update 5 Update 6 Update 7 (Part 1) Update 7 (Part 2) Update 8 Update 9 Update 10 Update 11 Update 12 Update 13 Update 14 Update 15 Update 16 Update 17 Kmsorter fucked around with this message at 03:31 on Apr 20, 2024 |
 #
?
Jun 6, 2023 21:35
#
?
Jun 6, 2023 21:35
|
|

|

|
| # ? Apr 27, 2024 18:35 |
|
|
Update 1 - Half of the Pre-Route Split Because I can't change classes until after chapter 6, I'm going to have to play through the prologue like normal. I could just skip over this, but then I'd feel like the run was incomplete. If you're not interested in this, feel free to skip to whatever update has chapter 7.  I'll be playing on Lunatic mode, though I'm not above changing it to Hard after chapter 25 depending on my team composition. People who've played Conquest Lunatic know why.  I'm also playing on Classic, because I have self-respect.  This is the Corrin I made. I like his pink hair. 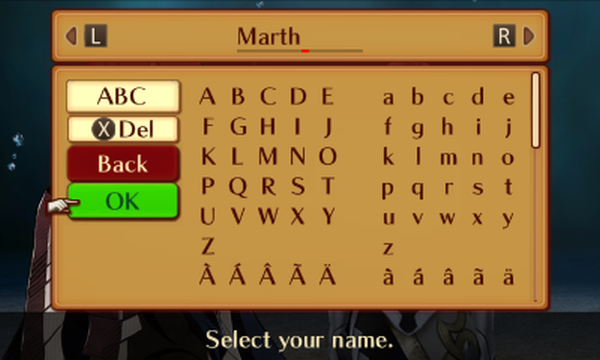 You may call him Marth. I can choose both his talent as well as his boon and bane. The talent will decide what his class change options are, and his boon and bane alter his base stats and growth rates. For the purpose of this run, I have to decide what his talent will be randomly. To do this, I looked up a list of every promoted class in the game (by my count there were 26 that Corrin can get through his talent), randomly generated a number, and scrolled down the list until I reached his class.  Ten makes him a Malig Knight, so I pick dragon as his talent, which gives him access to Wyvern Rider.  I pick quick as his boon, which gives him +2 base speed, as well as a 15% higher speed growth. It also raises luck and skill growths by 5% each. I pick unlucky as his bane because Luck is the worst stat, basically only affecting your chances of getting critical'd. This gives him -2 base luck, as well as -20% luck growth and, unfortunately, -5% to both strength and magic growths. I'm not too worried about this because that adds up to, on average, 2 points to each after leveling up 40 times, which is fairly negligible.   We start the prologue and skip the cutscenes. These first couple of chapters are purely tutorials, and they have very little interesting gameplay to show, so I'll run through them quickly. 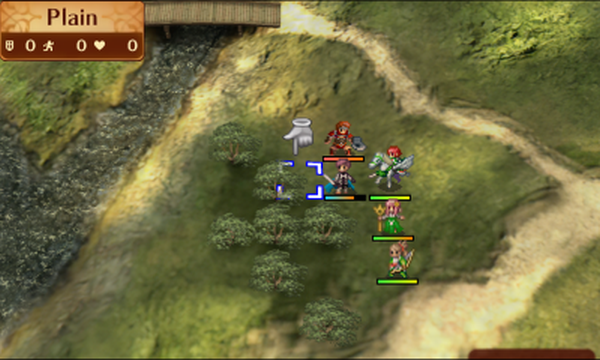 We only control Marth here, and there's only one enemy to deal with. The rest of this map is irrelevant.   Marth attacks and kills him, earning some juicy experience.  Ryoma is over there showing off the Birthright experience�.  A lot of guys show up across the map, but like I said, we're only concerned with our tiny portion of it.  An enemy soldier and Takumi, who is on our army, appear.   I have Takumi chip so Marth can dip.  This ends the map.   This is a simple tutorial map, but it teaches players badly and I don't like it.   We move up and attack Xander. If he were to attack us on enemy phase like a regular boss, attacking first could get us killed, but this is a tutorial, so he doesn't do that.  I forgot to show Marth's stats last map, so here they are now. I suppose now is as good a time as any to properly discuss him as a unit. Growth rates HP - 45 Str - 40 Mag - 25 Skl - 45 Spd - 60 Lck - 30 Def - 35 Res - 25 Marth's growth rates vary depending on the boon and bane we chose earlier, and these are the base growth rates for mine. It's important to note that these are his personal growths, not his class growths. Each class has its own growths that are added onto a unit's personal growth rates. For example, the Nohr Prince class has a 10% speed growth, so Marth's actual speed growth at the moment is 70%. This means that the same unit's stats will likely turn out noticeably different depending on what class they spend most of their levels in. I'm generally not going to discuss class growths, because they're usually pretty low and constantly checking the numbers as we change classes and promote units would be way more trouble than it's worth, but I wanted to note it here. Moving on, Marth is one of the best units in the game, and aside from child characters, he is easily the most versatile unit in the game because you can choose what his class change options are. His personal skill, Supportive, is pretty good. It gives C+ support partners +10 hit, +2 damage dealt, and -2 damage received. His other skill, Nobility, is essentially a personal skill, too, because it comes from the Nohr Prince class that's only available to him and his child(ren). It gives him 20% more experience gain, which is significant enough to help him skyrocket ahead of the rest of the cast, at least for a while. I'll talk about Xander's stats and skills when we recruit him, which is a long ways off.  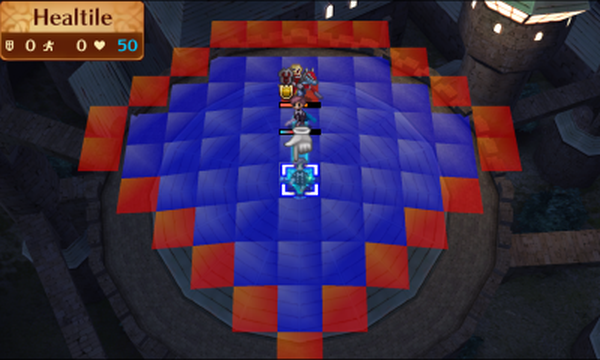 Xander damages Marth, so we retreat to the healtile he gives us to recover. Something interesting about this map is that you can suicide on Xander instead to get a dialogue where he's just like "really?" I think you need a -def Corrin to be frail enough though.  The numbers are better for us this time around because Xander's personal skill was giving him +2 damage dealt and -2 damage received because we were at full HP.  Marth gains his first level, and it's alright. I like the speed, but I'd trade the skill and luck for a point of almost any other stats.   We finish Xander off, and move on to the next map.  This map is the first actual map, though it's still not exactly a thrilling one. We do get Felicia (or Jakob if you picked Female Corrin) and Gunter, so I'll talk about them now. 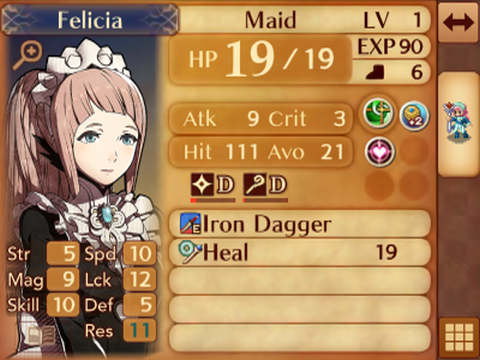 Growth rates HP - 40 Str - 10 Mag - 35 Skl - 30 Spd - 40 Lck - 55 Def - 15 Res - 35 Felicia's growth rates are pretty good, especially that speed, but she's clearly more geared toward a magic class. Luckily Conquest gives you a Flame Shuriken in chapter 17 that instantly turns her into a glass cannon if you keep her as a maid, which would definitely be my preferred class for her. Her personal skill is Devoted Partner, which gives Corrin, and only Corrin, +2 damage dealt and -2 damage received when she supports him. This applies to attack stance supports as well, and it stacks with her other skill, Demoiselle, that provides -2 damage taken to male allies within 2 spaces. This makes her a fairly potent battery for Corrin throughout the early game, and between that and staves, she is able to contribute pretty well even before you get a Flame Shuriken.  We won't properly recruit Gunter for a while, but I'll mention his personal skill, Forceful Partner (oh my) right now. It's just like Devoted Partner except it gives Corrin +15 hit and +3 damage dealt. It can be stacked with both of Felicia's skills for great affect. Other than that, he's pretty tough, and he makes a good backpack for your other units because he gives a significant +4 defense when paired up.     The first thing we do is use the dragon vein to open up the healtile floor that restores 20% of a unit's HP at the start of the turn.  We then move forward. So do the enemies.  I start by placing Marth in this chokepoint. He's next to Gunter and Felicia, so he's getting a total of +15 hit, +5 damage dealt, and -4 damage taken right now. You can do some pretty crazy skill stacking in this game.    He gets chipped by the Kodachi samurai, and the oni savage throws himself onto Marth's sword. He gets an okay level out of it. 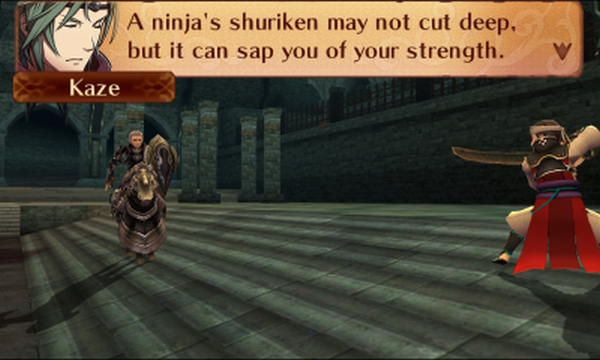 I forgot to screenshot it, but I moved Gunter to Kaze's chokepoint on player phase, and move Felicia below Marth to heal him.  Gunter takes some chip damage from Kaze and eats a shuriken debuff, which gives him -2 mag and -3 def/res, but he makes short work of the samurai.  On the other side, Marth gets Kodachi'd again.  But Rinkah decides to attack Felicia, who's dagger debuffs Rinkah's defenses even though the attack didn't actually do damage.  I have Marth kill Kaze with Gunter's support.  Gunter's 84% is vaguely concerning, but he connects it. 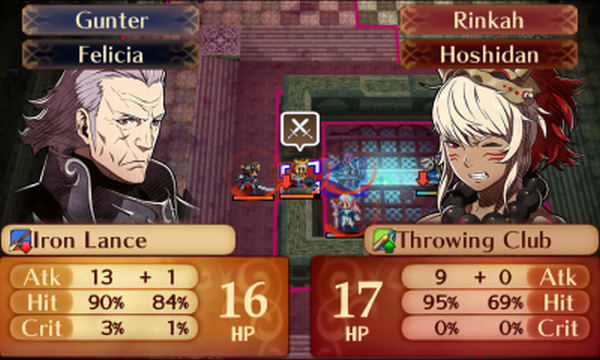 Gunter moves to attack Rinkah, who was conveniently debuffed by Felicia's counterattack.   Felicia finishes her off with Gunter's help. Once again, his 80% is a bit concerning, but he once again connects.  This Kodachi guy is the last enemy, and he's trying his best, okay? Don't judge him too harshly.   Marth goes in for the kill, and gets a very good level out of it. I knew he had it in him.   This is kind of the first actual map, and it's notable for having my third least favorite boss in the entire game, but we'll talk about that when we get there.  The northeastern group of enemies is technically beatable, but it requires so much more effort than I'm willing to put in, so we'll be ignoring them.   The game lets us pair up now, so I give Gunter to Marth and move him in range of both of these samurai. Felicia trails behind.   Marth takes no damage and oneshots them in return. The extra strength and defense from Gunter helps Marth out a lot, but I'm pretty sure these two are the weakest enemies on the map, which is why he so thoroughly eviscerated them. The free experience is always welcome, though.   Hans moves to commit suicide on these guys. You can very technically save him, but it requires a lot of effort and luck. Hilariously, if you do it, you're rewarded with him moving onto the gate we need to seize, which softlocks you.   I move everyone toward the dragon veins in the south while Hans gets murdered by a samurai.  You could use the northern dragon vein, but I prefer this one. It's a bit of a pain dealing with these archers on the more narrow bridge. This puts Marth in range of all three enemies.  The samurai attacks Marth, and it's not too threatening. This guy has Duelist's Blow, which raises his avoid by 30 when he initiates combat, which is why Marth's hit rate is so low.  Marth also gets a convenient yet unnecessary dodge against one of the archers.   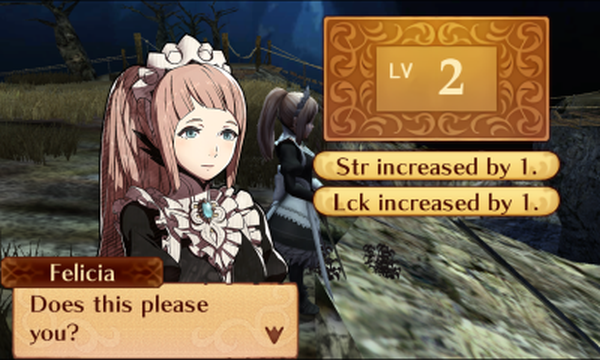 Felicia moves to finish the samurai off, and gets a mediocre level for her troubles. The strength is kind of nice at this point of the game, especially since she may end up being a Hero or Bow Knight later.  I have Marth pass Gunter to Felicia so he can have her attack stance the archer with him.   But then the madman decides to crit so it doesn't really matter.  The last archer goes for Felicia even though Marth wouldn't have counterattacked, and I think this is because he has weapon triangle advantage against daggers combined with her low defense. She dodges and chips in return.   Marth finishes him off, and gets a solid level. I'd have liked strength, but really, any level with speed is fine with me. He'll have access to tomes later, so the magic should hopefully come in handy.  I spend a turn advancing everyone across the bridge.  I could attack the boss, but with the archers behind him, that's not a very good idea. Instead I have a Gunter-supported Felicia move past the boss to deal with these archers. Gunter gives her +1 move, which just barely lets her reach this particular tile, and the extra strength he gives lets her do actual damage.  She's just showing off at this point.  Marth is gonna wait just outside of range, where it's safe. 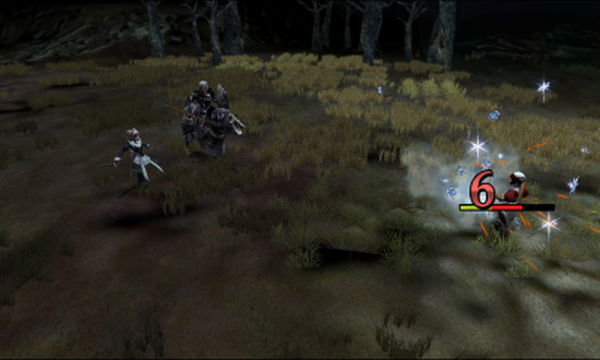  Felicia kills the damaged archer, and Gunter uses their guard gauge to block the other one. 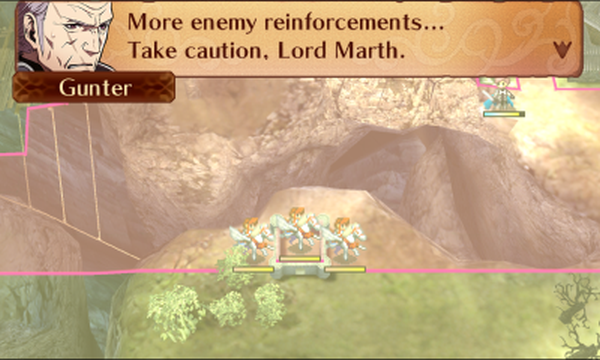 These Sky Knights show up from the southern fort, but they're pretty weak. The only thing to note is that they have Darting Blow, which gives them +5 speed when they initiate combat.   Felicia finishes the last archer and gets a good level out of it. These are basically the only stats I care about for her at the moment.  I have Marth move here, which puts him in range of one Sky Knight and Felicia's Demoiselle for the -2 damage taken. 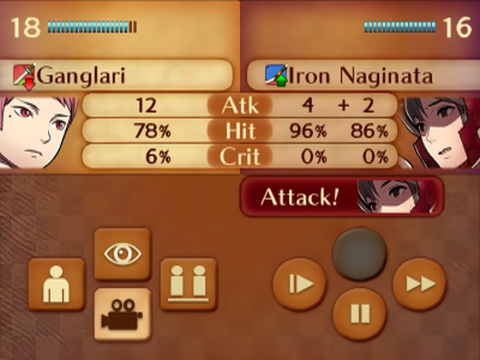  He fares pretty well. 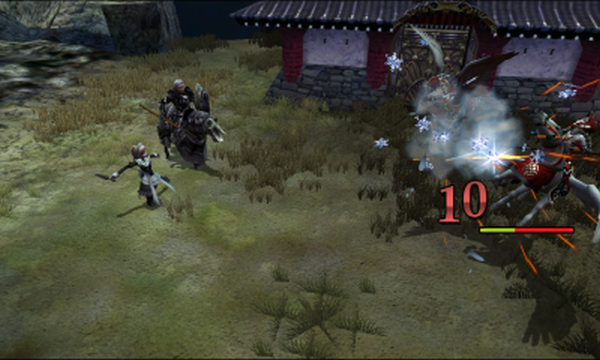  Felicia gets to work on one of the healthy Sky Knights while Marth finishes the first one.   They mop up the last ones on player phase, and now it's time to deal with the boss, Omozu. Felicia can still take a hit from him, so I had her finish the last Sky Knight inside of his range.  This guy isn't too tough, but he's a Ninja, so he's got more avoid than I'd like. This would be fine if they hadn't put him on an old gate that gives him +20 avoid. I've had runs where he's dodged 2-3 times in a row, which kind of forces you to retreat and heal, which bogs down an already relatively uninteresting part of the game. This is definitely my least favorite of the first six chapters, and it's almost exclusively because of this guy.  I have Felicia with Gunter support start chipping him down on enemy phase which debuffs his defense.   On the next turn, I have Gunter supported by Marth go in for the kill. Gunter missed the first time, but he but he chips him down on enemy phase and finishes him off on player phase. I realize in hindsight that I should have screenshot the top screen here but oh well.  I got pretty lucky with the dodges here; if Gunter had missed a second time, I would have had to back off and heal. Anyway, we seize the gate and finish the map. I got pretty lucky with the dodges here; if Gunter had missed a second time, I would have had to back off and heal. Anyway, we seize the gate and finish the map.  This map is essentially a big field of Faceless with mountains that can be destroyed using dragon veins. Ryoma joins us as a green unit, and he's going to move toward Sakura and Hinoka in the northwestern corner. Anything in his way gets deleted, as a general rule.    The main thing to watch out for on this map is these seal skills that some of these guys have. These will reduce a stat, in this case strength or defense, by 6 after combat. Losing 6 strength is more annoying than anything, but losing 6 defense could very well kill someone. The boss has both of them, which makes the group in the center pretty dangerous if you're not careful.   We also have Kaze and Rinkah for this map. I'm not going to discuss Kaze in depth here, because we won't properly recruit him for about ten chapters, but I'll say that he's very good, absurdly fast, and I'm gonna feed him a lot of experience over the next two maps. Rinkah we won't recruit at all, and I'll mostly be using her as a backpack. She's notable for being one of the only Birthright characters with a defense stat.  I have Marth  I have Kaze and Rinkah pair up, and then I have Kaze drop Rinkah in range of this Faceless. Between separating and transferring, you can squeeze a lot of extra mobility out of your characters in this game. It's one of my favorite things about it. 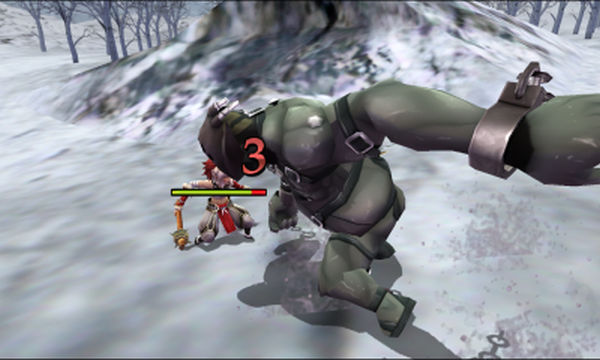 She gets hit and chips in return. I actually wanted her to take this hit, because her personal skill gives her +4 damage dealt when she's not at full HP.  Most of the Faceless on this map are moving towards Hinoka and Sakura, but they'll go for your units if you put them in range.   I pair Marth with Kaze, and have him move to the dragon vein before switching Marth to the front so he can use it. I just moved Marth seven spaces in one turn, which isn't even close to the limits of the mobility this game gives you.  I move Rinkah to this tiny safe tile, because I don't want her taking more damage.  Hinoka gets attacked, but she's perfectly capable of handling herself.    Meanwhile, Marth one rounds this faceless because Kaze is giving him enough extra speed to double.   I hope this Faceless had life insurance, because I'm pretty sure getting killed by Ryoma counts as an act of God.  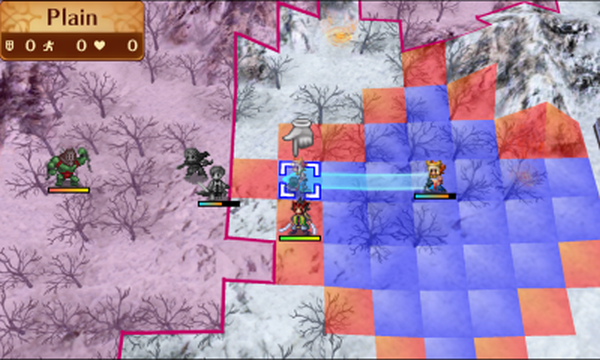 I move everyone forward, and trade Kaze's vulnerary to Marth. He one rounds the Faceless on enemy phase.  I move everyone forward further, putting Marth in range of this Faceless while having him use the vulnerary.    Between the vulnerary and the guard gauge, Marth stays pretty healthy, but he's not quite able to one round this guy. He also gets a crappy level.  Ryoma finishes Marth's work for him.   We've killed everything in the immediate area, and I spend a turn moving everyone up, separating Marth to the north to squeeze out an extra tile of movement. I then had the idea to pair Rinkah and Marth and put them in range of another Faceless.  My logic on pairing Rinkah and Marth was "well, he needs more strength to one round," but now he doesn't double, which is honestly worse.   At this point, I decided to pair Rinkah with Kaze, and have him finish Marth's Faceless. Kaze is, I think, the fastest character in the game, so he has no trouble doubling on his own. He does, however, greatly appreciates the +4 strength that Rinkah gives him.  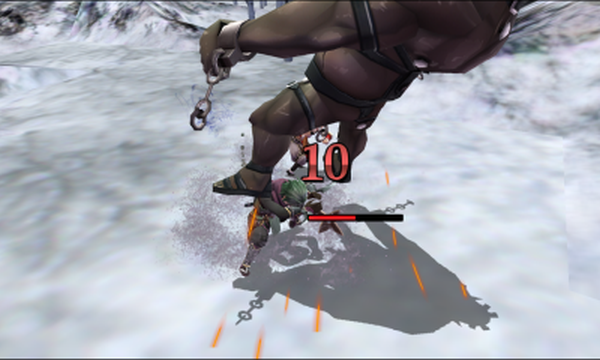  I forgot to screenshot it, but I move him toward the northern group, and he gets to work clearing them out on enemy phase. Hinoka also kills one of them.  The last guy in the north is about to get killed by Hinoka, so I have Kaze start dealing with the boss group while Marth moves north.   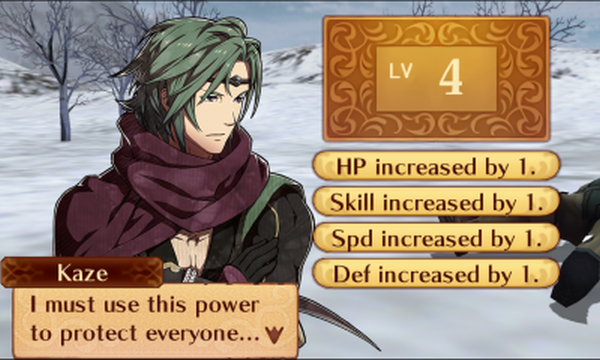 He hits both of those 67s, and finishes him off on enemy phase, taking no damage because of the guard gauge. He gets an alright level. It looks good at a glance because he got speed, but he has a 65% speed growth being boosted to 85% because of the ninja class, so that was basically a given.  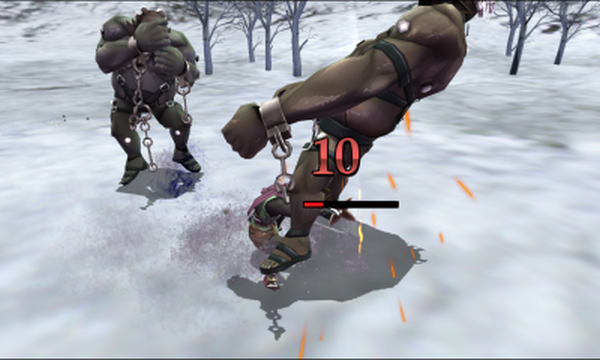 He repeats this process on the next guy, while Marth moves to talk to Hinoka.   She gives us a concoction, which is a better vulnerary that restores 20 HP. This is potentially very handy, especially in the early game when max HP isn't much higher than that. 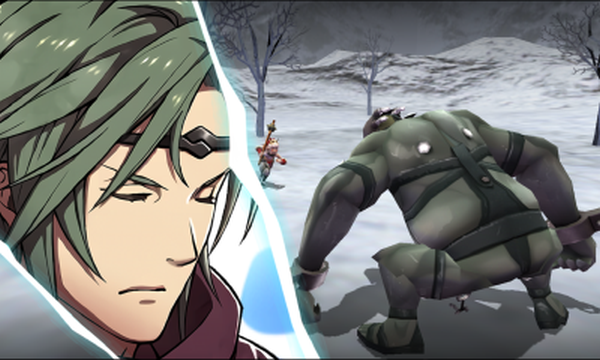  Kaze continues clearing this group out in style. 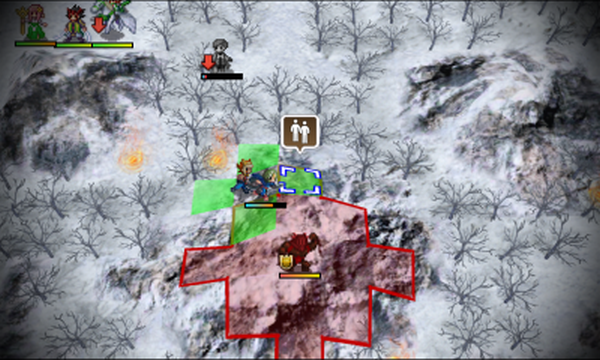 Now that it's just the boss, I drop Rinkah in range to chip because I don't want to get Kaze's strength sealed just yet. 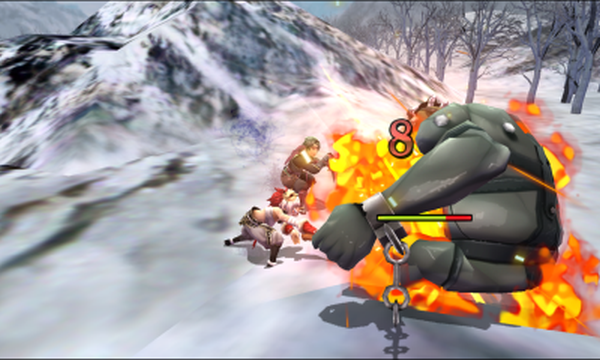  She chips him down, and eats both of his seals. This is fine, because she just needs to be Kaze's backpack now.  I have Marth use the dragon vein to get rid of the boss's mountain just to reduce its avoid.     Now Kaze can pretty accurately kill the boss and finish the map. He gets an okay level, but I would honestly trade every one of these gains for a single point of strength. And with that, I think this update is getting kind of long, so I'll save the rest of the pre-route split for the next one. Next time we'll play chapter 5, which is my personal favorite of the pre-split maps.
|
|
#
?
Jun 6, 2023 21:37
|
|
|
Yes! More Fire Emblem! More!  One suggestion, though obviously it's not relevant yet: maybe save unit breakdowns for once we've moved them into their class for the run, or maybe revisit them then with their full growths, something like that. It would make it easier to keep track of thoughts on units once we know how they're going to play out for this particular run, since class hopping is off the table this time. It'll be interesting to see how you handle Lunatic without being able to customize a lot of your units in the usual ways. Definitely keeping an eye on this one.
|
|
#
?
Jun 6, 2023 22:15
|
|
|
theshim posted:One suggestion, though obviously it's not relevant yet: maybe save unit breakdowns for once we've moved them into their class for the run, or maybe revisit them then with their full growths, something like that. It would make it easier to keep track of thoughts on units once we know how they're going to play out for this particular run, since class hopping is off the table this time. This does seem like a good idea.
|
|
#
?
Jun 7, 2023 19:58
|
|


|
Looking forward to seeing how this goes!
|
|
#
?
Jun 8, 2023 08:01
|
|


|
That haircut makes him look like a tomboy.
|
|
#
?
Jun 8, 2023 09:59
|
|
|
I can't believe there's more Fates. And another pink dragonriding Corn? How does it happen? I'll be silently watching this for reclass shenanigans, and also Lunatic strategy. I've heard Lunatic is a bit more balanced in this game than Awakening's, I've just never really looked. I know you said you didn't want anything to do with the story (likely for the best  ), but if for whatever reason you did want the transcripts, I have them. I've got full transcripts for all routes already set with portraits and I've definitely not got much of a use for the ones that aren't Revelations. ), but if for whatever reason you did want the transcripts, I have them. I've got full transcripts for all routes already set with portraits and I've definitely not got much of a use for the ones that aren't Revelations.Also, sheesh, I wish I knew about the HD texture pack when I started up the Gay Fates LP. Looks way better.
|
|
#
?
Jun 10, 2023 21:55
|
|

|
Cool LP - and i love the concept. Def folowing this one
|
|
#
?
Jun 12, 2023 23:03
|
|
|
theshim posted:One suggestion, though obviously it's not relevant yet: maybe save unit breakdowns for once we've moved them into their class for the run, or maybe revisit them then with their full growths, something like that. It would make it easier to keep track of thoughts on units once we know how they're going to play out for this particular run, since class hopping is off the table this time. Y'know, that makes a lot of sense. I'll start putting them at the end of the update from here on. Odd Wilson posted:I can't believe there's more Fates. And another pink dragonriding Corn? How does it happen? I suppose pink haired dragonrider Corrin was Fire Emblem Fated to be  . Awful jokes aside, yes, Conquest Lunatic is a much more well-balanced experience than Awakening's. While Awakening Lunatic relies on ridiculous stat inflation and basically forces you to use cheesy strategies to survive the early game, Conquest tends to rely on very tightly designed enemy formations and skill placements. In fact, the enemies often have the same stats as the ones in Hard, and when they have more, it's typically only a few extra points here and there. It feels like a fair challenge the whole way through, though the last couple of chapters have a pretty massive difficulty spike. I'll keep your offer about the transcripts in mind if I ever decide to do anything with the story. . Awful jokes aside, yes, Conquest Lunatic is a much more well-balanced experience than Awakening's. While Awakening Lunatic relies on ridiculous stat inflation and basically forces you to use cheesy strategies to survive the early game, Conquest tends to rely on very tightly designed enemy formations and skill placements. In fact, the enemies often have the same stats as the ones in Hard, and when they have more, it's typically only a few extra points here and there. It feels like a fair challenge the whole way through, though the last couple of chapters have a pretty massive difficulty spike. I'll keep your offer about the transcripts in mind if I ever decide to do anything with the story.
|
|
#
?
Jun 14, 2023 02:37
|
|
|
Update 2 - The Rest of the Pre-Route Split Moving on to chapter 5, which is the best map of the prologue, and the only one I genuinely enjoy playing. It gave a lot of people trouble when the game was new, but it's not so bad when you know how to play it. Ryoma is going to duel with the boss until one of them (almost always Ryoma) dies, but there's no reason to save him, even in Birthright. He retreats unharmed when he loses, but with some luck, he'll soften the boss up before he goes. 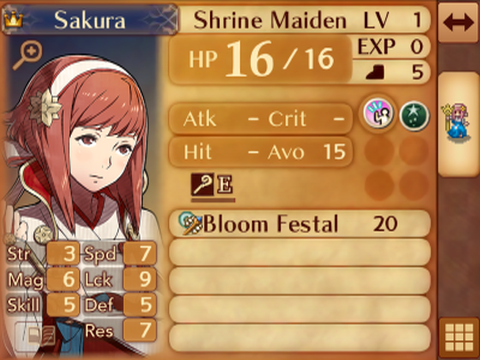  We also get to use Sakura and Azura for this map. Again, we aren't permanently recruiting either of them yet (or Sakura at all), so I won't talk about them in detail just yet. Both are valuable assets on this map, though. Azura is a Songstress (although I'm going to call her a dancer out of force of habit), so she can let other units move twice in one turn. The only things worth noting about Sakura are her personal skill, Quiet Strength, which gives allies within two spaces -2 damage taken, and her bloom festal, which is a heal staff with 1-2 range. And no, you can't keep the bloom festal in Conquest. I've tried passing it to Corrin before, and it disappears from your inventory after this map. The same goes for Rinkah's club.   Marth is, for story reasons that are utterly unimportant, currently strong enough to one shot every enemy except for the boss. The only thing that can threaten him is this duo of mercenaries with wyrmslayers. These are effective against dragons, and this triples the weapon's might against him. The wyrmslayer has 9 might, so it becomes 27 when they attack Marth. The mercenary on the right also has one, but Kaze will handle that one easily enough.  This guy drops an HP tonic, which raises max HP by 5 for one map. There's a reason they give this to you on this map.  Both of these Mercenaries have steel swords, which makes them effectively an HP tonic delivery service. I move Marth in range of both.   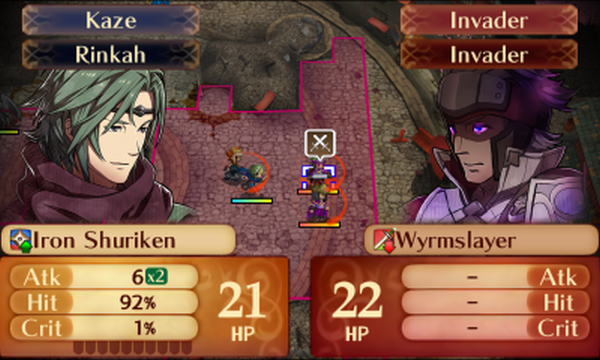 I have Kaze pair with Rinkah for the extra strength, have Azura dance him, and get him started on taking this mercenary out.    The boss attacks Ryoma and misses, and he gets a little chip damage in. Ideally, he'll bring the boss down low enough for Marth to finish with one hit.   Marth eats both of these guys as a snack, and gets the HP tonic as a reward.  The mercenary gets a solid hit on Kaze, but he finishes him off with his counterattack. 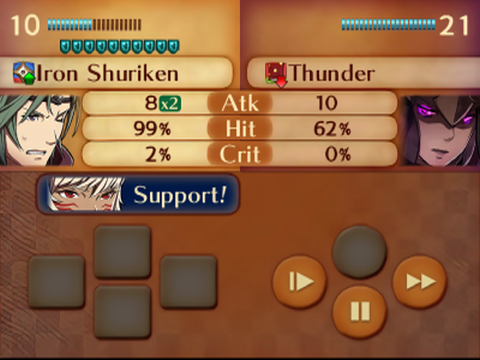  The mage attacks next, which would kill if it weren't for Kaze's guard gauge, so he softens the mage up for next turn.   Ryoma attacks and misses the boss, who also misses. I've gotta say, Ryoma's animations are pretty funny when you screenshot them like this. Seriously, it looks like he's about to look at the audience and go "yup, that's me. You're probably wondering how I got myself into this situation". 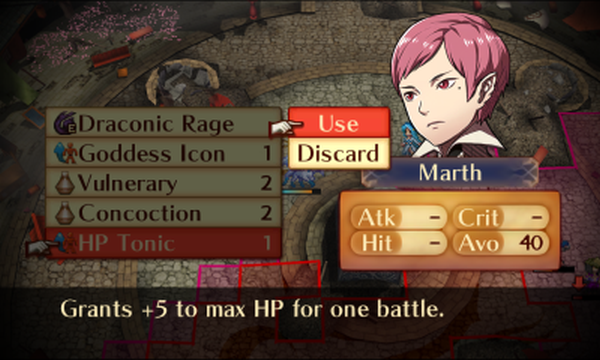 I have Marth use the HP tonic, because this lets him barely survive a wyrmslayer hit after healing. If he were just a bit bulkier this wouldn't be necessary, but they deal 22 damage, which is just enough to one shot without the tonic.   On the other side, I have Sakura heal Kaze up and move him in range of the southern mages while he finishes this guy off. I also dance for Sakura and have her move to heal Marth next turn.  You may as well have not leveled up.    Kaze unnecessarily dodges just to show off.  Baiting out the southern mages triggers the whole group, including the wyrmslayer bros. A mage also spawns in each corner of the map, but they're so far away that they won't be doing anything other than feeding Kaze more experience.    Sakura heals Marth, and he eats one of the wyrmslayer bros. He'll get hit by the last one next turn, but because he used the HP tonic, he'll be fine.  I dance for Sakura so she can get out of the mercenary's range.  Kaze finishes one of these mages off. He can only take one hit right now, but he's gonna build a guard gauge off of the first one to attack him. Pair up isn't as broken in this game as it was in Awakening, but it's still pretty crazy.    Ryoma finally gets hit, Marth eats the wyrmslayer hit before killing the mercenary, and Kaze tanks the first mage before using his guard gauge on the second.  He gains a strength level out of it.    Ryoma looks funny without his faceshield thing.  Marth moves down and eats the southwestern reinforcement mage.    Kaze finishes the last southern mage, and gets both danced and healed.   It's at this point that I noticed that Azura is in range of both of these reinforcement mages, so I move Kaze up to protect her. Although I'm pretty sure she just retreats if she dies, and that we'd still recruit her in chapter 9.  The southern mage almost kills Sakura, but barely alive is still alive.   Is... Is Ryoma gonna win? I've never seen him win. I'm pretty sure I've never seen him do this much damage, actually.   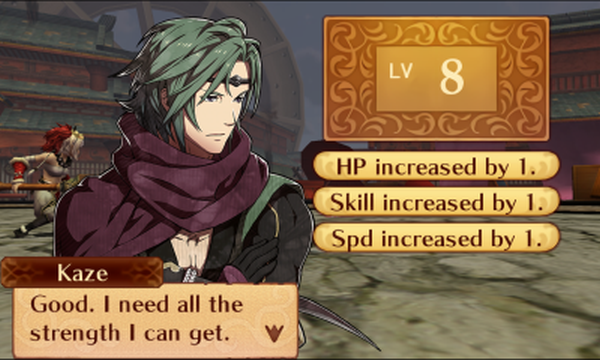 Kaze moves to kill the southern mage with a dance from Azura. Once again, he survives an otherwise lethal blow with a guard gauge. He gets an unimpressive level out of it.  Sakura heals Kaze while retreating to safety. 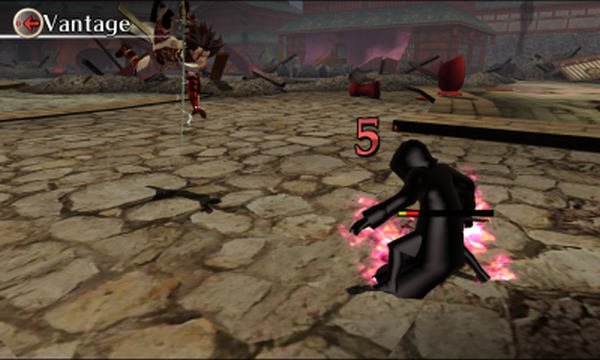  Ryoma, no! I was cheering for you! 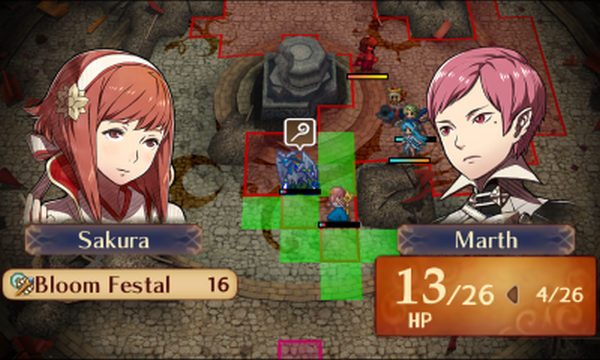  I have Sakura heal Marth up, and because he can't quite reach the boss, I move him down and have Azura dance for him.  At this point, it's as simple as finishing the boss with Marth while Kaze mops up the last couple of mages.  Unlike what chapter 1 teaches you, I'm going to wait and finish him on the enemy phase. If I have him attack now, Marth missing would get him killed on enemy phase.  Kaze moves to this chokepoint to protect Azura and Sakura.  See, this is exactly why I didn't attack. Also, Kaze chips the last mage down, but I forgot to screenshot it. Meh, you've seen Kaze fight enough mages this chapter to know how the fight went. 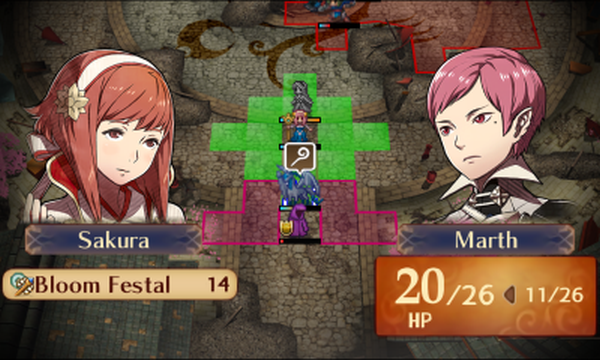 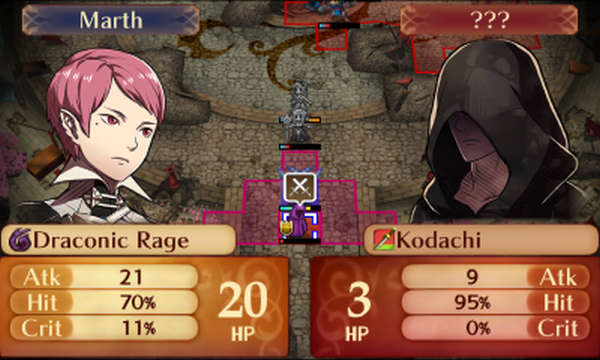 I have Sakura heal Marth up, and between the healing and Sakura's personal skill, he's now able to take two hits. This means that it's safe to attack on player phase now.  That's more like it.   Kaze finishes the map along with the last mage.   On to the next chapter, we decide to Embrace the Dark.� The route has technically split now, but I don't really consider this map a Conquest map. I think of the first 6 chapters as one long prologue to the actual game.   This chapter has an interesting objective to defeat 4 enemies, which is essentially the game letting you choose between killing Sakura and Ryoma. You can't see him in the screenshot but Xander is up north, and he'll be trying to chip Ryoma down. We have access to the entire Nohrian royal family for this chapter, but I'll once again wait until we actually recruit them to talk about them. They don't even gain experience on this chapter. One thing to note, however, is that Elise has a freeze staff that you can't take out of this map. This means that you can feel free to have her spam it or use it to reduce Ryoma's avoid if you'd like to kill him.   I put Leo on the edge of Hinoka and Takumi's range, which forces them to attack with Takumi against the weapon triangle because Hinoka doesn't have a ranged weapon. I honestly don't know why I paired him up with Elise. It wasn't the greatest idea, and I don't think it had any positive effect at any point. Everyone else just stays close. 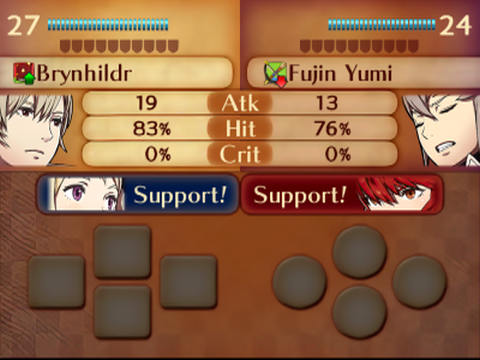 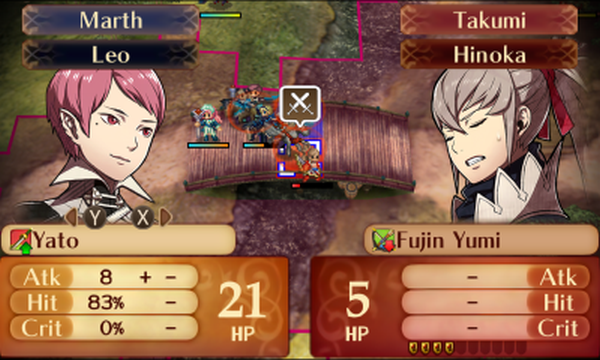 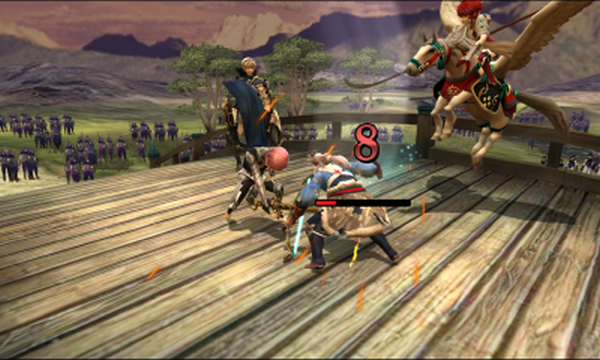  Leo fares pretty well, and Marth finishes Takumi off. He gets a very good level for doing so. As long as he keeps leveling speed, I'm happy.   I have Camilla chip Hinoka so Felicia can finish her off. She's getting +3 damage dealt from Camilla's personal skill.  She gets the first level good enough to make me screenshot the bottom screen to fit all the stats.  Leo is damaged, but he's healthy enough to bait Yukimura out.  Xander tries to chip Ryoma, but it's not working out. I'd like to try to kill Ryoma, but if this doesn't work out, I won't bother resetting over it.  Leo's hit rate is a bit lower than I'd like because of the weapon triangle disadvantage.   But he hits and softens Yukimura up while Xander misses Ryoma again.  Unfortunately, Sakura heals Yukimura, so I have Camilla bring his health back down.  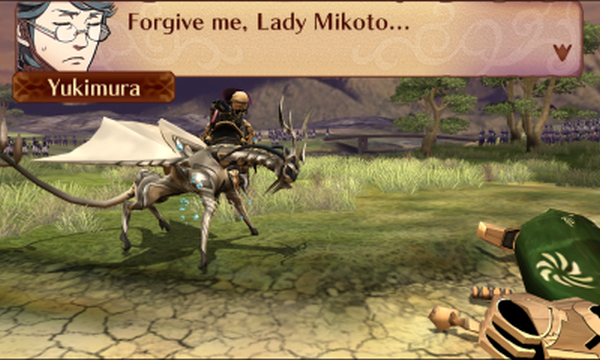 Because shurikens beat swords on the weapon triangle, the dragonstone is actually the most accurate option Marth has.   I decided that killing Ryoma is more trouble than it's worth, so we just kill Sakura and end the map. There's no particular reward for killing Ryoma, he just gives more experience than Sakura. Before I end this update, we'll move on to My Castle, where the run can properly begin!   I build a Marth statue during the building tutorial because it's funny. I like to think that he demanded it be absolutely shredded.  To make this run work properly, I need heart seals, and lots of them. The item shop won't have enough of them for quite a while, so I just hacked a bunch of them in. I'm going to use a random number generator to decide what class Felicia is gonna be. I'm counting the maid as 1, and her other class options from top to bottom as 2, 3, and 4.  An interesting thing about Felicia and Jakob is that the Maid and Butler classes are technically promoted, but their level cap is set to 40 and they grow at a normal rate for an unpromoted unit. This means that they have access to promoted classes and their skills right off the bat, without tanking their experience gain.  A 2 means she becomes a Hero. This is not ideal, and certainly not as good as Great Knight Jakob (a really strong early game option for him when playing with Female Corrin), but I should be able to make it work. When she hits C rank weapons I can get her a levin sword or a bolt axe that she should be able to do something with.  She's a touch frail, but she won't be getting one shot for a while, and she actually has more strength than Marth at the moment. I just wouldn't expect that to grow very much, because she only has a 25% strength growth even after changing to Hero. We'll see how she turns out in the long run, but in the short term, she's got very solid stats for the early game. I think she'll be extremely useful in the early game, but it wouldn't surprise me if she starts to fall off later on.  I also change Marth to a Wyvern Rider, because it was decided his final class would be Malig Knight. His stats are fairly average at the moment, and he's gonna need a little help to kill much of anything with a bronze axe. He should grow in time to be fast, strong, and physically tanky, so I'm expecting him to start snowballing pretty quickly.    I buy both a bronze sword and an axe for Felicia as well as another axe for Marth. Other than that, I got Marth and Felicia's C support, but that's all the My Castle stuff for now. Next time we'll take on Chapter 7, one of my favorite early game Fire Emblem maps.
|
|
#
?
Jun 14, 2023 02:39
|
|
|
LP is already paying off. Whenever I played FE games I'd always be curious about what the other options would end up like, and so this is really interesting to watch.
|
|
#
?
Jun 14, 2023 11:43
|
|
|
Nice more FE LPs! This looks like a fun run. And we have another pink haired dragon riding Corrin lol
|
|
#
?
Jun 14, 2023 16:43
|
|

|
Hero Felicia, huh? Will be interesting to see what use you can get out of her.
|
|
#
?
Jun 14, 2023 19:47
|
|
|
I foresee that you're going to need more healing items this run.
|
|
#
?
Jun 14, 2023 20:10
|
|

|
Update 3 - The Real Chapter 1 Before we go into chapter 7, I'll reaffirm that the random weapons and items your units can give you in My Castle are forbidden for this run (unfortunately, this means I won't be able to shame bosses with the raider weapons). If I ever accidentally trigger one of these like this, I'll throw the item(s) out.   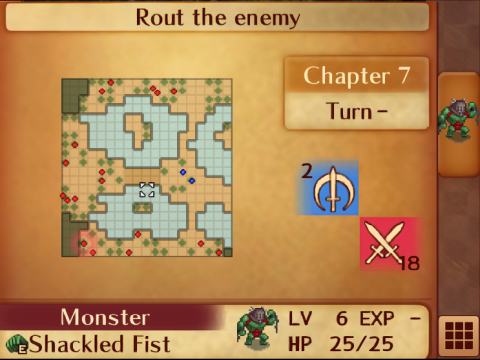 I did everything I wanted to in My Castle last time, so we'll move right into chapter 7. Like most maps from here on, it won't fit in a single screenshot, so expect to see me use multiple to show the map off in the future. I consider this to be the first "real" Conquest map, and I think it's a great introduction to Conquest's skill-heavy enemies. This map is a horde of Faceless from all directions, but they have a variety of dangerous skills to keep things interesting.  For starters, every single one of them has Grisly Wound, a skill that takes 20% of your foe's health after combat. This still works if their attack misses, or even if you're attacking from 2 range and they can't counter at all. Seriously, throwing a hand axe at one of these guys costs 20% of your unit's health. That being said, it only works if the Faceless lives through the combat, so if you one round them, it's not a problem.   These two in the back also have Poison Strike, which takes 20% of your health after combat if they initiate combat. If you let these guys survive after initiating on you, your unit is going to lose 40% of their health.   The most dangerous thing on this map, though, is these paired up Faceless with Seal Speed. This and Seal Defense are some of the most dangerous yet common skills in Conquest, and you'll pretty much always want to be on the lookout for them. You don't want your units getting unexpectedly doubled! There's two sets of these paired guys, one in the northeast, and one in the west.  Finally, we have the boss in the southwest, but he's only really a problem if you don't clear most of the others out before he gets to you. He's got Wary Fighter, which prevents both him and you from doubling anyone, which pretty much guarantees that you'll spend 2-3 rounds fighting him. He also has Savage Blow, which is an AOE Poison Strike that affects everyone within 2 spaces of his target. Ideally, neither of these will come into play because you'll finish the map shortly after he gets close to you.  I pair Felicia with Marth, who gets +4 speed on top of the extra damage and defense from Devoted Partner.  Then I have him move to this tile, which puts him in range of one of these Faceless.  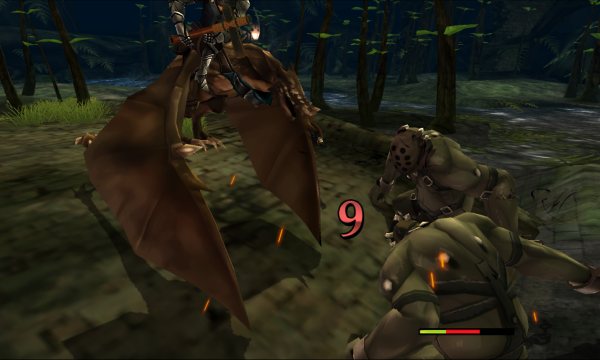 Felicia gives him enough speed to double, and her personal skill boosts his damage enough that he'll be able to finish him off on player phase without taking a counterattack.  Grisly Wound activates, which chips his health down further. You really need to be careful when placing anyone in range of 2 or more enemies on this map.   I have Marth kill from the same tile.   And he gains a solid level, as well as the Strength +2 skill out of it. This is the first Wyvern Rider skill, and it's not exactly a gamebreaker, but it's definitely appreciated in the early game.  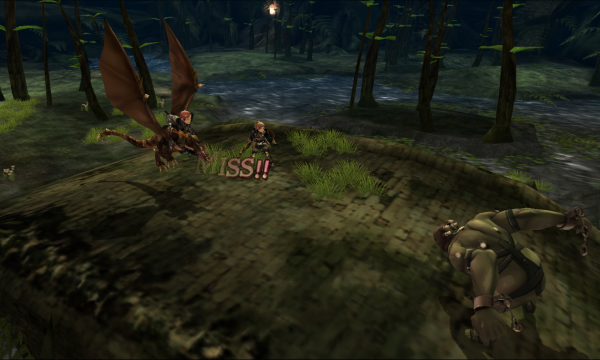 The other Faceless attacks, and Marth gets a slightly convenient dodge. The extra strength he just got brings his damage against these guys up to 12, which is frustratingly close to one rounding. If only there were a way to boost his damage by 1 measly point ") . . Oh, would you look at that. Silas and Elise joined us from the east. The Faceless I've marked here also started moving on enemy phase.   Silas is a Cavalier, and he's pretty good right off the bat. He's able to 2 shot most of the Faceless, and we'll be putting him to work immediately. Elise is a healer, which is nice to have here considering the abundance of Grisly Wound. Her personal skill, Lily's Poise, gives adjacent allies +1 damage dealt and -3 damage taken, and it's also gonna come in handy right away. Someone suggested that I save the proper unit discussions for after we know what class they'll be, and I think that makes a lot of sense, so I'll be saving the detailed discussions for the end of the update from now on. This also keeps me from bogging the flow of the LP down, because early Conquest tends to dump several units on you at once.   I have Marth move west before finishing this guy so he can bait the next Faceless out using his guard gauge.  I don't want Elise in range of anything, so I have Silas carry her over here, with him staying in range of the Faceless. 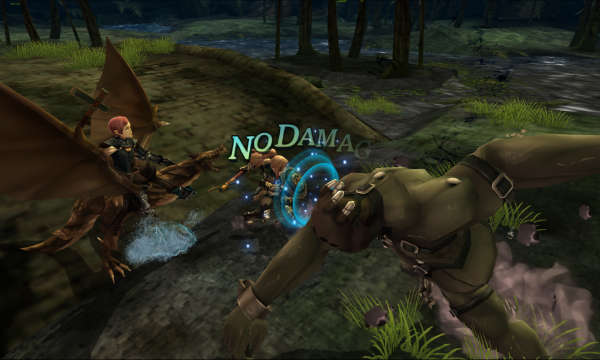  This guy attacked from a woods tile that gives him extra defense and avoid, but it won't save him.   Silas chips his guy down, taking only 3 damage because of Lily's Poise. This would be pretty nice, but Grisly Wound more than makes up for it.  Arthur and Effie join us from the east, which is good, because the highlighted Faceless all started moving. Most notable is the Seal Speed pairs. Most maps in Conquest have some sort of incentive to not drag your feet, and this is it.  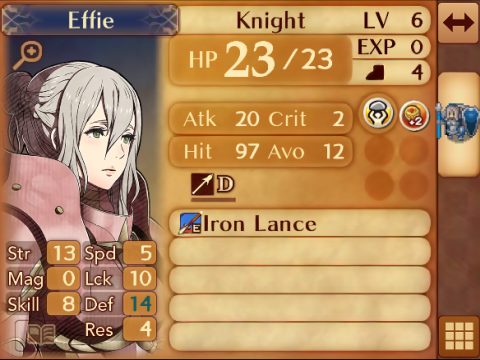 Arthur is mostly useful on this map as a backpack for either Effie or Silas. He can contribute himself, but his hit rates are kind of shaky. Effie is pretty good here, and I'm gonna have her start killing things right away.   Marth is officially tired, so I have Felicia finish this guy using the bronze sword for the extra accuracy it has over the axe. She'll get attacked by the Seal Speed guys next turn, but she's got enough speed to avoid being doubled even after that. 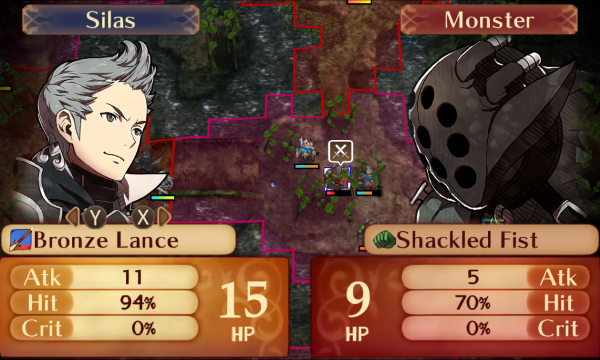  Meanwhile, Silas finishes this guy off from the right side so he can help Arthur out with the southern Faceless.    He takes advantage of the support to chip this guy for Effie.   And she lands her 84, clearing the only threat on this side for the turn.  Elise heals Silas because he needs it more than Arthur.    Felicia gets a nice dodge and builds a guard gauge.  These 2 in the north start moving just to make sure we have a steady flow of Faceless to deal with.  Now that the Seal Speed guys are in play, the map is about to get interesting. I have Felicia retreat because she'll need support to kill these guys. 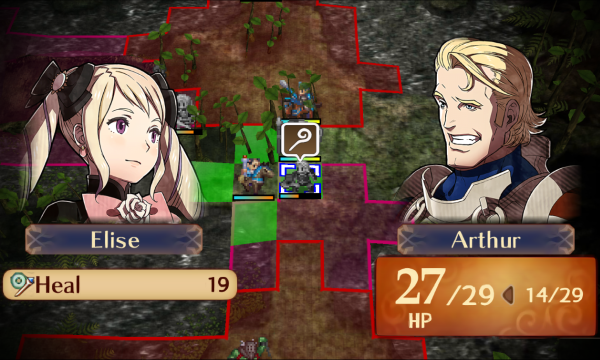 Elise heals Arthur so he can be bait this turn.  I positioned Arthur, Effie, and Silas carefully so that both Arthur and Silas fight an enemy with Effie support on enemy phase.   The paired Faceless switched the healthy one to the front, so Felicia chips that one down, too.   Silas chips his guy down with help from Effie.   And Arthur does the same.  The western Poison Strike guys start moving, but if you can handle the Seal Speed guys, they shouldn't be a problem. We're kinda still working on that issue, though. I need to carefully clean up most of the weakened Faceless without exposing anyone to too many Faceless.  I pair Arthur and Silas, because Arthur gives him just enough speed to avoid getting doubled after being speed sealed.   Felicia moves to finish this guy, because she can still take a hit from the northern pair.  No, Felicia, it doesn't. No, Felicia, it doesn't. She learns Good Fortune, the first Mercenary skill. It gives you a chance equal to your luck stat to restore 20% of your HP at the start of a turn. It's so unreliable it likely won't be useful very often, if ever.   Silas moves to kill one of the western Seal Speed bros. I had him use the bronze lance because I want him hitting D rank lances so he can use javelins. 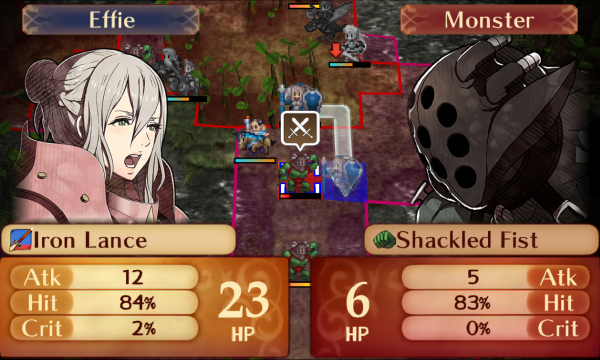  Finally, Effie takes care of this guy.  I've positioned everyone in such a way that, because of the woods tiles that cost more to move through, no one can get attacked by more than one enemy.  There's even a safe tile for Elise to heal Silas from!    During the enemy phase, Silas gets rid of the remaining Seal Speed guy and gets a very good first level for his troubles.    Felicia starts working on the other Seal Speed pair.   While Effie chips this southern guy.  I forgot to screenshot it, but on player phase, I have Silas retreat and kill one of Felicia's Seal Speed guys. He's in range of a Poison Strike guy, but that's fine.   Both Marth and Effie are just shy of killing these guys, but I am a master tactician, so it's time for a 200 IQ strategy.  By placing Elise here... 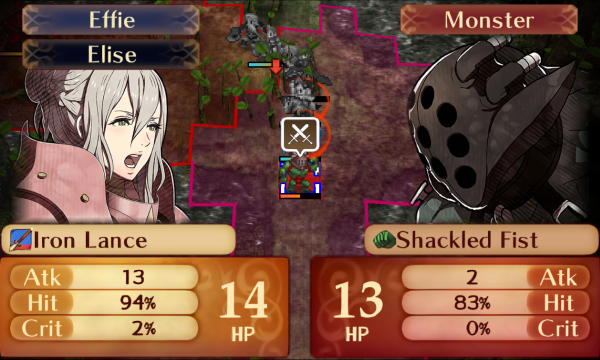  We apply Lily's Poise to both of them! I can't stress enough how useful support skills like this can be in this game. I wish I could say I planned this out in advance, but I didn't.  Both of them succeed, Marth using his guard gauge to survive.  Effie gets a very Effie level. Now that we've taken care of the Seal Speed guys, we've pretty much won the map.   Silas chips this guy down on enemy phase, but he loses 40% of his health because this is one of the Poison Strike guys. 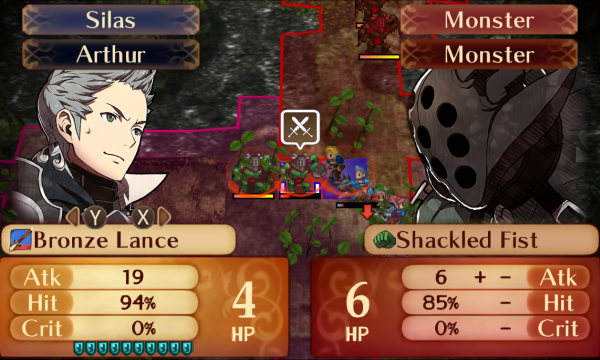  Silas finishes his guy off, and I keep him where he is so he'll start working on the northern Faceless using his guard gauge. 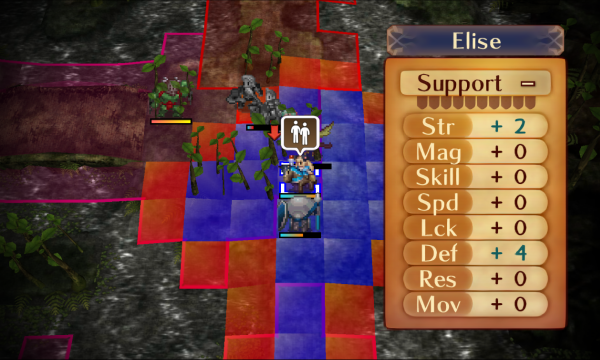 I'll need Effie to kill the last Poison Strike guy, but she can't reach, so I pair her with Elise.   Her hit rate is a little shaky, but it's not as bad as it looks. I won't get into the details, but the way the game generates random numbers means that hit rates above 50% are higher than they look. An 80% hit rate is actually a 90.14% hit chance. This applies to both your army and enemies, and it really helps characters like Arthur who struggle to get more than 80 displayed hit chance.   Felicia finishes him off, once again using the bronze sword for the extra hit.    Silas starts chipping on enemy phase, and he gets a decent level.    On player phase, Felicia finishes the guy Silas just chipped, gaining a good level out of it. She also learns Strong Riposte, the second Mercenary skill, which makes her deal +3 damage when counterattacking. It's pretty good. 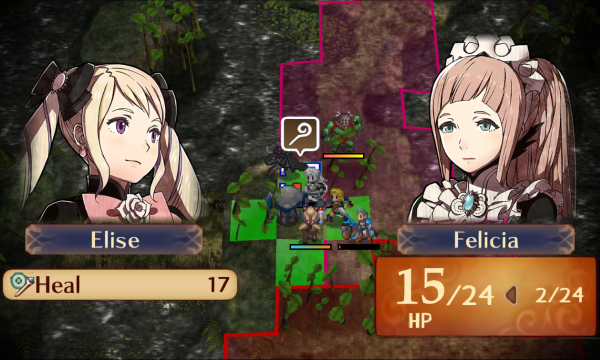 Elise heals her up.   Because I can't kill this guy with only one unit, I decide to have Arthur throw a hand axe at him so someone can kill on enemy phase.  Unfortunately, Arthur had other ideas.   I just have Felicia finish for him.  Silas and Arthur built up a guard gauge, so I leave Silas in range of the boss. 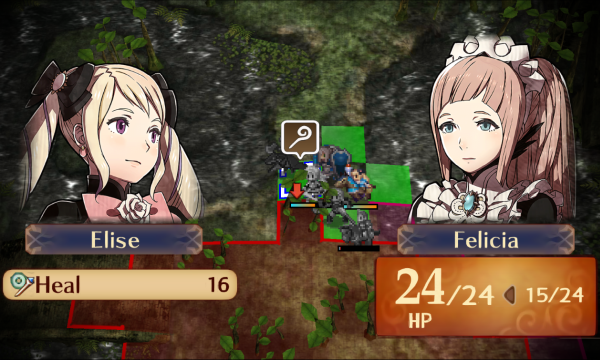 Elise heals Felicia, since Silas is about to get hit with Grisly Wound and Savage Blow and I'd rather the HP not go to waste.    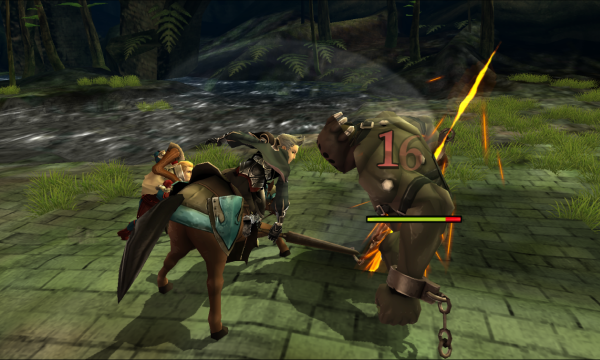 He gets a solid hit in. I should probably mention that his personal skill, Vow of Friendship, is giving him +3 damage dealt and -3 damage taken because Marth is below half health.    I have Silas finish what he started, which leaves just one Faceless on the map. Like I said, the boss isn't too dangerous on his own.  I move Elise into position to support Marth.    And he takes us home.  Strength and speed are exactly the stats I want him to get . And that's the map! Like I said earlier, I like this map a lot as the first proper map of the route. The turn-based aggro and sheer number of enemies incentivizes aggressive play, while the skills, particularly Seal Speed, teach the player that Conquest is a game where it's difficult to use Awakening-style juggernaut strategies where you place one strong pair out in front and watch them clear the horde. Overall, I think it's a really good, yet not-too-difficult introduction to Conquest's map design.  Back at My Castle, the first thing I do is grab Felicia and Marth's B support.  I also build the staff store.  And now it's time to find out what our new units' classes will be! Arthur can reclass to a Cavalier, but since he's not promoted, I can't see the order from top to bottom of his promoted reclassing options. I decided that in cases like this, a unit's base class promotion options would be assigned 1 and 2, and their secondary class promotions would be assigned 3 and 4. Within these categories, I order them alphabetically. In Arthur's case, from top to bottom, his final class options will be: Berserker (1), Hero (2), Great Knight (3), and Paladin (4). In hind sight, I maybe should done something a little less convoluted, but this is what we're doing for now. 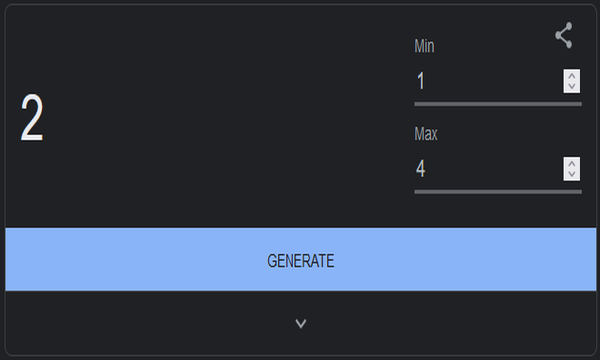 I roll a 2, making Arthur a Hero. This is basically his 'intended' class, and since he promotes to Hero from Fighter, he gets to stay unchanged for now. I'll talk about him in detail at the end of the update. 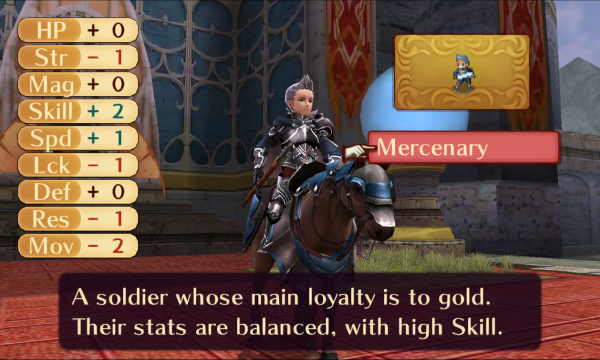 Silas can reclass to Mercenary, so his 4 promoted options are Great Knight (1), Paladin (2), Bow Knight (3), and Hero (4). 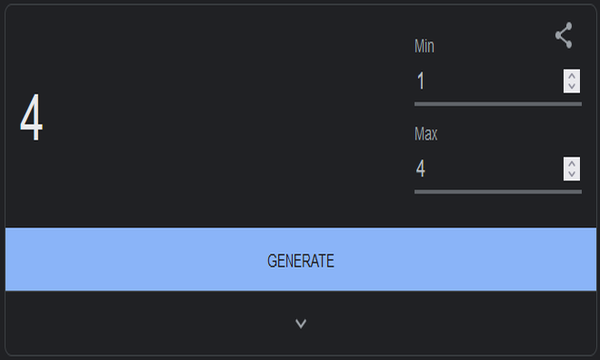 I roll a 4, which makes Silas... another Hero. Great. I guess I shouldn't have bothered trying to raise his lance rank.   I change Silas to a Mercenary as the RNG Goddess commands. Goodbye, movement  . His stats are still fine though, and I certainly won't complain about the extra point of speed. . His stats are still fine though, and I certainly won't complain about the extra point of speed.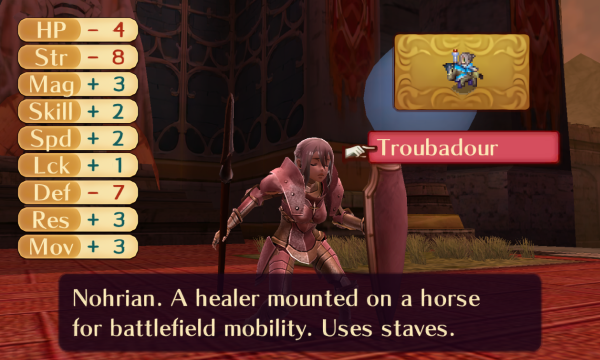 Effie can reclass into a Troubadour, which promotes into the Strategist and the Maid. Her promoted options are General (1), Great Knight (2), Maid (3), and Strategist (4).  I roll a 1, making her a General. Just like with Arthur, this is also her "intended" class. I was really fine with anything but Strategist, which would completely waste Effie's absurd strength growth.  Elise can reclass into a Wyvern Rider, so her promotion options are Maid (1), Strategist (2), Malig Knight (3), and Wyvern Lord (4).  For our last class change of the update, I roll a 4, which makes Elise a Wyvern Lord. This actually isn't as bad as you'd initially expect. My biggest problem with it is that this means I have no healers for the moment, which means the vulnerary budget just expanded significantly.   Her strength is a touch low, and she's a little bit frail, but Lily's Poise on a flier is nice to have, and later on she'll be pretty decent with a bolt axe. New unit discussions  Silas Class: Hero Growth Rates HP - 40 Str - 45 Mag - 5 Skl - 50 Spd - 40 Lck - 40 Def - 40 Res - 25 Silas is an all-around nice guy, and he's got nice all-around growths aside from his magic. His personal skill, Vow of Friendship, is really good. It gives him +3 damage dealt and -3 damage taken when Marth is at 50% HP or lower. In a typical run, I usually make him a Paladin or Great Knight, but Hero should be usable. His growths are all so balanced that I've had runs where he turns out much better than he should be, as well as runs where he falls off much earlier than he should. In the early game, he's really good because of his mobility, his solid bulk, and he's got enough speed to double with support bonuses and tonics. The first Cavalier skill, Elbow Room, gives him +3 damage when he's on tile without terrain effects, which helps him even if he doesn't double. He really shines when boosted by Vow of Friendship, which further helps him deal big damage with one attack, or outright deleting his enemies if he's doubling. In the late game, I usually find it hard to justify deploying him because unless he turned out particularly great, he's so outperformed by Xander that it's not even funny (mostly because of Siegfried). Hero gives him a 5% higher speed growth than Paladin, as well as an extra base point of speed. More importantly, he'll get Strong Riposte from Mercenary, and Sol from Hero. Strong Riposte is another damage boosting skill that stacks with Vow of Friendship and Elbow Room, which will be much appreciated, and Sol has a skill% chance of healing 50% of damage dealt, which should somewhat help his bulk, even if it's pretty unreliable. Arthur Class: Hero Growth Rates HP - 50 Str - 45 Mag - 0 Skl - 55 Spd - 35 Lck - 5 Def - 45 Res - 20 As a character, I like Arthur a lot. As a unit, he's okay, which is unfortunately pretty bad by Conquest standards. He struggles somewhat with his hit rates, but he's pretty bulky and usually fast enough to avoid getting doubled, though he tends to struggle with actually doubling in my experience. His personal skill, Misfortunate, is hilarious but not particularly good outside of crit stacking builds. It reduces the critical avoid of enemies within 2 spaces by 15, but it also reduces his by 5. This, combined with his naturally awful luck, means that he's going to face a lot of single-digit crit rates, which is annoying but a problem that I think people overemphasize when talking about Arthur. He also comes with HP +5 from the Fighter class, which adds to his already high HP. Arthur isn't bad, and he's definitely a fun unit to use, but I don't usually use him long-term. The simplest (and arguably best) way to use him is primarily as a stat backpack in the early game. As we've seen, he gives a lot of strength and a fair amount of speed, and when needed, he can swap to the front for a turn or two because he's bulky enough to tank a hit or two. You can promote him to Berserker and he'll give even more strength and speed as a backpack. That being said, I personally think the most fun way to use him is as a crit-stacking Berserker, because he'll hit really hard and between the Berserker's innate 20% crit, a killer axe, and his personal skill, he ends up seing some pretty crazy critical rates. You could use him as a Paladin or Great Knight, but then he's basically a slightly bulkier Silas with a much worse personal skill. As a Hero, his stat spread is so similar to Silas that I expect him to be basically the same unit but with a worse personal skill and more HP. I'll probably use him long enough for him to marry someone before benching him, but we'll see how he performs before making any decisions. Elise Class: Wyvern Lord Growth Rates HP - 30 Str - 5 Mag - 65 Skl - 25 Spd - 55 Lck - 70 Def - 15 Res - 40 Elise is one of my favorite units in Conquest because of her sky-high magic, solid speed, and excellent personal skill. We've already made extensive use of Lily's Poise, which provides -3 damage taken and +1 damage dealt to adjacent allies, but I'll reiterate here that it's very strong. This, combined with being a 7 move staff user makes her a very potent support unit even without weapons. She also has Resistance +2 from the Troubadour class, which is really never going to matter. In a standard run, I like using her as a Strategist. She picks up Demoiselle from Troubadour before promotion, and after promotion she gets access to tomes, letting her make use of her great magic and high speed. Her hit rates are a little shaky because of her low skill, but they're not too bad if you stick to more accurate tomes, like fire. At level 15, she picks up Inspiration, which gives -2 damage taken and +2 damage dealt to allies within 2 spaces. This stacks with Lily's Poise and Demoiselle, letting her provide at least -5 damage taken and +3 damage dealt to adjacent allies, increased further to -7 damage taken if they're male. The other viable option is Malig Knight, which lets her use her magic and speed with flier movement, and it gives her solid bulk. If you promote her at level 10, she's essentially a magic using mini Camilla. Alternatively, you could make her a Maid so she can be a flame shuriken glass cannon, but why do that when Strategist does the same thing with more move and better hit rates? Her last class choice, and the one we rolled, is Wyvern Lord. It's basically Malig Knight Elise but without tome access, which drags her combat down until she hits C rank axes so she can use the bolt axe. The bolt axe's 65 hit means that even after we get it, she'll have to choose between doing less physical damage accurately or doing a lot of magical damage with pretty shaky hit rates. Early on, her damage output is gonna be on the low side, though between Strength +2 and ally support, she won't be too difficult to train. In the long run, I think she'll be pretty good, but depending on what I end up getting later on I may bench her. Effie Class: General Growth Rates HP - 35 Str - 60 Mag - 0 Skl - 35 Spd - 50 Lck - 50 Def - 35 Res - 30 Effie is tied with Keaton for the highest strength growth in Conquest (not counting child characters) at 60%, which means that after class growths are added, it's almost a given that she'll gain strength when leveling up. This is nice, because her personal skill, Puissance (which I think is French for "power"), gives her +3 damage dealt when her strength is at least 5 points higher than her opponent's. She also has a high speed growth at 50%, which means that with support, she can actually double if you change her to a faster class. Unfortunately, her default class options are all slow except for the Maid and Strategist, and the Strategist doesn't let her use her strength at all. I've never tried it, but Maid has a 10% strength and 15% speed growth, and much higher base speed, which should theoretically turn her into a fast yet strong dagger unit. There's also Strategist, but because of Effie's literally nonexistant magic growth, I think it's safe to say it's not ideal. Otherwise, you can choose between Great Knight or General. Great Knight is slightly faster, has more movement, gives +1 move to pair up partners, and has Luna. General has better defense and strength, less movement, and learns Wary Fighter. I've used Effie in both, and of the two, I prefer General. The lower movement doesn't really matter in a game where you have so many mobility options from pairing up, and the extra strength helps her reach more oneshotting thresholds, especially because it almost guarantees that Puissance is always active. The total lack of speed also becomes irrelevant once she learns Wary Fighter at level 5, and she ends up being a unit that can reliably facetank physical attacks who doesn't need to double because the one hit she gets will really hurt. Great Knight is totally serviceable, though, if that's your preference. Because she rolled General, I'll definitely be using her for quite a while. Next time, we
|
|
#
?
Jun 21, 2023 02:23
|
|
|
I think where Arthur falls off (in my opinion) is his Spd. His gimmick is cute but would be ultimately trivial if he could double consistently (and even get more crits out of it). The shaky accuracy of axes makes it even worse, as sticking to Bronze means he can't crit, while with Iron he's basically rolling the dice until his decent Skl growth patches it up. Once he gets to Hero and can use Swords he evens out a bit, but it's getting there that's usually the issue half the time, and usually by that point you have more consistent options. Comparing him to an earlier unit, Vaike in Awakening also had 50/50 growths in Str and Spd, and I've had far too many Vaikes just fail the coinflip on Spd just a few too many times and relegated to benchwarmer territory.
|
|
#
?
Jun 21, 2023 02:56
|
|

|
I think every single LP of Conquest now has had wyvern Elise.
|
|
#
?
Jun 21, 2023 02:57
|
|
|
At least you dodged the bullet of Troubadour Effie!
|
|
#
?
Jun 21, 2023 04:38
|
|
|
I love the character overviews where you talk about what could have been v. what you actually got. Seems like of the 4 new characters, one rolled well, two kinda average, and one pretty poorly... I like those odds!
|
|
#
?
Jun 21, 2023 22:43
|
|
|
Fates has my favorite reclass system in the series, and this si a really fun idea for an LP! I think Fates also has the best Hero design in the franchise as well, so having your army 50% of that class isn't the worst. Felicia having Hero as a reclass option is so funny to me, and I'm glad to see it rolled. I wish magic weapons could proc skills though, I'd love to see Sol!Felicia legitimately be a thing with a Bolt Axe or Levin Sword.
|
|
#
?
Jun 22, 2023 00:04
|
|

|
Update 4 - No Healer, No Problem Before we go to the actual map, I'm going to handle some things in My Castle. 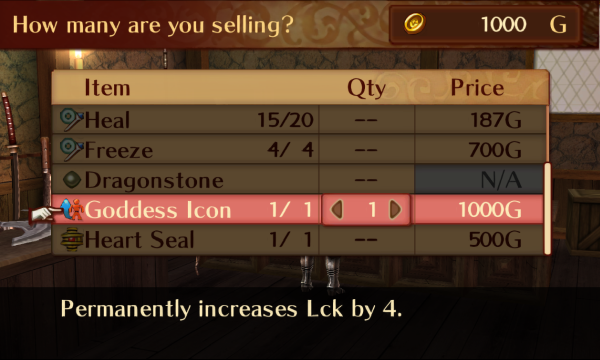  First, I sell the Goddess Icon so I can buy a javelin for Effie. Non-magic, non-dagger 1-2 range weapons got nerfed pretty hard in this game, lowering your speed by 5 and preventing you from doubling at all when equipped, but they're still very useful. Considering my lack of healers, I'll probably need some vulneraries at some point, but I shouldn't need more than what we've got for this next map. I also did some trading to make sure everyone has a weapon they can use.  We could do Paralogue 1 right now, but I'd rather recruit the units from chapter 8 because I may want to use the paralogue to train them.  Chapter 8 isn't too difficult, but it's the first chapter to have a reward you have to play quickly to get. 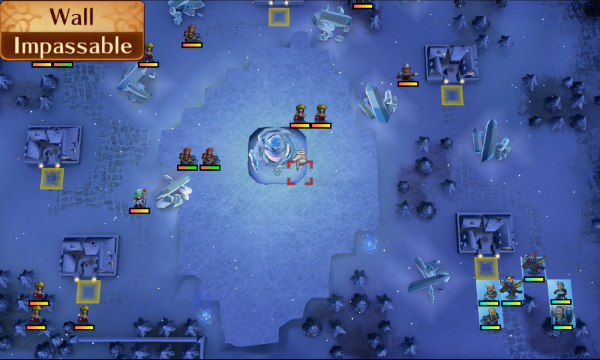   The objective of this map is to defeat the boss, and its main gimmick is the 5 villages that can be visited by either your army or the enemy. You get gold at the end of the chapter for visiting them.   The highlighted Soldiers have only 3 move, and if they manage to visit any of the villages, they'll spawn a boatload of enemies. Flora is also there, and while she doesn't move, she does have a freeze staff. This is mostly just a nuisance, but it could prevent you from reaching the western villages in time if you're not careful.  There's also these dragon veins, which turn this lake to water for a turn. I won't be using them, but it's a nice option to have if you're being overwhelmed by the high volume of enemies this map throws at you. You can also use it to delay the northern Soldier on his journey to the northern village if you decide to go for that one for whatever reason.   This map is pretty light on the skills compared to Chapter 7. The enemies here don't have any major problem skills, and some of them don't even have skills. The HP +5 Fighters can be pretty difficult to one round. Some of the Fighters have Quick Draw, which makes them deal +4 damage when they initiate combat, but since they still shouldn't be one shotting or doubling anyone, it doesn't do much. Without a healer, there's not much functional difference between a unit with 8 HP and the same unit with 4 HP. The mages have either Heartseeker, which reduces adjacent foes' avoid by 10, or Malefic Aura, which makes enemies within 2 spaces take +2 damage from magical attacks. This map's challenge mostly comes from the number of enemies and how aggressively you have to play to get to the villages in time. 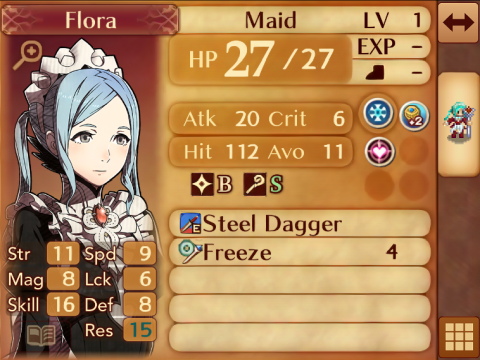 Flora is just here to freeze your units, and she's not too threatening in combat. She has Demoiselle and Resistance +2, but neither of these will come into play. Neither will her personal skill, Icy Blood, which deals whatever damage she takes on the foe when she takes a hit from 2 range or greater at less than full HP. It also inflicts skill and speed -3. It's so specific it kind of sounds like a Yugioh card effect, but becase we're only going to attack her at 1 range, we don't have to worry about it at all. 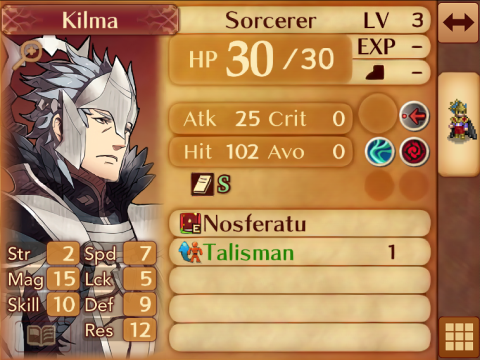 Finally, there's the boss, Kilma. I feel like there's a 'Kilma units' joke somewhere in there. Anyway, he's pretty dangerous if you're not careful, because he's got the very powerful Nosferatu/Vantage combo. Nosferatu restores his health, and Vantage lets him attack first even when being attacked when he's below 50% HP. Just be aware of this, because I've had runs where I forgot he had Vantage and he healed up enough from his attack to avoid dying when he was supposed to. He's also got Malefic Aura and Heartseeker, but these don't really do much for him.  At the end of the chapter, you get 1,000 gold for visiting only one village, 5,000 for visiting only two, and 10,000 for visiting at least three.  This is how I positioned my units during preparations. Essentially, my strategy for this map is to quickly push to the west, getting the starting village and both of the western villages before the enemy does. Having two fliers will help with this quite a bit.  Effie visits this first village, because everyone else has important things to do very quickly.   I separate everyone else while moving out to squeeze out extra movement.  Silas moves here, just on the edge of Effie's movement so he can pick her up next turn.  The only significant thing that happens on enemy phase is this northern Soldier visiting the village and spawning a huge group of reinforcements. Most of them won't move unless you enter their range, so it's not as bad as it looks. The 3 mages in the southeast also start advancing, but we'll take care of them shortly. On player phase, we get some new units!  Odin joins us! I like Odin a lot as a character, and as a unit, he's one of my favorites. For this reason, I'm using him regardless of what class he gets (please let it be Sorcerer).  Oh, we also got Niles. I'll save most of it for the end of the update, but both Odin and Niles are great units. On this map, Niles can one round mages without support, and with attack stance support, he can one round any Fighter that doesn't have HP +5. Odin is the most underrated unit in the game, and I think this is because he makes a pretty poor first impression on players by failing to one round anything on this map, even with support. In fact, he fails to two round anything without support. After this map, you can hand him a Nosferatu and place him in range of pretty much whatever you want and he'll probably survive. If you're willing to sell the Goddess Icon and spend literally all of your starting money on it, you can pass him a Nosferatu during this map if you really wanted to. I'd argue that he's, at worst, slightly worse than Camilla and Xander.   Effie pairs up with Silas so he can drop her in range of one of these central mages that she'll kill with a javelin on enemy phase.   Niles pairs up with Odin, and because the Outlaw class gives +1 move, it gives him just enough to reach this mage so he can switch to Niles for the kill. He's in range of one of the Fighters, but he'll survive, and I want to bait them out anyways.    Felicia pairs up with Marth, who can clear out the frontmost mage. I almost wish he had taken another point of damage because it would activate Vow of Friendship.  Arthur pairs up with Elise, who just barely has enough move to reach the last mage. If I hadn't had Arthur drop her to the left on turn 1, this wouldn't have worked.  She dodges, though it's absolutely unnecessary.  Uh-oh    And that's my main issue with Wyvern Elise. She's not bad, and having more fliers this early in the game opens up a lot of options, but her hit rates are shaky. My strategy on this map has very little room for misses.    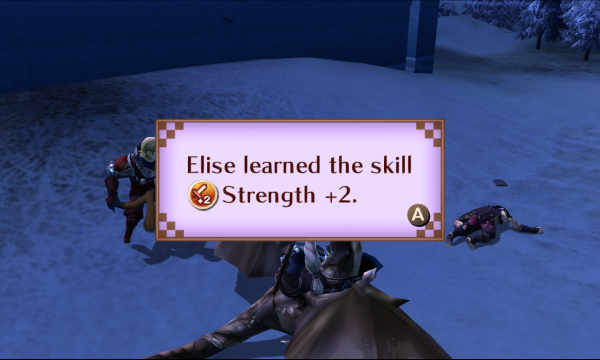 That's more like it. I replayed the map using the exact same moves, and I'm pretty sure we're in the exact same situation, so I'll leave the death in. Elise gets a solid level, and learns Strength +2. This and raising her axe rank are pretty likely the only way she's going to get stronger until we get a bolt axe. 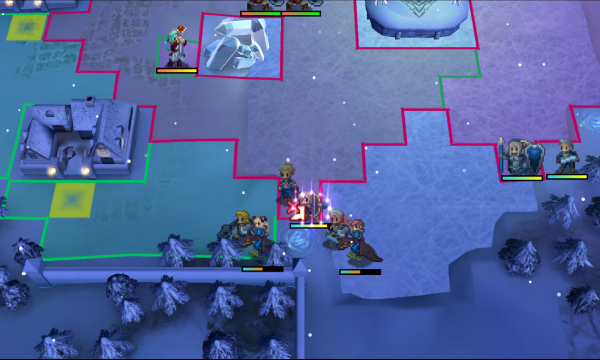 Flora freezes Niles on enemy phase, which at first seems odd because Elise has less resistance and she would have a higher hit rate against her. I'm not entirely sure, but I think the AI wants to reduce his avoid because he's in range of the Fighter, even though preventing Elise from going for the villages would be much more harmful. Regardless of why, I'll take it.    Effie takes a pretty significant hit, especially because I can't heal it up, but she kills with Silas' help before the mage can get his second hit in.  Niles also gets hit pretty hard, but that's all I'll need him to take, so it's fine. I should have taken a screenshot of it, but both central Fighters and the central Dark Mages moved out, and we'll have to deal with them pretty quickly so we don't get overwhelmed by the eastern group from the village. 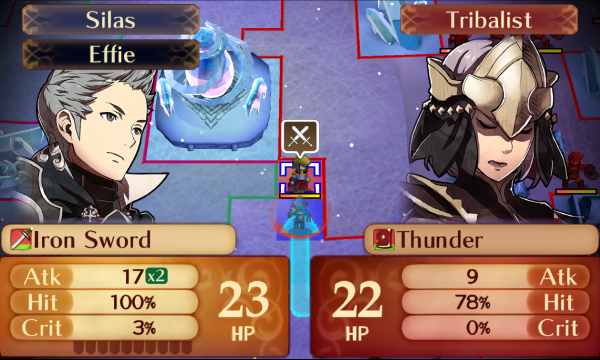  On player phase, I pair Effie and Silas, and because Silas can take 2 hits from mages, I have him kill this guy. He's in range of one of the eastern mages, but he's just outside of the only aggressive eastern Fighter, so he'll live.   Next, I switch Felicia to the front so she can kill this Fighter. He's got HP +5, so Marth can't quite one round, and she needed the axe for the extra damage.   Because Niles can't move, I switch Odin to the front and have him attack this Fighter because his attack will finish a guard gauge. Seeing his performance on this map, I honestly can't blame people for thinking Odin is a bad unit. He makes an absolutely awful first impression; even with the extra speed Niles gives him, he can't double this Fighter, and it would take him 4 rounds to kill.  I move Elise over here and separate Arthur. This puts Arthur in range of the southern village, and Elise in range of the northern one, without either of them being exposed to Flora's freeze range.   Flora freezes Odin on enemy phase, and now it's his turn to get hit.  Silas takes a hit from the eastern mage, and by this point about half of my characters are low on health. Because I don't have healers, I'm pretty much making them take turns being the meatshield.  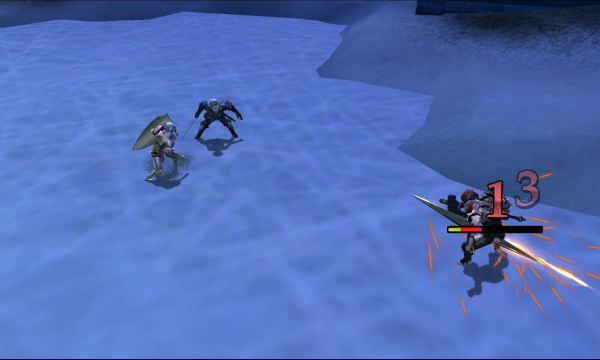 Health doesn't matter when you have guard gauges, though. Switching to Effie, she can finish building one by killing Odin's fighter for him while staying in range of the eastern mage.   It's not strictly necessary to kill Flora, but I want to. I have Felicia start attacking her, and because she'll prioritize fighting over freezing when given the choice, Felicia can secure the kill on enemy phase.   Arthur visits his village. Come on, old guy. Don't be rude. Does Arthur look like a guy who would kill innocents?   Elise, on the other hand, looks like she just might. With this, we've got 10,000 gold in the bag! It may not last as long as you'd think. 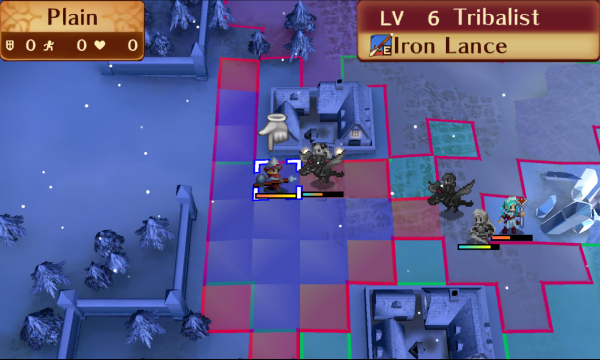 As long as there's a village left unvisited, this guy won't attack, so he's fine where he is for now.  I separate Odin to the north because it's about all Niles can do to move right now.    Enemy phase rolls around, and Effie chips this mage down. 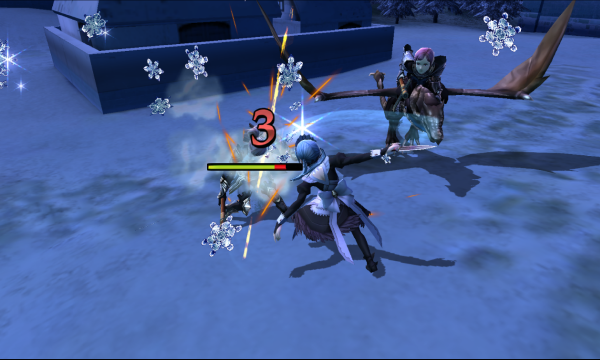    Flora attacks Felicia, giving her the kill. She gave Felicia a solid 60-ish experience, and she got a great level out of it. She also learned Sol, which gives her a skill% chance to heal for 50% of the damage that she deals. I personally think this skill is overrated, but it's nice to have. Notably, it doesn't work with levin swords or bolt axes, which kind of hampers its usefulness.   Odin finishes Effie's mage from a position where he can support Niles against the Fighter.  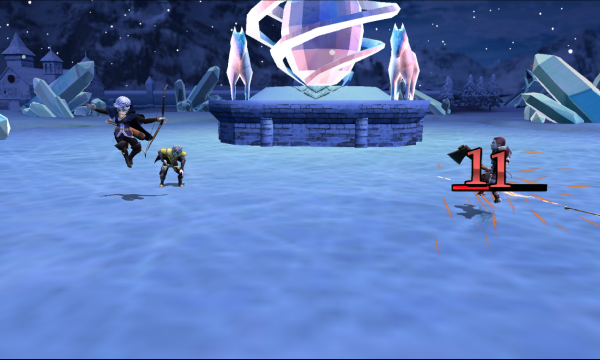 Niles accepts the help and one rounds the Fighter. In contrast to Odin, Niles makes a very good first impression on the player.  Effie moves north and separates.   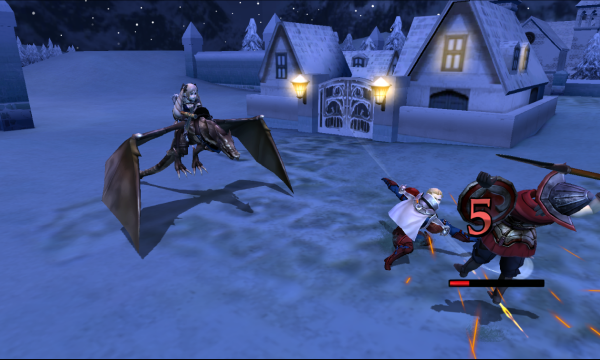 And Arthur chips so Elise can dip. This guy was going to attack either next turn or the one after that, depending on if he moved before or after the Soldier who's about to visit the last village.  I switch Marth to the front and have him bait out the mage near Kilma.  On enemy phase, the mage brings him down to 1 HP, which is fine because he's going to spend the rest of the map supporting Felicia against Kilma. 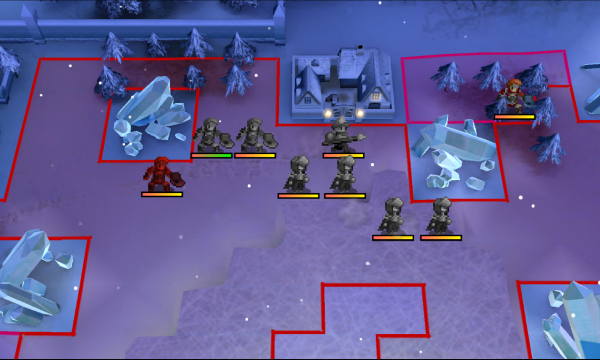 The Soldier also visits the last village, dropping a pile of units that are too far away to be relevant.   The mage plopped himself right in the way, so I have Elise chip him down with Marth support so that Arthur can finish him off with her support.   The hit rates against this guy were a little concerning. If Arthur had missed, It would slow the map down to the point where I'd have to worry about the reinforcements.  Felicia waits in front of Kilma, who is, incidentally, her dad. Awkward. Anyway, there's not much point in attacking first because he would just heal up with Nosferatu. She uses the bronze sword for the extra hit rate.  Everyone else just waits outside of the reinforcements' range. 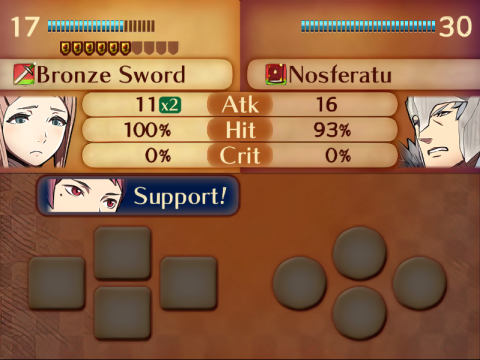   Felicia survives with 1 HP, and because she built a guard gauge up during combat, she can safely finish Kilma next turn. He'll activate Vantage, but the attack will be harmlessly eaten by Marth.     Because this is the last turn, I don't have to worry about keeping my units alive through the enemy phase, so I throw caution to the wind and squeeze as much experience out of these guys as I can. Silas gets an alright level and Good Fortune. Meh.    It took a surprising amount of effort to set up a safe kill for Odin, but he got a level out of it. It's okay. 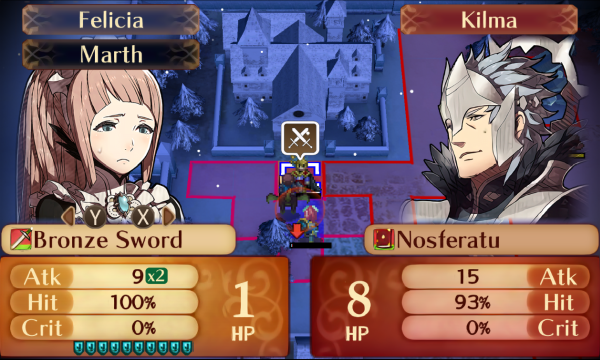    Kilma dad haha gottem  He drops a Talisman, which gives +2 resistance. I'm not sure who I'll give this to, so I'll hold on to it for a little while.  I could have stuck around to clear the rest of the enemies out for experience, but I feel like that breaks my "no excessive stalling" rule.   This is another map that I like quite a bit. Unlike Chapter 7, the enemies don't have much in the way of skills, but this map forces the player to play aggressively and engage more enemies at once by having you visit 3 of the villages. Unless they're willing to give up 5,000-9,000 gold. Flora is a nice introduction to status staves, and because you have to get at least one of the western villages (unless you freeze the northern Soldier on turn 1 or something), it forces the player to play around it. Kilma is also a pretty tough boss because of the Vantage/Nosferatu combo. Finally, this is the map where Odin joins you, making it an automatic 10/10.     Back at My Castle, we unlocked several supports during the map. Some of these will be pretty handy, but because I can't decide my classes, I really don't know what pairings I want yet. Also, we get to find out what Odin and Niles will be now.  Odin can reclass to Samurai, which makes his class options Dark Knight (1), Sorcerer (2), Master of Arms (3), and Swordmaster (4). He rolled a 3, which makes him a Master of Arms. I'm pretty sure this is the worst possible outcome for him, but I'll make it work. I'd have much preferred Sorcerer or even Dark Knight, because he could at least use Nosferatu before promotion.   Alas, it wasn't meant to be. Odin is criminally underrated as a unit, and I like him enough that I may actually use a separate save to show off how good he is as a Sorcerer in some bonus updates. We'll see. I've honestly only ever used Odin as a non-magic class briefly when I was having him pick up Vantage or other skills, so I don't fully know what to expect out of this, other than, perhaps, disappointment.  Niles can reclass to Dark Mage, so his class options are Adventurer (1), Bow Knight (2), Dark Knight (3), and Sorcerer (4). He rolls a 1, making him an Adventurer. Adventurer Niles is pretty good, especially because it means I'll have at least one staff user now. Depending on how things play out, I may promote him early so he can get staff access sooner.  Yes it would, Odin. Unfortunately, with E swords, all you can wield is this crappy bronze sword I bought you. 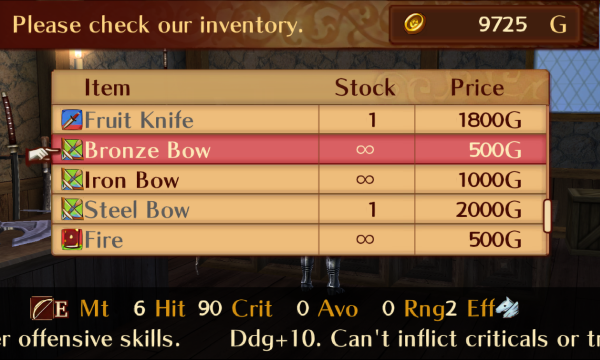 I also bought Niles a bronze bow, because it has more hit than the iron bow he's using. It's nice to have a more accurate option when you don't need the extra damage.  I use the dragon vein point we got from Chapter 8 to build the Mess Hall, which is one of the more important buildings because you can use it to get temporary stat boosts that stack with tonics.  This save file got meat as its food item, which is alright because it gives strength. I'll try to stick to just this, because I can't technically get any other ingredients without random events or visiting other castles, but I may cheat in some speed ingredients later in the game.  That's, uh, not a good sign. Sometimes if a meal comes out bad enough it can actually reduce your units' stats. I'll still eat this one, because if it's bad, I can just cook another one.   I don't know why the cook was worried, this meal is fine.  Flairs can modify a food's stat bonuses for certain characters or unit types. In this case, the dedicated flair gives Marth an extra point of strength and 2 extra points of magic.  At the moment, cooking only feeds half of your army at random, which kinda sucks if you ask me, but these 4 all appreciate the strength, so it's fine. Everyone on this list got strength +1 for the next map, except Marth, who got strength/magic +2. That's all the My Castle stuff for now, so it's time to discuss our new units. New unit discussions Odin Class: Master of Arms Growth Rates HP - 55 Str - 35 Mag - 30 Skl - 55 Spd - 35 Lck - 60 Def - 40 Res - 20 Odin is easily the most underrated unit in the game, and from what I can tell, it's because a lot of people saw that Nosferatu got heavily nerfed compared to its Awakening incarnation and decided it wasn't worth using. This is wrong, because Odin's bulk combined with Nosferatu's healing effect lets him tank hits like a champ, and at a certain point, you can just start throwing him at pretty much any number of enemies and he'll be fine. His personal skill, Aching Blood, boosts his critical rate by 10 when the weapon he's using has a custom name at least 12 characters long, which is hilarious but not particularly useful. You can't rename weapons without forging them to at least +1. All the cool weapons, like killer weapons, are in limited supply, and I can't justify merging 2 of them to give Odin +10 crit. Maybe if I end up having more killing edges than I know what to do with and no sword users. Anyway, you can promote him into either a Sorcerer or a Dark Knight. Sorcerer Odin lets you continue using him with Nosferatu, which is so much better than any of his other options it's not even funny. Dark Knight does give more move and better defensive stats at the cost of some magic and a point of speed, and it learns Lifetaker, which restores 50% of your health after successfully killing an enemy on player phase. It also learns Seal Magic, which is definitely one of the skills. Ultimately, you're choosing between a nigh-unkillable Sorcerer or a kinda-difficult-to-kill Dark Knight with more move and sword access. You really, really shouldn't, but you can technically go for physical Odin with either the Swordmaster or Master of Arms. Though I've never tried either except for a few levels to pick up skills, I think Swordmaster is his best option of the two. It fixes his speed issues and lets him use his decent strength, and once he gets C swords you can give him a levin sword so he can put his magic to good use. Swordmaster also gets Swordfaire at level 5, which boosts attack by 5 when equipped with a sword, which brings his damage up by a decent amount. Master of Arms is what he rolled for this run, and it's probably the worst option of the 4. Compared to Swordmaster, it's got slightly more strength and defense, but lower speed. Instead of Swordfaire, it gets Seal Strength at level 5, which is bad because it's typically better to just kill the enemy rather than sealing them, and unlike Seal Defense or Speed, it doesn't actually help you secure kills. At level 15, it learns Life and Death, which makes you deal and take +10 damage. It's an interesting skill, and I think it's pretty good, but it comes so late that it's hard to call it great. I'm going to use him, but I'm only expecting Master of Arms Odin to be okay at best. Niles Class: Adventurer Growth Rates HP - 40 Str - 35 Mag - 20 Skl - 40 Spd - 50 Lck - 30 Def - 30 Res - 40 Niles is a great unit, because archers are actually good in this game. He's got a ton of speed and enough strength to pack a serious punch against most enemy types. He'll frequently one round squishier units, like mages, and he's got a ton of resistance to boot. Bows let him one shot fliers, which is nice because this game has the occasional chapter with a lot of them. His personal skill, Kidnap, lets him capture enemy units if you've built a Prison in My Castle, which is a ton of fun and honestly an LP idea of its own. The Outlaw class gives him Locktouch, which is important because it lets you open chests without a key, and Movement +1 at level 10, which is really nice for literally everyone. It, as well as 3/4 of his promotion options, gives movement +1 to his pair up partners, which makes him a really nice utility unit as well. His best default class options are generally either Adventurer or Bow Knight, but he can be a Sorcerer or Dark Knight if you really want to go that route. I've never tried Sorcerer Niles, but it sounds like he'd be faster Odin with less bulk. If you give him all of the spirit dusts, I think he could be pretty good. Dark Knight is probably the better magical option, because I don't think he really has the bulk to use Nosferatu all that well, and it would let him use his decent strength with swords if you can ever get out of E rank. He'd also have 9 movement because of Movement +1, making him a good ferry for other units. His physical class options are generally better, especially because you can hand him a shining bow and he'll still have access to a magical option. Bow Knight is my personal favorite option for him, because it lets him keep doing what he does as an Outlaw but with 9 movement, and he's still got decent magic to use with the shining bow. It doesn't take away from the Outlaw's utility either, because he'll still give his pair up partners a lot of speed and an extra point of movement. Adventurer, which is what he'll be in this run, is pretty good, too. It's basically the Outlaw with more magic, letting him become a fairly potent magical attacker with the shining bow. It also gives him staff access, which is usually only kind of nice but becomes pretty important in this run because he's currently my only staff user. He'll be a great addition to the team. Next time, we'll take on Paralogue 1 and recruit Mozu, this game's villager. Kmsorter fucked around with this message at 02:36 on Jun 28, 2023 |
|
#
?
Jun 28, 2023 02:19
|
|
|
I think the most use people advocate Odin for is an early promotion to Dark Knight, which lets him actually do pretty well on some key maps until his lord shows up. I've tried it and it works, but then he falls off pretty hard after that since his exp gain rate slows and he doesn't get the growths he needs. I think I've always wanted him to do well, but his kinda wobbly bases and coinflip growths means he's usually battling against RNG to be good. Not to mention getting outcompeted by stronger magic-using units you get later on. Niles is a very good unit, though may depend on how often he rolls Str. I've had Niles which just refuse to proc Str and just start falling further and further behind.
|
|
#
?
Jun 28, 2023 03:24
|
|
|
I have a soft spot for Odin literally soloing entire halves of maps due to the drain tanking. Yes, Nosferatu's been nerfed.... but that doesn't make it bad by any stretch. Not having to stock 5 tomes of it also feels less stupid.
|
|
#
?
Jun 28, 2023 05:47
|
|
|
One thing about Odin that can help him a lot with his shaky offense is that there's really very little competition for Spirit Dusts in Conquest, and tossing a couple of them onto him can make a huge difference. His Speed can still be an issue, but it's usually enough to not get doubled and that's all that's really important for Nosferatu tanking. Master of Arms is almost certainly his worst class, so it'll be interesting to see how he turns out.
|
|
#
?
Jun 28, 2023 06:18
|
|
|
Great update - I love the write ups at the end after you've rolled their class which talks about everything that could have been v. what actually is the case. Really sucks that Odin seemed to roll his worst option, but that's what makes this LP so interesting!
|
|
#
?
Jun 28, 2023 12:48
|
|
|
PotatoManJack posted:Great update - I love the write ups at the end after you've rolled their class which talks about everything that could have been v. what actually is the case. Really sucks that Odin seemed to roll his worst option, but that's what makes this LP so interesting! It's his worst option but let's be clear though, there are far, far worse combinations out there, so gonna be interesting to see if we hit any of them (in fact we arguably dodged one in Valkyrie Effie). There are also some real stinkers on the Birthright side of things, maybe we'll bring them up when we start running into them as enemies.
|
|
#
?
Jun 28, 2023 13:50
|
|
|
ApplesandOranges posted:There are also some real stinkers on the Birthright side of things, maybe we'll bring them up when we start running into them as enemies. It's crazy how many BR characters get Apothecary as a reclass ption. Like, imagine doing this challenge and landing Merchant Orochi... barf. Physical Odin is usually worse than magical/mixed Odin, but at least Master of Arms will let you have a unit with some bulk who can use most of the D-rank specialty weapons. I can think of at least one map where Heartseeker and a Beastkiller is gonna be very nice to have.
|
|
#
?
Jun 29, 2023 02:14
|
|
|
Update 5 - Taking a Detour Before we move on to the next map, I make a quick stop at the item shop to buy Odin some tonics. A Dark Mage Odin with Nosferatu wouldn't need these, but Samurai Odin does.  We could move on to Chapter 9 right now, but if we put off Paralogue 1 for too much longer it won't give us as much experience, and Mozu becomes much, much harder to use because she falls even more behind the rest of the army.    Paralogue 1 is a really easy map, and that's because it's available on all 3 routes. Because of this, I like to use it to train up some of the early joiners who may not quite be up to snuff yet. For my purposes, the major goals here are to feed as much experience as possible to Odin, and to get Marth and Elise as close to D axes as I can. 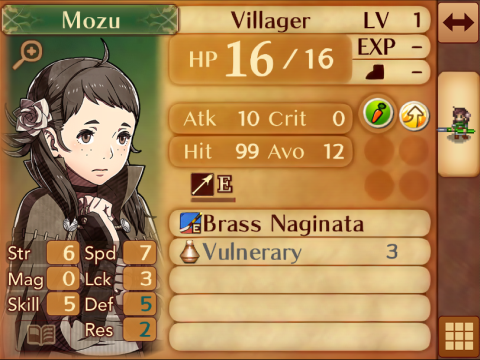 Mozu is in the south, and she'll need rescuing eventually, but you can afford to take your time with it. She's pretty useless on this map, but it's a good opportunity to train her if you're planning to use her. I'll wait until I know what class she'll be before I decide on that, so she won't be seeing any action for the moment.  The Faceless on this map are Birthright Faceless, so they don't have any skills. Their stats are kind of decent if you do this map as soon as you can, but they shouldn't be a problem.  This is the boss. Would it have killed them to give these guys a skill or two in Conquest? The only notable thing about this boss is that he's pretty tough to double, and he's got quite a bit of bulk to him. He can't move though, and without a 1-2 range option, you can literally chip him down with any ranged option without letting him attack if you want to. I'm gonna try to feed him to Odin.  This is how I've got everyone positioned. Essentially, Odin and Effie are gonna take the vulneraries and take the northern half of the map by themselves, while everyone else heads south.  This is what Odin's stats look like with Effie support after tonics. He's honestly looking really good, and once he gets access to a decent weapon, he should be very usable. 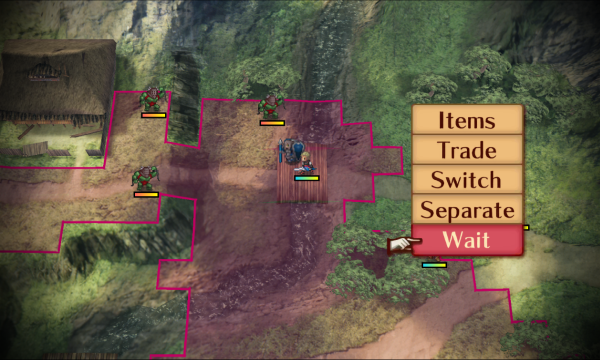 Odin charges into the horde.   Arthur gives Niles enough strength to weaken this guy for someone else.   And that someone will be Elise, who desperately needs to get D axes so she can do actual damage. She's not too far, so I'm gonna try to get her there during this map.  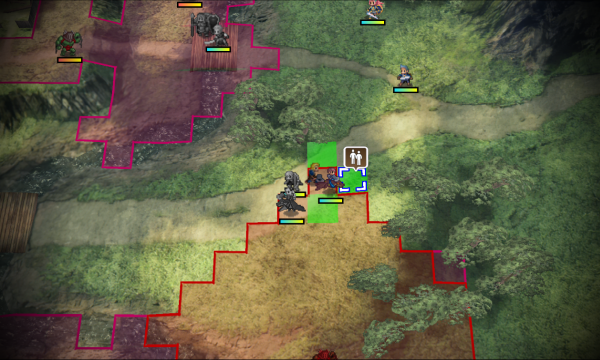 I don't actually want Arthur paired with Niles, so I have Marth take and separate him.  Felicia and Silas pair up so they can move a bit farther before separating. The only ones in range are Marth and Elise, which means that one of them will get some axe experience on enemy phase.    Odin fights 2 Faceless on enemy phase, and his damage is pretty good when you use every strength-boosting method available at the same time.   He dodges the second one, which is nice because I think it saves a concoction use.   The southern Faceless attacks Elise because she has lower defense than Marth.  The only other thing to note this enemy phase is that this guy towards the back starts advancing toward Odin.  Odin took a lot of damage that turn, so I have him use a vulnerary.   Arthur starts the turn off strong by flubbing a hand axe chip. It's kind of his signature move.  He still got experience because of the attack stance, though. This is basically all of the stats he cares about, so this is a very strong level. Also, it's worth noting here that Elise still gets axe experience even though she was just supporting in an attack stance. Generally, setting up attack stances can be a good way to get your newly-reclassed units out of E rank weapons more quickly.  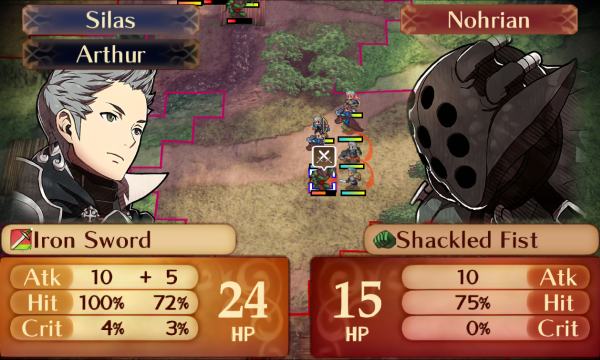  I have Silas trade Arthur's iron axe to his equip slot for the extra damage and accuracy before attacking. Arthur connects this time.   I pair up and separate the rest of the army, leaving Marth to bait the next group out with Elise support. This map is pretty simple and easy, so I'm just trying to optimize everyone's experience and weapon rank gains while we blow through it.    All of these Faceless are the same, so I'm just gonna show the highlights of Odin's fights here. He saves another vulnerary use by dodging.   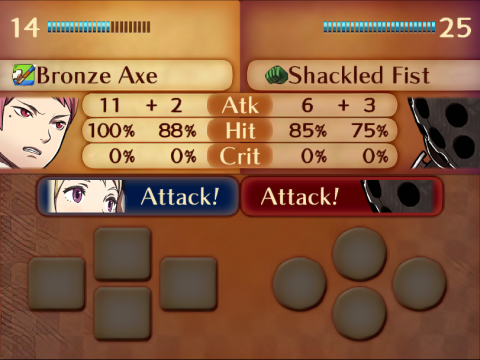  Marth's fights are marginally more interesting, but because the Faceless aren't really a threat, there's not all that much strategy in play at the moment. I'm really just baiting and killing, in that order. 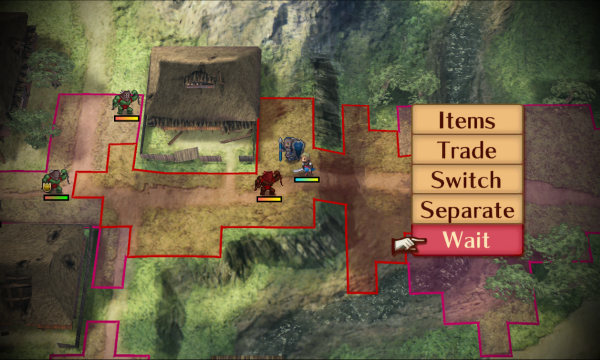 Odin ignores the Faceless he didn't kill on enemy phase so he can move forward to bait even more   We've got a nice little chunk of enemies here, so I have Arthur start us off by taking a pot shot with his hand axe.   But it was totally unnecessary, because Silas would have killed regardless.    Niles and Arthur chip the healthy Faceless down so Elise can finish him off. With her growths, I honestly can't be too disappointed with this level, even though it's pretty useless for now.   Felicia finishes the last of this group while Elise gets a little extra axe experience from helping out. It only takes 20 combats to go from E to D, so she should be reasonably close.  Is it, though, Felicia?  Marth moves toward Mozu so he can recruit her next turn.    Odin dodges yet again, saving us yet another vulnerary.   He gets a very nice level out of this kill, because what he really needs right now is more strength and speed. He also learns Duelist's Blow, the level 1 Samurai skill. It gives +30 avoid when he initiates combat, which is kind of nice but not something I generally want to rely on.    Effie gets a really good level from guarding Odin.   Because of the strength level, Odin can now finish these guys off on player phase without facing a counterattack.  I pair Silas with Marth so he can get to the front line sometime this year.   Marth recruits Mozu and separates Silas to the north so he can be the bait. Mozu is Fates' 'trainee' unit, but unlike many of them throughout the series, she's actually a solid unit who isn't too much trouble to get up to speed. Like any trainee, she'll take a while to get started but becomes quite powerful once she does. Unless you brought a heart seal and a bow, she'll have a hard time getting experience on this map.   Finally, I move everyone but Arthur toward the next group. Arthur stays behind to bait the southeastern guy, and Mozu is in position to pick him up next turn, since that's about all she can do without having kills spoonfed to her.   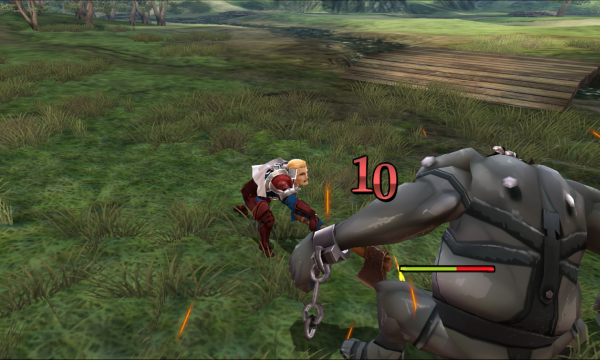 Arthur unnecessarily dodges his Faceless. I'm going to have him retreat to the west in a minute so I can give the kill to someone else.   Silas starts working on the next group with Marth support.  On player phase, Odin moves to bait both of the Faceless near the boss. 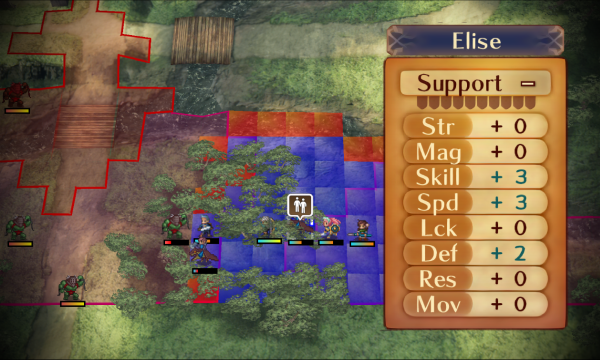  I have Elise drop Felicia here, which puts Silas in range of Lily's Poise and Demoiselle, while also letting Elise dual strike with him for axe experience.   Niles finishes this Faceless off because I couldn't think of a way to get Marth or Elise involved.  Arthur moves closer but stays in range of his Faceless.  And Silas moves here because he could only fight one Faceless per turn from his other tile because of the woods terrain, and I want to bring both of these guys in.  Lastly, Marth moves to support him from the north. I'm gonna have him fly Silas across the river next turn.   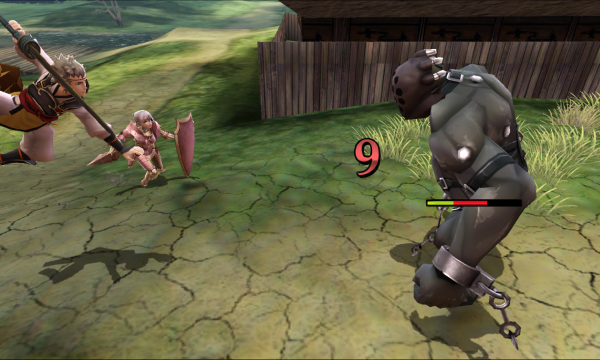 On enemy phase, Odin finally finally ends his dodge streak. Also, just like with Ryoma in the prologue, I think the Samurai animations look pretty silly when you screenshot them.   On enemy phase, he chips both of them down without a problem.    Arthur continues chipping his guy down. 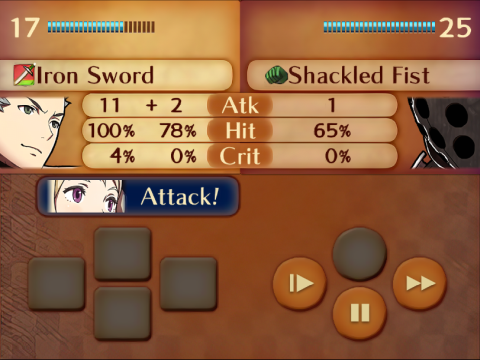 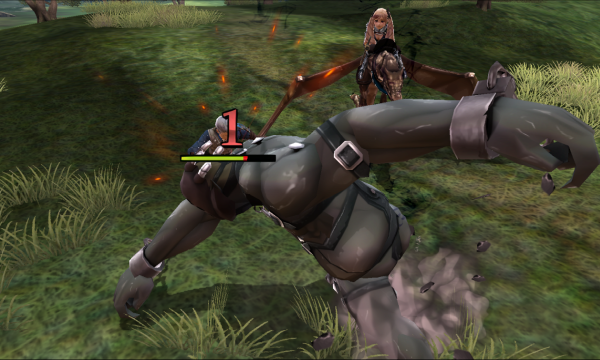  Stacking all of these damage reduction skills has made Silas a very difficult man to kill. Unfortunately, Elise decided that she didn't want axe experience right now, which is a shame, because she's pretty close to D axes.    Elise, why?! With true hit, a 78% is actually an 88.21%, and she just missed two in a row. It doesn't affect the map's outcome at all, but she doesn't get axe experience unless the attack connects. 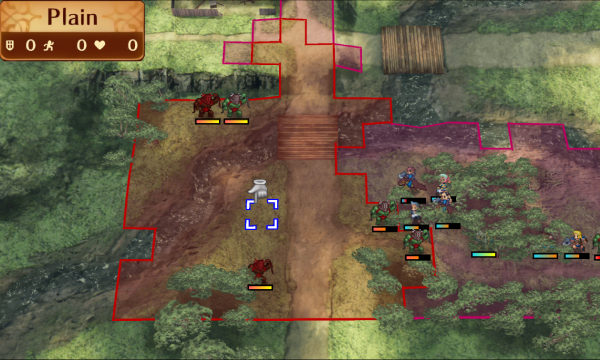 Anyway, the highlighted guys here also started moving on enemy phase.    Odin gets an okay level from killing one of his Faceless. His speed is probably his most dubious stat, so if he keeps getting it, I'm happy.    Felicia finishes this guy off, and Elise actually hits this time.   Niles chips this guy down for Elise.   And Elise finishes him off. She's also in position to bait another Faceless out.  Marth drops Silas across the river in range of one of the next couple of Faceless. I want some of my units other than Odin to start approaching the boss, because I don't want him to take too terribly long to kill.  Arthur is done chipping the southeastern Faceless down, so he and Mozu just leave it for someone else.    Odin finishes the last northern Faceless off on enemy phase.  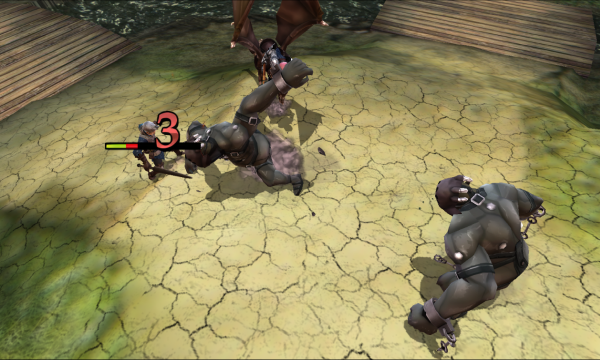  Silas and Marth chip this guy down, though he takes a lot more damage without Elise and Felicia's skills.    Oh come on!  How hard is it to hit them, Elise?! How hard is it to hit them, Elise?! I missed my chance to screenshot it, but Felicia activated Good Fortune at the start of player phase. It doesn't end up helping.  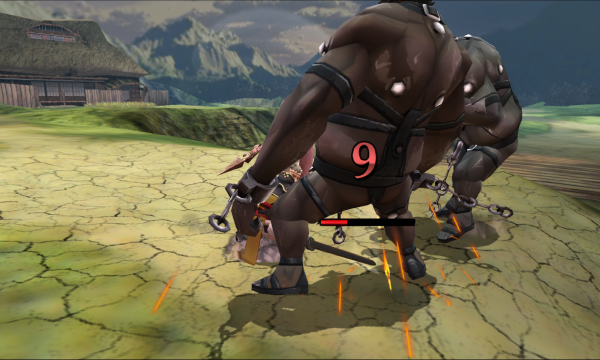 Odin starts the turn out by stealing Silas' kill.    Niles once again chips, this time getting a mediocre level out of it.   Unfortunately, because Elise missed on enemy phase, I couldn't find a safe way to feed this kill to her, so Felicia gets it instead.  Back in the north, Silas and Marth hide behind Odin because he's got a guard gauge. 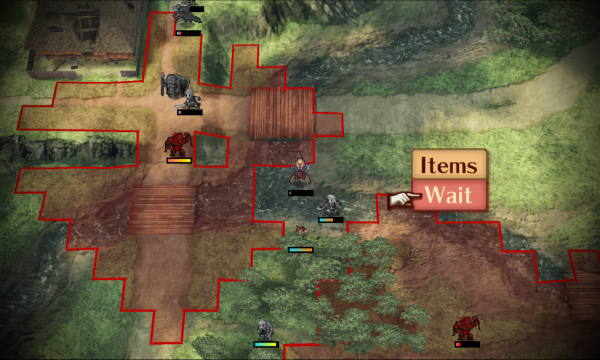 Because we're nearly done with the non-boss enemies, I have everyone else start moving toward the boss, making sure to avoid this guy's range so he goes for Odin. Next turn, Arthur is going to pair up with Elise so she can fly him over the river. We're still managing to avoid the southeastern guy's range, but we'll clean him up on the next turn.   Odin chips this guy down on enemy phase.  Back on player phase, because he's able to finish this guy without Effie's help, I pass her to Marth so she can help with the boss this turn.   Odin finishes this guy off, leaving only 2 enemies counting the boss. 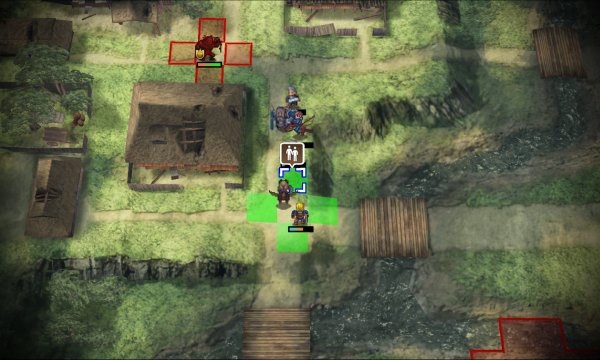 Arthur drops Elise as close to the boss as he can.   Because there's no way they'll make it to the boss in time, I pair Felicia and Niles before having Felicia kill the last non-boss Faceless. 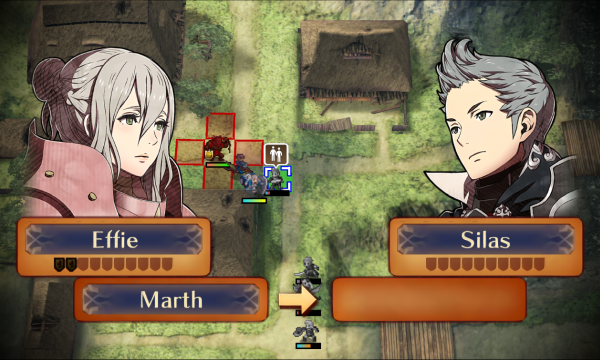 Marth moves and switches Effie to the front, and because the boss doesn't have a 2 range option, she passes Marth to Silas so she can get dual strike support. We're not going to let this guy attack.   This guy is super tanky if you aren't doubling, and he's also pretty tough to double, especially if you do this map before Chapter 8. If he moved, he could have been a somewhat dangerous opponent.  Next turn, Elise and Arthur pull the same stunt as Marth and Effie so Arthur can get Silas to dual strike with him.   Typical  . At least Silas connected. . At least Silas connected.  I'm starting to get sick of- 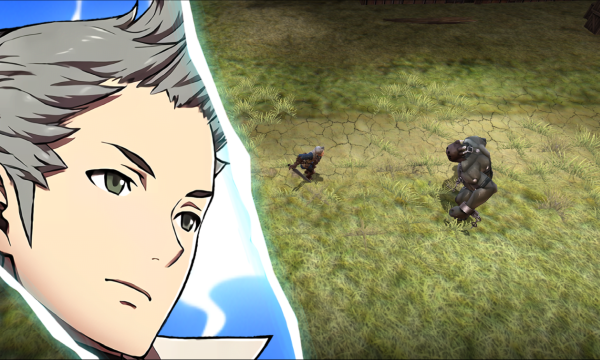   Oh. Okay then. Oh. Okay then.   Silas may as well take us home after that performance.   You deserve this, buddy.  And that's the map. This is a map I'm not especially fond of, but it does provide a good opportunity to raise weaker units, which is nice. I think they should have changed it up a tad depending on the route, because it sticks out like a sore thumb in Conquest. Maybe throw some skills on the enemies in Conquest, and some obnoxious elevators or teleporters in Revelation.      Back at My Castle, the first order of business is grabbing supports. We didn't get anything too significant, but Odin will get more stats from Effie if I pair them up again, which is nice. The more exciting business is finding out what class Mozu gets! 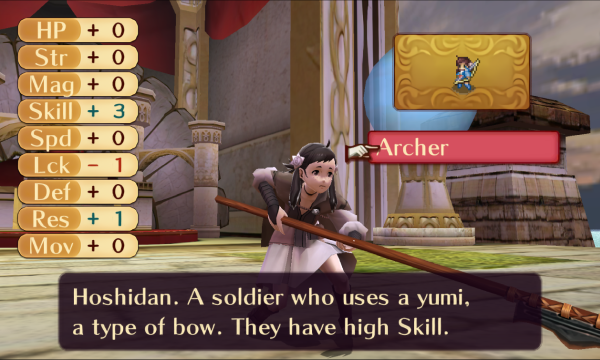 She can reclass to Archer, so her promoted options are Master of Arms (1), Merchant (2), Sniper (3), and Kinshi Knight (4). If she rolls Sniper or Kinshi Knight, she'll be a very good addition to the team, becoming a fast, high-powered glass cannon that can one round most enemies. If she rolls Master of Arms or Merchant, she'll take a lot more work to get started, but she should still be pretty good, if we end up using her.  She rolled a 1, making her a Master of Arms. This is... not her worst option. Mostly because Merchant exists, but that's not a very high bar to clear. Unlike Sniper or Kinshi Knight, she has to stay as a Villager until at least level 10. While it's not as bad a class as it was in Awakening, it's not nearly as good as Archer, particularly for Mozu. Archer gives her Quick Draw, which really helps her damage output when she needs it the most, and helps push her past one rounding thresholds sooner. Villager leaves her stuck with lances which means she'll be taking a lot more counterattacks, which is bad because of her lack of bulk. The lack of Quick Draw also delays her becoming self-sufficient, which hurts her usability substantially. If I were playing on my own, I wouldn't use her, but because I think that using less-than-optimal units is in the spirit of the run, I'll leave the decision to use her or not up to a vote at the end of the update.  I don't think it's long enough to warrant its own update, so I'll take this opportunity to squeeze Invasion 1 into this update as well. There are 3 invasions in this game, and they're basically optional paralogues that use My Castle as a map. I think it's a pretty cool idea. Before we do that, we'll be doing some cooking. 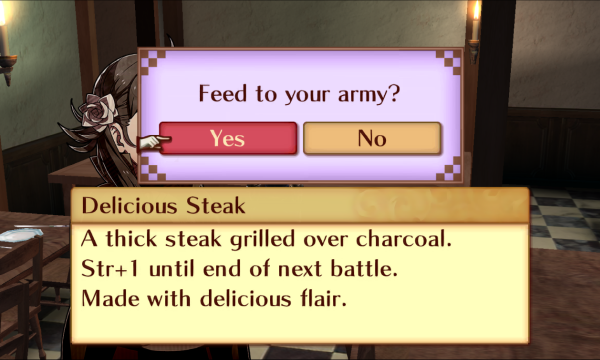  Mozu is a pretty good cook, and her meal gets the Odin Seal of Approval�.   It's a good meal, and it affected a solid group of units.  On to Invasion 1! 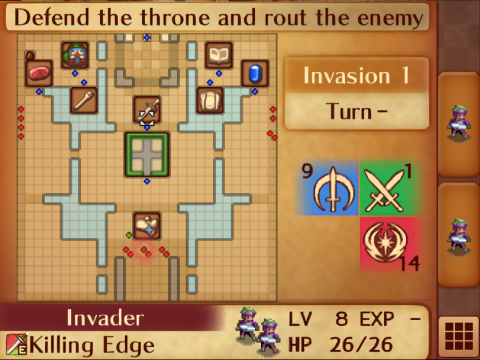 This is how I've arranged my buildings for this map. Each building (not counting statues or certain other specialty structures) has a deployment slot during invasions. Certain buildings give boosts to your units' stats during battle. For example, the Private Quarters gives +3 damage dealt to all allies as long as it hasn't been destroyed yet. There are Wyvern Riders in the east, Cavaliers to the west, and 3 pairs of Mercenaries to the south. The boss is one of the Mercenaries.   The Wyverns and cavaliers aren't too dangerous, but they can destroy your buildings if you don't kill them quickly. Their stats are pretty high, but because of the Private Quarters and the Records Hall, all of our units get +3 damage dealt and -3 damage taken, so they go down a little easier than you'd think at first. We'll want to handle them quickly before the southern group gets too close. 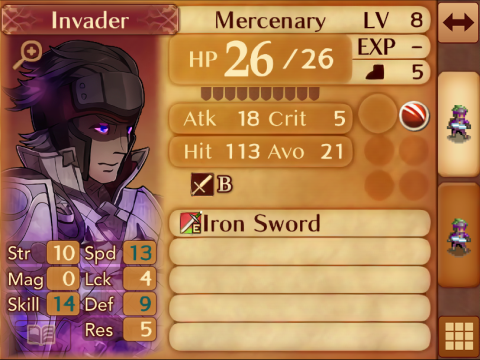  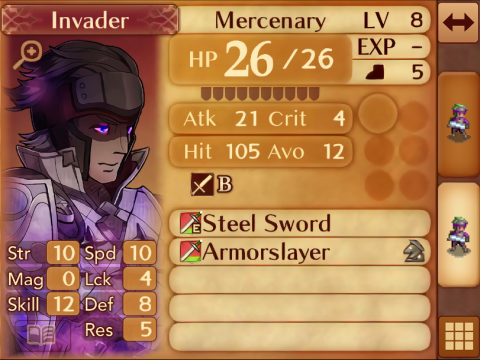  The Mercenaries in the south are the real threat here. They're paired up, giving them enough speed to make them hard to double, and some of them have dangerous weapons, like armorslayers and killing edges.  The boss is, interestingly, in the back of his pair up. He's got Lunge, which lets him swap places with an opponent after initiating combat. This skill is common throughout Conquest, and it's genuinely one of the most dangerous skills in the game. It's not so dangerous here, though. I guess the idea is that it prevents you from camping on the throne. His most dangerous skill is Armored Blow, which gives him +10 defense when initiating combat. He's also got Good Fortune, which is never realistically going to be a problem. Lastly, he's equipped with a silver sword, which makes him hit pretty hard. Silver weapons debuff your strength by 2 every time you use one, so he'll get weaker every time he attacks until you either kill him or his attacks become comparable to beating you with a pool noodle.  In the west, I've got Felicia, Effie, Silas, and Marth to handle the cavalry. 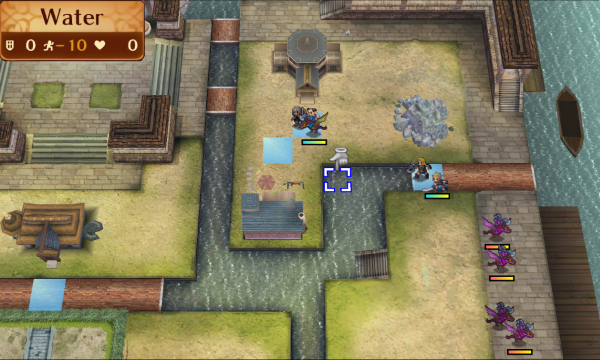 In the east, it's Elise, Niles, Odin, and Arthur to deal with the wyverns. Mozu is guarding the throne because I'm not sure if we're using her yet. Don't worry, if you guys decide to make me use her, I shouldn't have too much trouble raising her even though I'm missing the best opportunities to get her up to speed. 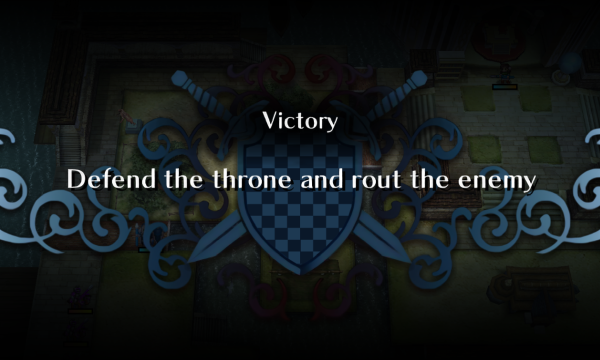 Invasions require you to defend the throne. This isn't too difficult, though the AI is a bit unpredictable because sometimes they'll try to seize the throne rather than attacking your units.  I have Marth drop Silas here so that the two of them can dual strike on the next turn. 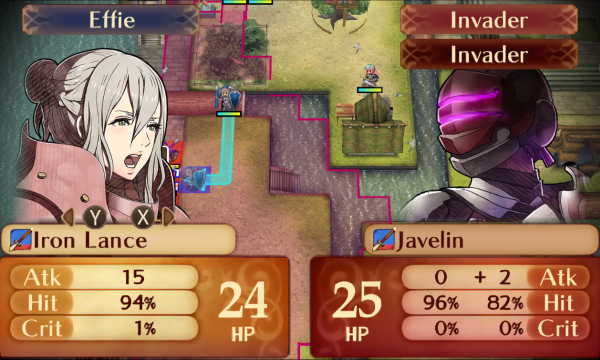 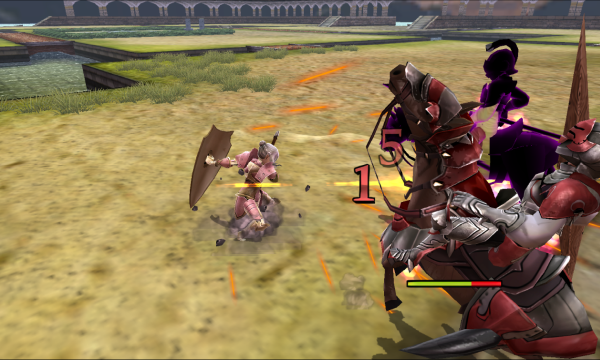 Because of the Records Hall, Effie is fine on her own, so I have her start chipping this javelin guy down.  Felicia moves here, equipped with the bronze axe. She's only in range of the javelin guy, who is pretty weak, so she'll be fine even if she gets hit.   Back in the west, Elise flies Niles in range to shoot down one of these Wyvern Riders.  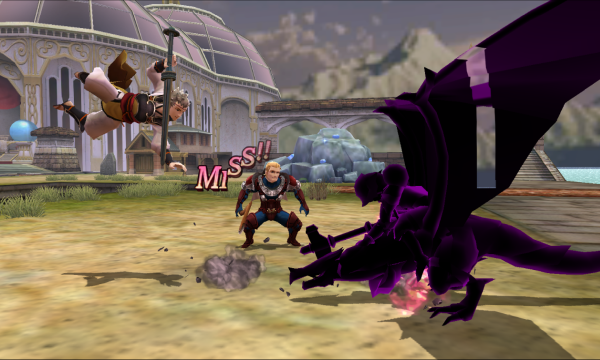  With the extra strength from Arthur, the meal, and the Private Quarters boost, Odin is just able to one round these guys without a tonic.  On the enemy phase, the boss kills Lilith because I placed her fishbowl too close. Oops.   Effie chips a Cavalier down.  Niles takes an axe to the face.  And Felicia tanks the javelin guy.  The southern group is going to steadily move north until we take them on.  Most of the cavalry ignore Effie because they wouldn't be able to damage her.   That's fine, because Marth and particularly Silas will make short work of them. Go Silas!   Effie finishes her guy off.   While Felicia finishes the javelin guy. 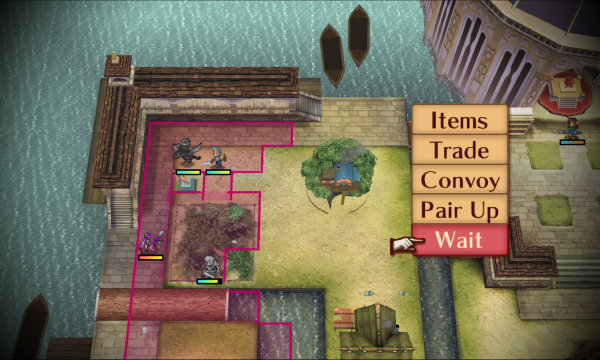 Silas just waits so he and Marth can finish the last Cavalier off next turn.   Niles takes out the first of this Wyvern Rider pair.  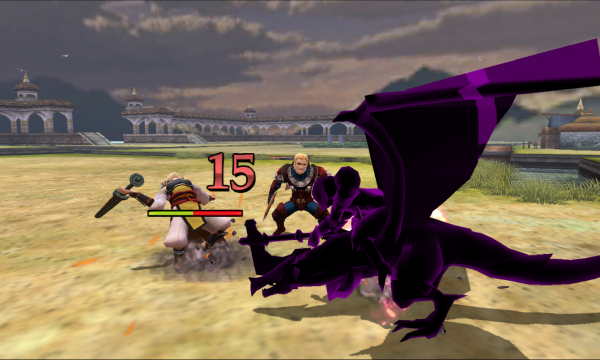  And Odin takes out the last wyvern.  I sure hope so, because while the bulk is nice, you really need speed and strength.   On enemy phase, the Mercenaries keep moving north while the last Cavalier continues to ignore our units to go for our buildings. Also, Felicia activates Good Fortune again.   Marth chips the last Cavalier for Silas.   And Silas finishes him off. Now we can comfortably deal with the Mercenaries.  Felicia and Effie pair and separate towards the center of the map.  I have everyone else move towards the last group as well.  They continue to ignore me in their quest to take the throne. 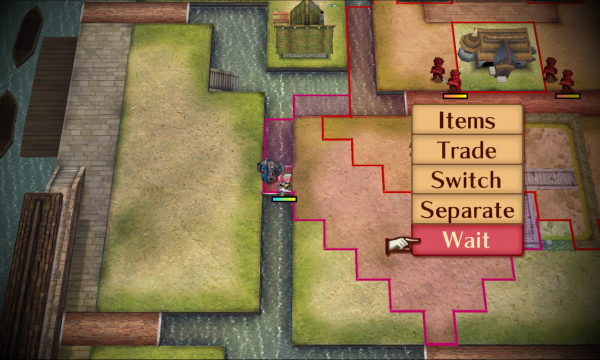   Felicia moves to bait the boss, Odin moves to bait the easternmost pair, and Marth and Silas move closer to the middle pair.    Felicia gets attacked by the boss, who hits pretty hard and only takes 4 damage because of Armored Blow.  Felicia, haven't you already gotten this level before?  It's not particularly useful to him here, but he uses Lunge to swap places with Felicia. Enemies with Lunge will always use it, no matter how useless it may be.    Odin baits his guy out and chips him down. The middle pair just move north, toward the throne.   Niles finishes the first member of this pair.    Then Elise gets to work on the second one. This is the more dangerous one, because he has a killing edge. It's worth noting that killer weapons in this game deal x4 damage with crits instead of the usual x3. It doesn't matter here, because she would have barely survived it anyway.   Odin finishes the killing edge guy, who was probably the most dangerous enemy on the map. 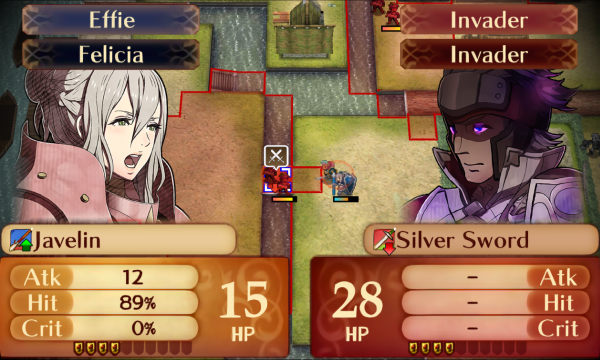  Effie switches to the front and starts chipping the boss down with her javelin. 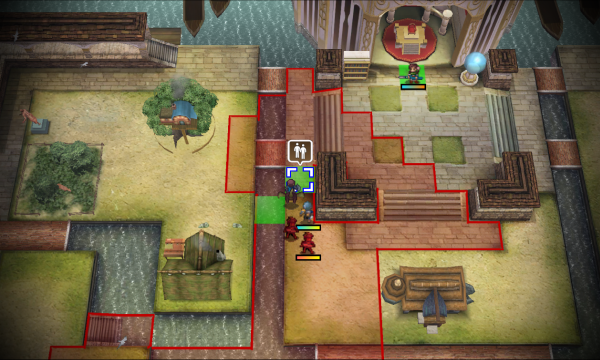 Lastly for this turn, I have Silas and Marth separate here because I might want both of them to attack this guy next turn.   The boss attacks Effie, and because of the silver sword's debuffing effect, he's only able to meaningfully damage frail characters now.    Silas trades blows with this pair, and it's a very one-sided fight.   We're really just cleaning up these last couple of enemies at this point.  Effie chucks a javelin at the boss to eat his guard gauge. 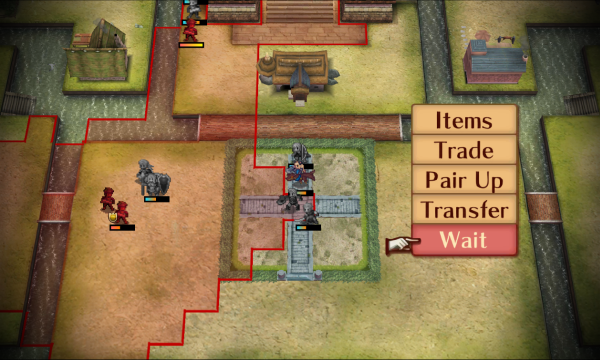 And because Odin has a guard gauge, it's time to have him start stealing the boss kill.  Because these two won't be able to contribute in the south next turn, I have Marth move here so he doesn't support Silas against this guy. It gets us another round of chip experience without extending the map.  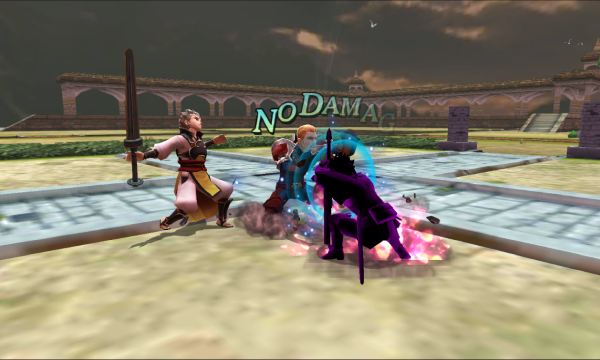  On enemy phase, Odin chips the boss and gets D swords out of it. The relevant weapons that this unlocks are iron swords, armorslayers, and the 1-2 range Hoshidan kodachi that we won't be getting until Chapter 12.    Silas dodges unnecessarily and nearly oneshots the poor guy.    Marth steals the kill, mostly for axe experience, and gets a solid level out of it. I would have liked some speed, but strength and defense are pretty important, too.  He also gets Lunge! This is a skill that I'm sure is incredibly useful if you're a good enough player, but I generally forget about it and end up severely underutilizing it. Maybe I'll try to use more during this playthrough.    Odin finishes the boss for a mediocre level. Of course, my criteria for Odin levels is basically "no strength or speed = mediocre, strength or speed = solid, and strength and speed = great."  He does learn Vantage, which is pretty good. It's very good on Sorcerer Odin because it's not technically an offensive skill, so you can activate it while using Nosferatu. It's not as good on a Samurai, but it's still one of the better unpromoted class skills.  The boss also drops     I have Effie pass Felicia to Elise so that Elise can dual strike for some axe experience. As a bonus, Effie gets a decent level while leaving this guy barely alive for Elise to finish.   Elise finishes the map with a very nice level.  I think that the invasions were a fun little addition to the game. I kind of like building my own map, and because there's only 3 invasions in the game, I don't think it has enough time to get repetitive or annoying. The last one is kind of ridiculous, though. I'm pretty sure more than half of the total enemy count in that one are reinforcements, and all of them show up within the first 5 turns. Anyway, this update is getting pretty long, so I'll save the My Castle stuff for the next one. But before that, new unit discussions! New unit discussions Mozu Class: Master of Arms Growth Rates (adjusted for Aptitude) HP - 40 Str - 50 Mag - 15 Skl - 60 Spd - 65 Lck - 55 Def - 45 Res - 40 Mozu is a solid unit in Conquest in particular. In Birthright and Revelation, she doesn't really bring anything unique to the table, but in Conquest, she provides you with a very powerful delete button if you reclass her to Archer. Her personal skill, Forager, restores 20% of her HP at the start of player phase if she's standing on a mountain, woods, waste, or field terrain. It's not a bad personal skill, but she's not exactly a tank, so it's not exactly game changing. The Villager class is locked to her and her children, so the Villager skills are basically personal skills, too. Aptitude, the level 1 Villager skill, boosts all growth rates by 10%. It's pretty nice, but not as strong as it was in Awakening (where it was a 20% bonus in a game with generally higher growth rates). Underdog, the level 10 Villager skill, boosts hit and avoid by 15 if your opponent's level is higher than yours. This isn't particularly great, and it certainly doesn't make it worth keeping her a Villager until level 10. If you reclass her to Archer immediately, she's not that difficult to train because of her sky-high speed and solid strength. She becomes mostly self-sufficient pretty soon after learning Quick Draw. Her best promotion options are either Sniper or Kinshi Knight (my personal favorite). Sniper is Archer but better, turning her into a delete button that can eliminate 1 enemy per turn almost regardless of stats or skills. It learns Certain Blow at level 5, which boosts hit by 40 when initiating combat, and Bowfaire at level 15, which boosts damage dealt by 5 when using a bow. These skills make Sniper Mozu even better at deleting people on player phase. Kinshi Knight trades some bulk and more importantly, some damage, for more movement. It learns Air Superiority at level 5, boosting hit and avoid by 30 when your opponent is a flier, and Amaterasu at level 15, which restores 20% HP to allies within two spaces. Its skills are on the 'meh' side, but in my experience, Kinshi Knight Mozu is still able to one round most enemies, except now she can do it more easily with flier movement. Kinshi Knight also has the advantage of giving +1 move to pair up partners, providing her with a bit more utility that Sniper Mozu doesn't have. Her other options are a lot less appealing, mostly because they leave her stuck with lances for a much longer time, making her harder to raise. I can't say I've ever used Mozu in either of her other classes long term, so I'm not exactly sure how she does with them. Merchant is kind of neat, being a bulkier, slower class with bow access, but unless she ends up much bulkier than I'd expect, I'd say it's only good for gimmicky gold bar strategies. Master of Arms, which is what she rolled, has higher speed than Merchant, and I think she'd turn out to be somewhat bulky, very fast, and pretty strong. The only real problem I'd expect is that she'll take a while to get off the ground. Should I use Mozu? If so, who should I bench? But before I end this update, I'd like to gather opinions on using Mozu now that we've passed the deployment limit. Going forward, I'm not 100% certain how I'll be deciding on new characters, but in Mozu's case, she'll be pretty much unusable if I wait too much longer to start raising her. Odin is the only character that I'm not willing to bench; everyone else is fair game. Voting will end when I play the next chapter, probably on the weekend. Next time, Azura plays Metal Gear Solid.
|
|
#
?
Jul 4, 2023 23:14
|
|
|
Bench Effie for Mozu, she's too good 
|
|
#
?
Jul 5, 2023 01:27
|
|
|
Drop Effie for Mozu! Idk what Master of Arms' give on pair up, but maybe he can attach herself to Swordmaster Odin and give Ophelia the ultimate Samurai DNA.
|
|
#
?
Jul 5, 2023 01:39
|
|
|
Forget Mozu - you already have Master of Arms Odin, don't need another
|
|
#
?
Jul 5, 2023 03:01
|
|
|
I wouldn't use Mozu, personally. Too many units to raise (especially depending on future reclasses) and Mozu takes a bit too much babying at the start.
|
|
#
?
Jul 5, 2023 03:02
|
|
|
Bring Mozu, and cycle around units so the lowest leveled are in place for each map so they get their levels. (This is how I always played Fire Emblem. I always burned out because I was trying to keep everyone equally leveled  ) )
|
|
#
?
Jul 5, 2023 07:14
|
|
|
Don't use Mozu long-term, but it's ok to bring her along to build support and unlock a child paralogue.
|
|
#
?
Jul 5, 2023 07:14
|
|
|
Update 6 - Slow and Steady The first order of business in this update is Mozu. There was a tie in the voting, so I'll just flip a coin to decide. Heads for using Mozu, and tails for benching her.  Looks like we're using Mozu. 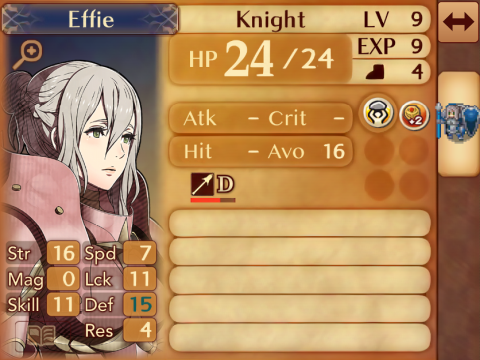 You guys also voted to promote Effie to Benchmaster (love you too, guys), so the team just got substantially worse. Mozu is the only one at this point who can use lances, so I gave all of Effie's stuff to her. This should make the run more interesting.   Next is supports. Marth and Silas is pretty nice, because now they can activate Supportive. Effie and Elise is pretty worthless now, though.  I build the prison, as well as the accessory shop and a Felicia statue. I won't be using captured units, but it gives some extra crit during invasions. Accessories only have an affect on the gameplay during invasions, so I might buy some for funsies. The accessory shop itself also gives extra avoid during invasions, though it'll be a while before the next one.    I also do a little shopping. Odin needs an iron sword, and I also get an iron axe for both Marth and Elise, and a hand axe for Elise. They can't use them yet, but they're close enough that they should reach D axes within the next map. I think Elise is literally one combat away. 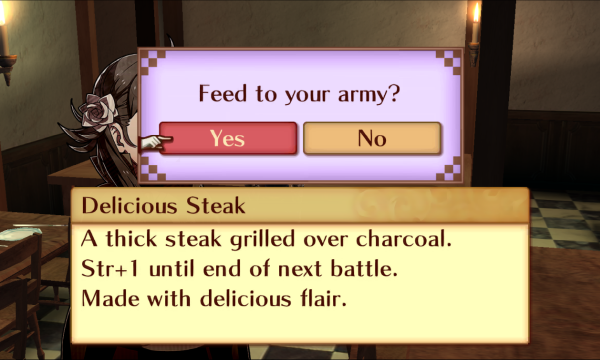    I also cook another steak. It's a nice meal, and it went exclusively to characters that benefit from it, which is nice.  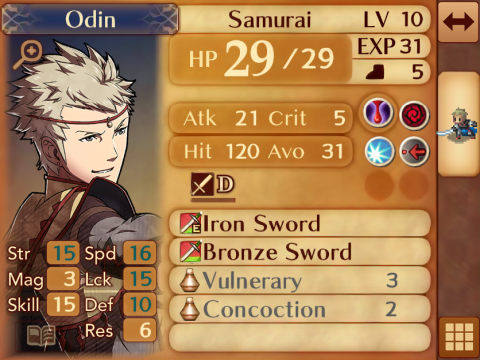 Finally, I give Odin health, strength, speed, and defense tonics. He'll be my main fighter throughout this next map. 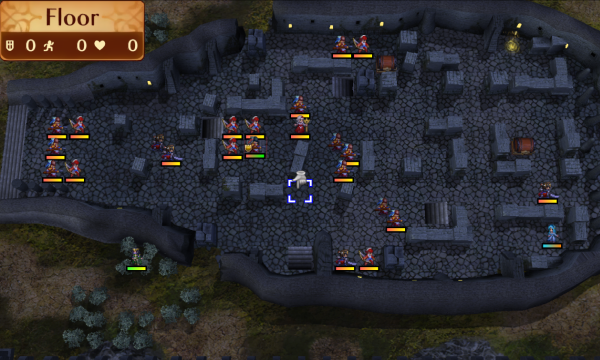  Welcome to Chapter 9, one of my least favorite maps in the game. "least favorite" is relative when playing Conquest, because this map is still fun to play. My big problem with this map is that it kind of encourages slow play, because it's full of bulky Spear Fighters in a tight space where there's not much room to maneuver your units. The Archers in the middle further tighten the space, which is fine until the Enfeeble staff further worsens the problem. There's not even a thief or anything to encourage you to pick up the pace. The enemies are mostly Spear Fighters and Archers, which means lots of Seal Defense to deal with. The northern chest has a Rescue staff in it, which lets you warp a unit next to the user. It's incredibly useful, but it's so nice to have during the final map that I'll only use it if it's absolutely necessary. The eastern chest has a brass naginata, which is just there so Azura can get a weapon.  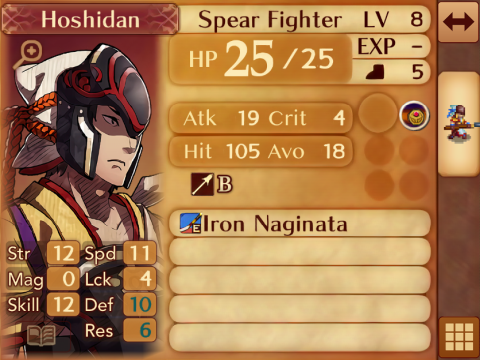 Thankfully, not every Spear Fighter has Seal Defense. In this front group, it's just the two I've highlighted.   Both of these paired Samurai have Vantage and Duelist's Blow, but they're kind of on their own, so they shouldn't be a problem.   These Archers in the center all have Underdog, and their level is low enough that it's gonna be active most of the time. This just serves to make them a little more accurate, which isn't too bad. One of them also has a shining bow that does magic damage, just in case you thought you could just have Effie deal with it using a javelin. The real problem is the amount of stuff that adds up to make them a pain to deal with. The boss has Rally Defense, which gives allies within 2 spaces +4 defense until the start of next turn. Because of this, these guys effectively have 12 defense.  Like this guy, for example. They have an Enfeeble staff, which debuffs all stats by 4, and has 4 uses. Anyone trying to handle the Archers is likely to struggle after taking this, especially without a healer, because no one on my team will be able to take more than one hit from them.   Every highlighted enemy in this screenshot has Seal Defense, including the supporters in the pair ups. Between the Enfeeble guy and the sheer number of enemies, it's very difficult to deal with the huge cluster in the east. Also, when you enter the rough area I drew in, the game drops reinforcements from all three stairways; a total of 9 enemies. I usually block off at least one staircase, because that's too much. 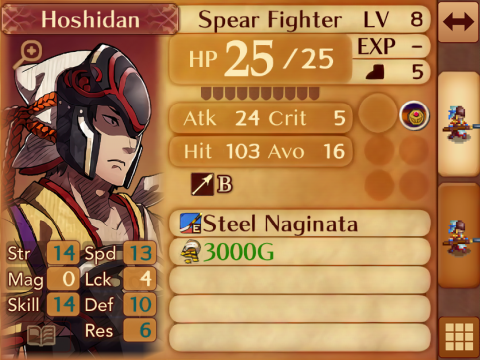 To make matters worse, the pair bonuses make them pretty difficult to double, which makes it hard to one round and avoid Seal Defense.  The last enemy to talk about is the boss, Haitaka. He's a pretty tough boss because he hits hard, he's pretty bulky, and he's on a throne, making him kind of dodgy too. The steel nageyari he's equipped with is an enemy-only weapon that's basically just a steel naginata with 1-2 range. He's also got Seal Defense and Strong Riposte, which both make him hit that much harder. He's also apparently a great unit if you capture him, but I've actually never bothered.  We're done talking about the enemies for now, so here's our new units for the map. First we have Nyx, who is honestly one of the worst units in Conquest. She's still pretty good, which really says something about how good the unit balance in this game is. She's not all that useful in this map, but she can contribute if you want her to.  Next we have Azura, who starts as a blue unit that we can control. She won't be doing much singing in this map, because her main use here is to do a sort of stealth mission to activate a dragon vein. She'll want to head north, avoiding the Samurai, grab the naginata from the chest, and activate the dragon vein.   This is probably the best attempt at a stealth mission in the series. Azura wants to head north, avoiding the Samurai until she grabs the naginata from the chest, and activate the dragon vein. It's a fun little side goal, and I think it's neat. The dragon vein brings several enemies to 1 HP, most notably the front half of the pairs, making the enemy cluster much easier to deal with.  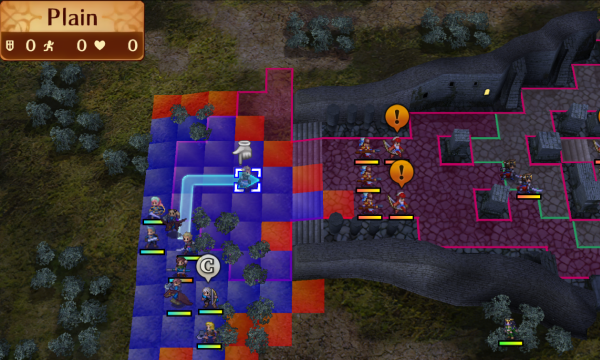 Now that we're done thinking about the map, it's time to actually play the map. This is how I arranged my units. The only units on my army with a defense stat at the moment are Marth, Elise, Silas, and Odin. Of these, Marth and Elise are fliers, so they can't really bait the problem spots on this map. That leaves Silas and Odin, and even though Silas is probably the better choice, I decided to use Odin as the spearhead of the army. Because of all the stat boosts he's got, he'll be fine even though he's facing a lot of enemies.  Everyone else but Marth just kinda hangs out to clean up next turn. Felicia is positioned so that Odin can take advantage of Demoiselle, and Marth heads east to recruit Nyx. 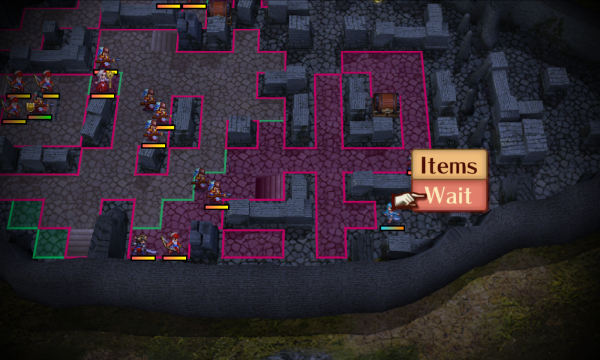 Azura starts inching as close to her guard's range as she can without entering it.   Because of all the strength boosts Odin has right now, he's able to one round these Spear Fighters, which means they can't seal his defense.  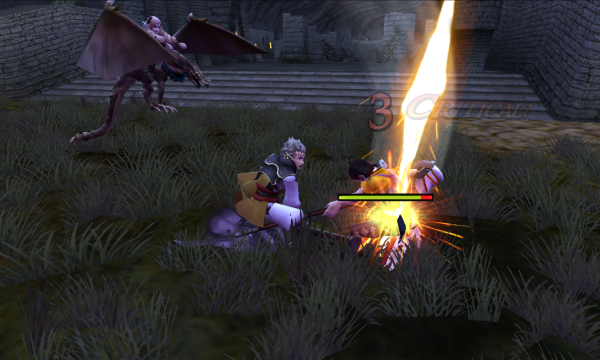     I think he would actually been fine without the health or defense tonics, but they're affordable enough that I didn't feel like finding out.  Azura's guard starts patrolling the eastern portion of the map.   On player phase, we're left with a couple of Archers from the initial group. Silas starts chipping them down.   If you use attack stance well, Mozu isn't too difficult to raise. She currently gets just under 50 experience per kill, so she'll start getting some levels soon enough. Unfortunately, this isn't the easiest map to feed her kills in.    An Arthur-boosted Elise chips the second one down, and she finally gets D axes. Say hello to hand axe hit rates worse than Arthur's!    Niles finishes for one of the worst levels he's capable of getting. 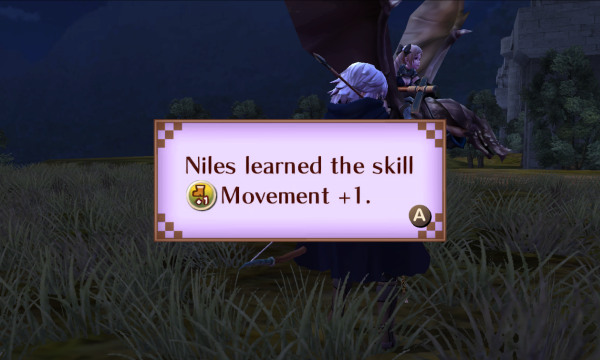 Movement +1 more than makes up for it. It's easily one of the best skills in the game, and a solid choice to pass down to child characters.  Odin supports Felicia while she baits the Samurai pair.  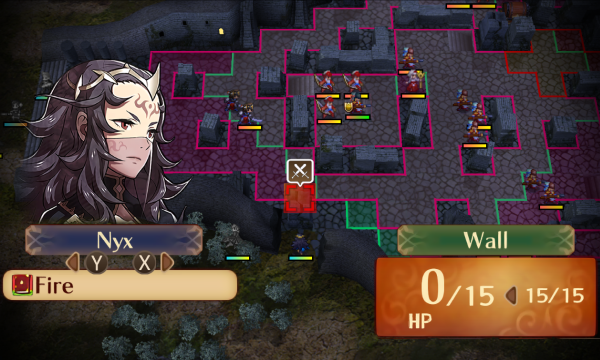 And Marth recruits Nyx, who immediately starts smashing stuff.  Oh, and Azura inches forward a couple more spaces.  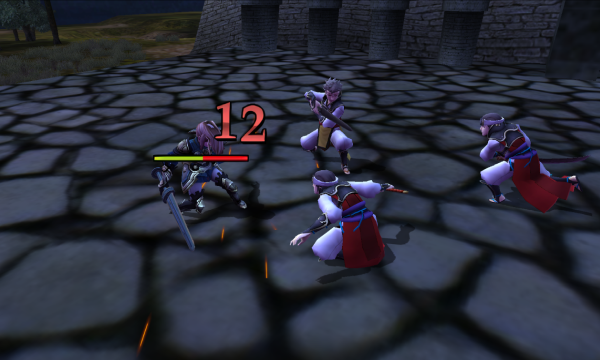  Felicia baits the Samurai pair out, but they get an obnoxious dodge. Her hit rate would have been 100% if it weren't for Duelist's Blow.  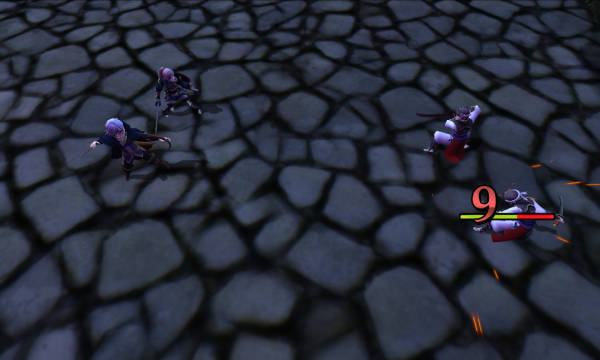 Niles isn't much more reliable, but he chips successfully. 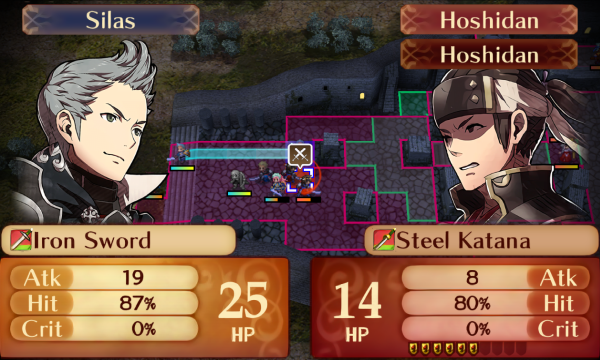   Silas at this point provides a single massive, yet accurate, hit against pretty much anything. He finishes the first Samurai for a level that makes him better at doing that. I just wish he had gotten some speed. 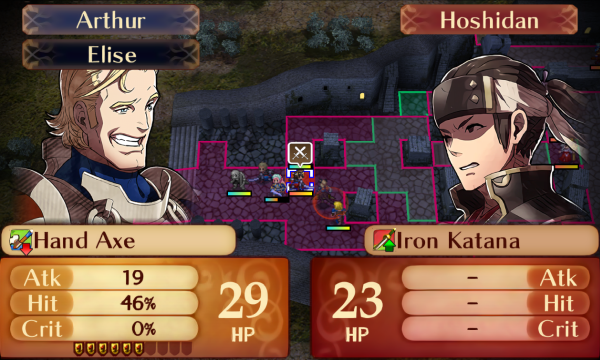  I'd rather not take any more attacks from this guy, so I have Arthur take a pot shot at him with his hand axe, and it pays off nicely.   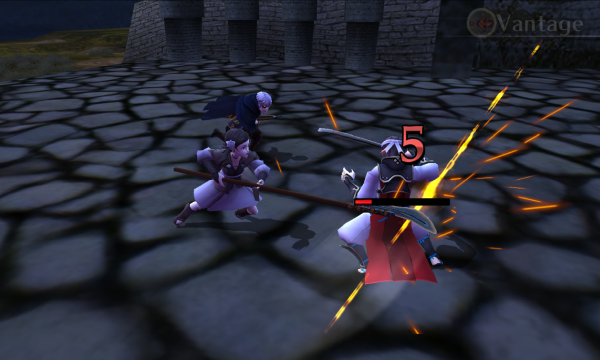 Now he's weak enough for Mozu to finish. I don't really care that he activated Vantage, because these are the only enemies on the map with it, and Mozu just won't attack unless she's getting the kill, so her health really doesn't matter. Unfortunately, there's not many more opportunities to feed her kills in this map, so this is about all she'll be doing for the moment.  Nyx moves into Enfeeble range so she can start wasting its charges. I don't plan to use her for several turns, so she won't mind the stat reduction.  Azura moves towards the chest, and everyone else just moves forward, staying out of enemy range. The problem at this point is that if putting someone in enemy range also puts them in enfeeble range, and I don't have any options to deal with both of these problems at the same time.  Literally nothing happens during enemy phase aside from Nyx getting Enfeebled, but Felicia activated Good Fortune on player phase, which is actually kind of nice right now.  I pair Elise and Silas, as well as Felicia and Niles, and have everyone inch closer to the enemy, staying just out of range. Odin uses a vulnerary, because he'll need the health to deal with the eastern horde. I usually take the southern route, but I couldn't see any way to survive all of that without taking even longer, so we'll use the northern route for this run. I'm just going to soak up every Enfeeble before taking on the group near the boss. This honestly might break my "no excessive stalling" rule, but I really couldn't think of a way to proceed without mostly waiting out the Enfeeble charges or using a lot of extra vulneraries to maybe save a couple of turns. 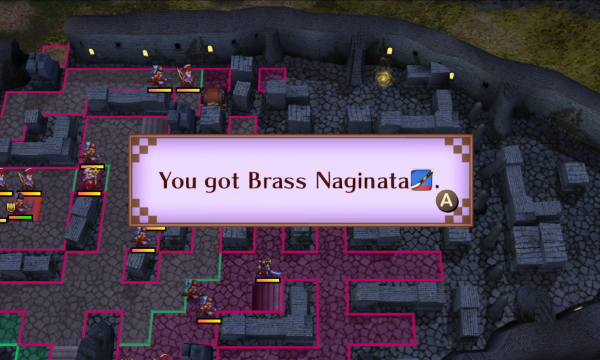 Azura opens the chest from the north, and though it's not a great one, she has a weapon now.  Once again, nothing happens on enemy phase except for Mozu eating an Enfeeble (it's not like her stats mattered right now anyway). Back on player phase, I move Silas and Elise north and have them break this wall.  Felicia and Niles move just behind him to provide Demoiselle support. This only puts her in range of the Archer. 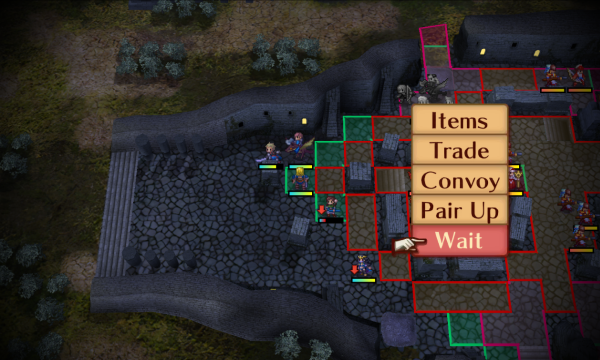 Arthur lines up for his turn with the stat debuff.  I pair Nyx and Mozu, and everyone else inches forward, staying out of enemy range. Because of Arthur's low resistance, the Enfeeble would normally target him instead of everyone else. Unfortunately, Conquest AI is pretty smart, so it's going to target Silas instead because he's actually facing combat and will actually be affected by the debuff.  Azura gets just a touch closer to her dragon vein, but now that she has a weapon, she can stay in her guard's range to start fighting him on enemy phase.  You can't see it well in the screenshot, but this is Silas getting Enfeebled.    Thankfully, this guy doesn't have Seal Defense. Silas hits really hard even with -4 strength and weapon triangle disadvantage. 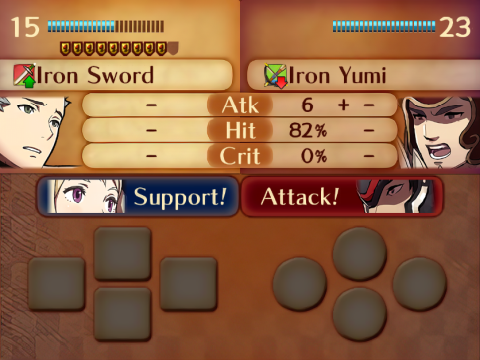 He does get chipped by the archer, but he's still fast enough to avoid doubles even through the -4 speed.   Elise cleans up the Spear Fighter. She's almost dealing double digit damage now!  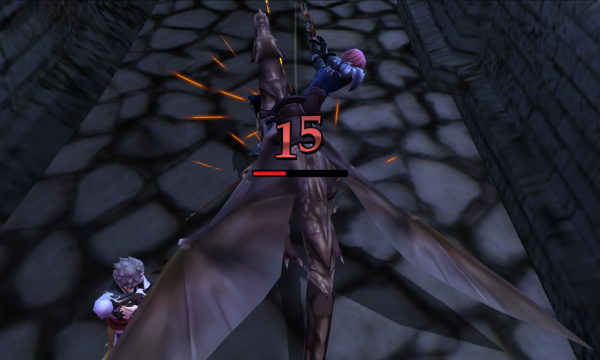 Marth doubles and kills the Archer. He's become pretty great at this point, though these Archers are pretty slow, so it's not that impressive. 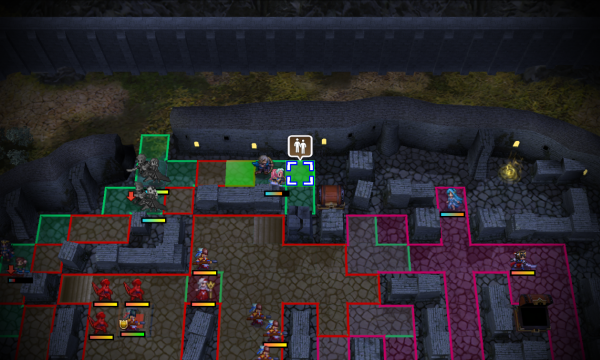 Felicia and Niles separate near the chest.  I'm content with Azura taking the Samurai on during enemy phase, and everyone else is literally just waiting on the Enfeeble to run out, so I just end the turn.  On enemy phase, Arthur takes the last Enfeeble for the team.    You may think it's a little strange that a dancer can have such an even fight with a Samurai, but this guy is pathetically weak. Like so pathetically weak that he may actually be the worst enemy in the entirety of Conquest. I guess they left the job of guarding the Hoshidan princess up to the new recruit. 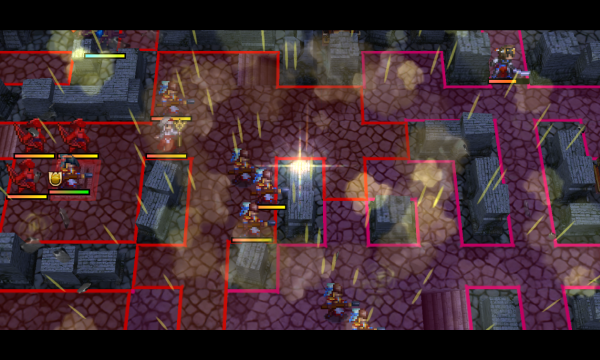  On player phase, Azura drops acid on these enemies' heads. It only damaged the front member of these Spear Fighter pairs, so it's not as effective as it looks. They'll just switch before attacking unless you attack them first, which would trigger a lot of reinforcements.  Odin is ready enough for this next turn, so I have him pair up with Marth and break this wall down.  Niles grabs the Rescue staff, which is extremely useful in the endgame (and pretty much anywhere else, to be honest).  I want Elise alone in a bit, so she passes Silas to Felicia. For now, she's hanging out next to Odin so he benefits from Lily's Poise.  Felicia and Silas move west and separate, so they can help out against the Archers in the boss room.  And finally, we have Nyx and Mozu wait here to start properly fighting them. 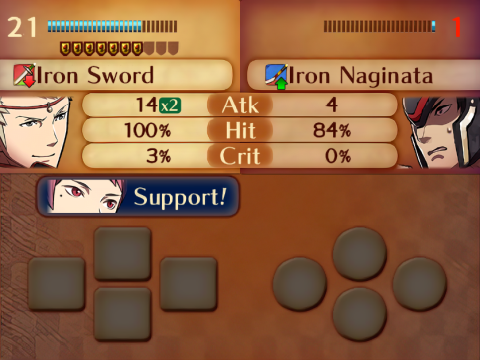    On enemy phase, Odin starts us off by taking out this first Spear Fighter for a great level. More strength and speed!    Like I said, this pair here swapped the healthy guy to the front. It's not a huge problem, but if you were to trigger the reinforcements at the same time, it would be pretty difficult to deal with. 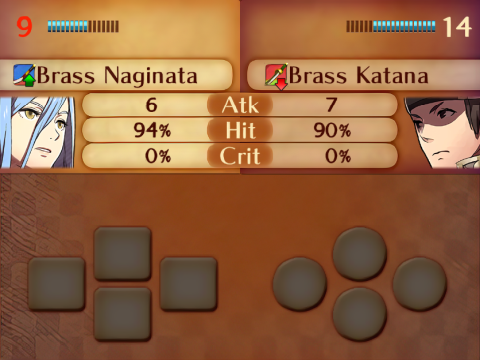   Azura continues her slapfight. She'll win eventually.    This is the most interesting fight this turn. Because this guy has a shining bow, he does magic damage, so Nyx's personal skill, Countercurse, deals half of his damage back at him. This usually won't matter because she'll two round without it, but it will help in a minute.  Mozu gets a pretty good level from blocking the dual strike, too. She desperately needs strength so she can actually start fighting things, so this is nice even though she didn't get speed.   Odin finishes the first of this pair.  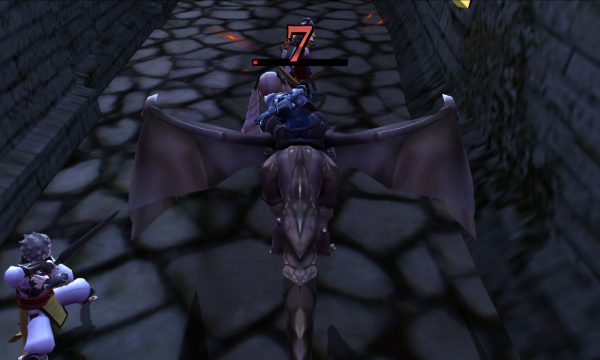 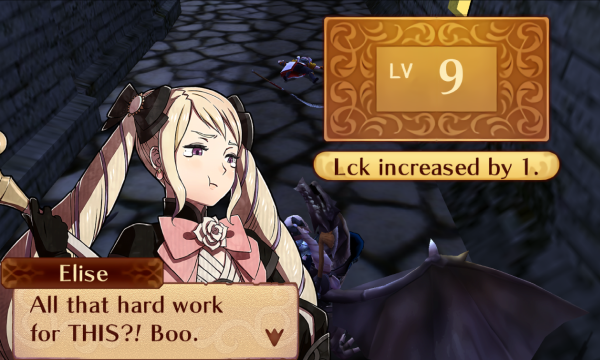 And Elise kills the other one, for probably the single worst level you can get in this game. At least it can only get better from here!  We do get 3,000 gold out of it, which is nice.   Nyx backs off and uses Mozu's vulnerary.   This is where Countercurse helps us. Niles would still kill without the extra damage, but it lets him avoid a counter so he can soak up another hit on enemy phase. 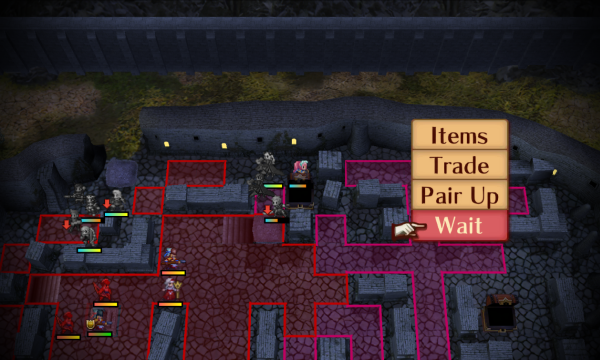 Felicia is done over here, so she moves to provide Demoiselle support to Odin.  Azura finishes the turn by using a vulnerary. 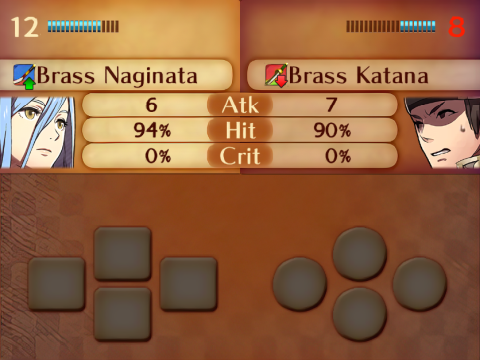   She's almost got him! Any day now!    Odin kills the last Spear Fighter for the moment. In hind sight, a tonic-boosted Silas with Vow of Friendship active could probably have let me do this map much more quickly, but that's not what I ended up doing and I'm not willing to replay this map again.   Once again, if Niles had taken the counterattack from the first Archer, he'd have just barely died here. It's not much, but Countercurse did technically help here.  Back on player phase, Felicia activates Good Fortune again.  Niles has a guard gauge, so he moves forward while staying in the Archers' range.   Nyx finishes the second Archer off. Fimbulvetr is kind of inaccurate, especially in Nyx's hands, but it worked out, and that's all that matters.  Elise moves to provide Lily's Poise support so she doesn't die to the last Archer. She also trades Nyx's fire tome to the front so she hopefully won't miss on enemy phase.   She did it! It would technically have been safer to use another vulnerary, because if she had missed she would have died, but I'm a cheapskate and it was realistically not going to miss.  Odin uses a vulnerary without moving forward, because I'm not ready to trigger the reinforcements just yet. 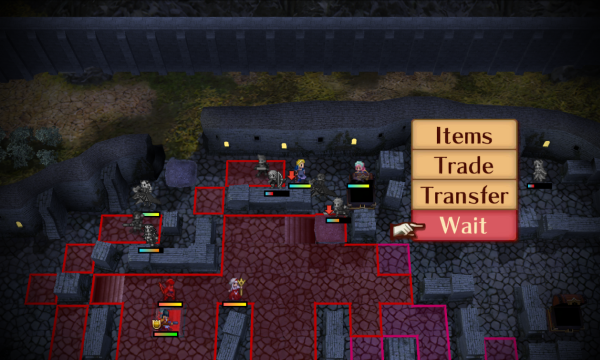 I end the turn after Arthur moves forward.  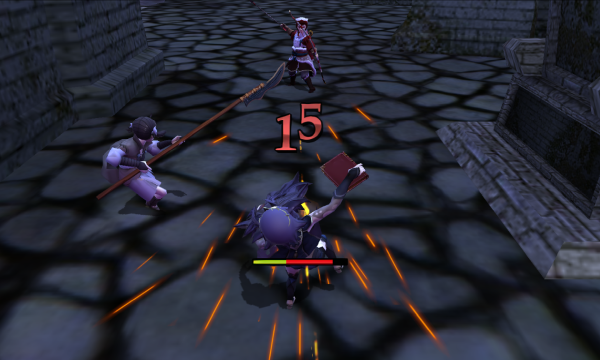  Nyx barely survives and chips. I think this is the most I've ever had her contribute in this map. 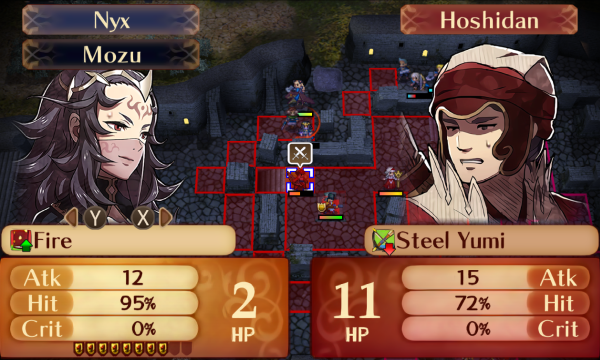  She finishes this guy on player phase.  It's finally time to trigger those reinforcements, so Odin moves in and uses a vulnerary.  I move everyone in, making sure to block the northern stairs, because they'll spawn a whopping 4 Spear Fighters if I don't.    This is the other Spear Fighter pair. We'll take them out next turn.  These are the reinforcements I've been so afraid of. You can see how dealing with all of them, or even just the northern ones along with the Enfeeble staff and Spear Fighter pairs would be difficult, especially with such a sub-optimal army. I'm sure it could be done with this team, though.   Rare footage of Arthur having more than 80 hit with a hand axe.   Odin finishes the second member of the last pair because he's one of the only ones able to tank the reinforcements.  Azura decides it would be safer back in her hole in the north.   Elise commits a war crime by killing an unarmed medic for axe experience. Everyone else just waits around for the reinforcements to come closer.  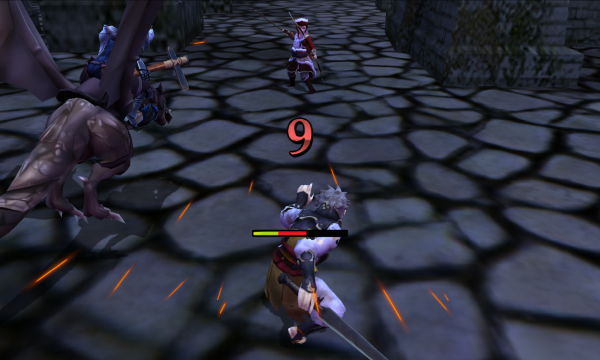 Odin is in range of all three Archers, but there's only room for these two to attack, so he's totally fine.  It's really, really annoying that the third Archer went to the left. In my practice run, he went to the right which made them easy to take out. On the left like that, it forces me to enter the range of the southern group that was otherwise content to stay there. This is gonna add a couple of turns to what was already a pretty bad turn count, but I'm not willing to replay the map over it.    Marth kills one of the Archers and finally gets D axes. Hurray for hand axes!   Azura gains a decent level for refreshing him. She's actually got good speed and strength growths, which we just might put to use depending on what class she ends up as.   Before I use Marth, I decided to handle the western front because I wanted to keep him as an option. Nyx starts us off by chipping this Samurai. 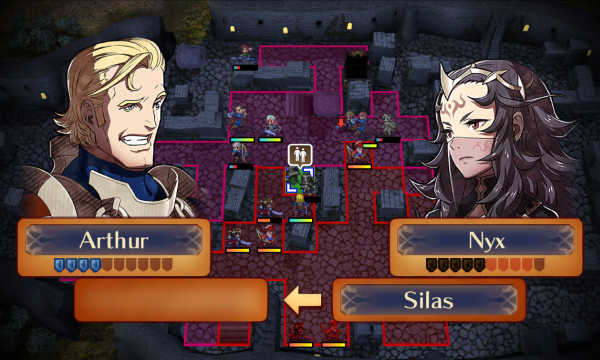   I thought about this one for a minute, because Arthur was super inaccurate, but then I thought "oh, duh" and used Silas, who one shots this poor guy with Arthur's support. He would definitely have been a better choice of main fighter over Odin, but whatever.   Now that we've handled that, Marth can safely finish the other Archer off.   Felicia kills the other Archer, and because she healed up with Good Fortune, she can choke this point for a turn.  She will want a pair up partner, though. Elise will do nicely.  Niles just kind of hangs around because he can't really do anything at this point.    On enemy phase, Felicia chips a Samurai down.   She also facetanks an Archer.    Nyx finishes the weakened Samurai. Even though she's not a great unit, I won't complain about more 2 range options.   Silas cuts another guy in half. He's not even using tonics right now! He gets C swords after this, unlocking steel swords, levin swords, and killing edges. C swords also gives him +1 attack with swords, which is pretty nice.   This was supposed to set up a kill for Mozu!  She can still chip, so she pairs with Niles and has Azura refresh her so she can reach the Archer's other side.   It's not much extra experience, but every bit helps.  Odin has a guard gauge, so he moves into Haitaka's range to start us off. I also decided to have Silas trap the Archer so Mozu can safely chip him again next turn. It's kind of cheap, but it's not slowing me down, so I don't consider this "excessive stalling."    Vantage can kind of work against you with the guard gauge system. Odin wasn't going to take damage here regardless, and attacking while the gauge is full keeps him from filling it with that attack. Not that it matters here, though.    Mozu chips before Arthur heroically puts the poor guy out of his misery. 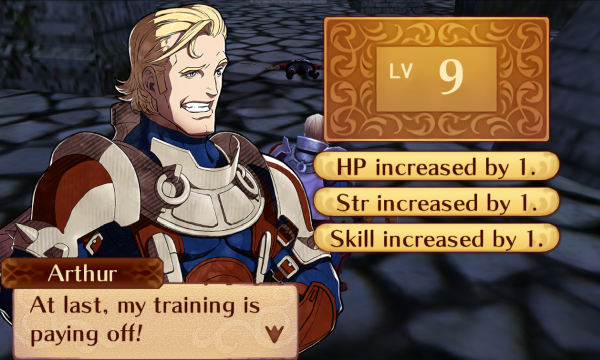 He gets a solid level for his heroism.  Azura refreshes him, and he moves to attack Haitaka. 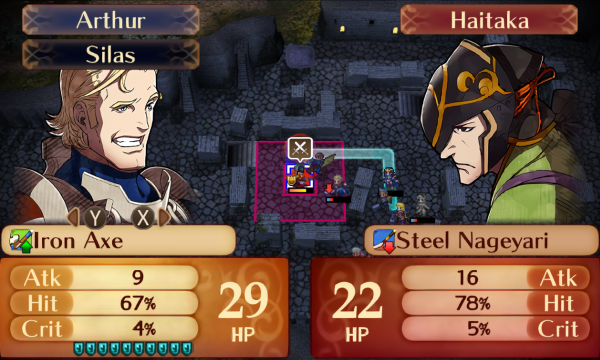   His hit rate is pretty bad, but it's as good as I can get it because the boss is under the effect of Odin's Heartseeker. Something to note about Heartseeker is that it doesn't stack with itself, so Nyx and Odin can't drop his avoid by 40 together.    I have Elise chip him for experience.  I don't want to take any chances with this guy, so I have Marth wait patiently.    I hate this guy. He's not my least favorite boss, but he's pretty high on the "obnoxiously dodgy bosses on thrones" list. The throne even healed him on enemy phase!   At this point, I kind of said "screw this" and had Odin back off before using the concoction. Azura refreshes him so he can get back in there.  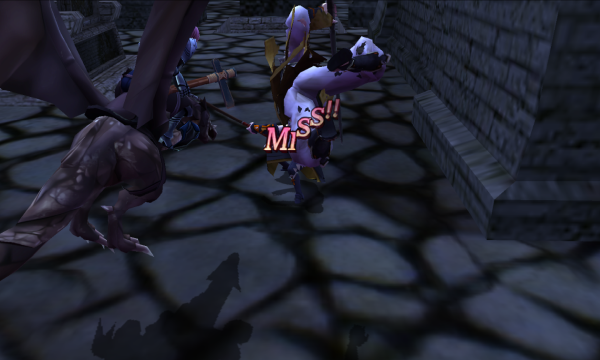 He dodges, but at this point it doesn't matter. It does make the concoction I had him use unnecessary, though.   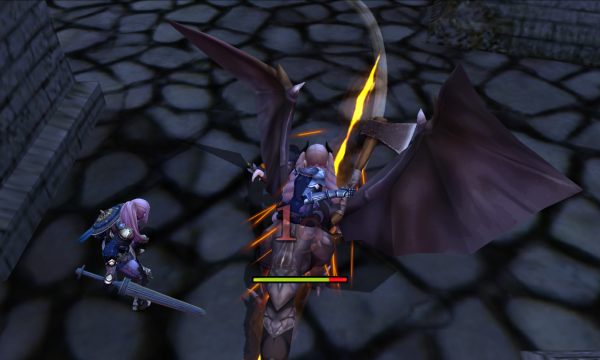 Elise fails to chip him, which is pretty normal behavior for her. The funny part here is that this decision delays the map clear by a turn, because now I don't have enough people in range to seize the throne this turn.     Then I realized that Silas could finish him off accurately using Odin's bronze sword. In hind sight, he should already have had one of his own for situations like this.  I've still got a couple of these lying around, so this is pretty useless to me. I could sell it, but I don't think I will.  If I'm spending an extra turn here anyway, I might as well have Azura get some experience out of it.  This was... not my best work, to say the least. I really should have boosted Silas up with tonics and had him lead the charge, but this is one of my least favorite maps in the game, so I'll just keep this run.     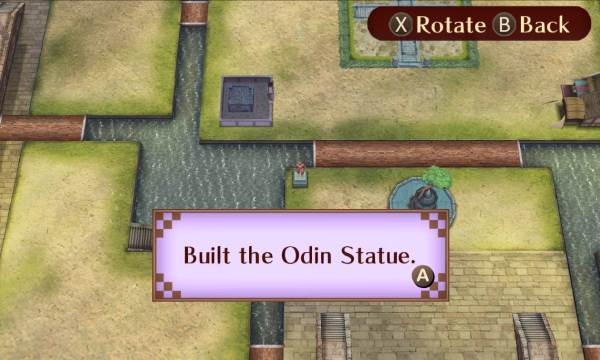 Back at My Castle, these are the supports that we unlocked. I also built the Odin statue because of course I want a statue of Odin.  Because Nyx can reclass to Outlaw, her promoted options are Dark Knight (1), Sorcerer (2), Adventurer (3), and Bow Knight (4).  She rolls a 2, making her a Sorcerer. I honestly have no idea how good she is with Nosferatu, but I think we're going to find out in the next chapter or two. I don't generally use Nyx, so I don't really know what she's capable of.  Azura can reclass to Sky Knight, but because the Songstress is a class with no promotion options, she only has three final class options. These are Songstress (1), Falcon Knight (2), and Kinshi Knight (3).  She rolls another 2, which makes her a Falcon Knight. I can't really describe how big of a downgrade this is compared to Songstress.  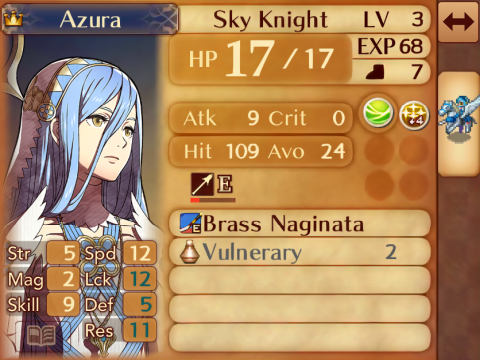 She doesn't even have a second digit in her attack stat! But her strength growth is high enough to bring this up eventually, so she might end up being pretty good in the long run. Flier utility is never a bad thing either. I might have preferred Kinshi Knight for bow access, though.    I give Odin's old thunder tome to Nyx, and I buy a bronze lance for Azura as well as a hand axe for Marth. That's all of the My Castle stuff for now, so let's move on to the new unit discussions! New unit discussions Nyx Class: Sorcerer Growth Rates HP - 30 Str - 5 Mag - 50 Skl - 35 Spd - 50 Lck - 20 Def - 15 Res - 30 As I said earlier, Nyx is arguably the worst unit in Conquest. She's still solid in my limited experience, being a magical glass cannon with somewhat shaky hit rates. Unfortunately, that role is usually taken by Elise, and I don't typically want another one. It's been a long while since I last used her in the long term, so take this whole discussion with a grain of salt. Her personal skill, Countercurse, makes enemies take 50% of the damage they deal to her with magical attacks. It sounds better than it is; in my experience, it is only rarely useful because she won't generally be fighting mages. As a Dark Knight, she gets a little more bulk and more movement, which somewhat helps her out, but she's so naturally frail that I'd be surprised if that helps her out all that much. Lifetaker would probably help her bulk, but I doubt it would make her that much better. I hear that you can promote her immediately to Dark Knight and she becomes a prepromote of sorts, but I feel like there's better uses of your early heart seals than that. I've never used her as an Adventurer, but I'd guess that she's pretty good once she gets to C bows for the shining bow. Bows are pretty good in this game in general, so she might even be pretty good with physical weaponry, especially if you give her the strength drops (though there's quite a bit of competition for those and they're probably better used elsewhere). She'd definitely be able to contribute in Chapter 10 against the Sky Knights, which is never a bad thing. Bow Knight would probably be better because of the extra movement, because I doubt she'd really need the Adventurer's extra magic with her growths. I don't think there's really any skill she would particularly benefit from on the Outlaw side of things, other than maybe Shurikenbreaker. As a Sorcerer, I expect her to either be a speedy magic nuke or a Nosferatu tank that doesn't work as well as Odin. Maybe both? I don't really know, but maybe she'll surprise me by being really good. Azura Class: Falcon Knight Growth Rates HP - 25 Str - 50 Mag - 25 Skl - 60 Spd - 60 Lck - 40 Def - 15 Res - 35 Azura for some reason has similar offensive growths as Ike in Path of Radiance. Hers are actually slightly better, because she beats him out by 5% in speed. I think this was just so she could contribute during dual strikes, because she really shouldn't be fighting anything on her own. Her personal skill, Healing Descant, restores 10% HP to allies within 2 spaces at the start of player phase. It's just about all you could ask for on a pure support unit like Azura, though it's not generally going to make a huge difference. Currently, my healing options are limited, and I may find it more useful than usual. As a Songstress, Azura is easily one of the best units in the game because singing is just that good. The Songstress skills are Luck +4, which is generally garbage; Inspiring Song, which gives sing targets +3 speed, skill, and luck until the start of next turn; Voice of Peace, which makes the user take -2 damage from physical attacks from enemies within 2 spaces (the skill description is wrong when it implies that allied units get the bonus too, which I actually didn't know until just now); and Foreign Princess, which gives her +2 damage dealt and -2 damage taken from the invisible purple enemies. The only good skill here is Inspiring Song, but the class is so good that it could have literally no skills and it would still be her best option by far. Her other options are Falcon Knight and Kinshi Knight, which are both very similar. She'll be a very frail flying glass cannon in either class, but you're choosing betweeen staff access in Falcon Knight and bow access in Kinshi Knight. Darting Blow from the Sky Knight is pretty good, and will help her double early on before her speed starts really growing. Amaterasu from the Kinshi Knight stacks with her personal skill and lets her restore 30% HP to allies within 2 spaces, which is nice but not worth changing her class over. The best skill on the table is Rally Speed from the Falcon Knight, but in a normal run she should be singing, not rallying. In this run, she'll probably be the most frail unit on the army, but her damage output should be pretty good once she gets going if we use her in the long term. As nice as bow access would be for her combat, because it lets her avoid many counterattacks that she really doesn't have the bulk to survive, Rally Speed is easily the best rally and it's going to be very useful, so I think I like Falcon Knight better than Kinshi Knight for this run. The next map lets me bring everyone but Effie, so there's no bench voting for today. Next time, betrayal and pineapple stocks are both way up!
|
|
#
?
Jul 12, 2023 06:11
|
|
|
Sorcerer Nyx is her best attempt at being an actual offensive unit (and it makes her a decent pair-up option for anyone that wants Mag), the problem is that her hit rate is almost always going to be shaky. She has too many flaws, in my opinion, having really iffy bulk and bases to go with it as well. Her main upside is that she doesn't have that much competition for a while, since Odin can be a bit slow and Elise is still a while away from promoting, so she can get kills on Knights another other low Res enemies. But I prefer Odin over her in the long run (and he also makes for a better instant promote to Dark Knight if you're going that route).
|
|
#
?
Jul 12, 2023 14:46
|
|
|
Azura being Falcon Knight seems like a pretty big blow, but hey that's what the run is all about right? Nyx as Sorceress I think is going to be surprisingly good.... at least that's my uneducated prediction!
|
|
#
?
Jul 13, 2023 00:03
|
|
|
Nyx doubling more targets than Odin doesn't really matter when Odin can safely Nosferatu tank like 5 dudes a turn. He's still getting way more attacks off. Plus he'll hit every target.
|
|
#
?
Jul 13, 2023 08:39
|
|
|
I've always found Nyx to be nigh unusable, though I freely admit I'm very bad at the game. She's just so papery and her hit rates are terrible, so every move you make with her feels like a huge gamble. I've heard some good things about Adventurer Shining Bow Nyx, for whatever that's worth.
|
|
#
?
Jul 14, 2023 06:15
|
|
|

|
| # ? Apr 27, 2024 18:35 |
|
|
Outlaw Nyx hits the right numbers to kill specific targets with physical bows until you can get the Shining Bow, so she's Good Enough:tm: Azura in a real class is legitimately scary, but her HP never gets any better without just feeding her every Angelic Robe... and even then, that tapers off eventually.
|
|
#
?
Jul 14, 2023 07:39
|
|