|
Update 11 - Increasing Discomfort This time around, you guys decided to nix Nyx, which is honestly for the best, because she's clearly wanted this for a couple of chapters now.  She didn't have much to redistribute, but Camilla got her fire tome in case she needs a little more accuracy to secure a kill with magic. She probably won't ever use it. 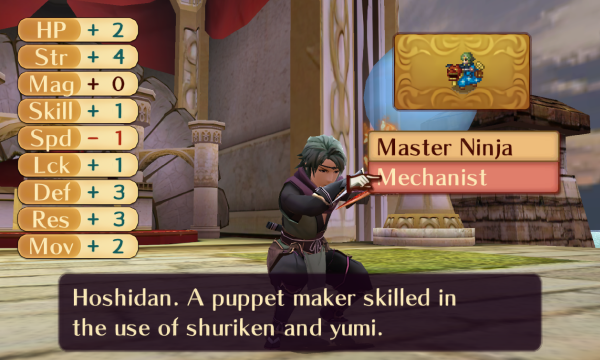  In other news, Kaze wouldn't gain all that much from promoting 3 levels later, so I went ahead and promoted him. 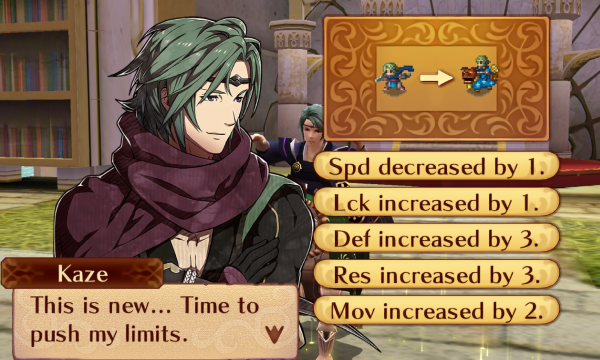  He gets a whopping +4 strength promotion bonus, which is huge for someone who will almost always double. Though he actually loses a point of speed, which is disappointing. He's fast enough to eat the loss for now, but not gaining speed on promotion is probably going to hinder him later on.  That was the only master seal we had on hand, so I bought another one. They cost 2,000 gold in this game, which really isn't too bad.  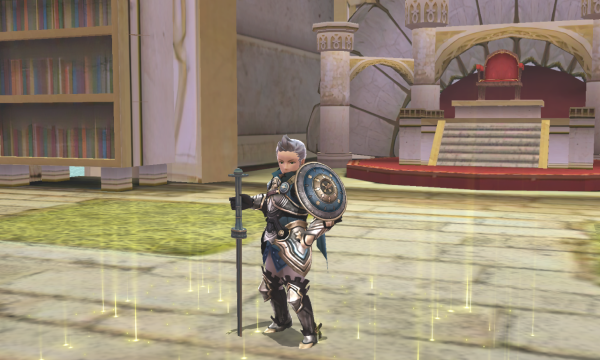 Silas is our next promotion, though at this point it's kind of overkill.   He's better all around for now, but as good as he is, I wouldn't be surprised if he stops shining quite so brightly later on.   Our last promotion for today is Odin, because I'm getting tired of him just kind of being present for the map. Hopefully he'll be able to pull his own weight with this.   The extra defense and strength should help him a lot, but another less obvious benefit is that he gives generally better pair-up bonuses now.   It might be my Odin favoritism showing, but I decided to give him the arms scroll so he can use D rank lances and axes. He also gets another +1 attack with swords from B swords, as well as silver sword access, both of which could help him out.      After this, I did a little shopping to arm everyone with the weapon types they just unlocked.   Str/def +1 isn't bad, and it affected a solid group of units.  Chapter 14 is a fairly average map. It's pretty good, though I think it's got too many status staves.  "I have no idea who this woman is" - Corrin.  This is an actual image of me reading this game's story for the first time.    This is chapter 14. It's a kill boss map, and its defining feature to me is the sheer number of status staves present. This, combined with the restrictive layout for non-fliers, can make it pretty difficult to play quickly without flier-rushing the boss. There's also some reinforcements from behind once you cross the midpoint or so that can be extremely dangerous if you aren't expecting them.  The most disgusting one is this hexing rod in the north. 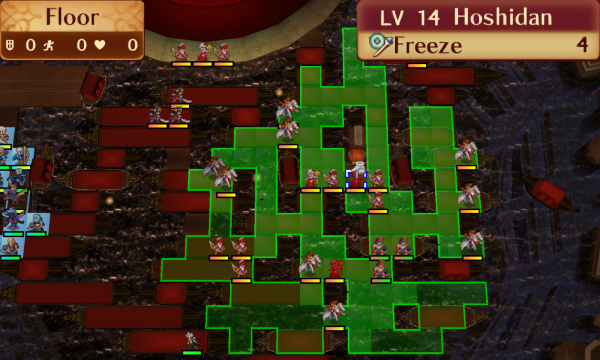 These two highlighted ladies have freeze staves, which are more annoying than threatening for the most part.  This one has an enfeeble staff, which is probably the most dangerous one of the bunch. It's a toss-up between this and the hexing rod, but I've certainly been screwed over by this one more.  And this last one has an entrap staff, which it intends to use to teleport your units next to the boss and his Archers. It's really easy to avoid, because it only covers the very corner of the map. I'm surprised that lunatic mode didn't move them a few tiles to the left, because as it is, you pretty much have to intentionally put someone in range of it.  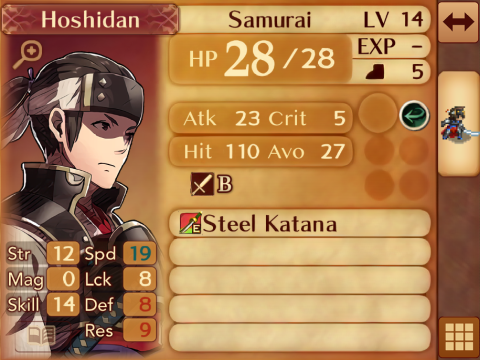  The enemies here aren't that threatening, and their skills aren't either. Most of the fliers have Darting Blow, the Samurai in the front have Pass for some reason, and some of the Archers have Lunge.  Some of the fliers have threatening weapons, like this guy with a bolt naginata (which is basically a levin lance).  There's also this guy with a swordcatcher, which has tripled might against anyone using a sword. It's not too threatening as long as you don't forget about it and put a squishy swordie in their range.   The boss, Kumagera, is pretty easy to deal with. For his weapons, he's got a tiger spirit and a steel mace (1-2 range steel club). His skills are Countermagic (1-2 range Counter but for magic), Darting Blow, and Certain Blow. He's kind of a fun unit to capture, though.  Lastly, we've got two new units in this map. We have Leo from the start of the map, and he's a pretty great unit even though he doesn't quite compare to Camilla or Xander.  We've also got Keaton, who joins after talking to Corrin. He's about as good as a 1 range locked infantry unit can be, mostly because he can swap beaststones to choose between being fast and strong or slow and tanky.  This is how I've got everyone arranged. Generally speaking, Beruka, Niles, and Odin are going to go north to get the chest while everyone else moves to the east to clear the path to the boss.   To start us off, Niles moves Odin through the hexing rod's range while Beruka trails just behind.   Charlotte pairs up with Leo, who moves into range of the Samurai as well as the hexing rod. Camilla backs him up with Rose's Thorns.  Benny moves here, which blocks the only tile the Pass Samurai could reach, preventing him from passing through Leo to hit our backline.  Marth pairs up with Azura so he can reach this tile, and he drops Azura to the north. He's just barely in Keaton's range now, and because Keaton is one of the smartest green units in the series, he'll recruit himself on ally phase.  Felicia and Silas move behind Leo, while Kaze moves south to support Marth and Azura.  The hexing rod has trouble hitting targets with higher resistance, like Leo. He's got something around a 30-40% chance to get hit here, and he needs to dodge to consistently survive. I don't mind relying on a little bit of luck on the first turn.  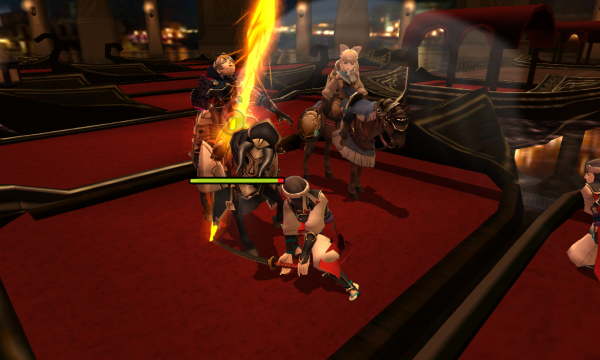  Between Charlotte's pair up bonuses and Rose's Thorns, he's able to just barely oneshot these guys. I'm basically throwing experience away here, but I want these guys out of the way quickly.  Though one of them decided to support the others with dual strikes rather than attack, so he ony kills two of them.   Keaton starts equipped with the normal beaststone rather than the beastrune, so he takes quite a bit of damage from these guys.     Leo chips this pair down while taking minimal damage thanks to a guard gauge. 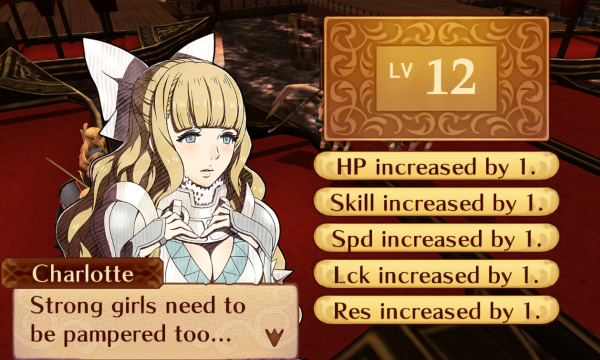 And Charlotte gets a solid level, though I wish she had gotten strength. Even though she's a Troubadour, she's still got a very solid 55% strength growth, so she just might end up being good.  She also gets Resistance +2. Meh.  Keaton recruits himself, which is nice because now he can act on player phase.   Back on player phase, Leo murders the last Samurai.  Camilla and Marth move here. They can't really move forward with so many status staves and Archers around, so they'll just enemy phase some of the fliers instead.   Silas kills the lead of this flier pair with the kodachi.  While Benny and Felicia just kind of chill for now. The narrow hallways in this map kind of limit your options.     Kaze puts his new bow to use against this Archer with Keaton's help. As a sidenote, I like the Mechanist's animations; they're fun. Especially how the puppet fires your weapons from its mouth. It reminds me of the puppet users from Naruto, which I've always thought were cool.  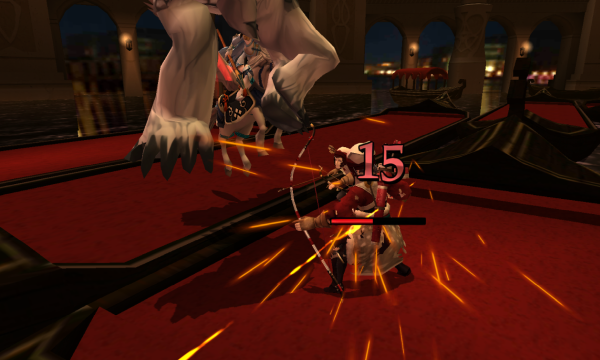 Azura pairs up with Keaton so he has enough speed to double, and he eats this guy.    Niles moves just outside of the enemy range, while Odin carries Beruka into it so she can take them on during enemy phase.  Back on enemy phase, Leo dodges the second hexing rod. It's nice that he did, but I don't think he strictly needed the dodge this time.  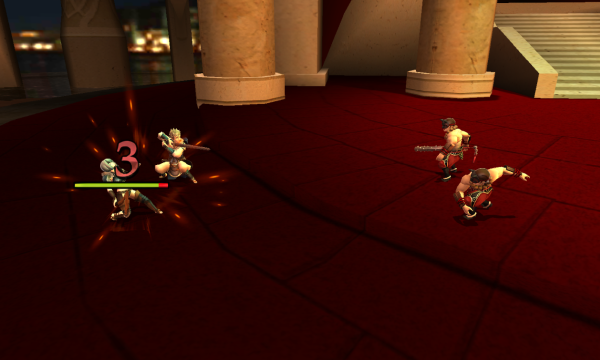  Beruka shows this guy how it's done.   She hasn't even promoted yet, but she's still pretty much unkillable.  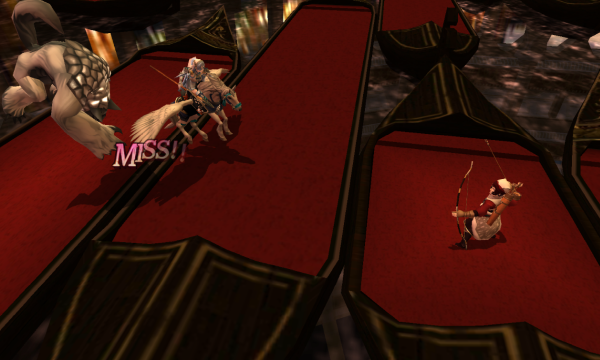 One of the nice things about Keaton is his large HP pool, which lets him shrug off even pretty big hits like this.  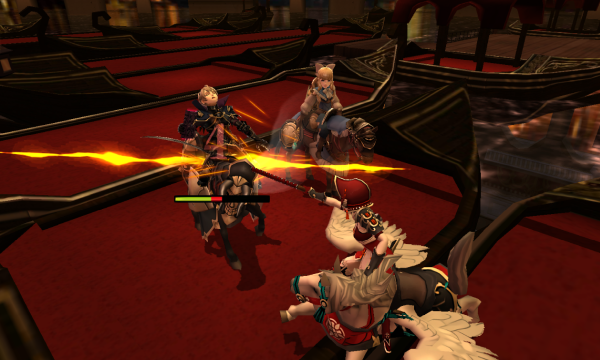  Sometimes it's kind of nice that Leo can't one round everything; it lets him chip enemies like this for other units.   Meanwhile, Kaze takes this hit like a champ thanks to the extra defense Mechanist gives him.    With Rose's Thorns, Marth is able to one round these fliers with a dual strike from Camilla.    Keaton has Beastbane, which makes his attacks while using beaststones effective against beasts, so he hits these guys like a truck. He'd have one-shot if he had been using the beastrune. 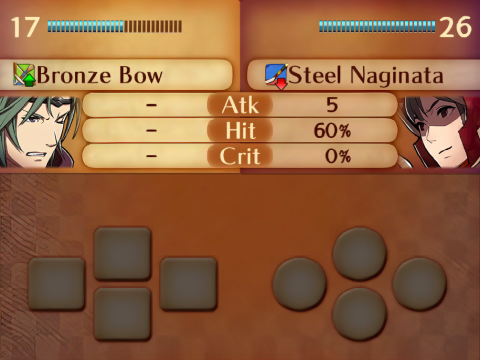 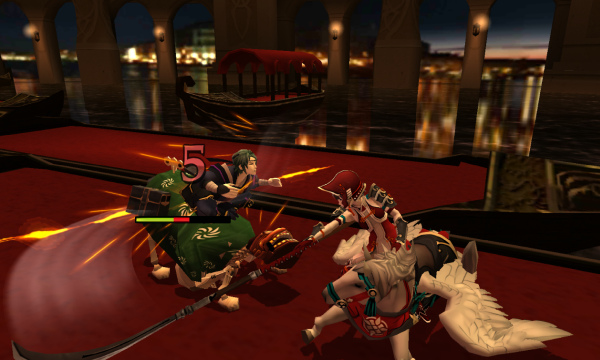 Because of the cluttered nature of this map, some of the fliers are bound to get through to your backline like this. But we'll clean them up next turn. 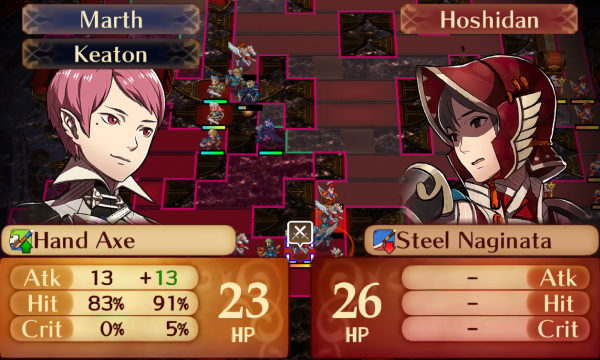   Marth starts the player phase off with a very nice level.   Camilla deletes the last southern Archer. 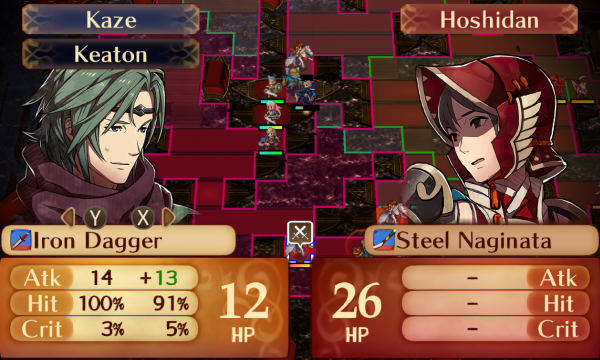  Kaze cleans up this flier with Keaton's help. I used the dagger because I'd rather train his dagger rank than his bow rank.   Azura gets a juicy kill on this weakened flier. She's still getting something like 60 experience per kill right now, so it's always satisfying when she can steal them.   Silas kills this other flier with the kodachi. This was a minor misplay on my part; in hind sight, I should have paired him with Felicia and had her use the kodachi to get this kill. She would have gotten actual experience out of it.   Leo isn't quite able to oneshot the Shrine Maiden, so he opts to kill this Archer instead. He'll enemy phase the other one in a minute.   Beruka can kill this guy because of the extra damage Opportunist gives her.  And he gives her a solid level. She'll be that much harder to kill now.   Niles retreats to safety, and I'm content with where everyone else is, so I end the turn. 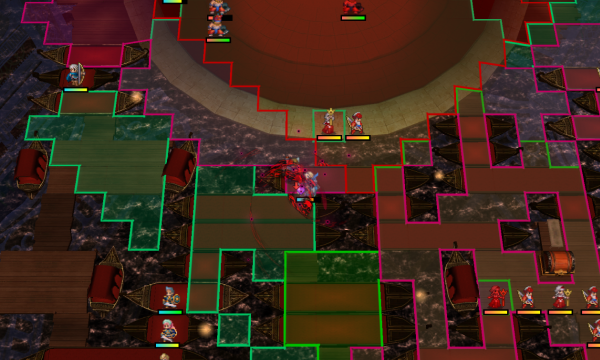  Leo finally gets hit by the hexing rod, but it doesn't really matter at this point. Also, Camilla gets frozen, which is only mildly annoying.    Leo kills the last northern Archer, clearing the way to the chest for our northern squad.   I should probably note that Beruka is currently getting some extra defense from Odin now that he's a Master of Arms, which is pushing her past the "I don't care about this attack" threshold.  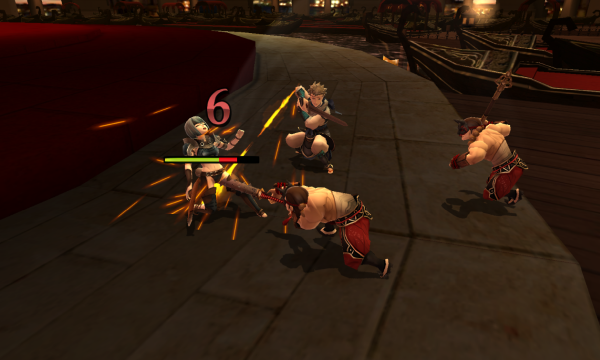  More of the same.   Back on player phase, Beruka finishes another guy. She should be able to finish the last of them next turn.  Azura drops Keaton in range of these Oni Savages, as well as the freeze and enfeeble staves. He'll get frozen and debuffed, but he'll just pair up with Azura to get out of there. 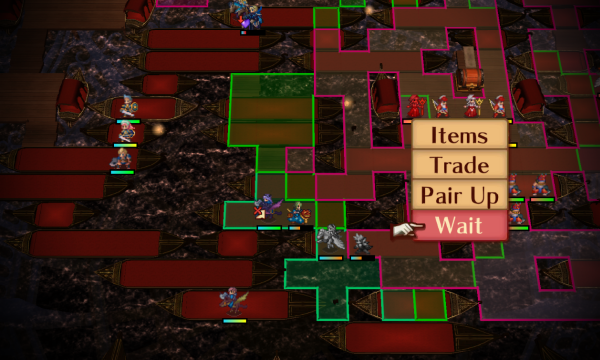 Kaze waits next to Camilla so they can do the same thing next turn.   Leo waits here to be ready for the reinforcements that'll be showing up next turn. I also had Silas take Charlotte so she could heal Leo up.   Everyone else gets into position to deal with the reinforcements. If you kill the boss quickly enough, you won't have to actually deal with them, but I'm not smart enough to do this while grabbing both chests, so we'll be killing them.   Keaton gets frozen and enfeebled, but he's strong enough to survive the turn even with -4 to all stats.   Beruka clears out another Oni Savage. 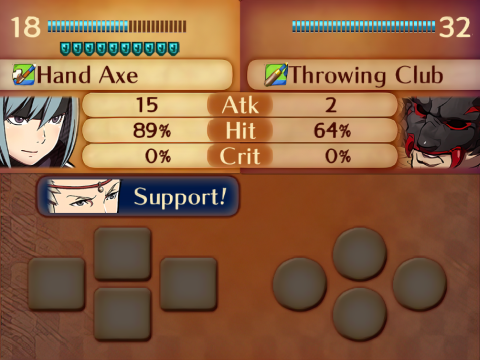 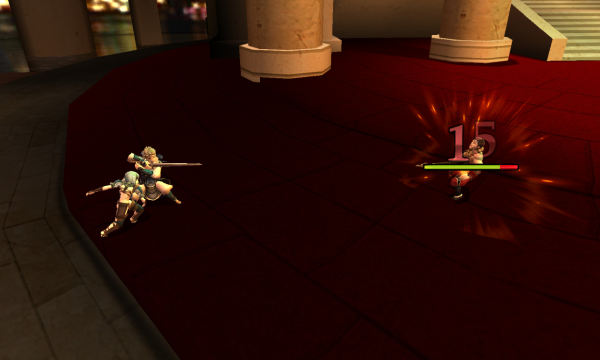 And she chips the last one down a bit.    Enfeeble makes this a pretty nasty fight, but he's durable enough to survive.  At the end of enemy phase, these guys show up. They've got Kinshi Knights in the back of the pair that can be kind of difficult to deal with sometimes. They don't have any special skills or anything; they're only threatening because they have so much movement in such a cramped map that it can be hard to kill them all before they find a way to murder one of your squishies. If you're prepared for them, they aren't too bad.    But before we worry about them, Beruka needs to clean up this guy. I'm not even mad about the bad level; she can do what she wants at this point.  Niles is going to wait here so he can bait the northernmost pair out. He's on the very edge of their range, so they'll switch the Kinshi Knight to the front and attack from 2 range so he can counter. If you're careful with your placements, you can bait out all three Kinshi Knights and kill them off before they get a chance to do much of anything.   Camilla picks up Kaze and drops him just in range of the southernmost pair. He'll be chipping the Kinshi Knight down with his bow.  After moving a few people out of the way, Leo is able to sit on this tile here that's just barely in range of only the middle pair. With this setup, we'll be chipping all of the Kinshi Knights down on enemy phase.   Azura then airdrops Keaton next to Kaze, mostly so he doesn't get murdered by Oni Savages.   We really can't move forward with these fliers breathing down our necks, so Marth commits a war crime while he waits. Everyone else just hangs around to end the player phase.  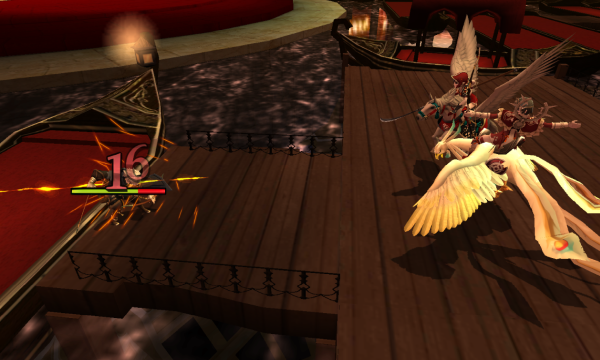  I really wish Niles had more hit, but he connected and that's all that matters.  Speaking of more hit, he gets C rank bows, which gives him +5 hit with bows as well as unlocking shining bows, killer bows, steel bows, hunter's bows, and blessed bows. The only ones useful to Niles here are shining bows and hunter's bows.     Leo successfully chips his Kinshi Knight.    And Kaze nearly oneshots his.  Lastly, nearly every enemy on the map starts advancing. This is why it's important to deal with these reinforcements quickly, because otherwise you'll be sandwiched.    Even though Niles can kill, he dies if he misses, so Odin passes Beruka to him so she can finish instead.  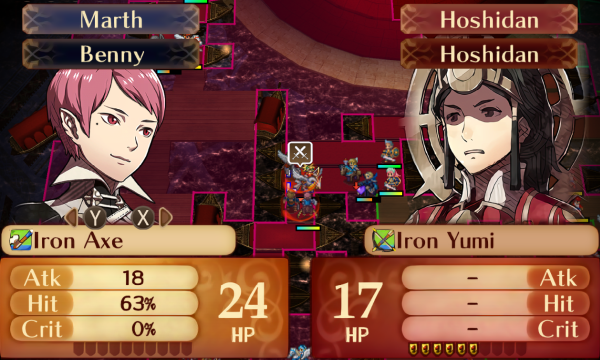  Marth misses the potshot I had him take. It was worth a try. He'll be getting a ton of experience next map anyways. 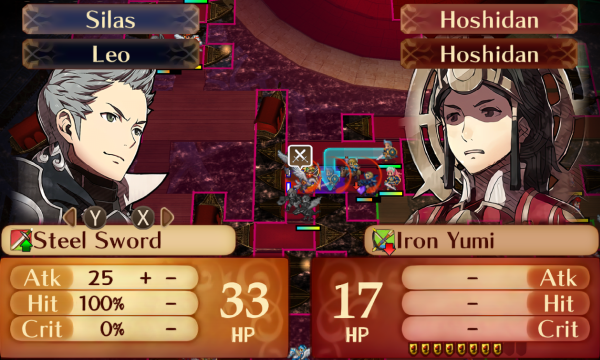  Silas handles it instead. Because this is a promoted unit, he actually gains a pretty normal amount of experience.   And then Felicia chips the leftover Sky Knight.  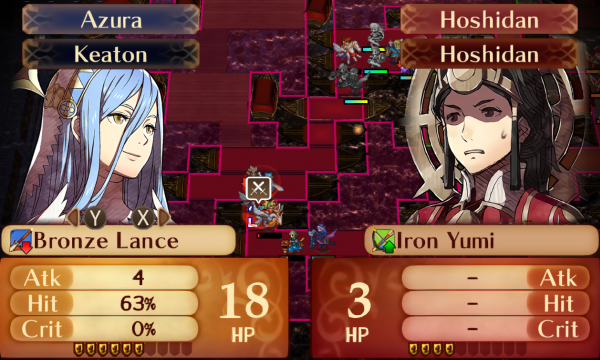  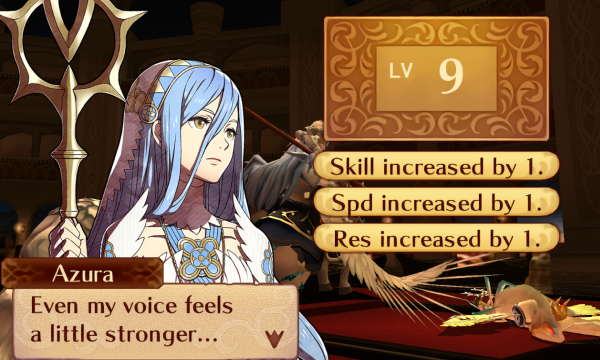 With the extra strength Keaton provides, Azura is able to finish the southern Kinshi Knight off with a potshot for an okay level.   Kaze eats the leftovers. I love the way the puppet just goes  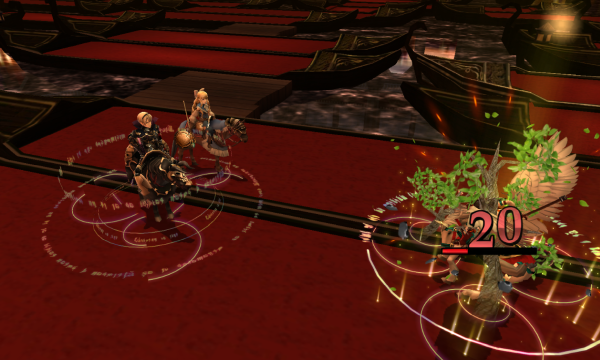 For our last fight of this player phase, Leo finishes the last of the middle pair. 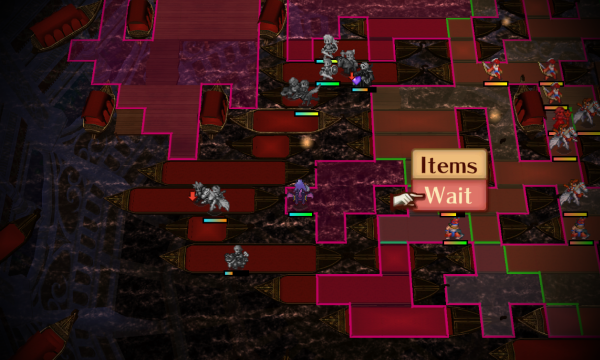 Camilla ends the phase by waiting in range of the bolt naginata flier.     She chips them down nicely.     Odin handles his first, and at this rate only, combat of the map pretty well.   Beruka passes Niles to Odin before finishing the last of the reinforcements.  And the two of them move towards the northern chest. They probably won't be seeing any more combat this map.   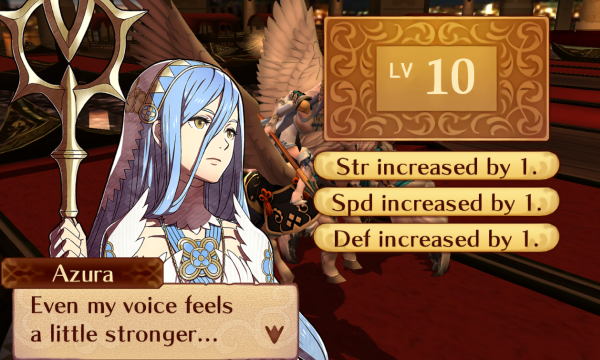 Azura finishes the bolt naginata guy for another solid level. That point of defense won't be making much difference any time soon, though.  She also learns Camaraderie, which restores 10% of her HP at the start of player phase if she's within two spaces of an ally. It's almost completely useless on a glass cannon like her. 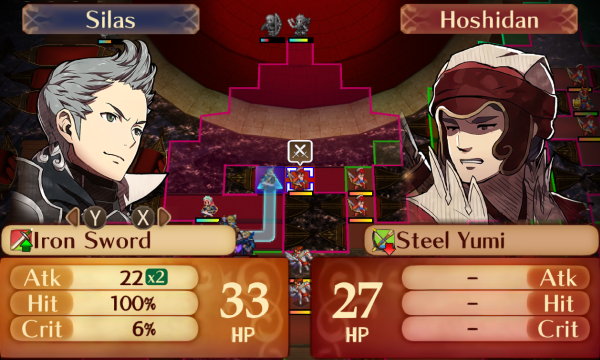  Silas kills the frontmost Archer while plugging up their path to my other units.   Camilla takes care of the swordcatcher guy with Leo's help. I want her in this tile so she can help with a dual strike in a second.   Felicia also borrows Leo to kill this Oni Savage.   And Marth deals with the last of the fliers with Camilla's help. 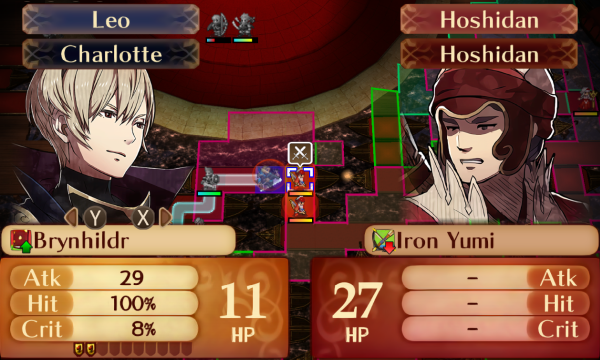  Leo picks up where Silas left off by killing more Archers.   And lastly, Kaze chips this guy down with his shuriken. This guy has a pike-ruin club, which has tripled might against lances. Even though he's got weapon triangle advantage, it doesn't work against shurikens, so Kaze is fine. 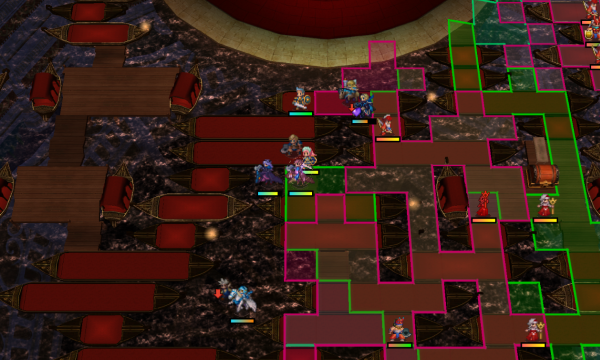 Back on enemy phase, Marth gets enfeebled. I was pretty much done using him for combat anyways. 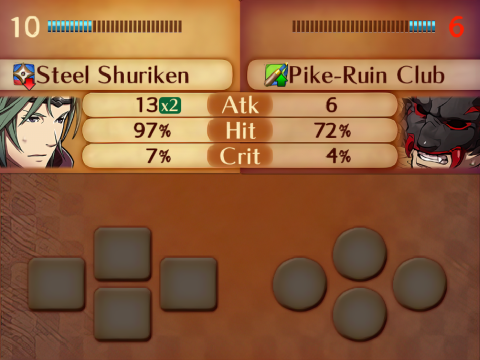 please don't crit  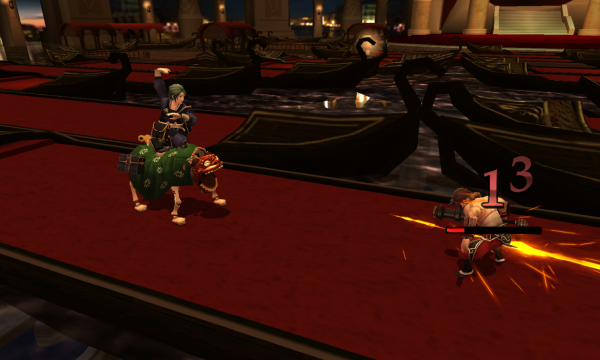 thank you    Leo deletes the last Archer.    On player phase, he and Marth do a little sibling bonding over their shared love of killing defenseless healers.  Marth even gets C axes out of it, giving him +5 hit with axes as well as unlocking steel axes, bolt axes, and killer axes.    Camilla chips this guy down for Azura, who secures the kill by having Kaze do it for her.  She gets D lances out of it, so she can finally use iron lances and the javelin she's been carrying around for the past several maps. Offensive Azura is officially in business.   Niles grabs the seraph robe from the northern chest. It's a stat booster that gives +5 HP permanently.   On enemy phase, Marth and Silas get frozen, but not much else happens. There aren't a whole lot of enemies left.  Benny uses a chest key one of the enemies dropped to grab us 10,000 gold. It's a nice haul.   Felicia chips this healer for next turn.   Charlotte heals Leo while Camilla gets ready to carry him to the boss. 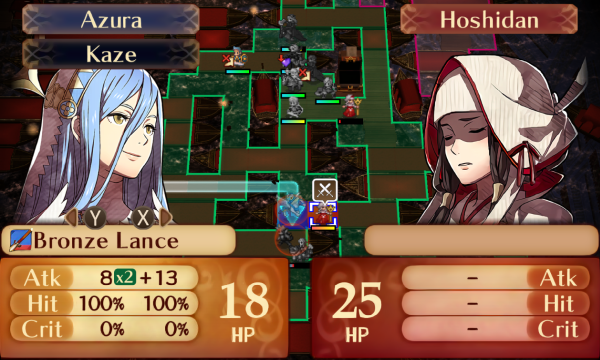  And Azura squeezes out another kill with Kaze's help. 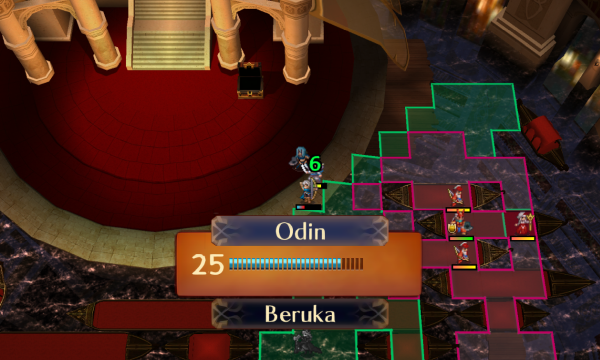  Niles passes Beruka to Odin and heals him for experience, and the two of them move towards the boss.    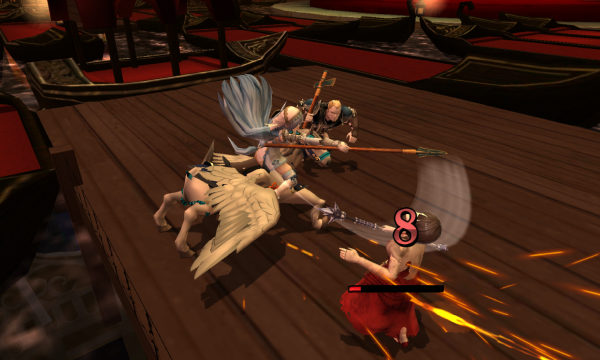  Azura continues sating her bloodlust by stabbing the last freeze person. This is kind of a bad level, but at the same time, she should be starting to actually double things pretty soon.  There's nothing going on now, so I'm not showing most of my movements here. Silas is going to ride Marth to the boss.     He almost one-rounds him outright.  Marth gets a solid level from helping out. 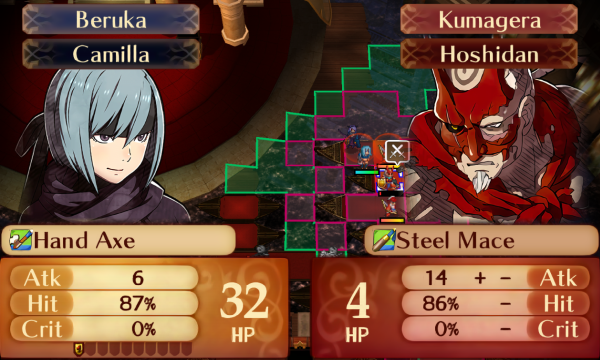    I do some shenaniganery to get Beruka on Camilla's back, and she finishes the map for us, getting an okay level in the process.  We unlocked the Grim Yato, which would be a nice upgrade for Marth if he were able to use swords. Even though he can't, it still gives him +2 def/res when it's in his inventory, so it's still nice to have. 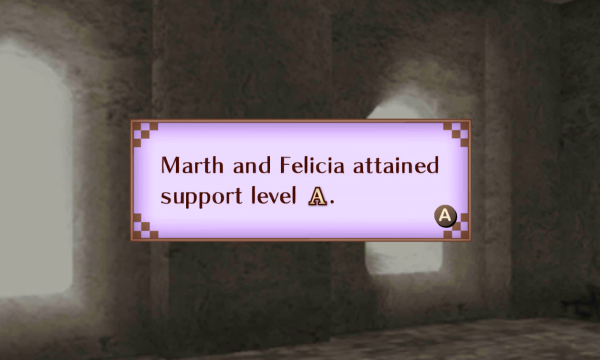     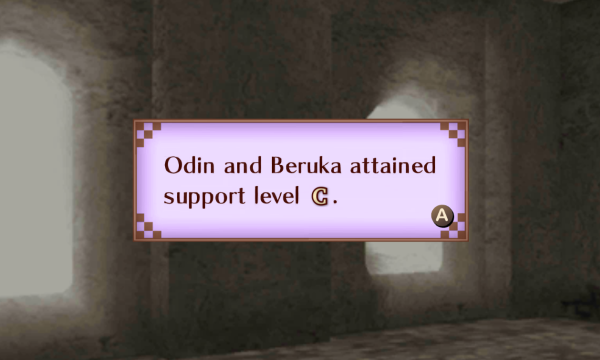  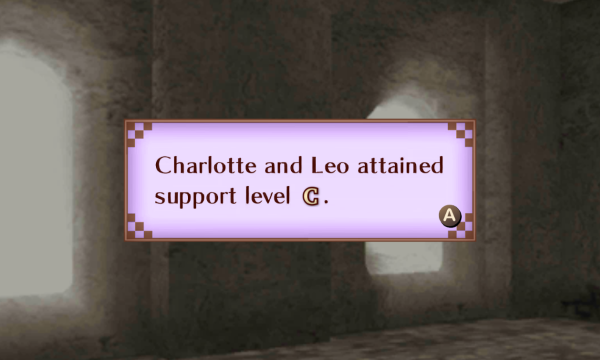 Lots of supports this time, but there's nothing hugely impactful.  Leo's reclass options are Dark Knight (1), Sorcerer (2), Butler (3), and Strategist (4). I think I'm okay with any of these but Butler, because he'd still be able to use tomes.  Which is why he rolled a 3, making him a Butler.    At least he looks handsome, and it kind of fixes his speed issues? If he can hit C daggers, he'll be pretty potent with the flame shuriken, but until then he'll be a bit on the weak side. I guess he's still kinda bulky, too.  Keaton, like Azura, is a special case where his starting class only has one promotion choice. Because of this, he only has three final class options; those being Wolfssegner (1), Berserker (2), and Hero (3). I think he could technically work fine in any of these, but Berserker and Hero make him suffer through E rank weapons for a while, which sucks.  He rolled a 2, so he'll be a Berserker.   His stats are pretty much the same, but now he doesn't get the beaststone bonuses, making him a lot weaker in the short term (and probably in the long term, too).  Also, we can upgrade the fire orb to level 2, so I went ahead and did that. And now, it's time to discuss Leo and Keaton. New unit discussions  Leo Class: Butler Growth rates HP - 45 Str - 25 Mag - 55 Skl - 35 Spd - 45 Lck - 45 Def - 30 Res - 45 Leo is the best non-Odin mage in Conquest. And that's not just for lack of competition; he's a genuinely solid unit. He's got solid bulk, enough magic to two shot most enemies, and enough speed to double some enemies (especially with a speedy pair up). His only real problem is that he's often just short of doubling enemies without speed investment, and most of the time, Xander benefits more from the same investment. His personal tome, Brynhildr, gives him a skill% chance to reduce magical damage taken by 50%. It's pretty disappointing compared to literally every other personal weapon in the game. His personal skill, Pragmatic, gives him +3 damage dealt and -1 damage taken when his enemy's HP is not full at the start of battle. It can come in handy, but it's not usually relevant. His class options are mostly magical, so he can go Sorcerer to get Nosferatu access at the cost of his mount, or he can go Strategist for slightly more magic and speed at the cost of a lot of defense. I haven't tried it, but I'd guess that tanking his bulk makes Strategist worse than Dark Knight even though he gets a bit more speed. His last (and worst) option is Butler, which removes his ability to use his magic stat offensively until he hits C daggers. This is another option I've never tried, but I'd' guess that he'd appreciate the speed once he gets the flame shuriken, though it does cost him some of his bulk. The skills his classes have access to are generally unimpressive. The best one is the Sorcerer's Vengeance (which adds 50% of missing HP to his attack when it activates), which he has enough bulk to make use of even if he doesn't stay in Sorcerer for long. Otherwise, the Dark Knight's Lifetaker (which restores 50% of his HP after combat when he kills an enemy) is nice to have, as are the Sorcerer's Bowbreaker and the Butler's Tomebreaker.  Keaton Class: Berserker Growth rates HP - 60 Str - 60 Mag - 0 Skl - 20 Spd - 35 Lck - 30 Def - 50 Res - 25 Keaton is an interesting unit because his stats are only decent, but they're pushed into the realm of "good" by beaststone bonuses. The fact that he has no 2 range options as a Wolfssegner drags him down quite a bit, but the fact that he can be both a fast, strong, unit and a slower, bulkier, unit makes him pretty versatile. His personal skill, Collector, gives him a luck% of obtaining 3 My Castle resources after moving for the first seven turns of a map. So he basically doesn't have a personal skill, because this is hot garbage. The Wolfssegner and Wolfskin are practically his personal classes, and their skills are Beastbane (which adds effective damage against beasts to beaststones), Odd-Shaped, Better Odds (which restores 50% of his HP at the start of odd-numbered turns), and Grisly Wound. They're all nice to have, but none of them exactly make or break him. Better Odds is nice because it compliments his mixed bulk and huge HP pool, and the free damage provided by his other skills is nice. His other class options are Berserker and Hero. I've honestly never tried reclassing Keaton, but I'd imagine that he's substantially worse as either of these. He's probably still fairly bulky, but having to suffer through E rank weapons is awful, and the final product is probably disappointing. He can get some pretty good skills from them, but it's probably not worth reclassing him unless you want to pass something down to Velouria. He'll be on the slow side, but he should still be able to take a few hits. And with the Berserker's 25% strength growth, he'll get strength on 85% of his levels. The one hit per battle he gets is gonna really hurt, so I think he could be pretty fun to use. Because the next map is special, I'll hold off on the benchmaster voting for now. Next time, we play probably the strangest map in the game.
|
|
|
|

|
| # ? Apr 27, 2024 19:03 |
|
Leo's usable enough due to the scarcity of good magic units on Conquest, but he's rarely impressed for me. His main benefit is probably his range (horse + magic). Otherwise he usually ends up either really needing speed or magic (which Nyx can solve with pair-ups). He's alright, but of the Conquest royals I'd say he's the weakest. Keaton is cool, he's got really good stat growths and Wolfssegner is a very good class. Fighter is kinda rough for him, he's got the growths to make good use of it (high HP, STR, DEF), but his low SKL growth really comes out in that class. If you compare him to Benny, Keaton might actually double a unit once in a while, but Benny is much more likely to actually land a hit.
|
|
|
|
Yeah, I've never really been impressed with my Leos either. Keaton is fun, though. I AM curious to see how brutal his Fighter-SKL will end up actually being. I've never done it before because it looked so dire, but maybe it won't be as bad as I expected?
|
|
|
|
Luninareph posted:Yeah, I've never really been impressed with my Leos either. Keaton is fun, though. I AM curious to see how brutal his Fighter-SKL will end up actually being. I've never done it before because it looked so dire, but maybe it won't be as bad as I expected? To compare, Arthur has 70% Skl growth and Charlotte has 50% as Fighters. Nyx, a character known for shaky hit rates, has 35%.
|
|
|
|
The game wants you to have an army of maids and butlers. Frankly, that's about the level of respect fates deserves anyways. Beruka is living life as a fighter. She's gotten so much speed.
|
|
|
|
Ooof - hitting Butler seems really unfortunate. Still looking to see if Leo is somehow able to make it work!
|
|
|
|
Landing both Butler Leo and Maid Charlotte is honestly pretty funny; I hope both see a decent amount of use. I legitimately like fighter-tree Keaton. Hp+5 makes his great bulk downright crazy, and even though his skill sucks, giving him Sol works well with his style of "one big meaty hit" combat. And I don't mind E rank hell on him in general because the dude kinda needs bronze weapons to hit poo poo in the first place. I can't decide if I like ch 14 or not. The Kinshi pincer is memorable and fun--as is how they serve as Exp pinatas--but how the map is split in two by the water makes it feel kinda sluggish outside of the ambush.
|
|
|
|
ApplesandOranges posted:Leo's usable enough due to the scarcity of good magic units on Conquest, but he's rarely impressed for me. His main benefit is probably his range (horse + magic). Otherwise he usually ends up either really needing speed or magic (which Nyx can solve with pair-ups). He's alright, but of the Conquest royals I'd say he's the weakest. He's okay considering that he doesn't require any investment to do what he does, but yeah, he's not usually exceptional. Honestly, I wish Brynhildr had a better effect. Xander and Ryoma both get very solid stat boosts from their personal weapons on top of unpenalized 1-2 range they wouldn't normally have had, and Takumi's ability to sprint over mountains is situationally very useful. But Leo gets stuck with a crummy version of Aegis? I personally think Brynhildr should always cut magical damage in half (or reduce it by 25%, if 50% is unreasonable), because it would let him frontline more, especially against those late game mages with like 45 attack. It would give him a niche as the sort of mixed tank of the family. I might just dump every goddess icon and skill book on Keaton if he ends up seeing long-term use. Add in some skill and luck tonics, and he might be kind of reliable, especially if he gets to use the dual club with its doubled weapon triangle bonuses. FoolyCharged posted:The game wants you to have an army of maids and butlers. I live to serve. Blue Labrador posted:I can't decide if I like ch 14 or not. The Kinshi pincer is memorable and fun--as is how they serve as Exp pinatas--but how the map is split in two by the water makes it feel kinda sluggish outside of the ambush. To me, it kind of feels like they designed the northern portion for another route, and then felt obligated to use all of that space here even though they didn't really want to.
|
|
|
|
Update 12 - The Land that Shall not be Named Chapter 15 is weird, so no one got benched last map. Or maybe almost everyone got benched? Anyway, it's a pretty easy map, but it's got a cool gimmick that I personally enjoy.   I buy a bolt axe and a master seal for Marth. The magic weapons are more useful in Fates than in most other Fire Emblem games because of how heavily standard 1-2 range weapons were nerfed. Even though they can't crit or proc offensive skills, they can double, which makes them useful even for characters with lackluster magic.  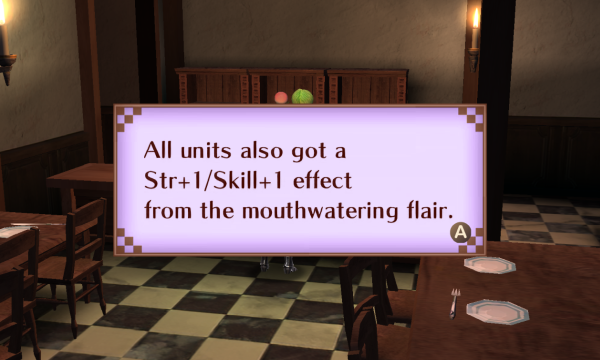 This is a solid meal, and it affected Marth, which is good, because he's gonna be doing about 90% of the combat in this map. You might have noticed that I've mostly been having him support others for a couple of chapters now, and this is why. He'll blow past everyone else from all the experience he's gonna get here.  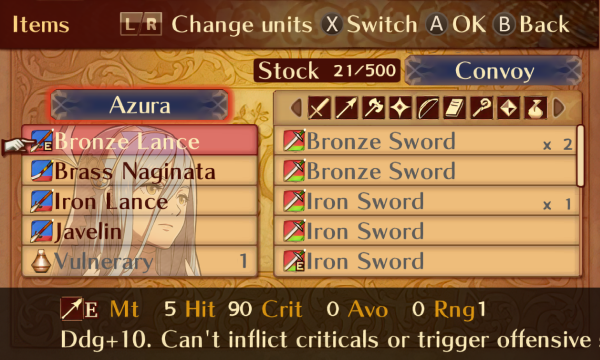 I also gave Marth the dual club, and Azura a used vulnerary. 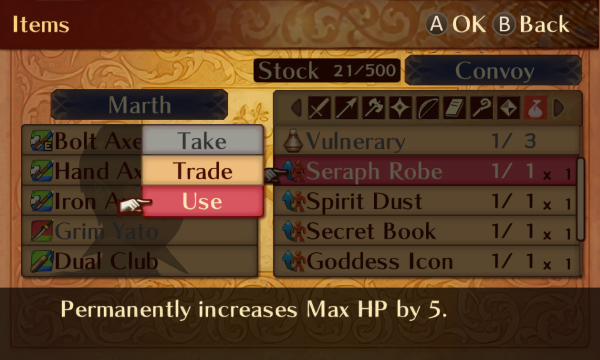 Lastly, Marth gets the seraph robe we got last time, bringing his HP to a solid 29. 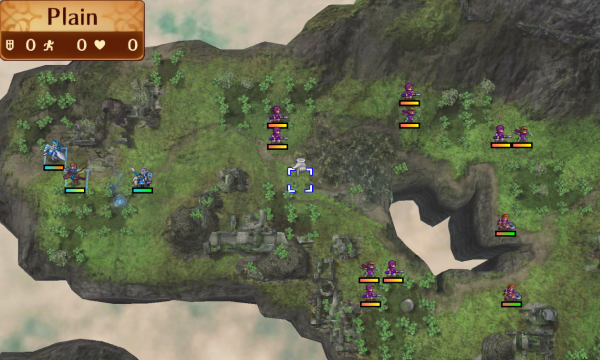   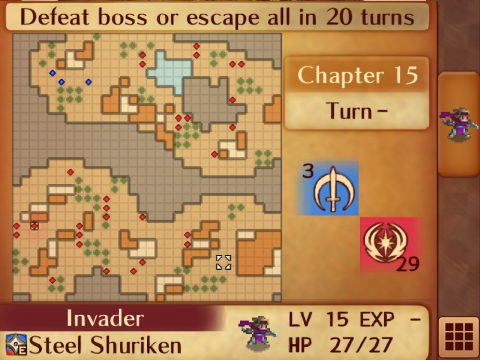 This is Chapter 15. It's divided into two halves, with the north side having generally weaker enemies, and the south side having a lot of droppable items on its enemies. You can either kill the boss in the south, or escape to the east with all your units. The boss drops a speedwing, though, so we'll absolutely be killing him.  We get Gunter now, and he's honestly pretty good. He's got genuinely awful growths, but his base stats are solid and he gives very solid pair up bonuses (especially to Corrin because of his personal skill). His biggest problem is that he can only support Corrin and Jakob, so if you're not pairing him with Female Corrin, he's pretty much relegated to being a filler unit when you have an extra deployment slot. He's mostly here to make sure you can win this map even if you didn't level Corrin up.     The enemies here aren't too threatening. The Villagers are surprisingly strong, and a couple of them have potentially dangerous weapons, but they aren't too bad. The Ninja are pretty weak, though some of them have Poison Strike, which can be a problem. Some of the fighters have Armored Blow, but that's hardly a problem because we have the bolt axe. And there's a couple of enemies in the south who have Seal Strength or Seal Defense, which can actually be kind of nasty.  Lastly, this is the boss. He's not too dangerous, but we won't have weapon triangle advantage, so our hit rates will be pretty shaky. Otherwise, he's not too bad.    Marth starts us off by having Gunter carry him here so he can whiff both of these attacks. At least he got guard gauge progress out of it.  And Azura activates this dragon vein, which... 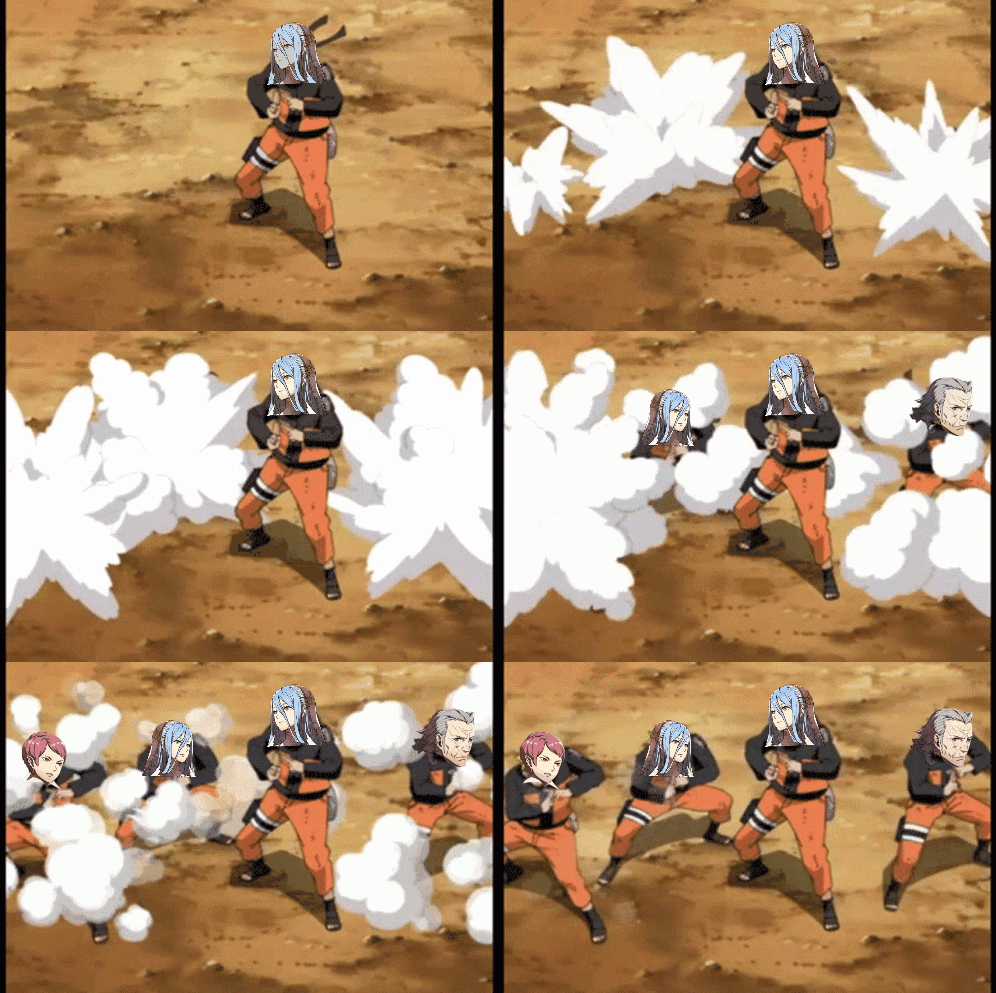  Creates replicas in the southern half of the map. The replicas share everything, including experience points, HP, stat buffs and debuffs, as well as their inventories with the originals. This means that you've got to manage your units' HP pretty carefully, because they'll be losing HP on two fronts. The dragon vein also clears the rubble in the south and creates some healtiles, but they're pretty useless.   Replica Gunter and Marth pair up and move into enemy range, while Azura sits nearby to provide a little healing from her personal skill.  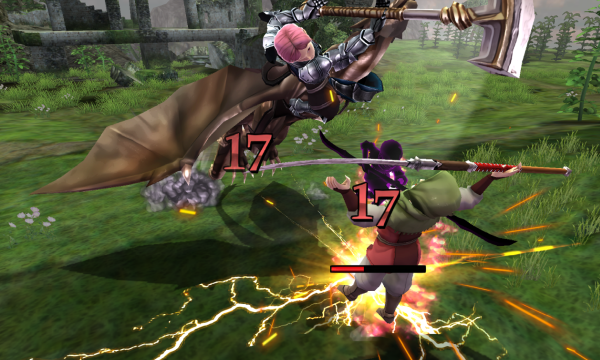  The northern Marth starts the enemy phase off strong by killing both of these Villagers, including the dual naginata guy.   While the southern one chips this soldier down. He's taking minimal damage, but it's enough to wear him down eventually. 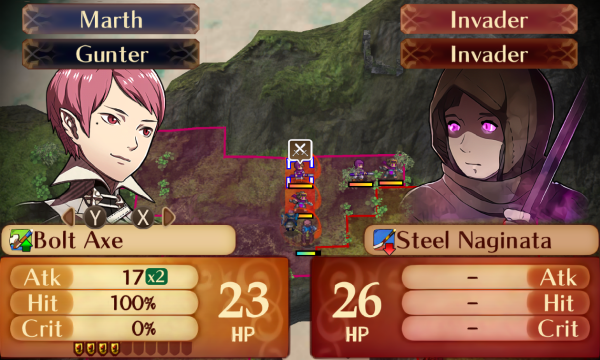 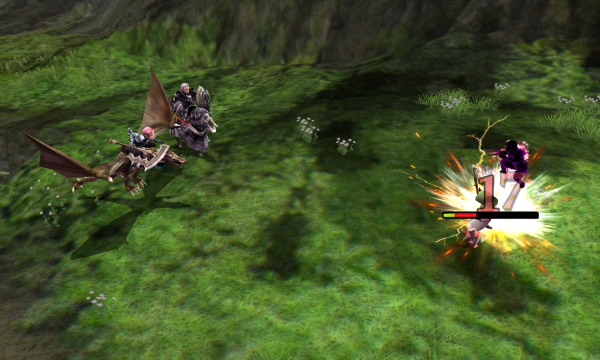 Northern Marth moves to the north and wipes out another Villager. He'll take 0 damage from these Ninja because of the defense Gunter gives him.   Southern Marth moves behind enemy lines and chips this Fighter with the hand axe. Northern Marth gets equipped with the hand axe, too.  Azura follows pretty closely, just in case she gets a chance to steal a kill.   Northern Marth starts the enemy phase off by chipping this Ninja. Using the hand axe lets him two shot, which is nice.    And Southern Marth gets a very solid level out of his Ninja.     Back to Northern Marth, who chips the rest of his enemies. They're steadily chipping his HP down.    Southern Marth dodges and kills this soldier. 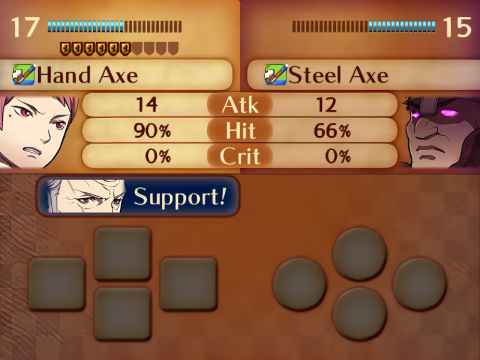   Yeowch, this guy hits hard. It turns out that dodge was necessary, so if that had connected, I'd just give Marth an HP tonic for the next attempt.     Back on player phase, Southern Marth kills the Fighter while Azura kills the Ninja with his help. Marth is in range of a Fighter, but he's got a full guard gauge.   Northern Marth kills this Villager. The leftover Ninja are weak enough that he'll be able to finish them with the bolt axe.  And Northern Azura just kind of trails behind because there's no safe way to bait one of these guys out.  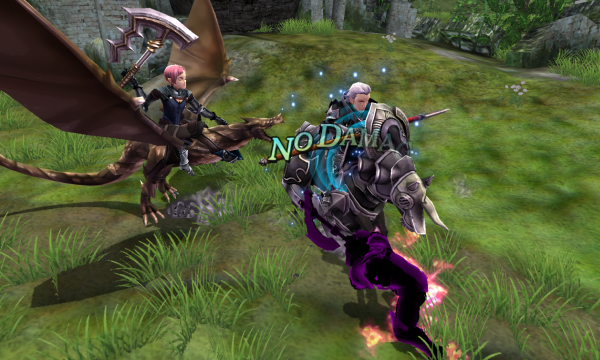 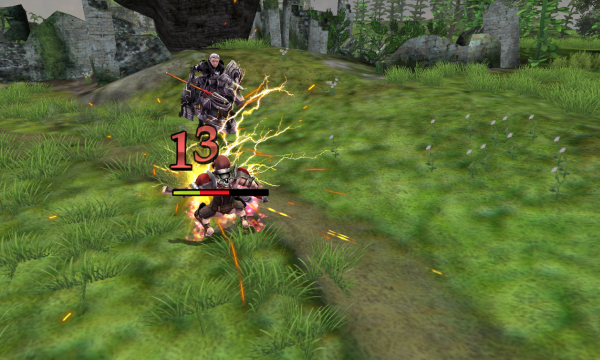  Southern Marth chips his Fighter down for another very solid level. I do wish he'd gain some strength, though.    Northern Marth ends the enemy phase by clearing these guys out.    Southern Azura kills the Fighter with Marth's help, claiming a vulnerary for her trouble.   Speaking of vulneraries, Northern Marth uses one while Northern Azura waits in range of this Ninja who's been advancing alone for a while now.  Southern Marth needs more HP, so he also uses a vulnerary. This sort of double vulnerary play is one of the reasons that I like the replica gimmick.   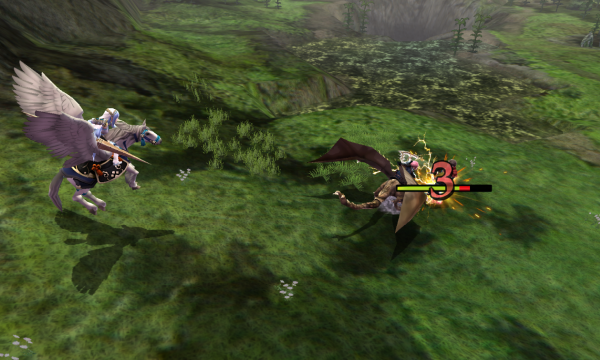  Azura can survive this hit because this guy wasn't able to dual strike with anyone. And she gets a nice level out of the chip! She's steadily approaching downright solid damage output. Oh, this guy also has Poison Strike, but since she wasn't going to survive another hit anyway, so there's no functional difference between 3 HP and 1.  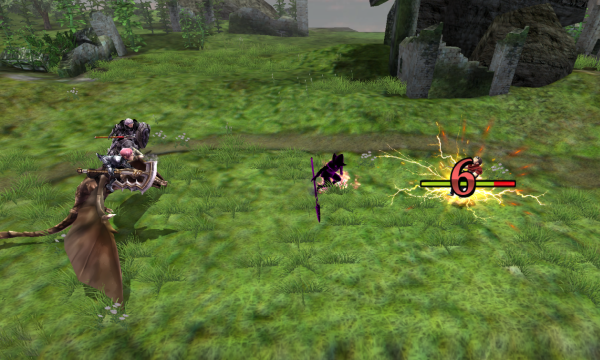  Southern Marth gets Poison Striked, which is kind of annoying. I'd like to have chipped this guy with the hand axe, but I wanted the bolt axe so we can take out the other enemies more quickly.    This guy has Seal Strength, but most of our damage output is coming from the bolt axe at the moment, so it's not a huge problem.  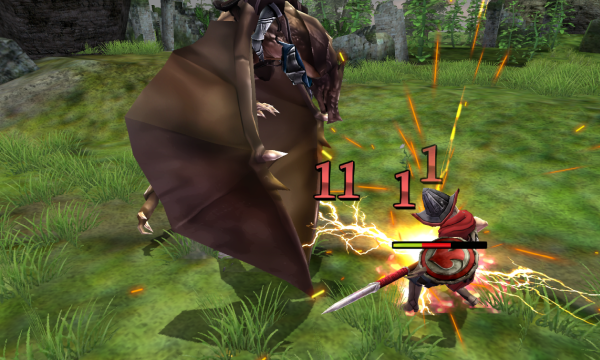 I wish the guard gauge had blocked the Fighter's attack instead of this one, but whatever.  Southern Marth takes out this guy with the hand axe so he'll be able to kill the Ninja more quickly.  And Northern Marth uses another vulnerary while running from their Ninja. Both Azuras are once again trailing a safe distance behind.   Back on enemy phase, Southern Marth chips his Ninja down. If it weren't for Seal Strength, this would have been a kill. Oh well, Marth can afford to eat more Poison Strike damage.  Gunter's only personal growths above 5% are his 15% growths in HP and luck, so this isn't that bad all things considered.   Southern Marth also clears this Soldier out.  Because of the Fighter's poor positioning, this guy didn't get a chance to attack. 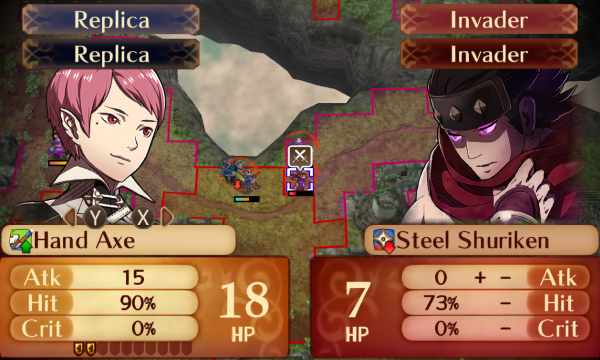 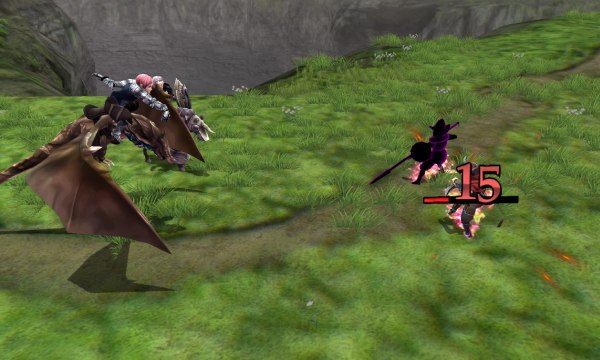 Southern Marth moves forward while killing this guy with a hand axe. 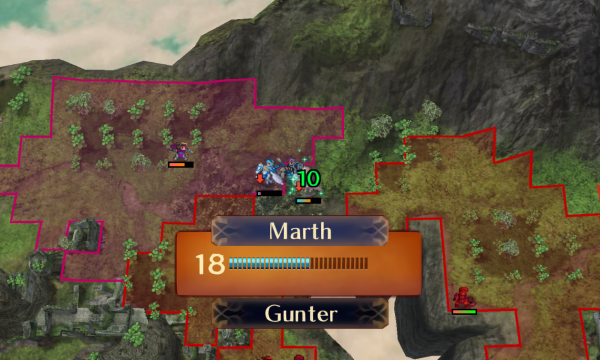 And Northern Marth keeps him juiced up with more vulneraries. We'll deal with that Ninja eventually, but for now, Northern Azura keeps running away. 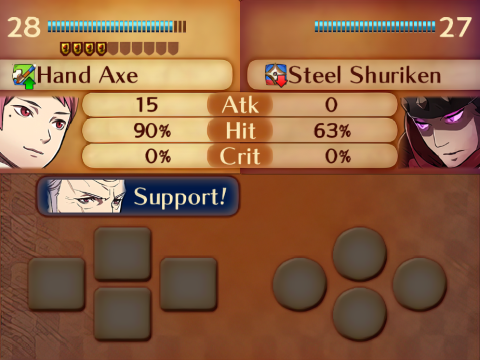   On enemy phase, Southern Marth chips this Ninja he just baited out for another very nice level. Gunter aside, the levels have been consistently solid this time around.  These Poison Strike guys are really chewing into my vulnerary stock. Luckily, this is the last one I'll bother fighting. That guy in the south can live; he doesn't have any loot for us.   This guy has Seal Defense, so Marth just got a lot more frail.  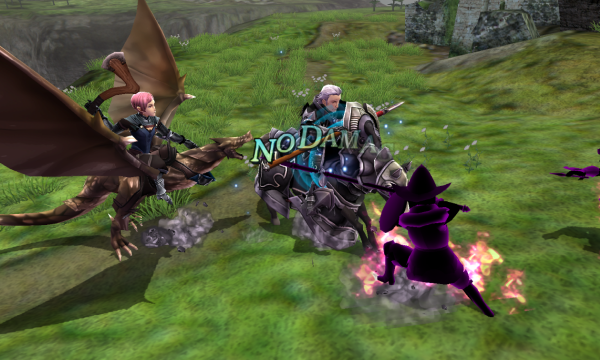  Luckily, guard gauges are always there for us. 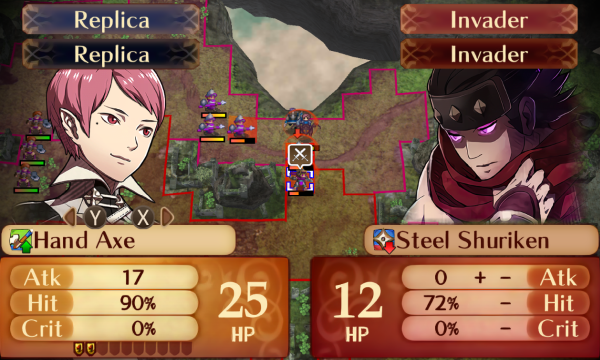   Southern Marth kills this guy and takes his goddess icon, which I'll probably just sell later on. 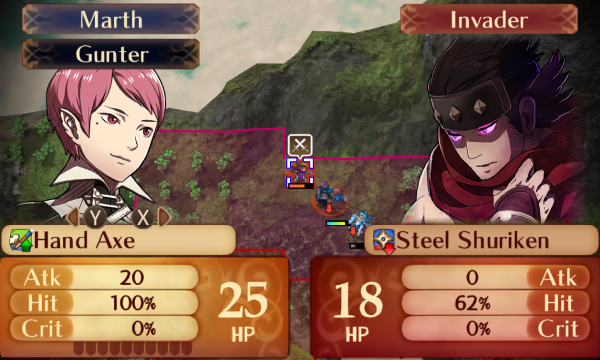  Northern Marth finally finishes off the Ninja.  And Azura swaps both Marths' equipment to the bolt axe.    Southern Marth chips one javelin Soldier and kills another.    And another.    And he chips yet another.      Back on player phase, Southern Azura kills one Soldier for a spirit dust while Southern Marth kills the other.   And Northern Marth gets a free moment to kill another Villager because Southern Marth doesn't immediately need a vulnerary.  Then he chips the last northern Ninja down on enemy phase.    It's really nice that the Ninja attacked first, because that charged a guard gauge up for this much more dangerous attack.   Southern Marth moves forward and chips this Fighter down. These three are the last group between him and the boss.    Northern Marth chips so Azura can dip.  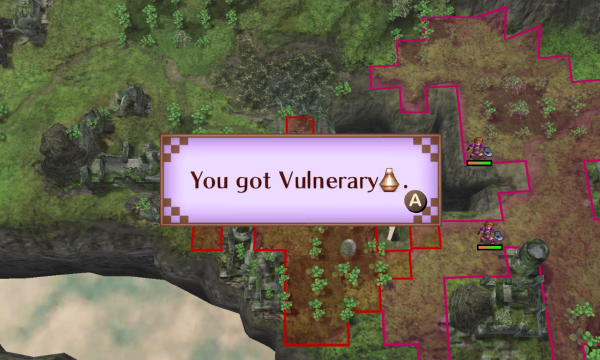 Marth gets B rank axes for helping her out, giving him an extra attack +1 compared to C axes, as well as unlocking silver axes and tomahawks. The Ninja also dropped a vulnerary.  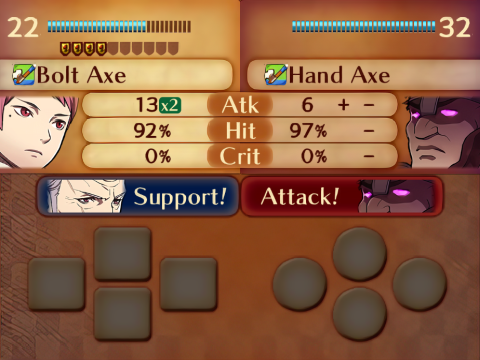    Southern Marth kills the weakened Fighter and chips the other two on enemy phase.  And Northern Marth uses a vulnerary while Southern Marth gets to work on the boss.  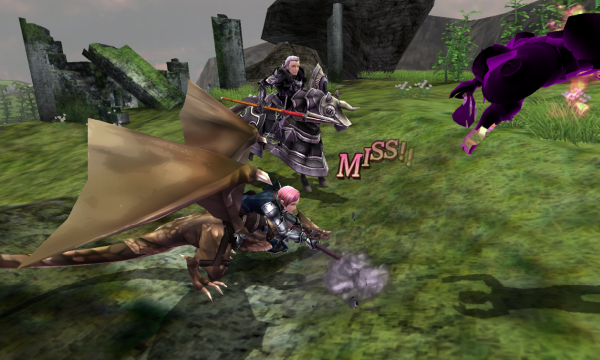  At least, he tries to. This is a pretty bad miss, because as soon as he switches to the axe, our hit rates are gonna drop, so this was the only reliable hit we had. I was honestly hoping for a crit.  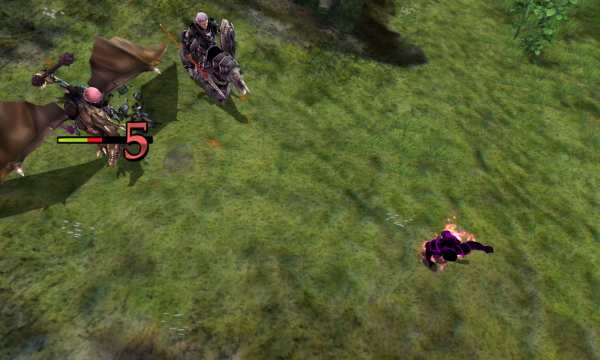 On enemy phase, Southern Marth gets chipped down by both Fighters. This was honestly a pretty bad misplay on my part; I had a brain fart and expected him to counterattack with the dual club.    Thank you, guard guages.  Oh, and these last two Fighters in the north started moving. I honestly don't know if it's because of the turn count or because we engaged the boss.    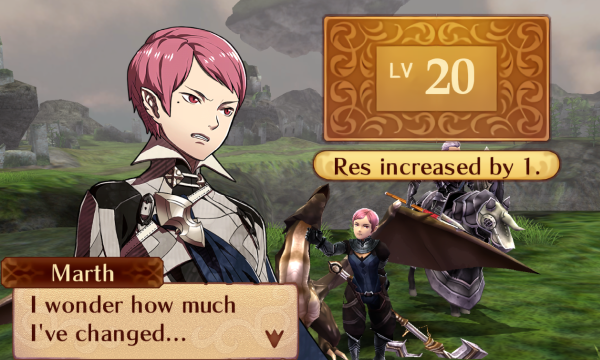 Either way, Azura chips for experience while Northern Marth kills for his last unpromoted level. It's a pretty anticlimactic one. At any rate, now I'll just have Southern Marth promote, and he should be able to handle the boss without too much trouble!  Or, uh, maybe not. Turns out the replica Marth doesn't have convoy access. Oops.  In that case, we'll have Gunter lead the charge with his javelin!     He enemy phases both of the Fighters for another level, as useless as it is.    The boss also dodges again, which is more annoying than problematic.   Northern Marth promotes, essentially turning him into a second Camilla.   And Southern Marth heals up to enemy phase the boss. 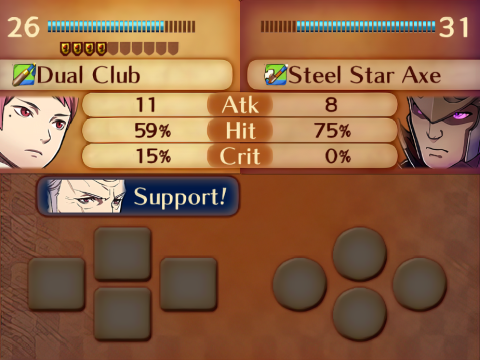   The promotion bonuses help, but our hit rate is still pretty low.   Northern Marth chips the last Fighter for experience. 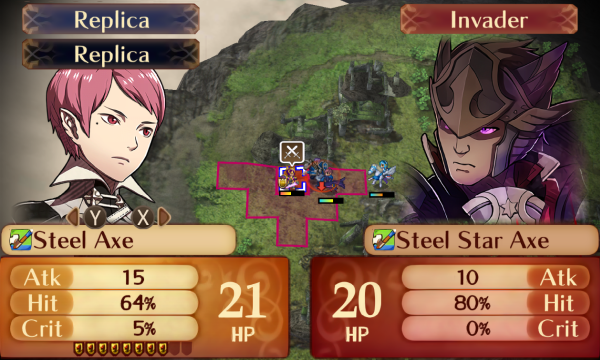   On player phase, Southern Marth borrows Gunter's steel axe and gets a solid hit in.  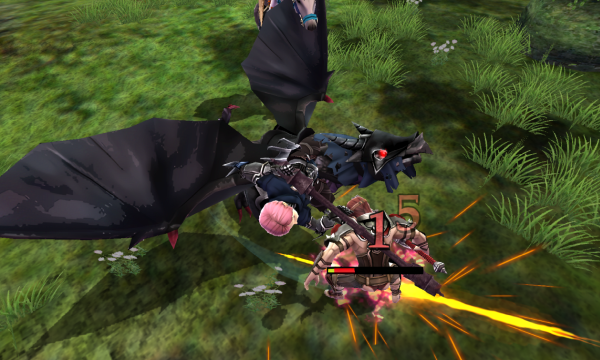 Northern Azura chips the last Fighter for experience before Northern Marth finishes him off.  This is tempting, but I decided that it wasn't worth the risk. 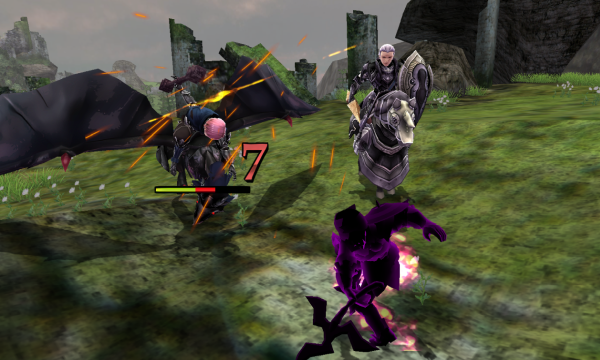 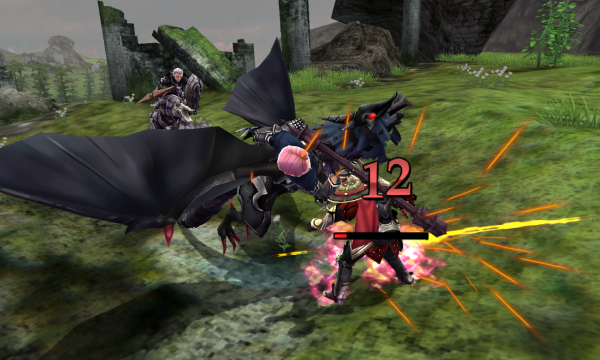  And Southern Marth finishes the boss off on enemy phase, nabbing the speedwing and the map clear.  This is a neat map, because you don't get a whole lot of opportunities to play around with replicas, especially in Conquest. My main complaint is that it's pretty repetitive, and is usually a Corrin stomp because of the limited deployment.  Honestly, I'd have enjoyed a DLC where you play as Gunter surviving alone down here for a map or two.  Azura in a nutshell.  Back at My Castle, there's another character waiting for us! 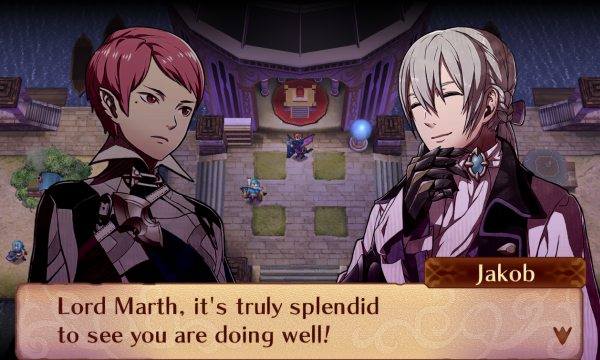   It's Jakob! He's not great, and neither is Felicia if you recruit her at this point. We'll talk about him in a minute.   We get a couple of supports that probably won't matter in the long run.   Here's a quick comparison between Camilla and Marth. He's slightly faster and tankier than her, and slightly weaker both in strength and magic, but they'll function about the same. Anyway, it's time to roll classes for the new recruits!  Gunter has access to six classes for some reason, so his choices will be Great Knight (1), Paladin (2), Bow Knight (3), Hero (4), Malig Knight (5), and Wyvern Lord (6). I've never used him in the long term, and I've also never reclassed him, but I'd guess he functions about the same regardless. You're pretty much looking at his final stats when you change his class.  He rolls a 3, making him a Bow Knight. This is probably his worst option because it takes away all of his good weapon ranks, leaving him with D swords. He should still be somewhat usable as a backpack, though.   The big loss here is the defense, because he's trading his physical bulk for a little magical bulk, which really doesn't work out.  Jakob's class options are Butler (1), Strategist (2), Great Knight (3), and Paladin (4). He's honestly not going to perform particularly well in any of these at this point.  He rolls a 2, making him a Strategist.   He can be a decent staffbot since he's got C staves. We haven't used any of the status staves yet, so we've got quite the stock to play around with. New unit discussions  Gunter Class: Bow Knight Growth rates HP - 15 Str - 5 Mag - 0 Skl - 5 Spd - 0 Lck - 15 Def - 5 Res - 5 In a game where being a support unit isn't viable, Gunter would be almost entirely useless just a few chapters after he joins, when you stop seeing unpromoted enemies. In Fates, though, it's totally okay to let someone be a stat backpack, and that's a job Gunter can do reasonably well for almost no cost, making him pretty decent. His personal growths are bad enough to make Fire Emblem 6 blush, but his base stats are enough for him to meaningfully contribute to combat for several chapters, and his class options generally give good pair up bonuses, letting him take on a supportive role any time. He starts with the basic Cavalier skills, most notably Shelter, which lets you pull off some crazy multi-refresh strategies with Azura. He also has Luna, which is nice but too unreliable to be all that useful, in my opinion. His personal skill, Forceful Partner, gives +15 hit and +3 damage dealt when he's supporting Corrin. It honestly doesn't matter what class he rolls, because he'll fall off pretty quickly as a combat unit regardless. For what it's worth, though, I think Bow Knight is his worst option because it drops his durability and doesn't let him make use of his axe or lance ranks. The unit quality in this game is among the best in the series, so I never find room to deploy him, no matter how temporarily capable he might be. I've only used him in the long-term once that I remember. He has more reclass options than most, which honestly doesn't help him all that much, but at least it's something. Because of his personal skill and the fact that he can't support anyone else, I think the best way to use him is to make him a stat backpack for Female Corrin. It's something he can do pretty well for literally no investment, which is good because investing in these growths is not a good idea. If you do invest anything into him, I think reclassing him to Wyvern Lord so he can pick up Rally Defense after 3 levels is about all I can recommend. Overall, I'd say that he's surprisingly solid, but probably not worth using.  Jakob (if you picked Male Corrin) Class: Strategist Growth rates HP - 50 Str - 30 Mag - 15 Skl - 40 Spd - 35 Lck - 45 Def - 25 Res - 25 Jakob is one of the best units in the game if you pick Female Corrin and recruit him at the start of the game, because he makes excellent use of an early heart seal to Great Knight. If you picked Male Corrin, though, he's pretty underwhelming because he joins so underleveled. Because that's the Jakob we have, that's the Jakob I'll be discussing here. He starts with Resistance +2, Gentilhomme (provides damage taken -2 to female allies within 2 spaces), and Live to Serve. His personal skill, Evasive Partner, gives avoid +15 and damage taken -3 when he's supporting Corrin. I honestly don't like it as much as Felicia's Devoted Partner. He can be a solid staffbot if you happen to want another one, but otherwise, he's generally not worth the effort it takes to get him up to speed because his damage output is just too low to secure kills. Especially because we'll be seeing a lot more promoted enemies starting next chapter. Reclassing him to Great Knight or Paladin helps his stats, but it also tanks his weapon ranks, so it's not helping all that much with his damage output. Reclassing him to Strategist at least lets him keep his staff ranks, and because there are a few chapters ahead that have low-resistance enemies, it wouldn't be too difficult to get his tome ranks up. For my part, I won't complain about being able to use the C rank and above staves I haven't been able to mess with so far. The best way to use Second Jakob, in my opinion, is to use him as a staffbot/debuffer until he gets married before promptly benching him after his child's paralogue. Benchmaster Voting  Because the next map has 12 deployment slots counting Marth's, we'll need to bench 3 characters this time. As usual, Odin is off-limits. Also, we're just about done recruiting the first generation units, so starting in chapter 17 or 18, I'll probably start deploying characters we've benched so I can pair them up to unlock their children. If you have any pairings you'd like to see, the next couple of updates would be the best time to let me know. Just note that Marth will be marrying either Flora (who we haven't recruited yet) or a second generation character, because if he marries anyone else, there won't be enough female characters to go around, and we'll miss out on a child unit. Next time, we fight to defend our doubloons!
|
|
|
|
Gunter has six class choices because the 'Corrinsexuals' (like him, Shura and Reina) get an extra class set to make up for the very few friend support options they have. Anyway, let's immediately bench Gunter and Jakob. Jakob could be marginally more interesting as a high-mobility staff bot, but we don't need him. As for one more, uhh, honestly, I'd say Leo. Butler Leo sounds... pretty bad and you'd have to limp to C rank to use the Flame Shuriken. No specific pairings in mind, but SilasxBeruka might make for a cracked Sophie considering how busted both units have been so far.
|
|
|
|
No arguments there. Voting to bench Gunter, Jakob, Leo
|
|
|
|
Definitely agree with benching Gunter and Jakob, and Leo works for the third choice. I'm pretty interested in keeping Azura, Beruka, Charlotte, and Keaton around to see how they do/ keep doing.
|
|
|
|
AweStriker posted:Voting to bench Gunter, Jakob, Leo Throw another vote onto this pile
|
|
|
|
I thought this chapter was the coolest poo poo my first playthrough, and even though it gets a little repetitive after multiple playthroughs, it's still a rad map. I also love how sick the magic weapons look in Fates; the Bolt Axe is so absurdly large and jagged, it's the most metal poo poo lol. I'm down with the Gunter Jakob Leo ban train, and I don't have to much preference for kids, though I agree super soldier Beruka!Sophie would be fun, and giving Azura one of the Keaton/Benny fighter backpacks would be nice too. Good stuff!
|
|
|
|
Update 13 - Pirates of the Nohrian Sea Last time, you guys voted to bench Jakob, Leo, and Gunter, so I redistributed their stuff. I'll be deploying Jakob and Leo before too long for their children though, so we'll probably still end up  I bought a master seal for Beruka to carry around as well as a levin sword for Charlotte, for reasons you'll see in a minute.  This is a fantastic meal, because "adult" includes all first generation characters, including characters like Mozu and Elise.  Odin gets a speed tonic, but that's the only tonic we'll be using here.  Chapter 16 is solid map. It's the point where we start seeing a lot more promoted enemies, but the game also hands you Xander, so it evens out nicely. As cool as chapter 15 is, because it doesn't let you build support for most of your army, it's at this point that I always find myself thinking "Oh wow, I'm already this late in the game? I'm way behind on pairings!" so I'll start trying to build some of those now. 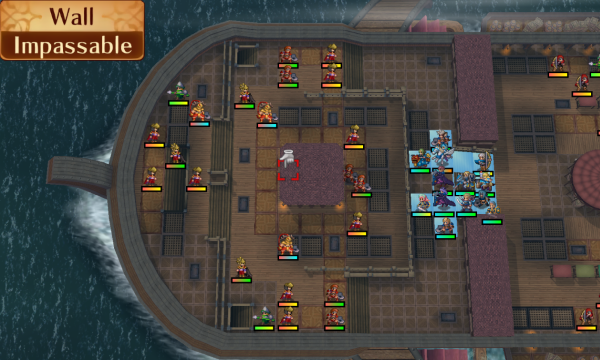   This is a kill boss map, but because the boss only shows up after you talk to all four of these green units, it usually ends up being pretty close to a rout map. We've got Sorcerers and Berserkers on the left, and Adventurers and Heroes on the right. The left side's enemies are more dangerous, but there's a couple of status staves on the right that balance it out somewhat. There's also an incentive to play quickly, because there's a 10,000 gold pot that gets 300 gold lighter every turn. It's not a huge incentive, but more money is always nice, so I'll try not to drag my feet too much. You can also see how I've got my units arranged here, which you should probably take note of because I apparently forgot to take a closer screenshot of it.   The Sorcerers have a lot of attack, so they'll pretty frequently two-shot your units, but they're not that durable, so you should be able to take them down pretty easily with someone like Kaze. The Berserkers are the most dangerous enemy type on the map because they've got a shipload of strength and an inherent 20% crit bonus, so there's pretty much always a small chance of them just deleting one of your units. Luckily, none of them have 2 range weapons, so it's pretty easy to not let them attack.  Also notable on this side is that several of the Dark Mages have Nosferatu, which you'll need to factor in when attacking them. It's not a fun surprise to realize that the one-round you were relying on is actually a two-round.   On the right side, we've got these Heroes. They're not as brutal as the Berserkers, but they're pretty durable and Darting Blow makes them pretty dangerous on enemy phase. Most of the Adventurers are stationary staffbots, but this one in particular is one of the most dangerous enemies on the map. He's fast and has a shining bow that deals magic damage, so he can be a nasty surprise for someone like Xander. He's also the only one with these Seal skills.   The unpromoted enemies on this side are made or broken by what skills they've got. If an Outlaw has Quick Draw, he's able to do significant damage, but otherwise they're not too dangerous. Likewise, if a Mercenary has Armored Blow, they're obnoxious to take down, but otherwise, they're relatively harmless.  We have control of Xander from the start of the map, and we'll be putting him to use immediately. He's got sky-high defense that's boosted further by his personal weapon, Siegfried, which gives him +4 defense when in his inventory. It also gives him unpenalized 1-2 range, which is one of the things that sets him ahead of your average high-defense wall.  On turn one, I move most of the army into position. Kaze and Azura are baiting out Dark Mages in the north, while Odin is baiting a Fighter out in the south. Beruka and Silas are charging southeast to start on that group. Broadly speaking, Kaze, Marth, and Camilla are going to lead the charge on the left, while Xander, Silas, and Beruka handle the right. Everyone else will scurry around to help out wherever they can.   Xander pairs with Charlotte and moves to bait the northeastern enemies out. He takes the levin sword from Charlotte, and passes Siegfried to her. I want him to soften these guys up for other units, and if he kept Siegfried in his inventory, the extra defense would make a couple of them deal 0 damage, so they wouldn't attack him. Everyone else is fine where they are, so I just end the turn.  I don't know why we don't get this money back after the map. I get that the pirates are taking it, but where? We're at sea! Are they throwing the gold overboard? Did they bring lifeboats? The world may never know.    Kaze starts the enemy phase off by murdering this Dark Mage from across the railing. These Berserkers are strong enough to one-shot with a crit even though they're only dual striking. Kaze died to this guy no less than 3 times during my practice attempts.     Azura baits out the only mage she's in range of. She gets a disappointing level out of it.   Kaze, you need to cool it with the crits! Save them for where it counts!    Odin kills his Fighter, but he takes a lot of damage in return.  And Felicia gets a solid level for helping him out. I'd have liked strength, but I'll take it. 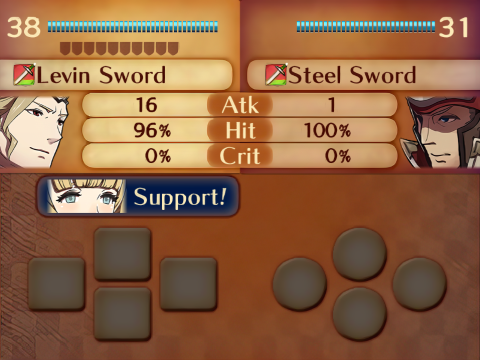    Xander starts chipping his group down. Neither of these guys would have attacked him if he still had Siegfried on his person.   This Hero would have, and without the extra defense, he takes a couple of pretty solid hits. Or one solid hit, thanks to the guard gauge.   Silas is gonna take a lot of damage, but I'm really just having him chip things down for Beruka, so I don't really mind.  These Outlaws chip him down further.   This Hero was the main enemy I wanted Silas to chip. Beruka has enough defense to shrug off pretty much everything else, so now that he's within her kill range, she can safely start slaughtering some swordsmen with the dual club. 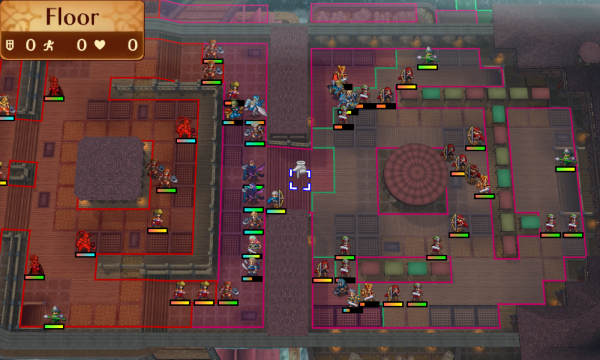 Here's the situation as of turn two. We've baited out a solid half or so of the enemies, and now we just have to survive the onslaught. Xander and Beruka are pretty much fine for the moment, so we're mostly worried about the left side of the map.   We can't afford to enter the red zone here just yet, which makes taking the back mage out slightly difficult. Camilla clears out the first one so we can reach him.   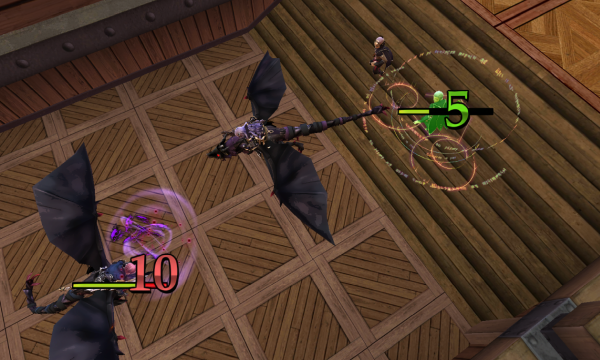  And Marth is able to finish him off thanks to Camilla's help. It's pretty important that you factor in the healing from Nosferatu when you attack these guys. I have very limited options to kill this particular guy, so if that had let him survive, it would very possibly have doomed the run.   Odin chips the last southwestern guy down, dodging his counterattack thanks to Duelist's Blow.   And Felicia finishes him off.     These guys are pretty slow, so Keaton can actually double them. Not that it matters here, but it's fun to see big number hit twice. He gets a fantastic level out of it, too! Literally all the stats he cares about! He also gets HP +5, bringing him to a ridiculous 41 max HP. If he keeps gaining speed, he could potentially end up being a very strong unit. 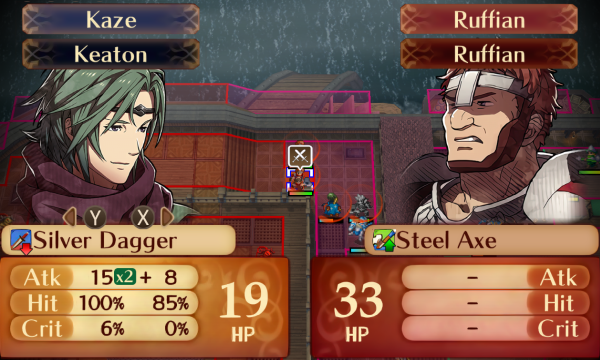  Kaze takes out the stronger of the two northwestern Fighters. This is one of those cases where silver weapons come in handy; he couldn't one-round without it, and the -2 strength will recover before it has a chance to matter.  A little healing from Niles, and Kaze is ready and willing to take a hand axe to the face if necessary. With he and Keaton forming a fleshy wall between this guy and the rest of our units, we can safely ignore him for now.   Beruka switches to the front and kills this Mercenary with the dual club. She would have killed the more dangerous Hero instead, but this guy had Armored Blow, which made him the priority because he can't really be enemy phased.   Xander moves to draw his enemies closer to the main army, while Azura and Benny find safe spaces to hang out for the turn.   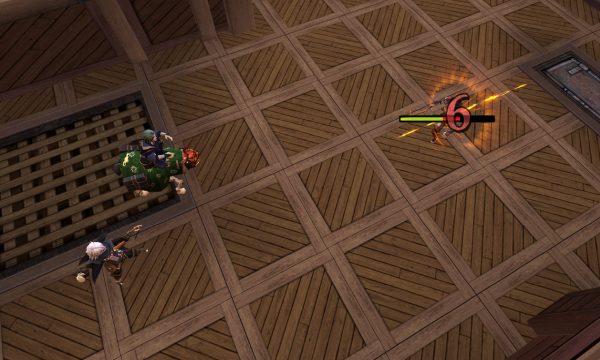 On enemy phase, Niles nearly gets murdered by the axe guy, but he's fine. I'm pretty sure he's into that, anyway.  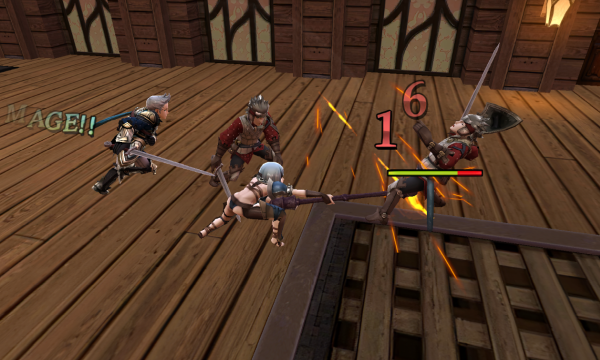   With weapon triangle advantage removing the enemies' weapon rank bonuses, Beruka takes negligible damage from the Mercenaries. She also two-shots all of them except for the Armored Blow guy, who we'll deal with on player phase. 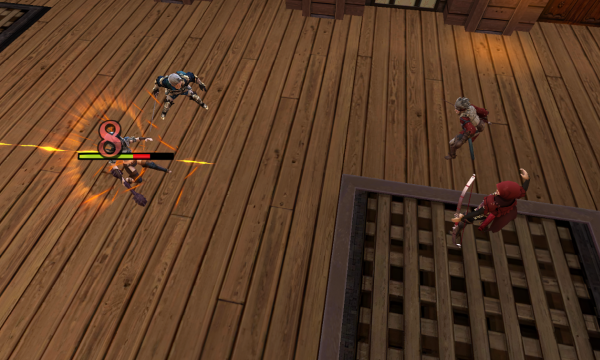 The Outlaws deal pretty significant chip damage, too. This one especially, thanks to Quick Draw.    The Hero also does a good chunk, but unlike the Outlaws, he gets killed on enemy phase. This crit sure would have been nice against the Armored Blow guy!   Beruka adds another great level to the pile.  Just out of curiosity, I checked what her average stats at level 19 are as a Fighter (counting her one level as a Wyvern Rider). I expected her to be significantly better than average, but she's actually pretty close to the everyday Beruka. She's ahead by ~3.5 defense and ~0.5 speed, but she's actually behind by ~2 strength. Her other stats don't matter as much, but there's no major outliers there either. Just out of curiosity, I checked what her average stats at level 19 are as a Fighter (counting her one level as a Wyvern Rider). I expected her to be significantly better than average, but she's actually pretty close to the everyday Beruka. She's ahead by ~3.5 defense and ~0.5 speed, but she's actually behind by ~2 strength. Her other stats don't matter as much, but there's no major outliers there either.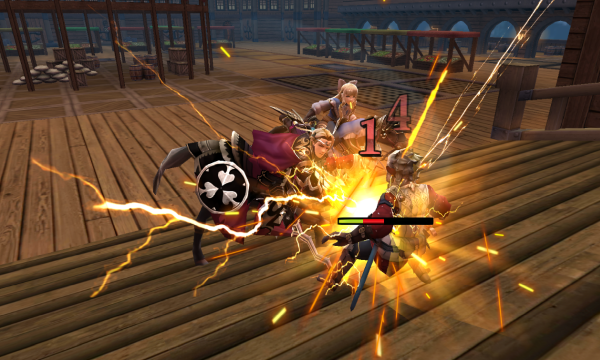 Anyway, back to the gameplay, Xander continues chipping his guys down. This screenshot makes this look like a kill, but he lived with 1 HP, thanks to Xander losing his personal skill's damage boost because the enemy's health wasn't full at the start of battle.   Yeesh, when you take away the Siegfried bonus, Xander's defenses start to look a little more normal. Still crazy high, but he stops being totally unkillable and instead becomes nearly unkillable.  Here's the situation on player phase. We've cleared most of the initial onslaught, so things are starting to feel a little less constrained, but we'll have to start dealing with the horde of promoted units on the left and the status staves on the right. Also, the Outlaw Xander baited earlier went back to his spot because Xander left his range.   We've held Xander back long enough; it's time to have him start clearing out problem enemies. This was the Quick Draw guy, so it was definitely worth it to take him out now.   Look at those numbers! Keaton won't be doubling super often, so don't get used to this.   Benny's personal skill pushes his hit rate up enough that I'm comfortable having him steal this kill against the weapon triangle.     Odin can't quite reach on his own, so he has Azura carry him to this guy so he can steal a kill. 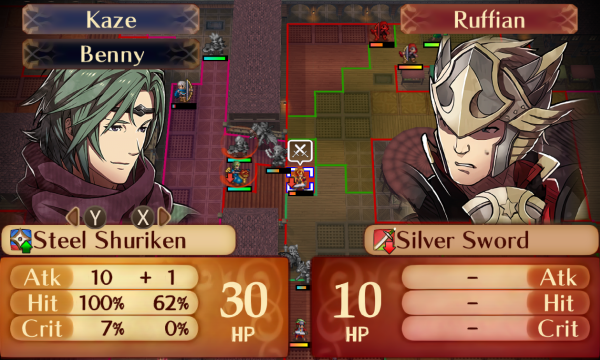   Kaze finishes Xander's Hero off for a great level. I would have liked to feed this to someone else, but everyone in range was either an axe user who couldn't reliably hit, or too puny to actually kill. 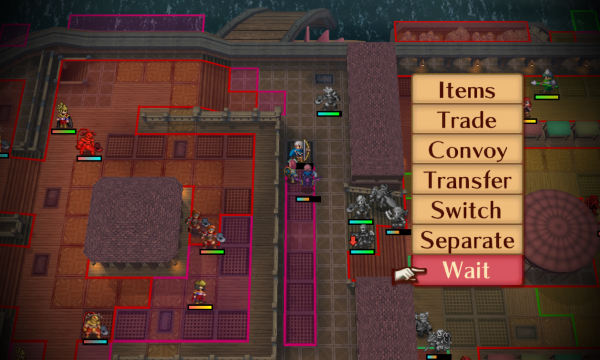   Marth pairs with Felicia and sits in range of this leftover Dark Mage. Niles heals him for another awful level. He's really trying for a Benchmaster promotion. 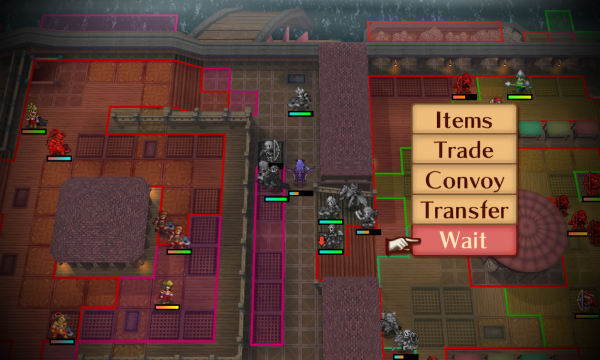 Camilla sits here to support Marth. Between Rose's Thorns and Devoted Partner, his damage is being pushed up enough to one round the Dark Mage even though he's using a magic weapon.  Beruka needs a pick-me-up, so she uses a vulnerary.   On enemy phase, Marth kills his Dark Mage as expected.  And Xander gets enfeeble'd. This is a bigger problem than I'd expected it to be.   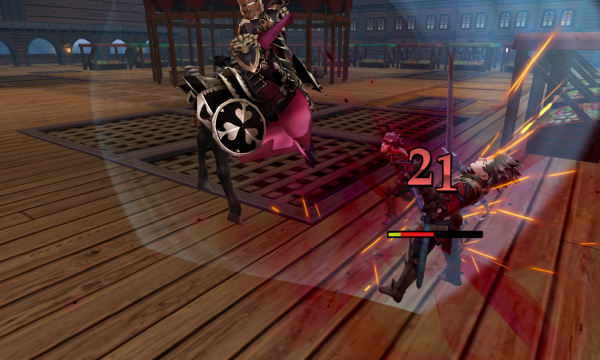 I thought that with the defense boost from Siegfried, the enemies would opt to attack Beruka because they deal 4 damage instead of 3 to Xander, but because of the extra defense she got from her level up, they 3 damage to her, too. Because they don't have weapon triangle disadvantage against Xander, two of them decided to suicide into him instead. RIP like 20 experience points.  The Armored blow guy opted for her, though, I guess because she deals less damage than Xander.  Back on player phase, Xander deletes the other Outlaw.  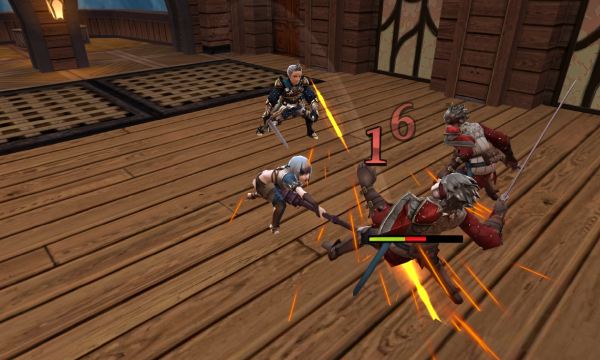 Beruka bonks the last Armored Blow Mercenary.   With a little healing, Odin is just durable enough to bait out both of these Outlaws with the javelin.   Marth starts killing Berserkers on the left. It's mostly going to be him and Kaze leading the charge over here.  Kaze moves to bait out a Sorcerer while everyone else hangs around.   On enemy phase, Marth takes out the first of this Fighter pair. This guard gauge is pretty nice; even though they're not promoted, these guys still hit hard. 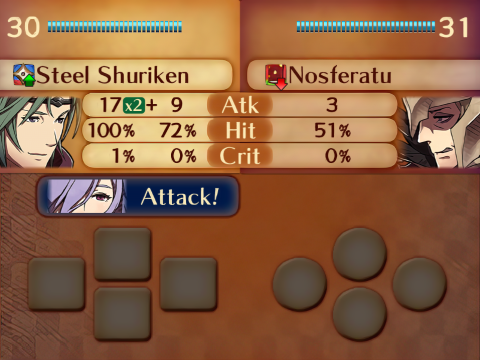   Kaze is able to pretty much completely ignore even promoted mages, at least for now. Camilla also gets B axes from helping out, which is nice. She provides a lot of dual strike support because of Rose's Thorns, so she'll probably get some mileage out of a silver axe. 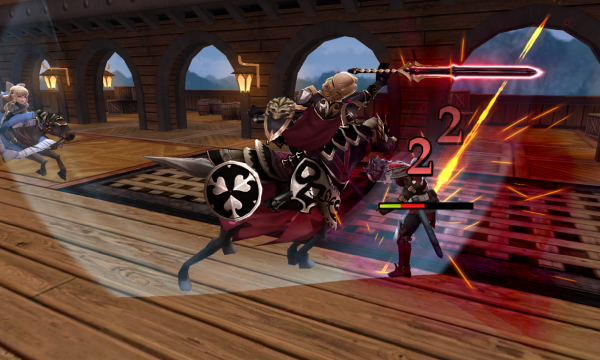 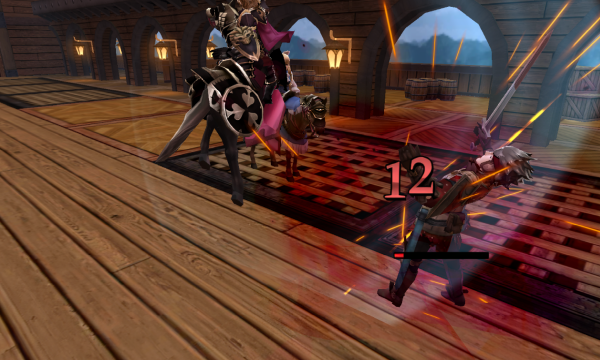 And Xander finishes killing the Mercenaries in the south. I'd have preferred them going to someone else, but I'm not willing to replay the map over it. We'll just call it more Xander/Charlotte support grinding. 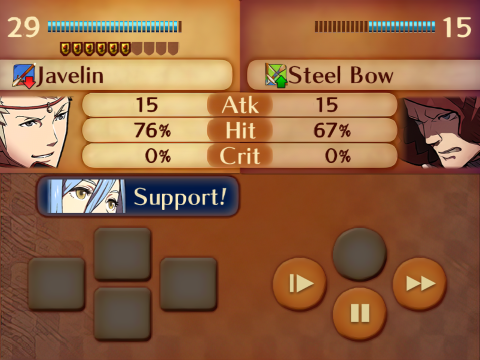   Odin, man, please try not to screw up the jobs I give you. I'm trying to enjoy using you as a non-Sorcerer, but you're making it difficult.   Vantage is actually a bad thing here, because Odin's guard gauge is full at the start of this battle, so it wastes an attack's worth of charge. Though because this Outlaw doesn't have Quick Draw, Odin would have survived this hit even without the gauge. 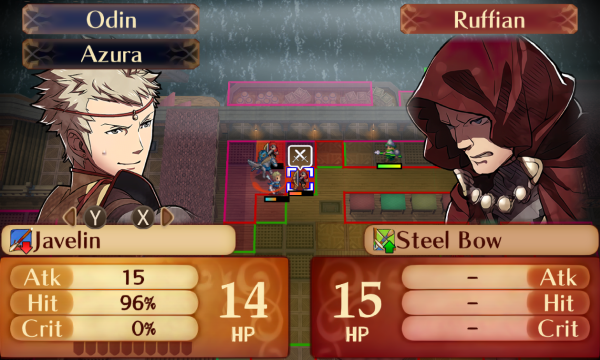  Back on player phase, Odin clears out the Quick Draw guy, this time attacking from 1 range to take advantage of Heartseeker.  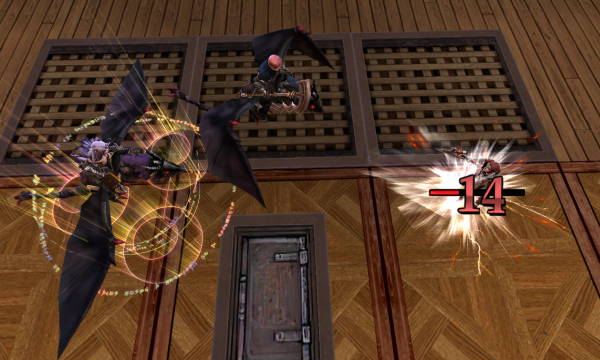 Camilla separates from Kaze for now to kill the leftover Fighter with Marth's help.   Marth kills this Berserker and prepares to eat a hit from this Sorcerer. He won't kill with the counter, but he can take the hit without any problems.  Approaching this last group from the north requires you to bait out both a Berserker and a Sorcerer, and I'd rather not do that, so Kaze has Benny move him to the south.   All of our safe choices to handle the promoted units on this side are damaged, so Xander spends a turn getting a double shot of healing. He's definitely the safest option to lead the charge next turn. 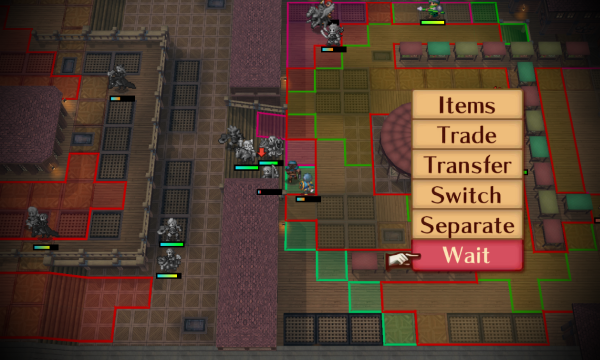 Silas and Beruka end the turn by falling back. I left him in range to eat this Enfeeble use, just in case we don't kill the staff guy as quickly as I'd like.  This won't be all that relevant; Silas is mostly done fighting for the map.    Ragnarok is probably Conquest's favorite spell, and any Sorcerers equipped with it will hit pretty much any unit quite hard. Marth isn't gonna be able to take any more hits for the moment.   Odin ends the enemy phase by killing this guy with Vantage for an awful level. It's okay Odin, you get good when you feel ready to.  Marth talks to the first green unit, but even though he looked kind of sus, he wasn't the imposter.   Kaze takes this Sorcerer out, leaving a single Berserker and a group of mages to guard the second left side green unit.   Xander gets healed to full, pairs up with Charlotte, and moves into enemy range to bait the Hero/Adventurer pair.  Odin separates from Azura, and everyone else just hangs around nearby for the turn.  In hind sight, I should have moved Xander in and just one-shot the enfeeble guy, because he actually has been pretty obnoxious.   Xander dodges one of these, but I'm pretty sure it didn't matter. The important thing is that he chipped the Adventurer down. This was also the only thing to happen on enemy phase.  Kaze moves into range of as many mages as possible without being in the Berserker's range, while Marth separates from Camilla.  Azura pairs up with Keaton; their pair up bonuses compliment each other nicely, and they're already at C rank, so I figure they're as good a pairing as any. I also personally like their supports.   Beruka kills the Adventurer in the lead of this pair, which brings her much closer to level 20. 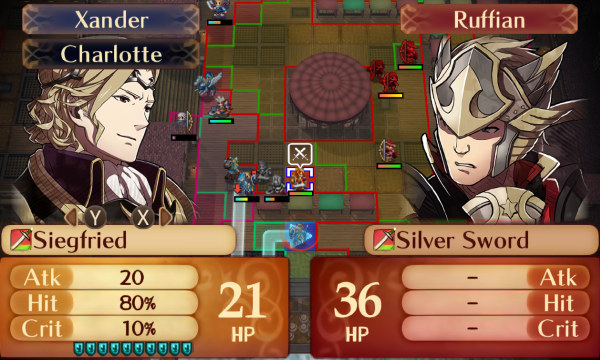  Xander chips the remaining Hero down. We need him dead this turn.     We'll need someone stronger than Odin or Keaton to finish him off though, so Odin has Niles carry him to Beruka, where he trades Niles for Silas before chucking a javelin at the Hero.     Keaton moves adjacent to Odin, grabs Silas and switches him to the front so he can finish off the Hero. I love transfer/switch tactics like this; they open up so many options that aren't always immediately obvious.  On enemy phase, Beruka gets debuffed. Meh. 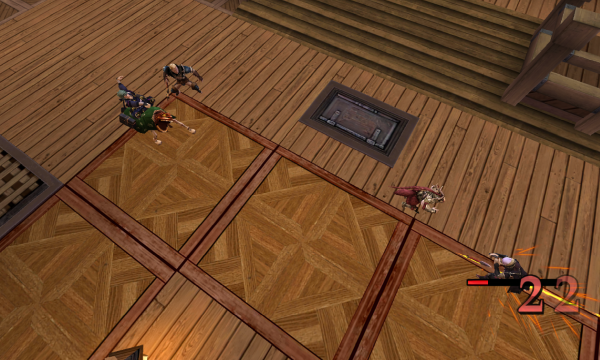  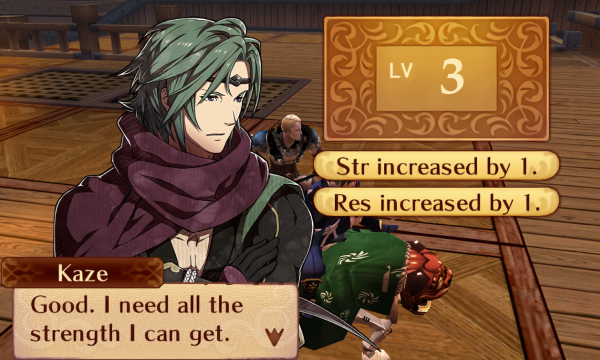 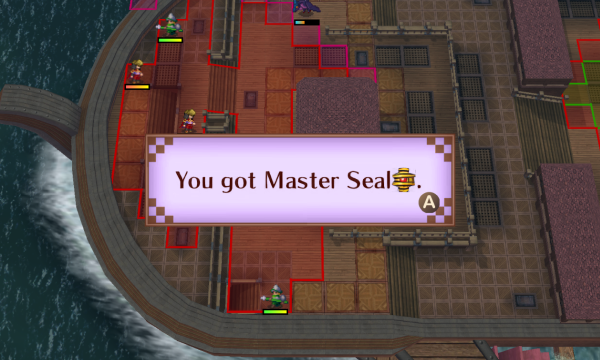 Kaze kills a Dark Mage and a Sorcerer, getting a master seal in the process. He also gets a kind of disappointing level, especially because the extra resistance makes one of the Dark Mages change his mind about attacking this turn.  Lastly, Silas gets chipped down by this Outlaw pair.    There's only 3 enemies left on this side of the map, and Felicia takes out the first one with Kaze's help. I can't stress enough how important it is to make sure you factor in the Nosferatu healing against these guys. It's gotten me so many times in past playthroughs, though I'll admit that that's probably because I'm an idiot.    Marth kills the last Berserker for a decent level. I'd have liked strength or magic, though.   There's no surprises here, but Kaze kills this mage with ease.  Camilla finishes our business on this side by talking to the other green unit. This gimmick would be pretty obnoxious if the boss were actually picked at random, especially because he's an archer so you wouldn't be able to safely have a flier go ahead of everyone to talk to him.    There's not much space to attack these guys from that isn't inside of the freeze staff's range, so Beruka solves that problem by lunging into him. 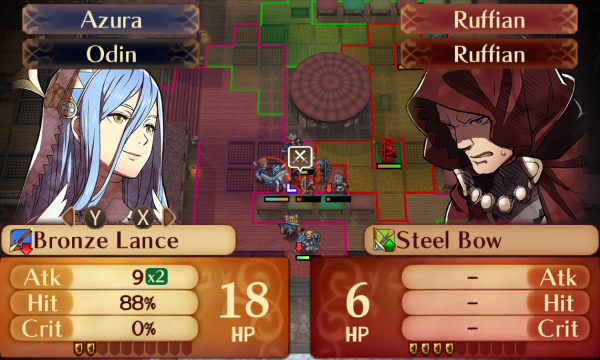  Azura gratefully accepts the free experience, and with how everyone is positioned, this guy is pinned uselessly against the wall.  Xander moves forward to bait out the last two Mercenaries. 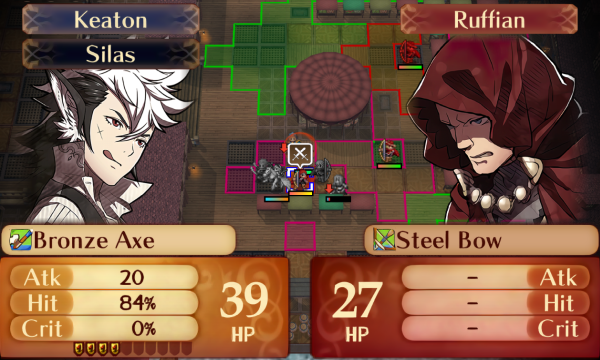  And Keaton chips the last Outlaw down for next turn.   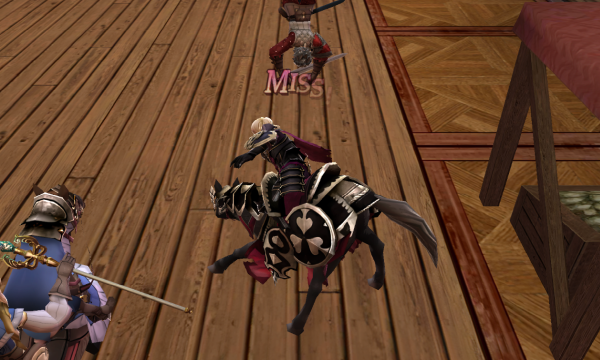 Xander chips one Mercenary and misses the other. Imagine being this guy; you're fighting the crown prince of Nohr equipped with his legendary weapon, and you just casually backflip out of the way of his swing.  Everyone on the left moves forward on player phase.    Azura converts the last Outlaw into a very nice level. She's really starting to come into her own lately!   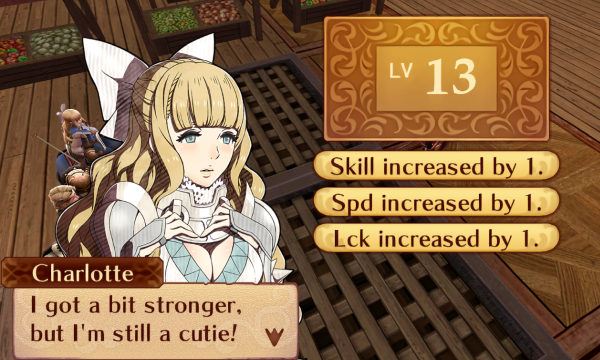  Xander chips this Adventurer down, and Charlotte gets an okay level out of blocking this 0 damage attack. I think it might be best to go ahead and promote her so she can start working on her dagger rank, so I might just do that next map. She also gets Demoiselle, which is kind of nice but it doesn't stack with itself, so it's not likely to be gamechanging at this point.   Berkua kills one of the last two Mercenaries. 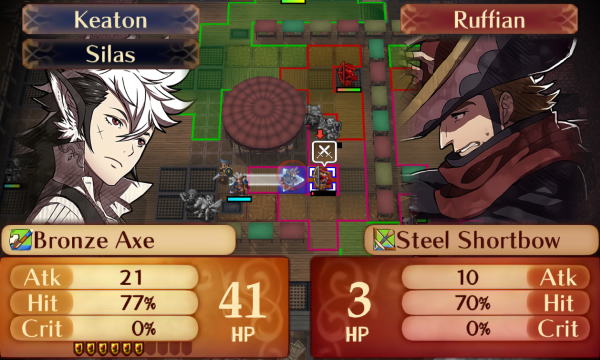 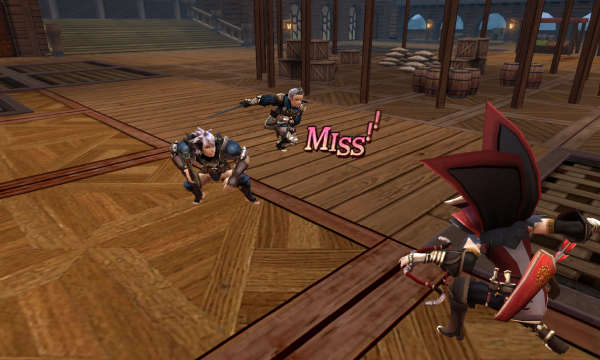  Keaton ends the turn by flubbing this attack. Man, this guy looks cool with that cape. I kinda don't want to kill him now.  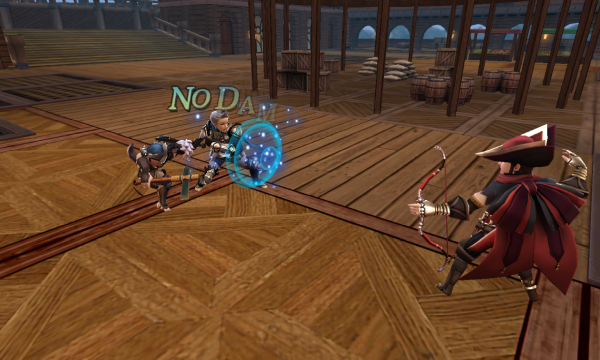  Keaton gets frozen before finishing the Adventurer on enemy phase.    BERUKA SMASH! Also she gets B axes. Nice!   Yet another heal and Xander is eager to sit in front of this last Adventurer. In hind sight, I got a little sidetracked and slowed the map down this run; I could have ignored these Adventurers and sent someone to talk to the northern green unit while Xander went for the eastern one, which would probably have shaved a turn or two off the map clear. It's too late now, though, and I wasn't willing to replay the map for a slightly better turn count.    At any rate, Xander chips him down and dodges unnecessarily, perhaps trying to make up for missing that Mercenary earlier.    And Beruka finishes him off on player phase for her final level as a Fighter.  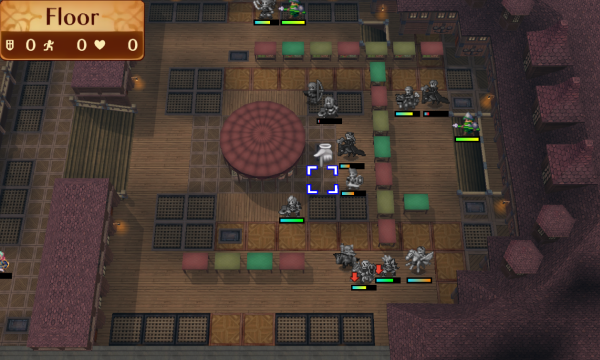 Odin checks the third green unit while everyone else gets in position to deal with the boss once someone talks to him.   One final heal and Xander moves in to talk to the last green guy. Niles gets D rank staves out of this, which gives him access to Mend and Freeze. Maybe we'll get some mileage out of that later on.   May I just say that you, sir, are wearing some very fine boots. Footwear aside, Shura is kinda pathetic as far as bosses go, which is mostly because his stats are almost exactly the same as when you recruit him. The only difference is that the boss version has an extra 10 HP.    Even though he's not super dangerous, he does have Counter, which is a pretty nasty end-of-the-map surprise if you didn't check his skills. It's also about the only way he's gonna do significant damage with the mini bow. It's weaker than an iron bow, though it's interesting because it's a 1 range bow. Not a 1-2 range bow, a 1 range bow.     Charlotte heals Xander for support more than anything, while Silas finishes Shura off for one of the worst levels he could have gotten.  And that's it for Chapter 16! I like this chapter a lot as a sort of introduction to dealing with a lot of promoted units. The promoted enemies are mostly placed so that you can deal with them at your leisure, and they're also not as well-equipped as later enemies will be. You're also given Xander, who can pretty much handle whatever you throw at him for the moment. Add in the gold loss every turn to encourage faster play, and you've got yourself a solid mid-game map that nicely bridges the difficulty gap between the early game and the late game.  We got 6,700 gold from this clear. I could have finished this map faster, but I honestly don't care to do that for less than 1,000 gold.   In a standard run, I'd leave this decision up to a vote, but I think full recruitment is more in the spirit of this run, so that's what I'm doing. Welcome aboard, Shura!   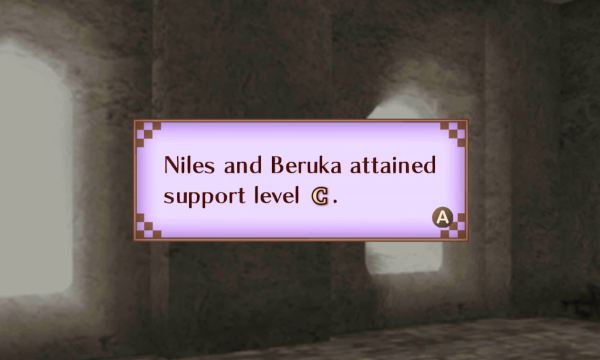   The most relevant support here is Beruka/Silas, because I've decided to create the ultimate Sophie.    Beruka promotes, and here's a quick comparison between her and Silas. She's almost the same as him, though she has slightly higher defense as well as axe ranks instead of sword ranks. Both of them will continue to be useful for quite some time, I expect. And with that out of the way, it's time to see what Xander and Shura roll!  Xander's options are Great Knight (1), Paladin (2), Malig Knight (3), and Wyvern Lord (4). He'll keep his high defenses no matter what class he gets, so I honestly don't care too much what he rolls.  He rolled a 4, making him a Wyvern Lord. This is fine with me; he gets that sweet, sweet, flier movement, though he also loses Siegfried access and has to suffer through E axes. He has high enough defense to make axes work, and in the long run, it should end up being pretty good.   He's effectively got 30 defense when holding Siegfried, which is enough for the moment to shrug off pretty much any physical attacks. He could even tank a hit from an archer or two, I think.  Shura is another special character with access to 6 classes, so his options are Adventurer (1), Bow Knight (2), Berserker (3), Hero (4), Master Ninja (5), and Mechanist (6). I've only used him as an Adventurer or Mechanist, so I'm interested to see what he gets.  He rolled a 1, making him an Adventurer. As interesting as it would have been to try something like Berserker Shura, he's very solid as an Adventurer, so you won't hear me complaining.  Here's Shura's stats. As you can see, he's much better than Niles, though he can't support anyone but Marth. Anyway, that's all for this update, so it's time to discuss our new units! New unit discussions  Xander Class: Wyvern Lord Growth rates HP - 45 Str - 50 Mag - 5 Skl - 40 Spd - 35 Lck - 60 Def - 40 Res - 15 Xander is pretty much the go-to guy for when you need a tile turned into a wall. His bases are fantastic for his join time, and his naturally high defenses are boosted further by Siegfried, even if he's in a class that can't use it. His personal skill, Chivalry, gives him damage dealt +2 and damage taken -2 when his opponent's HP is full at the start of battle, which shaves off a lot of extra damage and lets him tank even more enemies in a single turn. Having unpenalized 1-2 range is also great, because in addition to not dying to anything physical, he'll counter everything for a pretty big hit. Unfortunately, one hit is pretty much all he'll get without some help in the speed department, because he's kinda slow. Not unsalvageably so, but he'll need a speedwing or two and a good backpack if you want him to double a lot. If you reclass him to Great Knight, he gets some extra defense as well as Luna at the cost of a point of movement and some speed. Personally, I don't think it's quite worth the tradeoff because he's already got plenty of defense, and his speed is already his problem area, so making it worse for relatively little benefit is kind of a bad idea. You can also reclass him to Wyvern Lord, which has the benefits of better defense, flier movement, and axe access at the cost of not being able to use swords in combat. It's also slightly slower, which might make a difference in his case. I've only tried it once, but he performed very well, although not quite as well as he does in Paladin. Finally, you can make him a Malig Knight, but why would you do that when Wyvern Lord is an option? It's overall worse for him in every area except magic, which is something he's no good at. He would at least appreciate Trample (+5 damage to non-mounted enemies), especially because there's not that many mounted units in Conquest. Honestly, it's kind of bland, but I think Paladin is the way to go.  Shura Class: Adventurer Growth rates HP - 30 Str - 25 Mag - 10 Skl - 20 Spd - 35 Lck - 30 Def - 15 Res - 35 Shura is one of the more underrated units in the game, mostly because of the opportunity cost of recruiting him. When weighed against the boots, I understand how it's tempting to throw the new guy away, but if you take Shura, he's pretty solid. That being said, I honestly haven't used him enough to talk too confidently about him, so take this one with a grain of salt. His bases are good enough to let him contribute from the moment he joins, and he has weapon triangle advantage against daggers, which we'll be seeing a lot of from here on out. He has a lot of speed and strength, as well as decent magic for a combat unit and a boatload of resistance. His personal skill, Highwayman, reduces the enemy's strength and speed by 3 after any battle they couldn't counterattack in. It's situationally good, but not super useful. It's also worth noting that he can only support Corrin, which does hinder him quite a bit. Oh, and he comes with a free killer bow and a mend staff, but neither of those compare to the boots so whatever. Shura has 6 classes to choose from, and of them, I've only used him as 2. As an adventurer, he's a solid combat unit as I've already discussed, but he also makes a decent staffbot. Bow Knight gives him more movement and strength, which is actually probably really good now that I think about it. Something to try next playthrough. Anyway, he's also got Berserker, which definitely makes use of his speed and strength if he can get out of E rank axes. Hero sounds kind of mediocre, because like the Berserker, it forces him into E rank weapons, but it has lower strength and speed. It would make him more durable though, and he has a lot of skill, so maybe he'd get some use out of Sol? And lastly, there's Master Ninja and Mechanist. Master Ninja is pretty good once he gets out of E rank daggers, because it makes him strong and fast, and Mechanist makes him similar to Mechanist Kaze but with more strength and less speed. You could take him through Hero to put Sol on either of these without any friendship seal shenaniganry, which sounds, at the very least, fun. I personally think his best option is probably Bow Knight because it lets him use his bow rank, keeps his movement-boosting pair up bonus, and it gives him more strength, which is always a good thing. 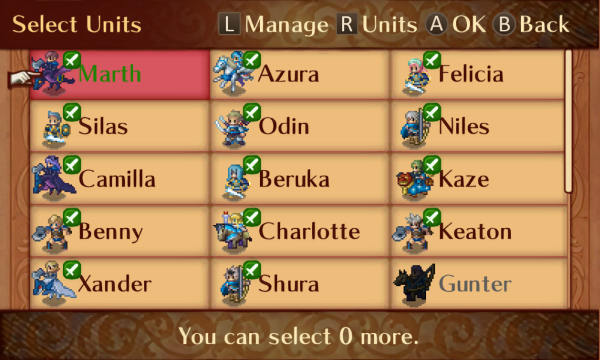 The next map actually has enough room for our new recruits, so this is the team we'll be bringing to it. After that, I'll start deploying people for support purposes, so it shouldn't be too long before we start getting child characters. Next time, Marth attends the annual Hoshidan Naruto Convention.
|
|
|
|
I also like Shura; he's a good option if your Niles has been flagging (like in this run), and he's also a good extra option for the next map which is full of ninjas. Growth rates aren't great but his bases are fine. We seem to be really picking up a lot of axes lately. Hopefully Keaton or Benny get some training in soon because otherwise I can see them really starting to lag behind.
|
|
|
|
For Shura, you rolled between 1 and 4 instead of 1 and 6. Not a big deal, but you rolled 1 to 6 for Gunter. Gotta work on those S supports! It is really late to get started. I hope the benchwarmers are still up to the task.
|
|
|
|
ApplesandOranges posted:We seem to be really picking up a lot of axes lately. Hopefully Keaton or Benny get some training in soon because otherwise I can see them really starting to lag behind. They've got a lot of weapon triangle advantage in the next couple of maps, so they shouldn't have too much trouble catching up. NeoRonTheNeuron posted:For Shura, you rolled between 1 and 4 instead of 1 and 6. Not a big deal, but you rolled 1 to 6 for Gunter. Whoops! I'm glad you noticed this now; I'll invalidate the first roll and re-roll between 1 and 6 at the start of the next update.
|
|
|
|
Giving Xander a Levin Sword for the Armor Blow guys is actually huge brain, I'm totally stealing that. The fact that Charlotte pair up still helps him there even as a troub is fantastic a swell. I really like this map: as you say, the promoted units mixed in with the riff-raff help train you to look at skills and inventories more, the money gimmick is a great incentive while not feeling horrible to forgo, and while Counter on Shura is a bit of a dick move, it doesn't feel too mean-spirited to lose against. Out of curiosity, how are you gonna handle the classes for the child units? Are the parents gonna pass down their base classes, or their randomized ones?
|
|
|
|
I mean the parents will always pass down a specific class set based on pairing, it has nothing to do with what class they're in. So like Beruka will always pass on Wyvern Rider unless she marries Arthur (at which point she'll pass down Sky Knight instead). So presumably they'll just roll a new class for the kid based on what class sets they end up with.
|
|
|
|
Kmsorter posted:Whoops! I'm glad you noticed this now; I'll invalidate the first roll and re-roll between 1 and 6 at the start of the next update. I hope he gets something interesting! I really like Shura and I'd like to see if he can do well in this LP.
|
|
|
|
Blue Labrador posted:Out of curiosity, how are you gonna handle the classes for the child units? Are the parents gonna pass down their base classes, or their randomized ones? As I understand it, classes are passed down based on the parents' class sets, not what class they're using. I don't plan on putting much thought into building super-children, so they'll inherit whatever they inherit and I'll randomly select one from their class list.
|
|
|
|
Update 14 - Believe it! I'll start this update out with a correction. Someone pointed out that I rolled Shura's class between 1 and 4 rather than 1 and 6, so I'll rectify that right now by rerolling him.  Once again, his options are Adventurer (1), Bow Knight (2), Berserker (3), Hero (4), Master Ninja (5), and Mechanist (6). This 3 makes him a Berserker, which is certainly a more interesting choice than Adventurer! He should be pretty solid even with E rank axes because he's both faster and stronger than most of our units.   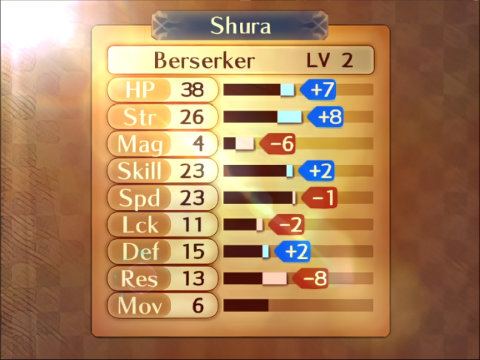 He's got a ton of strength and speed, as well as a bunch of bulk, so he's gonna be pretty useful. It's kind of a shame he'll probably get benched for support purposes, at least for a while, since he can't talk to anyone but Marth. He gets a bronze axe for now.   Now that that's been sorted out, it's time to do a little shopping. Beruka gets a silver axe that'll probably get passed around to several people over the course of the rest of the game, and Silas gets a silver sword. They mostly want these for dual strikes, but the extra damage will come in handy occasionally, particularly against faster opponents (I.E. almost every enemy in this next map). 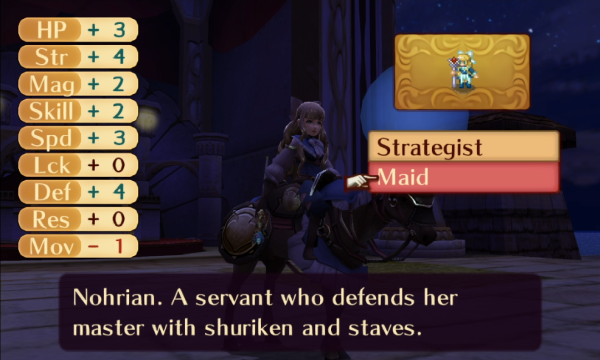    I'm going ahead and promoting Charlotte because she really hasn't been doing much as a Troubadour, and I want her working on her dagger rank. Honestly, I should have promoted her before the last map, but hind sight is 20/20, I suppose. This should be implied, but I bought her a bronze dagger.    If we're gonna try to make Berserker Keaton happen, he's gonna want as much hit as he can get, so he gets all of the secret books and goddess icons from this point on. Luck may not matter as much as skill to the hit formula, but half of your luck stat is factored into it, so it's something. I also bought a master seal for him to carry around, just in case I want him to promote mid-battle.  There's a lot of units that would benefit from this speedwing, but of them, Silas has the highest speed cap at 32 (though this can be raised with upgraded statues), so he gets them for now. He'll make pretty good use of it, I think.  We still don't have any proper mages, but Marth has a somewhat decent magic stat and a bolt axe, so he makes as good a candidate for these spirit dusts as anyone.  It's Jakob in the mess hall today! He's one of the best cooks in the game, so this is a very good thing. Normally I try to give him a chef hat accessory, which makes him guaranteed to be the cook, but in this case I just got lucky.   Meal stats cap out at +2 to 2 stats, and Jakob is so good at cooking that he can make this happen with only one ingredient. Even better, it's strength/speed! It still only affects half of the army, though.  And last but certainly not least, Charlotte removes this terrible, terrible skill. I can honestly say I'd rather not learn a skill than be burdened with -10 hit for the rest of the map. Anyway, that's about it for preparations, so let's move on to the map!      Welcome to Chapter 17! It's commonly called Ninja Hell, and for good reason. There's a real lot of these guys here, and they're pretty dangerous. The map's main gimmick is the dragon veins that open and close doors throughout the map. If you plan your moves carefully, you can use them to control how many enemies you fight at a time, which is pretty important for keeping Saizo alive. If you're not careful, though, you'll probably screw up and trap one of your units in a room with 5 enemies and no support, or let several new enemies reach your squishy units. The other gimmick is the caltrop tiles you see scattered around. They have the movement cost of a forest tile, but they reduce defense by 3, avoid by 30, and they damage units for 30% of their HP at the start of the turn. The HP drain doesn't affect units with Locktouch, which is why every enemy in this map his it even though none of them go for your treasure. Speaking of treasure, there's 5,000 gold in the northern chest and a master seal in the southern chest. Units with Locktouch, including Saizo, can remove the caltrops instead of waiting, which isn't always a good idea if the extra movement cost is protecting you from enemies. There's also two batches of reinforcements; one when you cross into the second third of the map, and the other when you cross into the last fourth or so of the map.  Probably the most dangerous enemies on this map are these guys because of their high speed, relatively high attack, and the fact that they have the Poison Strike/Grisly Wound combo that's always nasty.  The unpromoted enemies on this map are pretty weak, but their high speed makes them hard to one round, which lets them make use of Poison Strike. Between the shuriken debuffs and the damage skills, this map can chew through your tankiest units pretty quickly if you're not careful.  There's also enemy Mechanists, but they're not too dangerous. They're a lot easier to double, though they're also a lot bulkier. They don't have much as far as skills go, so they aren't too bad on their own.  They tend to come with these Automata that are honestly kinda weak. Their saws are unique weapons that aren't in the weapon triangle, though, and they debuff both strength and magic, which can be kind of annoying.  There are also a few Lunge Swordmasters that are pretty well-placed to drag your units into more enemies, but they aren't anything special otherwise. This one has an armorslayer, though.   This particular Mechanist has Life and Death, which makes him pretty dangerous, especially if the nearby Swordmasters drag your unit into his range first. 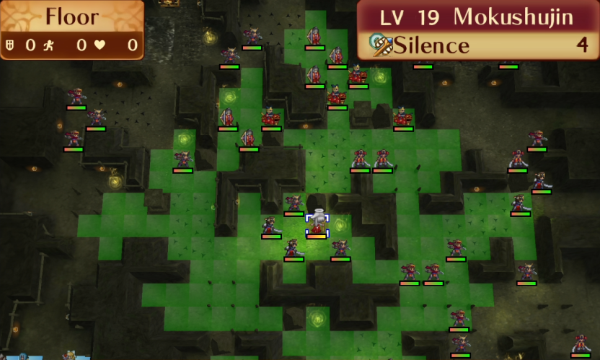  This is the only staff enemy, and thankfully, she's not too dangerous. The wane festal is a long-range heal staff, and the silence staff isn't too hard to deal with considering that we don't have any mages. Even if we did, almost every enemy on this map has high resistance, so it still wouldn't affect things too much.   Finally, we have Kotaro. There are very few decisions in Conquest's map design that I consider to be objectively horrible, and this is one of them. I hope whoever decided to put a speedy Master Ninja boss on a throne steps on a Lego every time I play this map. He's fast, strong, has a flame shuriken for your high-defense units, and his skills are pretty nasty. He has trample, which gives him +5 damage dealt to non-mounted units, giving him some extra oomph that makes him genuinely dangerous. Grisly Wound is mostly there to soften your units up when they attack him on player phase. Lastly, he's got Duelist's Blow because one of the developers was having a bad day when designing this map, and they wanted to make sure you were, too. The enemies in his room are also unwilling to attack you unless they can Lunge your unit into Kotaro's range, which makes him hard to approach. I've got a strategy in mind to handle Kotaro with minimal risk, though, so I won't be relying much on luck.  We also have Saizo as a green unit, and he's pretty good as far as they go. He can handle quite a bit on his own because his stats are great, and he's got the Immune Status skill, which makes him immune to damage skills like Poison Strike as well as stat debuffs from Seal skills and daggers. It's not available to the player unfortunately, but it makes him surprisingly durable if you let him see combat. If he survives to the end of the map, he gives you a speedwing. He's your anti-turtle incentive.  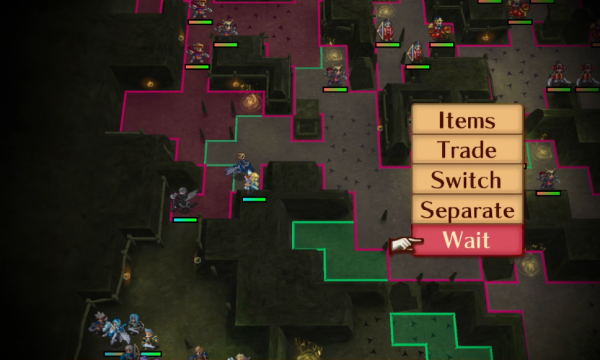 I start by moving Marth and Charlotte into enemy range. Charlotte needs to work on her dagger rank so she can maybe start being a good combat unit.  Everyone else moves forward. Camilla and Marth are in range, but the enemies don't do enough damage to justify attacking them.     Charlotte eats a silence before fighting the Ninja. She doesn't perform particularly well, but she'll hopefully improve as she gains levels and weapon ranks. 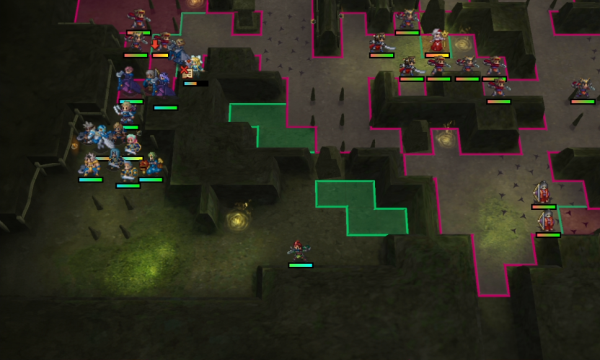 On ally phase, Saizo picks up these caltrops. I'm not gonna let him do too much more than this. 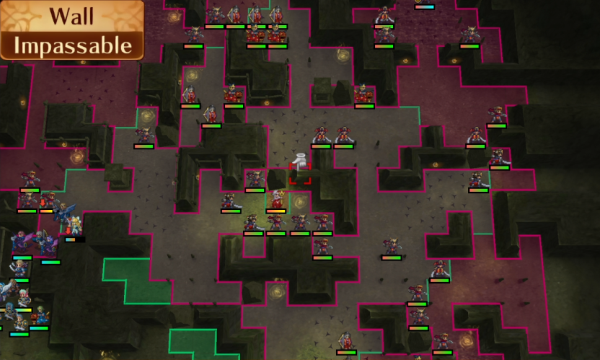 Also, a lot of enemies start advancing. I lost track of which ones were actually moving, so just assume it's a lot of these guys. 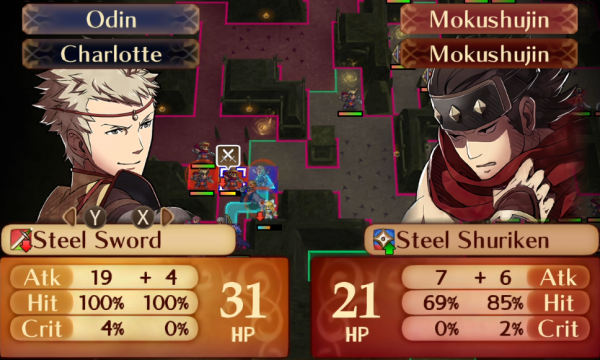  Odin starts the next turn off with this kill, and Charlotte gets a little more dagger practice in. She'll be seeing quite a few dual strikes throughout this map!    Marth chips this guy down with Charlotte's help.   Xander chips this guy down. He's absurdly tanky on his wyvern, but that won't help all that much during this map because he doesn't have any 1-2 range options.     Positioning Marth and Xander first places them adjacent to Keaton, giving him as much extra hit as possible. The fact that he only has an 89% with a bronze weapon and all of this extra support is kind of embarrassing, but it gets the job done. It's also about the highest hit rate he'll see for the map, because he just learned Gamble. Both strength and speed is pretty much all I need from Keaton because he's bulky enough thanks to his HP, so I'm actually very happy with this level. Clearly, Keaton understands that it's about quality, not quantity.     Benny clears out this last guy for HP +5 and an out-of-character speed growth. He's actually got a 25% speed growth rate as a Fighter, so he's likely to see a few more of these before the end of the game! Not that they'll actually help him, but hey! 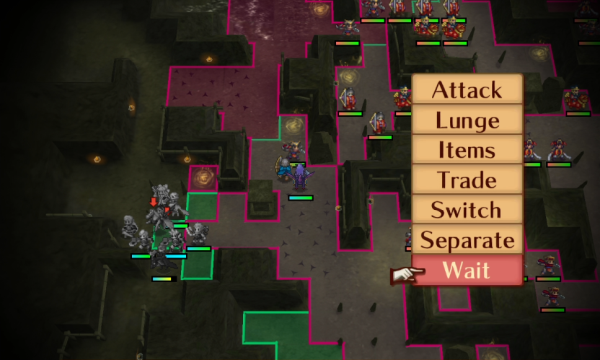 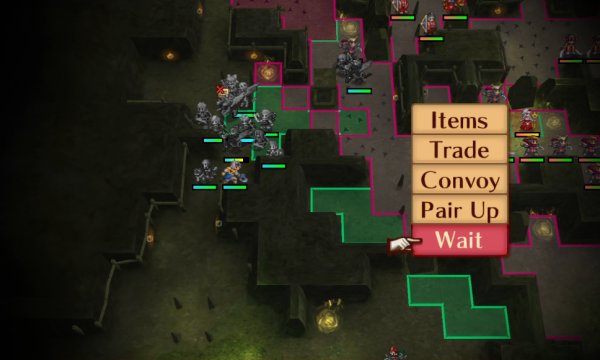 Lastly, Camilla advances with a hand axe to enemy phase this Master Ninja while everyone else trails behind.  On enemy phase, she eats the second silence. She certainly wasn't going to use magic on this map, so I'm okay with this!     I should note that I gave her a skill tonic because she has several somewhat shaky fights like this that are pretty important, and I wanted them to be as reliable as possible.   She gets a very nice level out of it! Although Grisly Wound leaves her worse for wear, so she'll need healing in a minute.  On ally phase, Saizo starts moving North. He'll have time to get comfortable with this room, because I'm gonna use the dragon veins to keep him trapped in this corner of the map for a while.    Marth Lunges this guy, which takes care of a threat and puts him in range of a Mechanist across the wall. Though I guess he could've just attacked from the tile to the right of Camilla... Oh well, Lunge tactics are fun!  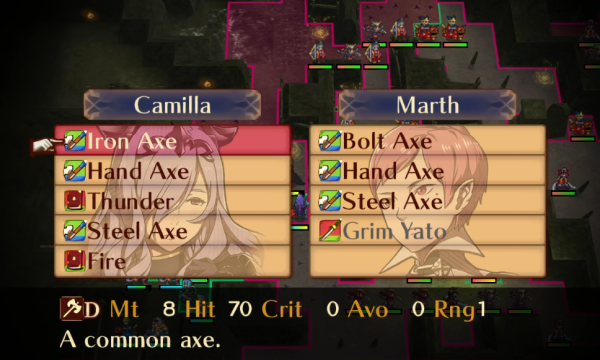 Charlotte heals Camilla up while Camilla helps Marth equip the bolt axe. It'll let him double the Mechanist.   Silas and Beruka wait here. Silas is in range of two Ninja, while Beruka isn't in range of anything. Everyone else inches closer.    Because these guys are so fast, it's hard to double them, so I have to rely on dual strikes to one-round. One-rounding is pretty important here, because otherwise Poison Strike chews through Silas (or really any unit) pretty easily.    The shuriken debuffs make a pretty big difference here, and I'm pretty sure that a Poison Strike would have made this a lethal fight.    Some of the camera angles in these tight corridors are awful, so you can't actually see what's going on in them. But I trust that you, dear reader, are smart enough to figure it out because you can see it in the combat forecast.  We'll be activating this dragon vein this turn, but first, we need to move everyone out of Saizo's area or they'll have to waste time waiting a couple turns to move forward.  Shura disarms the caltrops, which I almost forgot he could do now that he's a Berserker. He's in position to dual strike the Master Ninja now, too!   Beruka one-rounds this guy with a silver axe and Shura's help. I think she could have used a steel axe for this, but she doesn't have one, so she'll just have to deal with the debuff.   Xander plugs this hole and chips this Ninja. Though the Lunge Swordmaster is gonna unplug it in a second, but it'll be fine because we'll block most of those enemies off with the dragon vein in a second.  Azura and Keaton separate so they can bait the Automaton out and dual strike it on enemy phase.   Camilla finishes this guy off, which places her in range of one of the Master Ninja in the central room.  Everyone else moves out of the starting room, with Kaze pairing up with Silas because he couldn't reach otherwise. Now that everyone is clear, Marth pops the dragon vein. Interestingly, Silas is currently on top of the pillar it's about to raise up; he'll be on top of it afterward, able to move either way. Saizo, on the other hand, will only be able to get out of the starting area through the door in the south, so he'll have to spend a couple of turns backtracking. 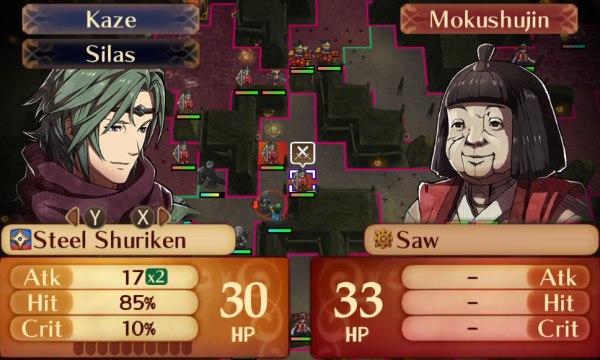 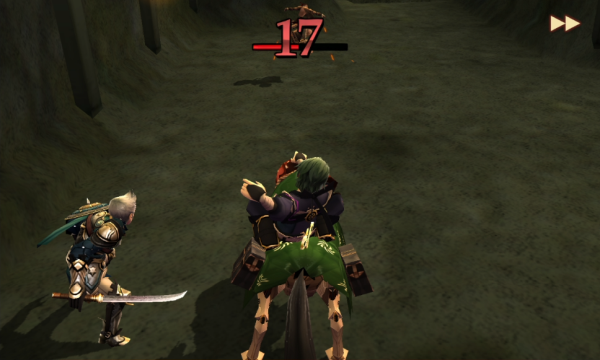 Anyway, he moves forward and lets Kaze kill this Automaton.  On enemy phase, Camilla soaks up another Silence use. Only one left, now! 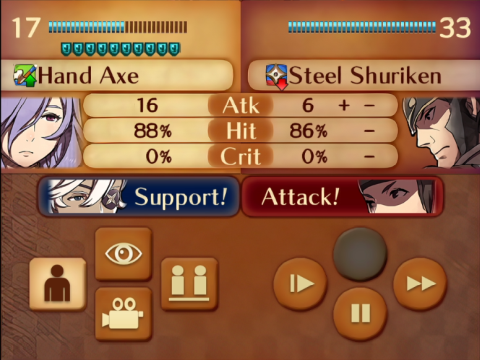   This is another case where you can't see what's going on; Camilla's attack connected here. Also, the battle forecast is a bit misleading because this screenshot was taken after the Master Ninja's attack connected, so she has the guard gauge ready for the next fight.  Which is good, because she won't be able to take a hit after this damage.    Kaze chips this Automaton down rather than one-rounding because it's attacking from a pillar terrain tile that gives extra defense. The -4 strength from the saw is kind of annoying.    Keaton and Azura chip theirs down.  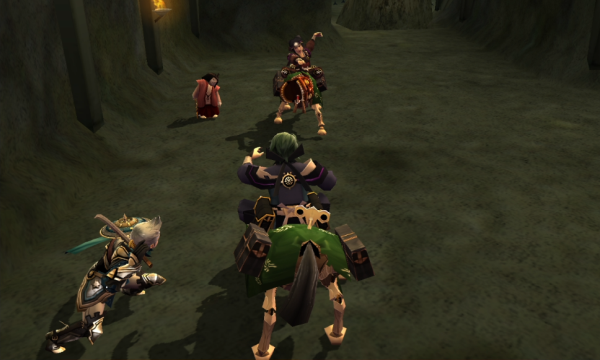 Kaze baits another Mechanist out, but the camera angle was bad again, so you'll have to use your imagination to visualize him connecting two attacks.  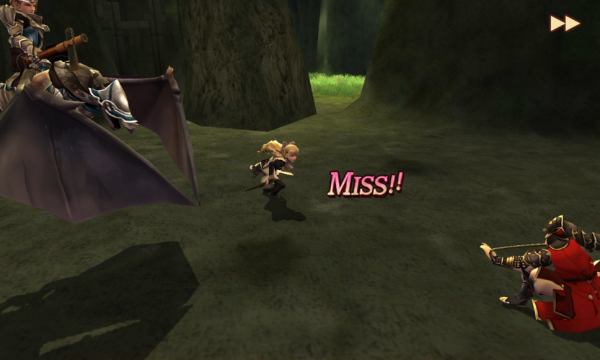 Xander gets Lunged by this Swordmaster.   And then he gets chipped down by this Master Ninja. But because we blocked the path off with the dragon vein, this is the last enemy that can reach him right now.  Saizo starts backtracking on ally phase. 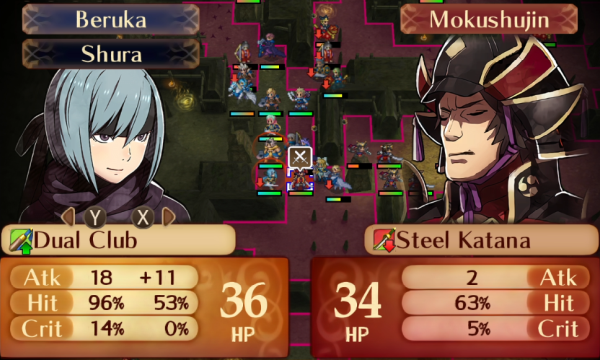  Beruka chips this guy down, and Shura manages to land his 50% chip.   Charlotte smells the opportunity to steal a kill! 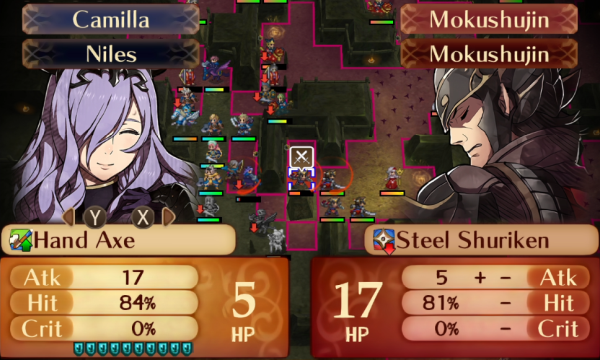  This is one of those shaky but important attacks I wanted Camilla to connect. If she had missed, it would have meant a reset.   Keaton finishes his Automaton off. 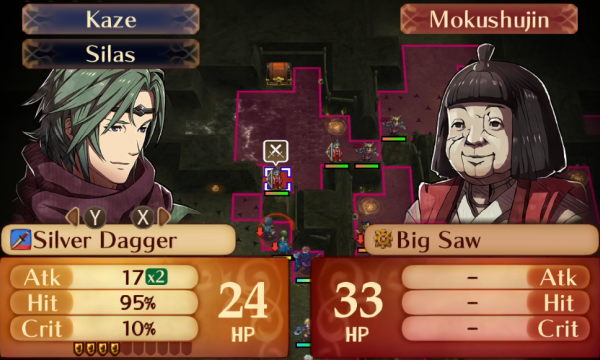  And even though Kaze's strength got debuffed, he can still one round this one with the silver dagger. This clears the way for the Master Ninja I want him to bait out on enemy phase.   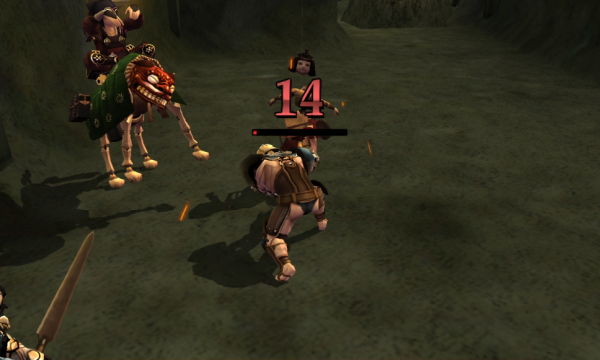 Felicia pairs with Benny for support points while he finishes off this guy. 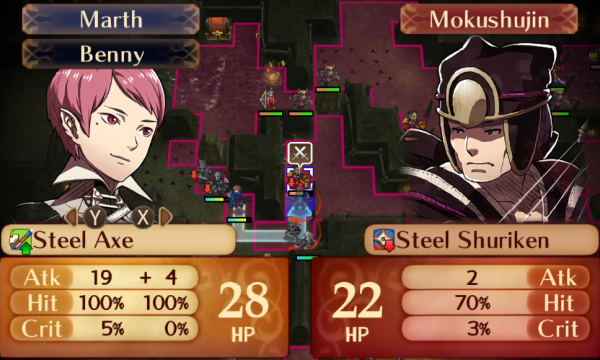   And Marth uses his help to finish off this Mechanist. He also gets a meh level. 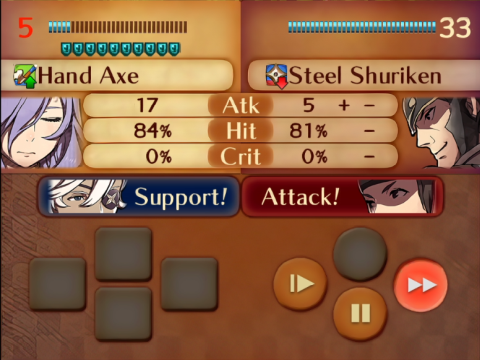  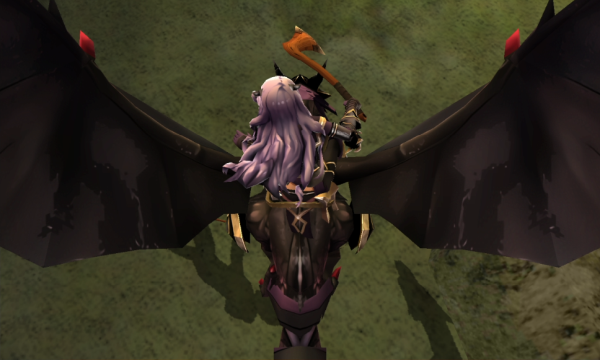 Enemy phase rolls around, and unfortunately, Camilla whiffs this chip even though you can't see it.    Kaze chips his Master Ninja down, which costs him all of his HP after Grisly Wound.  And Saizo is about to get out, so we'll be using another dragon vein this turn. There are also a bunch of reinforcements from the south you can see here.  There are also more from the north, but these are kind of trapped behind the caltrops, so they aren't an immediate threat.   Benny and Felicia start the turn off by grouping up with the rest of the army. With them out of the way, everyone is more or less positioned well for a dragon vein, so Marth goes ahead and pops it. 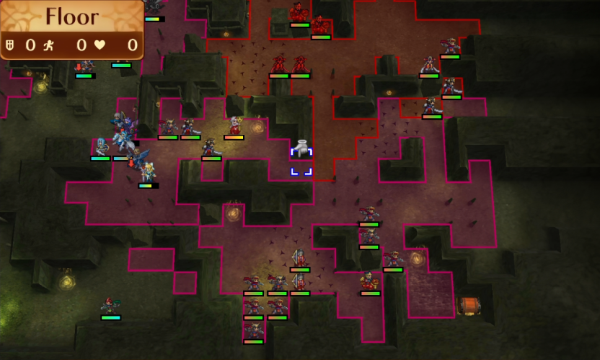  Here's the situation post-dragon-vein. We'll be clearing out the northwestern reinforcements soon, but we'll mostly be focused on surviving the onslaught in the center. 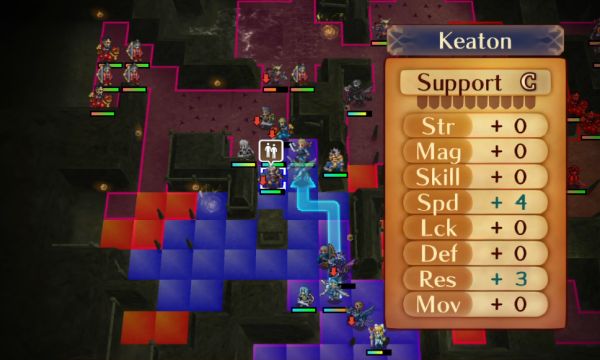 Azura pairs with Keaton because I thought that would let me feed the Master Ninja to one of them.   Odin handles him instead when I realize that won't work.  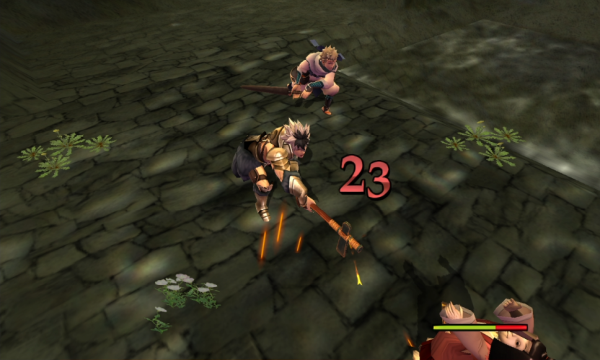   Shura deletes this Automaton. Being limited to bronze axes doesn't hurt his performance much when he can double so many enemies.  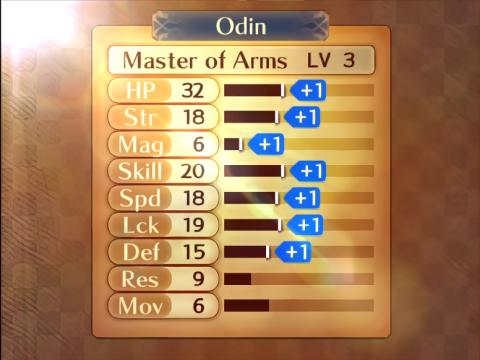 Odin also gets a fantastic level from helping out! It's about time.  Kaze picks up 5,000 gold from the northern chest. I'll probably blow it on effective weaponry during the next couple of chapters.  In the south, I misclicked and placed Camilla here instead of one tile to the east. Oopsie!   I wanted Camilla to help out here so we wouldn't have to deal with Grisly Wound and shuriken debuffs, but it worked out without being too big of a problem.    In fact, it's kind of nice that I did that because Charlotte can steal a kill this way! She also helps Beruka equip the dual club so she can tank the Samurai on enemy phase.  She also gets an absolutely horrible level. Hopefully she can start getting some strength soon, because otherwise she'll end up being nothing more than a staffbot.  Azura and Keaton separate to end the turn. 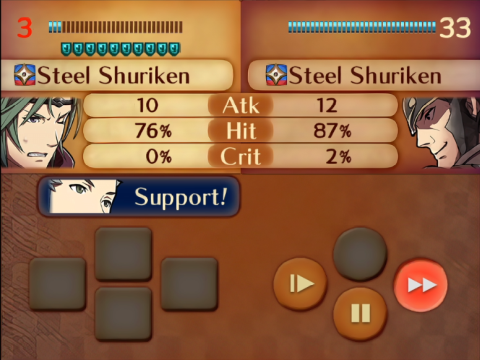   Kaze starts chipping the last northern Master Ninja using his guard gauge, which gets him an alright level for his trouble.    That axe splitter is still kinda scary even through the dual club!    I guess Beruka is a dodgetank now? 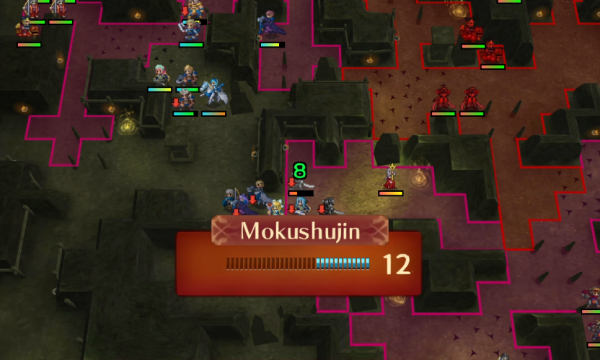 This healer continues to be kind of annoying. We won't have to deal with them for too much longer, though. 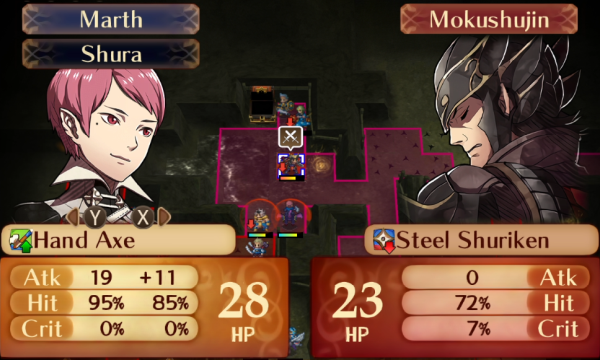  Marth and Shura finish off Kaze's Master Ninja, which means we can focus on these reinforcements now.   Odin has Felicia carry him to the south so he can bait out this Mechanist. I'd like to take this group out pretty quickly so we can move on to the other half of the map.  Kaze and Silas separate so they can be available to help next turn.   Charlotte steals yet another kill. She'll get D rank daggers halfway through the next chapter at this rate!  I want Charlotte to chip in here, so Beruka can hold back a bit and use the iron axe. 82% is accurate enough for me!   Oh look, the consequences of my greed.   Nevermind, it's even better now because Azura can get another kill!   Camilla and Niles separate and I'm okay with everyone's placement, so I just end the turn.    Another turn, another Automaton for Shura.    Odin baits his Mechanist out with a convenient dodge. 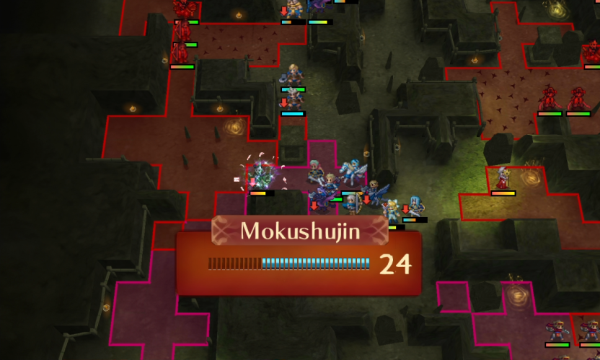 Although the healer tries to undo his hard work.    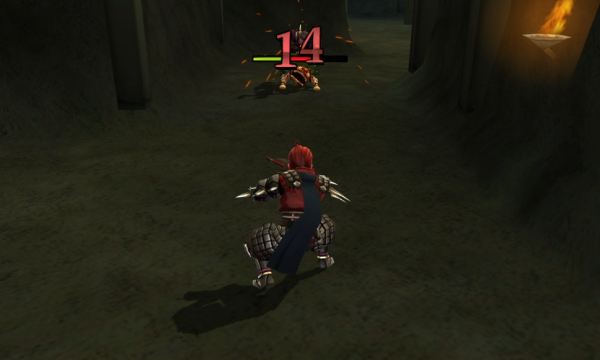 Lastly, this moron stepped into Saizo's range, so he gets turned into an experience pi�ata. Thanks, Saizo!     Odin eviscerates his Mechanist by dodging yet again before getting a crit. He's finally revealing his true power!   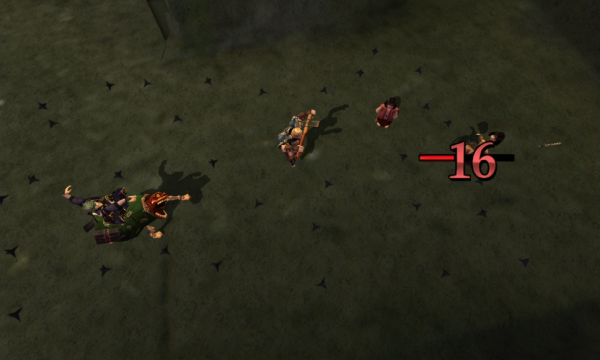 Silas pairs up with Benny, but before I move him, I have him dual strike with Kaze for axe experience.   And Marth makes use of Kaze's help to kill this other Automaton.   And now Benny moves south to pass Silas to Camilla, who quickly passes him to Beruka.    Though because Camilla is in range of enemies, she needs a little extra juice to survive the turn. She gets healed to full health and Xander as a backpack, which should be more than enough. 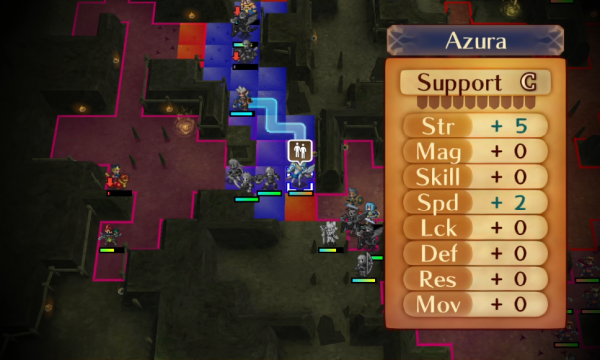   Keaton uses Azura to reach and kill Saizo's Mechanist. This was kind of a risky move, because it would have been annoying if he had missed, but it was worth it for the experience. 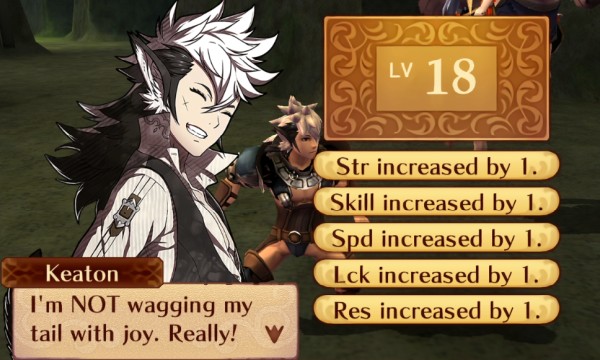  If he keeps growing like this, he has the potential to outpace Silas and Beruka!  Beruka just uses a vulnerary. She'll be leading the charge against pretty much everything from this point on.  Since we've cleared out the reinforcements, everyone is gonna group up in the center before making a beeline for Kotaro.     Between the damage skills and the debuffs, Camilla takes quite the beating, but that's all of the enemies she was in range of. Good thing we healed her up! 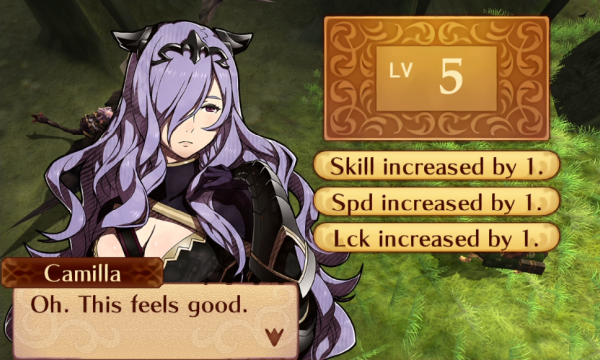  She got an okay level, and learned Savage Blow, which is basically Poison Strike but it affects all enemies within two spaces instead of just the one.  I honestly thought we'd have killed this healer by now, but there just hasn't been an opportunity.  Saizo heals because he doesn't have anyone to attack, or any caltrops to disarm. He's not generally smart enough to prioritize his survival over either of these things in my experience.    These reinforcements are closing in on us, so Beruka Lunges into this guy. She's gonna choke this point for a little bit.   I need this Master Ninja dead, and Xander is happy to oblige.     Vantage hurts, but Charlotte gets some strength, which makes this a very good level! I just wish she had gotten speed. 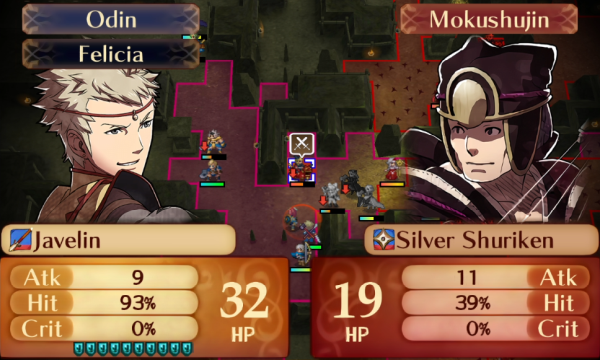  Odin chips this guy down because I don't want anyone getting debuffed by the silver shuriken. The speed loss hurts pretty badly.   Marth finishes him off with the bolt axe. I have no regrets so far about giving him the spirit dusts.  We'll be using another dragon vein soon, so the rest of the turn is a lot of moving toward the center. Niles also heals Shura up.    Beruka gets another solid level off of this guy.  I think this is the last wane festal use. Either way, this lady dies next turn.  Saizo cleans up the battlefield. I like to think that picking up jacks was a big part of his childhood. It would explain his odd fascination with the caltrops.  Niles may kind of suck at healing, but the mend staff lets him heal Beruka nearly to full anyway.   Marth and Xander chip this guy down for someone else, but before we can finish him off, we'll need to clear some space. It's getting crowded in this room.   Azura finally kills this healer! Even though they were out of heals, they were still bodyblocking my units, so I don't think this one counts as a war crime. 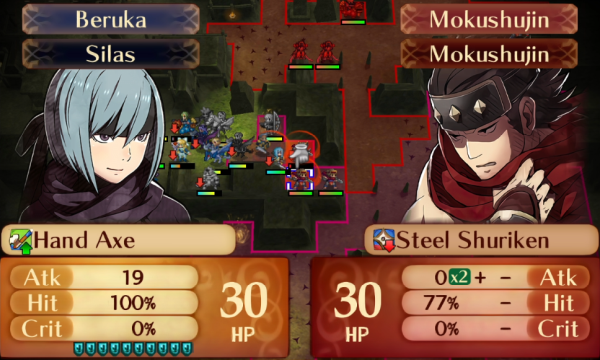   It takes a little awkward unit shuffling, but we'll be able to feed most of these kills to people who need them.   One for Charlotte!    And one for Benny! This is one of the most Benny levels he could've gotten.  This accursed skill again!  Everyone is where they need to be for the next dragon vein, which is good because we'll be using it in just a second. 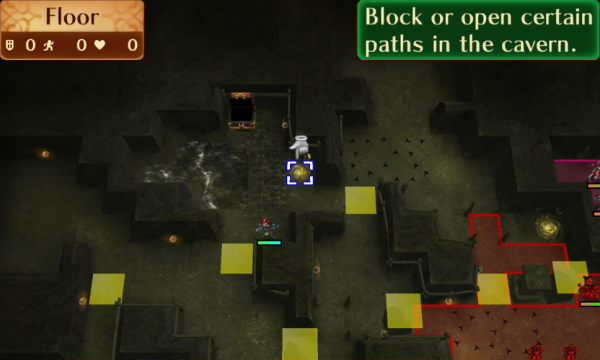 Saizo uses his turn to make a huge mistake. He's entered the Room of Shame�, where he'll be spending most of the rest of the map. 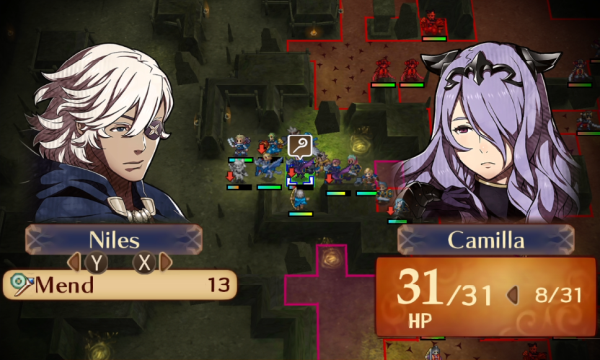 A little healing and unit rearranging later, and we're ready to activate the dragon vein. 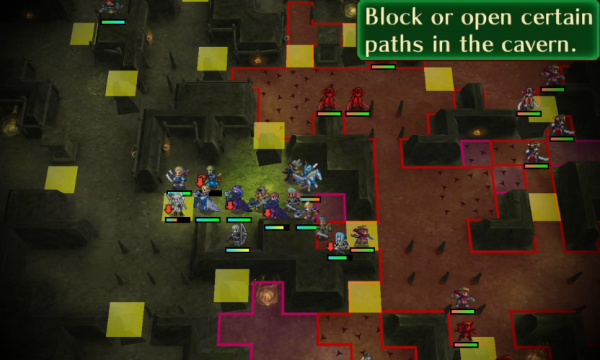  Here, you see the elusive Green Saizo. They live on a diet primarily consisting of caltrops, though occasionally they'll venture into civilization to feast on stolen experience points. An endangered species after the Mokushujin people overhunted them, this is one of the last of its kind. 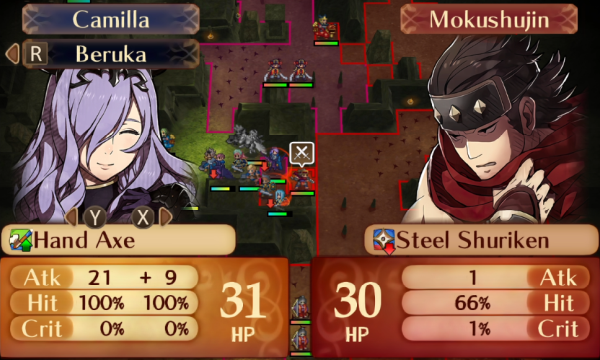 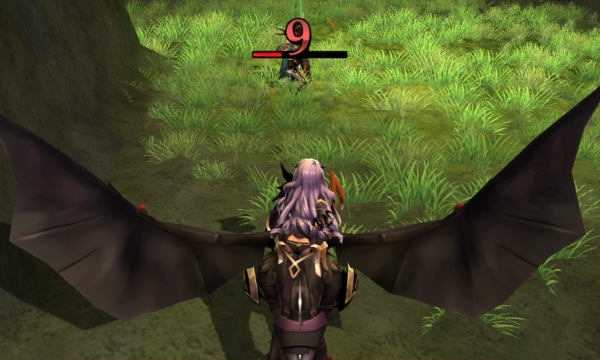 Don't you just love when the damage numbers come out perfectly like this? I mean, it doesn't really mean anything, but it's satisfying knowing that every point of strength was relevant at least this once.  That was pretty much all for this turn. I couldn't get anyone out to deal with the Life and Death guy aside from Marth, who'd very quickly melt if he tried to take those Swordmasters after the fact.    This guy chips Camilla down, but that's fine because she shouldn't need to take any hits next turn.    The high numbers you see with Life and Death never get old. Except for the ones the enemies get on you, those would get pretty old if this were a common enemy skill.  Wow, Marth got literally every stat I care about at the same time. Very nice!  Niles handles these caltrops, because he's certainly not about to contribute to the combat.    Beruka Lunges through the dual katana guy.   Benny equipped with Gamble has no right to ever have more than 40% hit against a Swordmaster, but because of the dual katana, he does! I always think it's funny when an enemy's dual weapon backfires on them like this. Thanks, moron!  Charlotte has Xander carry her so she can give Marth some much needed healing.   Camilla does a little cleanup. 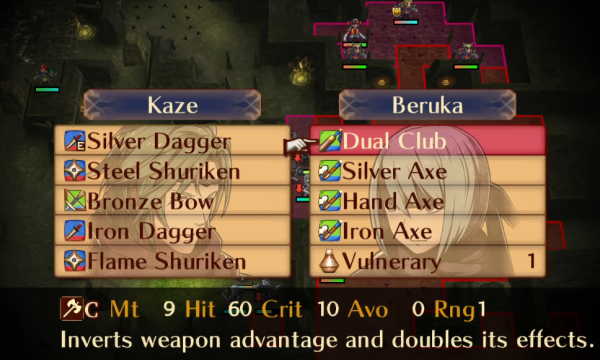 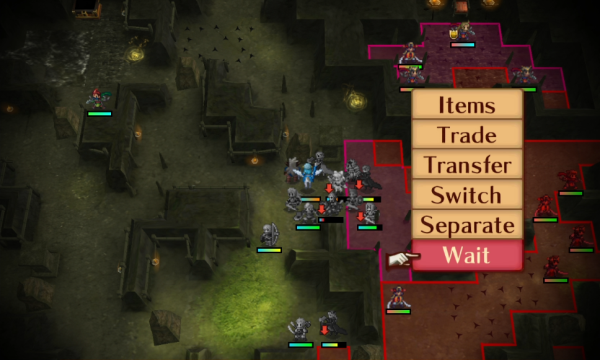 And Kaze equips Beruka with the dual club so she doesn't get shredded by this Swordmaster.  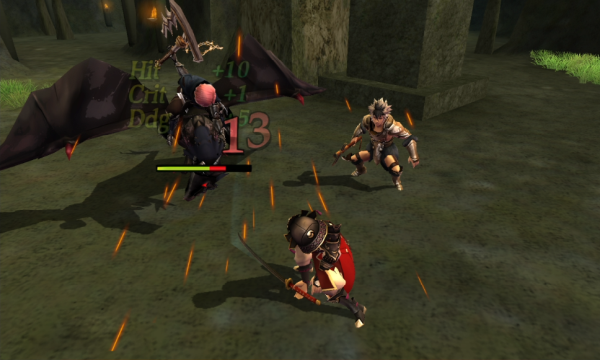  It doesn't help Marth much, though. Oh well.   Kaze and Beruka finish off the Swordmaster with the classic unnecessary dual club crit. 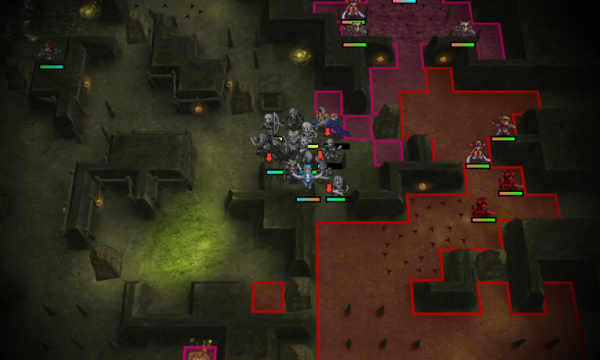 Once again, it's too dangerous to advance further, so I gather everyone into a ball for the turn. It's not the most advanced strategy, but it works!  None of the enemies are advancing right now, so we go right into the next turn. Azura pops another dragon vein, and we're gonna go straight for Kotaro. The reinforcements and the master seal are both too much trouble to be worth dealing with.   The enemies in Kotaro's room won't leave the room, so we'll take these two out and gather everyone up to execute him.    Camilla grabs Beruka's dual club and whiffs the Swordmaster.  I honestly think Savage Blow would be better if it affected enemies within two spaces of the target, because of situations like these.   Benny steals one last kill before we end the map.   Kaze softens this last guy up, and... Is that a kill for Charlotte I smell?   It is! Camilla wasn't flubbing earlier, she missed deliberately so this could happen!  The rest of the turn is just forming everyone up for next turn. 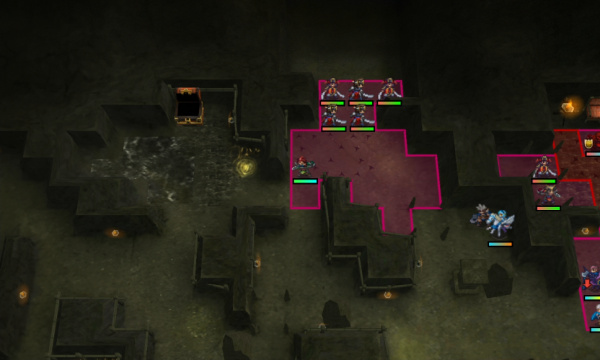 Saizo picks up some final caltrops instead of doing literally anything to these reinforcements. Even though they'll murder him on their next turn. He's not the sharpest tool in the shed, is he?   Now that we've crossed into the last fourth or so of the map, these guys show up. It's a lot of extra enemies, and while I could deal with them, it gives me a lot more chances to screw up for minimal reward. We'll be ending the map this turn, so they won't get a chance to do anything. 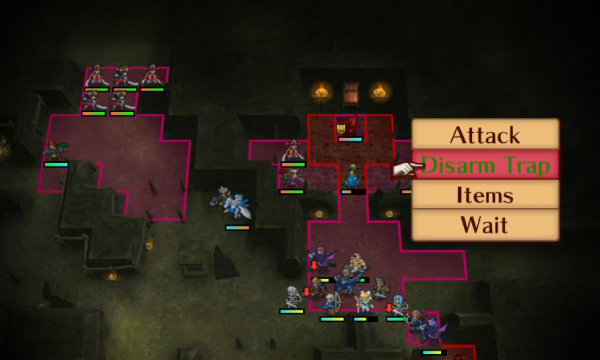 Time to deal with Kotaro. Kaze starts us off by removing the caltrops so other people can actually move in.  When I first played this game, I basically just threw all of my units at Kotaro and hoped for the best, which is a pretty shaky strategy because it tends to rely on a lot of sub-50 hit rates. The key to dealing with Kotaro reliably is to take advantage of as many avoid-dropping or hit-boosting skills as you can. Niles drops Benny here to take advantage of Fierce Mien, dropping Kotaro's avoid by 10.  Odin moves in next, and as much as I'd like to have him attack, he can't quite survive it right now, so he just waits to activate Heartseeker. It drops Kotaro's avoid by another 20, effectively cancelling the throne's avoid bonus.  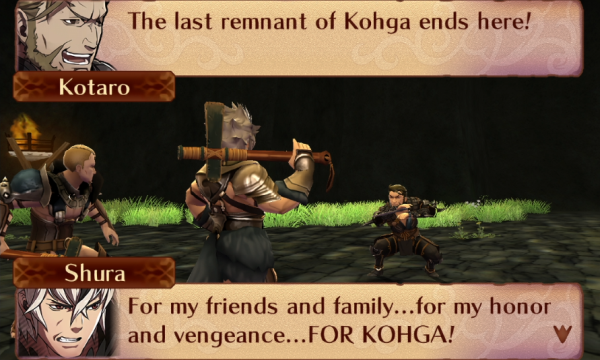  Shura gets the first hit on him with a downright reasonable 85% hit chance. Also I think this is one of the cooler boss conversations in the series, which is odd considering how bad this game's story is. Saizo's boss conversation is even better than this one, and he even has a boss finisher conversation for when he lands the final blow. I guess I just like the "my name is Saizo, you killed my father, prepare to die" vibe both of these have going.  Silas passes Beruka to Marth, and she can just barely secure the kill with her silver axe.   But before that, we might as well squeeze as much as we can out of this turn.   At least Keaton got something out of it.    Beruka finishes the map with a nice, reliable 100% hit rate.  And that's Chapter 17! If Chapter 16 is a bridge between the early game and the late game, Chapter 17 is a massive sinkhole in the road immediately after crossing. It's a pretty clear point where the maps become significantly longer and more difficult, and if you haven't gotten the hang of the mechanics yet, you're likely to have a very difficult time with the rest of it. I've grown to like this map more the more I play it. Saizo's speedwing is a pretty good incentive to play quickly, and once you realize that dual strikes are the way to go, it's not too hard, especially because you've got Xander and Shura (right?) who can pull a lot of weight right out of the box. The dragon veins are pretty fun when you use them successfully, though you have to be pretty careful with them or you could accidentally end your attempt because you used one. I do think the second wave of reinforcements is a bit much, especially because the chest in that section only has a master seal. And there's obviously Kotaro, but those aside, I tend to have a pretty good time with it these days.  Apparently, if you skip the cutscene, you don't get the popup telling you about the speedwing Saizo gives you, but here it is. I'll probably end up giving it to Silas, but we'll see.  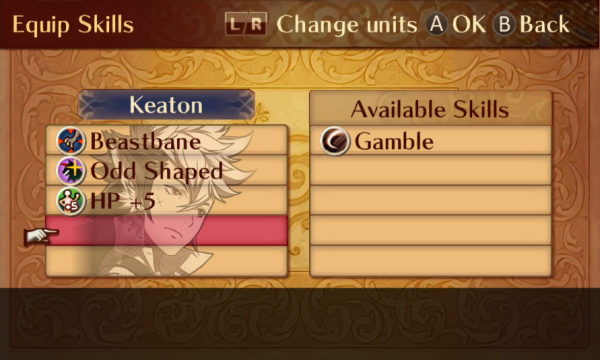 Every skill has its place, and Gamble's is in the garbage.       There's lots of supports this time, most notably Azura/Keaton's B support and Benny/Felicia's C support. I've pretty solidly decided to pair Azura/Keaton as well as Silas/Beruka, and I've tentatively decided on Charlotte/Xander, Benny/Felicia, and Niles/Camilla. If there's any pairings anyone wants to see, particularly involving currently benched characters, let me know or I'll just decide based on whatever makes building supports easier.  Lastly, Invasion 2 is available starting now. I probably won't do it just yet, partially because it can actually be pretty tough and partially because it can be used to catch a unit or two up, or to build a little quick support to unlock a paralogue. Next time, we attend an awkward Thanksgiving dinner with the extended family.
|
|
|
|
Kmsorter posted:As I understand it, classes are passed down based on the parents' class sets, not what class they're using. I don't plan on putting much thought into building super-children, so they'll inherit whatever they inherit and I'll randomly select one from their class list. Specifically they pass down their base class, and if that's already being given they pass down their secondary one. For skills each parent just passes the ine they have equipped in the last slot used.
|
|
|
|
Gonna be real interesting to see who you end up pairing Odin with, since you've already paired off Felicia. Camilla and Beruka can give her Malig but they're off the table now too. Elise and Nyx are the standard options but... eh, them being childlike in appearance has always kinda squicked me a little. Honestly, I'd have said Odin/Laslow if that was an option, since I think they have more chemistry than either of them with Selena. ...Actually, do Odin/Peri, because Ophelia is one of those people I can see actually rocking Peri's hair colour without looking silly.
|
|
|
|
I don't use Shura often, but he kinda seems amazing as a Berserker, wow. I kind of want to slot him in on a run as that now. Same with Silver Weapons. I always kind of assumed they weren't really worth it, but Beruka was going crazy with that Silver Axe, and the dual strikes with it looked really nice to have.ApplesandOranges posted:...Actually, do Odin/Peri, because Ophelia is one of those people I can see actually rocking Peri's hair colour without looking silly. I have no strong opinions on what pairings you go for, but I could get behind this. I can see Ophelia getting away with the Coraline thing with the bright yellow outfit and blue hair. Blue Labrador fucked around with this message at 20:19 on Nov 21, 2023 |
|
|
|
Chapter 17 gets a lot of flak, much of it deserved, but it does give you the tools to handle it (and by that I mean Xander). Kotaro is bullshit and the map can be tedious, but it's not as bad as some...others.
|
|
|
|
Update 15 - Dinner at Zola's We'll be doing Chapter 18 today, and because I'll be deploying people for support purposes, we'll be seeing a lot of old faces. A lot of them have fallen behind by this point, so we'll be buying some effective weaponry to help out.    Peri gets a Beast Killer, Arthur gets a Hammer, and Kaze gets a Hunter's Knife. The Beast Killer and Hunter's Knife (the knife especially) are gonna be very useful in Chapter 19, but they're also surprisingly handy here. The Hammer is pretty important for this map because we don't have a good mage, and there's a lot of chunky Generals to deal with. We're left with a measly 400 gold after these purchases, but there's 10,000 gold in this chapter we'll be grabbing soon, so I'm not too bothered by it.  Charlotte is our cook for today! Let's see how she did...  Oh. I bet she can do better than that; let's send this one back to the kitchen. 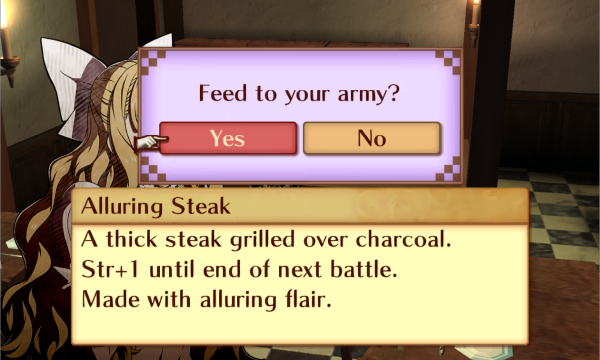  Much better!    Welcome to Chapter 18! It's the first map where every enemy is promoted, but by this point, your units should be more or less capable of handling them. If they aren't, it's a good thing that this is a breather map with a fairly lenient 20 turn time limit. There's 2 chests in this map; the northwestern one has a Master Seal, and the northeastern one has an Energy Drop. Lastly, you've got 3 bosses to kill; Zola in the north, and a pair of especially durable Generals in the south.   In the southwest, you've got a bunch of Generals. Most of them have Wary Fighter, which makes them extremely durable when you factor in their high HP and defense. There's also effective weaponry scattered throughout the map, so be careful with your cavalry and armored units!    In the southeast, it's a bunch of Paladins and a couple of Bow Knights. They're not too difficult to deal with, but a lot of them have grouped AI, so it's pretty easy to bait out more of them than you intended.  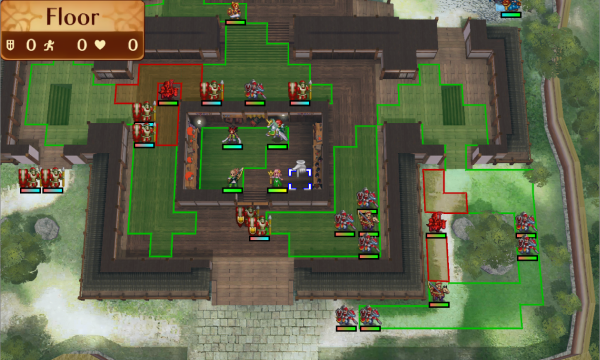 The south side also has these two Strategists with Freeze. The southeastern one is a little too out of the way to be a huge problem, but they can be kind of difficult to kill if you bother to do that.   The Maids in the north are equipped with much more dangerous Enfeeble staves that make the northern side generally harder to deal with than the south, even though the south has generally stronger enemies. In my experience, they're more manageable if you approach from the south, rather than from the sides.  The northwest has several Heroes that aren't too bad on their own, but they're pretty tightly packed and in range of an Enfeeble Maid, so they're actually the most dangerous group to tackle.  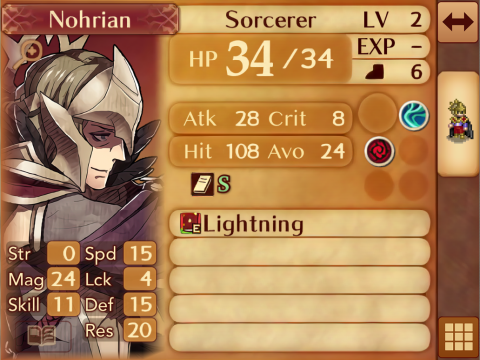  The northeast has Sorcerers equipped with a wide variety of tomes, some of which are dangerous. The Mj�lnir guy especially; it's a Killer weapon, and in fates, they deal x4 damage with crits instead of the usual x3, so be careful letting him attack you! The Lightning guy is also notable; it's essentially a 1 might Brave weapon that has the Silver weapon stat penalty after use. A couple of these guys also have Seal Resistance, which stacks nicely with Lightning guy, letting him deal 12 extra damage instead of the usual 6. This group is also in range of an Enfeeble Maid. 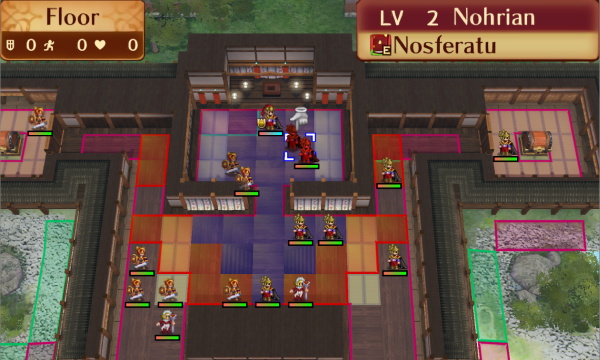   The last of the regular enemies on the map right now are these pairs in Zola's room. They're pretty dangerous, but just like the enemies in Kotaro's room last chapter, they don't like to attack you unless they can score an easy kill, so we'll just ignore them by rushing Zola down.  Zola has a cool outfit and a fat wallet, but unfortunately for him, that does not mean he's a strong boss. He looks pretty dangerous at a glance because he's got the Nosferatu/Vengeance combo from Awakening until you remember that he can't proc Vengeance without using his other tome. It's a simple matter of outdamaging Nosferatu's healing and killing him before he has a chance to attack you. He's kind of bulky, but you can just dogpile on him and he should go down pretty easy.    In the south, you've got the real bosses of this map. The Silver General Bros are ridiculously durable thanks to Wary Fighter, and the one attack they'll get per battle is gonna be a big one. They've also got Warding Blow, which gives +20 resistance when they initiate combat (though it's not like we have any decent mages to use against them anyway). Because they'll tag out when their HP is low, you've gotta be able to two-shot them or they'll build up a guard gauge and extend the whole fight unnecesarily. They've even got a strong 1-2 range option, thanks to the enemy-only Silver Javelin and Silver Star Axe. Lastly, they're generic units, which means you can capture them. I once captured the axe guy (his name was Manfred) and he made a very durable brick wall of a unit.  Oh, and lastly, we've got the Hoshidan royal family in this prison in the south. They don't have any weapons or items, they don't move, and the enemy AI ignores them, so you don't have to worry about protecting them.  This is the team we're bringing. I did a bit of support planning, and the plan for the moment is as follows: Marth/Flora Silas/Beruka Keaton/Azura Odin/Peri Niles/Camilla Benny/Felicia Xander/Charlotte Kaze/Effie Laslow/Mozu Arthur/Selena Jakob/Elise Leo/Nyx I didn't put all that much effort into crafting super-children, partially because I just don't enjoy that aspect of the game all that much and partially because it's hard to plan a child out when you don't actually know what class they're gonna be. Some of these, like Leo/Nyx, I chose because their stats would theoretically create a half-decent child, and others, like Kaze/Effie, I chose because one or both of them appreciate the support bonuses they'll get. Anyway, it's pretty late in the game to start working on supports, so we'll need to hit them pretty hard to make sure we can get all the children. Which is why we're bringing so many underlevelled characters at the same time! But there's an extra deployment slot because we can't pair Marth up yet, so Shura gets to come along for another ride!   Basically, Kaze is going to handle the right half of the map while Azura and Keaton steal kills when they can, while everyone else charges the Generals in the south. After taking care of them, the whole army is gonna move north to grab the chests and kill Zola.  Marth and Leo are paired up on turn 1 because the extra magic he gets actually does matter. He moves south to bait as many Generals as possible with the Bolt Axe. 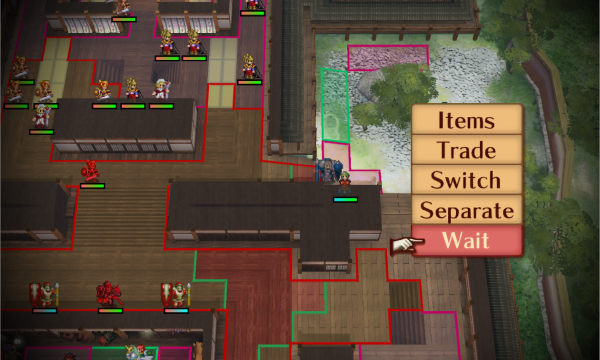 Kaze moves here, which puts him in range of just one Sorcerer. He can't get too much closer without getting hit by an Enfeeble, and I don't wanna do that quite so early. Everyone else just inches behind our frontliners.  Keaton found some floor milk! I'm not sure how safe it is to drink, but it's a speed ingredient, so it's actually a pretty nice find! Combining it with meat makes a guaranteed str/spd meal.  Selena is just too weak to damage anybody here, so she might as well eat an Enfeeble. I don't think it'll matter, though.   Kaze could have one-rounded with the Steel Shuriken, but leaving this guy alive leaves an extra kill for Azura or Keaton. 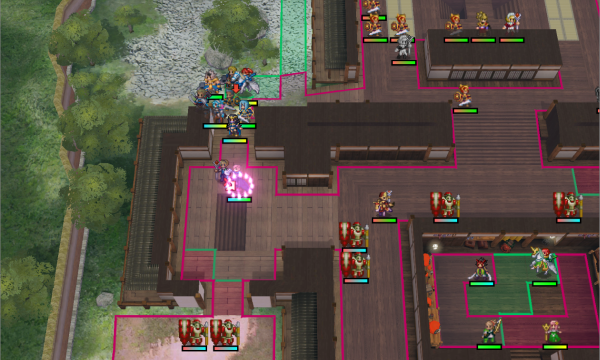 Marth eats a Freeze, which is completely fine. He wasn't gonna dodge any of this anyway, and he doesn't need to move next turn either.   The Bolt Axe is pretty good against these guys, but their resistance is high enough that it still doesn't two-shot.   Even though they can't double, Generals have so much strength that they'll chip just about anyone down in a couple rounds of combat. You'll also build guard gauges less quickly because your units aren't doubling, which makes them especially dangerous if you aren't careful. But this is the last guy who can reach Marth this turn, so he's fine.   Marth can't move, but he can still chip this guy down! 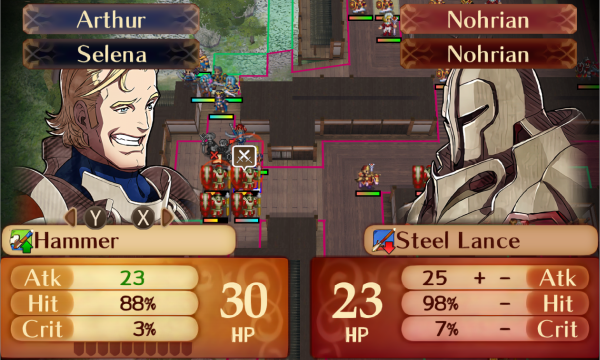  I love when the damage numbers line up just right like this. This is also why Marth needed Leo's support.   But you know what I don't love? Gambling.    Arthur is done with the Hammer for now, so Beruka uses it to bop this guy. These guys have Natural Cover, which makes taking the ones on the stairs down slightly more trouble. The -3 damage is relevant more often than you'd think! Also, placing her here will bait out a General from the center on enemy phase.  I'd be less okay with this level if she weren't one of our best units.    Nyx takes Leo and chips this guy down. I've always thought Spears were odd; why aren't you able to use it at 1 range? I guess they wanted something stronger than a Javelin that the player could use, but they thought that 12 might would be too much on a 1-2 range weapon. If they had put one in a chest somewhere, I'd probably get some use out of it, but making it essentially an overpriced bow makes it a really unappealing purchase, so I've never actually used one.   Regardless of the usability of the Spear, Odin finishes him off.  And Shura moves here to complete the fleshy wall that will protect Nyx. 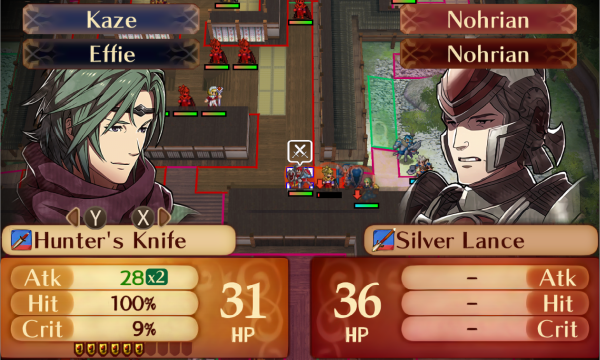  This Paladin moved in to provide support to the Sorcerer that attacked Kaze, so he puts the Hunter's Knife to use and deletes the poor guy.   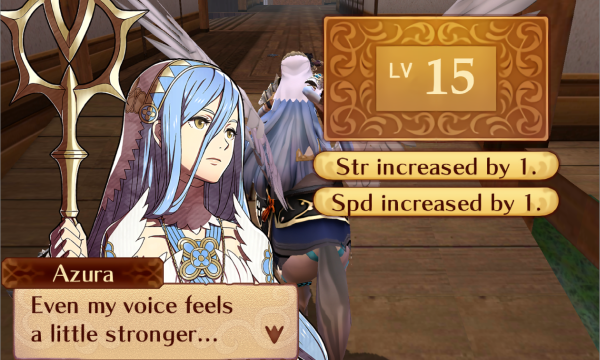 And Azura finishes the Sorcerer off with her Javelin. Strength and speed are the only stats she cares about, so I'd call this level a win! 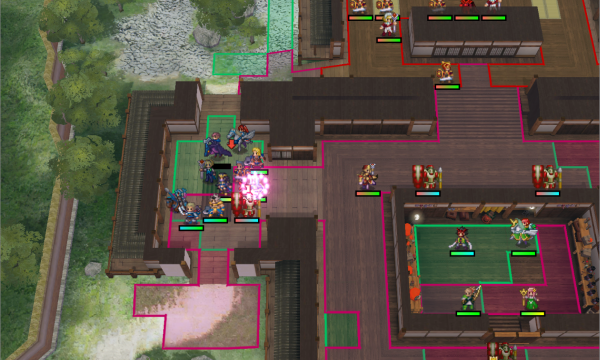 On enemy phase, it's Beruka who eats the second freeze. We'll have to play around that a bit, but it's manageable.    The closest General understandably decides his best target is the guy who doesn't have an armorslaying weapon.   Beruka's General is one of the few here that doesn't have Wary Fighter, so he commits suicide-by-Hammer.  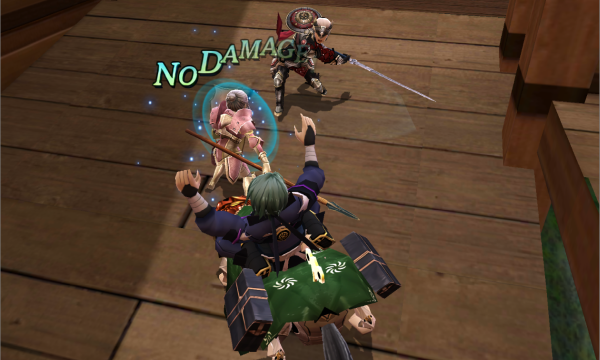 In hind sight, I should have had Azura switch Kaze's weapon out, but oh well. 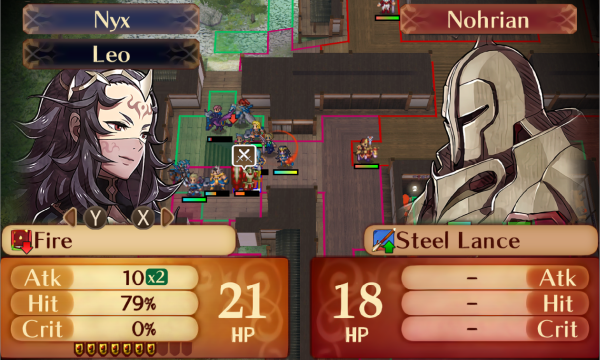  Back on player phase, this General also lacks Wary Fighter, so Nyx can actually get a kill! It's kind of impressive that she's still almost decent at this point. She hasn't been deployed for what, 4 chapters? And she wasn't exactly good during those.  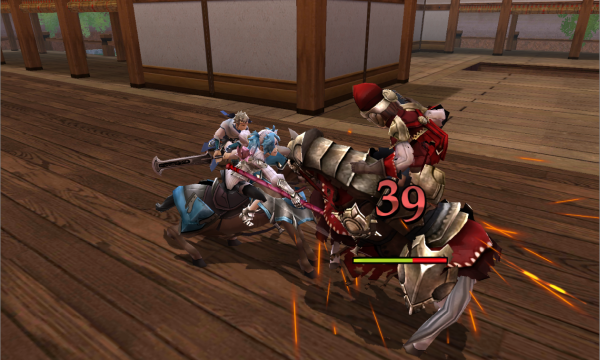 Peri deletes the Freeze Strategist with the Beast Killer. Despite being an objectively horrible person, I do like how cheerful she looks when she's on the winning side of a fight. 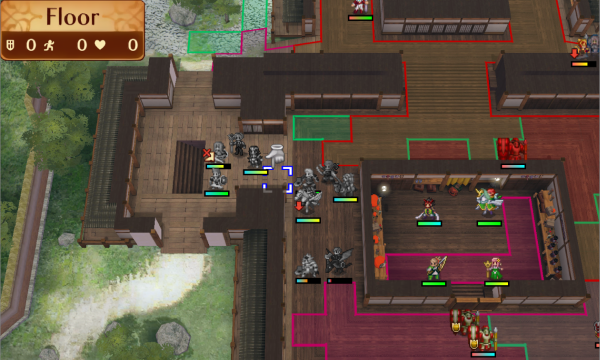 Everyone else moves forward, with Silas and Beruka separating for the moment.   If I had chipped this guy with the Silver Shuriken, this hit rate would be slightly higher because of the speed debuff. I went for this anyway because if Keaton misses, Kaze is perfectly capable of cleaning up for him.    Duelist's Blow keeps him from securing the kill, but at least he got axe experience from his chip on player phase!    Azura finishes this guy off for her future husband. More strength! There's gonna be reinforcements from the stairs in the east and west in a minute, so Kaze is just gonna chill where he is for now.    I want Silas and Beruka to bait out the cavalry next to the General Bros, so we'll need to ferry the two of them to their destination before transferring to pair them up again. This is the kind of Fates mobility shenanigans that I love!  Leo heals Marth while everyone else inches forwards.   Silas looks like he slipped on a banana peel or something in this one, which I think is pretty funny.     The Bow Knights aren't all that dangerous; they're just here to keep you from taking the group out with Camilla.    We want to clear all of these guys out this turn, and Peri gets us started. She gets a decent level for her trouble.    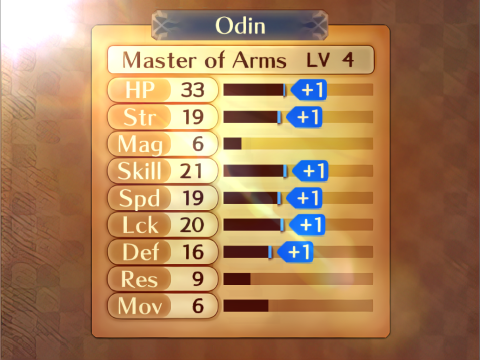 Odin finishes the Bow Knight for a fantastic level. More of these, please!   Shura can nearly one-round these guys on his own, so it's no trouble at all with help.    Beruka wipes up the last of this group with the Silver Axe. She's positioned so that she'll bring in the next couple of Paladins on enemy phase.  Leo heals her up after swapping the Silver Axe out. She'll want enough HP to take on the General Bros in a second.  Kaze and Azura are ready to deal with the reinforcements that'll show up on enemy phase.   Beruka, did you have to deny others the support and experience they'd have gotten from finishing this guy off? That's just rude. 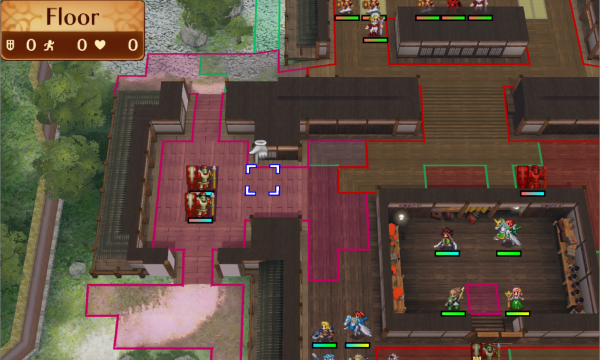  These dudes show up on enemy phase, but they aren't too dangerous. I don't fully know what triggers them, though. I know it's not turns, but the bad wiki tells me they show up when you fight the General Bros (which we haven't done), and the better wiki tells me the same but that they also show up when you fight one of the guys in the group of four we finished off last turn (which didn't spawn them until now if that's what did it). Maybe they show up when you start fighting some of the southeastern guys? I'm curious, so if anyone knows for sure, let me know! 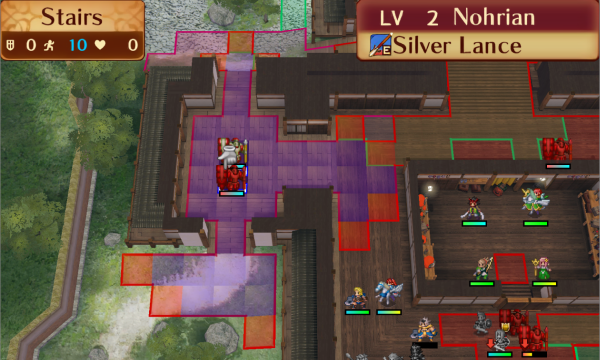 It's worth noting that this guy has Seal Defense. To me, it seems like an odd skill to put on a General, but it's still something to be aware of.   I tried to give Azura some chip experience from safety behind Kaze, but she decided to miss, so she gets nothing. Oh well.   These two came up the stairs only to be immediately turned into a paste by Kaze. 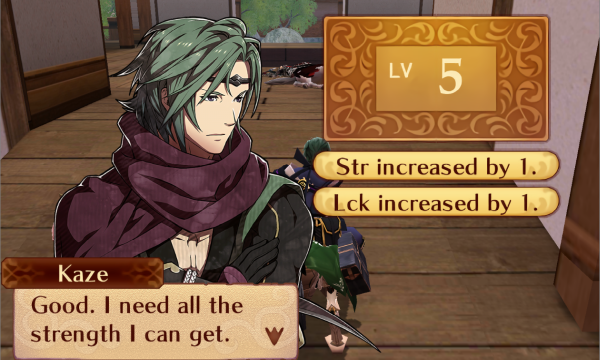  Despite this level being strength and nothing else of importance, I'm happy with it in Kaze's case. He also learned Golembane, which makes all of his attacks effective against Automata, Stoneborn (which we haven't seen yet), and other Mechanists. It would be pretty good if these were more common enemy types, but we won't be seeing too much of any of them for the remainder of the game.  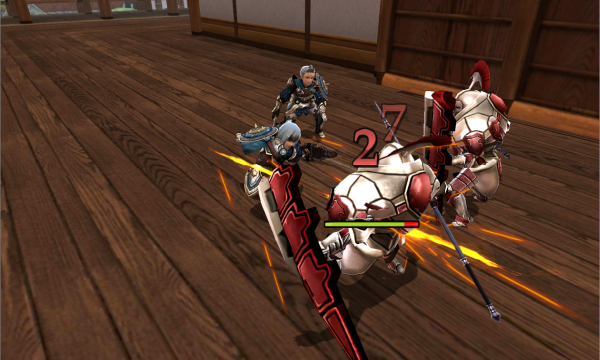  With another heal from Leo, Beruka is more than ready to take care of the General Bros. No one else is really able to do any damage to them, so it'll be a fair and honorable tag team battle.   I don't want anyone else in range of the Generals, so spaces to attack this guy from are in short supply. Marth remedies this by Lunging into him.   Odin can clean up the rest without any trouble. We'll just let the reinforcements come to us, so there's no need to move anyone else this turn.    The frontline General Bro is low on health, so he tags good ol' Manfred in. He doesn't really fare any better than the first one, but if you're not two-shotting them, this tactic virtually guarantees that they'll build a guard gauge up before you can kill one of them, which is annoying at best.  It's okay, Beruka, you go when you want to. 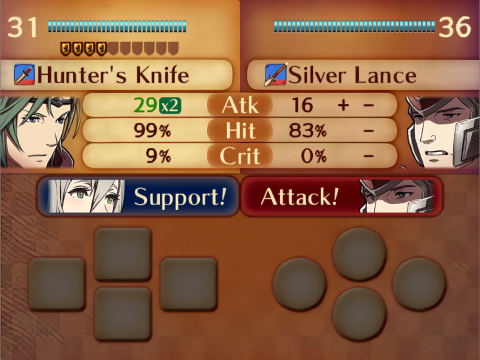   Kaze takes a pretty big hit, but his counterattack vaporizes the second Paladin. One of the southern Paladins decided to join the fight, so he's got his next victim lined up already!   Once you take the first Bro out, the other should follow pretty easily without the extra defense the pair up gives.   In fact, with the +2 strength he gets from Peri, Odin is just barely able to take the kill for himself. He finishes the fight in style, of course.   It's just a shame he didn't make better use of all that boss experience. The essentially empty level aside, he learns Seal Strength, which is kind of nice. It's one of the worst Seal skills, and Master of Arms Odin really isn't bulky enough to make good use of it, but at least he can reduce enemy damage output by chipping with a Javelin now.  Killing the General Bros also opens Team Green's gate, but they don't move or get targeted either way, so it doesn't mean much. It doesn't even affect the time limit!   We don't have enough units left to deal with these two, so we're just gonna wait another turn.   Azura chips this last Paladin for experience before allowing Kaze to put him down. They'll be moving north to draw out some of the Sorcerers soon.   Enemy phase came and went, but these guys are the only ones actually moving right now. We have enough units that we can feed these kills to whoever, so Nyx starts us off.   There's been a lot of points in this map where the numbers work out juuust right, and I love it every time. Even though it doesn't really mean anything.   I bet this guy wishes he'd have just brought a Javelin instead of the Spear right about now. 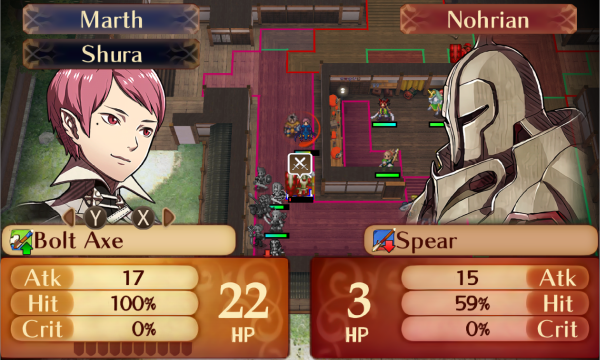  Marth finishes him off. I kind of wanted to feed the kill to Arthur, but there wasn't a way to get the Hammer to him while still letting him attack. 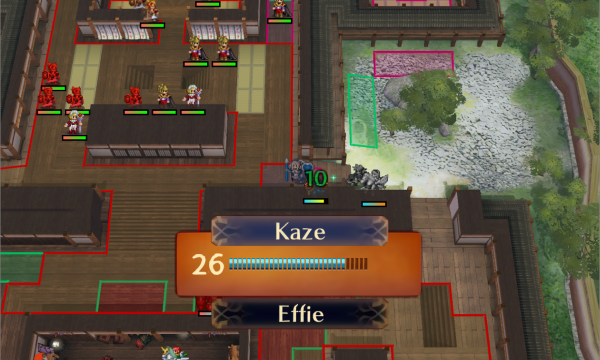 Now that there's no more distractions, Kaze grabs a Vulnerary off of Effie and moves to bait the Sorcerers.  He immediately gets Enfeeble'd on enemy phase, which would be more of a problem if he were facing the Heroes on the other side.   Although he can't quite double with the Steel Shuriken now. Also, one of the Heroes decided to join in to provide support, which means that Kaze can't just sit here and kill them all next turn.    Even through the Enfeeble, this Lightning guy doesn't hit Kaze too hard, but he'd chew through everyone else pretty quickly.  For this player phase, Leo healed Marth, and everyone starts moving into position. Beruka is once again our choice of bait for the last General on the map.  Kaze and Azura back away, out of the Hero's range. He'll just be facing the Sorcerers now.  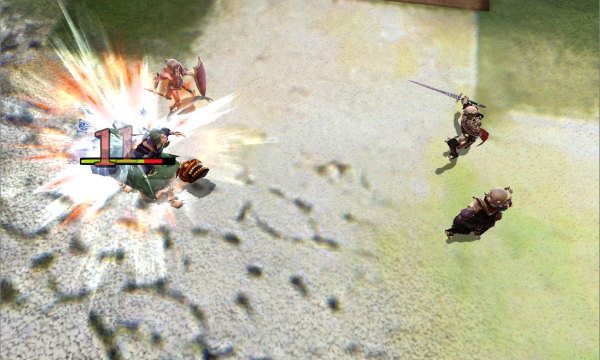   With the defense debuff from the Steel Shuriken, Kaze can finish these guys off this turn. He gets a solid level, too; it's really only missing strength.   Lightning's -2 magic debuff after use in combat has twice the impact of a Silver weapon's. It only has 1 might, so you can't rely on its stats to carry you through the debuff like you sometimes can with Silver.  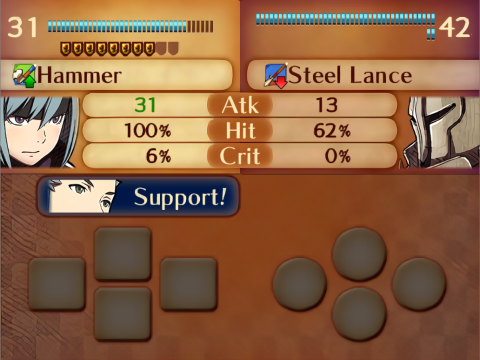   Beruka also gets Enfeeble'd, but she's strong enough to kind of ignore it, so these numbers don't really look all that different. 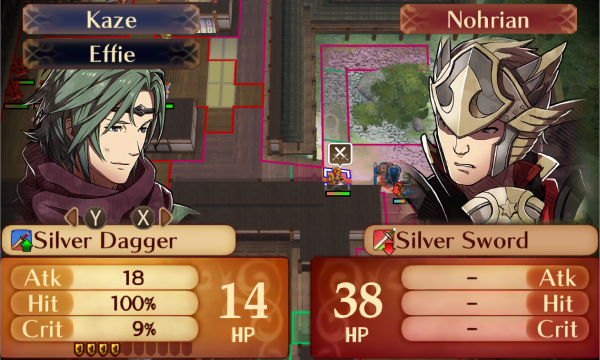   Kaze chips his Hero down with the Silver Dagger, mostly for the -4 speed debuff. 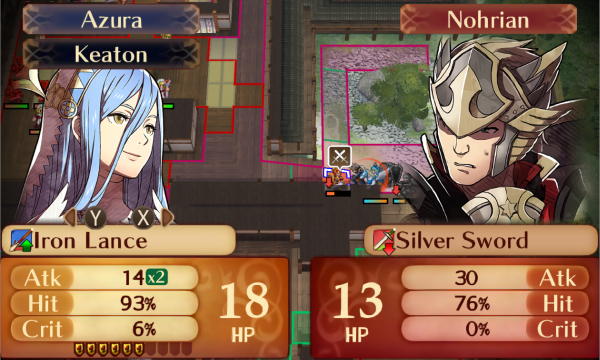  But that ended up being pointless because after Poison Strike, Azura was able to finish him off in one hit anyway.    Selena may not be able to fight anything with her noodle arms, but she can still pass Arthur the Hammer!  Now that we've got enough people available for the job, it's time to start dealing with these Heroes. 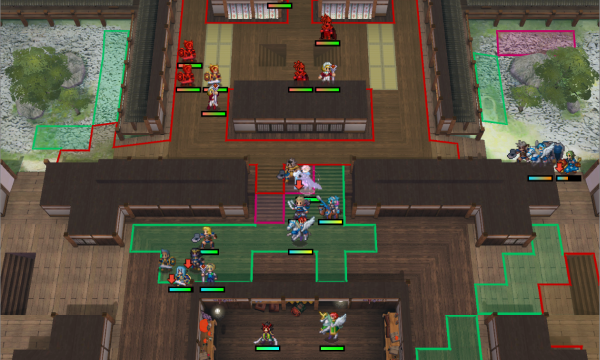  Marth and Selena take the Enfeebles for this turn. Better Selena than Beruka again; she wasn't going to actually fight anything anyway. 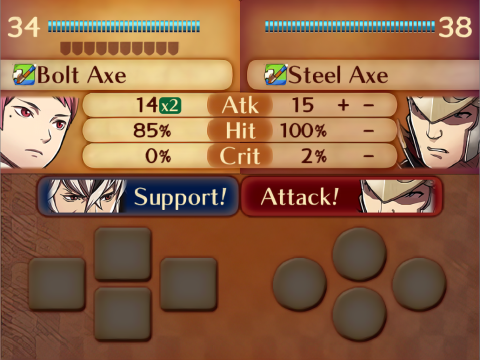   Even debuffed, Marth is able to double these guys. Though I think that's because of the extra speed Shura gives him. 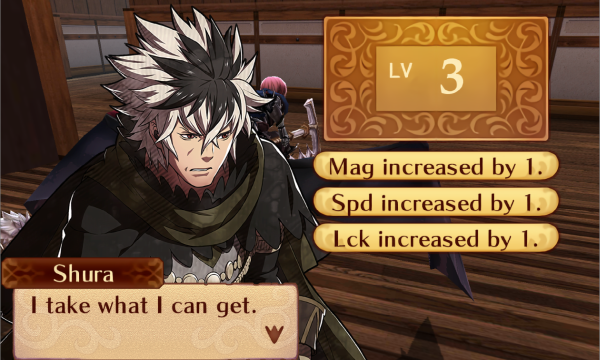  This is... not exactly the level you want to see out of a Berserker. The speed is good, and HP +5 is kind of nice, though it does mean that his next level will give him Gamble.    Amusingly, Peri gets exactly the level you want to see out of a Berserker!  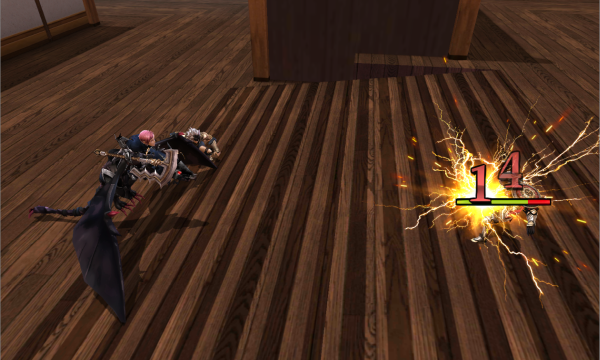 Marth gets lucky and connects both of these 62s.   Which lets Odin swoop in for the kill. 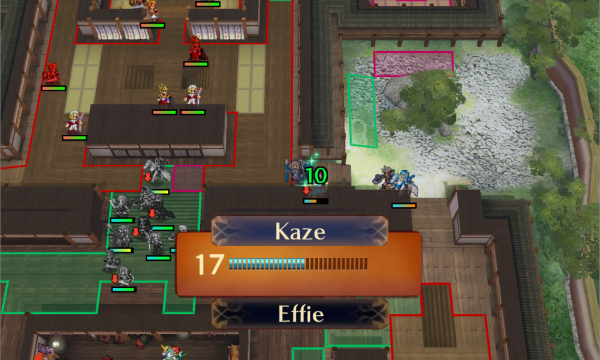 Kaze heals up and positions himself to bait another Sorcerer.   Today's Enfeeble winners are Odin and Kaze!    I like the Ragnarok animation. The way the magic circle appears before kind of conjuring an explosion inside it just feels very "magic" to me.  At this point, we'll need to watch out for this area here. As I mentioned at the start of the map, these pairs don't like to move unless they can score a kill or if you attack them (or Zola). Once you trigger them, reinforcements spawn from the staircases here. We'll just avoid the whole area for now, and once we're ready, we'll push a couple of our stronger units past them to take out Zola, that way we won't have to deal with them at all.    Azura can barely survive this hit, thus validating every point of HP and resistance she's gained until now.  Her reward is an okay level. The defense likely won't ever come in handy because she's so frail.   Kaze chips down the Mj�lnir guy. Even with the 4x damage, he could have tanked a crit, but he didn't need to thanks to his guard gauge.   It looks like Selena is gonna see combat after all! Because of the weapon triangle, Arthur wasn't able to reliably kill this guy, and I'm not risking a crit this late into the map.   She gets effectively +6 speed from this level, because I don't expect her to do any enemy phase combat.     This guy is a bit too far to kill, so Marth fixes that by Lunging into him. 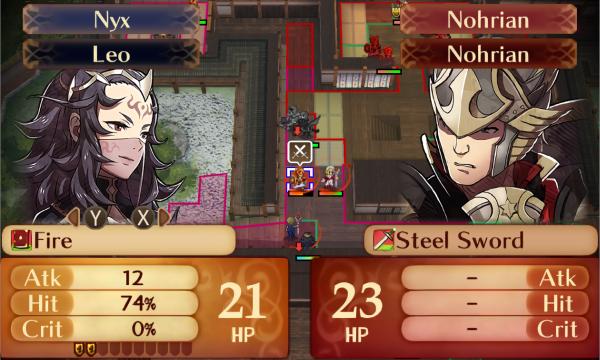  Nyx chi- Oh. Nevermind. This is why we benched you, Nyx!   In that case, we'll want someone to provide some solid dual strikes, so Silas deletes the Maid with his Silver Sword. 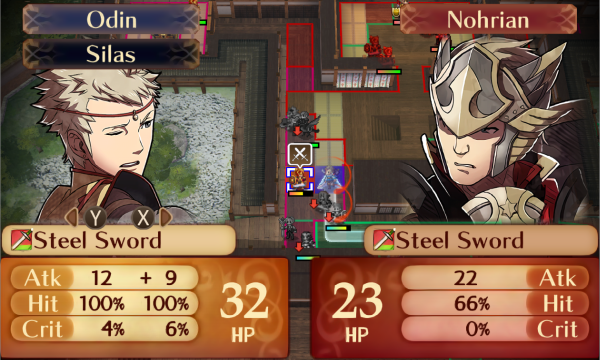    And now Odin can take advantage of his placement, though it doesn't quite let him finish. He got a very solid level, though. He'll get some use out of the extra defense.   Peri can have this kill, as a snack.    The only enemy phase action this turn is Kaze being attacked by this Maid.   But because he needs to get the treasure, he moves up north while Marth finishes.  There's not much else to do until after we get the treasure, so everyone just inches forward a bit while staying out of Zola's group's range.   Marth passes Shura to Peri so she can carry him to the northwestern door.   And Silas moves through it to start working on this Hero. 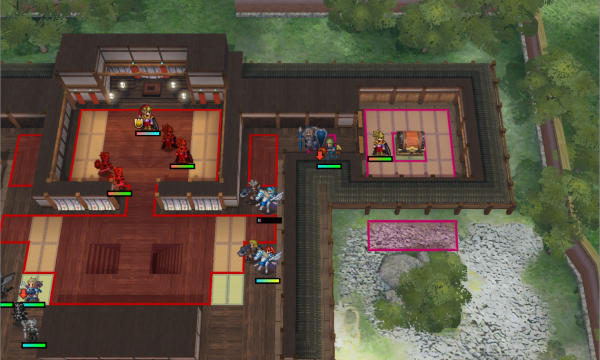 Kaze opens the northwestern door, and everyone else either stays put or shuffles around slightly. They really can't do anything else until we get the treasure.    On enemy phase, Silas flubs the finishing blow against his Hero because he has Duelist's Blow, which is kind of unfortunate because now he'll have to stay up there another turn. Oh well.    Kaze easily dispatches the Nosferatu guy in the way of his chest. It turns out Nosferatu doesn't really help when you initiate combat at full health.    Silas redeems himself while Shura grabs the Master Seal. We'll probably use it before the next chapter.  Kaze grabs the Energy Drop, and I honestly don't know who to give this to just yet. It's definitely not optimal, but a part of me wants to feed it to Azura. Anyway, some of our boss killers have already moved, so we end the turn without doing anything else.   Kaze gets passed to Selena, who flies him up so he can thrash Zola. 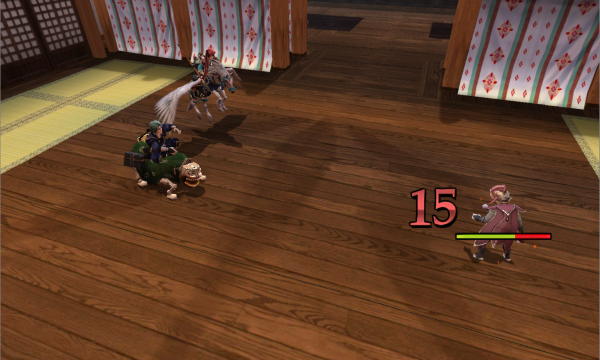   Kilma in Chapter 8 is a pretty dangerous boss because it's so early in the game that you don't have as many tools to deal with Nosferatu (and because he has Vantage). It's not quite as dangerous when you've got a good dagger user on the team!   Odin and Peri can get the traditional last chip in before we finish Zola off.   Marth flies in and kills the little slimeball. I actually wish he had missed this attack so Kaze could get a little more chip experience in.    Hey, he got a good level! And he learned Savage Blow! The extra 10,000 gold is also very nice, considering that we're out of money.  And that was Chapter 18! It's definitely a breather map that I think was intended to kind of ease you into fighting exclusively promoted enemies. The only problem I have with this map is that the turn limit is a bit too lenient. I personally think somewhere around 14-16 turns on Lunatic would have been more appropriate, but what do I know? Otherwise, I think it's fine. The enemies are pretty powerful, but they aren't too difficult to deal with because you have so much control over how many you bait out at once. Anyway, lets check in on how dinner is going!   I guess that's about as well as it could be expected to go. Alright, on to My Castle!    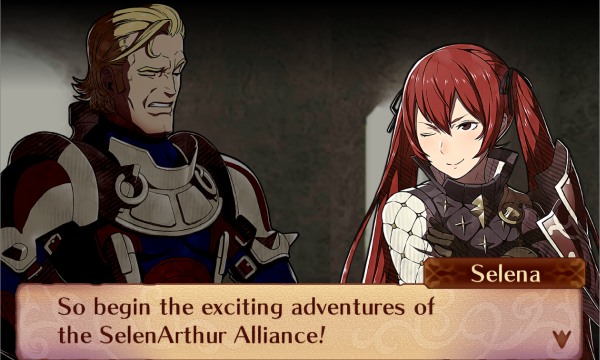    We got a lot of useful supports this time! I just wish I'd gotten a Leo/Nyx support; that would have made this perfect.  We can finally max out the Fire Orb, which means we can recruit Flora. She'll pop up in My Castle after time passes there, either by doing another map or by waiting 6 real-life hours. Speaking of which, as I'm writing this, it's been over 6 hours...    I don't know how she got here, but I can definitely say that I'm glad she is. Now I can start making progress on Marth's S support! 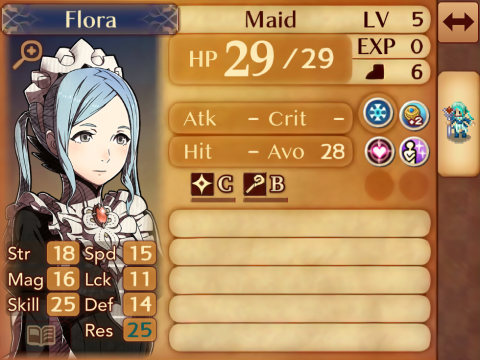 Flora, I couldn't help but notice that you didn't bring a weapon. That's okay, though; you probably won't get to use daggers in your final class. Anyway, to summarize Flora as a unit quickly, she's a solid late-game staffbot that may be able to contribute occasionally in combat, but she's held back by her low speed and her near-total lack of supports that aren't with Corrin. But that's enough about her performance as a unit for now, let's find out what class she'll be! Like Shura, she has 6 classes to choose from, so her final class options are Maid (1), Strategist (2), Bow Knight (3), Hero (4), Dark Knight (5), and Sorcerer (6).  Rolling a 6 makes her a Sorcerer! I don't really know what I wanted from her because she's actually got solid strength and magic, and her speed is irredeemable regardless. Maybe we'll get to see Nosferatank Flora?   I think she looks pretty good in the Sorcerer outfit! It complements the blue hair, I think.  Holy wow that's a lot of resistance. And with 20 skill, she shouldn't be too inaccurate with tomes. 14 defense and 28 HP makes her kind of bulky, too. Now that I think about it, Nosferatu meshes really well with her personal skill, and I'm kind of excited to see how well she'll work.  Back to a less interesting topic, we can also build the Hot Spring, which is useless but when maxed out lets us recruit Izana after Chapter 23. There's not really anything else to spend dragon vein points on right now, so I'll do that.  Lastly, we remove Gamble yet again. It's like a hydra at this point: I remove it from one unit and it pops up on two more. New unit discussion  Flora Class: Sorcerer Growth rates HP - 35 Str - 40 Mag - 20 Skl - 45 Spd - 30 Lck - 35 Def - 30 Res - 30 Flora joins so late in the game that she's usually either immediately benched or she becomes a last-minute staffbot to fill an extra deployment slot. That's how I typically use her, if I use her at all, and she's good at it because B rank staves is enough to use just about all of them and her stats are good enough that she can occasionally chip. Her combat potential is really held back by her low speed, because she'll have trouble doubling even relatively slow enemies, though her surprisingly high strength somewhat offsets this. Her personal skill, Icy Blood, deals the damage she takes to her opponent when she's being attacked by a nonadjacent enemy while her HP is not full. It also inflicts skill/speed -3 after combat. It's one of the most specific activation conditions in the game, but it's still pretty decent. It's also worth noting that if you put off maxing out the Fire Orb, she gains levels the later you recruit her, which can help her out in her role as an extra slot filler. For her reclass options, Flora can go into Bow Knight, Hero, Dark Knight, Strategist, and Sorcerer. I've never actually reclassed her, so take this section with a grain of salt! Flora's base strength is pretty high at 18 as a Maid, and if you reclass her to any physical class it gets even better. As a Hero she has 22 strength, which is more than everyone but Xander and Shura at the moment. Her speed is gonna hover around 14-16 no matter what class she uses, but the one hit she gets should be pretty solid. Sol meshes pretty well with Icy Blood if you take her through Hero, though bow access in Bow Knight lets her chip more easily. If she can get past E rank weapons, she should turn out at least decent in any physical class. The magical classes are pretty good, too. Her magic stat isn't super impressive, but because enemies tend to have lowish resistance, it's enough to make it work. Dark Knight lets her make use of her strength, which makes her versatile if not particularly impressive. Strategist lets her keep using staves without really taking anything away (other than Dagger access). And Sorcerer gives her more firepower and access to Nosferatu, which I think she'll be able to get some use out of. The best of these three is probably Strategist purely because staves are pretty handy to have around. All this being said, her best option is probably still Maid because it lets her keep her weapon ranks and Dagger access. There won't be any Benchmaster voting for now because we need to work on supports, so that's all for today. Next time, we go fox hunting!
|
|
|
|
...y'know, I never considered capturing one of the General Bros. Dang, they're quite good. (One of these days I should get around to trying the Conquest Captured Units Run but I simply have no idea how I'd ever get past Chapter 10 if I used the same ruleset as I did on Birthright...) Florceror should be interesting, her decent base str is completely wasted and her rather weak mag growth means she's gonna have to coast on her base as time goes on, but I'd still rather use her over Nyx!
|
|
|
|
I love Chapter 18. Difficulty-wise, it forces forethought, but it's still accommodating for whatever nonsense you have at hand to deploy, which seems like a slim tightrope to cross. It might also be because it sits right in the middle of 17-21, which can be total headaches, so it's really nice and welcome in that regard. I've never used or even thought about using Flora, and you make her seem like a pretty cool unit. Excited to see how she pans out! In terms of your other pairings gameplay-wise, I've never thought about Felicia x Benny, but that seems like it lets you get away with some goofy stuff, which sounds fun. Same goes for Odin x Peri, which sounds like it might be bad, but also feels like it could kinda work? Interested to see how the run goes!
|
|
|
|
Update 16 - Big Game Hunting It's time for Chapter 19, which is the first map in Conquest that's pretty much universally hated. I completely hated it and its gimmick when I first played it, but I've grown to kind of enjoy it over the years. Maybe it's just Stockholm Syndrome. Either way, we've got some preparations to make before we get to the map.   Silas gets the speedwing for the same reasons as last time. Although it won't really matter in this map; the enemies have speed around the mid 20s.  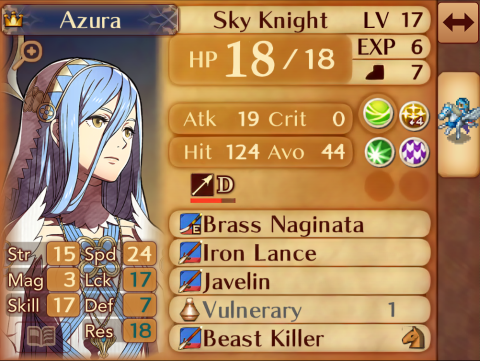 Honestly, Silas or Kaze are probably the best candidates for this energy drop, but I decided to give it to Azura because it's more fun.  Xander gets a defense tonic, which is the only tonic we'll be using this time. He's gonna be pulling more than his fair share of weight this time around.   Silas cooks up a decent steak for us. The luck gives us a slightly higher hit rate, so it's kind of nice to have. Because we already bought all the beastslaying weapons last time, that's all of our preparations for today.      Welcome to Chapter 19! At a glance, it's a fairly simple map because it's exclusively full of 1 range infantry units, but it becomes pretty obvious why people hate it when you start actually playing it.   This is the team we're bringing today. Keaton and Benny are staying because we'll be dealing with enough shaky hit rates as it is. We've got an extra slot available, so Shura gets to come along again! Otherwise, we're mostly trying to build up an A support or two if possible. Unfortunately, because this map is so player phase focused, it's not a great map to build a lot of support, unless your name is Xander. Oh, and none of the enemies in this map are capturable, which is kind of a shame. It would have been cool to use a Kitsune in Conquest.   A lot of these guys have Life and Death, which makes them dangerous but also pretty easy to oneshot. Oh, and every single one of these guys has Beastbane, which gives them a beastslaying effect.  Several of them also have Evenhanded, giving them +4 damage dealt on even-numbered turns. 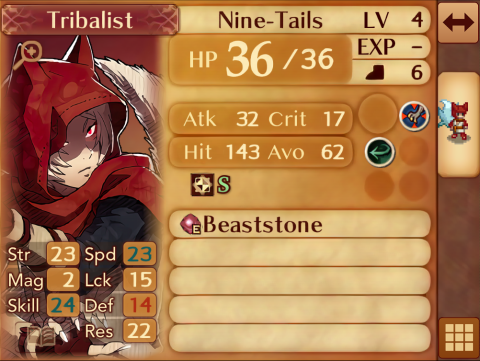 Pass is another common skill here, and it meshes very well with the map gimmick that we'll get to in a minute.  The boss, Kaden, is a lovable cinnamon roll in Birthright. But here, he's pure evil thanks to his 76 avoid. At least he doesn't have a throne to sit on. Other than that, he's got Armored Blow and Even Better, which restores up to 40% of his health at the start of even-numbered turns.  This is a serviceable explanation of the illusion gimmick, but it doesn't quite explain the magnitude of it. 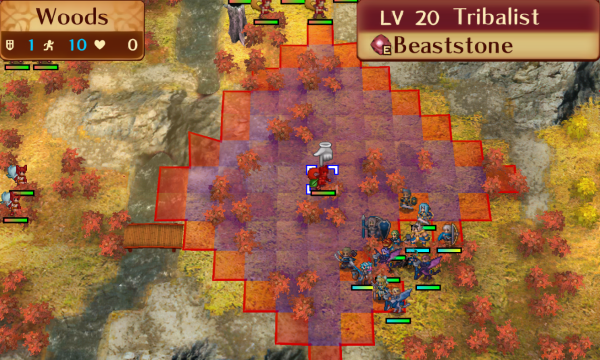 Basically, many of the enemies in this map have this little leaf icon next to them. When it's active, they can move but can't attack or be attacked. When it's not, they're regular ol' enemies. It appears and disappears at the end of player phase, which means that, if an enemy with the illusion effect has the leaf, you can't attack them this turn, but they'll be able to attack you on enemy phase. If it's not active, you'll be able to attack them, but they won't be able to attack you on their turn. If you know how this works, you can make some interesting plays around it.  As you can see here, we can't attack this guy right now. When we end the turn, he'll switch states and attack. 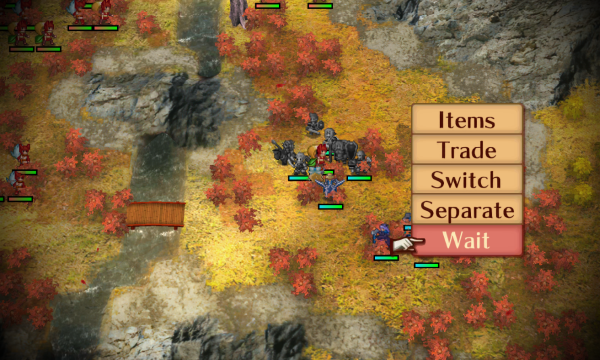 We may not be able to attack him, but because he doesn't have Pass, we can surround him.    I totally forgot to equip the Hunter's Knife, so this isn't the oneshot I meant for it to be. Oh well, it's more experience for someone else.    Between their low defense and Life and Death, it's very easy to oneshot these guys, though they're just as likely to blow up your squishy units if you're not careful.   Beruka starts the map off with a solid level. She also learns Sol, which has a lot of potential considering her solid skill stat.  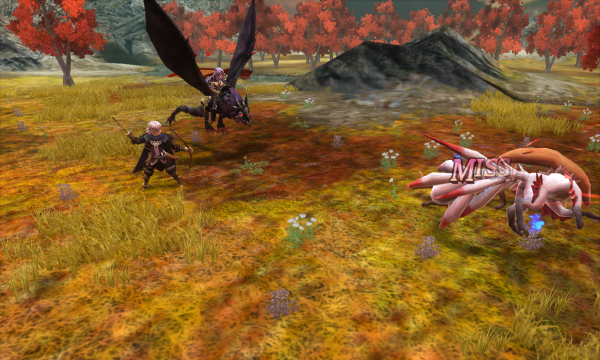  Because this whole group has Life and Death, we're gonna clear them out right now. Even Noodle Arm Niles is able to deal pretty big damage here. Y'know, if he had hit. I was just using this battle for support points anyway, so it's fine.    Camilla finishes this one off for a solid level.  Do the Kitsune use money in their society? I wouldn't think they do, especially since it doesn't seem like they trade outside of their tribe. Was this just this guy's coin collection?  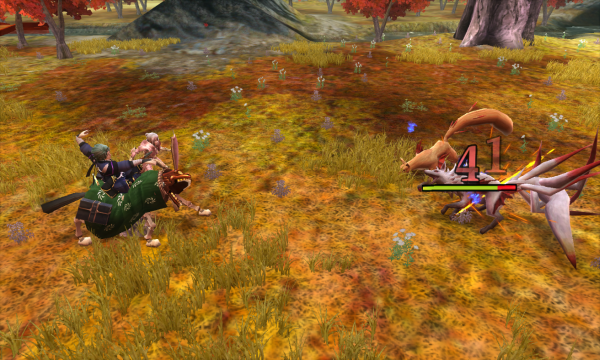 Effective weaponry can pretty reliably delete anyone with Life and Death. Assuming the attack connects, that is. 79% is pretty low all things considered, and it's certainly not the worst hit rate we'll be seeing today.  This is more or less a perfect level for Kaze, though!  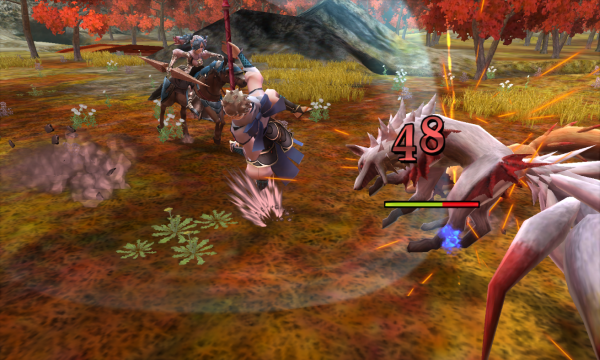 Odin bops this guy with the Beastkiller.    And Xander takes it so he can kill this guy. I like how knightly he looks in the Wyvern Lord armor.    Silas kills the next one for an awful level. At least the extra hit might come in handy!   Because every enemy in this map has high resistance, Flora won't be able to do much other than support Marth, so she snatches this one up while she can.   Shura cleans up the last of this group. We just barely had enough units to not leave any of them alive, which is nice.    Silas chips one of these northeastern guys down on enemy phase. We'll be dealing with a lot of small critical chances like this throughout this map. I hate it but that's just how it's gonna be.  The highlighted guys charge you starting turn 1, but the other groups in the west only move when you enter their range. We'll clean out the enemies that are already moving, then work our way west.   I honestly didn't care if this attack connected; I was just using it for support. It's nice that it did, though!   Marth Lunges into this guy, mostly to bring him a bit closer to the group so we can get better hit rates.    Since he's not contributing anything meaningful combat-wise, Niles might as well chip this guy for support. He gets an okay level for his trouble, but he's so far beyond redemption at this point that it doesn't matter.   Odin finishes him off with a surprisingly accurate attack thanks to Heartseeker.   Xander can just barely oneshot Beastrune Ninetails, though with an uncomfortably low 74% hit rate. This map is short enough that I kind of just accept that I may have to replay it a time or two because of a badly-timed miss.   Beruka chips this guy down from 2 range so Shura can finish at 1 range in a minute.  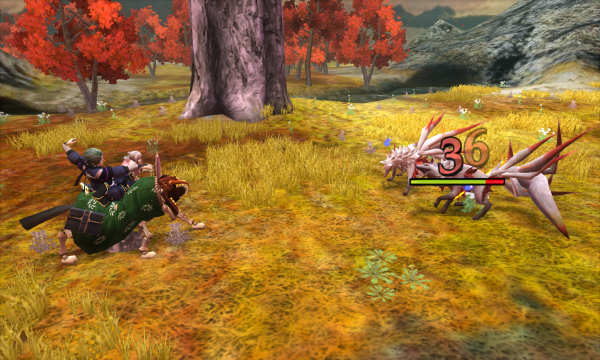 I hate to rely on so many shaky hit rates like this, but this really is as good as it's gonna get without the map devolving into a Xander solo.   Berserker Shura continues to impress. He does decent chip damage to the non-Beastrune guys, and he doubles the Beastrune guys.    And Xander gets a great level for helping him out!  Enemy phase comes and goes, but there wasn't anyone left in range to attack us, so we're moving right into next turn. Because of the illusion gimmick, this northwestern group is the trickiest part of the map. the southwestern group's illusions are in sync, so you can wipe them all out at once, but this group forces you to deal with at least 5 of them that you couldn't chip or kill on enemy phase. Fought normally, it's probably gonna involve a lot of retreating to kill everything while keeping everyone alive. But if you have a unit with high defense and a beastslaying weapon, you can just put them in range and watch them work.  Xander happens to fit that description perfectly. He waits in this particular tile because it forces them to attack him from either water tiles, which lower avoid by 10, or a plains tile that gives no bonus.   Because of all the forest tiles, we can't reach this group with enough people to wipe it out yet, so we'll wait for them to come to us. A little healing and Kaze is ready to be the bait. 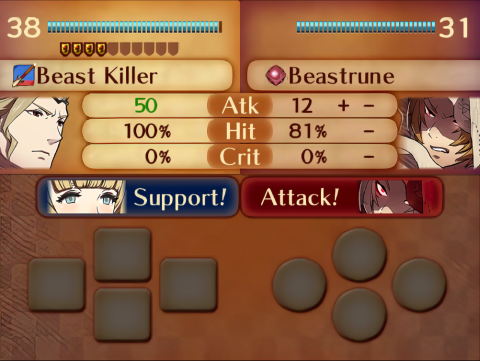   This is what Xander needed the defense tonic for. It shaves off a lot of the damage he'll be taking here.   This miss kind of sucks because now nothing else can attack him this turn, but he'll win eventually.    Man, these Beaststone+ guys hit hard. Good thing it doesn't raise their defense like the Beastrune.  Back on player phase, Xander retreats next to this breakable tree. By standing here, he's surrounded by water tiles that drop avoid, so he'll have at least a 75% hit rate against the rest of these guys, which is pretty solid.   Niles chips for support again.  This guy is on a forest tile and has a Beaststone+, so Odin waits next to him to bring his avoid down to a more reasonable number. 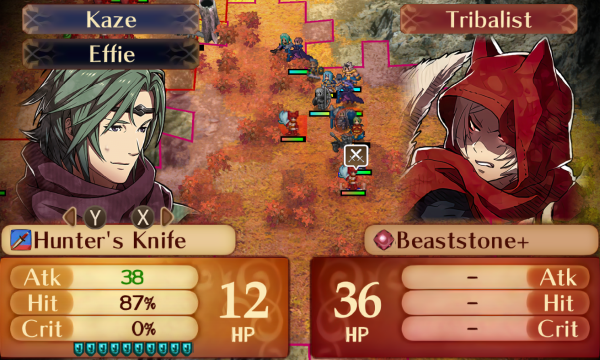  It still doesn't make it a guaranteed hit, but 87% against a Beaststone+ guy is very solid.     For this last guy, Marth and Silas chip n' dip. I'd like to note here that silver weapons also have good hit in addition to their high stats, making them particularly useful against evasive opponents like these.  While Xander clears out the northern group, the rest of the army is going to slowly move to take on the southwestern group.  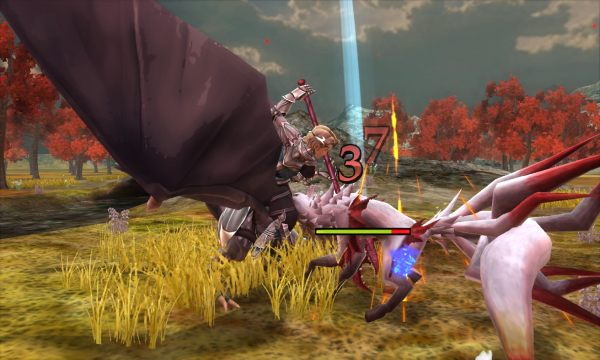  Xander is now thoroughly soaked in fox blood, but he's still thirsty for more.   We do a little healing on player phase.  And some movement shenaniganery gets us more or less ready to deal with the last group. They're all illusion enemies, so it's important to bait them out when they have the leaf up so they can actually attack you on enemy phase.    Marth is making use of the river's -10 avoid. Also, Rose's Thorns is putting in some work here; without it, Marth would be doing a less useful 7 damage.  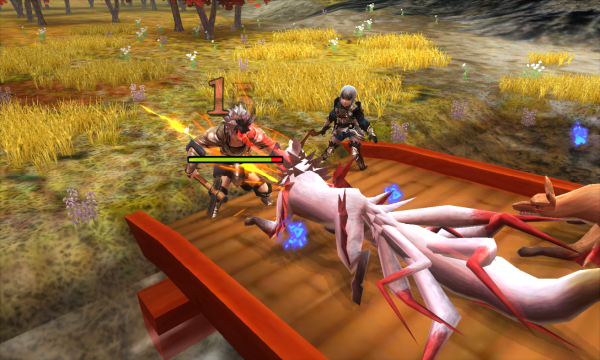  This hit rate is gross, but it wouldn't be a big deal if this had missed. 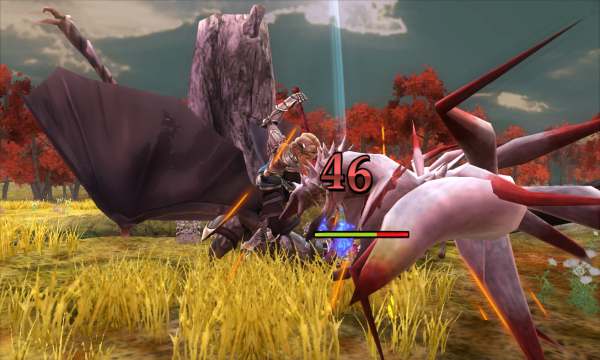 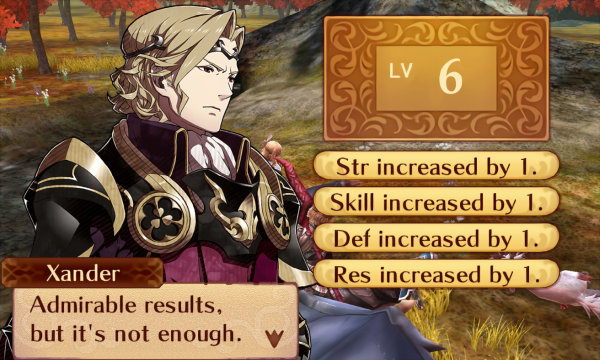  Xander continues his rampage for his second level of the map, where he learns Lunge. Having so many Lungers in the army gives me a lot more opportunities to use it, which is nice!  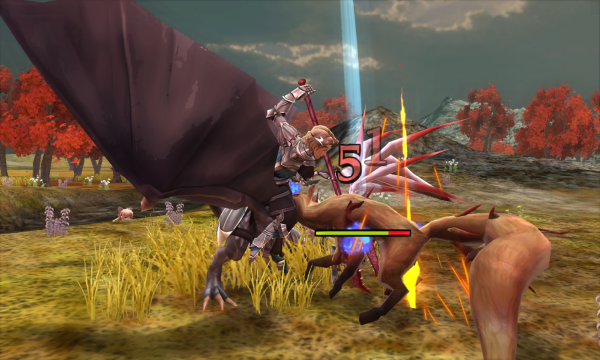  Charlotte gets a very Charlotte level from dual guard experience.    He's been beaten pretty badly, but thanks to the defense tonic, Xander is able to pull through the worst of it.    Because none of this group's enemies are able to attack us this enemy phase, we'll be throwing caution to the wind so we can clear out as many of them as possible. Odin starts us off and gets a solid level. 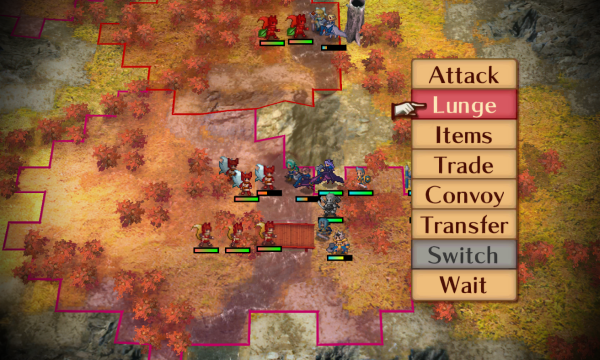   We're gonna prioritize the most dangerous enemies, like this Ninetails pair. Marth Lunges them into the water, which drops their avoid and brings them in range of more of our units.     Silas is in the way where he's standing, so he kills this one on the bridge. I just wish I could have had Beruka support him instead of Shura.    Kaze takes out the first of the pair with another concerningly low hit rate. This is an okay level, because while it's inevitable that he'll cap his speed because he's Kaze, he's not so fast that it's overkill yet.   Xander rejoins the main army to finish off the pair.    I'm honestly not sure why I had Beruka Lunge into this guy. I guess it was just to push her farther ahead?   Silas gains another solid level, and this one has Sol! I originally said that I hope Sophie doesn't roll Hero, because she wouldn't be able to inherit much from her parents, but when editing, I realized that she won't get Hero access from either of her parents. So she'll probably be inheriting Sol and Strong Riposte.  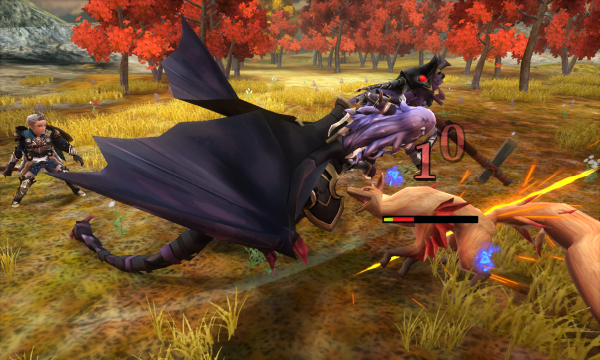  Camilla clears out another one for a very nice level.  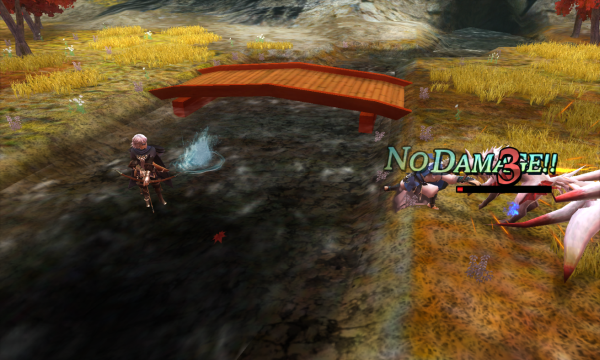  Odin can just barely do Niles' job for him, netting us a Talisman. I'll probably give that to Kaze, or maybe Marth? 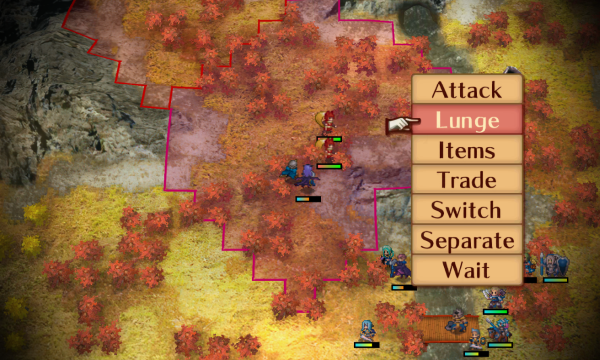   A turn later and we're ready to finish off these stragglers before moving on to the boss. Camilla Lunges into this guy so she can move an extra tile.   Since we've got a bit of time before the army gets into position, Flora can chip this guy for tome experience. It only takes 20 battles to get Nosferatu access, and I'm very interested in seeing if Nosferatank Flora works at all.  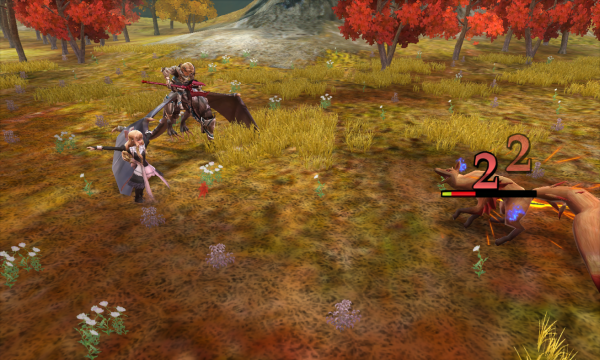 Charlotte can finish this guy off since we're taking it slow for a turn anyway, though in hindsight I think I could have cleared this map a turn faster if I hadn't done this. Whoopsie. 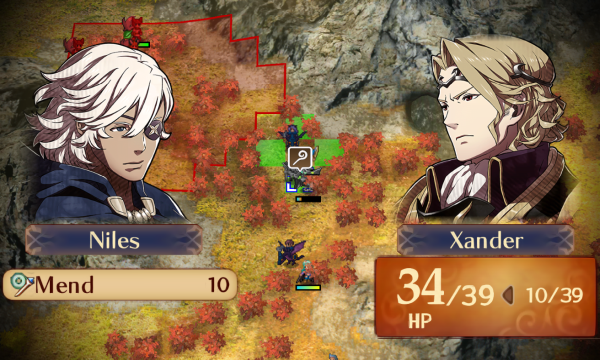  Niles does some healing while we get into position. There's a turn of literally nothing but moving, which bothers me because it feels inefficient, but I'll live with it. 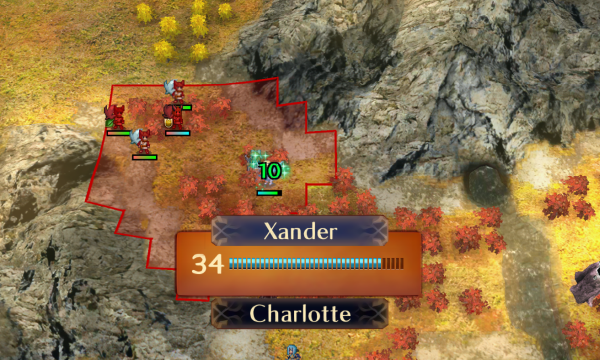 Xander moves in to bait the rest out. The tile he's standing on is surrounded by plains tiles, which is important because Kaden is hard enough to hit without terrain bonuses.      Look at that disgusting 53% hit rate! The only thing keeping this guy from being worse than Kotaro is the fact that he only has 1 range. Armored Blow even lets him just barely survive this attack. If Xander had missed, I'd have just had everyone run away and try again, because I don't want to deal with trying to kill him without leaving any squishy units in range of the two illusioned guys.   This is another lucky hit, but it's a little less important than chipping Kaden down.   Xander gets a horrible level for his accomplishments, but he learns Rally Defense, which can be a great skill! It lets him rally instead of waiting, which gives +4 defense to allies within two spaces for a turn. It can make a huge difference when a unit is seeing a lot of combat in one enemy phase, though you've gotta be careful not to raise it so high that the enemy ignores you.    Marth Lunges into Kaden, so even though this missed, he at least pulls him toward Silas and Beruka.  Xander tries out his new skill, which I think I did because I had a different strategy planned and then changed my mind, making it kind of useless. Oops. 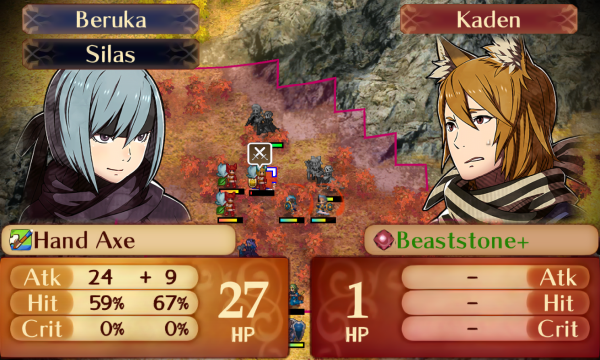    It took me a couple of minutes of thinking, but I eventually decided that the safest course of action was to have Beruka go for the kill. Silas could have attacked with a Bronze Sword for an 80ish% hit chance, but if he missed, he'd have absolutely died. This isn't all that much better, because I'm pretty sure a miss would have made me do some very risky stuff, but it worked out. With Kaden gone, we've pretty much won the map. 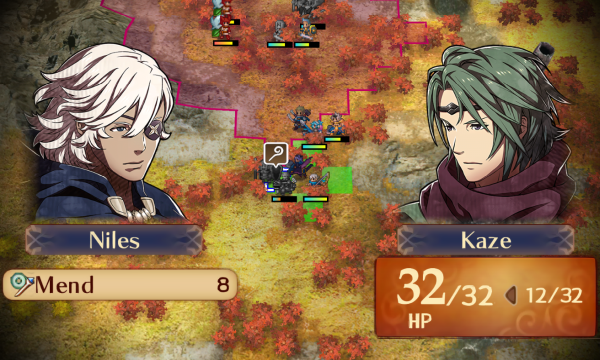  Niles gained a level from healing Kaze, but I accidentally skipped past it, so here's his stats instead. I'm pretty sure it was only 2 stat ups, and since it wasn't strength, I'm sure it won't be particularly relevant.  Everyone gathers as close as they can to the last couple of guys.    This is what you can expect when you let one of these guys enter a mountain tile. This hit rate is only above 50% because this guy has a Beastrune instead of a Beaststone.    If you bait Kaden's group out on a turn where these two attack you, things are much harder because then you've gotta deal with Kaden and his Beaststone+ guy for longer.  I mean, the magic is nice to have considering how much you've been using the Bolt Axe.  Niles heals one last time for more support points.  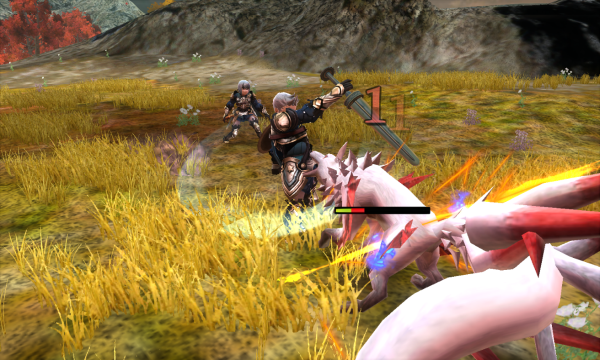 Silas clears out one of the last guys.     And we Lunge chain the last guy off the mountain and in range of more units.  Charlotte deals no damage for weapon experience, which I'm pretty sure you still get even if your attack does 0 damage.   Finally, Odin finishes the last one off. Good riddance.  That's Chapter 19! It's one of the most infamous maps in Conquest, and for good reason. What were they thinking making a map full of forest tiles and already-evasive enemies, and then throwing the illusion gimmick on top of it? Hit rates aside, I'm actually okay with the in-sync illusion groups because it incentivizes clearing them out all at once on player phase. But even though I kind of enjoy the map because one-shotting most of the enemies with beastslaying weapons is satisfying, the out-of-sync illusion groups completely ruin it for me from a design standpoint. Between Pass and the illusion gimmick, you can't safely clear these groups out using units who can't take at least 2-3 hits safely, which makes the second half of the map incentivize turtling and lowmanning. Though there are other maps like chapter 17 that have some parts I don't like, this is one of the only maps in the game that gets a solid thumbs down from me. I'm honestly not super happy with this clear, but I really can't be bothered to optimize it further considering how obnoxious this map is.      We didn't get as many useful supports as I'd have liked. It's really late in the game to not even have a single couple at A rank, let alone S rank. It should be fine though; once the paralogues start rolling in, things should go pretty smoothly. I think.  At long last, we can finally upgrade the Mess Hall! Now it'll affect the whole army instead of half of it at random! 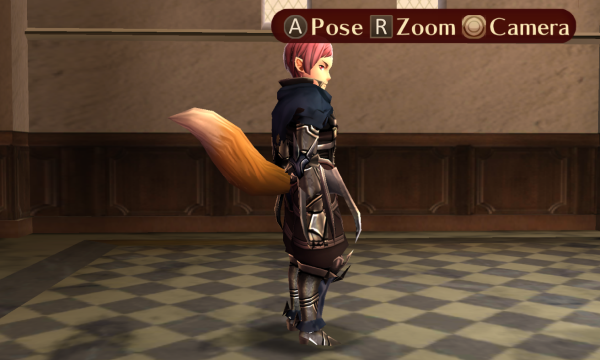 Lastly, there's no point in letting these go to waste! I hacked these in, but they only provide benefits during battles in other players' castles, so they don't break any of my rules. Anyway, that's all for now. Next time, we have a one-way ticket to Mr. Fuga's Wild Ride!
|
|
|
|
I think ninja hell usually gets more poo poo even though they throw you Shura as basically tailor made for it, but fox map is just lousy. Beyond the obvious� The visuals are kind of pretty but they make it really hard to see at a glance where to put your units (oh, this square with A tree is still considered a forest).
|
|
|
|
Great update - that level feels very "A couple of unlucky attacks missing, and a character is dead"
|
|
|
|
This map is so scuffed, way to actually play the map with more than just Corrin and Wyvern Xander! I do agree that chunking entire life bars with anti-animal weaponry is pretty satisfying though!PotatoManJack posted:Great update - that level feels very "A couple of unlucky attacks missing, and a character is dead" Yeah you got it! Slight tangent: Fates in general isn't the best game for iron-manning, and Ninja Hell into this map being a one-two punch isn't the biggest reason for that, but it definitely doesn't help haha.
|
|
|
|
Kitsune Hell is a kind of frustrating map, for sure, even just for your hitrates alone. Like Ninja Hell, the game does give you the tools to solve it pretty trivially, but in a very slow and boring manner. If you want to do anything interesting, it can be awful. Speaking of awful! How 'bout that next chapter
|
|
|
|
Update 17 - That Map It's been a hot minute since the last update, and that's mostly because I really didn't feel like playing this map, especially with the funky units we've got going on. But now that I've finished it, I can honestly say that it was about as rough as I expected it to be. This is easily the most trouble Chapter 20 has ever given me, and that's including my first playthrough! Anyway, we've got some preparations to make before we get into it.  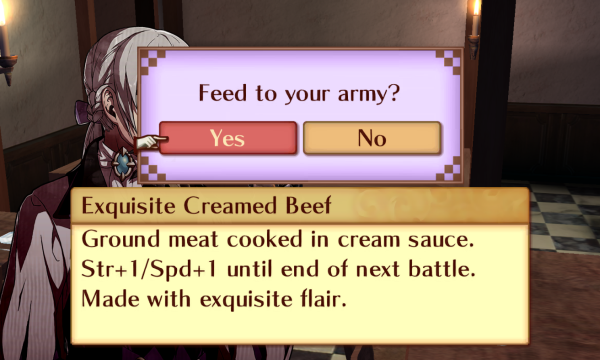  To start with, we do a little cooking. I lucked out and got Jakob as the chef this time, which is important because he's the best cook in the game. +2 to 3 major offensive stats is a lot, and that's exactly the kind of help we'll need on this map.    We also promote Selena because she'll need bow access to do anything meaningful from this point on. Her stats are still kind of pathetic, but with Arthur support, she might just be able to help out.    I hand out some tonics. Selena needs the speed to double, Kaze gets the skill because he has a couple of shaky hits he needs to connect or my plan falls apart, and Camilla gets the Tanking Special�, though I've since changed my strategy, making it largely irrelevant.  And Marth gets the Talisman because he's one of the two characters we have at the moment who are bulky enough to benefit from it. And that's all for the preparations, so let's get into everyone's least favorite map!      Welcome to Chapter 20, which I like to call Mr. Fuga's Wild Ride. It's got a wind gimmick that moves your units around that I'll explain in detail as we get into it. But despite the wind, this map is no breeze; out of all the maps in Conquest, it's the one I've spent the most time on, and not because I particularly enjoy it.   These are the units we're bringing, and how we're positioning them. You'll notice that we're bringing almost every flier we have, and that's because we desperately need the mobility. Elise is the only one staying, and that's because there's literally nothing on this map she or Jakob could feasibly damage.  This explanation is pretty good, but what the game defines "the nearest safe space" is a little unclear. There are some strange interactions here and there, and I'm pretty sure I've never played this map without at least one point where I thought "is it safe to do this?" because I wasn't sure what the wind would do. The wind only moves either up or down, and it has a six turn set pattern that's always the same, so with planning, you can use it to your advantage pretty well.  As far as enemies go, they're all pretty nasty in their own way. Spear Masters are shockingly bulky, and surprisingly hard to double, which makes their Seal skills especially likely to be a problem. They also hit like trucks, especially after you've been Seal Defense'd. To top it off, they've got +10 innate crit, which means that there's a solid chance that one of them just ends your run because screw you.  Great Masters have similar statlines to Spear Masters, but they trade a little (and I do mean a little) defense and strength for a lot of resistance. Some of them have Bolt Naginatas, and a lot of them have Seal Speed, which is the most dangerous Seal skill. 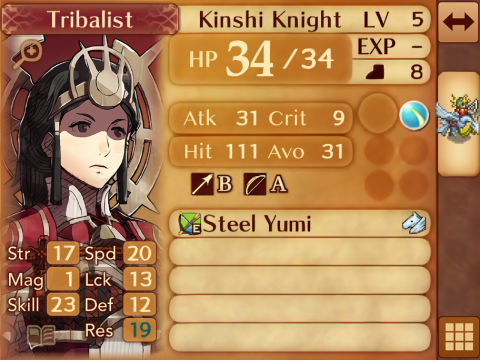  The fliers aren't too bad, but they're numerous, and they tend to put more pressure on you while you're dealing with other problems. The Falcon Knights are pretty hard to double though, and they're kind of bulky. Air Superiority and Axebreaker (which only a few have) are also particularly bad for us considering what options we've got available. Most of our best units are axe users, fliers, or both.   The Onmyoji are mostly not too bad, though they've got some pretty nasty skills. I've lost more runs to forgetting about Counter over the years than I'd like to admit. Kaze is gonna have to handle most of these, because they hit pretty hard and he's the only one who can shrug off their attacks while one-rounding them.      There's also a lot of staff users here. Freeze and Silence aren't too bad, but Enfeeble can be lethal, and Hayato's Hexing Rod is pure evil. They also have Wane Festals that they mostly use to heal up Spear Masters and other bulky units. Hayato himself is bulkier than he should be thanks to the Horse Spirit's +3 spd/skl/def/res, and he can be hard to kill without eating a Vantage attack that could proc Luna. But that Hexing Rod's gotta go, so we'll be rushing him down before he can do too much damage.  Mr. Fuga himself is a pretty durable guy, though he's not too dangerous on his own. He's got weapon triangle control, more Seal skills than one man should ever have, and Sol, along with a large HP pool to compliment it. He also has Armored Blow, which shouldn't be a problem because he shouldn't be getting an enemy phase to attack you with. Lastly, his personal skill, Wind Disciple, gives him Hit/Avoid +10 when his HP isn't full, making him slightly more dodgy after the first round of combat. He shouldn't be a huge problem, especially compared to the rest of the map.  There are also Dragon Veins you can use to activate the wind, moving both enemies and your own units. You can do some creative things with this, but in my experience it's really easy to make your situation worse by mistake. Use them at your own risk. Though it's important to note that you're just activating this turn's wind early; so if you use one, you won't be moved around on enemy phase that turn.  All of our flying pairs are gonna charge north over the gap. We're gonna take the brunt of the enemies on quickly and get over the hard part of the map.   Meanwhile, Silas and Beruka are gonna ride the wind to join the main army, while Kaze heads west to clear out these Onmyoji.   He fares pretty well against them, to say the least.   In contrast, Marth struggles to land a hit, so he's not likely to one-round them. Because he didn't, he gets his speed sealed, but that's okay.   He can technically kill both of these guys if he gets lucky against the first one, but I don't even care if he chips them down or not. All I wanted was to bait the group out.  I prefer these heals to go to squishy Onmyoji rather than Spear Masters, but honestly, they're more annoying than problematic. Also on enemy phase, some of the fliers in the north move closer, forming up around Hayato.  Azura gets blown 5 spaces north. Note that the wind blows after enemy phase is over, not before. Even if it blows someone across a reinforcements threshold, they won't show up until the next enemy phase.   Charlotte scores an easy kill. 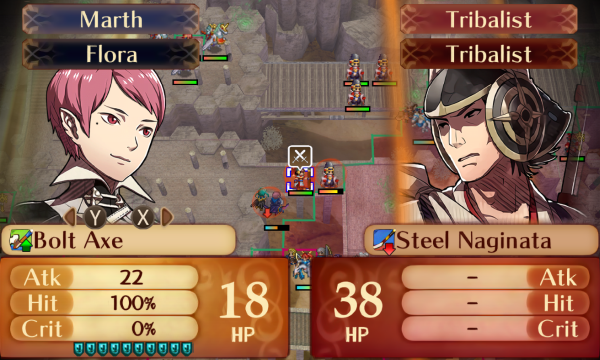 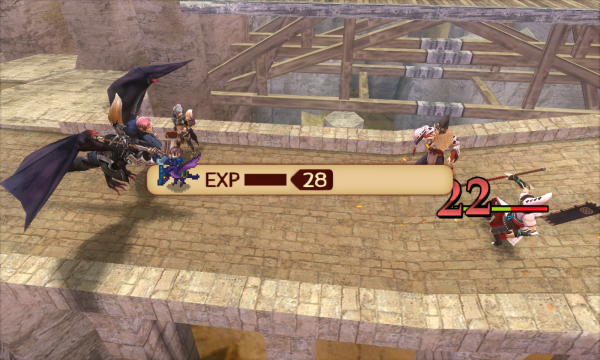 Marth moves into range of Hayato's Falcon Knights and chips this Spear Master. This would have been a one-round without Seal Speed.   But with the Savage Blow chip and Rose's Thorns, Selena is just barely able to finish him off. As a side note, I love the Kinshi Knight bow animations. They're like flying Adventurers!    It's a little weird to see Azura not even getting two-shot, but I'm all for it!  Everyone else on that side just forms up outside of Hayato's range. Kaze moves here, which just barely keeps him in range of both southern Onmyoji, and lets him ride the wind across the gap above him to join the rest of the team. 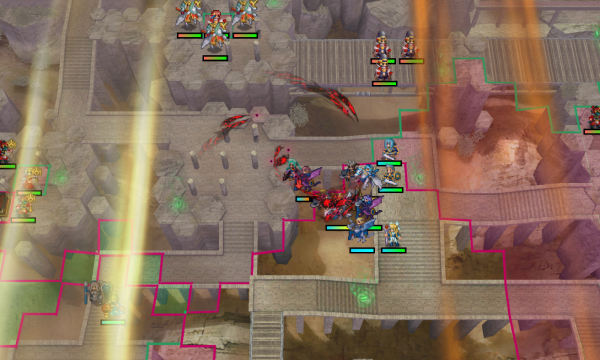 Marth gets his HP cut in half, which is kind of bad because he's one of our tankier units, but he'll still be able to contribute a lot even if he's not able to take hits as well.  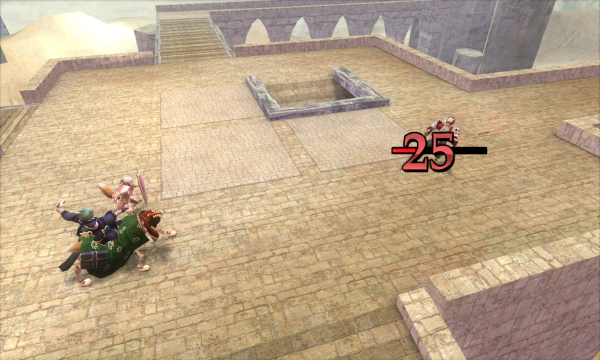 Kaze's back is gonna be sore from carrying the map with how much work he's about to put in.   These three Falcon Knights have Axebreaker, but again, we're just trying to draw them out right now. I don't care if they get chipped down or not.  The wind puts Kaze in the perfect position for this next turn.    He kills one of the Falcon Knights with the Hunter's Knife for a mediocre level. I like that pegasi are weak to beastkilling weaponry in this game; that's not always the case in this series, despite them literally being horses with wings. This also puts him in position to draw out the three Counter Onmyoji just to the north. 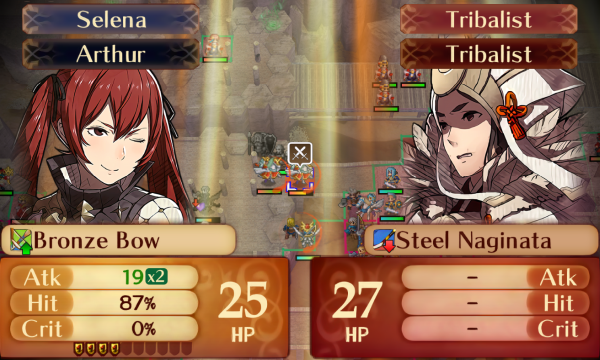   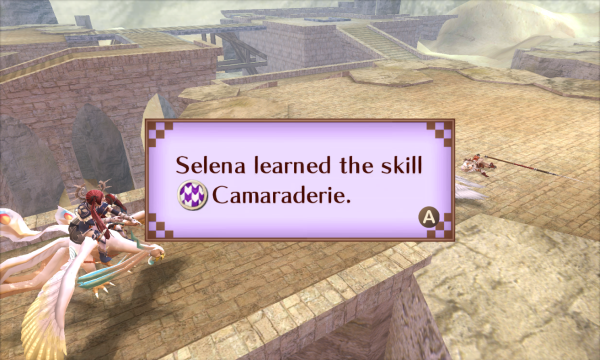 With the speed from Arthur's support, Jakob's meal, the speed tonic, and Darting Blow, Selena is just barely able to double the Falcon Knights. It's a shame she threw the experience points in the garbage. Camaraderie is also definitely a skill.    Charlotte chips the last Falcon Knight for a meh level, but Live to Serve is pretty nice on a unit with so much HP. She might get some mileage out of that later.   It put her in position to support Xander while he skewers the last one, too!  Kaze needs the extra damage from Rose's Thorns and the extra accuracy from the iron dagger to kill all three of these guys reliably.  The rest of the turn is spent separating the rest of our units so we have more people available next turn. You notice how the whole army is in that air current? It's time for Operation Drop the Whole Army on Hayato's Head.  Thank you Keaton, very cool.  This is absolutely clutch; Kaze dodged the Hexing Rod! I think things would have been doable without this miss, but Kaze having his usual bulk makes life a lot easier.  Camilla eats a Silence. The Silence guys are mostly just annoying, but I don't mind burning their uses like this.    This battle is why I gave Kaze the skill tonic; it only makes him a little more accurate, but if he doesn't kill this guy, we have to deal with Hayato, the flier group that's about to close in, and three Counter Onmyoji in the same turn, which is just too much.  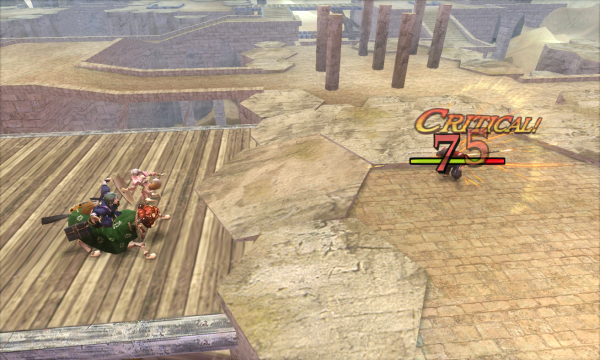  The other two have normal weapons rather than a Calamity Gate, so he cleans them up very easily.  Uncle Fuga can't help you now, Hayato.   We crossed a reinforcement threshold last turn, which triggers the Onmyoji and the Falcon Knight/Spear Master pairs, but the Great Masters from our starting position show up after turn 3. But regardless of their source, the game just vomited 11 units of reinforcements on us at the same time. Luckily, they're pretty far away, so we have a little time to prepare for them.   Marth starts us off by chipping this Falcon Knight so Savage Blow damages Hayato.  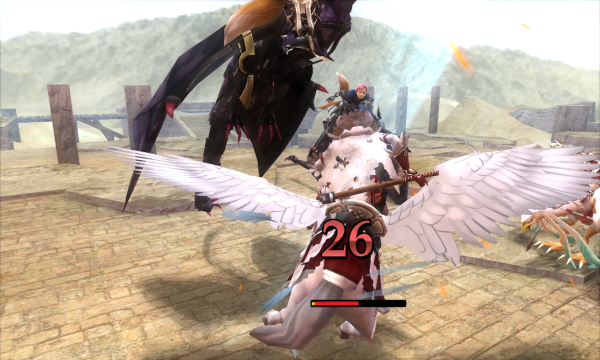  Camilla finishes for the same reason. We've done 12 damage to Hayato without even attacking him.  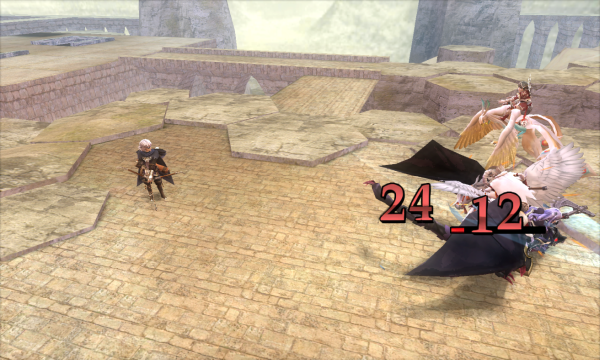 Niles kills his first enemy in what feels like a long time.   And now that he's alone, it's time to murder my least favorite Fates character! (Sorry, Hayato fans. If it makes you feel any better, I've only used him on the one playthrough, so I haven't read most of his supports)    Honestly, if it weren't for the Hexing Rod, I think I'd have left him alone since he's stationary. Dealing with his Vantage + Luna combo can be tough while you're dealing with problems everywhere else.  This isn't exactly a bad level, but I'd really like to see more than two good stats on a level at some point.    Because he's got all his HP, Kaze can block off the northern path with a little healing.   It's nice to see Selena one-rounding enemies after her initial performance was so bad. Some more support ranks with Arthur and she might be useful against non-fliers sometime!  Keaton find shiny. Keaton take shiny.  We're not in any air currents, and Kaze has the northern enemies handled. Operation DWAHH was a success!   Camilla eats another Silence, and Kaze eats the much more consequential Enfeeble.    Yeah, -4 to all stats makes him a lot less potent. But he brings home the first really good level of the map!    The Seal skills don't stack with Enfeeble thankfully, so he really only loses two more points when a stat gets sealed.   If a lone Spear Master is obnoxiously durable, a pair of them are dangerously durable. Marth can chip him down low enough to finish him off, but it's gonna take several more people to clear this group out. Which means they're gonna have to ride the wind south, to where the reinforcements are gathering.  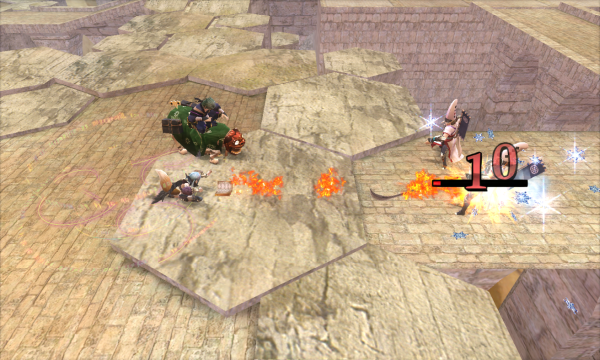 Flora finishes this guy off. I like how she still has the ice effect on her fire spell; it looks pretty cool. 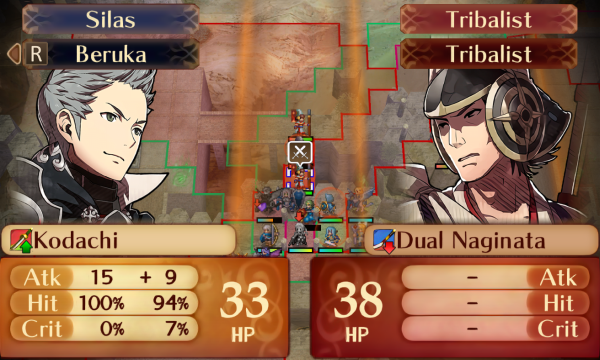  This guy has a Dual Naginata, which is a problem for all of our axe users. Silas and Beruka chip him down. Beruka's accuracy is good because she's using the Dual Club, which inverts the inverted weapon triangle back to normal, which is always a fun weapon interaction.   Hey, that level up last turn gave Kaze enough speed to double this guy! That's neat.    With him out of the way, Xander can fly behind Mr. Dual here and Lunge into him. I tried to do this from the side at first but couldn't because you can't Lunge into a unit if they can't move onto the tile you're Lunging from.  We finish the turn out by putting Keaton in range of the Falcon Knight/Spear Master pairs. He's definitely got the bulk to take it.   Niles eats a Silence while Silas eats an Enfeeble.   Xander shrugs off his Spear Master with ease.      Keaton survives his fights, but just barely, thanks to Seal Defense. These Silver Naginata guys hit hard. The good thing is, because they attacked with the Spear Masters, these guys won't be able fly over to us on the next turn, which helps.  And we're out of the frying pan, and into... another frying pan. Cool.  Turn 6 is the end of the wind pattern, and it's the turn where the entire map is covered with north-facing wind. Which means we're going right back into the other frying pan after this turn. This map is exhausting.    The eastern enemies can be blocked off without too much trouble, but these Onmyoji have to die. Azura starts us off by one-rounding this one with the extra damage from Rose's Thorns. She gets a decent level for her trouble.    Camilla and Niles finish the next one off for another decent level. It makes her bulkier, which is nice.   Kaze deletes the last one from two spaces, which is relevant because this one, and only this one, has Counter. He's also in range of a Bolt Naginata Great Master that decided to go west instead of north with the rest of his group.  And Niles helps him get the extra oomph he'll need to get the job done. 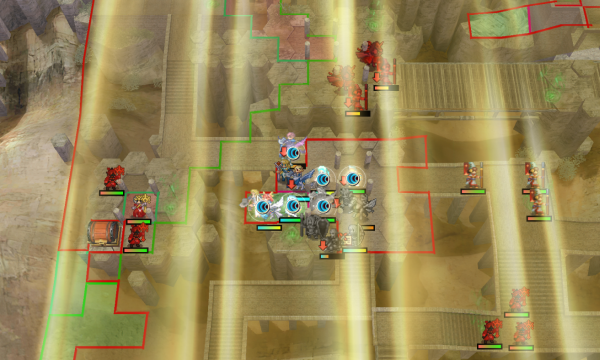 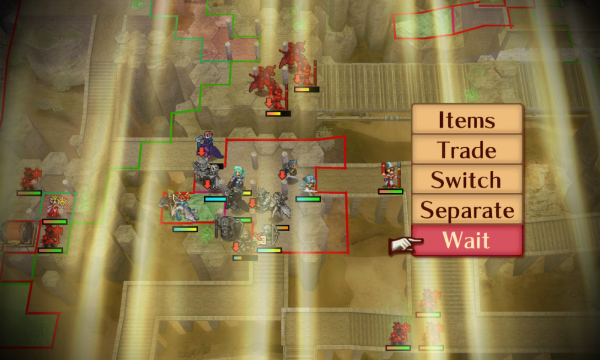 Xander buffs everyone's defense, and Beruka blocks off the enemies, just barely staying out of the other Bolt Naginata guy's range.   Marth uses this down time to soften up one of the northern Spear Masters.  And here's how we're positioned by the end of the turn. Kaze and Beruka are the only ones seeing combat this enemy phase.   The enemies do their usual healing and staffing, but it's just Silence staves right now, so they're not all that dangerous.     Beruka decides not to take damage, and the Spear Masters have little say in the matter.   The extra bulk Great Masters have over Onmyoji isn't quite enough in the face of the Silver Dagger.  And we're back in the north! 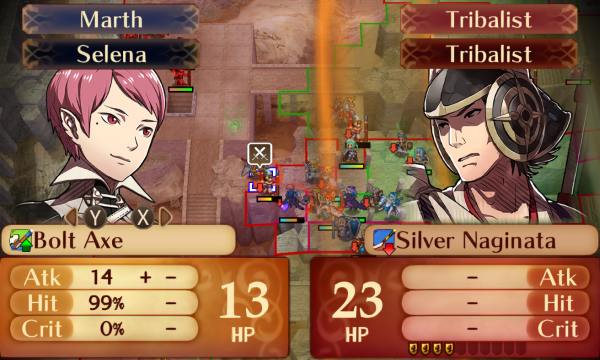 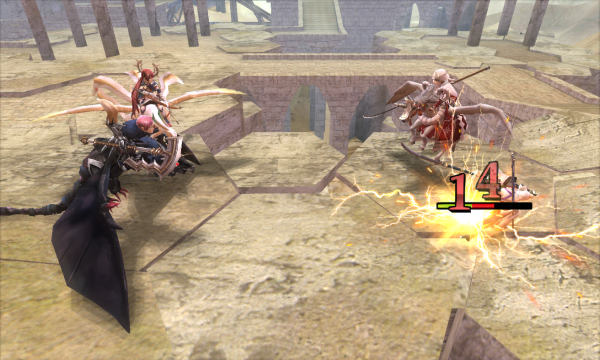  Marth chips the healthier Spear Master for a genuinely great level.    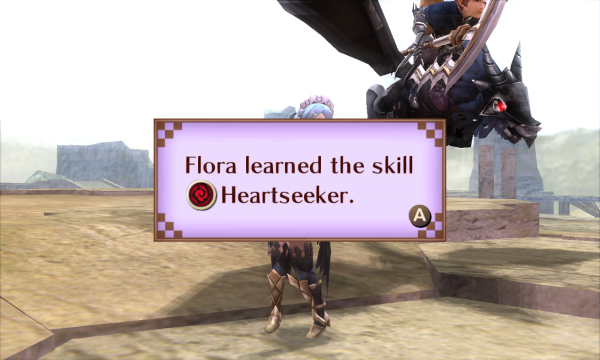 While his future wife finishes him off for a much less impressive level. At least she gets Heartseeker! 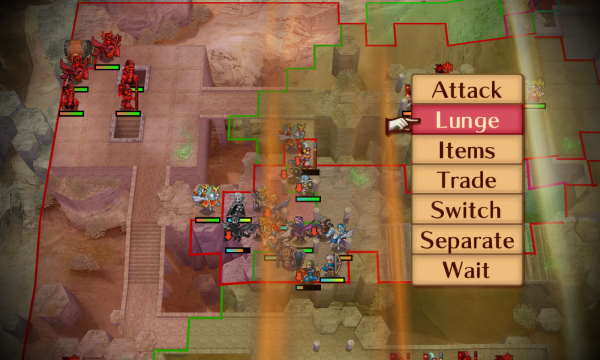   Beruka Lunges into this guy to bring the remaining Falcon Knight into the open.   But it doesn't really matter since Xander can just delete her. 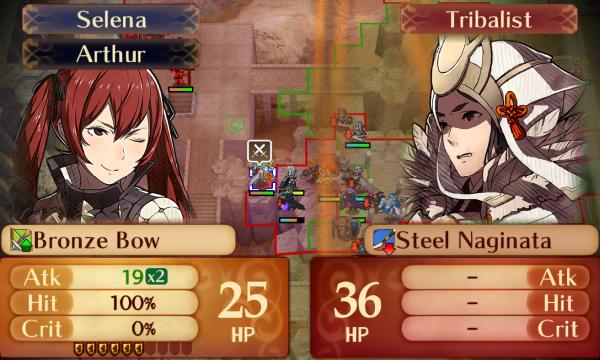   And Selena finishes the last of this group off for a very good level! If she keeps growing like this, she could be a good unit after all.   Kaze moves into position to bait out the ranged enemies from the south, and Niles heals him up. Camilla moves to support Kaze with Rose's Thorns, and we also separate Azura and Keaton to open up more options next turn.   Beruka eats another Enfeeble while Niles dodges another Silence. Other than that, it's just the enemies doing a little healing.  Ugghh, that's a disgusting 9% crit chance. Don't you dare!   Phew. It's at this point in the map where I started to get very scared of unlucky misses or crits, because I really didn't want to restart again.  Unfortunately, because of the Silver Dagger debuff, Kaze isn't quite able to one-round this guy.  Oh. I stand corrected. Man, if that RNG had been just a little different, this would have been Kaze getting murdered.    Beruka starts working on one of the Spear Masters who ran away for healing earlier.  And we get blown down yet again. Beruka and Silas getting stranded where they are wasn't planned; the Spear Master below them took their spot. We're past the worst of it now, though. After we clean up the last of the reinforcements, it'll be relatively smooth sailing, barring an unlucky crit or something.    Silas finishes off the last currently aggroed enemy in the north for another pathetic level. There's been a couple of good ones, but the levels so far have been generally bad. What gives, game?    Flora gets into position to support Marth, who eats one of the Spear Masters.   I decided that Camilla could get her stats sealed and it would be okay, so she chips this guy down.   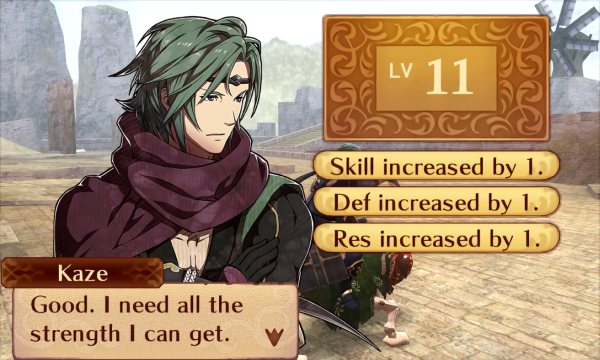 Kaze finishes him off for an obnoxiously defensive level. You want strength, Kaze! Strength!  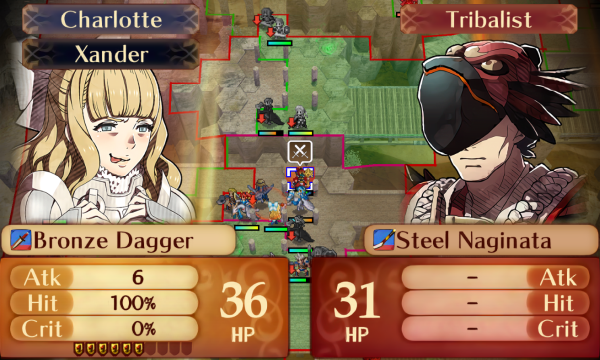  We heal up and start chipping this last guy down.    Keaton finishes him off for another solid level. I think he's gonna be really good after he promotes and gets D rank axes.  Oh yeah, this guy. I forgot about him because he stayed out of the way spamming Silence. Selena starts chipping him down.   Silas eats the last Enfeeble while Charlotte eats another Silence. That guy's really just gonna stand there and spam Silence until he dies, isn't he?  Selena's not complaining. It's free experience and bow practice.   Now it's time to start moving in on these chests. Camilla moves to bait the Great Masters guarding this one out, while everyone else gets positioned so they'll be more or less where I want them after the wind blows. 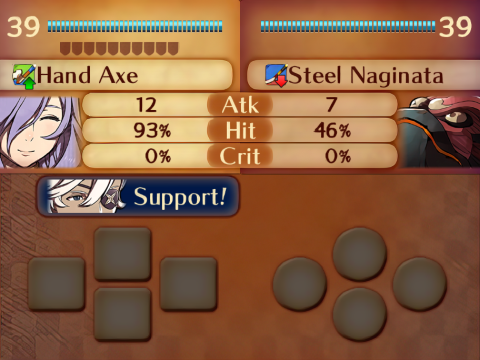    Camilla has plenty of mixed bulk, so she can mostly shrug off these guys.  After the wind moves everyone, we're ready to clear out the chest guards. 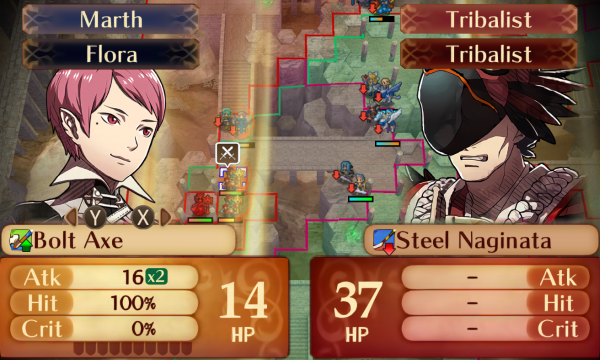   Marth chips one of them down for Selena.  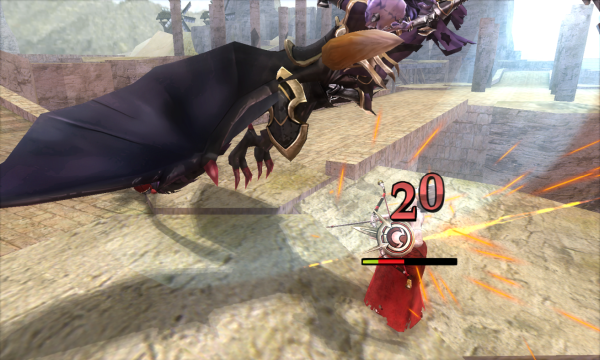 I love guard gauges.   Xander cleans up this last guy.   Because of the wind, we've also been positioning our units to attack the northwestern group next turn, which is nice. Nothing happened on enemy phase aside from some healing.  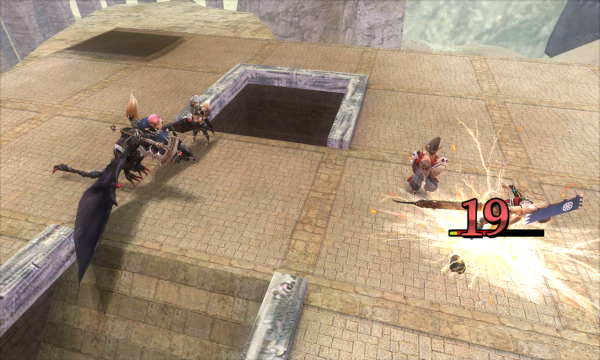 After the wind moves everyone, Marth leads the charge by taking out this Guard Naginata guy. I'm honestly surprised he could one-round, but he's getting +5 magic from Flora, so it makes sense.    Kaze deletes another Onmyoji, and he gets A rank shurikens for his trouble! This gives him an extra +1 damage, which he'll definitely appreciate!    Camilla gets pretty lucky and lands both of these hits through Air Superiority. She also gets a very nice level!    Now that Camilla's Savage Blow softened him up, Azura can finish this guy off easily enough.   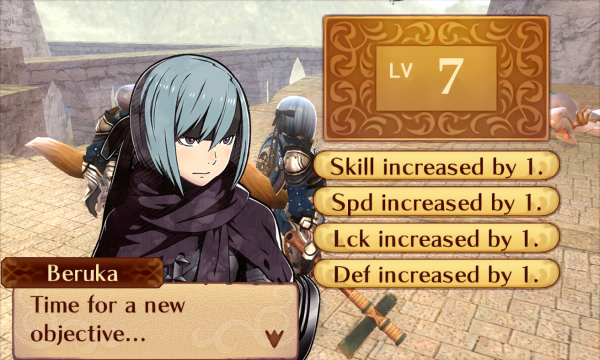 Beruka takes down the last one, and she gets a pretty good level for her trouble. I'd like more strength, but speed and defense make her bulkier, which is handy.  We heal Kaze and finish the turn by having Selena bait out this Bolt Naginata guy while she has a guard gauge.   She actually has good resistance, so she didn't even need the guard gauge.   Another magic weapon, another kill for Kaze.  Niles grabs the northwestern chest for a very nice 10,000 gold. This is gonna come in handy, especially because we unlock the level 3 armory and staff shop after this chapter, so we'll have plenty of new toys to spend the money on. 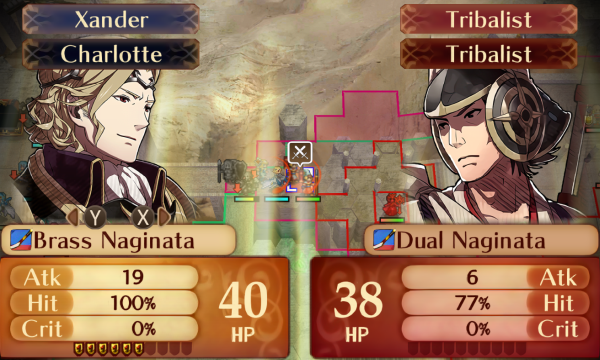 Xander starts working on the last Spear Master pair. 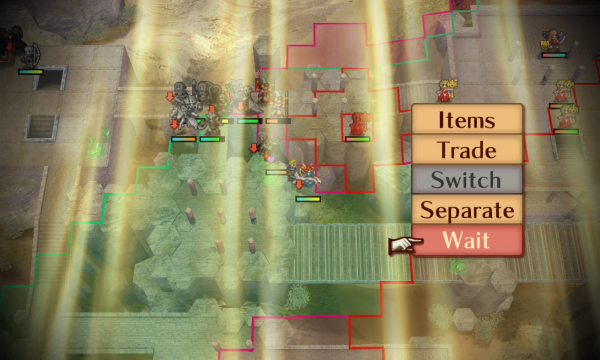 Everyone but Niles and Camilla moves toward Fuga's corner.   Xander won't be two-rounding since he got his strength sealed, unfortunately. Well, that and the healing.   Silas finishes this guy off before they could build a guard gauge. It's nice that they didn't switch the healthy one to the front, because we would have had to chew through their guard gauge.    Marth executes the leftovers for a solid level. More magic and bulk? Sign me up!  Now, it's important to note this Lunge trap outside Fuga's corner. Both of these Priestesses have Lunge, and if they pull someone into the room, you'll have to deal with a bunch of reinforcements. It's much easier to just ride the wind into Fuga, that way you can kill him without having to deal with those.   Oh yeah, this guy exists. Let's fix that.   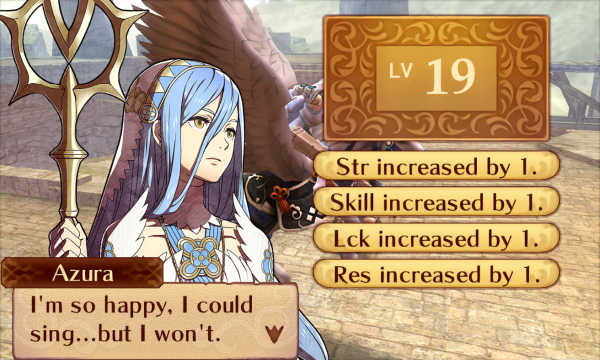 More strength is really all Azura needs, so I like this one.  Beruka stands here to bait out the eastern group so we can get that treasure, while everyone but Camilla follows just behind.    Sorry sir, Beruka still doesn't feel like taking damage right now. Try again in the next life.   We get blown around a bit, but we're solidly in the cleanup phase so it's not a problem. Marth gets lucky and lands two 63s, killing one of the Kinshi Knights.     Xander and Selena aren't quite as lucky, but we've almost got this one surrounded, so even if the next one misses, they can't do anything.   But Azura doesn't leave survivors.  Meanwhile, Niles grabs the second and final Rescue staff that Conquest gives you. It's gonna be extremely useful later on.  We're just gonna wipe up the enemies between here and this chest, punch through Fuga, and get out of this horrible place.   Hey, Beruka activated Sol while not at full health! That's cool.   Marth is just barely able to punch through this guy's high resistance stat.  We've got a couple of our units next to the last chest now, and everyone else is about to fly up to join them using this wind.     Azura chips for her last unpromoted level. It's a great one, too! She also gets C lances, giving +1 damage. Her offensive stats are really starting to snowball; her only problem is that her still-measly 19 HP won't be enough to survive a hit from anything except maybe a mage at this point.   Marth cleans up another Spear Master.    Selena chips the last one for a fantastic level! I think she's actually gonna be usable!   And Xander takes out the last Spear Master. Good riddance.  Then Kaze grabs the Dragonstone+, which is likely to be completely useless in this run because Kana probably won't roll Nohr Noble. But on the off chance that she does, having a 25 might weapon won't hurt. Oh, and that wind won't be a problem for him. There's no floor tiles above the chest, so he won't get blown anywhere. 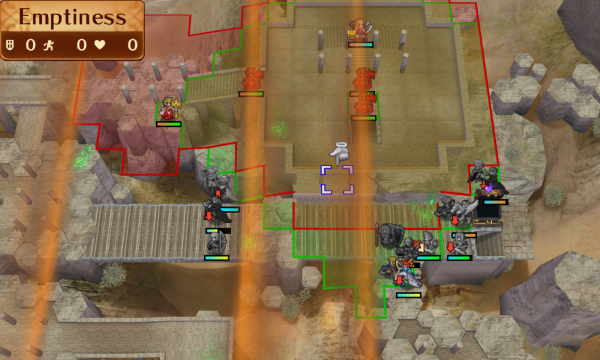 Everyone else moves closer to the now-empty chest, and Silas starts eating Freeze charges. Not that it'll matter, because we're finishing this map in the next couple of turns.   A turn of waiting, and the big wind is here to carry us to victory!   Mr. Fuga is pretty hard to kill, but he's not all that dangerous. Camilla starts us off.   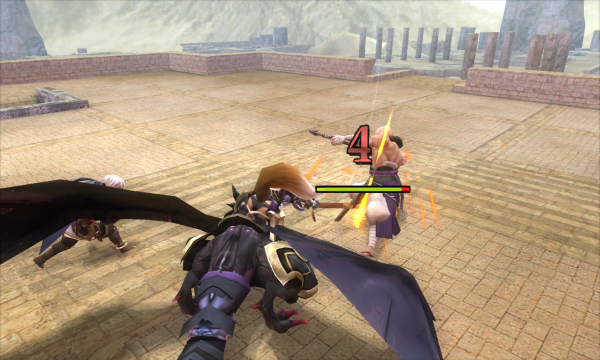 Sol completely negated the first hit, but I just wanted the Savage Blow chip, so it's not too upsetting.    Kaze chips him a bit for the debuff, but hang on a second...  His puppet's clothes got blown off! I don't use Mechanists much, so I don't know if I've ever seen this before. Neat!  I wanna be absolutely certain here, so Flora stands menacingly next to him to activate Heartseeker.    Xander chips him down a bit more.    Finally, Beruka brings him down.  It's kind of insulting that they he drops a Secret Book. It's like the map's final "screw you" to the player as it goes down, leaving you with one of the worst stat boosters in the game.    Because this is a seize map, it's not actually over yet, so Silas and Keaton murder this lady before they miss the chance.   And Selena takes the throne, bringing this map to a close in 19 turns! I've done better in the past, but with this team, I'd say that's pretty good. I honestly think they were on to something with the wind gimmick, but the way it is, it can be hard to predict exactly how the units are going to move when you factor in blocked tiles and other shenaniganry, which usually means that at least a couple of attempts in a playthrough go by where someone gets killed because I did something stupid with it. You can somewhat counteract this by bringing a ridiculous amount of fliers, which also helps you avoid the narrow walkways that the map is made up of, but it's still a rough time. The big problem is that this is where the enemy quality really starts to spike. Everything is starting to get faster, bulkier, and harder to one round, which you really feel with all the Seal skills strewn about. Then while you're trying to deal with that, the wind limits your positioning options. The consequences for messing up are likely to be fatal, either because you strand a unit or because you accidentally cross a reinforcement threshold and the game vomits like 8-12 more guys on you. To top it off, the treasure that's spread all across the map is all very good (except arguably the Dragonstone+, which is a one-of-a-kind item), which makes just rushing Fuga and skipping the map kind of a gross option. All that being said, you can do some pretty cool things with the wind, like moving your entire army across a gap in one turn. It just takes a lot more thinking than pretty much any other map in the game, and you're harshly punished for screwing up. Overall, I think it was close to being a fun map, but because it's so difficult to utilize the wind, it's one of my least favorite maps in the route. I honestly think the wind would have worked better if it were limited to dragon veins that would affect just the one or two nearby sections of the map rather than the whole thing in a pattern. That would let the player have some more control over it, and then it's exclusively the player's fault when they don't utilize it well.  You and me both, Marth. You and me both.   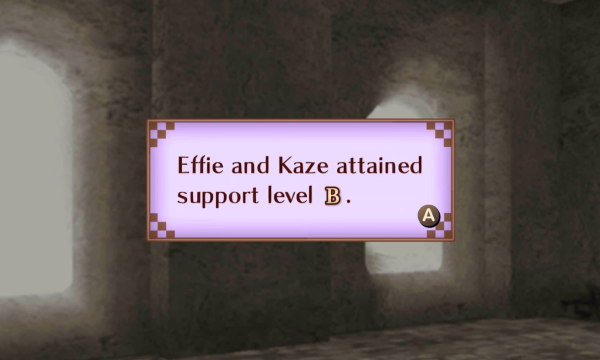  We got some very nice supports this time! Two A ranks means that, theoretically, we could have a child paralogue by the end of the next chapter if I use Invasion 2 correctly.    Azura goes ahead and promotes to Falcon Knight. This is gonna help her out a lot, I think. But even if it doesn't make a huge difference, she can heal people, and she's a potentially good candidate for Rescue use later on, since it's an E rank staff in this game.  We also finally max out the armory and staff store, giving us a lot of fun weapons and staves to play around with, as well as infinite Master Seals! We'll definitely be making some purchases next time. But that's all for now. Next time, either stairs or another home invasion, whatever comes first!
|
|
|
|

|
| # ? Apr 27, 2024 19:03 |
|
I like everyone slowly chipping away at fuga and then Beruka walks up and hits him hard enough that she was just shy of a one shot from full hp.
|
|
|


