|
TLOD 8: Hand-Eye Coordination After another short landing, we arrive at the third and final level of the Silver Tower. First there are six teleporters, whose destinations are all randomized among them. This part can be slightly annoying for that reason, but it doesn't last too long.  Four of them lead to hands holding Dark Moon keys.  Those are used to unlock the hallway to the east. There we check out the first door to the north.  On the previous floor we encountered monsters that look like beholders, now it's time for the real thing. No convenient spike traps this time. I rearranged my party to maximize throwing weapons. Their spells have fairly short range, so it's possible to avoid them by just backing away. Generally if the beholder is no longer visible, you're safe. I take this one down with a barrage of darts plus melee attacks at corners. If you don't want to face such a dangerous foe in this area, you don't have to: it's not necessary to go into that room and there's nothing else worthwhile there either. It's a bit hard to tell from a distance, but that beholder has a femur in its mouth which is dropped on death.  A better view of it comes from this other one, spawned in a room to the south once you're in front of the door. That door opens at the same time, so you'll have to either engage it or run away to the east. The beholders on this level aren't as tough as Xanathar. They have HP in the 70's to low 80's, roughly half of what Xanathar has (his HP is also randomized) though still certainly not trivial. Perhaps more importantly, they don't act as quickly as him. They're actually rather slow, which makes defeating them in combat much more doable. They can't shoot fireballs like Xanathar, but can paralyze with their bites unlike him. Of course, they still have two different instakills and are immune to magic, so stand-up fights with them can go badly in a hurry. I kill this one using the same tactics as before.  The room that second beholder came from has a wall that can be removed by pressing its bottom brick.  Behind it are three healing potions and an illusory wall, which as seen here can introduce you to this level's other enemy: the will o' wisp. They don't cast spells or have other special abilities, but their attacks can do damage in the teens with fast move and attack speeds. In addition, they are very hard to hit with an AC of -8 and seem to be immune to most magic. They're quite a pain. This wall is a potential shortcut but I continue east instead.  This comment is made when you step into that intersection, which that beholder won't go into until you do. I kill it the same way as the first two.  The east section has a couple spaces that monsters can't enter.  At the south of that section is a short corridor with fireball launchers, which less aggressive wisps try to bait you into.  This button removes the wall, which leads into the mass of illusionary walls pointed out by the map from the previous floor. There's also an open entrance to it from the north, just south of the other illusory wall.  Another wisp patrols that area, which can make for a very annoying fight. This button at the west will change the layout of the real walls in it. Our destination is at the south.  I decide to help. Trusting the good will of a beholder only went wrong that one time.  If there's any lesson to be learned from the Silver Tower, it's that Darkmoon Temple is a place for assholes. I reload with that in mind.   The answer is yes, since that leads to the northeast area with the one item we absolutely need from this level.   His color changed, since he's randomly spawned after you make the choice. You have to fight him either way, it's just a matter of where. Either location will be in a 2x2 space, which is just enough room for the dance of death.  There's another beholder in this wider area to the west, which makes it another easy victim of sidestepping. Behind us are a robe +4 and cursed bracers -2. The magic items visible from here are a healing potion, a halberd +2, and a shield +3. Under that shield is a crystal hammer +2, which looks like an axe on the ground. It's a blunt weapon that's also light and thus usable in the offhand. I already have superior options for that in terms of damage but still pick it up because it is necessary to reach the next area of the game. Luckily it is still possible to get back here if you missed it or didn't realize you need it. Talk to the last mouth in the hall leading to the stairs, which initially had no request: 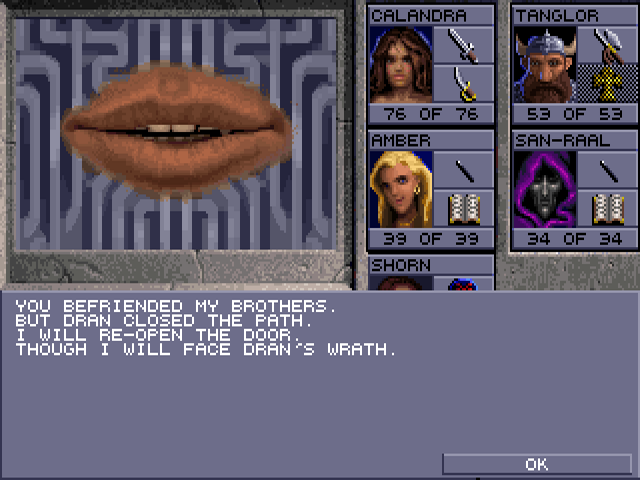 At the northeast corner of the level, there's a door with two beholders behind it. I hit the first one with melee at the corners then quickly retreat to the entrance. This kept me facing only one at a time. Going the other way resulted in having both of them at different sides and staring holes into the party as a result. Further along the corridor, a third beholder was easy enough to take out alone by luring it to the open area. Its room has dragon skin armor, which is leather +4 that went to Amber.  There's one more beholder at the end of the corridor. Its room has a wand of Dispel Magic, a spell there will actually be reason to cast in the near future.  We go back to the main area. Shorn finally reached level 9 here, so I have him memorize True Seeing. However, when I try to cast it the game tells me one is already active. I guess the one Ileria cast was still active at the time she left the party, so it never actually expired. Illusory walls will continue to be a mild annoyance through the end of the game.  A little ways into the western hallway, Khelben contacts the party again. Probably worth noting that the place where this happens isn't totally safe, since wisps patrol the area. Everything else pauses during the conversation.  I find the "distinguished gentleman" line kind of amusing since Dran didn't really bother putting on an act like that at all.  What this means is that the southwest section of the level has pressure plates which change the layout of its walls. It's not required to step on any of them.  As we get closer to our destination in the southeast, there's a rotation tile.  Among the last obstacles is this room with one of each monster in it. They don't come out into the hallway until you engage them. If you stand your ground against this wisp, you might be able to go in and fight the beholder in that 2x2 space for an easy kill. Otherwise, you'll need to backtrack a lot. The room has a Ring of Sustenance, which still doesn't work in this game. Past this, another hidden button like the one into the illusory wall area opens the way to the final room.   Two beholders are spawned, which each have over 100 HP. They stay in place until you enter this room. At the same time, the wall you removed to get in is put back unless you cast Wall of Force in its position. If you didn't, you are very likely to be surrounded by them due to the rectangular hallway. I still have two potions of giant strength from the first game, and this makes a good place to use them. The easiest way to deal with this is to simply run past them.  The goal is this pedestal at the opposite end.  "Do you want to get further in the game?"    All characters now have the mark of Darkmoon on their hands. Any character you recruit after this point will have it upon joining as well. With that, we now have access to the second tower. Alpha3KV fucked around with this message at 22:41 on Jan 1, 2022 |
| ← # ? Dec 30, 2021 20:05 |
|
Register a SA Forums Account here!
JOINING THE SA FORUMS WILL REMOVE THIS BIG AD, THE ANNOYING UNDERLINED ADS, AND STUPID INTERSTITIAL ADS!!!
JOINING THE SA FORUMS WILL REMOVE THIS BIG AD, THE ANNOYING UNDERLINED ADS, AND STUPID INTERSTITIAL ADS!!!
You can: log in, read the tech support FAQ, or request your lost password. This dumb message (and those ads) will appear on every screen until you register! Get rid of this crap by registering your own SA Forums Account and joining roughly 150,000 Goons, for the one-time price of $9.95! We charge money because it costs us money per month for bills, and since we don't believe in showing ads to our users, we try to make the money back through forum registrations.


Powered by: vBulletin Version 2.2.9 (SABB-v2.24.04)
Copyright ©2000, 2001, Jelsoft Enterprises Limited.
Copyright ©2024, Jeffrey of YOSPOS
Copyright ©2000, 2001, Jelsoft Enterprises Limited.
Copyright ©2024, Jeffrey of YOSPOS