|
AOMD 4: Pages by the Mages from Those Ages The Mages' Guild entryway has three teleporters, at the north, east, and south. I start by going straight ahead to the east one.  That goes to a short hallway with a staircase in the middle. I tried looking at this while Amber and San-Raal were still in the party, and it didn't change the description at all. While this looks like text, there are no translations or other race-based comments/reactions in this game.  Something annoying about this stage is that doors look like walls. The only real tell is their position in the middle of a tile. They appear to dissolve when opened, which goes in reverse when they're closed again. There are doors on both sides of the stairs, which each introduce one of this stage's monsters:  First up is the ogre slug. The manual says they can spit acid, but I've never actually seen them do that. They take half damage from blunt weapons, which include Delmair's claws. They have HP in the 40s, which Isharn can sometimes do by himself. All in all not much of a threat.  Watchghosts are the more dangerous enemy here. They have projectile attacks that look like Ice Storm, but only hit one character. It does damage in the teens after being mitigated by Blessed Warmth, but does not cause Delmair's transformation. Their threat is greatest when they appear in numbers.  The stairs go up to a floor inhabited exclusively by ogre slugs. Among the items to find are this Potion of Healing and Cloak of Protection +3, as well as a Potion of Giant Strength in the southern hallway. Being the Mages' Guild, there are of course mage scrolls here too. On a pair of shelves you can find Cone of Cold, Hold Monster, Disintegrate, Death Spell, Flesh to Stone and Stone to Flesh. That last one has no real use since there are no petrifying monsters in this game.  A room near the center of that floor has this. It is usable by any character, and identifies the item held in their other hand. It seems to have infinite uses.  The next floor is patrolled only by watchghosts. In the middle is this nook with two buttons across from each other.  Pressing both of them removes the wall on the opposite side, releasing these watchghosts. Fireballs are helpful here.  The room they were in has two shelves. Their contents are a Necklace of Magic Missile, a Wand of Fireball, and a parchment whose text I'll show a bit later. This ring is a required item.  There are three staircases up around the floor, leading to small rooms also occupied by watchghosts. The eastern one is slightly bigger than the other two, and is the only one with an item. This ring is +3.  From there I return to the entryway and take the north teleporter. This ogre slug always starts facing east, so you can sneak up on him like this. Further on, a button removes a wall, releasing four more watchghosts. Their room has two books in it.  They give some hints for the near future. That parchment from earlier has a small bit of additional plot detail. Nearby is a teleporter that goes to the same area as the south one in the entryway.  That area has a hallway with four teleporters, each marked by a sign.  They all go into a room with four more teleporters behind doors, which each have banners representing one of the elements beside them. The central room initially has four watchghosts in it, one of which landed a physical hit on Delmair. It also had the scroll shown at the bottom. I've been saving most of the scrolls for the second mage recruit, who we'll meet soon.  The solution to this was pretty much spelled out by the book we read. Go through one of the season teleporters, then the one for its correlated element.  The first three times, you will be taken back to the end of the season hallway. You can start with any of them, but have to follow the cycle afterwards.  If you go through the wrong one, there will be a watchghost waiting for you at the season hallway. If you did it properly, the last one will take you to Mages' Guild 2.  There, steel shadows will immediately attack. They're weak, three out of these four were killed by a single fireball. Behind this is a teleporter going back to the season hallway, where all four teleporters now go here.  Past them we meet that mage I was talking about earlier. 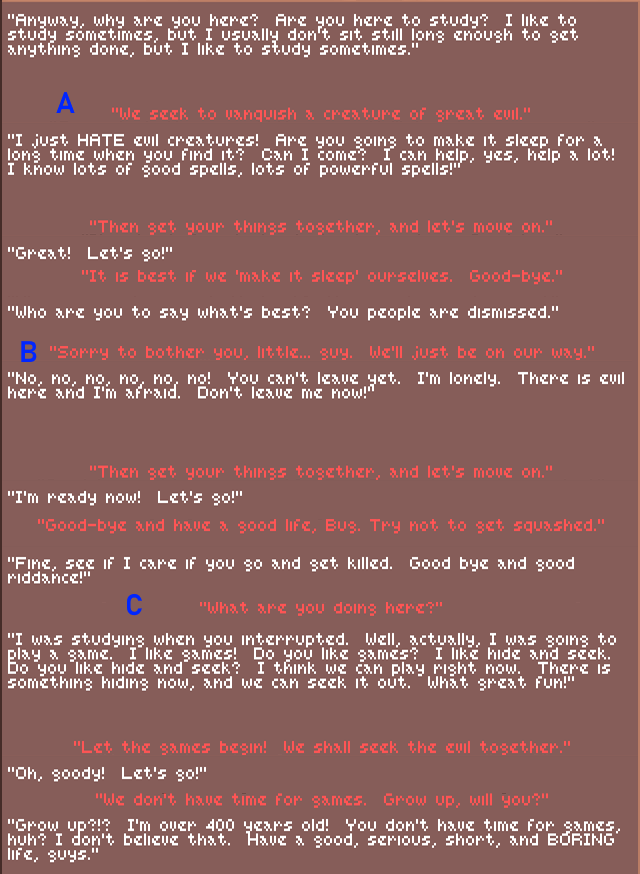 Once again your party can be pretty mean when they reject a potential member. Of course, I accept him.  He starts with the three items listed at the bottom. This mechanical scorpion is called a scaladar. They will come towards you but won't attack as long as the Ring of Trobriand is in your inventory, not even fighting back when you hit them. It's not necessary for anybody to actually wear it. They are immune to lightning bolts, Magic Missile, Disintegrate, hold, and cold-based attacks. In addition they have 35% resistance to other magic, and take half damage from fire and sharp weapons. While they're not hostile, they ARE in the way. Be sure you're not facing the entrance, because firing a projectile into an area transition will cause it to be lost. It takes a lot of bashing to bring them down.  And you really should do that, because you'll need to put the Ring of Trobriand into a shelf to progress further. That will permanently remove the wall and the ring, which makes them hostile. Past it is this cord that opens the doors on both sides of it.  Thankfully, the doors in this stage are easily identifiable as such. This one is opened by a button on the north wall. Inside this room are a couple steel shadows, a staff +1, two arrows +2, a wooden club, and four rocks. The club and rocks are non-magical.  This is in the northwest section. It's magical, but I'm not sure what its effects are. There is also a cord that does nothing but create an illusory wall.  Another cord in the northeast section teleports you to an isolated room. This dagger is "Ocnor" +4, which returns after being thrown. Bug can now contribute to all-attacks. Taking it or any other item from the shelf causes a steel shadow to spawn behind you each time. Two teleporters in this room just go between each other, the third goes back to the northeast section.  Leather Armor +4 can be found in the northeast. A room along the eastern hallway has two Potions of Invisibility, a Wand of Flesh to Stone, and a Ring of Sustenance, our fourth altogether. Not many upcoming foes are actually made of flesh.  This lab has four rocks +4 on top of an exploding spellbook. Under that are three Potions of Poison and an apple, so it's not worth taking the damage.  The southern hallway has a gauntlet. Four grates will raise spikes when walked on, causing damage to the whole party and forcing them west. Between those grates are three pairs of scaladars, no longer placated by the Ring of Trobriand. Their tails don't poison, rather they shoot lightning bolts that hit the whole party. They are quite deadly, especially when they're on both sides of your party. It's best just to run past them as quickly as you can. That's possible because they never move from their starting positions.  The spikes did a number on our party, but they also don't make Delmair transform.  This small button can be found just past the gauntlet. It removes the wall it's on, leading to another larger button that makes a way back before the gauntlet.  This other button, slightly further past the gauntlet, is kind of a trick. Pressing it deactivates the previous spike traps, which allows you to kill the scaladars by hit-and-run. However, that also activates spike traps to the west, where you're going. It can be re-pressed to toggle which spike traps are on. The southwest area has a short sword +3 and steel shadows, one of which lands a hit on Delmair.  At the end of the stage is this hallway. The first time you step on this tile, all of your party's metal items will be dropped, and two steel shadows will spawn in each of the tiles to the east and west. Once again, a single fireball kills three of the four. An interesting note is that the offhand is still free with the staff. I didn't bother keeping any of the ones I found, but clubs are heavy weapons that can only be used in the main hand. Past this, another cord opens the way to the stairs going to Mages' Guild 3. Alpha3KV fucked around with this message at 04:41 on Apr 6, 2022 |
| ← # ? Apr 5, 2022 20:33 |
|
Register a SA Forums Account here!
JOINING THE SA FORUMS WILL REMOVE THIS BIG AD, THE ANNOYING UNDERLINED ADS, AND STUPID INTERSTITIAL ADS!!!
JOINING THE SA FORUMS WILL REMOVE THIS BIG AD, THE ANNOYING UNDERLINED ADS, AND STUPID INTERSTITIAL ADS!!!
You can: log in, read the tech support FAQ, or request your lost password. This dumb message (and those ads) will appear on every screen until you register! Get rid of this crap by registering your own SA Forums Account and joining roughly 150,000 Goons, for the one-time price of $9.95! We charge money because it costs us money per month for bills, and since we don't believe in showing ads to our users, we try to make the money back through forum registrations.


Powered by: vBulletin Version 2.2.9 (SABB-v2.24.04)
Copyright ©2000, 2001, Jelsoft Enterprises Limited.
Copyright ©2024, Jeffrey of YOSPOS
Copyright ©2000, 2001, Jelsoft Enterprises Limited.
Copyright ©2024, Jeffrey of YOSPOS