|
bhsman posted:Shining gold + Mithril silver = Are you talking about mixing them or just highlights?
|
|
|
|

|
| # ? Apr 19, 2024 09:25 |
|
GoodBee posted:Are you talking about mixing them or just highlights? Mixing them, but there's nothing wrong with using a silver color to highlight gold. I'd go with a (relatively) "thick" highlight of shining gold, then a mix, then a thin-thin-thin highlight of mithril silver or some silver color. VVV bhsman fucked around with this message at 20:30 on Dec 24, 2009 |
|
|
|
GoodBee posted:Are you talking about mixing them or just highlights? mix em, 2:1 gold/silver then 1:1. if you're feeling sassy do a final highlight of pure silver E:burn in hades bhsman
|
|
|
|
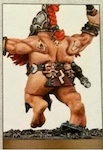
This is a long shot, but does anyone have these arm bits available to trade/sell? I especially need the right arm bit.
|
|
|
|
What exactly is the difference between matte medium and glazing medium. They look like they do the same thing, but that cant be right..
|
|
|
|
Fyrbrand posted:This is a long shot, but does anyone have these arm bits available to trade/sell? I especially need the right arm bit. Probably more than you want to pay, but http://www.thewarstore.com/product50328.html they have the left arm + weapons too.
|
|
|
|
Morning posted:What exactly is the difference between matte medium and glazing medium. They look like they do the same thing, but that cant be right.. Matte is opaque, glaze is translucent.
|
|
|
|
Devlan Mud posted:Matte is opaque, glaze is translucent. So they do similar things with the paint, just the matte makes it duller?
|
|
|
|
FirstCongoWar posted:Probably more than you want to pay, but http://www.thewarstore.com/product50328.html I won that axe, sword, and stormbolter on ebay actually, without thinking to check warstore first. Sigh. Thanks though.
|
|
|
|
Morning posted:So they do similar things with the paint, just the matte makes it duller? Matte ought to do what it says, which is kill the shine on the paint (but I have no personal experience, so YMMV). What I do know is that adding glaze medium will make your paint finish shiny, and if you mix it with paint and water in a 1:1:2 ratio, you end up with a very nice wash.
|
|
|
|
Fyrbrand posted:I won that axe, sword, and stormbolter on ebay actually, without thinking to check warstore first. Sigh. Thanks though. Fyr, if you want the arms, I have some off the Assault Terminators set you're welcome to have. Same sculpt IIRC.
|
|
|
|
Dont sweat the medium "sheen" too much, because if you varnish it youre changing it anyways
|
|
|
|
I figured I'd drop in here to ask this. I'm working on a Skink chief for my Lizardmen army and I want to model his cloak of feathers on him. I'm still pretty new working with green stuff, but if anybody knows any good method for sculpting feathers or a feathery texture, I'd love some help.
|
|
|
|
MarionetteOwl posted:I figured I'd drop in here to ask this. I'm working on a Skink chief for my Lizardmen army and I want to model his cloak of feathers on him. I'm still pretty new working with green stuff, but if anybody knows any good method for sculpting feathers or a feathery texture, I'd love some help. Expect a photo tutorial from me soon, if someone doesn't help you out beforehand.
|
|
|
|
GoodBee posted:
Love these, great colour scheme and lovely tidy painting. I do think the gold needs another wash though as its almost orange. Followed by the previously mentioned highlight.
|
|
|
|
MarionetteOwl posted:I figured I'd drop in here to ask this. I'm working on a Skink chief for my Lizardmen army and I want to model his cloak of feathers on him. I'm still pretty new working with green stuff, but if anybody knows any good method for sculpting feathers or a feathery texture, I'd love some help. http://www.bolterandchainsword.com/index.php?autocom=ineo&showarticle=49 http://www.miez.nl/putty-n-paint/tutes/sculpting_tut01.pdf Page 25ish Sole.Sushi posted:Expect a photo tutorial from me soon, if someone doesn't help you out beforehand.
|
|
|
|
Can anyone find any good examples of Hawk Lords vehicles? Specifically a rhino? I'm having a hard time coming up with ideas... mostly what to paint gold..
|
|
|
|
|
Hawk Lords vehicles (at least the bikes) have a lot of black in them according to the Space Marines codex. It baffled me and I just painted the rhynos straight purple without any gold, because metallic gold looks sort of dumb on tanks
|
|
|
FirstCongoWar posted:Hawk Lords vehicles (at least the bikes) have a lot of black in them according to the Space Marines codex. It baffled me and I just painted the rhynos straight purple without any gold, because metallic gold looks sort of dumb on tanks I've been doing quite a few marines half gold/half purple, and just slopping devlan mud over the gold. It makes it look less fag-shiny and more battle-worn, which is pretty cool. Found this:  Any idea how they did that? edit: more angles because I KNOW everyone cares...  Click here for the full 1024x767 image. Red Robin Hood fucked around with this message at 05:53 on Dec 26, 2009 |
|
|
|
|
The blocks of paint are easy enough, just paint the right areas the right color. The logo actually looks freehanded. I'd do purple/gold the way he did black/purple, probably, but I really don't think gold will look good over big surfaces like that.
|
|
|
FirstCongoWar posted:The blocks of paint are easy enough, just paint the right areas the right color. The logo actually looks freehanded. I agree with you, and thinking about it now.. I don't really want THAT much gold. I think the logo is almost freehanded. He used carbon paper(?)
|
|
|
|
|
Aranan posted:Do one anyway! 'Kay. Apologies beforehand for crappy photos. For this tutorial, here are the tools that I've used.  The leftmost is a pointed tool that is bent towards the end. Again, if you don't have access to such a specific tool, there are several ways to mimic the edge shape--anything pointy and wedge-shaped would work, bent or not. The middle is a flattening tool. The back of your hobby knife would work, though for this application, a toothpick might be best. Lastly, a trusty old hobby knife.  Here's some green stuff I've put atop some card stock to demonstrate proof of concept. It's simply flattened out with both my fingers and the flattening tool. Really, just smooth it to an even surface.  Using the wedge tool, start out from the bottom and press a wedge into it. In the row above, shift slightly so that the next line comes to bridge with the others in a feathered pattern, as shown above. As a note, it really does pay to keep your pattern even and consistent; I kind of rushed through with this one, but for demo purposes it works.  Here, I've taken the hobby knife and cut lines into the green stuff. First, cut a vertical line along the length of each feather to represent the core, then make downward-facing lines with the knife at steep angles from the core to make the feathery parts. The smaller your feathers, the sharper the edge of the tool that you want, which is why I prefer to do this with a hobby knife rather than a sculpting tool.  Here's a Sternguard model that I'm working on. Aside from the drake scale cloak, I've decided to put it on a model with a cloak already--a Sergeant should have more badges of honor, so I originally thought to put a fur cloak underneath. Feathers are sweet though, and make a nice contrast to the scales. To help the epoxy stick, I've scored the model, as shown above. However, for the model I won't be using green stuff, instead I'll be using ProCreate.  This is a 50/50 mix of ProCreate. I thought about getting a stiffer putty to make sharper lines, but in the end I figured that since the feathers will be rather small, it would be better to blend them in to hide my mistakes.  Here's the epoxy put onto the cloak. You'll notice it is pretty thick, and masks a lot of the details the cloak originally had. This is intentional, as I've yet to see a feathery cloak with sharp folds.   Here's the feather pattern base. If you are extremely patient, you could use this pattern for a nice scale cloak if you line things up right. I might end up doing this with a different Sternguard model--so, thank you for making me do this, as I never would have found out otherwise!  And with some knifework, we are done. As always, feel free to ask for other demos. It's good to help you guys out, and it's good practice for me.
|
|
|
|
Sole, never stop posting those tutorials <3
|
|
|
|
D'aww. Like I said, if anyone has ideas for more tutorials, I'll gladly put something together. If it doesn't end up looking like crap, I'll post it up here.
|
|
|
|
Posting pros and cons about the various putties you have used would be useful.
|
|
|
|
Sure thing. Green Stuff (GW, GF9, etc.) PROS: Relative ease to work with, generally cheap, holds shape well, great for beginners and experts alike. Can be sanded and filed after curing. CONS: Poor color contrast in material makes intricate details difficult, relatively short work life (approximately 25-30 minutes). Mixing vastly different ratios will cause product failure (anything greater than 40/60 or 60/40). ProCreate PROS: Easy to work with, holds shape very well. Can be sanded and filed after curing. Gray color makes great color contrast, allowing detail work to be extremely precise. Relative long work life (approximately 40-50 minutes); curing process can be halted indefinitely by freezing the product. BONUS: The ratios can be varied to get pretty much any kind of putty you want, from Green Stuff to Brown Stuff. CONS: Expensive. Ultra-fine grit makes it a poor material for beginners. Some surfaces may require scoring for proper adhesion. Kneadatite: Brown Stuff PROS: Strong material when cured. Takes extremely well to sanding, filing, etc. CONS: Mono-Tasker (Does one thing, but does it very well). Mighty Putty PROS: Dirt loving cheap. Product is essentially pre-mixed. Good for doing under-structure. CONS: Extremely short work life (10 minutes), grainy. Product will go bad regardless of handling (Between 6 months and 1 year). All of the above products are non-reactive to plastics and will take to both primer and paint without difficulty. I have been curious about air-curing polymer clay products (Apoxie Sculpt, etc) and I might give those a try within the near future. Hope this helps.
|
|
|
|
Oh jeez, I can't stop making stuff for my Araby army. Finished a unit of handgunners and sat around looking at the bitz box when I got an idea, which resulted in this:  Click here for the full 434x800 image. I made a sniper using a Hochland long rifle I didn't use for the handgunners because of it's size. Now I'm thinking of making a unit of these using the Skaven Jezzail rules, which seems rather appropriate. Or it might just end up a cool handgunner champ.
|
|
|
|
Got a few presents yesterday starting with: Click here for the full 800x532 image.  Click here for the full 532x800 image. And i'm starting to paint up my High Elf army. Been getting in some painting practice with Space Hulk lately and figured i'd move on to my dragon (also a present, only just getting back into WHFB) Really just been working on a colour scheme and the easy stuff so did some of the scenery that comes with the kit and came up with this:    I'm planning on a purple scaled dragon with light blue fleshy parts for the wings and belly, still not sure on the colours of the elves themselves yet. I like the idea of the runes in the scenery being kinda magical and giving off a blue glow, the spike on the pillar at the back of the base will give off a glow onto to the back of the ruins the dragon is perched on. Comments?
|
|
|
|
Sole.Sushi posted:D'aww. I used green stuff for the first time a few days ago with so-so results. What I'd like to know is other than liberally covering it and the working surfaces and tools with water how do you stop it from sticking to everything? I was amazed at how tacky it was.
|
|
|
|
Indolent Bastard posted:I used green stuff for the first time a few days ago with so-so results. What I'd like to know is other than liberally covering it and the working surfaces and tools with water how do you stop it from sticking to everything? I was amazed at how tacky it was. Liberally coat it and your tools with water. Also let it set for like 5-10 minutes before you start working with it, it will lose some of it's tackiness. Bust mostly coat everything in water.
|
|
|
|
dpack_1 posted:Comments? How'd you do the stone?
|
|
|
|
crime fighting hog posted:How'd you do the stone? Prime: Chaos Black Basecoat: Dheneb Stone Wash: Devlan Mud Highlight: Dheneb Stone The blue glow was a very light dry brush of Hawk Turquoise before washing and highlighting.
|
|
|
|
That's what I thought but I had to be sure. It looks very good, I'm slowly putting together a High Elf army too so I look forward to living vicariously off your updates
|
|
|
|
Is the little dragon part of the kit?
|
|
|
|
Zarkov Cortez posted:Is the little dragon part of the kit? Yeah, the kit actually comes with enough parts to make two riders, and a bunch of extras in terms of scenery and what not. There's also a little baby eagle you could use but i didn't want to overcrowd the base.
|
|
|
|
Sole.Sushi posted:Kneadatite: Brown Stuff I'm guessing this is the stuff I should be using to fill gaps in vehicles with, instead of green stuff or procreate. C/D
|
|
|
|
I have been and continue to be working on a Cadian Army... Colors are the standard Cadian 8th, although I'm not playing them as the 8th... I have been completing them at a relatively slow pace because despite having played 40k since 3rd ed and painting as long as well. I haven't really done anything as detailled as half of the models i see in this thread and the warhammer thread and EOW (where my current project is posted in the project log thread). I feel as though i have peaked in skill level and really only have a question about clear coating over a finished model... I have seen matte and gloss types and dont know whether I would want one or the other... how/when to appply and how many coats to use... do you wait until its been based or before etc. I haven't seen much detail on this stuff in this thread or any other I've read so hopefully someone with talent will have advice or a link to a good walk through thanks for the help...
|
|
|
|
Ideally you should use both. Wait until you're totally done painting and basing- the sealant will make your bases pretty much rock solid. First spray with a layer of gloss. Once that completely dries, spray on the dullcote. You may need more than one coat. I've had to do as many as 3 or 4 if I go too heavy with the gloss. If you plan on using decals, do them after gloss, let dry, then do a little more gloss over top before moving to dull. The gloss helps it adhere much better and will help hide the transfer paper.
|
|
|
|
Indolent Bastard posted:I used green stuff for the first time a few days ago with so-so results. What I'd like to know is other than liberally covering it and the working surfaces and tools with water how do you stop it from sticking to everything? I was amazed at how tacky it was. This is gross, but supposedly works: If you have remotely stereotypical goon oily/greasy skin then you can rub the (clean) tool across the skin of your disgusting nose, for example, and this will help stop the greenstuff sticking to the sculpting tool. Sole.Sushi posted:Where does milliput fit into this? It reacts very different to water, when compared to greenstuff, but you can sand and even drill it afterwards.
|
|
|
|

|
| # ? Apr 19, 2024 09:25 |
|
Indolent Bastard posted:I used green stuff for the first time a few days ago with so-so results. What I'd like to know is other than liberally covering it and the working surfaces and tools with water how do you stop it from sticking to everything? I was amazed at how tacky it was. Combaticus posted:I'm guessing this is the stuff I should be using to fill gaps in vehicles with, instead of green stuff or procreate. C/D As a note of interest, the term "brown stuff" does not always guarantee that you will be getting Kneadatite brand, so double check. They put actual aluminum into their product, while other brown stuffs might not--those are essentially green stuff with different colors to them. Danger - Octopus! posted:Where does milliput fit into this? It reacts very different to water, when compared to greenstuff, but you can sand and even drill it afterwards.
|
|
|


