


|
I'm not familiar enough with that pattern to steer you any direction other than emailing the person who wrote it. I have her super super cute crochet book, and since she has a blog and an etsy, chances are she'll respond to an email pretty quickly.
|
 #
?
Jul 16, 2010 16:01
#
?
Jul 16, 2010 16:01
|
|


|

|
| # ? Apr 29, 2024 17:02 |
|
|
Paper Lantern posted:I'm currently working on Roman Socks Toad pattern and i've become stuck on the last step of the legs I gave it a shot and what I ended up with was nothing like what the frog's toes look like. Someone posted what they did on the comments for the frog. quote:
I love Roman Sock's designs, but the couple of patterns I've tried have all had issues. She doesn't fully explain what to do. I was so excited when I found out about her book, but there's no way I'd buy it without getting it from a library first and trying a few patterns to see if they're written any better. I've heard they're not. It's a shame because she's done some really creative and cool stuff.
|
|
#
?
Jul 17, 2010 00:40
|
|

|
I have a yarn question that google doesn't seem to be helping me with. I usually buy the kind of cheap yarn that you can find at Michael's - Caron, Lion's Brand, Red Heart, etc. Well, I found a yarn store nearby that had a HUGE selection and I picked up something a little nicer. I ended up with Limache by Ester Bitran Hand Dyes. The only problem is I'm trying to find a pattern to use with it and I have NO CLUE what size this yarn is. On the back it says: 80% Wool 20% Cotton 117.4 mt=128 yds size 11 USA Needle 2.75-3 sts I've found some charts that are supposed to explain yarn size but this doesn't really seem to fit anywhere, or I'm just obtuse. It'd be much easier to find an appropriate pattern if I could figure this out. 
|
|
#
?
Jul 17, 2010 23:15
|
|
|
ahleeshaa posted:I have a yarn question that google doesn't seem to be helping me with. The page for it on Ravelry says super bulky--the thickest weight class. It'll work up fast and you should use a big hook (N or bigger). If you're on Rav, you can use the patter browser to find crochet projects calling for super bulky yarn. If you're not on Rav, this is a great reason to join!
|
|
#
?
Jul 17, 2010 23:30
|
|
|
Devi posted:The page for it on Ravelry says super bulky--the thickest weight class. It'll work up fast and you should use a big hook (N or bigger). If you're on Rav, you can use the patter browser to find crochet projects calling for super bulky yarn. If you're not on Rav, this is a great reason to join! Yeah, that's what the charts I found were kind of saying, but I thought I was reading them wrong because this yarn isn't very bulky at all. I've used super bulky yarn before and it was WAY thicker than this. Oh well, I'll make sure to check ravelry next time. I use them for patterns, but I never thought to look there for yarns. Thanks!
|
|
#
?
Jul 18, 2010 10:14
|
|
|
This is how I found the cat last night. It's totally crochet related because she is sleeping in a crochet project 
|
|
#
?
Jul 18, 2010 15:29
|
|
|
ahleeshaa posted:I've found some charts that are supposed to explain yarn size but this doesn't really seem to fit anywhere, or I'm just obtuse. It'd be much easier to find an appropriate pattern if I could figure this out. You can use Wraps per Inch to help determine yarn weight. Just wrap the yarn round something and see how many wraps you get in an inch. Super bulky is 5-6 wpi. It's not scientific in any way but helps especially when you have yarn not on Ravelry. Like this one:  11 wraps so it's a DK yarn.
|
|
#
?
Jul 18, 2010 16:44
|
|
|
ahleeshaa posted:Yeah, that's what the charts I found were kind of saying, but I thought I was reading them wrong because this yarn isn't very bulky at all. I've used super bulky yarn before and it was WAY thicker than this. Oh well, I'll make sure to check ravelry next time. I use them for patterns, but I never thought to look there for yarns. Thanks! I've had yarn classified as thicker than I thought it should be and after working with it, it usually does behave like a thicker yarn. Then there's all the yarn from big box stores that's thicker than it should be for no good reason.
|
|
#
?
Jul 18, 2010 16:49
|
|
|
Finished my Ewok, short of getting a long toothpick to pose as a spear... hehe. http://twitpic.com/26od60 Not sure if I want to do a side project first or keep doing star wars stuffs.
|
|
#
?
Jul 19, 2010 08:10
|
|

|
I was thinking about my aunt that passed away last year. She had great love for penguins. So, when I finished the Ewok yesterday and was thinking about what to make next, I figured I'd make me a penguin. Here's the result: http://twitpic.com/26xdo4 I used the pattern off of https://www.lionbrand.com but changed the beak and made oval wings instead of the circular ones in the pattern.
|
|
#
?
Jul 20, 2010 06:03
|
|
|
Such a cute penguin! I was just looking at that pattern (or something very similar) on Ravelry. Finished up the pdf for my piglet pattern! Available on my etsy: http://www.etsy.com/shop/sarsel  I am quite pleased with him  and he's small, so he's relatively easy to make! I whipped up another one so I could take progress shots for my pattern. and he's small, so he's relatively easy to make! I whipped up another one so I could take progress shots for my pattern. I want to make a panda.
|
|
#
?
Jul 21, 2010 16:57
|
|

|
shark farts posted:Such a cute penguin! I was just looking at that pattern (or something very similar) on Ravelry. Adorable! I am going to get your fox pattern soon, I've got the yarn ready to make it as a gift. The pig's sweater reminds me though, the one thing I wish the kitty pattern had included was the little vest your first kitties were wearing. popgenie, your penguin is adorable. I want to toss it around, but in a nonviolent and cuddly sort of way. I love how awkward it looks with the round body and the long wings.
|
|
#
?
Jul 21, 2010 22:25
|
|
|
shark farts posted:Such a cute penguin! I was just looking at that pattern (or something very similar) on Ravelry. Thanks! It was super easy to make. Shape and size make it very tossable. shark farts posted:I want to make a panda. Now that you mention it, I thought your bipedal animal pattern would be good for a bear-like critter, so I adapted it to a panda. I've drawn up a rough pattern (though my art skills are lacking) along with pattern estimates on stitch counts etc.; will just need to see how it looks in practice. Might need to adjust the dimensions a little. I wish that pattern maker thing that gives you stitch counts etc. for shapes worked in reverse - where you could input the number of stitches and it would model it. TacticalGranny fucked around with this message at 02:48 on Jul 22, 2010 |
|
#
?
Jul 22, 2010 02:43
|
|
|
I sent out my swap presents today I love the pieces I sent out, I'm just afraid that they are super girly.  One is a piece that really surprised me that didn't get picked up at the last convention I went to, and the second is one I made to go with it. I was really iffy about selling the larger piece because I liked it so much, and I'm glad it didn't sell so I could give it to someone awesome instead of a teenager who wouldn't be able to appreciate it. I really hope my giftee likes them! One is a piece that really surprised me that didn't get picked up at the last convention I went to, and the second is one I made to go with it. I was really iffy about selling the larger piece because I liked it so much, and I'm glad it didn't sell so I could give it to someone awesome instead of a teenager who wouldn't be able to appreciate it. I really hope my giftee likes them! 
|
|
#
?
Jul 22, 2010 19:13
|
|

|
Put it in Your Mouf posted:Adorable! I am going to get your fox pattern soon, I've got the yarn ready to make it as a gift. The pig's sweater reminds me though, the one thing I wish the kitty pattern had included was the little vest your first kitties were wearing. You have a good point, I really should add some sort of clothing item to the pattern to make it a bit more interesting. It's nice and simple as-is, but maybe if I added some instructions for optional clothing it'd be a bit more of an incentive for people to purchase the pattern - as it stands a couple of people have bought it but it's the least popular one I've put up. Trouble is that I don't know how I can make a vest. I suck so bad at flat pieces of crochet and anything that isn't amigurumi/worked in a continuous spiral. The vest on the small kitty was one flat piece with two "buttonholes" for sleeves that I had to stretch to fit the cat's arms into. That cat was small, this one is at least 2-3 inches taller so I don't know how I'd ever fit the arms through. Is it possible to make an armhole in a single, flat piece of crochet that is bigger than the typical buttonhole? I usually just make them by skipping x number of stitches and then chaining x in the row afterwards. I am so clueless  Maybe if the vest doesn't work out I can give him a scarf and a newsboy hat or something. Edit: Panda panda panda!  I swear it is much chubbier and pleasant in person. It kind of looks like an emaciated panda-head in this photo. After I post this I'm going to run out to either Wal-Mart or Jo-Ann's and look for some fabled invisible sewing machine thread: I knew that because the ears were black and the head was white, the stitching would be more obvious when I sewed them on... I figured if I was careful enough then it wouldn't be too noticeable. It is. It's a pain in the butt.  I've never sewn amigurumi together with anything other than yarn and a yarn needle, so I don't know how it's going to work out. I've never sewn amigurumi together with anything other than yarn and a yarn needle, so I don't know how it's going to work out. I am not looking forward to it. I hate sewing, regular needles and thread terrify me. It shouldn't be any different than just sewing stuff together with yarn but for some reason it just is. There is just something so comforting to me about using big, blunt yarn needles to sew stuff together. I'm a weirdo.
shark farts fucked around with this message at 22:13 on Jul 22, 2010 |
|
#
?
Jul 22, 2010 20:21
|
|
|
I have no idea how to properly do those things either. If I were to make something up, I would do what I think you're saying- for example, when you get to the place where you want the hole to start, skip a number of stitches. However many you skipped, make a chain of that number instead. So if you skip five stitches, chain five and keep crocheting in the sixth stitch. Is that how you make a buttonhole? I've never done one. It might help to use a taller stitch, like a double crochet. It would be thicker than single crochet, but also taller, so the skipped stitches would make a hole that is vertically wider. Oooh and I would also love to know how you put the little fabric ear accents on some of the original cats. I think those really gave them a look that was really unique. When I saw the pattern, I did think the cats weren't quite the same without, but still awesome. I have no idea if it would sell more patterns though. I agree that yarn is different than actual sewing thread. I've used that invisible stuff before, and it's even more of a pain in the rear end than regular thread. You're not the only one who avoids traditional sewing at all costs. If I were making the panda, I would probably just use a colored contrasting yarn like pink or blue, and go for the patch work look. I am terribly impatient.
|
|
#
?
Jul 23, 2010 00:50
|
|
|
shark farts posted:Is it possible to make an armhole in a single, flat piece of crochet that is bigger than the typical buttonhole? I usually just make them by skipping x number of stitches and then chaining x in the row afterwards. code:I know that's basically for a hood, but the technique could be adapted for something else, I'm sure. shark farts posted:shark farts posted:After I post this I'm going to run out to either Wal-Mart or Jo-Ann's and look for some fabled invisible sewing machine thread: I knew that because the ears were black and the head was white, the stitching would be more obvious when I sewed them on... I figured if I was careful enough then it wouldn't be too noticeable. It is. It's a pain in the butt. It would add it to the outside of the bottom of the ear, like a cuff, so it wouldn't change the proportions at all. Leave a long tail of white after the round of SS and you could sew with the white yarn through the cuff and minimize the visibility of it. shark farts posted:I am not looking forward to it. Not weird at all! I would rather not stain my creations with blood (unless it was Kratos  or something, that'd be p.awesome). or something, that'd be p.awesome).On the project side of things, I'm working on putting Toothless together so I can help with the wing/tail fin stitch patterns. I've got the body and head parts sewn together and am starting on the legs this evening. TacticalGranny fucked around with this message at 00:58 on Jul 23, 2010 |
|
#
?
Jul 23, 2010 00:53
|
|
|
popgenie posted:Why not join on and do a single round of slip stitch in white at the base of the ear? ...This is far too reasonable and easy. It's a little noticeable in the back but otherwise it worked perfectly. Thank you! You are a lifesaver. Unfortunately as soon as I finished sewing on the ears and admired how nice they looked, I had a mishap with some glue and now I think I may have to replace the panda's left eye and eye patch. Dumb dumb dumb dumb. I hadn't fastened off the head yet, so I'll undo a few rounds, take some stuffing out and hope that brute force is enough to remove this safety eye. I know it's nearly impossible to do with my hands, but I have a Dremel tool. 
|
|
#
?
Jul 23, 2010 22:10
|
|
|
So I've started my crochet lessons and look at this motherfucking sampler! Click here for the full 1600x1200 image. That's right, I have four different stitches there! And I kept the same number on every row!  Now I need help. I'm taking this class because I really want to learn how to make crochet amigurumi, and for my next class I need to bring in a pattern for one that's easy, but a little harder than "Sew two squares together and make a SQUARE MONSTER" Does anyone know a good one?
|
|
#
?
Jul 23, 2010 22:33
|
|

|
Wandering Knitter posted:So I've started my crochet lessons and look at this motherfucking sampler! You're doing better than me. Mostly I can SC a rectangle.
|
|
#
?
Jul 23, 2010 23:54
|
|


|
Wandering Knitter posted:Now I need help. I'm taking this class because I really want to learn how to make crochet amigurumi, and for my next class I need to bring in a pattern for one that's easy, but a little harder than "Sew two squares together and make a SQUARE MONSTER" The penguin ami I made from the Lion Brand pattern was super easy to make; only took a small amount of time and was very simple to put together. All the pieces are worked in the round, there's no wacky stitches or anything... it's all single crochet with increases and decreases. Even the beak, wings and feet (as their pattern is written) are created in the round using this method. code:
|
|
#
?
Jul 24, 2010 00:55
|
|
|
shark farts posted:...This is far too reasonable and easy. It's a little noticeable in the back but otherwise it worked perfectly. Thank you! You are a lifesaver. Glad I could help! shark farts posted:... hope that brute force is enough to remove this safety eye. I know it's nearly impossible to do with my hands, but I have a Dremel tool. I have a small jewelry plier set that I bought at Hobby Lobby or some such place. I found that a small bent needlenose, applied with some torsional force on the washer part will spread the back of the washer enough to allow you to slip it over the angled grooves of the eye post and remove it so you can re-use it (with a little bending back). Saved about 3 pairs of eyes this way thus far.
|
|
#
?
Jul 24, 2010 01:01
|
|
|
My Toothless in progress. Still gotta make a tail, ears, and horns, then I can get to work on the wings/tail fins. I like making his little feet, they're all :3 I'm still debating on whether I should put some yarn through the lower part of the forelegs to hold him in an upright position... or just let him flop around. http://twitpic.com/282nwe
|
|
#
?
Jul 24, 2010 05:01
|
|
|
He looks great so far! When I sew the front legs onto mine I put barely (if any) stuffing at the top of the leg and just sew the tops shut as I stitch them to the body. When it's pretty secure I just take the yarn and sew the legs a little further down onto the body so they don't flop around. There's really no method to it, I do a hack job of sewing but it still works and they sit nice and upright. I managed to get the washer off of the safety eye with just pliers. Hooray!
|
|
#
?
Jul 25, 2010 04:18
|
|
|
I made all the parts for Toothless (ears, mini-horns, tail) but have yet to attach them. After that's done, I'll get started on the wings/fins. I really wish I had a yarn ball winder - my skein has become.... deflated. Maybe one of the local folks on Ravelry will have one that I can borrow. Idea for a bigger project: granny square afghan modeled after a Weighted Companion Cube from Portal. teehee
|
|
#
?
Jul 25, 2010 06:14
|
|
|
Oh man, I wish I knew how to write patterns so I could share my stuff (or sell them?). I'm making the most awesome unicorn ever with wire so it stands by itself, but I make things up and sculpt on the go
|
|
#
?
Jul 25, 2010 08:18
|
|


|
Put it in Your Mouf posted:I have no idea how to properly do those things either. If I were to make something up, I would do what I think you're saying- for example, when you get to the place where you want the hole to start, skip a number of stitches. However many you skipped, make a chain of that number instead. So if you skip five stitches, chain five and keep crocheting in the sixth stitch. Ah I didn't see your post, I'm sorry! The double crochet idea is good, I'll try that out. As for the fabric, they were just scraps of fabric that I cut out and glued onto the ears and the bottoms of the feet. I tried to sew them on but it looked pretty bad, so I just used some Fabri-Tac and stuck them on there.
|
|
#
?
Jul 25, 2010 19:44
|
|
|
So after kicking around the idea of making a granny square afghan, here's what I've come up with: Taking inspiration from the Portal cube depicted below, and also to make it easy on myself, I've decided to start out with some afghans that look like 8-bit graphics. I used spreadsheet to make a 23x23 square field, formatted the cells to be square-ish, and used background colors to make a template. Each square on the spreadsheet represents one granny square (obviously) and scale per square is adjustable by changing how many rounds you make in each square, or by hook size. Using a 6.0mm hook and worsted weight, a three round granny square is about 3.75". Based on this, the project size should equal about 7ft 2.25in. I've done the calculations for different size squares to get an idea of how large the project would be, and the 3.75-4" range would yield an afghan in the 7 foot range would allow for some fold-over or wrapping over the feet, which is the main reason to have an afghan code:I can't remember if I saw this pic here or just some random place on the interweb, but it's epic. Since I'm not quilting, granny squares make sense. It will be a present for my brother (shhh, he's also on these forums:  A pattern requested by a buddy at work, certainly will be one of a kind:  One down, one thousand fifty seven to go.  was I thinking... was I thinking... Also finished sewing the bits onto Toothless, I'll get started on fins etc. in the next couple of days. Since I'm using different yarns and hooks for the ami stuffs, I figure I'll just pop back and forth from squares to amis depending on my mood. edit: If you have a Joann fabrics handy... there are some good yarn sales through the end of the month. I picked up a Caron one-pound for $5.50. That's a LOT of loving yarn, but I have to make a LOT of loving squares in that color... TacticalGranny fucked around with this message at 06:50 on Jul 26, 2010 |
|
#
?
Jul 26, 2010 06:47
|
|
|
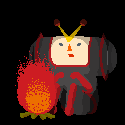
From the depths of the ocean....come's a monster!!! Ok, so not really. Ta-da! Btw, pattern is not mine but it was super easy to follow and fun to make.
|
|
#
?
Jul 26, 2010 07:38
|
|
|
Nibblet posted:From the depths of the ocean....come's a monster!!! haha, that's awesome! I like the little sucker detail, and the sewn eyes... very cool!
|
|
#
?
Jul 26, 2010 08:16
|
|
|
Popgenie, I've always hated making granny squares. Unless you're a big fan of them, you could instead just go with the pixelated Companion Cube and make a blanket out of repetitions of that. Basically, do 1 pixel = 1 sc. I did a Mario Bros.-themed blanket in that style, and I found it way easier than granny squares: Your idea sounds awesome, though, and I can't wait to see it!  I just have literally no granny square stamina. I just have literally no granny square stamina.Also, Nibblet, that is adorable!
|
|
#
?
Jul 26, 2010 09:13
|
|
|
electricgoat posted:Pure awesomeness!! Oh my god, I want one but the thought of making all those squares makes my fingers hurt!
|
|
#
?
Jul 26, 2010 09:33
|
|
|
electricgoat posted:Popgenie, I've always hated making granny squares. Unless you're a big fan of them, you could instead just go with the pixelated Companion Cube and make a blanket out of repetitions of that. Basically, do 1 pixel = 1 sc. I did a Mario Bros.-themed blanket in that style, and I found it way easier than granny squares: First off, that blanket is made of 70% win and 80% awesome. I am very, very impressed with that! Secondly... after doing 3 of 1058 squares, I can already see myself getting sick of them. Granted, I'm not very fast at them just yet and still reading instructions instead of just going on autopilot, but drat... right now it takes me like 30 minutes (while watching tv) to make a single square. Even if I somehow pull my average down to 20 minutes, that's still over 176 hours per afghan. I'll probably still make one, at least the companion cube one... but drat. That's over 7 days of hands-on time working at it on my off hours and weekends. I like crocheting, but that number is a bit daunting. I'm really interested in your technique for pixelating the stitches. Since each is slightly offset from the previous row, how did you manage to make that not look... skewed? I'm assuming that you did strips and then joined at the end vs. making it for the full width... then again, if I'm wrong about that, I'm 1000% more impressed just for the planning aspect. Two questions in particular: 1. How ragged does the back of that blanket look? I can only imagine with the color changes, joining off and on... That's one thing I would like to avoid on mine. I would much rather the product be reversible and not have yarn hanging around to get snagged on things like doggie feet, etc. 2. If it was created in strips and joined, what did you do for each strip? Did you do row, turning chain, row, etc.? It looks immaculate in the picture... When I've done rows in that manner there is always a striated look to it. Might be worth making a sample or two tomorrow I'll post my results. This might take a while...
|
|
#
?
Jul 26, 2010 11:18
|
|
|
popgenie posted:First off, that blanket is made of 70% win and 80% awesome. I am very, very impressed with that! Thanks, Popgenie! It was fun to make, but I sure didn't know what I was getting myself into when I started. Now that I hear your estimate of 176 hours, I think you might be on the right track. My blanket took much longer than that. Yeah, it's done in nine strips, but only because I don't know how to do a chain with more than one colour. I'm currently making myself a Doctor Who blanket in a similar style to the Mario one, and the background of the whole thing is blue, so I'm just doing it as one large piece. As for how to calculate that out, I just have a bunch of sticky notes with numbers on them. I hope it works out, but the truth is that if things look like they're fitting together wrong, you can always just stick a few more rows of background colour in there until it looks right. The joy of not having a proper pattern is that no one needs to know it didn't turn out the way you planned. ") I will be honest with you, though; that Mario blanket was the second thing I ever made. I don't know what the gently caress I was thinking. It also uses yarns of a bunch of different gauges, so the fact that it even came together is somewhat of a very large miracle. All the sections with characters on them are sc, and the background colour rows in between are dc. I did a ch 1 at the end of each sc row, and a ch 2 at the end of each dc row, which is probably what you mean by turning chain. Trust me, it only looks tidy when it's zoomed out. Here are the edges up close, but please be sympathetic because it was the first side I did:  The back looks like rear end. Its shittiness decreased as I went along, though, because I sure did learn a lot and improve like mad as the blanket went along. In the beginning, I was sewing in all the ends, and it looks a little sloppier. Then, I figured out that you can work the ends in as you go. How I got as far as I did without knowing that just proves I'm a bit of a slow learner. And yeah, I realize it looks like the ends aren't sewn in, but they are; I sew in ends but never trim them. I don't know why. Here's a shot of the back, with first a picture from when I was sewing in ends, then one when I was working them in (I also didn't carry the yarn very well in the beginning, apparently):   Probably the most valuable thing I learned while making this blanket is that a sc blanket takes way too long. My Doctor Who blanket is 2 dc = 1 pixel, and man, does that ever work up faster. The characters end up being larger than on the Mario one, but I think it's worth it, for sanity's sake. I can't wait to see your blanket! I hope you're planning on giving us regular update photos.
|
|
#
?
Jul 26, 2010 20:02
|
|
|
While I was on my way to bed in the early hours, I was thinking of ways to cover up the back side of a piece like that. The only realistic thing I could think of, aside from making another identical piece and joining them back to back, was to get a large sheet of cloth or a bedsheet and sew it on at the edges like a bunting that wraps around to create a smooth back. While it kind of takes away the traditional afghan look when you flip it over, it would at least cover some of the bumps and loose ends so they don't get pulled around. Also... 2nd project? loving hell. When I first started making amigurumi, I wanted to make a katamari damacy ball, but then realized the total stitch count of 8,628 for the ball and the 14 nubs and said EHHHHH that can wait. I can't even imagine doing something of this scale as a relative beginner. I can see how the 2dc for 1px would be preferable. 2dc is a WHOLE lot faster, and there's more places to hide the yarn. Sewing in ends is a lot easier on that stitch, there's just more wiggle room. Still, don't beat yourself up over ANY of it - that blanket is drat good and you should be proud of it - A+++ would buy from again, 5 stars, I'm putting you in my will sort of good.
|
|
#
?
Jul 26, 2010 20:52
|
|
|
popgenie posted:COMPANION CUBE AFGHAN I'm going to be making one of these for my girlfriend for Christmas. Have you given thought to joining the granny squares as you go? I'm doing that on another afghan and it makes it sooooooooo much easier.
|
|
#
?
Jul 26, 2010 21:26
|
|

|
machinegirl posted:I'm going to be making one of these for my girlfriend for Christmas. Have you given thought to joining the granny squares as you go? I'm doing that on another afghan and it makes it sooooooooo much easier. I've only done 6 squares so far, so I hadn't thought about it. At this point I've been concentrating on bulk production, I figured I'd make all my squares of color a, then b, c, d etc. I suppose with only 6 squares done, it's not too late to start doing this Thinking about it a little more leads me to believe that this would actually be a good thing; doing squares in different colors would break the monotony a bit... I just might try this. If you want the spreadsheet pattern I have (if you can't make it out from the picture), feel free to send me a PM and I'll forward it along.
|
|
#
?
Jul 27, 2010 00:31
|
|
|
Goldirocks! I got your presents, they are awesome! I'll post pictures tomorrow, I'm cutting my hair and charging the camera so I'll be stylish. My presents should be going out tomorrow or Wednesday, my birthday was Sunday so we're still trying to get family together for dinner and fun.
|
|
#
?
Jul 27, 2010 04:54
|
|
|
So I'm a big fan of math, projections, estimates, numbers, that whole thing... Holy. loving. poo poo. I made one of my 4" afghan squares in a different color, still using worsted weight 4-ply stuffs, just so that when it was done, I could pull all the stitches out and measure the length of yarn needed for a single square. It wrapped around my 18" craft ruler a little over 19 times. So, each of the squares, including some overage for the slipknot at the start and a little tail at the end, runs about 29 linear feet of yarn. There are 529 squares in the pattern. That's about 15,341 feet. 5113 yards and a foot to spare. 2.905 miles of yarn. In one afghan. Not even counting joining them all together into a cohesive piece of work. That blows my loving mind. I am now humbled by the thought of making an afghan. Huh. edit: I rethought this a little; I'll just call it 30 feet per square, and that should account for the yarn used sewing the squares together. That makes 15870 feet. 3.005 miles of yarn. FFFFFFFFFFFFFFFFFFFFFFFFFFFFFFFFFFFfffff edit the edit: After thinking more about it, using 3" squares instead of 4" squares (2 rounds vs. 3 rounds in the square) would save me a lot of time and materials, and still make a ~6 foot square afghan, which should be plenty big enough... I'll time the creation and length later tonight, but I'm guessing 15-25 minutes 3" per square (vs. my 30-40 minutes for a 4" square) and about half to two-thirds of the material usage. TacticalGranny fucked around with this message at 22:45 on Jul 27, 2010 |
|
#
?
Jul 27, 2010 11:14
|
|
|

|
| # ? Apr 29, 2024 17:02 |
|
|
Yep, so three inch squares I think are gonna be the way to go. Takes about 16.5 feet of yarn for one of those vs. 29 for the 4" square. That's 8728.5 feet of yarn for the whole afghan, vs. the 15870. 1.65 miles vs. 3.005 miles. 45% reduction of materials needed (which holds true across the board; 16.5 vs 29 inches of yarn, miles, feet, square footage... all around 45%) Muuuuuchhh better. The end result? A ~6' square instead of an ~8' square. I'm sold.
|
|
#
?
Jul 28, 2010 02:41
|
|