|
How'd you do the metallic green? I've been eyeballing the colored metallics at the craft store to do something like this, and would love some tips (unless thats some awesome advanced technique, in which case - tips as well!)
|
 #
?
Mar 6, 2011 07:03
#
?
Mar 6, 2011 07:03
|
|


|

|
| # ? Apr 19, 2024 08:19 |
|
|
There's always the "paint it silver and wash it" technique that works pretty well.
|
|
#
?
Mar 6, 2011 07:18
|
|

|
Mt. ORourke posted:How'd you do the metallic green? I've been eyeballing the colored metallics at the craft store to do something like this, and would love some tips (unless thats some awesome advanced technique, in which case - tips as well!) Technique I learned from Fix: Start with a metal base. In my case, I went with Hawkeye's Hobbies Aluminum Talon Acrylic. Wash once all over with Badab Black wash. Repeated layers of Thraka Green wash until you are happy with the color. Replace green with any other color you want, adding more layers of Badab Black to change the hue.
|
|
#
?
Mar 6, 2011 07:24
|
|

|
Sole.Sushi posted:Is that a good thing? I was just making a dumb joke that went over everyone's heads. They look good, though I'm not personally a fan of the heavy-washed metallic style. One thing I'd recommend is to get the smallest black micron pen you can find. Use that to scribble lines on purity seals, and to outline the eyes on the marines. You can do both with a detail brush, but the pen is way easier.
|
|
#
?
Mar 6, 2011 07:25
|
|


|
The micron pens are a great idea, but I kind of rushed through these so I'm not really worried about going back for details. I already have the parts for a second tac squad all put together--I just need to find another multi-melta guy to complete the squad: I'll take much more time getting those guys detailed and done to a higher standard.
|
|
#
?
Mar 6, 2011 07:30
|
|
|
I was mostly thinking of the purity seals for the chaplain actually. Cool hammer btw- I just now realized he had one. Shame chaplains can't actually take them but it makes for a good counts-as pfist or crozius in any case.
|
|
#
?
Mar 6, 2011 07:44
|
|
|
On going into detail about those flames: Please do. Hot rod flames are sick.
|
|
#
?
Mar 6, 2011 07:46
|
|

|
Feeple posted:Frybrand can you throw on 4 small turtles and a rat onto that slime piece? TIA. fyi I stumbled on a bitz seller on ebay that had exactly 4 Reaper turtle familiars, and they had the giant rat familiar too. So I got the necessary bits for a helluva lot cheaper than I expected, and soon enough will have them on the terrain.
|
|
#
?
Mar 6, 2011 08:06
|
|
|
NecronSchmecron posted:On going into detail about those flames: Please do. Hot rod flames are sick. 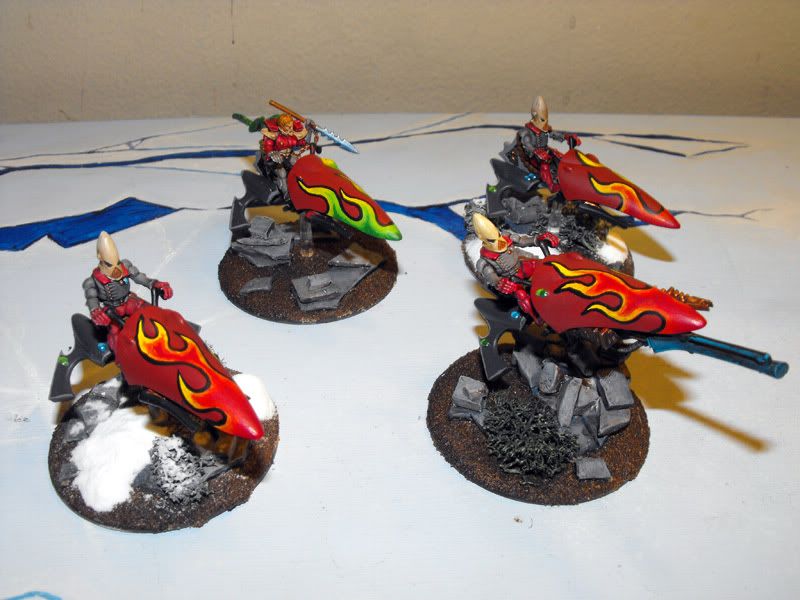 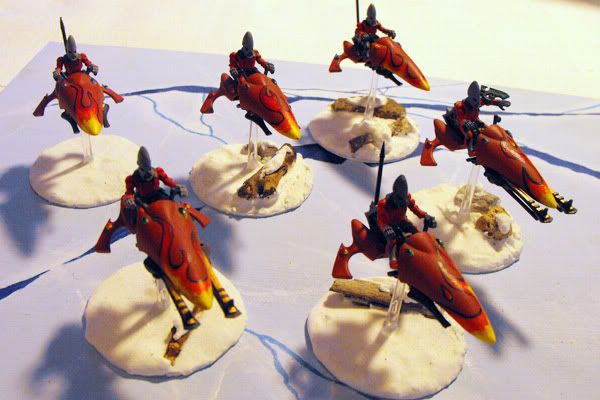 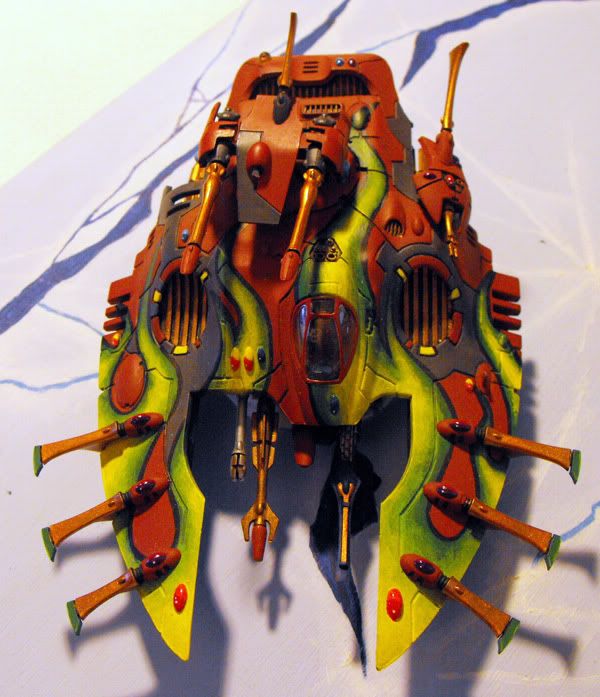 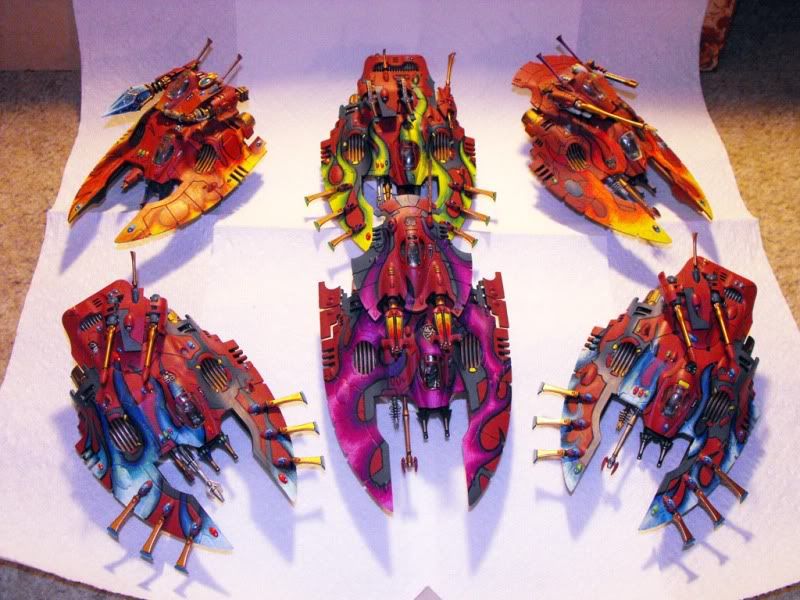 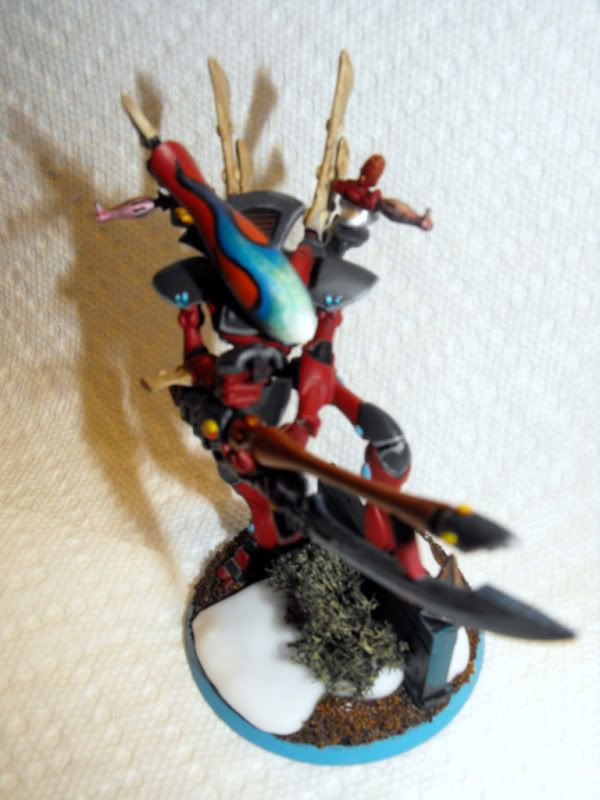 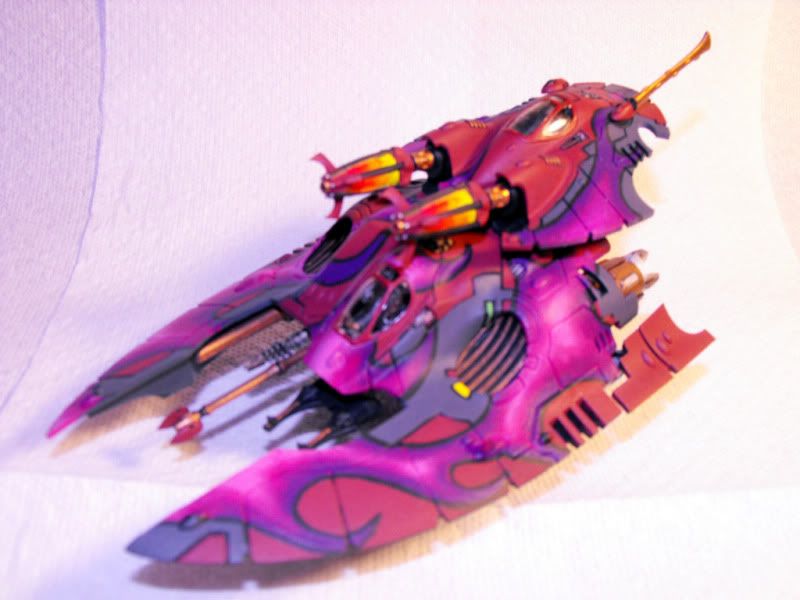 My babies.
|
|
#
?
Mar 6, 2011 08:24
|
|


|
NecronSchmecron posted:On going into detail about those flames: Please do. Hot rod flames are sick. To do it as I did, you'll need the following paints: Cygnus Yellow (P3) Solar Mecharius Orange (Foundation, GW) Blazing Orange (GW) Menoth White Highlight (P3) Liche Purple (GW) Black (I used the P3 black for this, but the GW works fine) Note: this technique, as I have it, only really works on black. I'm sure you can get it to work on other background colors with a bit of modification, but black is by far the easiest background to work from. Step 1: Solar Mecharius is watered down significantly, beyond the normal watered down ratio. Take your brush and make rough flame details, concentrating on the bottom and not going all the way to the top. It won't show up well against the black, but that's what you want. Let this coat dry. TIP: if you see hard edges after this layer, your paint is too thick. Step 2: Take Blazing Orange and water it down until it becomes a tint, and go over the first layer with your tint to saturate the Solar Mecharius. If you are doing it right, the orange will become more orange and the black won't change in color at all. Let this coat dry. Step 3: Repeat step 1, ignoring where you went the first time. Flames have color depth and no hard edges, so don't feel obligated to follow the exact pattern you put down the first time. Some parts of this layer will overlap with the previous layer, but that is good: especially towards the bottom where you want the flames to be concentrated. Repeat step 2 to saturate. Step 4: Repeat step 3 one or two more times, or until you are happy with the shape of the flame. If you don't like how it looks, go back over some of them with black and re-do them over layers. Step 5: Take Cygnus Yellow and thin it out to the same consistency as you had your Solar Mecharius thinned out to and paint "hot spots" both at the base of the flame and along some of the parts going upwards. Be sparing with this part, as too much yellow ruins the effect, but like before, don't always follow your established lines. Step 6: tint the yellow with Blazing Orange. Step 7: Repeat steps 5 and 6, again not following previous patterns. At this point, it starts to look more like fire. Take a moment and decide if you like the shape of some of your flames. If you don't, lay some black down and go over it again, or enhance any open areas between flames by putting a little black inside to make them pop. Step 8: Thin out your Menoth White Highlight and this time do follow some of the yellow--not all of it, but some--being careful to not cover it completely. Step 9: Tint with Blazing Orange once again. Step 10: Repeat steps 8 and 9 if you want to add more "hot spots" to your fire to enhance the overall look. Step 11: Thin down your Liche Purple like you did your Solar Mecharius, and carefully paint around the edges of your flames. Do this very sparingly, not around each and every flame. If you do it right, you won't be able to see it unless you are actively looking for it on the model. It's a lot of super-thin layers and applying the principles of airbrushing to a manual brush technique. For the airbrush representation of this trick, check out Ed Hubbs and his awesome series on doing realistic flame paintjobs. There are three in the series, and they are the three that inspired me to do a paintbrush/paint adaptation. EDIT: Seems Ed uses two different base oranges--I might try doing that next time. If you'd like a photo tutorial as to how I applied the technique to a brush, I can certainly do that. Fyrbrand posted:counts-as pfist or crozius in any case. He's a Salamander Chalplain, and in the first Salamander novel, their Chaplain had a Crozius shaped like a hammer, so I just went with that. Sole.Sushi fucked around with this message at 08:43 on Mar 6, 2011 |
|
#
?
Mar 6, 2011 08:38
|
|
|
theironjef posted:
Amazing.
|
|
#
?
Mar 6, 2011 09:35
|
|

|
WARHAMMER 40K: Wizard Bong-Sparking Power
|
|
#
?
Mar 6, 2011 09:45
|
|
|
Hobby tip: dried glue on your fingertips will prevent trackpads that are not pressure sensitive to detect your fingers! Cool news 
|
|
#
?
Mar 6, 2011 10:00
|
|
|
Just did the biannual paint cull. Out of 60 GW pots 20 were beyond salvation but 20 more were saved thanks to a toothpick and a few drops of matte medium (including an old Brazen Brass  ). I seriously don't know how I lived without this stuff before. ). I seriously don't know how I lived without this stuff before.
|
|
#
?
Mar 6, 2011 14:49
|
|

|
theironjef posted:My babies. Fuuuuck, How much cocaine do you do? All of your vehicles are loving insanely ridiculous and awesome. I hear a sweet guitar shred every time I see your Raider or one of those gravtanks.
|
|
#
?
Mar 6, 2011 16:22
|
|

|
theironjef posted:
I heard the Eldar were flaming, but this is ridiculous! Those are totally rad. Dudical, even.
|
|
#
?
Mar 6, 2011 17:30
|
|

|
Eldars with flames are the best eldars
|
|
#
?
Mar 6, 2011 18:13
|
|

|
The long term goal is to set up a wicked sweet diorama where the Eldar are charging headlong into the dark eldar. Fire vs. Lightning and red vs. blue. Space elves rule.
|
|
#
?
Mar 6, 2011 18:40
|
|
|
theironjef posted:My babies. This has the added tactical advantage of making it impossible for the other player to look directly at the models for fear of going blind, hence they can't get a good notion of what units are where and therefore lose track of what is happening.
|
|
#
?
Mar 6, 2011 19:29
|
|

|
theironjef posted:The long term goal is to set up a wicked sweet diorama where the Eldar are charging headlong into the dark eldar. Fire vs. Lightning and red vs. blue. Space elves rule. Fire? Check Flames? Check Guitar Shredding? Check http://www.youtube.com/watch?v=0jgrCKhxE1s I don't actually like this band.
|
|
#
?
Mar 6, 2011 19:44
|
|
|
I haven't painted my troll for my Blood Bowl team yet, but I've stuck some bits together for an elf team. Here's 3 blitzers and 2 witches: I like how puny that punchy elf is. It doesn't comprehend!
|
|
#
?
Mar 6, 2011 23:03
|
|

|
torsoboy posted:I haven't painted my troll for my Blood Bowl team yet, but I've stuck some bits together for an elf team. Here's 3 blitzers and 2 witches: Those helmets are rad. They're from the Cold One Knights, right?
|
|
#
?
Mar 6, 2011 23:21
|
|
|
yes the blitzer torsos/helmets are Cold One Knights, although I had to ghetto-glue a spiky bit from the wyches sprue to get the 4th samurai-like helmet.
|
|
#
?
Mar 6, 2011 23:34
|
|
|
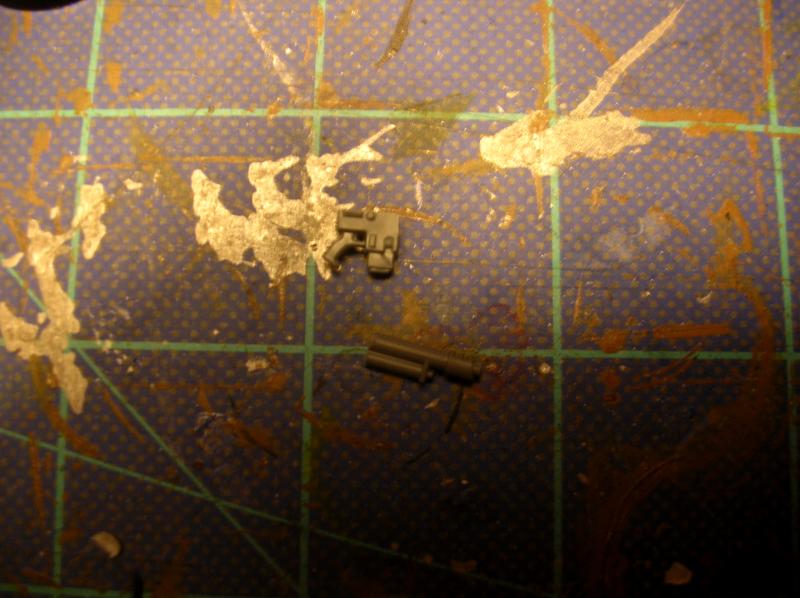
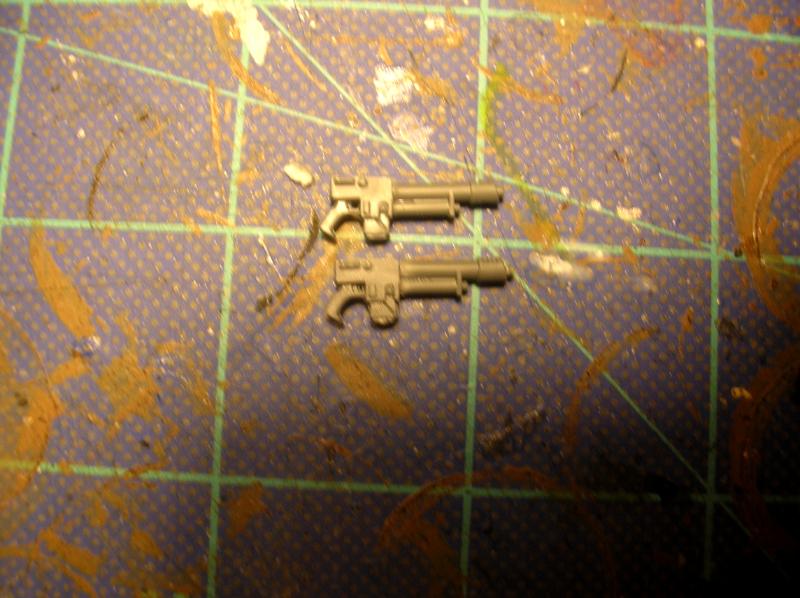
SRM posted:Bitchin! I'll look into finding some. Why do you need to use gloss coat first though? Shouldn't matte be durable enough? You know, this gave me an idea. Instead of using lasguns, use grenade launchers, and make street-sweeper shotguns... Now, I need chimeras...
|
|
#
?
Mar 7, 2011 00:05
|
|


|
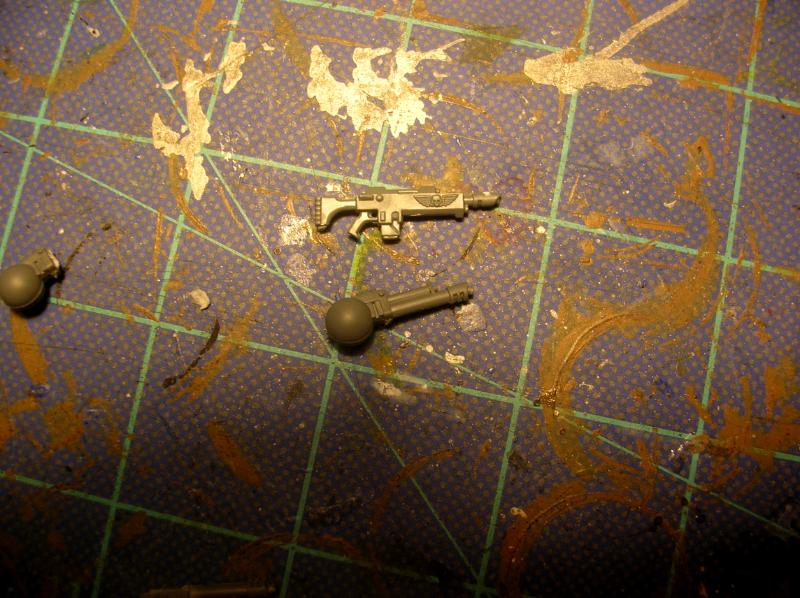
I'm trying to put together a plastic heavy warjack kit, and my torso piece is supposed to attach to the crotch part with a ball and socket kind of joint. I cannot squeeze these two together, the ball part is way too big to actually fit in the joint space. What's the best way to get these two things together? I've got a file, but I'm definitely not with it enough to get the end result to be spherical (I've tried a bit and I've got kind of an ugly d20 looking bit instead of the sphere I had to start with). Is there a smart way to do this or do I just keep chipping away at it till it fits in the hole and just shove enough super glue in there to fill up the empty space?
|
|
#
?
Mar 7, 2011 00:22
|
|
|
Gonna repost my photo dump from the Oath thread without all of the extra words and junk. Mixture of cell phone and Nikon with an annoyingly long lens. I can post up the other five warriors here in a bit too since they've been done for awhile. Either way, it's hard to get darker colored models to show up properly with a white background.              
|
|
#
?
Mar 7, 2011 01:00
|
|
|
Attn, sculptors: Anybody have any experience working with plumber's putty?  My FLGS had the choice of Citadel Green Stuff or this stuff. Rather than pay marked-up prices for repackaged Kneadatite, I decided to gamble on this. Haven't used it yet, I'm curious what other peoples' results have been in terms of ratios and the final product.
|
|
#
?
Mar 7, 2011 07:14
|
|


|
I like the fleshtones on your DE helldiver, pretty ballin stuff.
|
|
#
?
Mar 7, 2011 07:20
|
|
|
Tadhg posted:Attn, sculptors: Never tried it myself, though I have heard to steer clear of it. I guess it would depend on what you do with it, it may be fine for bulking up armatures/filling some gaps, idk. Good luck and post some thoughts.
|
|
#
?
Mar 7, 2011 08:00
|
|
|
Tadhg posted:Attn, sculptors: I tried the mighty putty once a while back. I think I may have mixed it poorly, but it dried too quick and wasn't ever really moldable enough to work at such a small scale. If you're quick, maybe you can pull off some kind of press mold, but I don't think you'll be able to do much in the way of real work with it. I was thinking of busting it out again to try with the Instant Mold I just got.
|
|
#
?
Mar 7, 2011 08:12
|
|


|
Tadhg posted:Attn, sculptors: Cures too fast and doesn't hold detail nearly as well. It's useful for bulking out armatures and making joins, but not enough to do any real work with.
|
|
#
?
Mar 7, 2011 08:13
|
|

|
Great. Just mixed up a small amount and used it in a 2-part bit mold. Mixed up extremely soft, kind of like warmed-up silly putty but "fluffier" feeling. This stuff wanted to stick to everything. I hope that it doesn't kill my mold. I still have hope, but I'm not super optimistic about it. I may just start buying my kneadatite online, since my FLGS isn't interested in carrying non-Citadel green stuff for some reason.
|
|
#
?
Mar 7, 2011 08:32
|
|
|
Tadhg posted:Great. I'm still pissed that customs has not cleared my package from CMON because I want to gently caress with that Instant Mold crap.
|
|
#
?
Mar 7, 2011 09:09
|
|
|
Warmachine Oath Thread Crosspost:      Somebody told me the bright bases detract from the model. What say you, painting goons? EDIT: Would a little 'dead grass' around the edge of the stone be too much? vvv Well its not like it's too late to change it to something like Charadon Granite. Eyespy fucked around with this message at 13:21 on Mar 7, 2011 |
|
#
?
Mar 7, 2011 11:24
|
|


|
^^^ I don't think you have to. It's all down to your aesthetics. There's been a good movement afoot to really demarcate the base rings for specific gameplay resons, and while I can see some appeal, it doesn't really strike me as the way to go, but I'm an old fart traditionalist (not a goblin green traditionalist)Eyespy posted:Somebody told me the bright bases detract from the model. What say you, painting goons? I don't think it does in these shots, but I think it does on the actual game board, where the contrast of color to the background terrain is exaggerated. Those look pretty pimp, though. Nicely done. Fix fucked around with this message at 11:34 on Mar 7, 2011 |
|
#
?
Mar 7, 2011 11:27
|
|
|
Someone tell me how to make an awesome light-box. I'm sick of my models looking like crap. 
|
|
#
?
Mar 7, 2011 11:28
|
|
|
Sole.Sushi posted:Someone tell me how to make an awesome light-box. I'm sick of my models looking like crap. Take the easy option
|
|
#
?
Mar 7, 2011 11:39
|
|
|
Sole.Sushi posted:Someone tell me how to make an awesome light-box. I'm sick of my models looking like crap. Get a cardboard box, remove the opening flaps, cut windows in 4 of the sides (leaving one for the base) and then tape some baking paper/parchment paper or whatever to diffuse the light. Also, Eyespy, ditch the blue edge, go dark grey or something instead, it is drawing the eye away from the miniature. If you do wnat a blue edge, at least make it darker. Also, add some flock to the bases.
|
|
#
?
Mar 7, 2011 14:14
|
|
|
Sole.Sushi posted:Someone tell me how to make an awesome light-box. I'm sick of my models looking like crap. Buy four pieces of foamcore board, tape them together like so, get a few clamp lights from your hardware store and stick floodlight bulbs in them, and if you want, get a sheet of art paper and stick it in there as a backdrop. bam. Leave the side flaps un-taped on the bottom and you can fold it up to stow, as well. 
|
|
#
?
Mar 7, 2011 14:27
|
|

|

|
| # ? Apr 19, 2024 08:19 |
|
|
Eyespy posted:Warmachine Oath Thread Crosspost: I like the bases. It's the same colour as the figures, so it actually ties it all in nicely. If you're really worried, maybe redo it in a darker blue?
|
|
#
?
Mar 7, 2011 14:42
|
|