|
I like using a while tile. The colors never look quite right to me on a clear surface.
|
 #
?
May 23, 2013 23:19
#
?
May 23, 2013 23:19
|
|


|

|
| # ? Jun 11, 2024 23:37 |
|
|
Purgey posted:Thanks! I've been gathering up inspirational 40k stuff and that army is like, the best daemon army I've seen. Am I the only one that saw this? 
|
|
#
?
May 23, 2013 23:20
|
|


|
Indolent Bastard posted:Acrylic Paper or Parchment Paper? Because while PP might be cheaper AP is less of a pain in the rear end. Parchment. Maybe it's a British thing but the cheap store brand stuff is great. I roll out a few inches and cut it to fit, I must have a year's worth in a £1 roll. Torabi posted:Watching some Miniwargaming painting tutorials and the guy is using a glass panel as his pallet where he drops the paint. I've seen this in a lot of tutorials. Do any of you guys do it too? I take it that it is nicer since you can just clean the glass when you are done instead of going through single use plates like I do. That just has to be his preference, but I'd rather not have to thin and remix my paint every 5 minutes, which is the main reason I use a wet palette.
|
|
#
?
May 23, 2013 23:29
|
|

|
Torabi posted:Watching some Miniwargaming painting tutorials and the guy is using a glass panel as his pallet where he drops the paint. I've seen this in a lot of tutorials. Do any of you guys do it too? I take it that it is nicer since you can just clean the glass when you are done instead of going through single use plates like I do. I use a ceramic palette I got at an art supply store but same idea. I just throw it in the dishwasher every week or two when I run out of clean wells to use.
|
|
#
?
May 23, 2013 23:31
|
|

|
krushgroove posted:Parchment. Maybe it's a British thing but the cheap store brand stuff is great. I roll out a few inches and cut it to fit, I must have a year's worth in a £1 roll. If it works for you that's great. I just found a home made palette with parchment tended to curl up and was annoying, and after using a purchased palette I would never go back.
|
|
#
?
May 23, 2013 23:40
|
|
|
Indolent Bastard posted:If it works for you that's great. I just found a home made palette with parchment tended to curl up and was annoying, and after using a purchased palette I would never go back. Place it down on the sponge, then flip it over. It only curls if it's wet on only one side.
|
|
#
?
May 23, 2013 23:52
|
|

|
I just use a cheap plastic palette. I've used glass and ceramic tiles in the past, but I really like having a well. For a long time I painted with a wet palette exclusively, but now I only bust it out for more complicated wet blends. For me I really like having a very certain consistency to my paint which I find I hard to control with a wet palette, and I get frustrated with a lack of working time on flat surfaces.
|
|
#
?
May 23, 2013 23:52
|
|


|
I use the PP pallete because I like that it snaps shut, it's easier to order from Amazon than get stuff from the local stores, and I now have a pile of paper that I don't have to unroll and cut out, so I can spend the time I set aside for painting actually painting, and spend all that free time eating out at McDonalds which keeps my house super clean  Seriously, it was super cheap, and I don't have to worry that I'm using the last bit of parchment paper when the missus has other designs on it. I like sea salt chocolate chip cookies and I think $9 is a small price to pay to increase the chance of more of them in my life.
|
|
#
?
May 24, 2013 00:33
|
|

|
Ill confess that I also use the PP wet palette and it is quite nice. But I got it for free!
|
|
#
?
May 24, 2013 00:42
|
|
|
sassassin posted:Place it down on the sponge, then flip it over. Not in my experince. But it is all academic anyway. I own a good palette so don't need to make due with parchment.
|
|
#
?
May 24, 2013 00:53
|
|
|
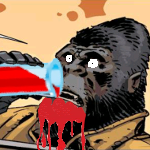
Test deathknight done  I tried but still think it looks like poo poo. Just couldn't get the green to come out good. I think I'll give oil washes a try on the armor for the next one if I feel comfortable enough.
|
|
#
?
May 24, 2013 01:18
|
|

|
crime fighting hog posted:Test deathknight done It is better than anything I have ever painted in my entire life. 
|
|
#
?
May 24, 2013 01:35
|
|

|
crime fighting hog posted:Test deathknight done But it looks great? Maybe just make green pop a little bit more, (but that is just nit picking) but other than that it looks great.
|
|
#
?
May 24, 2013 01:41
|
|

|
It looks great! If you're feeling self conscious just push your highlights harder and give it a good old pin wash.
|
|
#
?
May 24, 2013 01:52
|
|


|
Leperflesh posted:It is better than anything I have ever painted in my entire life. Hold me, bro. 
|
|
#
?
May 24, 2013 02:01
|
|
|
Haha, you guys are too much. I'm still a bit rusty I suppose and was surprised how long it took but that guy has WAY more detail than I first though.
|
|
#
?
May 24, 2013 02:42
|
|
|
I don't really see an issue with the green, personally, but that base could use some sprucing-up.
|
|
#
?
May 24, 2013 03:39
|
|

|
Torabi posted:Watching some Miniwargaming painting tutorials and the guy is using a glass panel as his pallet where he drops the paint. I've seen this in a lot of tutorials. Do any of you guys do it too? I take it that it is nicer since you can just clean the glass when you are done instead of going through single use plates like I do. crime fighting hog posted:I tried but still think it looks like poo poo. 
|
|
#
?
May 24, 2013 03:59
|
|
|
Pierzak posted:Yeah right. You forgot to say how you painted it in 60 seconds, drunk and blindfolded, with a stick held behind your ear the whole time I figured that was a given 
|
|
#
?
May 24, 2013 04:02
|
|
|
What I meant to say is, gently caress your superior painting skills. On an unrelated note, anyone have a good way to paint (dark-ish) amber, color progression, shine and all, as a powered armor? VVV: That's a different color and shine. I want the brownish amber, the dark honey-colored one. But I'll look in that direction anyway. Pierzak fucked around with this message at 06:03 on May 24, 2013 |
|
#
?
May 24, 2013 04:31
|
|
|
Pierzak posted:What I meant to say is, gently caress your superior painting skills. Follow a tutorial for NMM gold and then gloss the gently caress out of it?
|
|
#
?
May 24, 2013 05:42
|
|
|
crime fighting hog posted:Test deathknight done Were you mixing in white to the green as you were going up? It sort of looks like it but I'm not sure. Mixing in yellows or yellowish browns works a lot better with greens to go up and get the pop. Mixing in whites tends to make it go pastel and look washed out instead of popping. Also try shading the green by mixing in very dark reds. Bone armor tends to look pretty good with a really in your face super thick 'black line' of a tan everywhere it meets another surface.
|
|
#
?
May 24, 2013 07:05
|
|

|
crime fighting hog posted:Test deathknight done  This is the exact colour scheme I want to use for my little plastic men. Can you give a complete rundown of what paints you used to I can blatantly copy this?
|
|
#
?
May 24, 2013 07:14
|
|

|
Yo. With my new job and all (congrats, me) I've yet to find my routine. Still, I dedicated time to sculpting today. I added the sleeves and shoulder pads. I also built a Stug - I want to complete my FOW stuff.      
|
|
#
?
May 24, 2013 23:17
|
|

|
If you look at around 8:35 in this video , when the guy unloads his IG mans. They all have this fancy backpack. Any idea where I might find alternative backpacks for IG. Doesn't seem like GW themselves sell any and they look awesome. I'm already planning on sticking some of the backpacks I got from the heavy weapon teams that I got with my battleforce on ordinary guys, to make them look a bit more unique.
|
|
#
?
May 25, 2013 00:09
|
|
|
Torabi posted:If you look at around 8:35 in this video , when the guy unloads his IG mans. They all have this fancy backpack. Any idea where I might find alternative backpacks for IG. Doesn't seem like GW themselves sell any and they look awesome. I'm already planning on sticking some of the backpacks I got from the heavy weapon teams that I got with my battleforce on ordinary guys, to make them look a bit more unique. That video requires a subscription.
|
|
#
?
May 25, 2013 00:25
|
|

|
TheBlobThing posted:That video requires a subscription. Oh crap. I forgot I signed up for their bronze vault thing. Sorry about that, I can fetch a screenshot of the video instead. Edit:  Was thinking of something like that. (Kind of a blurry shot but that's the video.)
|
|
#
?
May 25, 2013 00:29
|
|
|
Those look like tissue backpack rolls I saw in a GW painting book 10 years ago. Its rolled up tissue tied loosely with string. Dip it in glue and let it harden.
|
|
#
?
May 25, 2013 00:32
|
|
|
Fauxtool posted:Those look like tissue backpack rolls I saw in a GW painting book 10 years ago. I guess that is a bad angle but they do look like actual models. Rather than something the guy made himself. Since it isn't just the backpack roll on their back, it has well, an actual backpack too. But I guess that technique could work as well.
|
|
#
?
May 25, 2013 00:35
|
|
|
Modeling help- I'm gona' buy a pair of vindicators + predators and plan to remove the engine bits on the sides and move them to the back hatch area. I want to cover that hatch and make it look like an engine. I can sculpt wires and ribbed hoses no problem- any ideas on what bits I can put there to bulk it out and make it look like an actual engine area? I'm considering taking some of those dreadnought power plant bits and using them as a starting point. e: This is the closest I came, but its too drat big
|
|
#
?
May 25, 2013 00:46
|
|
|
Torabi posted:Oh crap. I forgot I signed up for their bronze vault thing. Sorry about that, I can fetch a screenshot of the video instead. They look like the packs from Forge world upgrade spues. I known the Tallarn models have ones that look like that.
|
|
#
?
May 25, 2013 00:51
|
|
|
Chance II posted:They look like the packs from Forge world upgrade spues. I known the Tallarn models have ones that look like that. http://www.forgeworld.co.uk/Warhammer-40000/Imperial_Guard/Cadian_Shock_Troops/CADIAN_INFANTRY_SQUAD_UPGRADE_PACK.html I found that while looking at the Ford Road website. Looks exactly like the ones in the video. While it would have been nice with a pack that consist only of the backpacks, you get some nice stuff in there anyway so I might just pick it up
|
|
#
?
May 25, 2013 02:01
|
|
|
Games Workshop trip report: Dude wearing a leather trenchcoat? Check Bunch of guys with long greasy hair lurking menacingly in the doorway? Check Happy customers spending money? ... The stores aren't as fun since they got rid of the walls of blister packs everywhere. Is there a decent replacement for the old Enchanted Blue? All the new ones seem too pale/washed out in the pot.
|
|
#
?
May 25, 2013 13:17
|
|
|
C&C? I will be fixing it so that the entire background is white, not just shades of white!  http://www.coolminiornot.com/333328 Lethemonster fucked around with this message at 20:39 on May 25, 2013 |
|
#
?
May 25, 2013 14:37
|
|

|
I like it a lot. Varying shades in the flat areas, and the bright bits of foliage are a great touch.
|
|
#
?
May 25, 2013 14:39
|
|
|
That aquila is incredible, I wish mine was half as cool as that one
|
|
#
?
May 25, 2013 15:23
|
|

|
I just finished up a Daemon Prince this morning. I really like that if you don't attach the tail the daemon prince looks like he's wearing a thong. Between that and the Heldrake I've painted a lot of buttholes today.  BULBASAUR posted:Modeling help- I'm gona' buy a pair of vindicators + predators and plan to remove the engine bits on the sides and move them to the back hatch area. I want to cover that hatch and make it look like an engine. I can sculpt wires and ribbed hoses no problem- any ideas on what bits I can put there to bulk it out and make it look like an actual engine area? I think the Land Raider engine block might look okay, but I'm not sure if it's too big for what you're doing. panascope fucked around with this message at 16:03 on May 25, 2013 |
|
#
?
May 25, 2013 15:57
|
|
|
Lethemonster posted:C&C? I will be fixing it so that the entire background is white, not just shades of white! It's a hell of a lot better than mine, ill tell you that much.
|
|
#
?
May 25, 2013 18:03
|
|
|
I was originally going for a jungle/rainforest type set of ruins but couldn't get the right picture in my head to make it work on the model, so ended up going with more traditional forest floor instead. I have some little trees and branches I was going to include but none of them ended up looking right. I might try and pick up another aquila at some point and sculpt a massive tree growning out of it, with roots destroying the rocks and scenery. It uses a combination of real mosses, premade tufts, ground up herbs, different flocks and pigments for all the plants and dirt effects. The stone looked really boring without any effects on it so I used lots of stippling in grey tones, and some careful glazes and then careful washes with a paint + pigment mix, which was then brushed off certain areas. To try and get it to look nice and natural (random) I built it up in stages, starting with different pigment colours and mixes going over the base area. Next was some thinned pva glue put in some places, and the ground herbs sprinkled on. Some fluffy flock was mixed with matte varnish and then added to the most covered, darkest areas of the model where I thought dark, moist moss would grow. This was follow with a mix of the previous moss with greener, lighter flock added and this mix put on the model in lighter areas where I thought more colourful plant with more chlorophyll would flourish. This kindof went round in a cyle, with light pigment washes and then bits of plant added here and there. Some of the plants got drybrushed with greens and yellow to make them stand out. The final part was pulling off individual strands from a moss clump I had found and dried out, that looked like little plaits. I glued them on areas that were a bit dull, monotone or lacking in different detail. I glued the tufts down in areas I thought could do with a bit more height and directional plants coming out of them. I kept rotating the model to look at it from different angles to make sure I didn't have any big gaps or overcrowding before I added more stuff. I had some very fine moss that I glued glowing up the sides of the rocks. Then I picked out some rocks from where they had been covered by the pigments, but I wanted them to break up the browns a bit. It was really fun to make. I got a lot of nerdy pleasure individually placing bits of tuft and plants.  I think the photography is getting better as well, although getting the background completely white is turning out to be a pain in the rear end. I originally sat down to photo and sort a bunch of things to put up for sale on ebay but just doing the pictures of the terrain took a couple of hours.
|
|
#
?
May 25, 2013 18:58
|
|
|

|
| # ? Jun 11, 2024 23:37 |
|
|
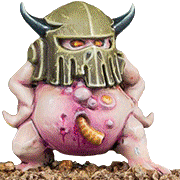
I get burnt out on 40k easily and usually after spending weeks on 5 Space marines i get sick of 'em so i've been working on a couple of Necromunda Gangs. First is my Scavvy gang:            I've still got alot of green stuff work to do on the men-at-arms based models, i'm going to blend out the shoulder pads and neck bits to make half cloaks/hoods. Then i've still gotta Necromundize them by adding pouches, holsters etc. I'm going to use FW Plauge Ogryns for the Scavvies, the only model i'm not sure about yet is the scavvy boss. He's going to be armed with a pistol and huge sword but i haven't found anything suitable yet. Think Cloud from FF7 with leprosy. Any suggestions? I'm open to non GW models. Once this gangs done i'm going to start working on an ash nomads gang based around these: http://victoriaminiatures.highwire.com/pages/highland I love her sculpts, there's some really cool WWI Cthulhu heads on there as well which i might pick up if i add to my Scavvy gang!
|
|
#
?
May 25, 2013 23:00
|
|