

|
Just finished up some more modern Tyranids from the Deathstorm box: I wish I had started earlier and had those old-school models, because I love their look (especially the Hormagaunts) but if I tried to collect those now I'd put myself in the poorhouse, which is really saying something for 40K spending.
|
 #
?
Dec 19, 2014 13:41
#
?
Dec 19, 2014 13:41
|
|


|

|
| # ? Jun 4, 2024 21:34 |
|
|
Star Man posted:I am going to attempt to paint this on my Salamanders command squad's company standard: If only 40k had a code for a free extra 30 men.
|
|
#
?
Dec 19, 2014 13:47
|
|


|
SRM posted:I actually have contemplated Tyranids, and this is exactly how I'd do them. If I ever finish this army I'm coming to Boston.
|
|
#
?
Dec 19, 2014 15:08
|
|

|
Star Man posted:I am going to attempt to paint this on my Salamanders command squad's company standard: You need a Vic Viper Stormraven proxy.
|
|
#
?
Dec 19, 2014 15:16
|
|


|
Z the IVth posted:Thanks for the tip. I've actually got a powered polishing tool. What do you recommend I use for the polishing compound in terms of grit and stuff? I just use the stuff that came with my Dremels. You can get a polishing kit that comes with a compound, but the metal on minis is soft enough that I've never needed it. I use the sanding drums or stones for mould lines and really rough surfaces, then the wire brush, then the soft buffing wheel. Of course always wear eye protection because you'll get bits of metal flying all in your face. One note, is that I usually only have to do this if the surface is bad or malformed. I don't typically do this for all metal minis. However, if the line you are buying has issues, you could give it a shot! Something like this:  Edit: Once I get my workshop set up, I was thinking of doing an updated WARHAMS 101 if people are interested.
|
|
#
?
Dec 19, 2014 15:19
|
|


|
I've been wondering about my progression in painting after going through the Uninspiration thread. I've been building models and painting minis since long before digital cameras, so I have very little documentation of my earliest work, other than some Traveler minis that are buried in the basement somewhere. I know I painted them in Testers enamels, but they are power armor troops and I used a black and yellow/red color scheme. They probably don't look that bad just because the scheme was so simple, but if I ever find them I will snap pics. Unfortunately I didn't really take good pictures of my earliest Warhammer models that I painted... oh, probably 13-14 years ago. I do have lots of pics of the ones I was proudest of, but only a couple group pics of the core troops where I really started. here are my Wood Elves that I later sold. The ones in the back row are the first ones I painted.  And yes, I painted my war dancers to be Goth.  Compare this to my latest models (which sadly is like 5 years old):  Moral of the story, there are other painters here who after 14 years are Gold Demon quality. Sure, I have progressed, but I paint in fits and starts, so my skills progression over time isn't nearly as I would liked. So if you want to git good, :justpaint: Bonus pic of SilverLeaf BucketHelm, one of my unit champions.  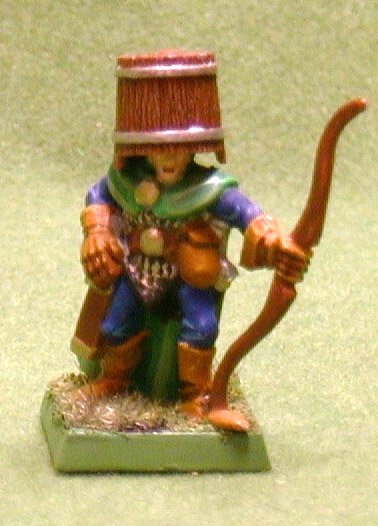
|
|
#
?
Dec 19, 2014 15:54
|
|
|
Doctor Zero posted:Bonus pic of SilverLeaf BucketHelm, one of my unit champions. Oh my god, it's the kid in the helmet.
|
|
#
?
Dec 19, 2014 15:56
|
|

|
Doctor Zero posted:However, if the line you are buying has issues, you could give it a shot! But I make those models.  I thought the buffing wheels needed some polishing paste to work? Do they work "dry"? I'm actually interested to see if there is a way of improving the finish of my master models before they go to production. Chasing down filing marks is a pain.
|
|
#
?
Dec 19, 2014 16:38
|
|

|
spacegoat posted:If I ever finish this army I'm coming to Boston. And we'll get some sweet, old-school White Dwarf battle report action in, card buildings and all. It'll be dope.
|
|
#
?
Dec 19, 2014 16:44
|
|

|
Frobbe posted:
I believe I've seen people use plastic army man sandbags. Gives it a nice "we're surviving with what we have" look.
|
|
#
?
Dec 19, 2014 17:35
|
|


|
Z the IVth posted:But I make those models. Holy poo poo dude you made that? gently caress me. That's really good then! You're out of my experience then but I would think a cleaner master might help, maybe? I don't do any casting or anything so not sure. I only have experience cleaning up existing stuff. e: sure enough you talked all about casting and I just kind of derped over it.  Are you supposed to use paste? No idea. Like I say I never got any so I can't say. It may explain why polishing is so hard on the pads though.  the metal is soft enough that it really does help. Maybe if I can find some good minis I can take some pics to show you what I mean. the metal is soft enough that it really does help. Maybe if I can find some good minis I can take some pics to show you what I mean.
Doctor Zero fucked around with this message at 20:49 on Dec 19, 2014 |
|
#
?
Dec 19, 2014 20:45
|
|
|
 i'm making progress on my chimera! after applying the Vallejo Cold Grey basecoat, and testing my old camo scheme on another chimera, i decided to ditch the camo scheme for a grey tank instead. I've slapped nuln oil in all the crevices and highlighted it with Vallejo Ghost grey. Really liking this so far, and once i start adding in all the various details on the tank, i'm sure it'll look hella rad! This chimera has sat unpained for nigh on 5 years, and the autocannon turret about as long :v
|
|
#
?
Dec 19, 2014 20:57
|
|

|
Hey all, quick question in regards to stripping paint off resin. My local hobby store has a set of xwing resin death star tiles that they didn't clean before priming and all the paint is flaking off. If I were to repaint it should I try and strip it first? I was thinking a bath with water and some purple power for a few hours. I also heard rinsing it with some denatured alcohol after a soak might help. Any suggestions on fixing this huge 3x3 hunk of resin?
|
|
#
?
Dec 19, 2014 21:56
|
|

|
Doctor Zero posted:Holy poo poo dude you made that? gently caress me. That's really good then! You're out of my experience then but I would think a cleaner master might help, maybe? I don't do any casting or anything so not sure. I only have experience cleaning up existing stuff. I was reading about the polishing wheels for another reason and I recall seeing that the felt wheels needed paste to go with them. I'm not too sure about the wire ones though. The surface texture one these specific miniatures is definitely due to the material itself rather than the master. I know the marks I leave behind, and the master does use plastic and putty in combination but the surface texture is even across the different materials.
|
|
#
?
Dec 19, 2014 23:56
|
|
|
So I'm going to be painting a diecast model soon. Anyone have experience with diecast? Anything I should know?
|
|
#
?
Dec 20, 2014 03:19
|
|

|
Finally finished my Christmas mini. Didn't get as much done as I wanted due to lack of time, but at least I got it to a point where I can, in good conscience, turn it in. I might add a quick Christmas tree, but I didn't get a chance to try out the OSL effects I wanted.    'E's makin' a list, e's checkin' it twice. 'E's gonna find out who's orky or nice, Santa Klawz is comin' to town. 'E knows just when yer lootin'. 'E knows when you're a flake. 'E knows if you follow gork or mork, So be brutal for cunning's sake. Oh, you better watch out, you better not whine, 'E'll punch out yer snout, he'll rip out yer spine. Santa Klawz is comin' to town! I'll try to get better pictures after I get back home from the holidays.
|
|
#
?
Dec 21, 2014 10:06
|
|

|
This is awesome. You're awesome.
|
|
#
?
Dec 21, 2014 10:13
|
|

|
Almost done with my Tetras. Just got finish the udders inside. Also did up thier flying base because I'm not a big fan of the transparent. C&C welcome.  
|
|
#
?
Dec 21, 2014 16:54
|
|

|
Frobbe posted:EDIT: might as well also ask here, does anyone have a source on track guards like on my chimera up there? i don't really feel like buying the tank upgrade sprue just for those. Looks like as good a time as any to try your hand at scratchbuilding: a cutting mat, a sharp scalpel, straight edge and some 2mm plasticard should sort you for those - you can use cereal-box card for the reinforcing strips - for the rivets you might need to spring for some photo-etch, greenstuff or styrene rod.
|
|
#
?
Dec 21, 2014 18:48
|
|

|
Decided to take more pictures now.    
|
|
#
?
Dec 21, 2014 21:37
|
|
|
Feeling smug today. Went to a Antiques market this morning, in a nearby town. Guy was selling the Kevin Dallimore Foundry Painting guide for �3.50. Beat him down to �3. http://www.amazon.co.uk/Foundry-Miniatures-Painting-Modelling-Guide/dp/1901543137/ref=pd_cp_b_2
|
|
#
?
Dec 21, 2014 22:15
|
|

|
That's a great deal. Related question. Besides the FW masterclass books are there any other painting books I should look into to step up my painting game? BULBASAUR fucked around with this message at 00:20 on Dec 22, 2014 |
|
#
?
Dec 22, 2014 00:10
|
|


|
BULBASAUR posted:That's a great deal. http://www.euromodelismo.com/shop1/en/ http://www.kitmaniamodels.com/euromodelismo-monograph-painting-overhead-lighting-ii-acrylics.html
|
|
#
?
Dec 22, 2014 00:24
|
|

|
I've painted up my first base of 6mm Roman Cavalry, and I like the look of them alot. Unfortunately, the molded-in base of the horse is about 1.5mm thick - so I'm of two minds: one is to simply glue to the unit-base and then judicously apply flock and scatter to hide the humps under the mans, the other is to lay a layer of ready-mix filler onto the base and press the cav into it. I'm up for suggestion!
|
|
#
?
Dec 22, 2014 00:51
|
|
|
Southern Heel posted:I've painted up my first base of 6mm Roman Cavalry, and I like the look of them alot. Unfortunately, the molded-in base of the horse is about 1.5mm thick - so I'm of two minds: one is to simply glue to the unit-base and then judicously apply flock and scatter to hide the humps under the mans, the other is to lay a layer of ready-mix filler onto the base and press the cav into it. I'm up for suggestion! Pummice and silicone also work. I just make a mixture of sand and PVA glue and smear it down.
|
|
#
?
Dec 22, 2014 00:56
|
|
|
After you flock it up, you shouldn't even be able to notice. These are some 10mm Vikings I did, and they're all standing on a similarly sized lead humps. Make the ground a neutral lumpy thing, and your eyes will get drawn to the figures instead.
|
|
#
?
Dec 22, 2014 01:02
|
|


|
Southern Heel posted:I've painted up my first base of 6mm Roman Cavalry, and I like the look of them alot. Unfortunately, the molded-in base of the horse is about 1.5mm thick - so I'm of two minds: one is to simply glue to the unit-base and then judicously apply flock and scatter to hide the humps under the mans, the other is to lay a layer of ready-mix filler onto the base and press the cav into it. I'm up for suggestion! Dremel rotary grinder bit, grind the hell of that base to 30% size. That's what I did with my lovely 15mm cavalry.
|
|
#
?
Dec 22, 2014 01:53
|
|
|
I got a couple of old metal Dark Elves Hydras and I've been trying to glue the heads for a while and I just can't do it. I managed to glue 2 heads on each Hydra, but the rest keep fallin off or just don't stick, to the point I think I'm doing harm to the model (because of the glue that remains after each failed attempt). Any suggestions? I'm using the same super glue that I've used for other metal models before but it just doesn't work.
|
|
#
?
Dec 22, 2014 02:32
|
|

|
Wash the areas thoroughly. If it still won't stick, score the areas with a knife to give the glue something to hold.
|
|
#
?
Dec 22, 2014 02:47
|
|
|
File off all of the old glue, score the areas and pin the heads to the necks. Attach the heads with superglue and epoxy putty, using the excess putty to blend the head and neck joint together.
|
|
#
?
Dec 22, 2014 07:53
|
|


|
moths posted:After you flock it up, you shouldn't even be able to notice. Yeah, flock and sand them and people won't even notice.   For anyone who hasn't seen a 6mm unbased.  
|
|
#
?
Dec 22, 2014 09:40
|
|
|
I put down some spackle on the base and push the strips into them. Then I glue on some fine sand with PVA glue, and finally I put on some flock or short static grass. It covers it up pretty well. On these I haven't put on flock/static grass yet but they are still quite ok for tabletop use: 
|
|
#
?
Dec 22, 2014 12:15
|
|

|
Right, how do you guys make sure you don't get PVA all over the models? I've clipped apart and arranged a stand of cavalry, and the gaps between the legs/etc. are so small.
|
|
#
?
Dec 22, 2014 13:19
|
|
|
Sharpened toothpicks and getting the excess sand/flock off before the glue dries.
|
|
#
?
Dec 22, 2014 13:21
|
|
|
I use a (cheap) relatively fine brush to put it on. Also, I don't bother trying to get flock or sand between the legs of the horses, as you can't tell the difference just by looking at them.
|
|
#
?
Dec 22, 2014 13:22
|
|
|
I use brushes that I have damaged so much that they no longer hold a point, and are useless for most painting.
|
|
#
?
Dec 22, 2014 13:26
|
|
|
Cross-post from the 40K thread, I've got 2 weeks off before an Apocalypse game at Warhammer World and have been working on Dark Eldar Khymera and Grotesque conversions for the past couple of days: I've been working on them all day, converting old and new Vampire Counts Dire Wolves:   You can't see the tentacle things on the backs that great in this picture I've also been converting loads of Rackham models into Grotesques, thanks to suggestions from Justin on Ghost Hand's podcast:  The original model (actually pretty nice models, each set of legs and arms are different, with many heads to choose from)  Cut off one weapon and laying out how the models will be assembled  Adding the neck and back muscle-things  modifying half of the models to put them in a running pose   Using Instant Mold to make an extra hand and couple of helmets, the Talos model I got from the TG Secret Santa was great for all the bitz  The models that have a changed pose - the 2 on the left are still standing but are much taller than the unchanged models.  The one with its leg on the block of Instant Mold will have one leg on a pile of skinned corpses That makes 9 Grotesques, and for 5 of them I'll need to make some sort of kilt/loincloth thing for the rear because they are werewolves or something so I've chopped off much of the tails and I want to cover them up. I have a couple of WHFB Rat Ogres coming this week that will be converted as well.
|
|
#
?
Dec 22, 2014 20:50
|
|

|
Soo...first time posting on the Big Scary Thread for me. I could do with soome input/advice  As a bit of background, I have recently been lured back down the rabbit hole of wargaming and model painting (after about 15 years away) and am starting up a PHR army for Dropzone Commander. I'm looking for some advice/input on my colour scheme, I'm trying to keep it simple and subtle. I started with the vague idea of urban camo and went down a two-tone grey path. My concern is that I am at risk of mastering 'urban camo' to the point where my army may blend into the tabletop and be very missable. While I might win more games if the enemy can't tell where my units are, I think I'd rather have a cool-looking set of models! So, I'm looking for some pointers on my progress so far. Does this scheme work for you? What could/should I do next?   There are some angles in an album here: http://s37.photobucket.com/user/Ugleb/library/The%20Oath%20Thread/PHR%20Colour%20Test I'm going to be taking this army to a tournament at the start of Febuary (hopefully all painted!) and would like them to look good. So please, feedback would be very welcome!
|
|
#
?
Dec 22, 2014 23:53
|
|

|
Did some nebula bases for my Firestorm Armada stuff, these are just two of several dozen. Surprisingly easy. Some Giant Tonks for Flames of War, these were my first attempts at using weathering washes (rust, oil, etc... not just Army painter DIP) and pigments. My attempt at Zentalhal highlighting was totally obliterated by the weathering so pro-tip, make sure the highlight is rather extreme before weathering. 
|
|
#
?
Dec 23, 2014 07:45
|
|

|

|
| # ? Jun 4, 2024 21:34 |
|
|
Ugleb posted:Soo...first time posting on the Big Scary Thread for me. I could do with soome input/advice I might to a test model where you replace the darker grey with a green-grey/olive, king of like number 101off this chart http://cdn.acrylicosvallejo.com/96921f6a542f9c4908aacc121b259cc0/Carta_ModelColor_rev01.pdf
|
|
#
?
Dec 23, 2014 08:02
|
|