|
I'd forgotten how drat weird Fire Emblem threads always get.
|
 #
?
Mar 6, 2015 22:16
#
?
Mar 6, 2015 22:16
|
|


|

|
| # ? Apr 19, 2024 04:15 |
|
|
This? This is loving tame. When someone starts asking about LPer fanfiction, that's when poo poo's gone weird.
|
|
#
?
Mar 6, 2015 22:30
|
|

|
But we're on the way now. Two pages ago we weren't on the way. The dams were holding. Now it's inevitable.
|
|
#
?
Mar 6, 2015 22:34
|
|
|
Sorites posted:But we're on the way now. Two pages ago we weren't on the way. The dams were holding.  Edit: Geop's Wind Waker LP is doing sea shanties.
|
|
#
?
Mar 6, 2015 22:57
|
|


|
Nihilarian posted:Edit: Geop's Wind Waker LP is doing sea shanties. This is easily my favourite point raised in an argument throughout my whole time on these forums.
|
|
#
?
Mar 6, 2015 23:22
|
|
|
Alright then everyone, the time has come! It is time I gave you my step-by-step guide to maxing all the ranks in Lyn mode, getting Nils to Level 7, and somehow breaking Lyn's story even harder than Melth did in the process! So then, before we go onto the chapters themselves, let's go over the way this game determines chance, shall we? Now, to determine things like whether or not a character misses on a 74% chance of hitting someone, or whether someone gets 7 stats or no stats on a level up, this game uses a long series of random numbers that it generates when you start up the game. And of course, Melth has already gone over how two RN's (random numbers) are used to hit someone (and the following implications that that has on how you should read the percentages), but of course, things are much more involved than just that, and we're going to need to cover the rest of how randomness works in this game if you're going to understand anything I'm doing, and why it works. So then, first of all, the basic stuff. In addition to using two RN's to decide if your blow does or doesn't land, the game also uses RN's for other things. Firstly, if the game decides that if you managed to hit your enemy, it will then use another RN to decide if your attack is a critical or not. And if your Critical Hit% is higher or equal to whatever RN the game brings up, you will score a critical hit! And then, if and only if you actually get a critical hit, the game will then use yet another RN to decide if that critical hit becomes a Silencer critical, even if your class is NOT an assassin. In addition, the game does not have separate lists of RN's dedicated only to level ups, or dedicated only to combat, or anything like that. No, when you boot up your game, the game just generates one extremely long list of numbers, and then uses that list to determine everything. So essentially, in any single round of combat, you will always burn at least two RN's, even if you just whiff one Javelin throw on a dodgy enemy or whatever. Or, you might burn 8-10 RN's depending on how fast you are compared to your enemy. And if you're both wielding Brave Weapons, and you have 4 more AS than your enemy, you can burn as many as 36 RN's in a single round (assuming of course, that all of you and your opponents attacks, with all of them being criticals that you both somehow survived). So, how is any of this relevant? "Who cares?" you might ask. Well, here's the thing. You see, when you turn on your game, and it loads up it's long list of numbers...the numbers on that list are NOT random. Instead, the list is a pre-determined list that the game always uses when you start up your game. So if you turn your console on, that list will ALWAYS start the same way it did as the last 105 times you turned it on! Now, it won't do that if you use the A + B + Start + Select reset trick (which we will refer to as a "soft reset" from this time forward). No, you will still be on the same spot on the list that you were before the reset. And if you choose to "Resume Chapter", the game will remember where you were at on the list before you left, and return things to the way you were. BUT, if you actually turn off your game then turn it back on (which we will call a "hard reset"), then you will return right back to the very beginning of the list, at the same spot, every time. And what that means is, assuming you always clear a chapter the exact way, with the exact same characters, with the exact same movements, and the exact everything else, and do a Hard Reset before each run...you will always...always...ALWAYS, get the same results each and every time. So we're going to be doing exactly that. Let us begin! And remember... Hard Reset=Turn off your game then turn it back on. Soft Reset=Use the A + B + Start + Select reset trick. 2 RN's are used for hitting enemy. 1 RN checks for criticals if your attack lands 1 RN checks for Silencers if you get a critical (even on non-assassins who don't have that skill) 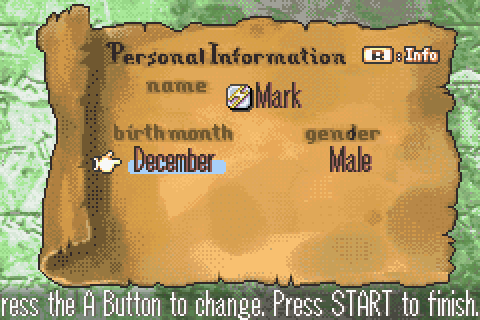 Here's my affinity if you're curious. I have never S-Ranked Hector Hard Mode before, so if Melth thinks this affinity is best, who am I to argue  ? Anyways... ? Anyways...Prologue (5 Turns): 1: Go 3 up and 2 left. 2: Go west without attacking. 3: Attack Batta from the east. 4: Finish him! 5: You are winner! Those there are my written notes for which exact sequence of moves will get us what we want. Note that you do have to go 3 up and 2 left on turn 1, because the game also uses RN's to determine how exactly enemies move. For example... 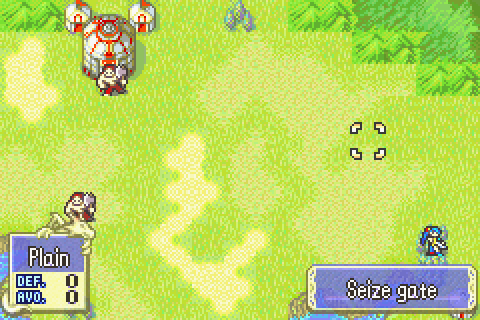 Let's say that there was an enemy standing in the exact same spot that Lyn is standing in right now, and it wants to move to where the cursor is. Well, there are multiple ways that the enemy could do that. It could move like this... 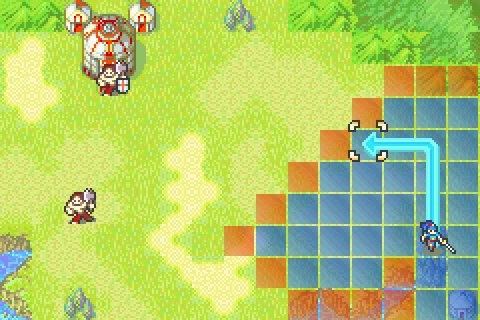 Or it could move like this... 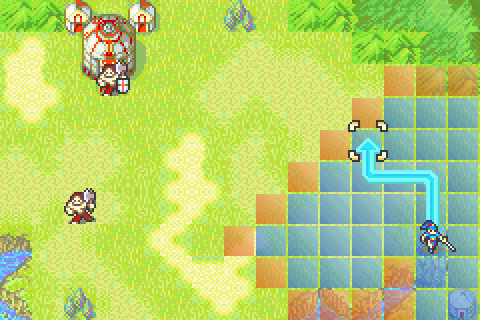 Or perhaps it could move like this... 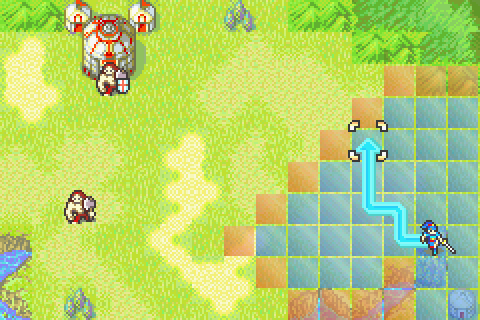 And so on and so forth. But in addition to burning RN's to decide which exact path the enemy takes to where it's going, the game also uses RN's to decide where the enemy moves relative to where you are. So let's say that the brigand here is only 4 spaces southwest of Lyn, and it wants to move closer to her. It can't reach her, so what does it do? Does it go 4 spaces north and 1 space east? Or would it go 4 spaces east, and 1 space north? Or perhaps it would go 3 spaces north, and 2 spaces east? The game uses the same list of RN's to determine which of these equally viable actions an enemy would take, and in this way, even little things like how exactly you move end up playing a role in how many RN's are burnt on the Enemy Phase. So when you read the instructions that I post for each chapter, you'll generally want to follow them very carefully. Speaking of which... 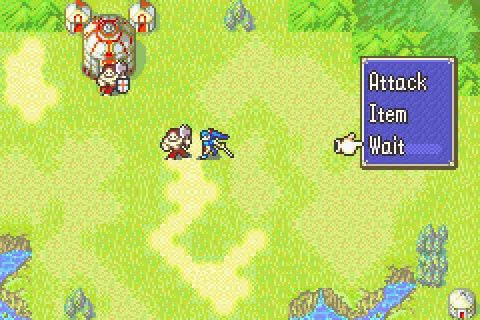 Whenever you find an instruction like "Go west without attacking", and I don't specify just how far west you're supposed to go, that means that I'm telling you to go as far west as you possibly can, just I want the instructions to be as concise as possible, so I won't actually say "go all the way west" when I'm expecting you to do just that. 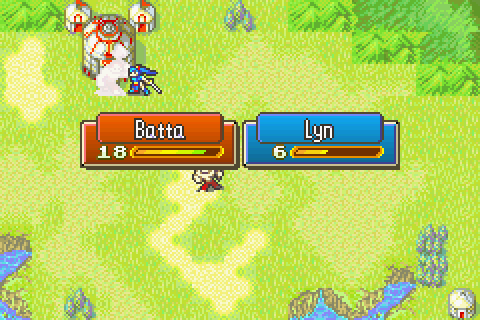 Now look at this mess I've gotten myself into! I am literally attacking a full health Batta, with only 6 HP, on the Player Phase. This move would be tantamount to suicide in any normal playthrough. But if you follow my instructions, not only will Lyn not die... 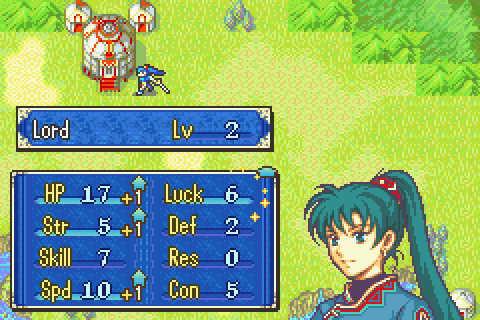 But she'll even get an awesome level out of it! In fact, my instructions are specifically designed to give awesome levels every time you level up, for everyone, not just Sain (though he gets slightly better levels than everyone else anyways). So then, before we go to the next chapter...  ALWAYS do a hard reset on your game before every chapter (except for Chapter 5). These notes are specifically designed to be as easy to pull off as possible, so if you botch something on a Chapter, you won't have to restart your entire run just for everything to go right. Just do a Hard Reset, and presto! You're still good to go! So, on to Chapter 1... Chapter 1 (5 Turns): 1: Kent attacks brigand w/lance from below, Lyn gives a sword to Sain from the east, then Sain attacks from above with lance. 2: Sain 3 east while equipping sword, Kent gives sword to Lyn. 3: Sain 2 east and 2 north. 4: Sain attacks Zugu. 5: Sain kills Zugu with sword, Kent 3 east w/lance. Here you will see the first, but certainly not the last, instance of attacking axe users with lances, not just to preserve the funds rank, but because things can go slightly different depending on if the enemy hits or does not hit your character during combat. In this case, that could be the difference between 5 RN's being burnt, or 6 RN's being burnt, which means we might not get levels like this! 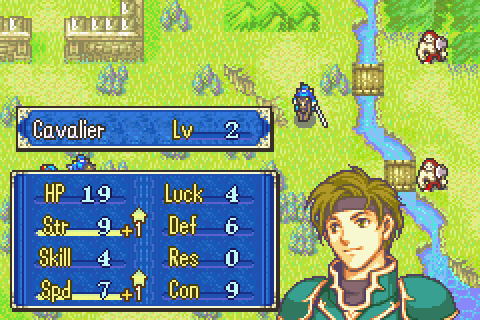 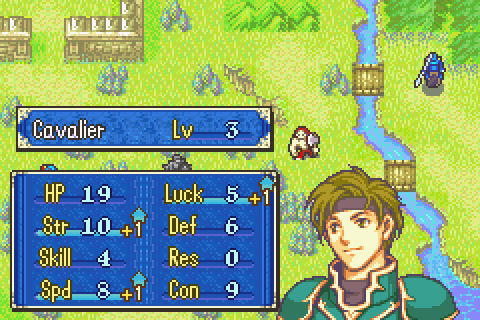 Ok, so they may not seem like the greatest levels ever...but actually, it's very important that we get a lot of Strength and Speed. Strength, so that units like Florina, Kent, and Lyn can ORKO enemies they otherwise wouldn't be able to (and therefore helping your Combat score). So for example, Sain needs at least 9 Speed to double brigands on Chapter 4, everyone needs 12 Speed to double mercenaries, and Flor needs 9 Strength and 13 Speed so she can instantly kill cavalries with an Iron Lance on Chapter 10. And if we're looking at these units joining in on Hector Hard Mode, Lyn needs at least 10 Strength in order to ORKO mercenaries on Chapter 16, even if they spawn with maximum defensive stats. So these Strength and Speed levels are actually very important to get, even if they come at the cost of other stats (though don't worry, our characters don't end up glass cannons ") ). ).So then, Chapter 2... Chapter 2 (4 Turns): 1: Sain into forest w/lance, Kent and Lyn outside enemy range. 2: Attack wall with Sain's lance, and put Lyn and Kent next to Sain. 3: Break down wall with lance, Attack east brigand with Lyn, put Kent 2 west of Glass, 4: Kent weakens boss, Sain kills him. Then Lyn trades Sain her sword in return for his Vulnerary and captures throne. Not much to say about this one. So, moving on... Chapter 3 (3 Turns): 1: Lyn gets Wil, Wil attacks archer, Kent kills archer w/lance, Flor get and flies 2 west of forest, then Sain gives Flor his Iron Lance and dumps Lyn onto forest. 2: Sain OHKOs archer, Lyn kills merc, Kent trades his Iron Lance for Sain's 30 use Iron Sword then heads for shop while Flor gives Vulnerary to Wil and prepares to take village next turn without aggroing merc. 3: Flor gets money, Kent buys Iron Lance and Sword, Lyn kills merc, and Sain attacks Miguel. First of all, Turn 1 of this chapter is kind of interesting in the strategy you use to low turn it. I don't talk about the strategies that go into most of the Chapters since many of them can be summed up as "go all out while sometimes doing seemingly pointless things"...but this one is an exception. 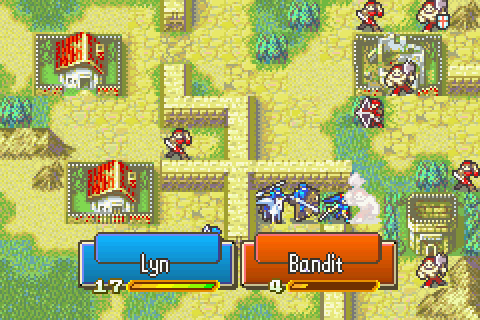 See, in order to beat this in 3 turns, you either have to rescue drop Sain (or someone else strong) over the walls, or you have to drop someone like Lyn on the forest here. Otherwise, if you can't mow down most of the enemies on Turn 1, they're just going to end up clogging the passageway, and making it impossible to get to Miguel on time. In other news, Kent gets to buy a new Iron Lance, and everyone gets to have awesome level ups... 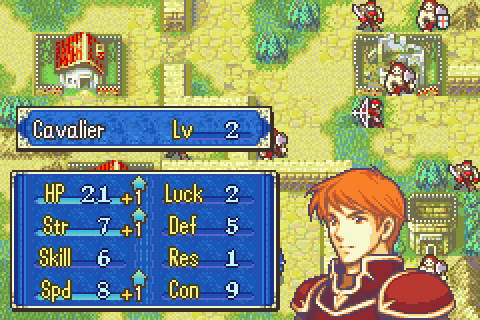 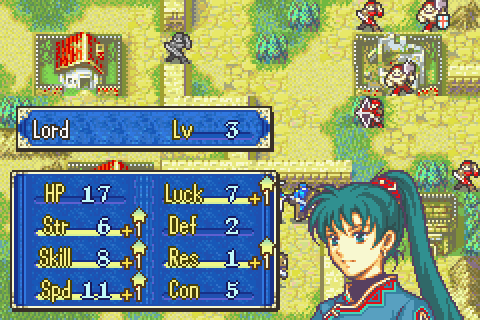 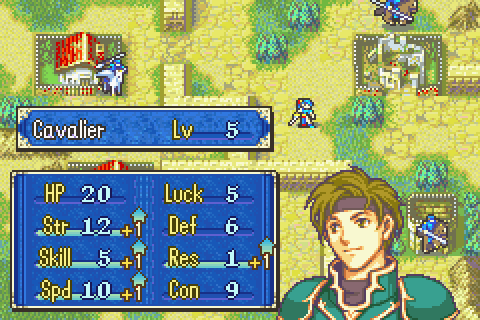 Really, that's one of the most awesome things about following my notes. Not only do you get these awesome level ups, but, because the Lyn Mode maps are so simple, following a step-by-step guide is WAY easier than it otherwise would be if we were on one of the later maps. In fact, they're really not even that hard to do even WITHOUT having to look at them! I myself can go through multiple chapters without ever having to look them up, something I'd never be able to do if I were on, say, Cog of Destiny. That being said though... Chapter 4 (8 Turns): 1: Sain 3 west and 4 south to kill Brigand, Lyn below Wil, Flor east of Lyn, Wil goes northwest, Kent 1 northwest of Lyn. 2: Kent kills west archer from above w/lance, Sain kills east archer w/lance, Wil hits merc, Dorcas and Flor hide behind Lyn. 3: Flor equips Iron Lance and goes 3 south and 1 east from northern merc. Kent 2 northwest, Lyn 3 south of Flor. 4: Flor attacks north merc from below, Kent kills merc with Iron Sword. 5: Kent kills brigand w/sword, Flor attacks. 6: Flor attacks. 7: Flor attacks, Sain attacks w/sword, Kent kills full health brigand. 8: Stupid game mechanics quirk! This chapter here is where things start getting a little harder, just because now you start having to do things in a specific order to get what you want. For example, on Turn 5, if Florina attacks her enemy before Kent attacks his, Kent won't get the awesome level that he's supposed to. So that starts making things a little more complicated. Not only that, but then there's Chapter 5... Chapter 5: (WARNING! DO NOT HARD RESET AFTER CHAPTER 4! IN FACT, MAKE SLOTS FOR CHAPTERS 4 AND 5!) 1: Sain kills archer w/lance, Kent goes into forest 1 northeast w/lance, Lyn recruits Serra and Erk, then Flor rescues Lyn and goes east. 2: Sain 3 northeast w/sword, Flor drops Lyn on forest north of Bug. 3: Flor buys two Javelins while Sain buys one Javelin. Lyn kills archer, and Kent kills brigand. Yes, Chapter 5, the one chapter where you are NOT supposed to do a Hard Reset, because otherwise, I couldn't guarantee a good level for everyone. Fortunately, Chapter 5 itself is extremely simple and straightforward, but coming off the heels of Chapter 4, it can be tremendously scary. After all, if you mess up just once, you have to start Chapter 4 all over again! You don't just get to restart Chapter 5 like you can with all the other Chapters with these instructions! Also, here we get a glimpse into why we've been doing so much inventory management up until now. See, not only does Sain need to have room for the extra weapon he gets, but he also needs room in order to buy his fancy new Javelin. And Florina also needs to have enough room to get herself two Javelins, otherwise, you start running into all kinds of problems. And fortunately, that ends up becoming somewhat of a non-issue once Chapter 7 rolls around, but until then, some chapters can really bite you if you're not careful. So that's that...now then, let's talk about Serra for a bit...  After everything is all said and done, we are actually going to end up just short of the Exp. requirement after Chapter 10, so there's two ways that we can make up for that deficit. One, we can have someone like, say, Kent, kill some enemies on Chapter 10 or perhaps take a few extra turns on Chapter 9. However, what I personally prefer to do is to have Serra spam her Heal staff on Chapter 10 instead. This is because everyone but Sain generally needs to use two whacks of whatever weapon they're using to kill an enemy. So unless you're using an Iron Lance (and most users of that are going to be pretty high leveled anyway, so they won't get much Exp.) or an Iron Axe (and Dorcas kind of stinks), it actually ends up being slightly more expensive to kill an enemy that it is to just use a Heal Staff. And, most importantly, I find it WAY easier remembering to just to have Serra heal Nils on Chapter 10 than I do remembering yet more steps about how "Sain needs to kill this guy before Kent kills that guy so that Lyn can critical that guy" and etc. So, for our purposes, you'll want to have her heal some people whenever you get a convenient opportunity to do so, even if my instructions don't say to do that. Just so you know ") . .Chapter 6: (Dorcas and Erk do nothing. They aren't needed) 1: Have Kent get Door Key and go 3 east of Sain, then have Flor trade one of her Javelin's for Kent's Door Key while going east. Have Lyn, Matthew, and Rath do Normal Mode stuff, and have Wil, Serra, and Sain go closer to the castle while the others get away from the enemies. 2: Sain kills soldier with Iron Sword, Matthew gets chest, Flor waits next to soldier, and have the main group go into the castle (with Rath and Kent helping to get Lyn into castle, so you won't have to remember to move her on Turn 3). 3: Have Flor open door and go up to soldier, have Sain open door for Matthew, and have Matthew get into position to get Armorslayer next turn. 4: Flor and Matthew do their thing, Sain hits Bool, Lyn kills archer, Wil hits Bool, and Kent finishes him off. At this point, you start getting a lot of units, so from here on out, I include notes about who is and is not needed, that way things are slightly easier to remember. Also, since this is a really Florina centric level... 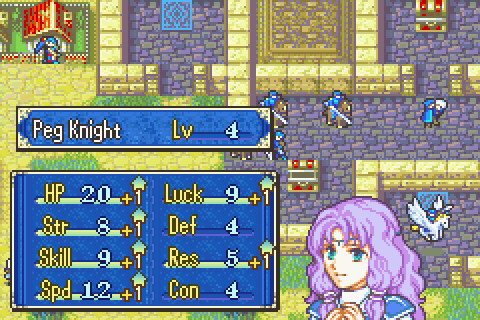 I figured I'd show you all how she's getting along. As you can she, I am putting her down the same path that Sain is headed in, turning her into a killing machine that can just murder anything and everything she comes across! In fact, just like an early promoted Sain, a power-leveled Florina is also a tremendous boon to have going into the other modes, just because not only can she fight, but she can ALSO fly! And she'll even have a low level to boot, so she's also pumping the experience rank by murdering things. Like Raven! So I especially put some effort into raising her. Now then, that's enough about good units...now let's talk about bad units... 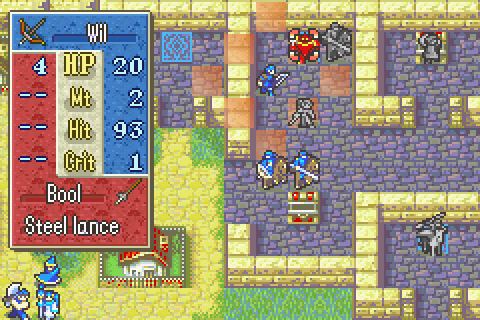 See this? Yes, Wil is literally so weak, that he is the only one who cannot kill Bool, even after Sain himself attacks him! Because of this, he gets the...dubious honor of being the one who made this strategy possible. And Dorcas is similarly useless, so because of this, I consign them to a little job I like to refer to as "Keeper of the Vulneraries". 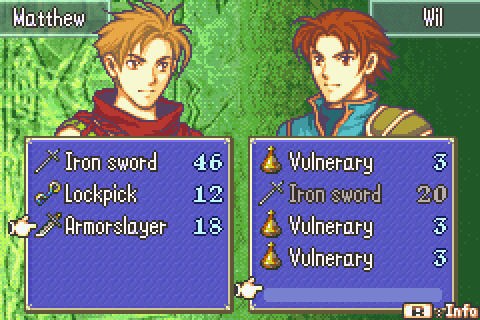 Yes, all that useless junk that we're never going to use needs to go somewhere. So why not unload them on those two? They're not doing anything but warming the bench after Chapter 6, so we may as well find something for them to do. And of course, Serra gets to have this honor as well, but only because she's not getting anything from enemies, so you don't risk losing anything. Chapter 7: (Units Used: Lyn, Sain, Kent, and Flor) 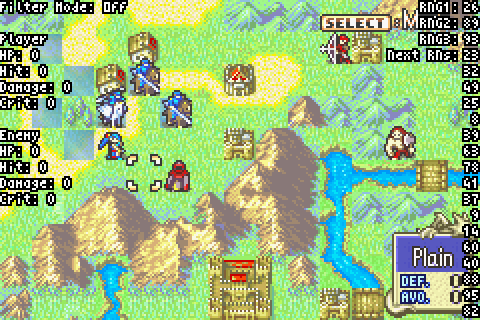 1: Kent kills archer w/lance, Lyn kills Shaman, Sain equips Javelin and gets picked up by Flor, Flor goes on fort, Nils dances for her, then Flor drops Sain south onto fortress, with both wearing Javelins. 2: Burn an RN with Lucius using secret method, kill shaman with Sain, have Lyn kill bandit with Nils's help, and have Kent go past Lyn. 3: Have Kent get Pure Water, have Nils dance, have Flor kill bandit, and have Sain wait in front of Heintz w/lance. From now on, I'll be uploading screenshots of my starting formation to help you all out. Also... 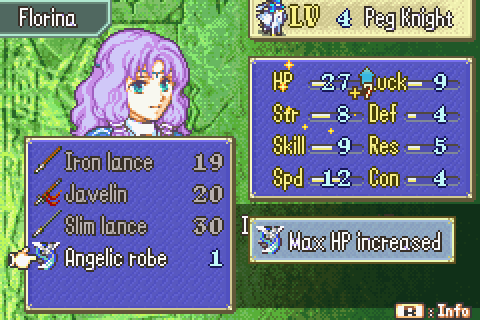 Florina gets to eat an Angelic Robe. So that's pretty awesome. Now, on Turn 2, I tell you to burn an RN. Manually, without engaging enemies or anything. How do we do that? Well, let me show you... 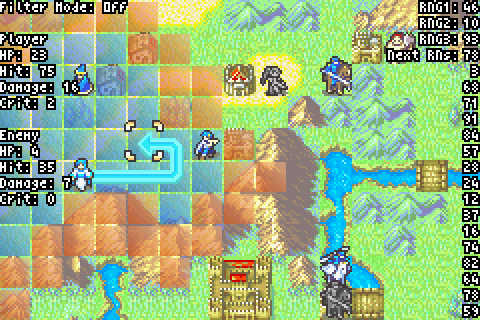 See those numbers there? Right now, I'm using this lua script here, on an emulator by TASForums specifically designed to use such scripts, to show you where I am at on the list of RN's. Now, see how I've drawn that arrow? Let's see what happens when I move it one more space to the left... 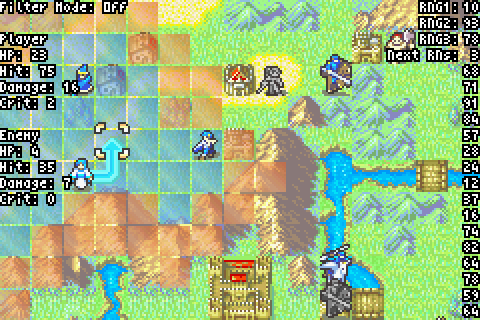 BAM! See what happened? We just burned an RN by forcing the blue arrow to redraw itself! See, because Lucius only has 5 Move, his blue arrow can't go any longer than five spaces, and by doing what I did, I forced it to try and do something that it would've needed to be six spaces long in order to do. So to resolve that conflict, the game was forced to redraw the arrow. Now, that in and of itself doesn't burn an RN. What DOES burn an RN though, is the game trying to pick between two valid options for how the arrow should move in order to go 1 northeast of Lucius. Just as it went 1 east then 1 north, it could just have easily done 1 north, and THEN one east instead. So to resolve that conflict, it had to burn an RN to decide what it wanted to do... So, if you ever see a Fire Emblem TAS, this is why TASers are constantly moving their arrows around, that way, they can burn RN's. However, for our purposes, this is the one and only time where the instructions ever tell you to do this. Other than that, I tried to stay away from using this method as much as possible, just because it would be impossible to remember. So moving on... Chapter 7x: (Units Used: Lyn, Sain, Kent, Flor, Erk, Rath, Nils, and Lucius) 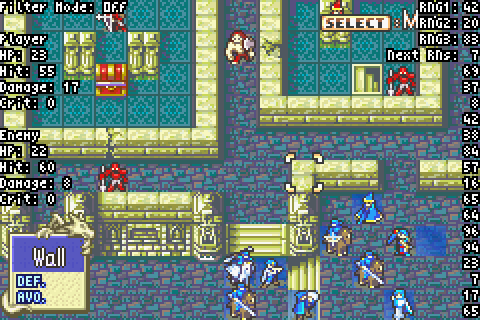 1: Erk kills soldier, Florina kills soldier with Javelin, Matthew moves west for Nils to dance him (with Nils himself being just east of Flor). Put Matthew just west of Flor, position Kent to kill brigand on counter-attack w/sword, get Sain next to Nils and Kent, put Rath next to Kent, move Lyn west as far as she can, move Lucius below Lyn. 2: Sain breaks wall, Matthew steals Vulnerary, Nils take Matthews Vulnerary and dances for him, Flor kills the archer, Erk south of Rath, Lyn west of Rath, Kent above Nils, and Lyn goes up as far as she can. 3: Matthew steals Vulnerary, Flor kills soldier, Nils dances for Flor, Kent goes 2 west of Flor, Rath rescues Matthew and goes above Sain, then Sain drops Matthew onto chest and stops 1 space south of Kent. Lucius kills cavalry, Erk goes east, and Lyn goes up. 4: Erk kills soldier, Lyn moves 1 space up, Sain kills Beyard from a distance with Javelin, Matthew steals from above, Nils dances for him from above, Matthew gets chest, Kent OHKOes thief from above, Rath rescues Matthew and goes 6 north, Flor makes sure Matthew has an open slot, drops him east, then goes to the right of Matthew. 5) Matthew steals Vulnerary with help from Nils, Flor rescues Matthew and goes west, then Lyn goes below Flor to kill merc on counterattack. Now THIS one has a strategy that I'm particular fond of. There's a TAS for S-Ranking Lyn Mode out right now, and that TAS also steals all the Vulneraries just like Melth did. So my strategy is mostly an adaptation of that, except, instead of getting Matthew to crit like the TAS did, I found a way so that it wouldn't be needed. Also...  I didn't get a snapshot of it, but even Kent can kill thieves in one hit now! So even Kent gets to join in on the level up bonanza! 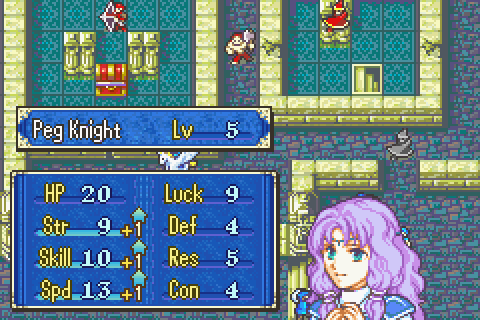 And of course, Florina has now hit all of the benchmarks she needs to hit. In fact, pretty much EVERYONE has, so if you really wanted to, you could just ignore the instructions from here on out after beating Chapter 7x. The only thing you'd miss out on if you did are about 4 more awesome levels for Sain (including 3 points of Defense), three more awesome levels for Florina, and a particular good one for Lyn that skips her Speed, but boosts her HP and Defense in addition to her Strength. I of course, decided to set up more instructions for the next three chapters anyways...but I'm sure you could get away with not following them if you don't feel like breaking the game too much, or if all this is tedious, or anything like that, because you're already strong enough to ORKO anything you want to. So Combat won't be a problem. But, if you DO decide to follow the future instructions, then make sure that you do NOT have Nils dance on one of the turns between Chapter 7 and Chapter 8, so that he only has 70 Exp. when he starts Chapter 8. Otherwise, he'll get a level at an inopportune time, and that'll throw everything off (because you see, when I was making these, I forgot to have him dance on one of the turns). Anyways, onto Chapter 8... Chapter 8: (Units Used: Lyn, Sain, Kent, Flor, Nils and Lucius) 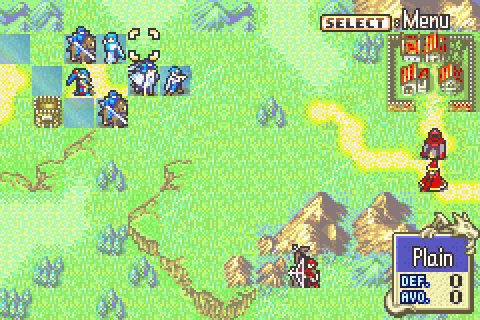 1: Sain equips Iron Lance and moves up to Flor. Then Flor equips Iron Lance and rescues Sain before going 4 south and 3 east. Then Nils dances for Flor from above, Flor drops Sain onto forest and goes north, Kent goes south (outside of merc range), and Lyn and Lucius go east. 2: Lucius goes east to get Lancereaver next turn, Flor kills ballistae man from where Nils can reach her, Sain goes next to Yogi and attacks soldier w/sword, Nils helps Flor kill archer, and Kent goes south. 3: Sain goes onto western bridge, Kent goes southeast w/lance to kill brigand on counter, Lyn kills both mages with Nil's help, and Lucius gets Lancereaver. If you want to, you could also use Lyn instead of Sain to own all the enemies, however, I kept finding that Lyn would either die, or not get the kind of level up I wanted. So that's why I used Sain here. Other than that, not much else to say here, other than that again, you'll want Nils to enter this with only 70 Exp. if you want this to work. Sorry  Chapter 9: (Units Used: Lyn, Sain, Kent, Flor, Rath, Nils, and Lucius) 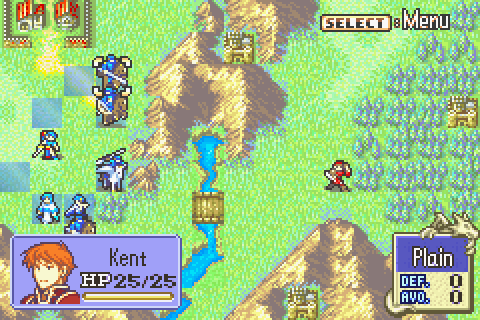 1: Flor rescues Lyn and goes 1 east past bridge, Nils dances for Flor, Flor drops Lyn to the right, and then Flor goes 1 north and 6 east. Sain goes 1 east of Nils, Rath goes 1 west of Nils, Lucius goes into southernmost forest. 2: Lucius attacks brigand, Nils helps Sain attack Eagler from range, Rath rescues Nils and goes east, Flor drops Nils east and goes one space above him. Finally, Kent kills soldier. 3: Lucius attacks brigand so that Sain gets an awesome level up from Eagler! Then Flor kills brigand, and Lyn seizes with Nil's help! Nothing new here either, although I will say that this chapter was an absolutely NIGHTMARE to try and find something for. Also... 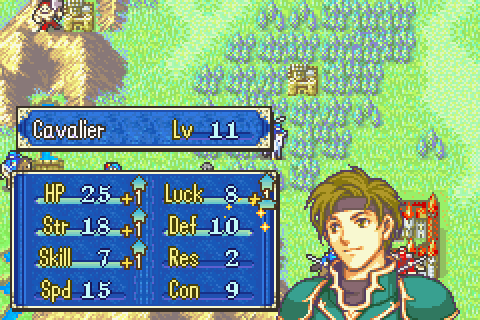 See this? This is the one and only time where I got a level without Speed and Strength, but accepted it anyways. After all, Defense is pretty awesome. And of course... 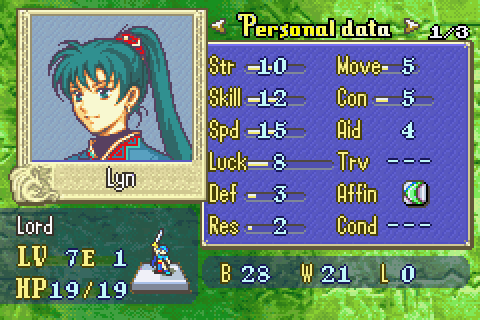 Lyn gets her own HP and Defense level, complete with Strength and Speed as well! Unfortunately, I didn't get the exact snapshot of that, so instead, I decided to show you how she leaves this mode. Yes, her Level in Chapter 9 is the last level she gets with my strats, but it certainly isn't the least. Now, according to my calculations, she can ORKO even the sturdiest enemies on Chapter 16 now! And she only had to sacrifice 1 HP to do it! Now then, final chapter! Chapter 10: (Units Used: Lyn, Sain, Nils and Wallace): 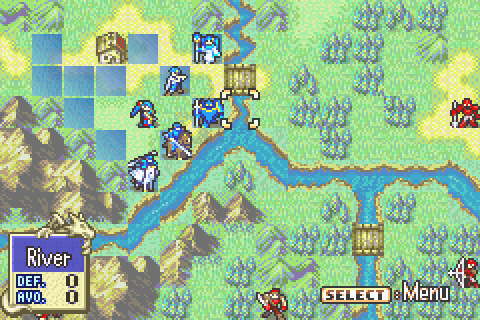 1: Flor goes 6 south with Javelin, Nils 2 east of bridge, Wallace on bridge, Serra 2 west of Wallace. 2: Flor goes east and equips Slim Lance. 3-4: Flor kills shaman and gets Energy Ring before heading west. 5: Flor goes south of merc, equips Slim Lance, and uses Energy Ring. 6: Flor goes on middle fort and equips Iron Lance. 7-9: Flor waits, and Lyn heads into rivers. 10: Flor buys Heavy Lance. 11: Flor gets just outside range of knight. 12: Flor kills knight with Iron Lance 13-15: Flor gets Sain (and gives him her Heavy Spear), then drops him off. 16: Sain gets Heavy Spear and runs right below Lundgren while equipping it. Flor goes to get Lyn. 17: Sain finishes off Lundgren with Heavy Spear for another awesome level. 18-20: Passing turns... 21-36: Move Nils left onto a Plains tile (so that Serra can get more Staff Exp.), and...do stuff. This chapter here is my personal favorite from the whole story, for a variety of reasons. First, the Energy Ring is awesome, and due to my lesser Funds, I get to use that and the Angelic Robe instead of the Knights Crest + Angelic Robe. So Florina's even more of a murder machine than she was before. Secondly, despite how long this chapter is, so little actually goes on, that it's actually pretty easy to remember what you have to do. And because of that, it's not even that hard to get your awesome level ups here. Then of course, there's the grand strategy. 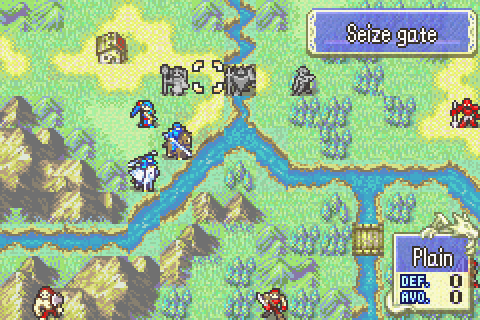 See this formation here? This ensures that Nils cannot die in one Enemy Phase by pumping his already insane avoid to ludicrous levels (well, relative to the enemies anyway). And he's going to be facing many Enemy Phases where four enemies are attacking him at once, that way, he's getting 14 Experience per turn, and not just 10! So, in order to keep him alive, all you have to do is have Serra heal him whenever he's hurt... 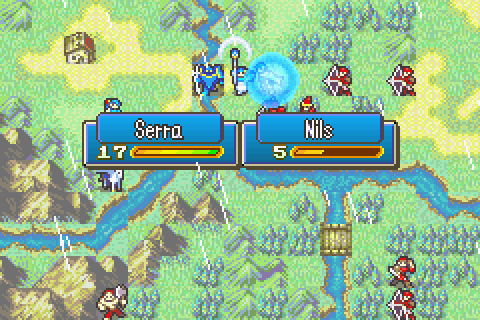 Like so... 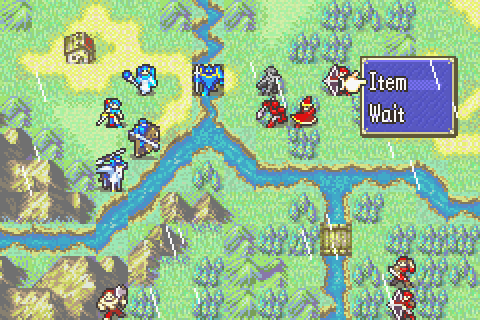 Then once Nils dances for Serra, BLAM! She goes right back to where she was before! And of course, Wallace is basically invincible, so nothing's ever getting past him. And then once Turn 21 comes around, just move Nils and Wallace to the left... 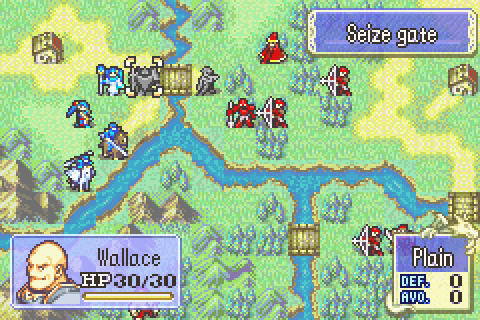 And there you go. Serra is still safe and sound. And that's that! Those are all the instructions you need to not only S-Rank Lyn Mode, but get all the awesome level ups you'd ever want in the process! Here are the Ranks we have achieved... Funds: Cash-4240 Iron Sword-1190 Armorslayer-1260 Lancereaver-1800 Iron Lance-1008 Slim Lance-450 Heavy Spear-1050 Javelin-700 Iron Axe-540 Hammer-800 Hand Axe-300 Iron Bow-504 Short Bow-1760 Heal-160 Fire-476 Lightning-540 Knight Crest-10000 Vulnerary-4500 Pure Water-900 Torch-500 Total Funds-32678 (S Rank) Combat: 122/303=40.2% (S Rank) Turns: 82 out of 83 Turns spent (S Rank) Survival: All characters survived (S Rank) Experience: Lyn-606 Exp. earned Sain-1245 Exp. earned Kent-577 Exp. earned Florina-703 Exp. earned Nils-603 Exp. earned Serra-242 Exp. earned Wallace-8 Exp. earned Lucius-33 Exp. earned Rath-13 Exp. earned Erk-88 Exp. earned Wil-32 Exp. earned Matthew-41 Exp. earned Total Exp. earned-4200~/4150 (S Rank) And there you have it! I'd include a snapshot of my ranking for Lyn Mode, but, unfortunately, when I downloaded this game, I also used a save to instantly unlock Hector Hard Mode and all the supports. And since that save also happened to have all the rankings maxed in all the Hard Modes, well...there's nothing I can do about that. When you get a second S Rank in a particular mode, it does not override the one you already had. So, that's that. Thank you so much for reading everyone! Any questions? Fionordequester fucked around with this message at 00:20 on Mar 8, 2015 |
|
#
?
Mar 7, 2015 02:21
|
|
|
 That's a whole 'nother level of complexity, especially the bit about the arrows. Great to see the guide though!
|
|
#
?
Mar 7, 2015 02:31
|
|


|
Heh heh heh...yeah...but if all of you have handled Melth's War Rooms so far, I figured you could handle it  . .Also, one thing I need to say. I made a mistake in my section where I was talking about Serra, which I corrected. Basically, don't worry about healing until Chapter 10. It might throw off a few of the awesome levels in Chapter 10 if you heal any earlier than that.
|
|
#
?
Mar 7, 2015 02:43
|
|
|
Huh. I guess having a list of all upcoming RNs would make that a lot easier to manipulate for good levels. Nifty tool.
|
|
#
?
Mar 7, 2015 03:02
|
|
|
Fionordequester posted:Squaring the circle, Melth's little theorems that it can't be done be damned! Well that was quite impressive. My friends and I had thoroughly convinced ourselves that it was out and out impossible to get Nils to 7 while S Ranking Lyn's story, but you've proven that it's merely very improbable. And sufficiently determined RNG knowledge or manipulation makes probability no object at all. Although I haven't actually checked the odds though, it looks to me like the chance of this working without exploiting the RNG or one's foreknowledge of RNs is too close to zero for that to be viable. So I guess we end up with a choice of 2 of the following 3: 1) Get Nils to 7 2) S Rank Lyn's Story 3) Don't use knowledge of the RNG __________________________________________________________________________________________________________________________________________________ Sorry for not updating on time; I've been way busier than I anticipated lately. I should probably be able to get back on track by Sunday. Melth fucked around with this message at 04:01 on Mar 7, 2015 |
|
#
?
Mar 7, 2015 03:55
|
|

|
Melth posted:Although I haven't actually checked the odds though, it looks to me like the chance of this working without exploiting the RNG or one's foreknowledge of RNs is too close to zero for that to be viable. Well...actually, you don't really HAVE to manipulate the RNG in order to get the results I did. You COULD just reset over and over to get the stats you want, like this Low Turn Count playthrough... http://www.youtube.com/watch?v=MvBBUT0srvc So, you'd still be able to beat the Chapters fast enough, you'd still be able to max the Fund rank (at worst, using only one stat booster instead of two), Exp. isn't that tough of a rank to max out (in fact, the only reason I didn't get 80-81 turns instead of 82 turns is because I didn't want to overcomplicate the Chapter 10 strategy, and I forgot to have Nils dance on one of the turns on Chapter 7 and Chapter 7x). And if you're really careful, and get good enough levels, you could probably still ace the combat ranking... However, that being said, you'd almost certainly have to reset your game a few times in order to get good enough levels to do all that. So that's part of the reason why I made a turn-by-turn guide. Not because that's the only way Lvl 7 Nils w/S Rank is possible, but because I feel like that's the easiest and most convenient way to do things. At least, if you happen to have the notes on hand
|
|
#
?
Mar 7, 2015 08:06
|
|
|
I tried my hand at doing a ranking run for the first time. Even though it was just Eliwood Normal Mode, it was a lot harder than I expected, since I'm not used to being that frugal with expenses and everyone was lower leveled due to finishing maps faster. Spoilered image because my mvp is a character we don't have yet. you can probably guess who.  I did my best, I have no regrets. The funds score I know I could have done better, having missed a few opportunities to steal and probably promoting too many people, but it's the exp rank that baffles me. I had 5 stars all the way through the game and I checked before the final chapter and still had 5 stars. Then, when I went to check it, I only had three stars. Whatever though, I'm pretty happy to have done it and I feel it wasn't a bad first attempt.
|
|
#
?
Mar 7, 2015 21:53
|
|
|
The EXP ranking is really unforgiving, and it's hard to get very far ahead of it. The difference between five-starring any given chapter (except zero chapters) and no-starring it is only 200 points, for example. I'll wager you were just barely in the five-star range. Then you fought the last chapter using (perhaps) some maxed-out units? And because the last chapter is full of tough enemies, the potential experience there was high. So you fell to the very tip-top of the three-star range.
|
|
#
?
Mar 7, 2015 22:27
|
|
|
Sorites posted:The EXP ranking is really unforgiving, and it's hard to get very far ahead of it. The difference between five-starring any given chapter (except zero chapters) and no-starring it is only 200 points, for example. Yeah the XP ranking is rough and only more so on hard mode where you get reduced XP under some circumstances. You've really, really got to use loads and loads of weak units. As this LP goes on you'll see that I'll generally bring 3 promoted people at the most on most chapters, however many is juuuuuust enough to get the job done. And you should pretty much immediately retire anyone who hits level 20 promoted and never use them again. I try to have no one above level 17 or 18 promoted going into the final chapter. Actually, on my first ever HHM max ranking run, I had basically the same thing happen to me (though I had 5 star funds). I had 5 star everything until the final chapter when I suddenly dropped 2 XP stars. Fortunately I'd saved in a separate slot on Sands of Time. Unfortunately, I found it didn't matter. I could indeed push the XP ranking up to 5 stars, but only at the cost of enough turns that I dropped a tactics star. It was all for nothing.
|
|
#
?
Mar 8, 2015 05:24
|
|
|
 I'm amazed at the kind of fuckery (and effort) that goes into these things. Definitely wouldn't want to play the game that way myself, but it's interesting seeing it done. Also someone needs to draw Florina literally eating an angelic robe. It probably needs salt.
|
|
#
?
Mar 8, 2015 16:33
|
|

|
Well, according to Serenes Forest, 5 star ranking the last 2 chapters of the game require getting 3500 exp (in normal) or 3000 exp (in hard) within 10 turns. So technically 5 star ranking exp is a bit easier in Hard than Normal, not mention easier in Hector mode since he gets several 0 requirement chapters where you can really crank up the EXP (which I'm assuming is much harder to make up than shaving off turn counts). ...but yeah, that's a shitload of EXP for the final chapters. Even on Hard you need to get the equivalent of 3 full levels PER TURN. I don't really see how that's feasible in Eliwood's mode without going into the final chapter(s) with a raging surplus. Shiki Dan fucked around with this message at 02:44 on Mar 10, 2015 |
|
#
?
Mar 8, 2015 22:15
|
|

|
The problem here isn't the high bar per se (although that's a big part of it). It's that the gap between perfect and mediocre is so tiny, and there aren't (for example) half-stars. You don't really get meaningful feedback as to how well you're doing, because a 2999-point four-star and a 2901-point four-star look the same despite the massive practical difference. If you have a four-star ranking, and you want to know whether the run can be salvaged, you might have to go through and add up every character's gained xp and compare it to the requirement.
|
|
#
?
Mar 8, 2015 22:54
|
|
|
Yeah, I don't think the rating system was very well designed. It's cool to see how people can do max rank runs, but I don't particularly miss rankings in the series.
|
|
#
?
Mar 8, 2015 23:08
|
|


|
Manatee Cannon posted:Yeah, I don't think the rating system was very well designed. It's cool to see how people can do max rank runs, but I don't particularly miss rankings in the series. Admittedly the ranking system is kind of wonky and very poorly explained and makes a lot less sense than, say, most of the AW series's. But unlike many AW titles, you didn't really lose out on anything by not getting a good ranking, so it's not like the ranking system existing hurts the game experience in any way. So I kind of wish later titles still had it. I find max ranking FE to be a more fun sort of optional challenge than, say, speedruns or "efficiency" runs and so on. That you have to balance the contradictory demands of the XP, funds, and tactics requirements makes for a challenge that's both strategic and tactical instead of merely tactical. In comparison, I do enjoy trying to get all perfect Ses in every AW title (except AW1 which I just don't enjoy playing at all). But the trouble is that you generally achieve maximum points in each category in exactly the same way. The same strategies that win fast do so with few casualties and rapid destruction of the enemy forces, so you succeed every ranking category. And strategies that win with high casualties (like mech swarming) do so slowly and without killing many enemies at once, so you fail every ranking category. There are a few exceptions, such as the final level of AW:DoR or AW2, where you can win very rapidly without hurting the enemy much at all, but even on those chapters most conventional good strategies will still net you a fairly easy S. So I guess what I'm trying to say is that FE7's ranking system is definitely weird and has its issues, but I think it works pretty great overall. I admit that I think that's kind of an accident, not a matter of brilliant design. Similarly the the 0-chapters make things much more interesting for ranking purposes, but they arose accidentally.
|
|
#
?
Mar 8, 2015 23:42
|
|
|
 The Dragon�s Gate marks a clear end to the first part of Eliwood/Hector�s story. I remember that the first time I played FE I had assumed the Dragon�s Gate would actually be the second-to final level with chapter 20 (Dragon�s Gate is 19 in Eliwood�s story) being the battle with Nergal. I was hoping the game would go on for another 10 chapters with a Hector�s story following Eliwood�s (since I think I�d heard the phrase �Hector�s Story� before but didn�t know it referred to an alternative to Eliwood�s story). When the Dragon�s Gate ended in defeat for Eliwood�s group, I was quite surprised and had no idea what to expect. We�re off the rails now and the plot could go almost anywhere for the next few chapters. For now, we have a chapter with a battle which is largely irrelevant but with a LOT of character development and filling in on just who Nergal is (Remember, we went into the Dragon�s Gate almost completely blind about him). The title is very fitting for a turning point in the story that sets up for our new goals. Chapter Summary: Despite their best efforts, Eliwood and Hector could not save Marquess Pherae and he died not long after wounding Nergal. Now aware at last that they were in way over their heads and with Nergal having escaped, they fled back to where Fargus was waiting and sailed for Badon. With Eliwood having had some time to grieve and Ninian and Nils some to recover, they compare notes and find out what�s been going on from Ninian and Nils before suddenly coming under attack by Black Fang sent to retrieve the siblings.  You know, this really describes Hector a lot of the time. People- especially Lyn- talk like he�s a jerk, but it�s really pretty clear that he�s mostly just bad at communicating with people. That does often go hand in hand with his kind of stoicism.  Hector, remember, had never met Ninian and Nils before this trip and Eliwood barely knew them. It�s mostly Lyn who�s most interested in finding out what happened to them and what their role is in things because she�s the one who knew them best.  And that�s the real tragedy of it. There are so many times when all of this could have been avoided if the characters weren�t the people they are.  Eliwood and Lyn ask what Nergal wanted Ninian and Nils for anyway now that they�ve revealed that Nergal was after them the whole time- the Black Fang in Lyn�s story were trying to capture them on his orders. And it�s because the two of them have the power to open the Dragon�s Gate and let dragons back through into Elibe, as part of Nergal�s plot.  At this point the distinction sounds like a hair-splitting one, but it�s actually fairly important in retrospect as more of the story is revealed.  So we�ve heard Nergal mention this word �Quintessence� before but we had no idea what it was.  Nils doesn�t understand the magical technicalities, but does explain that Quintessence is basically life energy or the substance of the soul and that Nergal steals it, killing his victims and empowering himself.  And now we find out what the heck Nergal and Ephidel were trying to do in Lycia. He didn�t care what happened to Laus, he just wanted to cause a destructive and bloody civil war which would release huge quantities of quintessence for him to steal.  Now we finally have a reason to oppose Nergal.  And now he gets into the events of Eliwood�s story. Nergal�s plans to start a war had been foiled by Elbert and Eliwood, but Elbert�s truly staggering amounts of quintessence meant the whole war was no longer necessary in the first place.  Nils is really blunt and puts his foot in his mouth here, rather casually talking about Nergal killing Elbert in front of Eliwood.  So things get awkward and he segues into talking about how much he and his sister loved Elbert, their fellow prisoner, who never blamed them for their role in his predicament.    I really like this whole conversation. It�s a gigantic infodump, except that it actually doesn�t read like one. It�s one of the better written conversations in the game.  They leave Eliwood to let him grieve on his own. Lyn suggests that as Eliwood�s best friend, Hector should be with him, and he responds with one of his best character-developing lines.  They shift back to talking about Nergal and what Elbert meant when he said Nergal would return.  Unlike most FE villains I can think of, Nergal doesn�t sit passively back and let you oppose him freely. Even badly injured, he keeps the heat on you more or less from this point onward.  The two of them agree that Eliwood deserves more time to mourn properly and decide not to tell him enemies are coming while they fight. 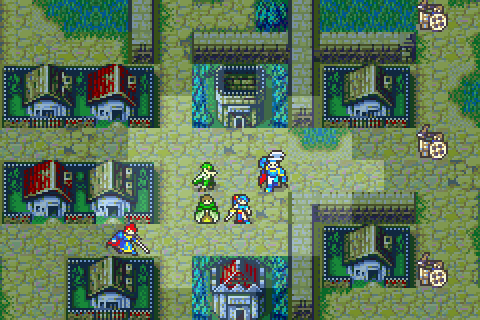 Eliwood is never one to let anyone else risk their necks without him no matter the circumstances though and comes running immediately.  This chapter is really the one that fully establishes Eliwood�s character. I�d say he comes across as one of the more appealing and human FE protagonists. This part of the chapter is really the important bit. The fight to follow does not actually advance things very much, but these scenes gave the background needed for building up the rest of the story. The War Room, Part 23 I meant to include this War Room with chapter 19xx, but had no space for it. Oh well, this chapter is also a good time for it because while 19xx was the first time negative conditions were encountered, this is the first chapter with positive. Both are extremely important to understand, and I�ll start with negative ones. [img] 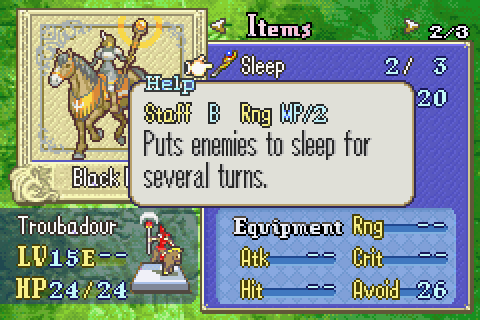 [/img] [/img]19xx was the first chapter where enemies had status ailment-inflicting weapons. There are several kinds of these, but the only ones that really matter are the staves: Silence, Sleep, and Berserk in ascending order of devastation. Essentially, these staves inflict a status ailment on the target which lasts for 4 turns. Some statuses (or �conditions� as they�re technically called) prevent others from being placed on the target. For example, a unit with Sleep or Silence or Berserk cannot be buffed by one of Ninian�s rings and vice versa. Further, the enemy will never double up those debuffs on one unit. And as a last, interesting note, enemies will never debuff a unit which is carrying a rescued unit. In any case, here are the details of those 3 dread debuffs: The Silence condition prevents the victim from using any staves or magic tomes- on either offense or defense. The enemy of course is smart enough not to use it on non-magic users. So being silenced makes the victim completely incapable of fighting, though I believe it can still rescue allies and it can certainly still move. Sleep is far worse. First of all, it can affect any unit- not just magic users. Second, the victim is not only incapable of fighting, it is also incapable of moving. Thankfully it can still be rescued and traded with and, in this game, can still dodge attacks. If this happens to a unit in the wrong place, you may have no choice but to restart the level as it becomes impossible to complete in time. It�s also highly likely to result in the death of the victim unless you can protect it immediately. And even if neither of those things happens, a single enemy has spent one turn taking out one of your precious few units for 4 turns. A very good deal for the enemy indeed. And Berserk is almost a game over automatically if you don�t have a Restore staff right nearby to undo it. The victim ceases to be controllable, can�t be rescued or traded with, and now moves on the enemy turn (starting with the next one). And it treats your units as enemies and will attack any of them in range. Horribly, the berserk unit can run right through your troops as if it�s still an ally, so you can�t block them. Even if you can pull all your other troops out of attack range, it�s still treated as a target by the actual enemy and it will recklessly attack them. 4 turns of stupidly attacking and being the target of everything in sight will kill any unit even if it doesn�t actually murder one of your other troops. In short, Sleep and Silence can completely cripple your strategy if they happen to the wrong unit at the wrong time. If Berserk can�t be cured immediately, you generally should just restart. This means that enemy staff wielders are THE most important enemies to keep track of and kill quickly- even more important than those with Bolting or Purge. One nuisance later on is that clicking �A� to view the attack range of a unit which has both a magic tome and an offensive staff will display its magic range but not the staff range. However, if you click the unit again, the staff range will display instead. This is a very important trick. There are only 2 ways to get rid of most conditions. First, they�re cured automatically after 4 turns. This counter does not progress if the unit has been rescued. The other way to get rid of conditions is that the C level Restore Staff can remove the condition of an adjacent ally instantly. Once you get them, they�re the most important tool you have on levels with staff-wielding enemies. So what determines whether a condition staff works or not? They don't work by normal weapon rules. First of all, the range of a condition-inflicting staff (and of any ranged staff actually) is 1 to (Wielder�s Mag / 2, Min 5). So that range starts considerable and can become truly enormous- much larger than even Bolting. Secondly, the accuracy and dodge formulas are totally different- and not affected by terrain or support. The net accuracy formula is 30 + 5x (Wielder�s Mag � Victim Res) + Wielder�s Skill � 2x (Distance to target). So at first glance all of the cards are held by the attacker: you cannot try to reduce enemy hit chance by using good terrain or standing near allies who can support you. However, you do have some options. First and best, you should almost always craft a strategy such that you can take down the staff wielder without it ever being able to use its weapon. Perhaps a flyer or paladin assisted by a dancer can rush in from outside its range and instant kill it with proper planning. When that's impossible, you can sometimes force the enemy to waste their charges on units with high Res on the edge of their range who they'll probably miss. Remember that an ounce of prevention is worth a pound of the cure. Even if you have a Restore staff on hand, using it still wastes the turn of a valuable unit, so you should try to prevent the enemy from inflicting conditions in the first place by the above methods. 21 marks the introduction of positive conditions. Although you could compare the effects of the Torch item and the Pure Water/Barrier staff to positive conditions, they technically are not. No, the only true positive conditions are those produced by Ninian/Nils�s 4 rings. Each of those ring effects act almost exactly like a negative status, but they only last 1 turn instead of 4 and can be granted only at range 1. The first and best ring is Ninis�s Grace. For one turn, this grants an enormous +10 Def and Res to the unit you bestow it upon. That makes fragile units into tanks and tanky units completely invulnerable. The second and second-best ring is Fila�s Might, acquired on the chapter Living legend. It grants +10 Str/Mag, an incredible boon for units which can double their enemies but don�t do enough damage on their own. Thor�s Ire and Set�s Litany are acquired much later and are terrible. They grant + 10 critical and +10 avoid respectively, much too small and undependable to be counted on. Each ring has 0 cost, so you shouldn�t worry about them eating into your funds score. Because of this and their unique capabilities, they�re among the best items in the game. But there are 2 main limits on their usefulness: First and most obvious, each is unique and has only 15 charges. Second and often more important is the opportunity cost. The true benefit of using, say, Fila�s Might isn�t just the value of the target gaining +10 attack for 1 round. Instead, it�s that value minus the value of the best alternative move you could make- such as using Ninis�s Grace or using Fila�s Might on a different unit or just using Ninian�s completely unlimited and extremely useful Dance ability to grant a unit another turn. Dance is generally more useful than the rings. Here are a few occasions when the rings might be useful though: 1) Sometimes you need to take on a very large and dangerous crowd of enemies. Often none of your units you want to use will be tough enough to handle the job. In that case, you may well be able to use Ninis�s Grace on someone and then let them solo the mob- or at least aggro and weaken the mob so that the rest of the team can then mop it up next turn. 2) As is well known, you can use Ninis�s grace to abuse the arena for free gold and XP. I won't be using the arena myself, so I won't be doing that either. 3) Ninis�s Grace or Fila�s Might can both be tremendously valuable to weak units you�re trying to train. The massive stat bonus can be just what they need to take on several tough enemies or finish one they couldn�t normally scratch, netting them great XP. 4) Some of the game�s tougher bosses can be extremely difficult on an HHM max ranking run. Ninis�s Grace or Fila�s Might can be just what you need to tilt the balance in your favor. Remember that to get maximum use out of these buffs, you need to be sure the enemy actually fights the buffed unit. Try to make it so no other unit is in the enemy range. Battle Preparations & the Map 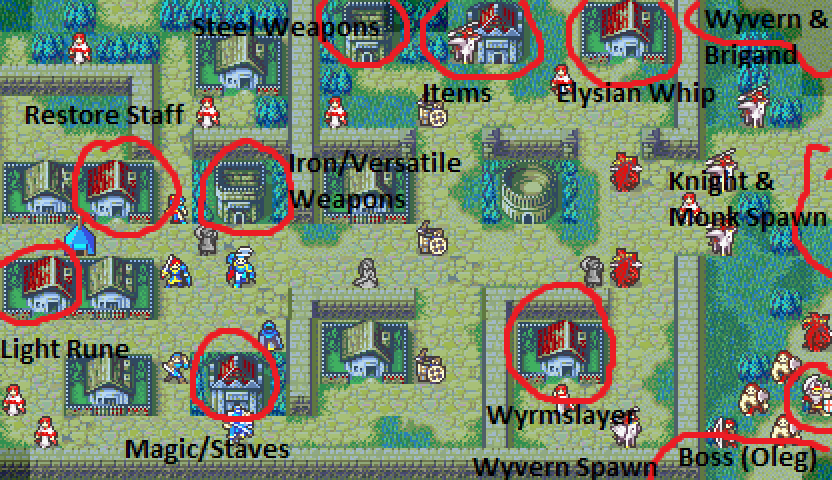 Another busy map! This one is fog of war with a nasty, restart-inducing flock of air units just outside initial vision. Here I�ve used both thieves, assisted by Ninian and torches, to illuminate almost all of the map for you. This is the first chapter since Pirate Ship (18) on which shopping was possible and it�s also the first in the whole game for which the silver card is available. Almost all of my weapons are nearly broken and there are no more stores will 24, so I need to buy a lot. Luckily, all the important gear (except for door keys) are at the nearby two stores, making things easier. There are also a great many villages to visit, and the eastern ones will be destroyed if you don't get there fast. Unfortunately, the enemy forces are significantly dangerous on this chapter, partly because of the terrain. One thing you should immediately notice is that the map is covered in buildings and walls. These are completely impossible for ground units to traverse but no problem for air units. Meanwhile, there is almost no beneficial terrain on the whole map (except for the tiny bonuses from actually being in a village or store). In short, this is very much an air map and the enemy is going to use that to their advantage. Only the enemy air units pose a big threat. The monks are almost all armed with Shine, which is too heavy for them. The result is that they can deal accurate but small amounts of damage to nearly any unit you can field, but can be killed effortlessly by nearly any character. Monks are pretty much never anything but free XP and this chapter is no exception. They're not the problem. No, here�s the problem: 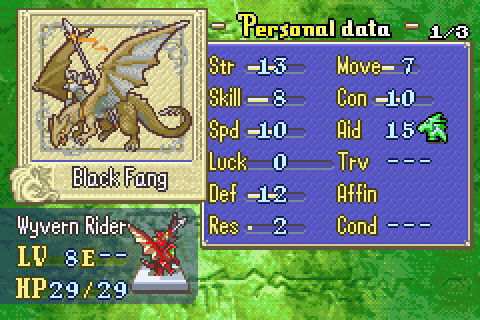 Look on my stats, ye Mighty, and despair! We got a small taste of the power of wyvern riders on 19xx. These wyverns are much stronger, much more numerous, and favored by terrain. But how different could they be from pegasus knights, right? Well here are this chapter�s best pegasus knights: 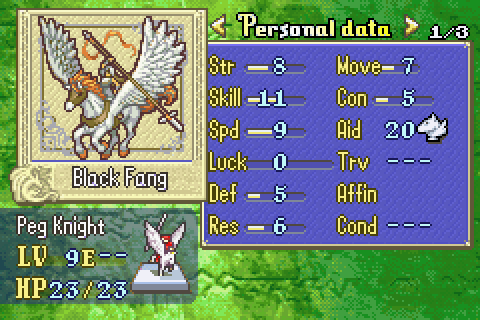 Wyvern riders are the best enemy units- and indeed the best player units- in most FE games and this is no exception. They�re actually tougher than knights due to superior HP and are in a whole different league from pegasus knights in durability, they tie the pegasus knights for the best available movement, they outspeed the allegedly fast pegasus knights, they have enough con to wield most lances without penalty- where the pegasus knights have a functional speed of only 6 with an iron lance and 1 or so with a steel lance- and they hit far harder. They are, quite simply, better than most of your available troops at this point in the game. In particular, that 10 speed is massive, so huge that almost none of my troops can double them. Not Canas, not Eliwood, not Fiora, not Lucius, not Florina with a javelin, not Marcus until an absurd level 15 or so. My extremely fast Hector can manage it against the slow wyvern riders, but a regular one couldn�t. And of course, Sain can. So other than Sain (and Hector vs the slowest ones) I don�t have anyone capable of one-rounding one of these monsters. Wyvern riders are allegedly weak to arrows and to magic, but in actuality 12 Def takes the bite out of an iron bow and leaves archers floundering. A rather high level (13) Rebecca with an iron bow would be dealing 9 damage per shot and would not double attack. Even a steel bow user will only deal moderate damage- and will definitely not be able to double attack. As for their weakness to magic, it�s at least true that they don�t have better Resistance than most other units- but they aren�t really worse than anything but pegasus knights and magic users either. And their massive HP mitigates most of that disadvantage. Their final weakness is the Wyrmslayer sword which is only acquired toward the end of this chapter, is too expensive to use, and due to weapon triangle disadvantage is much less effective than a measly iron bow. In short, these wyverns are a piece of work and my main obstacle on this level. And there will be many, many more of them. Far too many to defeat without overusing Sain or Hector or Canas. Besides dealing with these particularly dangerous enemies, there�s also the problem that the boss is extremely damaging, surrounded by spawn points, moves, and must be stolen from. The chapter ends when he�s defeated, so I need to do that just as soon as I�m finished with villages and shopping. There�s really only one thing that prevents this from being one of the hardest chapters in the whole story and it�s this:  Nearly EVERY enemy unit is using a poison weapon and those absolutely suck, as detailed previously. That -15 hit and -4 might really makes a big difference in letting you kill these pesky wyvern riders in particular. The wyverns still beat 90% of my units in a straight fight of course, but it would be 95% otherwise. It took some thinking, but ultimately I went with this setup: 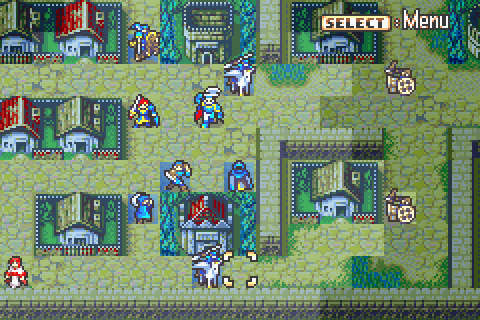 Objective: Kill Oleg (The boss) Secondary Objective: Steal the Hero Crest from Oleg Secondary Objective: Get the Restore staff from the top left village Secondary Objective: Get the Light Rune from the bottom left village Secondary Objective: Get the Elysian Whip from the top right village Secondary Objective: Get the Wyrmslayer from the bottom right village Secondary Objective: Do some shopping and buy supplies with the silver card Reinforcements: Very numerous, but other than a couple of brigands there is a merciful delay of 4-5 turns or so before they begin spawning in force. Due to fog it�s hard to be exactly sure where each enemy comes from on each turn, but it�s true that a total of 4 wyvern riders (2 top and 2 bottom) will be spawning for a while and monks will begin appearing in the middle right around the same time. Since the wyverns are completely unmanageable for most of my units, I have to end this chapter fast and not stay and fight them all. Turn Limit: This is actually not that painful at all. This chapter could be completely in just 2 turns or so if you rushed Oleg with someone like Sain, so the only thing that really slows you down is needing to get all the villages and do the shopping. You�ll notice I actually spend a fair amount of time lurking just outside Oleg�s attack range killing his reinforcements while I continue my shopping. Units Allowed: 6 + Hector + Eliwood + Ninian. Now THIS hurts. Even an Eliwood as stat-blessed as mine is useless on this level and I can�t use my Hector much because he�s overleveled. And I need to take a healer an I need to take a thief and I need someone to do the shopping and someone else will need to be on at least part time village visiting duty and wow that only leaves about 2-3 discretionary units. Ninian is a godsend at least. Units Brought: 1) Hector. Required and my best or second best anti-wyvern unit. He�s the only one other than Sain who can actually win a fair fight with more than one. Or really even with just one. But mine is already level 19 and can�t promote for about 10 chapters, so I mustn�t use him much. 2) Eliwood. Required, and that�s a huge nuisance. Eliwood cannot double wyverns and with weapon triangle disadvantage, he will actually lose to one in a one on one fight despite his stat blessing and massive level. And he�s not good vs pegasus knights or monks or ANYTHING else on this level. Still, I do need to train him. 3) Ninian (not shown, but she pops up as the map begins). Required, and by far the best unit now on my team, including Sain. Ninian is dodge-y and tough enough to stand up to anything and she lets me use my strongest units twice on tough turns to ensure I take down the key enemies or my weak units twice on easy turns to maximize XP gain. Plus only with her Ninis�s grace can my first turn strategy work. 4) Legault. I need a thief to deal with fog and to steal Oleg�s Hero Crest. Matthew is horrible compared to Legault for combat and I don�t need both of them here, so Legault it is. Much like Matthew, he enjoys a brief grace period of actually holding his own in fights for a few chapters after he�s recruited anyway. 5) Priscilla. A healer is not optional on a chapter like this and Serra is just worse than Priscilla, as usual. 6) Florina. This is an air map and although Florina loses one on one fights with wyvern riders, she still does better than most of my units. Meanwhile, she�s highly effective against monks and good for shopping or visiting far-flung villages. 7) Fiora. Same as Florina but not as good, same as always. And of course she�s lower level, so I�d like to train her to boost up my XP score a bit. 8) Canas. Canas is an absolute must for me on this chapter. He�s impervious to monks and deals spectacular damage to wyvern riders and is tough enough to take more than two hits from one before dying. Plus I want him to promote soon so that I can finally have a healer who isn�t a complete waste of a slot. 9) Raven. My only other �discretionary� unit other than Canas. In fact, I consider him the only truly optional member of this party. Raven can actually double attack wyvern riders for respectable damage and can stand up to a few hits from them. Crunching the numbers, I discovered that despite weapon triangle disadvantage he�s actually tougher AND more damaging to wyverns than Dorcas would have been. Notable Units Rejected: 1) Lyn. Unusable. She can hit a wyvern rider for 1 damage twice. She�s not even good against pegasus knights. Or monks. Or anything. 2) Matthew. Unusable, he can�t damage anything on the level but the monks and he might actually lose to them. And one thief with a torch is enough to illuminate everything of importance on this map, so I don�t need both him and Legault. 3) Serra. I�d like a second healer, but I don�t have enough slots to afford one. 4) Dart. Man, he�d be great here. Unfortunately, he wouldn�t be as good as Raven and he doesn�t let me make progress toward unlocking Jerme�s chapter. 5) Dorcas. If I could take a 9th person, he�d be it. Solid against wyverns due to his speed blessing and weapon triangle advantage and he�d help me toward Jerme�s level. 6) Bartre. Monks are actually so bad that Bartre can beat them one on one, so I briefly considered bringing him along to take out the ones near the starting position. But he�s too slow to get all the villages and too weak to beat two monks at once. 7) Erk. He�d be good here, but not as good as Canas. If I wanted Kenneth�s level, I�d bring him instead of Raven. 8) Lucius. Same as Erk, but not quite as good here. 9) Sain. Yeah, the big guy is off the team! How about that, huh? I knew this would make beating Oleg hard, but I also know that otherwise he would sponge too much XP. By my initial number crunching it would be tough but doable to win without him, and I was right. Hoo boy, it�s like Chapter 13x all over again! I haven�t had a chapter where I really showed off seriously good tactics since Whereabouts Unknown. Most of the recent chapters have ultimately been easy as long as my starting unit choices were well done. But at this point, my gear is so broken and battered and scarce that I can�t even equip my 8 starting units. Fortunately, I can now sell some valuables and then go shopping with the silver card on turn 1. Unfortunately, that still leaves my troops unequipped unless I do some strategic trading and setup my formation to allow that. The trick is that, just like on chapters like 12, I not only need to trade around items so that people can actually fight, I also need to immediately begin making serious progress. In this case I think I need to immediately aggro and damage the nearby wyvern riders while killing as many of the pegasus knights as possible. Only then will it be feasible to take out the wyvern riders and continue charging east. In her current top right position, Fiora can get just barely far enough to be attacked by almost the entire enemy air wave. But just 2 attacks would kill her! Fortunately, with the miracle of Ninis�s grace, anything is possible. That ring will allow Fiora to tank the entire wave of attacks and kill many of the enemy pegasus knights in return. Canas has only 9 uses of his Flux tome left- not enough to do serious fighting- and I certainly can�t afford for my MVP to suddenly be out of the fight and need to spend 3 turns running back to the store. No, I need to buy him a new flux tome this turn no matter the cost. Florina is positioned for maximum efficiency in buying him that flux tome and then flying to an advanced position where he can trade it from her and be good to go and close to the front. Notably, I chose Fiora over Florina for the principle tanking duty because I want to train her more since she�s lower level and also because she has significantly higher Def. As the fighting intensifies later though, it�s Florina with her higher damage who I�ll want close to the front, so Fiora will actually fall back and visit the left villages and stores while Florina continues with the main army. Legault doesn�t need to reveal much of anything for a while and can�t fight well, so he starts in the back. Raven only has one real spot available to him since Canas is more important and thus needs to be closer to the front. Since, almost by definition, healers have nothing to do on the first turn, it is Priscilla who will do the shopping. She�s positioned to go to the store with her silver card, buy everything the party needs, and then run past Fiora to where people can trade it off of her. Starting with Fiora. I only have a single iron lance and a single javelin remaining, so Fiora actually starts off completely unarmed. But she can immediately take Priscilla�s recently purchased goods to equip herself and then continue moving due to being a mounted unit. It�s the only way to get everyone geared up and in position on turn 1. The Characters: 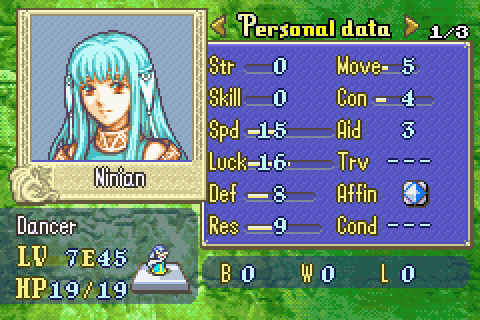 ��I am no mere dancer. My dances� They will help you. �Please allow me to help�� �Ninian, Chapter 21 Nils�s more polite and thoughtful but somewhat annoyingly shy sister, Ninian is what Florina might be like if Florina was a serous character instead of a joke. She gets less development than Nils outside of supports, but Nils can�t develop supports at all so that makes up for that. Her budding romance with Eliwood is fairly charming and the two are a rather good match. Indeed, it�s probably the closest the game comes to a canon pairing with how many scenes of just the two of them being affectionate with each other there are and how later events I can�t spoil will play out. Ninian and Nils are basically the same unit. They share stats, level, equipment, everything except Supports. Only Ninian can develop supports, but that�s irrelevant in a max ranking run as I previously noted. Everything I said about Nils�s amazing usefulness goes double for Ninian right now because� 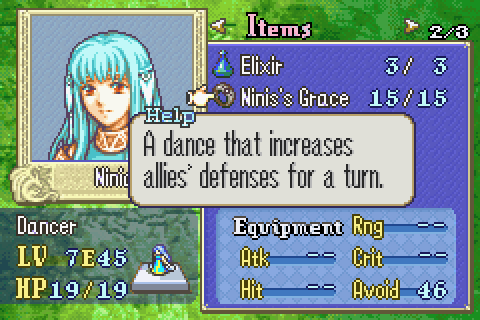 �Do you understand? I have power. The power to perform miracles.� � Of this, quite possibly the second most valuable item of any kind in the whole game- after Hector�s Wolf Beil and ahead of even Matthew�s initial lockpick. The power of the one ring to rule them all will be on display this chapter. 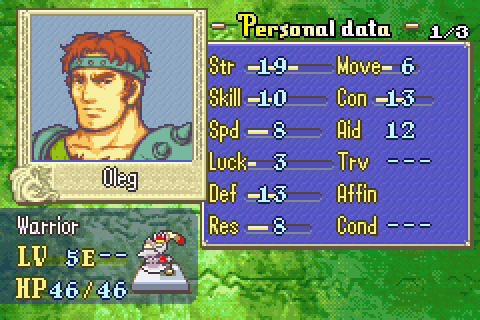 �In defeat�there is only�death. Urgh�� �Oleg, Chapter 21 A rather thuggish and violent Black Fang, apparently he knows Nergal well enough to have been tasked with retrieving the siblings directly. And he doesn�t think much of Nergal�s idea that he just offer Eliwood the chance to hand them over peacefully, preferring to seize them by force. Oleg is very durable- and he�s not vulnerable to the Wolf Beil as all previous durable bosses were. He moves, unlike most bosses and he hits very hard indeed because he�s armed with� 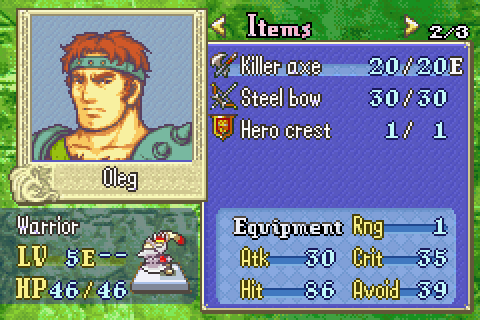 A 30% chance of making you restart per swing. Nothing and no one can stand up to a killer axe from this guy at this point, so you must never, ever allow him to use it. Lure him into using his bow and then kill him in one round. Fortunately he�s slow and won�t have any terrain bonuses, so he should be fairly easy to gang up on. The real trouble is how he and the reinforcements near him support each other. You can�t take them out because he�ll kill you if you get near their spawn points, meanwhile they might get in your way as you try to surround and finish him. Further complicating things, you must steal that hero crest from him, so that means it�ll be harder to pile your other 1 range units next to him and kill him. Playing Through: 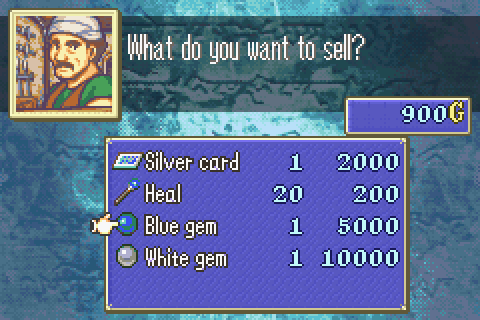 The first thing is to sell my blue gem! Up until this moment, my available cash has been extremely limited. I could just barely buy enough gear to squeak through up until this point. From now on, I have infinite cash. With the silver card, I can sell ANY treasure I want and make no loss as long as I spend the money on gear with the silver card in hand. I�ll start with these two gems just to make sure I can buy whatever I want for the time being. And I have quite a shopping list: 6 iron swords, 7 iron lances, 7 javelins, 4 iron axes, 8 handaxes, 4 more heal staves, 2 more fluxes, and 3 more door keys (I think I�ll make compiling a proper shopping list the subject of a war room in the near future). Unfortunately, I can�t get the latter 3 items here from this store. 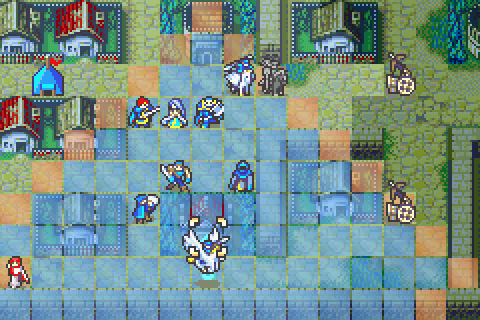 So Priscilla did the buying and selling, critically, she started with an iron lance and then a javelin so that Fiora will be able to take that from her later. Now it�s Florina�s turn and she needs to visit the vendor. She doesn�t have the silver card, so I don�t want to buy much with her, but I absolutely need to get a flux tome for Canas this turn, so I�m going to have to eat that 450 gold net loss. 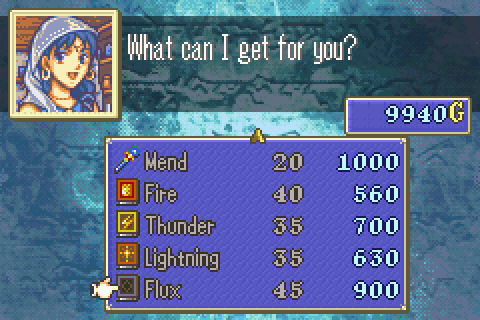 Even after buying that massive pile of weaponry, you can see I still have tons of cash. And that�s barely dipping into my absolutely mammoth treasury. Money is unlimited from here on out- I just need to make sure I acquire enough assets to stay ahead of the funds score. In order to make sure I do that, I�m not going to waste more money here than I need to so, I�ll buy only the single flux tome and nothing else. 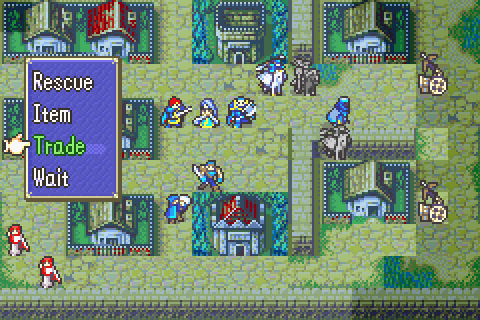 Florina finished her movement and Canas took his new tome. Now the show is about to begin.  Ash nazg durbatul�k! 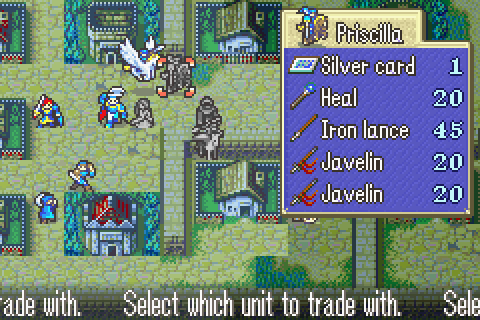 Remember, Fiora had no starting gear at all, but now she can take everything she needs and then keep right on moving. 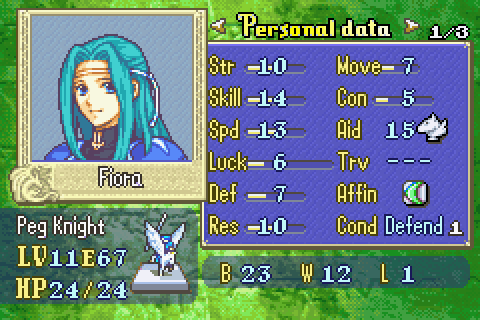 There�s her wonderful Defend condition listed. It doesn�t SHOW the bonuses to Def and Res, but they�re applied nonetheless. 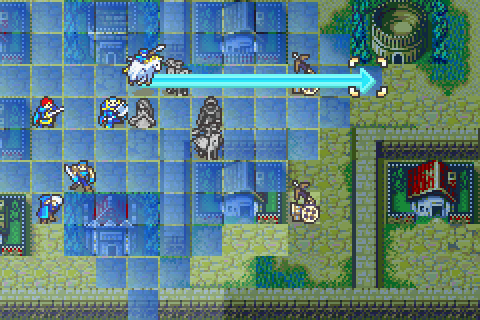 There she goes after trading, right into the center of the enemy formation (currently hidden by fog). 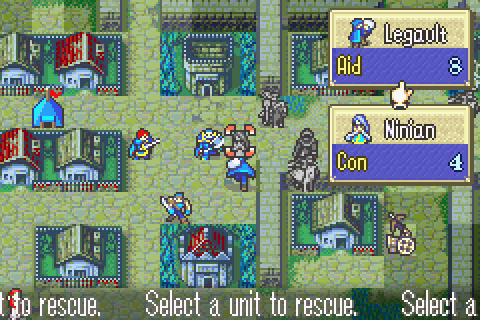 One of the many uses of rescuing is just making small changes to your formation to allow you to pack in more tightly than usually possible. Here for example, I�ll be able to move Ninian closer to the front but only if I first pull her back into Legault�s square. 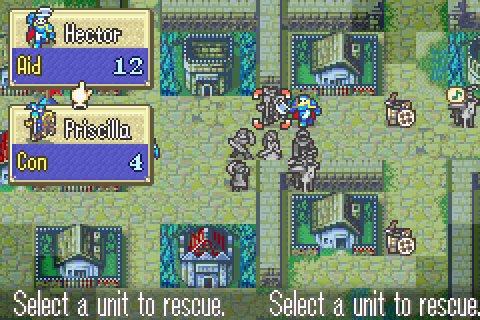 And here Hector can pull Priscilla out of the way so that Eliwood can take her spot and then dump her further back- he needs to be closer to the front than her. Use this kind of minor rescuing to optimize your formation whenever you have a lull in combat like this. It�s really mastering rescuing and using it all the time that makes serious strategy possible in this game. 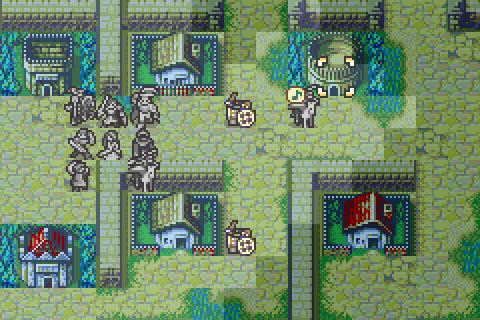 That musical note on Fiora means she�s under the effects of one of the rings (Ninis�s grace in this case). You�ll note that I�m completely ignoring the monks around the left area for now. It�s much more important to get everyone properly equipped and heading east. I can send Fiora back to take care of them and the shopping later. 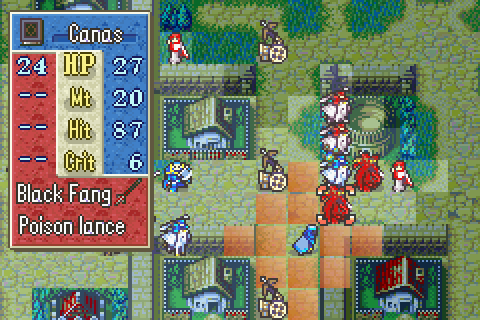 My turn. Fiora is badly injured, but she took down 1 pegasus knight and crippled another and also damaged the wyverns. Canas will cripple this one so someone else can finish it. Even Hector can�t dish out that kind of damage to these guys in one hit. 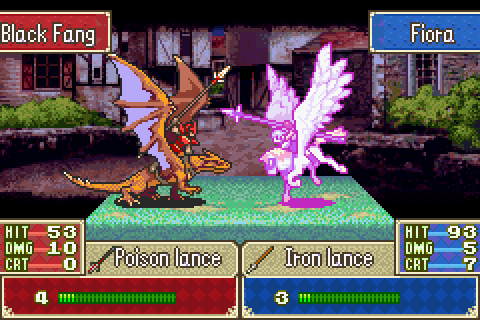 Fiora, you can see, is poisoned (hence purple) and one hit from death. And even with the absolutely terrible poison lance equipped, this wyvern rider will does 10 damage to her. Despite being 4 levels lower and up against a fairly blessed Fiora. Who won�t double him. If that doesn�t tell you all you need to know about the power mismatch between Wyverns and pegasi, nothing will. 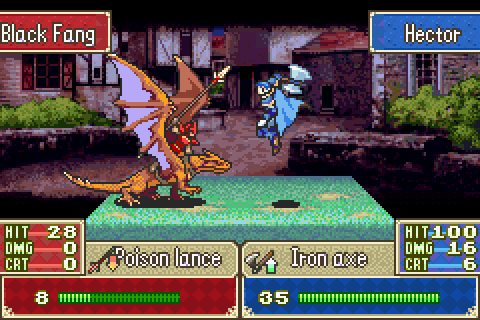 Hector is moving up in the world! Once upon a time he couldn�t even take down pegasus knights in one round, now he can actually beat wyverns! 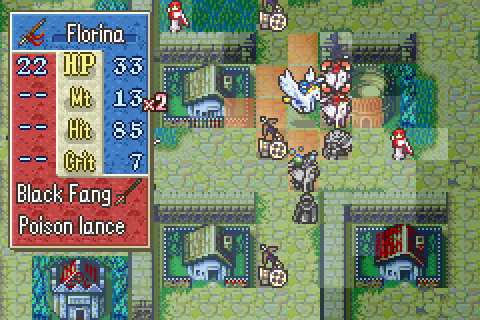 The wyverns are dead, now Florina takes up a position to help block the bottom pegasus knight and kill the top one. Certainly I could have killed the bottom one more cheaply with an iron lance, but it�s important to limit enemy access to your back row. Oh and you can see now that Fiora is poisoned (the bubbly things all over her indicate that. With 50% odds she will die at the beginning of next turn even if she isn�t attacked since she only has 3 HP left. 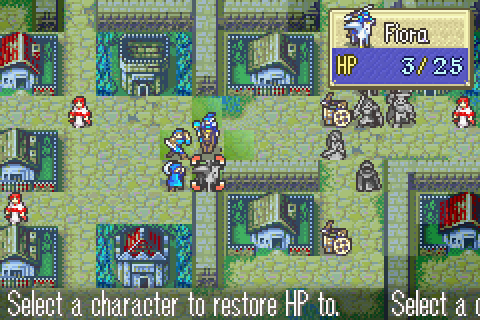 Ninian allows Fiora to evacuate- in this case moving into range of some of the bottom monks with her javelin. And then Priscilla restores her to proper fighting shape. Now she�s ready to take on 5 monks. 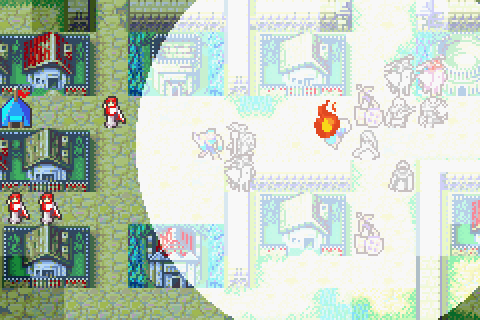 And now Legault is actually close enough to the front that a torch might be useful. You can see that I�m leaving Ninian completely exposed to enemy fire. But she�s level 7 since Nils was level 7, so her solid defenses and massive dodge make her one of my most durable units. Of course, she can�t counterattack, but at the very least I don�t need to babysit her like I do Priscilla. 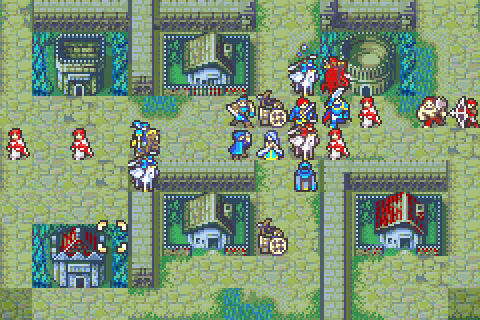 Turn 3, the second wave of wyverns arrived (and I believe one died to Hector). There�s quite a crowd built up, but I can already tell that it�s going to completely disintegrate if I make my moves well. 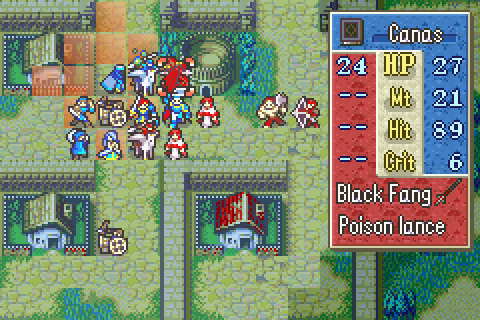 Canas initiates things by crippling another wyvern. 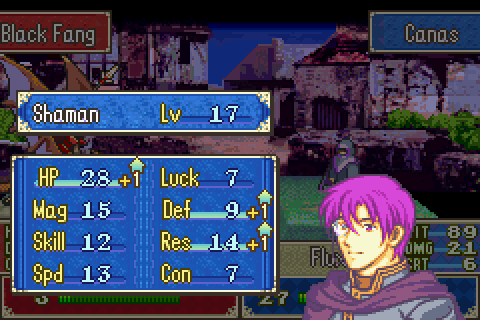 And he gets a darned good level out of it! The tougher Canas gets, the better!  Hector drops the monk in front of him so that everyone can charge out freely. I need that archer down so that Florina can fly safely. Raven has just enough power to beat this brigand. And what are the odds he�ll get hit? 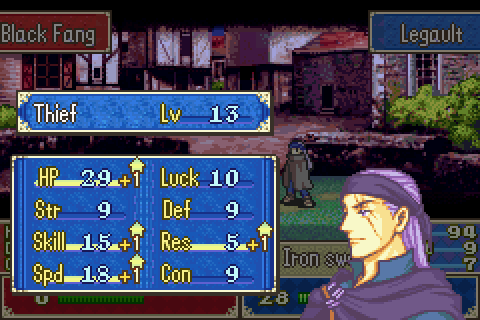 Even Legault can beat these monks! And get a level that would be great on almost anyone else. 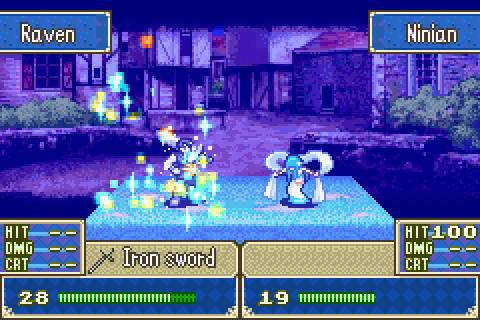 Remember, I really want to train Raven, and Ninian helps make that possible by dancing for him. 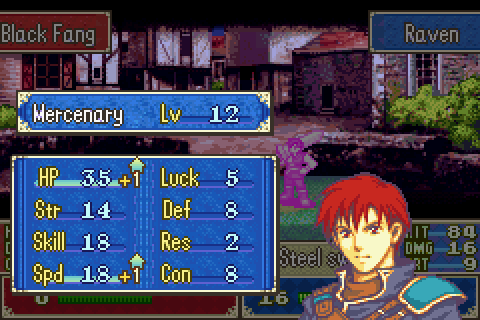 He got hit by the brigand of course. Actually, lots of my troops took improbable hits so they�re almost all poisoned. Fortunately, poison is weak enough that it barely matters. I�m going to blame this sucky level up on him having been poisoned though. And the enemy were killed to the last man, no one left to attack me that turn. Once the wyverns are gone, the rest are easy. 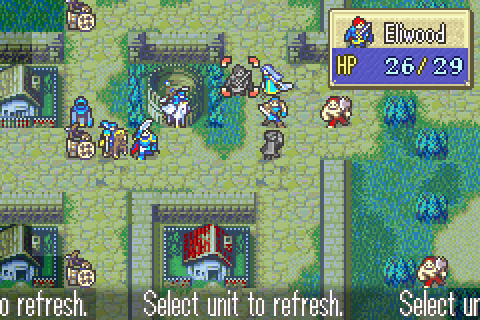 Next turn, you can see I�ve already exterminated nearly everyone in just 2 moves. Eliwood, like Raven, needs more training so Ninian gives him another turn. 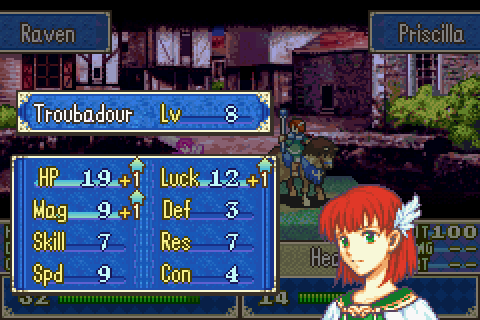 One great thing about Poison is that every turn it inflicts just a tiny bit of damage which you can heal off without curing the poison. Fantastic for leveling your healers. Not that I�m trying to do that at the moment. 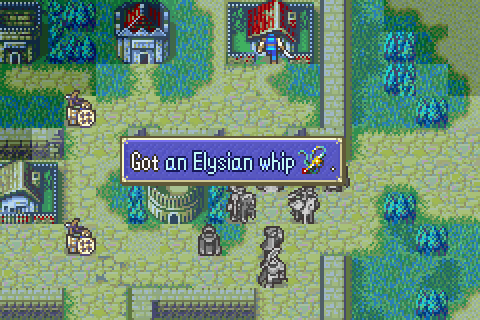 Everyone else is moving toward the front, but the grace period before reinforcements start is nearly over, so I need to grab this village. Meanwhile Fiora easily mopped up most of the western monks. 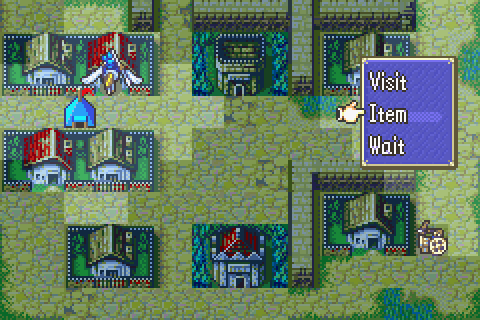 There�s this one north monk who won�t charge like the others, so Fiora is going to him. But for efficiency she�ll stop at this village. But before doing that, I�ll switch back to her javelin. Remember that order matters for moves like this. You can�t visit and then equip your javelin and then move on. 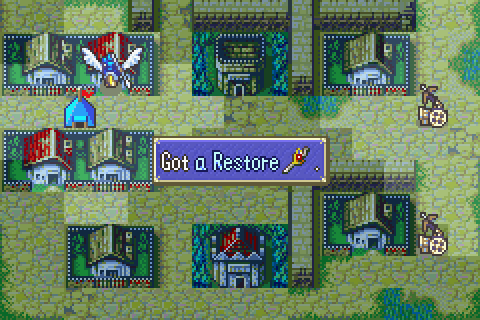 Restore! Awesome. One of the handiest staves in the game, I�ll really need this thing in a few chapters when Sleep starts getting thrown around again.  And in that position the monk will attack her and will do so without a terrain bonus. 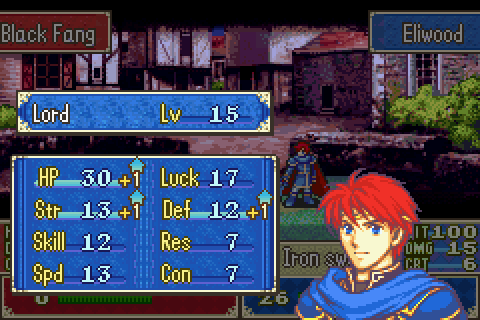 Eliwood continues fighting and gets a good level. Actually I wish he�d gained just 1 more speed though so he could double some of these darned wyverns. 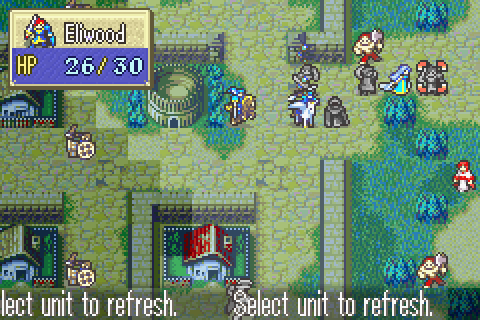 He got that level off a reinforcement monk- which put him in range of Oleg (hidden in that bottom right forest). Yet ANOTHER use of Ninian�s dancing though is to let people move back out of danger zones like this. 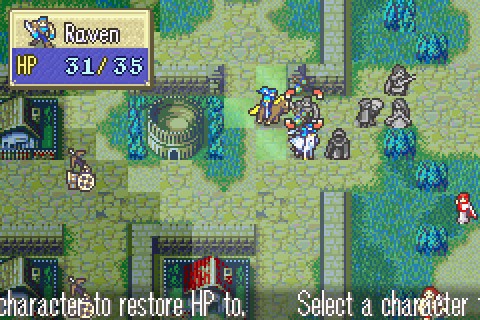 Another free XP heal on poisoned Raven. 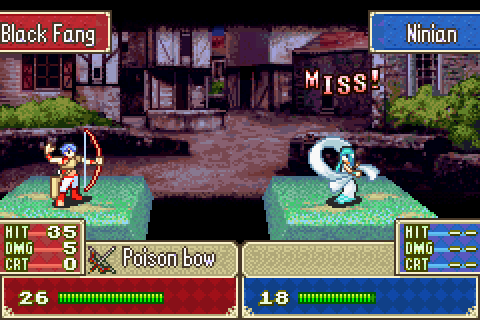 And you can see how tough Ninian really is here. Mages would be doing about 1 damage to her. 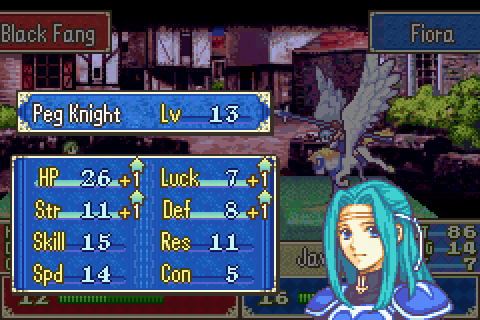 Fiora doesn�t kill the attacking monk, but does get a good level. I�d assumed she was fast enough to double it, but my Fiora is REALLY slow and I was wrong. Now I need to change plans. 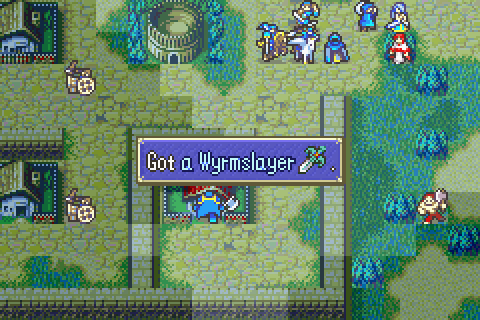 Hector visits the village. Since I didn�t want him hogging XP, there wasn�t much else for him to do. 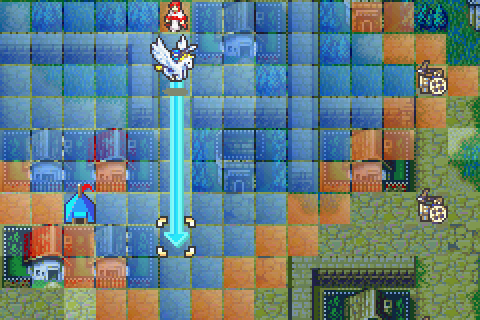 Back to Fiora. I thought this move out carefully and checked all the numbers. Sure enough, she�ll just barely get hit by the monk here and then counter and kill him. And then she can visit the left village and just barely reach the bottom Vendor on turn 8- the turn I aim to win on. Perfect. Don�t leave this kind of thing to guesswork. Check your numbers. Leaving behind this monk would be worth it if I couldn�t quite do one of those things otherwise. 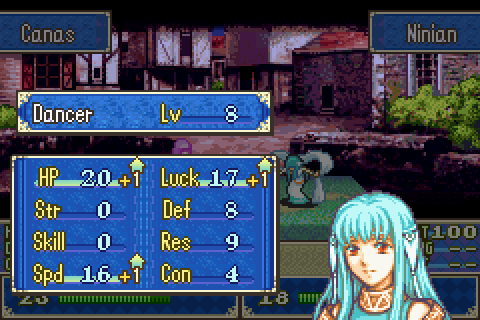 Every dance is 10 free XP, and Ninian gets even dodgier. 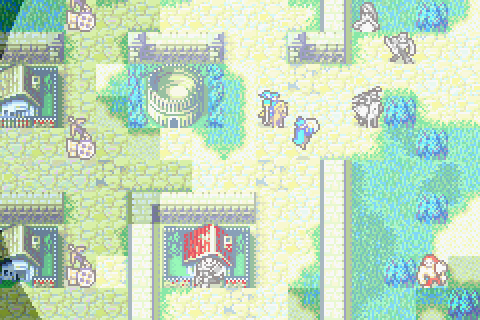 I need to know exactly who is spawning where at this point, so another torch use is in order to restore the bonus vision. 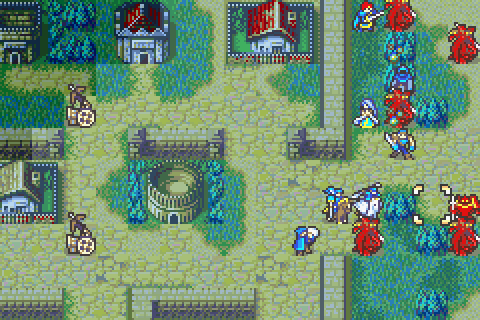 Bam! Turn 7 crisis! Everything had been going just great, right? Well now there�s going to be 4 wyvern riders and loads of knights coming in every turn till way past the deadline. If I don�t win this now, I�m going to be way overtime as I�m forced to retreat. 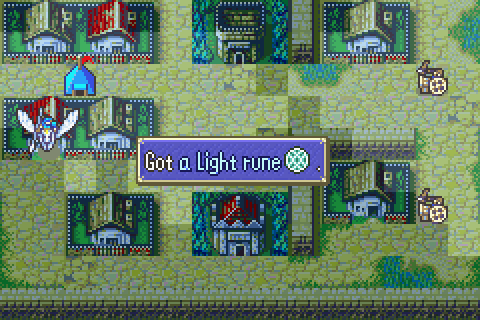 The monk dead, Fiora gets the light rune from the village. Then she�ll keep moving toward the vendor. 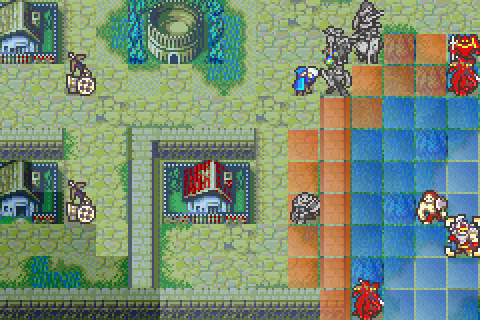 Hector is positioned with a handaxe here. He�ll not only thin the herd of wyverns, he�ll also aggro and badly injure Oleg- and force Oleg to equip his bow while moving into range of the rest of my army. 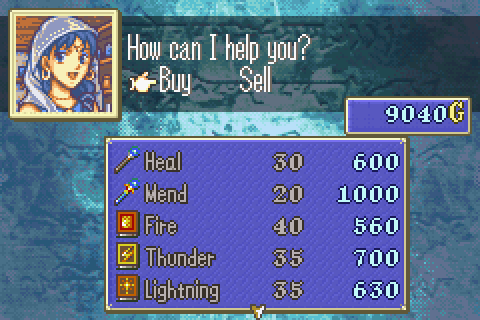 And at this point I realized something terrible: I forgot to have Priscilla trade the silver card to Fiora. Darn it. I had it all planned out, I had the opportunity and everything, but I forgot to do it. And now it�s way too late. Ultimately I decided to do no further shopping. That does put me unfortunately behind in heal staves, but there�s not much choice. 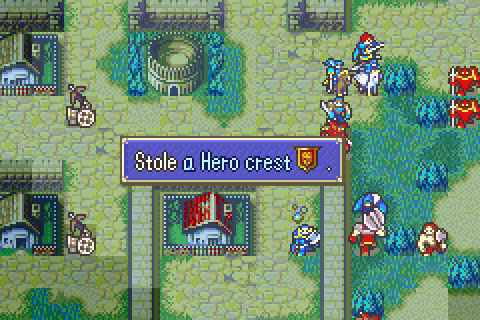 Hero Crest get! 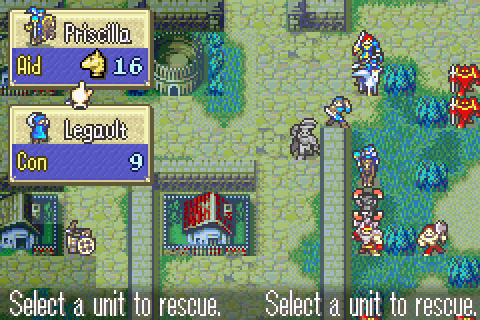 I checked the numbers after having Hector clear the wyvern Florina can�t finish Oleg alone and no one else can join in while Legault is here. So yet another use of rescuing, I�ll just pull him out of the way so that Florina and Raven can dogpile Oleg and kill him immediately. 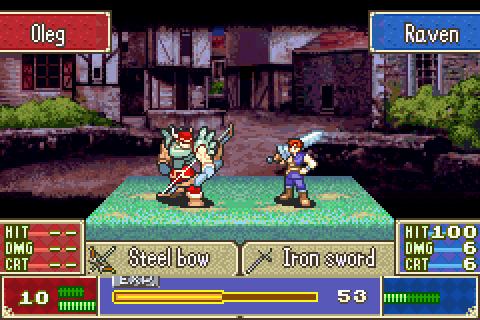 Raven softens him up. Meanwhile, Canas and Ninians have been wiping out wyverns on the top front to keep the heat off these guys. 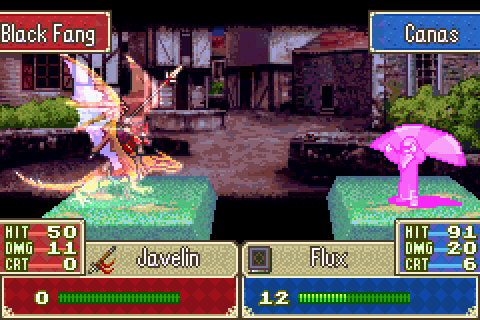 Ah ha! Some of the later ones spawned with javelins, far more dangerous than poison lances, but also juuuuust heavy enough to slow them down! And that makes them just slow enough for Canas to double. Awesome!.  It�s now turn 8 and I�m about to win. 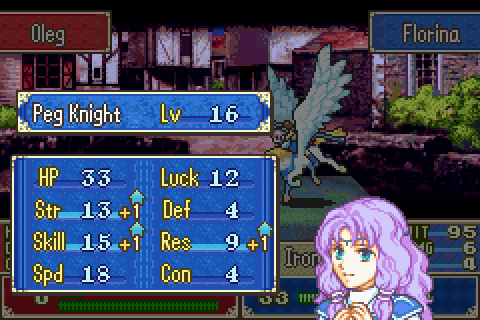 Florina kills Oleg and gets a solid level. That�s terrible Def and HP at this point considering the angelic robe. She hits hard, and that�s nice, but the problem is that she�s going to slam her Str cap somewhere along the way to 20 promoted but be stuck with bad Def forever. And that�s the win!  In the aftermath, the court of Pherae has a little scene of their own. Marcus and Eliwood are almost always an interesting pair.  And the group make their plans. We�ve been wondering since the end of the Dragon�s Gate where the plot would go next, now it seems that�ll be the logical direction of Ostia to talk to our most powerful ally and brief him properly.  Remember Isadora? Of course you don�t. She�s seen for 5 seconds in Eliwood�s story only, being left behind to guard Eliwood�s mother. But here she is. It says a lot about how much Eliwood has been through lately that his first thought is that his mother might have been killed or abducted or something. But no, she�s fine, and upon hearing of her husband�s heroic death and Eliwood�s danger, she sent Isadora to help Eliwood instead.  Hector talks to Market and offers her an out. In case she doesn�t want to face almost certain death with the rest of the group Some might argue that that�s not really his place since Market is technically working for Eliwood.  Enemy cutscene, Nergal talks to Sonia and tells her to get the Four Fangs- the most dangerous and powerful Black Fang members- out after Eliwood immediately. But just where is he? That architecture doesn�t match the Dragon�s Gate or nearly anywhere else we see. And we aren�t told where this hideout is. My best guess is that it�s a secret underground lair he created somewhere in Bern.  And Limstella gets her(?) orders, killing anyone powerful she can find and harvesting their quintessence for Nergal. Total Restarts: 11 Turn Surplus: 6 (Every little bit counts) Things I Regret Missing: The lockpick on chapter 11, that darned archer on chapter 11, this one brigand who attacked Marcus on chapter 12, 2 more brigands who ignored everyone else to attack Marcus on chapter 13x, and 2 archers who ignored Hector and Dorcas (DORCAS!) to attack Marcus on chapter 14, like 10 more enemies I could have killed if Hector could have survived one more turn on chapter18, and Uhai who decided to take a 100% chance of death to Sain over a free hit on Hector, and the chance to finish shopping properly with my silver card on chapter 21. Melth fucked around with this message at 00:50 on Apr 16, 2015 |
|
#
?
Mar 9, 2015 10:15
|
|
|
Just finished binge reading this thread, I can't believe how much this has taught me about the game. And holy crap the Sain though 
|
|
#
?
Mar 9, 2015 14:04
|
|

|
Obviously it would prevent you from S ranking Lyns mode, but what are your thoughts on killing off Kent/Rath/whoever in her story for the changes in their stats and levels when they rejoin?
|
|
#
?
Mar 9, 2015 20:53
|
|
|
 Absolutely the biggest, most ferocious battle to date. If you don�t thin the herd, the enemy will easily slam into the 50 unit cap and stop spawning reinforcements. Meanwhile, you have almost a dozen useless but brave allies with bizarre AI. It�s really the allies, rather than the enemy, that present the big tactical surprises on this map. Yeah the enemies are pretty tough and very numerous, but they fight conventionally and this is a very ordinary map. But when your allies start blocking you, stealing your kills, and luring the boss to unexpected areas, things get tricky fast. Chapter Summary: Uther, the Marquess of Ostia, arranges to meet the group halfway rather than in Castle Ostia which is full of spies. Hector, Eliwood, and company are waiting to meet him in a fortress on the Ostian border when Nils suddenly collapses. Around that time, the infamous mercenary Eubans �who was working for Marquess Laus and doesn�t know he�s dead- hits them with a huge surprise attack. Meanwhile, the Black Fang elite is manipulated into preparing to attack Eliwood.  The gang�s all here! At their mountaintop fortress in Bern, Brendan Reed and his wife Sonia, Nergal�s minion, meet with the Four Fangs: Jaffar, Ursula, Lloyd, and Linus. She tasks them with hunting down and killing Eliwood.  And she acknowledges that he and his group are actually a huge threat and to be taken seriously. Her brand of intelligent, practical villainy is really refreshing after Ephidel�s idiocy. And again, I like that Nergal and his minions are actually proactive.  This quick conversation reveals a lot of tension and distrust within the group. While Sonia has Brendan in the palm of her hand, his sons Lloyd and Linus do not trust her and go so far as to question whether their father really approves of the orders she�s giving.  Meanwhile, back at the plot, everyone is chatting while they wait for Uther when Nils suddenly falls unconscious.  And that�s when Eubans- the semi-legendary leader of the mercenary company who attacked on Chapter 15- shows up with his whole army. Heath- and indeed many of the others- are not keen on attacking Eliwood here when Marquess Laus has disappeared and they�re all on the run from Ostian forces, but he insists.  And he stupidly tries to strong-arm Heath into fighting despite Heath not wanting to hurt the women in the group by threatening to turn him in to the authorities in Bern (from whose army Heath deserted BECAUSE he was ordered to attack women and children). As Sealen remarked 9 chapters ago, Heath isn�t cut out to be a mercenary, but Eubans is a quintessential one. 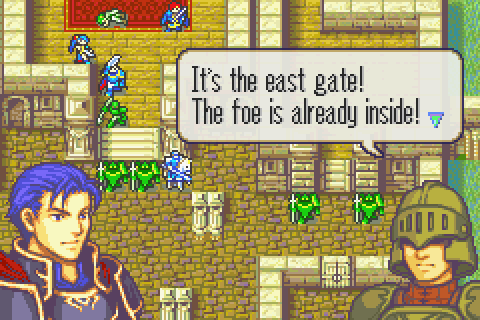 Of course they are. No soldiers whatsoever were posted at the gate or anywhere near the actual entrances to the fortress. Again, people in FE games just have no grasp whatsoever what castles are FOR. This whole scene, of course, is reminiscent of the last time Eubans�s company got inside a fortress we were resting in and surprise attacked. The War Room, Part 24 Since this chapter is the first since Whereabouts Unknown to have non-recruitable green allied units and is the first period where they�ll fight even if you�re playing well, this is a good time to talk about turn and movement order- and about green units for that matter. The most basic thing to understand of course is that the game cycles through the Player Phase, Enemy Phase, and Allied Phase in that order every round. Blue, Red, Green, in that order. BRG. If you mistakenly think the green units go before red, you could make some very poor tactical decisions, so make sure you remember. I�ve played long enough that it�s obvious to me, but maybe the following silly mnemonic might help the less experienced: if you remember the right order, then you�ll get to BRaG about your easy victory. Now within each phase, what determines the enemy (or allied unit) movement order? Well generally they go in the predefined order that they were loaded into the map. This starts with the boss and you can check what order the rest go in by clicking R on the boss and then tapping down to go through the full list in order. But from what I�ve seen on this chapter, I believe there is an exception to this rule (I�ll try to test it further in the future since it�s contrary to the way I thought things previously worked). It seems that if an enemy cannot currently attack ANYONE, that enemy will be skipped for now and then will be checked again later in the turn order. For example, imagine that Lyn is currently at a choke point and is up against a fighter and a wyvern rider. Suppose the wyvern rider is first in the turn order (which you found out by clicking R on the boss and then tapping down until you found both units in the list, running into the wyvern rider first). What happens on the enemy turn? Well the wyvern rider�s turn comes up first, but it can�t attack anyone. It doesn�t just wait in place or move and then wait, instead it is skipped for now. The fighter attacks Lyn. If the fighter isn�t killed, then that�s that. But if the fighter IS killed then the wyvern rider realizes it can now attack Lyn and does so. You can use this knowledge to significant effect sometimes. For example, suppose that Lyn can equip either an iron sword or a lancereaver and she�ll be attacked in a chokepoint hallway by either the fighter or the wyvern rider but can�t just go next to one immediately. Further, suppose she won�t kill either of them with her counterattacks (typical for Lyn really). This means that exactly one enemy will attack her, so it�s optimal to equip the weapon that enemy is bad against. If you know the wyvern rider goes first, then you know you should equip the lancereaver. Otherwise you should go with the iron sword. Another example was seen on Chapter 11 where killing the boss ends the level. On that chapter, the boss attacked and was killed by Hector so the chapter immediately ended and I won- even though Hector was in range of several enemies who could have killed him. You can similarly apply your knowledge of the order green units move in and the fact that they go after the enemy to get some tactical advantage, but first you should know the following information about green units: First, there�s no consistent pattern as to which green (allied) units will actually charge across the map to seek out and destroy the enemy and which will stay put unless an enemy comes into their movement range. Unless you happen to already know in advance, you should probably assume they�ll do whatever is least convenient for you. Besides generally fighting very badly, they NEVER gain XP from fighting. This is true even of recruitable allied units like Rath on this chapter, so letting green units fight- let alone get kills- is pretty much always a waste of XP. That said, occasionally the waste is worth it. You can let green units soften up an enemy for you to kill more easily, minimizing their XP theft. Their terribleness often makes this as simple as making sure the enemies they fight aren�t badly injured to start with. And lastly, note that the green unit AI seems to have exactly the same crazy priorities as the red one: they will gleefully attack anyone who can�t fight back, but are even fonder of suiciding one by one to a powerful unit that together they have a tiny % of actually killing. In general they have no grasp of the possibility of missing on attacks, so they will choose to target someone who they could kill if it wasn�t for the fact that they have a 0% chance to hit and who will definitely counter and kill them over a completely defenseless person they could hit with 100% accuracy but couldn�t kill. Battle Preparations & the Map: 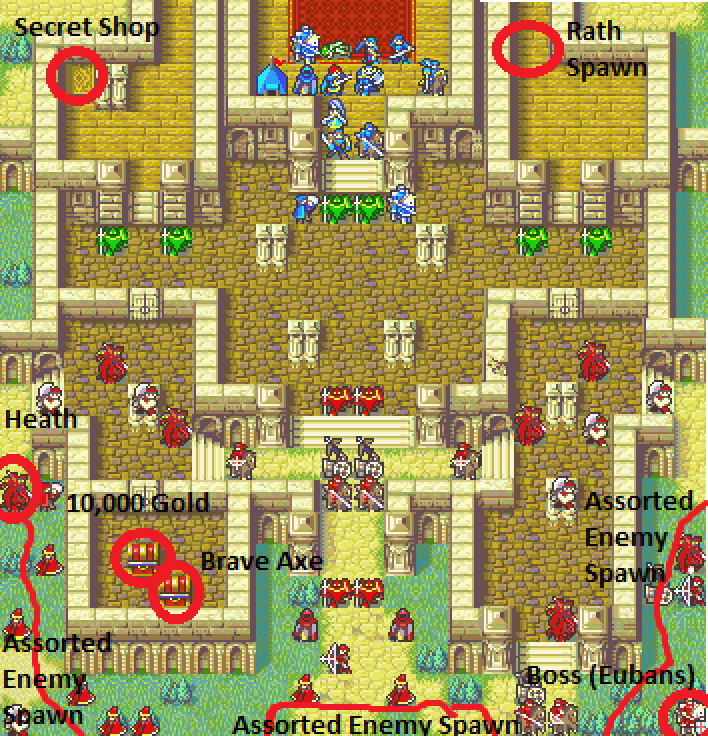 It�s a big one, but a lot of it is empty space where no fighting will take place. It�s also a very crowded one. That�s nearly 40 starting enemies and more are on the way. And you have 6 alllied Ostian knights + Rath is about to arrive as a green unit with a couple of other allies. From all the locked doors, you might think there�s really just going to be one big front to fight on, but actually loads and loads of the enemies have door keys and they will destroy the broken wall on this chapter. On turn 1, both left doors will be opened first thing and the right broken wall will fall. Curiously, even though there are 3 fighters with door keys nearby, no one will EVER open the right door under any circumstances. You�ll also note that this map is pretty wide open, has quite a few ballistae and enemies with bows, and its only notable terrain features are the kind of walls that block air units as well as ground ones. This is not, in short, a map that flying characters are very good for. The fact that the enemy wyverns are very numerous and outclass your pegasus knights doesn�t help matters. Despite appearances though, this map is actually quite straightforward. It�s just one huge fight on 3 fronts with some characters to recruit, not a lot else going on. There are 2 chests, but they�re fairly easy to get to first and the enemy thief thankfully goes for the Brave Axe first instead of the 10,000 gold which you couldn�t get back under any circumstances. No hugely valuable items you have to steal. No reinforcements from behind. No fog of war (3 of the last 5 chapters had fog!). No incredibly tight time limit. They even gave you a solid number of units and some allies who do contribute a little bit toward winning the fight, even if they ARE also a nuisance. The enemy are pretty dangerous, but not quite as much as they could be. The biggest threat on this chapter is not actually the wyvern riders, it�s the gigantic number of assorted magic users pouring out of the bottom middle. Very few characters can stand up to magic attacks, so you�d better bring some who can. Now the reason the chapter is easier than it looks is the enemy equipment: 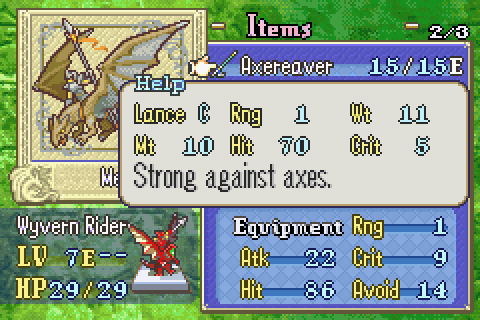 Almost EVERY enemy has reaver weapons! If you don�t notice that while setting up, then you pretty much instant-lose, but you deserve that because checking the enemy equipment is absolutely essential for a ranking run. Now reavers are quite formidable weapons- more dangerous than the poison ones that made the wyverns last time survivable- but the trouble is that they�re easily countered. If only 50% of the enemies had reaver weapons and the others had iron or steel, this chapter would be extremely hard. But since ALL of them have reaver weapons and since the weapon triangle is not merely reversed but DOUBLED and reversed for reaver weapons, you can take on huge numbers of enemies safely by just matching lance enemies with sword charaters, etc. Also, the enemy wyverns are actually lower level and slightly weaker this time, which helps. 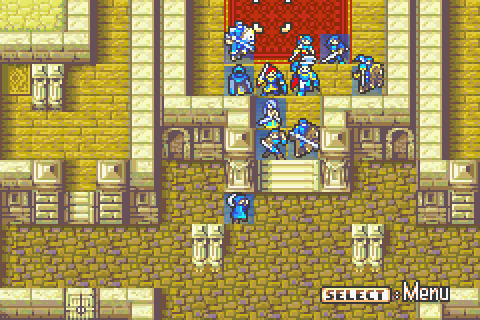 Objective: Protect Nils (He�s in a 100% safe spot so don�t worry) for 11 turns or Kill Eubans (the boss) Secondary Objective: Recruit Heath with Hector or Lyn Secondary Objective: Recruit Rath with Lyn Secondary Objective: Get the 10,000 Gold from the left chest Secondary Objective: Get the Brave Axe from the right chest Secondary Objective: Steal the enemy thief�s lockpick Secondary Objective: Visit the secret shop Reinforcements: A very large number of many, many types of units �mostly wyverns and various kinds of magic users though- scattered all around the bottom and bottom left and bottom right parts of the map. They all stop by turn 8 or 9 though. Turn Limit: 11 (Remember, if you actually wait out the 11 turns on a survival chapter then it counts as 12. If you kill the boss to end it early though, it counts as the turn you actually won on). A very cushy time limit, it�s easily winnable with plenty to spare. Units Allowed: 8 + Hector + Eliwood + Lyn + Isadora. Wow, that�s a ton of units! More than enough, especially since you have all those allies and can recruit 2 more in the chapter. Units Brought: 1) Hector. Required. He�s surprisingly ineffective on this chapter since lance users with axereavers predominate while sword users are rare. That�s just as well, mine is about 20 XP from level 20 anyway. 2) Eliwood. Required and suddenly AMAZINGLY useful because so many enemies have axereavers. And he has the Str to actually deal damage to wyverns once he has that edge. 3) Lyn. Required and pretty bad. She�s just too weak to hurt most things even with the doubled weapon triangle advantage. Plus she has to run out of her way to recruit Rath, so she can�t do much fighter. 4) Isadora. Required and surprisingly awesome. She�s just good enough that you don�t need to worry at all about her and just bad enough that she�s good for feeding kills to other people without slaughtering the enemy herself. She�s like an early game Jeigan is supposed to be. Plus she�s great for rescuing people around. 5) Sain. Yes, he�s back, but actually more in a support role. He�ll mostly be here to rescue people around and to kill exactly 2 problem enemies on the left flank so that I don�t need to commit a huge force there to take control of it. He�s also my insurance in case things go bad on one particular front and I end up needing serious muscle. 6) Canas. This is Canas�s chapter. Sain could not do what Canas is going to do on this level. No one else in the game is anywhere near as good as taking on giant hordes of enemies that are like 75% mages with 25% weapon users thrown in. I hope to get him to level 20 and promote him to Druid at the end of the chapter, but we�ll see. In any case, he�s definitely my MVP this time. 7) Ninian. Ninian continues to be astoundingly good. I�m not really using her to her full potential this chapter, but she still makes possible maneuvers I couldn�t even attempt otherwise. Ninian use is essential for seizing control of the left front early, which you need to do to recruit Heath and get the treasure. A Ninis�s grace before charging into the bottom middle hordes would completely seal the deal and let me use someone other than Canas there, but I think I�ll use her to feed more kills to Heath instead. 8) Raven. Like Eliwood and Lyn but better. Raven is awesome here. 9) Legault. Could be a decent fighter with so many axereavers about, but I�ve already got a total of 4 sword specialists, so he�ll just be on treasure and theft duty. 10) Guy. Yeah, Guy is bad as usual, but he�s usably bad here and that�s something, right? And this is the best chance I�ll get to give him more XP so as to get to Jerme�s level. 11) Priscilla. Definitely need a healer on this chapter and Priscilla remains better than Serra at just about everything. 12) Lowen. Actually, I could easily have brought many other people in place of Lowen, but honestly I just really want to see if I can actually use him this run. In any case, his fairly versatile set of weaponry and solid defenses mixed with non-terrible offense makes him an attractive character for a map like this. He�ll mostly be on breach-blocking duty, nothing glamorous, but he�s darned good at that. Notable Units Rejected: 1) Dorcas. There are like 2 units with lancereavers on the level and 20 with axereavers. And he�s not good at the best of times. 2) Dart. Slightly better than Dorcas, but same problem. 3) Florina. She�s bad this level. Florina with iron lance vs wyvern rider with axereaver is a very bad matchup. Plus there are tons of nomads and ballistae about. She�d be good against the magic users in the bottom if it weren�t for the fact that several knights will be mixed in. 4) Fiora. Florina but worse, as always. 5) Serra. I could use 2 healers, but I do want to avoid Kenneth�s chapter and I�d rather have Lowen. 6) Erk. Tempting for taking on the enemy monks and mages, but don�t be fooled. He can�t take even 2 hits from enemies with actual weapons, and he�s going to need to take 3 or 4. 7) Lucius. Even worse than Erk for this purpose. Sure he�s immune to magic, but a stiff breeze with an iron sword will knock him over. 8) Matthew. Only one thief really needed here since the treasure is nicely concentrated and there�s not much to steal. We haven�t had a chapter that was really nothing but a huge knock down, drag-out fight since Pirate Ship- and even that was different in that the enemy forces were actually overwhelming. These are even more numerous and better armed, but we�ve increased in power so much that they�re much easier. Really it reminds me most of Chapter 14: False Friends. It�s going to be pretty refreshing and fun and a good chance to get some leveling done. Legault is almost a no-brainer. Usually I�d be putting someone like Ninian in that spot, but in this case there�s no point since Hector is the one who really needs to get left fast and he starts really far back. He doesn�t actually have a lockpick of his own; there�s no need since I plan on stealing the enemy thief�s one promply. Now Isadora is going to start 3 spaces right of Legault and she desperately needs someone to hand her an iron sword. I don�t want her or Sain to do much fighting, but I do foresee needing them to eventually pull Hector back from the left front once Heath is recruited so he can be used to weaken Eubans. Meanwhile, it�s absolutely imperative that I get Hector above the left door on turn 1, and that�s absolutely impossible without some rescue-dropping, so I�ll have Sain and Isadora drop him into a good position for Ninian to dance him the rest of the way. Ninian is only as far forward as she needs to be for that purpose. Canas�s big job comes after the first wave is dealt with, so he doesn�t need to be in the front line. He also only has a single Flux tome and no backups, so I don�t want to use him more than I need to (which is a ton). Raven and Lowen are the ones I want using their swords to tank the initial axereavers, so they get those front spots. Raven doesn�t need any special swords to be effective, so I just give him iron with a backup of steel for when he needs a little bit more damage. Lowen will be doing serious tanking duty so he gets a vulnerary as well as a wide variety of weaponry. Guy is useless and just there to be fed what XP I can spare, so he goes in the back. He�s got a killing edge so that he can actually kill things with more than 1 Def. Similarly, Eliwood has the new Wyrmslayer. It would have been useless last time, but now that it has weapon triangle advantage to increase its damage by a total of 6 per hit relative to last chapter, it�s pretty great. Lyn has an iron bow which she�ll give to Rath because he really needs one. All of those weapons are of course quite pricey relative to iron but I�m way ahead on funds. Furthermore, sometimes you just need to hit really hard -just like sometimes you really need to hit at 1-2 range. The common maxim that max ranking HHM requires using only iron weapons is completely stupid. If you want to max rank HHM, you�d better NOT only use iron weapons. Iron should be your bread and butter, but everyone should probably have at least one special weapon at all times for special purposes. Use your super-effective weapons and your Xreavers. Definitely use your Wolf Beil and Rapier and Mani Katti. Buy javelins and handaxes in bulk. Use Luna. Heck, use Nosferatu or Thunder or whatever lets you get the job done. Use steel or killer weapons or even silver when you have to. Just don�t use them except when they�re necessary: when they save you turns, when they let you beat enemies you absolutely need death right now, when they let someone weak net a kill and get some precious XP, etc. And make sure you use trading to switch back to iron or the like so you don�t waste any uses. Healers never have much to do on the first turn, so Priscilla starts in the back. She�s packing an iron sword as well as the member and silver cards. Those are all for Isadora since I plan on having Isadora stay out of the fight after the initial few turns, and she might as well go check out the secret shop for me. And no one�s gear is about to break! It�s wonderful! Everyone is decked out with iron weapons and javelins/handaxes and more, all in perfect condition. The Characters: 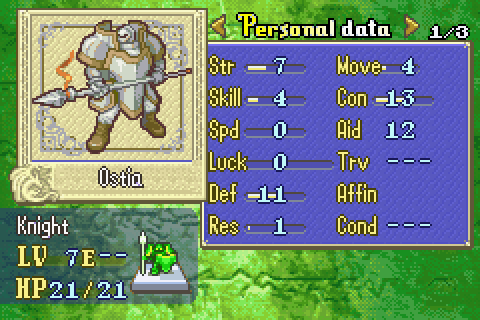 Our allies, the famous- and invariably terrible- knights of Ostia. The level 1 knights you fight early in the game could beat these guys. They�re mostly just good for blocking you and slowing you down and stealing your kills. And for once there�s no bonus if you keep them alive, so let them all get massacred quickly. If there�s one thing they�re good for, it�s attracting enemy fire. Rath will also be rejoining, along with a pair of much more competent but ultimately still fairly mediocre allies. Each of them is about on par with a single enemy each. Rath himself is pretty solid on this level due to all the flyers and his always respectable movement and stats, but it�s going to be hard to recruit him while also using Lyn. 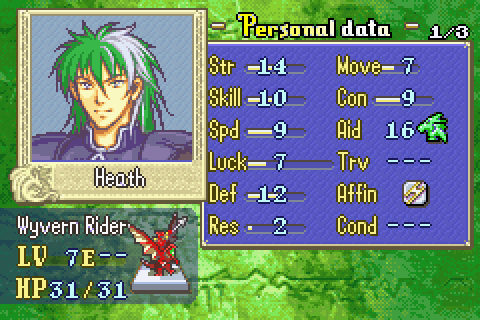 �[Attacking women and children] is something no knight, no man, could do without shame.� �Heath, Chapter 22 A renegade from Bern�s wyvern knights who joined Eubans�s mercenaries and now is deserting from them too, Heath is a courageous and principled (if perhaps kind of sexist considering that women regularly fight alongside men in this setting) man. His most interesting relationship is really with his country. It�s clear he misses Bern and was proud to serve in its armies, but he was disgusted by an atrocity he was ordered to commit and decided he would rather abandon his country than continue to serve while its military leaders were so corrupt. Look at those stats. He�s lower level but better than those overwhelming wyverns from last chapter. I think he has more Def than my level 17 or so Florina and 12 or so Fiora combined. And more Strength than either of them too. Heath is, bar none, the best air unit in the game. Which makes him quite possibly the best unit in the game other than Canas. His only trouble is his low starting speed. His growth is respectable and his massive strength, HP, and Def will allow him to take on just about anyone, but until his speed grows a bit he won�t really be able to one-round kill people well and that means it�s hard to feed XP to him. Oh and this one time I realized that his hair �other than being green- looks just like David Bowie�s did in Labyrinth and now I can�t un-see it. 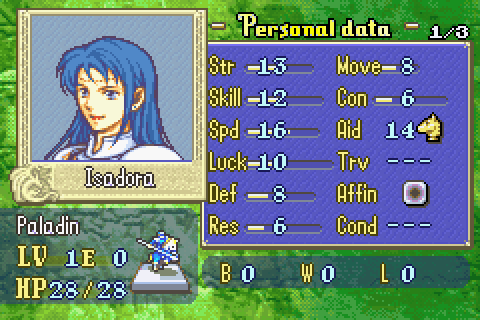 �I will serve with my very life.� �Isadora, Chapter 22 Another of the impressively skilled and loyal knights of Pherae, Isadora was left behind to guard Eleanora, but was sent to aid Eliwood after word of Elbert�s death reached his wife. She was engaged to Harken, another knight, and seems to have been trained by Marcus, who respects her but is definitely her superior in the group. She basically never talks outside her supports and almost no one else has anything to say about her other than that she�s apparently beautiful, so it�s hard to learn much about her personality, but her supports are actually pretty great. Don�t use Isadora. Marcus had better stats when he was level 1 and Marcus sucks. Her only real asset compared to him is her speed, but her absolutely horrible Con for a paladin negates much of that that if she uses anything but an iron sword. On this chapter you have to bring her so you might as well put her to work, but in the future she�ll never be useful. Worst paladin in the game, hands down. 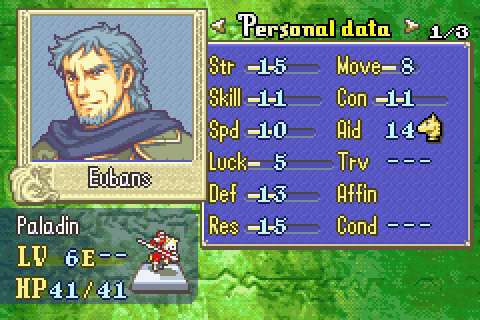 �I live and breathe the air of war! I can�t be beaten!� �Eubans, Chapter 22 One of my favorite minor enemy characters, Eubans is a sleazy, unprincipled, cynical, but darned competent mercenary. His men are loyal and disciplined because of his leadership and they�re a fighting force far superior to most of the regular armies you�ll run into. Other than being way too loyal to Marquess Laus for some reason, he�s actually pretty mercenary- which is rare for mercenaries in this series. Most mercenaries we run into in FE are heroes or anti-heroes at worst with a strong sense of morality and a reason to fight other than money. In other words, they�re not really mercenaries. Eubans�s company are a lot more like, say, condottieri in renaissance era Italy really were, and I find that refreshing. It�s nice to see at least one group of mercenaries portrayed as little more than a gang of assassins with better weapons and military skill. Eubans doesn�t really get much of a power boost in HHM, though he does now move. As long as you know that, he�s not that hard to deal with. His stats are solid all around, as is his weapon the semi-unique Spear, but he�s not a threat to any character who should be fighting a boss at this point. Playing Through: 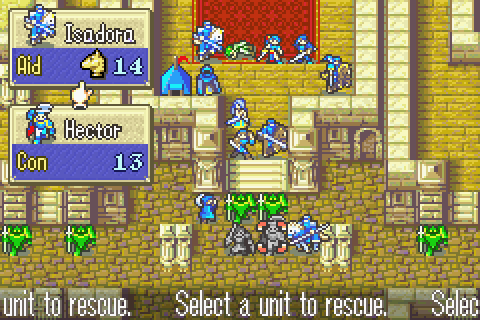 Hector moves up so Isadora can rescue him and then let Sain drop him. 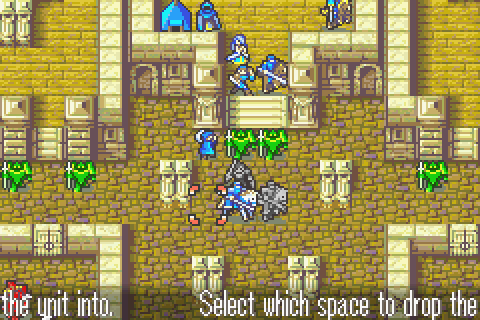 Sain does his part, dropping Hector just at the edge of Ninian�s range. 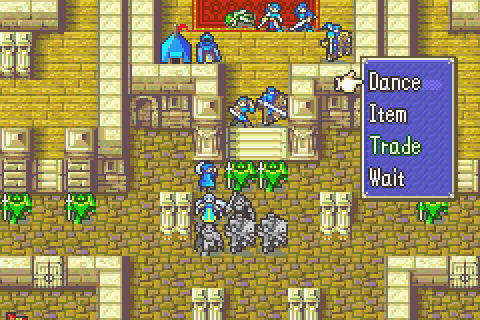 Which will let him most to precisely in front of the left door-exactly where he needs to be. 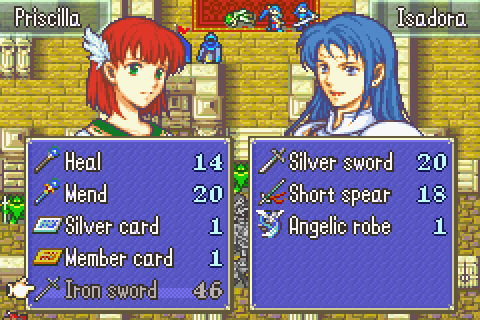 And a space was left so that Priscilla could move forward and trade with Isadora. Isadora will give up that angelic robe and get the 2 cards and the much cheaper silver sword. That little gambit was really elegant. No movement was wasted, no one started further forward than they needed to, everyone ends up in the perfect positions and with the perfect gear to do their jobs. And my other units were free to just begin their advance. 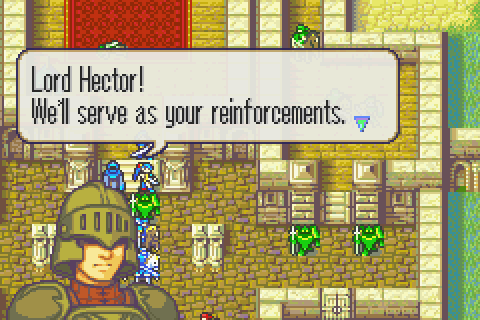 The enemy also just spends their turn moving up, so at the start of turn 2 Rath and his group arrive. It�s about time WE got some reinforcements for once isn�t it? 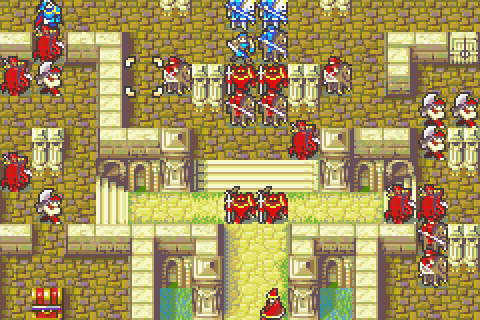 As so often happens, turn 2 is the big one. Look at this massive wave of enemies! But critically, most of them can be chokepointed off to fight later and only a few of the people in the middle are armed with something other than axereavers. So I�ve got a plan�  First, I need to break through this wall of enemies to get to Heath and talk to him. 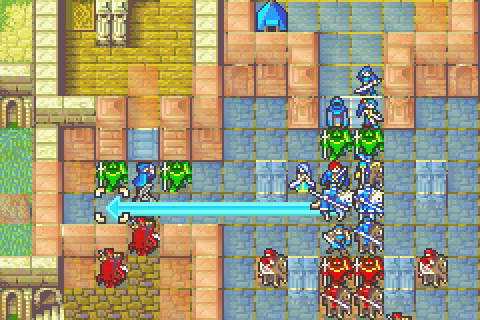 Sain is in position to ride over and kill the other wyvern- and no one else could possibly do this, it HAD to be Sain. He goes to the left side of Hector so Ninian can dance for Hector on the right. 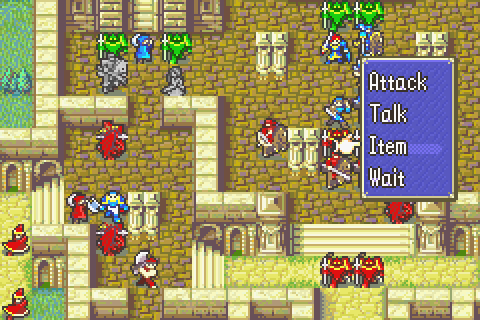 See all those mages? I�d better equip a handaxe to deal with them before talking.  Heath get! 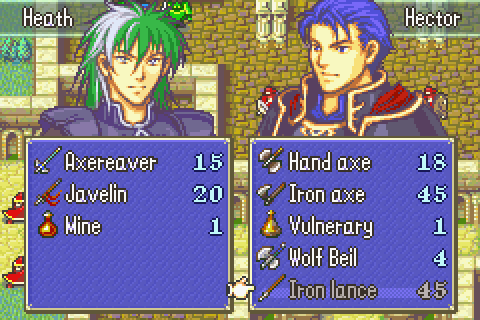 I gave Hector an iron lance for Heath, just like I gave Priscilla an iron sword for Isadora and Lyn an iron bow for Rath. ALWAYS come with gear ready to trade to recruitable allies who don�t start with the stuff they need. If you don�t think ahead like that, you�ll really be hurt bad. 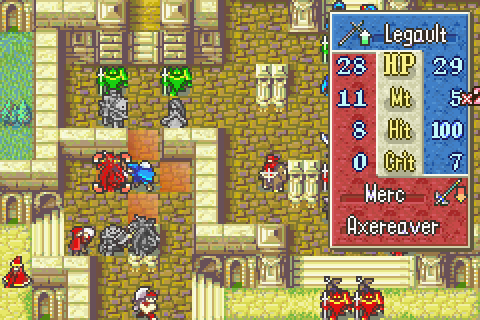 Thanks to the miracle of doubled reverse weapon triangle, Legault can actually win a fight against a wyvern rider on this chapter. For now he just needs to block this spot though. 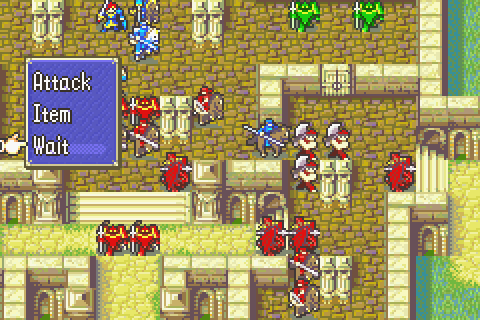 So remember how I had a war room about enemy move order? Here�s where that matters. Those wyvern riders with their dangerous axereavers and that cavalier with his lancereaver go before these 3 fighters. So if Lowen attacks with his lance and kills this swordreaver fighter, he gets 1 kill. Then he�ll immediately be slugged by a wyvern rider and won�t make any progress for like 3 turns. If Lowen just waits, then the fighters should all suicide to him and he�ll get 3 kills. That�s what would happen if the enemy actually went strictly in list order anyway. 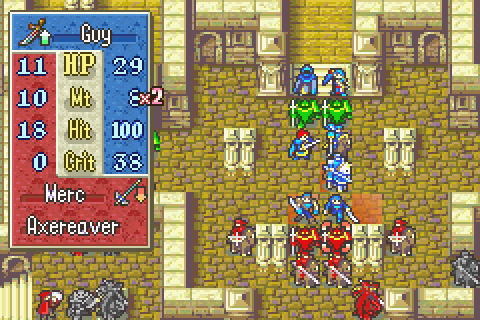 So with Lowen out of the way, Guy can finish this knight he weakened- but only with his killing edge. Oh well. One nice thing about the killing edge is that criticals can save you money. 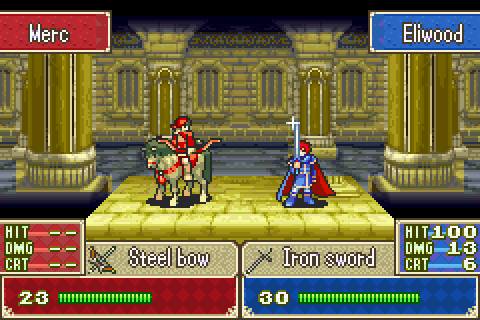 The nomads HAVE to die. That�s absolutely essential. If they�re alive, I�m going to lose Priscilla or someone. But if I can kill both nomads and at least 1 cavalier, then there�ll basically be no one but a bunch of axereaver enemies facing a wall of swords they can�t hope to beat. I really got a huge number of criticals on this level. Like 15 by the end I think. Most were at completely unimportant times like this. 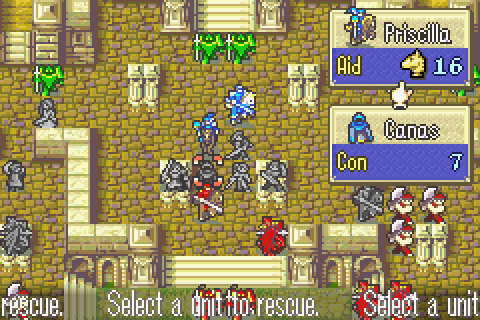 Raven killed the other nomad, Lyn killed the other knight, and Canas killed the right cavalier. But Canas can only survive 3 lancereaver hits- not 4- and his offensive power means he�d end up having to fight all 4, so I need to get him out of there. 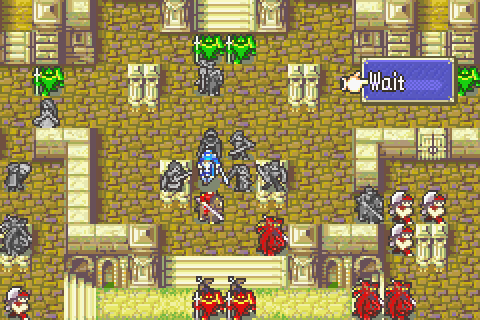 Isadora drops him back down and then moves in to complete this semi-wall. Priscilla can be hit by the cavalier, but that�s fine. All the other enemies are up against people they have a 90% chance to miss. This turn was really a good demonstration of a lot of the damage reduction tactics I talked about in The War Room, part 18. 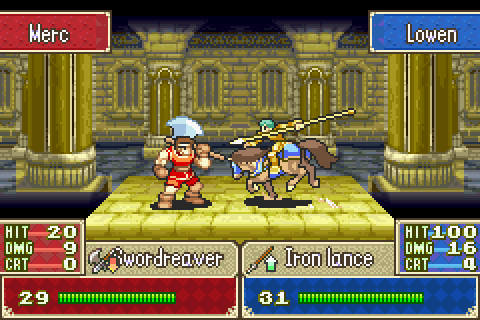 Even Lowen can wreck enemies who have the wrong reaver equipped!  Oh. Oh darn it. I JUST realized as I�m writing that this guy drops his armorslayer. And the green units killed him! So the armorslayer was lost forever and the game didn�t even tell me! DARN IT! Man, I would have restarted if I�d noticed that had happened before now. That�s a whole 1260 gold and a really handy weapon down the drain. And it was 100% avoidable. All I needed was for Canas to kill the left cavalier instead of the right� 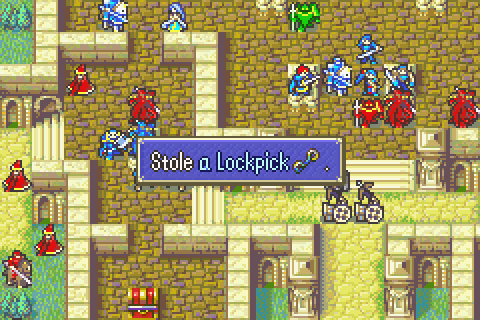 Well I guess that makes up for the money loss more or less, but I�m still kicking myself. Letting that cavalier die to the knights was, without question, the stupidest move I�ve made in this whole LP. 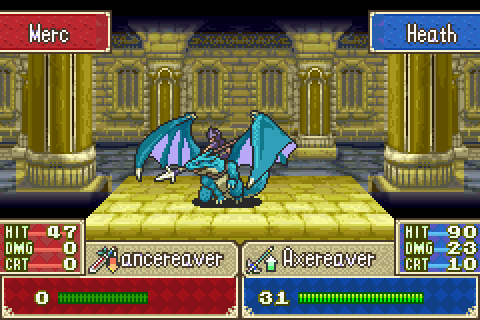 Heath is strong enough to outright instant kill some weak enemies like this thief. Hail the prince of the skies! 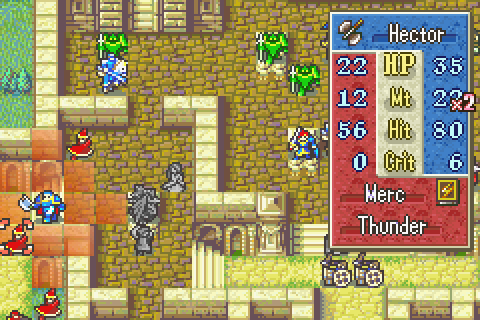 Mages are a big threat to Hector all throughout the game and this chapter is full of them, which is one reason he�s not very good here. Fortunately, he can instant kill some of them if he gets the drop on them. And Sain takes out this last remaining threat. The left flank is now pretty much completely under control. All that�s left is to loot the treasure and visit the secret shop at my leisure and to feed as many kills as possible to Heath with Ninian�s help. 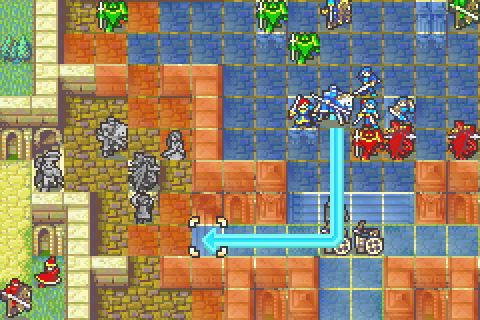 Isadora�s position last turn was of course carefully planned to let her move here. This will let me have Sain rescue Hector, move him nearby, and then have her drop him so I can use him a few turns from now. Meanwhile she can go shopping- or help Heath out. 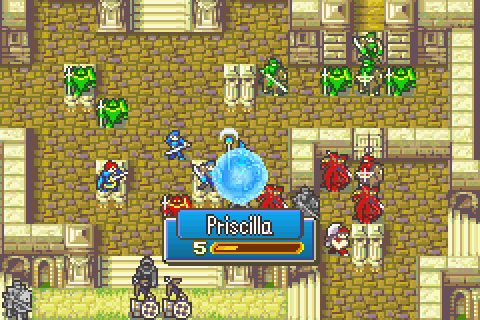 Priscilla needs a vulnerary after getting hit by the armorslayer, meanwhile Canas moves into position to tank about 12 guys- mostly mages. 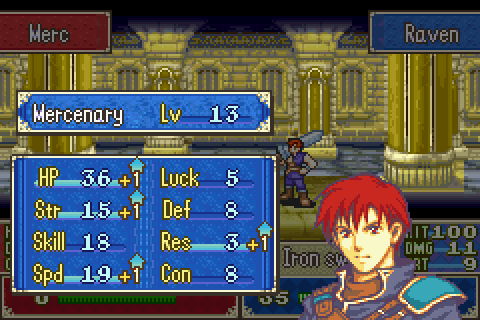 A nice level for Raven, taking down the wyvern rider nearby. Eliwood and Guy team up and like magic, the enemy forces have just disintegrated. 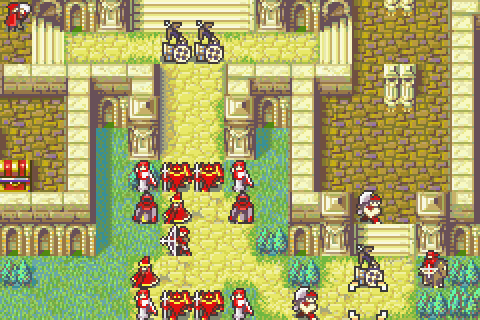 Except, you know, for this massive swarm of reinforcements started appearing a couple of turns ago. Canas is going to have his hands full for a little while. 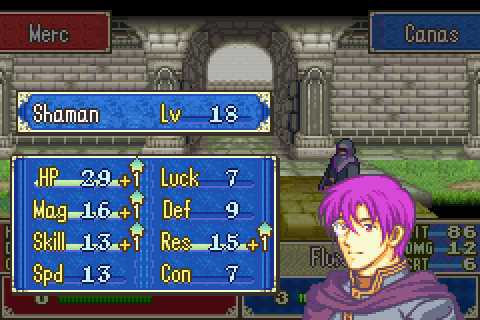 Sweet! Now every single enemy �literally every single one, which includes 3 people with actual weapons- who attacked Canas this turn hit him. And he still survived, because he�s Canas. 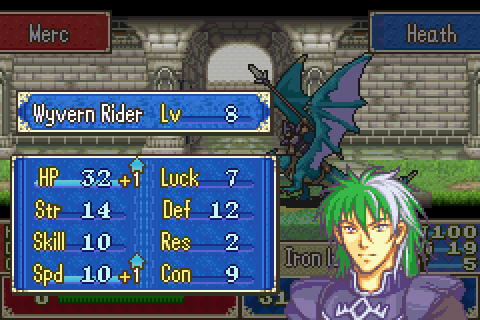 Sweet! Speed is all I need right now. 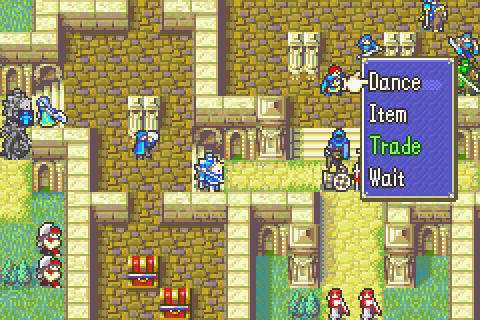 I changed my left flank plans this turn, having Hector and Sain help out a turn longer, but thanks to Ninian- and Isadora waiting- I can still get the two of them out immediately. 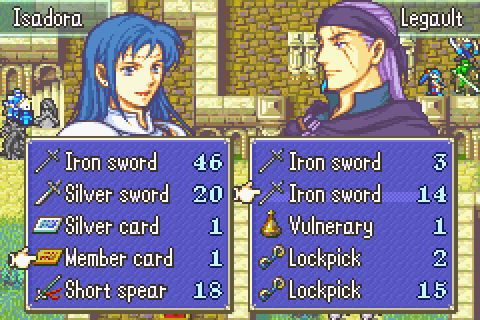 I�ve also decided that I may have Legault do the shopping. After checking the numbers, he can just make it to the secret store on turn 8, which is about when I want to end things, so that works out nicely. Isadora can help Heath instead. 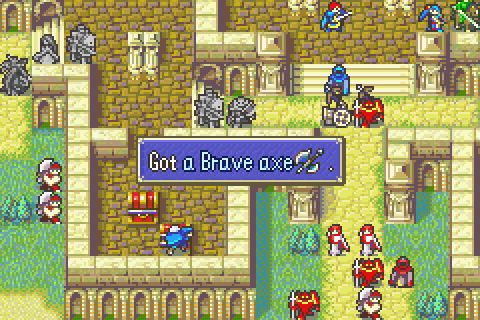 So Sain and Isadora basically switch places and Sain and Hector approach the middle front where a third wave of mages and more is coming. And Legault does what he does best. 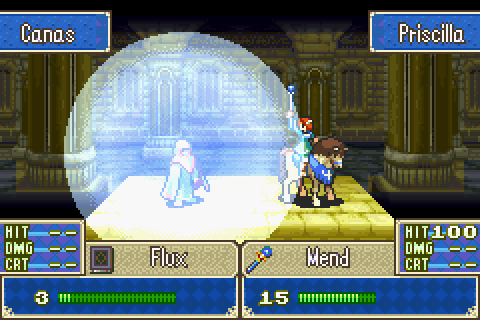 Sometimes you need a steel sword. Sometimes you need Mend instead of heal. When Canas has to go fight another 8 or so people including 4 with reaver weapons is one of those times. 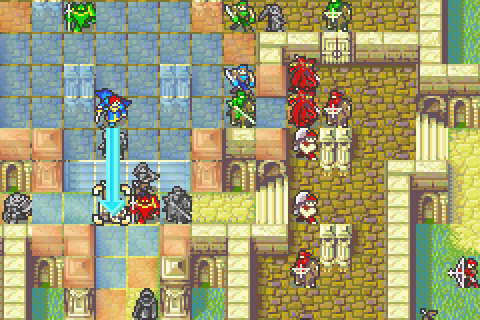 This knight actually has a steel lance. Crazy, right? And since I didn�t get that armorslayer, I have no way to easily beat the thing- Eliwood�s Rapier is nearly broken remember. So there�s nothing for it but to block it in till Hector or Sain can deal with it.  Lowen holds the line and gets a good level. And Canas kills another swarm of people while not much else goes on. 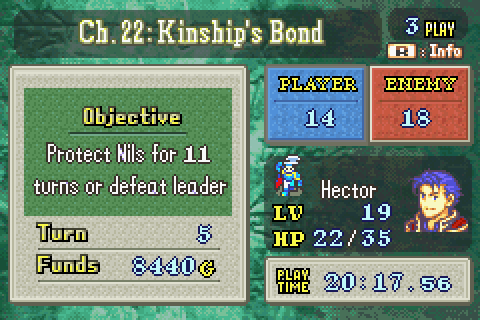 Turn 5 and the horde has been cut down to size. From here the rest of the chapter is largely mop-up and me trying to squeeze out the maximum possible XP.  Legault gets the gold. 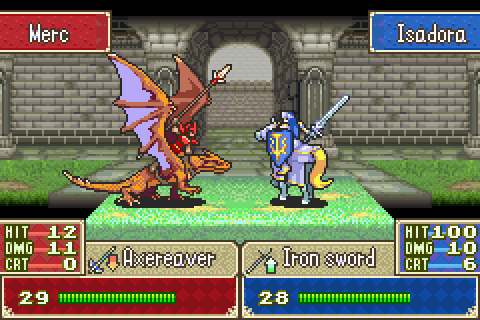 Isadora�s badness pays off nicely, since it lets her set Heath up to get kills. 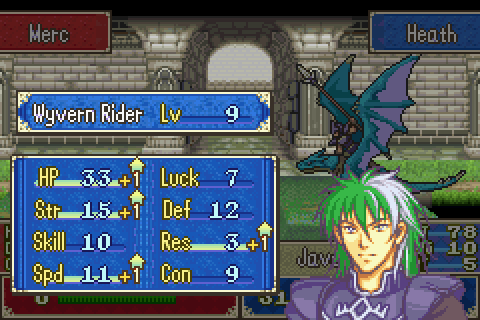 Awesome! 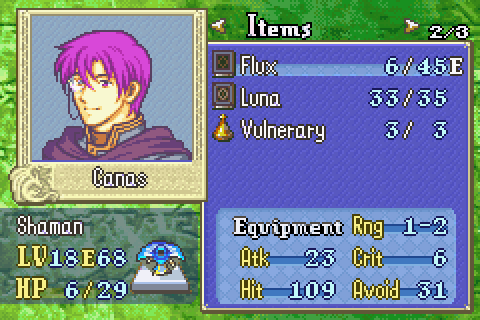 Not awesome! Canas killed so many people that he basically consumed an entire flux tome on one chapter. As a sidenote, that tells you how little XP enemies start to give on hard mode. Even my low level guys are barely growing. 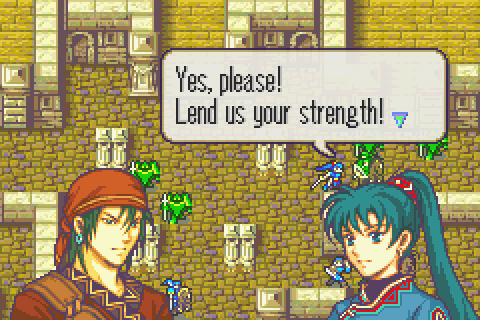 Lyn finally gets around to recruiting Rath. There�s just been too much to do. 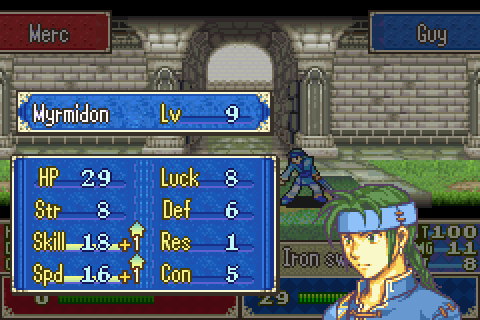 Thaaaaaat�s Guy! Not a single point of Str or Def in 6 levels. 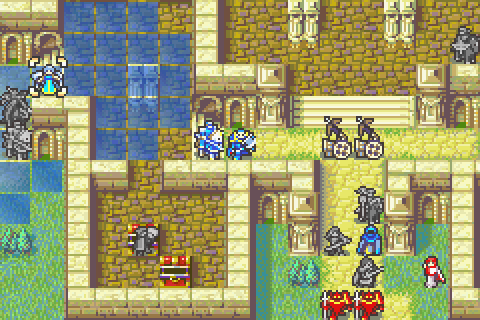 Hm, what do do. I want Ninian back on the middle front, but she can�t get next to Sain for him to rescue her with maximum efficiency. There�s a solution though.  Sain just moves one left and waits. Now she dances for him. Now she�s next to him and he�s ready to rescue her. 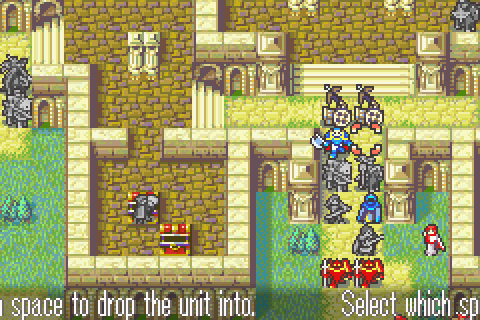 So between Sain and Hector, she�s dropped where she needs to be. Canas has torn apart almost all the enemy, so it�s down to people who aren�t even a major threat to Guy. 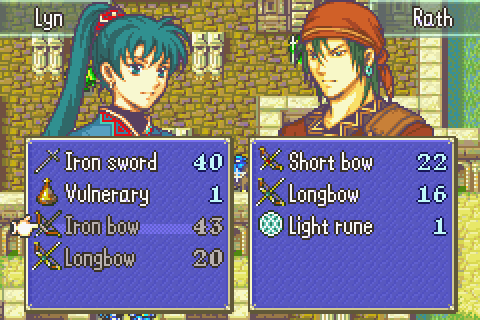 The turn after recruiting him, I have a chance to give him the iron bow. I also brought a longbow just in case because I didn�t remember that he started with one. 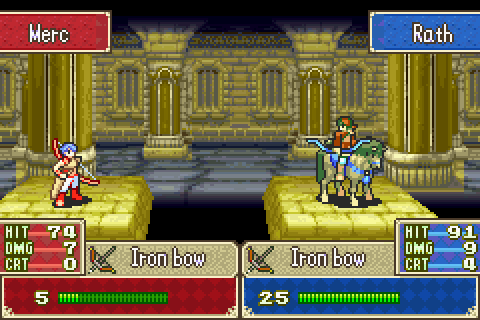 Rath outclasses enemy archers at join level. 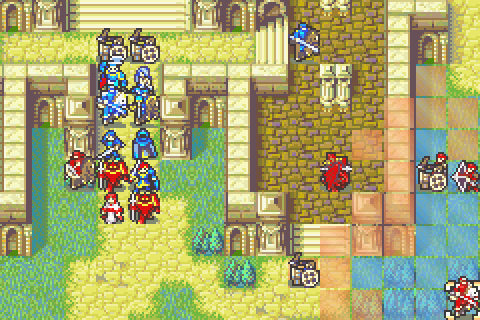 Meanwhile on the main front I check out Eubans�s attack range. The guy moves and I need to make sure he moves in the right direction in order to kill him efficiently, so I need to make sure I don�t just wander in. 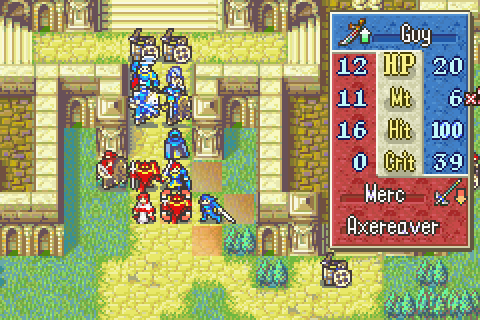 Again, Guy has to use the killing edge to do any damage. Fortunately he gets another crit. 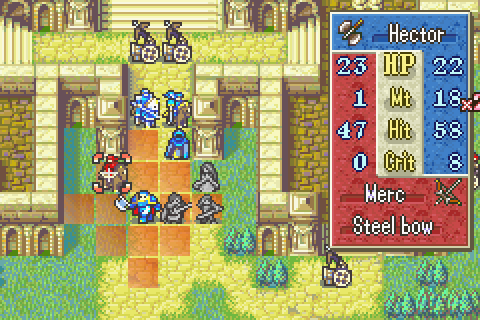 I mentioned a long time ago that sometimes you can use the inaccuracy or weakness of handaxes and javelins to your advantage. This is one of those times. Hector has a solid chance to miss at least once, which will let me kill this nomad with Canas while expending only 1 use of Flux instead of two.  Ultimately I went with the iron axe, but the same result. Hector reaches level 20 and his final stats for most of the rest of the game. He�s pretty average overall. Slightly good Str and Skill, slightly bad luck and Res. Good speed, bad Def. 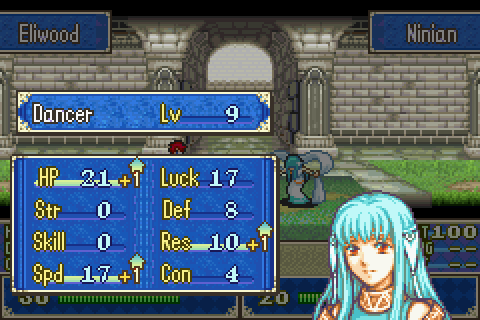 Next turn, Ninian gets a level as she helps Eliwood get some needed kills. Every little bit helps. 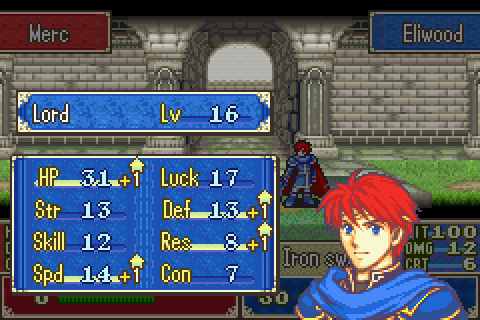 Awesome! Just what I was hoping for. Thanks, Ninian. I sure hope he doesn�t use the amazing stats you helped him get to accidentally kill you or something. As long as Eliwood�s next 4 levels are at least average, I think I might actually splurge and give him the first heaven seal. He�s turned out really excellent overall and I have truly staggering amounts of assets at the moment. 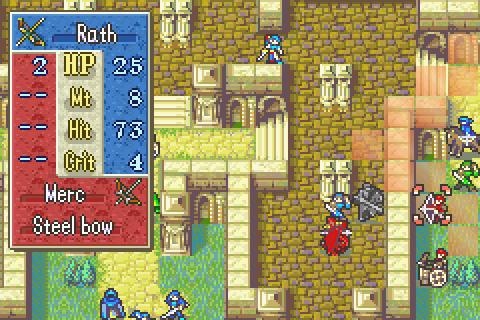 The longbow is really a great weapon, weak and expensive though it is, because it lets you get kills or weaken enemies in situations where no one else could even attack. 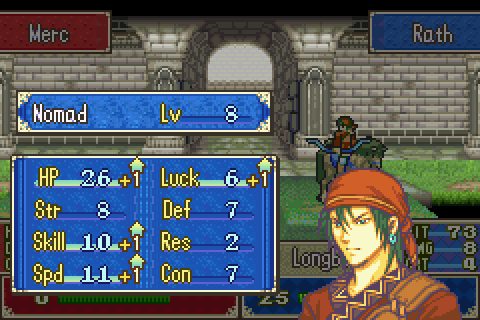 It�s all thanks to longbow! 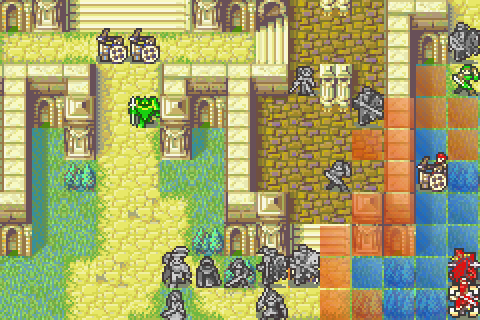 That darned green mercenary is going to lure Eubans next turn, so I�d better pull him the other way this turn. Sain is positioned to lure him to a spot where I can easily trap him and fight him at my leisure. 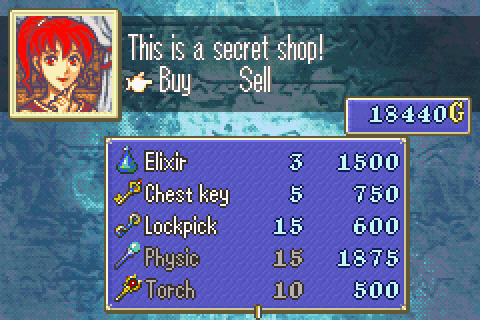 And Legault reaches the secret shop, so I can kill Eubans and win any time now. I pick up a ton of chest keys. I�ve been hurting for lack of them up till now since apparently the game basically just doesn�t give you any on HHM. I bought 4 or so sets- enough that I could open every single chest from here on with one if I wanted to. I also bought a pair of physic staves. They�re pricey, but sometimes they�re absolutely necessary and you need more. 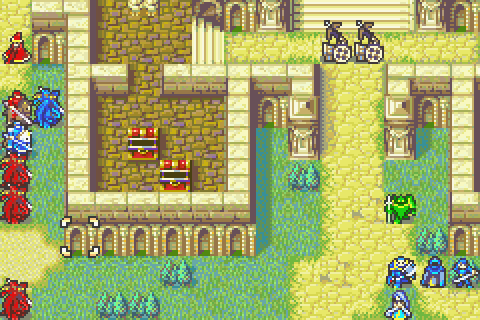 The reinforcements on this level are really problematic. We went from 0 enemies to a big crowd of dangerous ones in just two turns over here. While I figure out what move to make there, I make the easy moves on the eastern front instead. 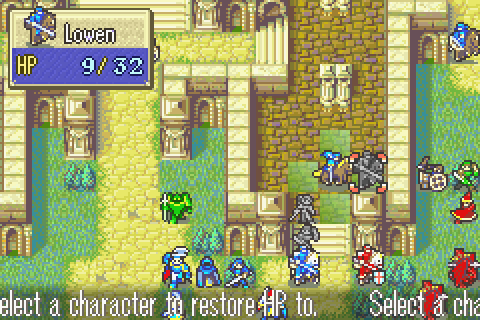 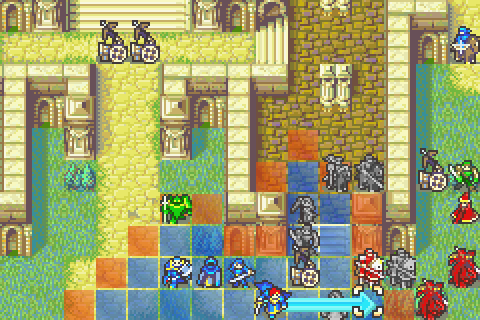 It�s a trap! Eubans took my bait. Ninian allowed Sain to get to the other side of him- and she acts as the perfect bait to make him attack someone who won�t prematurely kill him. Meanwhile Eliwood and Canas will block him in, allowing me to fight anyone else I want to freely. 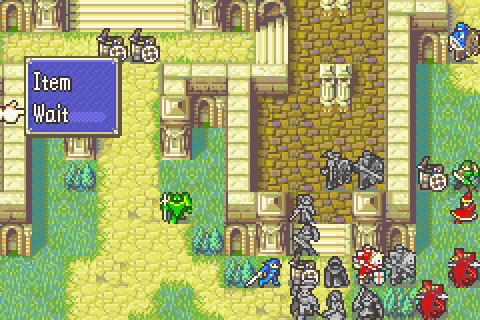 Everyone piles in just outside of his range, ready to harvest any reinforcements and kill him next turn. 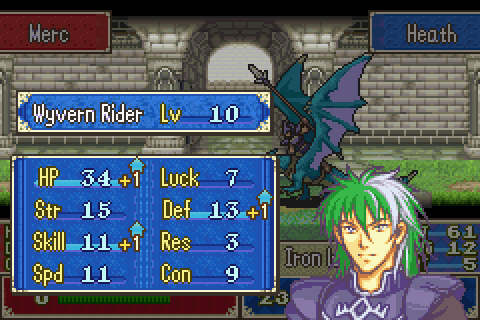 On the western front, I tried what I thought was a good strategy since it should have let about 4 enemies die to Heath. Instead, they all went for Isadora even though they had a 0% chance to hit her� This guy was the only one who fought Heath. 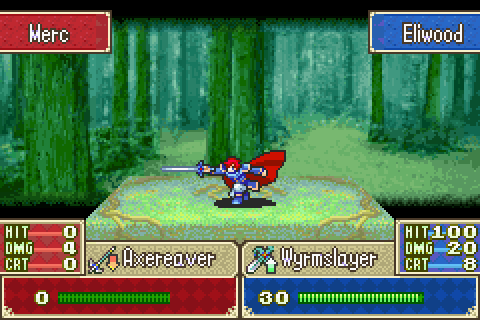 Next turn, I had to use the wyrmslayer just this one time to get the kill. That�s some pretty sweet damage. Last chapter I�d have been looking at just 12 or so damage due to level differences and the massive importance of the weapon triangle for super effective weapons. 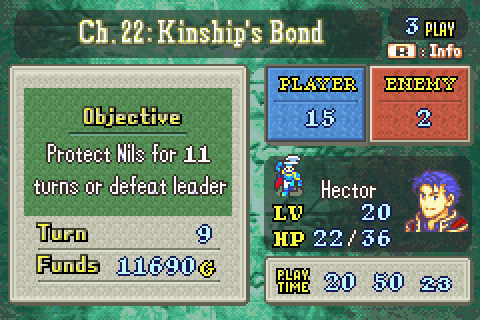 It�s turn 9 and I have killed every single enemy who will ever spawn on the map except for 1 more wyvern to the west and Eubans. Time to finish this. 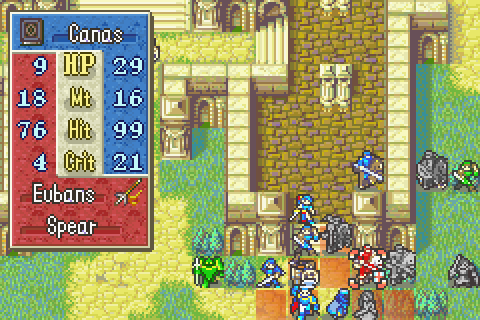 Luna is already showing its great value for assassinating bosses even though Canas isn�t even promoted yet. 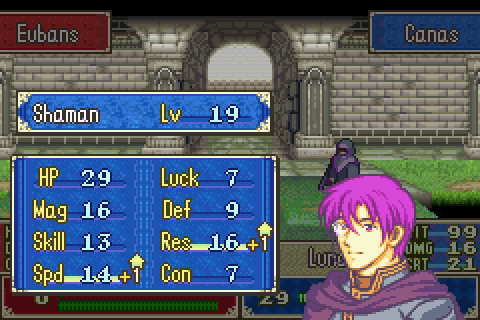 Pretty good; I�ll take it. 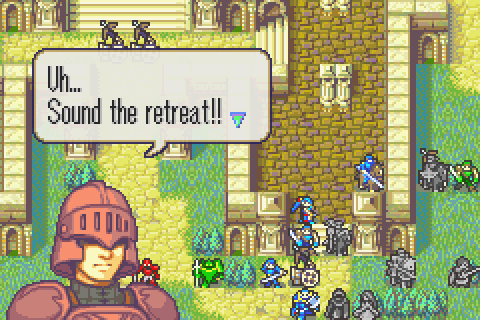 I guess that must be the job of the one remaining wyvern rider. That�s the chapter finished! Now Uther arrives and no one acknowledges that a battle just happened 5 minutes ago.  Uh� wow, Uther is kind of a jerk really. I mean, it was one thing that he refused to help earlier- he had his political reasons- but to now lie to the grieving Eliwood�s face and say he was POWERLESS when in fact he could have helped in many, many ways but decided not to is just cold.  And Eliwood will never know the truth it seems. I�m surprised Hector doesn�t have anything to say about this since he�d been yelling at Uther to help out earlier, but I guess he really does care about not causing political trouble for Ostia.  They explain things to Uther and then talk among themselves while he confers with his aides.  And they realize that since they didn�t bring back any proof, it probably won�t be possible to unite all the nations against the common threat.  Uther calls us back and lies again. He doesn�t help at all really. No funds. No men. No intelligence about what�s going on. I really don�t get why he doesn�t at least give you some money- Ostia has tons and tons to spare as we see later. Or maybe one more trusted retainer or something could join the party. Either of those things would make him not look like a useless, lying jerk.  And talking with Ninian, they discover that he may be in Bern- bad news since if he�s able to get control of Bern, he�ll have the strongest army on the continent on his side.  Now Uther gives us some completely cryptic advice to head out to Nabata and meet a �Living Legend.� Would it kill this guy to help the group save the world? Like using just a smattering of his tremendous wealth to fund them? Or maybe some of his political influence? Or his huge army? Or maybe just telling them who he�s sending them to see and why?  Later he and Hector have a rather tense and charged conversation- but civil at least, unlike their previous shouting match. Previously it looked like Hector was just impetuous and wild and Uther was the reasonable one, but recent events have really made Uther look like a rather self-centered schemer with no respect for his allies. Hector�s honest and courageous leadership might actually be better for Ostia, wild though he is. Total Restarts: 12 (I made one stupid mistake on my first run where I just forgot to have Lowen drink a vulnerary. Since there was nothing wrong with my strategy, I restarted and did everything the same and the result was what you see) Turn Surplus: 8 (Turn 9 is pretty much the perfect turn to win this chapter. +2 turns and you got the chance to kill every single enemy). Things I Regret Missing: The lockpick on chapter 11, that darned archer on chapter 11, this one brigand who attacked Marcus on chapter 12, 2 more brigands who ignored everyone else to attack Marcus on chapter 13x, and 2 archers who ignored Hector and Dorcas (DORCAS!) to attack Marcus on chapter 14, like 10 more enemies I could have killed if Hector could have survived one more turn on chapter18, and Uhai who decided to take a 100% chance of death to Sain over a free hit on Hector, the chance to finish shopping properly with my silver card on chapter 21, the armorslayer that I have acquired if not for a stupid minor mistake on chapter 22, and these 3 wyvern riders who decided they preferred a 0% chance to hit Isadaora and then 100% chance of death against her to fighting a low level Heath.
|
|
#
?
Mar 10, 2015 10:03
|
|
|
A legit defend the castle walls map could be interesting, but you'd probably have to rework ballista stats. Have a wall lined with reworked ballista, magic circles (basically magic ballista), rocks to drop on the enemies, have them come at you with ladders (your melee units have to chop them up to stop enemies from coming up) and try to ram the gates. You'd probably have to get creative with the scripting though.
|
|
#
?
Mar 10, 2015 16:40
|
|
|
Nihilarian posted:A legit defend the castle walls map could be interesting, but you'd probably have to rework ballista stats. Have a wall lined with reworked ballista, magic circles (basically magic ballista), rocks to drop on the enemies, have them come at you with ladders (your melee units have to chop them up to stop enemies from coming up) and try to ram the gates. You'd probably have to get creative with the scripting though. There's a Radiant Dawn chapter sort of like that. 3-13. Doesn't have all the things on your list, but it has ballistae and ledges to defend, and the objective is to prevent the enemy from entering a certain area.
|
|
#
?
Mar 10, 2015 19:37
|
|

|
Heath is pretty great and I use him almost every run, but man are Isadora and Rath a bummer. Rath can be fine but unless you grind in Lyn mode he'll start at a low level (they should really give him back to you a few chapters earlier than this), and Isadora is the worst mounted unit in the game.
|
|
#
?
Mar 10, 2015 19:53
|
|
|
My first playthrough I somehow mistook Heath for a prepromote and benched him instantly.  Also, I do not understand why they gave Isadora the stats they did. First off, 6 con, really? It's like the only reason for her existence is if you somehow get Sain, Kent, Lowen, and Marcus all killed and really need a Paladin.
|
|
#
?
Mar 10, 2015 20:54
|
|


|
Dr Pepper posted:It's like the only reason for her existence is if you somehow get Sain, Kent, Lowen, and Marcus all killed and really need a Paladin. That's exactly it. That's what all the pre-promotes are for really. Except usually for solid Res (but isadora even sucks in that stat) they're way worse than just about any non-pre-promote of their class, but they're juuust good enough that you can still complete the game with them if you lost your better troops. Of course in a ranked run where you can't promote all that many people, some of the good ones like Pent and Harken are more useful.
|
|
#
?
Mar 10, 2015 21:00
|
|
|
Dr Pepper posted:My first playthrough I somehow mistook Heath for a prepromote and benched him instantly. The worst thing is, looking at her -/5 stats and comparing them to the other cavaliers, they're not that terrible on their own. It's really the 6 con that brings her down. If she had the 9/10 of the others, then she'd actually fill her goal as the fast dodgy but weak paladin. Instead, her speed starts low enough that anything heavier than an iron sword makes her useless, and her strength starts low enough that anything weaker than a silver lance makes her useless. I really think Intsys just didn't get how important Constitutio and speed, and thus doubling and dodging, were going to be when comparing units.
|
|
#
?
Mar 10, 2015 21:04
|
|
|
She's a girl so obviously she's not as big so of course she has less Con! 
|
|
#
?
Mar 10, 2015 21:05
|
|
|
Melth posted:That's exactly it. That's what all the pre-promotes are for really. Except usually for solid Res (but isadora even sucks in that stat) they're way worse than just about any non-pre-promote of their class, but they're juuust good enough that you can still complete the game with them if you lost your better troops. i've always felt this logic is somewhat suspect since if you've gotten enough people killed to the point where isadora is a viable prospect, you're probably not good enough to finish the game with her.
|
|
#
?
Mar 10, 2015 21:10
|
|

|
For the record, Marcus, Kent and Sain have almost double her Con. Lowen does have double. It basically kills her one advantage over Marcus, her 16 speed.
|
|
#
?
Mar 10, 2015 21:12
|
|
|
Its almost entirely why I was so happy they got rid of con affecting double attacking after FE8. It exists almost entirely as a stat to gently caress over female characters.
|
|
#
?
Mar 10, 2015 21:49
|
|
|
What they replaced it with in FE9 was even worse, though.
|
|
#
?
Mar 10, 2015 22:42
|
|
|
Manatee Cannon posted:What they replaced it with in FE9 was even worse, though. Yeah, I preferred the GBA Con and Wt and Speed system too. It made Con an interesting stat since you needed high amounts of it to wield good weapons but low amounts in order to be rescued (or rescue others if you were a mounted unit). Plus, unlike Str, it doesn't grow constantly so heavy weapons are still heavy in the endgame. In FE9 and the like every weapon was weightless beyond level 10 or so.
|
|
#
?
Mar 10, 2015 22:53
|
|
|
Thankfully they've just dropped weapon weight into the dustbin.
|
|
#
?
Mar 10, 2015 23:43
|
|
|
The Isadora situation makes me wary of using Con as a balancing factor between characters of the same class. If there were less variation - like, 1 point off the baseline either way - or just standardized per class instead of per character I'd probably be more on board. Also, make it more interesting than "women always have less Con than men". Not to mention the situation with mounted rescues. Dr Pepper posted:Thankfully they've just dropped weapon weight into the dustbin.
|
|
#
?
Mar 10, 2015 23:53
|
|
|
Dr Pepper posted:Thankfully they've just dropped weapon weight into the dustbin. I really liked weapon weight honestly. It struck me as a pretty great mechanic all in all.
|
|
#
?
Mar 10, 2015 23:56
|
|
|
I too thought weapon weight was a reasonable balancing mechanic, but it tended to be handled poorly, as with all women seemingly getting unreasonably low values (Are there exceptions? I have FE8 open right now and Amelia has the highest for the ladies with 11 as a General, while Lute has 3 unpromoted; typical lady value seems to be 5). I was a fan of Build (and Capture) in FE5, because it did grow, so you can have a character that becomes good at captures and heavy weapons (while not automatically also being good at damage because strength does double duty).
marshmallow creep fucked around with this message at 01:09 on Mar 11, 2015 |
|
#
?
Mar 11, 2015 01:01
|
|


|

|
| # ? Apr 19, 2024 04:15 |
|
|
Lotish posted:I too thought weapon weight was a reasonable balancing mechanic, but it tended to be handled poorly, as with all women seemingly getting unreasonably low values (Are there exceptions? I have FE8 open right now and Amelia has the highest for the ladies with 11 as a General, while Lute has 3 unpromoted; typical lady value seems to be 5). There's an exception in this very game! Vaida rocks a 12 con, which is two higher than Heath when he promotes. Of course, this comes back to haunt her a bit since her rescue is a whopping 8, which is terrible for a mounty. Con on mages in FE6 wasn't a big deal since books didn't have much weight to them. Sadly, this changes radically in FE7 and FE8, but the increased growths of units usually makes up for it. I'm rather interested in what the OP thinks of Vaida since she's pretty good in HHM, but a similarly leveled Heath is usually far stronger. However, she's got RNG proof strength and defense, and since she starts with A rank in swords and lances, she can use some of the heavier weapons with little handicap and do just fine. Krumbsthumbs fucked around with this message at 01:21 on Mar 11, 2015 |
|
#
?
Mar 11, 2015 01:17
|
|