


|
ZombieApostate posted:IK the feet to the ground instead of animating it that's another thing I can't actually do even if I wanted to because I'm using all generic rigs and Unity only supports IK for Humanoid Avatars 
|
 #
?
Oct 25, 2019 20:01
#
?
Oct 25, 2019 20:01
|
|


|

|
| # ? Apr 23, 2024 22:17 |
|
|
Your Computer posted:something similar was suggested with the doublejump (of "leaving behind" parts of the rig) but I simply can't figure out a way to actually feasibly do that. I could animate the legs to go downwards like you're suggesting but it would have to be at the exact same velocity as the player is moving up, and the only way that would look right is if it's synced up exactly with the jump code. Any changes to the code would require changes to the animation. This would also be even more of a nightmare since I'm not even manually setting the player's jump velocity, it's calculated backwards from the desired jump height and time. Yeah, you'll have to hand-tweak it. Just wildly overdo it. Like make the legs go down way too fast and grow to like 150% of their normal length and see how it looks. baby puzzle posted:of course tilde doesn't work for somebody... UGH Like 50 people said it wouldn't.
|
|
#
?
Oct 25, 2019 20:02
|
|


|
ProBuilder seems really cool for quickly brushing out rooms Tried building objects with it though and seemed fiddly, the controls aren't great for fine details So I hopped over to Blender and I brushed out a simple polygonal arcade machine that I'm pretty happy with considering I'm not artiste But holy poo poo I've been spending the last 30 minutes trying to figure out a reasonable workflow for painting textures onto the model and literally every thing I google about Blender refers to keybinds that do not work with the current version and the whole UI has changed 6 times since these tutorials so they're fairly useless Just seems like there's so many frustrating hurdles that the GUI doesn't help you with and poo poo just doesn't work, I'm sure most people are familiar with it but man it makes it hard to pick up fresh. Maybe I should install Maya IDK I also continue to hate that everything has moved from text guides you can read at your own pace to youtube videos where people just do stuff super fast and barely explain any of it, forcing you to rewind and watch the same 5 seconds 20 times to figure out what the heck just happened
|
|
#
?
Oct 25, 2019 20:27
|
|

|
Zaphod42 posted:I also continue to hate that everything has moved from text guides you can read at your own pace to youtube videos where people just do stuff super fast and barely explain any of it, forcing you to rewind and watch the same 5 seconds 20 times to figure out what the heck just happened I know it's not a consolation, but the reason for this is youtube gives people a platform to get paid for making those tutorials based on views. Nobody is going to host their own website and try to make money with adsense when they could make an actual living off of youtube videos.
|
|
#
?
Oct 25, 2019 20:36
|
|
|
 Why isn't this working?! Its clearly rendering the texture to the UVs to the model, but texture paint won't change it. The weird part is the image even shows an asterisk * after I try painting, like its been modified, and then it'll save the change and the asterisk goes away, and then if I paint again it gets the asterisk again. But it just stays solid black. I can't change anything. All I wanna do is paint FRONT and BACK and TOP on it so its obvious which UV is which in photoshop, this shouldn't be rocket science  I am so frustrated right now I am so frustrated right nowAlso, I created one object in Blender and imported it into Unity and it created a new light and camera. I just want the object. So I thought I'd be clever and delete the default light and camera in blender so they don't get saved in the object file. But now I can't render from the camera in blender, and I have literally no clue how to add a camera back. I tried all the obvious things for like 10 minutes and I just am completely stumped on how you add a camera. Googling found 5 different articles which all suggested keybinds that don't work on the current version of Blender.
|
|
#
?
Oct 25, 2019 20:41
|
|
|
Zaphod42 posted:
without knowing anything about texture painting in Blender, does the material on your model use the same texture as the one you're painting and have you set the viewport shading to show textures? (rather than just material color or w/e)
|
|
#
?
Oct 25, 2019 20:44
|
|
|
The blazing fast tutorials are also miles better than the ten-minute tutorial that spends 8 minutes talking about poo poo you either don't care about or already know. From reviewing a tutorial, in Blender 2.8 (the current version, and BTW when googling for stuff it can help to say "blender 2.8 texture paint" instead of "blender texture paint" to prune out the old poo poo), it looks like the process is basically:
EDIT: To add a camera, make sure you're in Object mode, hit shift-A, and choose "Camera". I don't blame you for having trouble with this because my usual advice (hit F3 and search for "Camera") didn't work. Weird. TooMuchAbstraction fucked around with this message at 20:50 on Oct 25, 2019 |
|
#
?
Oct 25, 2019 20:47
|
|

|
Your Computer posted:without knowing anything about texture painting in Blender, does the material on your model use the same texture as the one you're painting and have you set the viewport shading to show textures? (rather than just material color or w/e) Its definitely using the right material, not sure about the latter... TooMuchAbstraction posted:The blazing fast tutorials are also miles better than the ten-minute tutorial that spends 8 minutes talking about poo poo you either don't care about or already know. The problem is in my experience they all take 10 minutes going through obvious poo poo you must know to have clicked on the video, and then go through the actual important stuff in 3 seconds TooMuchAbstraction posted:From reviewing a tutorial, in Blender 2.8 (the current version, and BTW when googling for stuff it can help to say "blender 2.8 texture paint" instead of "blender texture paint" to prune out the old poo poo), it looks like the process is basically: Yeah I've done those steps... its clearly rendering the texture but it just... wont'... paint... Also those steps skip that you have to add the texture as a node in the material :V why couldn't this all just be default or have a button to set up the obvious stuff that 99.999% of people are going to be doing... Shift-A does nothing for me  I found a page suggesting that but it literally does nothing... oh, unless I focus on the scene editor, then Shift+A expands everything, or collapses everything. But it does not give me any kind of prompt to add a camera I found a page suggesting that but it literally does nothing... oh, unless I focus on the scene editor, then Shift+A expands everything, or collapses everything. But it does not give me any kind of prompt to add a camera  E: Like it won't even change the texture, much less on the model. Even if I paint directly on the black texture, it stays black. I have cyan selected. It adds and asterisk, so its changing the file. But nothing is visible. Aagh. Zaphod42 fucked around with this message at 20:55 on Oct 25, 2019 |
|
#
?
Oct 25, 2019 20:52
|
|
|
I just tried it in an empty project and it seems really straightforward? https://i.imgur.com/a5erJni.mp4 you shouldn't have to mess with around with nodes or cameras or anything
|
|
#
?
Oct 25, 2019 20:54
|
|
|
Your Computer posted:I just tried it in an empty project and it seems really straightforward? Yes it does seem straightforward :| that's not really helping Your Computer posted:you shouldn't have to mess with around with nodes or cameras or anything ... I'm not messing with nodes or cameras to try to set up texture painting. I did that as I explained in my post because it created duplicates in Unity and I didn't want them, and didn't realize it might cause an issue in Blender.  I am now asking how to add them back because I don't know and I worry that may be part of the problem. I am now asking how to add them back because I don't know and I worry that may be part of the problem.I guess I could just completely start all over with a new object but it shouldn't be impossible to undo!
|
|
#
?
Oct 25, 2019 20:56
|
|
|
Zaphod42 posted:Yes it does seem straightforward :| that's not really helping I notice in your screenshot in the property manager you're on the Texture tab and it looks like you've set your texture to the Brush Texture? You should be setting your material's base color to an Image Texture and then select your newly created texture from the list, like I show in the clip. Zaphod42 posted:... I'm not messing with nodes or cameras to try to set up texture painting. I did that as I explained in my post because it created duplicates in Unity and I didn't want them, and didn't realize it might cause an issue in Blender.
|
|
#
?
Oct 25, 2019 21:03
|
|
|
Yeah I found an article saying that may be the issue, its trying to paint textures instead of painting color ON the texture, which explains why its showing changes being made to the texture (its adding textures, which are ... empty and invisible I guess?) But as far as I can tell there's only one brush and I'm using the same one in the examples... But man this just doesn't seem very clear to me. I'm gonna take a break and come back at it later. Thanks for confirming that not having a camera is not an issue at least, I'm just trying to think of any variables I've possibly changed because this should be very simple but it just isn't working. Zaphod42 fucked around with this message at 21:10 on Oct 25, 2019 |
|
#
?
Oct 25, 2019 21:07
|
|
|
Zaphod42 posted:Yeah I found an article saying that may be the issue, its trying to paint textures instead of painting color ON the texture, which explains why its showing changes being made to the texture (its adding textures, which are ... empty and invisible I guess?) You shouldn't be in the Texture part of the properties window at all if you just want to paint. It overwrites the brush color with whatever texture you give it, so you could "stamp" one texture onto another or stuff like that. KillHour posted:Yeah, you'll have to hand-tweak it. Just wildly overdo it. Like make the legs go down way too fast and grow to like 150% of their normal length and see how it looks. Your Computer fucked around with this message at 21:25 on Oct 25, 2019 |
|
#
?
Oct 25, 2019 21:17
|
|
|
Changing the tab doesn't seem to matter. And I'm on TexDraw brush... everything seems like it should work. I should probably just start over since I don't know whatever is set wrong so I can set it right, ugh. I guess I'll export my object and re import it into a new project? In your video as soon as you create the new material it gets applied automatically? It doesn't do that for me. It stays purple in texture paint unless I manually add the material to the node graph in shading... Why is this so hard?! Ah, its because there's a default material that you're using that's already on the node graph. Yeah I'm just going to reimport the object this poo poo is too messy. E: I can literally create a brand new texture and it just doesn't let me draw on it, look at this: Zaphod42 fucked around with this message at 21:52 on Oct 25, 2019 |
|
#
?
Oct 25, 2019 21:41
|
|
|
let me try it in pictures 
|
|
#
?
Oct 25, 2019 21:50
|
|
|
Its not that  It just will not paint to the texture. I don't know if this is a bug or some weird setting or what but it works in a new project and just refuses to modify the texture in my existing project.
|
|
#
?
Oct 25, 2019 21:54
|
|
|
Zaphod42 posted:In your video as soon as you create the new material it gets applied automatically? It doesn't do that for me. It stays purple in texture paint unless I manually add the material to the node graph in shading...    it looks like you haven't assigned the texture in your gif above.
|
|
#
?
Oct 25, 2019 21:57
|
|
|
I haven't but that's because I deleted things and was testing lots and lots of different things tearing my hair out. Yes, I know how to create textures and materials both. I understand that. I already had the UV mapped texture rendering to the model above, I know how to do both of those things. I'm not even trying to paint on the model, Your Computer. I'm trying to paint ON THE TEXTURE. That should ALWAYS work, right? See how my cursor is on the LEFT viewpane? on the texture itself? I'm not even trying to paint on the model right now. Regardless of materials or UVs? If you create a texture and paint on it, that's that. It should ALWAYS work. I can't imagine why this isn't working except that its treating the texture as read-only or something. If I create a new project, even with nothing set up, if I create a texture, I can paint on it. But in this project, for some reason, I just can't paint on textures. Everything else is working. It can render a texture to a material to a model using the UVs perfectly. It just refuses to paint anything on the texture. I've already created a new project and imported the object and its working fine because now I can paint on the texture. I don't know if this is a Blender bug or what but it just does not paint to the texture in that project right now, due to some invisible setting or bug.  I'm jumping back and forth between projects to compare settings and nothing seems different. It just... refuses to paint to texture in one project. Zaphod42 fucked around with this message at 22:06 on Oct 25, 2019 |
|
#
?
Oct 25, 2019 22:03
|
|
|
I don't get why you're being mad at me for trying to help you with a question you asked for help with but it's good that you got it working at least ")
|
|
#
?
Oct 25, 2019 22:05
|
|
|
poo poo nevermind.
|
|
#
?
Oct 25, 2019 22:31
|
|
|
Your Computer posted:
I understand. I'm saying if your jump height never changes, you can tweak it by hand until it matches.
|
|
#
?
Oct 25, 2019 22:32
|
|
|
 Its a start. I got a loooot to learn about 3D modeling. Your Computer posted:I don't get why you're being mad at me for trying to help you with a question you asked for help with but it's good that you got it working at least I'm sorry, I just felt like you weren't really listening to me and I was already frustrated. But I appreciate the effort.
|
|
#
?
Oct 25, 2019 22:48
|
|
|
what are you boyos doing in terms of project backup? ATM im using github for code version control, a physical backup in another drive, and a cloud backup. this seems pretty good for mitigating disasters, but you cant really use git for large assets. ive heard about git large file storage and perforce. are they worth looking into?
|
|
#
?
Oct 25, 2019 22:49
|
|
|
zebedy posted:what are you boyos doing in terms of project backup? I've been using a local GitLab server for my personal projects. They support GitLFS out of the box. If you'd rather let them do the hosting, they have a free tier that does just about everything a solo dev needs, and has a 10GB repo size cap. Perforce is very common in the industry, but I've never found a free cloud-based service.
|
|
#
?
Oct 26, 2019 00:29
|
|

|
Azure Devops is good and free for 5 or fewer users. Supports LFS and has a 10gb per repo limit.
|
|
#
?
Oct 26, 2019 00:40
|
|

|
Blender has several different modes you should pay attention to, the most common ones are edit and object. In edit shift+a creates a new primitive, in object shift+a creates everything from lights to cameras. In preferences you should change the search key from f3 to space. The search feature is a huge timesaver. Also in plugins enable node wrangler. This lets you have various shortcuts, most importantly Ctrl+t to create an image texture. https://gregzaal.github.io/node-wrangler/ The long and short of it is that to texture paint you need to link your texture to a material and be in lookdev. Once you find your workflow save your settings.
|
|
#
?
Oct 26, 2019 00:57
|
|


|
Your Computer posted:something similar was suggested with the doublejump (of "leaving behind" parts of the rig) but I simply can't figure out a way to actually feasibly do that. I could animate the legs to go downwards like you're suggesting but it would have to be at the exact same velocity as the player is moving up, and the only way that would look right is if it's synced up exactly with the jump code.
|
|
#
?
Oct 26, 2019 02:14
|
|
|
That name again is Mr. Beer I am SO bad at this, but it feels good to be making my own art from scratch and have total freedom! Texture is a placeholder, gonna work on a few better versions. Can use the same can for some sodas too, and then all of these will make for fun props in the shooting gallery. Working my way up from objects that are fairly polygonal, gonna do some bottles and chairs and work my way up to guns and people.
|
|
#
?
Oct 26, 2019 03:38
|
|
|
Looking good! I really want to shoot that can and send it ping-ponging about the arena. Today was supposed to be "now I start tweaking numbers on my ship parts" day, but instead it was "fix a bunch of bugs left over from yesterday" coupled with "why can't my ships hit anything" with a bonus of "you probably shouldn't be able to kill a ship by shooting the cutscene trigger volume that's attached to it."
|
|
#
?
Oct 26, 2019 03:52
|
|
|
So here's a really simple illustration of something I don't get: tons of people have told me 'Dude, you are working way too hard to texture your stuff, tons of your environmental and background assets should be sourced from CC0 textures,' and I'm pretty sure they're all absolutely right. The thing is, let's look at a really crude example where I blocked out some low-poly stuff and slapped some textures on them: Even without any tweaking each individual texture looks pretty okay, but it is immediately and loudly obvious that they're sourced from different places- they clash, and even the wall and floor, which have similiar palettes, don't really gel together. Even if I spent a couple hours going through tons of options and deliberately picking textures that complemented each other well there wouldn't be any kind of stylistic cohesion, and instead of a strong, uniform art and color style you basically have visual soup. So is the implication that people who effectively leverage tons of CC0 stuff have a semi-standard photoshop/GIMP process to filter, tweak, and color-correct every diffuse texture? Because I suppose that's still technically less work than rolling your own stuff, but it seems like the leap between editing CC0 stuff and rolling your own isn't that big, and it would produce dramatically better results just due to the stylistic uniformity.
|
|
#
?
Oct 26, 2019 07:26
|
|


|
Biggest issue out the gate is the tiling scale is weird. The bricks on the ground are smaller than the person�s feet but the stones on the wall are like the size of their torso. I think tweaking repeating tiling scale and size of the textures will go a long way to uniformity. Color correcting can be done for very simply with Gimp�s high pass filter which helps remove dramatic changes in lighting giving an overall better diffuse.
|
|
#
?
Oct 26, 2019 08:02
|
|
|
Applying strong lighting effects and/or shaders can get around that issue Like, imagine if you were cel-shading everything in that scene. Suddenly the texture mismatch would be irrelevant, right? You don't have to go that extreme, but a shaders are a powerful tool.
|
|
#
?
Oct 26, 2019 08:55
|
|
|
I think part of why everything feels off is the scale. That door looks like it's about 10 ft tall. The reason the textures don't match is the difference in detail. The rock wall came from a photo and has lots of shadows. The brick is completely flat with no detail. You have to specifically look for textures that work well together. Edit: also, you're still at the whitebox stage in your level geometry so any detailed textures are going to look weird until you start filling in all the geometry details. KillHour fucked around with this message at 14:08 on Oct 26, 2019 |
|
#
?
Oct 26, 2019 13:57
|
|
|
KillHour posted:I think part of why everything feels off is the scale. That door looks like it's about 10 ft tall. What's really funny is that technically the guy is the one who's really weirdly-scaled: the whole scene is a giant test room to see how blender stuff looks in unity, and the building is mostly to scale with what's around it, but the entire scene has like 20 different art styles and generally looks like gmod sneezed. In that particular area most of the whiteboxed level geometry is built to the same scale, but the guy is from a completely different practice session where I was seeing how close I could get human proportions when boxing the model out from memory, and ended up with a dude who was either too big or too small for literally every single asset in the scene. I appreciate all the feedback though, I'll have a go at seeing how much I can tune it just for practice. For my actual stuff I'll probably end up with really minimal hand-painted textures and maybe some procedural Cycles stuff for pavement/wood grain/anything else that's generally easier to implement as a material and bake into a diffuse map than it is to draw, but since I'm just now starting to play with the art side I'm trying to make a point of screwing with every common approach I can find to make sure I'm not making my day any harder than it needs to be. (And yeah, I know I should really be kitbashing like 90% of it, but it's genuinely fun to have the flexibility to junk out whatever I want to play with at the moment.) Omi no Kami fucked around with this message at 16:08 on Oct 26, 2019 |
|
#
?
Oct 26, 2019 16:05
|
|
|
rolling! https://i.imgur.com/kcRKYbz.mp4 got most of the base moveset now so I think the next step would be to fine tune and make everything just right, as well as cleaning up some of the code. I've already done a lot of refactoring on the player code to avoid unnecessary "is[action]" bools when checking the current animator state will suffice and so on. One thing I find a bit hard to make nice and readable is the code for the different moves since they affect a lot of different parts - I've tried dividing the player code into methods that do one thing (calculate velocity, rotate the player, etc.) but the moves do a lot of things at once so their code inevitably ends up spread around rather than in one neat place.
|
|
#
?
Oct 26, 2019 17:15
|
|
|
Added more birds to my game.
|
|
#
?
Oct 26, 2019 22:18
|
|

|
Made my first anti-submarine weapon, before I even have enemy submarines to use them on. This is the "Hedgehog", it features 24 rocket-launched depth charges. They're small but still have enough punch to puncture a submarine hull. This is the first time I've actually shown the projectile as part of the weapon model...I don't think I'm going to try to animate the projectiles actually leaving the model though. When you fire they'll just generate copies that fly through the air, and the actual rockets will remain on the ship part. It's a small weapon (about 2x3 meters) so you probably won't even be able to notice unless you look really closely.
|
|
#
?
Oct 26, 2019 23:31
|
|
|
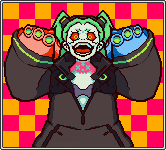
https://twitter.com/Shoehead_art/status/1188223614136573953 Working on a boss atm
|
|
#
?
Oct 26, 2019 23:53
|
|
|
TooMuchAbstraction posted:This is the "Hedgehog", it features 24 rocket-launched depth charges. They're small but still have enough punch to puncture a submarine hull. This is the first time I've actually shown the projectile as part of the weapon model...I don't think I'm going to try to animate the projectiles actually leaving the model though. When you fire they'll just generate copies that fly through the air, and the actual rockets will remain on the ship part. It's a small weapon (about 2x3 meters) so you probably won't even be able to notice unless you look really closely.
|
|
#
?
Oct 27, 2019 00:17
|
|


|

|
| # ? Apr 23, 2024 22:17 |
|
|
 Operation VR low-poly sprite textures is coming along, this is more or less the aesthetic I'm going for. Need to play with the shaders though, and figure out what the heck is going on with the lighting. Using Wolfenstein textures for placeholders because my own sprite skills need work, I'm starting to get the hang of Unity 3D, ProBuilder, and Blender, and now I've gotta start adding Aesprite to the mix  I think I'm gonna code this robot dummy to act like a shooting range target, and spawn number popups to score you based on where on the model you hit him. Build a little test room with guns and toys and figure out what I'm doing here, then I can work on building the first level, the bar.
|
|
#
?
Oct 27, 2019 04:10
|
|