


|
I've been happy with my Ender 3. The only real upgrade it needs is a glass/mirror bed. Make sure to go over your Z-axis assembly with a fine tooth comb to make sure it moves freely. I think I bought mine drunkenly at midnight a year or so ago from Woot! E: the only real upgrade mine needed was the glass bed, but as pointed out below it's sort of a case by case preference/issue. SpartanIvy fucked around with this message at 20:11 on May 21, 2020 |
 #
?
May 21, 2020 20:00
#
?
May 21, 2020 20:00
|
|


|

|
| # ? Apr 23, 2024 12:10 |
|
|
I actually moved back to the original Ender3 build surface because I got tired of having to add hairspray to my glass bed and wanted it to just stick even if my bed wasn�t leveled perfectly.
|
|
#
?
May 21, 2020 20:06
|
|
|
Hadlock posted:Looks like the Ender 3 is about $200 shipped? Is this an acceptable 2am drunk purchase? Yes. SpartanIvy posted:I've been happy with my Ender 3. The only real upgrade it needs is a glass/mirror bed. Ehh, I had no problem with the stock bed for a long time.
|
|
#
?
May 21, 2020 20:07
|
|

|
Hadlock posted:Looks like the Ender 3 is about $200 shipped? Is this an acceptable 2am drunk purchase? Asking for a friend. Yes I am aware I asked about $600 tier printers just a few pages back You have spent $200 on way dumber things, I guarantee it.
|
|
#
?
May 21, 2020 22:04
|
|
|
The CR-10 is bigger and just a little more expensive, right? I don't have one but it might be closer to what you're looking for. On the other hand you can also get an Ender 3 and one of these for big prints. You might even be able to do your boats without cutting them up.
|
|
#
?
May 21, 2020 23:16
|
|


|
Everything on my printer has been adjusted. Belt tensions and wheel clearances. Me being me, I chose prints which I consider to be the Dark Souls equivalent to a benchy. Print in place gearsets. This has been my current test. https://www.thingiverse.com/thing:2430713 The herringbone planetary gearset is a nightmare for me. First attempt was the 3DFillies Pastel green on the E3DPro bed. It had curling, or something. After printing it was clear that the bottom side of the gears were far from flat I did however manage to break the teeth loose and get it to turn. Even ran it in a drill for a while. It felt as bad as the transmission in my car. Second attempt I used some blue painter's tape, and the 3DFillies PLA+ Red I got recently. It's a nice red by the way. Not as bright as I was expecting. I added 0.1mm elephant foot correction and tried dropping the nozzle temp a little. Still had some nasty fusion on the first layers, and some deformed splines and grooves where the gears touched. I managed to break it free with a little wallowing of the 5mm hex hole in the middle. I ran the little red bastard mercilessly hard in the drill for a few minutes in each direction. I am genuinely surprised at how well these gearsets work. Made the binding points a little softer but not much. I resorted to using a soldering pick thing to try to scrape out the deformed grooves with some success. Still a little bind-y so it doesn't spin so good on the fidget spinner body. Lastly I went with my favourite spool. The 3DFillies PLA+ Black. Black goes with everything. I've nearly used the drat thing up. Downside of it is it's a liitle more oozey or something. I had two attempts at the gearset. Wrecked the center of the first trying to break it free unsuccessfully. Tried again but with Cura, same result. I tried progressively lower temperatures too. As a little aside, I broke the odd little clip bit on the extruder last night. It's not a functional piece, but it's where my thumb usually goes when squeezing to release the filament.
|
|
#
?
May 22, 2020 00:36
|
|
|
And so it begins.... Lots of splices over the years. Pulling most of this out and redoing it just for the new hot end wiring harness.
|
|
#
?
May 22, 2020 00:52
|
|
|
ceebee posted:Just preordered a Snapmaker 2.0, curious to see how a 3-in-1 machine works (CNC, Laser, and 3D extrusion). Was about $1400. The only other device I have for printing is a $300 Elegoo Mars but I'm holding out on buying a larger scale resin printer once they all start going the mono-LCD route. My main complaint with resin-based printing is how toxic and messy the actual resin is, I just don't trust these cheap rear end chinese resins. Anybody have any experience with Snapmaker devices by the way? I'm going to quote this from like a month ago. Sagebrush posted:In 3D printing, you move a lightweight tool at high speeds with zero pressure on the mechanism beyond the toolhead's inertia. In CNC milling, you move a rather heavy tool at low speeds with moderate to high pressures from the tool carving into the stock. No personal experience, but I did look at some mechanical information. It's closer to a light duty cnc with a 3d printer head than this post implies. This is only sort of an improvement, as to do so they're using leadscrews. This means that it's going to be a very slow printer. This, combined with the very low power laser also means that it's going to be an exceptionally slow laser.
|
|
#
?
May 22, 2020 02:24
|
|

Sounds perfect to me for a $1400 machine. I don't do any crazy laser cutting or cncing so it will most likely be used for pretty light work. I'm not too worried about the speed of any of the functions, it's just gonna be sitting in my garage getting stuff done. ") Thanks for the info though! I'll let yall know how it goes
|
|
|
#
?
May 22, 2020 02:43
|
|
|
Anyone have any suggestion for a cheap laser engraver that will work on leather or cloth? Also not blinding my dumb rear end would be a plus as well.
|
|
#
?
May 22, 2020 02:49
|
|

|
Somehow I forgot that torx bits are a big, wonderful middle finger to Allen bolts. Cracked the fused herringbone gears loose instantly. Had the black PLA gears running on a drill for about half an hour now. Changed the direction a couple of times. Tried the black PETG gears. lol no. Some filament unravelled a little, and it spat out the gears in a few minutes. Too flexible. Figured that would happen.
|
|
#
?
May 22, 2020 02:52
|
|
|
It's amazing how I consistently gently caress up leveling my bed despite having done it 1,000 times.
|
|
#
?
May 22, 2020 04:11
|
|
|
SpartanIvy posted:It's amazing how I consistently gently caress up leveling my bed despite having done it 1,000 times. It's easy. PETG is even easier. It's just a fraction beyond where the Ender 3 decides thermal expansion is what the cool kids are doing. My bed mat has a rectangle carved into it because of that. Today when I was setting it up for PETG I definitely did over 10 "rounds" before it started to act even. Then I knocked a wheel. e: loving up I mean.
|
|
#
?
May 22, 2020 04:26
|
|
|
General_Failure posted:It's easy. PETG is even easier. It's just a fraction beyond where the Ender 3 decides thermal expansion is what the cool kids are doing. My bed mat has a rectangle carved into it because of that. Today when I was setting it up for PETG I definitely did over 10 "rounds" before it started to act even. Then I knocked a wheel. I didn't even think about thermal expansion but that's probably what it was. I use a calibration program that heats up the bed and moves the extruder point to point, but I'm trying to use some new filament (SUNLU PLA+) and I'm having to jack up my temperatures to get it to work decently, but didn't updated my calibration program  Finally got it leveled and working and came back after doing dishes to my extruder not moving at all and just sitting in a big blob of PLA 10% through the print. Didn't hear any stepper motors torquing or anything trying to move it so I'm not sure what the gently caress was going on. SpartanIvy fucked around with this message at 05:11 on May 22, 2020 |
|
#
?
May 22, 2020 04:38
|
|
|
Stupid_Sexy_Flander posted:Anyone have any suggestion for a cheap laser engraver that will work on leather or cloth? Also not blinding my dumb rear end would be a plus as well. If you just mean to mark stuff, buy one of the aluminum extrusion laser diodes (200-2500+mW). They're cheap(~$100-300), work well out of the box, have a large working area, and you can just place them on whatever you want to mark. Power is correlated to speed. They use visible light, so they work much worse on white materials, or materials the same color as the laser (blue). Typically not sold with an enclosure, so put it under a box. If you actually want to cut, buy a K40 (search 40W CO2 cutter). They're mostly poorly assembled hack jobs, probably running on pirated software (yet still needs a dongle) with misleading controls that let you damage your machine(get one with an analog meter and a knob, not one with a 7 segment panel and +/- buttons. Yes, this sounds backwards. Yes the digital panel is billed as an upgrade. It is not.). But they're cheap (~$400), and performance for that price is unbeatable. They're much faster, and they'll work with many many more materials. These are very much machines you have to setup and tinker with. The working area will be smaller than most of the diode lasers with an Al extrusion frame. CO2 lasers are arguably much safer. For one, they always include an enclosure. In addition the way the optics in the CO2 head work causes reflections to defocus much faster than the reflections that come out of the laser diodes. The beam that goes to the laser head is still collimated, so its reflections won't disperse, but it doesn't intentionally hit anything. You'd have to stick your head in the machine, or something shiny in an odd place The next step up is $1500+. We're no longer what I call cheap at this point. They're larger CO2 cutters. 50-60W units. They're much larger physically, are built much better, and typically have better software (but still not all the way to good). There's also some aftermarket software for these that probably is all the way to good. (Lightburn) There are also some other companies that attempt to give you better experiences at various price levels. (Full Spectrum, Glowforge) They get expensive VERY fast.
|
|
#
?
May 22, 2020 04:58
|
|
|
Was going to finally buy my first printer and welp, Prusa Mini shipping estimate for new orders is now in September.
|
|
#
?
May 22, 2020 14:45
|
|

|
Elos posted:Was going to finally buy my first printer and welp, Prusa Mini shipping estimate for new orders is now in September. I'm watching for a secondary market of printers once the PPE printer people are done, bored, or have broken them beyond their ability to repair. I should set up some kind of auto-search on Facebook Marketplace, now that I think about it.
|
|
#
?
May 22, 2020 21:44
|
|
|
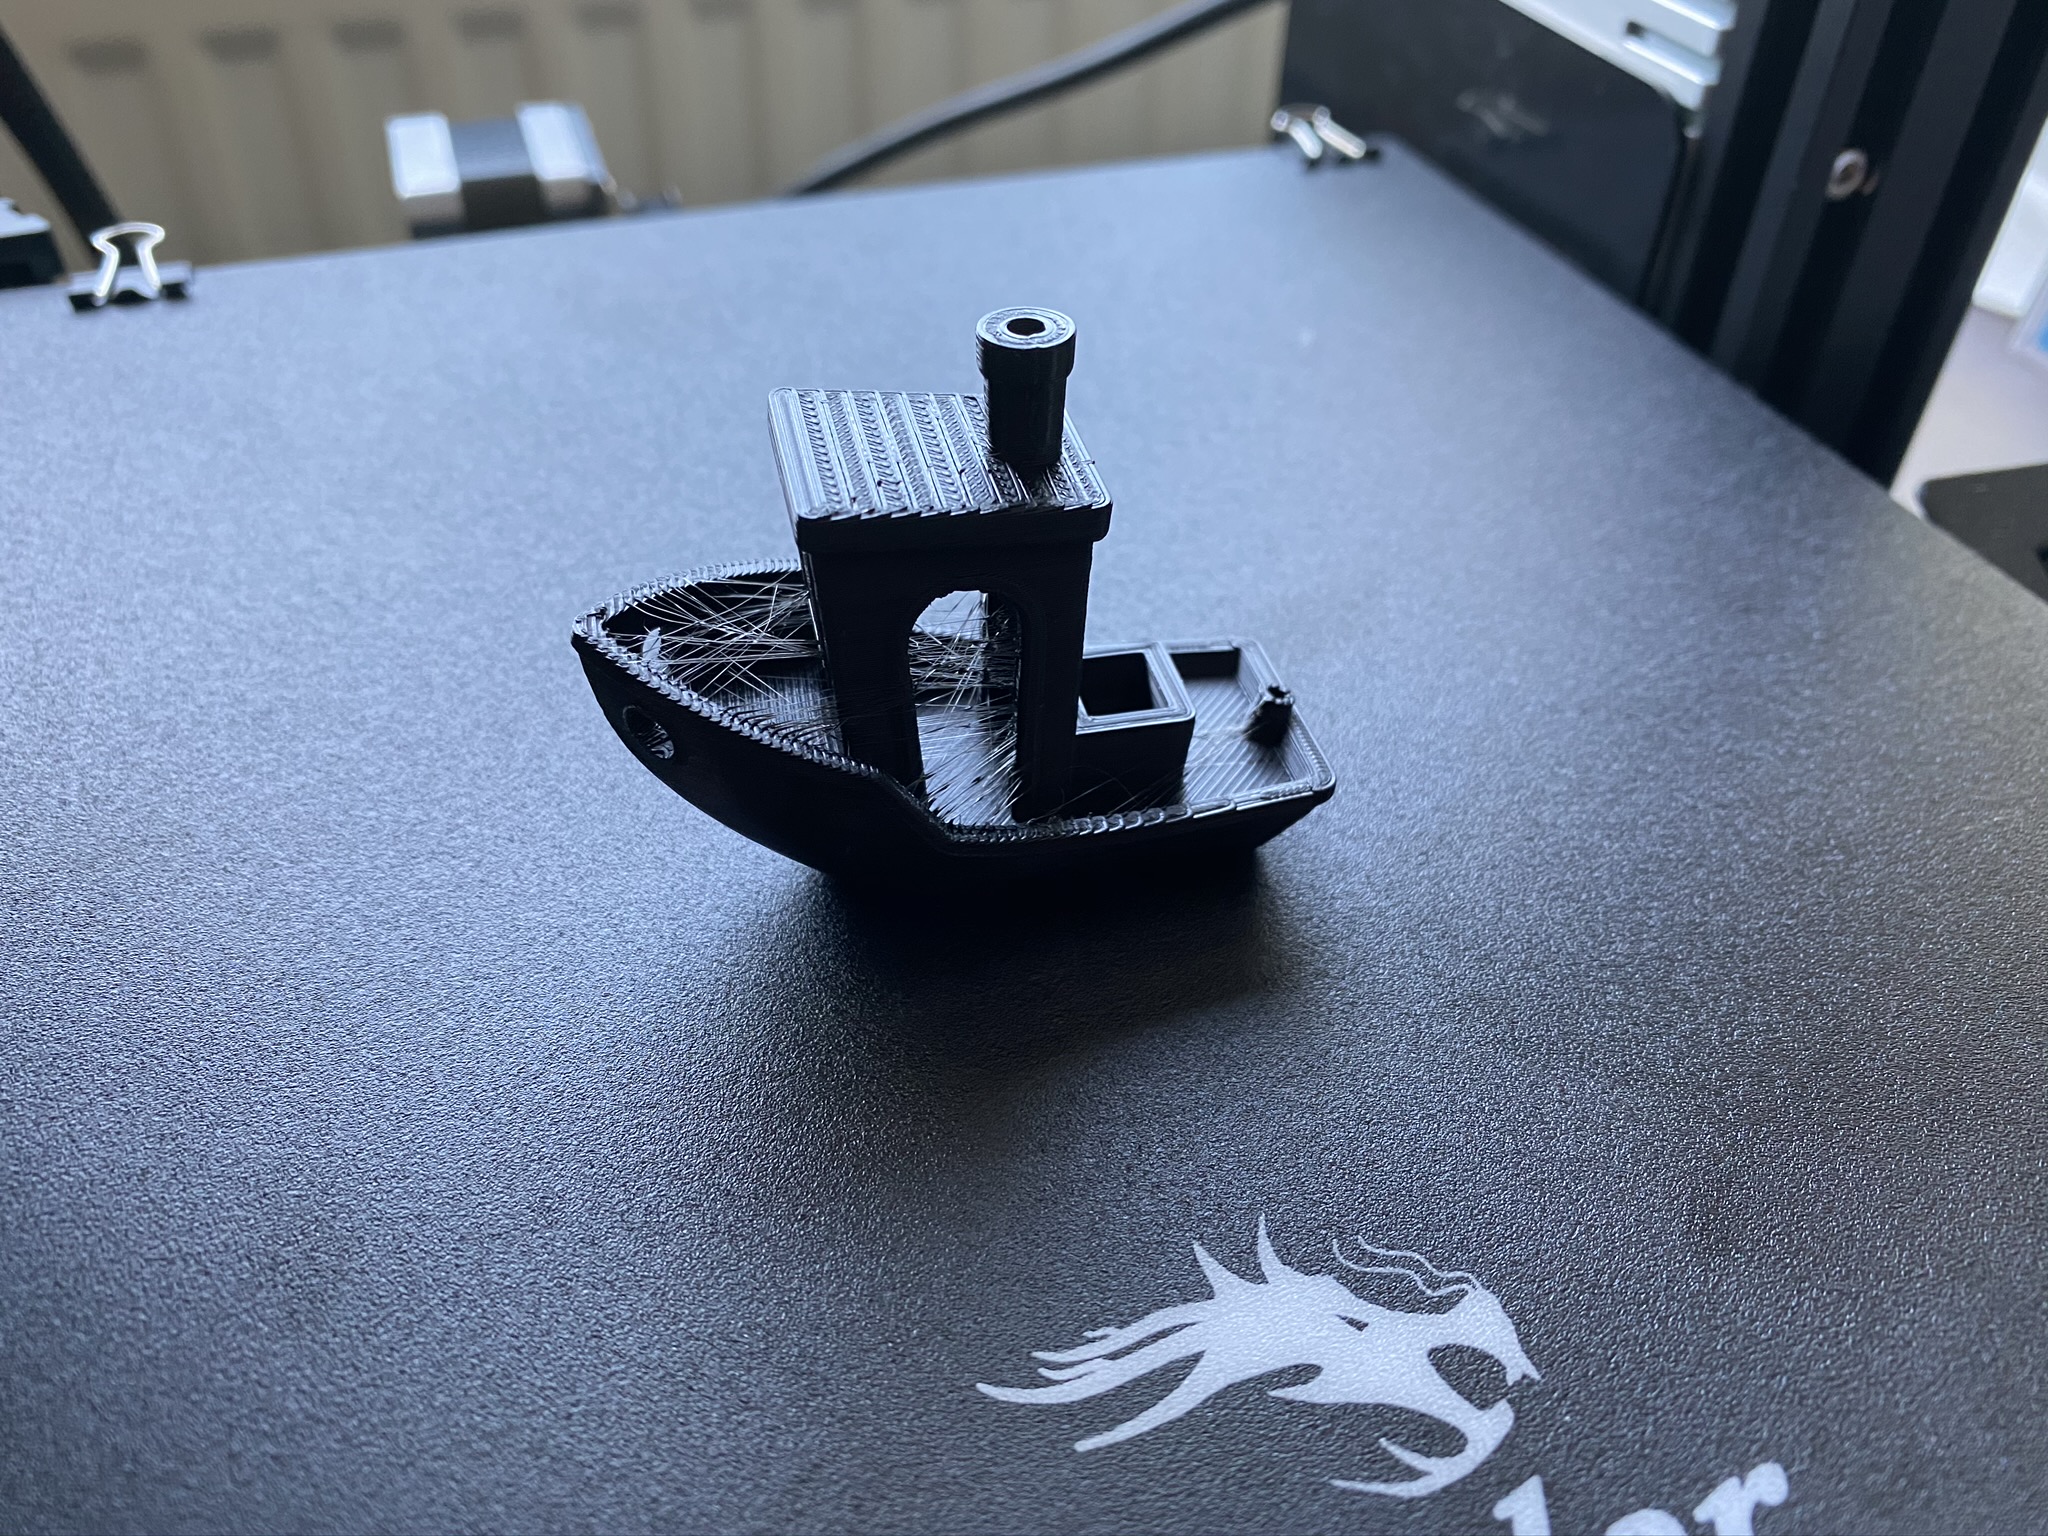
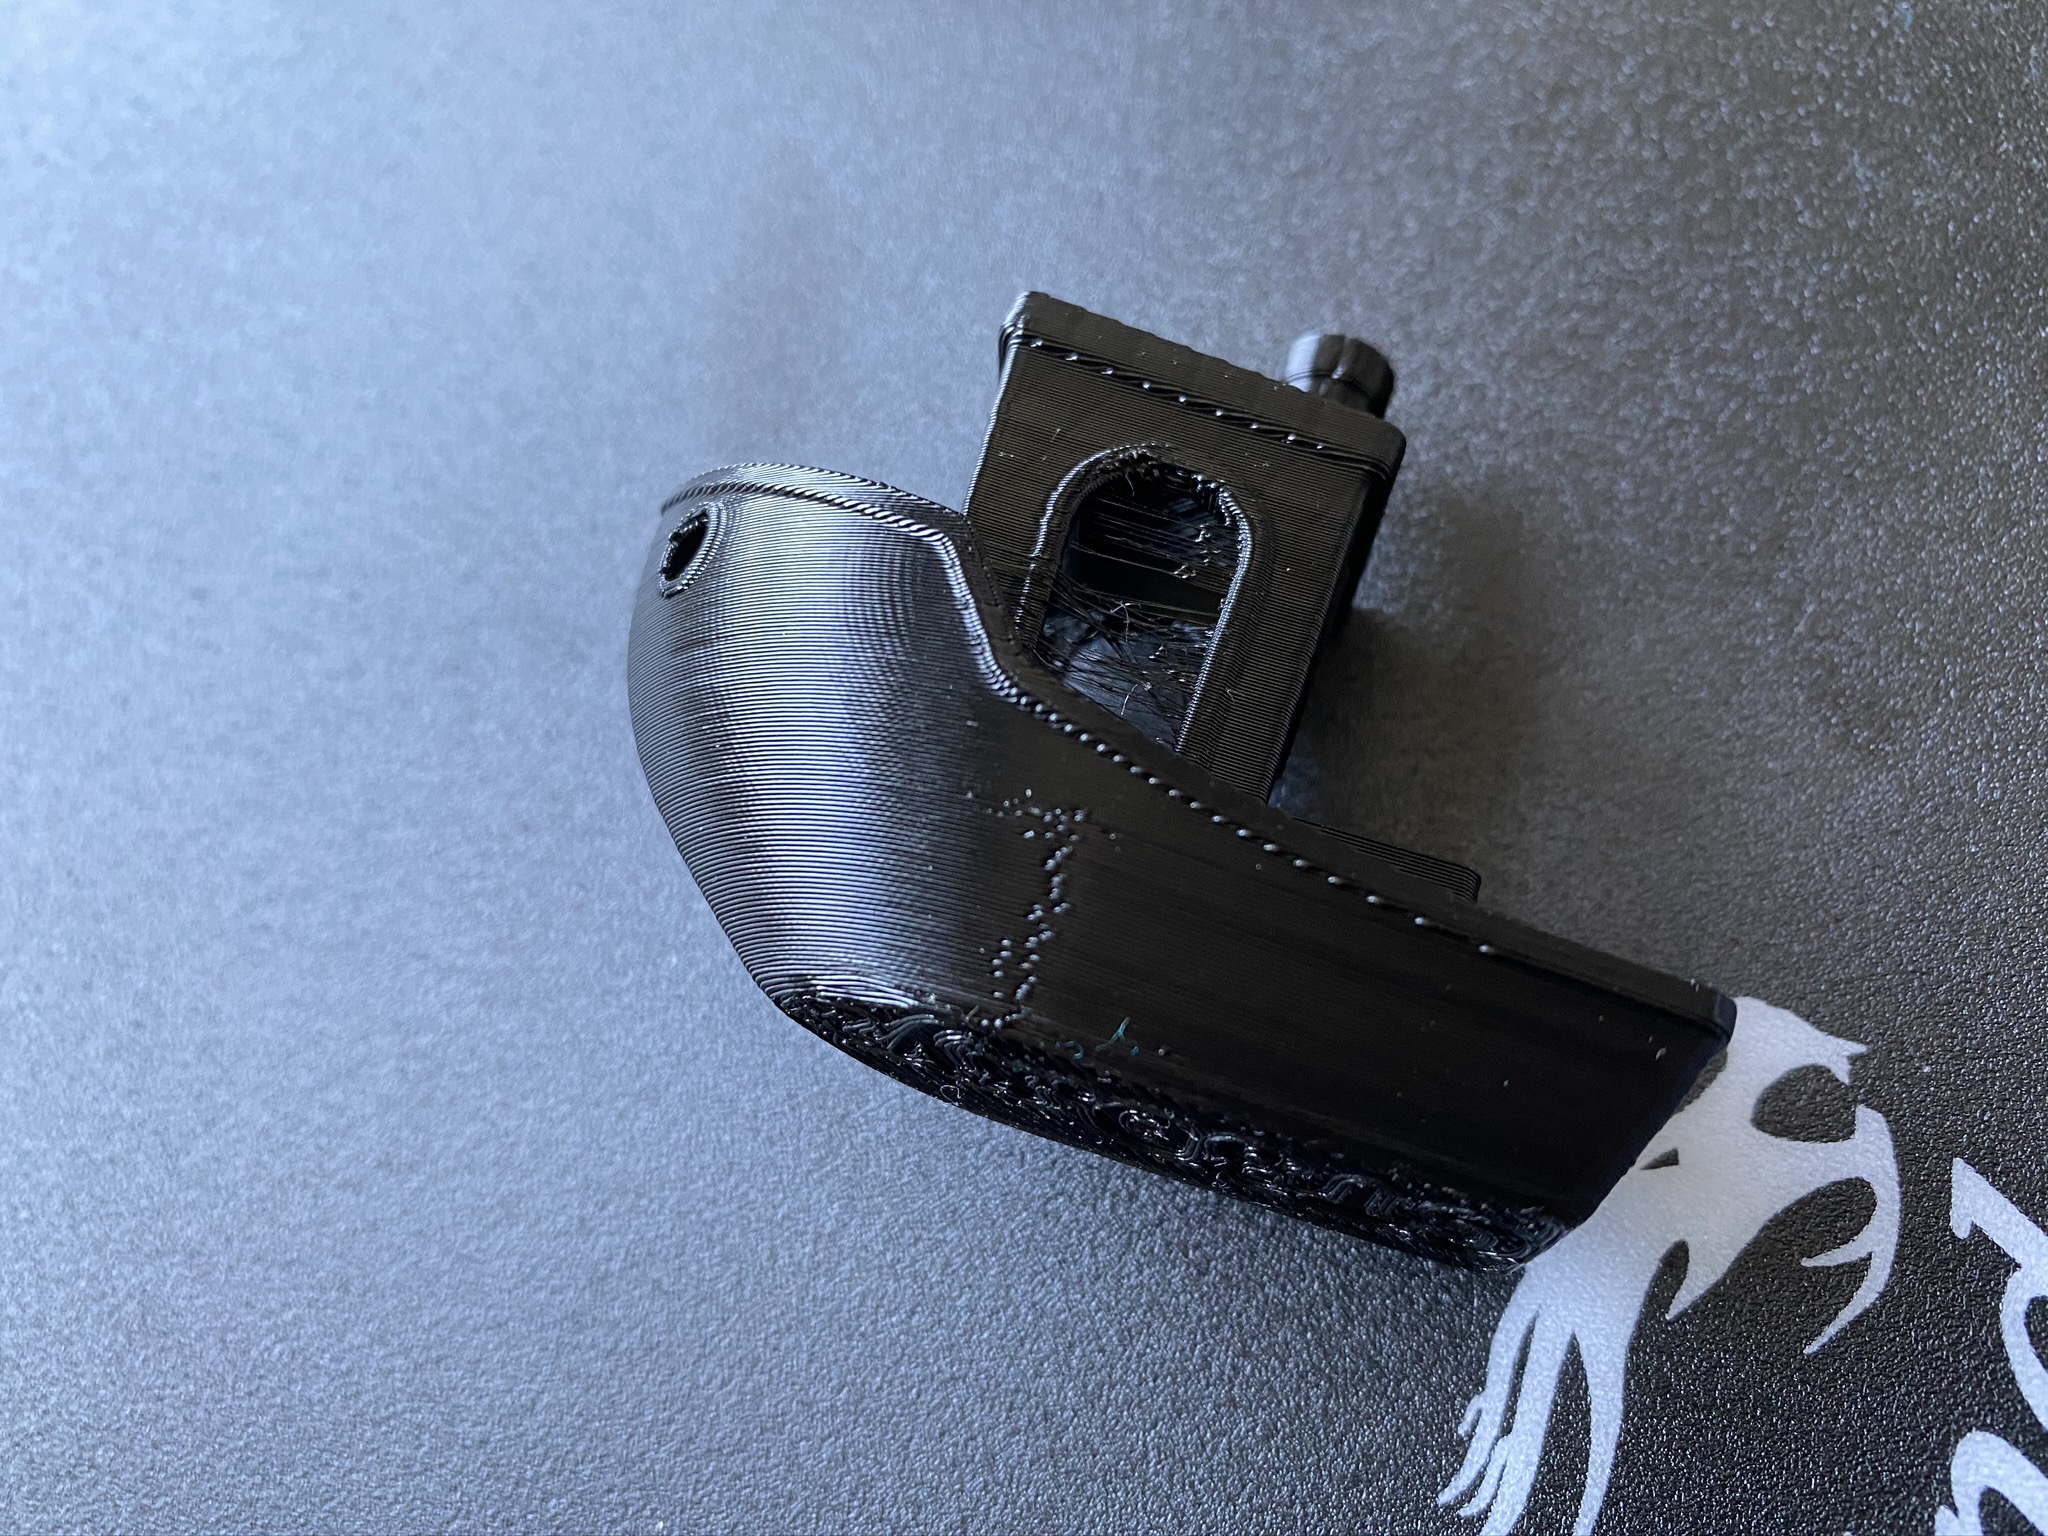
Veotax posted:I just brought an Ender 3 and run my first few prints. They've come out pretty great, but the 3Dbenchy I did had quite a bit of stringing and an anomaly on one side of the hull. DrVax did a long video about stringing today. It's a pretty deep dive into why it happens and how to tune your printer and it'd be a good resource if you're new to 3d printing. I don't watch a lot of his channel but he was in a coma for a couple of weeks while on a ventilator for covid 19 a month or so back and I appreciate that he's got a renewed focus on making his channel about teaching. https://www.youtube.com/watch?v=WLWYzJe8zxI
|
|
#
?
May 22, 2020 22:53
|
|


|
Jessie transition rolls in stock, got 4, wonder what they'll be edit: sold out in <5min shovelbum fucked around with this message at 23:49 on May 22, 2020 |
|
#
?
May 22, 2020 23:46
|
|


|
I gave up waiting and ordered 3 regular rolls and then an hour later the transition rolls came in stock 
|
|
#
?
May 23, 2020 00:13
|
|
|
SpartanIvy posted:I gave up waiting and ordered 3 regular rolls and then an hour later the transition rolls came in stock I put my SMS info in as my contact email and set a custom loud as hell ringtone for it edit: I'd say they have them 3-4 times a week or so
|
|
#
?
May 23, 2020 00:32
|
|
|
Anyone know of a miniature 3d printer file? My partners brother saw mine and wanted one for himself, so I bought him an Ender 3 but first wanted to print out a miniature version to give to him as a "joke", and then later give him the real one. Thanks!
|
|
#
?
May 23, 2020 03:05
|
|


|
FAT CURES MUSCLES posted:Anyone know of a miniature 3d printer file? My partners brother saw mine and wanted one for himself, so I bought him an Ender 3 but first wanted to print out a miniature version to give to him as a "joke", and then later give him the real one. Thanks! This one looks like an i3 style: https://www.thingiverse.com/thing:3227645 Some other styles: https://www.thingiverse.com/thing:3278126 https://www.thingiverse.com/thing:12094 https://www.thingiverse.com/thing:2494219 https://www.thingiverse.com/thing:813436 https://www.thingiverse.com/thing:526029
|
|
#
?
May 23, 2020 03:16
|
|
|
Rexxed posted:This one looks like an i3 style: Thanks! I wasnt sure exactly what to search for in Thingiverse and just kept popping up with printable parts.
|
|
#
?
May 23, 2020 03:37
|
|
|
Welp after lots of wiring... (and 2 hours of trying to get additional wires fished up the towers)  It works!  Its nice to have auto-cal that just works instead of using that janky converter I was using before...
|
|
#
?
May 23, 2020 03:45
|
|
|
Hi. I'm a dumbshit that had a print fail four times before remembering brim existed. That is all.
|
|
#
?
May 23, 2020 04:00
|
|
|
brim (or raft) is good if you are building something with a bunch of really skinny arms sticking out or almost no surface contact on the bed. however i loving hate removing brims and dealing with the little razor sharp edges they leave so if your parts regularly require them to stick you should consider washing or sanding your bed.
|
|
#
?
May 23, 2020 04:26
|
|


|
Sagebrush posted:brim (or raft) is good if you are building something with a bunch of really skinny arms sticking out or almost no surface contact on the bed. however i loving hate removing brims and dealing with the little razor sharp edges they leave so if your parts regularly require them to stick you should consider washing or sanding your bed. It was for tall narrow parts with some creator prefab'd supports. Trouble was the base profile of each piece was only a few mm^2. Get a few layers in and all sorts of fun thing happen. It's all good now. Also I hate brims for the same reason. The flexible bed mat on the Ender3 Pro makes them easier to deal with though. Flex a little and the brim (hopefully) pops up on one side, ready to be peeled off.
|
|
#
?
May 23, 2020 05:40
|
|
|
Sagebrush posted:brim (or raft) is good if you are building something with a bunch of really skinny arms sticking out or almost no surface contact on the bed. however i loving hate removing brims and dealing with the little razor sharp edges they leave so if your parts regularly require them to stick you should consider washing or sanding your bed. A 1-2 layer brim usually just peels off without too much trouble.
|
|
#
?
May 23, 2020 08:02
|
|

|
I haven't had much trouble separating brims but it does depend on the material. Sometimes if there's a little left a deburring tool will take it right off, or a flush cutter will get it separated. It can be time consuming if you have to do it a lot. I'm having a tougher time with the PETG I'm using right now because I ended up using a brim on the pieces of this plague doctor mask I'm printing for a friend who needs it for his apocalypse chic: https://www.thingiverse.com/thing:4234215
|
|
#
?
May 23, 2020 08:22
|
|
|
So I bought a second Elegoo Mars a while back and I only took it out of the box but never even turned it on. Anybody looking for one still? I might be looking to get that big one when it becomes available. I could even throw in a replacement screen and some FEP sheets.
jubjub64 fucked around with this message at 18:41 on May 23, 2020 |
|
#
?
May 23, 2020 18:34
|
|
|
I really appreciate how customs slashed open the foil of my vac-packed extremely hygroscopic filament, ignoring the literal ziplock on the bag, then just dumped it back in the box unsealed and exposed so it could soak up all that sweet spring humidity. A+ heartily recommend.
|
|
#
?
May 23, 2020 21:40
|
|

|
Remember how I forgot about the brim? Got a couple more parts printed out with the brim no worries. Then was printing another. A couple of hours in the print started to sound a little "off". Then there was a light crunch and the hotend ripped the print off the bed, brim and all. Goddamn it. I'm using the "skin" tone 3DFillies PLA+. I know I've mentioned it before. It is an utter poo poo to print with. The reason why I'm using their brand exclusively is purely availability by the way. stevewm nice job! I've been curious, how badly does the body of the printer change with humidity and temperature?
|
|
#
?
May 24, 2020 02:25
|
|
|
General_Failure posted:"skin" tone 3DFillies PLA+ Really? In 2020?
|
|
#
?
May 24, 2020 02:35
|
|


|
Subjunctive posted:Really? In 2020? I didn't name it. I think it's a lovely name. I got it for printing ball jointed doll parts for my SO. It seems to be the standard creamy colour used for the resin. I dunno. Maybe it makes a good base colour or something.
|
|
#
?
May 24, 2020 02:41
|
|
|
The Eyes Have It posted:I really appreciate how customs slashed open the foil of my vac-packed extremely hygroscopic filament, ignoring the literal ziplock on the bag, then just dumped it back in the box unsealed and exposed so it could soak up all that sweet spring humidity. A+ heartily recommend. What was it?
|
|
#
?
May 24, 2020 02:47
|
|
|
General_Failure posted:I didn't name it. I think it's a lovely name. I got it for printing ball jointed doll parts for my SO. It seems to be the standard creamy colour used for the resin. I dunno. Maybe it makes a good base colour or something. Oh, I didn�t think you named it. Just thought maybe we were past that now!
|
|
#
?
May 24, 2020 02:49
|
|
|
General_Failure posted:Remember how I forgot about the brim? I opened up a Sunlu PLA+ roll recently and I have the same kind of experience with it. Total garbage filament but it's what I could get. I can't wait until my Jessie filament arrives.
|
|
#
?
May 24, 2020 03:00
|
|
|
SpartanIvy posted:I opened up a Sunlu PLA+ roll recently and I have the same kind of experience with it. Total garbage filament but it's what I could get. I can't wait until my Jessie filament arrives. i got a pack of sunlu clear pla and sunlu white pla+, ugh now i dont even want to open the pla+
|
|
#
?
May 24, 2020 04:45
|
|


|

|
| # ? Apr 23, 2024 12:10 |
|
|
I used up two rolls of Sunlu PLA+ and got lucky and it printed.. fine. Color was pretty hideous but it was otherwise okay. Sunlu is one of the trash Amazon brands who's quality is sort of randomized chaos. Maybe fine sometimes, hilariously bad other times. I will always recommend picking a few brands and sticking to them for consistency sake. The only Amazon filament I'll get is eSun and 3D Solutech, and even within those I've just got a few colors/types of each that I always trust to be good.
|
|
#
?
May 24, 2020 04:55
|
|


