|
Manifisto posted:funny you should say that, I was just looking at some tutorials for 2d artists doing that exact thing. again, probably you won't be able to follow specifically, but hopefully you can get the gist. I was thinking of using something like Opentoonz to mess around with animation, but now I�m considering blender instead
|
|
|
|

|
| # ? Apr 29, 2024 09:54 |
|
https://www.youtube.com/watch?v=c57qq2nE3B0
|
|
|
|
Tim Heidecker, on the topic of blender: "It's free"
|
|
|
|
|
it's free computer generated estate
|
|
|
|
  it's happening it's happening 
|
|
|
|
holy crap. i am just skipping around this video but it looks like they just did a 3d drawing. i already bother drawing the whole 3d object in my head when drawling and its always so annoying only 1 angle makes it to "page." i wonder if lazynezumi works with blender b/c my pen is a little jittiery oitherwise |
|
|
|
|
|
blaise rascal posted:
|
|
|
|
|
This was asked a while ago but I do pretty much all my modeling with Maya. I genuinely think Blender has some way better functionality with things like converting curves into poly objects, non-destructive boolean functions, stuff like that. But, after using Maya basically every day for like a year, trying to go back to Blender just feels impossible because of the control differences, even after switching the presets to Maya-likes. Honestly, I think the #1 thing that will make your renders really good is to improve at texturing. Here's a WIP of a scene I'm making right now, but you can see for the most part a huge amount of it is very basic geometry. The most complicated parts are the wires, which are just long cylinders extruded from curves.  So then you can take shapes like those that are really basic and don't take long to model at all, and then convert them over into something like this  
|
|
|
RazzleDazzleHour posted:So then you can take shapes like those that are really basic and don't take long to model at all, and then convert them over into something like this This seems like it would be an unlockable ash tray in MGSV. So is that, like, pitting in the material and that smudge near the foremost lip/dip(?) done with just, the 2D image used to wrap around the model or is it something you specify on the model's, uhh, "skin" itself? |
|
|
|
|
|
Khanstant posted:This seems like it would be an unlockable ash tray in MGSV. So is that, like, pitting in the material and that smudge near the foremost lip/dip(?) done with just, the 2D image used to wrap around the model or is it something you specify on the model's, uhh, "skin" itself? There's two ways to do really specific texturing like this and I think you've basically figured out and are trying to describe them both. The model itself is just a small cylinder cup with four booleans used to cut out the holders, so there's very little geometry compared to the amount of detail.  UV projection is where you have a single image file that is wrapped around the object using UV Shells. The way you usually do this is by lining up the specific parts of a model up with different parts of a photograph so that everything fits together. Here's a great example of how to do this in video form if you're trying to build a model around a texture. https://www.youtube.com/watch?v=v_ikG-u_6r0 So, for this method, if you're custom-making a texture, once you've got your basic gold shiny layer, for details, you just need to cross-reference where each part of your model in 3D space would correlate to on a 2D image plane. So, you would find the part of the image where the inside of the ashtray goes and drop in your little ash details. Find where the little resting spot would be and draw in your fingerprints. Most of this sort of work is done directly in Photoshop. The second method is the one that is way more fun and also probably easier and that's vertex painting. It's technically done the exact same way as the last method - all textures will always be a flat 2d image layed onto an unwrapped model. But, you use a program to project the texture onto the model in real-time and you paint on the model itself, which in turn just edits the image file. So, you can just spin your model around, grab a fingerprint-like-brush, and click on the exact spot where you want it to go. Switch over to an ash-like brush, then paint it into the bottom. You can do this in Blender but I use Substance Painter (I have a student license) since it's what the industry uses and so I need to be able to. That's honestly pretty much the biggest reason I haven't switched over to Blender either, very few companies actively use it at their studios. https://www.youtube.com/watch?v=HDWSkCDIu1E |
|
|
|
|
RazzleDazzleHour posted:You can do this in Blender but I use Substance Painter (I have a student license) since it's what the industry uses and so I need to be able to. That's honestly pretty much the biggest reason I haven't switched over to Blender either, very few companies actively use it at their studios. thanks for your perspectives razzle, I always find it interesting to hear perspectives of people who use other programs. for the benefit of other interested people, there is a big difference between small studios and freelance pros and big studios (from what I have heard). small studios and pro freelancers are currently much more likely to adopt (or at least permit the usage of) Blender, they can save a considerable amount on licensing fees and their workflows are not so established that it would be a major pain in the butt to adopt a new tool. for a hobbyist like me, having everything in one free tool is amazing. the annual licenses to get all of the supposedly "best in class" programs (substance painter for texturing, zbrush for sculpting, nuke for compositing, houdini for physics simulations, after effects for motion graphics, maya or max or cinema 4d for modeling, and so on) would be absolutely absurd. but some people, freelancers and such, are finding they can use blender for many things, but still have holdout favorites (substance painter and zbrush seem to come up commonly) that they're willing to pay the licenses for.
|
|
|
|
RazzleDazzleHour are you doing game stuff? I know nothing about art but I've been a game programmer for like a Very Long time
|
|
|
|
|
RazzleDazzleHour posted:There's two ways to do really specific texturing like this and I think you've basically figured out and are trying to describe them both. to add to this excellent description, there's a third method that is becoming increasingly popular with blender users, and that is generating textures entirely "procedurally" using texture nodes. blender now has capabilities that allow you to create actual 3d bumps, protrusions, hollows and whatnot using texture nodes (it used to be that you could create "fake" bumps using bump maps or normal maps). you can of course control colors, designs, things like shininess and glow and translucence and many, many other things using texture nodes, and you can use texture nodes to precisely place details that are either image textures or are themselves created procedurally. procedural textures are amazing. I have mentioned before there is an annual thing called "nodevember" in which artists try to create materials entirely procedurally--they start with a sphere and do not do any modeling or sculpting. google "nodevember" to get a look at the many, many amazing results from 2019 here's a video highlighting some of them https://www.blendernation.com/2019/12/04/amazing-nodevember-results/
|
|
|
|
|
I've just sort of started to work with procedural textures with Substance Designer and it's pretty complicated - if you're a hobbyist I wouldn't recommend it unless you're really interested. Following some tutorials can get your some pretty neat results, but the real burden of knowledge is having a fundamental understanding of how all of the instructions will interact with each other, and how to combine them in order to arrive at a desired look. I'm not even really to the point yet where I can make something completely from scratch, unless it's something simple like tiles or bricks. Procedural texturing is done through step-by-step instructions. It's node-based, just like the shader graph in Blender, which means that you're essentially constructing a final image from a flow chart.  At the bottom is my final result, which is a cliff-like material. At the left, you start with a simple pyramid, then the next node scatters it randomly. Skip the next placeholder node, and you've got an angular distortion that sort of does the thing when you move a window on your PC and it leaves a trail behind. That's combined from the bottom with some randomized noise so it doesn't look even, and then that process is done a second time from a slightly different angle. However, using the info from the first time, I extract some of the height data from there and use that as an opacity filter so that when I do the process again, it will mostly leave the elevated areas alone and exaggerate the crevices. Along the top, I'm doing the same height-analysis system, but I'm using it to look for general shapes along the outside. Then, I bold them out and use what is basically a Photoshop blending layer to have the edges conform more towards what I outline there. Like I said, this stuff is kind of a nightmare and if you don't plan on going pro you'll probably never have to worry about it, or you can just follow a tutorial to make the desired material. more falafel please posted:RazzleDazzleHour are you doing game stuff? I know nothing about art but I've been a game programmer for like a Very Long time Yeah, I just graduated with a Digital Arts degree but I spent basically my entire last year doing exclusively 3D modeling and texture art for game pipelines. For a lot of my projects, I'll end up doing the final renders in Unity or Unreal just for portfolio reasons. Honestly, basically every decision I make is for portfolio reasons. Here's a scene I took into Unity and converted into a small VR room https://www.youtube.com/watch?v=v3Nx9n-3cig RazzleDazzleHour fucked around with this message at 20:31 on Aug 8, 2020 |
|
|
|
RazzleDazzleHour posted:Yeah, I just graduated with a Digital Arts degree but I spent basically my entire last year doing exclusively 3D modeling and texture art for game pipelines. For a lot of my projects, I'll end up doing the final renders in Unity or Unreal just for portfolio reasons. Honestly, basically every decision I make is for portfolio reasons. Here's a scene I took into Unity and converted into a small VR room |
|
|
|
|
very nice, very creepily atmospheric RazzleDazzleHour posted:I've just sort of started to work with procedural textures with Substance Designer and it's pretty complicated - if you're a hobbyist I wouldn't recommend it unless you're really interested. Following some tutorials can get your some pretty neat results, but the real burden of knowledge is having a fundamental understanding of how all of the instructions will interact with each other, and how to combine them in order to arrive at a desired look. I'm not even really to the point yet where I can make something completely from scratch, unless it's something simple like tiles or bricks. the really crazy things that people do procedurally in blender require just a ridiculous number of nodes, it's not very intuitive but if you're just having fun with it you can pick up a few basics and make procedural stuff that's really pretty neat, altho not necessarily photorealistic I'm sure substance painter has more options and features for this kind of thing tho
|
|
|
|
|
this has nothing to do with textures but check out the insane stuff this guy can do with blender https://www.youtube.com/watch?v=RxD6H3ri8RI
|
|
|
|
|
I think LazyTutorials specifically do a great job of showing what Blender is capable of. And that extends past the really fancy technical stuff, because the hardest part of learning all of the 3D art software is just knowing what you actually CAN do. 90% of things I've learned have been me trying to do something, wondering "is there a better way to do this?" and then looking up a video/asking someone and then realizing holy poo poo there IS an easier way to do this. I showed that building video to two of my classmates a while ago and we were all like "wait whaaaaaat" |
|
|
|
|
RazzleDazzleHour posted:I think LazyTutorials specifically do a great job of showing what Blender is capable of. And that extends past the really fancy technical stuff, because the hardest part of learning all of the 3D art software is just knowing what you actually CAN do. 90% of things I've learned have been me trying to do something, wondering "is there a better way to do this?" and then looking up a video/asking someone and then realizing holy poo poo there IS an easier way to do this. I showed that building video to two of my classmates a while ago and we were all like "wait whaaaaaat" I agree. starting out I enjoyed the long form tutorials that really spelled out everything they were doing, but as I've got concepts under my belt I find that the shorter ones impart most of the info I need, unless it's a totally new technique, like using animation nodes or something. or the new grease pencil stuff, it looks amazing but there are a number of new concepts to learn.
|
|
|
|
https://i.imgur.com/mig2aVR.mp4 Okay, greasepencil kicks rear end
|
|
|
|
|
blaise rascal posted:https://i.imgur.com/mig2aVR.mp4 that is lovely, so cool
|
|
|
|
|
what owns about blender is how much it can actually do. like, i just found out it can edit video the other week. |
|
|
|
|
well why not posted:what owns about blender is how much it can actually do. like, i just found out it can edit video the other week. yeah! honestly the video editor may seem a bit bare bones at first but in truth it can do most everything you need for a lot of projects. there are addons that make the interface more intuitive, and there is a contingent of fans that keep pushing for vse improvements.
|
|
|
|
|
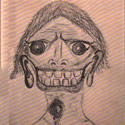
This is really cool, I don't have a full grasp on keeping my cursor in the right 3d space yet but it's fun to draw this way even though this is all i've managed so far  I'm not interested in 3d modeling but arranging multiple 2d drawings in 3d? hell yea! I wish I had a computer that didn't struggle to run blender though |
|
|
|
|
deep dish peat moss posted:This is really cool, I don't have a full grasp on keeping my cursor in the right 3d space yet but it's fun to draw this way even though this is all i've managed so far I like it!
|
|
|
RazzleDazzleHour posted:There's two ways to do really specific texturing like this and I think you've basically figured out and are trying to describe them both. The model itself is just a small cylinder cup with four booleans used to cut out the holders, so there's very little geometry compared to the amount of detail. ah swell, this all doesn't look easy, but it's starting to approach intuitive to me, without having even opened the program (i did install it finally) yet. at least compared to fucknig around with maya/3dsmax way back in highschool. "The model itself is just a small cylinder cup with four booleans used to cut out the holders, so there's very little geometry compared to the amount of detail." - i think boolean in the bit of java we did in HS was just a binary y/n thing. I'm taking in this instance, you've created boolean spheres, which are basically negative-space spheres that subject from the more basic, dipless ashtray cylinder. If so, very cool I can see how that would be a useful way to think of constructing objects in 3d space. Not unlike rock-sculpting in that you're subtracting material selectively to create a structure you envision underneath it. That stuff in the video where they selected parts of that 2d image and extruded them to make em have the tiny lip... omg, if that can work the way im hoping it does, will save me so much time in just my normal drawings. Buildings always take me an inordinate amount of time to make despite generally being made out of straight vertical and horizontal lines, its all those tiny lips and details that need to be in good perspective or look wonky that i get hung up on. im assuming theres an isometric view option for things too? painting directly on model is so cool too, always had trouble trying to make an origami box in my head for a model Khanstant fucked around with this message at 20:37 on Aug 10, 2020 |
|
|
|
|
deep dish peat moss posted:This is really cool, I don't have a full grasp on keeping my cursor in the right 3d space yet but it's fun to draw this way even though this is all i've managed so far  I'm pleasantly surprised how easy it is to draw in greasepencil. The sculpt tool makes it so that I can screw up as much as I want, and it's super intuitive to pull things back into submission. Demo:  Also, the bucket tool works like a dream - all it does is magic select a region, grow the selection by a few pixels, and fill in the shape on a lower layer. But that is literally all I've ever wanted out of a bucket tool. There are still some issues, such as the fact that I keep accidentally deleting parts of the drawing somehow, but I'm having fun! e: By the way, I'm using licecap for these animated gifs blaise rascal fucked around with this message at 23:13 on Aug 10, 2020
|
|
|
|
|
Khanstant posted:explanation Yeah, you've generally got the gist of it. Here's a step-by-step, it took like a minute to recreate. You start with a cylinder, extrude the top inward and then down to turn it into a cup. Then, make another cylinder the shape of the little holes. Duplicate it, rotate it 90 degrees, then combine so you have an X shape. Select the cup first, then the X, then boolean modifier them. All I did to finish up was add some extra edge loops so it holds its shape once you convert it to a smooth mesh. Honestly, this is a bad way to do this, though. Boolean cuts will a lot of times (read: always) leave you with bad geometry and N-gons (a face with more than four sides) that you will need to manually fix, otherwise they'll look weird. You can see that in my original, fully rendered ashtray, there's still some pinching around the top lip. Maya works differently from Blender in that in Maya, you usually do the part where you convert a shape from low-res to hi-res at the end of the process instead of at the beginning. So, when you convert your ashtray to a smooth mesh, it will automatically fix geometry the best that it can, and that includes eliminating Ngons. It wasn't perfect, but for a background object you wouldn't see that clearly, it was good enough for what I was doing. For the example at the bottom I threw a quick preset texture on it just to show how little of that original bad geometry actually shows through once you texture something, so you don't really need to be worried about "bad practice" 
|
|
|
|
|
this seems to competent and educational for byob |
|
|
|
|
RazzleDazzleHour posted:stuff about booleans there are some excellent videos going over the geometry issues that booleans create and how to lessen the impact. they are not reliable for "beautiful" geometry but for some things they are so much faster it's worth figuring out how to make them look "good enough" (from what I gather). e: also, n-gons (I have heard it said) are not "always" bad. they are often bad, often enough so it is passed along as a rule, but depending on your needs there are plenty of times you can get away with tris and n-gons and poles. https://www.youtube.com/watch?v=BjnCV2PIkKA Manifisto fucked around with this message at 01:38 on Aug 11, 2020
|
|
|
|
|
this is one of the ones I had in mind but there are plenty more https://www.youtube.com/watch?v=0T3QdLJOBF8&t=551s
|
|
|
|
Sing it with me now! https://www.youtube.com/watch?v=5DcKiwFXDUA TAAAAAAAAAAKE OOOOOOOOOOON MEEEEEEEEEEEEEEEEEE!!!
|
|
|
|
well why not posted:this seems to competent and educational for byob Agreed, RazzleDazzleHour and Manifisto are on another level
|
|
|
|
Yeah I'm slowly absorbing small bits of knowledge to make my eventual actual try more productive. I thought the default in 3d modeling was for everything to be triangles, not r'tangles, except for how any recty is really able to be two snug triangles. im making it a personal goal to do a blender by end of the year one day i want to be strong enough to make things like this: https://www.youtube.com/watch?v=4MWN48V0Oac |
|
|
|
|
|
So one big thing I'll say in terms of making the 3D sonic is that you can make an object out of multiple shapes that dont necessarily need to be connected. The head is just a full sphere with cones sticking out of it, so you don't need to start with a head-like-shape and extrude spikes from it, you can just place cones inside of it and call it a day. In fact, the entire sonic is just whole, barely-adjusted shapes. Blue circle, tan circle, tan half-circle for the head, two entire white spheres for eyes. Actually...  If you're worried about how hard animation might be, don't be. You can import a humanoid skeleton for rigging a model onto it, and it basically just comes down to putting the joints where they should be on a person. Make sure the knees line up, make sure the elbows line up, etc. Then, you can import pre-made animations that are free to download and just plug them in, and the rig will do everything for you. I know the Sonic thing was posted as a "maybe eventually" sort of goal, but this is honestly something you could have looking pretty neat in just an afternoon RazzleDazzleHour fucked around with this message at 03:59 on Aug 11, 2020 |
|
|
|
|
Khanstant posted:I thought the default in 3d modeling was for everything to be triangles, not r'tangles, except for how any recty is really able to be two snug triangles. it seems counterintuitive, but I've seen a number of explanations (some of which actually made sense!) about why, even though the computer ultimately makes everything into triangles at render time, it is considered much better, and gives much better results, to model as much of your stuff using quadrilaterals as possible. quads play nice with subdivision surfaces for example. sonic is a good goal! some nice pointers from razzle too!
|
|
|
|
 I seem to have dug myself into a hole. I grabbed my greasepencil layer and moved it away from the canvas, and now I can't go back and edit my book drawing. I can't get my cursor back to the book layer, nor can I move the book layer exactly back onto the canvas. (I can get close just by clicking and dragging but it's not perfect.) Am I just out of luck? Shift + right click only seems able to move the 3D cursor to meshes, not to greasepencil drawings, so that's not an option. blaise rascal fucked around with this message at 14:42 on Aug 17, 2020
|
|
|
|
|
blaise rascal posted:
(I am trying to help in discord)
|
|
|
|
Thanks manifisto for sending me some tips over discord! I can get pretty close just by clicking and dragging But to make it exact, I need to select a point on the stroke in edit view, then press F3 -> "Snap cursor to selected points" From there I can switch to object mode, right click and select "set origin to 3d cursor" so that the canvas will continue to appear in this spot in the future! Amazing!
|
|
|
|

|
| # ? Apr 29, 2024 09:54 |
|
|
laughing about making a 3D render of an art gallery interior with one of those artworks which look like abstract shapes on sticks until you stand in an exact position and it suddenly looks like a sculpture, except it's "byob" |
|
|


