

|
In installed the Lightroom 3 demo and am messing around with post-processing for the first time ever. All my other shots are just straight from the camera. These are some before & afters... 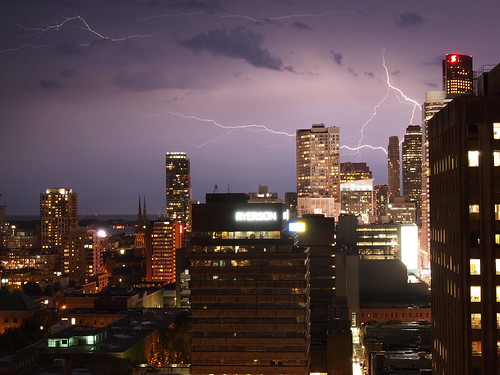  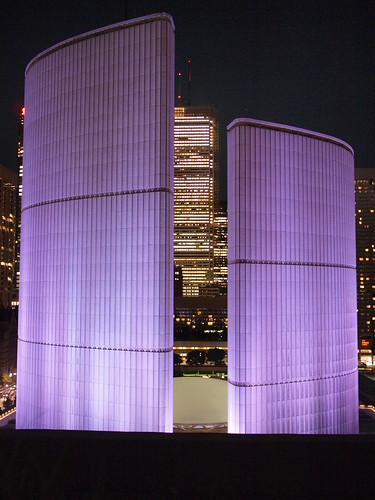  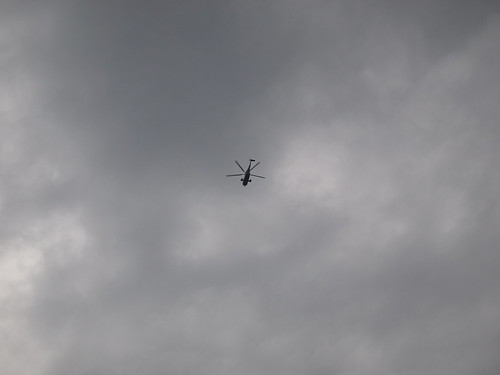  ...uh, that city hall picture didn't export correctly at all. The rest of the images I've tried processing on are here: http://www.flickr.com/photos/markosaar/sets/72157624322526675/
|
 #
¿
Jul 9, 2010 00:13
#
¿
Jul 9, 2010 00:13
|
|

|

|
| # ¿ Apr 26, 2024 07:01 |
|
|
JaundiceDave posted:For the one with the lightning and the city, I'd run a -20% or so saturation brush over some of the buildings. With a shot like this, it's good to have a dramatic contrast between the sky and foreground with the intensity of their color. I'm not quite sure I understand how the Lightroom 3/Flickr syncing works. It seems to take forever, as if it's reuploading my photos, each time I hit the publish button. It updates all the titles, captions and tags at least, which is pretty cool.
|
|
#
¿
Jul 10, 2010 15:10
|
|
|
 My girlfriend was using a Canon 20x super-zoom from the 300-level stands. They seem salvageable. I didn't want to bring my PEN in case security decided the old giant lens I'd be using makes the camera too "professional." (But photography with "non-professional" equipment was wholly encouraged.)
|
|
#
¿
Jul 13, 2010 22:57
|
|
|
SirRobin posted:Kelby's stuff's OK, though he has a disturbing habit of telling people to flatten images in photoshop waaaaay too often (ie: at all). For my money, if you want to learn what Lightroom does and how to drive it, Martin Evening is the writer to look for.
|
|
#
¿
Jul 16, 2010 22:32
|
|
|
scottch posted:LR3's noise reduction is pretty great, too. http://forums.somethingawful.com/showthread.php?threadid=3092090&userid=0&perpage=40&pagenumber=49#post380715109 (warning: Lady Gaga) There was some other stuff done too (mostly just raising blacks), but you get the idea.
|
|
#
¿
Aug 12, 2010 03:25
|
|
|
LR3 runs great for me, but they did mention in the changelog...quote:Addressed performance issues that could occur while reviewing images in Loupe view
|
|
#
¿
Sep 1, 2010 00:45
|
|
|
.
|
|
#
¿
Sep 1, 2010 05:38
|
|
|
I'm trying 
|
|
#
¿
Mar 19, 2011 06:06
|
|
|
gib posted:I like to leave a little bit of yellow/warm cast in a photo shot under tungsten. If you're dealing with sodium vapor lights often found outdoors it's almost impossible to get truly good colors. The lights don't give off a full spectrum, so no amount of white balance fiddling will ever really fix it. edit: oops, meant to remove the attachment. Weird that it's permanent. Was going to use it as an example of generally leaving a bit of a warm cast. Gotta love the hole in the head the glasses leave 
teethgrinder fucked around with this message at 17:11 on Mar 20, 2011 |
|
#
¿
Mar 20, 2011 17:09
|
|
|
It's been a long time since I've used Photoshop (I use The Gimp), but I guess you're saying that the selection deselects itself at one point? I don't see why you can't just keep working with the same selection, inverting it as required. That said, isn't there a "Save Selection..." option in one of the menus?
|
|
#
¿
Mar 22, 2011 00:44
|
|
|
Thank you for the tip, the Nik Collection is exactly what I was looking for. Powerful and reasonably priced (for the collection at least). Also there are coupons available online if you look. ---- I've been reading The Adobe Photoshop Lightroom 3 Book: The Complete Guide for Photographers by Martin Evening, which was probably recommended in this very thread. It would almost be worth having a "Photography Pre-Processing" thread. It blew my mind that I could nest tags in Lightroom heh. Durrrrrrrrrrr. But just little things like applying metadata at import saves so much time. Since I decided to drink the Lightroom kool-aid, I've been going through my collection since 2003, tagging and purging. It's time-consuming, but a good exercise for the nostalgia. Now that stuff is tagged, the instantness with which I can find stuff is mind-blowing. But yes. Nesting tags ... so great. You can select a specific tab, and then inherit the containers. (Or you can specify that the containers are not exported with the rest of the tags if you like.)
|
|
#
¿
Apr 11, 2011 11:29
|
|
|
Haggins posted:One thing I really like about Aperture, and it sounds like you will too based on the problems you posted, is that your library consists of a single file. I have about 5 libraries which are very easy to keep track of. I think LR has a lot more potential for misplacement mistakes.  I'm currently in love with Lightroom's tagging/filters/search. I don't know how I've lived without it.
|
|
#
¿
Apr 13, 2011 19:48
|
|
|
I chose Lightroom because ... I don't have a Mac. Ha.
|
|
#
¿
Apr 14, 2011 05:05
|
|
|
I let Lightroom 3 manage my photos and sort them into folders automatically on import ... isn't that basically the same as "the Mac way"? In this case I think it's outstanding, and the catalogue and tagging add so much to it. All the files are still easily accessible too if I want to manually back them up, which I gather is the same Aperture?
|
|
#
¿
Apr 14, 2011 07:41
|
|
|
Moist von Lipwig posted:No, the Mac way is that everything is one huge file. So say you have 100GB of photos, your library would be one monolithic 100GB file. Apparently you can change that now, I'm not sure you always could. Oh well, been fooling around with a new camera and that Nik Software bundle. (And watched many YouTube tutorials.) Dfine is amazing, and I'm in love Viveza, but I used Color Efex for the first time on this one for soft focus:  Original:  (it's a pretty big crop too, but I exported a copy without any changes in Lightroom for a 1:1 comparison) The software is amazing, but Color Efex and Silver Efex seem to encourage people making gimmicky poo poo heh. Very easy to abuse tools.
|
|
#
¿
Apr 14, 2011 08:05
|
|
|
Wheeeeee first time fooling around with HDR. Using Nik Software's HDR Efex Pro. The programme is stupidly good about aligning photos. I did this hand-held. I didn't notice the birds in the shot until I got home though, ah well.  Original 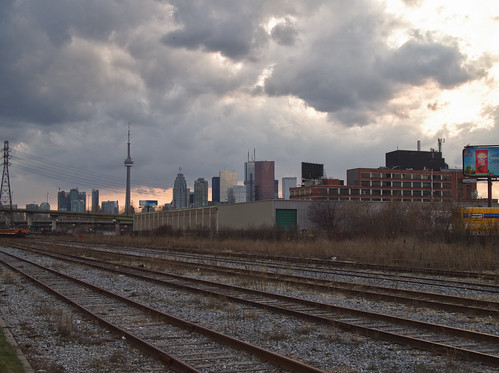 "Realistic (Balanced)" 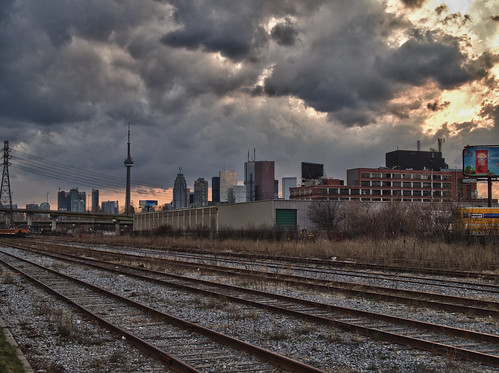 "Realistic (Strong)" (standard cliche HDR)  "Monochrome (Soft)" (the hard one had severe haloing) 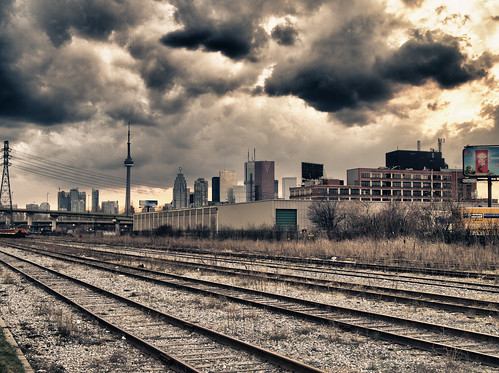 "Granny's Attic" (tempting to use on every bloody stationary photo ") ) )
teethgrinder fucked around with this message at 14:51 on Apr 24, 2011 |
|
#
¿
Apr 24, 2011 02:44
|
|
|
I generally thought people mostly do it on this sort of shot just for the skies. I could probably manually override it, but frankly the rails are the only thing interesting on the ground to me. Anyway before I ever try something like that again, I should find less cliche subject matter. I feel a little dirty posting it.
|
|
#
¿
Apr 24, 2011 02:59
|
|
|
Haggins posted:You should have left it up, I would like to see it. edit: vvvv Thanks. Weird that they still showed for me even after refreshing. I did add one tag to each photo in Lightroom, funny that that was enough to change the saved preview files. teethgrinder fucked around with this message at 14:53 on Apr 24, 2011 |
|
#
¿
Apr 24, 2011 14:24
|
|
|
A5H posted:Is "Clarity" just an unsharp mask?
|
|
#
¿
Apr 26, 2011 14:02
|
|
|
Here I'm trying to salvage shots taken in the dimmest of red light. Am I on the right track? I was surprised at how much detail was revealed through manual white balance. I probably made a mistake by reducing the blacks at first, but again I was surprised by the detail it revealed.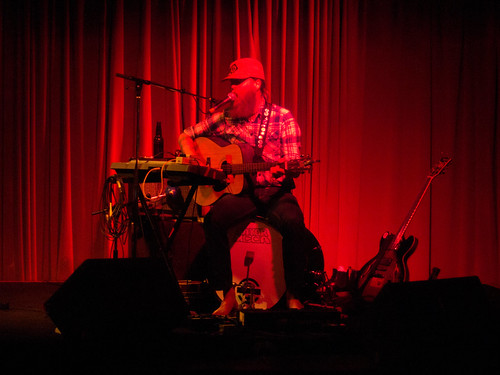 Processing: Import into Lightroom 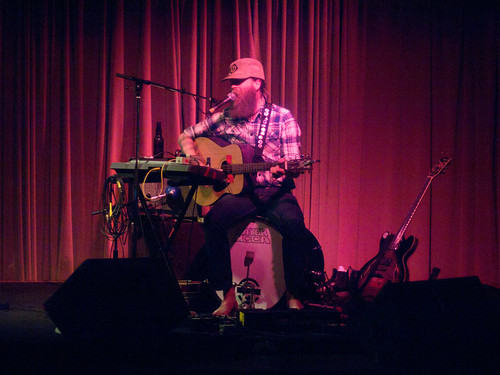 Processing: White balance  Processing: Exposure 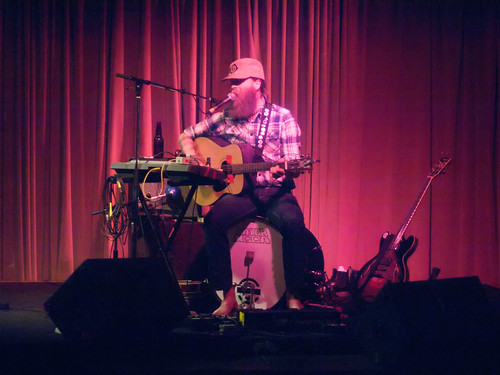 Processing: Dfine 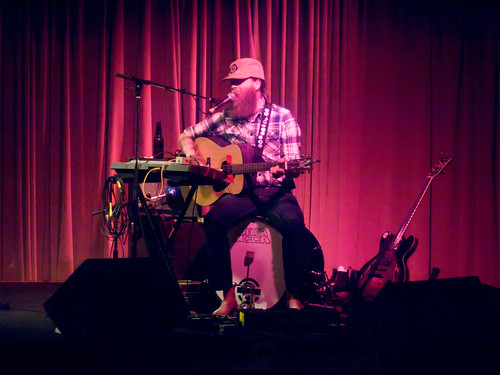 Processing: Blacks & clarity Nik Software's Dfine was fantastic for noise-reduction. I normally allow it to run in automatic, but I used a control point to preserve Mayor McCA's beard. He's a bit pink, but I think that's fair because of the red lighting. If I balance for his skin, the other colours become garish. I suppose I could use Viveza possibly but I'm not sure if it's worth it. Certainly not on every photo, but maybe one or two. edit: Used Viveza to get rid of the ugly colours on the left, but I don't even know what to do for the one-man band. 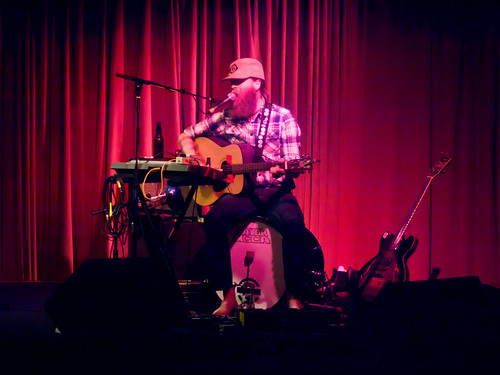 Processing: Viveza Magical programme though. teethgrinder fucked around with this message at 04:27 on May 6, 2011 |
|
#
¿
May 6, 2011 03:55
|
|
|
This is what I finished with:  Honestly, all I could think to do to fix it was create second copy with different white balance and then composite the two together. It's not really worth the effort. The problem with doing it more automatically is that the colours on him are in the highlights of the curtains behind him.
|
|
#
¿
May 8, 2011 04:19
|
|
|
You don't like using the built in Facebook & Flickr management? I do wish the official Flickr plug-in would allow you read "captions" for titling on Facebook instead of just titles or file-names.
|
|
#
¿
May 9, 2011 12:09
|
|
|
Yeah I need to move on. I've just been resisting, hoping Adobe eventually fixes my fairly minor complaint. This weekend I used his geotag-encoding plug-in to match GPS data from my BlackBerry to my photos in Lightroom. It worked incredibly well. (I was shocked at how precise the GPS tracking was, even with my phone in my pocket during a bike-ride. I used this site and their app: http://www.instamapper.com/) The problem was that the geotags didn't get exported to Flickr. Maybe his Flickr plug-in takes care of that automatically.
|
|
#
¿
May 9, 2011 15:00
|
|
|
Shift + O; just O to cycle through different overlays.
|
|
#
¿
May 23, 2011 00:01
|
|
|
jf's Flickr plugin can actually import your publish settings/catalogue from the official Adobe plug-in. So loving awesome and so powerful. (It can even do a "deep scan" and try to match everything on your Flickr account to your Lightroom catalogue, even stuff not ever uploaded through it.) edit: yes/no? Before: 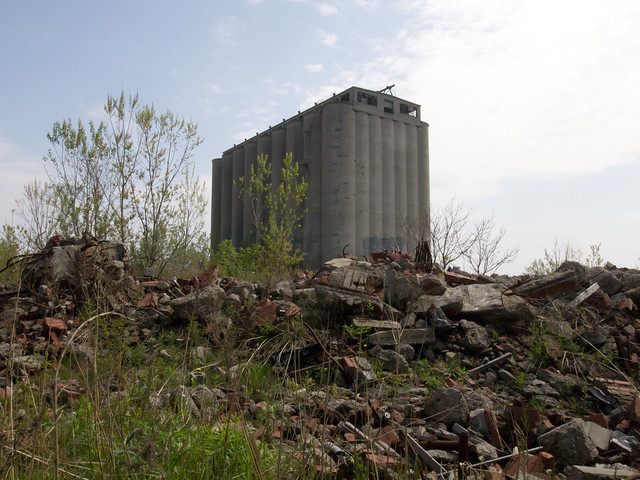 After:  I used HDR to insert a sky where there was none before. To my horror though when I got back to Lightroom, the photo was super-saturated and ultra-sharpened. (My bad for not checking while tweaking it.) Instead of doing it over, I desaturated, and turned down the clarity. ...then when I exported to Flickr, the original all of a sudden has a blue(ish) sky where there was none in Lightroom. I need to learn more about colour profiles and RBG formats. teethgrinder fucked around with this message at 02:35 on May 23, 2011 |
|
#
¿
May 23, 2011 02:06
|
|
|
Just wanted to show an example of an image Nik Software's Dfine 2 was able to rescue that Lightroom 3 couldn't help: 
|
|
#
¿
May 26, 2011 04:47
|
|
|
It depends. I usually let it do it's thing. Sometimes I manually override it to preserve faces/hair better. Make sure you don't miss the "more" settings though. The debanding ones work really well. I don't really understand where banding comes from in some low-light noisy photos I've taken, but dfine completely removed it.
|
|
#
¿
May 29, 2011 17:24
|
|
|
For the latter you can use the "Synchronize..." button instead and just uncheck crop.
|
|
#
¿
Jun 15, 2011 14:46
|
|
|
I think most of us in here use Lightroom or some other major post-processing suite. I think Irfanview can do it automatically by batch if you need something quick and really dirty.
|
|
#
¿
Jun 15, 2011 19:34
|
|
|
I googled myself a coupon
|
|
#
¿
Jun 20, 2011 21:17
|
|
|
Your other option is their complete collection for $300, assuming you have Lightroom or Aperture. (You can also try searching online for coupons.) Dfine is an excellent de-noising tool that allows you to be more selective rather than just processing the entire image. I find it generally works better than what's built into Lightroom 3 anyway. Viveza allows you to make Lightroom-like corrections/adjustments by region rather than affecting the entire image. A lot of people swear by Silver Efex for their B&W conversions. HDR Efex is useful if you want to do HDR and don't already have a method to do so. I don't have any experience with Sharpener Pro yet. Search this stuff on YouTube and Google though to see what people are doing with it, and how quickly they work. edit: Dfine before & afters:   HDR Efex: I should probably give Color Efex another go. teethgrinder fucked around with this message at 20:21 on Jul 4, 2011 |
|
#
¿
Jul 4, 2011 20:15
|
|
|
And hitting "J" is a shortcut to show you both.
|
|
#
¿
Aug 8, 2011 14:18
|
|
|
Depends. Sometimes it just looks completely wrong. An outdoorsy daylight scene though, yes, I would probably push until I just blow-out. And sometimes if more detail is required, I blow it out anyway and then use the recovery slider a bit. I do deliberately blow specular highlights though.
|
|
#
¿
Aug 8, 2011 17:37
|
|
|
Haggins posted:(I shoot Canon so the max I can bracket is 3 shots). I also use the Nik Software stuff... Both hand-held:  Graffiti by markosaar, on Flickr HDR Experiment (presets) by markosaar, on Flickr
|
|
#
¿
Aug 15, 2011 15:12
|
|
|
Color Efex Pro 4 announcedquote:Key new features: Being able to stack filters is huge. More information and videos and the like here: http://www.dpreview.com/news/1109/11090809ColorEfexPro4.asp
|
|
#
¿
Sep 8, 2011 21:28
|
|
|
History browser is a nice-to-have for sure. I guess after buying the collection before, I have to upgrade them piecemeal now if I see something I need. I missed the free upgrade by about a month, poop.
|
|
#
¿
Sep 9, 2011 22:23
|
|
|
I haven't done anything quite that big, but I don't see why it would have any problem with it. It's pretty fast when it's just spitting out JPEGs. Irfanview should be able to do it too.
|
|
#
¿
Sep 10, 2011 03:25
|
|
|
Can we have the RAW file to gently caress around with?
|
|
#
¿
Sep 23, 2011 06:55
|
|
|
Bought the Color Efex 4 upgrade in anticipation of getting back into post-processing. Googling for 15% off coupons still works. I was worried when I completed the order but got a notification that it did not complete and would be "reviewed." But ten minutes later it was done anyway. Seems totally worth the $85 to upgrade from 3 just for being able to layer the effects.
|
|
#
¿
Oct 26, 2011 19:54
|
|
|

|
| # ¿ Apr 26, 2024 07:01 |
|
|
 Love ColorEfex. Step 1. Add graduated filter Step 2. Add control point to prevent filter from affecting the building strongly Done.
|
|
#
¿
Oct 29, 2011 18:04
|
|