


|
I ripped these:.JPG) ...out of this: .JPG) In other words, I'm embarking on a rebuild of the carbs on my newly acquired 82 GL1100. Step 1: replace all the philips head screws on the trim, carbs and fairing with allen bolts.
|
 #
¿
Apr 8, 2009 05:34
#
¿
Apr 8, 2009 05:34
|
|


|

|
| # ¿ Apr 25, 2024 09:21 |
|
|
I ran the first set of jets from the Goldwing through an ultrasonic cleaner. Then, while blowing compressed air through the float valve, the tiny filter on the end of it blew off. I haven't found it yet; this is not a good start 
|
|
#
¿
Apr 17, 2009 07:46
|
|
|
AnnoyBot posted:I ran the first set of jets from the Goldwing through an ultrasonic cleaner. Then, while blowing compressed air through the float valve, the tiny filter on the end of it blew off. I haven't found it yet; this is not a good start Today I found the filter; it's the size of a large grain of rice. Hooray! And I took pictures and video of the ridiculous linkage so I don't have to kill myself when I get stumped during reassembly. Coming up this afternoon: disassembly. [edit] Jesus christ, the lock washers on the plenum were designed my God himself. After stripping two of the the #3 philips head screws holding the carbs to the plenum body halves, I had to drill the fuckers out and use an extractor. The threads were pristine with no corrosion anywhere, it was all necessitated by the lock washers. AnnoyBot fucked around with this message at 05:05 on Apr 19, 2009 |
|
#
¿
Apr 18, 2009 23:13
|
|
|
Proceeding with the Goldwing carb rebuild after a few weeks off... I broke the head off the mixture screw today because instead of soaking the body in acetone for a day like I should have, I went at it with pliers. I guess I figured I could just fall back to the extractor like I did before. Well, doing that on a brass screw seated in a tube cast from white metal is a recipe for disaster. So now the J-B Weld is curing, setting the pieces of the mixture screw tower back together. I carefully put the pieces in place and verified that the threads were aligned, then glopped the epoxy on and wound 18" of fiberglass around the mess. Hopefully this should help the epoxy resist the expansive pressure when the idle screw is replaced. [the above was written a few weeks ago. Continuing...] I finally got around to touching up the epoxy this afternoon. Goddamn that poo poo is tough. I also took a look a the Goldwing tech tips page which indicates that major issues with idle screws are common, so I feel better. In other news, I'm going to be posting about Vespas pretty soon, since my 75 year old dad got hit by some fucker making an illegal left turn last night, while riding my mom's Vespa. I suppose it's better that than his Norton 850 Commando.
|
|
#
¿
May 17, 2009 08:34
|
|
|
AnnoyBot posted:...[Goldwing carb nightmare, followed by epoxy sculpture.]... Both repairs seem to have gone well. The idle mixture screw fits the reassembled threads, and the air cutoff valve housing threads have been reconstructed. For the latter, I fit a screw with a bit of wax on the threads in the remains of the housing and put 2 layers of JB Weld epoxy around the exposed threads. The waxed screw came right out this morning and everything looks good. Onward to the Chemtool dip, and the dealer for a replacement mixture screw. Over at the '82 Seca 650, I determined that one cylinder is sparking but not firing and the petcock is now leaking. Looks like I've got another round of fuel system work.
|
|
#
¿
May 24, 2009 08:38
|
|
|
Assembled the linkage on the Goldwing carbs, then installed them and fired the beast up after a 2.5 month downtime. I probably should have filled the bowls with fuel first, so it took a while to catch; it ran like a champ after that. An old, fat, punch drunk champ. But a huge improvement over what it was like when I got it nevertheless. [edit] Here's the epoxy repair I made to the mixture screw tower, that I discussed earlier: http://www.flickr.com/photos/73245657@N00/tags/mixturerepair AnnoyBot fucked around with this message at 08:48 on Jun 14, 2009 |
|
#
¿
Jun 14, 2009 07:36
|
|
|
Installed new timing belts in the Goldwing, then started the bike without replacing the timing mark inspection port. Now the crankcase is covered with fresh oil. Also flushed the radiator. I would have test ridden it, but the timing cover gaskets are so gummed up with old silicone and Permatex that I spent the rest of the afternoon picking the poo poo out with a screwdriver. The gaskets are undamaged, and only act as weather seals, so I don't know what the idiot PO was trying to achieve. Friday night I ordered some OEM VTX1800 rear shocks (take offs) from ebay. Other people on the old Goldwing forum say they are a drop in fit and for $50, how can I lose? Anything to get rid of the air suspension as soon as possible...
|
|
#
¿
Jun 22, 2009 08:18
|
|
|
AnnoyBot posted:Friday night I ordered some OEM VTX1800 rear shocks (take offs) from ebay. ...for the '82 Goldwing. And then installed them with the help of a few stacks of washer to allow them to fit since the VTX shocks are bigger than the GL1100 shocks and hit the frame otherwise. Anyway, they loving rock and are stiffer than I expected. Finally I grabbed a new Metzler 140/90-16 rear tire, to replace the squared off, plugged (but identical) tire that came with the bike. I have a full complement fo tire levers, and a giant vise so breaking the bead was easy as pie. Getting the fucker off the wheel was a bitch until I figured out how to combine the vise and a 2x4 so as to pry the tire off in a way I've never done before. It's hard to explain exactly how it worked- I put the vise on the tire and clamped it as tight as it would go, then worked it around until I could get the 2x4 in between the tire and the wheel. Note: This would not work if you intend to reuse the tire. The bike runs beautifully now, and it is finally solid at speed as well. I measured 33mpg tonight, and that was with a lot of WOT. However... Tonight I ordered (from z1enterprises which has the best prices on this stuff that I've seen) fork seals, brake pads, grips and an air filter. And for the '82 Seca I ordered a petcock rebuild kit and fork seals. This is the summer of bike restoration, and I'm enjoying the hell out of it.
|
|
#
¿
Jul 1, 2009 07:42
|
|
|
Installed clubman bars on the 650 Seca, plugged up the hole where the tach drive lives (too ghetto to explain), powerwashed the front of the engine and adjusted the cam tensioner. My god, the cam chain must have been all over the place before, because the bike revs a lot smoother at higher RPMs now. Considering how easy that job was it was probably the best effort:return fix I've done so far. With the clean engine, I can see now that I'm leaking oil from the cylinder head bolts; I'm sure there's a weekend job lurking in that area. I still need to do a valve adjustment, but it's a shim-under-bucket design so I'm not looking forward to the $80 or so of dime size pucks I'll probably need to acquire.
|
|
#
¿
Sep 21, 2009 08:18
|
|
|
After riding the Seca 650 around for a month with the thottle cracked at stoplights because I never set the idle after tearing down the carbs, I decided to address the issue. Education ensued. I read up on xjbikes.com about setting the idle, then I dicked around for a bit with the mixture screws and did a half assed sync. Then I put it back together, having run out of time. It started racing when warm, then sometimes dying. I read up some more and discovered that I had leaned the mixture way out and a lean idle did in fact tend to race when warm. Finally something made sense! So tonight I was able to work on it while it was still warm. I reset the mixture to about 1.75 or 2 turns out, and did a much better sync. I haven't been able to go for a test ride yet but it looks very promising. I also discovered that the butterfly shaft seals probably need replacing because the shaft ends are sucking an audible amount of air. In other news, I measured 39mpg from the R100GS, which is way better than I've seen lately, but probably due to the almost 100% freeway riding I've been doing. Anyway, good to see it's still running well.
|
|
#
¿
Oct 1, 2009 08:07
|
|
|
Bucephalus posted:'82 CB650SC owner here. I feel your pain. Ever try to find an M7 cap/acorn nut? It doesn't loving exist. Not even Honda sells their goddamn moon fasteners anymore for 1982 Goldwings. For those of you who didn't experience the Bay Area's recent storm I'll describe it thusly: when I got home from work yesterday, I dumped about 60 gallons of water off the brand new (and thus watertight) tarp covering 3 of my bikes. Then today I started all of them to make sure they were dried out.
|
|
#
¿
Oct 15, 2009 09:23
|
|

|
I rounded off two of the four 8mm bolts holding the oil screen on the '82 Goldwing. gently caress. I hope that getting a 6 point combo wrench at Sears is sufficient to solve the problem (I did the damage with a 12 pt wrench). Otherwise... gently caress, I don't know what "otherwise" is. Drop the engine and break out the extractor I guess, since these fuckers are wedged between the frame and the engine. At least drilling them out will be easy because they're made of loving butter. [update] I got the 6 point wrench today and it did the trick. Now I just have to figure out what to do about the metal shavings in the screen, and verify that the bike has oil pressure. Here's the screen. The cylindrical thing was loose in the screen chamber; I don't know what it is yet:  Here's the oil I scooped out of the chamber with my finger. Lots more junk there; I believe the gold flakes are bearing material. Good times:  AnnoyBot fucked around with this message at 09:03 on Oct 21, 2009 |
|
#
¿
Oct 20, 2009 07:20
|
|
|
I found the cause of my 650 Seca's lean running. Finally. FINALLY! Back around last fall I tore down the carbs and cleaned everything out. They weren't too bad but I figured it was time. Unfortunately when I put them back on the bike it wouldn't idle and basically exhibited all the symptoms of running lean. gently caress. So I dicked around a bit, and then decided (after reading a lot on xjbikes) that I had a leak at the butterfly shafts. So I got the right seals, installed them and... still lean. By this time it was getting to be early winter and I had hosed up the synchronization to the point where it was totally unridable and basically hit 10000 RPM as soon as it was started. So it got covered and mostly forgotten. Until last week. I pulled the carbs, did a real bench sync with feelers, and reinstalled them. Better, and ridable, but still lean. So I set about loving with the mixture. Better still, and more ridable, but still not very good. It wouldn't idle and had the annoying habit of staying at whatever RPM it was at when I closed the throttle while riding. So tonight I got to trolling through xjbikes again, looking at Colortune threads. Nothing new here. Except... what's this about pulling the inline filter? I remembered I had put the filter from my Goldwing on the XJ; it had seemed pretty free flowing, and the ones on my BMW had always been fine. But the Goldwing filter is for a system with a fuel pump. So I pulled it and: victory! The lean behavior seems to be gone- I now have nice things like engine braking and the revs drop as I close the throttle. The idle is still poo poo, since it still has the settings from when the filter was in place, but that should go away once I redo the mixture. The major issue is gone and I am a happy guy now. The moral: don't use filters designed for pressurized systems in a gravity fed system. Duh.
|
|
#
¿
May 17, 2010 07:03
|
|
|
Gave the mixture screws a final tweak, then replaced the plugs, plug caps and two of the plug wires on the '82 Seca. The other two wires are OEM and permanently attached to the coil, plus those cylinders weren't having issues with missing. I've been hitting the headers with an IR temperature gun and #2 was a bit cooler than the others, plus it seemed to be missing at idle after getting warmed up. That's all gone now. I've owned the bike for 11 years and this is the best it's ever run. Starting from San Jose, I took a test ride down Almaden to McKee Road, which goes by Calero Reservoir, then Uvas Reservoir, then finally ends at Watsonville Road. It was a glorious ride, probably one of the most satisfying I've ever taken. I love working on bikes, even if I suck at it sometimes. Next up: - change final drive oil - replace fork seals - replace tires - replace headlight assembly - recover seat
|
|
#
¿
May 23, 2010 21:27
|
|
|
Finished replacing the fork seals on the Seca. It felt great as I headed towards the freeway to go into work. Halfway up the on-ramp, I went to upshift and the clutch cable snapped. Or maybe the head pulled off; something like that anyway. gently caress. I backed down the ramp on the shoulder, pushed it past the cop directing traffic, made my way through the road construction and finally stashed it on a side street. Now it turns out that no one has the cable in stock locally and it has to be ordered. gently caress. A 5 minute repair and I can't get it done until like next Wednesday.
|
|
#
¿
Jun 5, 2010 02:47
|
|
|
infraboy posted:Had a mechanic in the bay area come over and did a valve check on my GS, found out the exhaust valve on cylinder #2 was super tight, like going into negative clearance, so basically the exhaust valve was staying open all the time, pretty much explains why the bike was running like poo poo. So after a bit of cursing managed to hold the shim bucket down, and pried the little shim out. Also had the carbs synced. To hold the bucket down, do this: - Remove the spark plug - rotate the cam fully down so the valve is wide open - shove a folded over, medium size zip tie in the spark plug hole. If your cylinder head is anything like my XJ650, it should jam itself between the valve and valve seat quite nicely - rotate the cam 180 deg and remove the shim - removal is reverse of installation (duh)
|
|
#
¿
Jun 19, 2010 09:29
|
|
|
I've been battling a lean running condition on my '82 XJ650RJ Seca for weeks (months/years) now. Tonight I achieved victory. I did a sync with a Carbtune (which has utterly hosed things up on previous occasions) and got it more or less right this time. But more importantly I replaced the ossified rubber boots on the sync port nipple things with homebrew airtight covers. For the first time ever, I arrived home from my ~10 mile test ride with the engine not racing, the throttle responding correctly and everything hunky dory. I'm pretty goddamn stoked right now.
|
|
#
¿
Jun 20, 2010 07:11
|
|
|
Raven457 posted:Finally got around to replacing the intake boot orings on the GS850. After a quick ride around the block, the bike is up on power and feels a lot smoother. I'm waiting for my cell phone to charge up some so I can take it out for a nice hour or two ride. I went in to do the same on my '82 Seca tonight. Turns out the manifold bolts are made of butter just like the carb screws so I've got a broken stud. I've now entered the land of drills, screw extractors and possibly pulling the head and taking it to a machine shop. I've read enough threads on the subject at xjbikes.com to know that I'm in for a very expensive fix. That is, assuming I don't decide to roll the fucker into the river next to my house at 2am.
|
|
#
¿
Aug 9, 2010 08:53
|
|
|
AnnoyBot posted:I went in to do the same on my '82 Seca tonight. Turns out the manifold bolts are made of butter just like the carb screws so I've got a broken stud. I've now entered the land of drills, screw extractors and possibly pulling the head and taking it to a machine shop. I've read enough threads on the subject at xjbikes.com to know that I'm in for a very expensive fix. That is, assuming I don't decide to roll the fucker into the river next to my house at 2am. Well, I got a set of extractors a few days ago and promptly broke one off in the stud. I just finished grinding it out with a Dremel. I'm calling the machine shop now...
|
|
#
¿
Aug 16, 2010 17:31
|
|
|
A while back I posted about breaking off an intake bolt on my '82 Seca. I pulled the head and had a shop unfuck the bolts, then life took over. I haven't been able to do much since then except occasionally clean stuff with steel wool, scotchbrite and solvent. Today I finally stole a few hours, got my poo poo together and remounted the valve head. It wasn't that hard in the end, but that's largely because there was a month of (intermittent) prep work already in place. Stuff like covering the top 1/4" of each stud with masking tape to avoid scraping the head deck, wire brushing each head bolt and washer, re-annealing the copper washers, testing the various sealants and prepping each bolt/washer with a combo of antiseize and Permatex aviation sealant. Then removing the masking tape with a dental pick and tweezers, applying the right torque in stages, realizing that nut #14 couldn't be installed with the other bolts in place, undoing everything and separating the goddamn head by 1/4", installing the fucker, then reapplying torque and hoping I didn't just ruin the new gasket. Next up: coat everything with assembly lube, drop in the cams and fit the cam chain. I also ran the whole exhaust system through an electrolytic rust removal process and plan to paint it with some VHT flame proof paint.
|
|
#
¿
Oct 11, 2010 02:11
|
|
|
I finished the Seca head gasket & header paint project!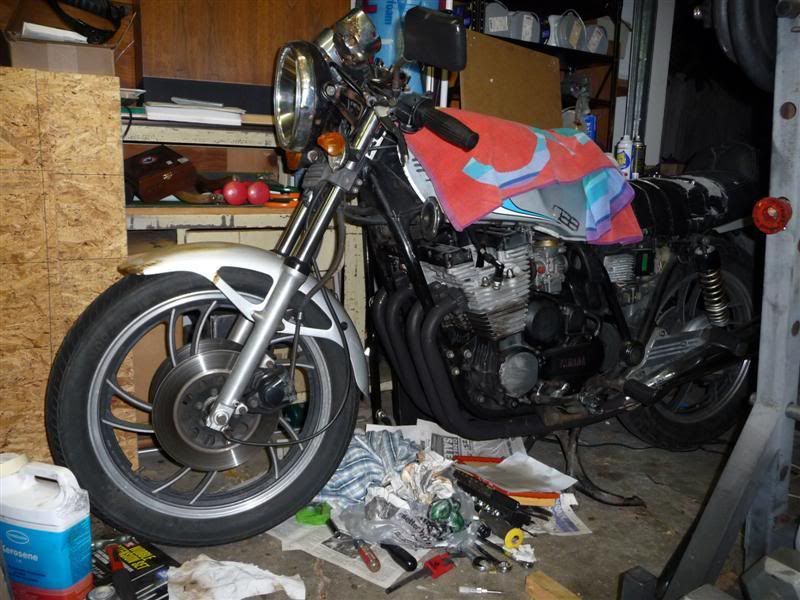 I did the headers with VHT flame proof paint. I haven't done the mufflers yet, but they take 3 seconds to remove so that's a quick job when I'm ready. I started it up and it sounded great, not a bit of smoke or anything. The gas is a bit old so it wasn't as smooth as it could be but I was drat happy regardless. Then the VHT paint started smoking/curing and I had to shut down after it became unbearable. The curing process is 3 step so that's fine. I won't be able to tell if the lean running is fixed until later this weekend when I can get a real test ride in. Here's hoping...
|
|
#
¿
Oct 15, 2010 07:27
|
|
|
Sorry to hear about the DRZ; that sucks. So I took the Seca out for a spin. It ran exactly like before- badly. I checked the plugs and #1 was black while the others were grey. I despaired for a while, then got to work. I pulled the carbs and didn't see anything missing on the bottom side of #1, so I went to pull the slide. The loving diaphragm was mis-seated. After refitting it, I did some tests to see if it appreared to behave like the others- same rate of descent if I lifted two slides and let them drop, same amount of lift when a shop-vac was applied to the manifold side with the trottle partially opened, etc. Things looked OK. I refitted the carbs this morning and took it out for a spin- everything was perfect. Except for the rain. But throttle response was good, there was no sign of oncoming lean running behavior, etc. I'm heading out again for a longer test ride but I'm hopeful that the major running issues are dealt with. [edit] Took a longer test ride. Adjusted the idle a bit mixture and checked sync (which looked good). Another test ride, then pulled the plugs: perfection! (aka "light tan") AnnoyBot fucked around with this message at 03:05 on Oct 18, 2010 |
|
#
¿
Oct 18, 2010 01:22
|
|
|
Blaster of Justice posted:Gasoline is not that flammable. Igniting point at 1 atm is about 280-320�C. You can easily drop a burning cigarette in a jar filled with gasoline without igniting it. I've splashed gas on a hot header before, which based on my pyrometer readings would be just on the low side of the ignition range, and a fair bit hotter than a hot engine. Thank god all I got was a dramatic sizzle.
|
|
#
¿
Oct 20, 2010 08:01
|
|
|
N183CS posted:I ordered an Ohlins rear shock in a group buy for $200 off retail. poo poo! At first I read that you bought it for $200. So what was the actual price, like $1000? I would kill for an Ohlins on my GS. I would not, however, pay anything approaching retail price. As for me, I bought a Scorpion EXO-700 helmet and filled the '82 Seca with gas. That's right: I used a whole tank of gas in the Seca without something going wrong and requiring a 2 month project to fix.
|
|
#
¿
Oct 29, 2010 08:31
|
|
|
Finally measured the Seca's fuel economy. 42mpg- definitely on the right track. I'd love love LOVE to get hold of a Colortune for an afternoon and nail the rest down. With that in mind I decided it was time to take a step away from utter ratbike status and get the seat recovered by one of the seven thousand shops around here (San Jose). $165 later it looks great and hopefully won't make my taint go numb as fast. They really rebuilt the whole seat, they didn't just recover it. Now I won't be mistaken for a two wheeled homeless person with the disaster of cracked vinyl and black gaffers tape I was sitting on before. Also I got a set of superbike bars to replace the clubmans that are on it now. Not installed yet though. You can actually see them in the picture next to the can of VHT.  Here's the "before": 
|
|
#
¿
Nov 8, 2010 07:46
|
|
|
Lunchb0x posted:Which place was it? Looking to get my old seat redone. I'm down in Santa Cruz. http://www.yelp.com/biz/abys-custom-upholstery-san-jose Let me know if you want extra detail, under the seat pics, etc.
|
|
#
¿
Nov 9, 2010 05:16
|
|
|
Not strictly "to your ride"... Had a breakthrough tonight with my TIG practice. I got tired of releasing radioactive dust in my garage by grinding thoriated tungsten, so I picked up a few lanthanated tungstens. Then I stumbled across a diagram showing how you need to flatten the tip of the ground point for steel welding. Holy poo poo- I can actually control the heat on 22ga sheet metal now! My bead on 22ga is ugly, but working on the low setting really allows me to make a tiny puddle, even near the to-be-welded joint, and just work it around until things start to come together. This practice is eventually going to be used to fix the crack in the eggshell-thin header pipe of the R100GS. It seems to be around the thickness of 22ga, but the cracked area has probably eroded to something less than that.
|
|
#
¿
Jul 24, 2011 08:51
|
|
|
AnnoyBot posted:Not strictly "to your ride"... I'm so full of poo poo. A coworker found a precision welding shop like a mile from our office; they did his cracked custom R1 muffler for $35. This afternoon they fixed my header for $20. The dude at the shop said he might have even built the system on my bike in the mid 90s, as I have a Supertrapp and he fabbed R100GS Supertrapp systems back in the 90s; he even owns an '89 GS. It's possible, I contacted the previous owner and he didn't know where the pipes came from either. Anyway, the weld looks great and with a little VHT paint it's ready to put back into service. ...so tonight I'm celebrating by beginning the engine extraction process on the '82 GL1100!
|
|
#
¿
Jul 30, 2011 07:20
|
|
|
Welp, it's time to do or die: I really did pull the engine from the Goldwing this time. Once I figured out that the driveshaft has a circlip and wasn't just stuck it went pretty smooth. Glad I didn't break anything there. Of course I did this with my wife an 2 year old daughter out of town; it will probably take months to hit the next milestone on this project, whatever it ends up being. At minimum an engine flush and a new clutch. At most- the junkyard; there were scary colored metal bits (bearing shavings, probably) in the oil when I drained it forever ago.
|
|
#
¿
Aug 2, 2011 08:44
|
|
|
Finally connected with a craigslist "free goldwing stuff" seller. It was weird and also a jackpot. The guy who answered the door was a big Samoan dude who didn't know who I was when I said I was there for the bike stuff. Then he directed me down the hall. The seller was curled up in a hospital bed with tubes coming out of him and seemed to be possibly in a morphine haze. There was a TV, an electric wheelchair like a quadriplegic might have, and various bits of "you're going to die" equipment around. He perked up and rasped to the big companion to take me out back and let me take whatever I wanted. I half (3/4) expected to find a smashed Goldwing with pieces of the seller's spine hanging off it. In fact there was a nice late 90s Harley chopper that was also being sold, with the Goldwing parts residing in various cabinets. Next to the final drive was some sort of anti-coughing therapy machine; the seller must have had lung cancer or some awful respiratory ailment, as opposed to dying a slow death following a horrific Goldwing crash. Anyway, I got a nice radiator, a set of Progressive Suspension shocks, all three brake calipers + lever, a final drive, a cherry set of solid feeling aftermarket (too clean to be original) headers, both exhausts, some electronic thing with a heat sink and a rear fender. All for $0.
|
|
#
¿
Aug 10, 2011 06:19
|
|
|
ReidRansom posted:Dude. I am so incredibly jealous right about now. Nice haul. Well, I can feel an empty gnawing karmic blackness on my soul that grows by the minute, but thanks! I think this stuff was from a '79. I probably don't need the brakes, since I my '82 has dual piston calipers and these are single. The radiator is going to be used as a cooler on my TIG welder. The muffler/headers may or may not fit, I don't know yet; I'll use them if they do, but my old ones will then be available. I doubt I need or can use the final drive or ignition module. The shocks appear like these, I have VTX1800 shocks now so probably don't need them. I don't need what I think is the airbox. I doubt I'll be using the footboards or the rack. I definitely do need the fender. I don't need the old license plate :-) I'm in San Jose. This project will probably run into the fall at least so I'll update this thread as things proceed. Here's the haul:   
|
|
#
¿
Aug 11, 2011 22:27
|
|
|
GnarlyCharlie4u posted:AnnoyBot, does he happen to have a spare front end (forks, calipers, axle) to get rid of? My parts gl1000 is donating one to my cb750 since my buddy took mine. If that works out I could use another for the other CB I don't think so, the only stuff I left was bits of the false tank assembly. There was no evidence of any frame, engine, wheels, etc. I'm trying to get a link back to the craigslist ad for the Harley now. I think it was a mid 90s bad boy, but I'm not an expert at H-D identification.
|
|
#
¿
Aug 11, 2011 23:08
|
|
|
Forty Two posted:Haha so you get a massive haul of free stuff and the only thing you're probably going to use on your bike is.... the fender! Totally guilty over here. Sadly the radiator was the thing that really got me there. My TIG torch is water cooled and sucks without a cooler.
|
|
#
¿
Aug 12, 2011 03:54
|
|
|
GnarlyCharlie4u posted:HAHAHAHA WHAT?!!!?!?! Not sure what you mean here. Please clarify.
|
|
#
¿
Aug 12, 2011 19:23
|
|
|
BlackMK4 posted:My dad had a Porsche 911 RSR replica when I was a kid, I have a very vivid memory of ramming the door with one of those battery powered jeeps when I was like 4 or 5. What's up dad's-Porsche-abusing-buddy? I had a nifty fort in the rafters of my dad's garage and one day knocked a mahogany plank onto the hood of his 1961 356. Luckily Roy Sasaki Restoration in San Jose exists and does magic things with sheet metal. This was in about 1981, I dunno if the actual guy still runs it. Content: The lovely Walmart battery in the Seca went bad. The Battery Tender shows a green light after an evening on the juice, but it only turns the engine over about 2 revolutions. It's only about a year old. The bright side is that the lady at the customer service counter said they would exchange it, I just have to come in on a day when they have my model in stock. If I can get a new one without it being prorated I just might be hooked. I also did a valve adjustment on the R100GS, and torqued down the head bolts. That was really drat easy. gently caress shim-under-bucket, tappets 4eva. Now I just need to replace the paralever boots and lube the driveshaft spline so I don't kill the u-joint, assuming it's not already damaged. Finally- went to Mount Lassen a few weeks ago with the family. While I was gazing longingly at the V-Star club entering the park, I got to thinking. Then I made a rash statement. I told my wife that if I hadn't ridden the '82 Goldwing to the top of Lassen by August 2012 I would get rid of it even if I have to give it away for parts. The engine finally made it from the driveway to my workbench where it's awaiting disassembly and inspection. If the main bearings are scored that's the end of the story. If they're not- well that's when things get interesting. [edit] gently caress me- I just took the clutch cover off the GL1100 and found one retaining bolt MIA and one loose in the case, bent at a 60 degree angle. That would pretty much account for the awful noises the bike made the last time I rode it. I can cross "oil starvation" off the list, which is a huge relief. loving previous owner. AnnoyBot fucked around with this message at 09:11 on Aug 20, 2011 |
|
#
¿
Aug 19, 2011 09:05
|
|


|
Marv Hushman posted:Hold the phone! Mr. Greenjeans was brought back from the dead to run a chain of restaurants? No, but if you nail that turn combo you'll be granted total Krishna Consciousness. Content: I installed a new shift lever grommet for the Seca. 
|
|
#
¿
Aug 30, 2011 08:34
|
|

|
AnnoyBot posted:
Well dammit, turns out the pressure plate is destroyed as well. You can see the cracks on two of the bolt thread towers:  Availability is dicey, I may have to hit up ebay. However I have this posted to the naked goldwing site too and they should probably be able to point me to where I need to go.
|
|
#
¿
Sep 6, 2011 06:56
|
|
|
Odette posted:How did that bolt get so ... twisted? You see the cracked part? The bolt was in there and backed its way out until it hit a rib in the cover (not shown), at which point it wedged itself between the drum and the cover. The mark it left is that ring you can see on the clutch drum; the bolt has a small facet somewhere too from the friction. The noise was horrifying and caused me to park the bike for 2 years while I pondered the next step. I thought I had lost oil pressure and fried the crank. Actually the main reason this took so long is my daughter was born about 10 days after this happened so my garage time went away. I only just recently got some time together to pull the engine and dig in.
|
|
#
¿
Sep 6, 2011 09:55
|
|

|
So my battery replacement odyssey a few weeks ago was for naught (but thanks for the free battery Walmart!). I went for a nice long ride down Uvas road two weeks ago and when I paused at the edge of Watsonville, the fucker wouldn't turn over. I push started it easily and pulled the starter when I got home. Sure enough the brushes were worn down to nothing and had basically lost contact with the armature (I think that's the part). This explained why a tap with a rubber mallet no longer resulted in a few cranks. I'd like to thank Yamaha for using a starter motor that can easily be serviced 30 years later. It felt pretty awesome to reassemble it and have it spin up on the battery charger with $30 in new parts instead of requiring a $400 new motor.
|
|
#
¿
Oct 1, 2011 09:54
|
|
|

|
| # ¿ Apr 25, 2024 09:21 |
|
|
Finally got the clutch press plate for the Goldwing. I still need to get the wear items (clutch lock washer, gaskets, etc) but the hard to obtain part is taken care of. The R100GS left carb started pissing gas as I pulled in the driveway a few weeks ago. I'm not sure what that's about, but I'll be diving in soon enough. Any ideas why this would just happen as the bike was running? Finally, I stopped at an estate sale on a whim while out with the family today. It seemed more like a bankruptcy sale, but whatever. Someone there was a major dirtbike guy because there was gear, tools, fuel cans and stuff for sale. I took an ATV/MC jack for $20 and was pretty drat stoked. The sale is on McKean in Almaden Valley south of San Jose if anyone wants to clear out what's left (which is actually a hell of a lot). [edit] Ha! I just finished grinding a 15/16" socket into the 4 point tool required to remove the clutch lock nut on the goldwing. I locked the clutch in place with a socket and a steel rod, and undid the nut with an impact gun. Flawless victory! Here's my version of the clutch removal socket: 
AnnoyBot fucked around with this message at 21:15 on Nov 13, 2011 |
|
#
¿
Nov 13, 2011 07:04
|
|