


|
Liquid cement. Lacquer paints. Solvents. The list goes on. Don't believe the hype about pride in a well-constructed model, because we modelers DO IT FOR THE INHALANTS. ") Hopefully, I can draw out some fellow scale modelers on the forums with this thread, because I know you've got to be out there. Let's share tips and tricks of the trade, pictures of our work, and make promises about when we'll finish a model that we don't deliver on... For the first post, how about some good information on getting started if you've never even touched a model before? Modeling can be a very relaxing and satisfying hobby, but it helps if you start out right to keep from getting needlessly frustrated. Getting Started First and most importantly, stay away from standard modeling cement (Testors and the like) because it's complete crap. You'll drive yourself nuts, make a mess, and there are much better products available today. As your first purchase getting your feet wet with the hobby, other than a model kit of course, I recommend the Touch & Flow Applicator: http://www.micromark.com/TOUCH-N-FLOW-APPLICATOR,7841.html?sc=WGB&utm_source=GoogleBase&utm_medium=feed&utm_campaign=GoogleBase You'll also need some liquid cement to go with that. My personal favorite is ProWeld non-toxic (smells like oranges!) because it's less caustic and works well, but Tenax 7R and Tamiya Liquid Cement are also excellent. Go with what you can get from your hobby shop. Pick an easy kit for maximum modeling satisfaction! The problem here is that the outward appearance of kits can be deceptive. Many don't show the parts themselves anywhere on the outside of the box, so it's difficult to know how well the kit is engineered, how detailed it is, and how good the instructions are. I'm predisposed towards aircraft, but if you like cars, go for it. Tanks are great, but you're not ready for them yet, believe me. 1:72 scale aircraft are a good starting point. The kit is likely to be simpler, with fewer pieces, but even at that scale you will still get some nice detail. Go for a Revell, Airfix, Italeri, or Tamiya. My personal favorite brand is Hasegawa, but they go for insane detail and I don't want you to end up throwing your model against the wall. For basic tools, you're also going to need an X-ACTO knife, a file, and whatever paints your model calls for. Paint is such a large topic on its own that I think I'll go into it later. Concentrate on assembly before you perfect your painting techniques. A few more things that are handy, but may not be necessary at first include modeling putty (for filling cracks and voids), masking tape (for holding things together temporarily or protecting things from paint), and masking fluid (again, for protecting things from paint). Putting It Together Plastic models are made of injection-molded polystyrene for the most part. Some are made of resin, more on that later. The process of injection molding necessitates that the parts be attached to a "tree" or sprue. Thus, to begin putting those parts together you must cut them from the sprue, and then trim the excess plastic. There are a couple of different ways to do this, but don't be fooled by fancy "sprue cutters"; they are essentially wire cutters and nothing more. Leave a little bit of sprue material hanging off the part. At this point, I feel the need to mention that X-ACTO and similar knives are surgically sharp. They will cut into your fingers effortlessly, and so you need to be careful about how you're holding a part while you're trimming it. By the same token, you can also cut off too much plastic and destroy detail on the part if you are careless or push too hard with the knife. Trimming excess plastic with the knife works fine, but some people prefer to use a file instead for more control. Paying close attention to the kit's instructions, once you have some parts to put together, you're going to want to "dry fit" them first. Most parts will have pins and holes that engage with other parts in the kit, simplifying the assembly process and aiding with alignment. However, there can be imperfections when the kit is manufactured, such as warping or "flash". Flash is excess plastic, usually quite thin, protruding from the edge of a part. It can easily be trimmed off with the dull edge of your knife. Check the fit of the parts and look for any imperfections in the plastic that might prevent a good fit. Once you are comfortable with the fit, it's time to make it permanent. With liquid cement and a Touch & Flow, the procedure is as follows: 1. Get your Touch & Flow charged with liquid cement. It comes with instructions on how to do this. 2. Hold the two parts together firmly with one hand. 3. Touch the Touch & Flow to the seam between the parts and move it along to the end. It's hard to describe how this will work, but this is a well-designed tool and it's very easy to use. 4. Continue holding the parts together after cementing the entire seam. Occasionally let go a bit to check if it has started to set. Liquid modeling cement works by partially melting the polymers in the plastic, and as it evaporates the plastic again becomes solid-but joined together! This usually only takes about 10-15 seconds, but if you are dealing with parts that "want to" come apart due to warping or the general shape, you are going to want some sort of clamp to hold it together for a longer period until the bond strengthens. Cyanoacrylate (super glue) is another option, especially for pesky seams that don't want to stay together. To make things even better, you can get Zip Kicker: http://www.micromark.com/ZIP-KICKER-SUPER-GLUE-ACCELERATOR-8-OZ-LIQUID,7577.html (I know it seems expensive, but a little bit goes a LONG way) Zip Kicker accelerates the hardening of cyanoacrylate glues, and by "accelerates" I really mean "sets instantly". This stuff is really nasty, and as I've found out first hand you don't want to get it in a fresh cut from your knife...but you haven't cut yourself because you're being careful, right?  Coming Soon: My favorite specialized tools, including the coolest clamps ever created by man! Powdered Toast Man fucked around with this message at 01:57 on Jun 5, 2009 |
 #
¿
Jun 4, 2009 22:04
#
¿
Jun 4, 2009 22:04
|
|


|

|
| # ¿ Apr 19, 2024 20:37 |
|
|
TOOOOOOOOOOLS I love tools and gadgets. In fact, I find it difficult to make it out of Hobbytown USA without buying some nifty new gadget. Sometimes this has fantastic results, as in the case of the Berna Hobby Clamps: http://www.micromark.com/BERNA-HOBBY-CLAMP-SET,8990.html (by the way, if you can't tell already, Micro Mark is a great store) The genius of these clamps is how flexible they are. Traditional clamps only clamp in a single direction and typically are only effective with flat surfaces. Springs clamps are way too strong for plastic models. Berna clamps work by simple friction, in basically any position, and they're reasonably priced. They're the best tools I've ever bought. Sanding sticks are my preferred method for getting rid of excess plastic. I use these, which you can also get at Hobbytown or Hobby Lobby: http://www.micromark.com/5-PIECE-FLEX-PAD-SET,7367.html Liquid mask is fantastic for protecting parts that you don't want to paint, or masking off areas of different color when painting. It works especially well for protecting aircraft canopies! Just paint right over it, and when you're done it rubs off easily, paint and all. The different model supply companies all have their own versions which are basically equal, although I use Gunze Sangyo/Mr. Hobby because I get a kick out of their products being mister this or mister that. Every single product they sell, no kidding. The best tools do come at a price, but they will last you forever and work much better. It seems that Japanese guys are extremely serious about their hobbies, so the Japanese tools are the best, no question. Tamiya and the aforementioned Mr. Hobby make a full range of stuff you probably had no idea even existed. Hasegawa also makes a few specialty tools. This thread needs more PICTURES so here is a Tamiya store in Japan...except, something seems a bit odd about it...  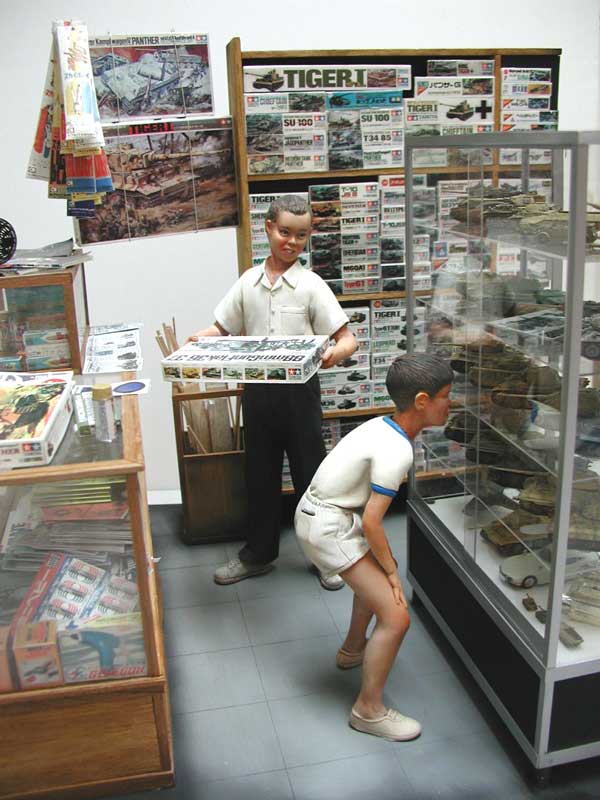 Click here for the full 600x800 image.
|
|
#
¿
Jun 5, 2009 19:15
|
|
|
VanguardTruth posted:Whenever I build a car, the body paint done with a spray can doesn't come out very satisfying. Should I be looking into an airbrushing system or jut take more time and do a million thin coats for a more even look with the spray can? I don't really do cars, but if you think about the finish that you're aiming for - glossy, smooth, uniform - then an airbrush most definitely makes sense. People are often intimidated by them, but they're really just a matter of practice. Spray cans suck. They clog easily, sputter, and often cause orange peel due to uneven spray. Fortunately, the most expensive component of an airbrushing system, the compressor, has been coming down in price over the past few years. I have an Iwata Revolution CR and I absolutely love it. Double action gives you excellent control, and yet it can still put out an impressive volume of paint for covering large areas. It is also easy to take apart and clean after painting. I got my compressor with my favorite hook up for otherwise expensive items: Hobby Lobby, if there is one near you, frequently puts out a 40% off coupon that is good for anything in the store. That's a big savings on a $120 airbrush compressor! Coming soon: Kickass modeling websites for help and buying! (but please, please, support your local hobby store; they are a dying breed)
|
|
#
¿
Jun 5, 2009 20:42
|
|
|
Selecting an Airbrush Iwata is the only brand that I have personal experience, and an airbrush is a very personal thing. However, it's pretty obvious that there are airbrushes intended for detailed model painting and illustration, and airbrushes intended for making tacky tee shirts and vanity plates. Iwata belongs in the former category. From what I have seen, and from talking to the knowledgeable guys at my hobby store, Badger and Iwata are typically the best, whilst Paasche and Aztek tend to be inferior. For any kind of model painting I strongly recommend double action because you get so much more control. I chose the Revolution CR because I planned to use it for more detailed work, and a gravity feed topside paint cup is better for that. Larger scale work doesn't require that level of control, so a siphon-fed paint cup is fine for that. If you want to blow even more cash, I know of Japanese guys who have both. They use a siphon-fed airbrush for priming and painting the base coat, and a gravity-fed for details. One possible additional advantage of this is your detail paints will usually be acrylics, which require only water and standard airbrush cleaner to clean up, while primers are lacquer and must be cleaned up with lacquer thinner. (oh, and did I mention I got my airbrush for 40% off at Hobby Lobby, too? hehe.) Compressors Airbrushes do not really require a large volume of air or a lot of pressure. Your airbrush will include specifications on how the air supply should be regulated for best results. Compressors that are specifically made for airbrushes are best because they're going to be intended for indoor use, and will thus be quieter in operation. Then again, maybe you enjoy the sound of a loud air compressor. I don't. Many airbrush compressors are tankless and only run when you are actually spraying, via an automatic relay system. There are some combination airbrush/compressor sets available from various companies, but I have yet to see one that's priced less than they would be individually. No matter what your air source is, it is very important that the air is both filtered and dried. Compressed air has water vapor in it just like the air you breathe, but the problem is that when that compressed air is released and expands, it cools and the water vapor condenses out of it and into your airbrush (see the Ideal Gas Law for the physics behind this: http://en.wikipedia.org/wiki/Ideal_gas_law). This causes spotty, uneven spray patterns. Some airbrush compressors come with an air drier already attached. If not, don't worry, any place that sells airbrushes and compressors will have all of the hardware you need. Airbrush Care & Feeding You're probably going to be surprised by how little paint an airbrush actually uses. Just don't forget that unless the paint specifically says that it comes ready to airbrush, it needs to be thinned in some way before you use it. Acrylics should be thinned with airbrush thinner/airbrush medium. The formulation of acrylic paints varies, and so you'll get the best results if you get thinner that is the same brand as the paint. Cleanup is simple and quick with basic airbrush cleaning fluid. Obviously, follow the cleaning instructions that came with the airbrush. Lacquers are nasty, but boy do they ever paint well. They must be thinned with...you guessed it, lacquer thinner. Cleanup is also done with lacquer thinner. Wear a respirator unless you want to get violently ill. Airbrushes also require lubrication!  Use only specialized airbrush lube for this, such as Iwata Super Lube, which is teflon-based. WD40 IS NOT A LUBRICANT, it's a cleaner. Sorry, that's a pet peeve of mine, but don't use it to clean your airbrush, either. If all you ever paint with are acrylics, you probably won't need to lubricate often. With lacquers, the thinner is going to break down the lubricant rather quickly, so you'll have to lubricate much more often. As with all airbrush-related things, read the instructions for lubricating your airbrush that came with it carefully. Use only specialized airbrush lube for this, such as Iwata Super Lube, which is teflon-based. WD40 IS NOT A LUBRICANT, it's a cleaner. Sorry, that's a pet peeve of mine, but don't use it to clean your airbrush, either. If all you ever paint with are acrylics, you probably won't need to lubricate often. With lacquers, the thinner is going to break down the lubricant rather quickly, so you'll have to lubricate much more often. As with all airbrush-related things, read the instructions for lubricating your airbrush that came with it carefully.
|
|
#
¿
Jun 6, 2009 00:40
|
|
|
TheFuglyStik posted:For my compressor setup, I've got a cheap tankless compressor hooked up through a T-junction to an air tank and the brush. Same as the $150 compressor I had my eye on, but with a large 15 gallon tank and cost me less than a hundred. The cheaper tanked hobby compressors I've had either blew out a part in dramatic fashion or just crapped out after a few light uses. I've often wondered if the lack of a tank would make these compressors wear out faster. I have the "Fusion" brand compressor they sell at Hobby Lobby, and it's worked great so far.
|
|
#
¿
Jun 6, 2009 18:07
|
|
|
Looks nice. I welcome miniatures painters in here, btw, because I think there's a lot of lost techniques in painting that never get swapped between scale modelers and miniature gamers. You have to get pretty creative to paint details that small. For those who were asking about airbrushing earlier in the thread, the doo-hickey on the left end of Cakefool's compressor is a combined regulator/moisture trap. There is a drain on the bottom of it, but I've honestly never had to let anything out of mine. You can also get in-line traps/filters from Iwata and others that attach directly to your airbrush, and then you attach your hose to that. Today I'm getting my work area cleaned up and organized because it looks like a hobby store barfed on my desk...
|
|
#
¿
Jun 6, 2009 22:32
|
|
|
MasterSlowPoke posted:Anyone know of any good general camouflage painting tutorials? This is one of my favorite techniques: http://www.finescale.com/fsm/default.aspx?c=a&id=788 MASKING WITH SILLY PUTTY!   Plus, it's...silly... Anyway, if you think about it you're going to want to make uneven, curvy shapes, and silly putty is easy to form. It will not lift existing paint, and it also happens to be pretty cheap. Of course, if you're an absolute badass you can try to freehand airbrush camo patterns. Some people do this, but I don't have the finesse. Those with a hard-on for hard metal will find plenty of great stuff here: http://www.armorama.com/ Danger - Octopus! posted:I've heard that zap-a-gap is good. Does it actually fill gaps or is it just easier to use putty? Zap-a-gap is tricky to use. The idea is that it's supposed to be stronger than standard superglue, but you lose some of that strength if you use Zip Kicker on it. I find that it's mostly effective for very small gaps. Putty has several advantages, not the least of which is how easy it is to sand once it has dried. Zap-a-Gap, on the other hand, is harder than polystyrene so it's difficult to sand it without damaging the model itself. Putty is also soluble in lacquer thinner and acetone (nail polish remover works fine), but bear in mind that both of these things will melt polystyrene. It is possible to carefully remove dried putty with a solvent. Use sparingly, and stop immediately if the plastic around the putty gets shiny...that's a sign that it's starting to break down. Powdered Toast Man fucked around with this message at 23:45 on Jun 6, 2009 |
|
#
¿
Jun 6, 2009 23:41
|
|
|
Danger - Octopus! posted:Does anyone know of any companies that make modern US military figures in 1/48 scale? There appear to be endless options in 1/35 but I need them for a diorama with something that's 1/48 and I can only find WW2 figures in that scale. I found some Tamiya figures in 1:48, but they were WWII-era. What you seek unfortunately may not exist, which is unfortunate because 1:48 is really the most common scale for aircraft. That being said, what are you planning? EDIT: By the way, you did a great job weathering that hummer and getting the look of mud on the tires. LIIIIIIINKS Do you like planes? I love them, and these guys eat, sleep, and breathe them: http://www.aircraftresourcecenter.com/ Try to ignore the horrible site design, because there's lots of good stuff here. Tutorials, and my favorite part, the gallery. Some good stores and companies: http://www.squadron.com (watch for sales, and once you buy anything from them you'll get a free catalog every quarter) http://www.spruebrothersmodels.com (good source for Japanese tools and supplies that are hard to find elsewhere) http://twobobs.net (fantastic custom aircraft model decals, very high quality) http://www.Megahobby.com (good prices and sales. bad web design. see a trend here?) http://www.eduard.cz (ultra high quality detailing kits for aircraft models, photo etch and resin) Powdered Toast Man fucked around with this message at 00:43 on Jun 9, 2009 |
|
#
¿
Jun 9, 2009 00:24
|
|
|
Cakefool posted:Silly question - I'm airbrushing with acrylics, in a well ventilated room - do I need fume extraction? I think not, but am I going to kill myself? Acrylics are relatively harmless. They contain some alcohol, but mostly water. As long as the room is well ventilated, as you say, I don't think you have anything to worry about.
|
|
#
¿
Jun 9, 2009 15:11
|
|
|
EvilMuppet posted:Why the touch and flow thing when you can get essentially the same thing with a bottle of glue on the end? Quality is decent too. This is sexy, but Revell "blue" products (supplies/tools, not models) are somewhat hard to come by in the US. I have yet to see a single thing made by them in a hobby shop other than their models. ASSTASTIC posted:Where do you guys suggest I buy parts/accessories for my new airbrush from? Lube: http://www3.towerhobbies.com/cgi-bin/wti0001p?&I=LXTXV5&P=FR ACCEPT NO SUBSTITUTES! This stuff is great. Needles: http://www3.towerhobbies.com/cgi-bin/wti0001p?&I=LXTXX1&P=SM http://www3.towerhobbies.com/cgi-bin/wti0001p?&I=LXWBG5&P=SM http://www3.towerhobbies.com/cgi-bin/wti0001p?&I=LXWBG6&P=SM (wasn't sure which one you needed) Powdered Toast Man fucked around with this message at 22:00 on Jun 24, 2009 |
|
#
¿
Jun 24, 2009 21:55
|
|

|
Cakefool posted:Because I just watched James May get shot to the edge of space, and I'm as impressionable as wet clay, I really want to build a really good model of the Saturn 5 rocket. Where would I look for a good one, brand wise? Revell used to make one that was pretty slick, but it might be out of production. I'll check into this and get back to you in this post.
|
|
#
¿
Jun 29, 2009 21:14
|
|
|
EvilMuppet posted:Hows this one? Recently reissued, much to my surprise: http://www.squadron.com/ItemDetails.asp?item=RM5088 This kit is actually a pile of crap, but you can play with it and make rocket noises... Or you could go batshit loving loco and get the 1/96 version: http://www.spacetoys.com/proddetail.php?prod=MAPRS5 Sure, it's over $400, but it's also nearly FOUR FEET TALL! I thought there was a Tamiya model of this out there, but I can't find it. I did, however, find this: http://www.youtube.com/watch?v=z-X4z_cRLOY Holy poo poo.
|
|
#
¿
Jun 30, 2009 20:15
|
|

|
Cakefool posted:Yeah, thanks. I found the 1/96 Revell for about �50 over here, I'll have to act surprised if it turns up and the missus gives me that look You're going to get a look, for sure. I do hope you've thought about where you're going to put it when it's done...
|
|
#
¿
Jul 1, 2009 19:18
|
|
|
Danger - Octopus! posted:Lots of model stores (online and offline) should sell them since they're from two of the big scale model companies, and Ebay too possibly. This one is an Italeri M998 Desert Patrol kit, the other one that I've finished is an Academy M1025. If you're looking for more stuff to stick on a vehicle like this to make it "busier", Tamiya makes some good (and affordable) little accessory sets like this one: http://www.squadron.com/ItemDetails.asp?item=TM35266 Boxes, packs, fuel cans, etc really add something to the look, as long as you don't go completely overboard of course. From the look of your vehicle I'm going to guess it's intended for an Imperial Guard army, which doesn't have the "higher tech" look of the Space Marines...so, most of the armor accessories (even WWII stuff) should fit in with the theme just fine. Games Workshop doesn't really say what the general scale of their figures and vehicles is, do they? 1:35 seems close but I'm not sure it's consistent across all the various armies and units. Tossing in some random scratch-building tips here: "Music wire" or cheap guitar strings make great "hoses" for various usage. They're made up of a core wire that is wrapped with a much smaller wire, giving you the ribbed appearance that, say, an oxygen hose for a fighter pilot would have. Smaller, solid wire can be found very cheap at the hobby store or even somewhere like Home Depot...in the picture framing department! I use it for adding detail to areas like landing gear bays; shape the wire the way you want it, drill a tiny hole at each stopping point, and dab the end with a bit of superglue before sticking it in. Styrene is such a pain in the rear end to deal with for making irregularly shaped small parts that I'm now leaning more towards thin brass sheet metal. You can get it in a thickness that's almost, but not quite like foil and it's very easy to cut and shape. Use pliers that don't have "teeth" on the inside of the gripping surface to prevent marring the metal. While we're on the subject of thin and malleable sheet metal, I recently had an idea that I haven't implemented yet, but it feels like it would probably work: Let's say that you have a military model, be it armor or aircraft, that you want to give that beat up, battle worn look. Damage is notoriously difficult to model, but there are established ways of creating bullet holes and of course you can do a lot with paint, but... How do you put dents in plastic? It's very difficult to do so without destroying the model. So, my idea was to take the area you wish to dent and beat up on the model, remove the existing plastic, put in some styrene sheet as a "backing" on the interior of the model, and then apply your sheet metal to the outside with a layer of epoxy underneath it for support and a strong bond. While the epoxy is still soft, you can put dents in the metal. There are some problems that would need to be worked out, such as blending the edges with the rest of the model, and dealing with areas that are not simply flat but have some raised or recessed detail. However, I think that with the right model, this could produce some really impressive results.
|
|
#
¿
Jul 10, 2009 14:18
|
|
|
Vaporware posted:I was always afraid of ruining my pen by leaving it out with glue or ink on it, is it easy to clean up if you let it gum up? In this case it's not likely to gum up, because Tenax and similar liquid cements simply evaporate. I lost an entire bottle of the stuff one time when I accidentally left the cap off for a couple of days. If you did get some 'melted' styrene stuck in it, lacquer thinner or acetone should clean it off easily. I have one of these ruling pens in my set of drafting tools and this is a fantastic idea! Thanks for the tip, permanoob!
|
|
#
¿
Jul 13, 2009 14:00
|
|
|
permanoob posted:I'm getting a huge nerdy itch to build something sci-fi. I'm in the planning stages of a prop-quality 1:1 replica of the AEP7 Laser Pistol from Fallout 3. When I have something to post, I'll be putting up pictures ITT. Regarding sci-fi models, you might get a kick out of building a Gundam even if you have never watched the series (I haven't, but I love the mechs). No glue is required, they're pose able, and you can easily add detail with painting if you want although they look just fine without it. http://www.gundamstoreandmore.com is a good place to start. The 1:144 "High Grade" mechs are cheap but build up into nicely detailed figures. If Star Trek is your thing, I recommend staying away from most of the Revell/Monogram kits because they're total crap. Some of them certainly have some nice details but the engineering of the kits is so lousy that you'll go insane trying to get everything to fit together like it should. Polar Lights makes some better quality Star Trek kits.
|
|
#
¿
Jul 14, 2009 14:08
|
|
|
csammis posted:If we're posting sci-fi model wish lists, I wouldn't mind someone releasing kits for more Battlestar Galatica ships. Revell released three from the old BSG series for its 30th anniversary - I built the Viper, didn't like the older Raider or Basestar - but drat drat drat do I want a reimagined-series Battlestar hanging in my office. The Pegasus: http://cgi.ebay.com/Battlestar-Pega...%3A1%7C294%3A50 (may she rest in pieces  ) )...made by this guy, who makes some other neat things as well: http://bambamproductions.blogspot.com/ As with all limited production resin kits, they are expensive. The detail does appear to be very nice, though. I can't seem to find it right now but I know that in the past I've seen re-imagined Basestars, Vipers, and Raiders. Keep an eye on eBay and they may show up again. EvilMuppet: The Aliens kits are out of production as far as I know, but can still be found in some places if you're lucky...say, the dusty back corner of a comic book store...or eBay, if you don't mind paying out the rear end for them. The little-known, but epic 1:1 Alien Facehugger kit shows up on there occasionally, as well as the usual Halcyon kits. My personal favorite is the dropship. As far as I know, they never produced a model of the Sulaco, but with the "technical manual" you can get that details the Space Marines technology, there's more than enough drawings to build one from scratch...
|
|
#
¿
Jul 14, 2009 16:53
|
|
|
ASSTASTIC posted:Not really models, but prebuild+painted, look up the Hot Toys Alien/Predator action figures if you want to see a quality AvP figure. Stay frosty. 
|
|
#
¿
Jul 15, 2009 01:09
|
|

|
EvilMuppet posted:I beg to disagree, Halcyon made one: 1/2400 Aliens USS Sulaco Model Kit.  Curse you, now I must find this at any cost!!! Edit: Some quick poking around resulted in...well, nothing. It looks like Aoshima re-issued the kit a while back but it's basically sold out everywhere. Get this, though...apparently there was also a "garage kit" (limited run resin) that was twice the size of the Halcyon model. It's even more unobtainable, though. 
Powdered Toast Man fucked around with this message at 13:18 on Jul 15, 2009 |
|
#
¿
Jul 15, 2009 13:08
|
|

")
|
EvilMuppet posted:This place seems to have it in stock, it let me get as far as the checkout with one: Here's the garage kit I was talking about : http://www.culttvman.com/kyu-woong_lee_s_sulaco.html 100% resin kits, especially those that are not produced by a top-notch company such as Eduard, are a major pain in the rear end to work with, but the toughness of the resin material allows for much finer and sharper details. So, it's a lot of work, but as you can see from this dude's finished model, it can be very rewarding. Personally, I've never understood why there isn't more of a market for science fiction models like this, because the engineering should be a lot easier than for an aircraft. With aircraft you also have the challenge of reproducing a real object as accurately as possible. If models existed for ships from Homeworld 2, Descent: Freespace, the Wing Commander series...well, I'd have a fricking fleet of them. I think that as the technology in development for rapid prototyping on the desktop continues to evolve and get cheaper, we'll finally be able to build essentially whatever we want from scratch.
|
|
#
¿
Jul 15, 2009 17:09
|
|
|
Oh, hell. I hit the jackpot: http://www.frontiermodels.co.uk Someone take away my credit cards, quickly! 
|
|
#
¿
Jul 15, 2009 18:35
|
|
|
Archer2338 posted:I'm inclined towards WWII armored vehicles, but some of them look insanely detailed and I would most likely die from frustration if I bought the wrong model. Scale doesn't really matter, but what's the best "starter" size? Some of the WWII models will actually end up being easier to build because, well, the tanks were simpler back then. A modern tank such as an M1A1 Abrams is going to be festooned with tiny bits like antennae, sensors, smoke grenade launchers... For instance: http://www.squadron.com/ItemDetails.asp?item=TM35020 Delicious halftrack goodness, and cheap. You'll also get some practice painting figures, which is useful.
|
|
#
¿
Jul 20, 2009 15:55
|
|
|
Bloody Hedgehog posted:Heh, I'm a longtime scale modeler, and even I balked about 2/3's of the way through a 1000+ piece Panzer IV. That, and those photo-etch tool clasps with the working hinges. Assembling those could be used as a form of torture. Ask the warhams about "green stuff". It's a two part putty with decent working time that I have seen them produce absolutely incredible results with. There are tutorials available that will help you get started. With green stuff you should be able to re-create entire limbs and add on more details such as clothing, equipment, and weapons. What brand is your Panzer? Sounds like maybe a Dragon kit from the way you are describing it? I'd love to do one of those mega detailed tanks but I honestly don't think I have the patience for the fiddly bits. They're expensive if you screw up, too.
|
|
#
¿
Jul 21, 2009 15:58
|
|
|
Audiot posted:I haven't done any modeling in years, but I've seen really good things made with Alumilite. You could use it to cast limbs or really whatever using the stuff. I've been looking at Alumilite products for my aforementioned Fallout 3 AEP7 Laser Pistol replica project. The design of the pistol is not all that complicated; it is essentially a square tube with end caps, a handle, and a sort of guard that comes forward from the bottom of the handle and then returns up to the main body of the gun. The end caps, however, look like solid cast metal with fins for heat dissipation. My plan so far is to create an initial sculpture of that shape, and then use it to create a mold from which I can then cast a solid resin piece, and because the resin can be machined it should be easy to make adjustments to the final shape. The handle seems like a good candidate for cast resin, as well.
|
|
#
¿
Jul 22, 2009 13:13
|
|
|
Tamiya paints would definitely be labeled, though...did you get one of those Testors themed sets (e.g. aircraft, cars, etc)? Tamiya paint is more or less impossible to brush unless you use retardant or thinner. At least, that seems to be the case with most of the colors. Some of them behave differently and I have no idea why. It's really a pain in the rear end because I have no desire to airbrush everything. Just about the only thing I use enamels for is special effects. I also use them to "dot" tiny things like indicator lights or buttons inside aircraft cockpits because the consistency of the paint works well for this, and the pigmentation is more intense. One example of an enamel paint special effect is Masa Narita's technique for cockpit instruments, which you can see in his F-15E Strike Eagle how-to article on this page: http://www.naritafamily.com/howto/howtoindex.htm This guy is pretty much who I wish I could be when it comes to modeling. I have fooled people into thinking that some of his finished model pictures are in fact pictures of real planes. The cockpit instrument technique produces incredible results, and yet is so simple: 1. Primer undercoat 2. Base coat of LACQUER (important) white 3. Top coat of ENAMEL (also important) black 4. Soak a toothpick in ENAMEL THINNER 5. Rub the black ENAMEL paint off the raised details on the instrument Lacquer and enamel paints are sufficiently different in their chemical makeup that enamel thinner will not remove dried lacquer paint, and that's the secret behind this layered technique. It would be essentially impossible to paint these tiny, tiny details without getting paint on everything else around them, and I believe that Narita-san's cockpits look much better than pre-colored photo etch. Edit: No surprises on your problems with that kit; Academy's instructions generally suck. Don't take 'em at face value.
|
|
#
¿
Jul 22, 2009 16:31
|
|
|
Yep, you know the dude is a badass from the Tamiya and IPMS trophies, plaques, and honors he has. I think my personal favorite is the Su-27 Flanker, although his award-winning naval diorama is epic.
|
|
#
¿
Jul 22, 2009 21:54
|
|
|
MarshallX posted:I had to find the walkthrough to figure out how the waves were done. Absolutely blew my mind. Spring for the "Bunker Buster" variation; it comes with an absolute shitload of bombs and stuff. The kit itself is usually about $149 retail but can be found for less online. Paints won't cost much because the Strike Eagle is the same color all over.
|
|
#
¿
Jul 23, 2009 13:08
|
|
|
Vaporware posted:What's everyone's choice for superglue? I normally use zap-a-gap but I'm not super attached to them since their nozzles are so terrible. I do like plastizap since it doesn't craze styrene. The house brand stuff at Hobby Lobby is decent. I think it's called MAXIMUM POWER or something equally corny. Zap A Gap is still my favorite of all time, though. I keep it in the fridge so it doesn't set up and stays nice and flowy. Their Zip Kicker accelerator fluid works great, too. Depending on where you buy your supplies from, you may be able to get replacement/alternative nozzles that work with the Zap A Gap bottles. Hobbytown USA has them, for instance. Keeping my glue in the fridge seems to help with nozzle clogging, for what it's worth.
|
|
#
¿
Jul 23, 2009 20:02
|
|
|
Vallejo and Games Workshop (Citadel brand) both make absolutely fantastic quality paints. I had never touched them before until I started dabbling in figures, and I couldn't believe how easily they flow and brush compared to, say, Tamiya. The Citadel washes are also kickass for achieving shading effects. They are apparently pigment based rather than ink, which makes them more permanent and vivid.
|
|
#
¿
Jul 29, 2009 17:19
|
|
|
Vaporware posted:
No excuses, soldier! 
|
|
#
¿
Jul 30, 2009 03:54
|
|

|
Sorry I let the thread languish; I've been busy lately with work and such so I haven't had much time for modeling. Works in progress: This model: http://www.arcair.com/Fea1/601-700/Fea646_F-14D_Manfre/00.shtm I can only hope mine turns out so well. The level of detail on this thing is crazy for a 1:48 kit. The cockpit in particular is fantastic. ...and I'm working on building a model of one of the frigates from Homeworld 2 from scratch. The basic shape is not too difficult; I think most of the work will be in painting all those little details after I have it built. I haven't started building it yet because I've been sketching different ways to make the shell. Most likely, I will make an internal framework out of brass strip stock and then attach sheet styrene to the outside of that with little machine screws. This should produce a strong, yet lightweight body that I can attach parts to for details.
|
|
#
¿
Aug 27, 2009 17:07
|
|
|
Here is an example of what the Frigate I'm going to build looks like: Click here for the full 800x640 image. In-game screenshot:  Click here for the full 1280x1024 image. As I looked closer at the main body of the ship, I realized that it is not in fact curved. Actually, I think the graphics engine for Homeworld 2 doesn't support curved surfaces so they do polygonal trickery to make some things LOOK curved (such as the Mothership). Points of interest/ideas so far: - The internal framework as I envisioned it may not be necessary. Still, there will be a need for support of the "shell". - The turrets will be tricky. I'm thinking about creating the basic shapes out of layered foam core construction and then sticking styrene sheet to the outside of that to make a nice, smooth surface. - Another tricky bit: the engine exhausts are conical. I have brass tubing that I think is about the same size so I may try to reshape it. Beyond that I have absolutely no idea how to make them, although robbing parts from some bargain bin airplane models is a possibility.
|
|
#
¿
Aug 31, 2009 20:57
|
|
|
Tamiya makes fully detailed (and, for that matter, painted) RC tanks, but they're ridiculously expensive. I understand that they're very big over in Japan... 
|
|
#
¿
Sep 3, 2009 15:24
|
|
|
Ahhh, the sweet smell of lacq-uh, progress! I got the cockpit for my 1:48 Hasegawa F-14D assembled and primed over the weekend, so I can now get to trying out the technique detailed earlier in the thread for "layer painting" the details. I plan to photograph the steps for everyone's enjoyment, and will update this post with the results: 1. Lacquer flat white, airbrushed. 2. Enamel flat black, brushed by hand, because like hell am I running enamel through my airbrush. 3. "Rub off" the enamel black with a toothpick soaked in enamel thinner to expose the white for the rings around the dials and the dial details. 4. Dot some Future on the dials to make 'em glossy and purty. What, you don't know about Future? It's floor polish with liquid plastic or some poo poo like that in it. It makes a great glossy finish for decals or wherever you need a shine. You might be thinking, "Raised dial details on a 1:48 model cockpit? WHAT?" Yeah, Hasegawa is loving insane with the details. The landing gear bay attached under the cockpit had a cute little separate oxygen cylinder, for instance.
|
|
#
¿
Sep 8, 2009 14:20
|
|
|
Kerro posted:I've started working on another kit again since I used to enjoy this stuff when I was a teenager and have kinda missed it over the last ten years. I'm definitely benefiting from having a lot more patience than I used to, but the one thing that's causing problems is decals. I have a vague feeling that I used to know a trick to make them not look like poo poo but I'm damned if I can remember what it was. I'm glad you asked! As I mentioned, Future floor polish makes a great glossy surface. Decals really don't adhere well to anything but a glossy finish, otherwise you get "silvering" which is what you're describing. To get fantastic looking decals, put a gloss finish on first, then apply the decals, then spray with a matte/flat overcoat such as Dullcote. Stubborn, bitchy decals may require decal setter or softener. This is especially the case if you're trying to get the decal to conform to an extreme contour, but be careful because both of these solutions will make the decal very prone to tear. I like to use something soft to position the decal, such as a q-tip or swab. Edit: VVVVVV Yeah, you're probably better off using green stuff or similar products for something like that. I've never seen these 'raised decals' before, though. Interesting concept. Powdered Toast Man fucked around with this message at 21:06 on Sep 9, 2009 |
|
#
¿
Sep 9, 2009 12:36
|
|
|
I'm not sure if it ends up being cheaper (after all, a pack of Ernie Ball Extra Slinkys is pretty cheap), but Hobby Lobby carries "music wire" in the section with the brass stock.
|
|
#
¿
Sep 23, 2009 17:44
|
|
|
Warping and edge meeting problems with models is a bit of a sore subject, but I can at least comment on the brands I've dealt with. Generally speaking, you get what you pay for. There's a reason why Revell models are so cheap, and it's because they are by and large total crap. The exception to this would be the Made in Germany Revell models, which can be the total opposite and yet still be a bargain. I really don't understand it. Tamiya varies widely. Some of their molds are very old, and it shows. The engineering on their newer models is much better, and it also seems that they do better with larger models such as the 1:32 scale aircraft. The best models I've ever bought are, by far, Hasegawa. Their engineering is superb, the molds are crisp and free of flash and ejector pin marks for the most part, and they put in an incredible amount of detail in even 1:72 models. Next after Hasegawa I would place Trumpeter and Academy, both of which are higher quality in larger molds-again, 1:32 aircraft. Lastly, but still pretty good would be Italeri, who has been putting out some kick-rear end re-engineered kits lately that even come with nice little reference photo books. I don't have much experience with the eastern European brands, but from reading reviews it seems that you can get a lot of bang for your buck from some of the Russian makers, who also have models of some off the wall subjects that you just don't see from anyone else. When it comes to armor, my friends swear by Dragon as the gold standard, and I figure that since they include turned metal barrels on their tanks that's probably a good sign. Ultimately it depends on how you feel about the subject. If you really have a passion to build something, working with a difficult (read: crappily manufactured) kit can be a labor of love. In some cases you may have to settle for low quality molding because it's the only company that makes the model. Vacu-form models are a total pain in the rear end. Resin is frustrating and unforgiving. Photo etch is fiddly. And yet, when you're done and you have a beautiful piece of work to look at...it's all worth it.
|
|
#
¿
Sep 29, 2009 13:56
|
|
|
Bloody Hedgehog posted:I can attest to Dragon being kick rear end. Sometimes their stuff is almost too-detailed. You open the box and are just ".... oh gently caress, this is going to take for-loving-ever to assemble." Yeah, I think I could get into armor if it wasn't for all that business with the tank tracks. It just looks like a tedious pain in the butt.
|
|
#
¿
Sep 30, 2009 13:51
|
|
|
TheFuglyStik is definitely on the right track, but painting cars perfectly is a pain in the rear end no matter how you do it. Bear in mind, though, that even a cheap airbrush will give you far more control and better results than a spray can. I've seen Japanese guys drain the propellant and drill a hole in a spray can to get the paint out so they can airbrush it just because that particular paint was only available in a can...
|
|
#
¿
Nov 17, 2009 19:53
|
|
|

|
| # ¿ Apr 19, 2024 20:37 |
|
|
Tamiya also makes some 1:100 sets, I believe. Revell/Monogram makes a series of 1:100 kits, but they are low-quality pre painted snap together junk. On the other hand, if you were dedicated I suppose you could modify them to look better, which is what this hobby is all about!
|
|
#
¿
Nov 19, 2009 21:42
|
|