


|
2020 edit: The original-and-forever-a-project truck: Post more of the truck? Sure, why the gently caress not! I haven't taken enough pictures of it all in one piece in entirely too long, so I need to fix that once I get poo poo squared away. 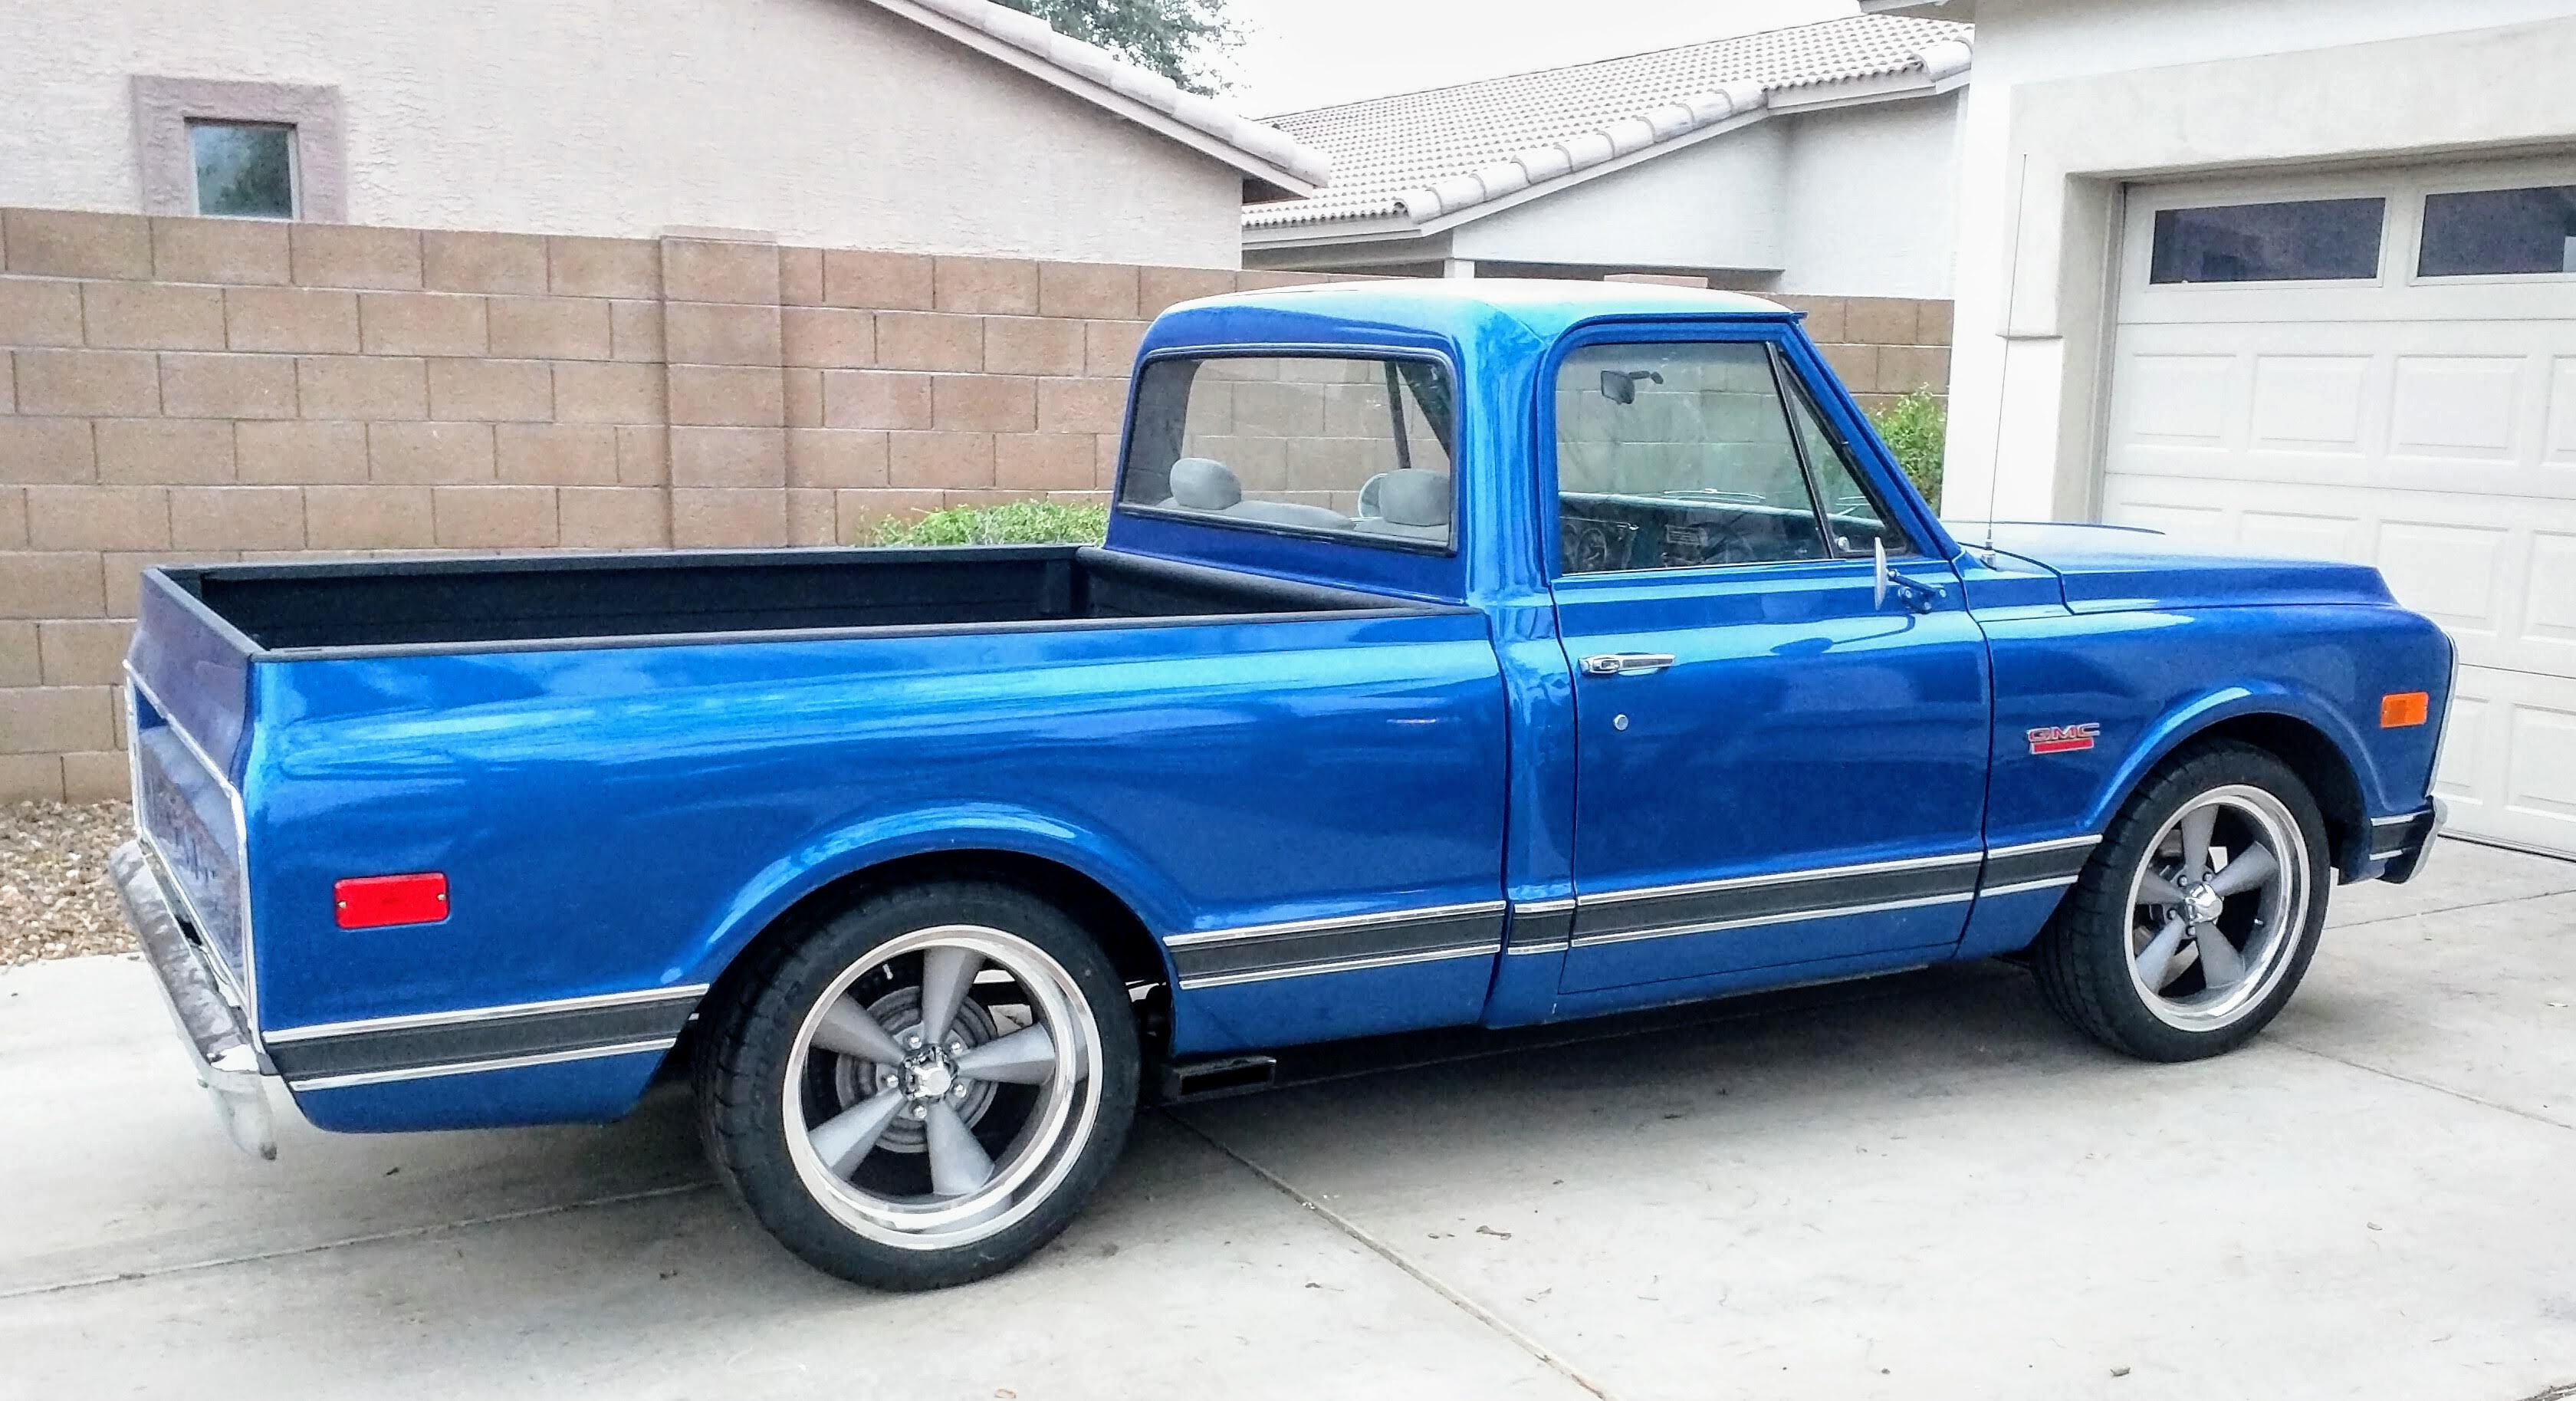 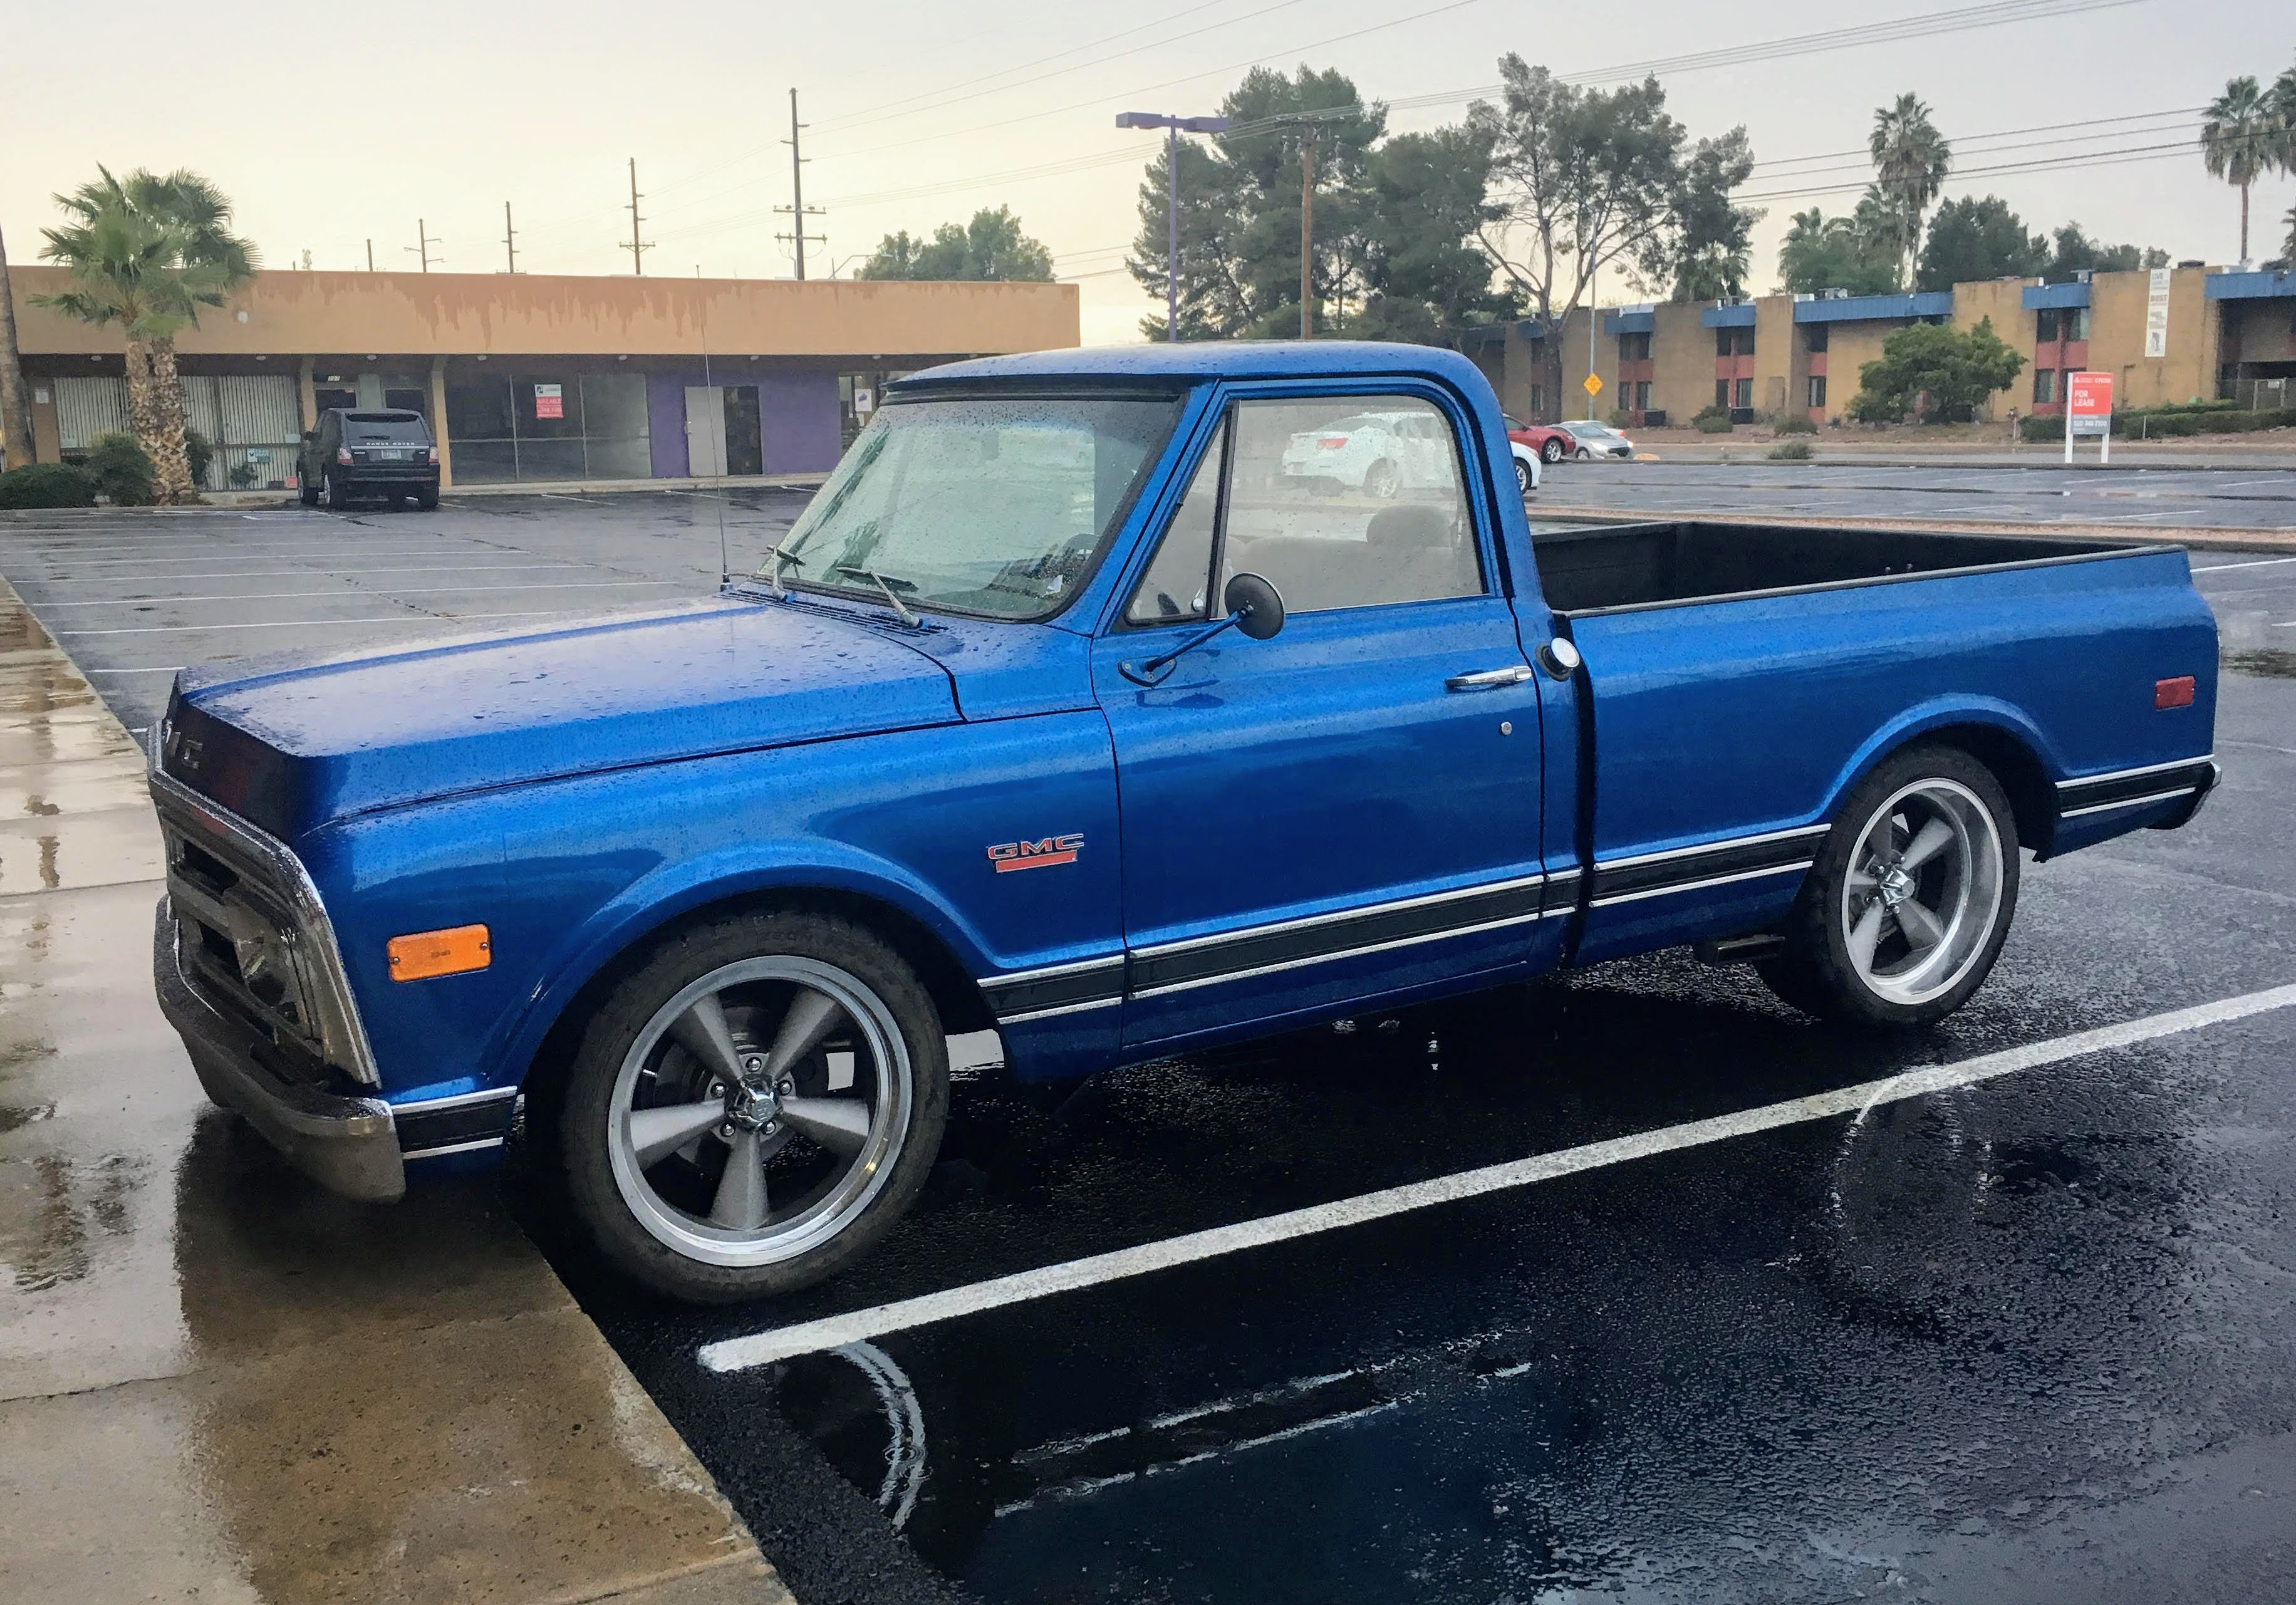 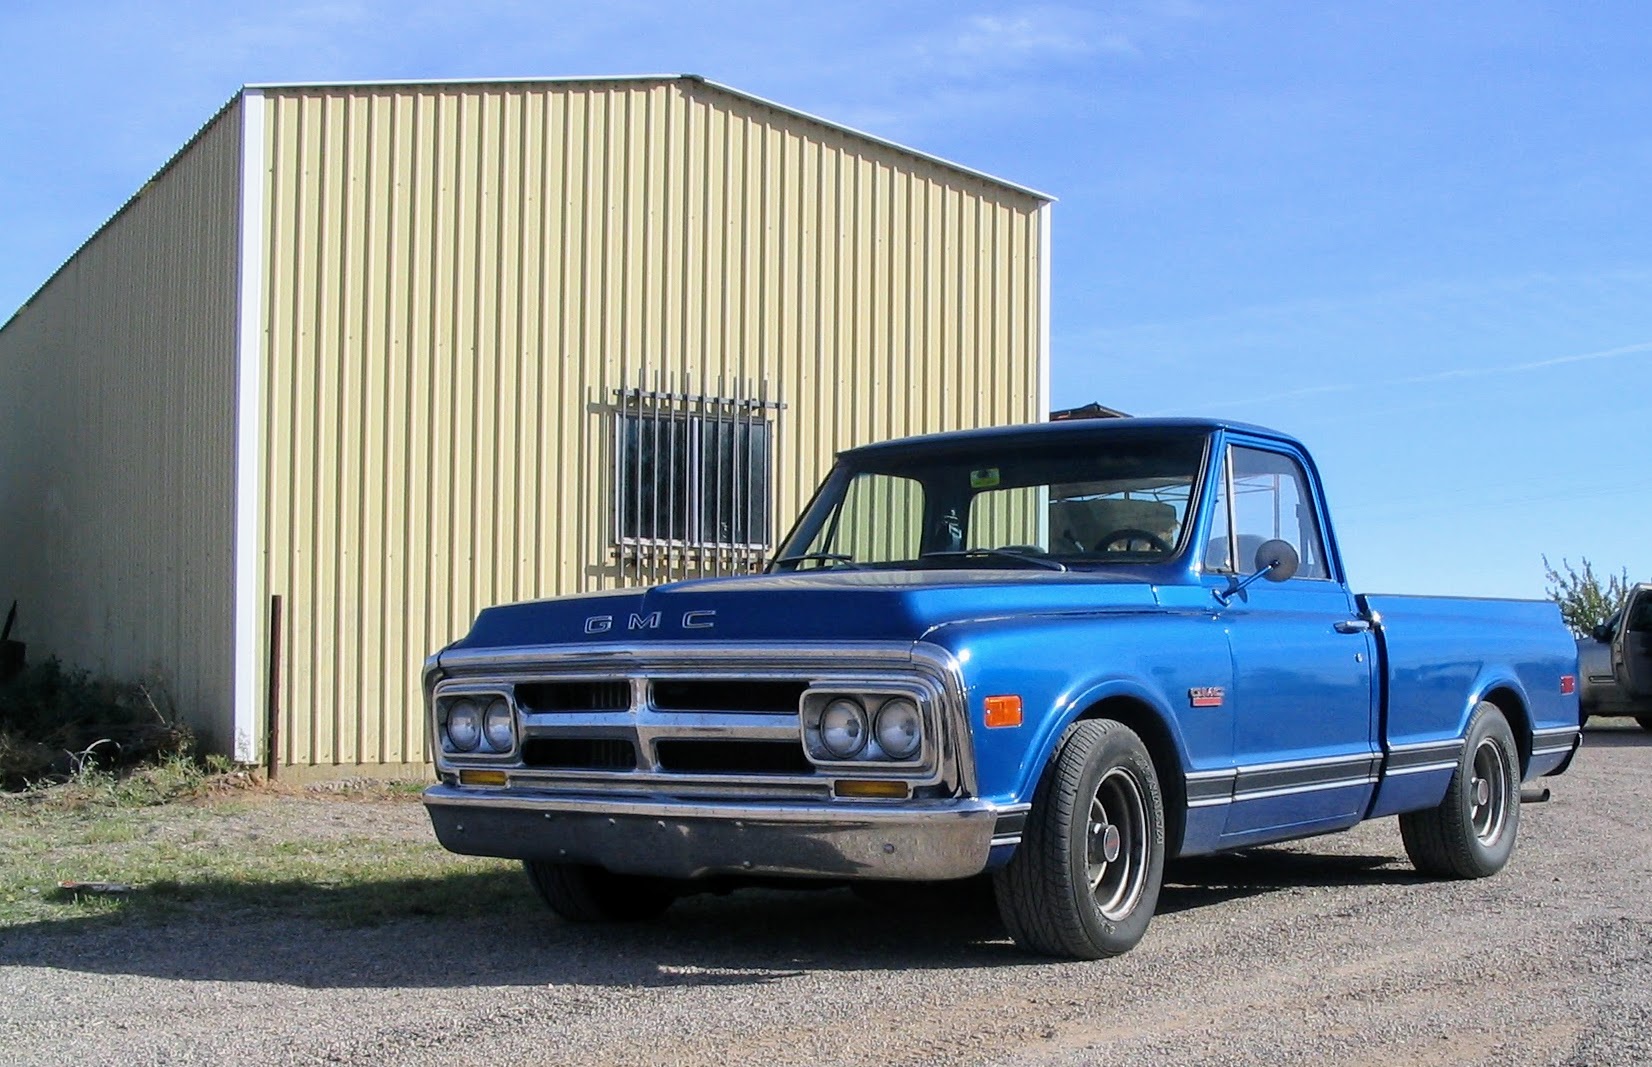 Included that last one because I have basically no recent photos of the grille for some reason? That's a 17-year-old photo of the truck, pre-LS1 swap, on the farm where it spent the first few years before my grandpa gave it to my mom. --- So as most of you know, I've got a 1970 GMC that I've been working on (on and off) over the course of the last 13 years. Unfortunately, lately has been more off than on. I'm tired of having my project languish in the garage covered in junk, so this thread is as much to help motivate me as anything else. Of course, real life priorities have to come first. With my impending fatherhood, I'm going to be leaving the nice, safe, and modern Mazdaspeed3 at home with my wife and soon-to-be-child; my beater Ranger is now going to be my commuter vehicle too. It's had a lot of maintenance deferred by the previous two owners that I need to resolve, primarily around the suspension. At just shy of 170k, I think most everything underneath this thing is original. Click for bigger, if for some reason you really want to see this poo poo in high res. 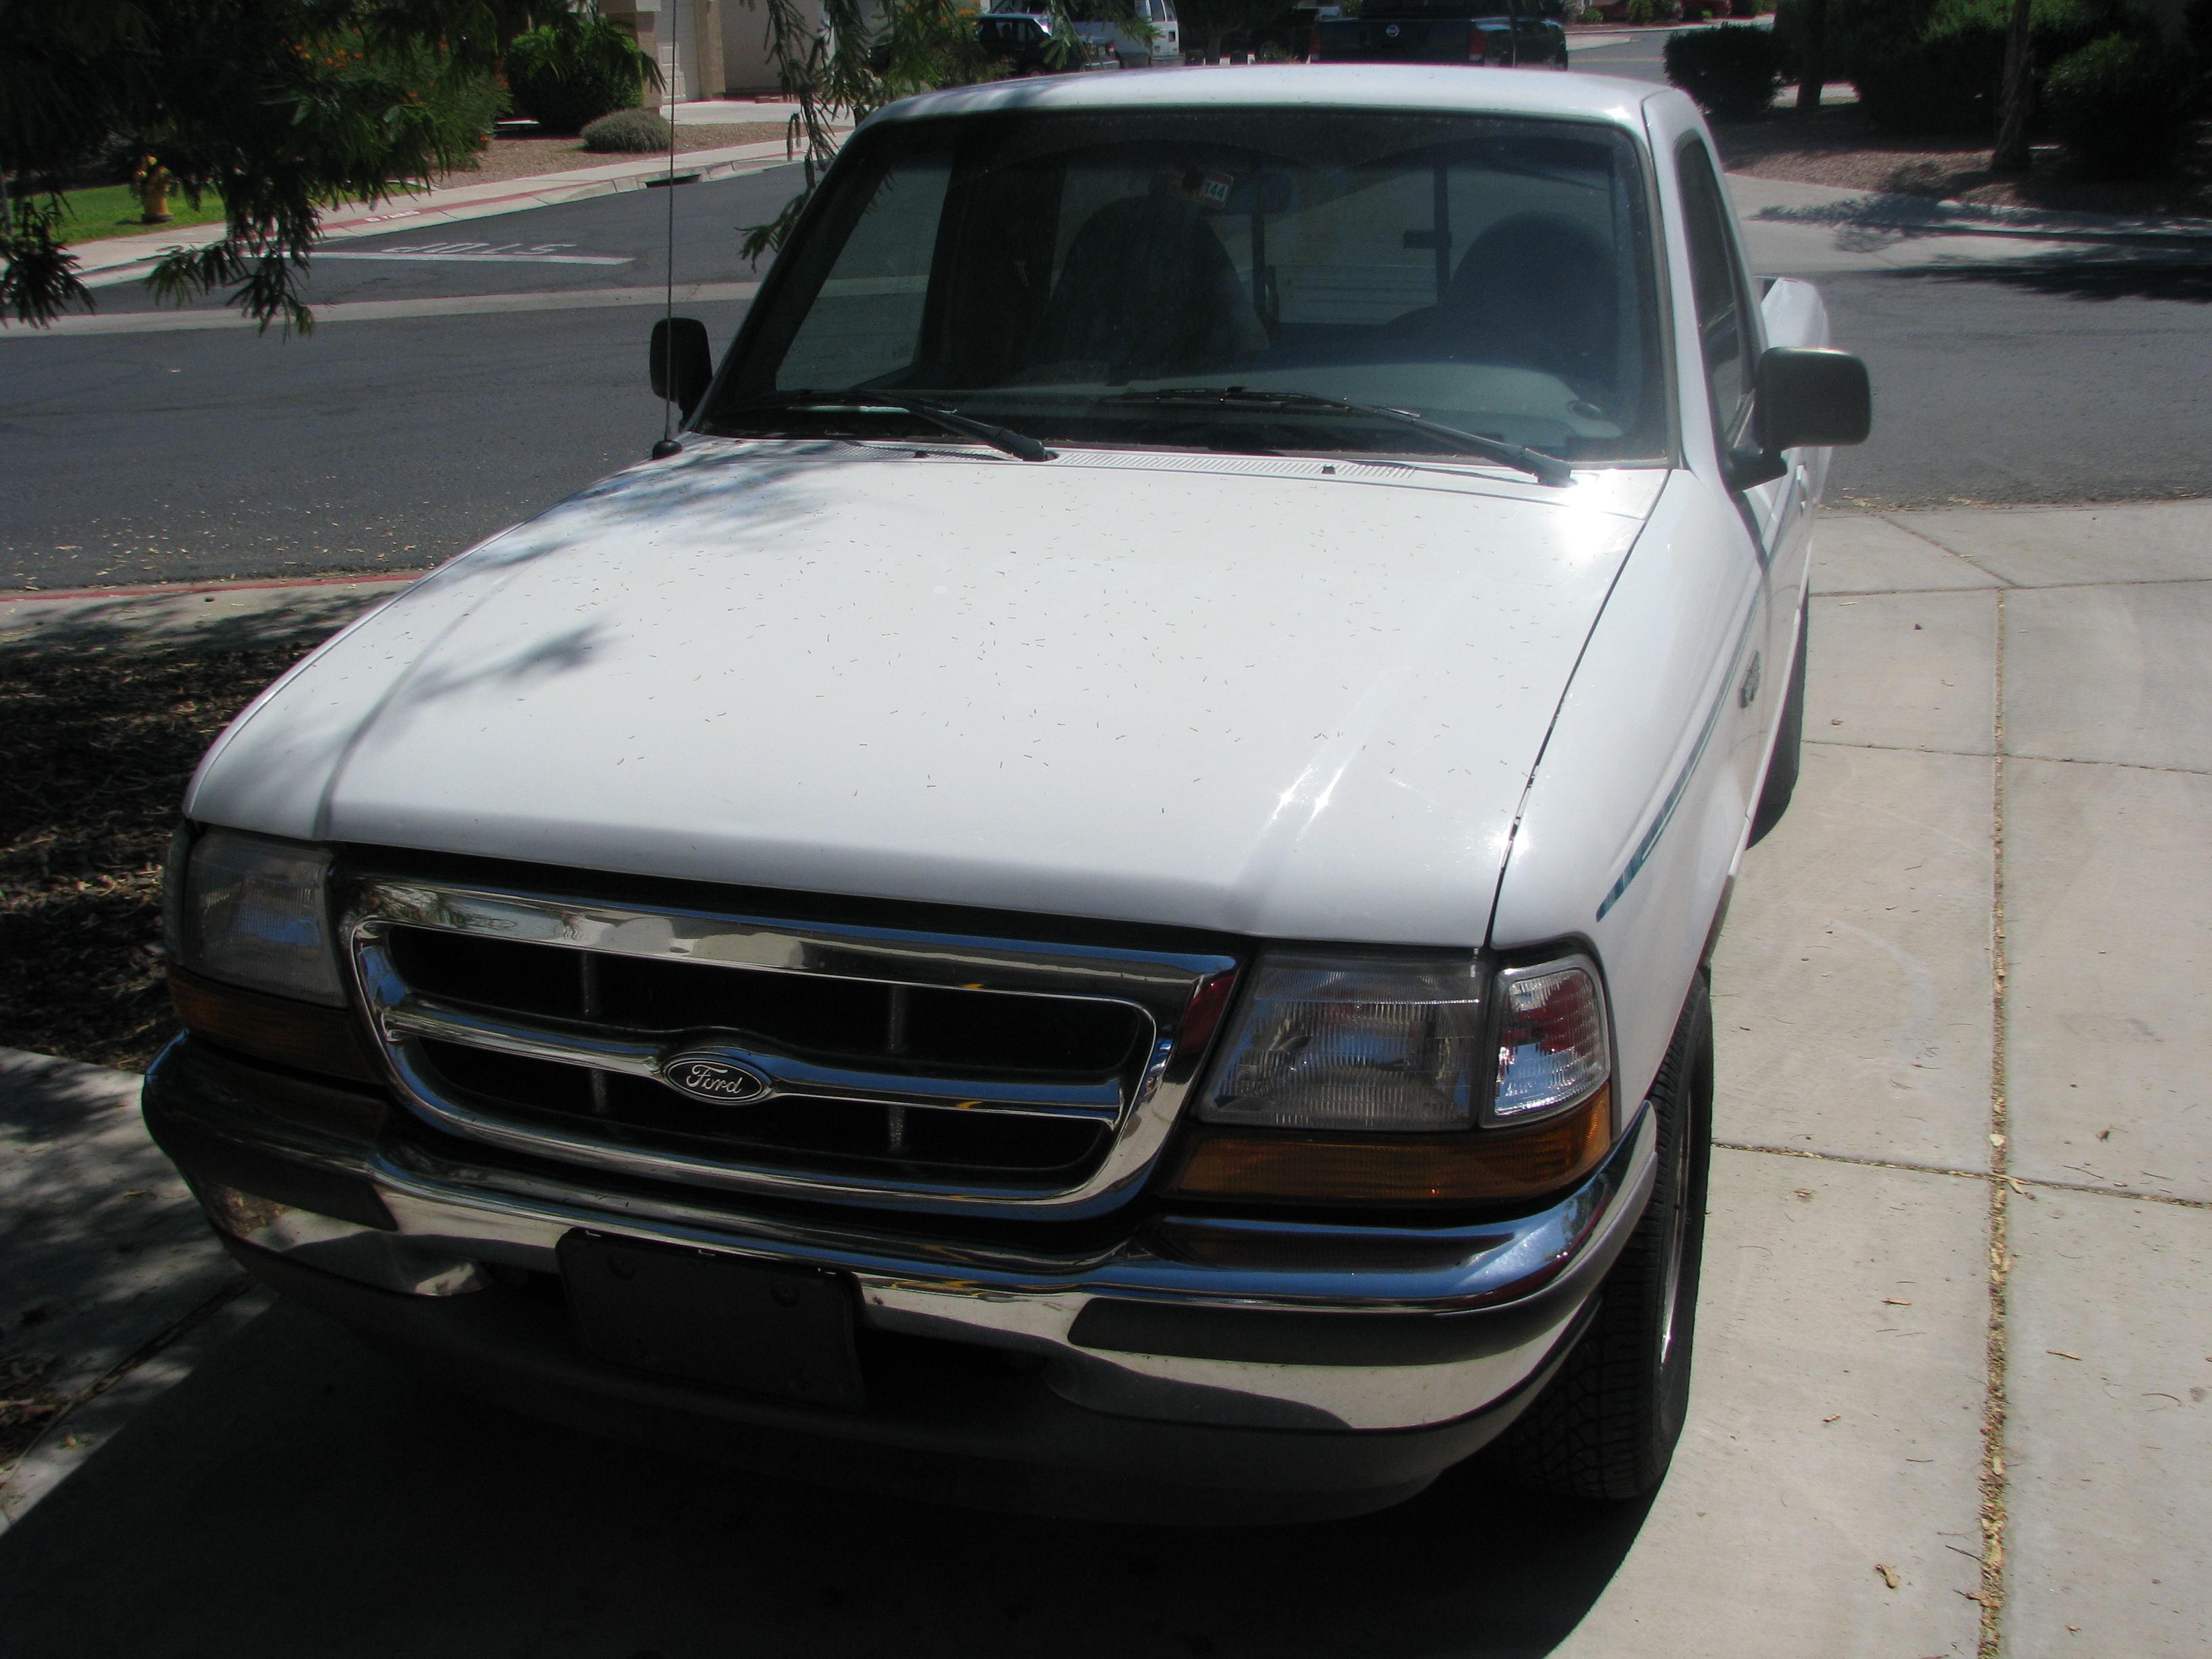 The patient at hand - 1998 Ford Ranger, in 'old man special' white with green stick-on stripes. 2.5L Pinto four-cylinder, five-speed stick, and not much else. 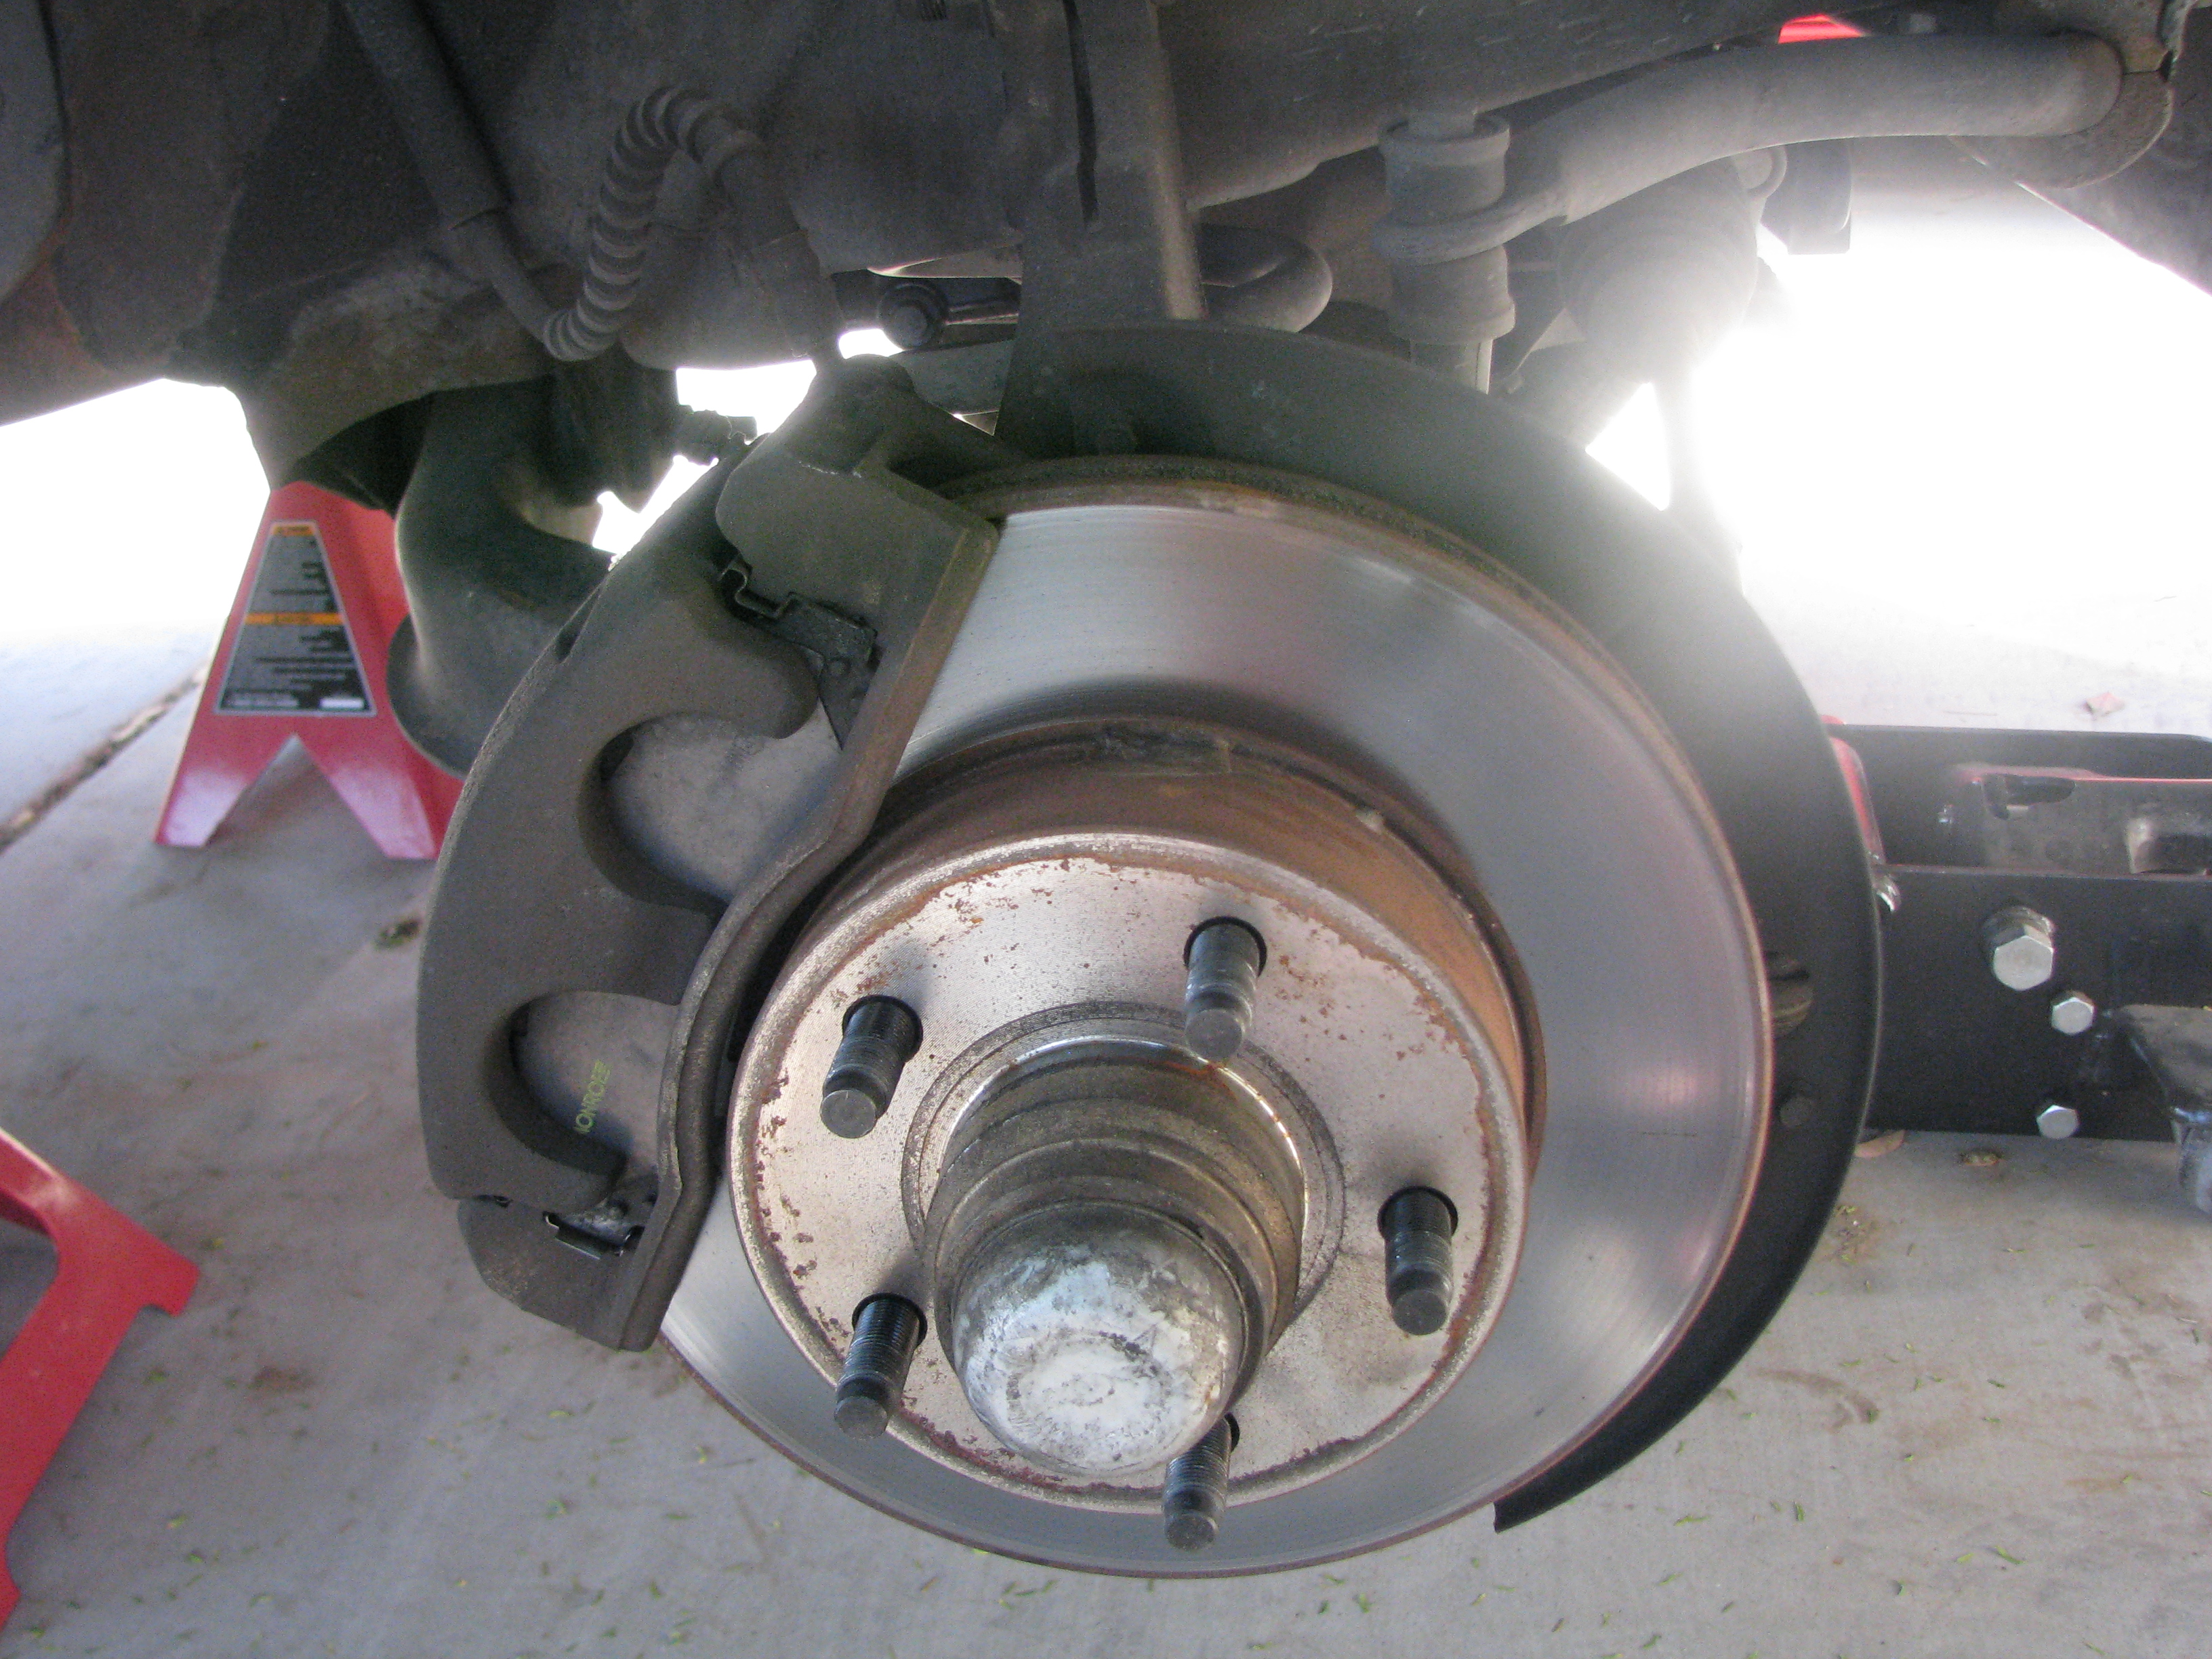 Passenger wheel off. Not much to see yet... 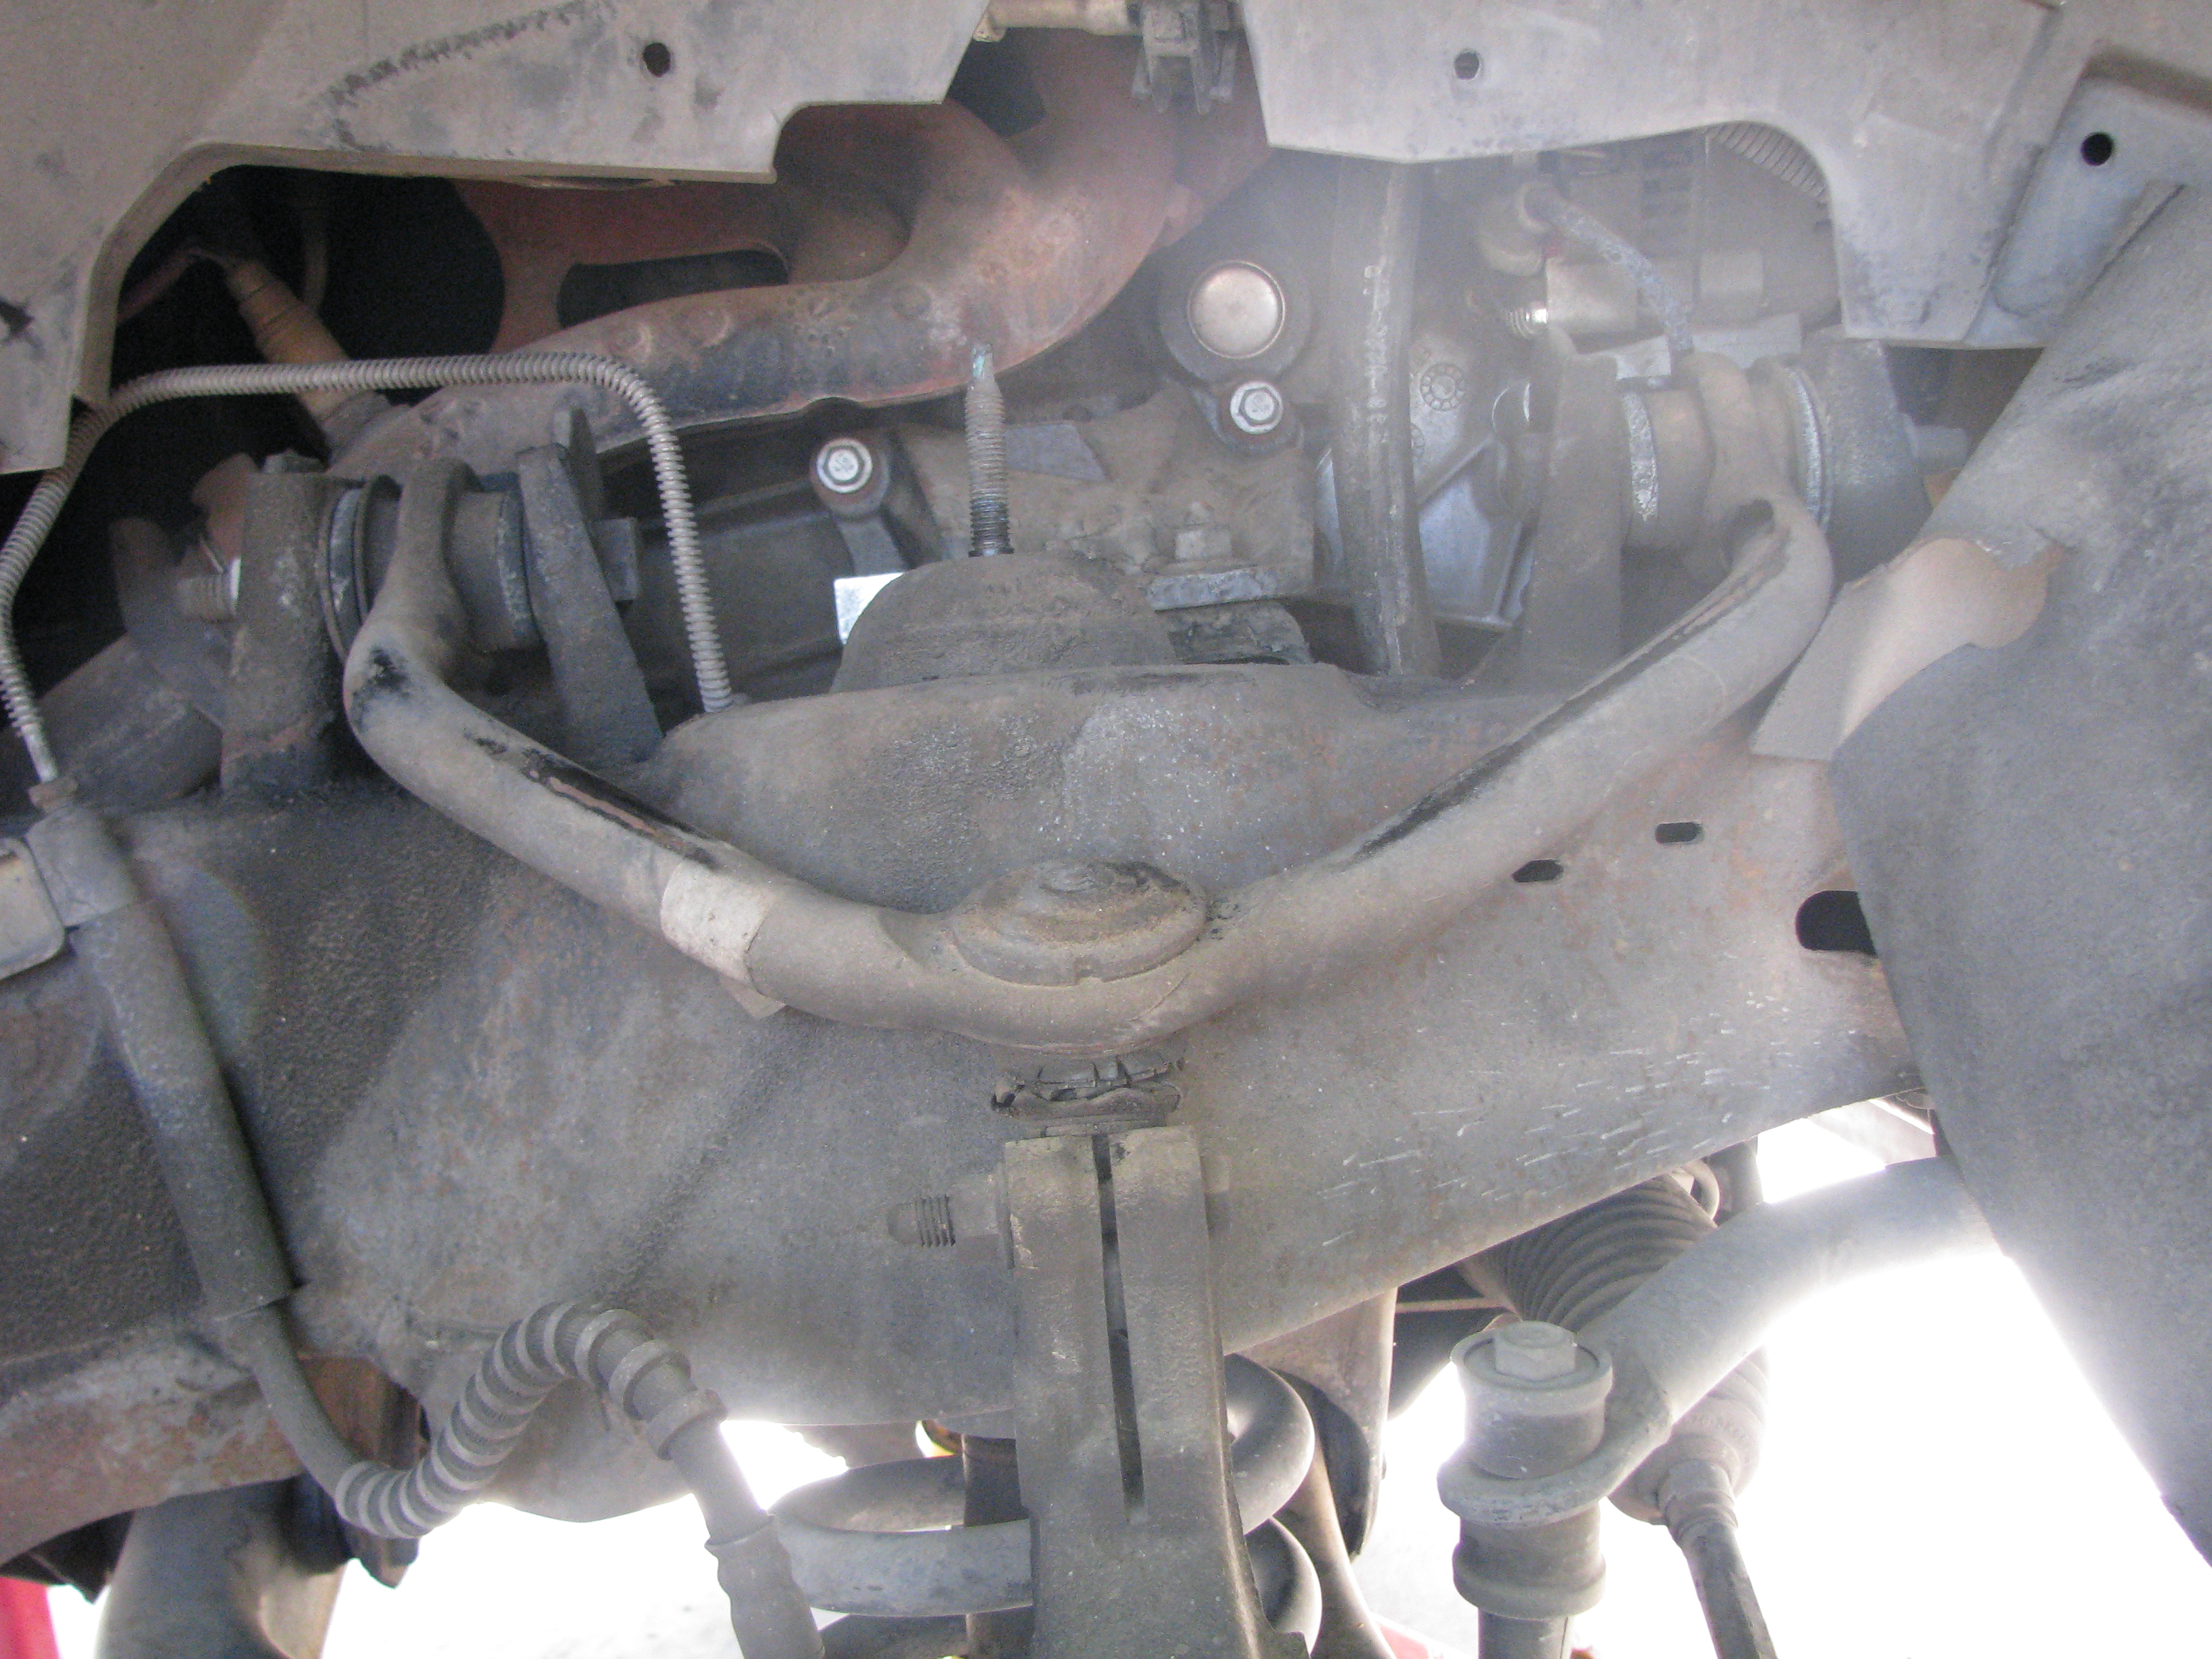 That shows the upper balljoint on this side. All four balljoints look pretty much the same as this. Oddly the tie rod ends look pretty good. Already have the upper nut off of the shock; most of the guides I found online were discussing having to grind this off. I love Arizona vehicles  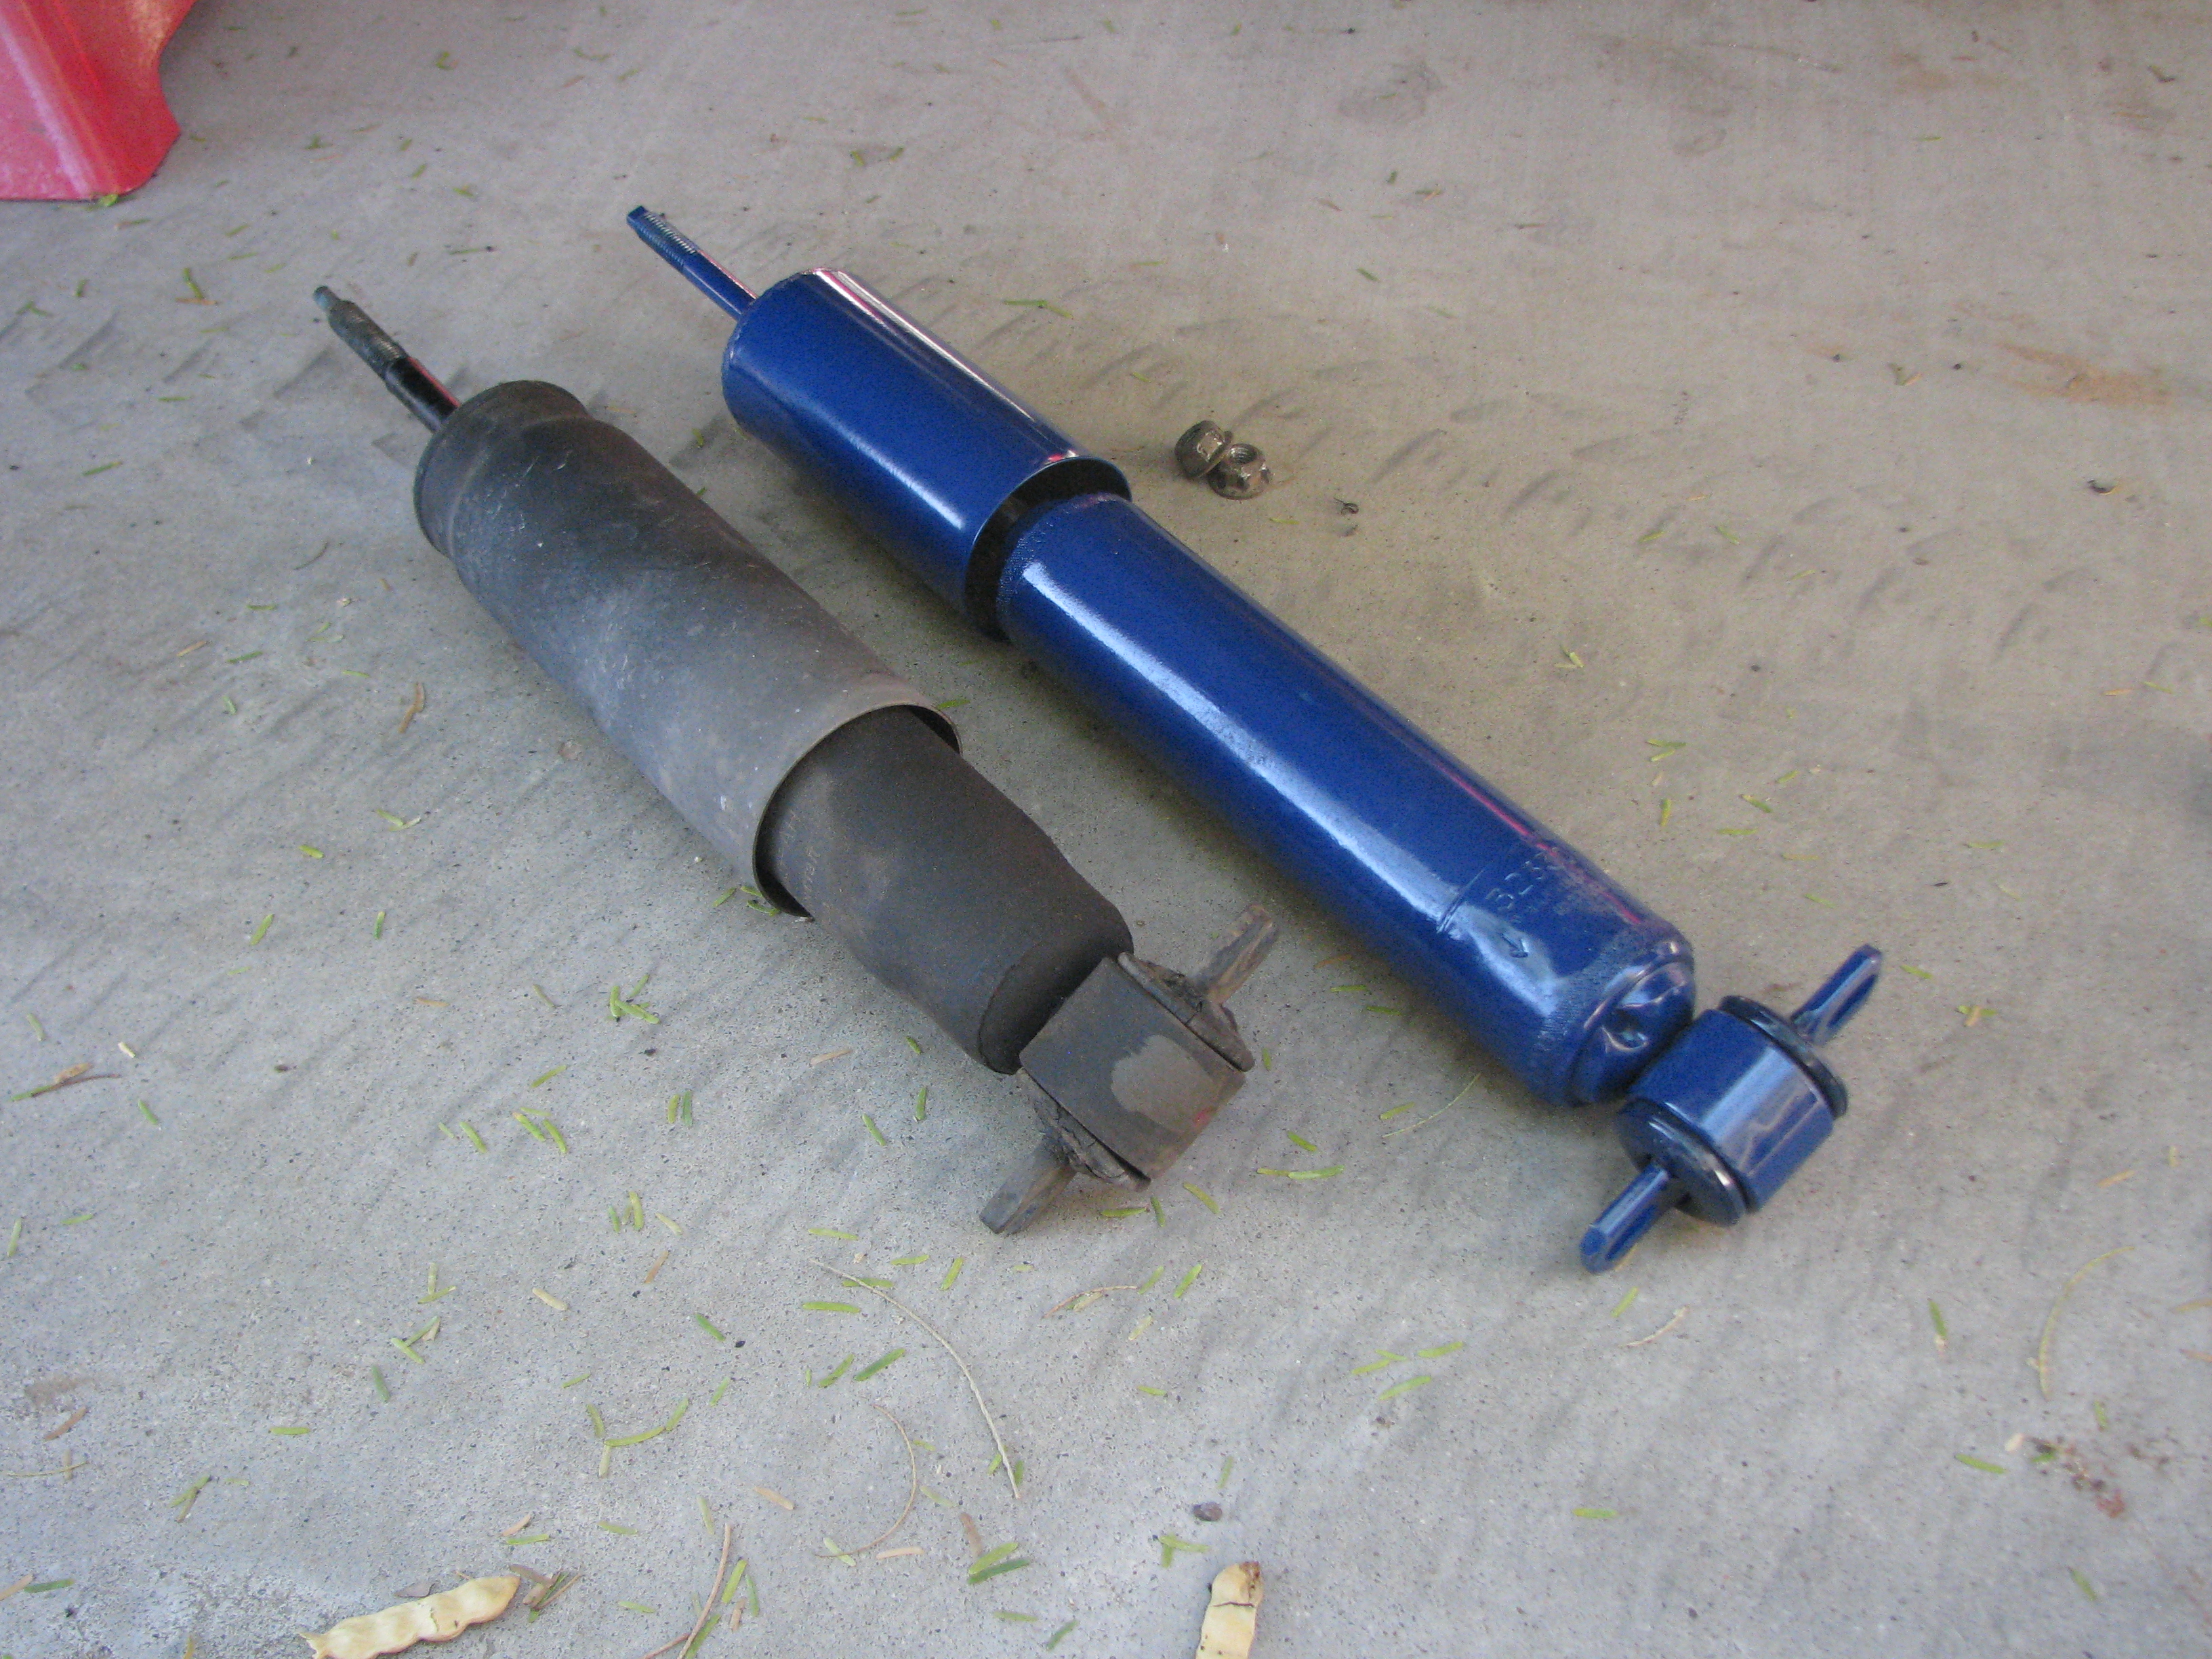 Old shock out of the truck (the front shocks are ridiculously easy to remove) and new one next to it. Right front shock could be easily compressed by hand and would never re-extend. Left front at least would try to rebound. 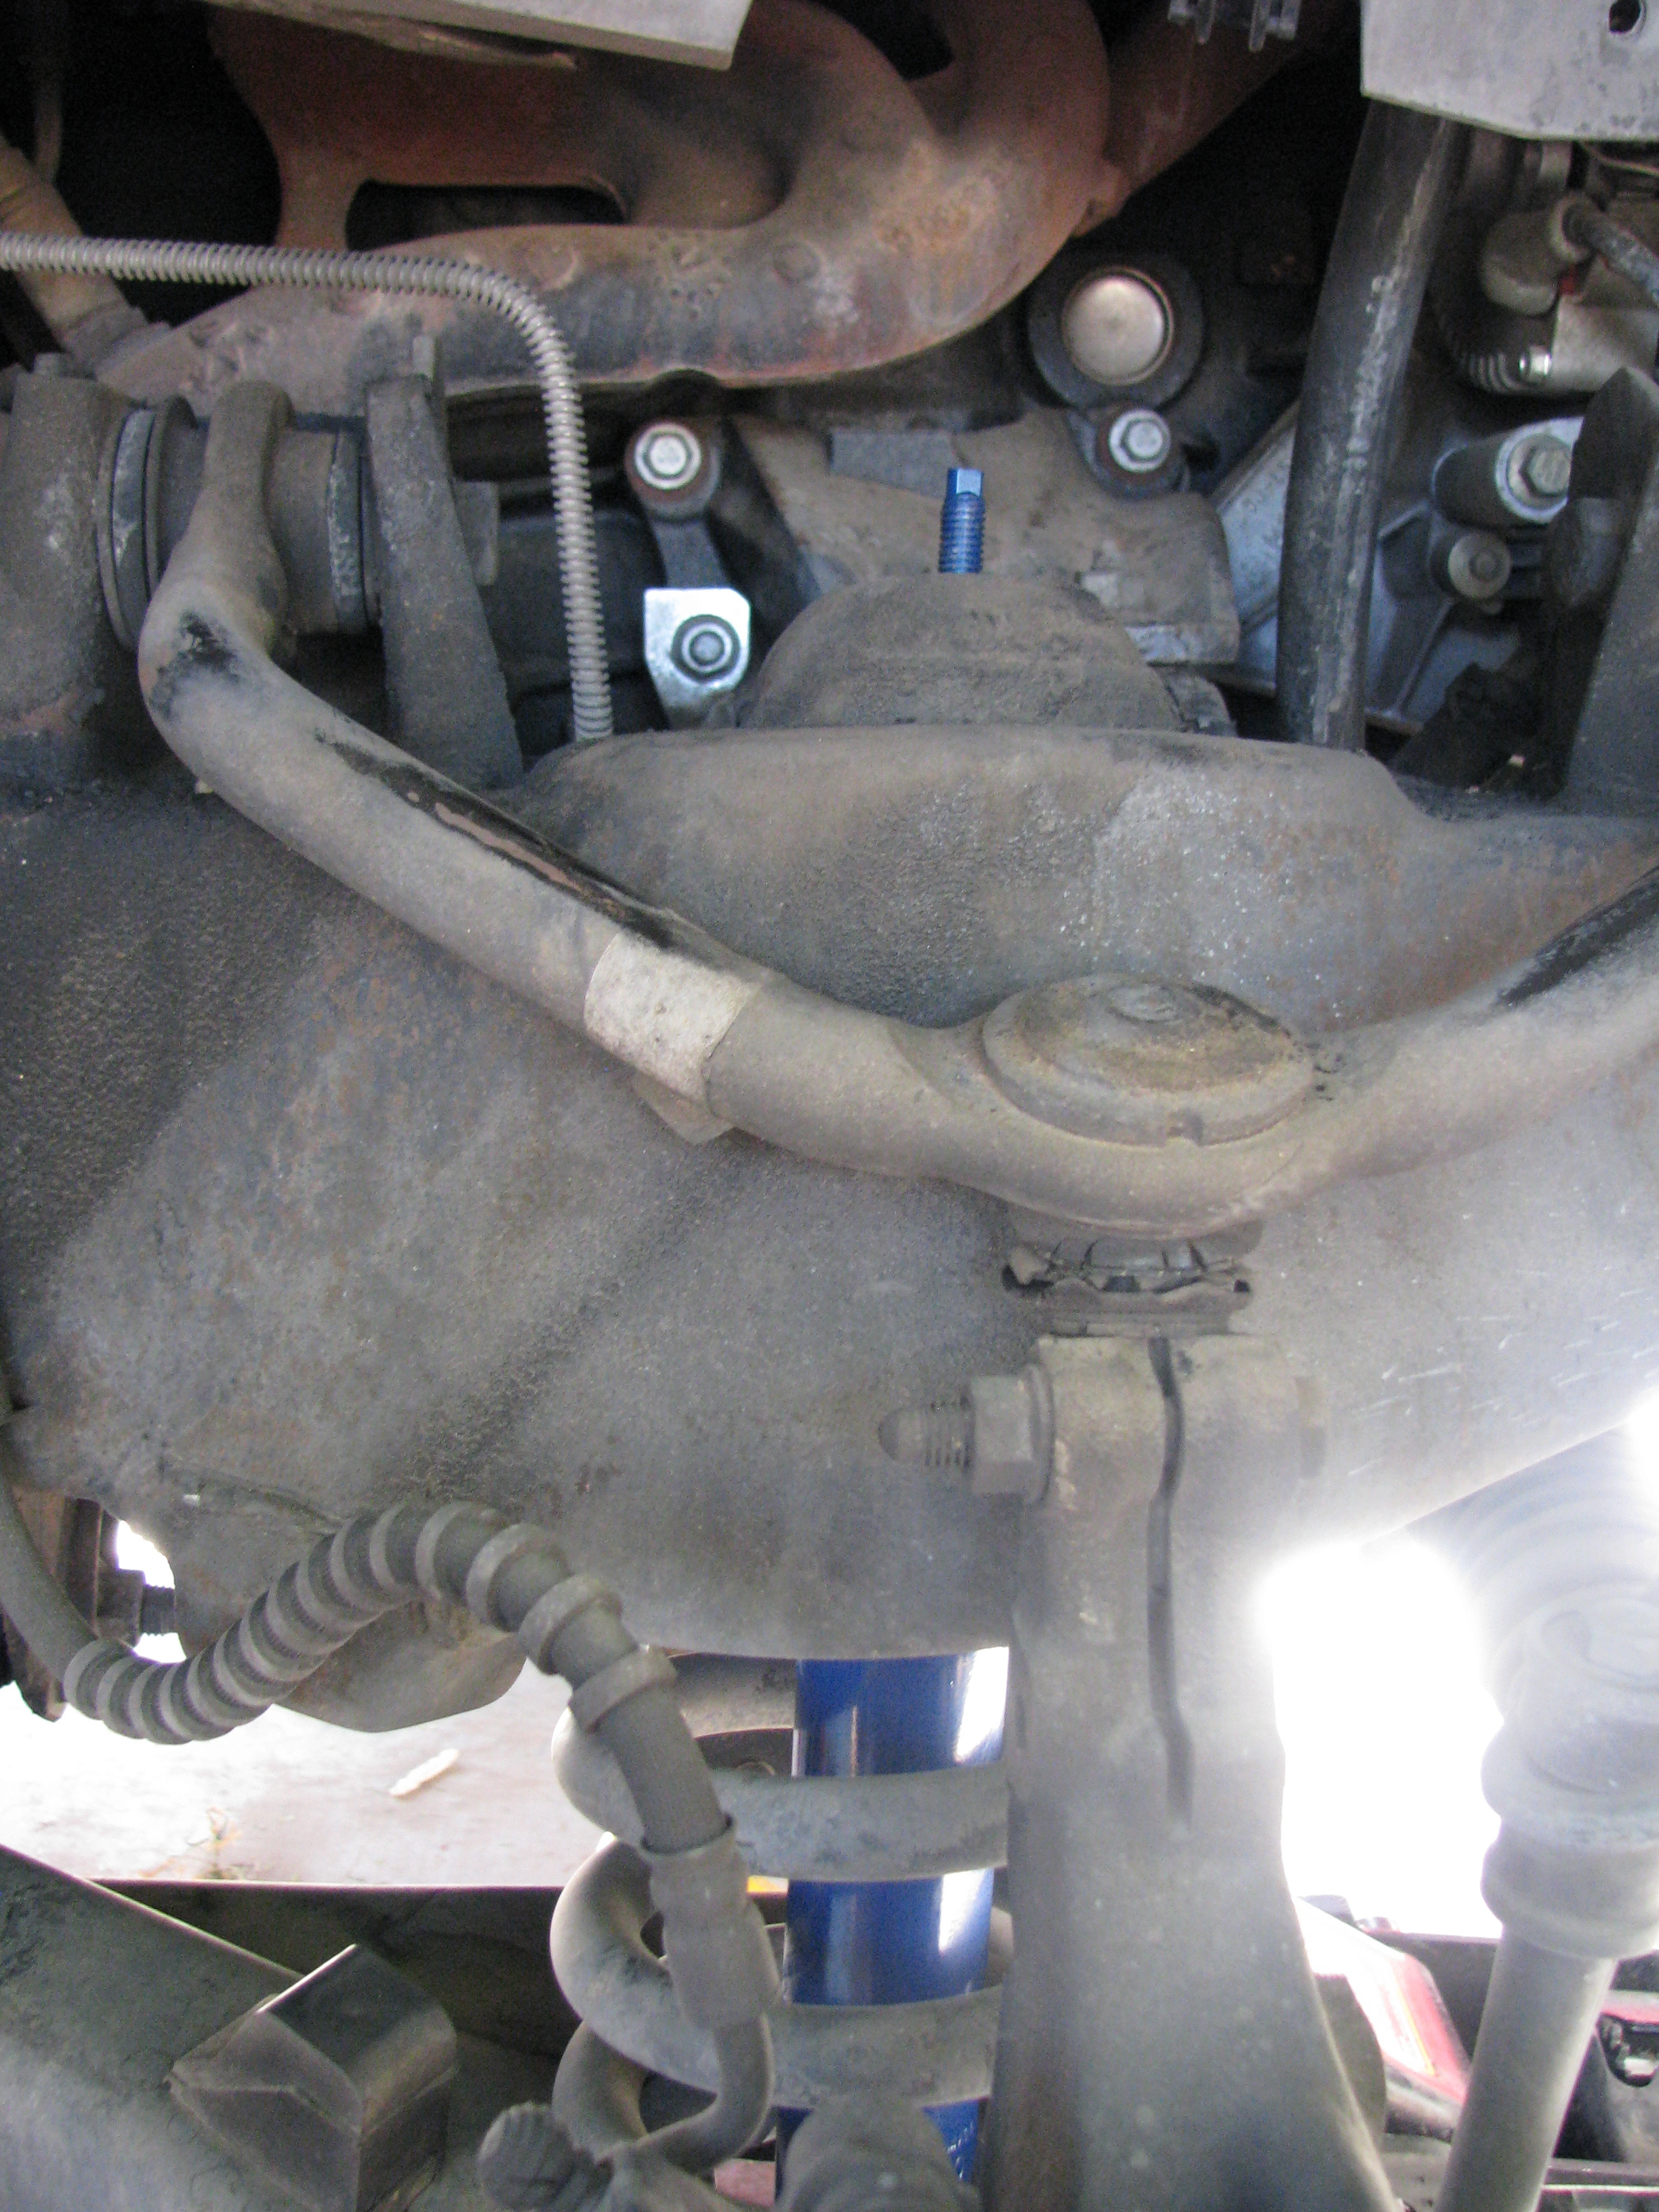 New one in, bolted in at the bottom only. 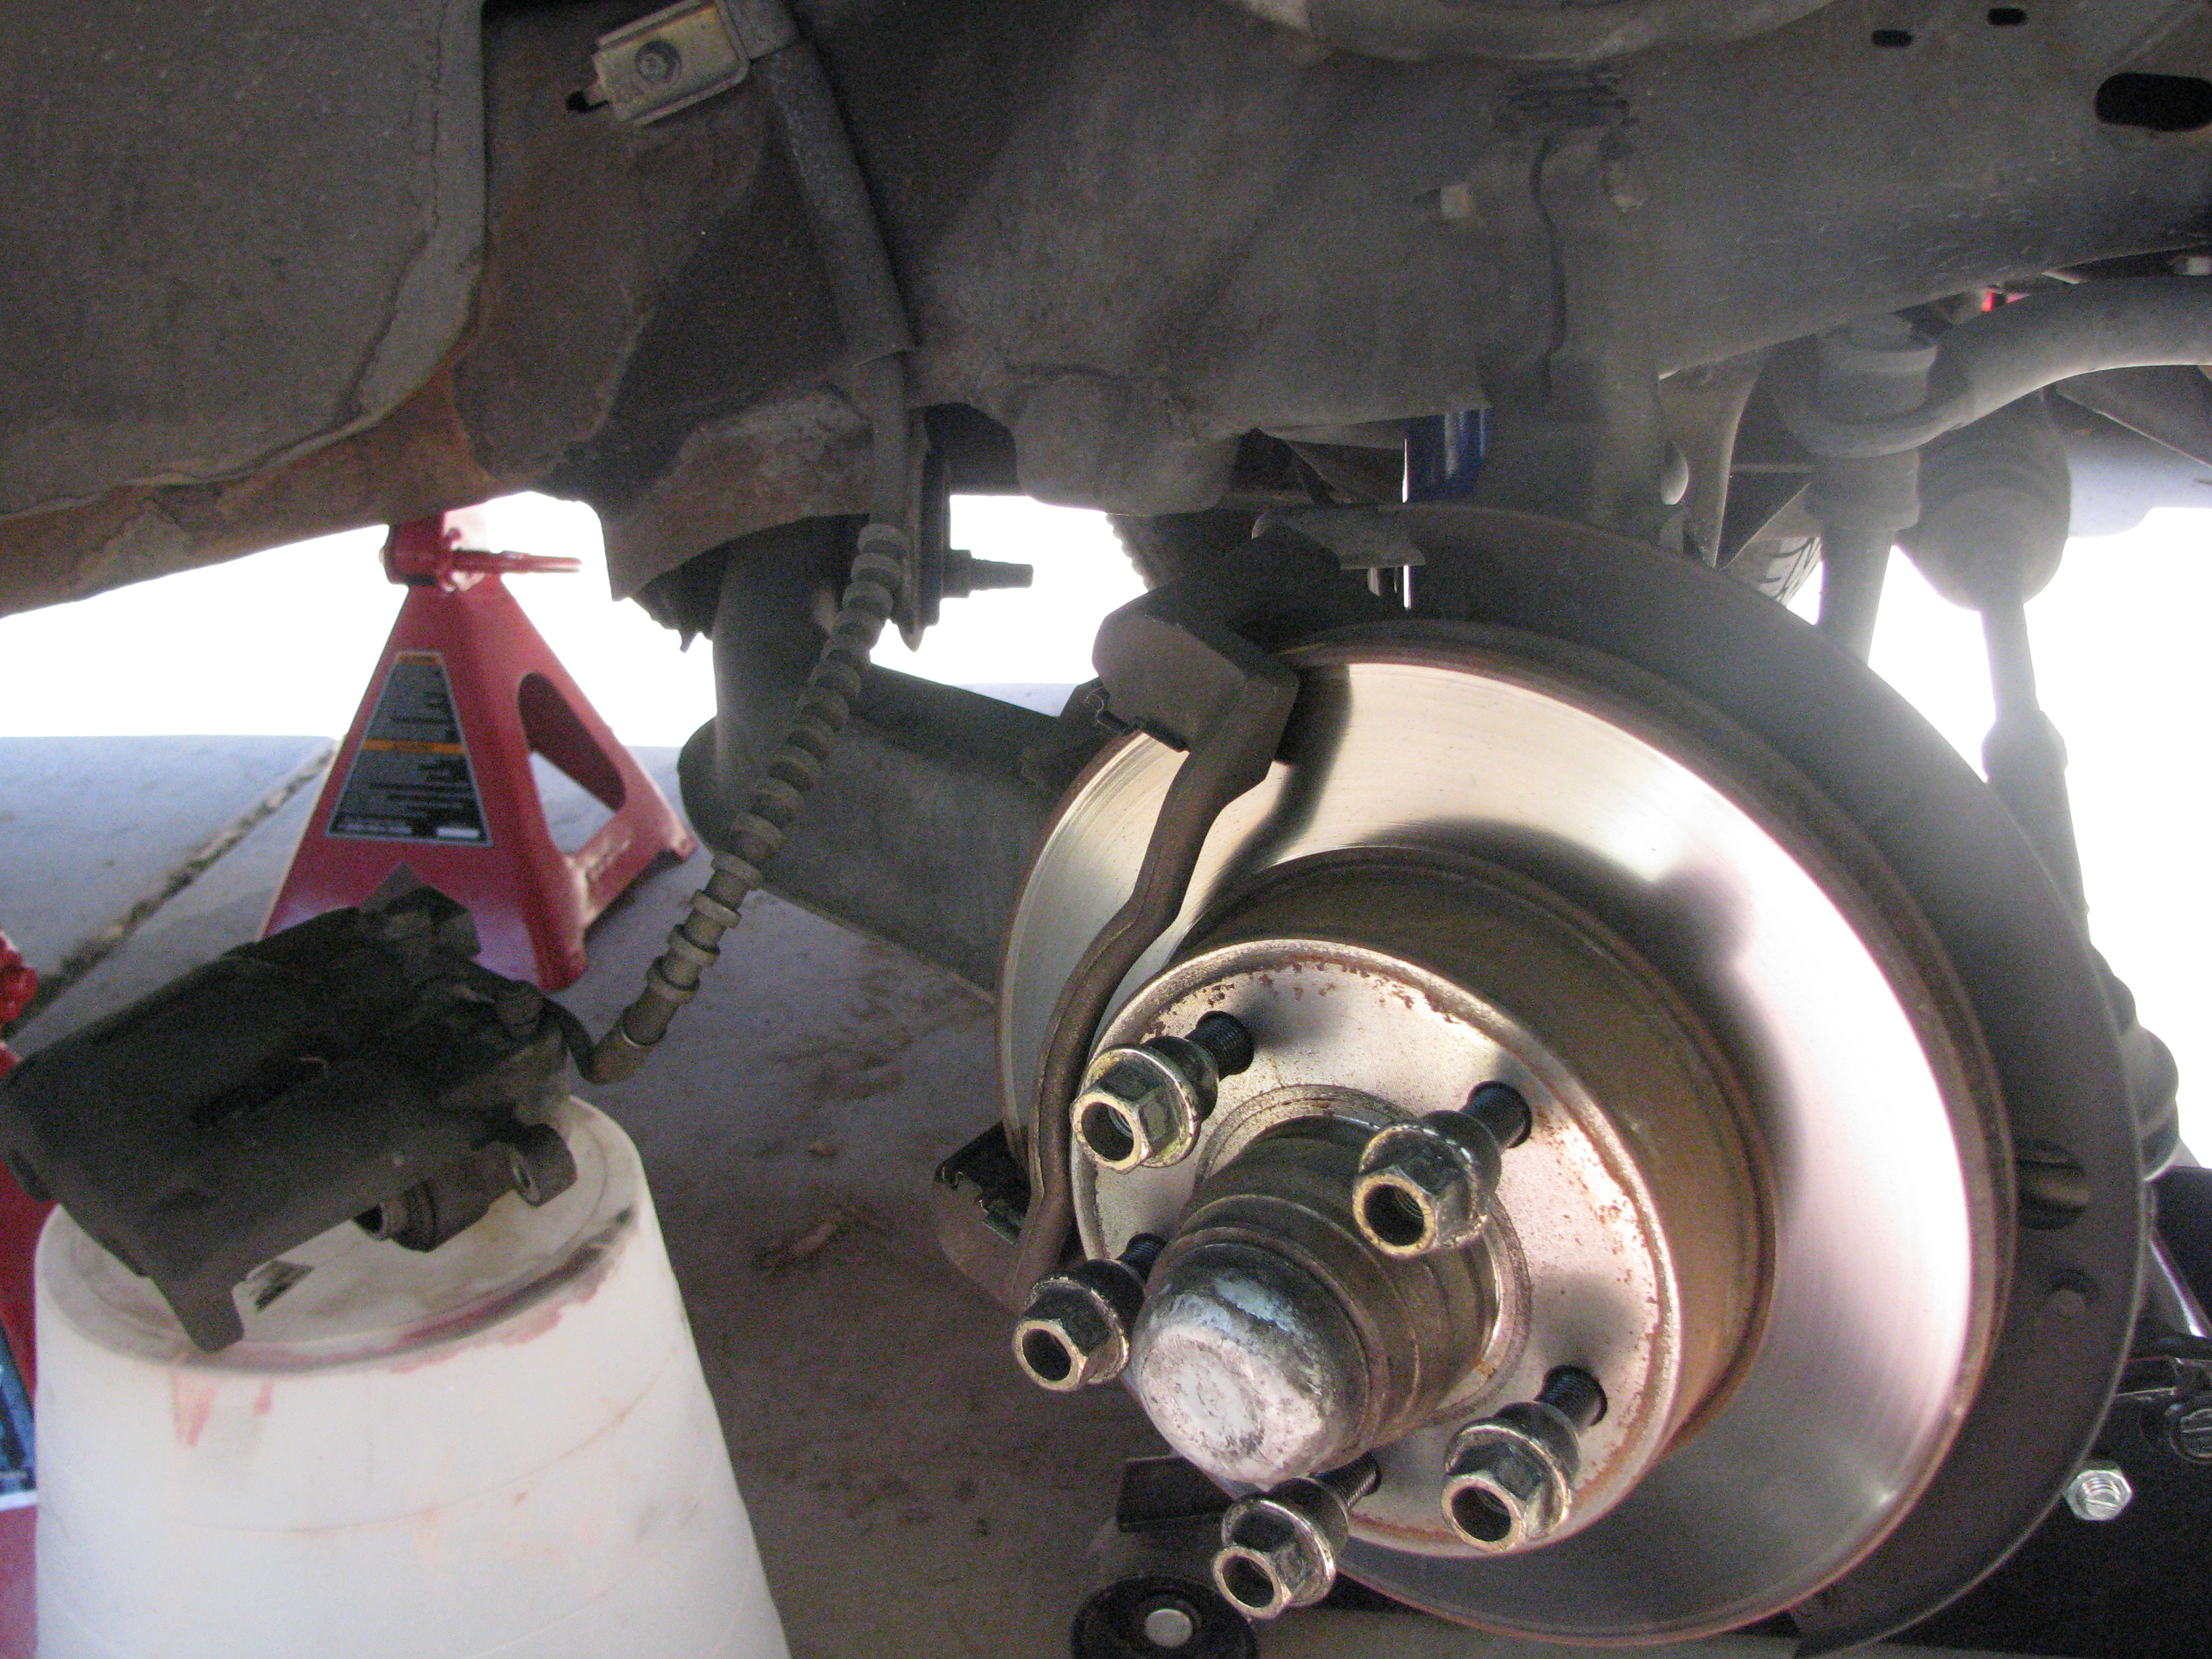 To do either balljoint, you have to separate it from the spindle - and pulling the caliper is a drat good idea since it takes 30 seconds to do. 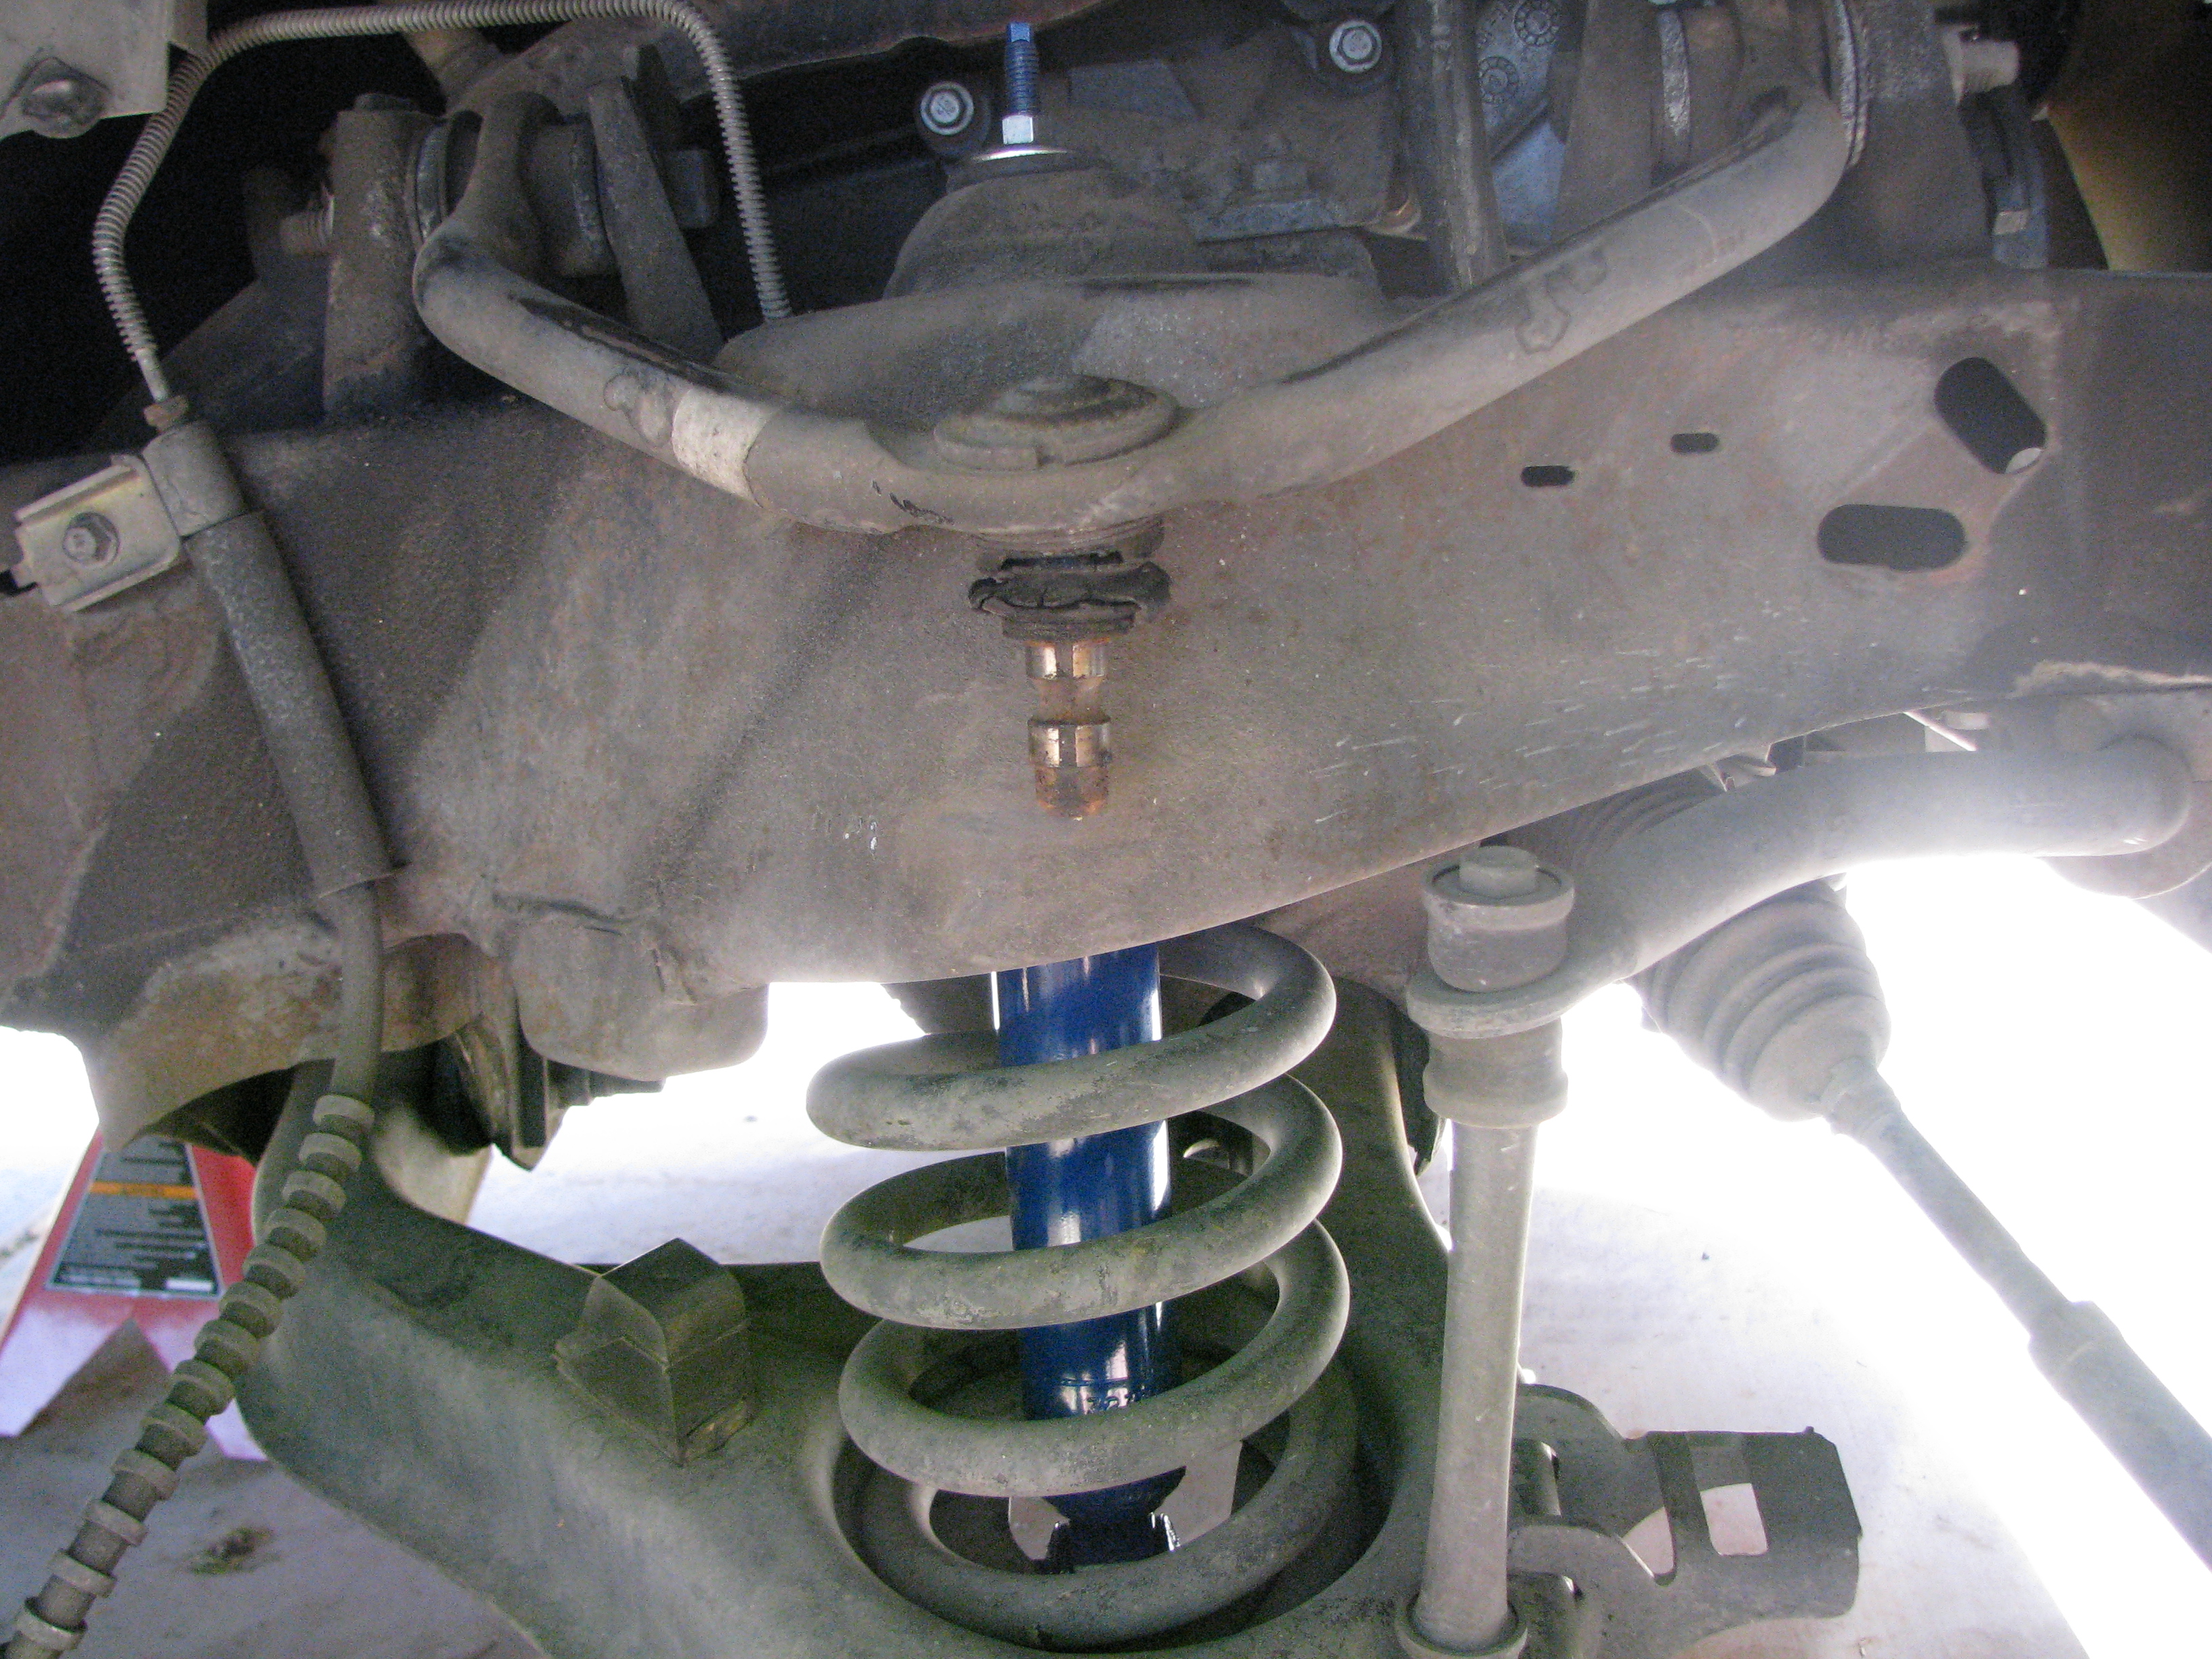 After removing the pinch bolt and smacking the spindle a few times with a hammer, the upper joint is free. Clacks around with the lightest touch. 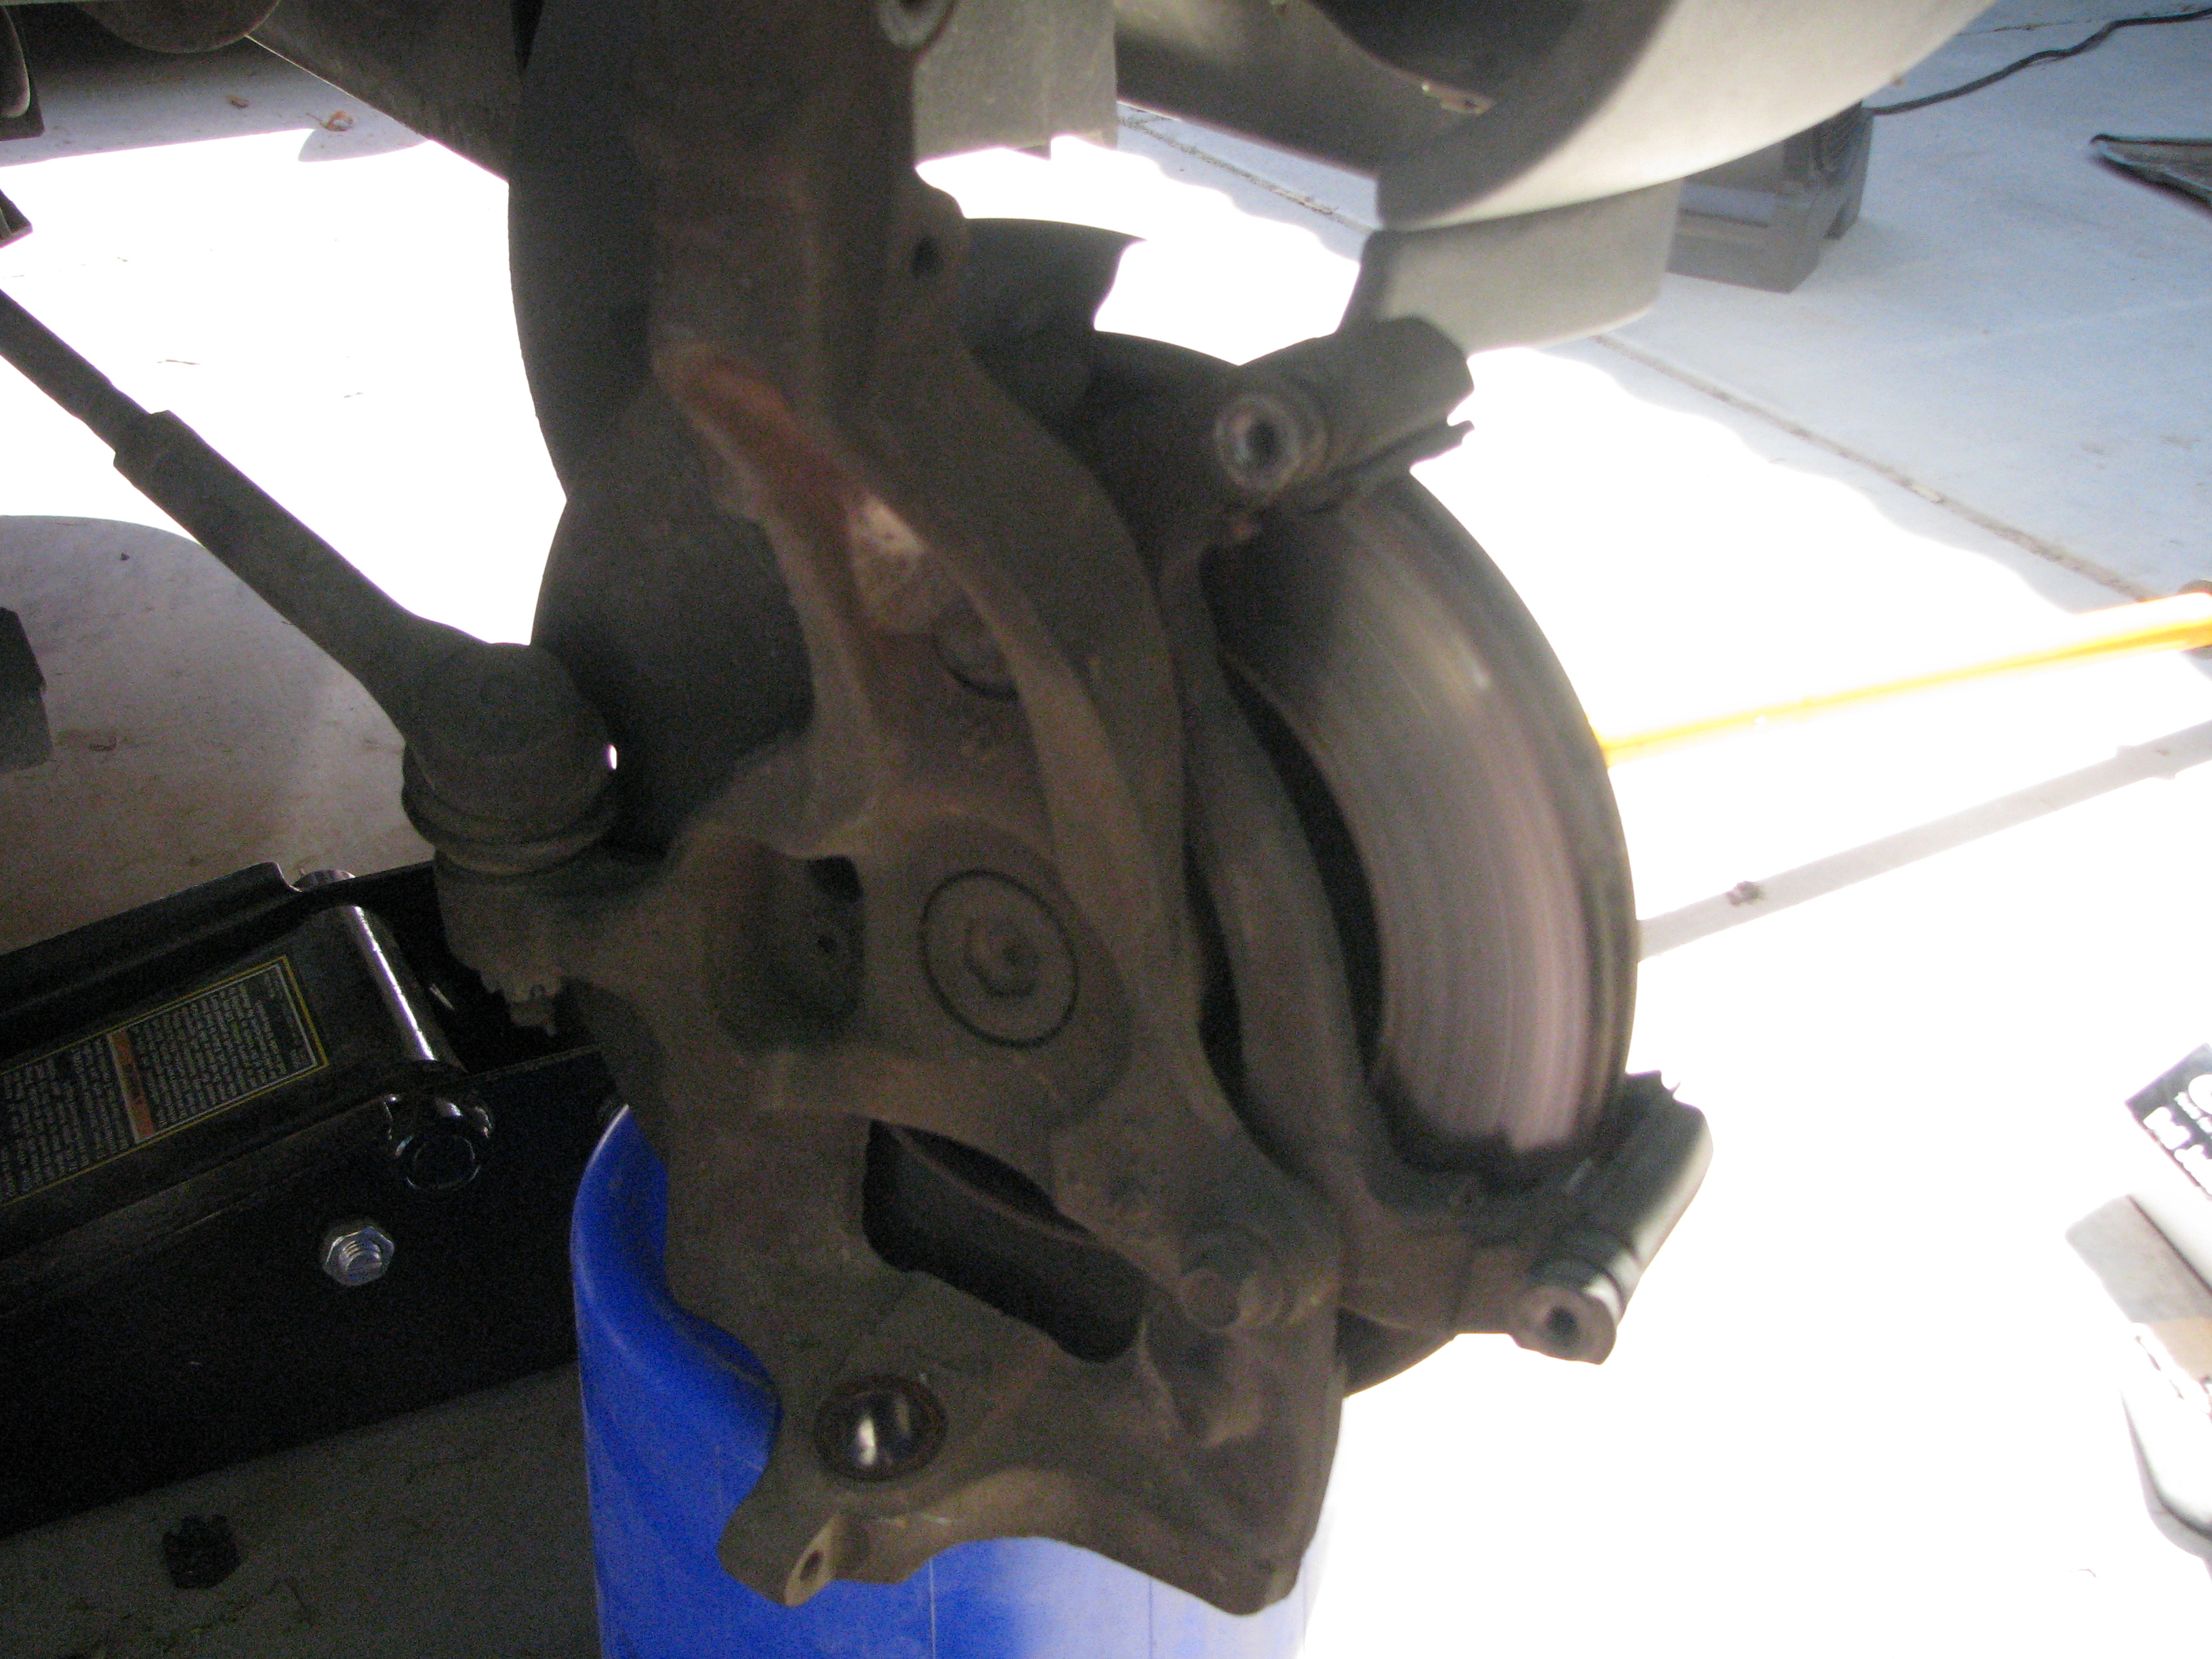 Pickle fork makes short work of the lower joint. Left the tie rod attached, put the rest on a bucket for support. 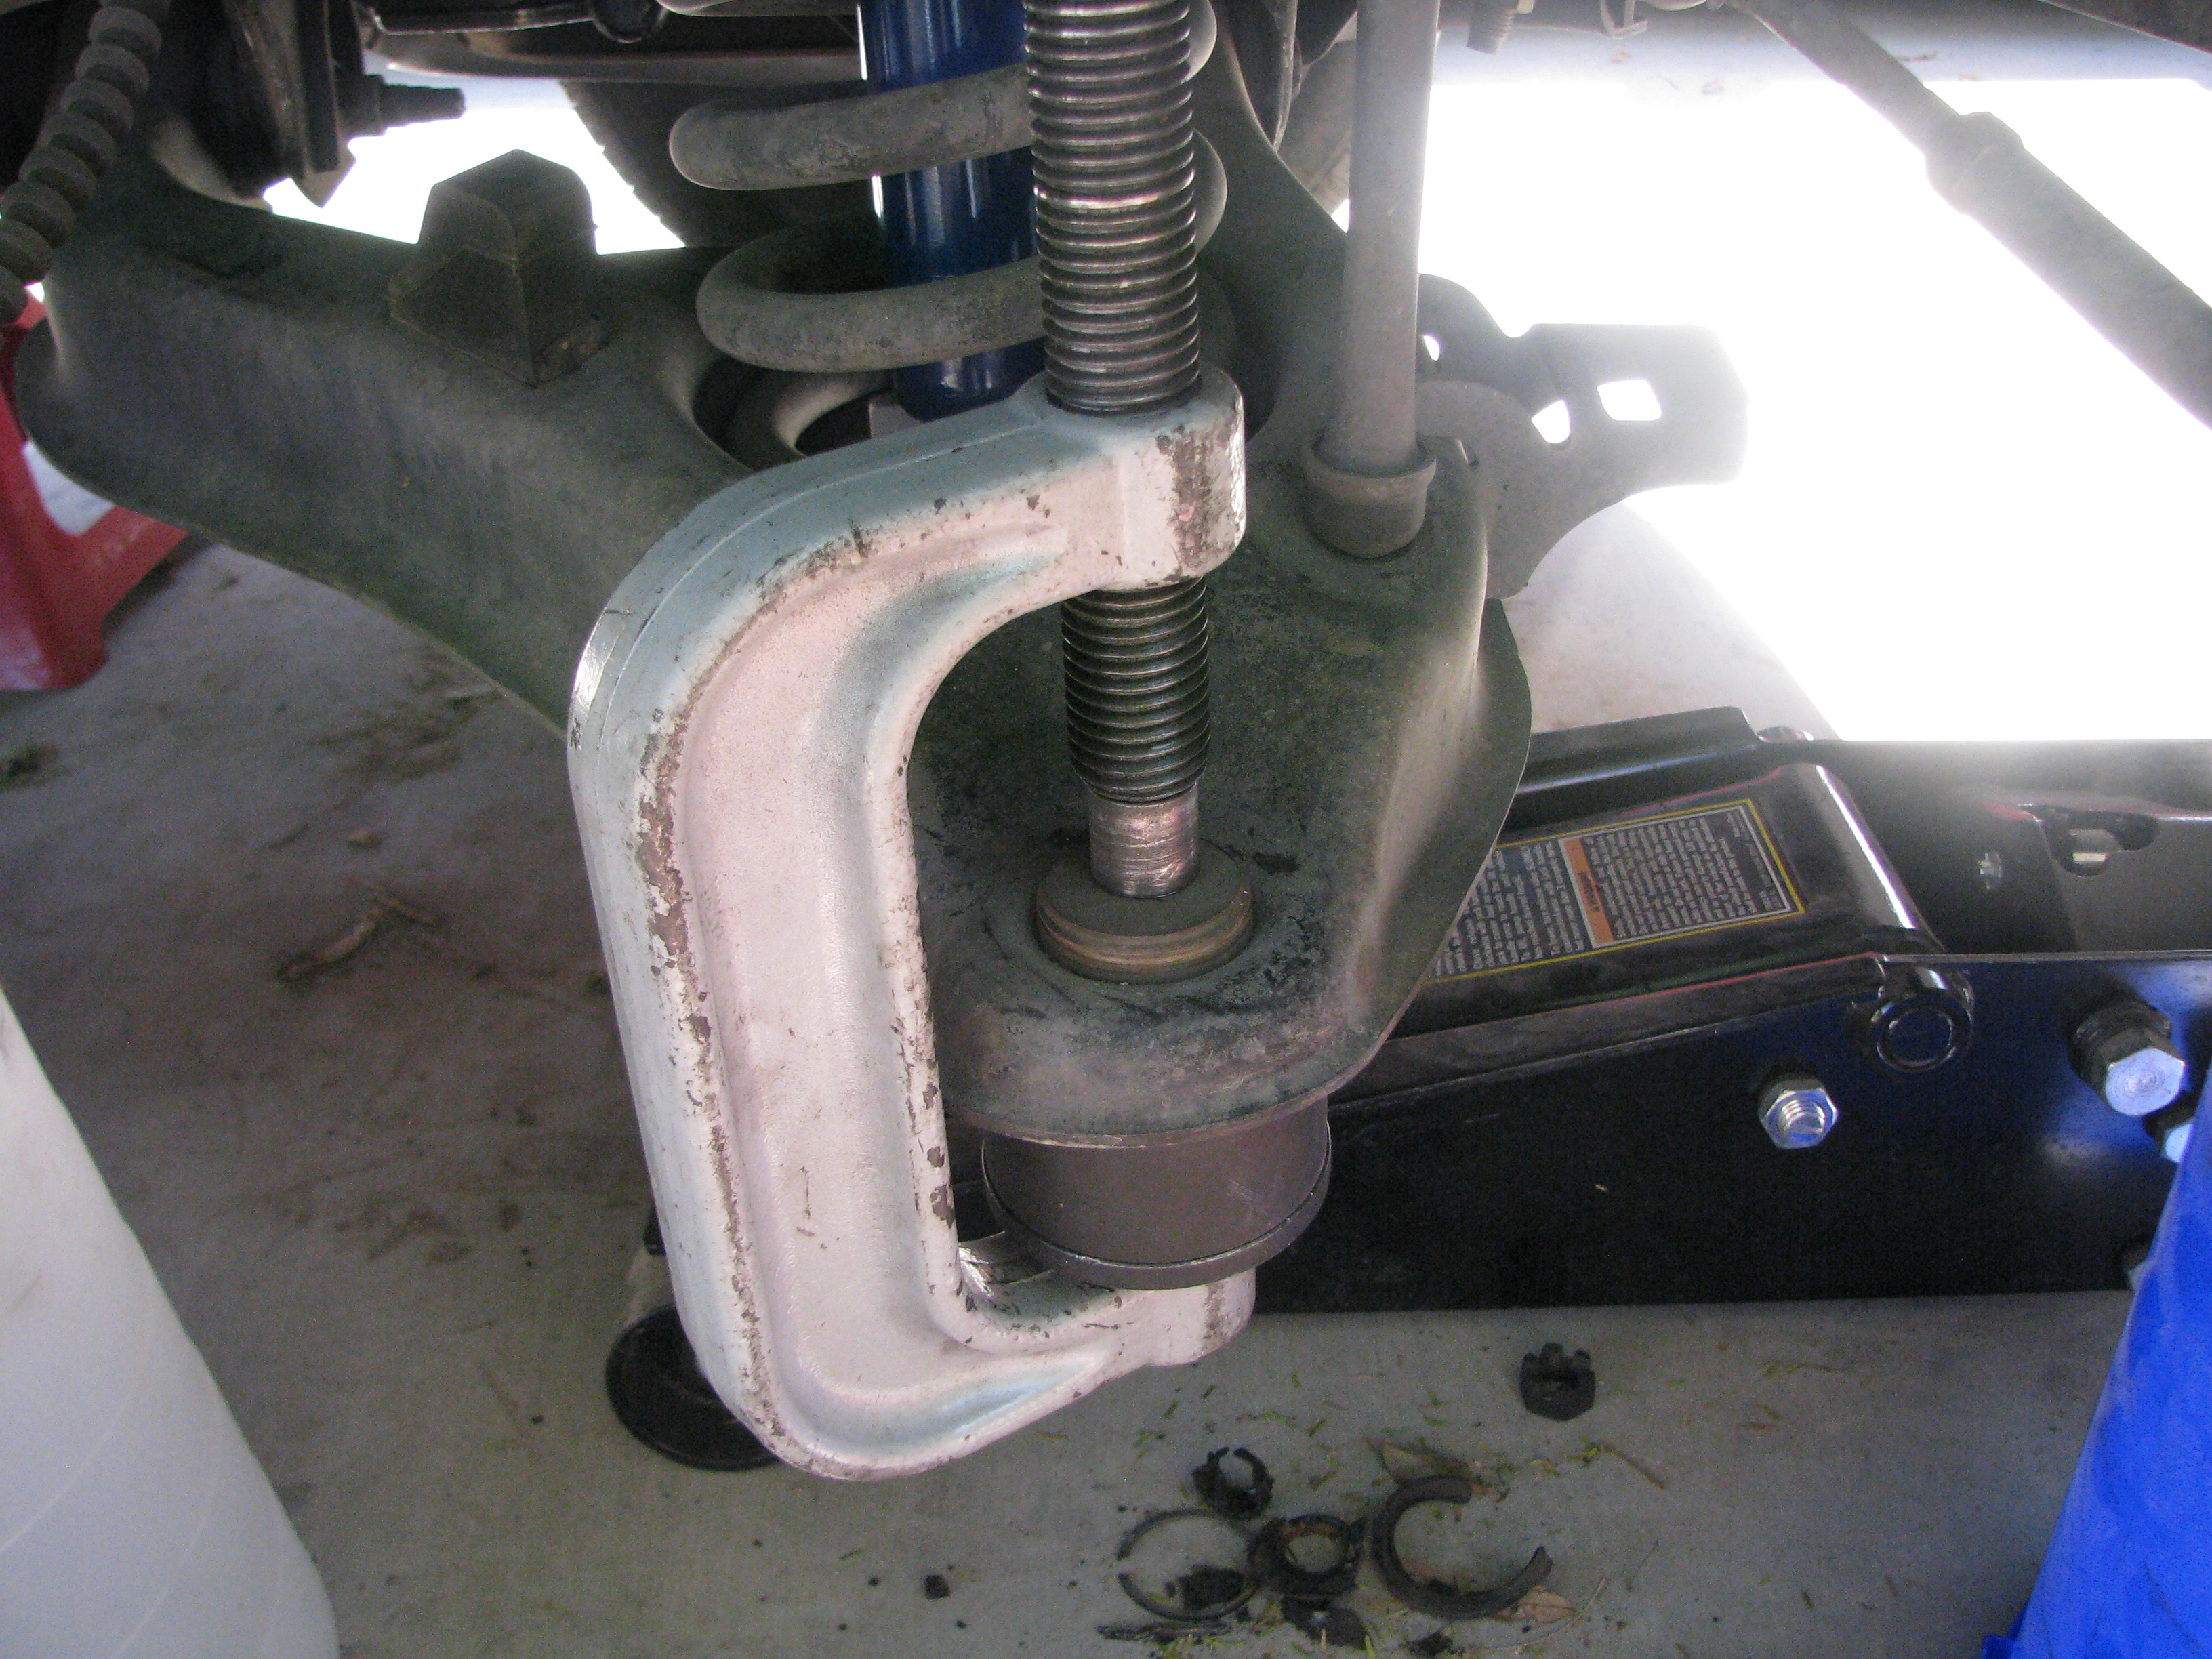 Lower joint is a press-fit with a C-clip. Hit it with the Autozone rental press and a breaker bar... 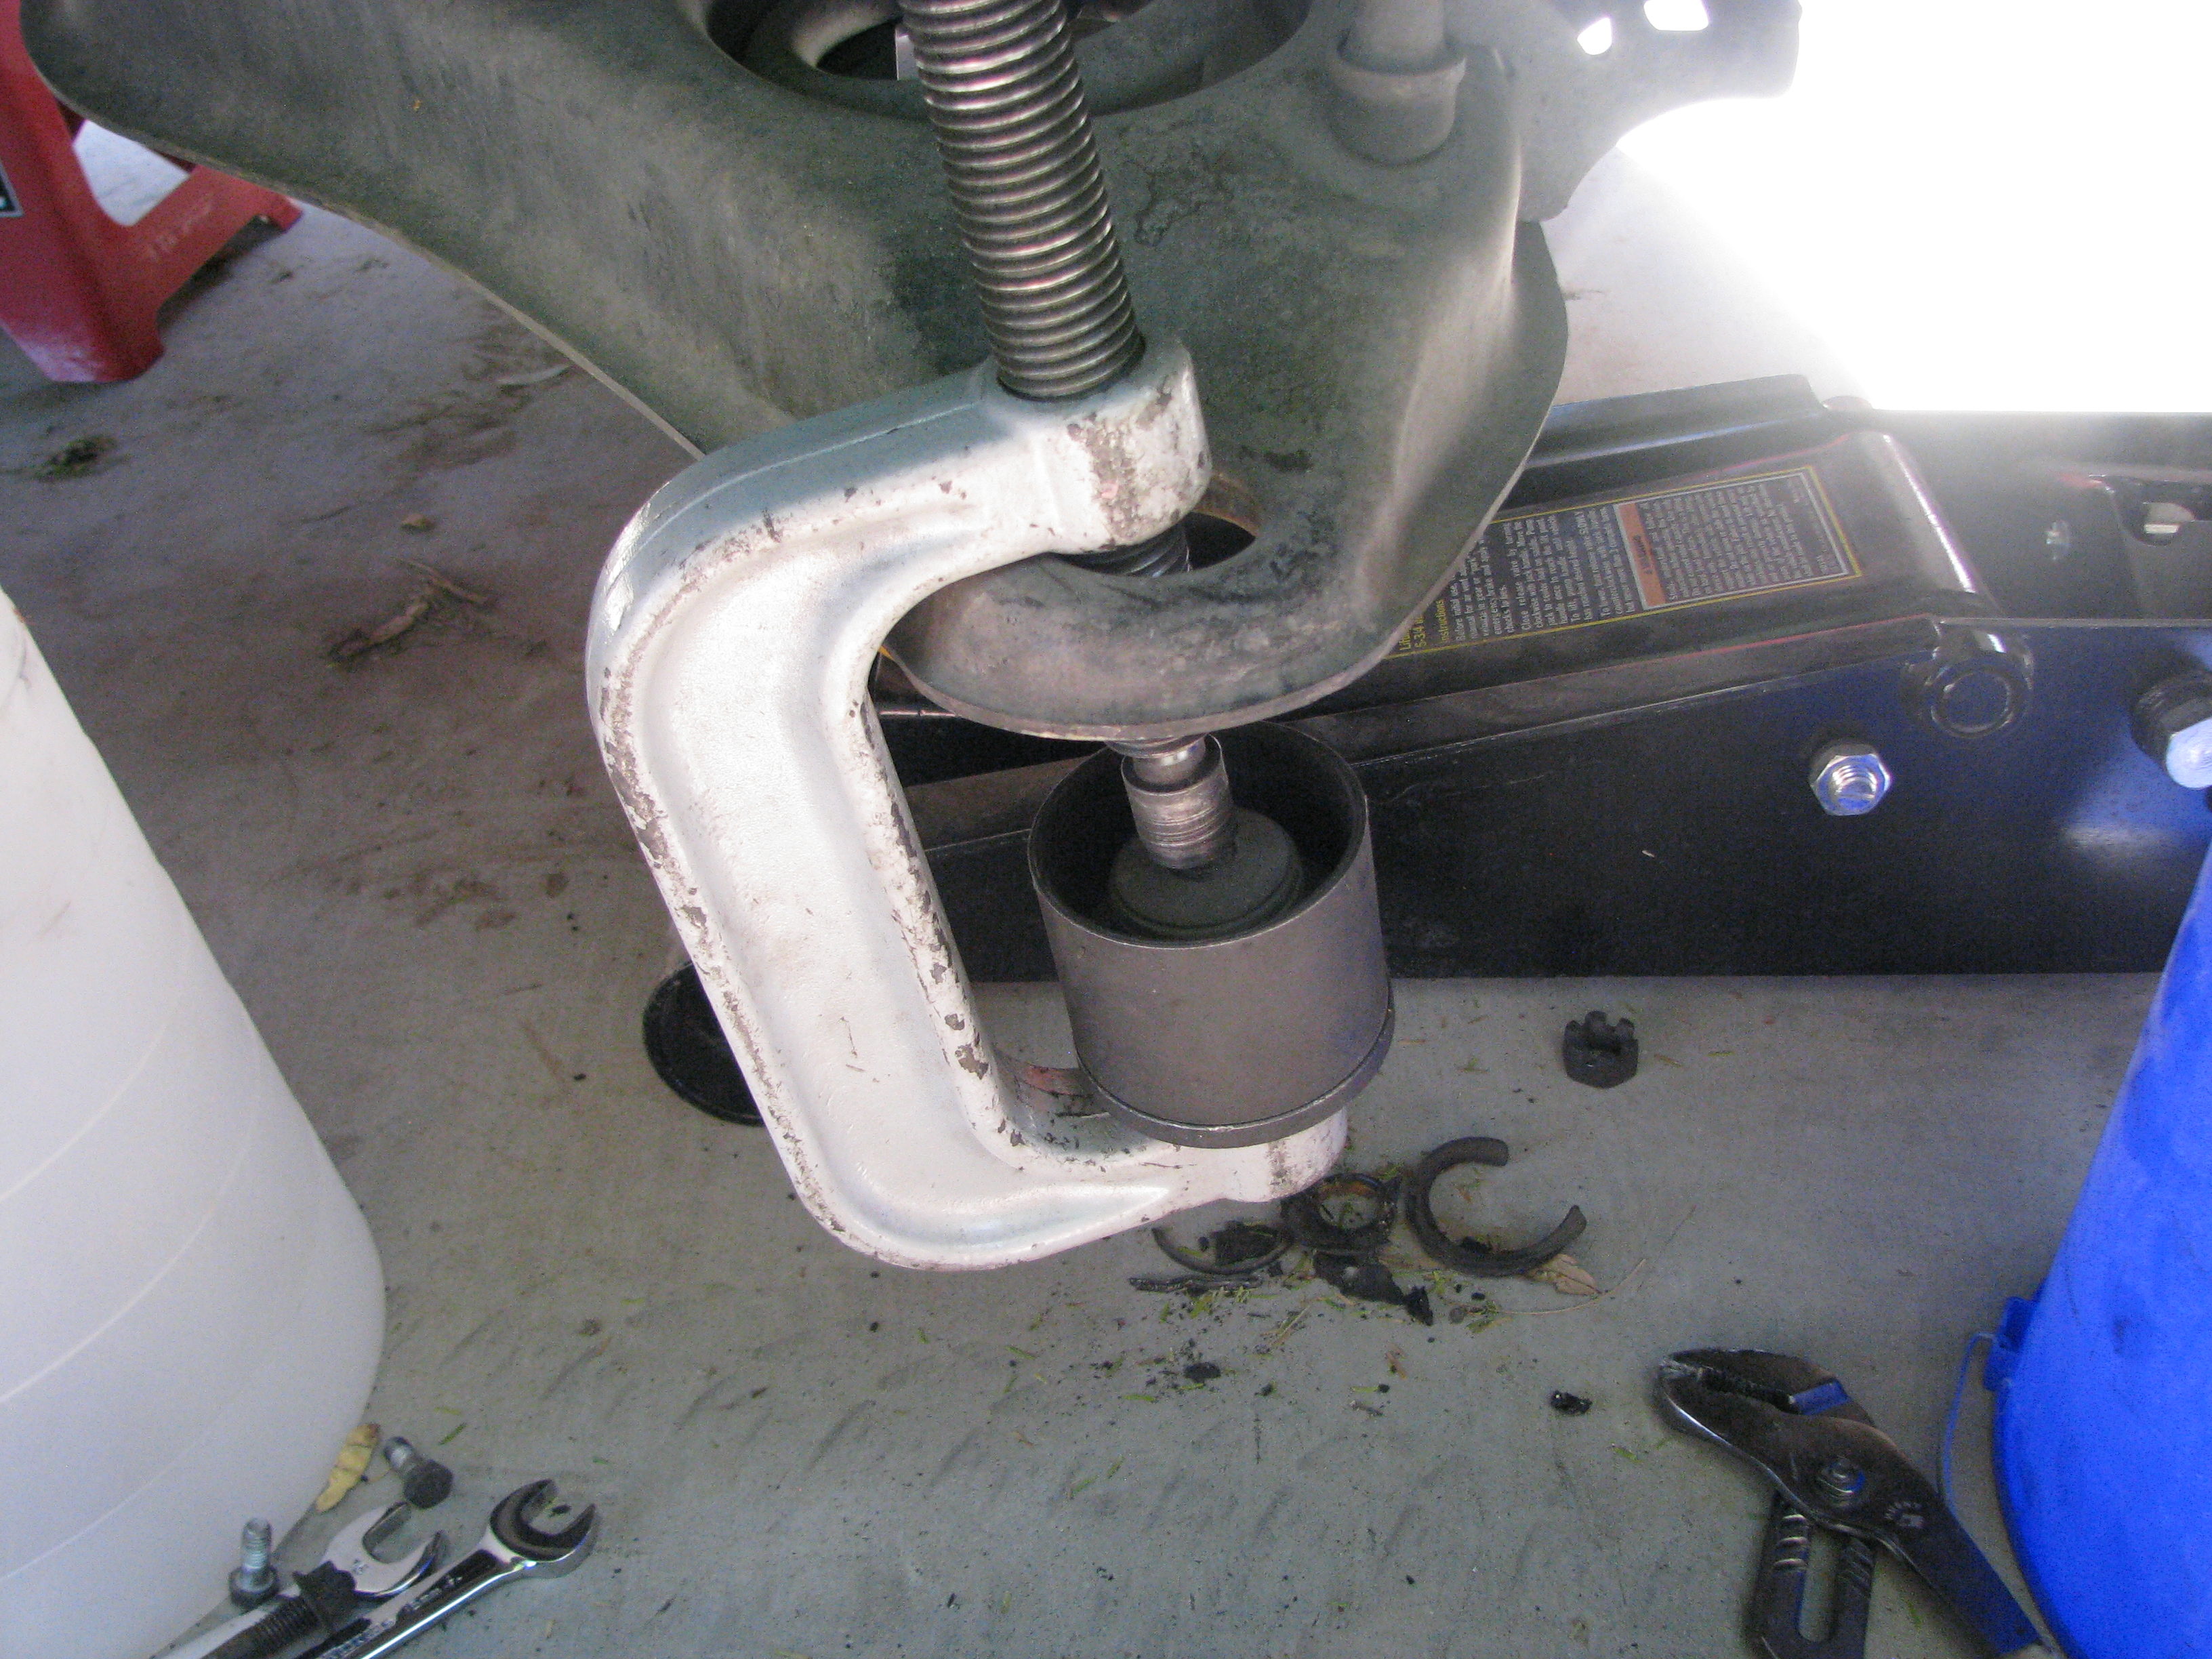 ...and out it comes. 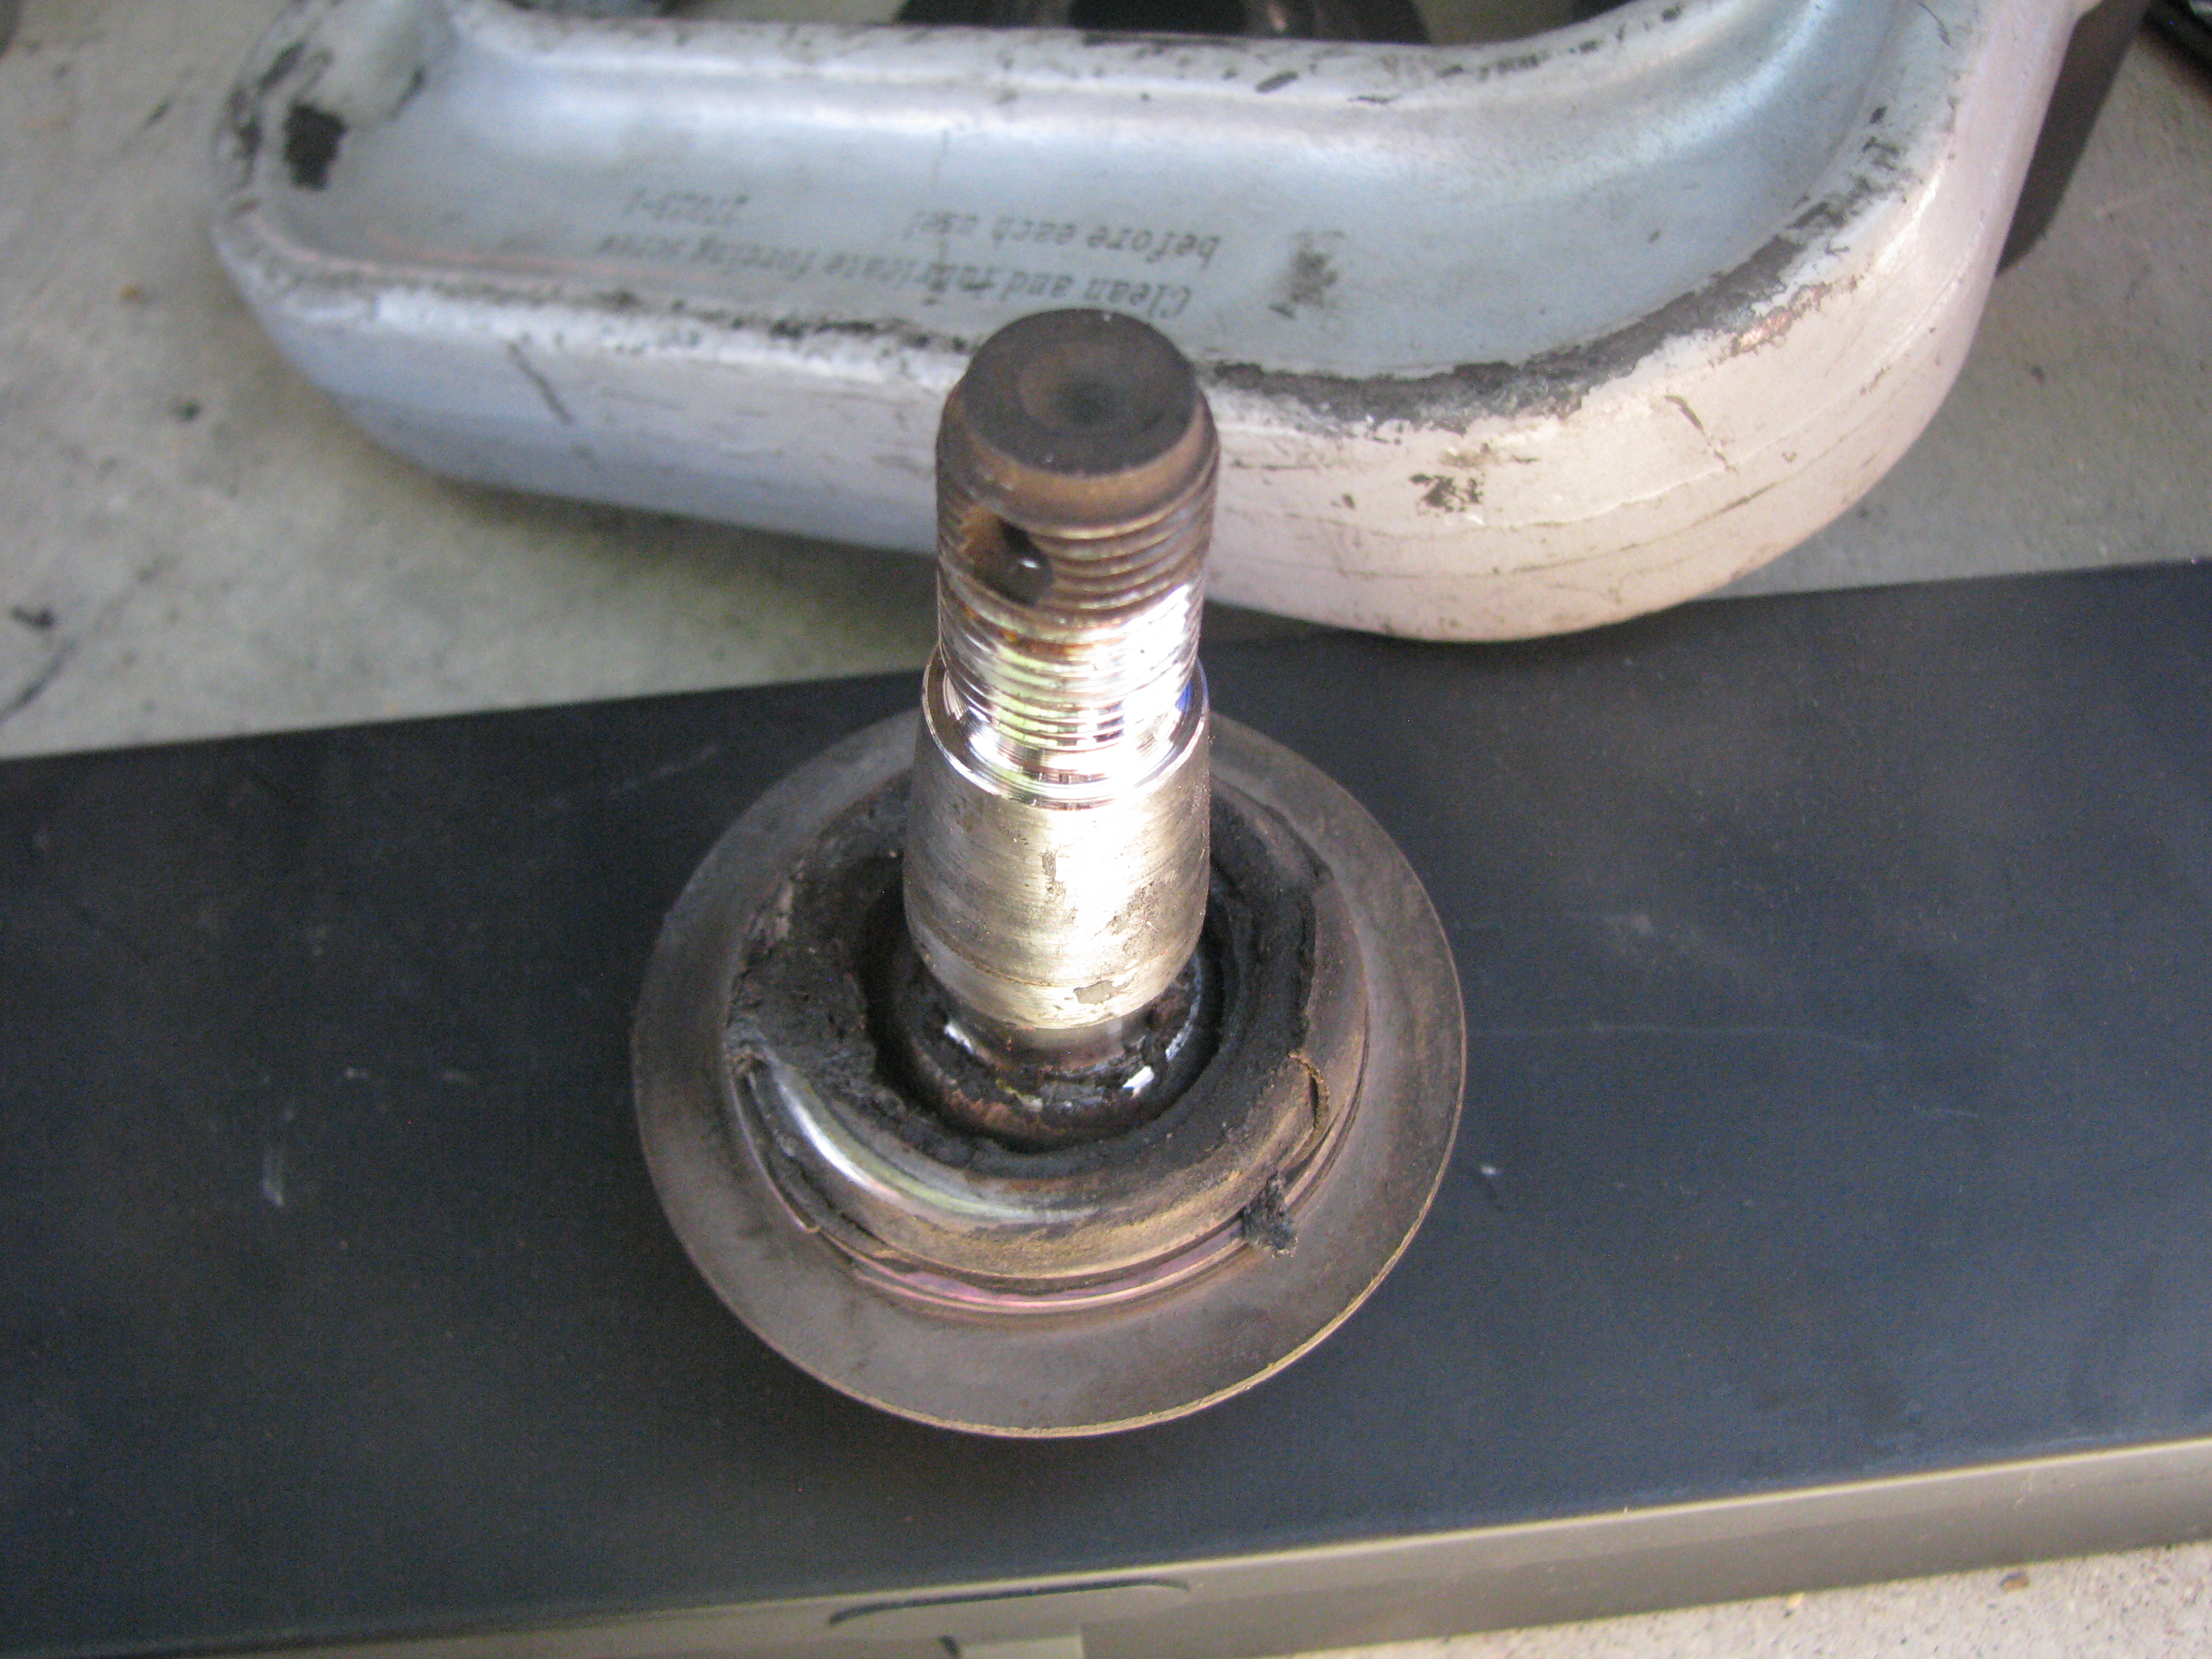 Just a bit dry in here! 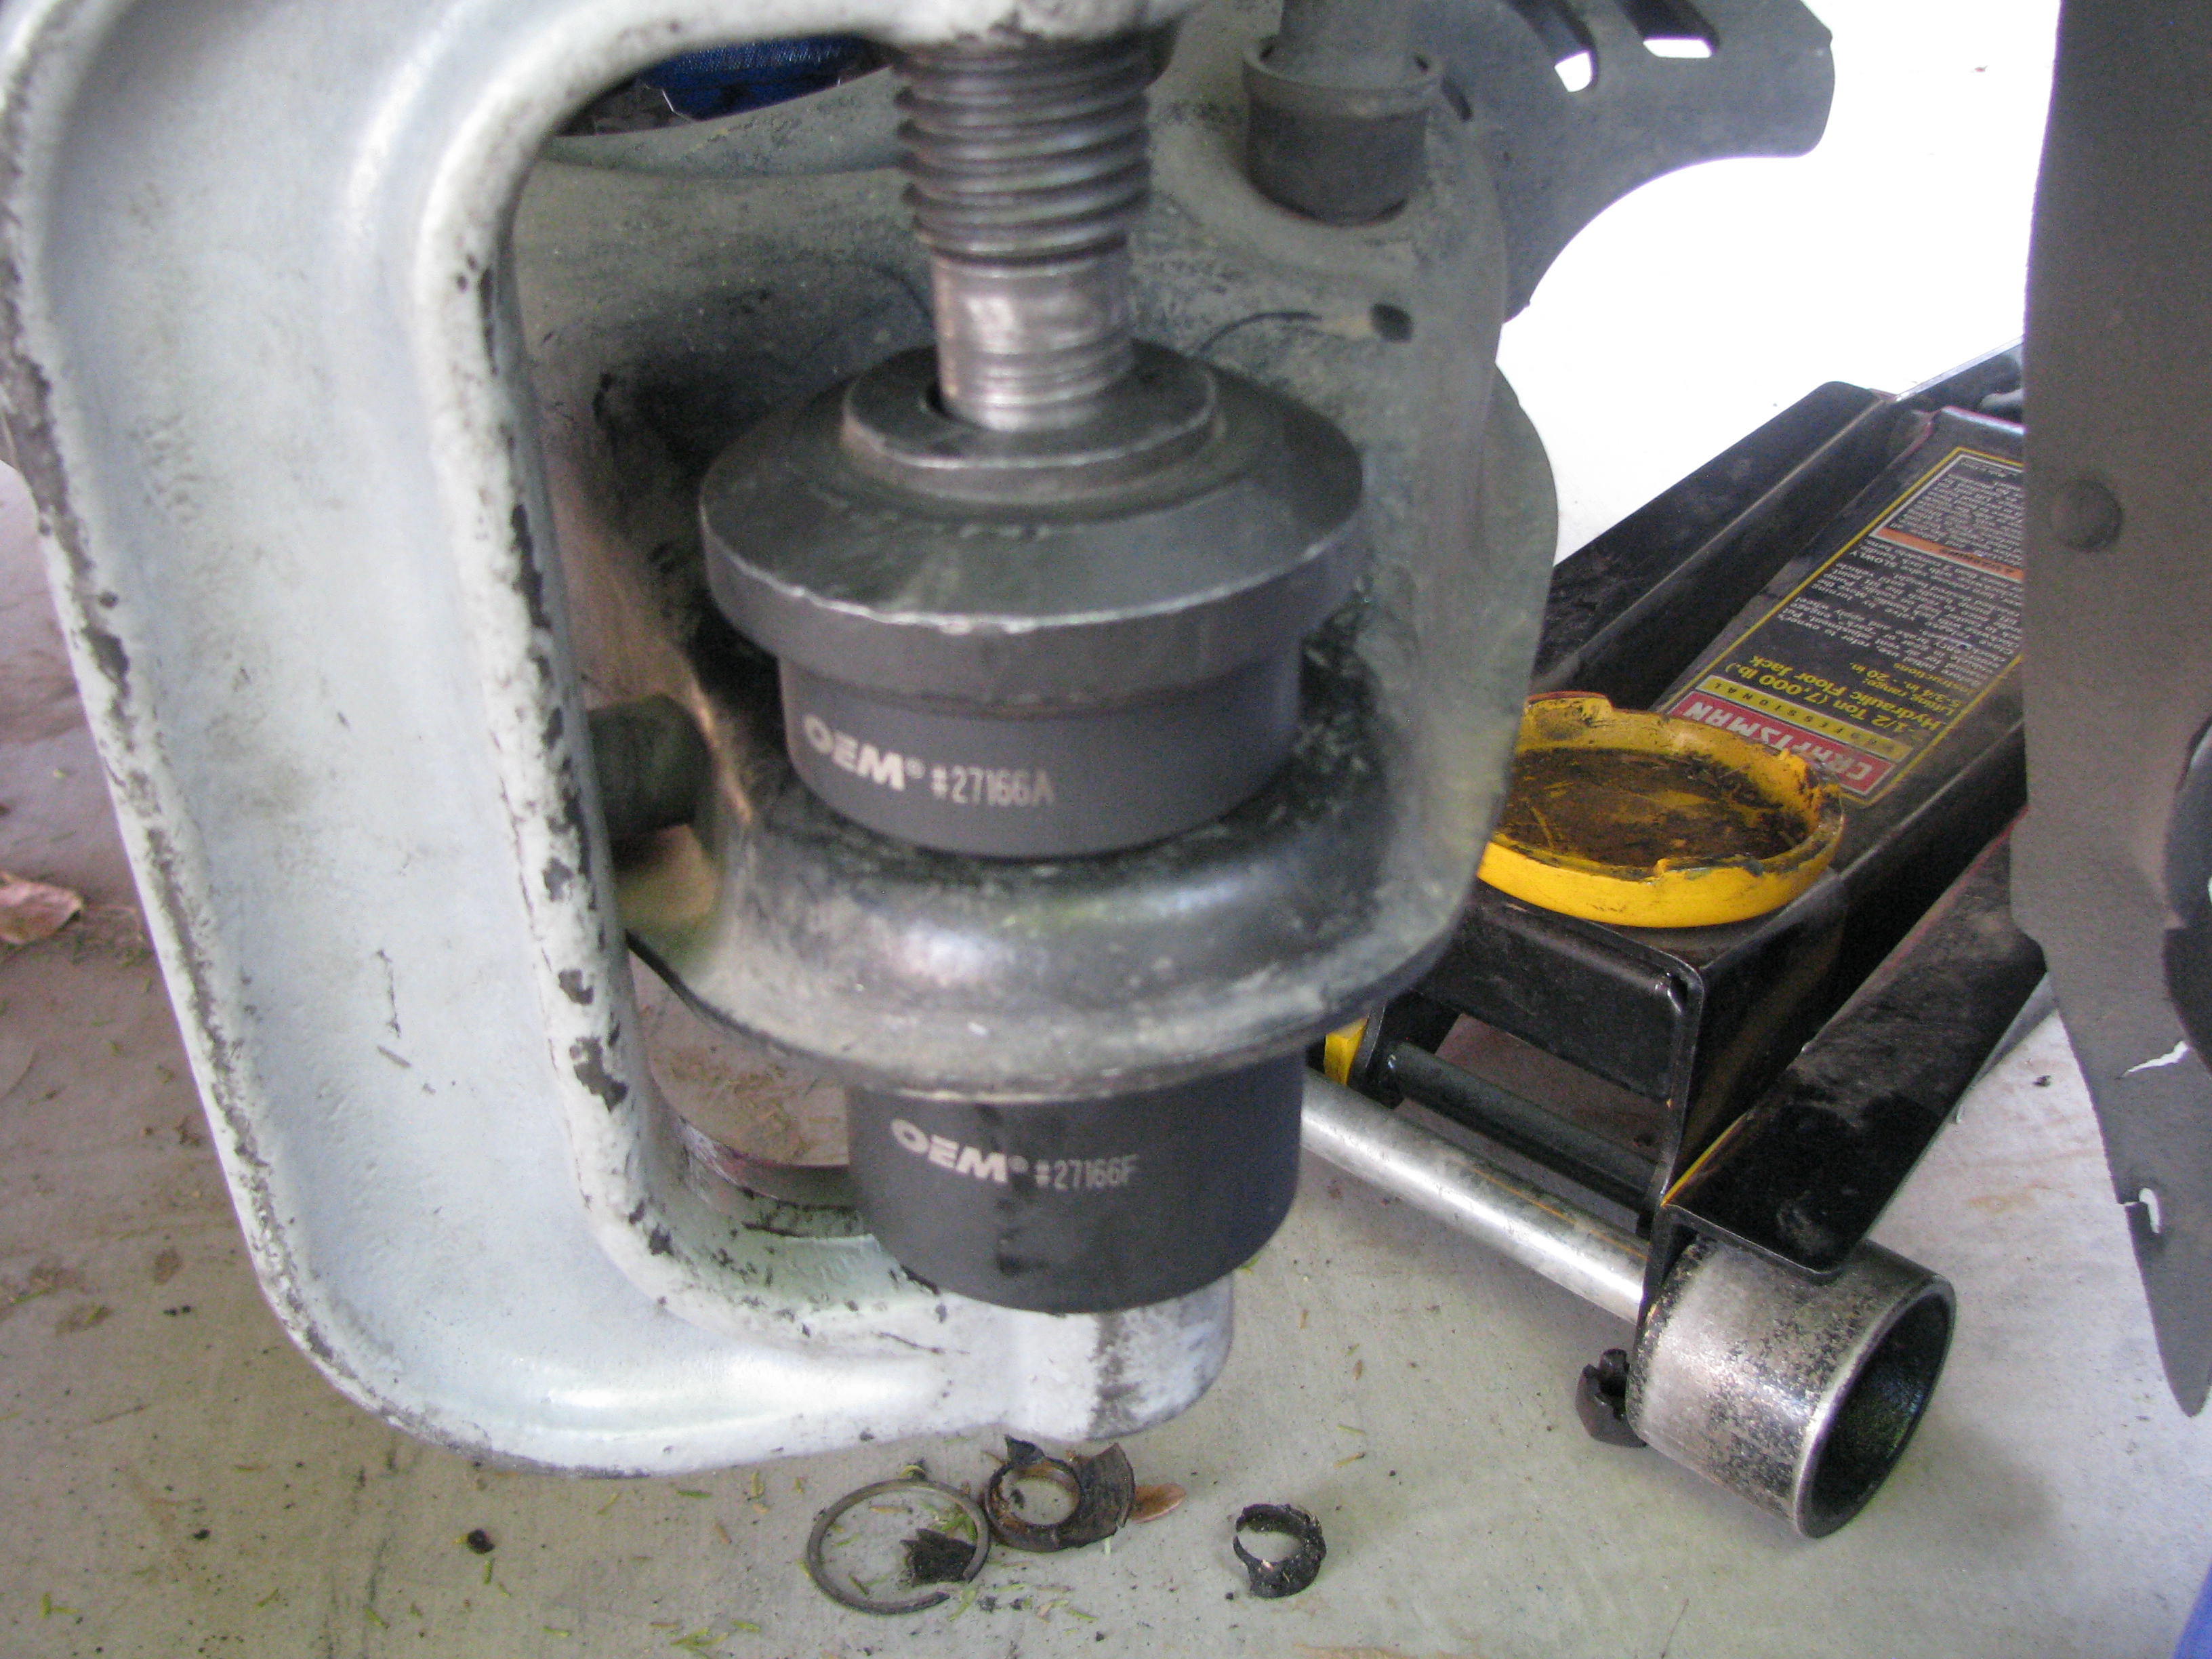 Protip: While the regular Autozone kit will get the old joint out on its own, you need to grab the 2WD adapter set too to get the new ones in. You can make a stack of adapters that fit the ball joint with the regular kit, but they're too drat tall for the actual press. With the adapter set as shown, it's easy. 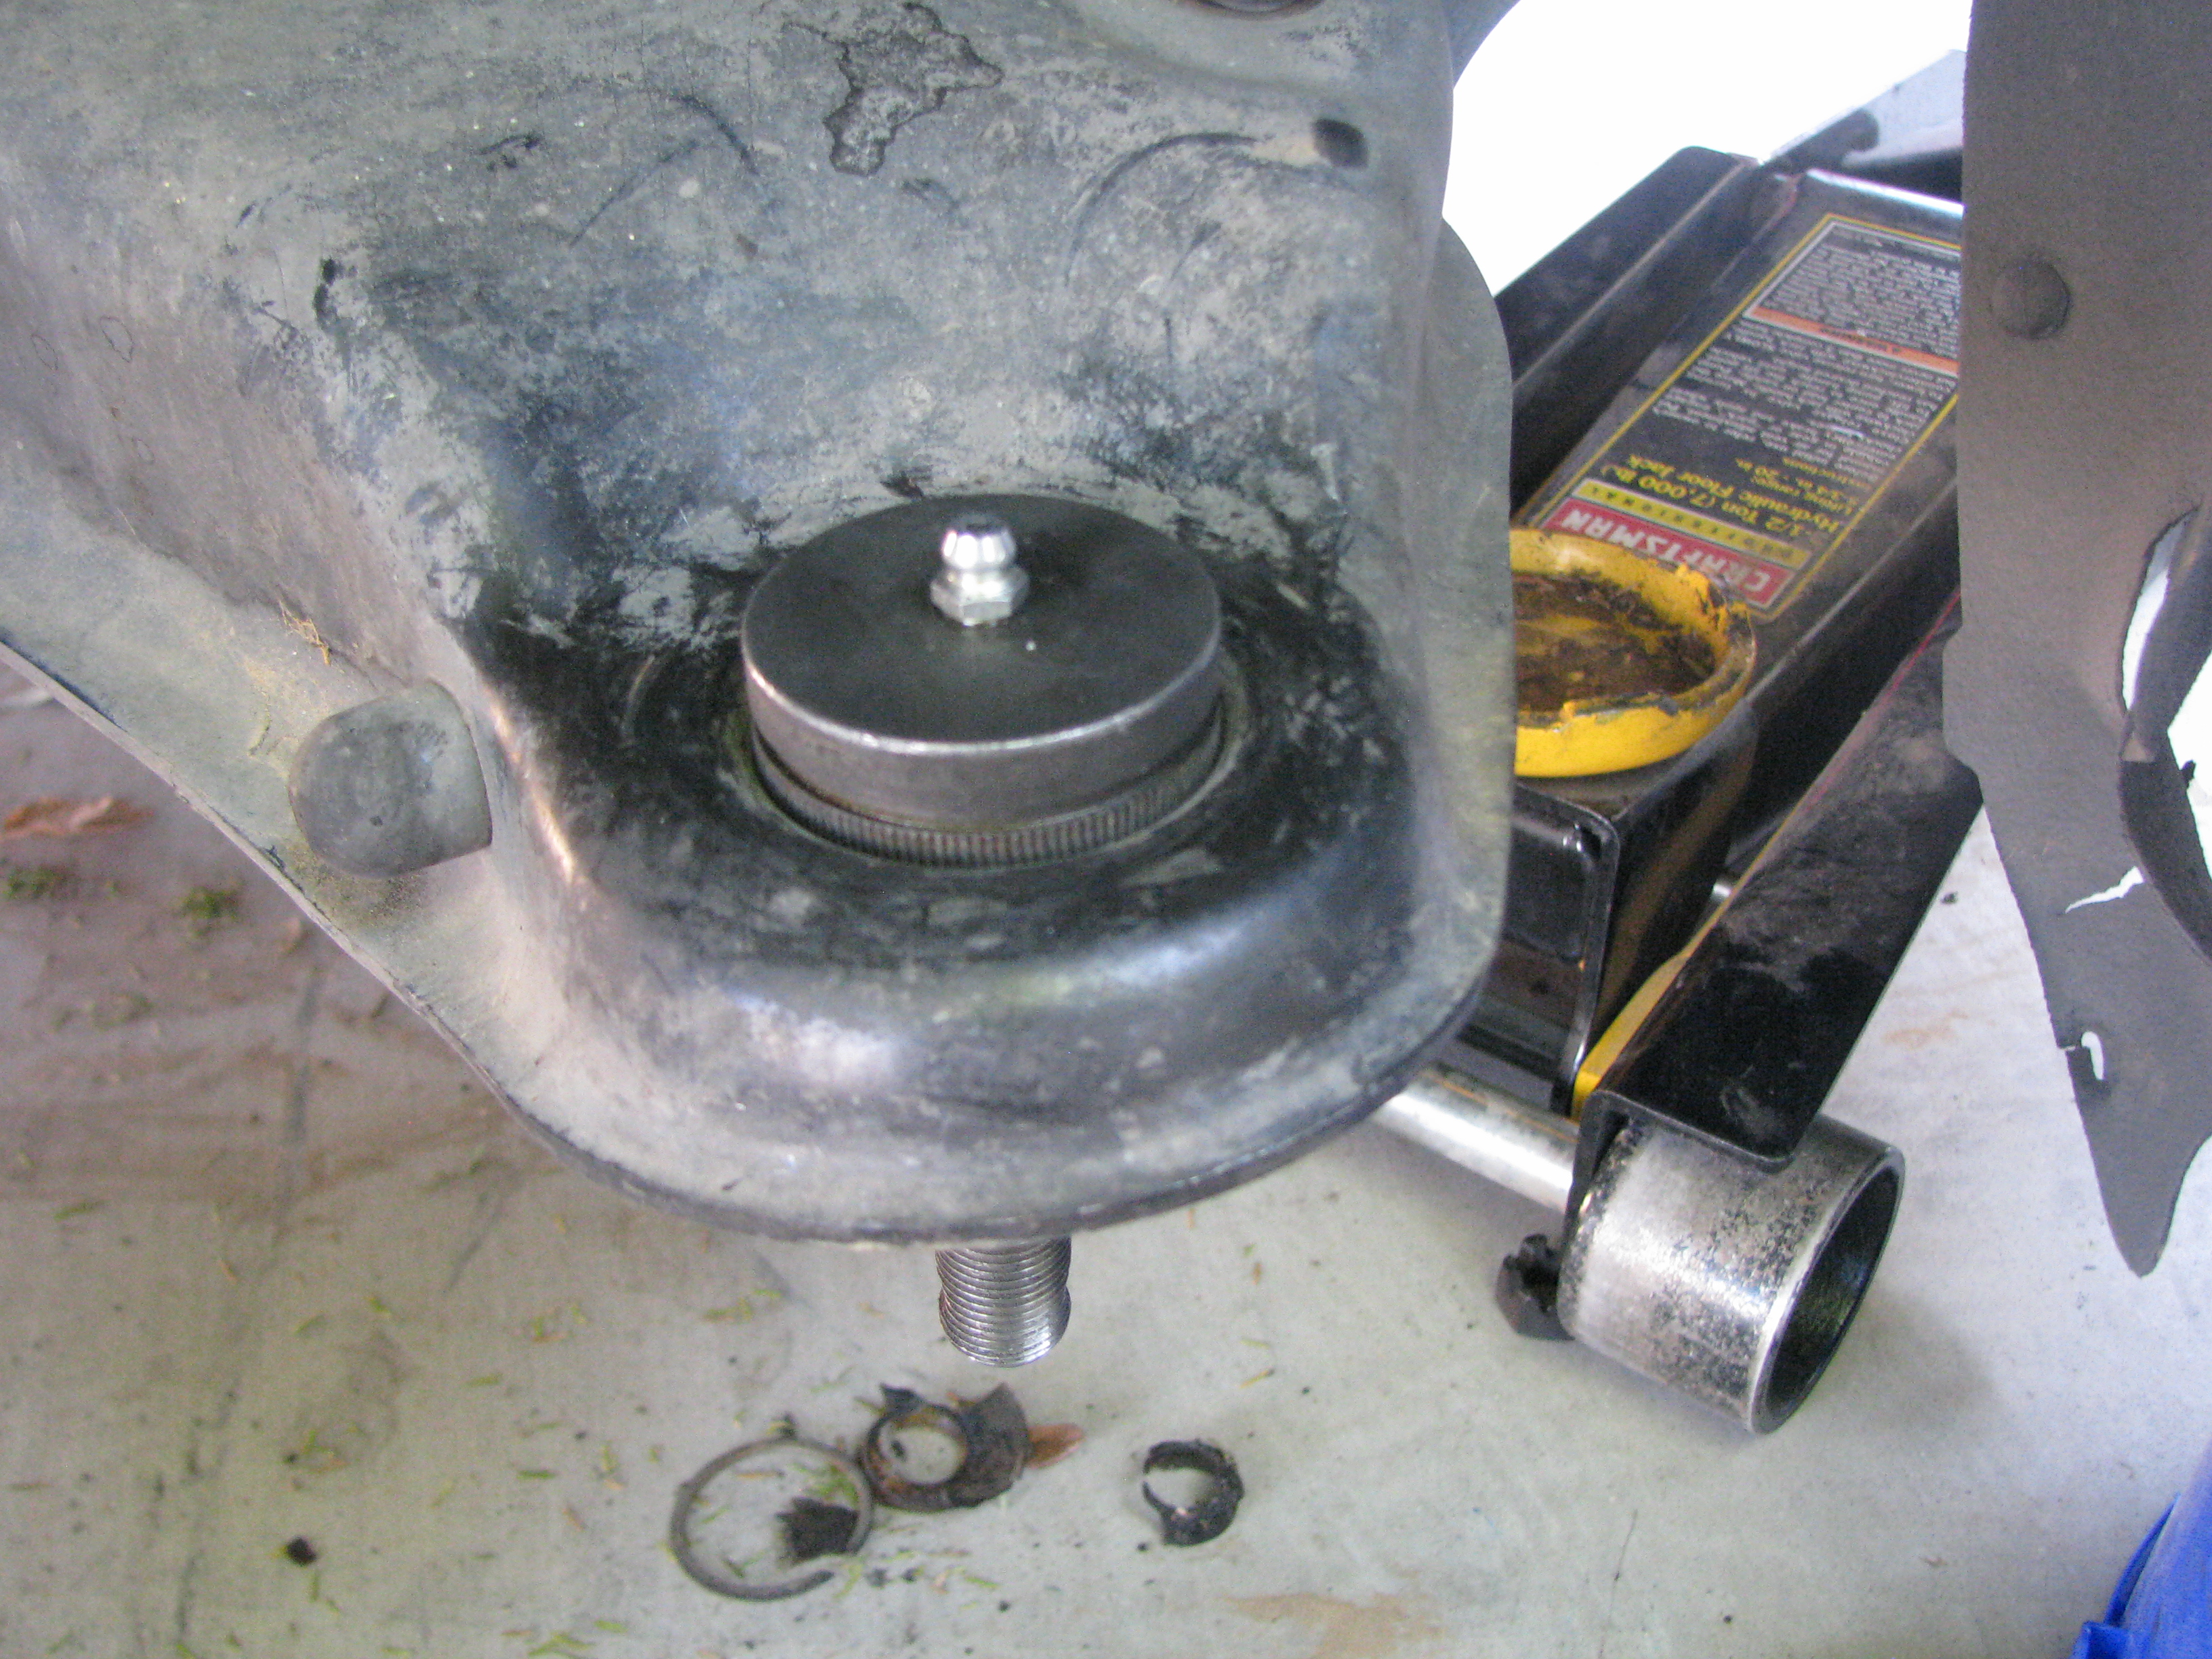 Look, it's even a greasable one, unlike the factory piece! 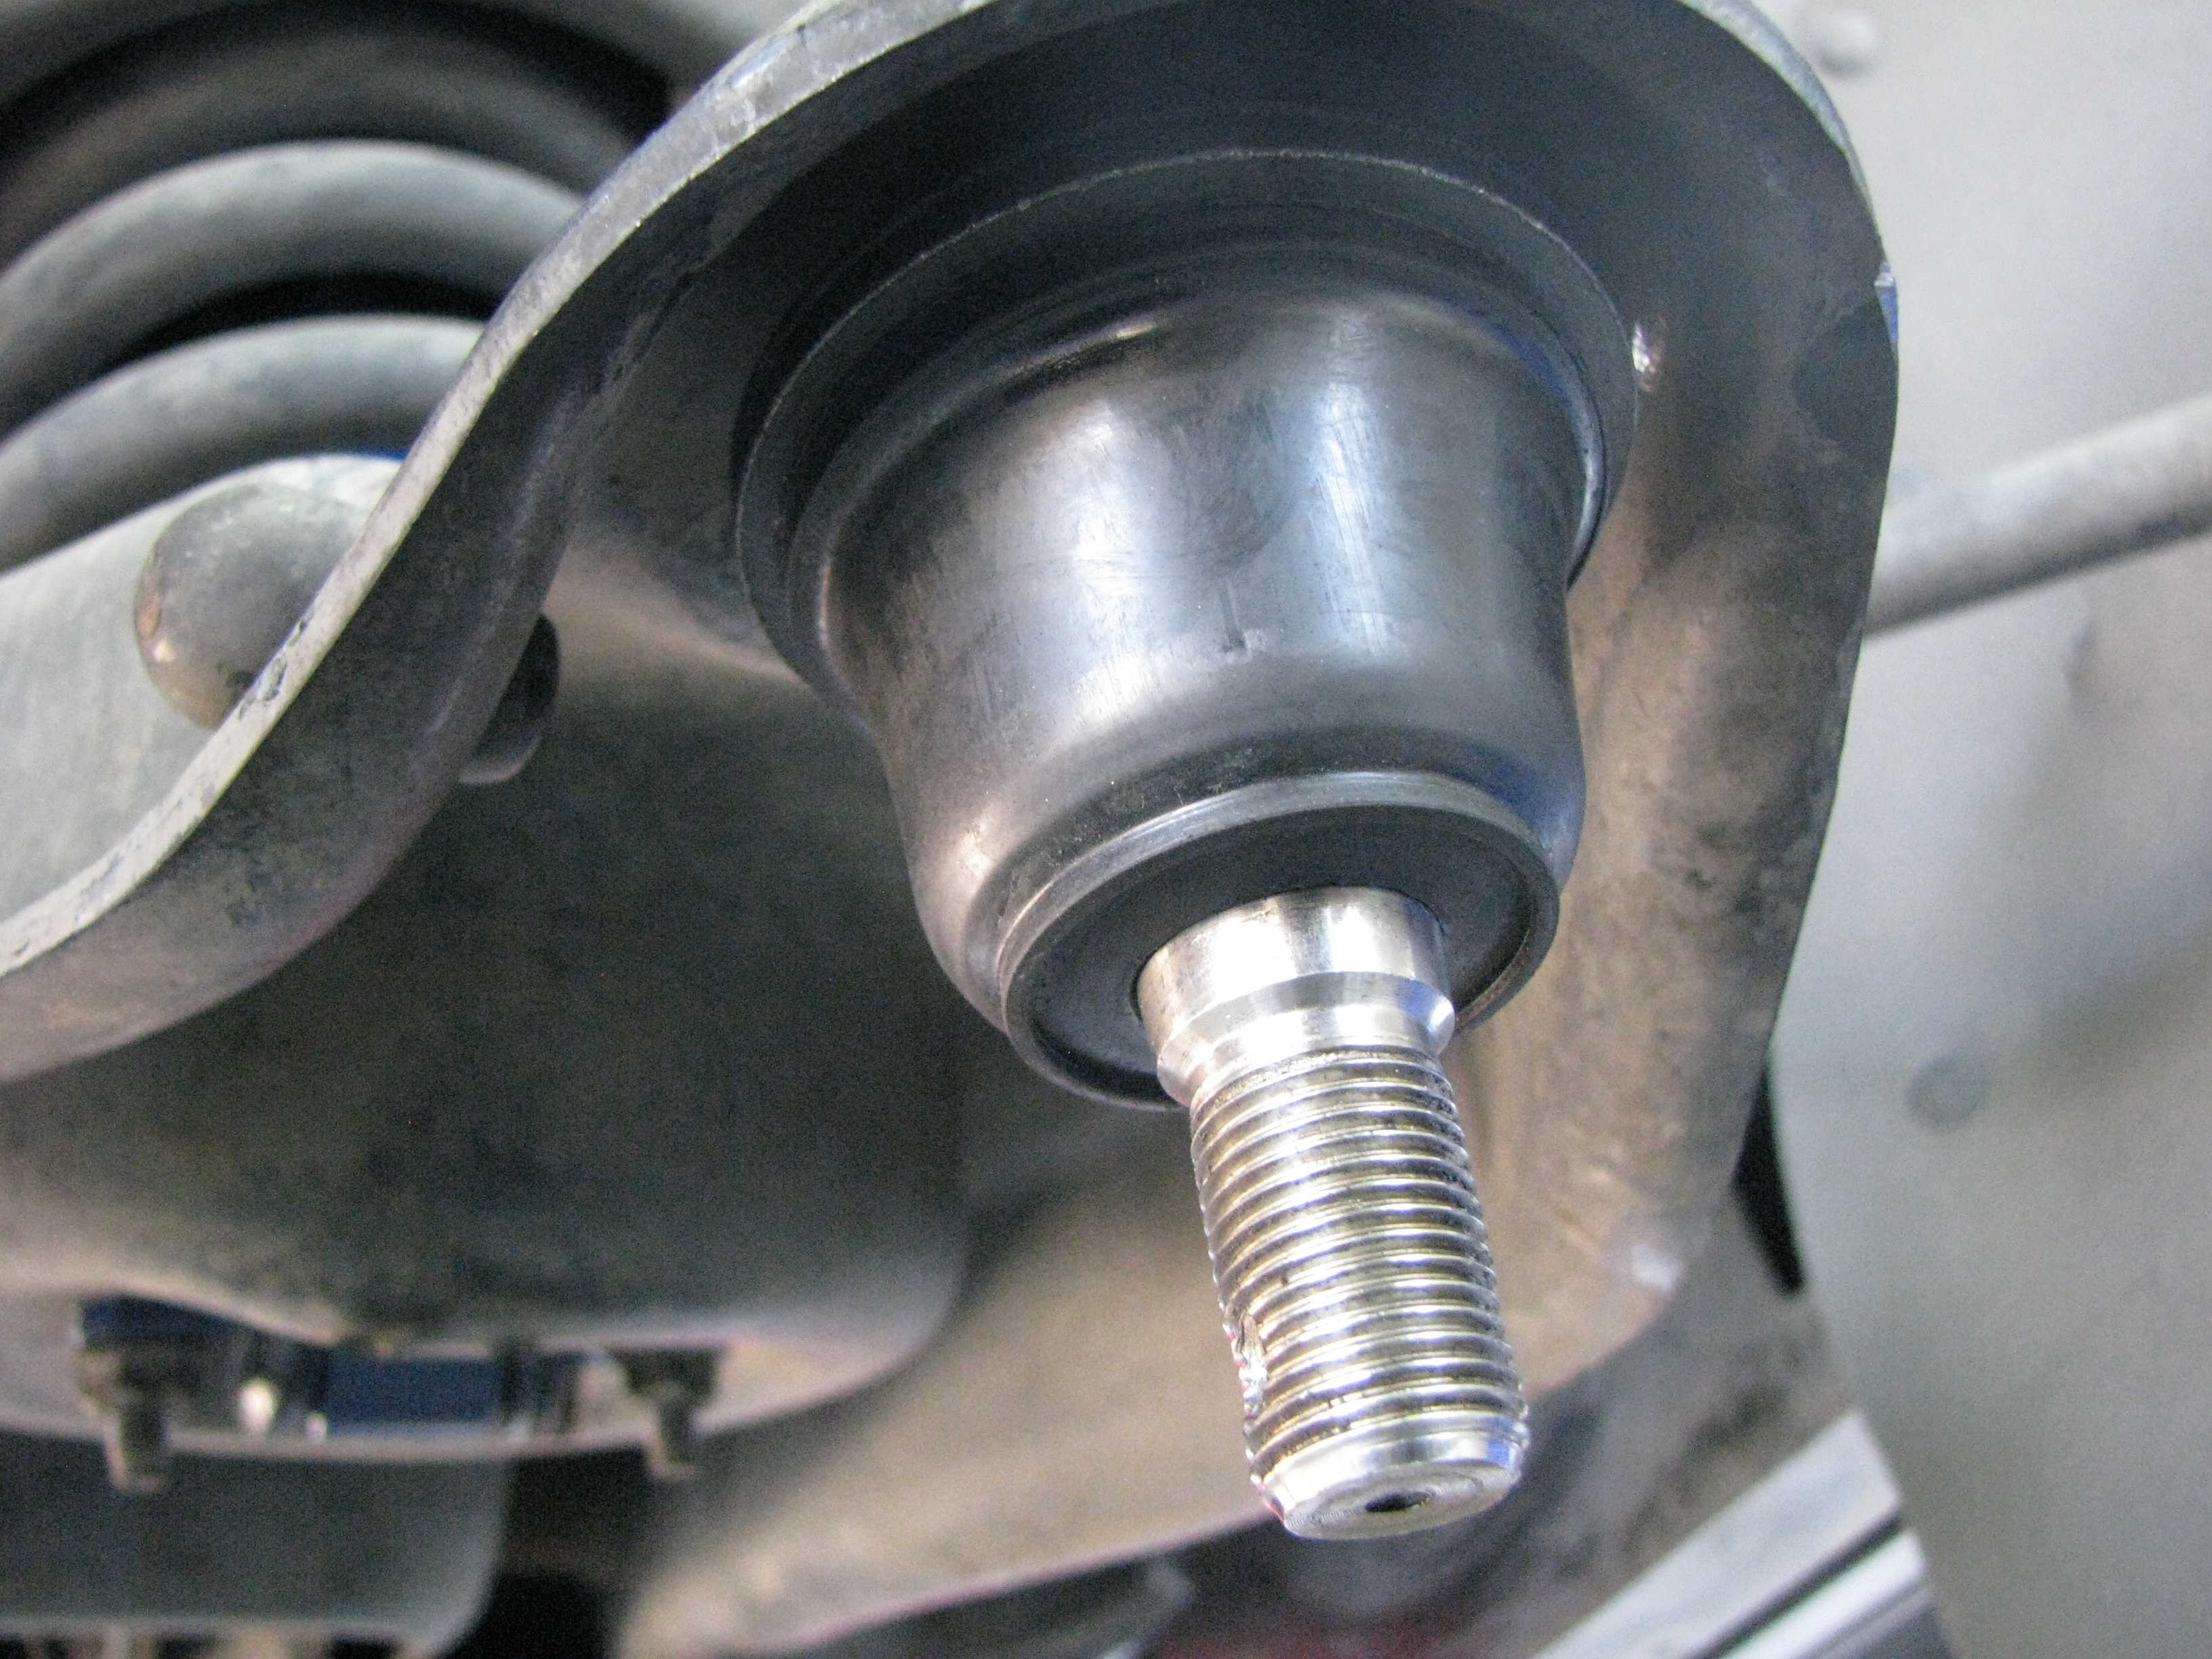 Shiniest piece of the whole truck, right here. 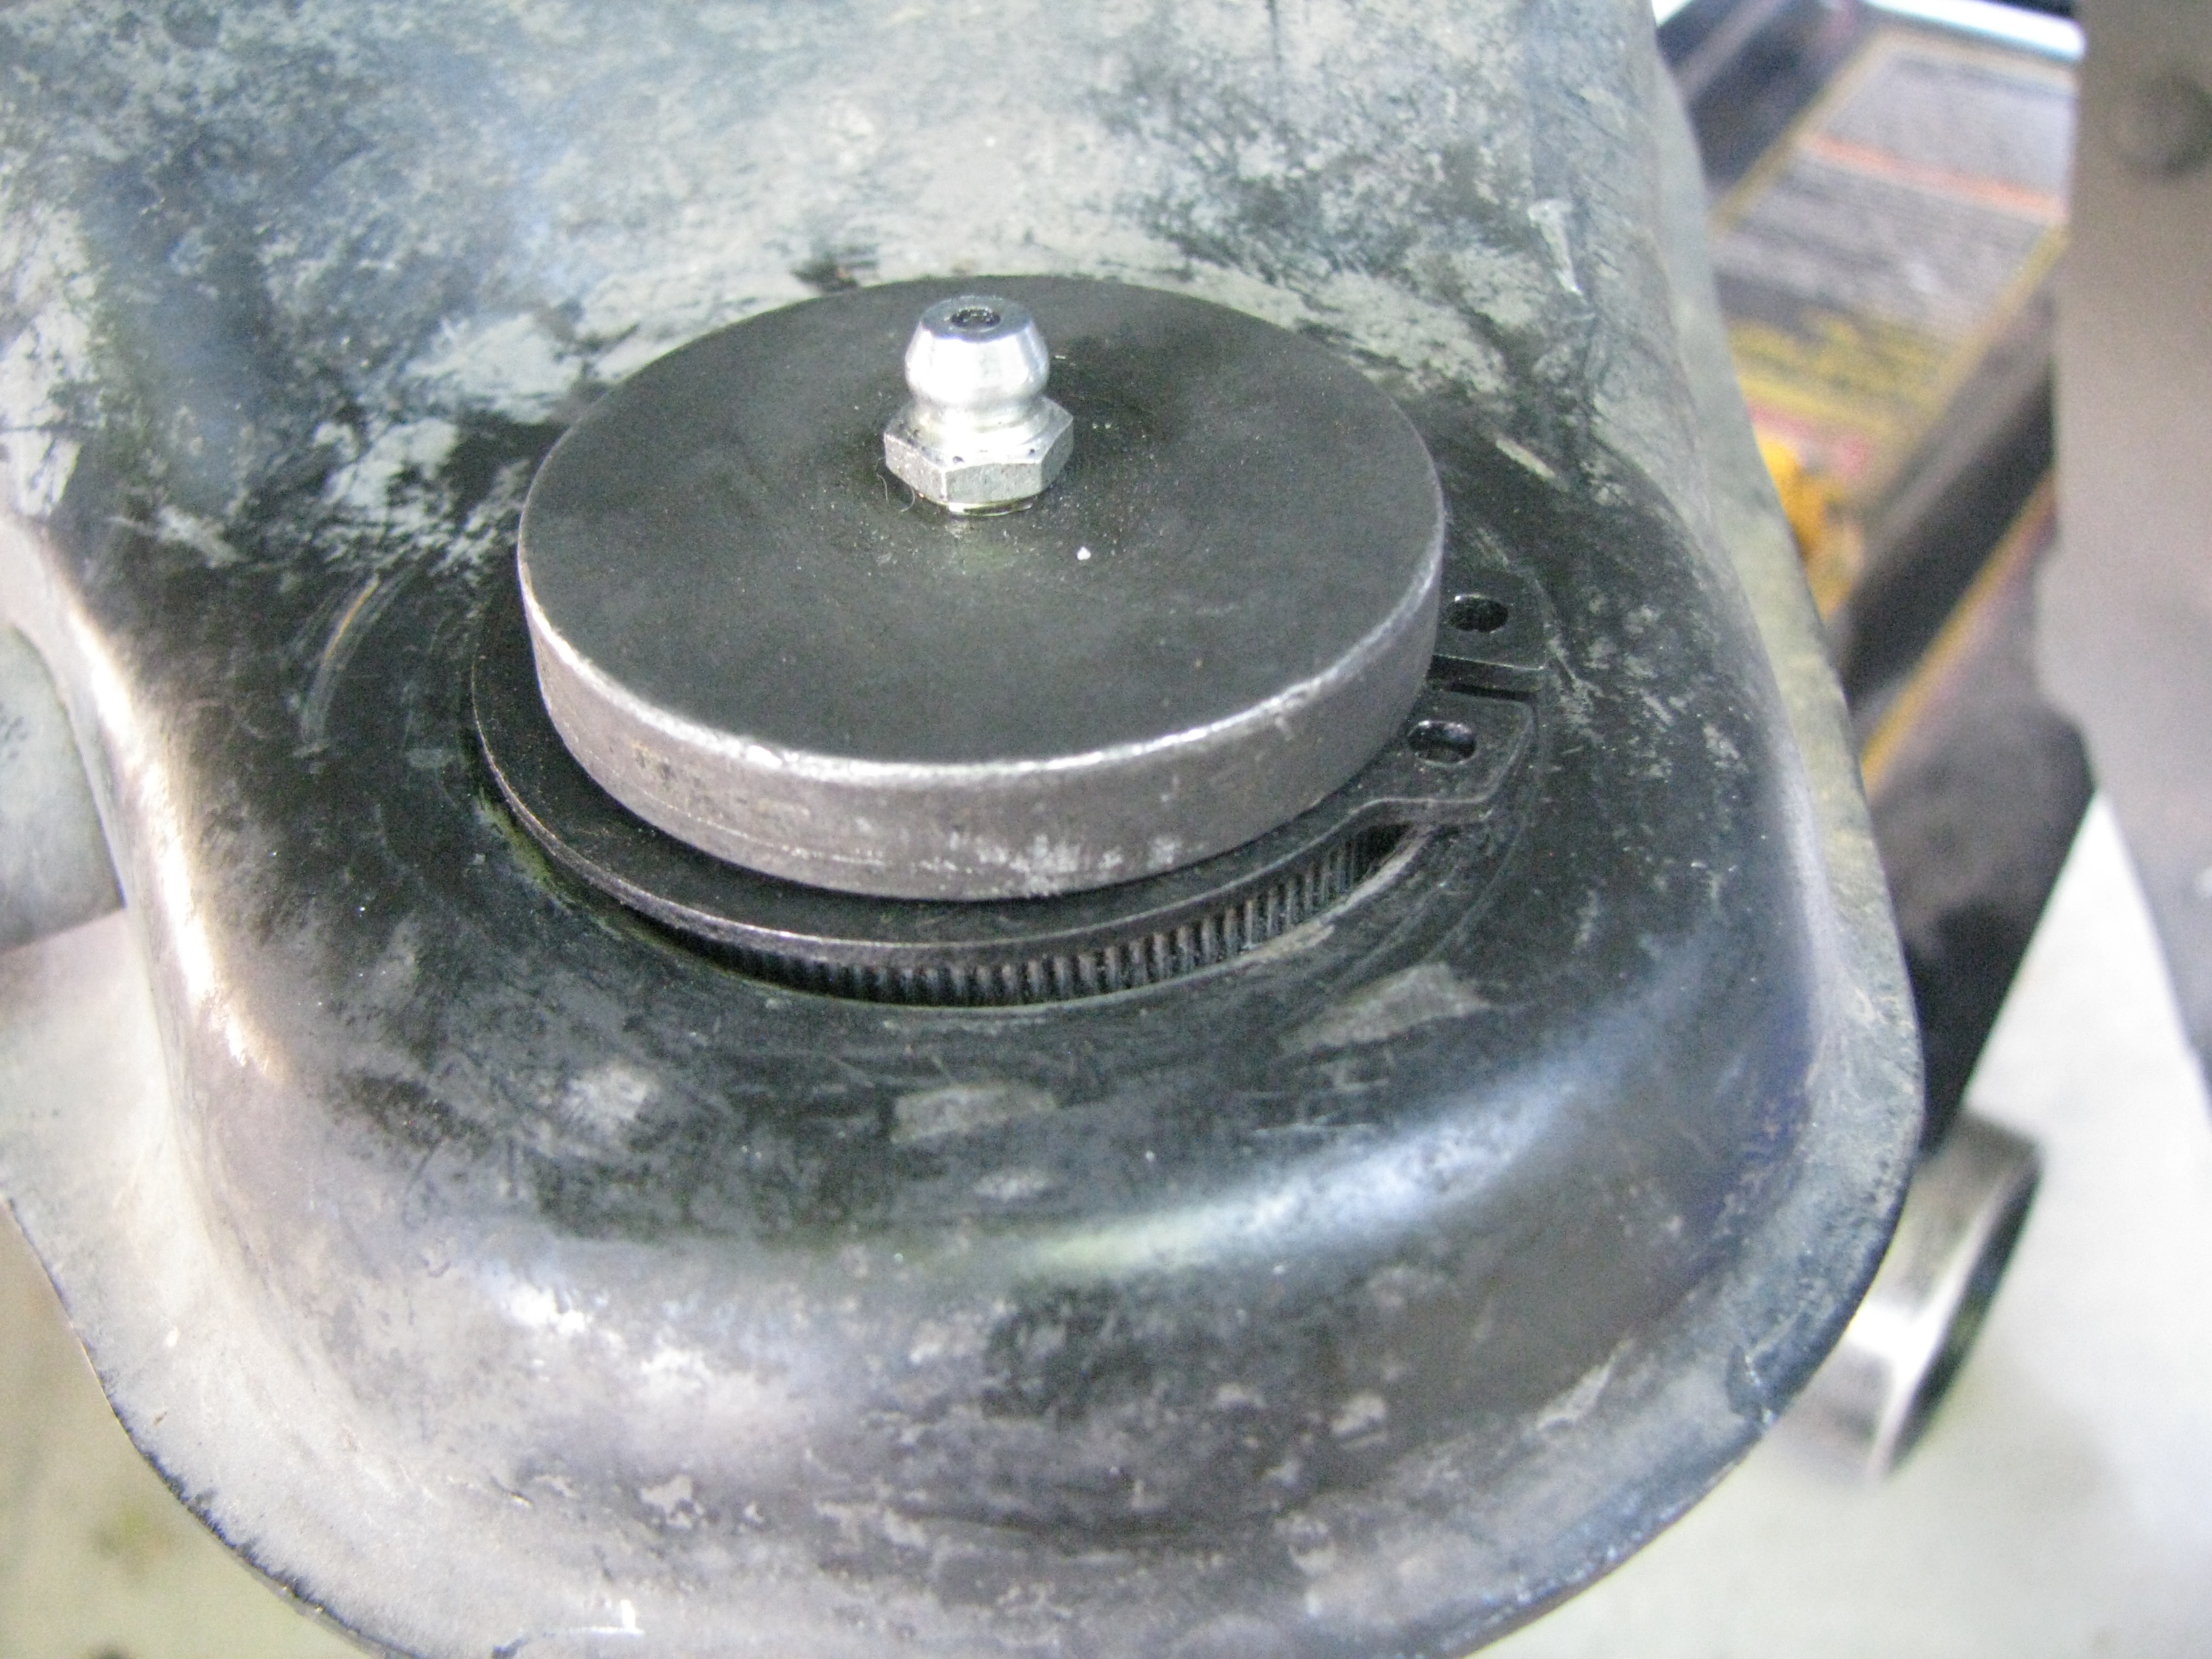 Comes with a new C-clip too. 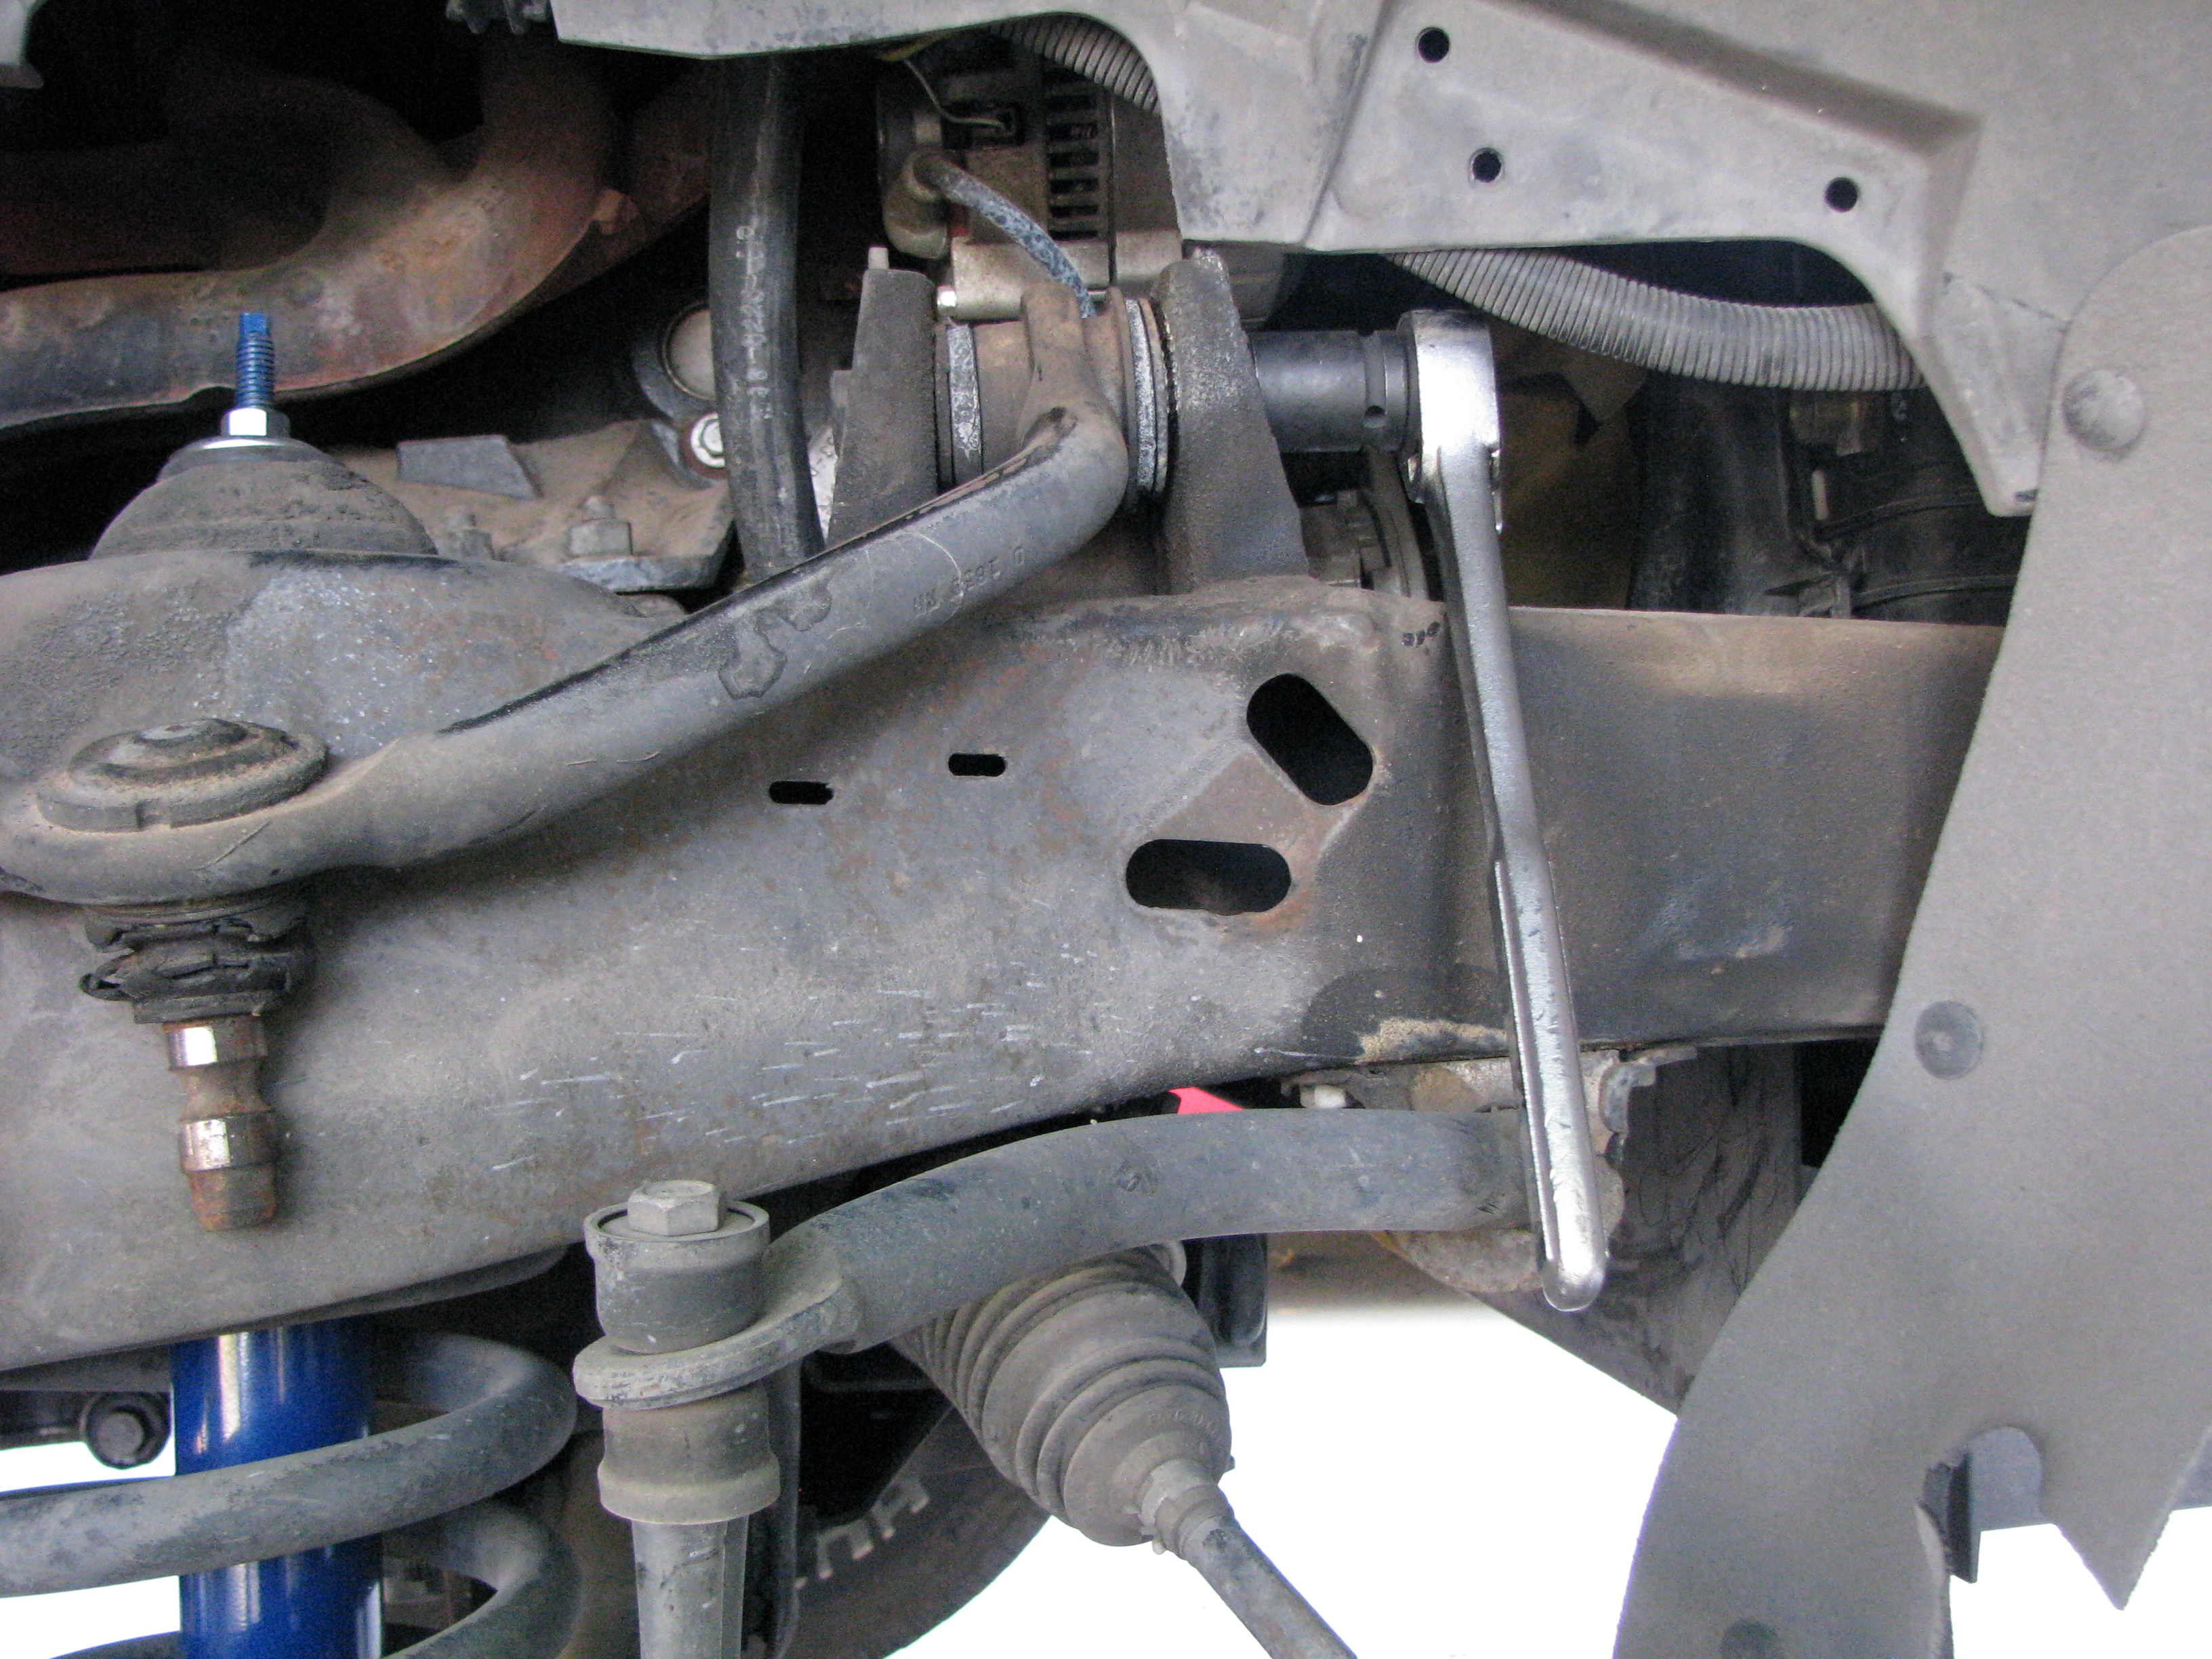 Upper ball joints, at least on this era of Ranger, are not officially replaceable within the control arm. You can actually buy the joints themselves, but the only account I've found of a replacement without replacing the whole arm, required pulling it and using a very large press anyway. So, out with the bigass bolts that hold the arm to the truck. 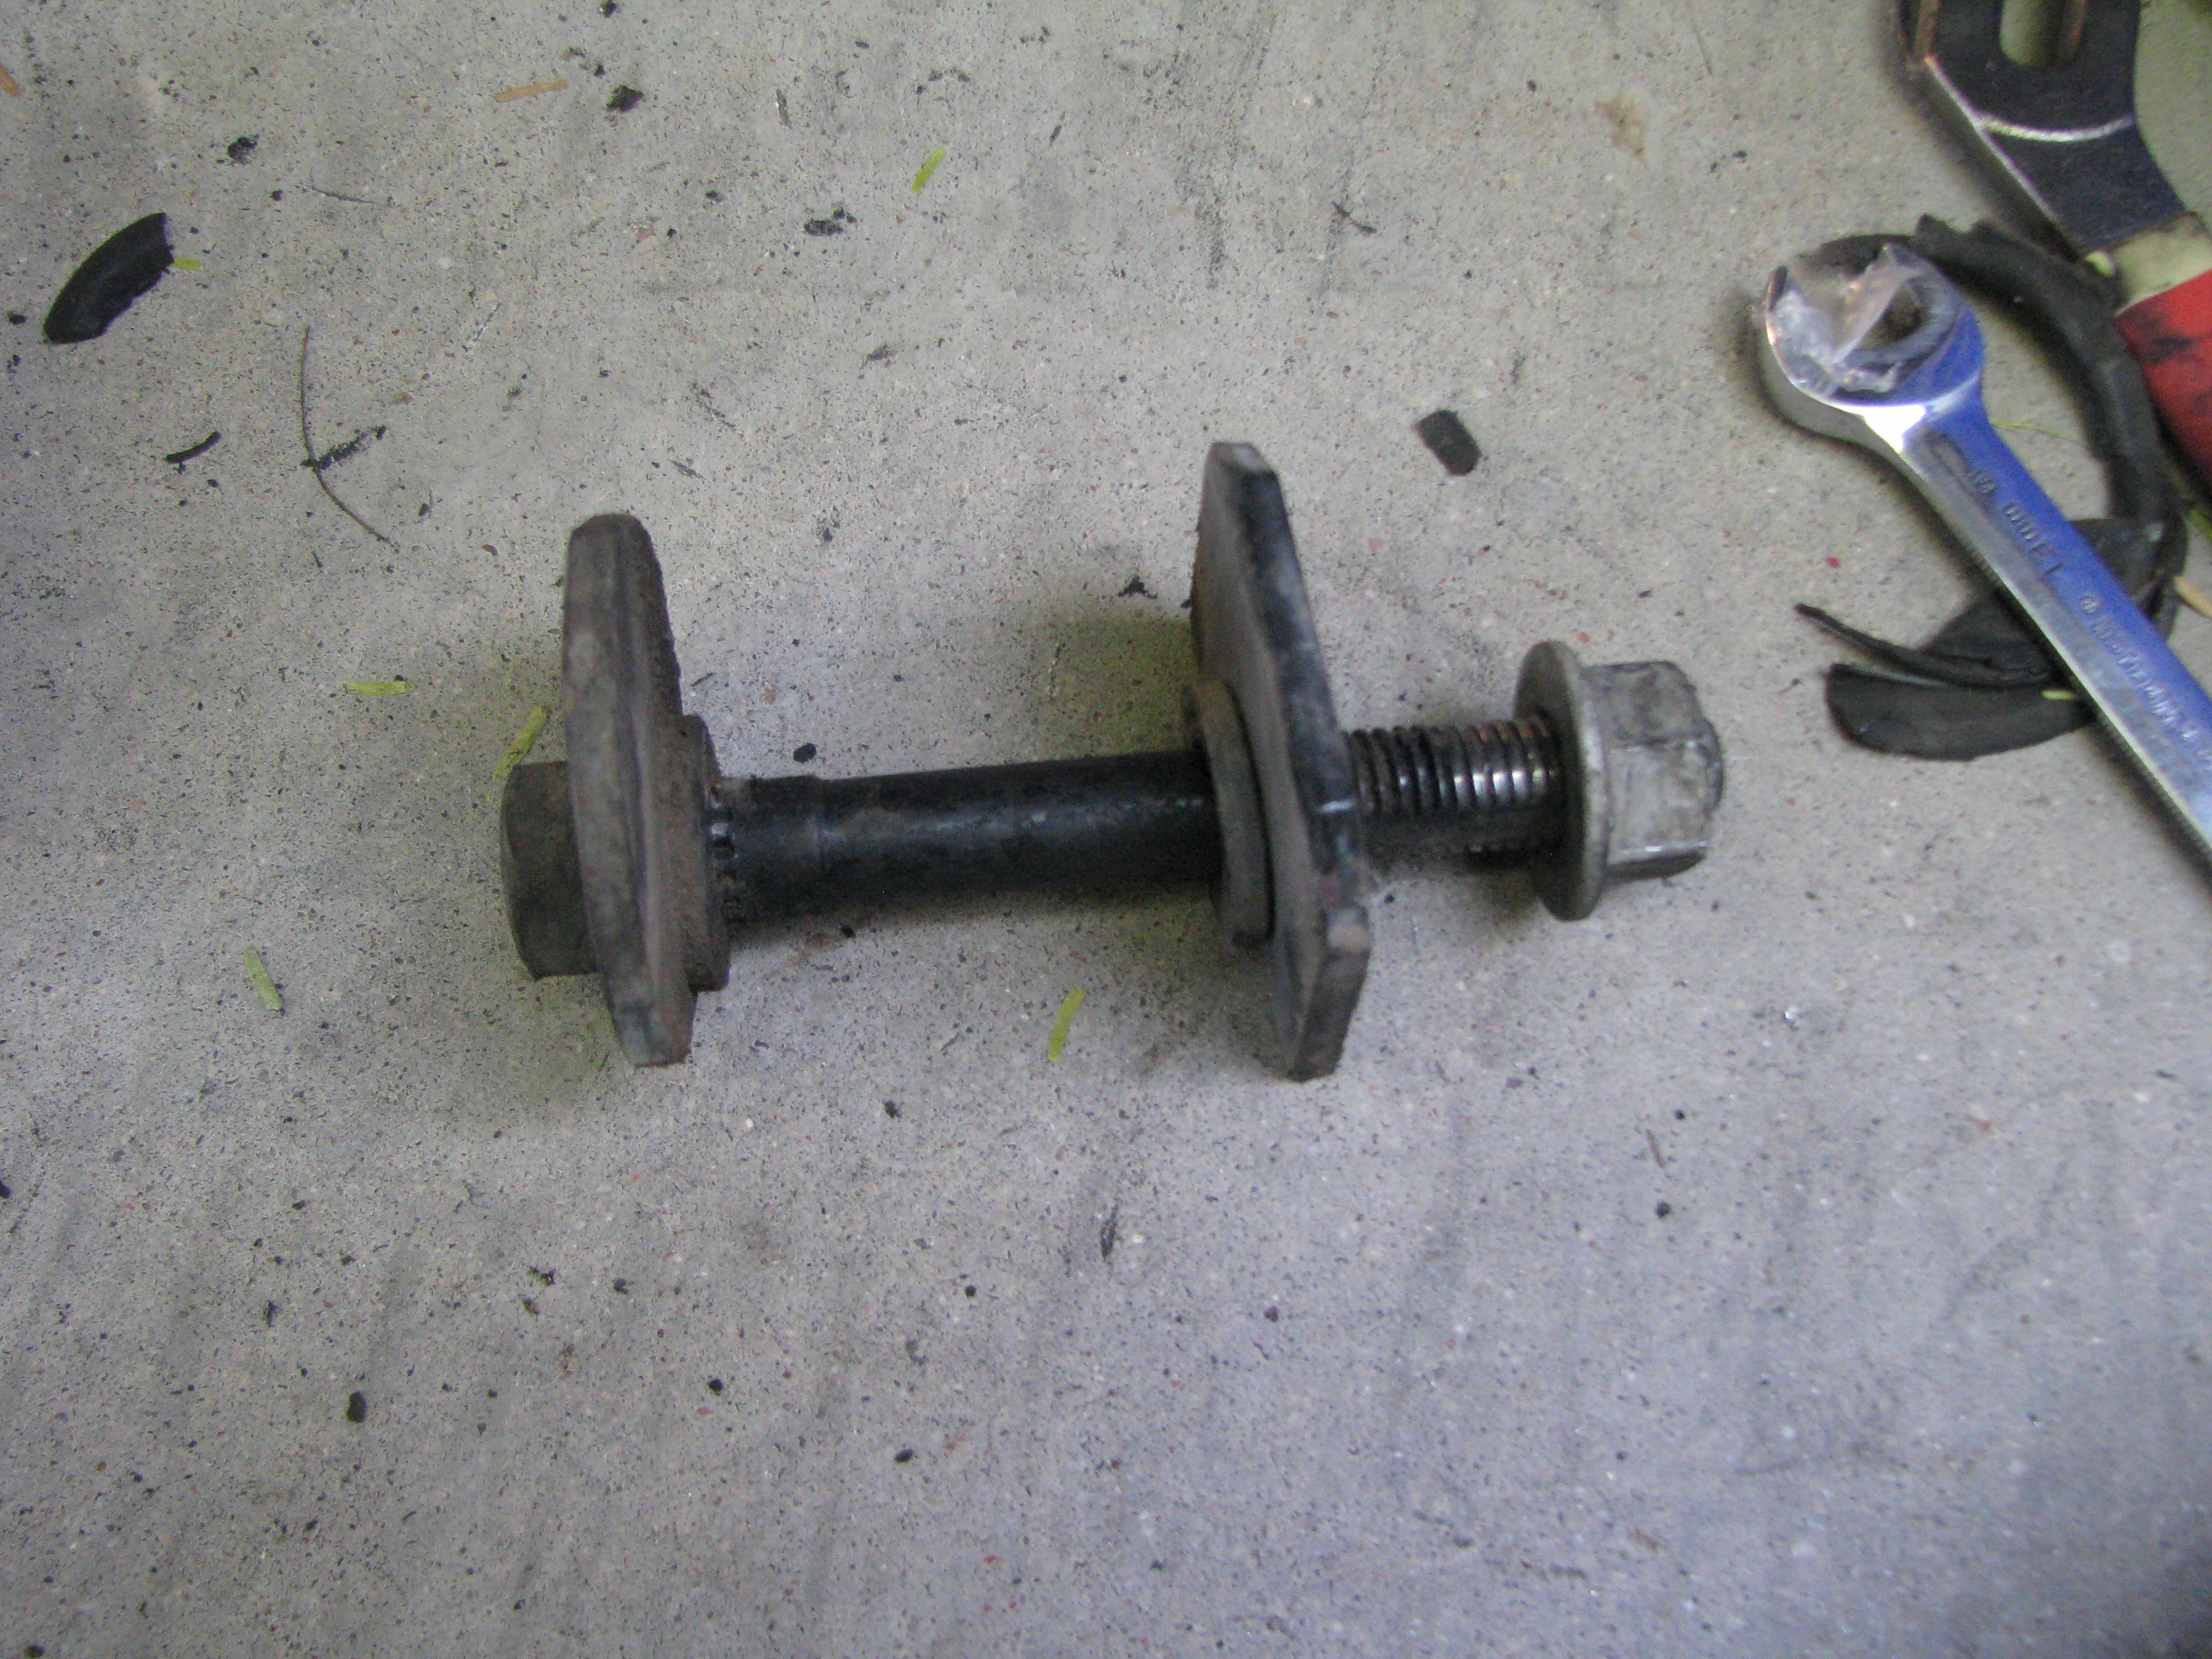 Eccentric bolt, camber washer, and nut. I'm going to need one hell of an alignment after this. 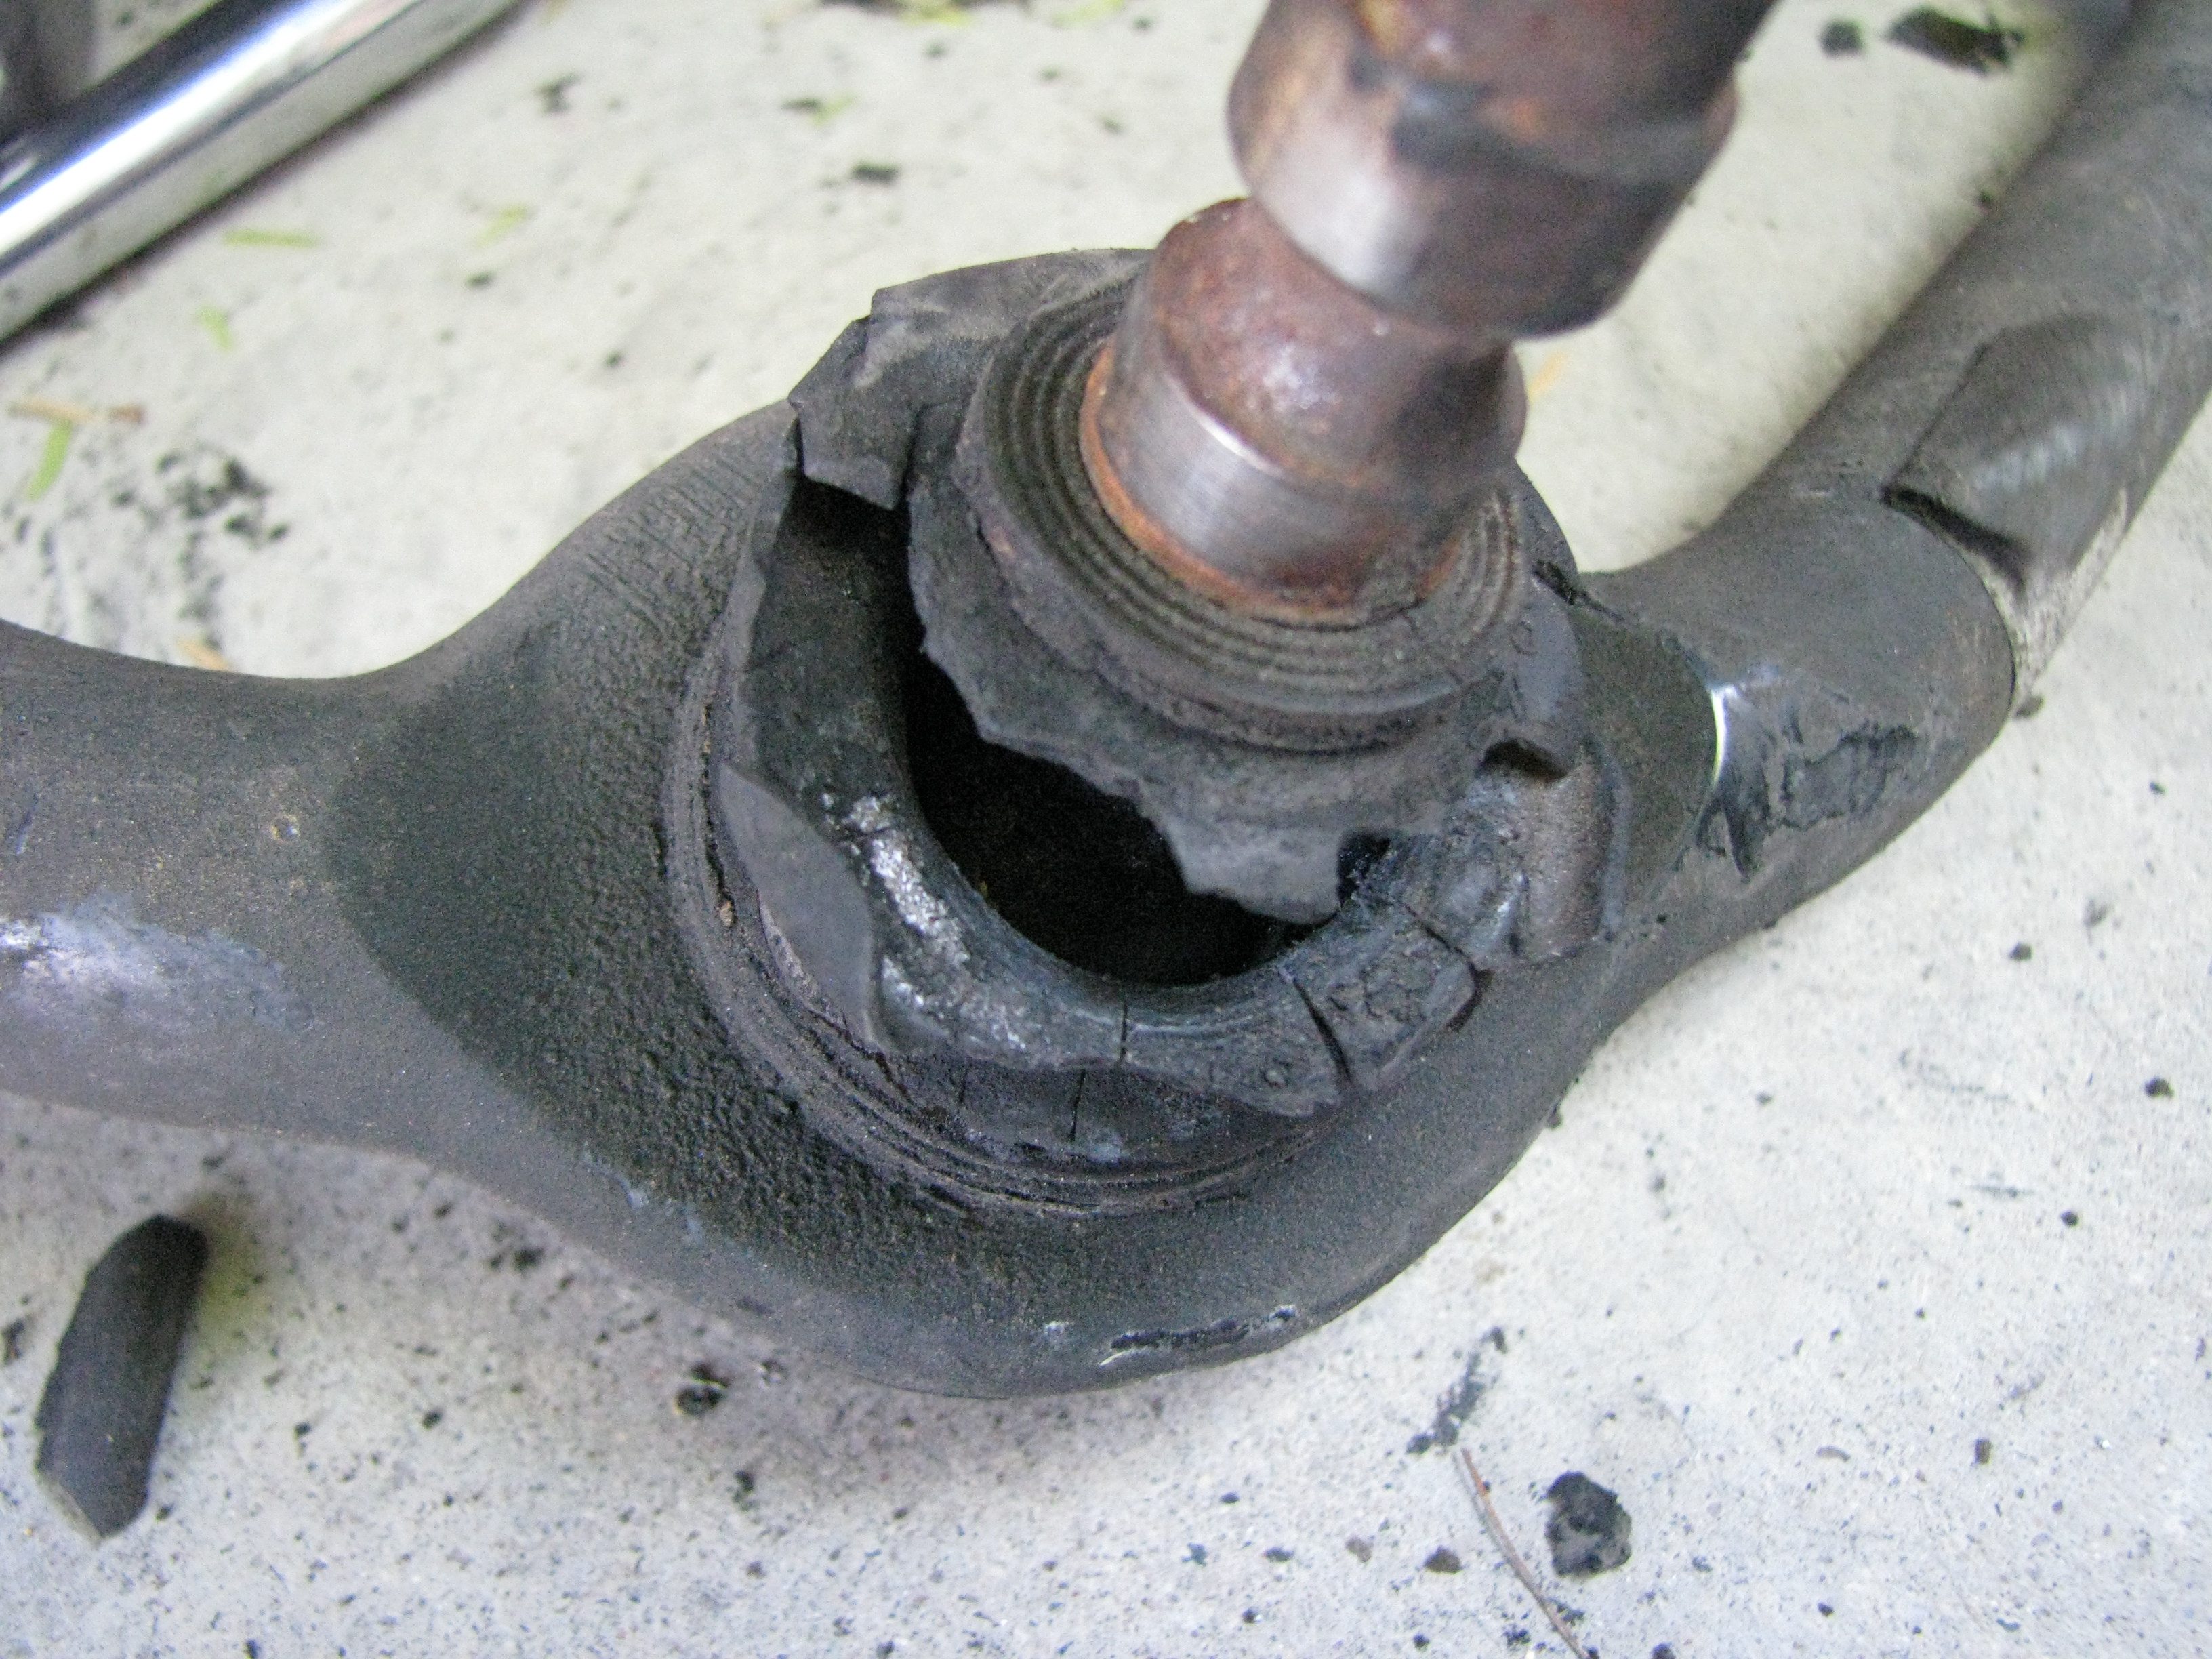 Also a teensy bit dry here. 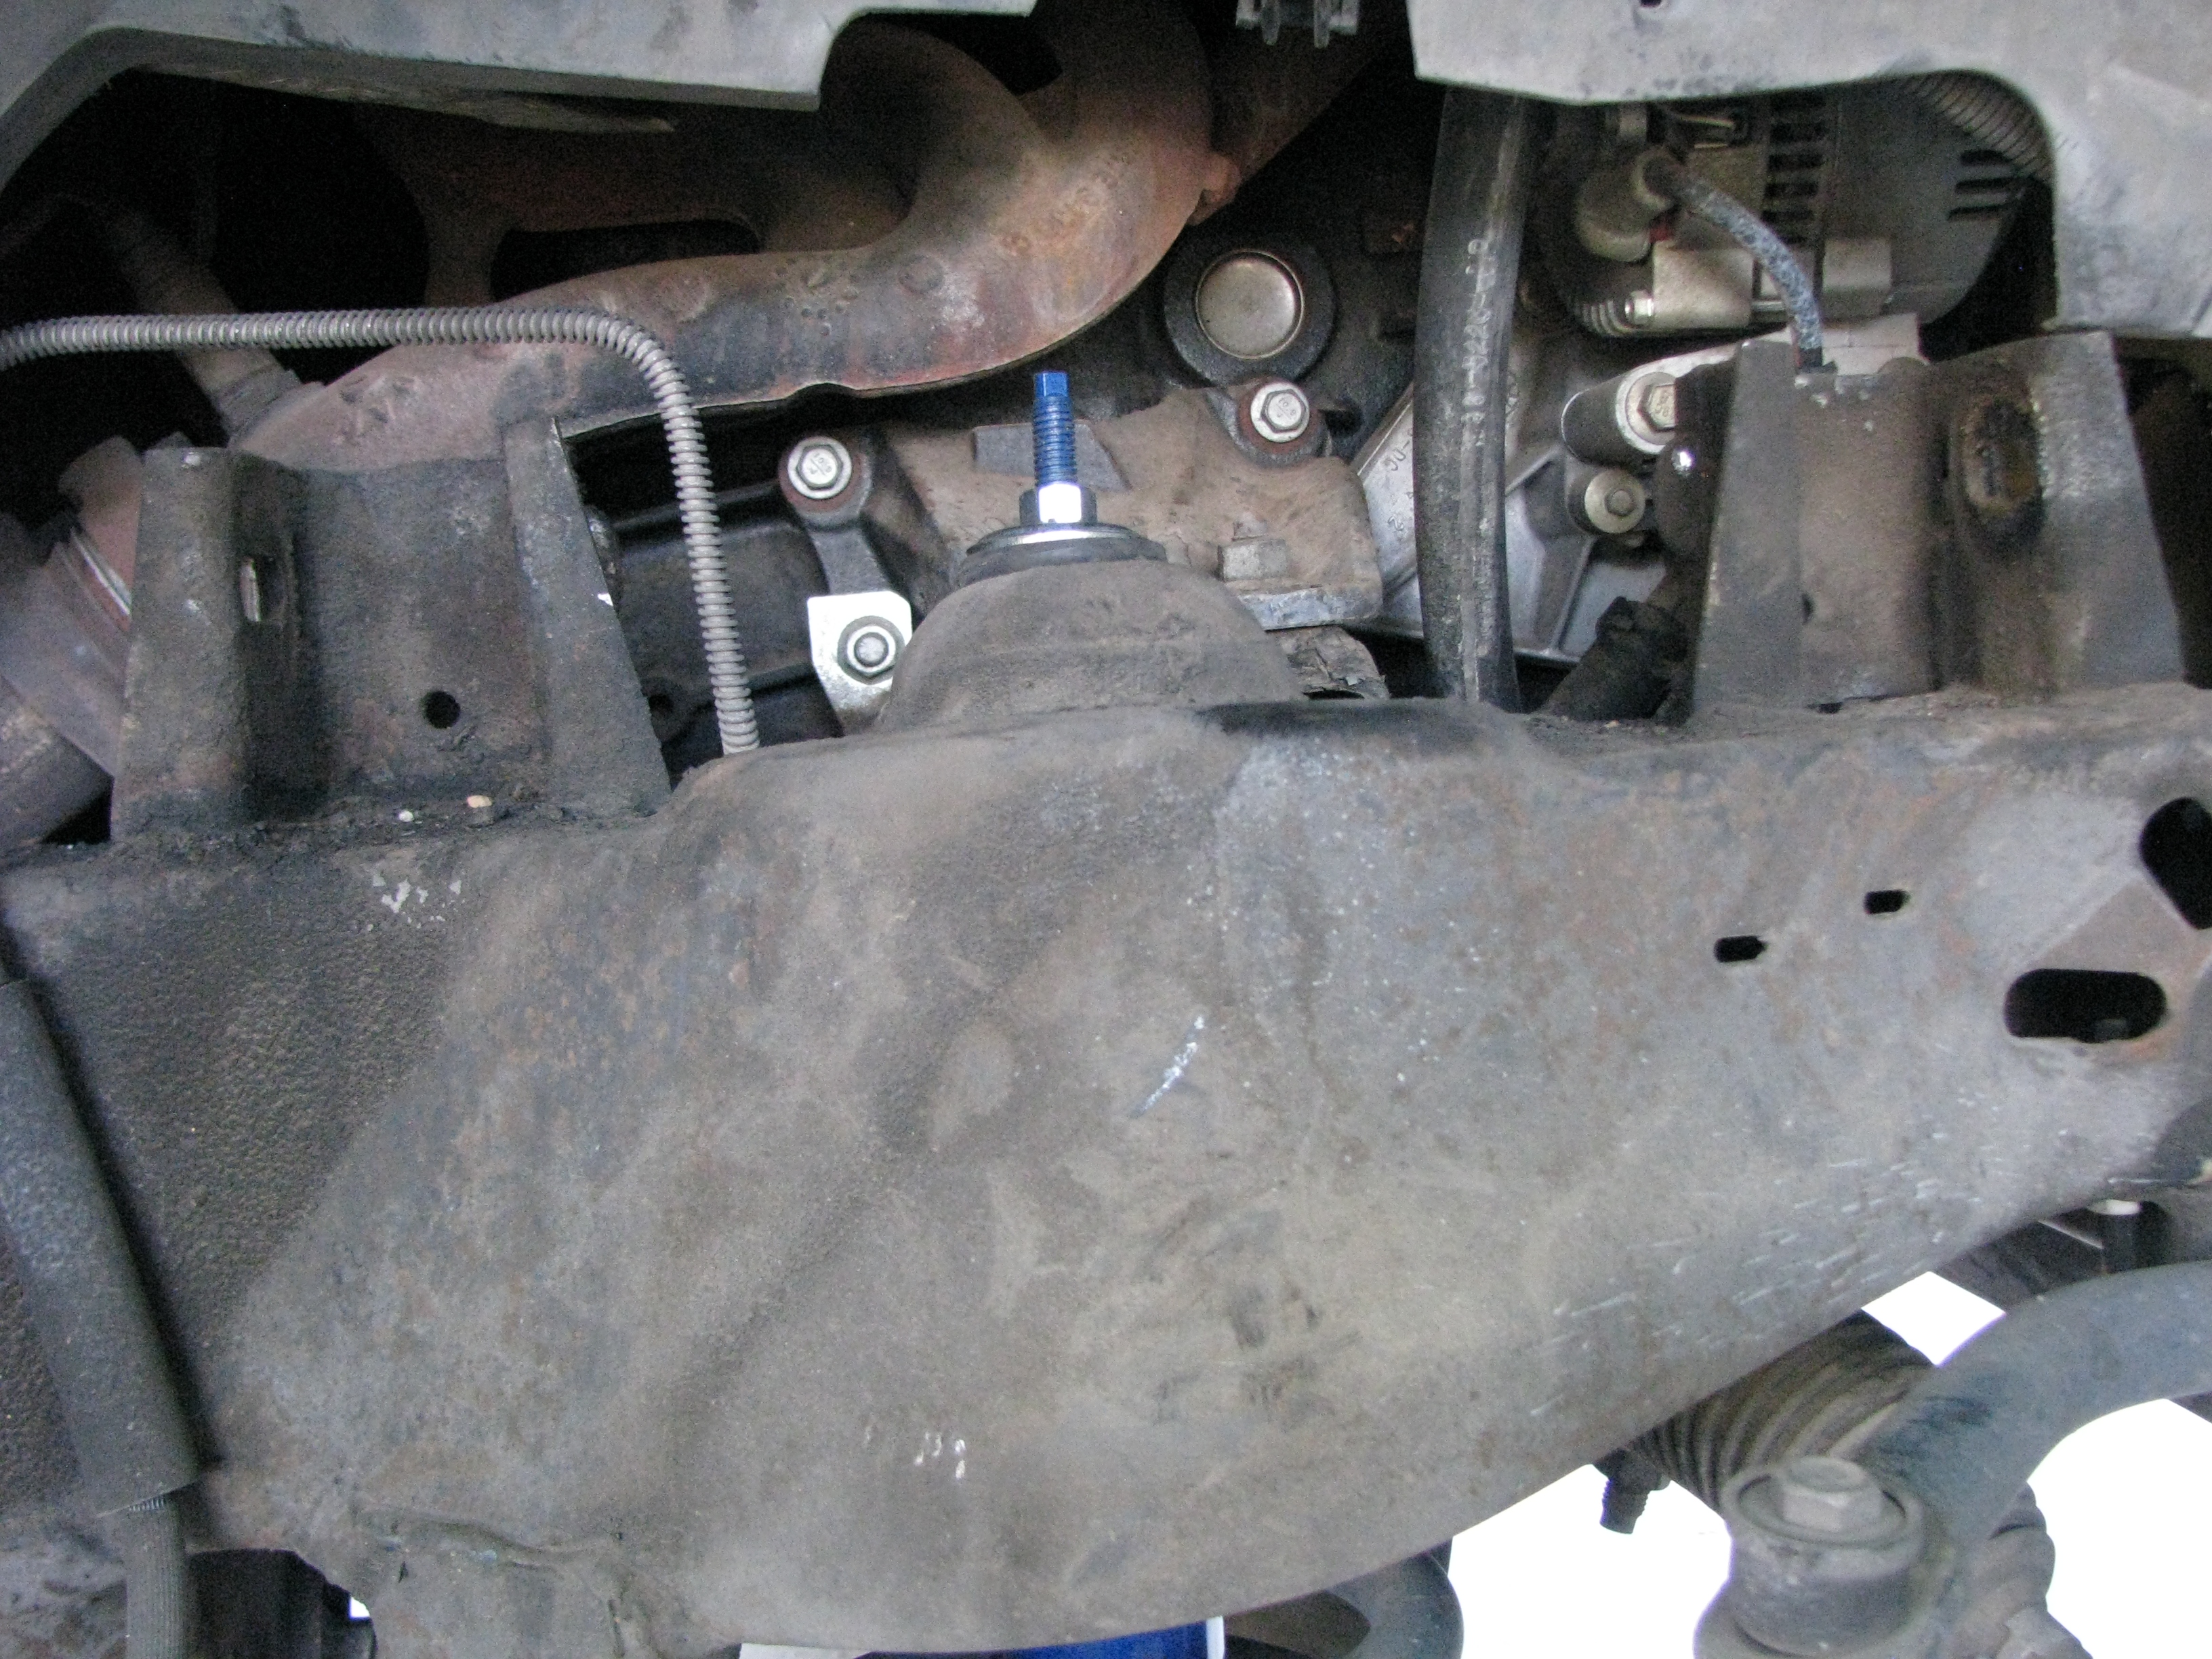 Control arm removed, upper shock nut installed. 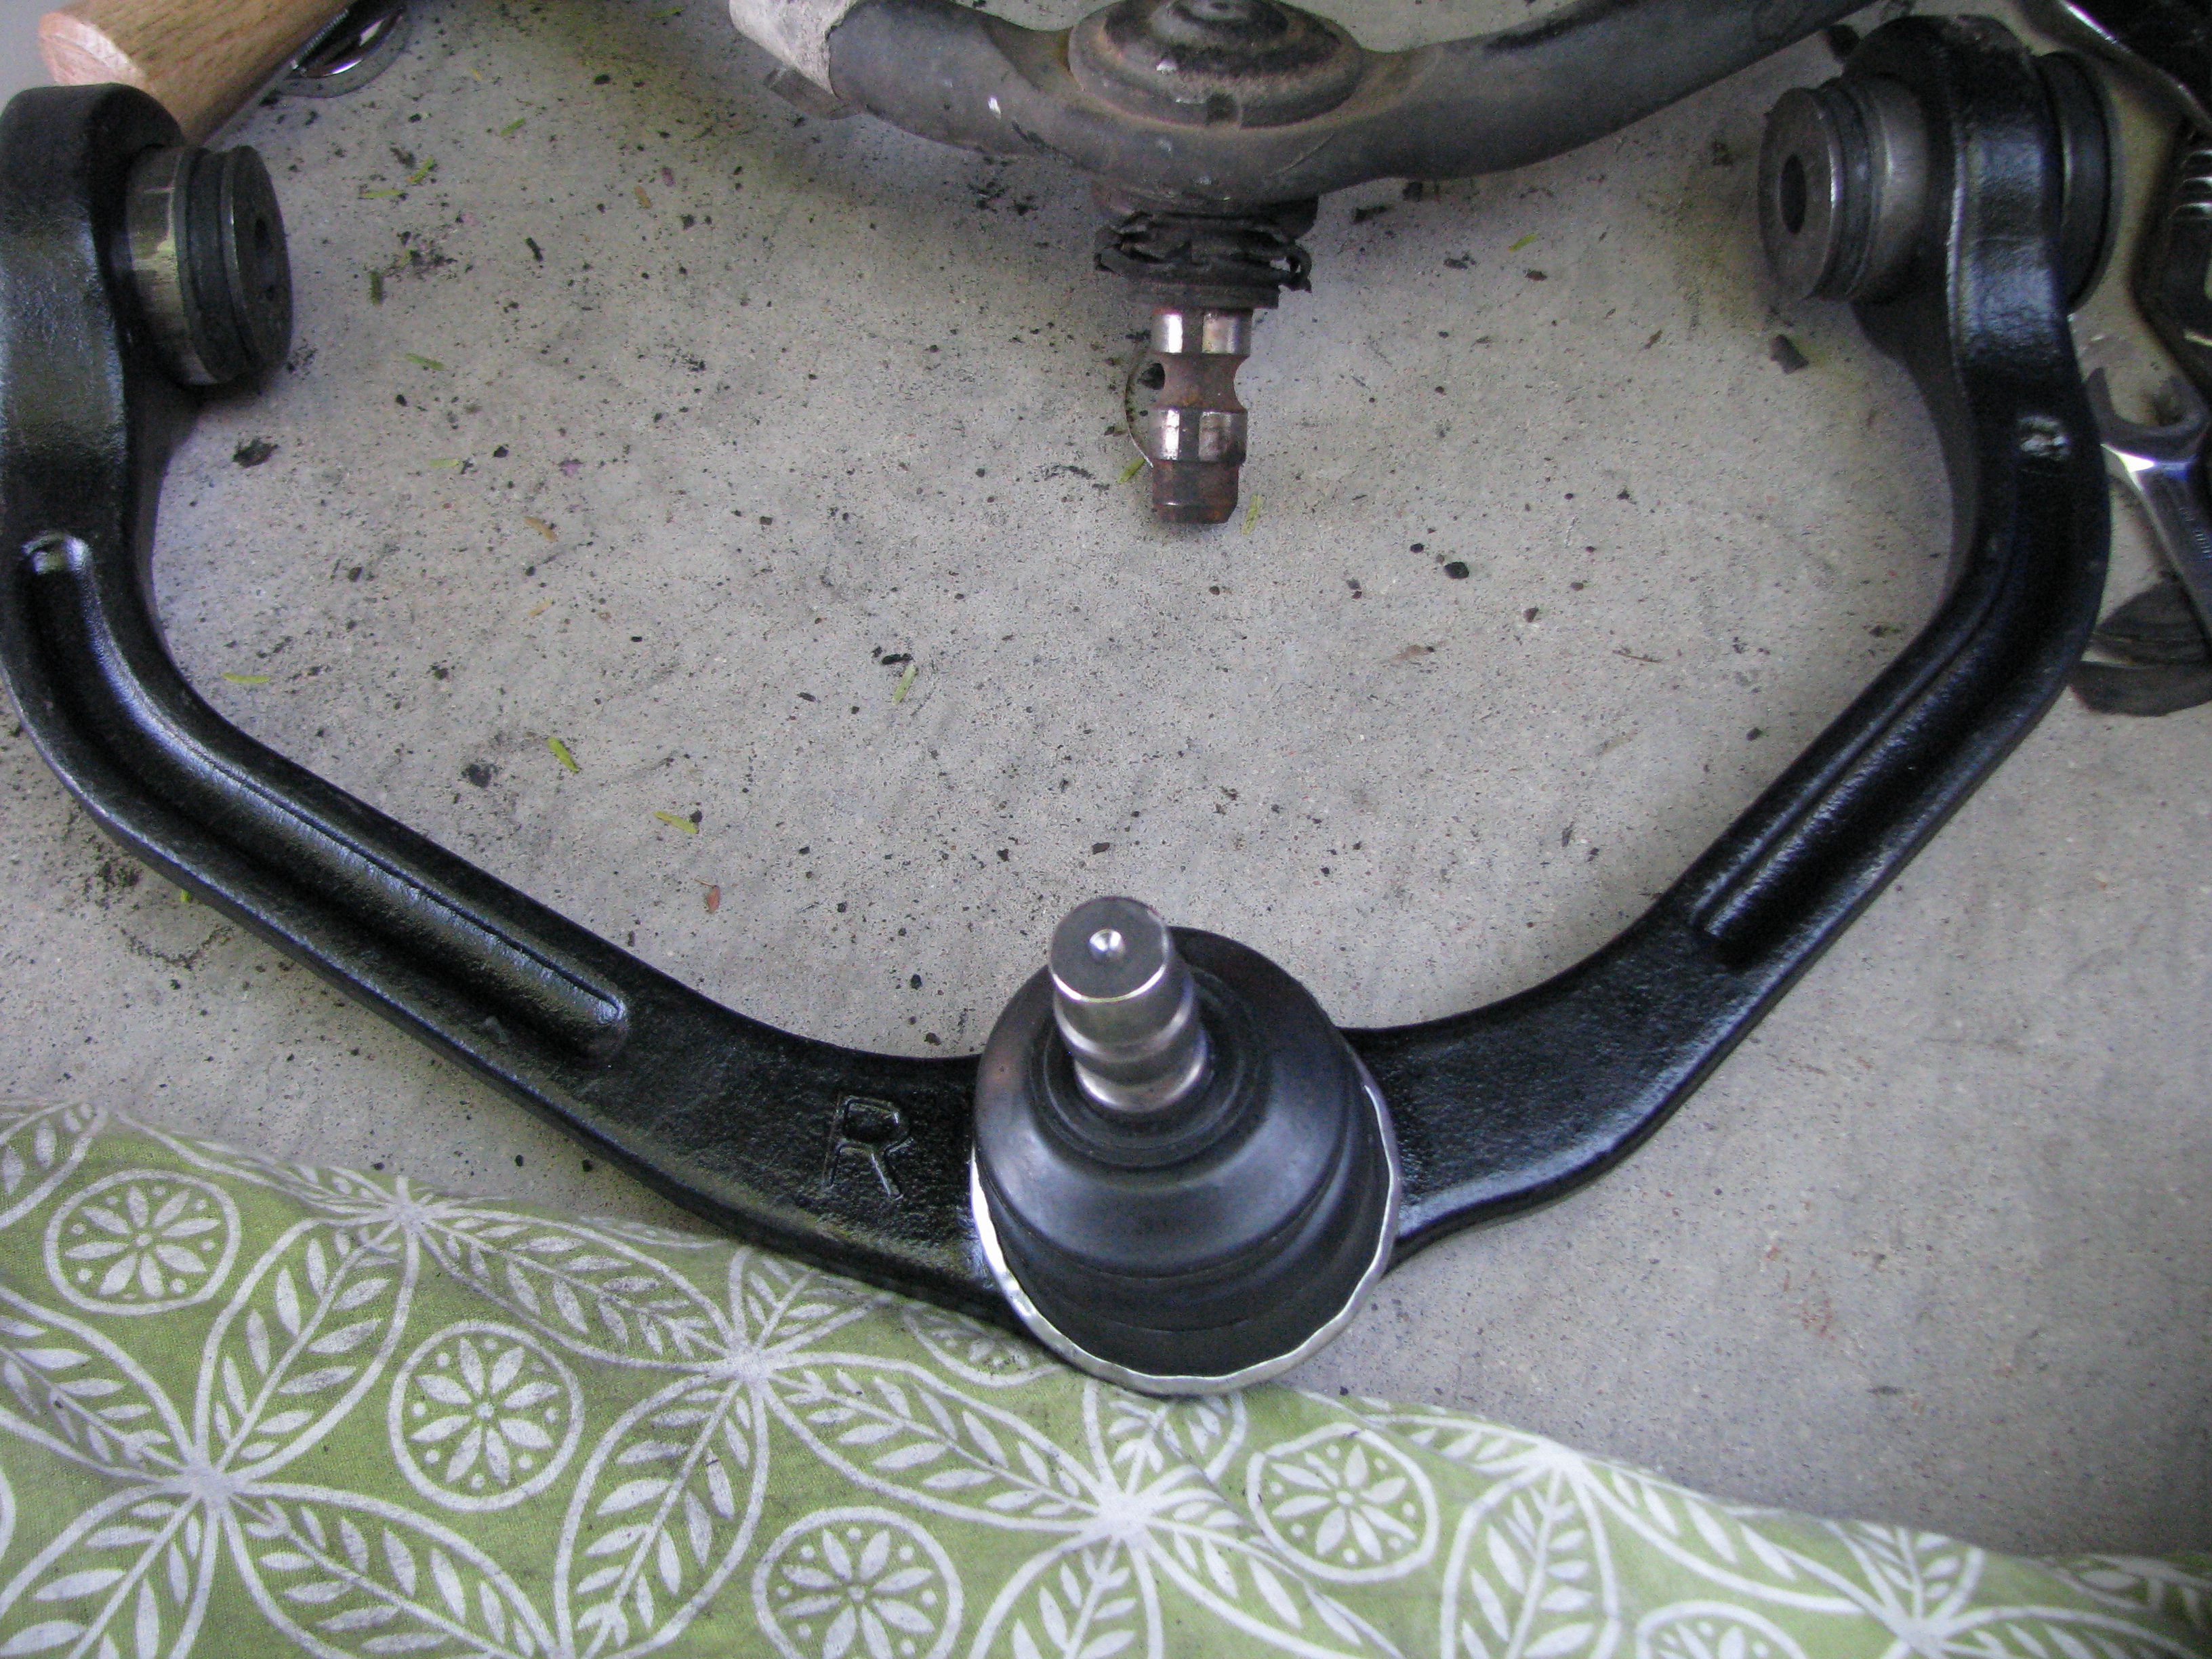 New upper arm next to old one. 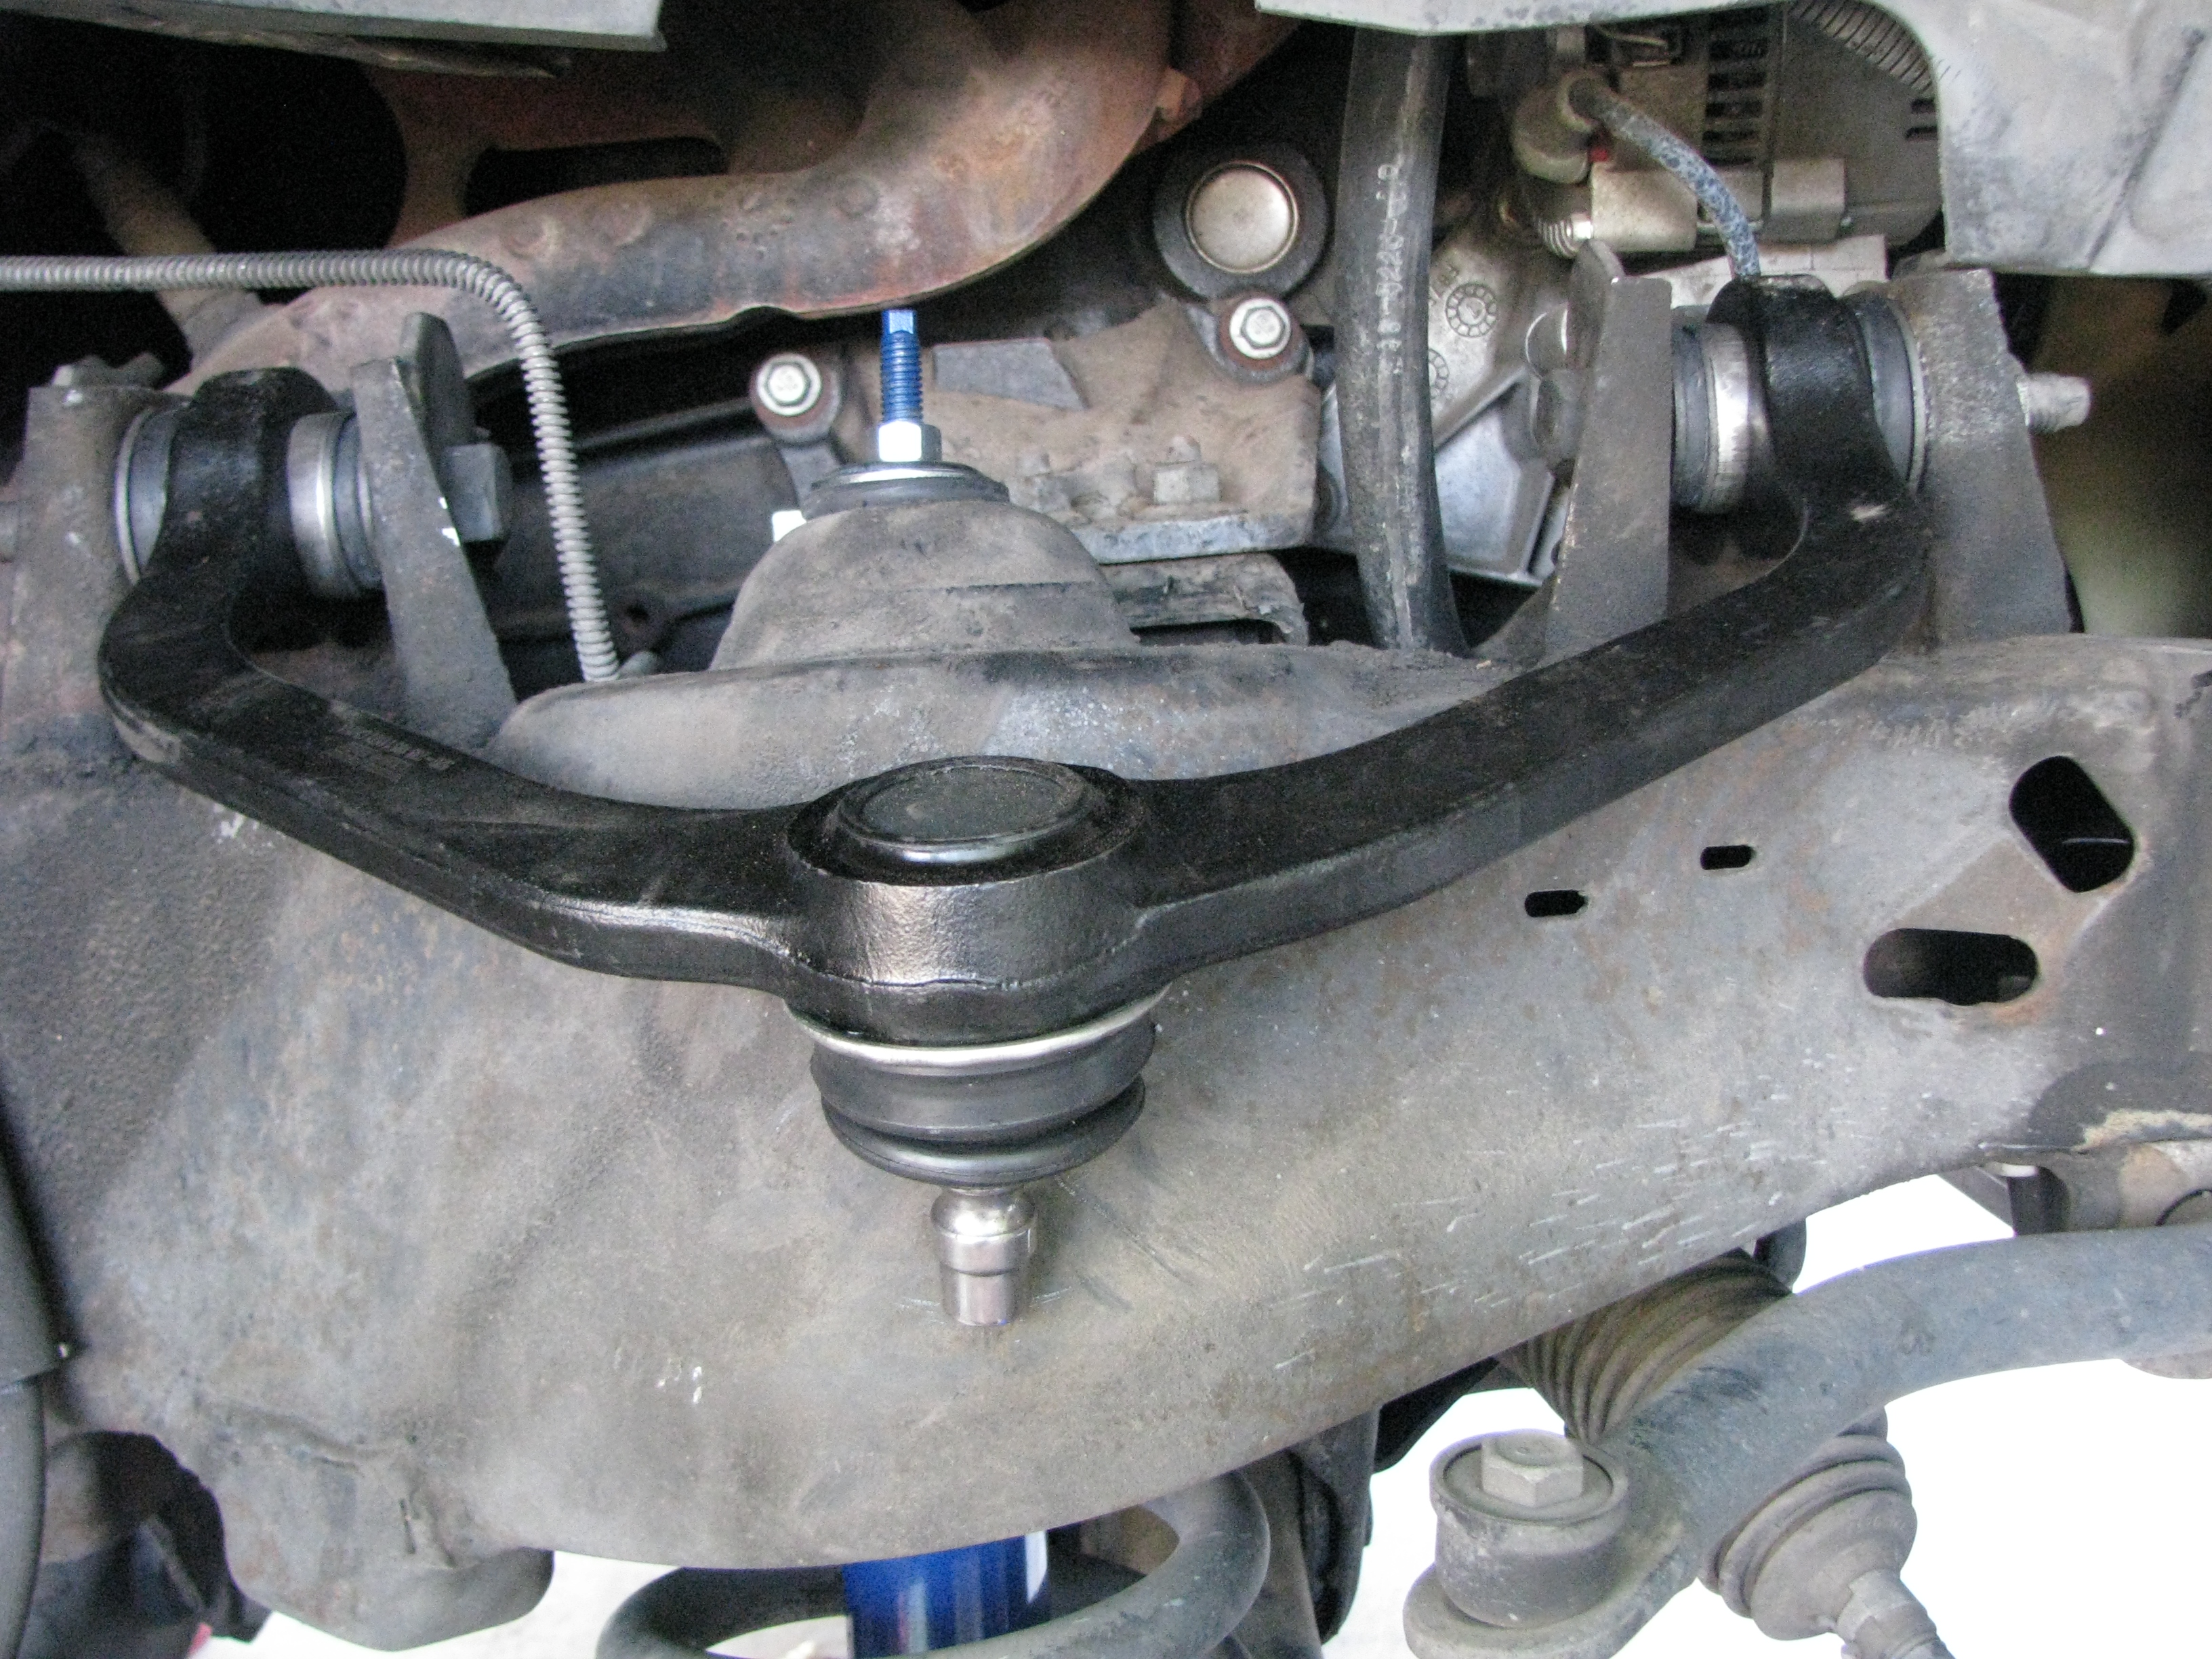 And on the truck. 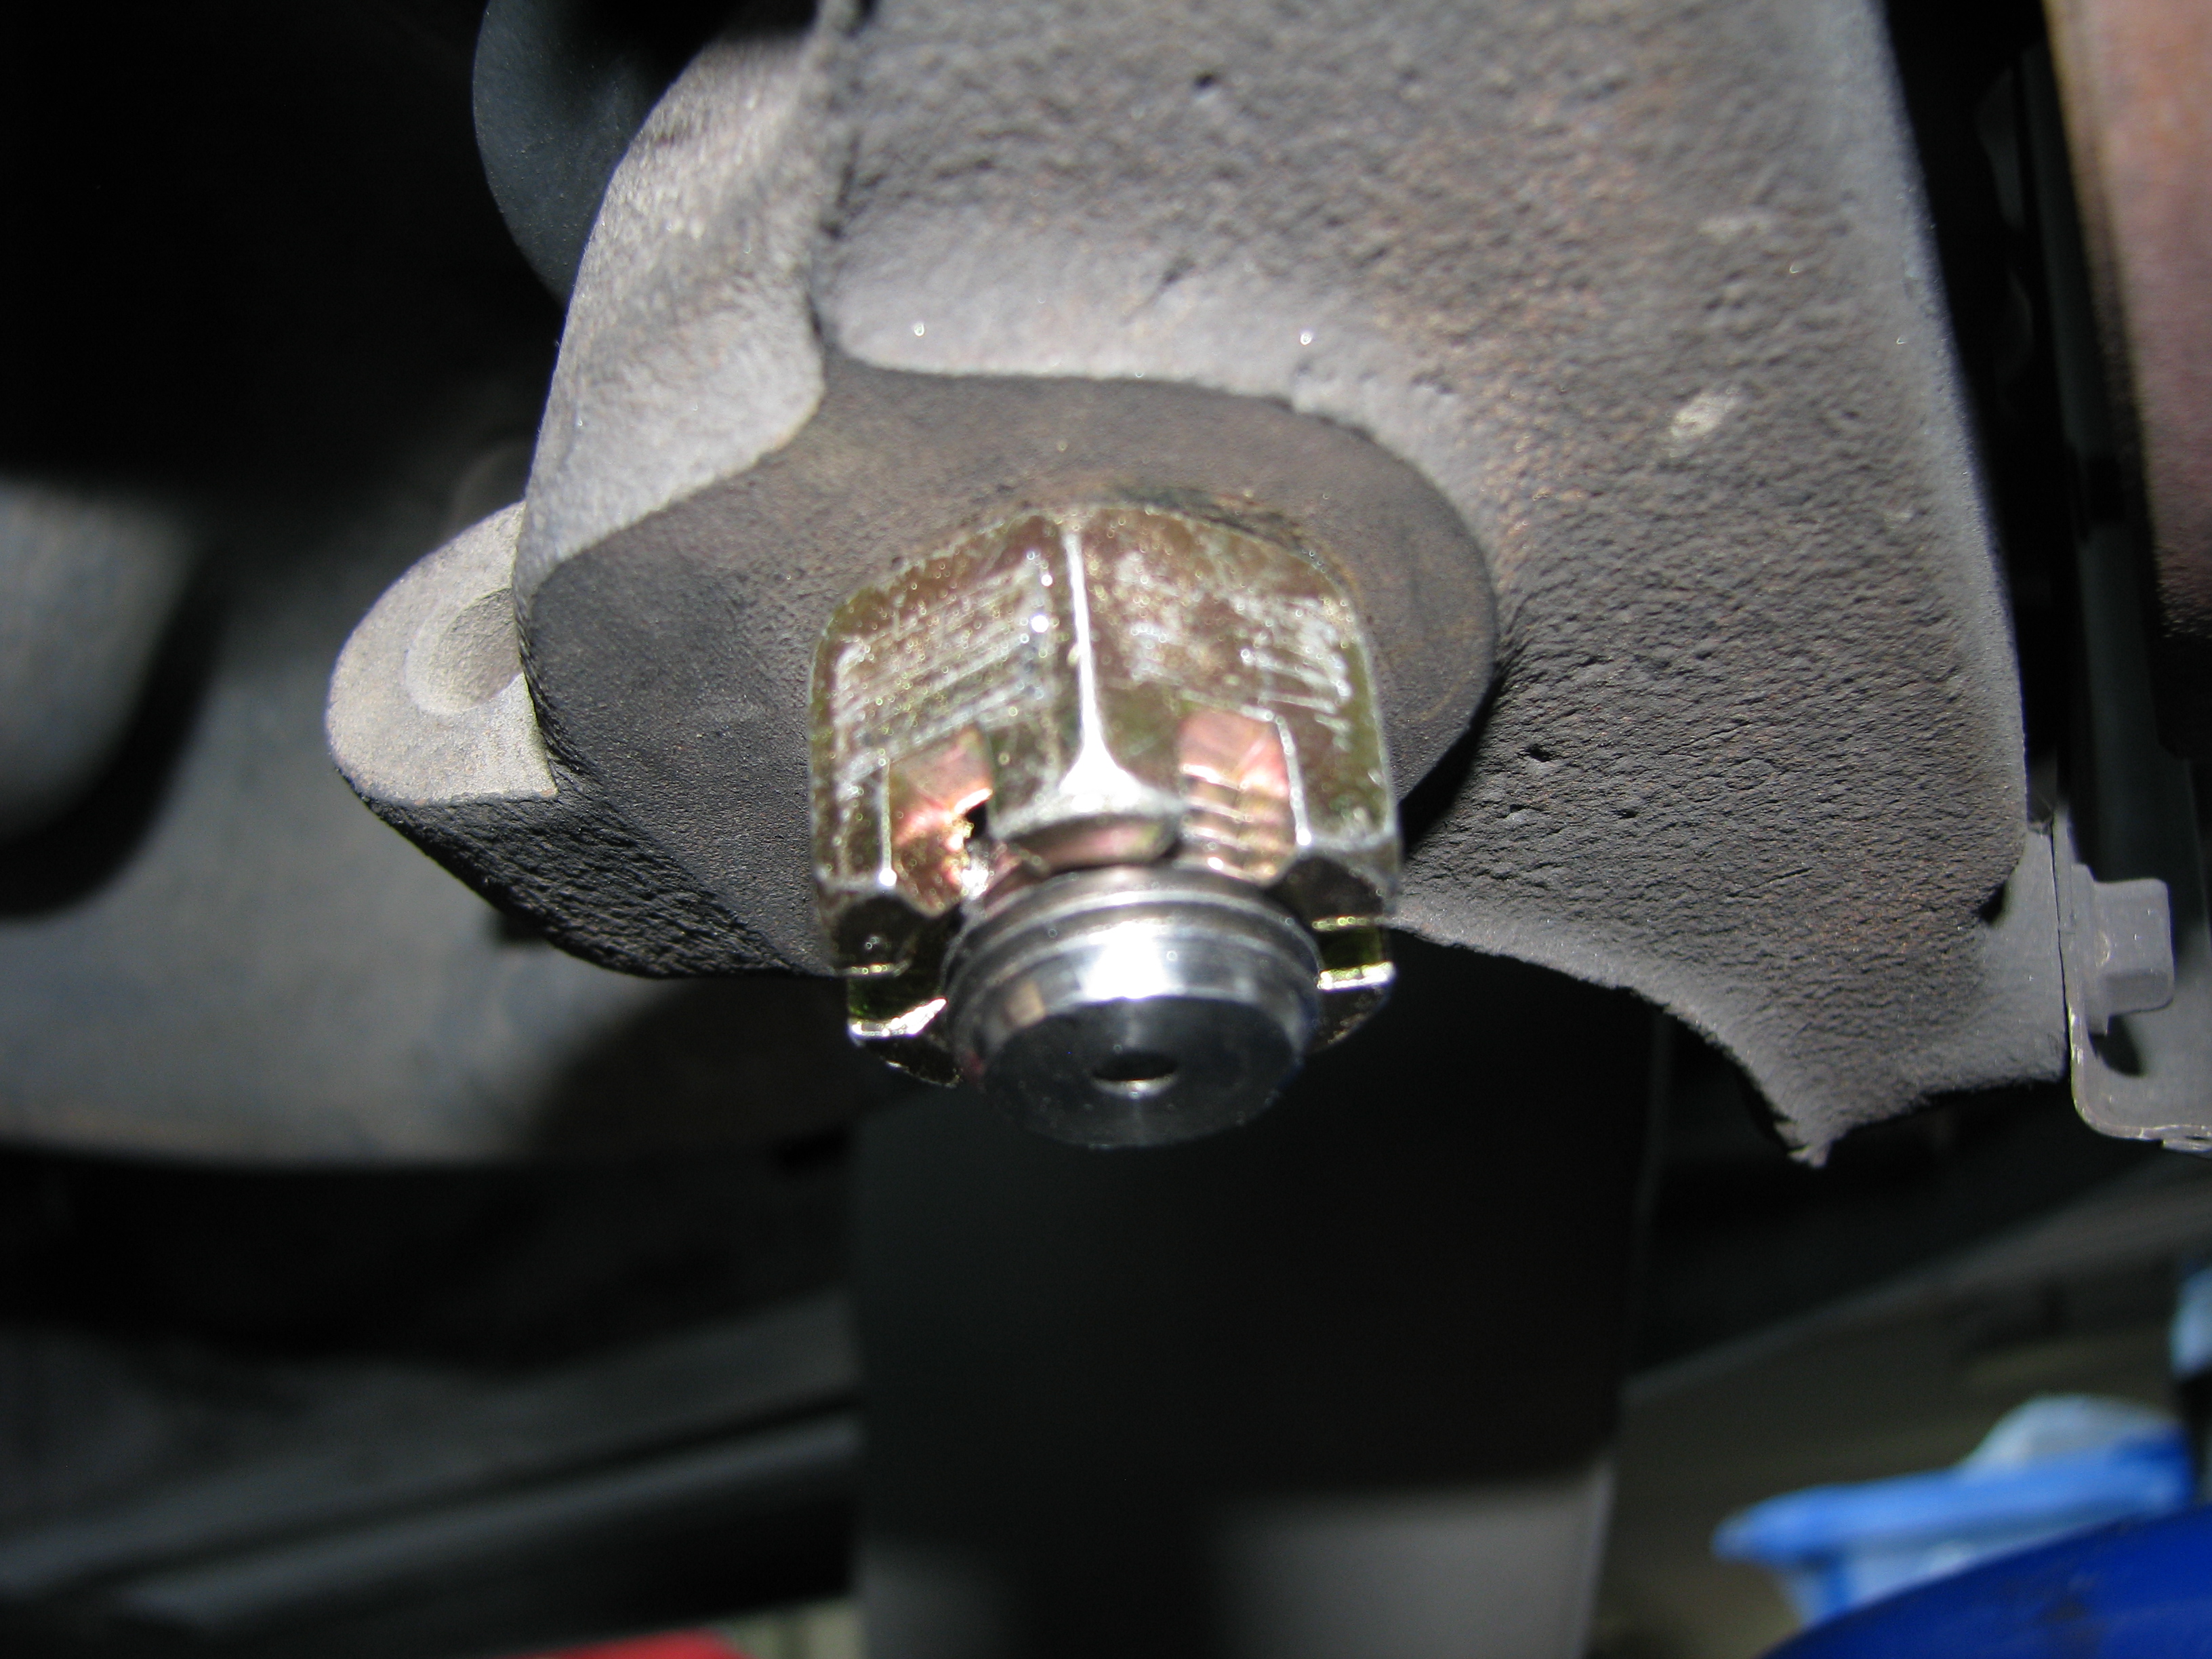 Lift the spindle up under the new lower joint, thread the new castle nut on enough to hold it. Then start playing with the upper to line it all up, unless this happens: 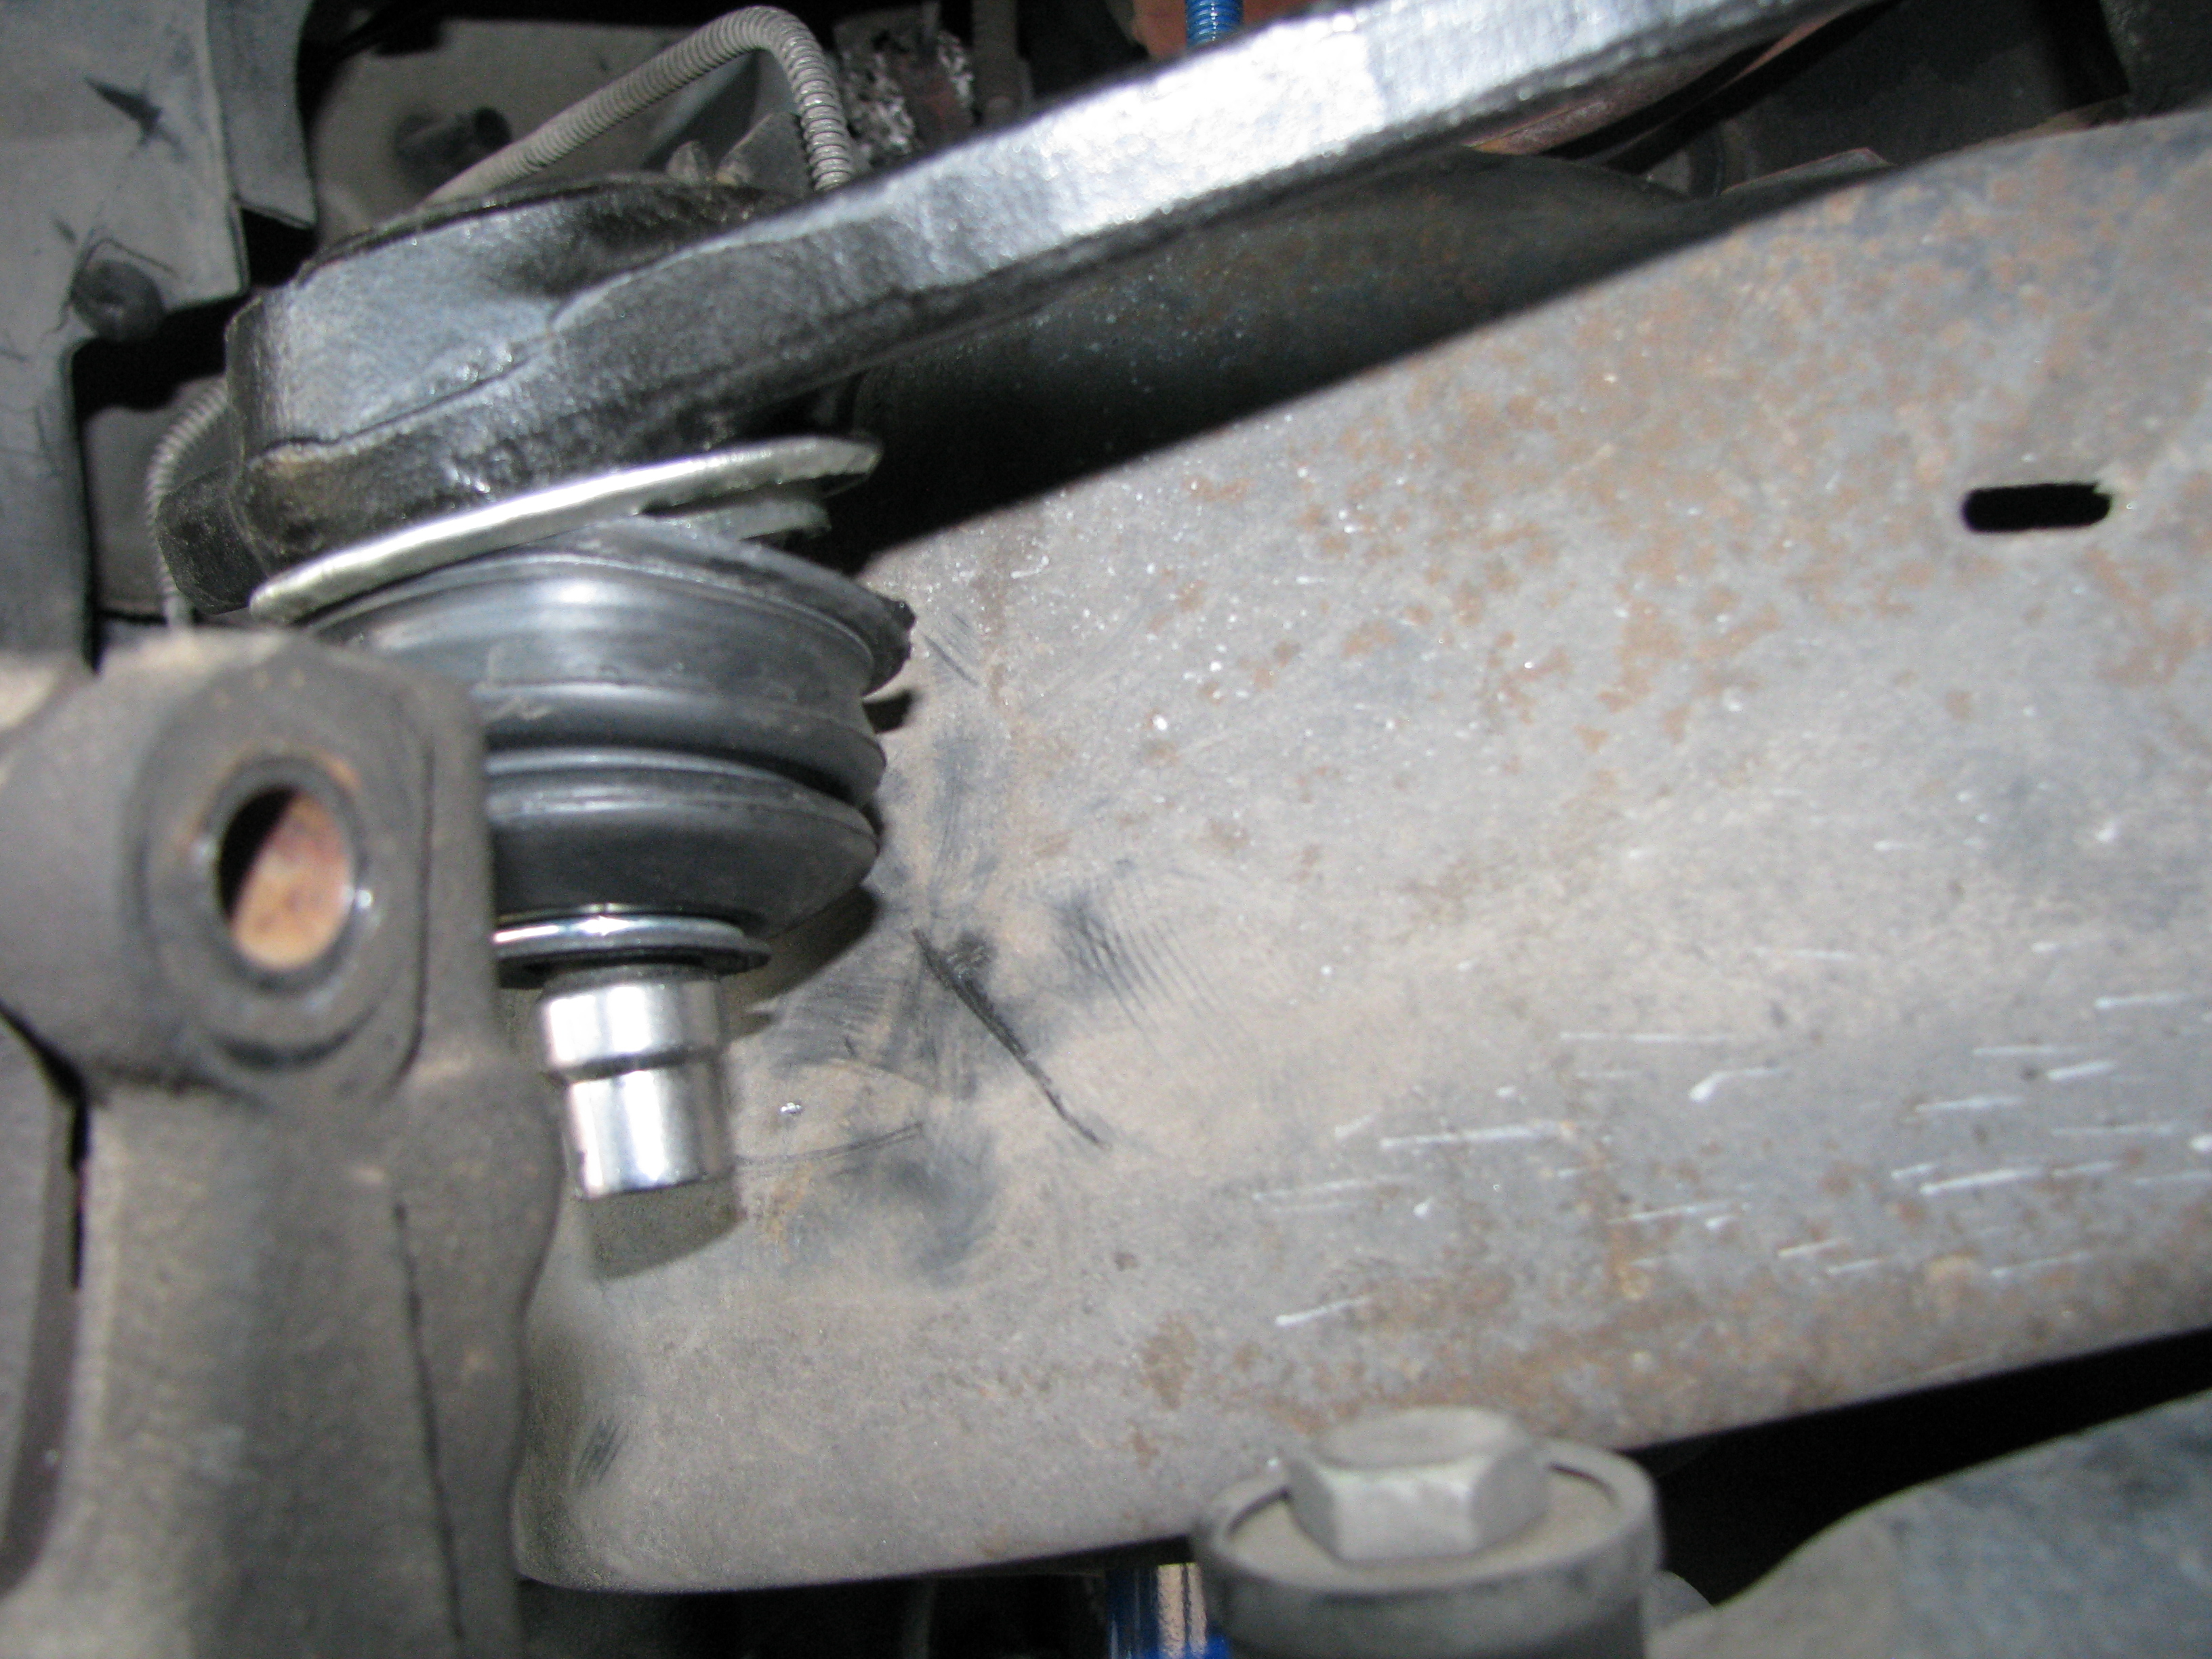 The boot popped out of its crimped base  I pulled it off, pushed it back in, but as soon as I had the whole thing assembled and the suspension at full droop, it popped loose again. Lesson learned, don't buy the Dorman arms; get the nicer Moog ones. I may yet try to press it back into place with it still on the truck, but I may also just see how long it lasts as it is. I pulled it off, pushed it back in, but as soon as I had the whole thing assembled and the suspension at full droop, it popped loose again. Lesson learned, don't buy the Dorman arms; get the nicer Moog ones. I may yet try to press it back into place with it still on the truck, but I may also just see how long it lasts as it is.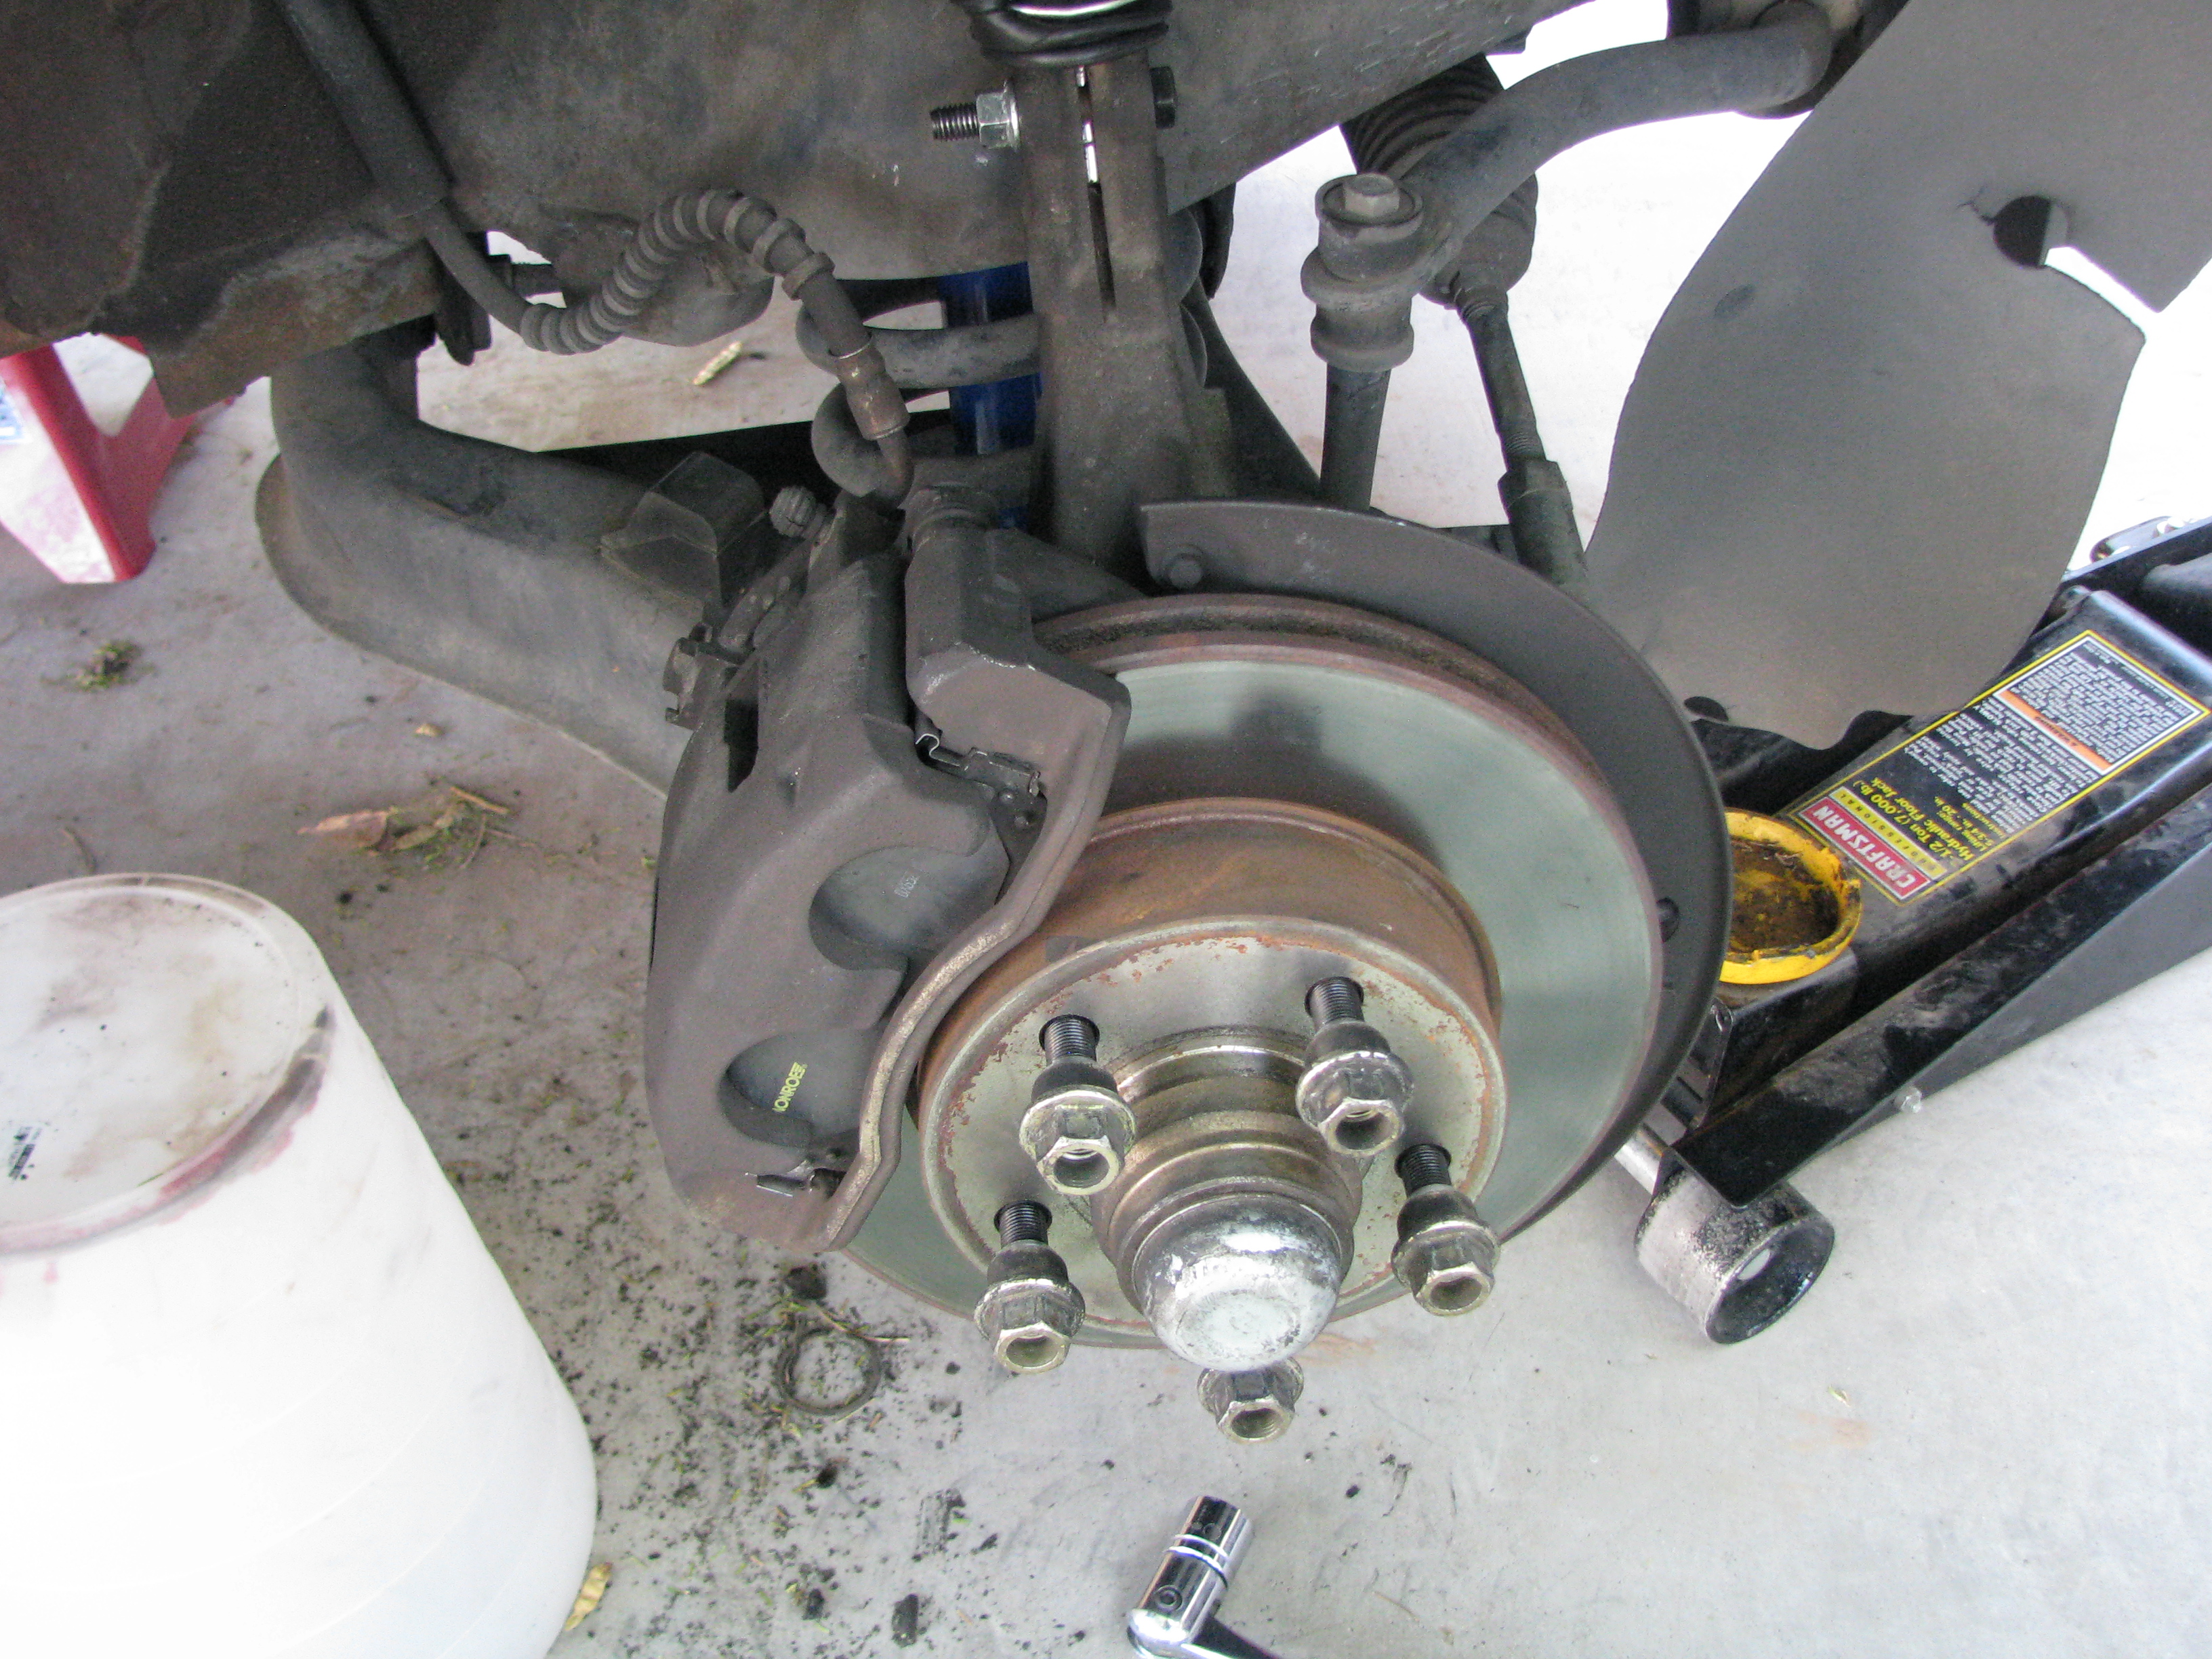 Everything pretty much put together on the passenger side now. Up to this point was all wrenching in yesterday's hot sun. Between the heat and impending family gatherings, I stopped until this afternoon. 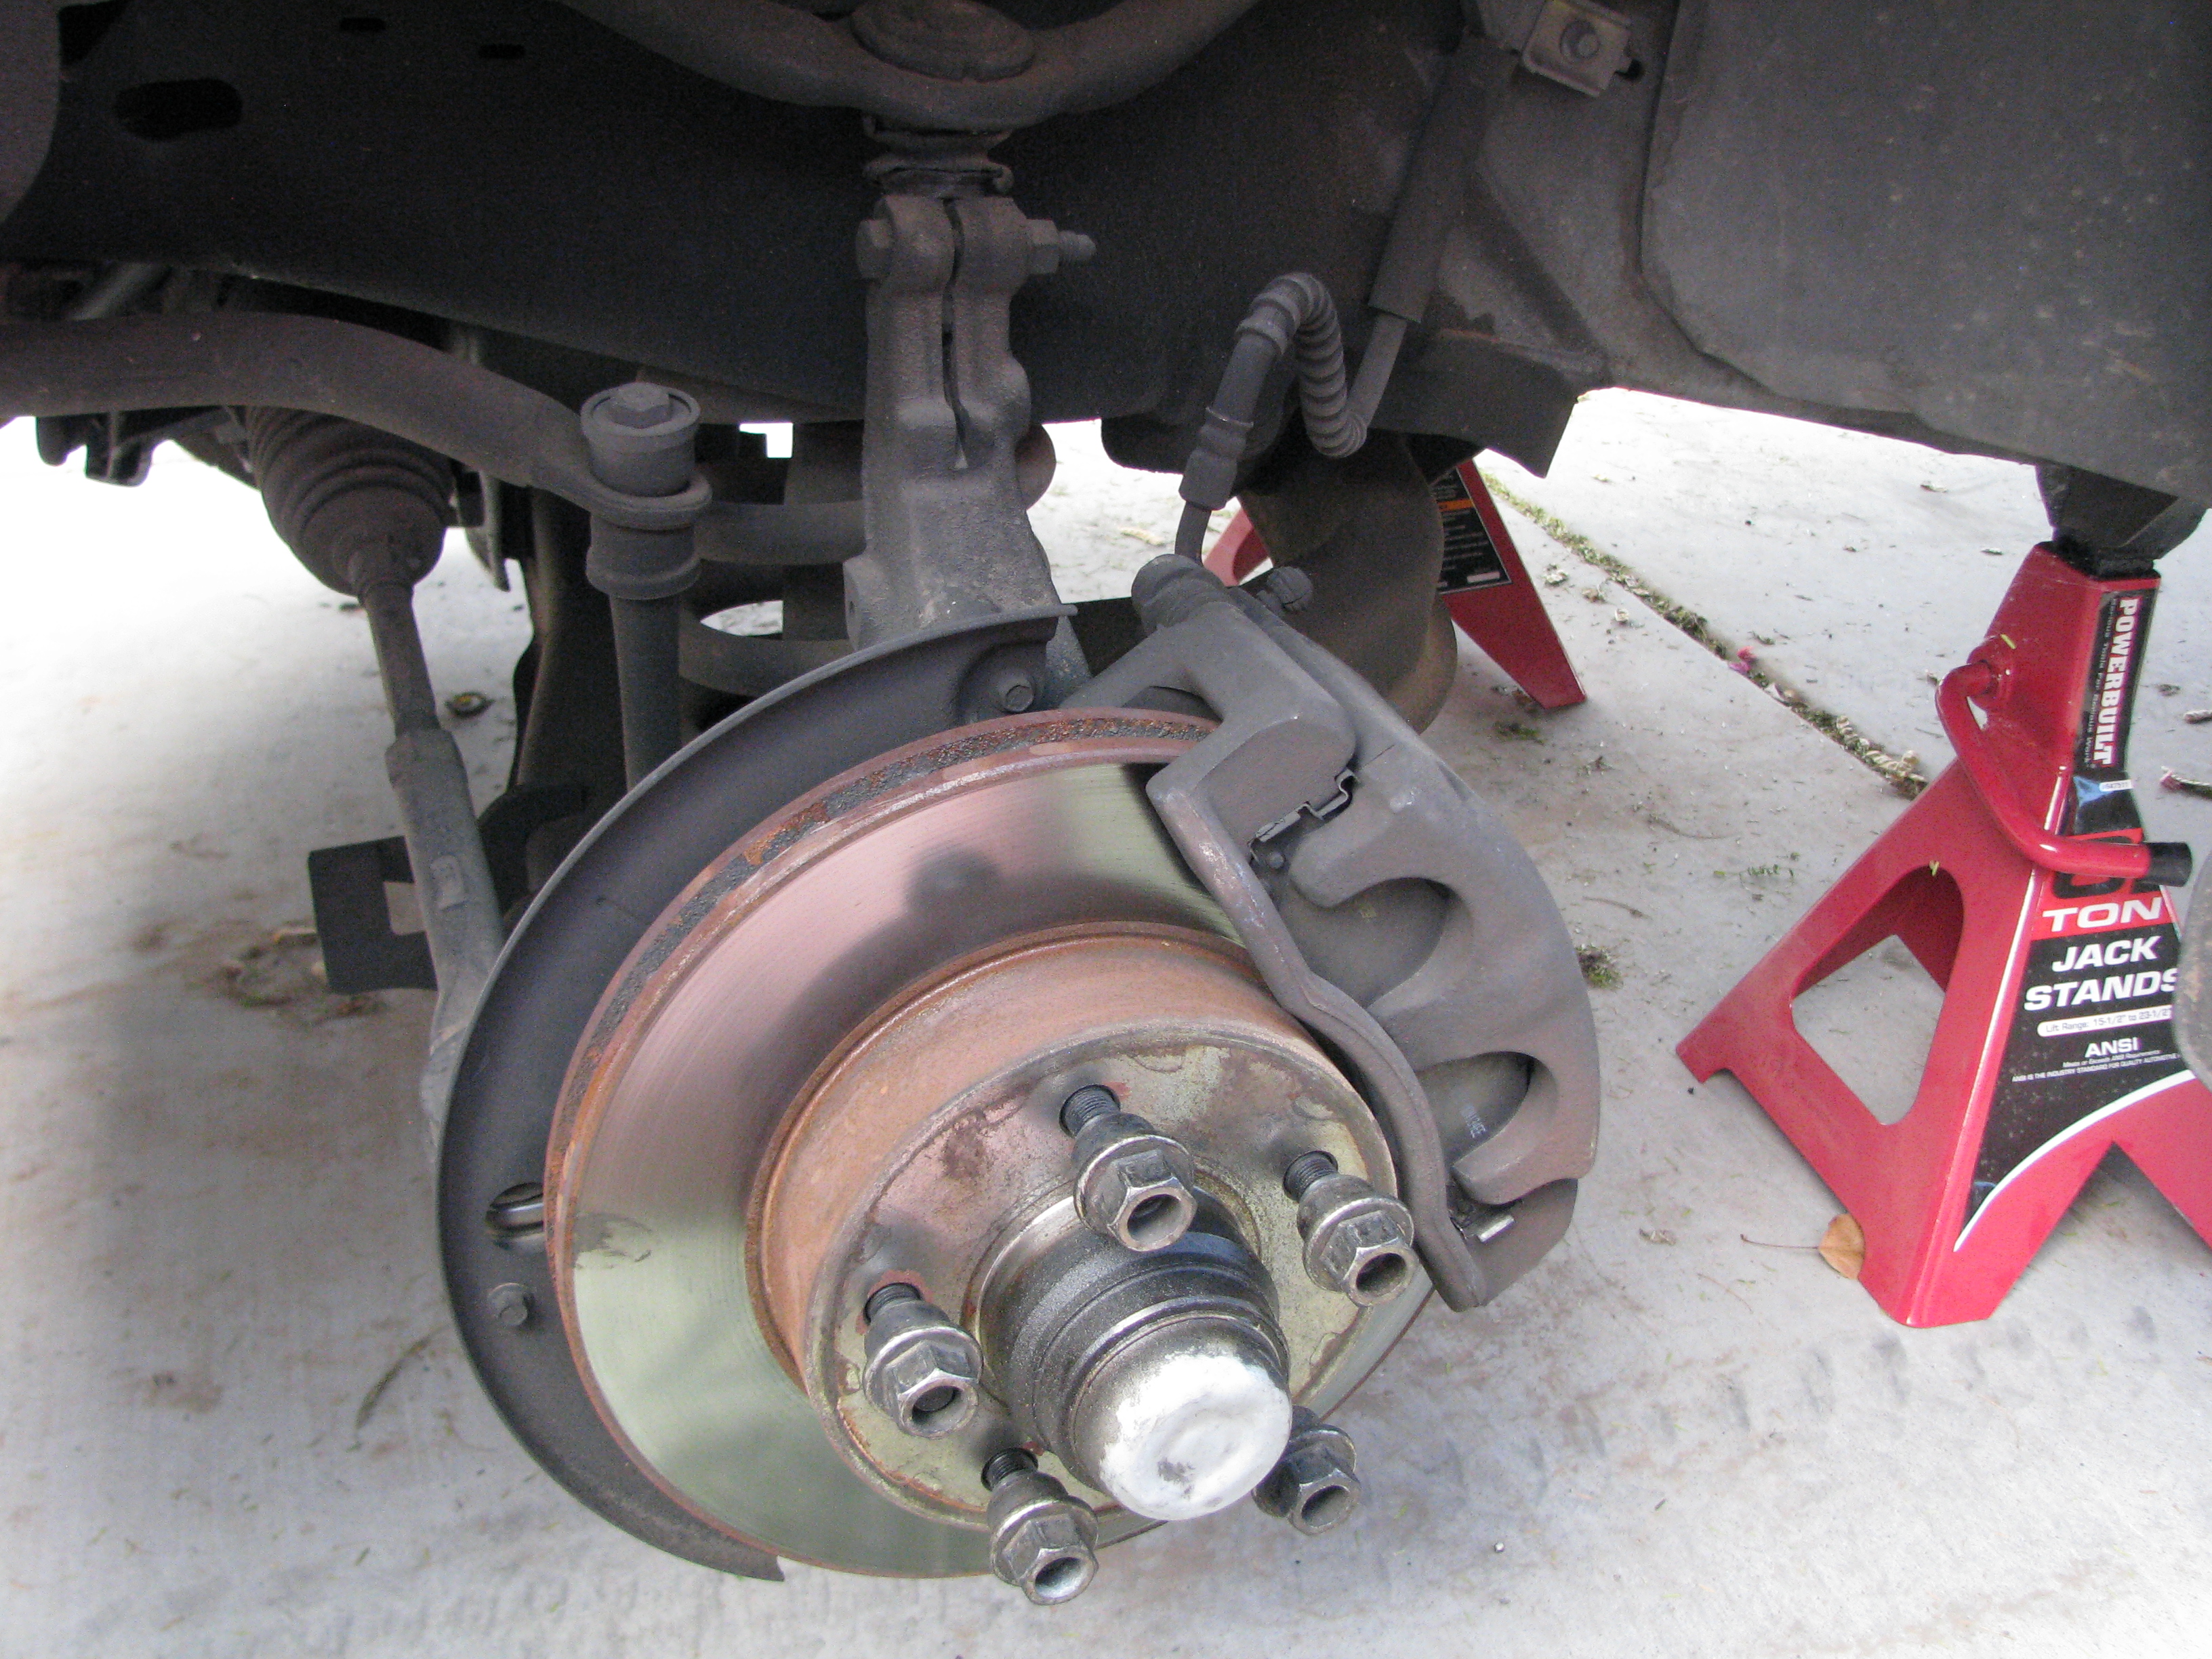 Lather, rinse, repeat, it's the driver's side! On the plus side, it went much more quickly having done it all once and not having to run to Autozone in the middle of it for those adapters. 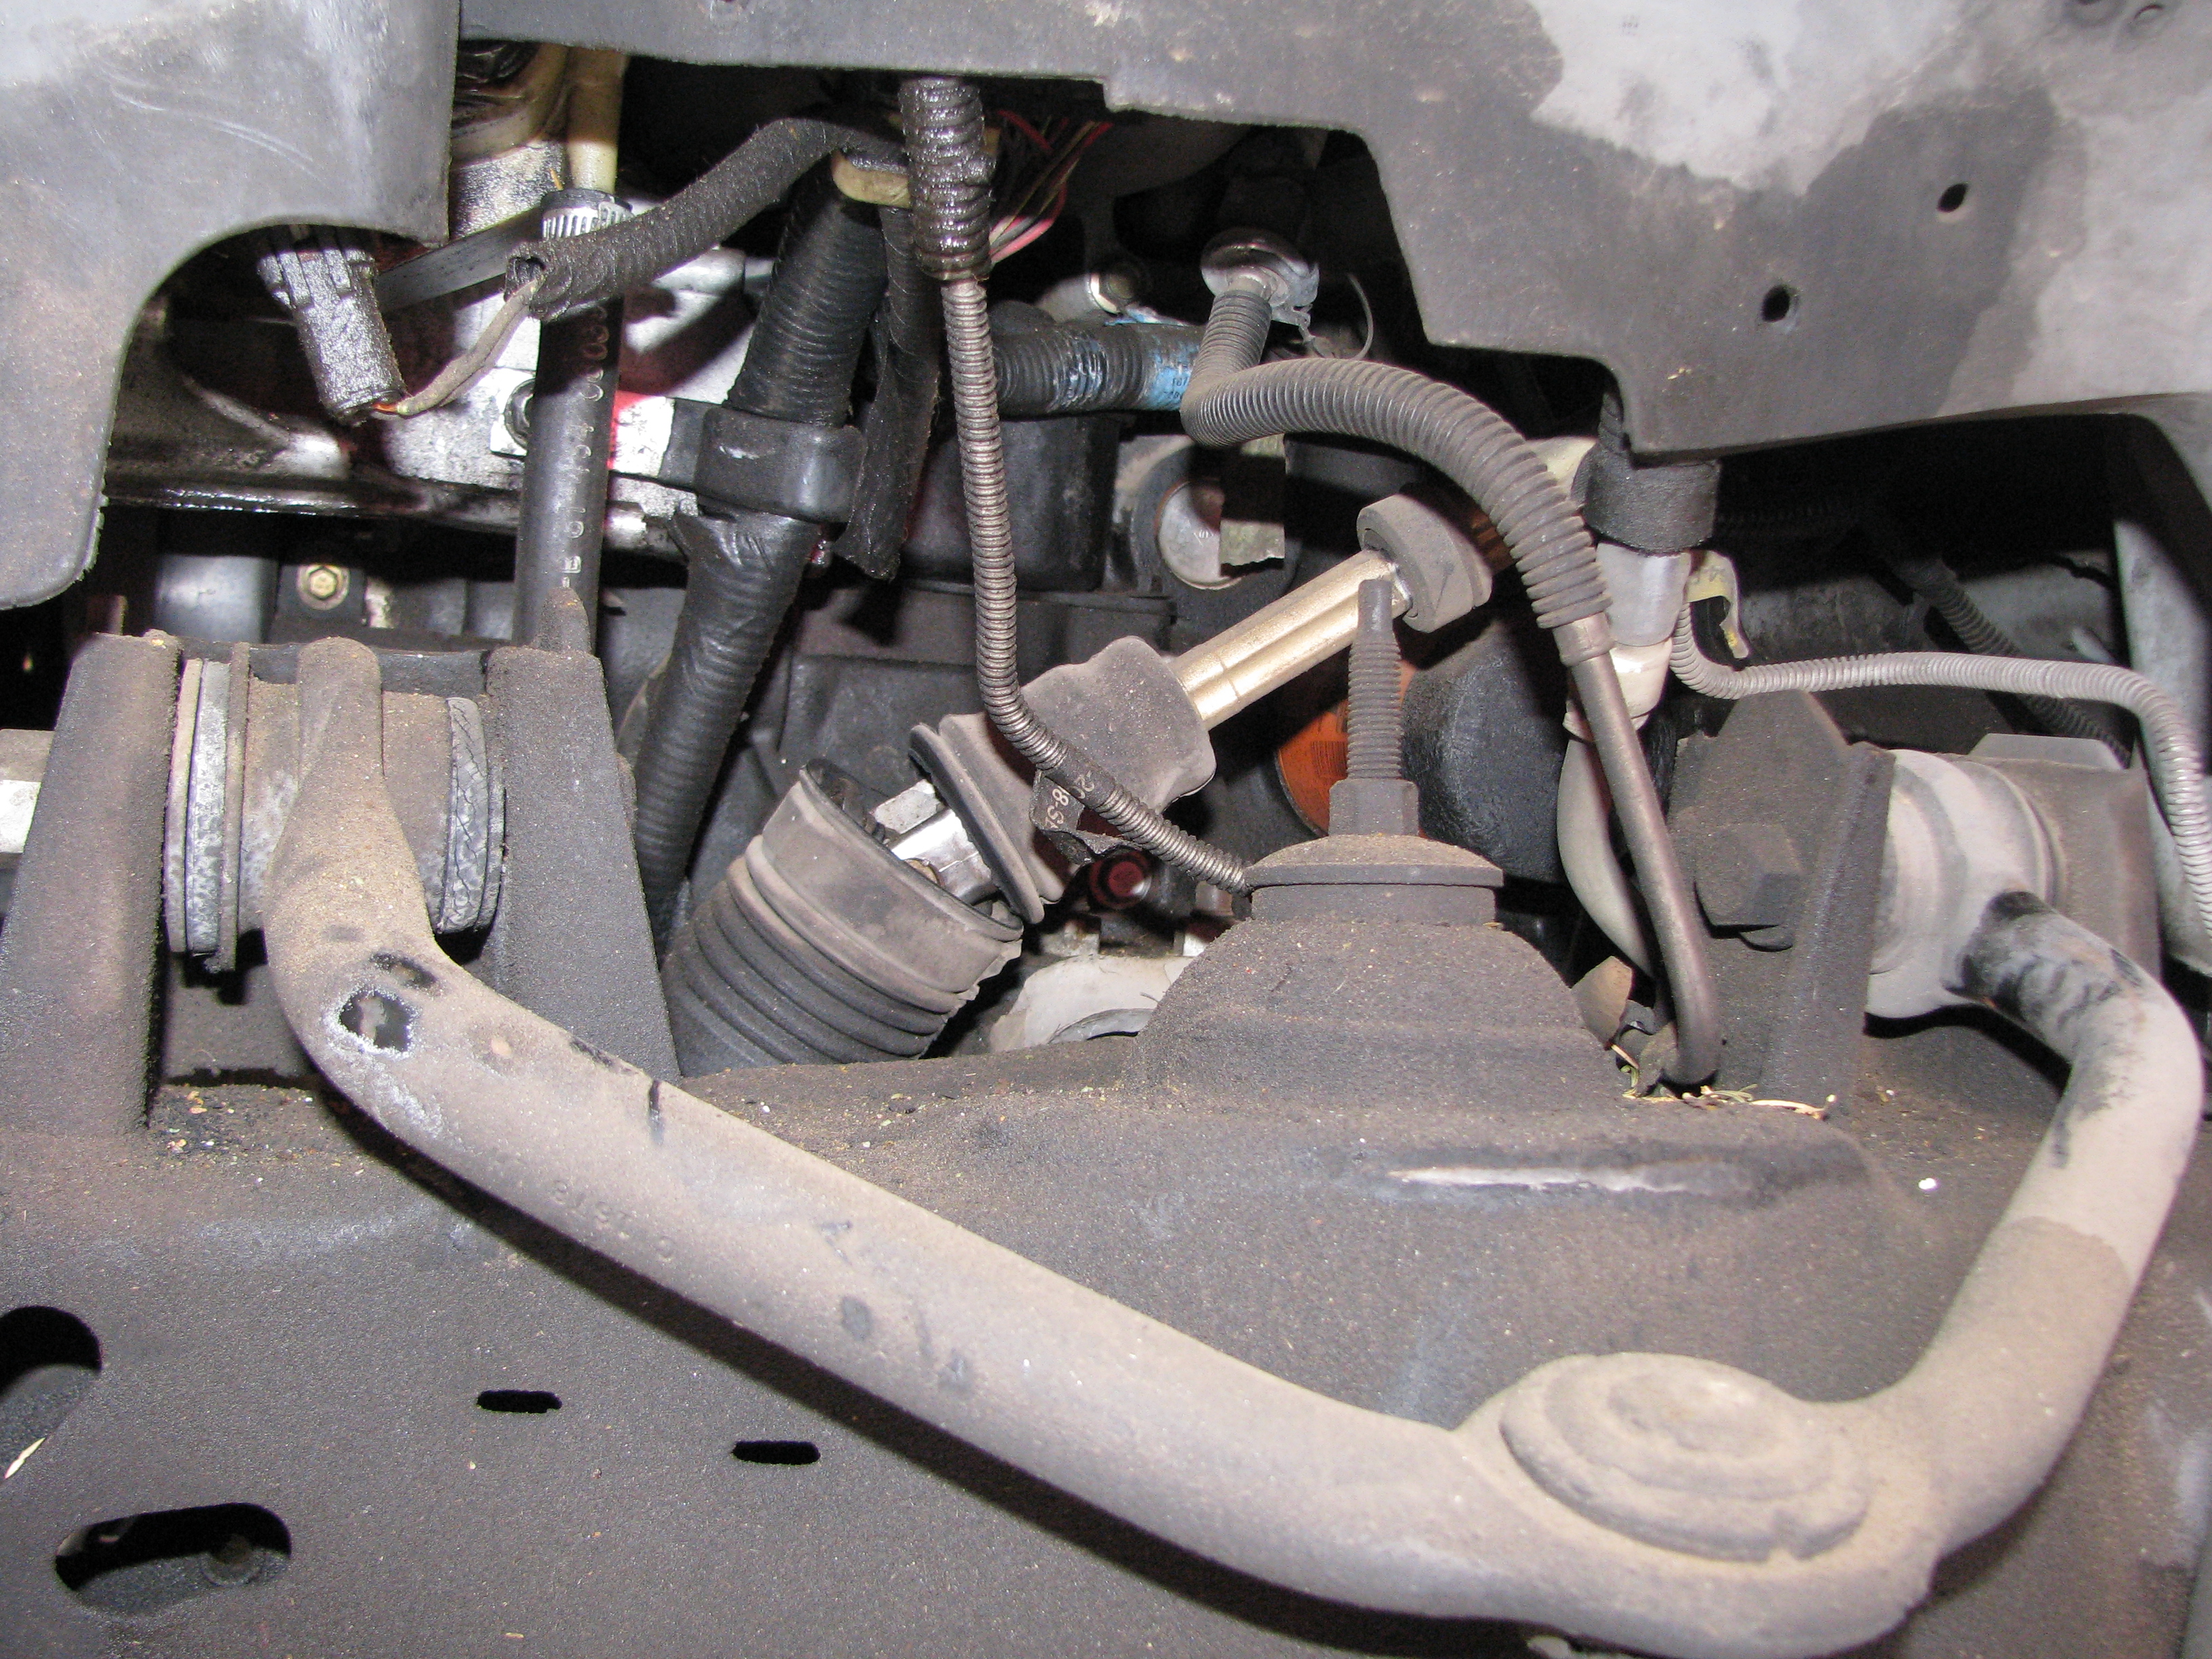 Everything up under the fender liner. Yes, the boot covering the steering U-joint is ripped; no, I'm not replacing it unless the U-joint itself ever gets sloppy. 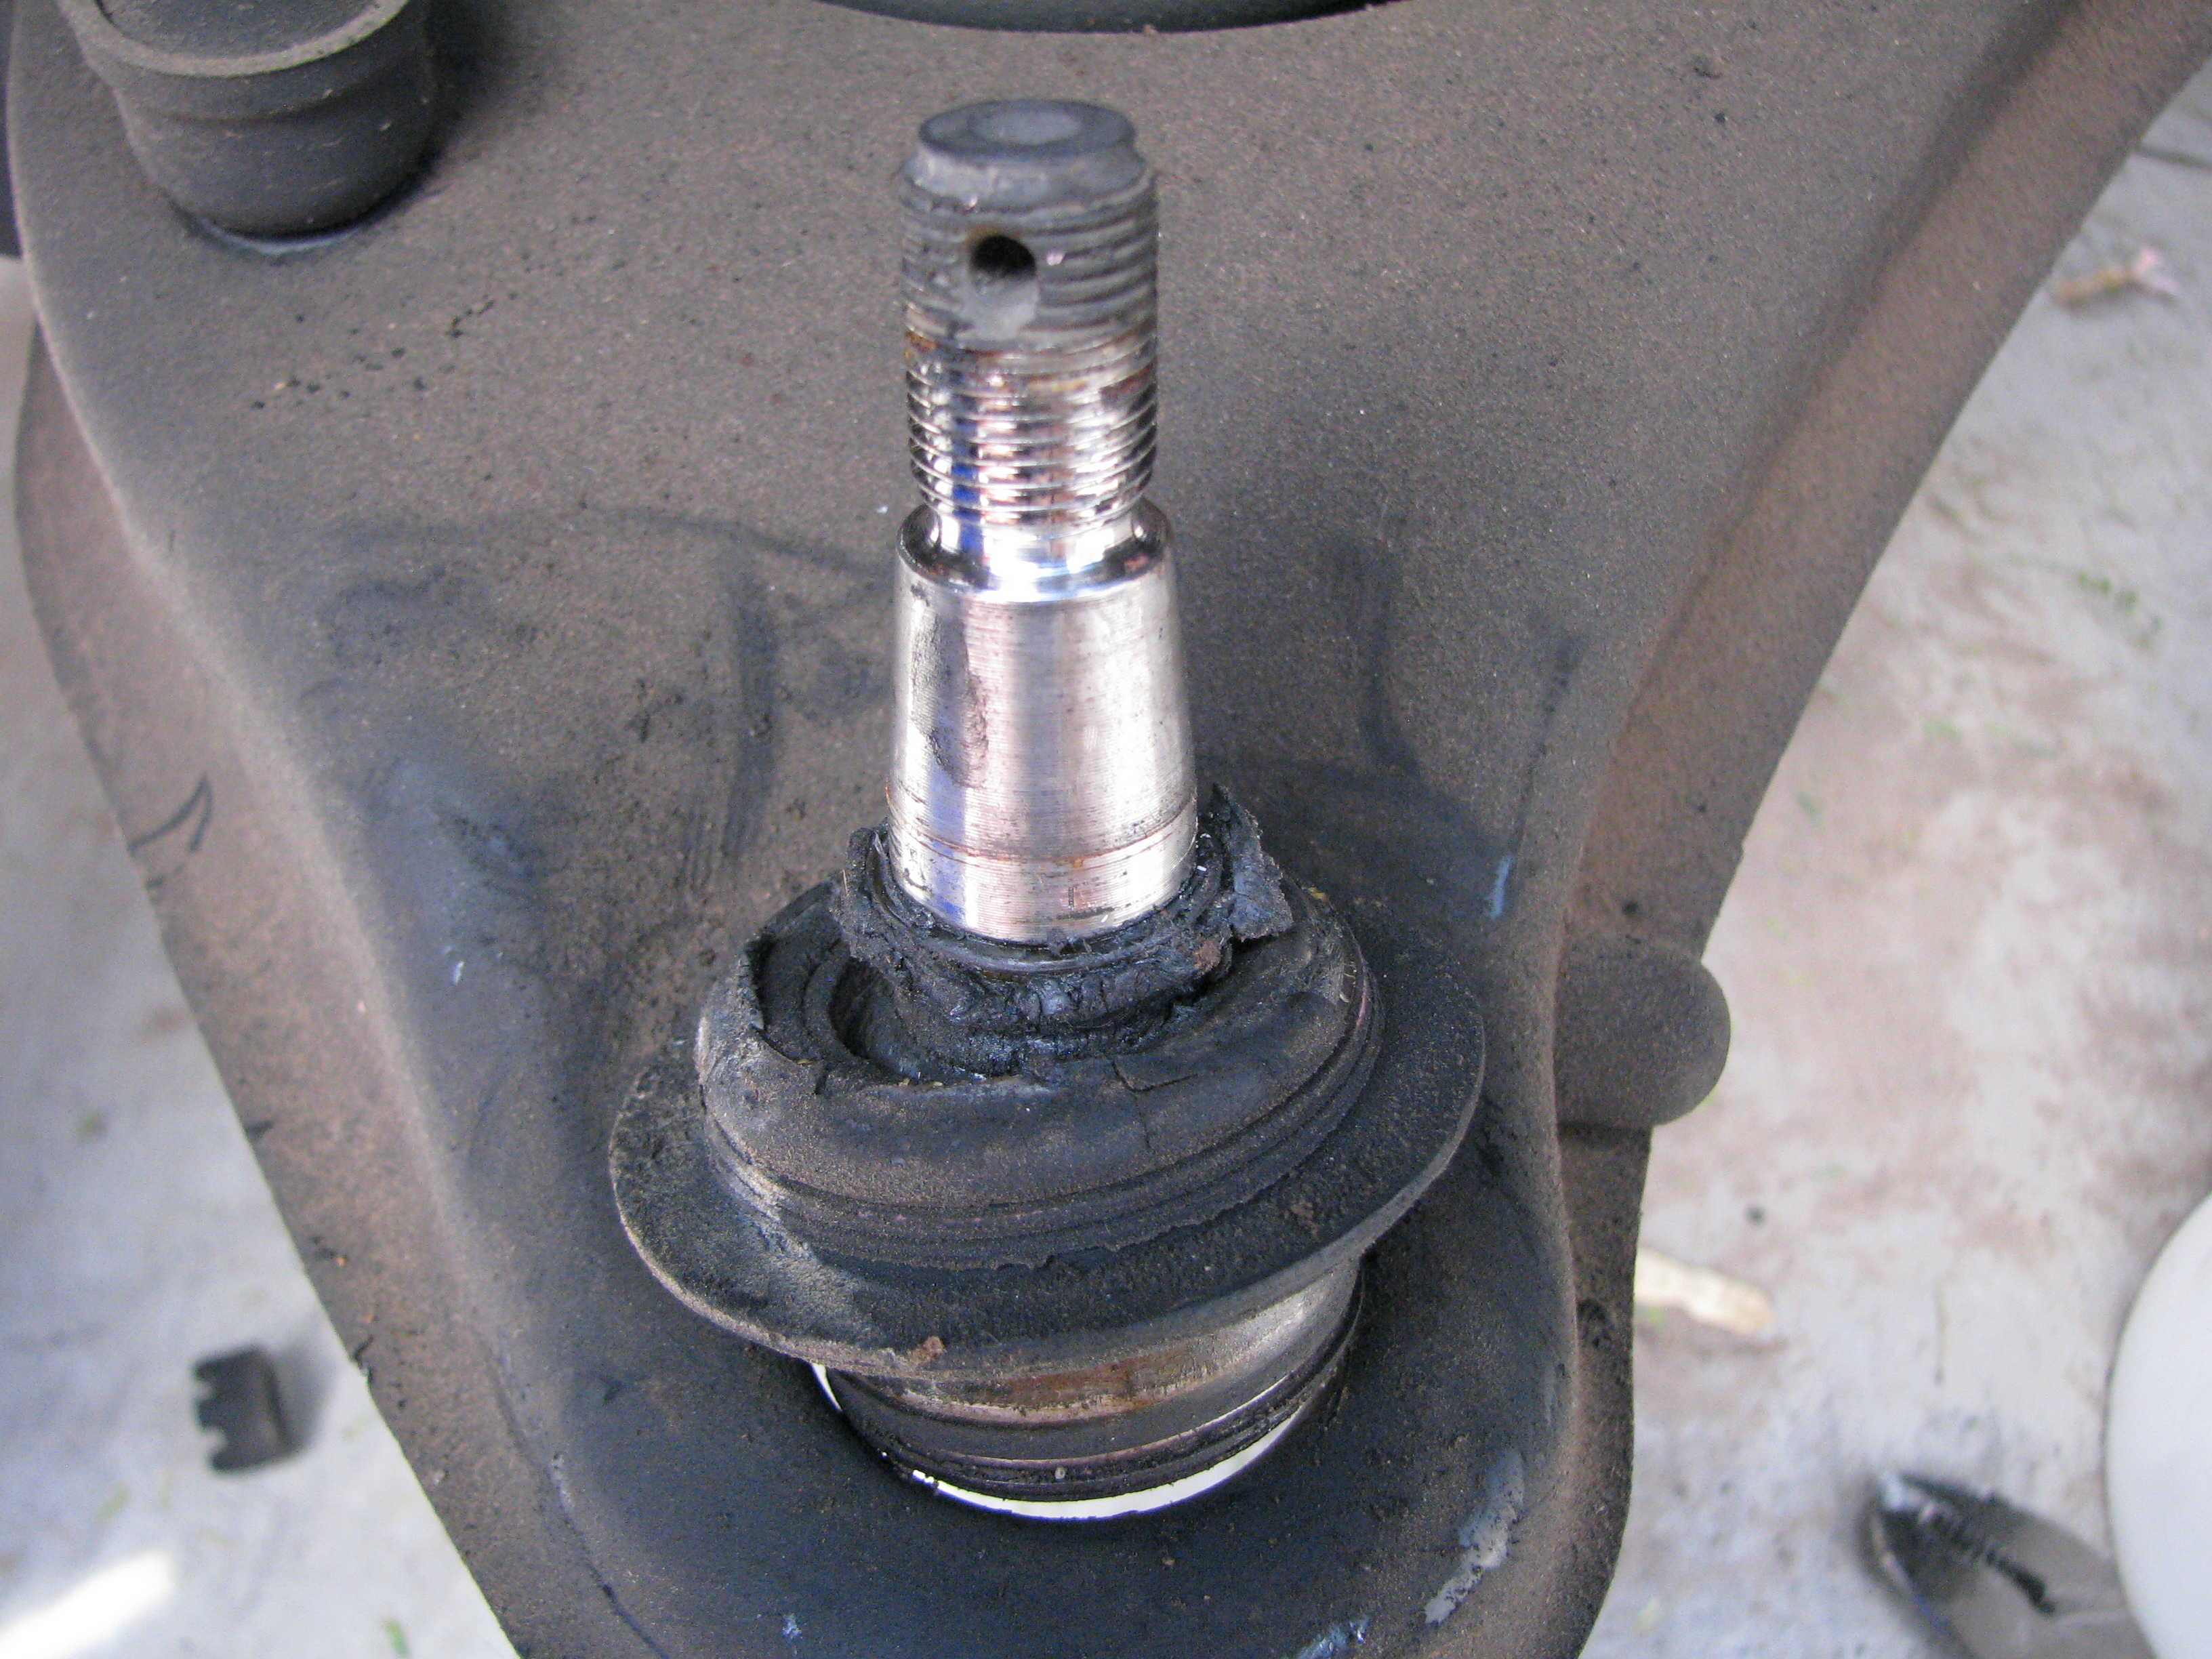 Old lower on the driver's side. The only one that I could actually make clunk by hand. For having shredded boots, there was a surprising amount of grease left in these things. 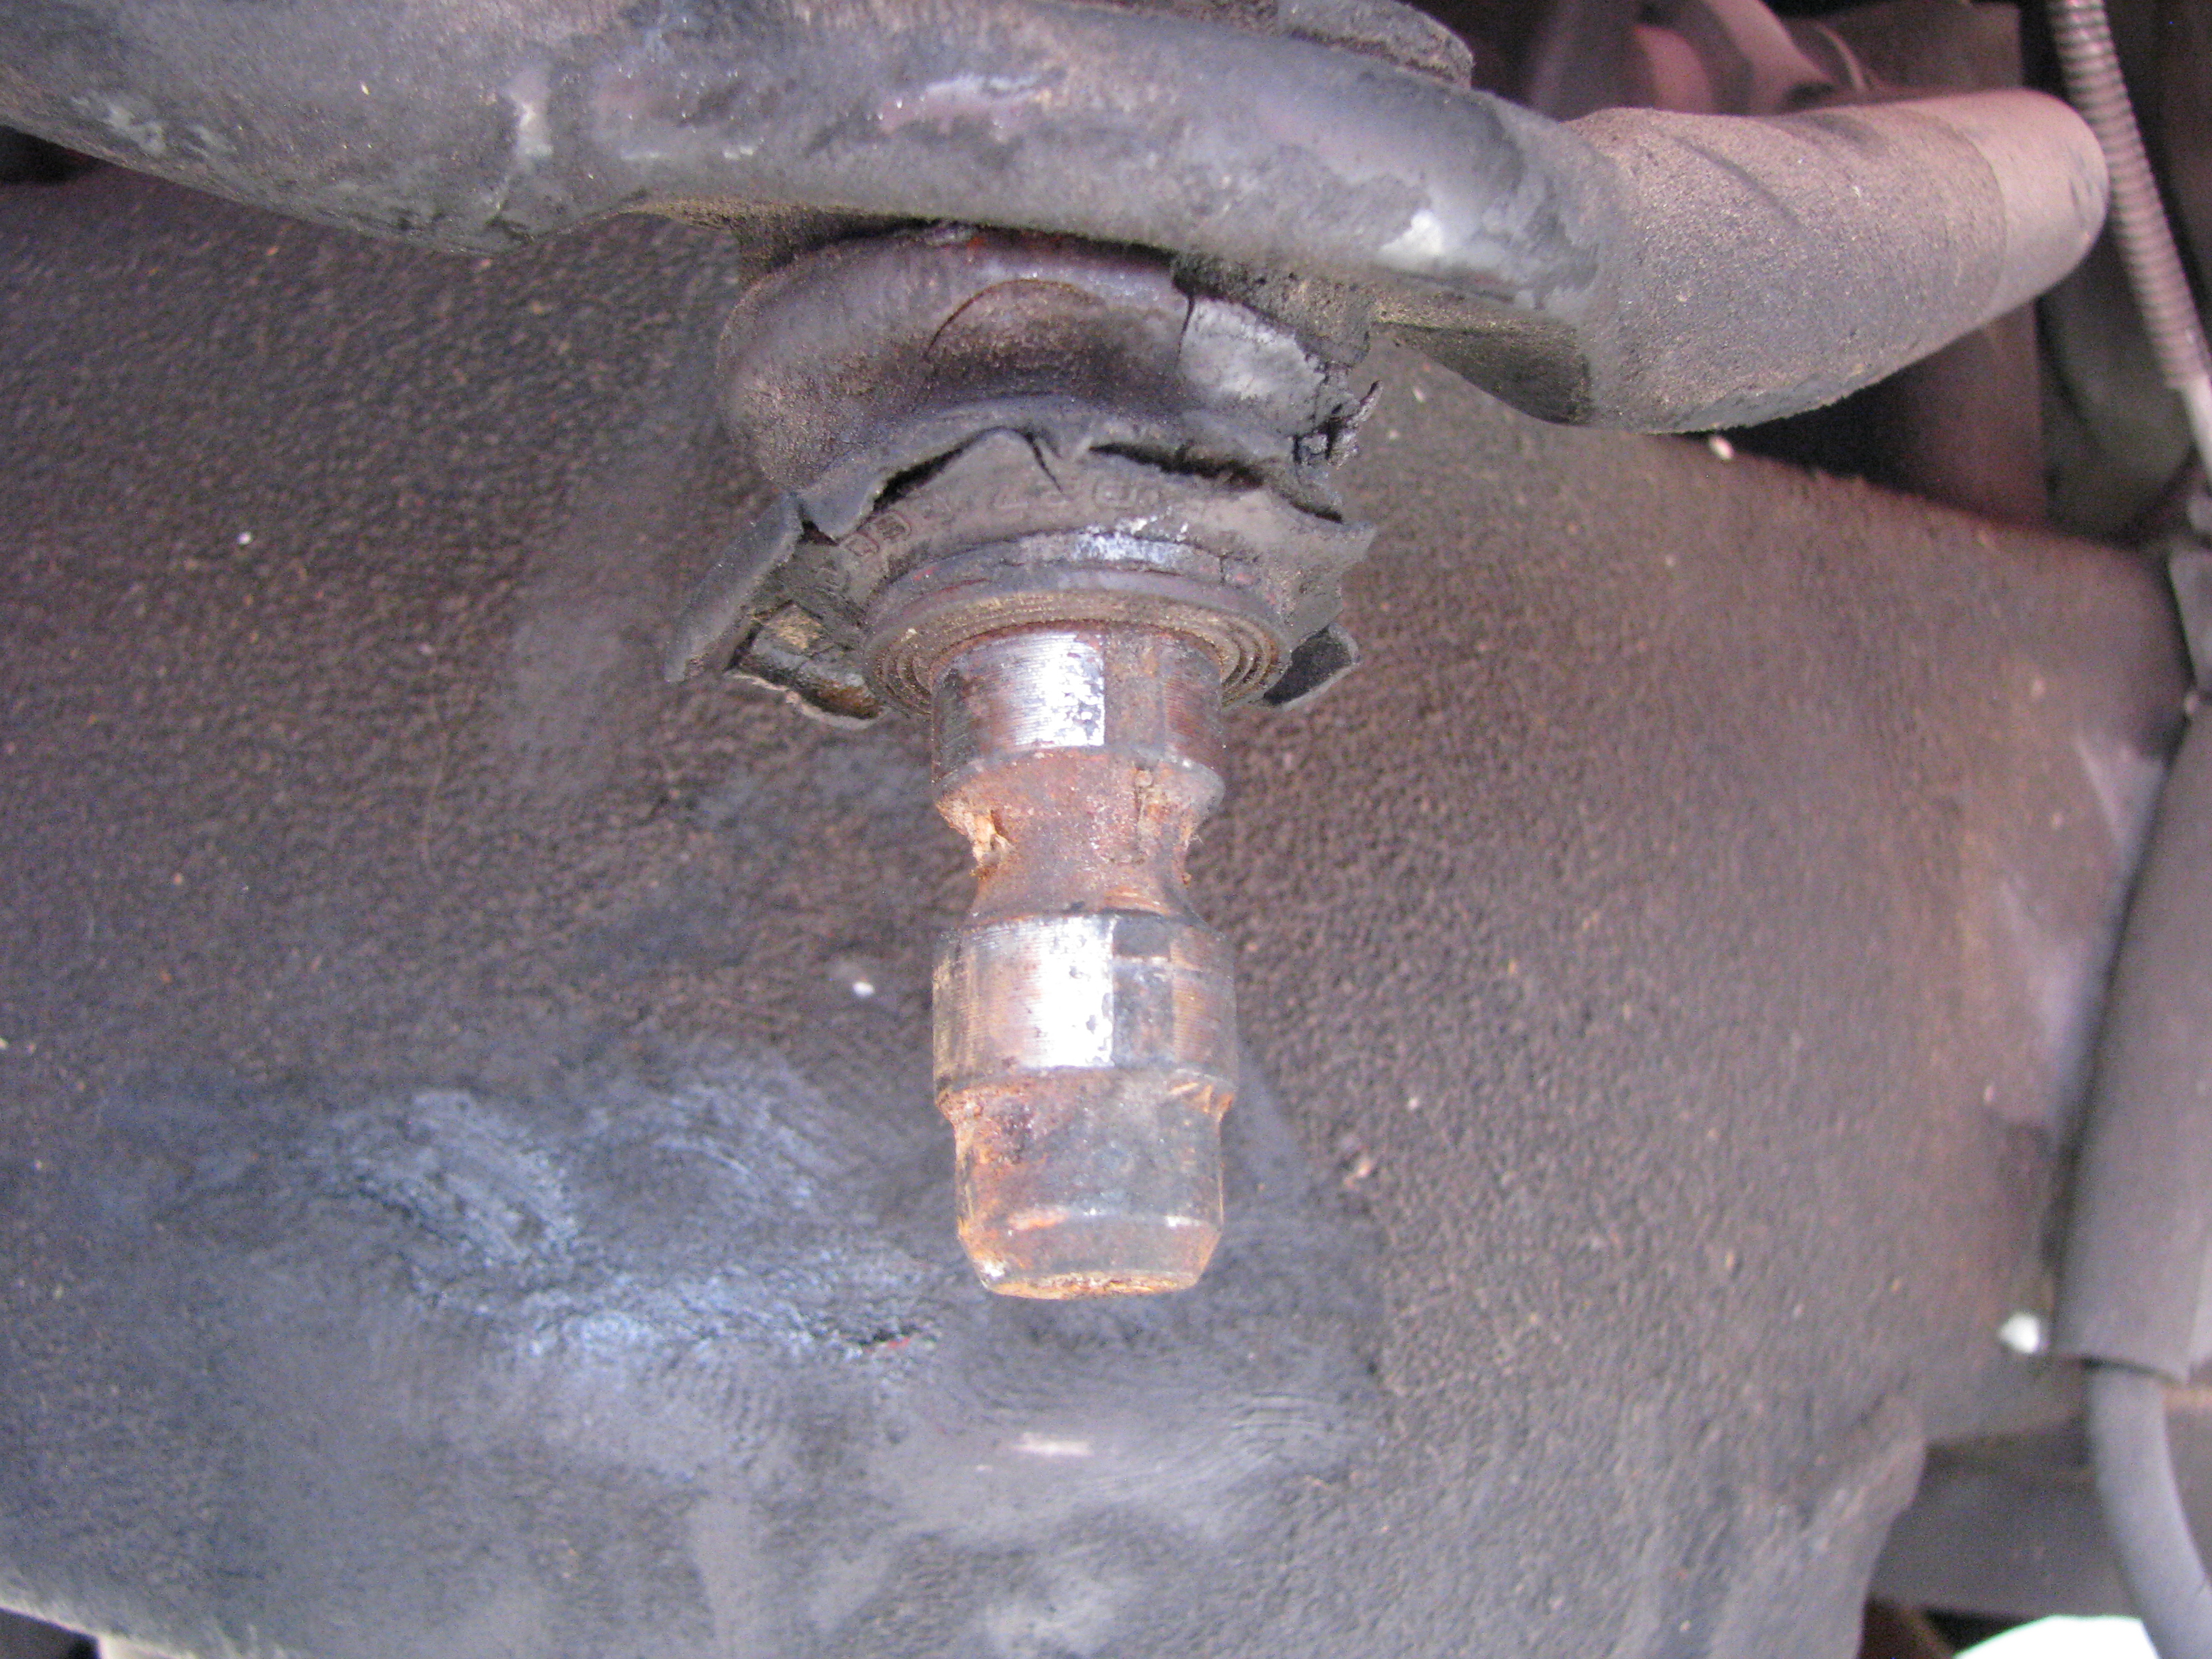 Driver's upper. 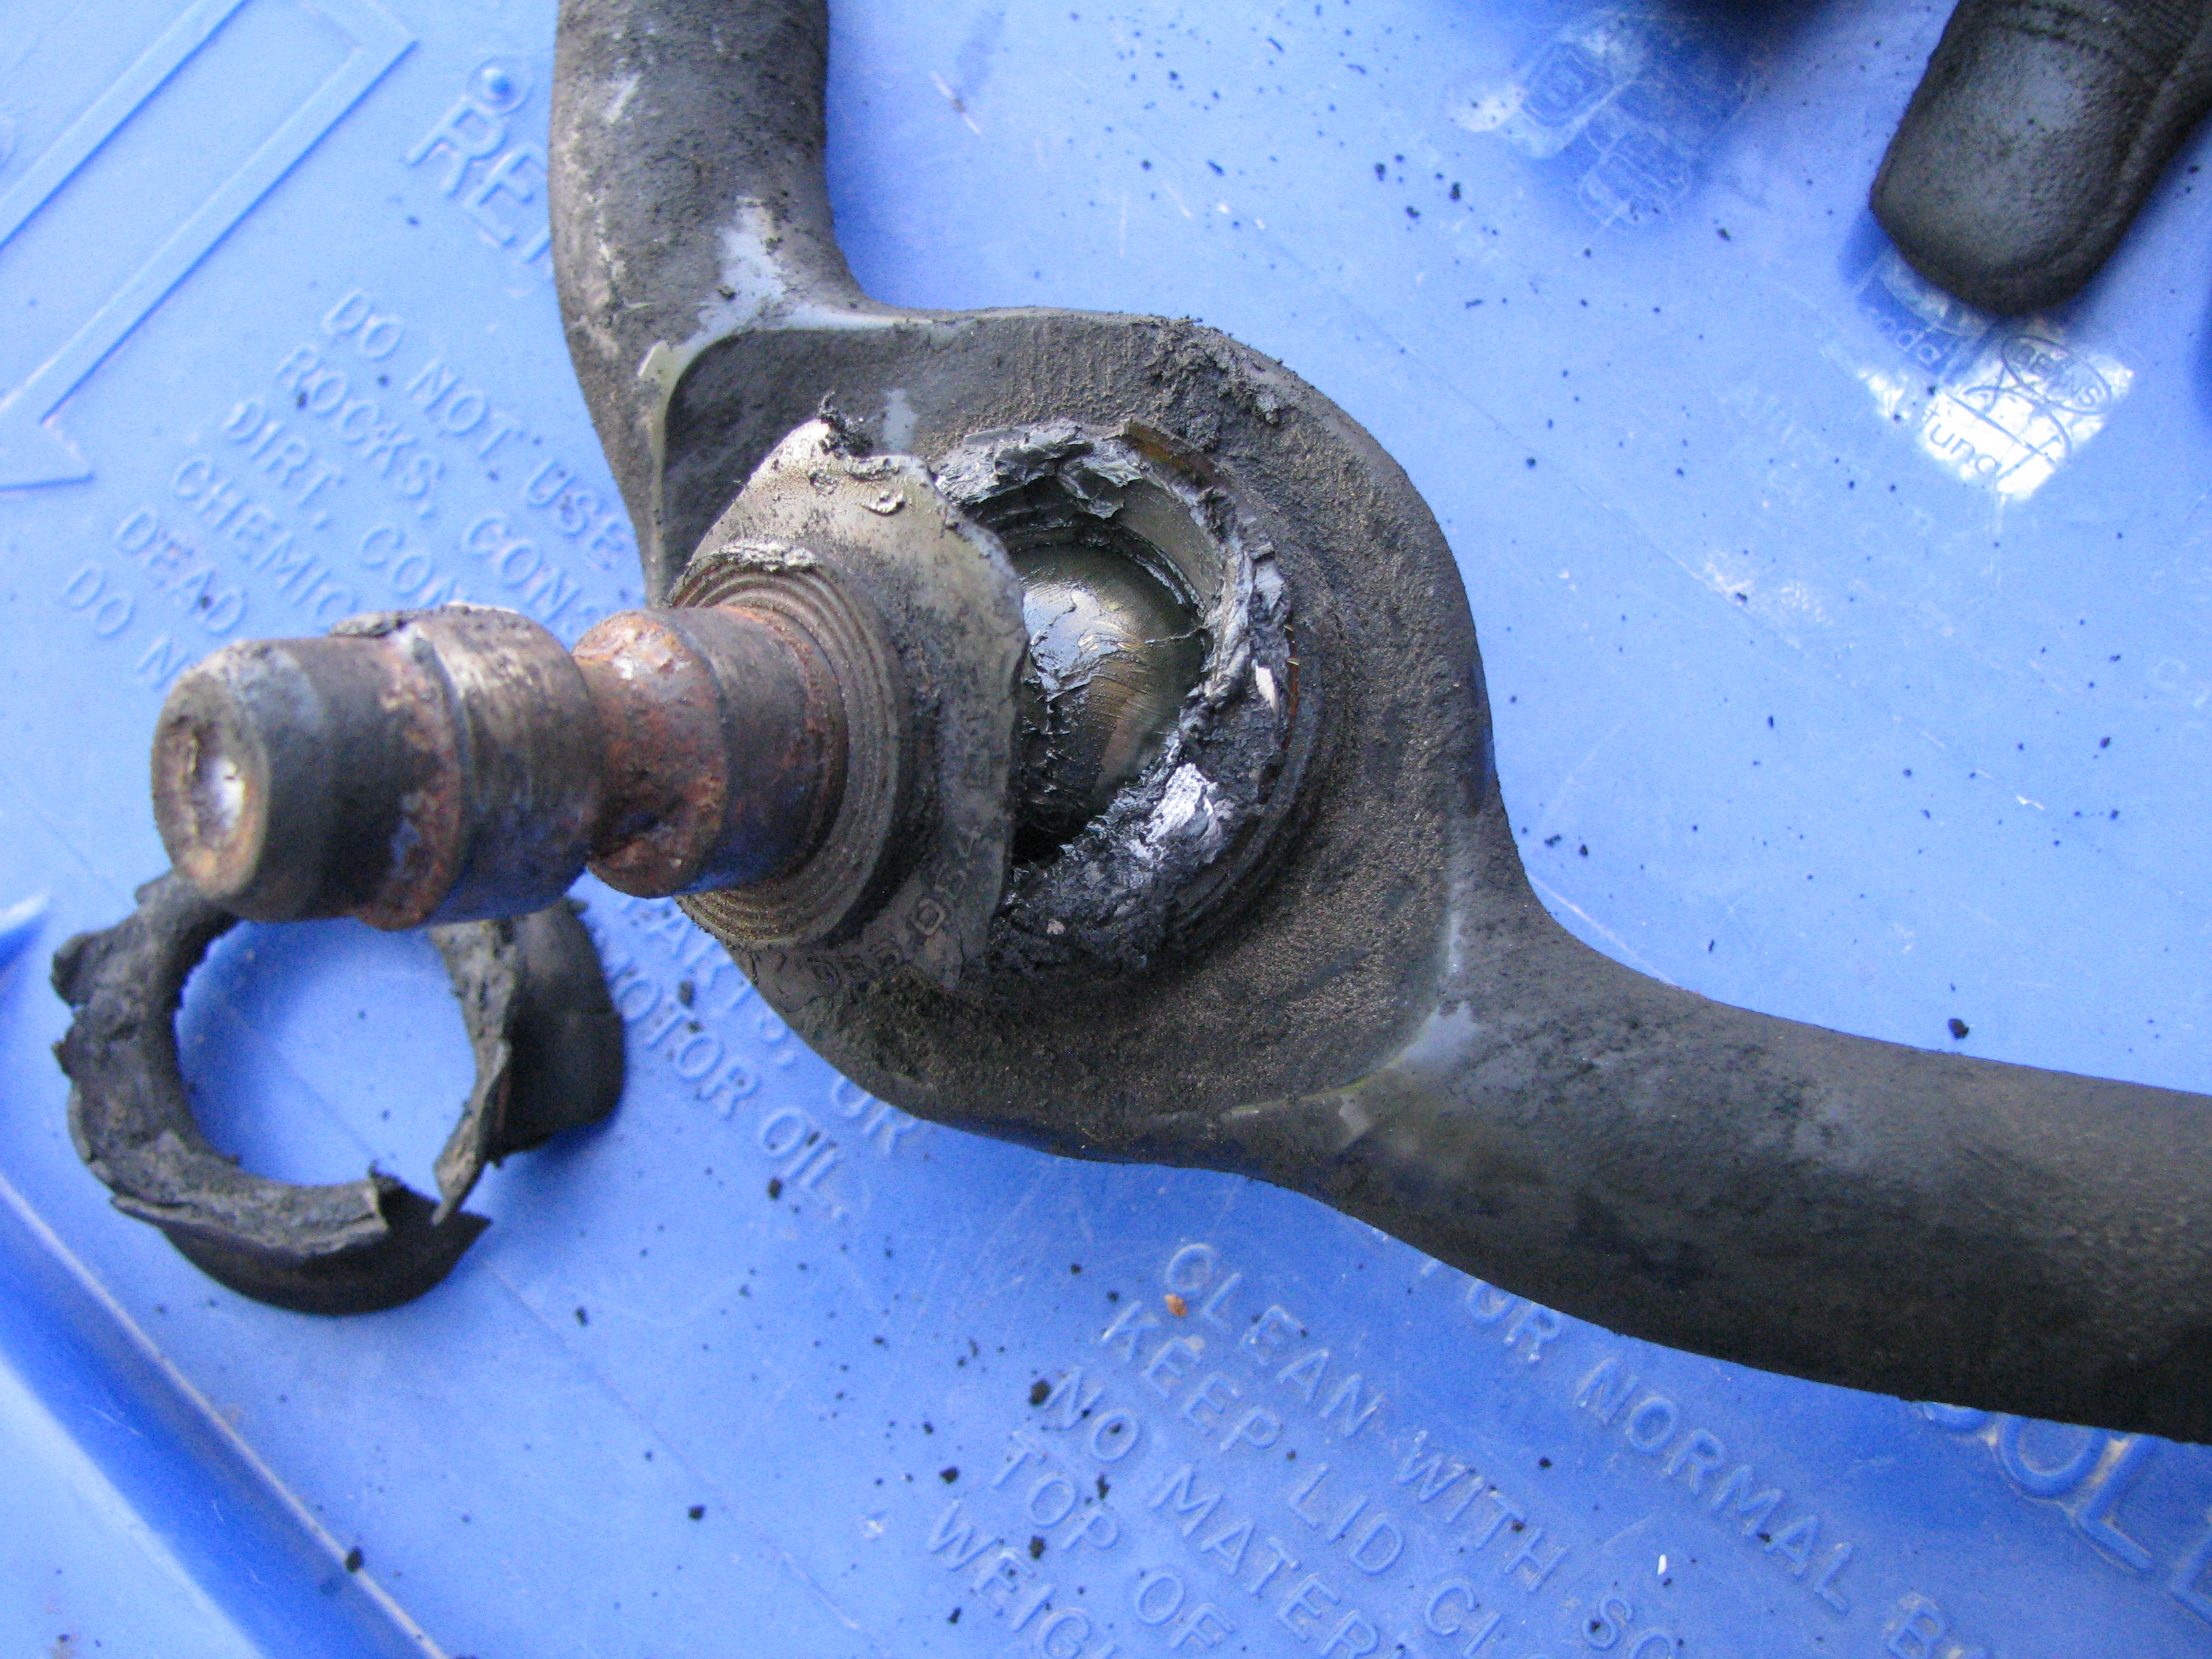 Again, a lot of grease still in here for a destroyed boot - and these aren't greasable parts. (Neither are the Dormans I'm putting in for the uppers) 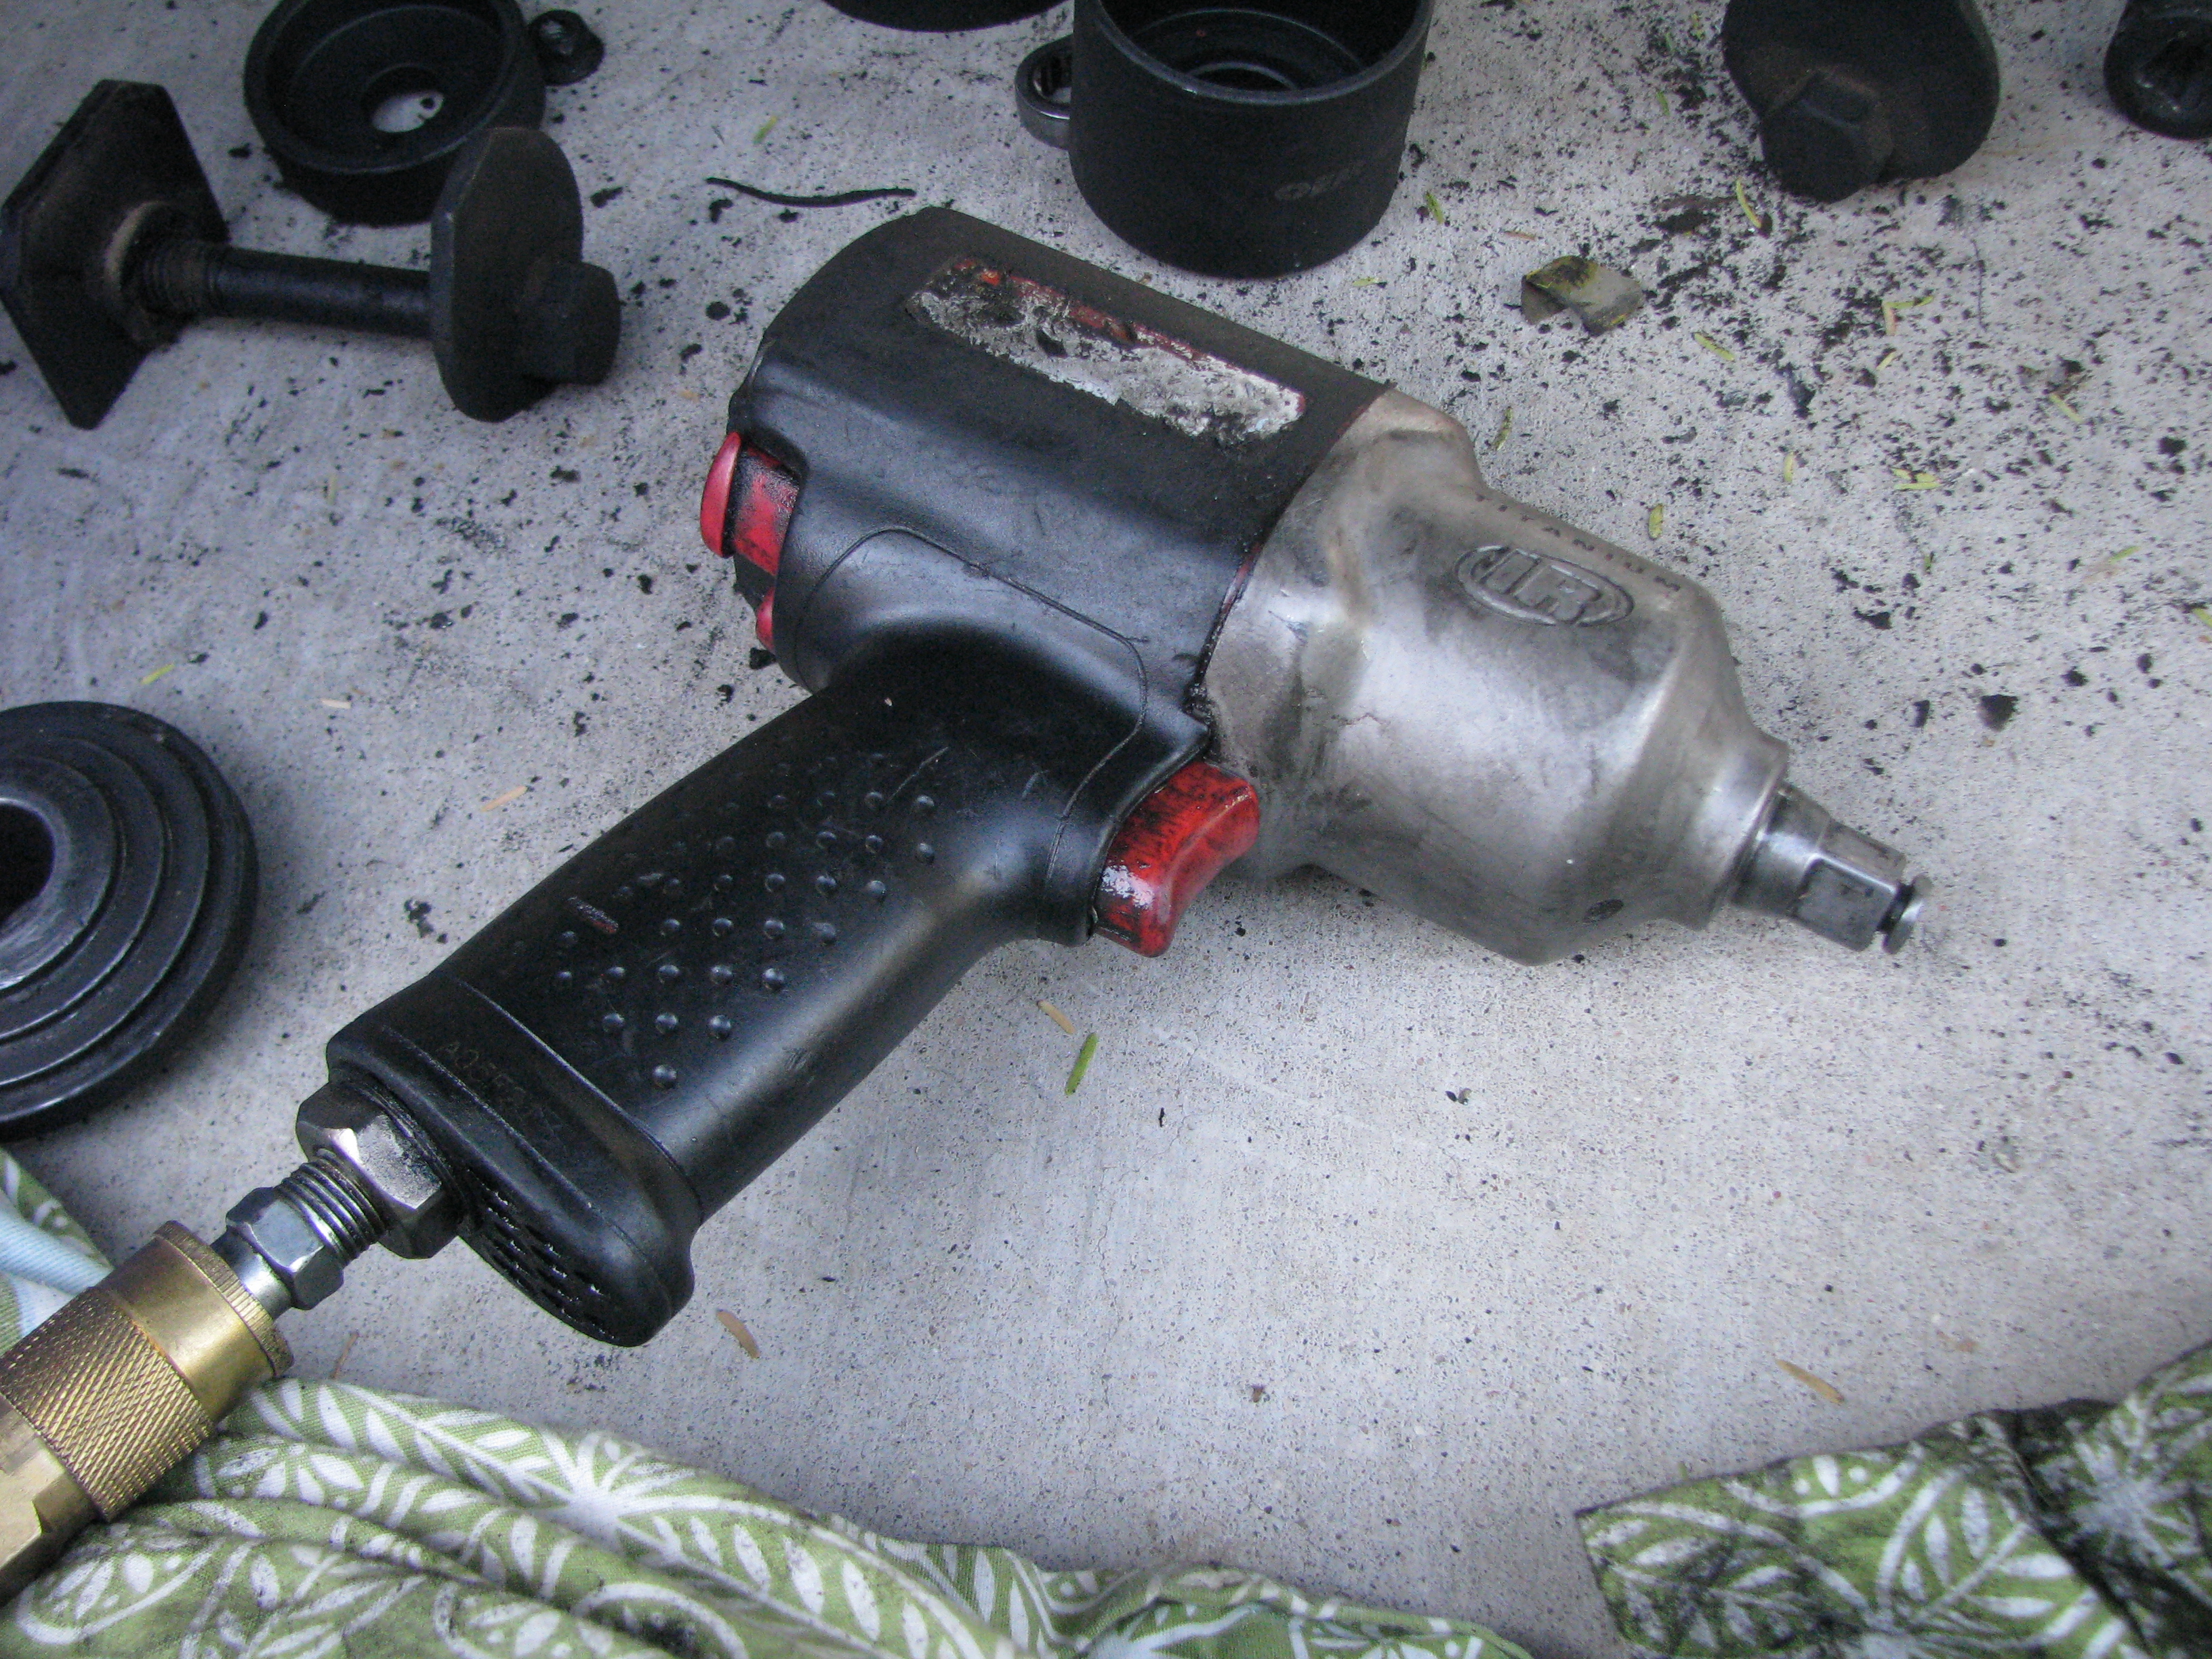 I ended up getting the lower joint cocked a bit initially, so I needed some air help to get it in all the way. Thanks again, JnnyThndrs! 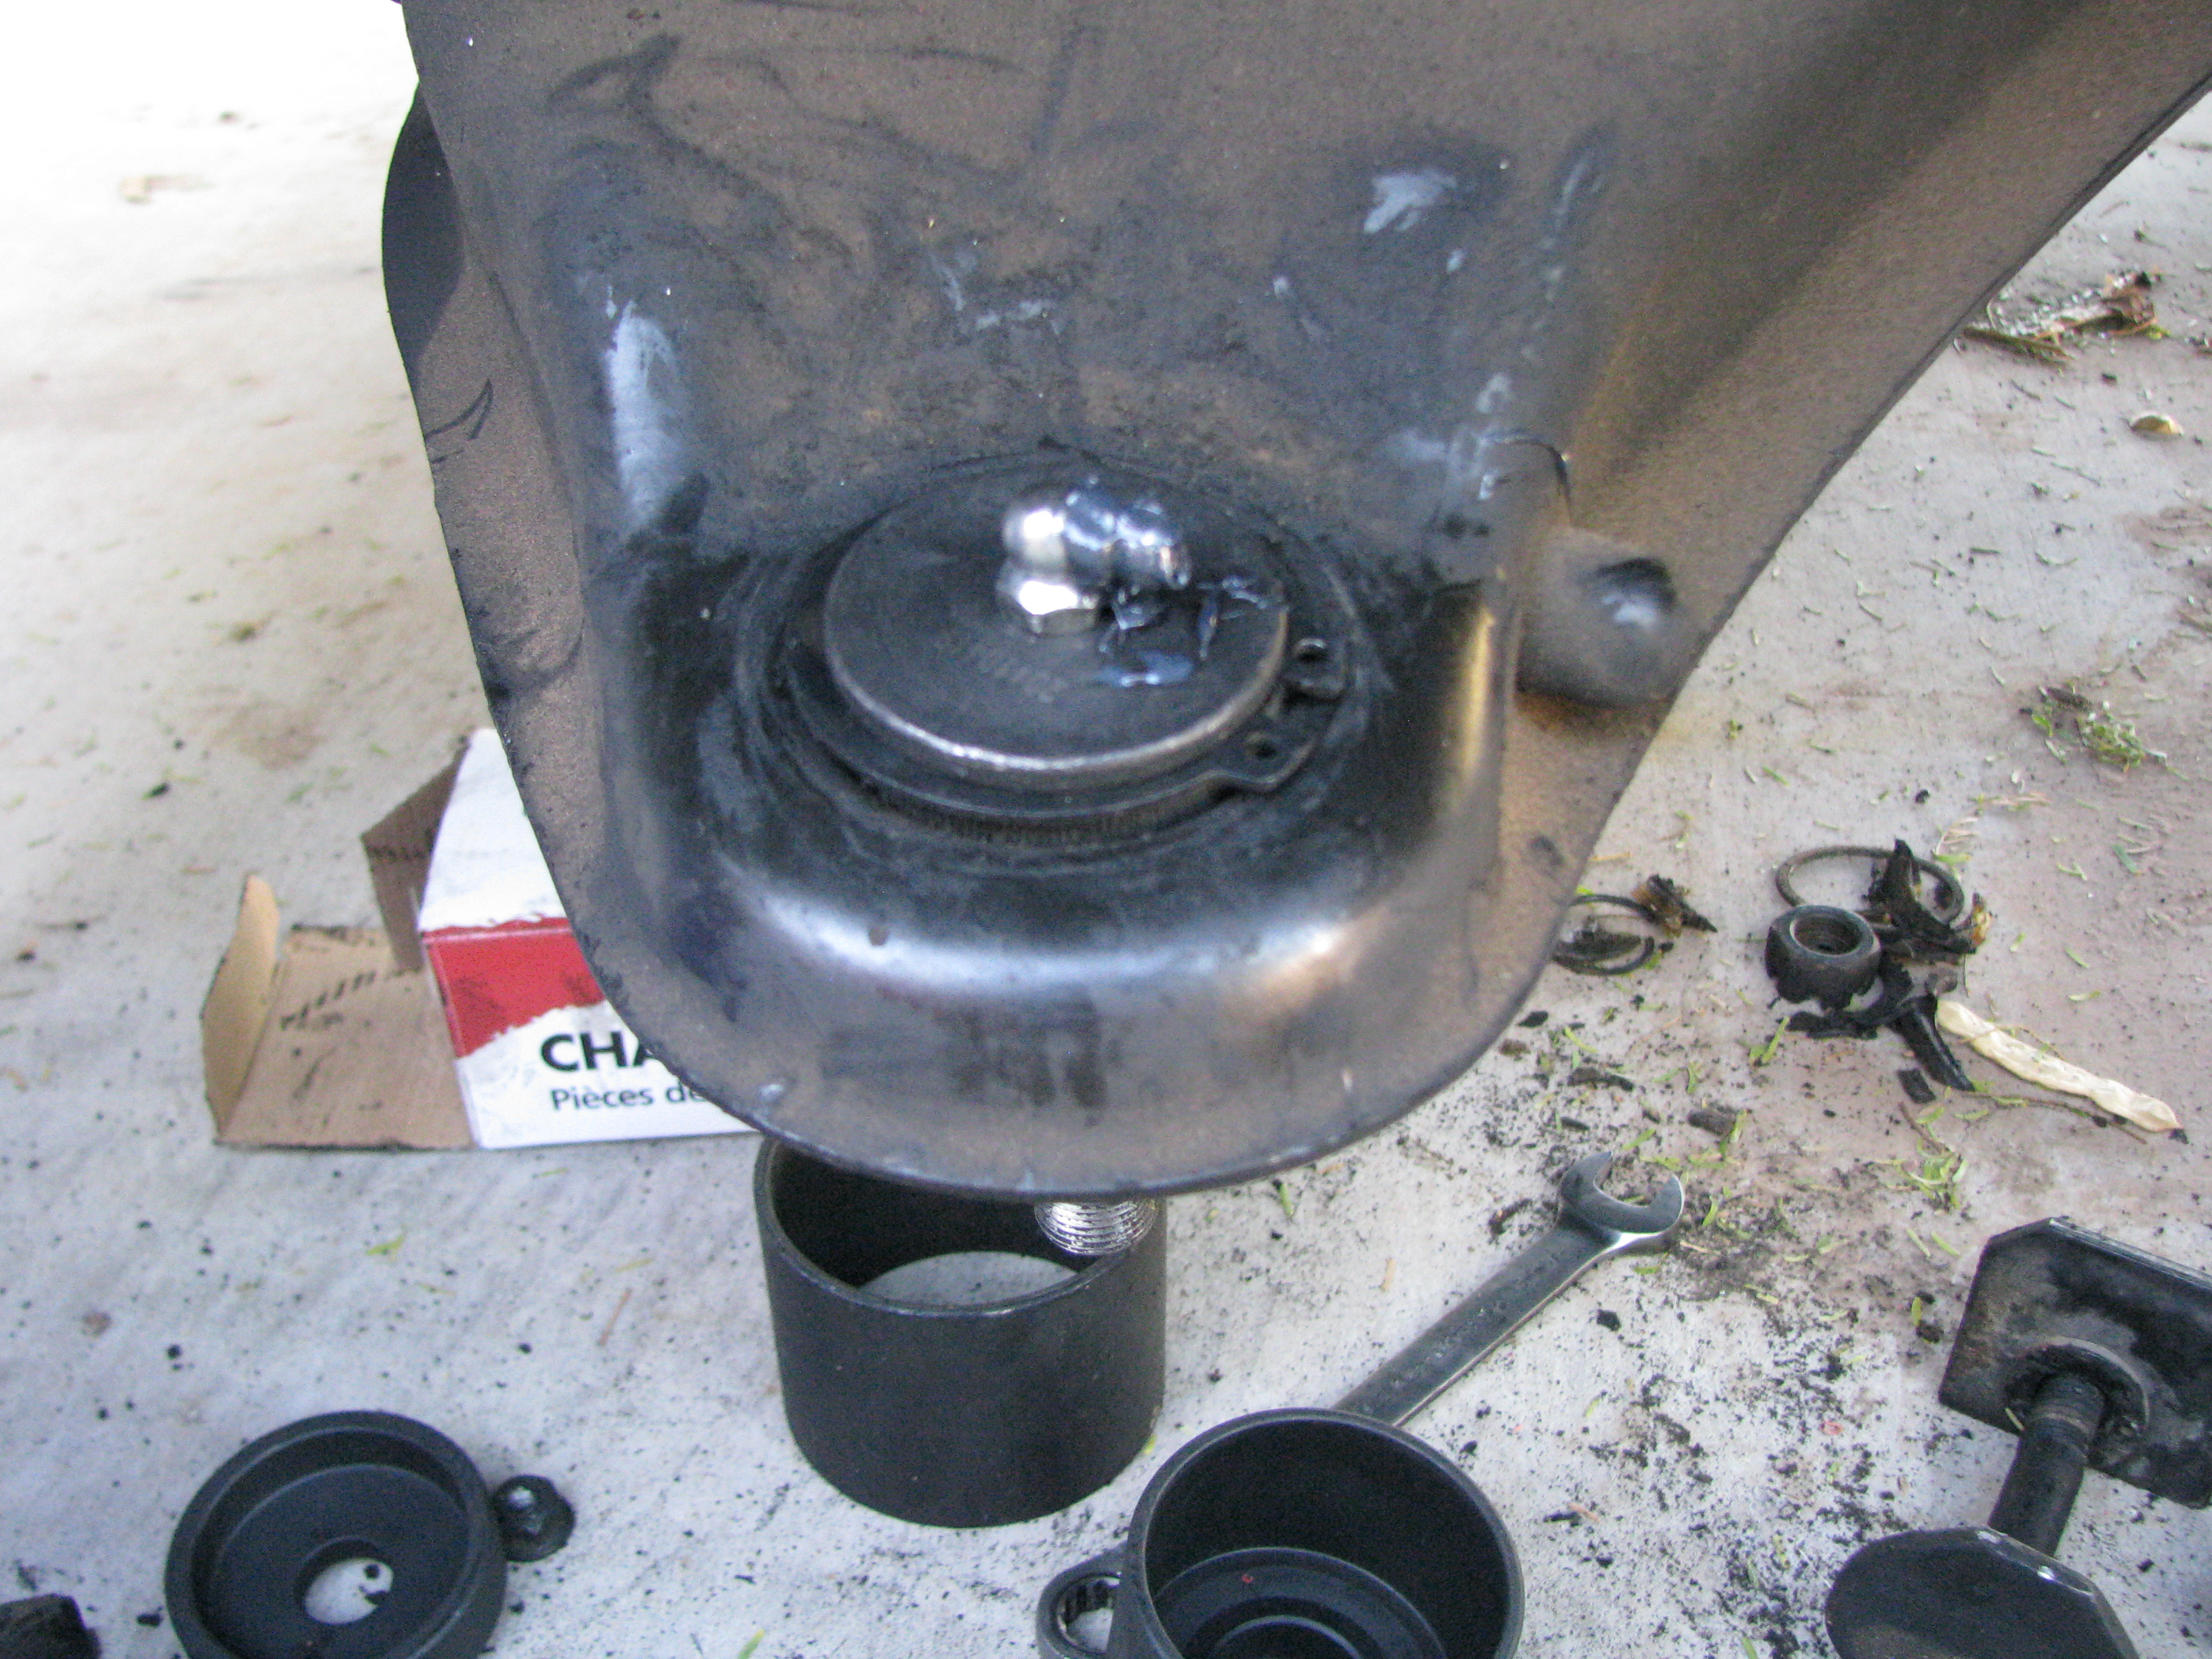 This one came with a 90-degree zerk that wasn't preinstalled for whatever reason. Installed, and greased. 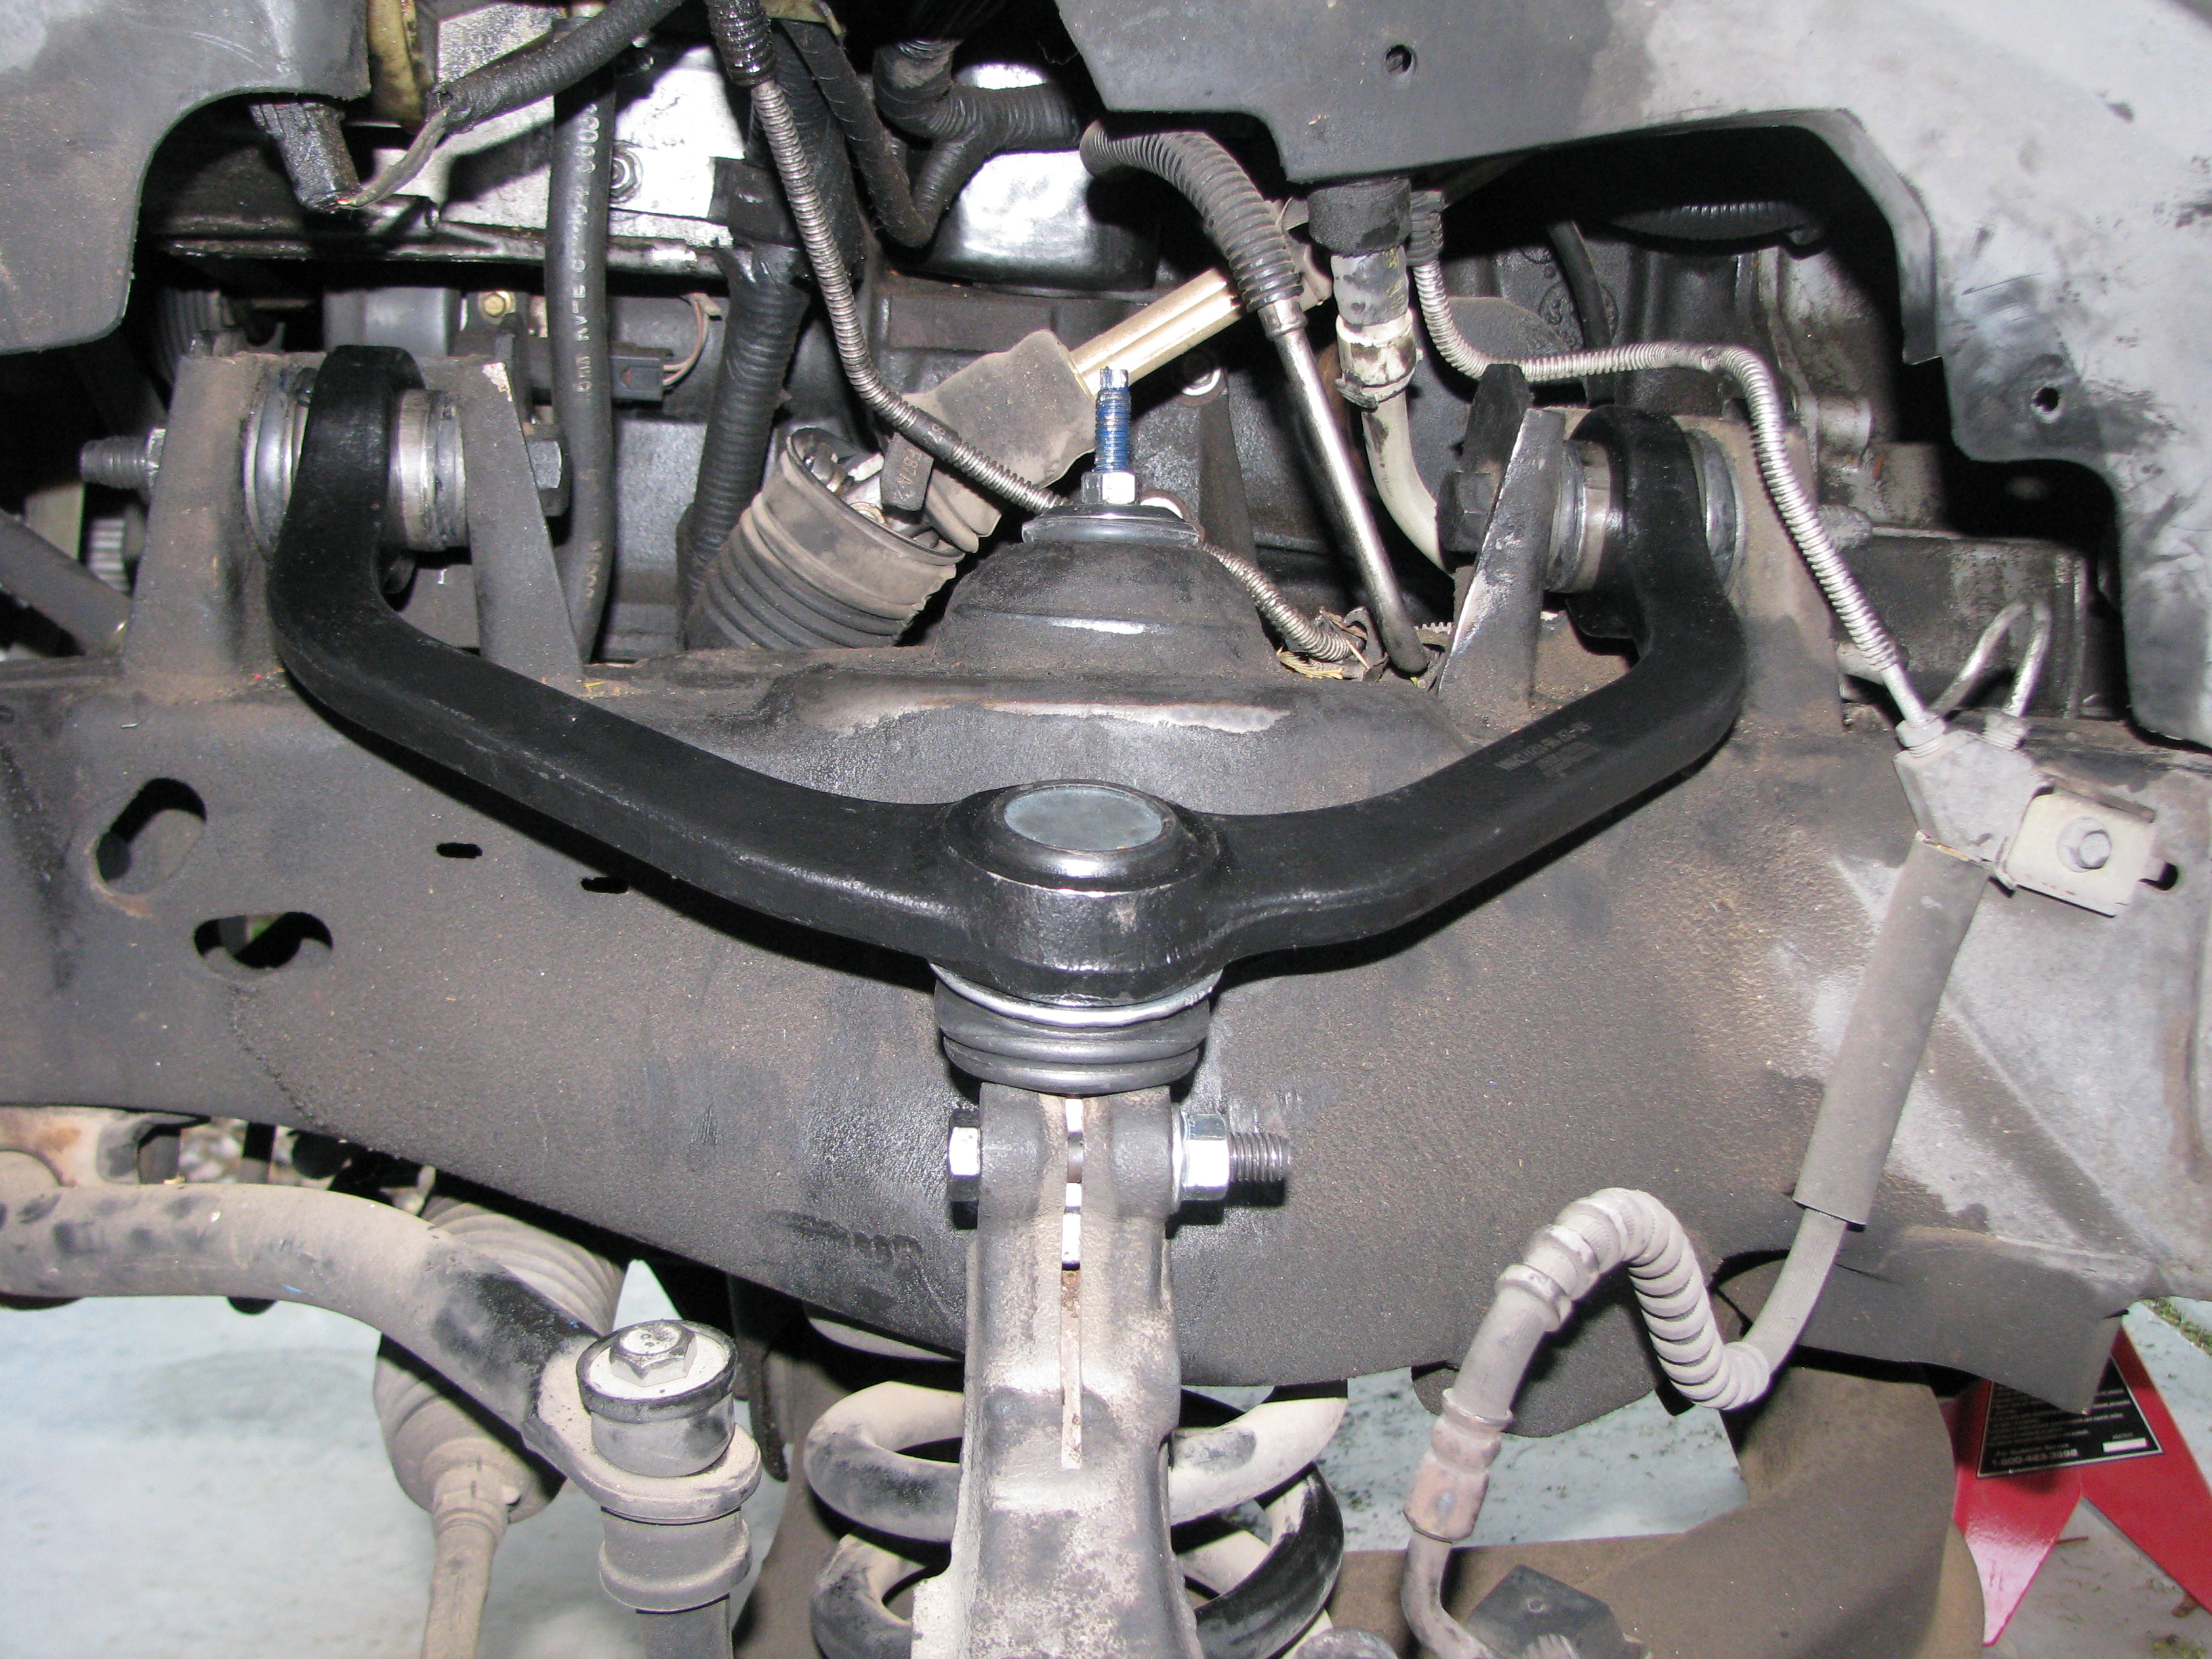 Driver's side all buttoned up. Took it on a short test drive to return the tools to Autozone, definitely needs an alignment but it's definitely a good bit quieter over bumps. Still some noise that I think must be the passenger lower control arm bushings but I'm not replacing that unless it gets some serious play and can't be aligned. Still to come: rear shocks, rear brake rebuild, power steering hoses, and a cluster swap to get a tach. IOwnCalculus fucked around with this message at 17:53 on Apr 23, 2023 |
 #
¿
Aug 6, 2012 06:00
#
¿
Aug 6, 2012 06:00
|
|


|

|
| # ¿ Apr 28, 2024 15:40 |
|
|
It definitely feels 'better' but with the alignment all kinds of screwy, it also wants to wander - which is distracting from the improvements. I'm going to try and squeeze it into the shop for an alignment this week.
|
|
#
¿
Aug 6, 2012 07:36
|
|
|
No photos today since I didn't do anything I wanted to spend any time with a camera for. Changed the oil on the MS3 (holy hell was it hot today) and got the Ranger aligned. Annoyingly enough: the stock control arm bolts on the Ranger / Explorer have a very limited range of adjustment. With the new parts, the shop couldn't get anything more than about 2.5-3 degrees of caster, so I had to pay for some new adjustable bolts. Wish I had known beforehand so I could've bought some for $20-$40 and put them in with the control arms, instead of paying shop prices and rates so that I didn't need to pay for the bolts AND another alignment. Does drive a lot better now, though.
|
|
#
¿
Aug 11, 2012 03:35
|
|
|
She's taken it a lot faster than I ever have, so yes ") She's the same one who drove a 1985 Toyota 4x4 and a 1973 Opel GT, and helped me with the LS1 swap. Fun cars are very much not lost on her.
|
|
#
¿
Aug 11, 2012 15:26
|
|
|
Meatpimp: Good to know about the gun. I did have to crank the regulator on my compressor from 60PSI to 100PSI, though.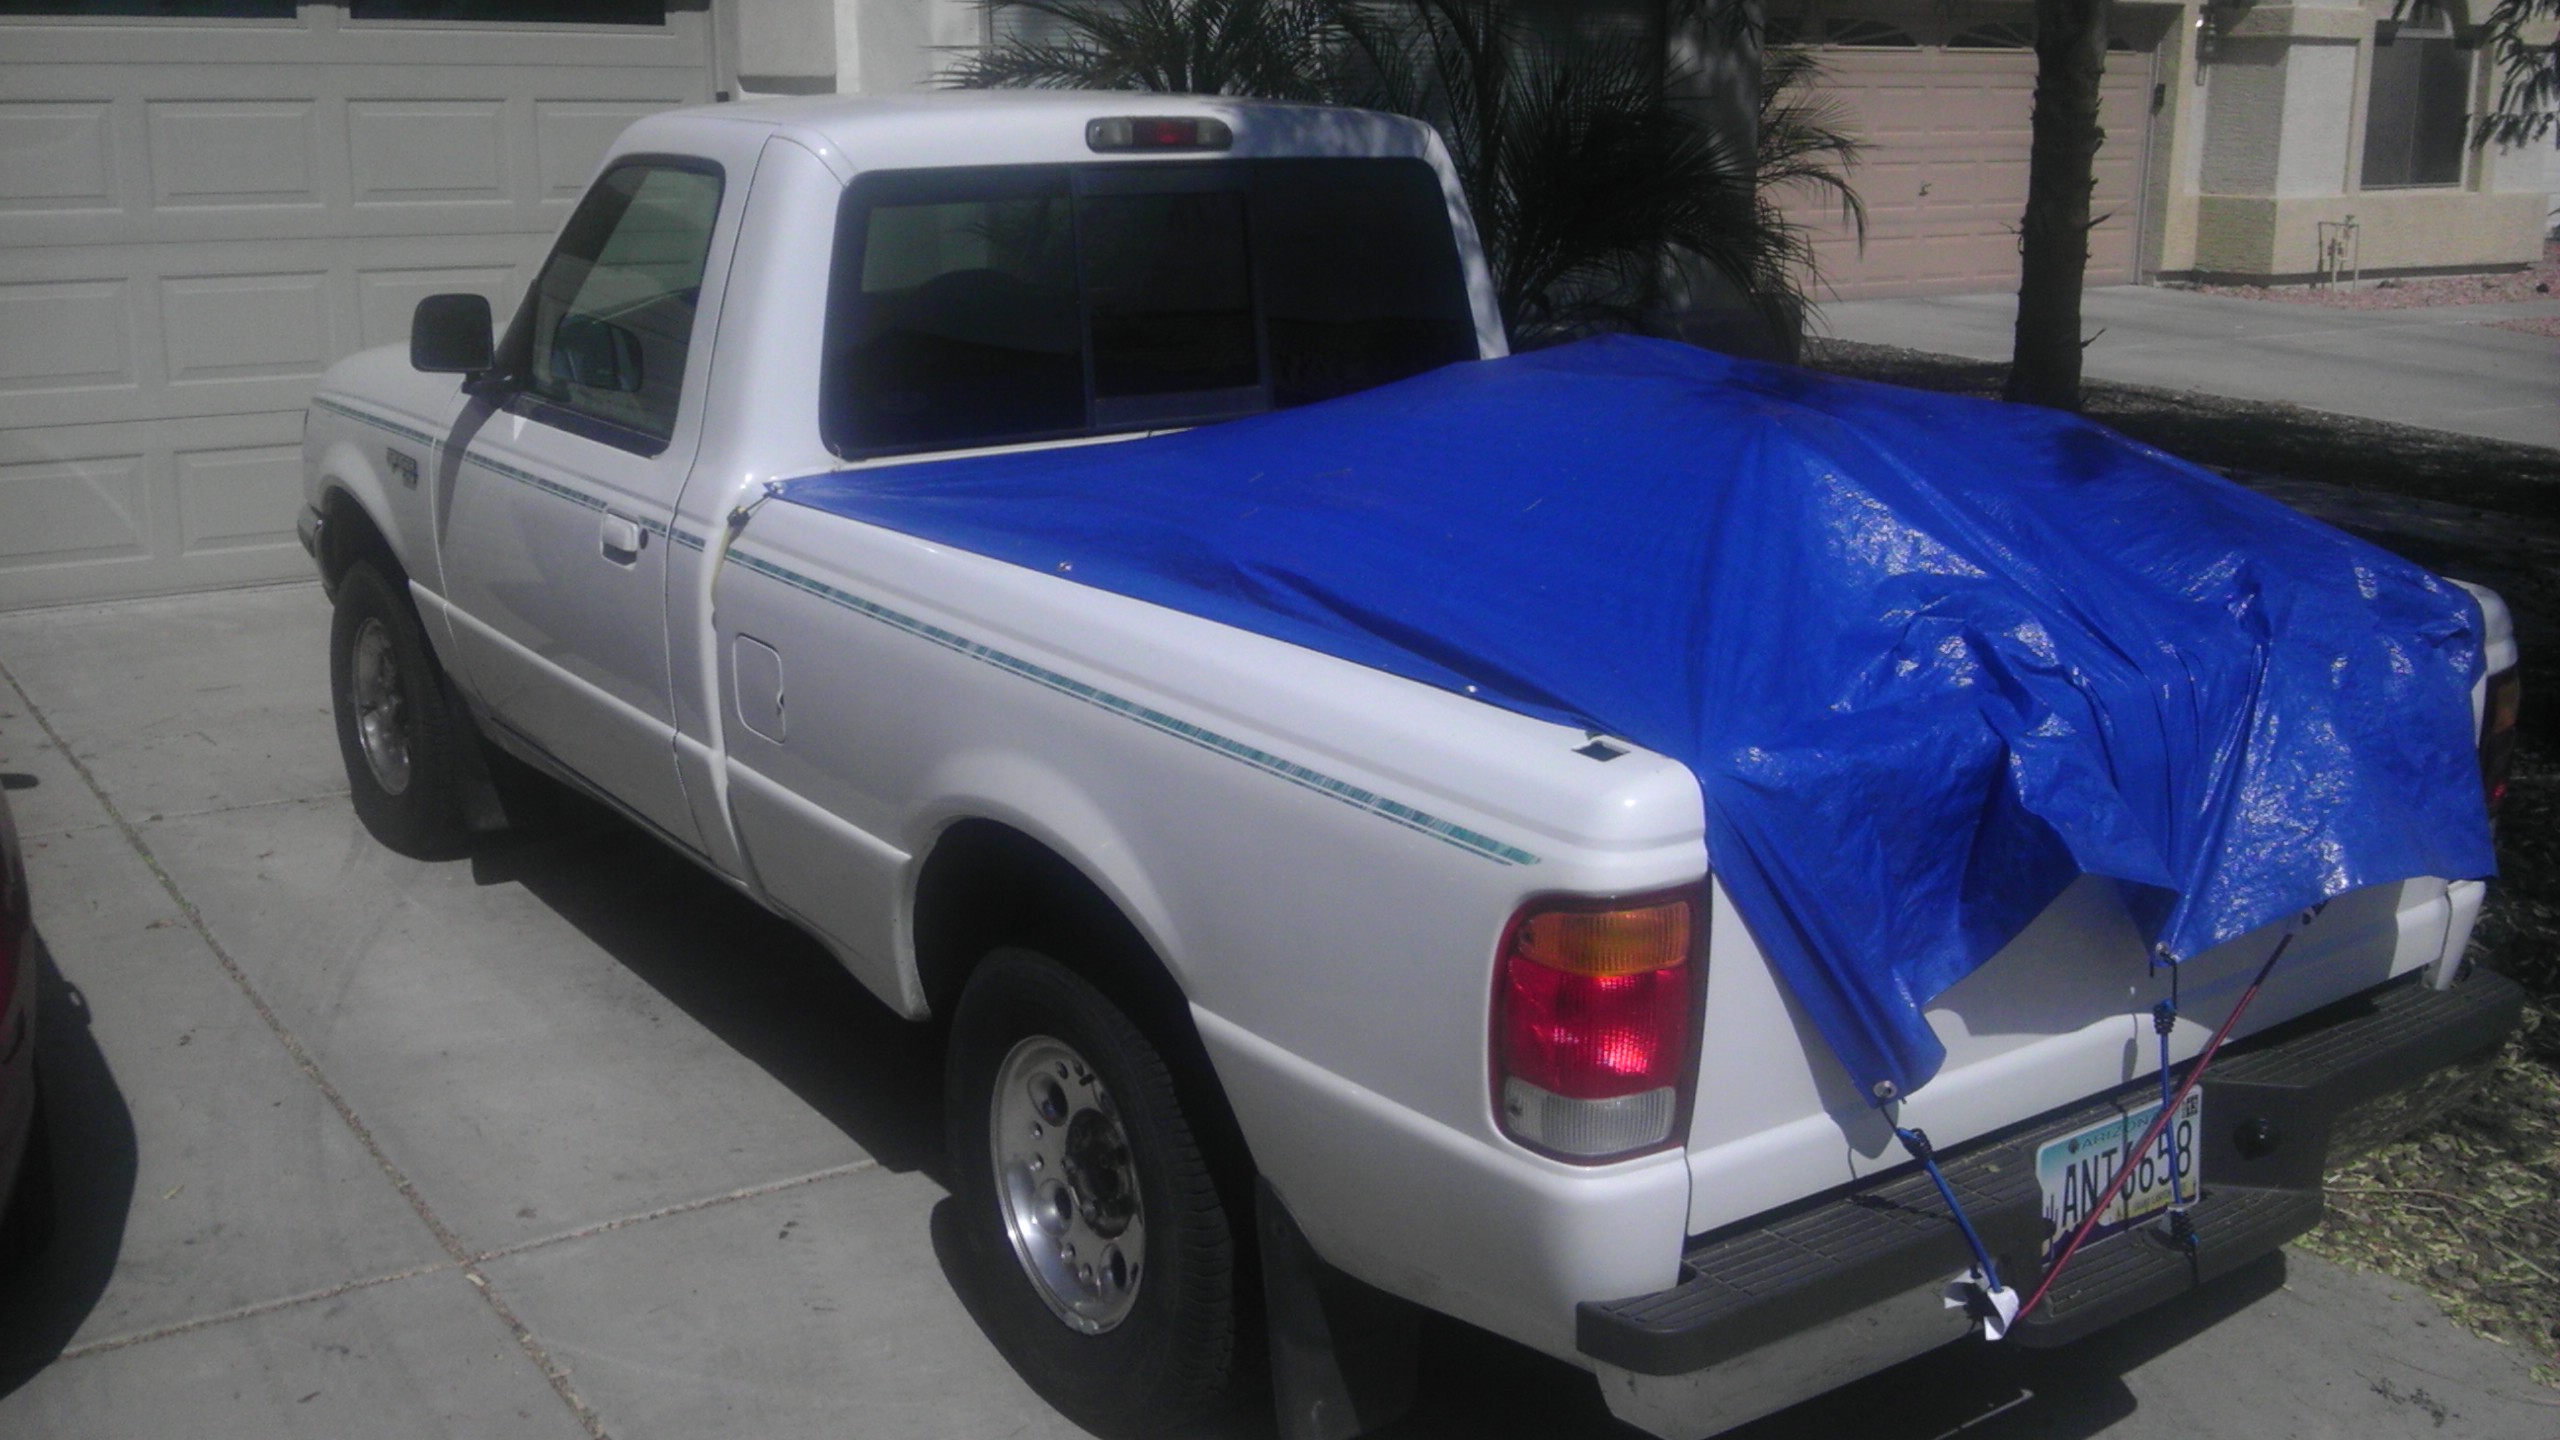 Look, it even does real-truck things! 160 pounds of yard debris. Had a dead tree in the yard that finally toppled over. Thing was even drier than some 2x4's I've bought (and thus, extremely light) but drat if it didn't feel like I was caber tossing when I was one-handing a 6' chunk of the trunk into the dumpster.
|
|
#
¿
Aug 11, 2012 19:49
|
|
|
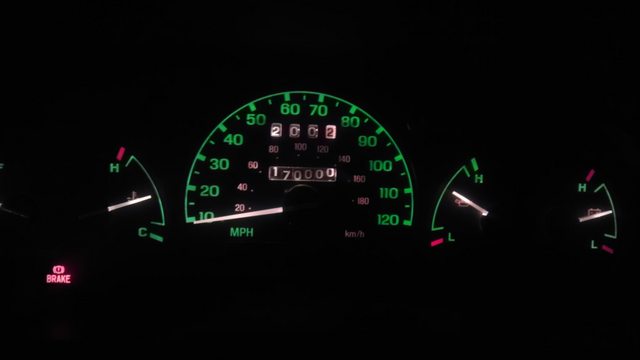 Only about 800 miles to go before I can swap to my new gauge cluster without having to muck around with an odometer swap. IOwnCalculus fucked around with this message at 17:54 on Apr 23, 2023 |
|
#
¿
Aug 20, 2012 05:40
|
|
|
Heh, almost certianly never. The Ranger's number one goal is to be cheap transportation that I don't need to worry about. Besides, I've done the newer V8 swap. If I do an engine swap, the only one I could possibly think of that I'd want to do would be swapping a Mazdaspeed3/6/CX7 turbo 2.3 in. After all, the later Ranger came with the naturally aspirated 2.3L Mazda...
|
|
#
¿
Aug 20, 2012 17:43
|
|
|
I'm quite certain the engine mounts for the 2.3L Mazda are very different than what I have in my 2.5L Pinto powered truck, though I don't know if that's something that can be easily swapped or if it's a new crossmember. Then on top of that, I have no idea if the transverse 2.3 has the same mounting capabilities as the longitudinal 2.3.
|
|
#
¿
Aug 20, 2012 18:02
|
|
|
So, I did stuff again today!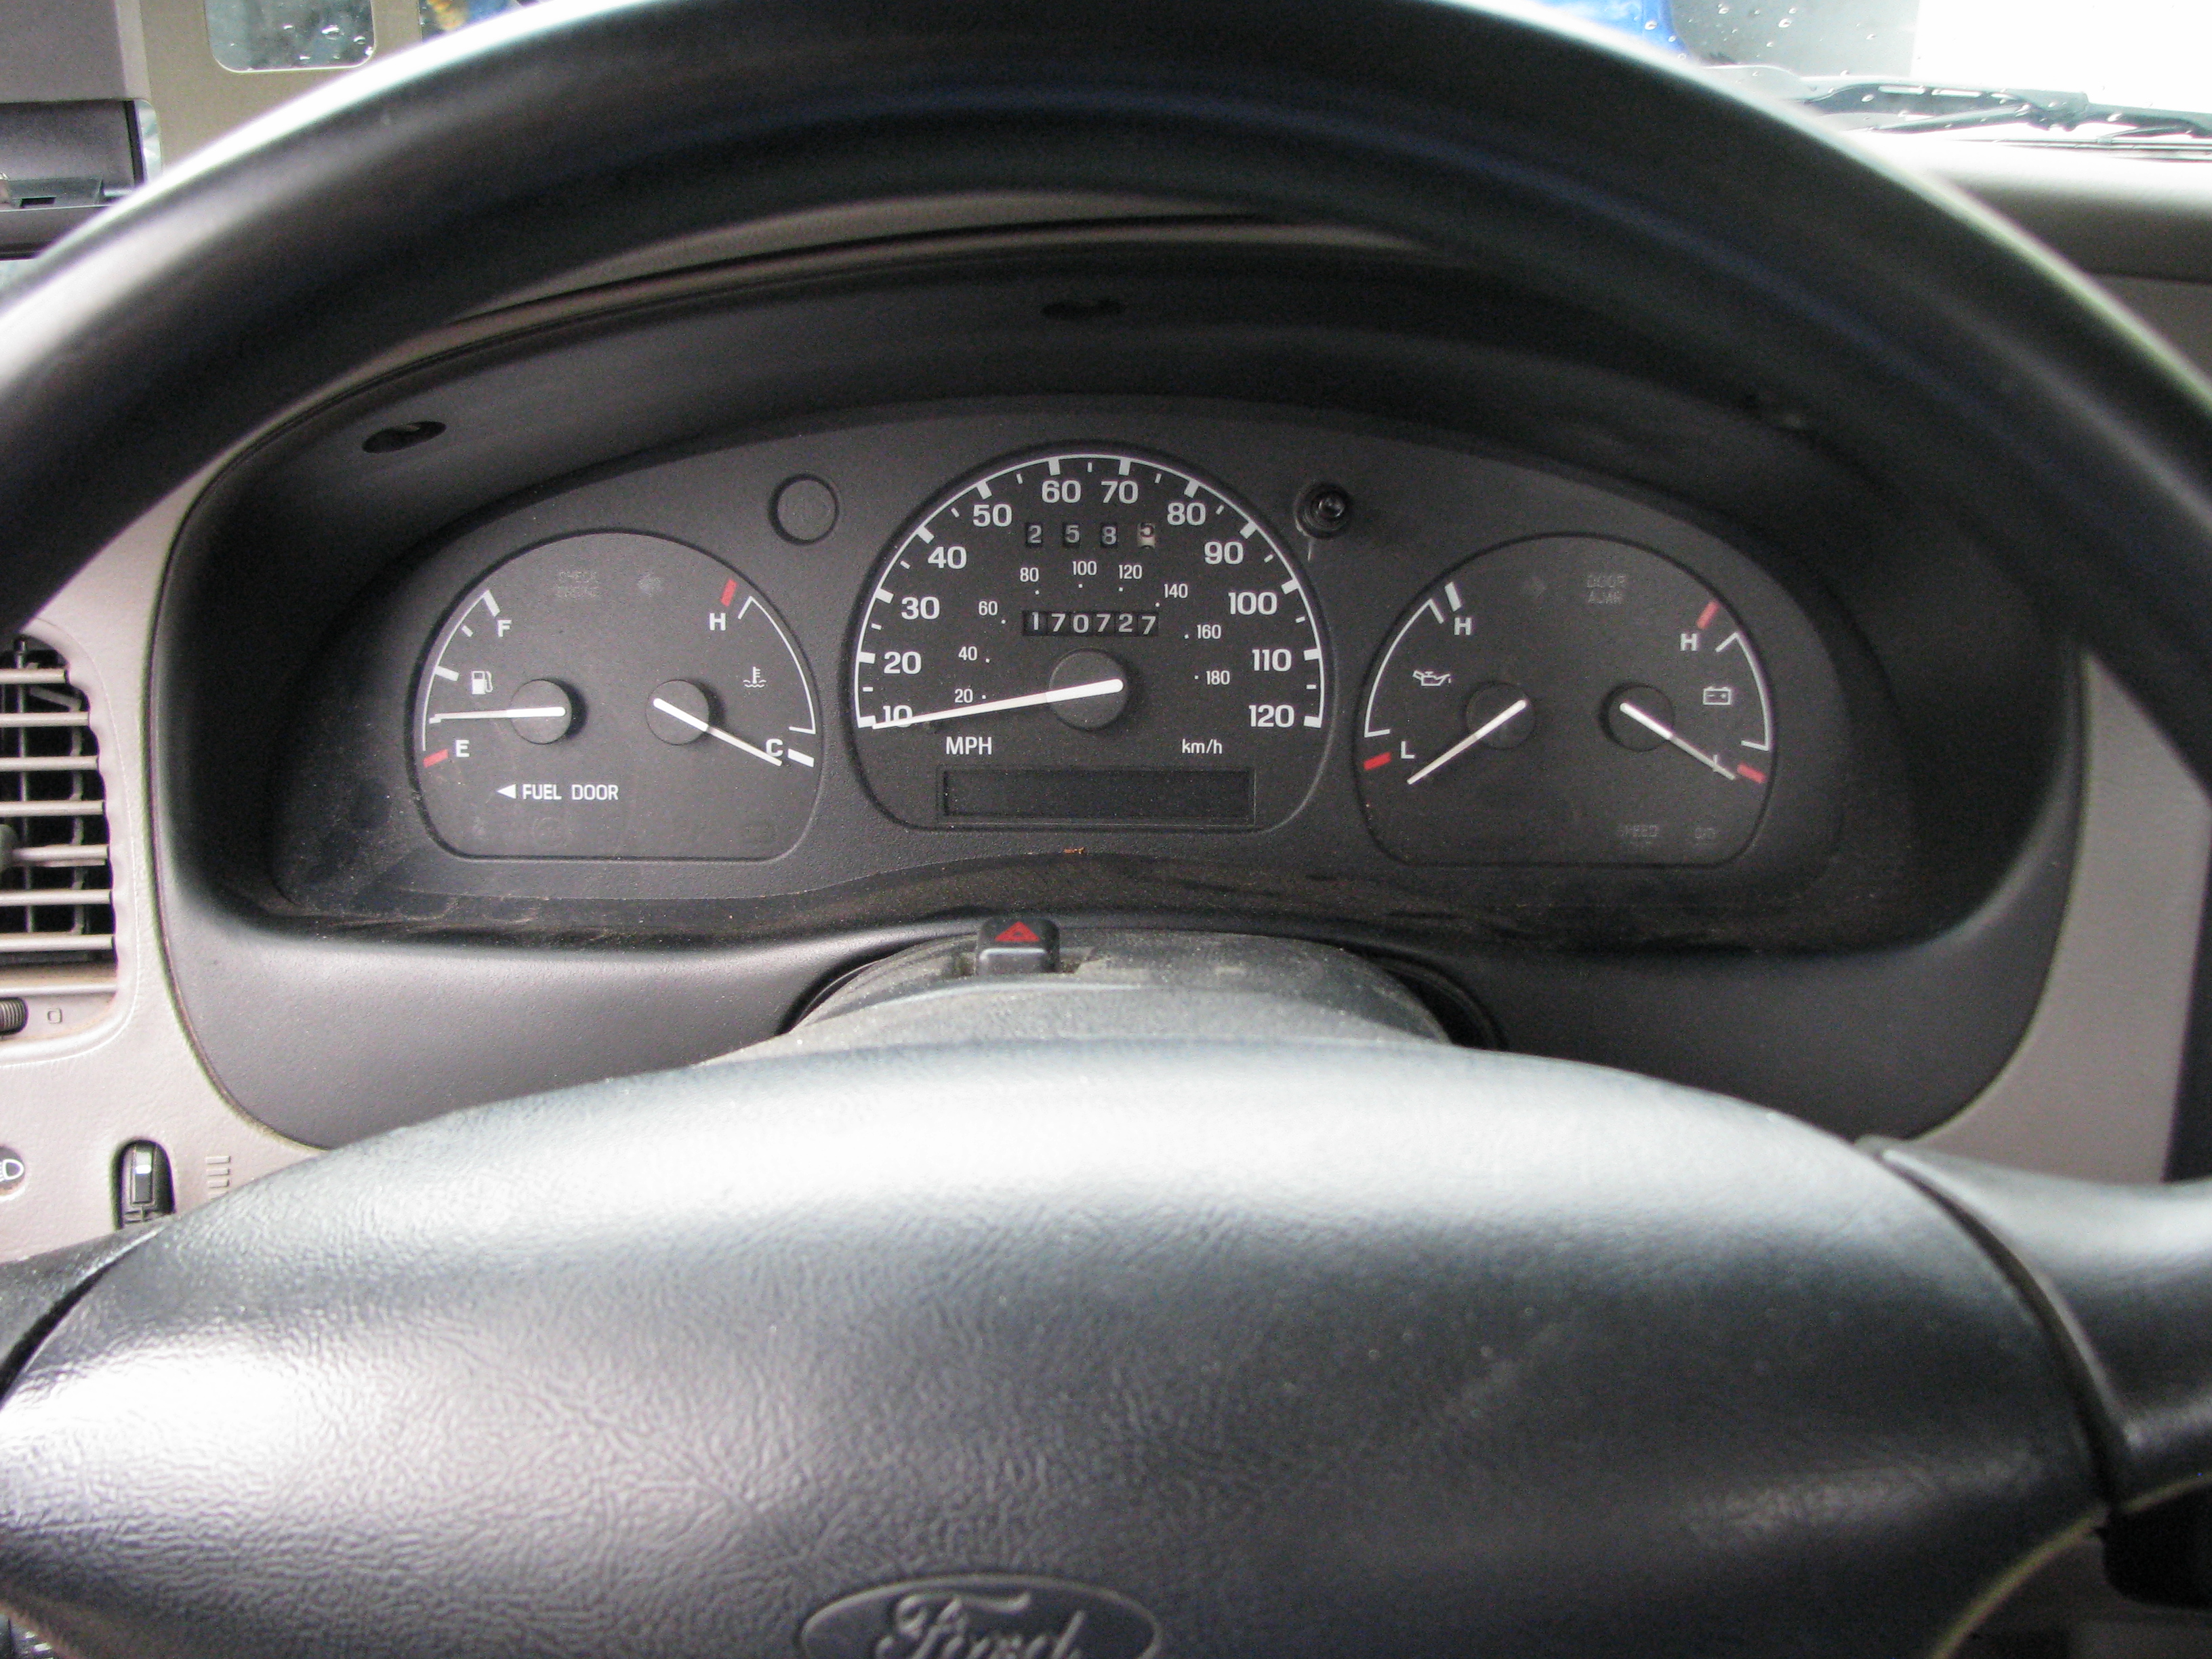 Where we started the day - still no tach, and just for fun the trip odometer has started not wanting to reset to 000.0 recently, so I'm glad I don't have to swap the odometer over to the new cluster. 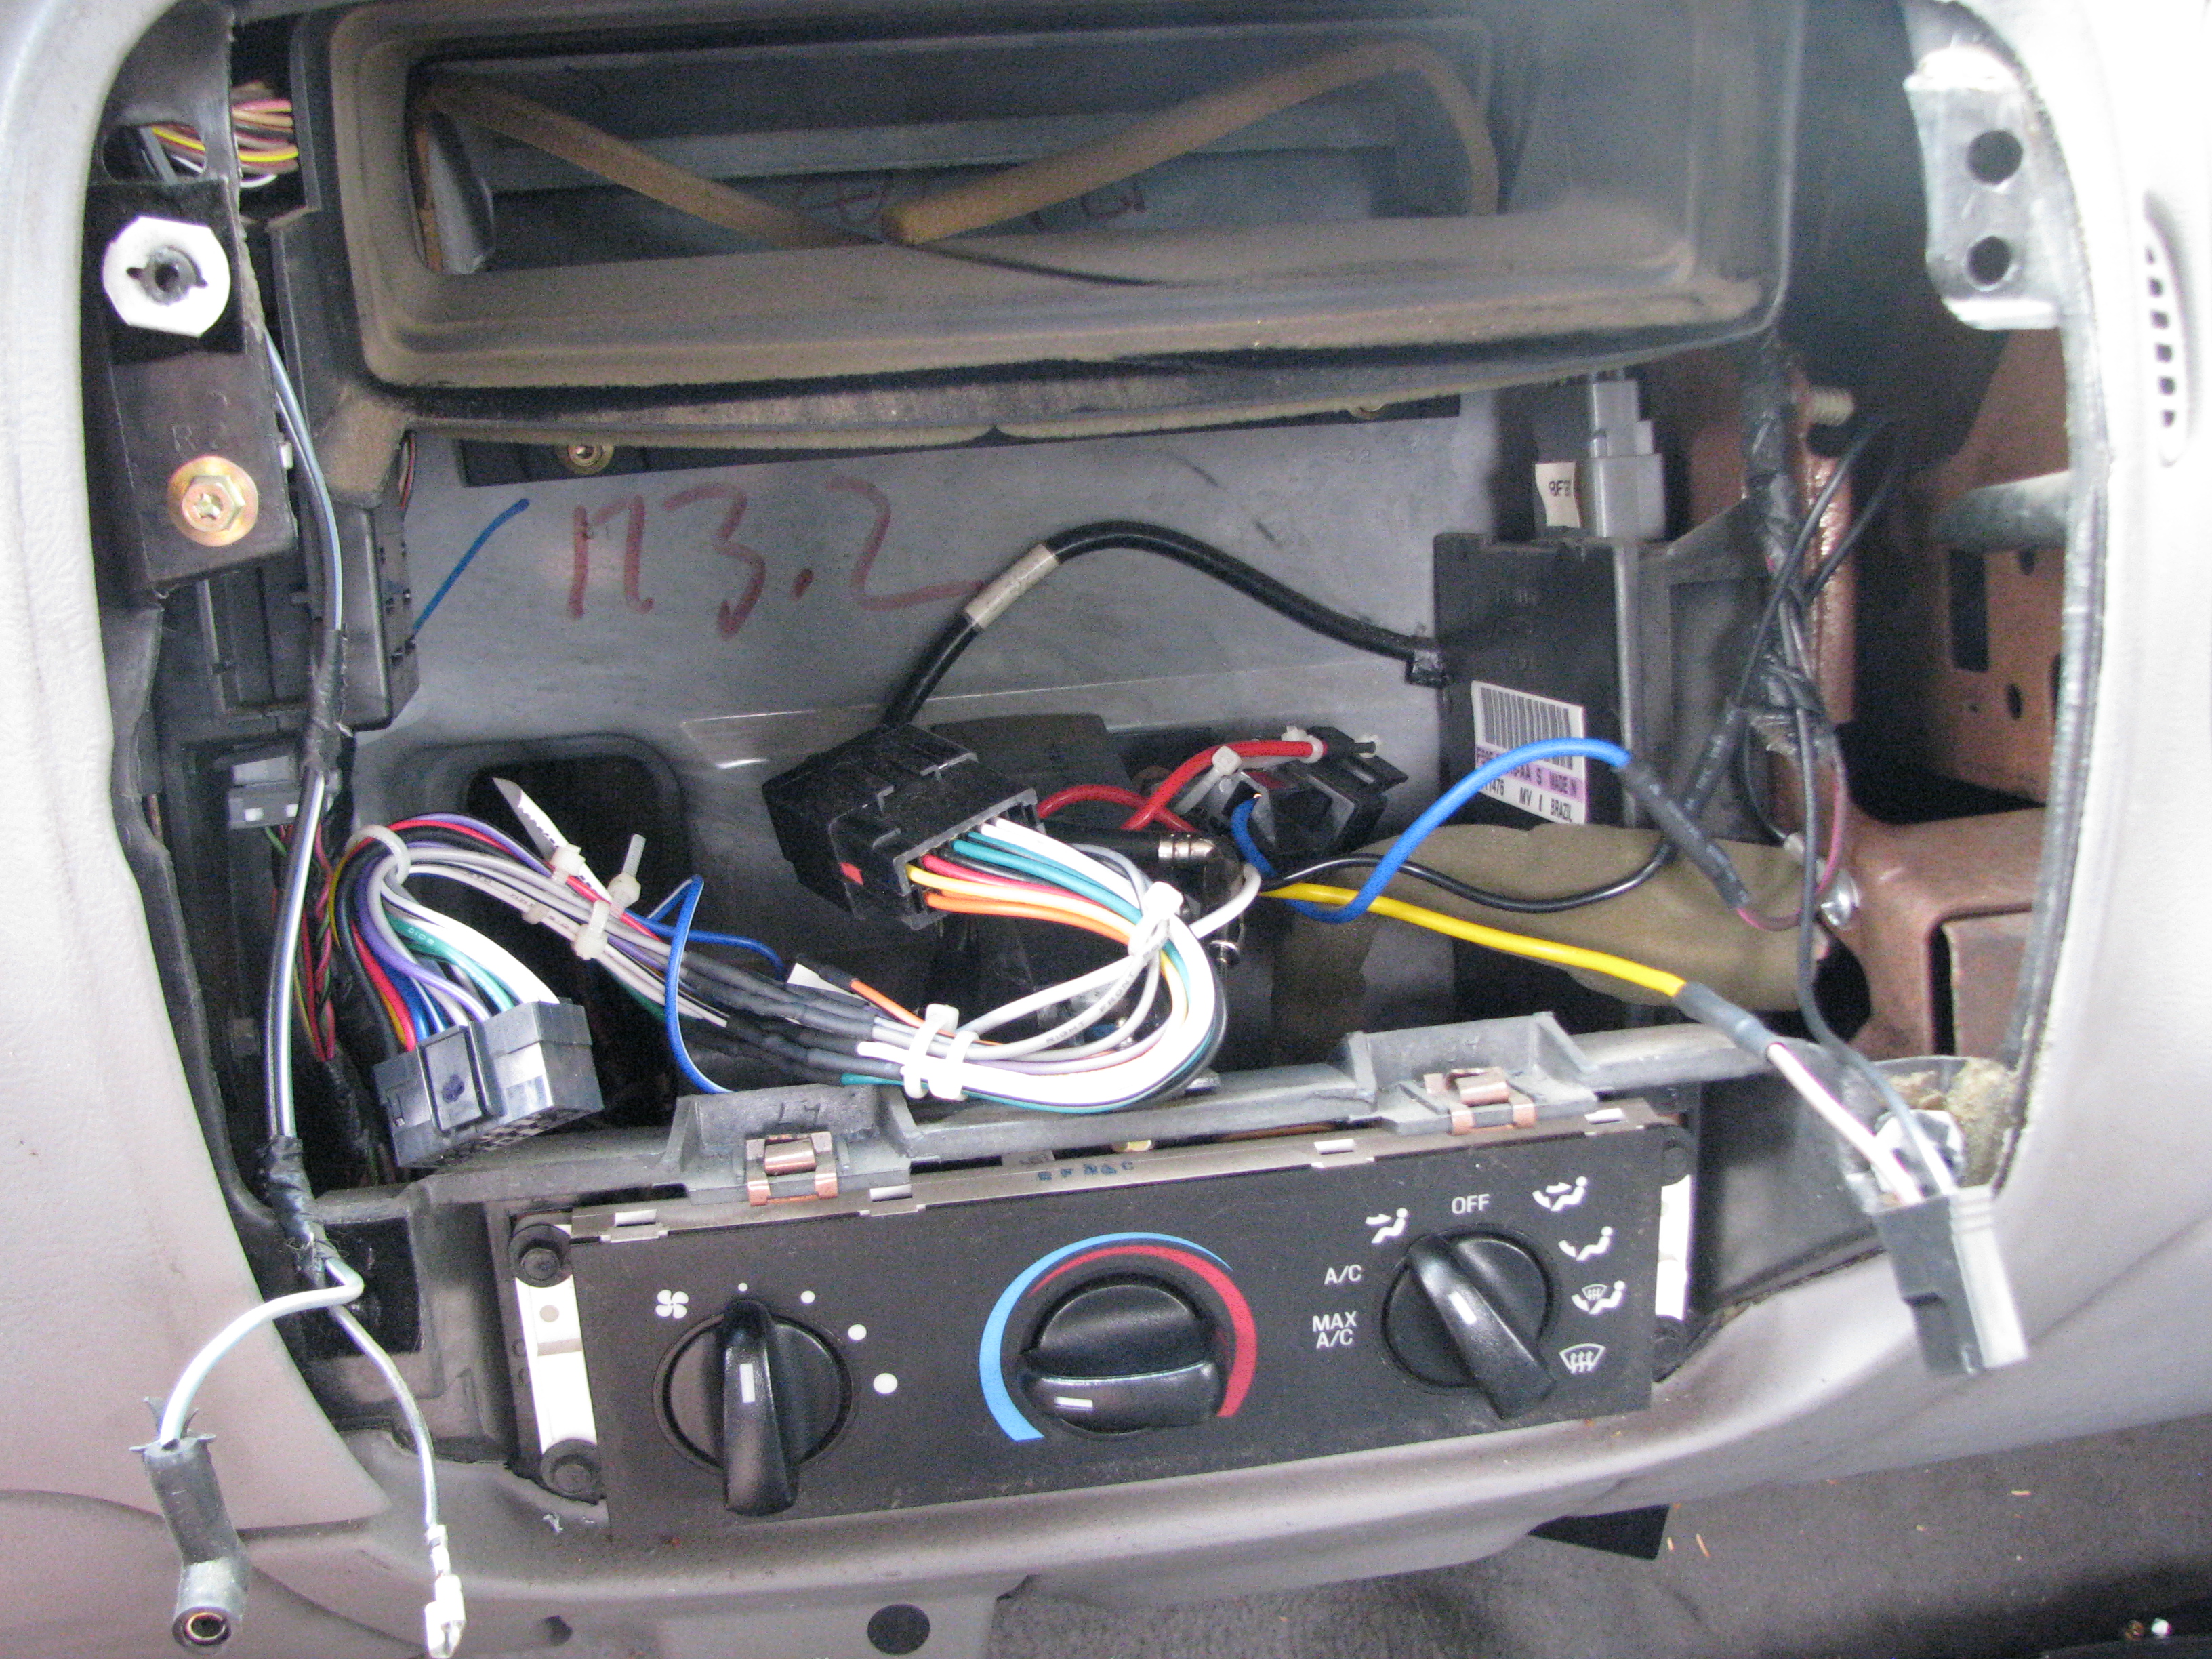 Three screws and some yanking gets the center portion of the dash out. Shown, my wiring job on the radio as well as the wiring for a relay I added to make the power port trigger based on the amp turn-on wire from the head unit. 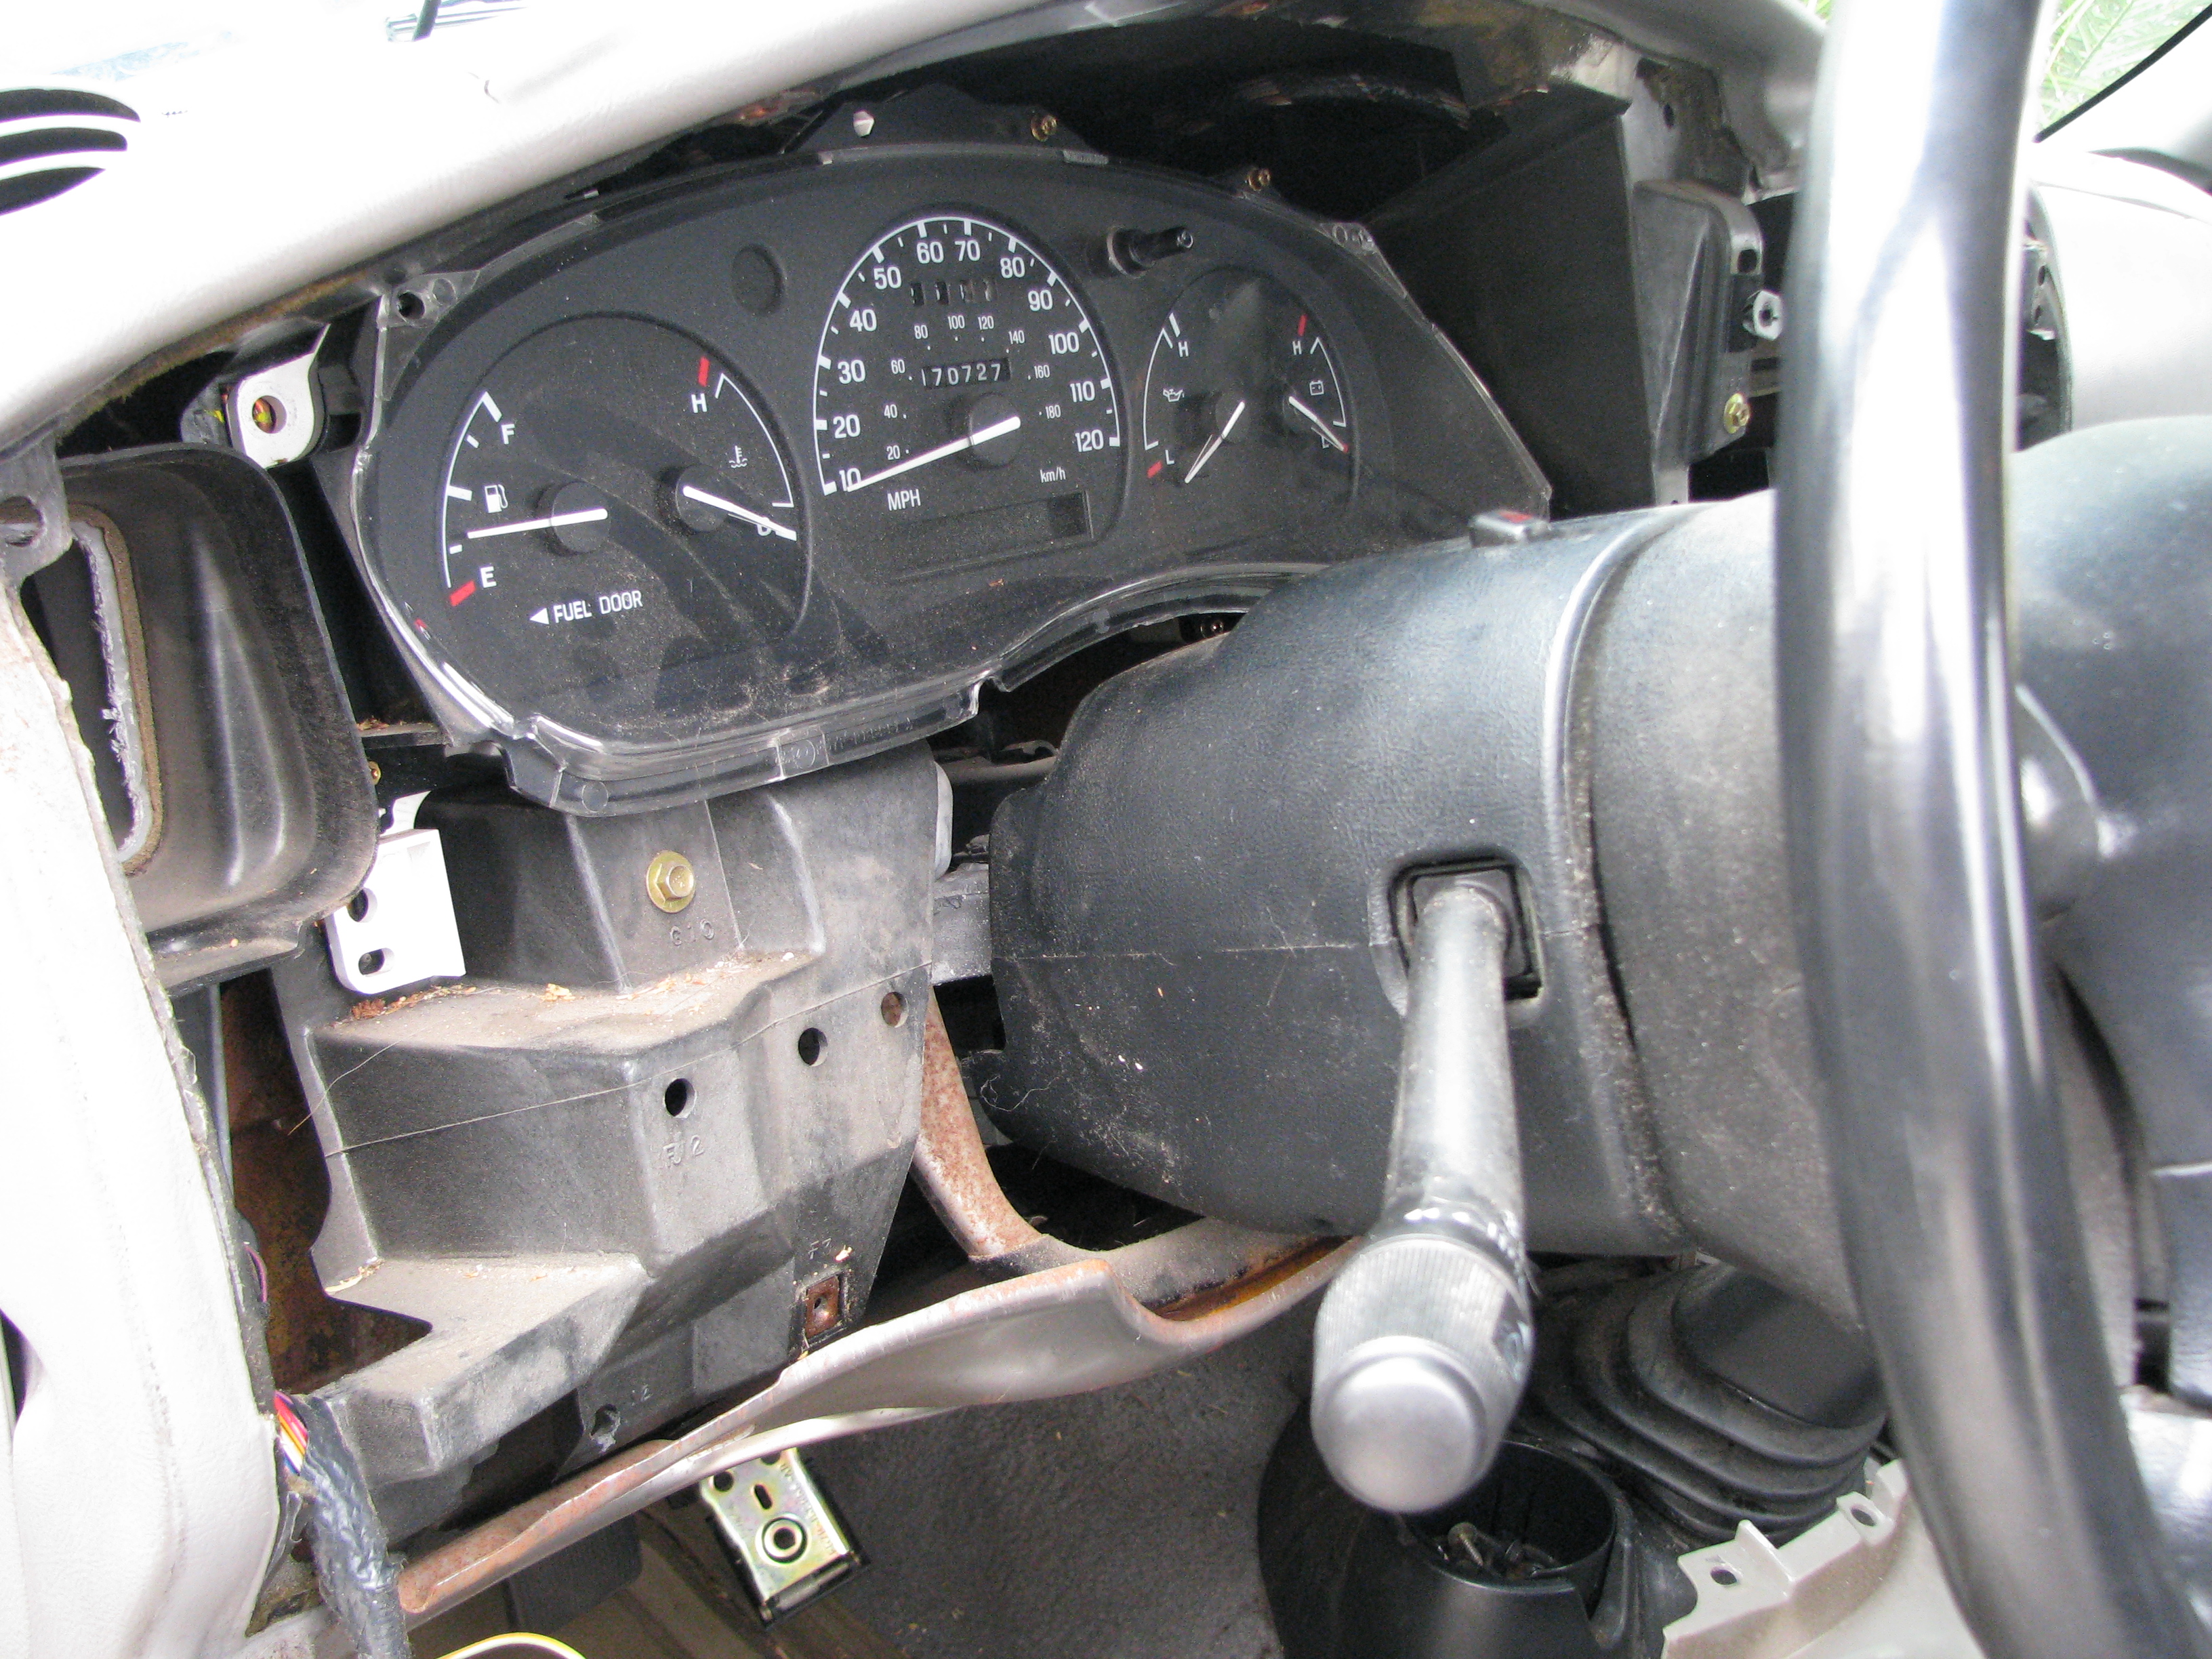 More screws and more yanking pulls the dash surround out. Conveniently, since the last time I had this apart I forgot to actually screw the cluster in, it just pulls out!  Never rattled, amazingly. Never rattled, amazingly.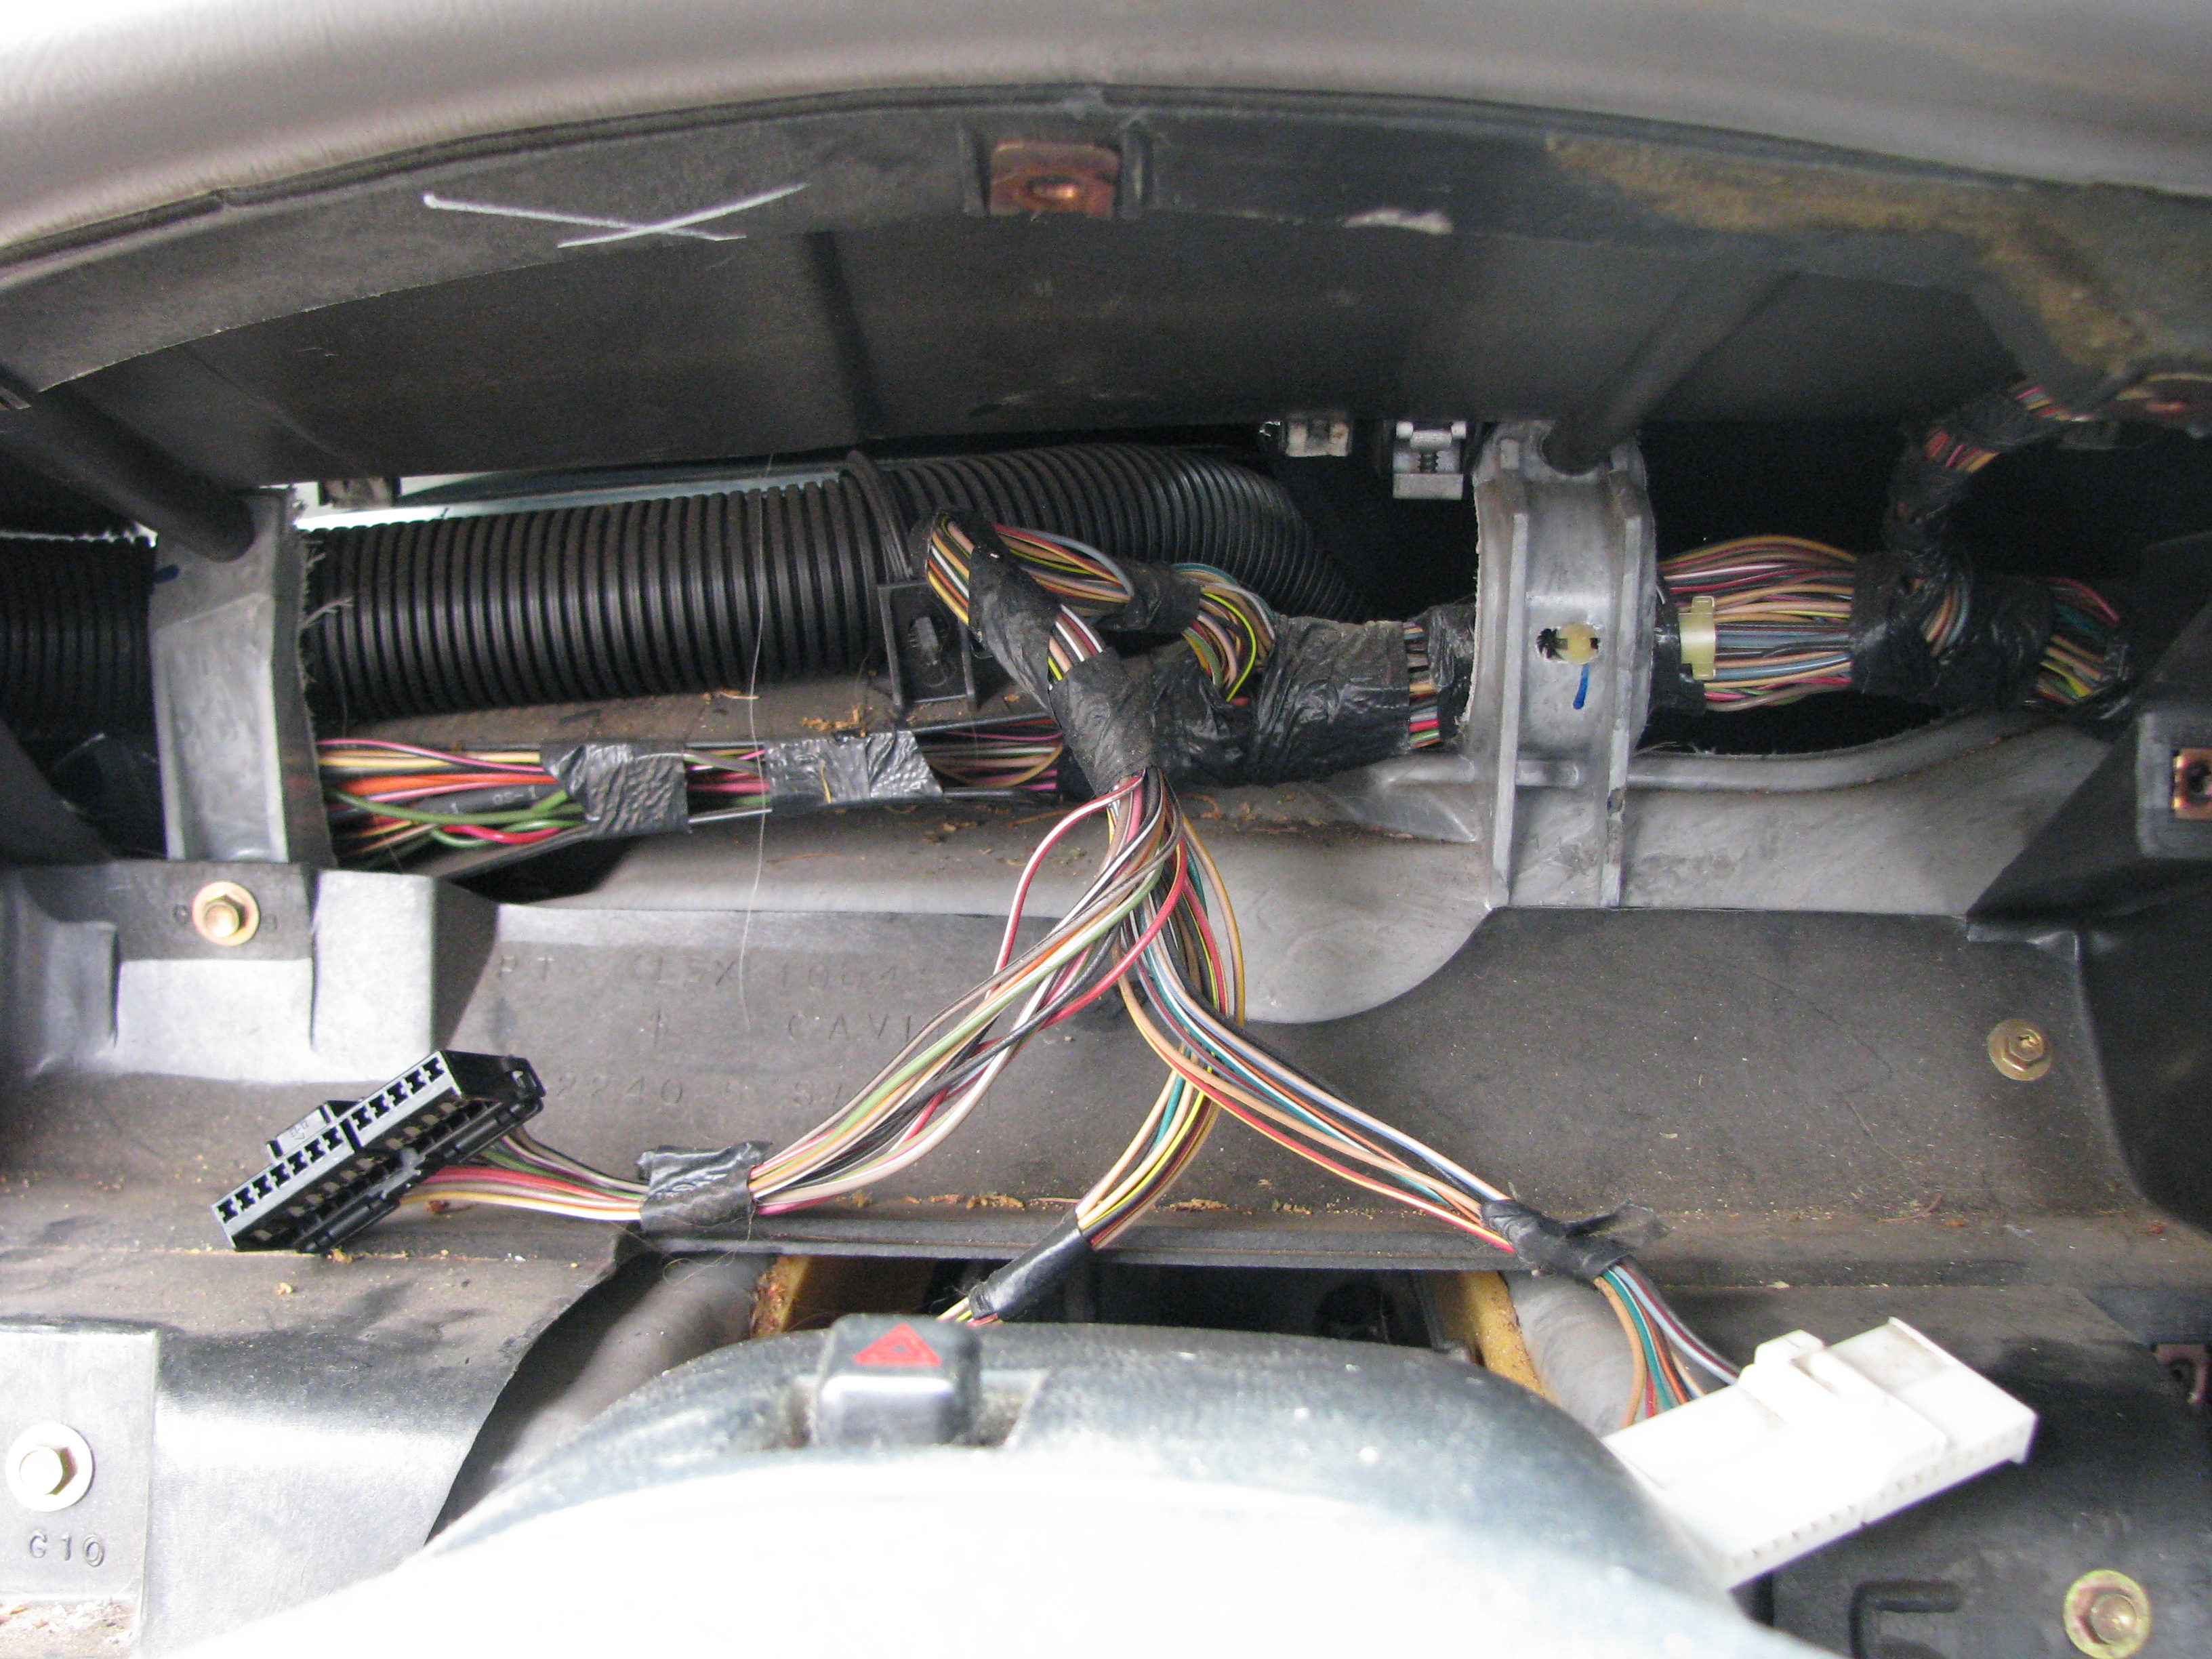 And what's left after I pull it out. That daylight in the back was a good sign for me - one of the two things I wanted to accomplish today was hiding the USB cable that runs up to my car dock on the windshield. Turns out I didn't need to drill a single hole in the dash, there's already a significant gap up there that is more than large enough to get a micro USB connector through... 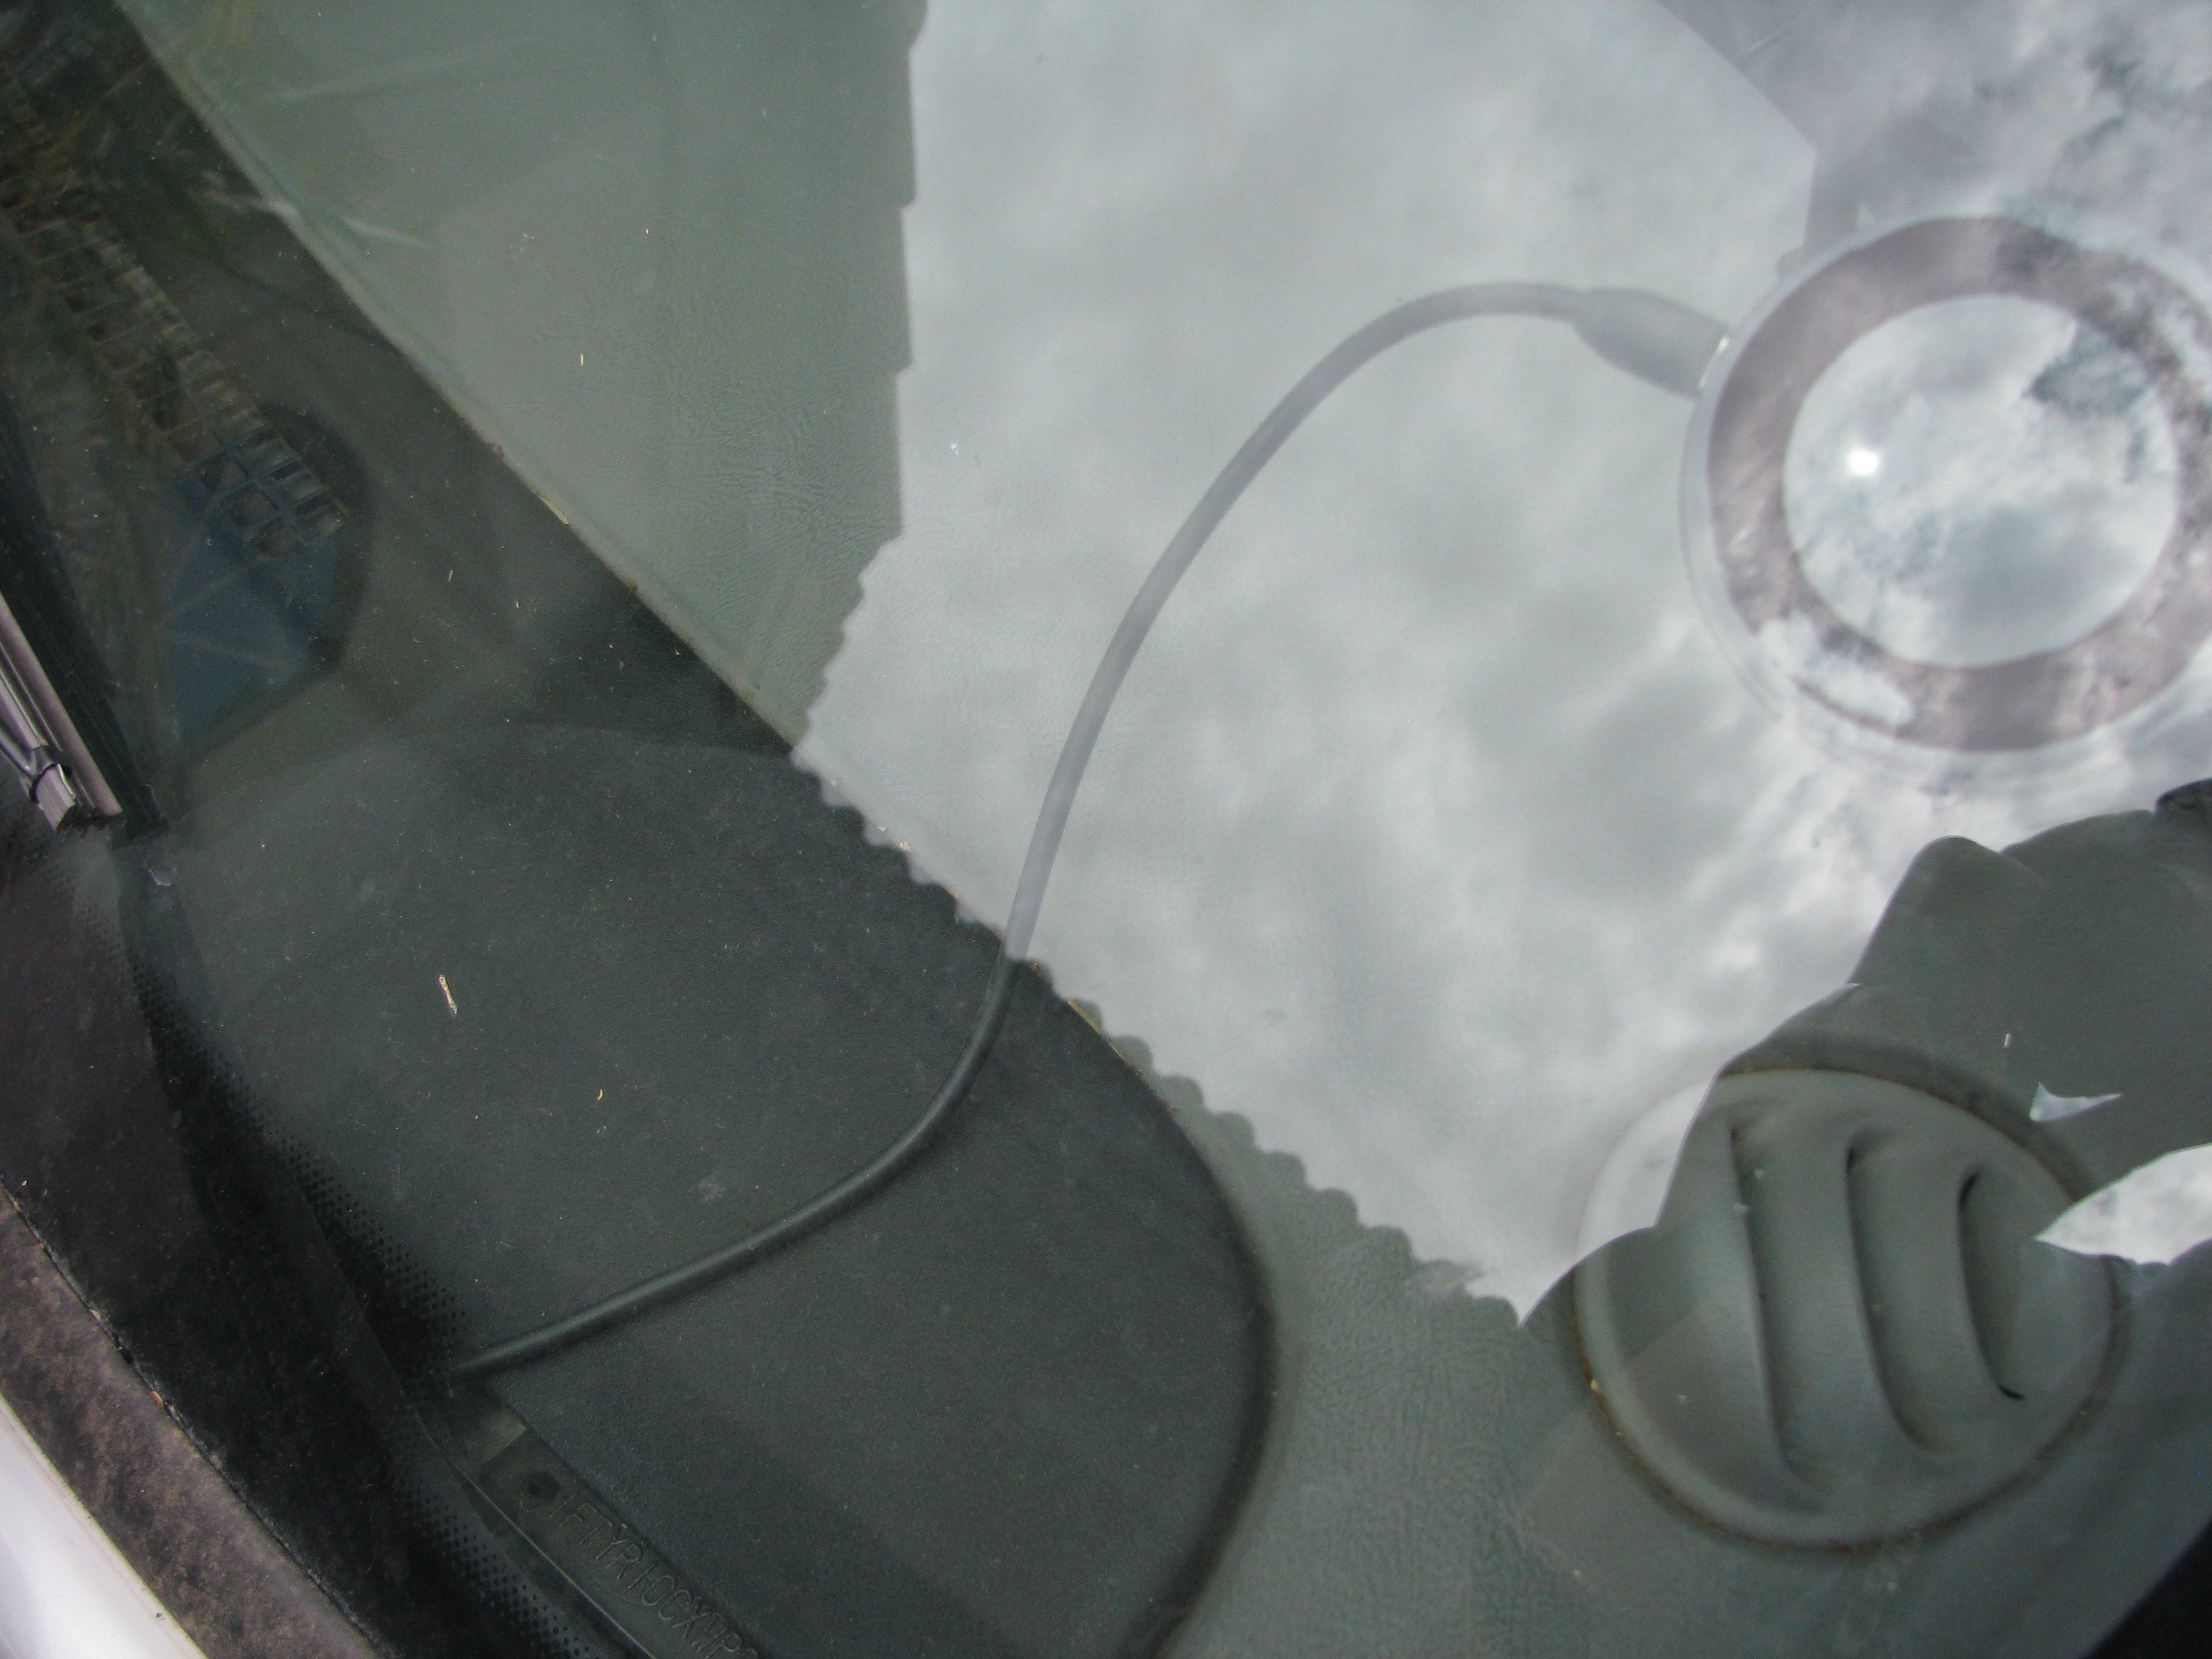 As shown. Just had to wiggle it around enough near the VIN and I was able to fish it up. 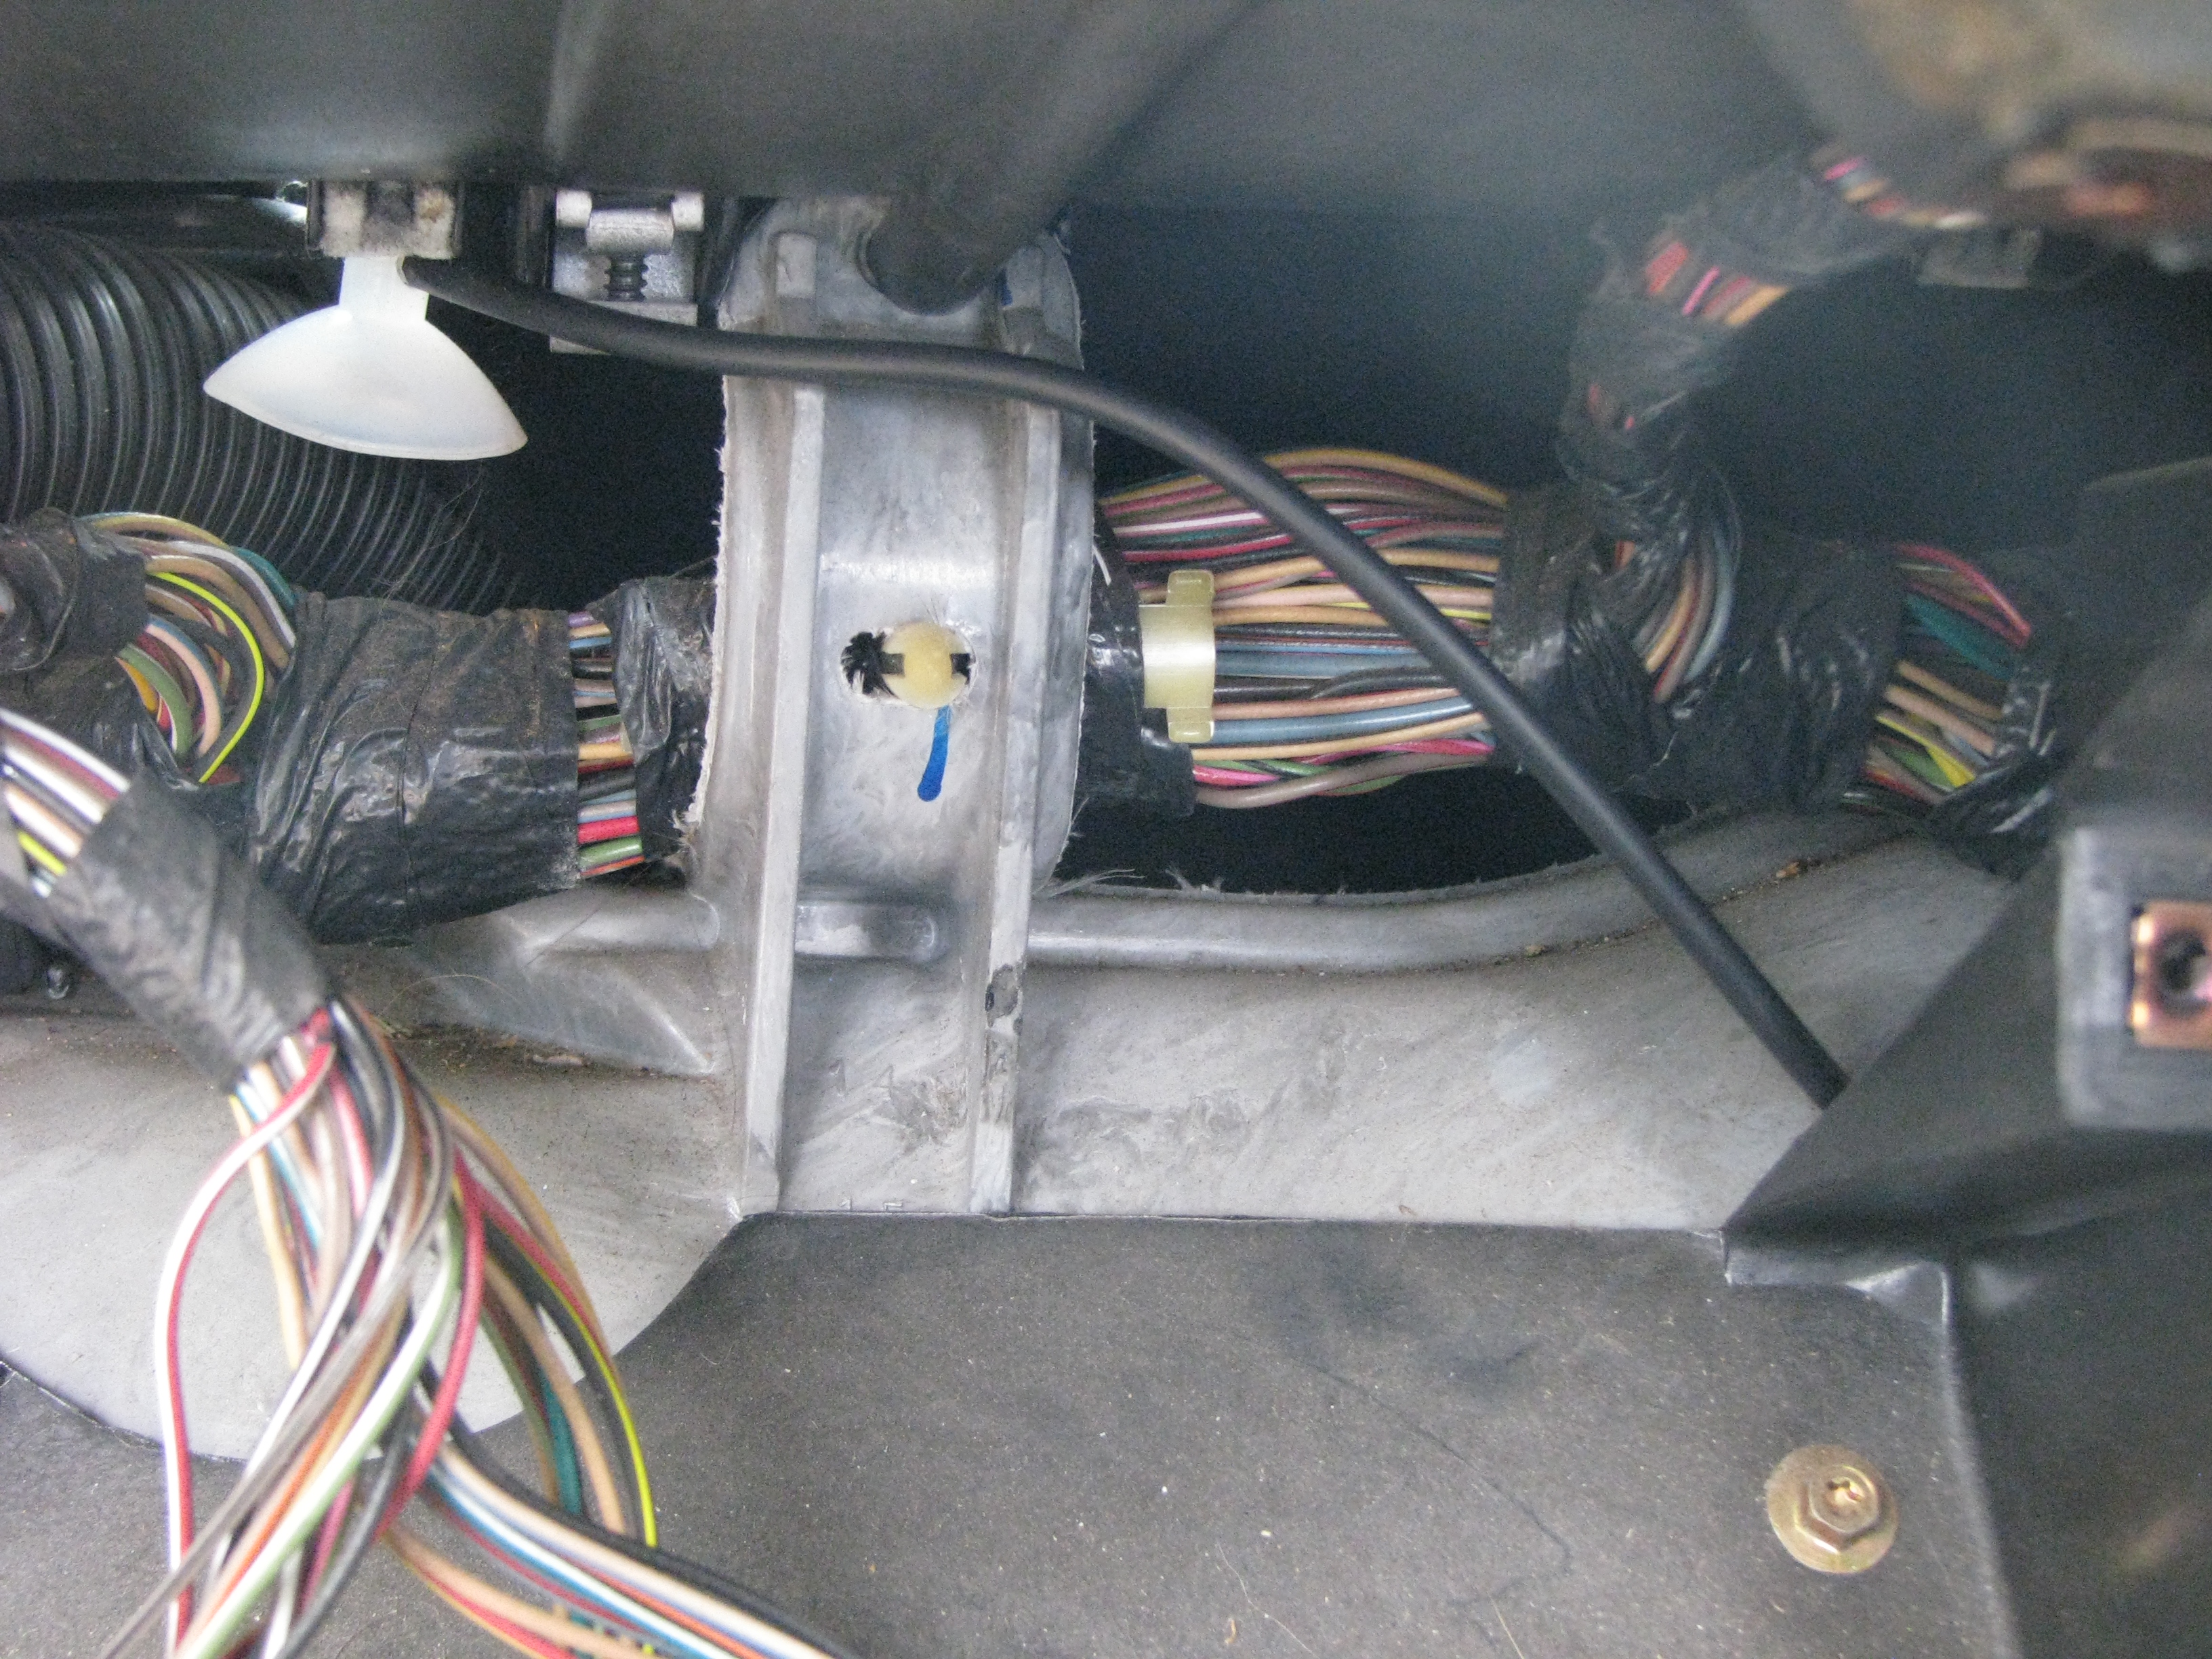 Snake it behind one of the supports to get it over by the radio, and we'll pick up the other end of that cable later. 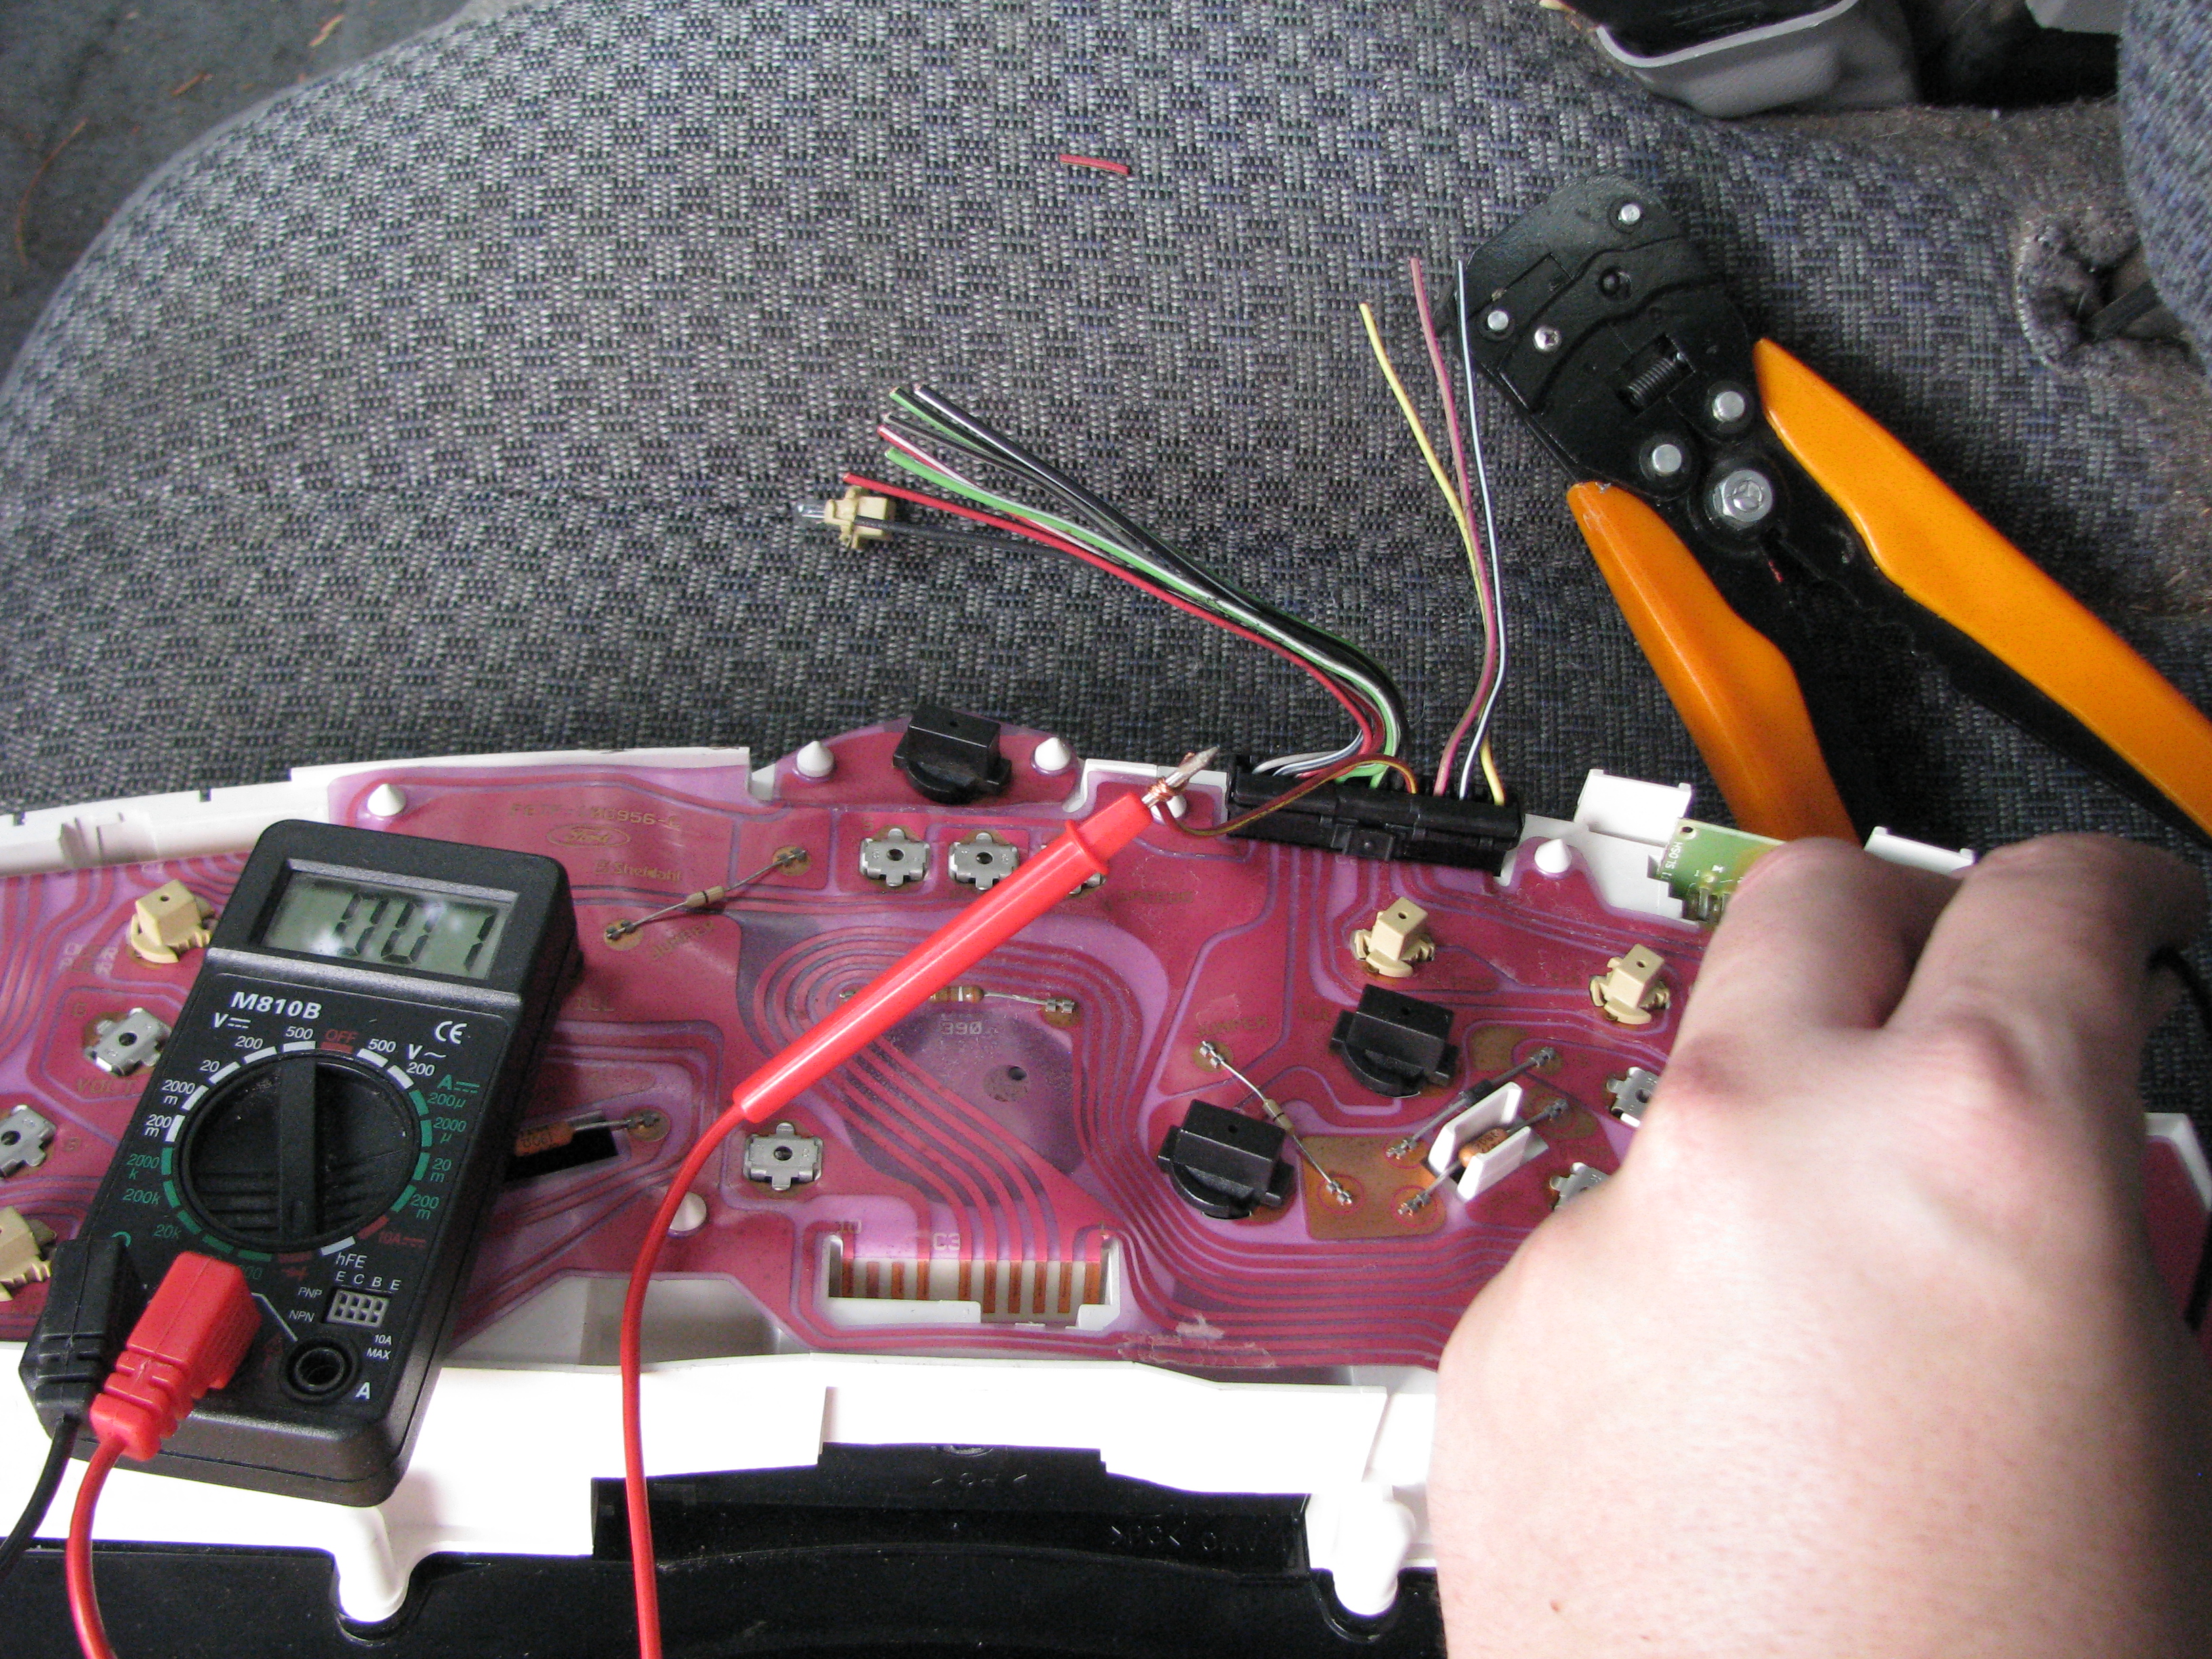 So my donor cluster is out of a 2000 Mountaineer - and supposedly transplanting into "older" Rangers can result in the CEL illuminating the wrong idiot light. The info on what constitutes older is a bit sketchy, though. I decided to just check for myself. This is the back of the original cluster, which having fewer gauges is pretty easy to trace. The seller of the cluster included hacked-off ends of the wiring harness, so I just had to strip the appropriate wire and go from there. 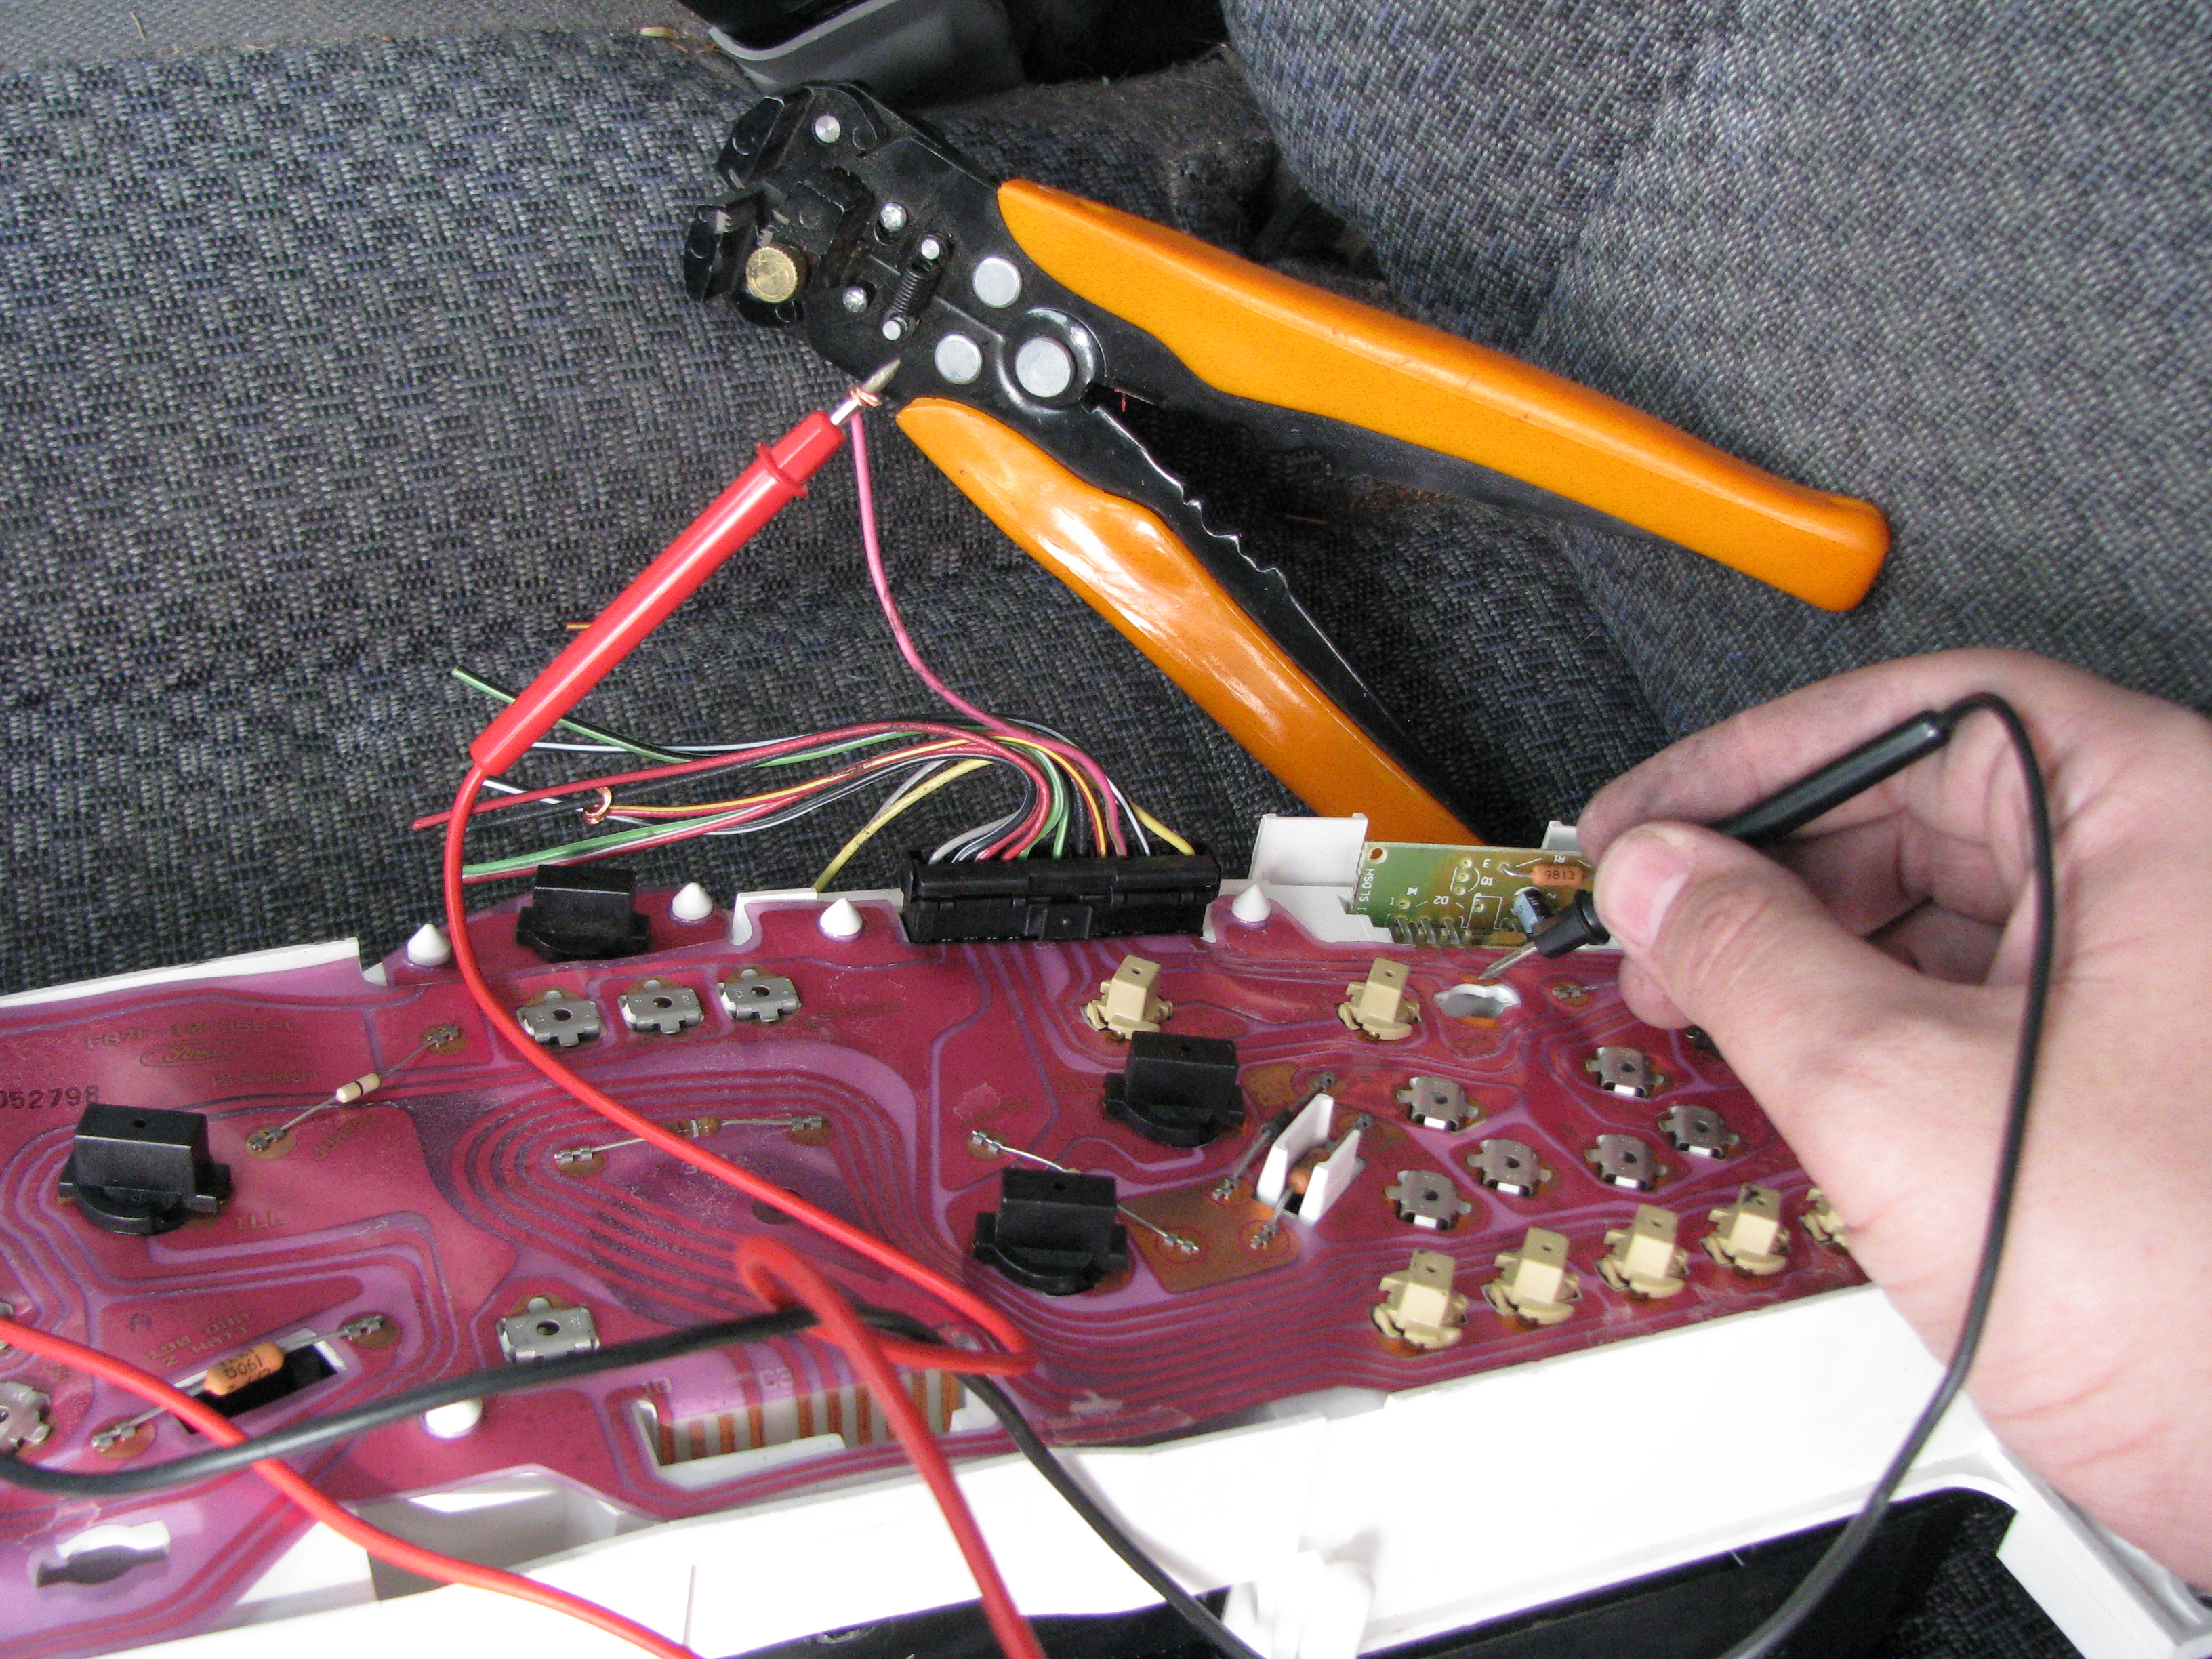 Tested it on the old...  And confirmed continuity on the new. In that first picture I actually had the wrong wire - I had traced the common ground with a few other lights, and not the actual signal wire. Tracing the right wire on both showed that the CEL was still on the same pin on both the '98 Ranger and the '00 Mountaineer, so all was well here. 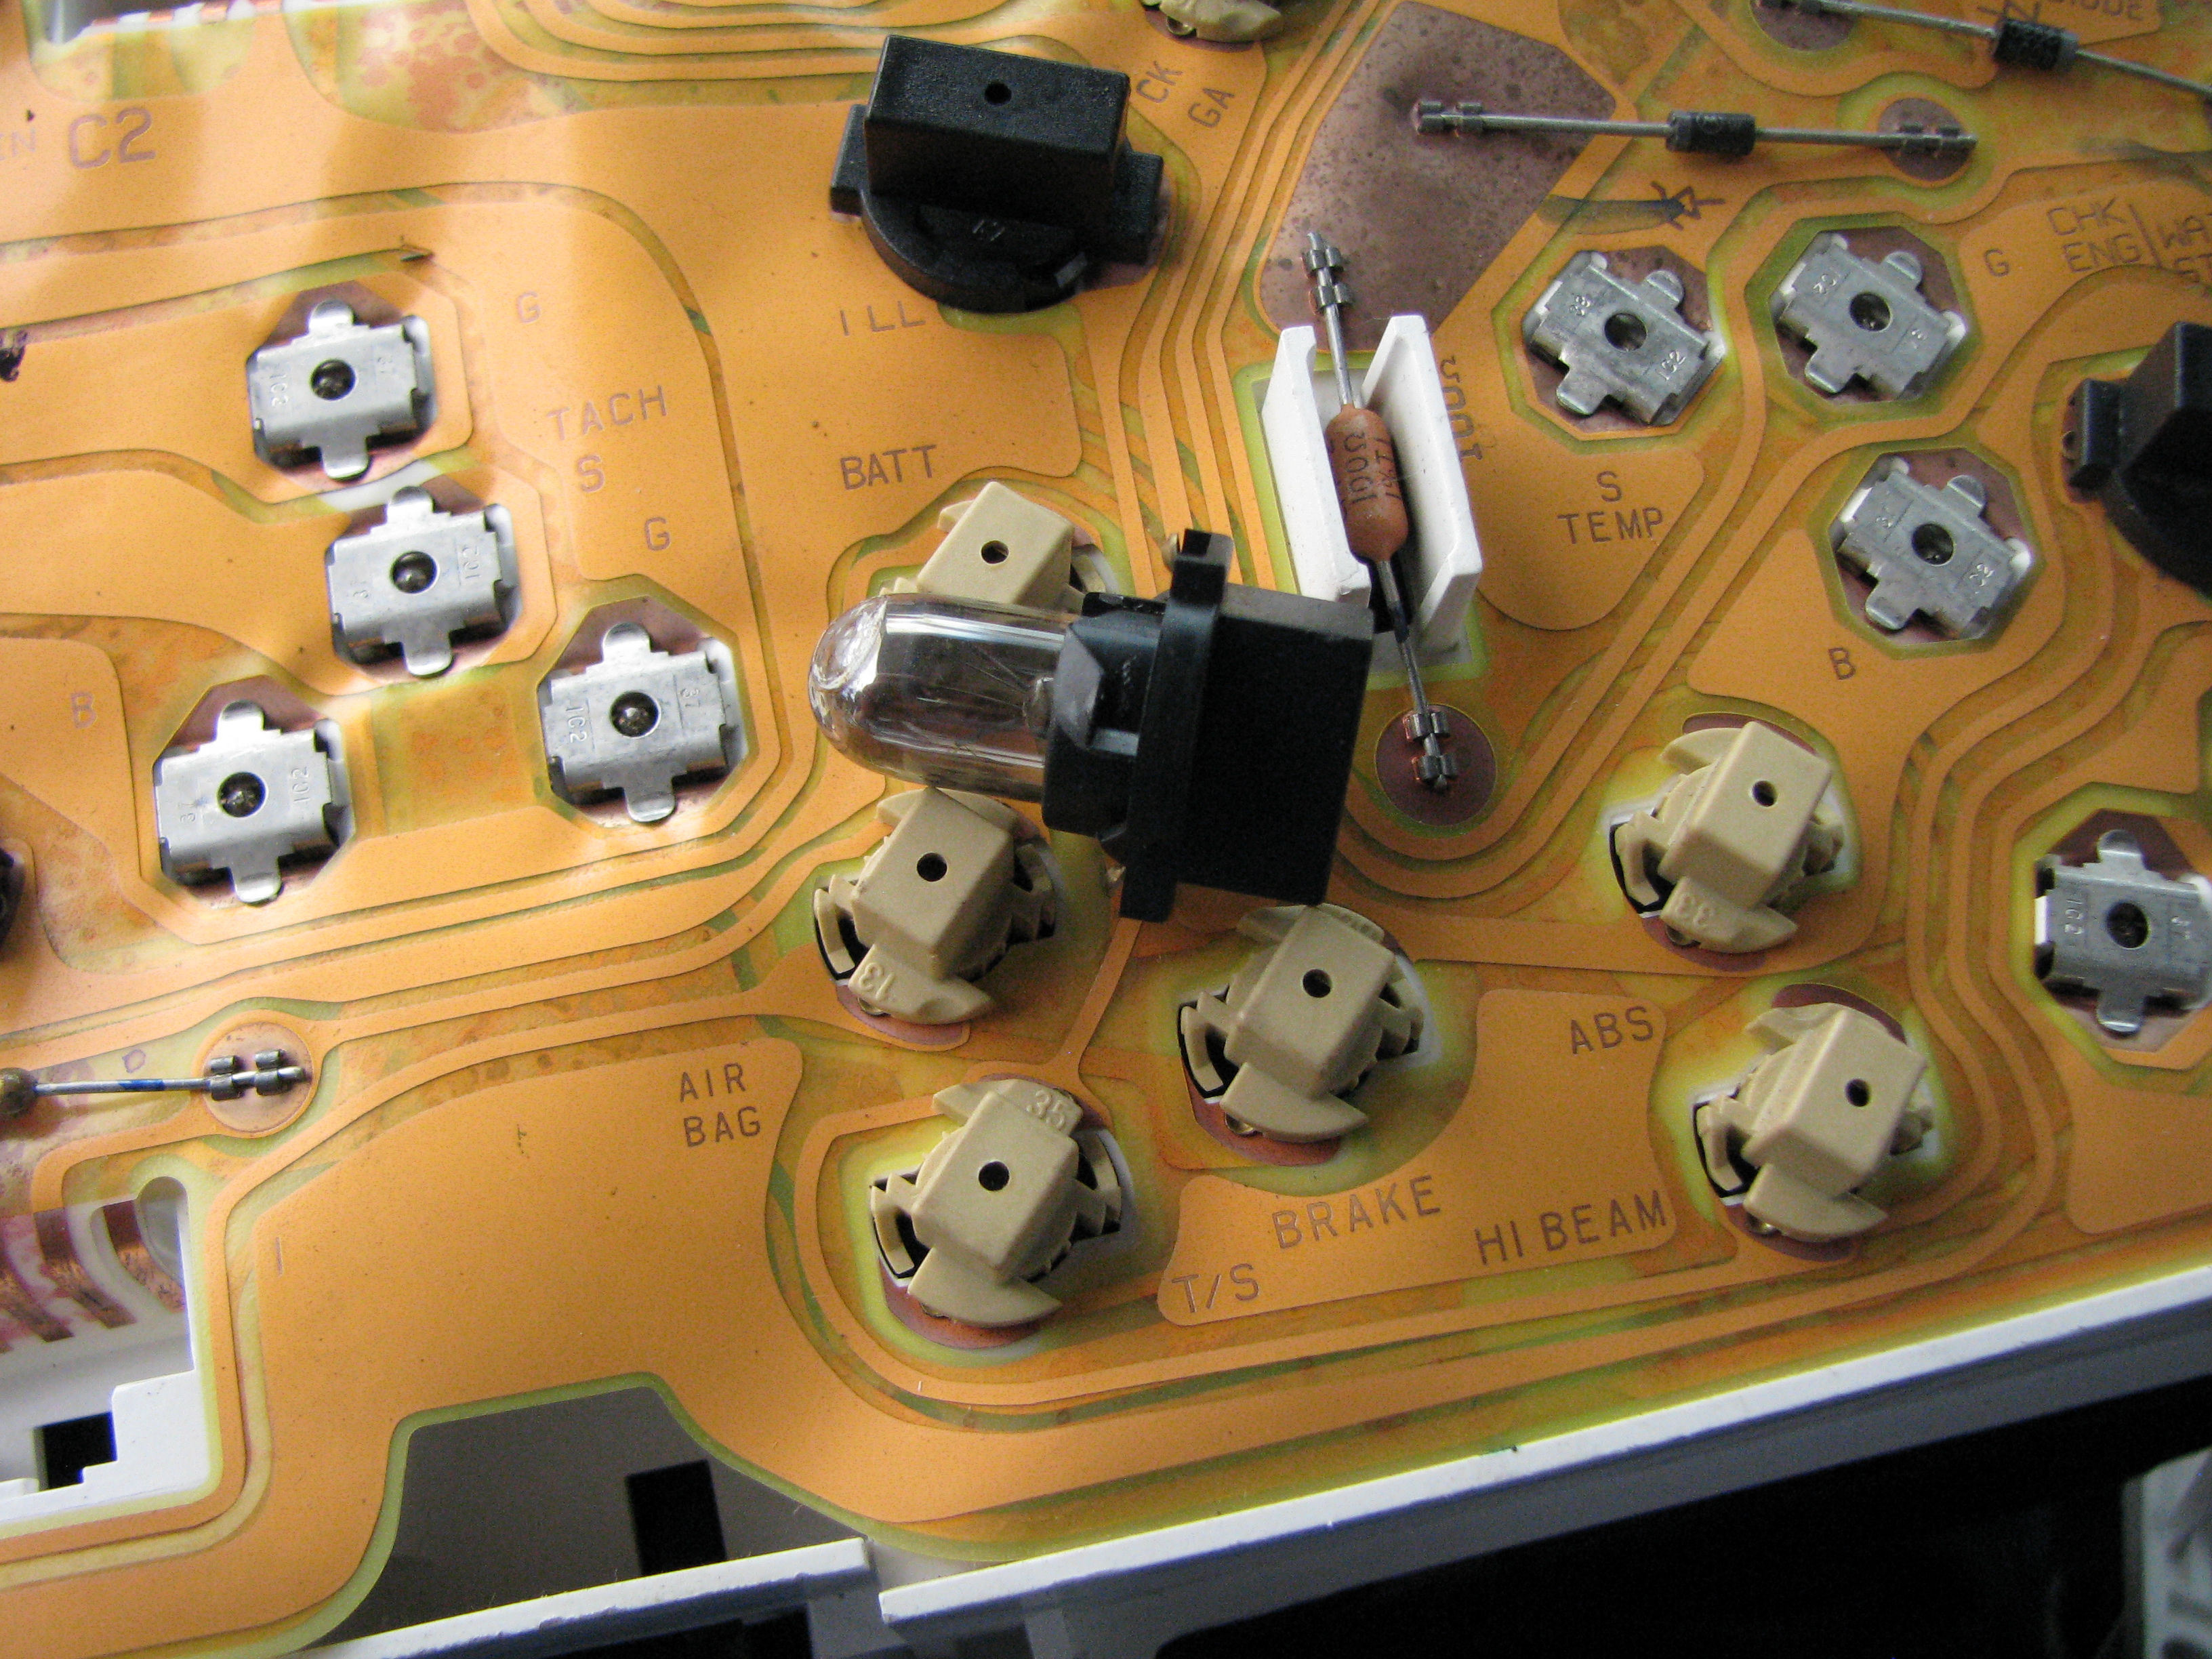 So I've had the cluster out before, and it was to replace all of these damned 194 bulbs that Ford apparently got from the world's cheapest source. Sure enough, most of them on the donor cluster were burnt out too, but I just swapped the year-old bulbs from the old cluster in, until I came to this one. The white residue on the tip was a bit odd... 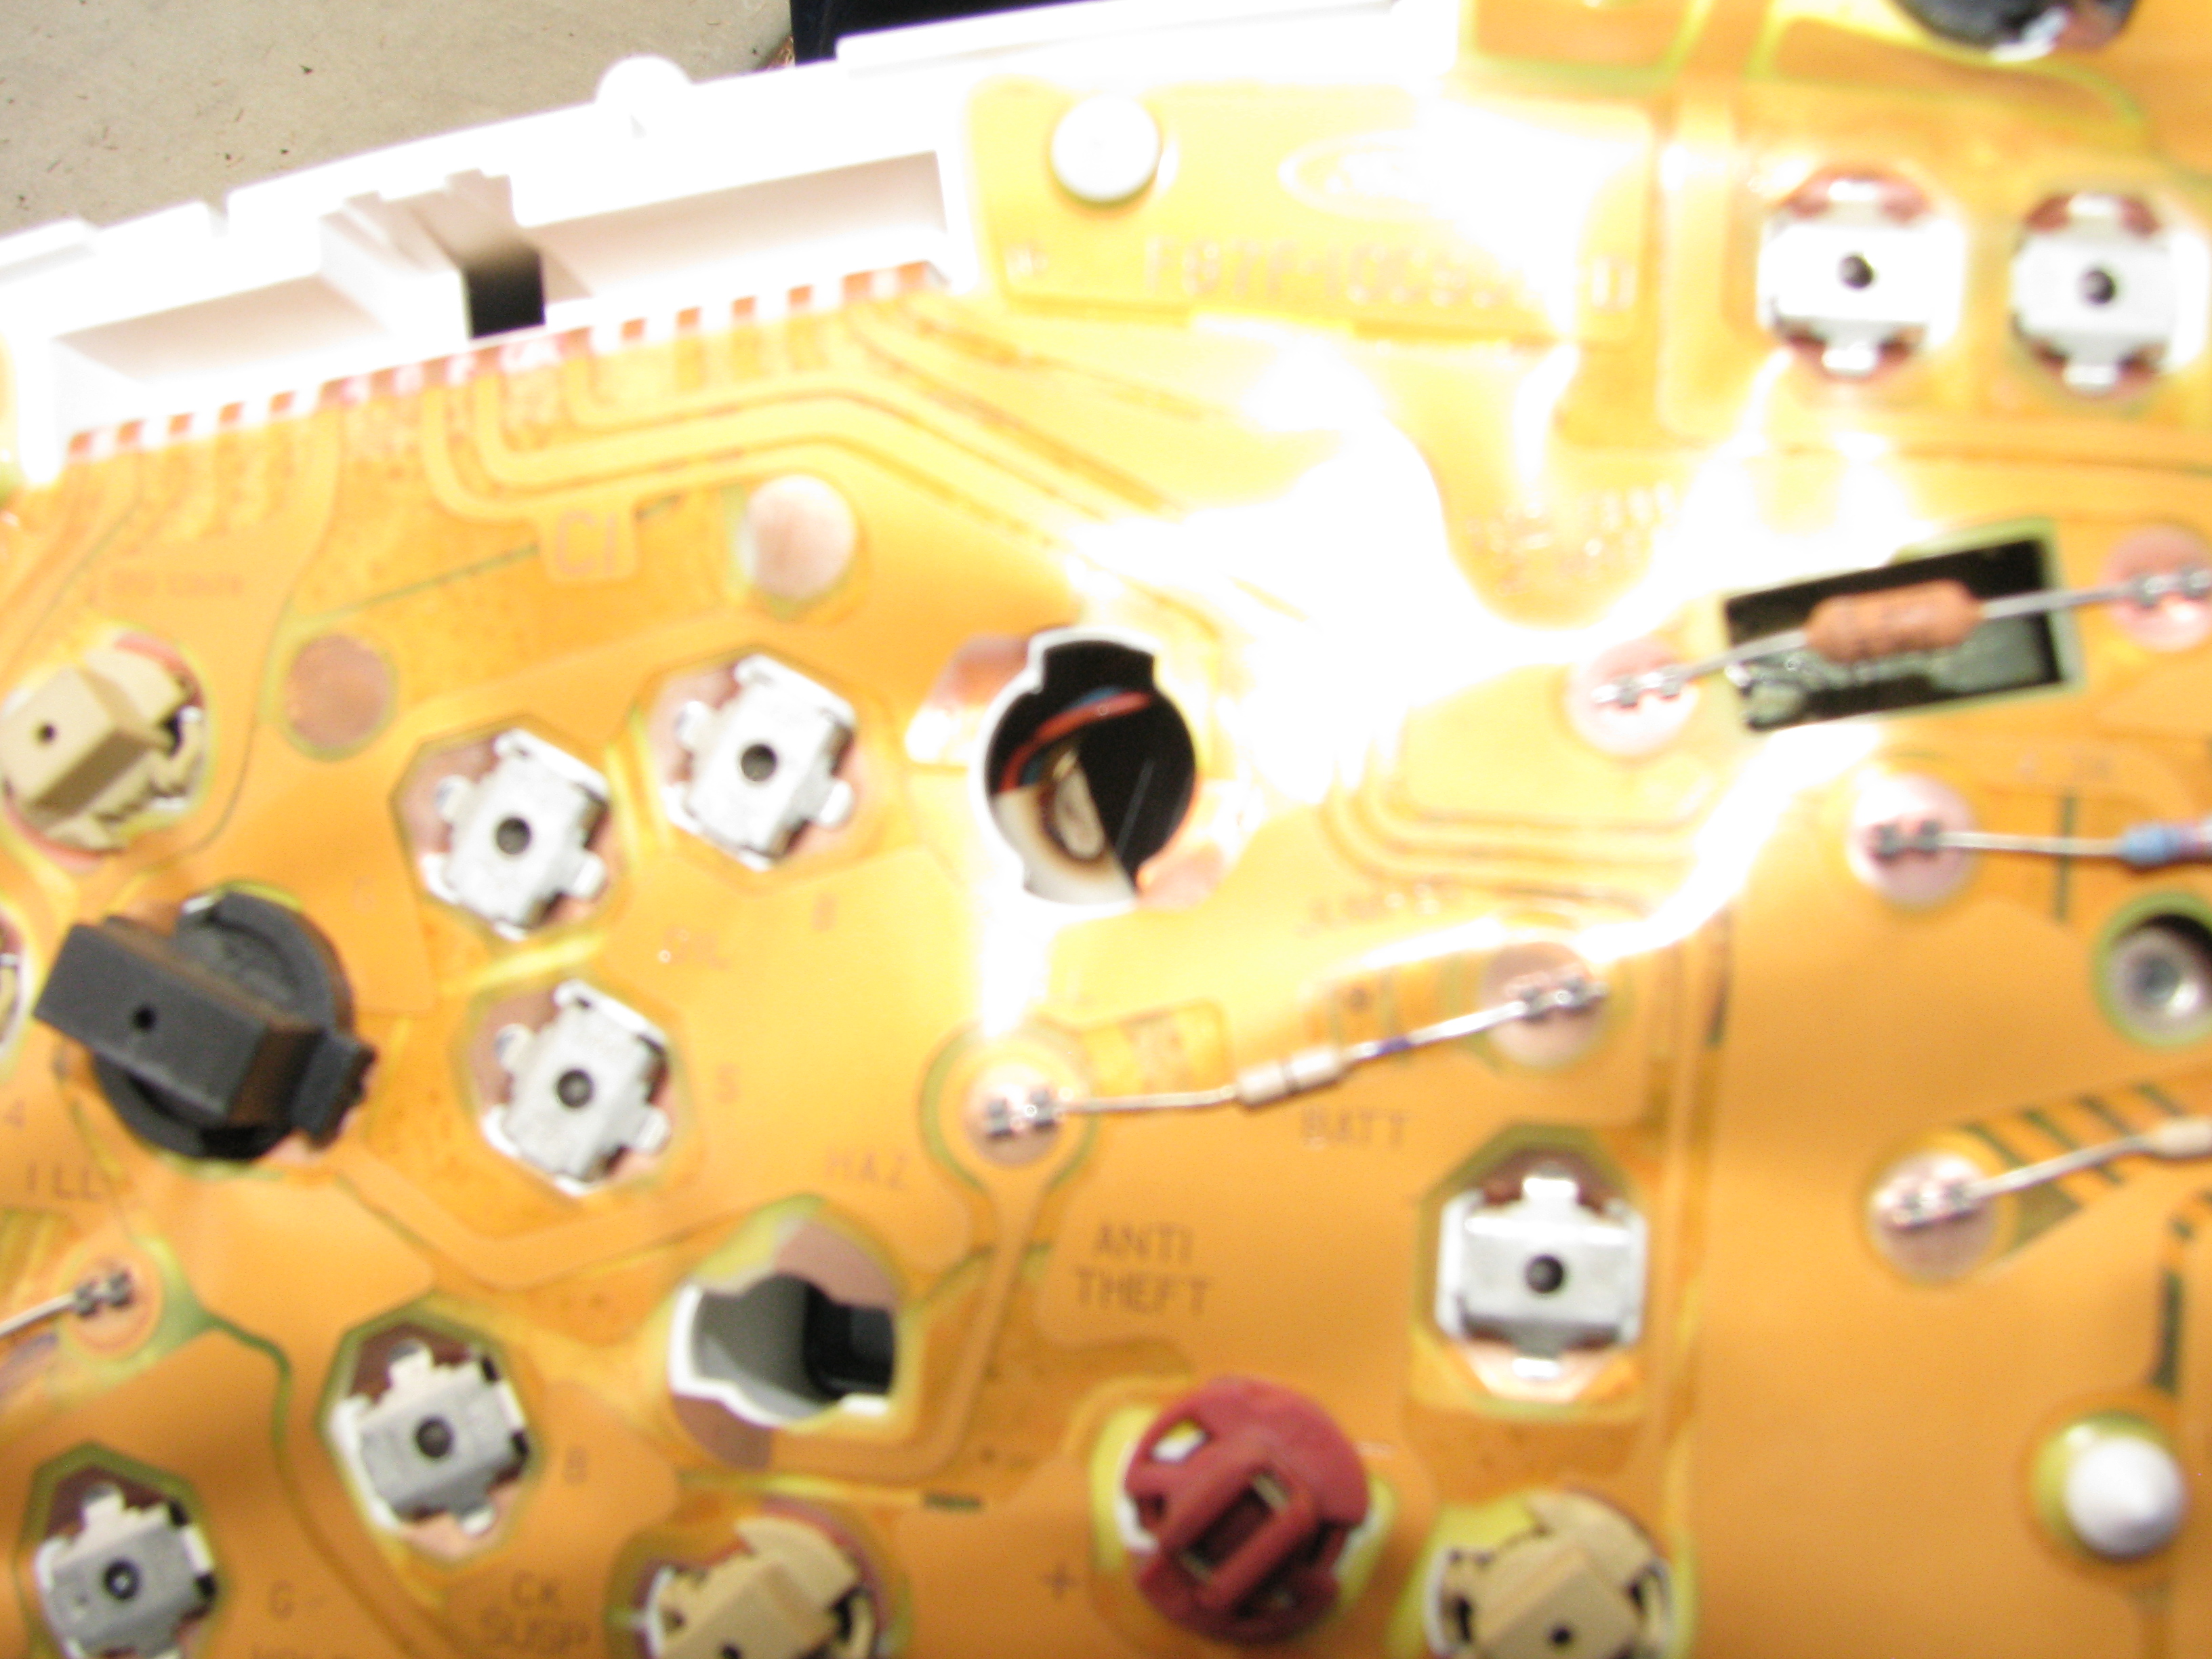 Oh.  Factory firestarter! Factory firestarter!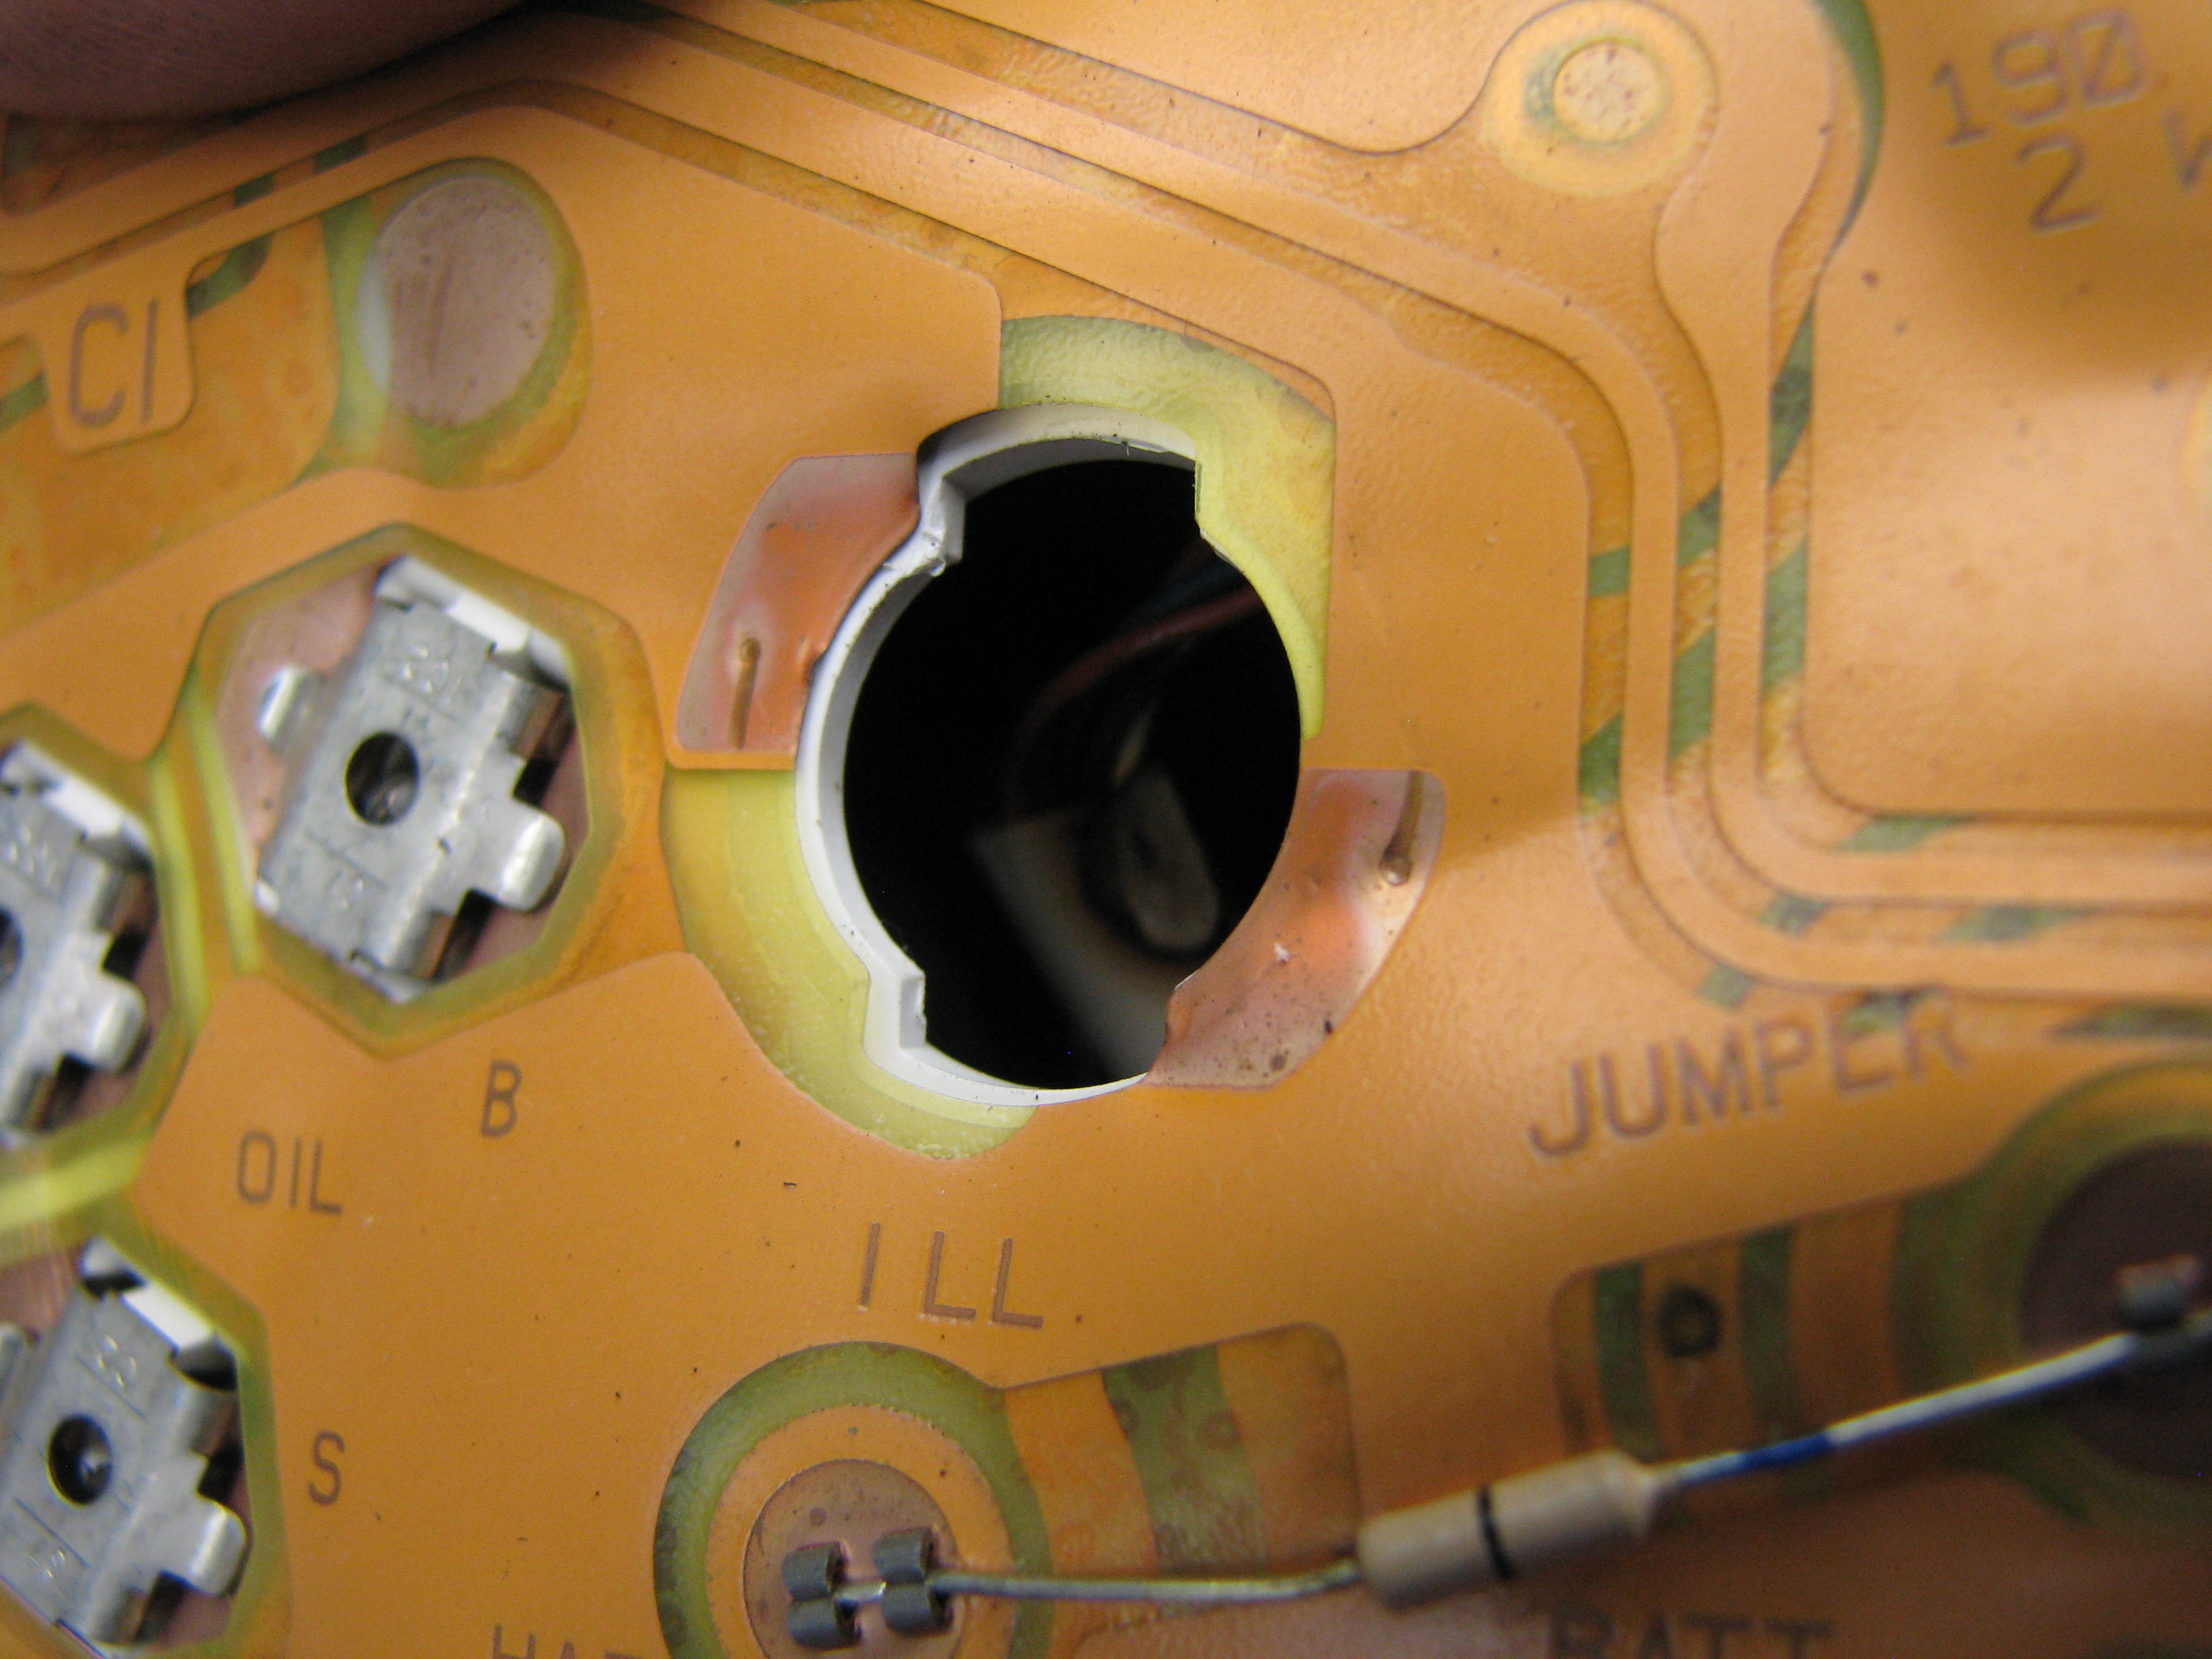 Couldn't tell a whole lot about it through the hole, but I had to pull the cluster apart anyway so I decided to investigate further after I did so. 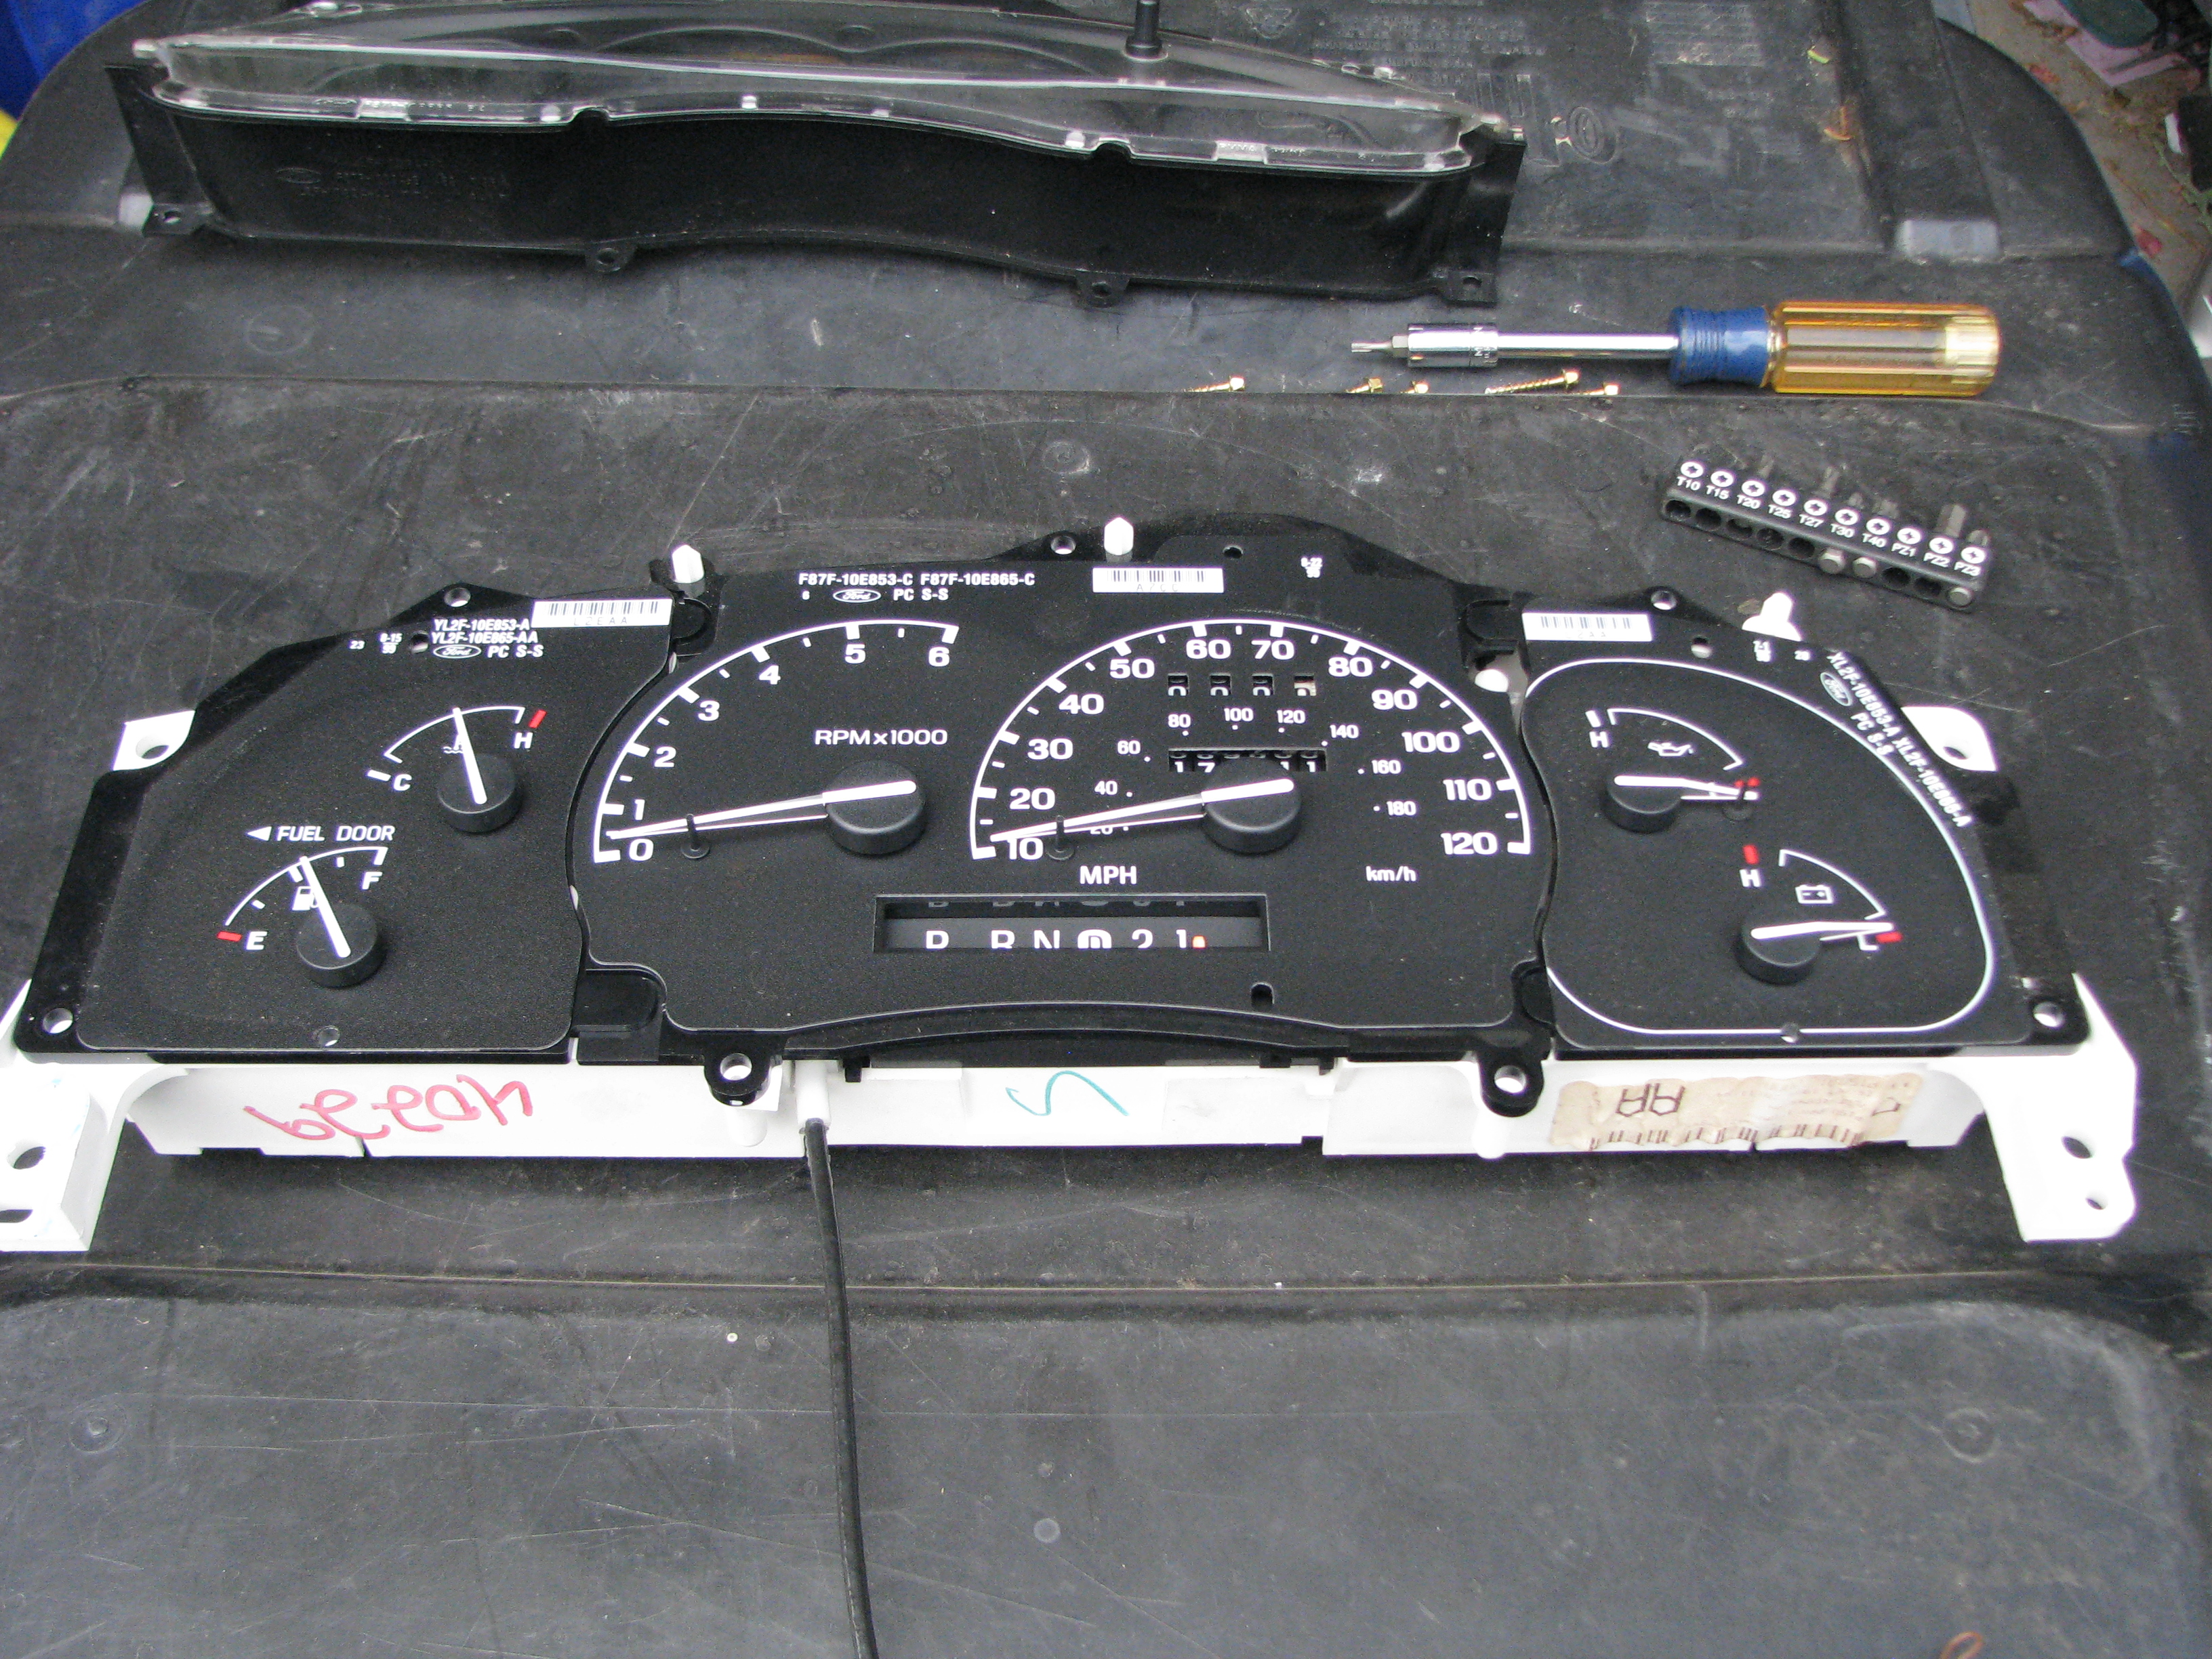 A smattering of T15s and the front cover is off. Couldn't actually find my T15 but luckily they are so low-torque that my T10 did the job, and they're hex-headed too. 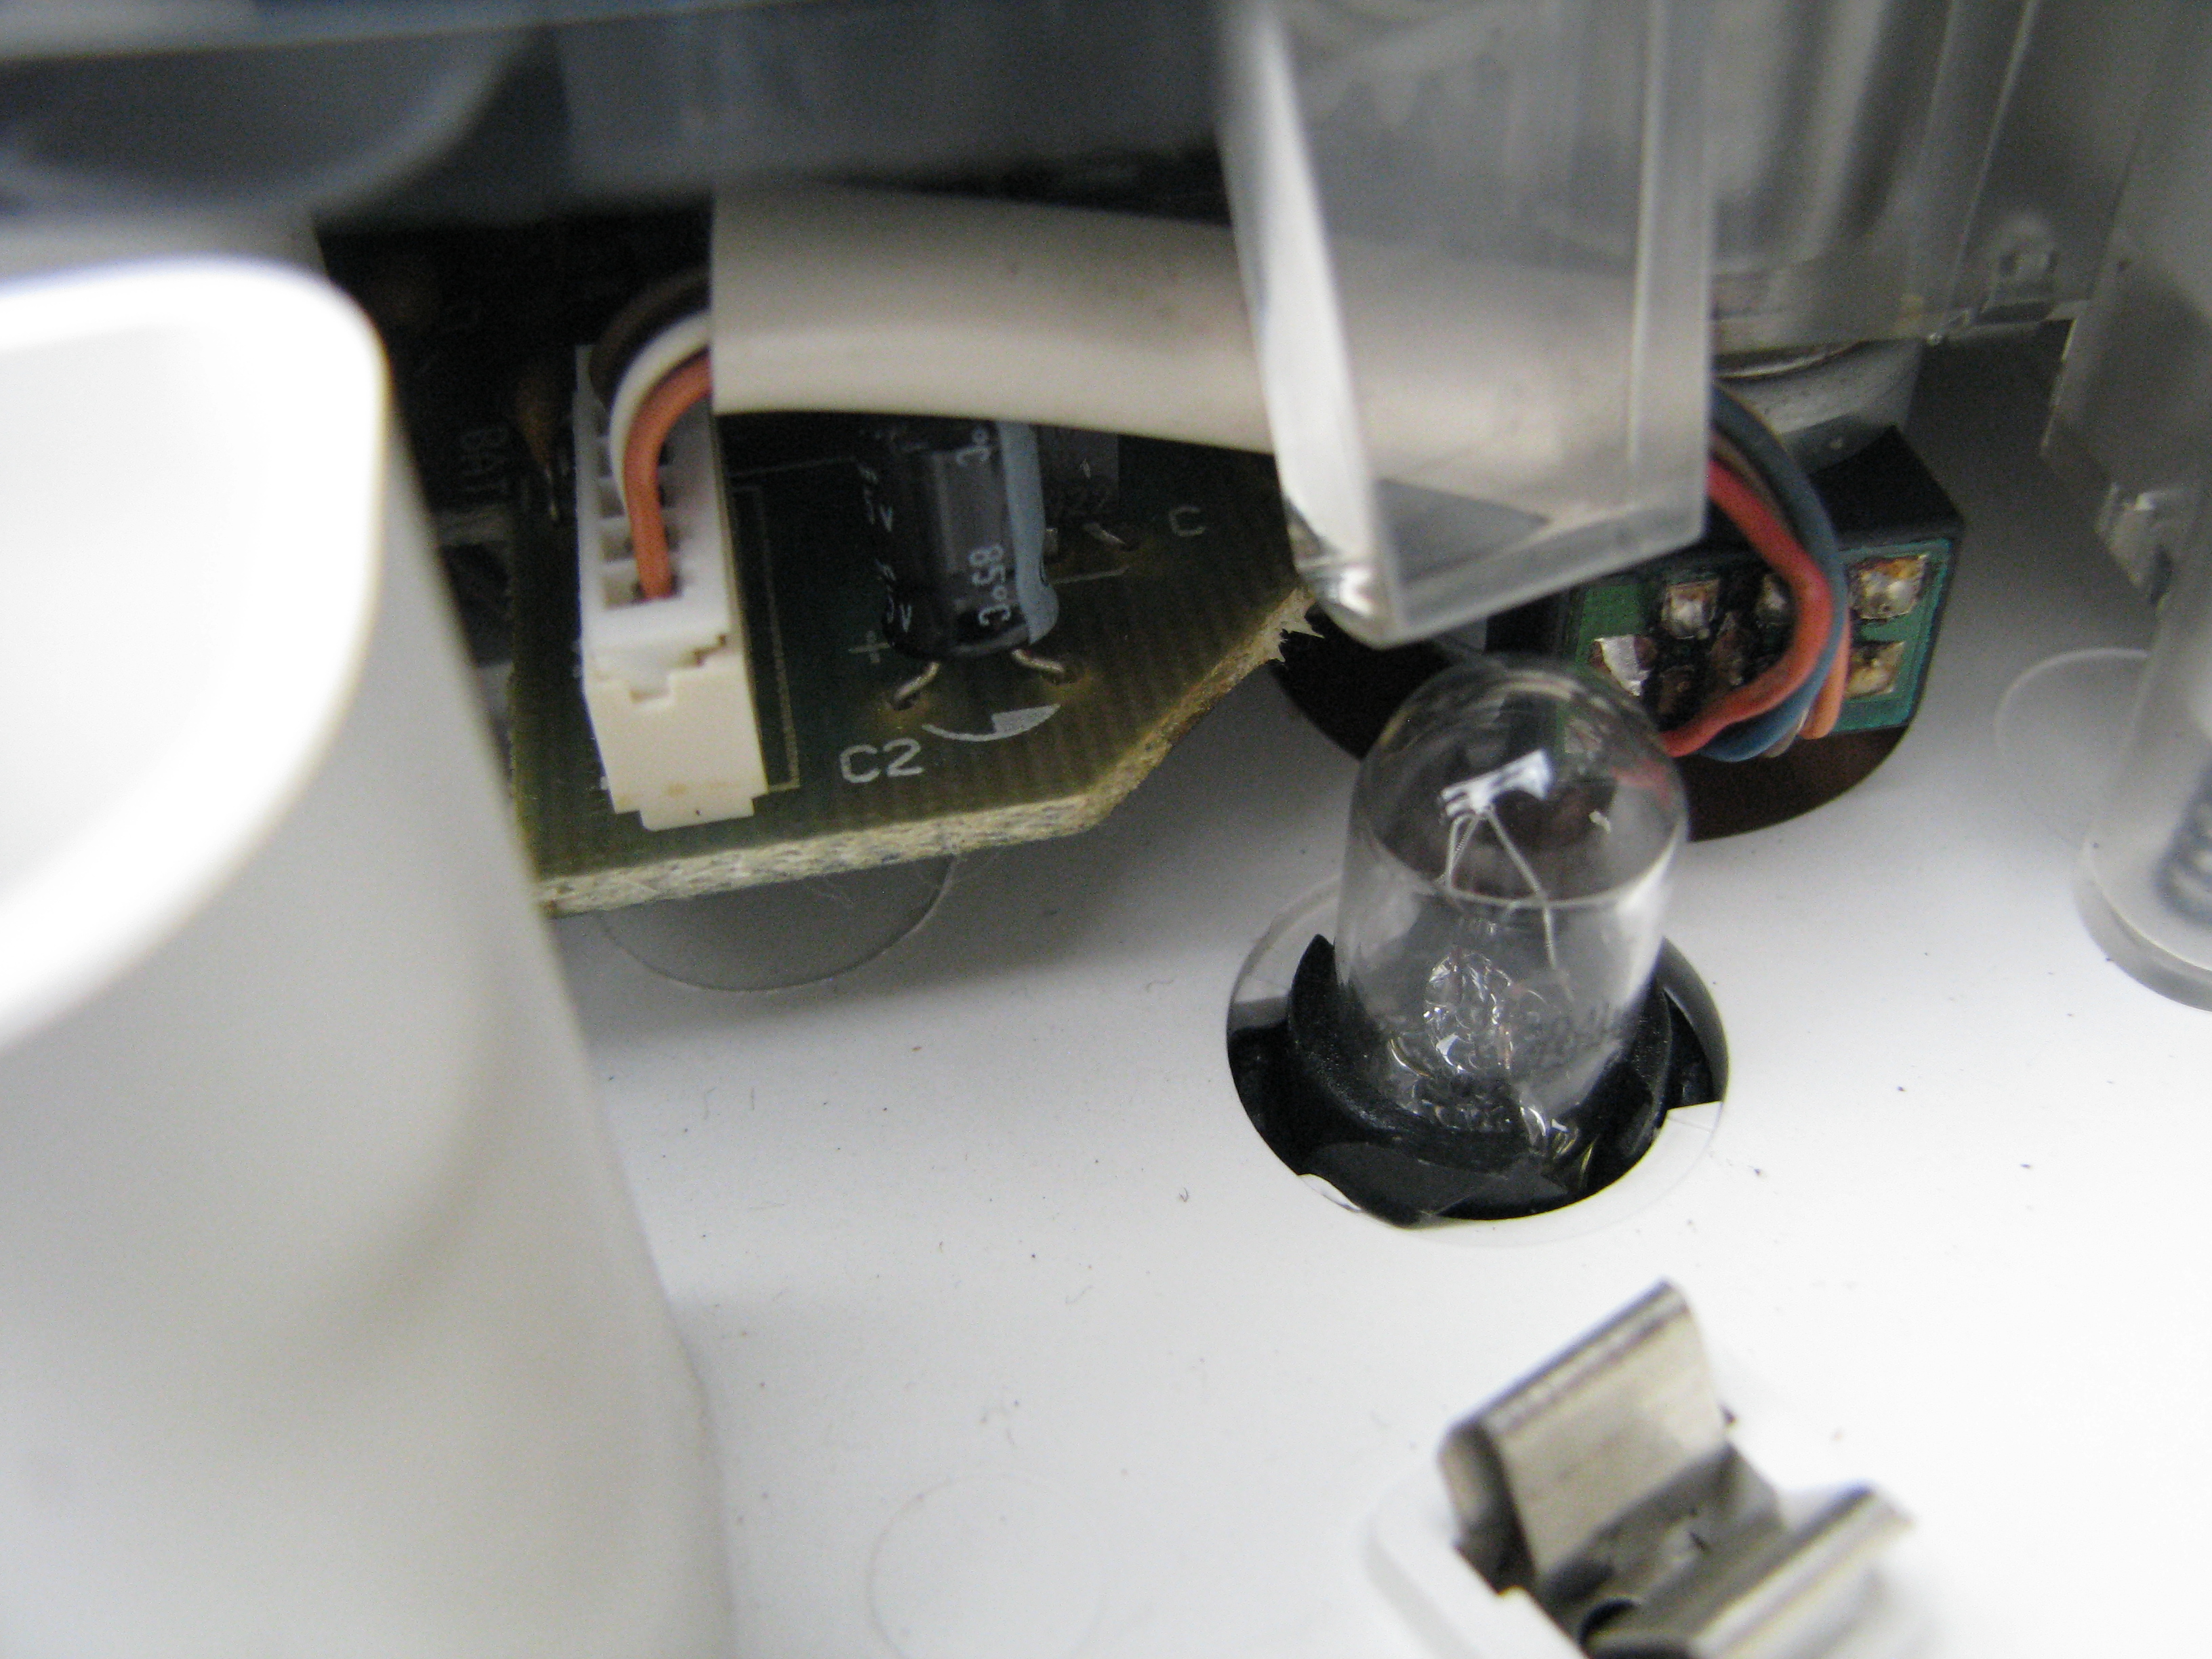 So the white stuff is just heatshrink, and I was able to shove the bundle up and against the plastic for the illumination to keep it away from the bulb. 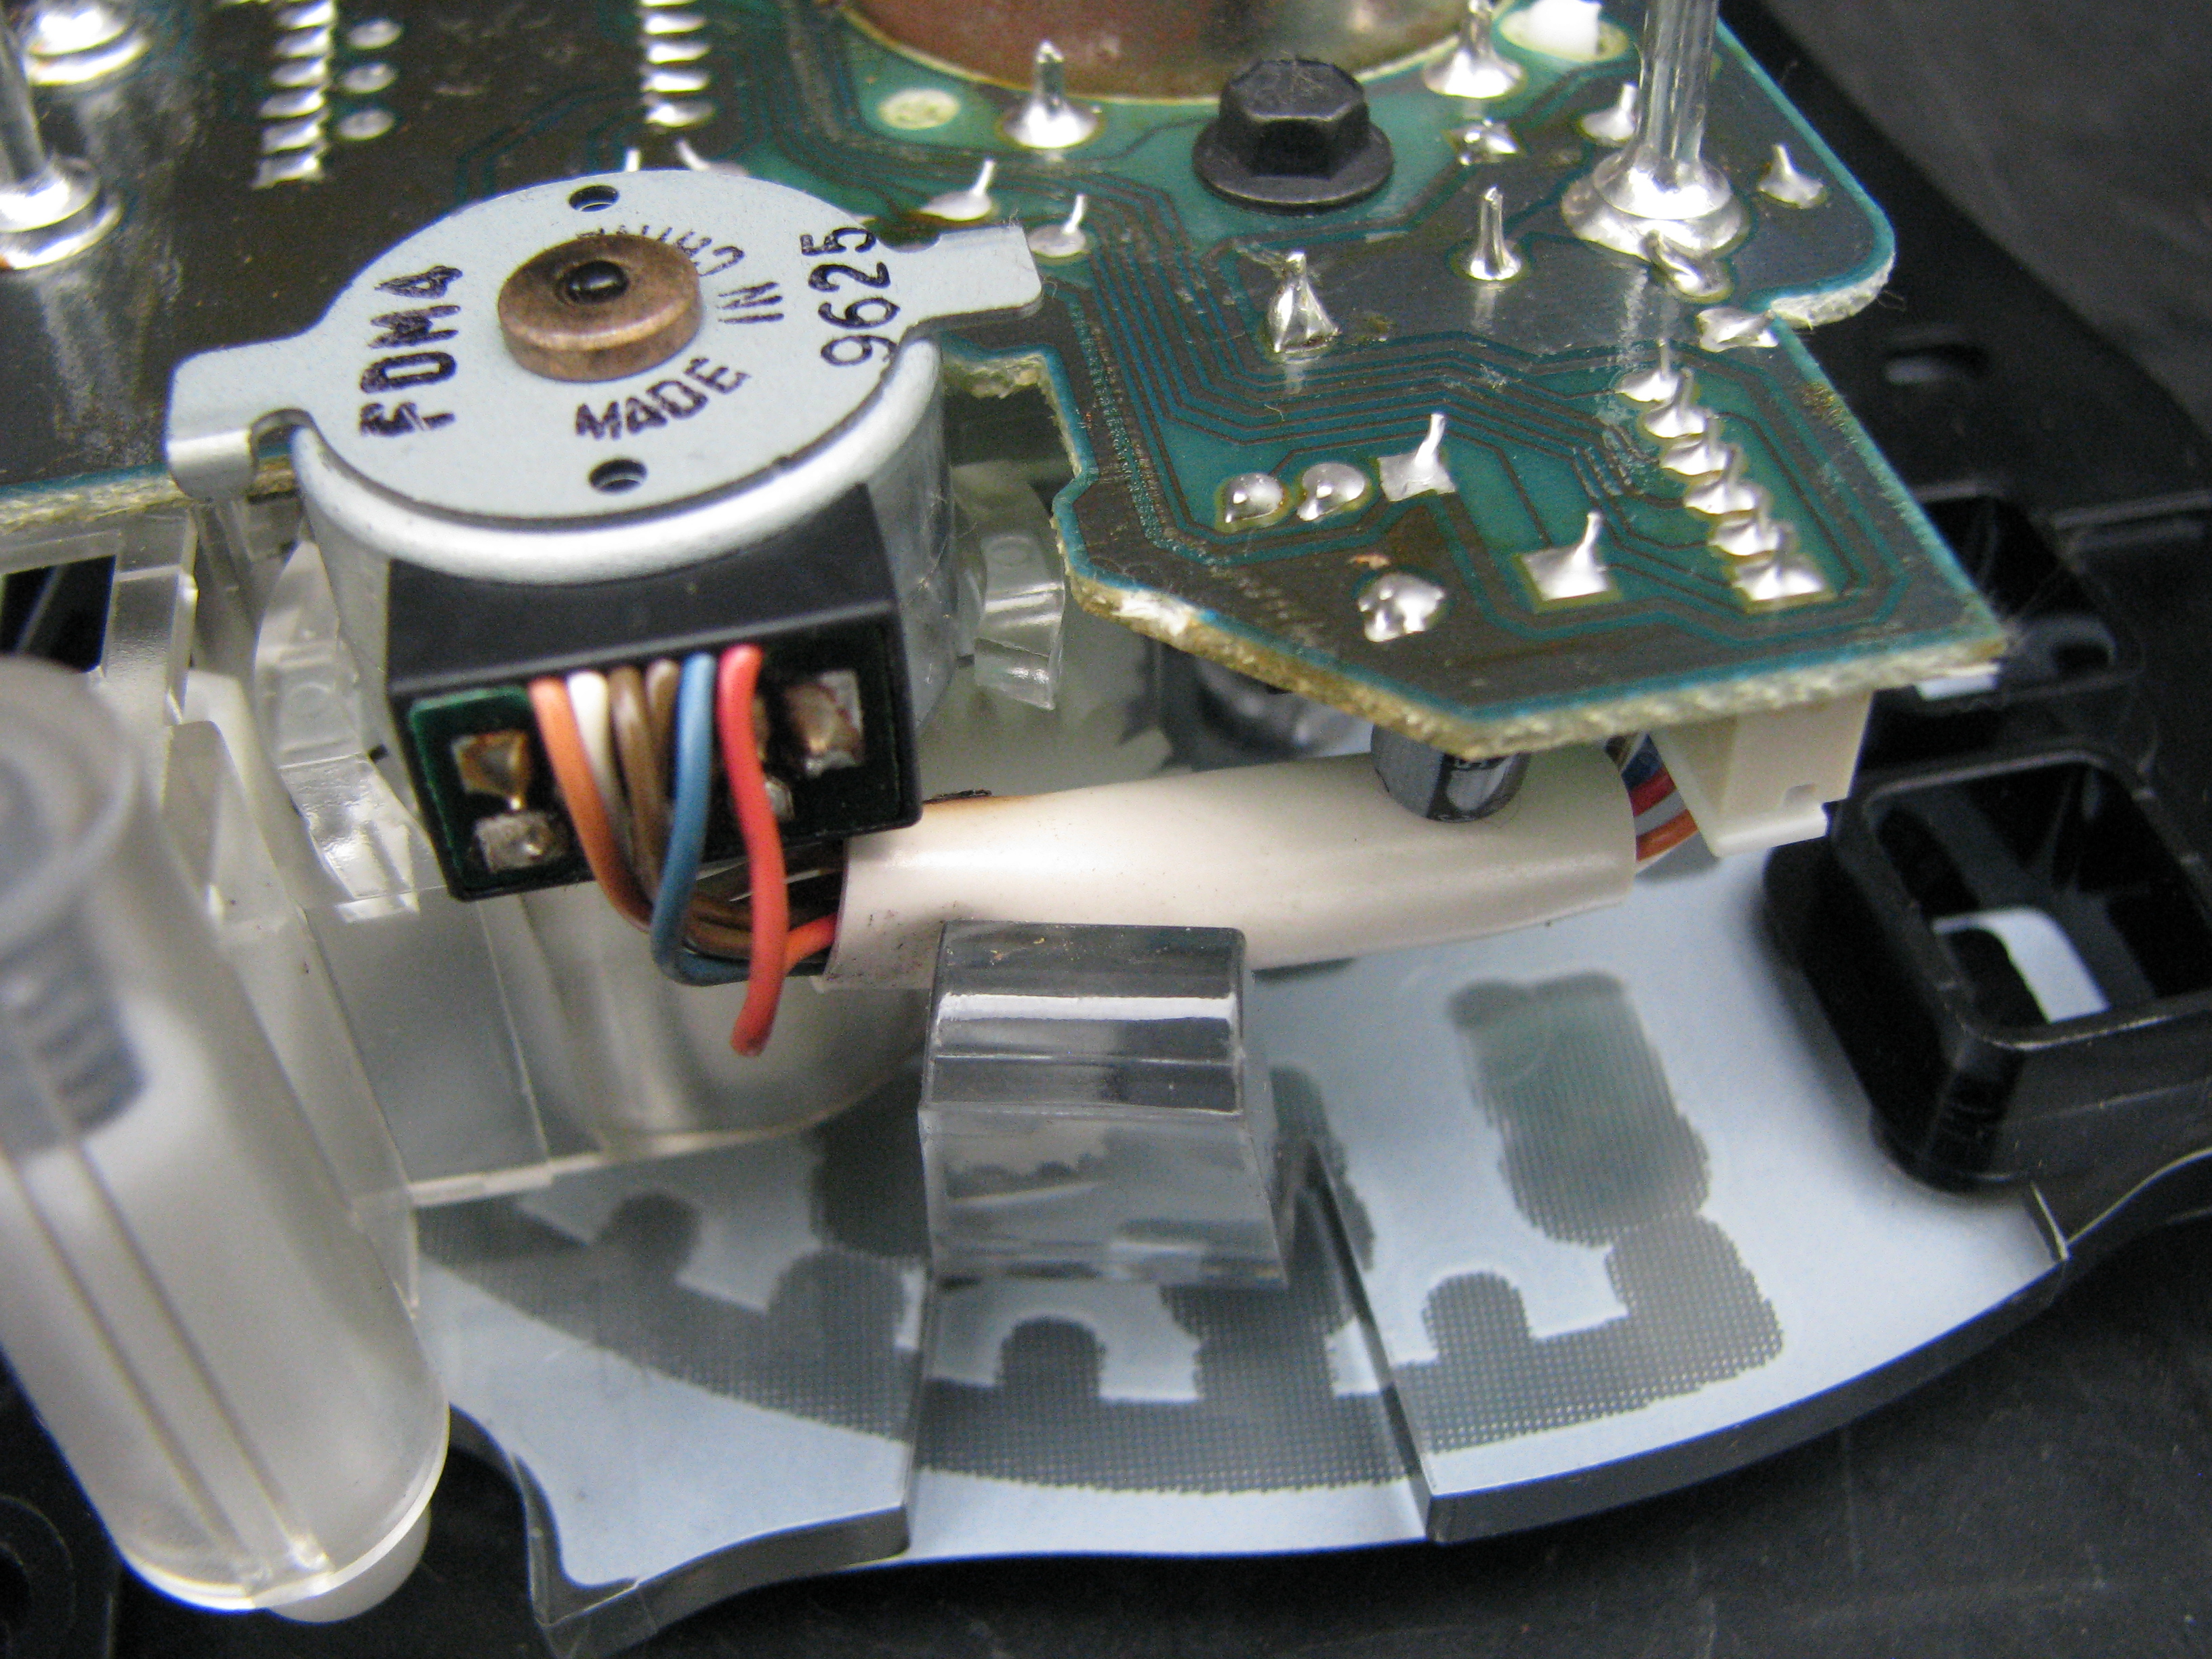 After popping the center cluster out. All three sections of the cluster just pull out from the back, which makes this nice and easy. 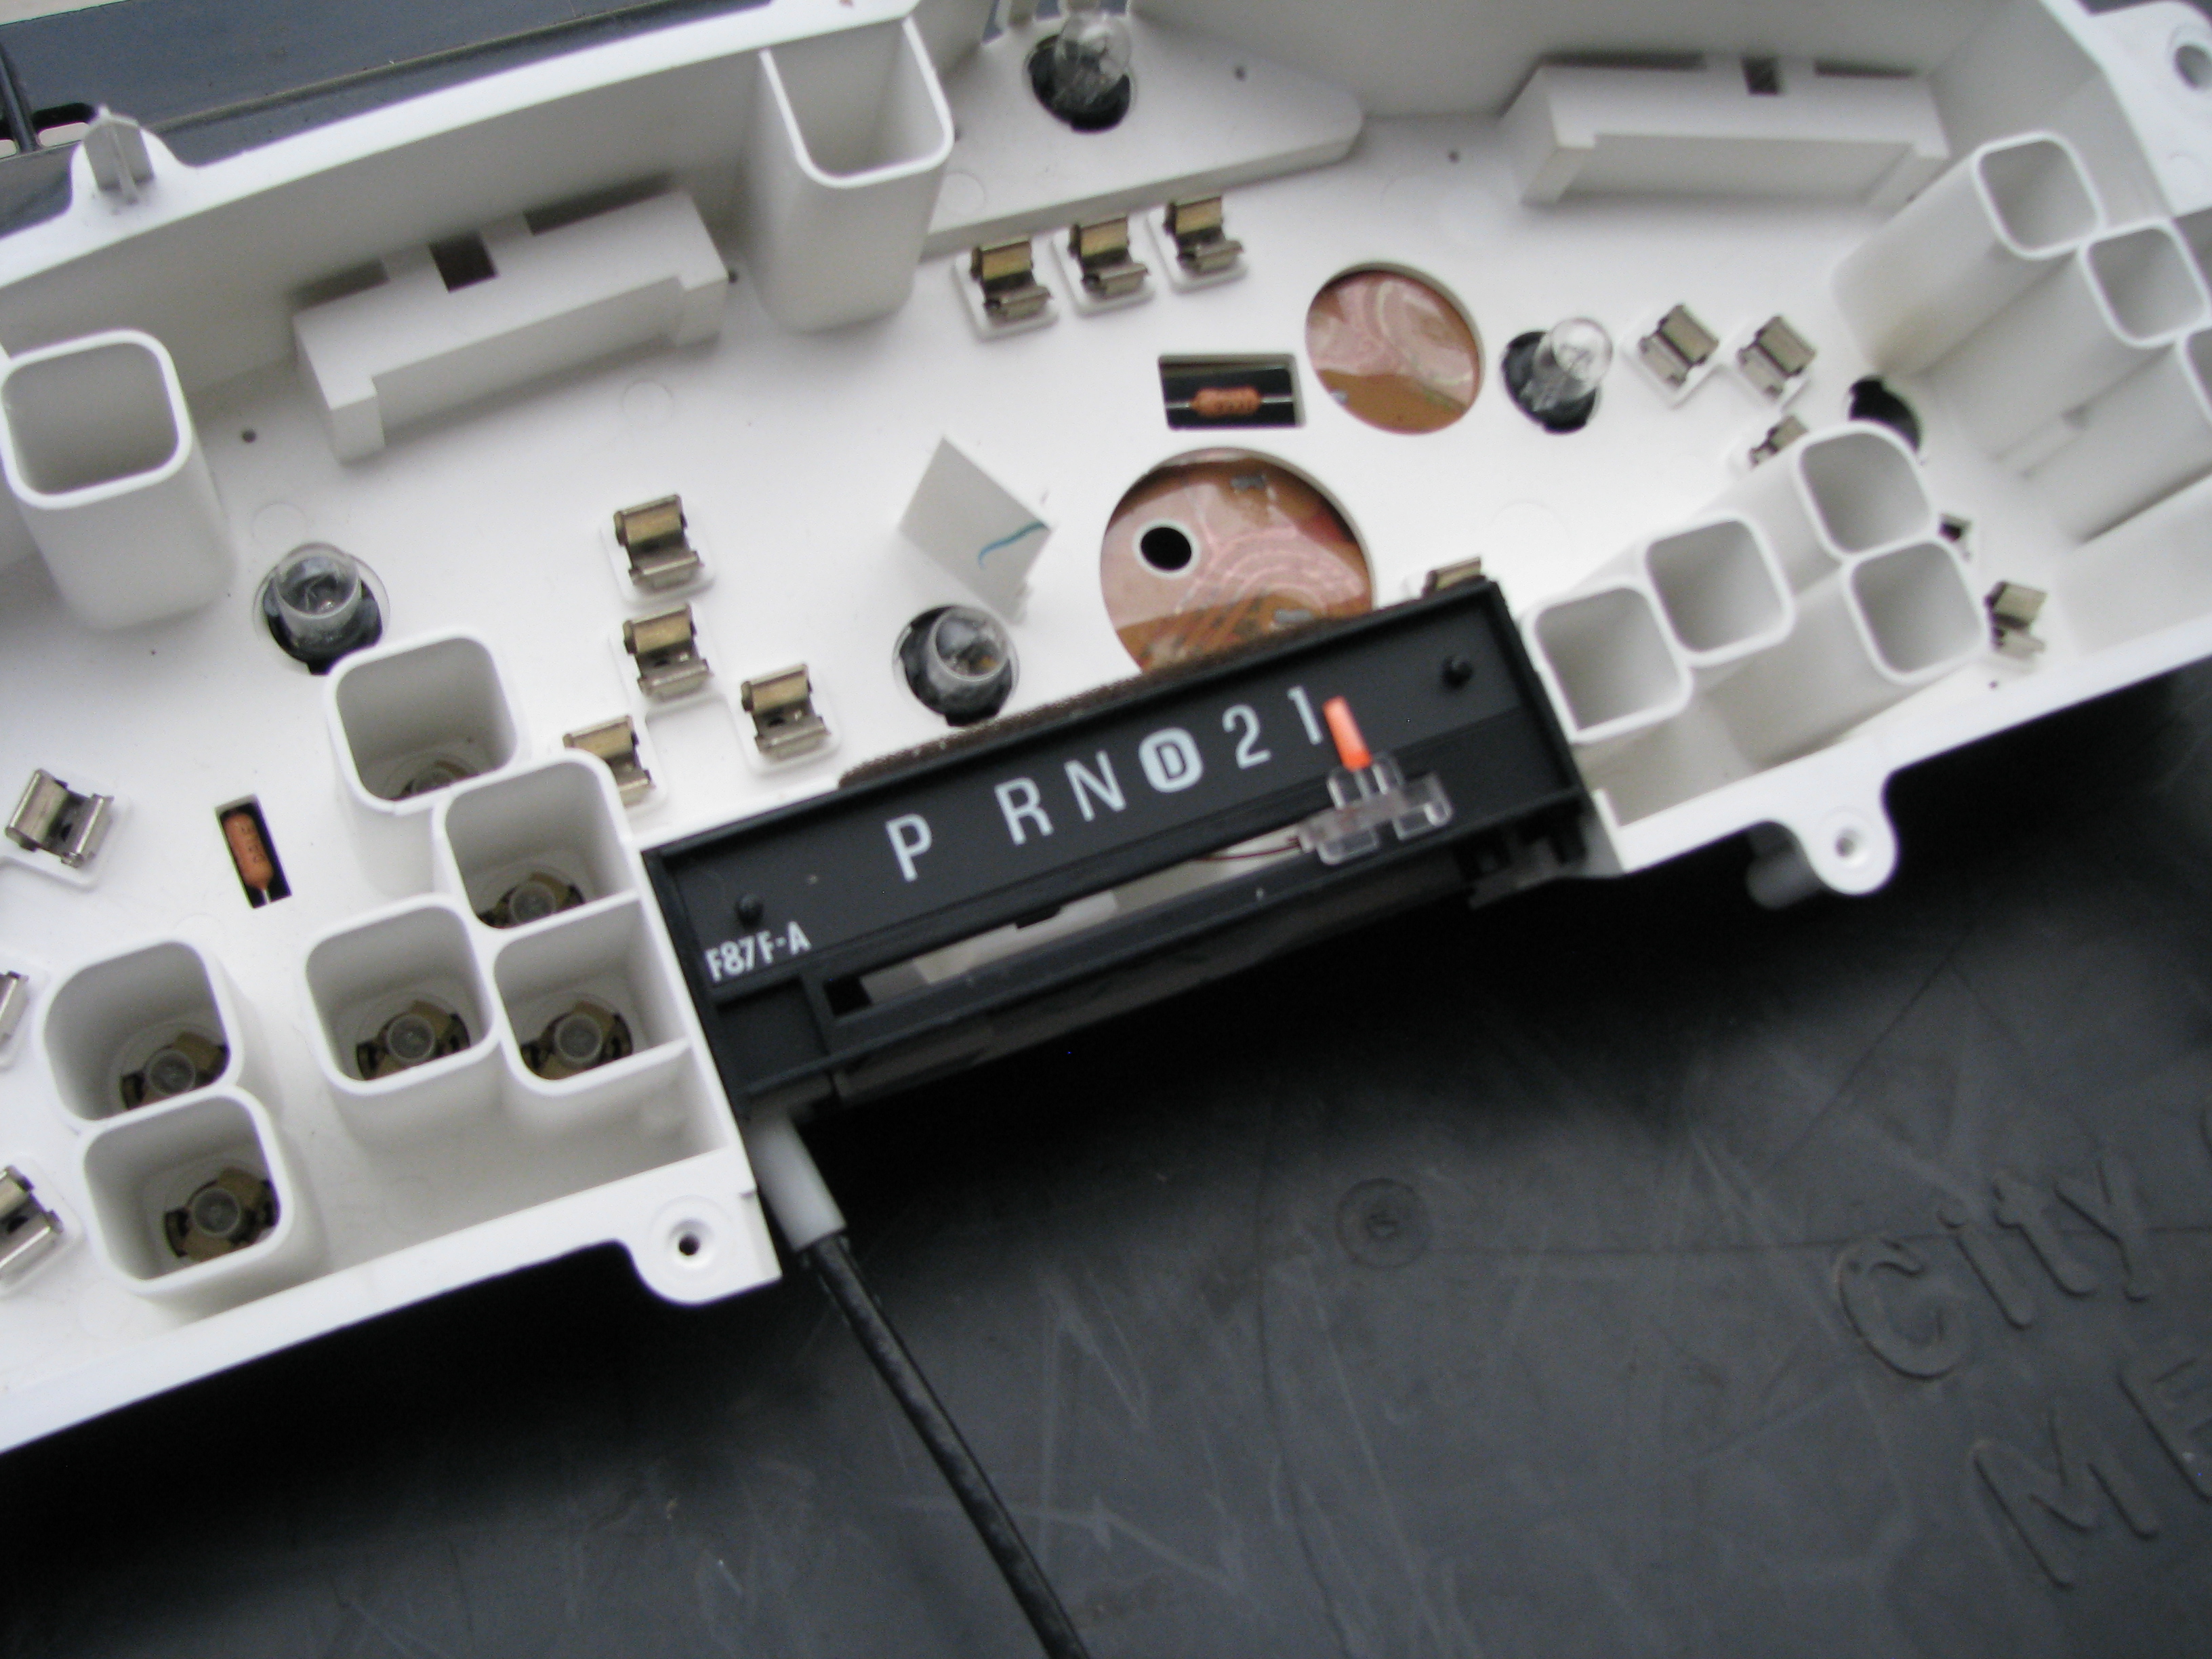 The original reason I had to pull it apart anyway - the donor was an auto, but my Ranger has a stick so I don't need this. This literally just slides out and you can slide the blanking plate from the stick cluster into its place. 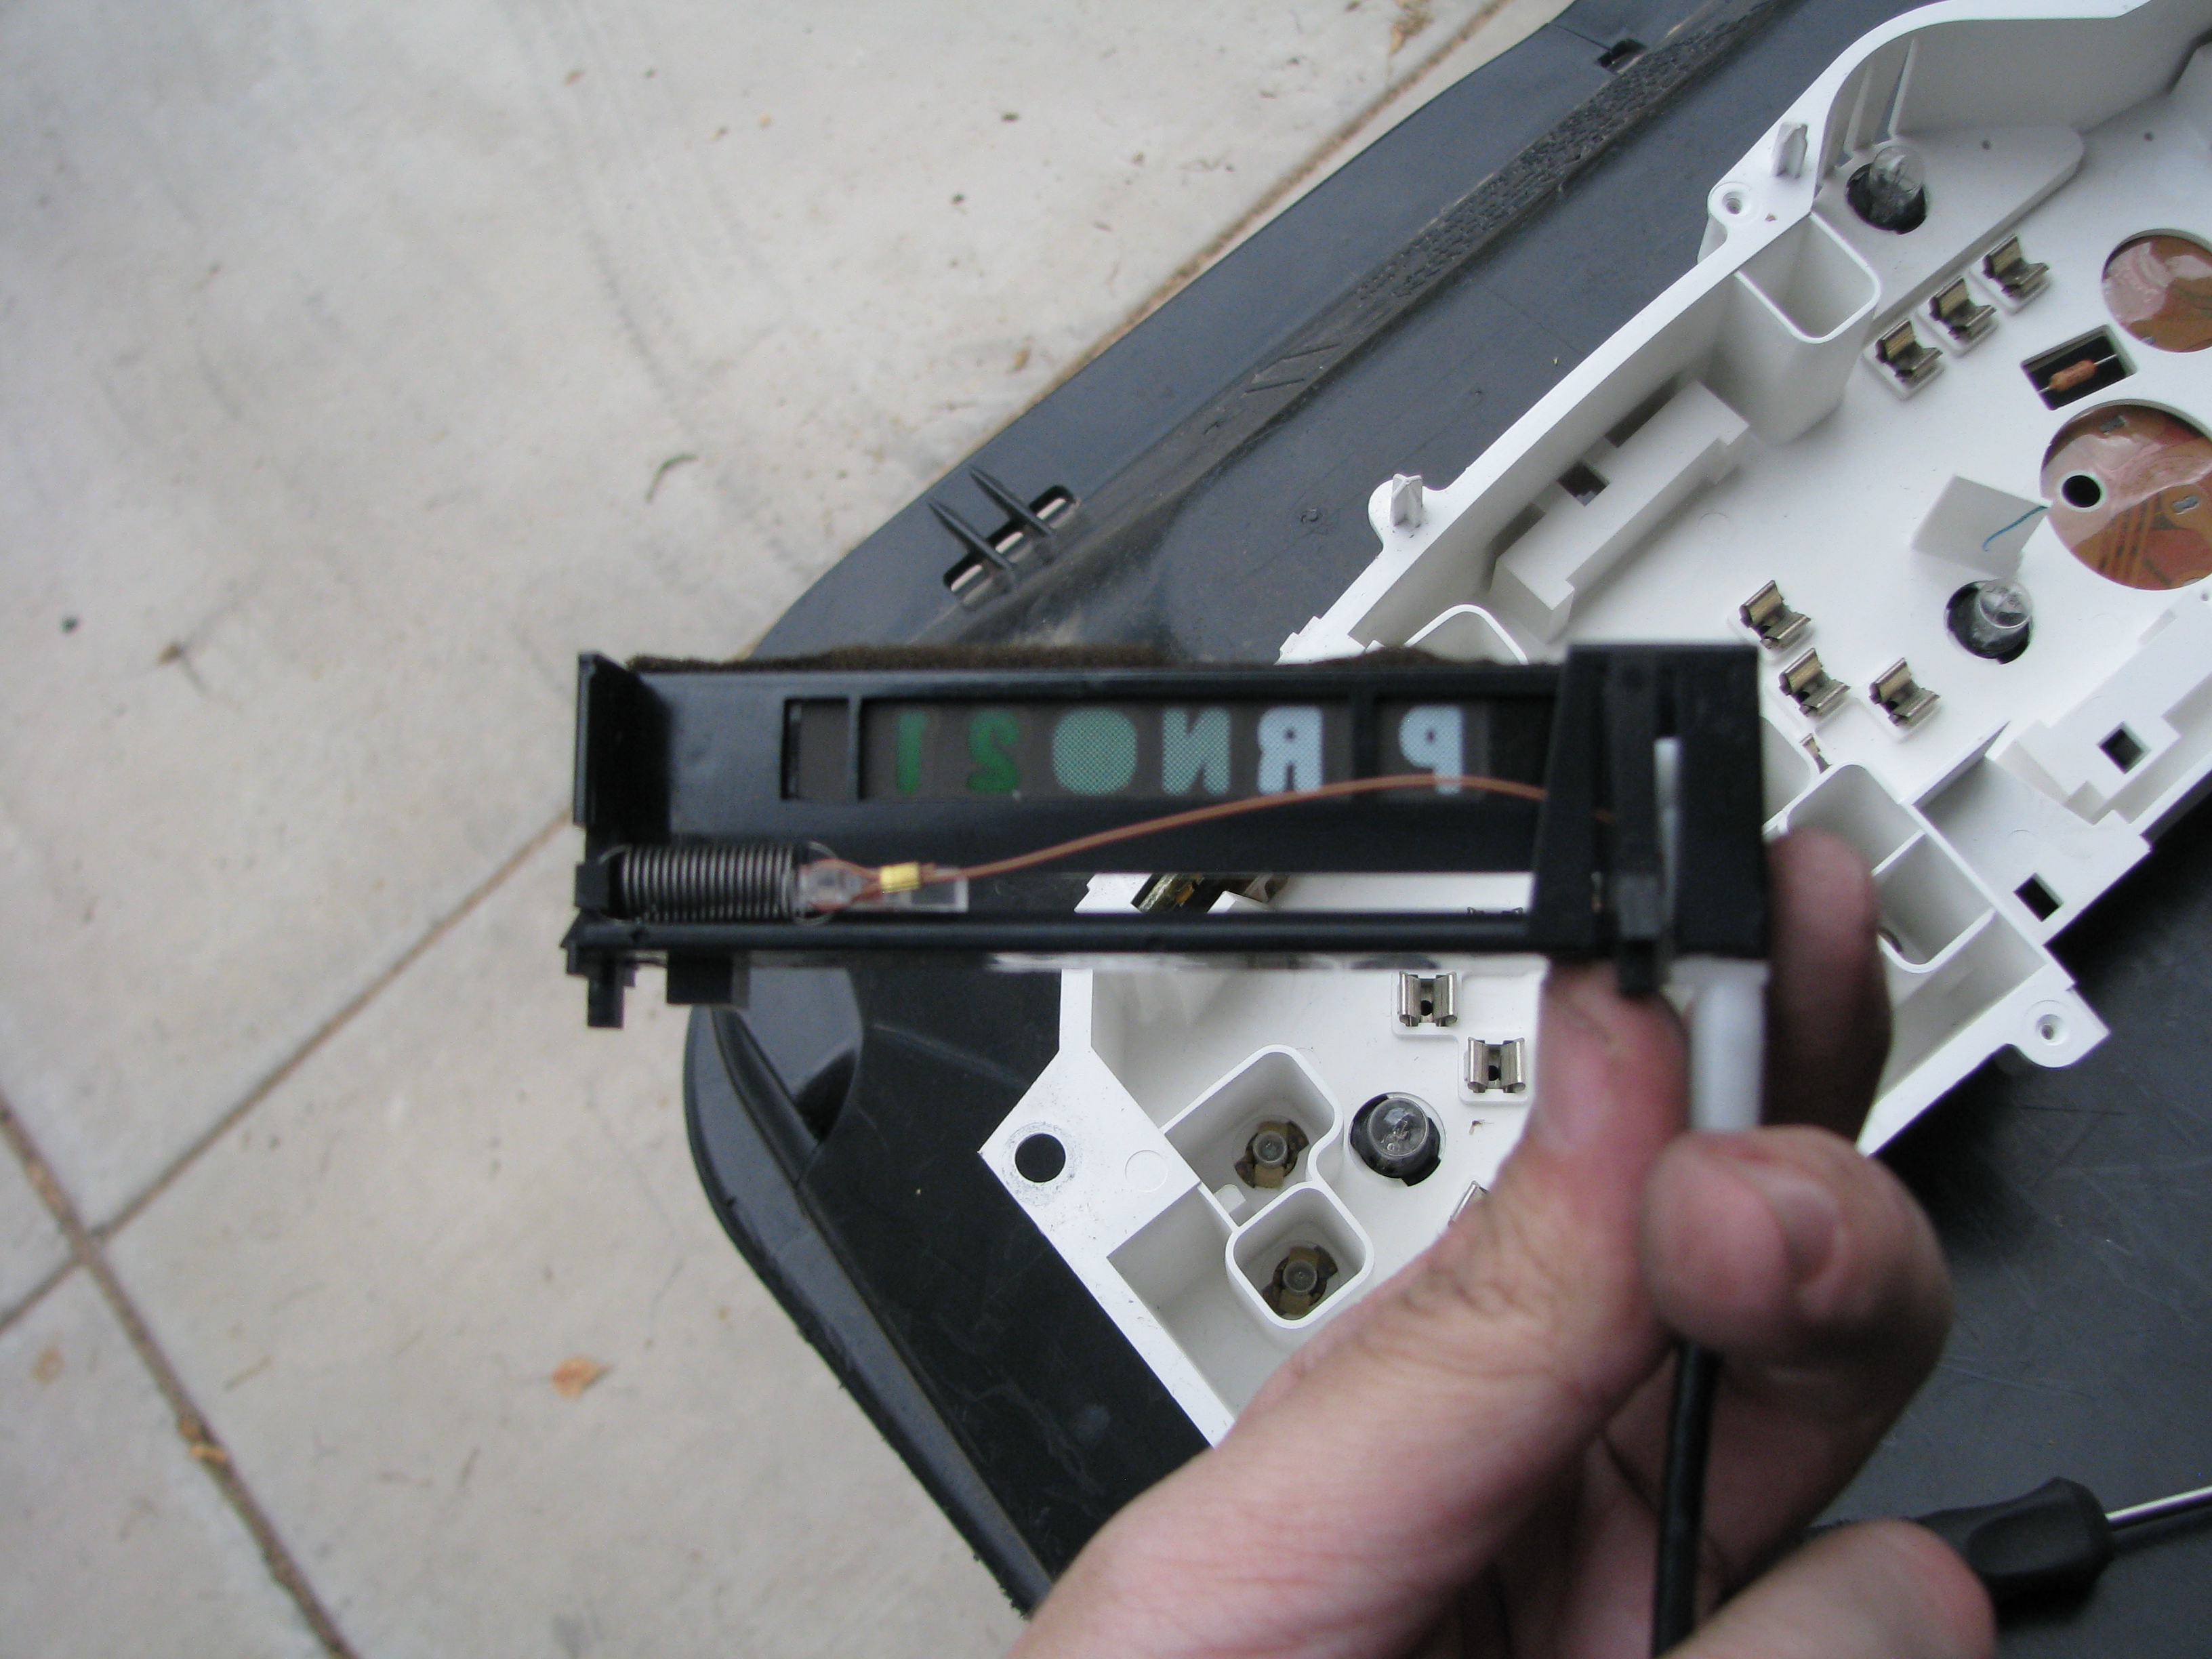 The back of a PRNDL. 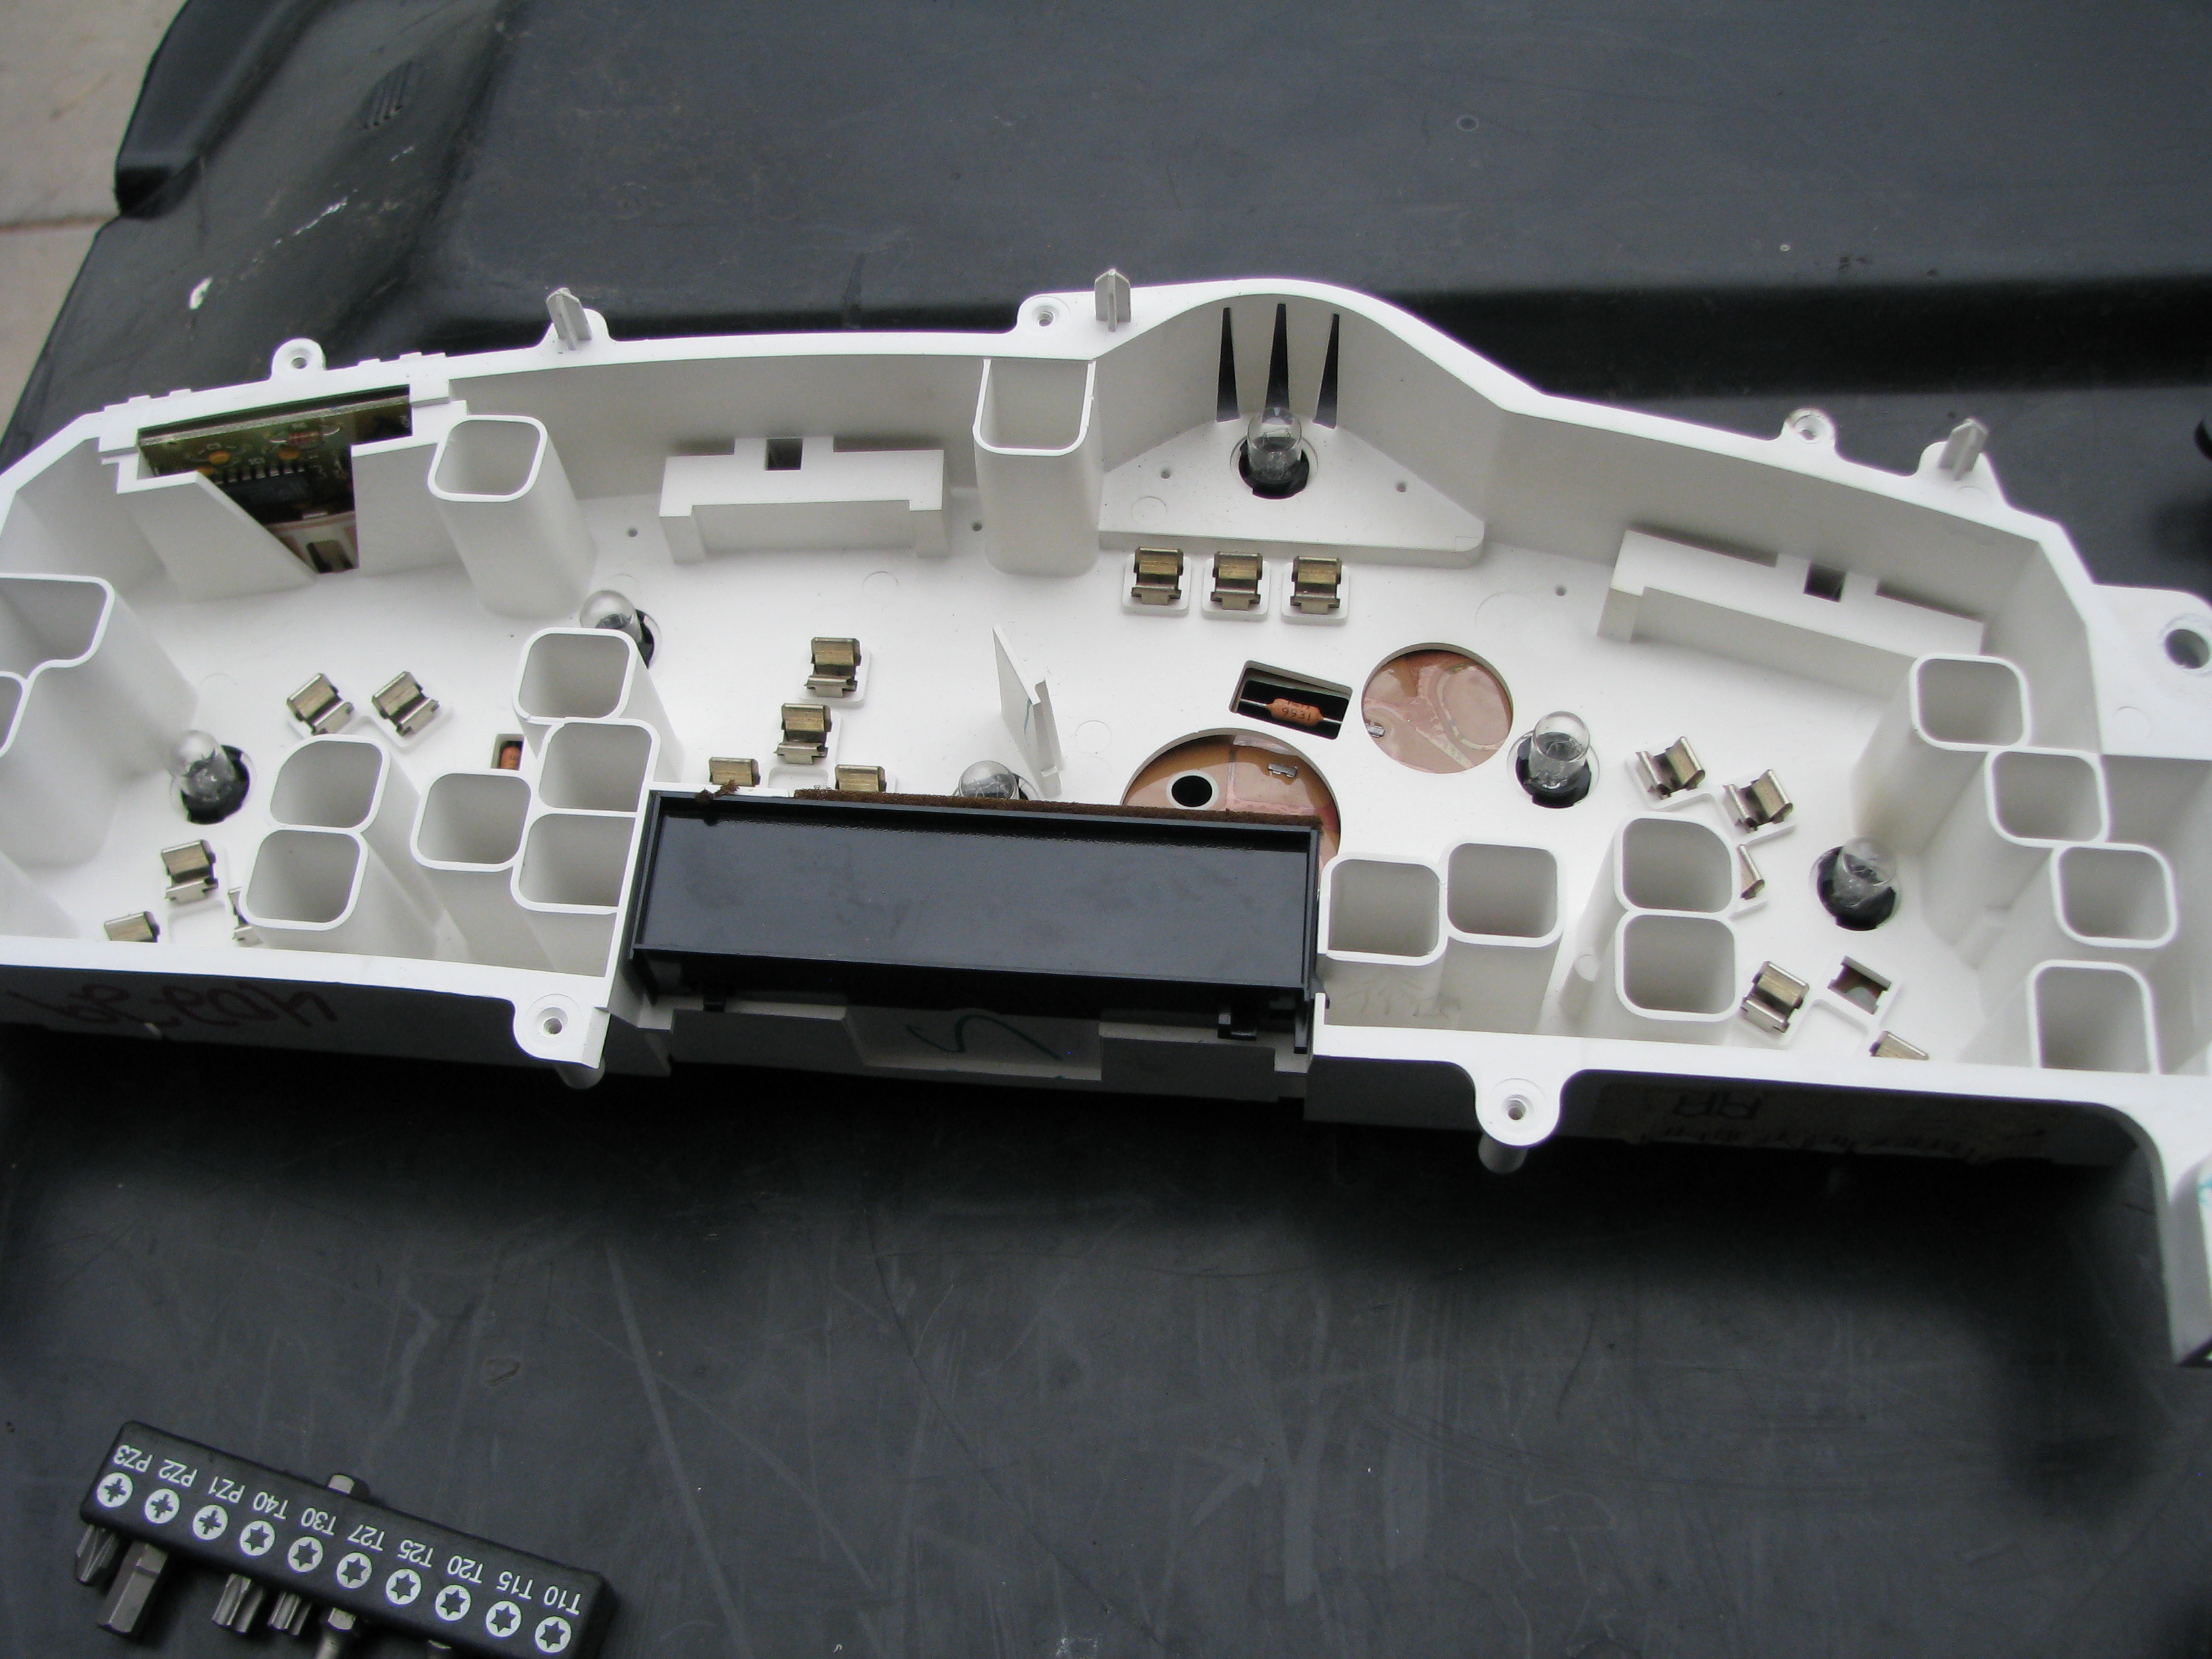 Blanking plate installed after disassembling the original cluster in the same manner.  Remember the USB cable earlier? My stereo install kit has a little drawer included with it, and these holes are already almost big enough to pop a USB cable through, if the one you have doesn't have a lot of rubber around the head. Mine does, of course, so out came the drill press.  Small hole made larger with no apparent change in integrity of the box, and now the male side of the USB comes out under the radio again to plug into my USB adapter. 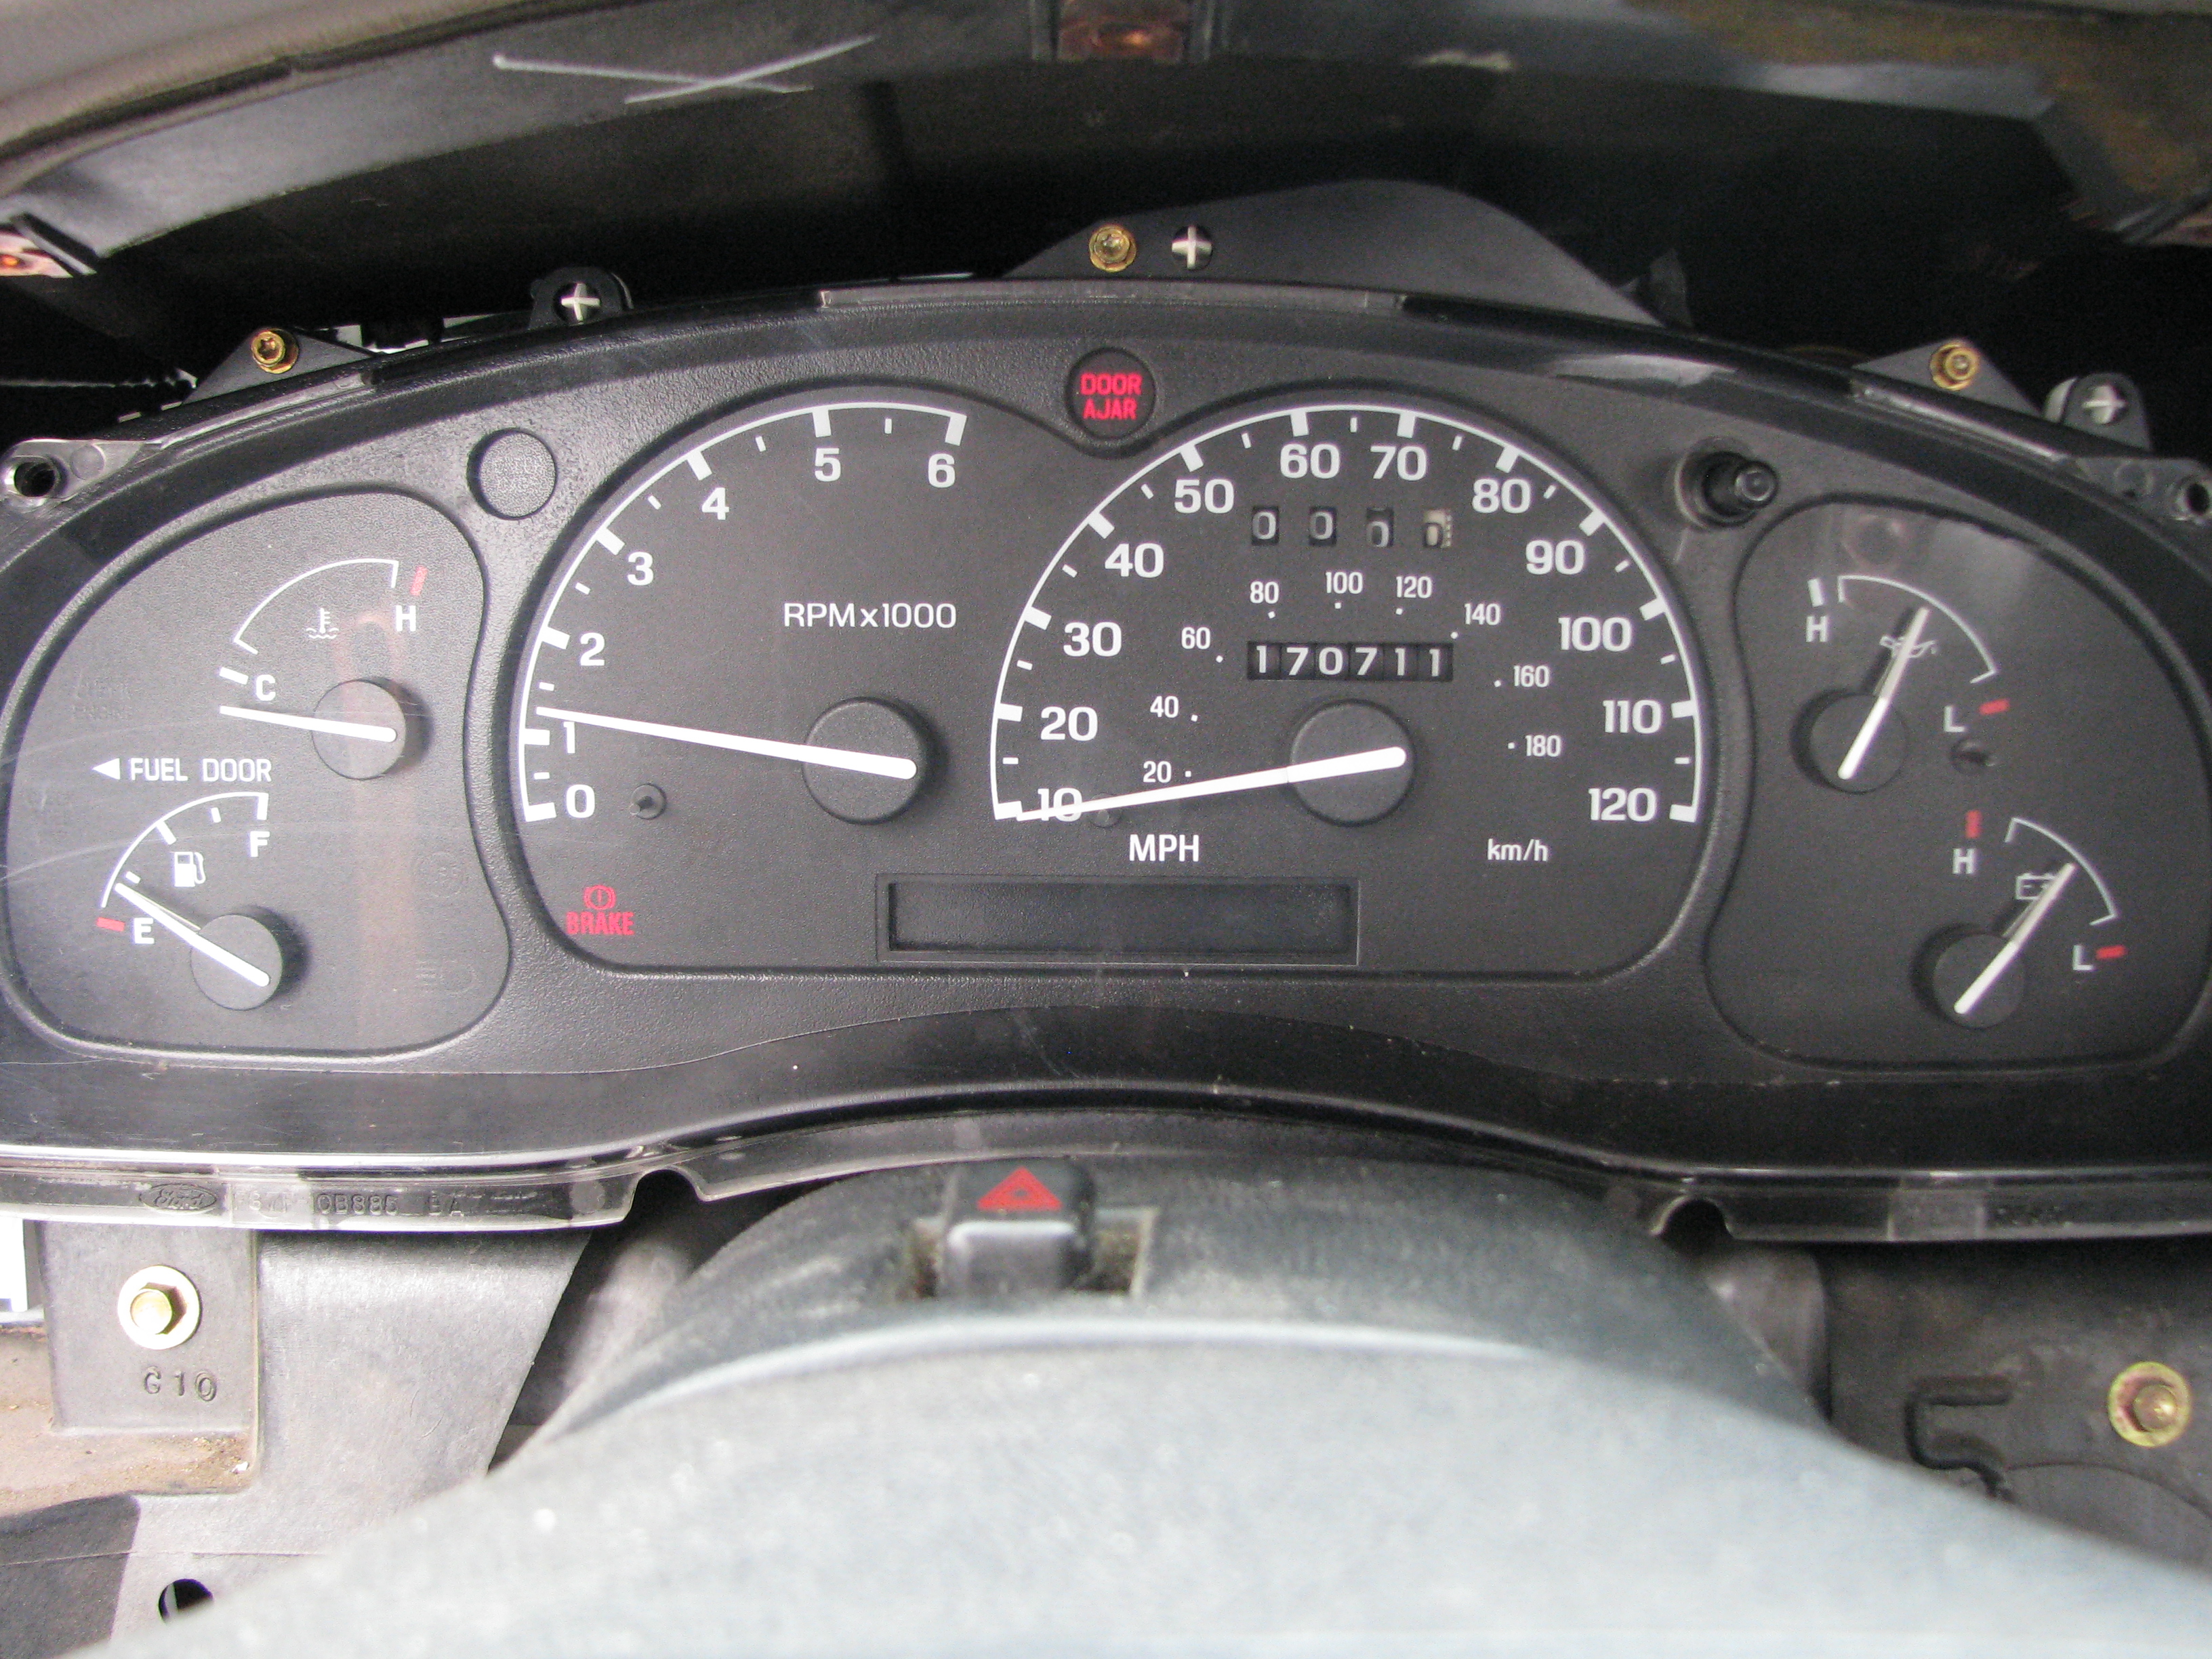 And now we're at everyone's favorite step - installation is the reverse of removal. Plugged it in and cranked it up, and everything worked right away.  Skipping well ahead but the interior of this thing seriously comes apart / goes together in like five minutes. 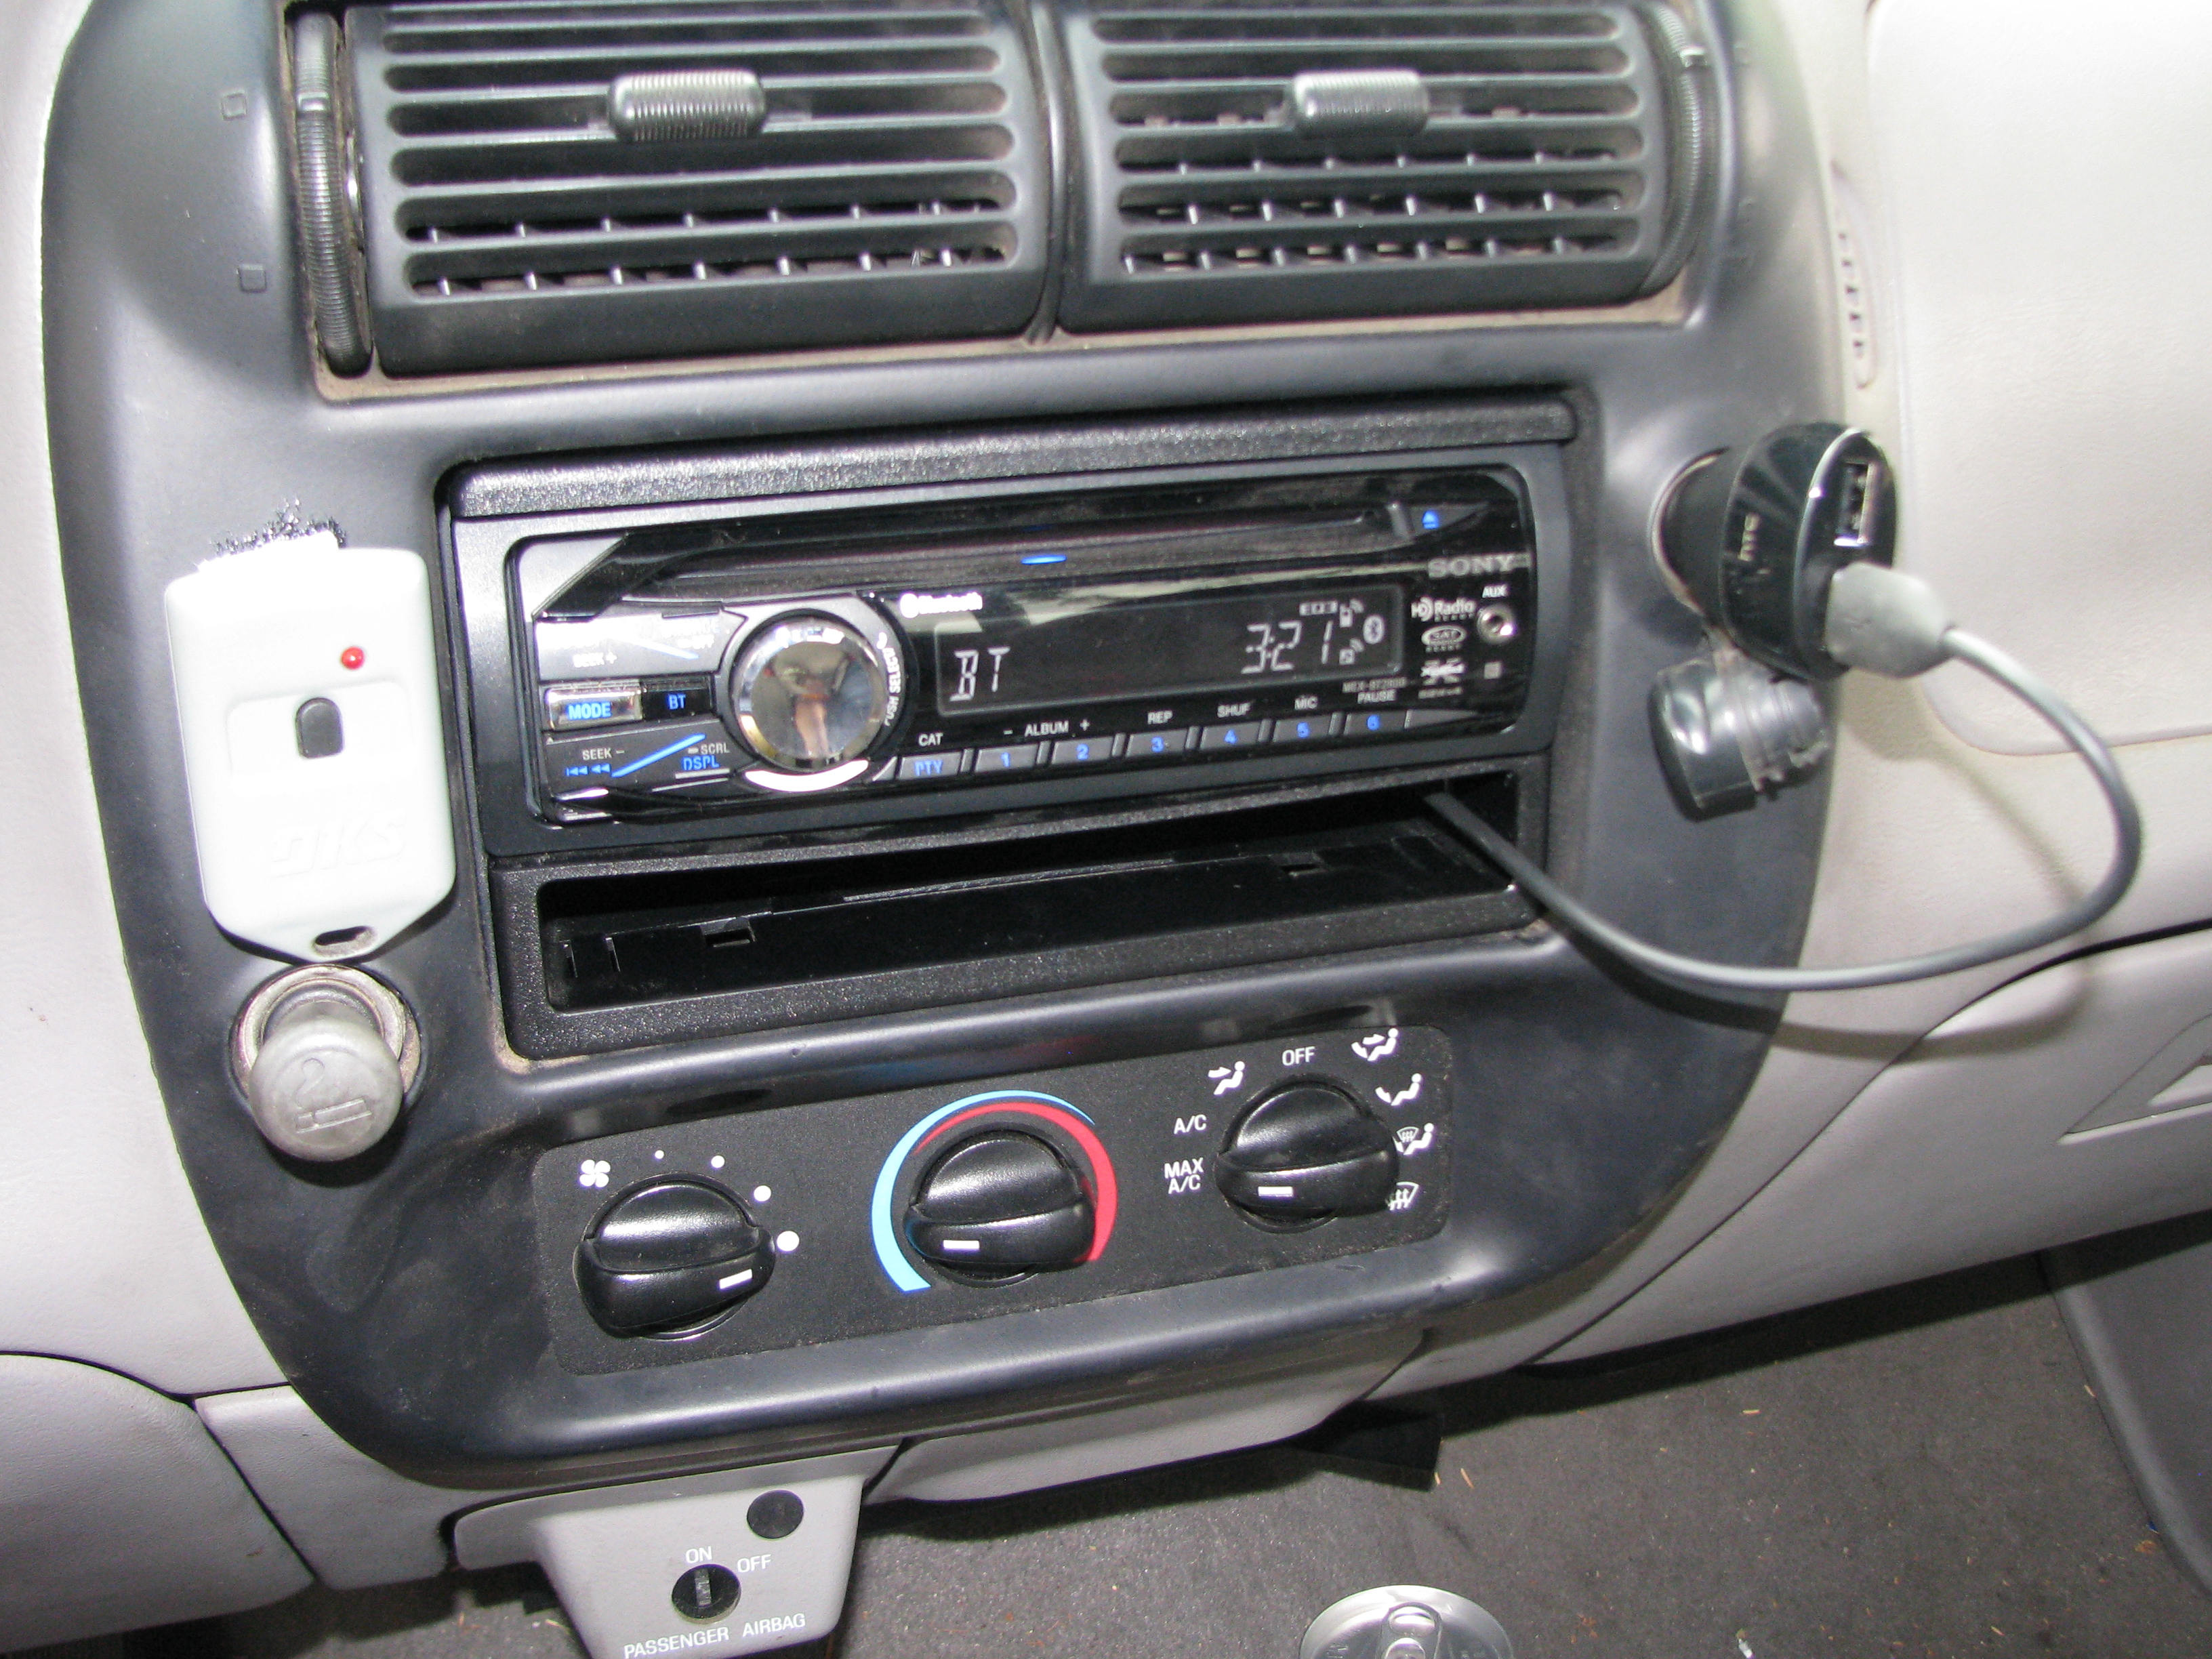 The new center dash area. I'm almost tempted to hardwire a USB adapter behind the dash eventually, but I really don't want to just have a cigarette adapter plugged in somewhere I can't quickly unplug it. So, now I have a tach - which means maybe I'll get some visual indication when it decides it doesn't want to idle anymore! I suspect it's probably a dirty idle air control valve.
|
|
#
¿
Sep 9, 2012 01:32
|
|
|
Alright, you guys sold me. I found a spare USB adapter I have no problem hacking up and hardwiring in... and then lost it again  I'm debating whether I'm going to use a project box or just see if I can cram it all into a mess of heatshrink. I'm debating whether I'm going to use a project box or just see if I can cram it all into a mess of heatshrink.Nothing photographic to report. Changed the belt today now that I'm satisfied that the dents I managed to put in the A/C compressor pulley aren't damaging anything. The one on the truck only had a very, very worn Motorcraft logo - I wonder just how old that thing was. At least it's a very easy job to do, but as I was letting it warm up I discovered where my slow coolant loss has been going. The heater control valve that I replaced not long after I bought it has already failed again, in the exact same way (and actually leaking more than the one it replaced). So much for the Autozone part; got a Motorcraft one on its way from Amazon.
|
|
#
¿
Sep 23, 2012 05:29
|
|
|
So no less than 30 seconds after that last post, I remembered where I put the drat thing, and decided to get to it.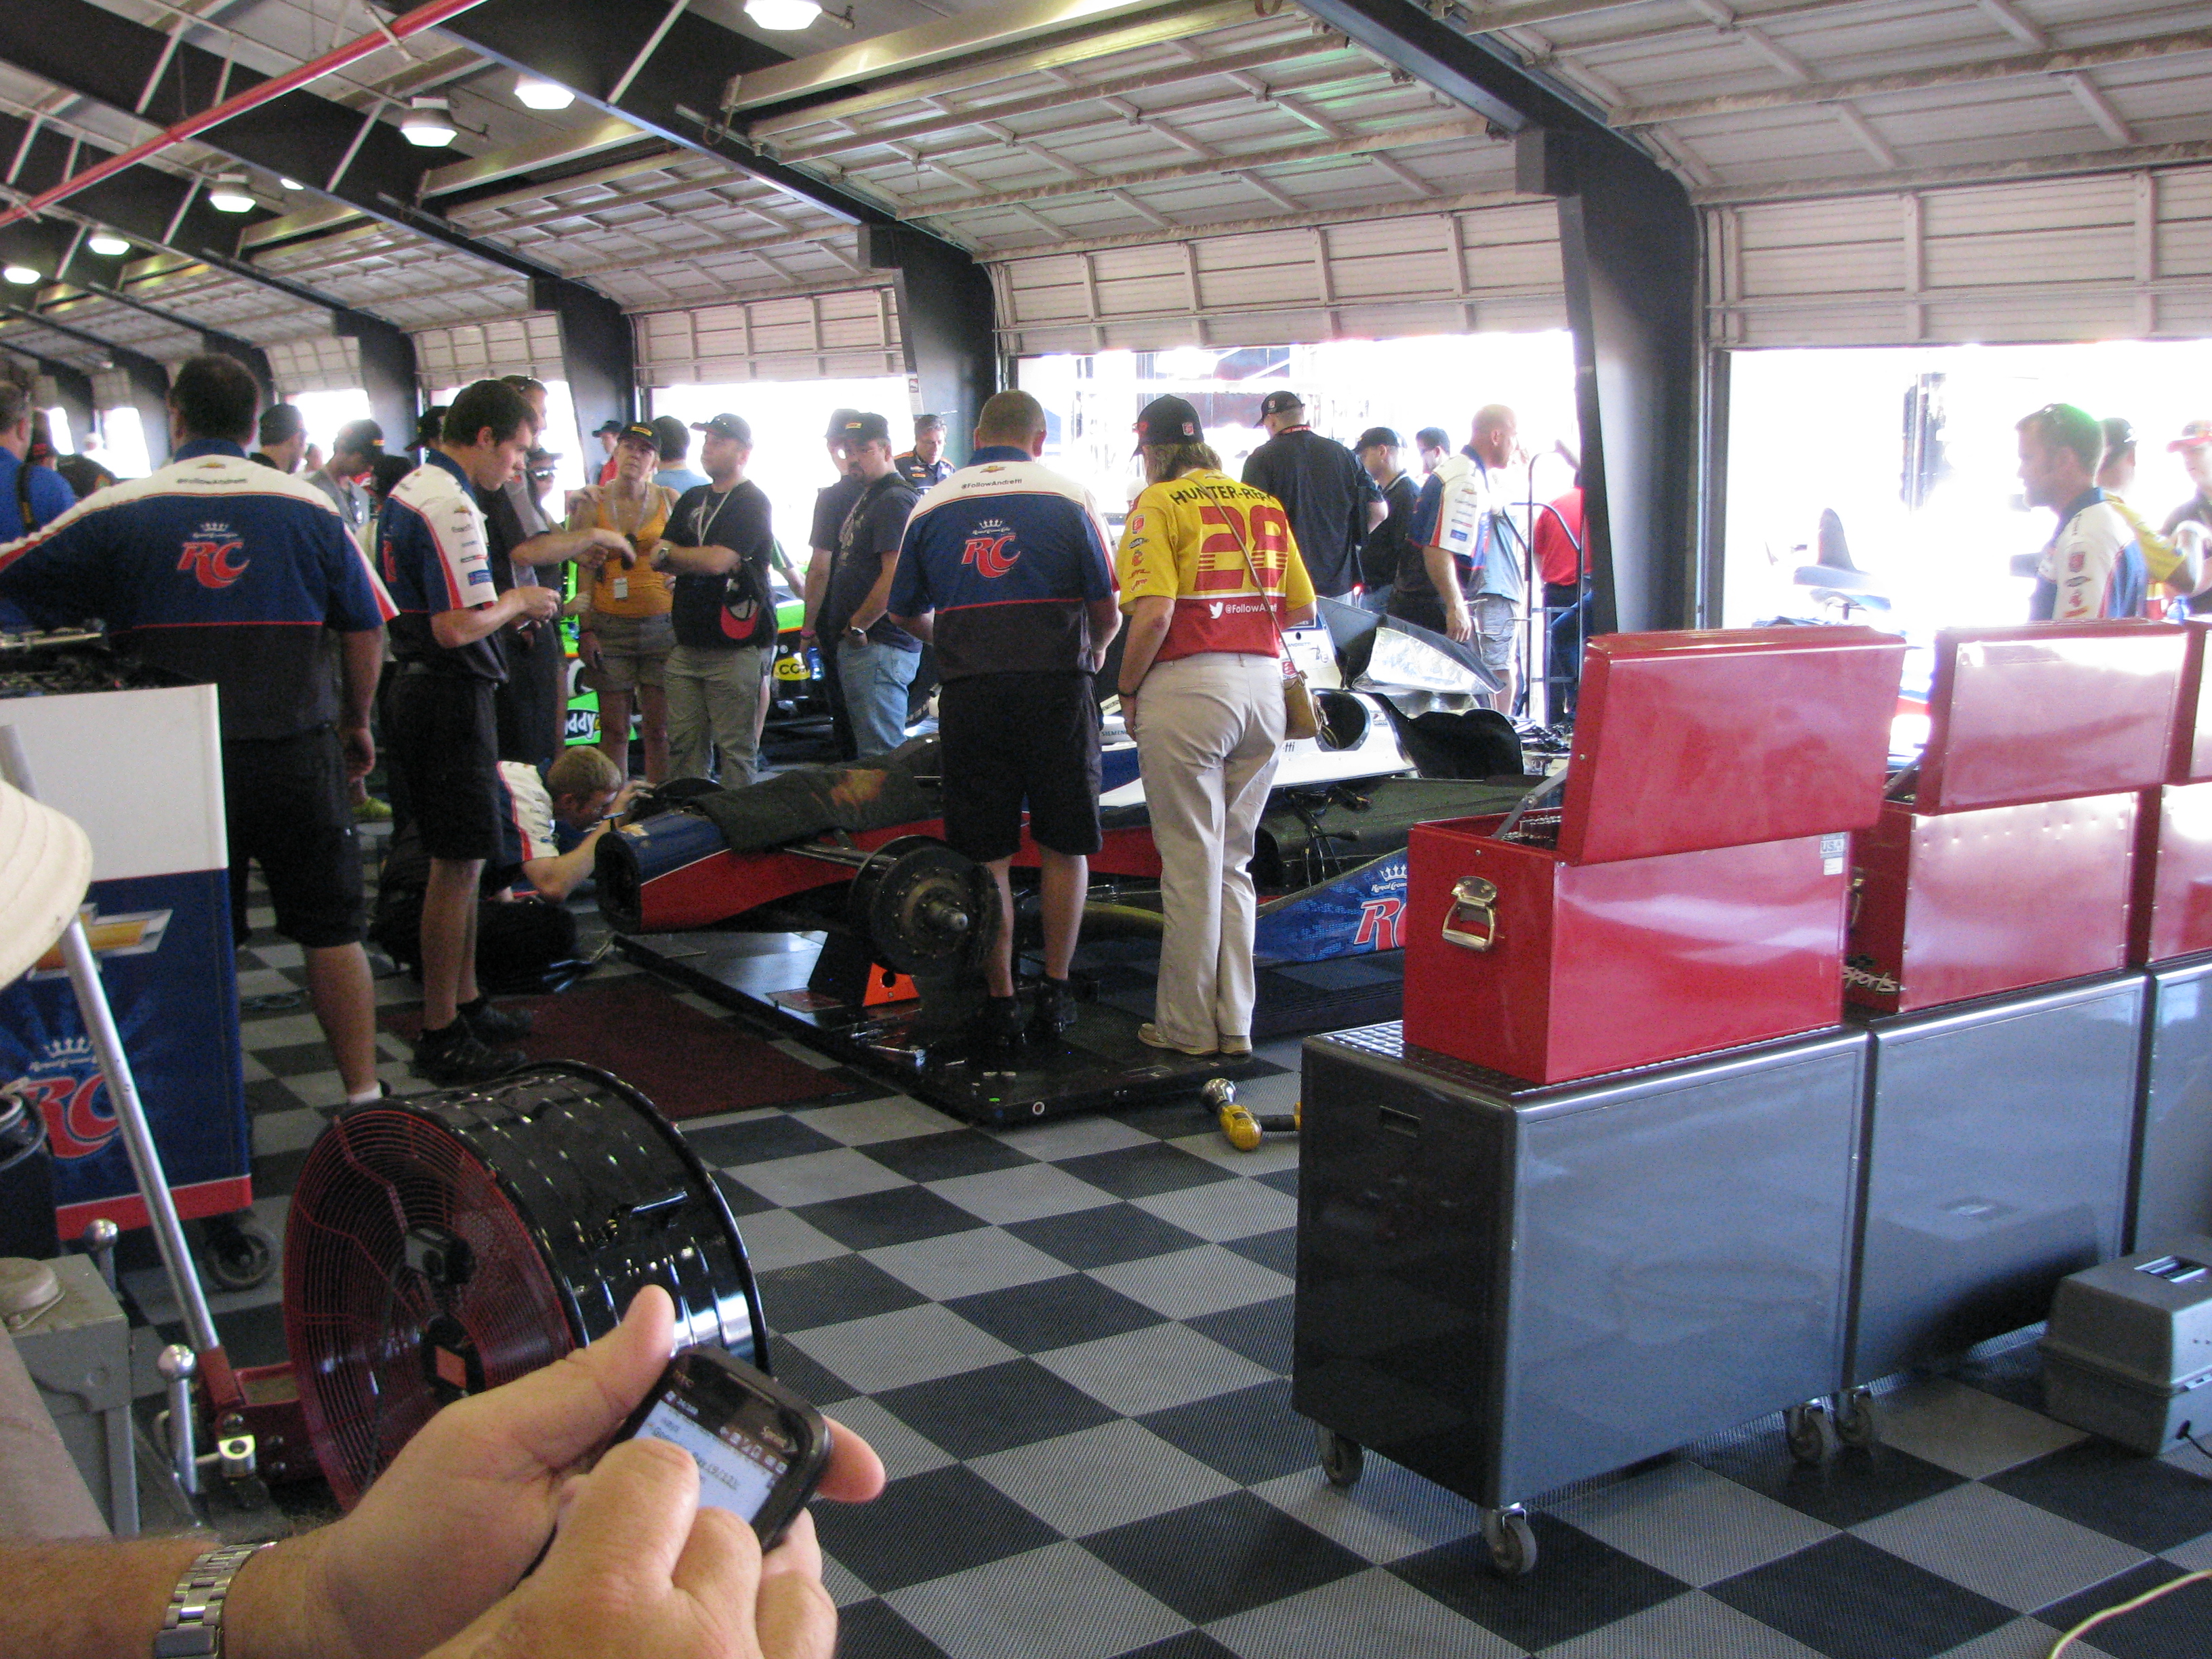 Sticking this in here since it was on the camera. Hanging out in Ryan Hunter-Reay's garage last weekend, about 8 hours before he pulled off one hell of an upset to win the Indycar championship. All of you jerks who like racing should seriously watch Indycar. 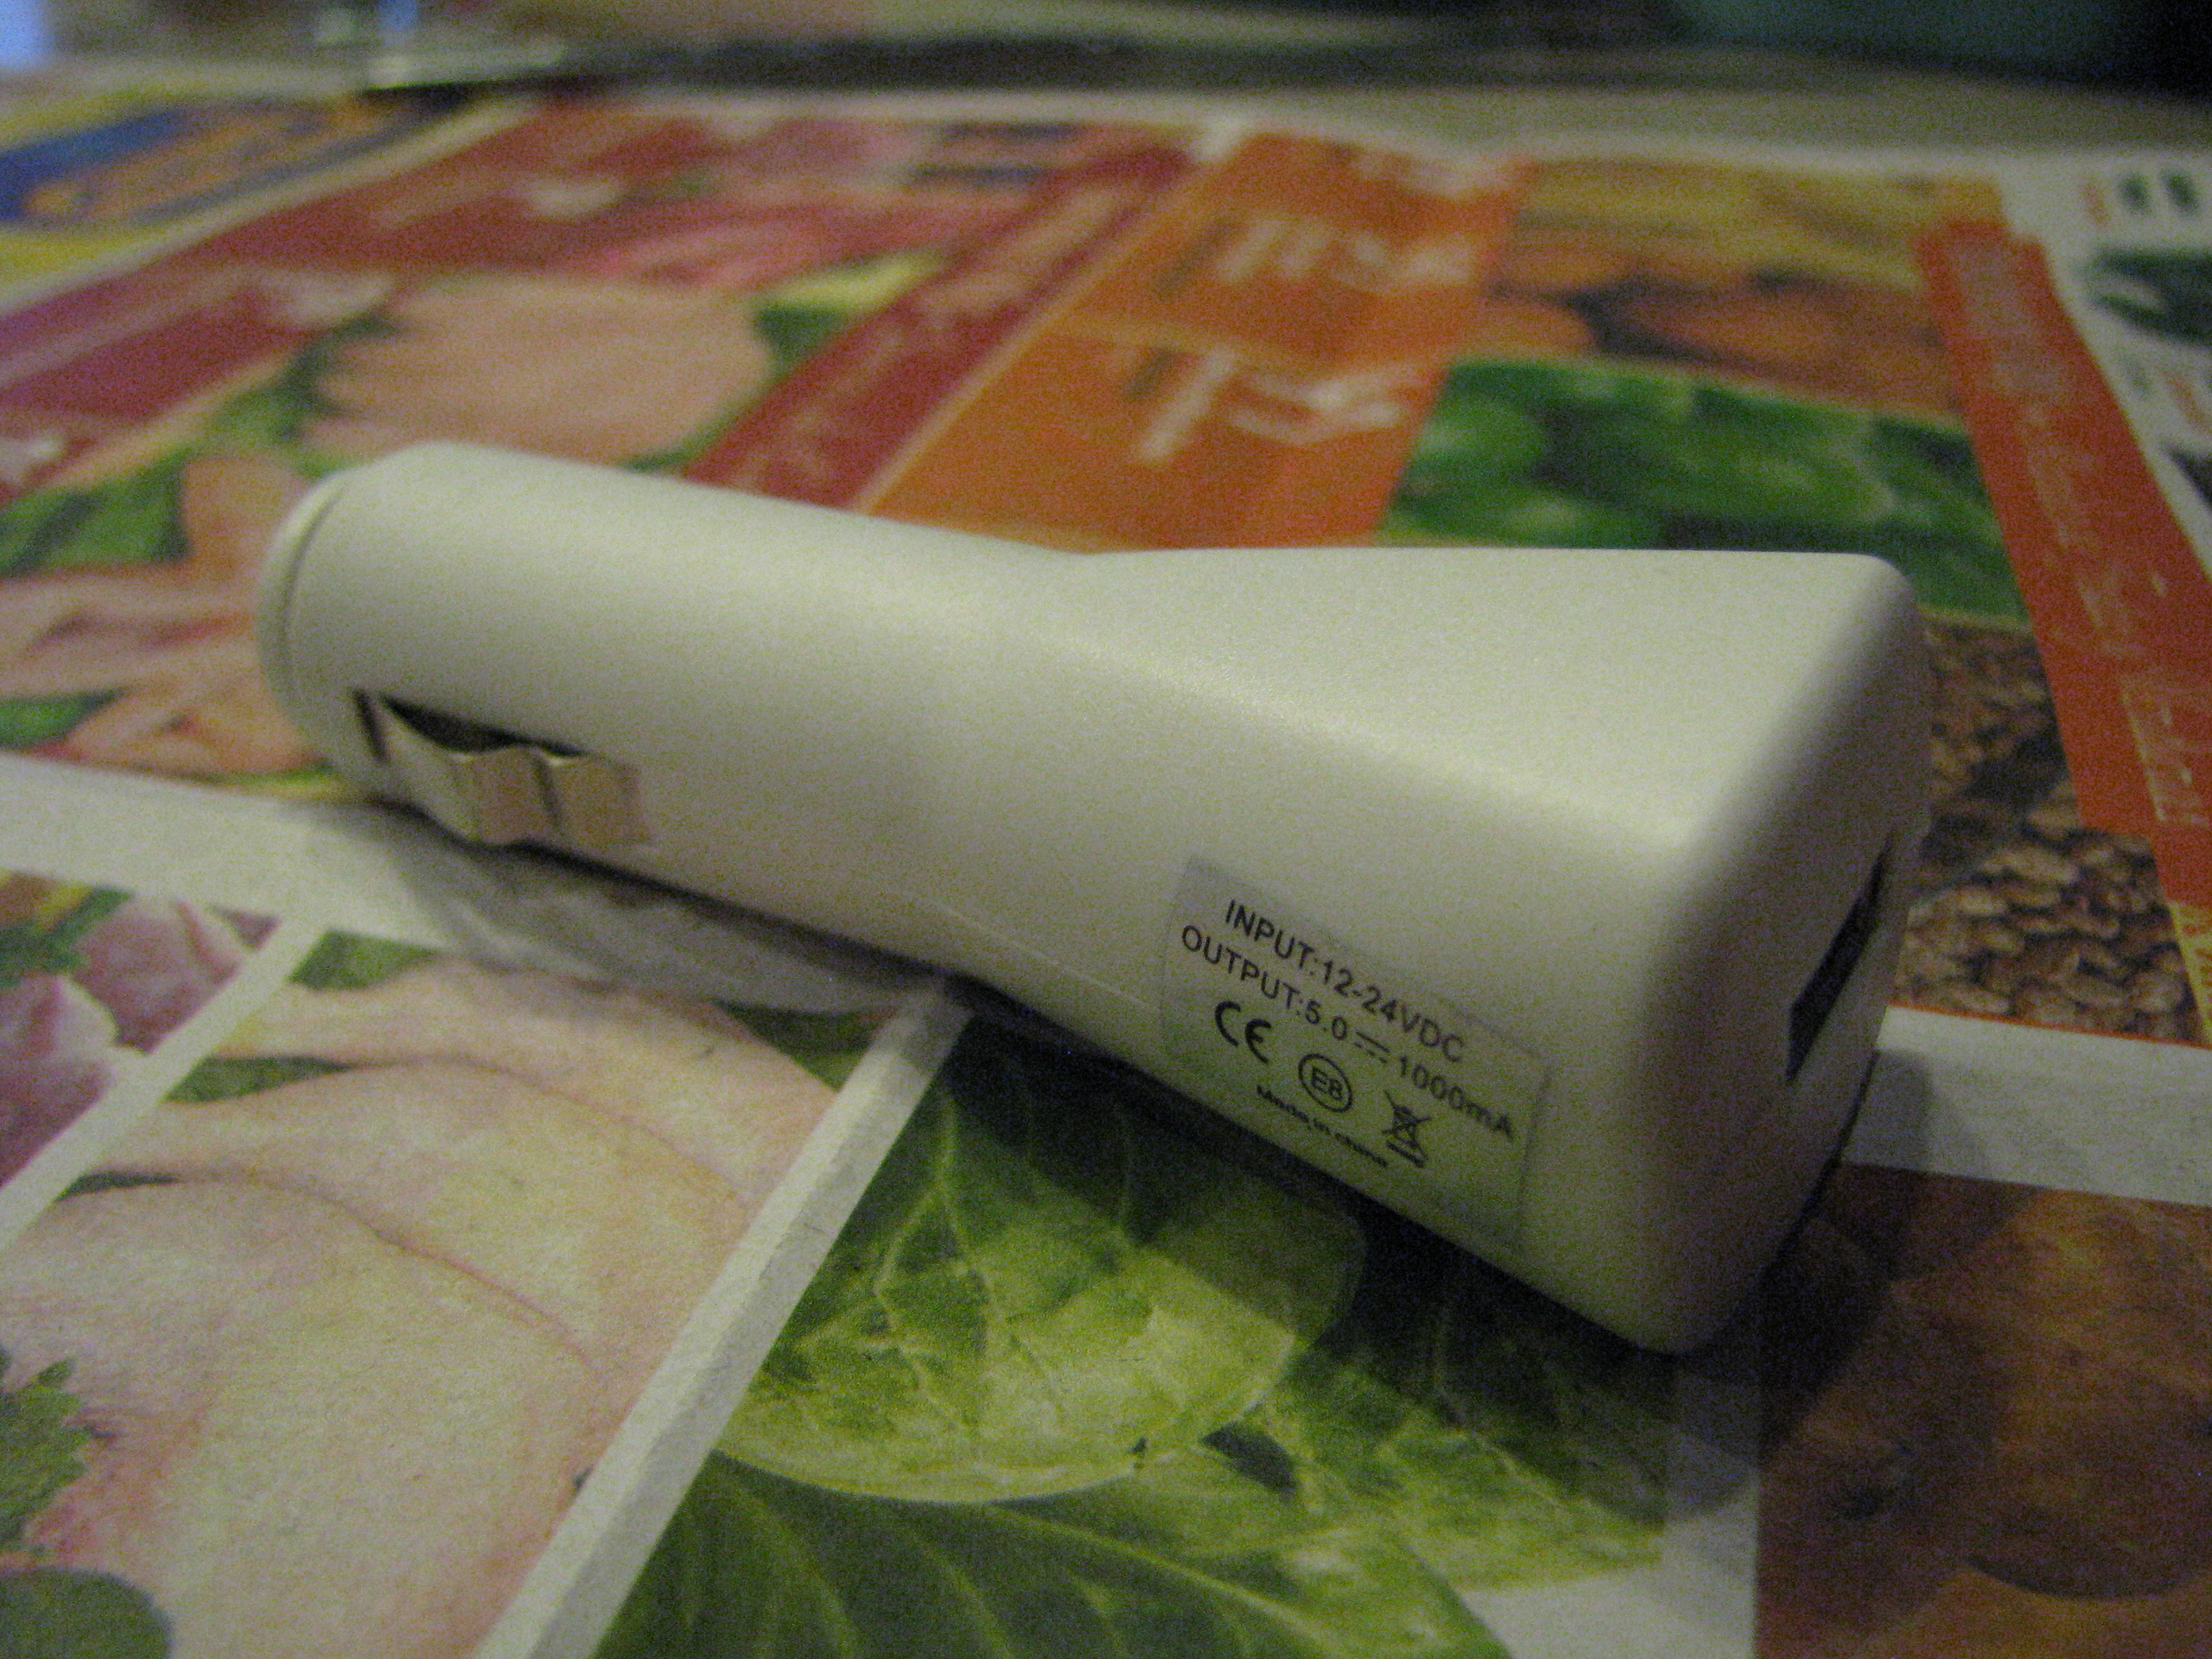 The patient. I was worried I might have to go nuts cracking this case off... 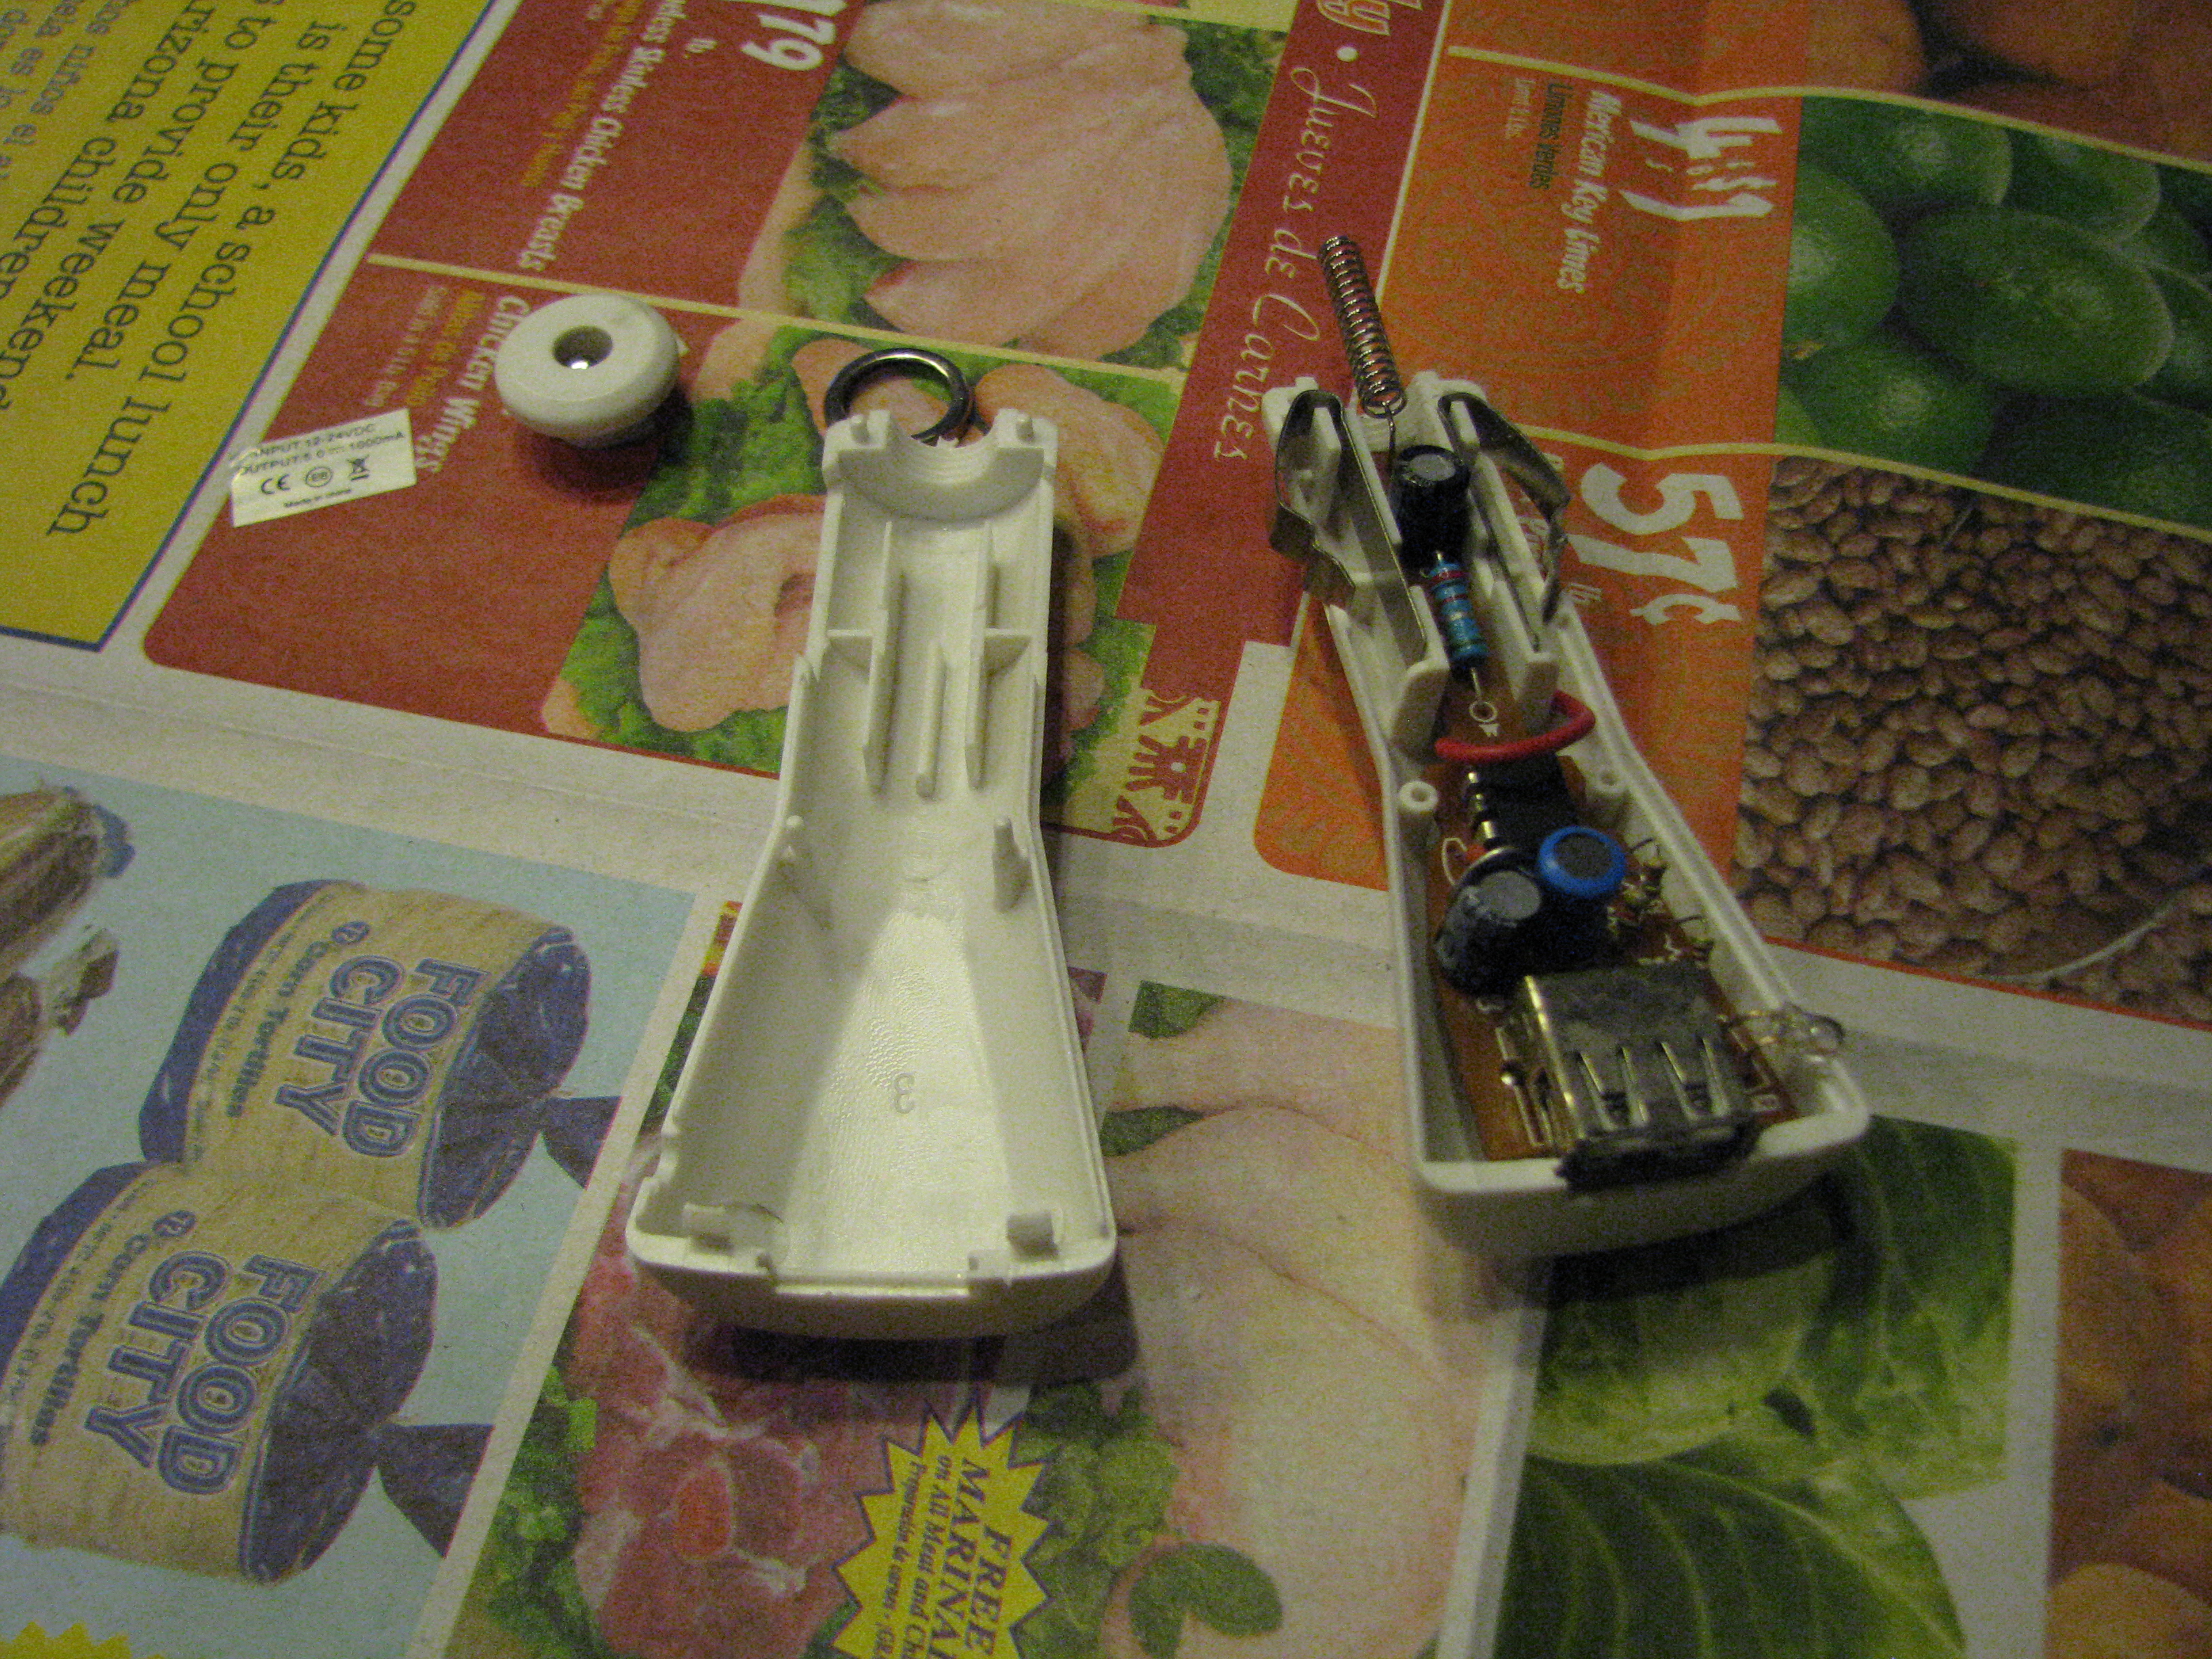 Nope. Unscrew the tip, take off a teeny plastic lip holding that chrome ring on, and both halves fall apart. 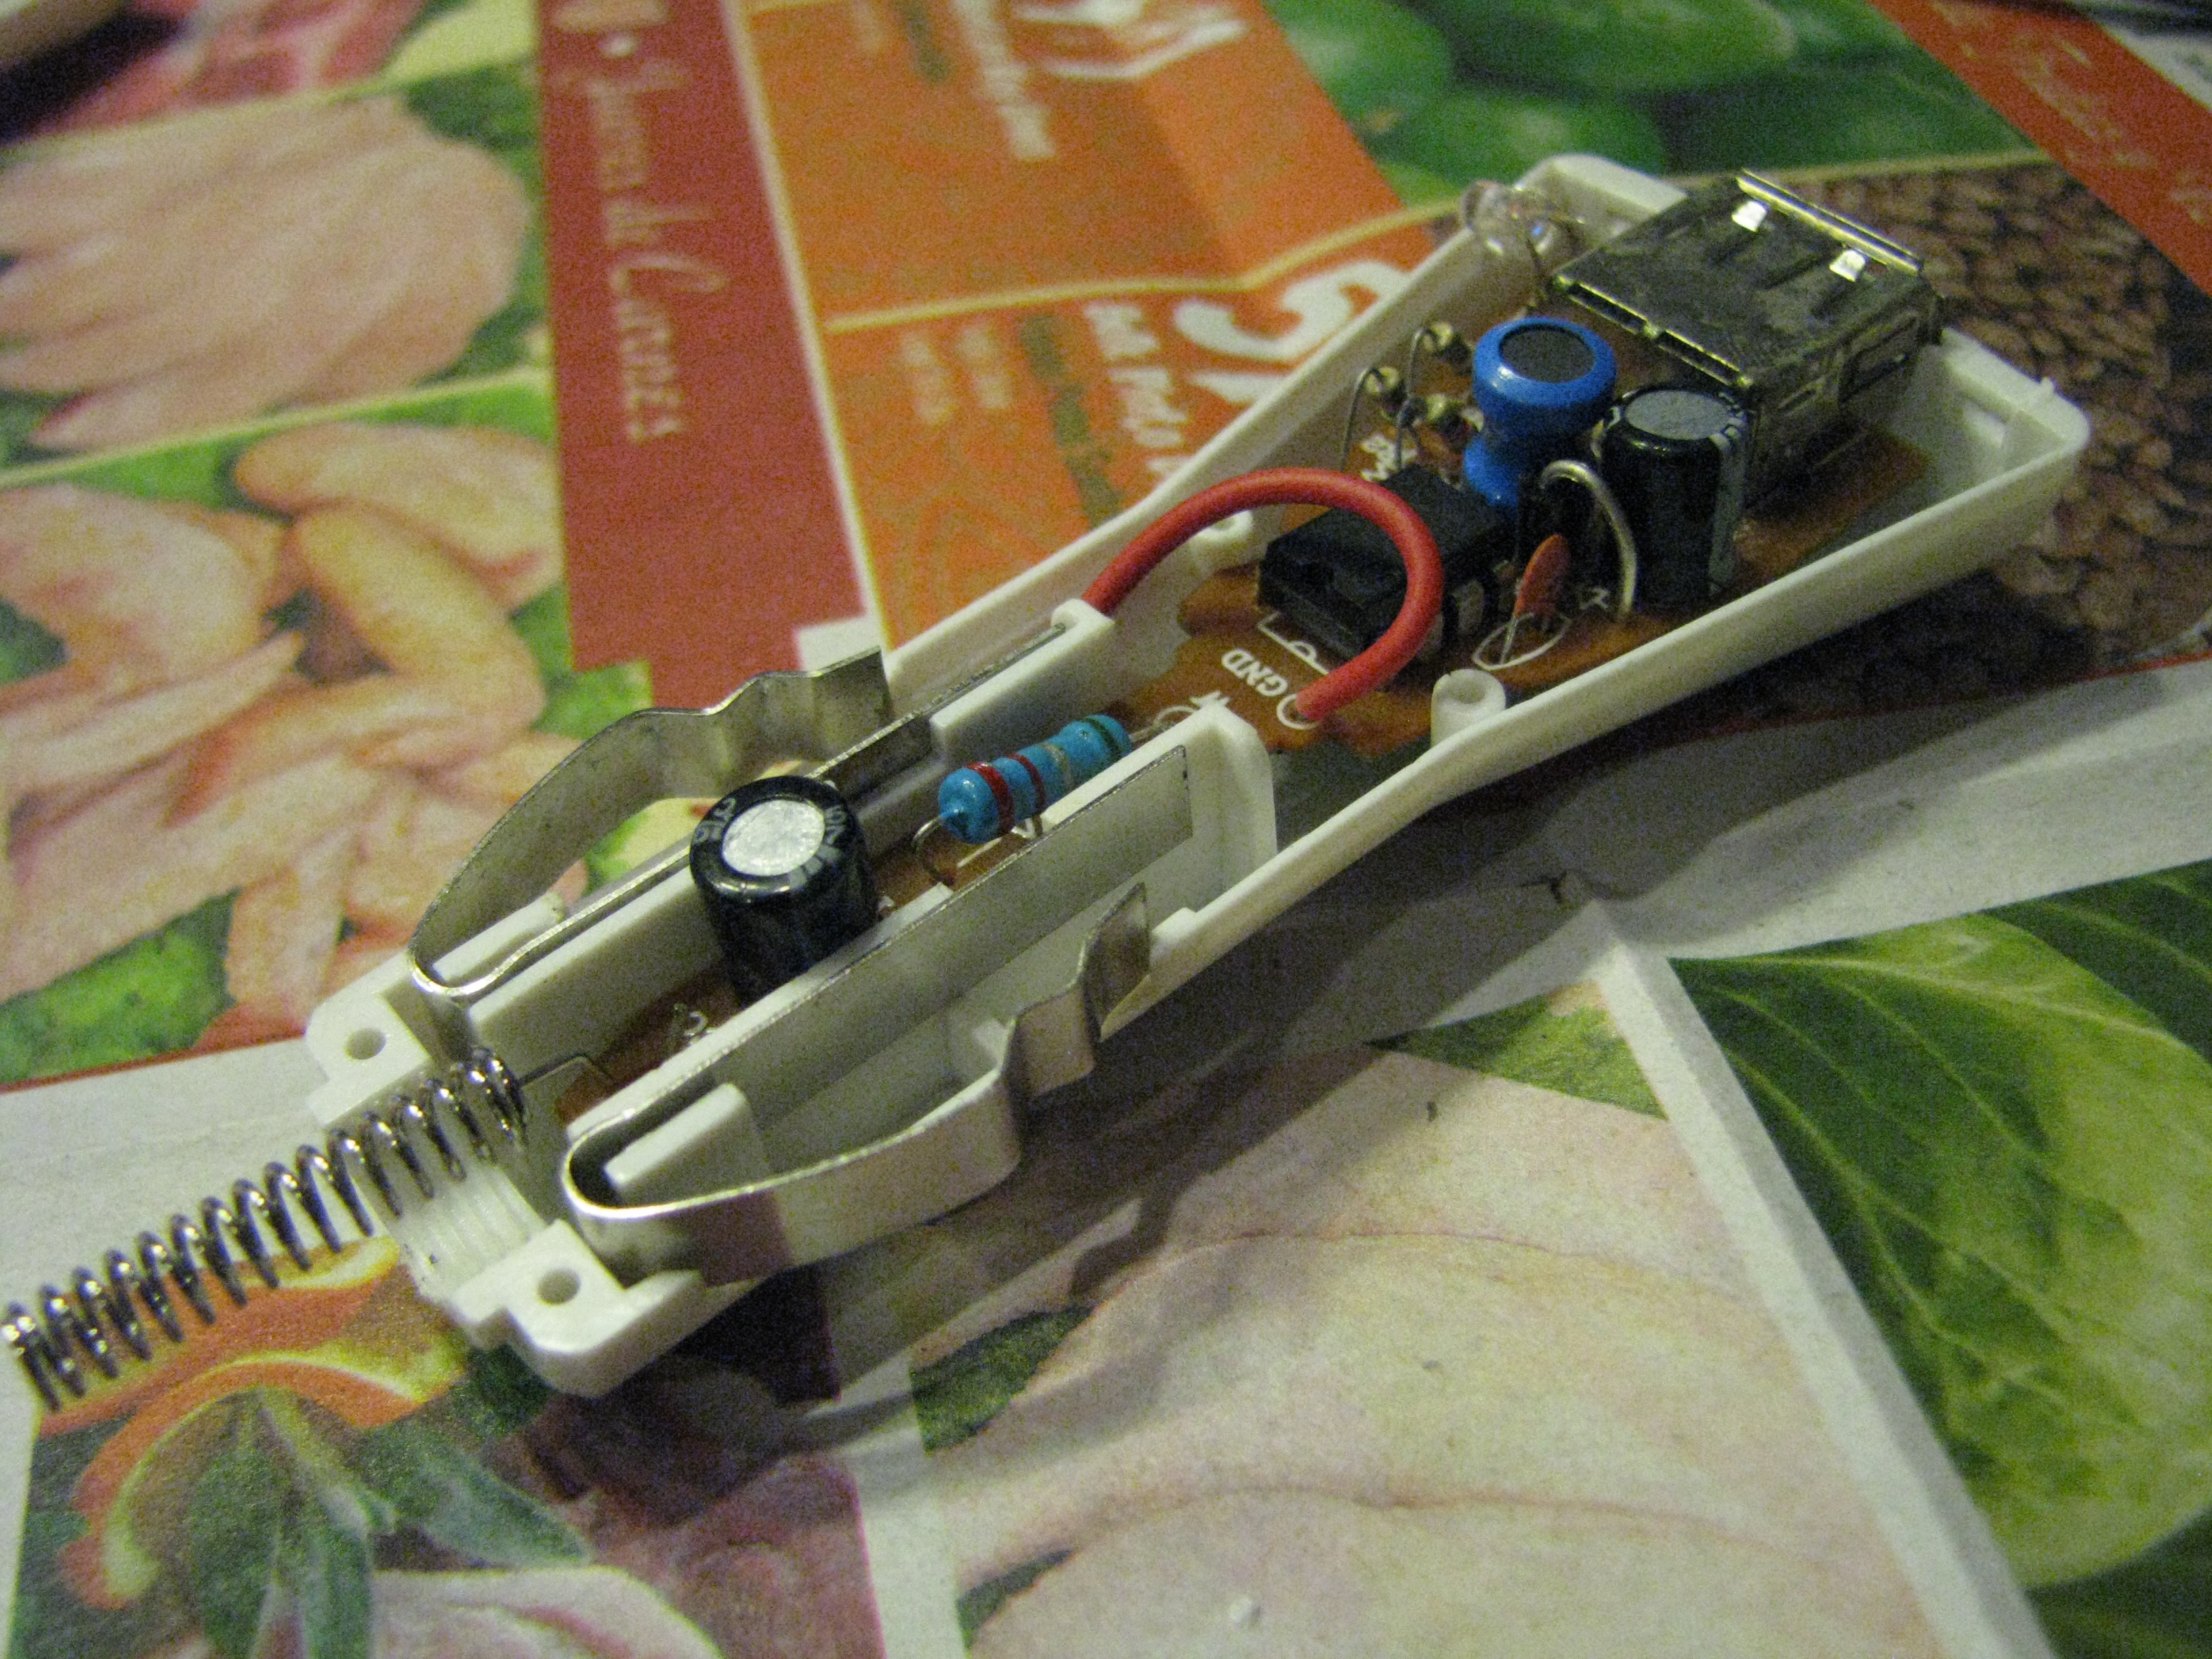 While they were obnoxious enough to use red wire for ground, they at least labeled it as such. Interestingly enough the near contact is just a spring, only the other one is actually grounded. 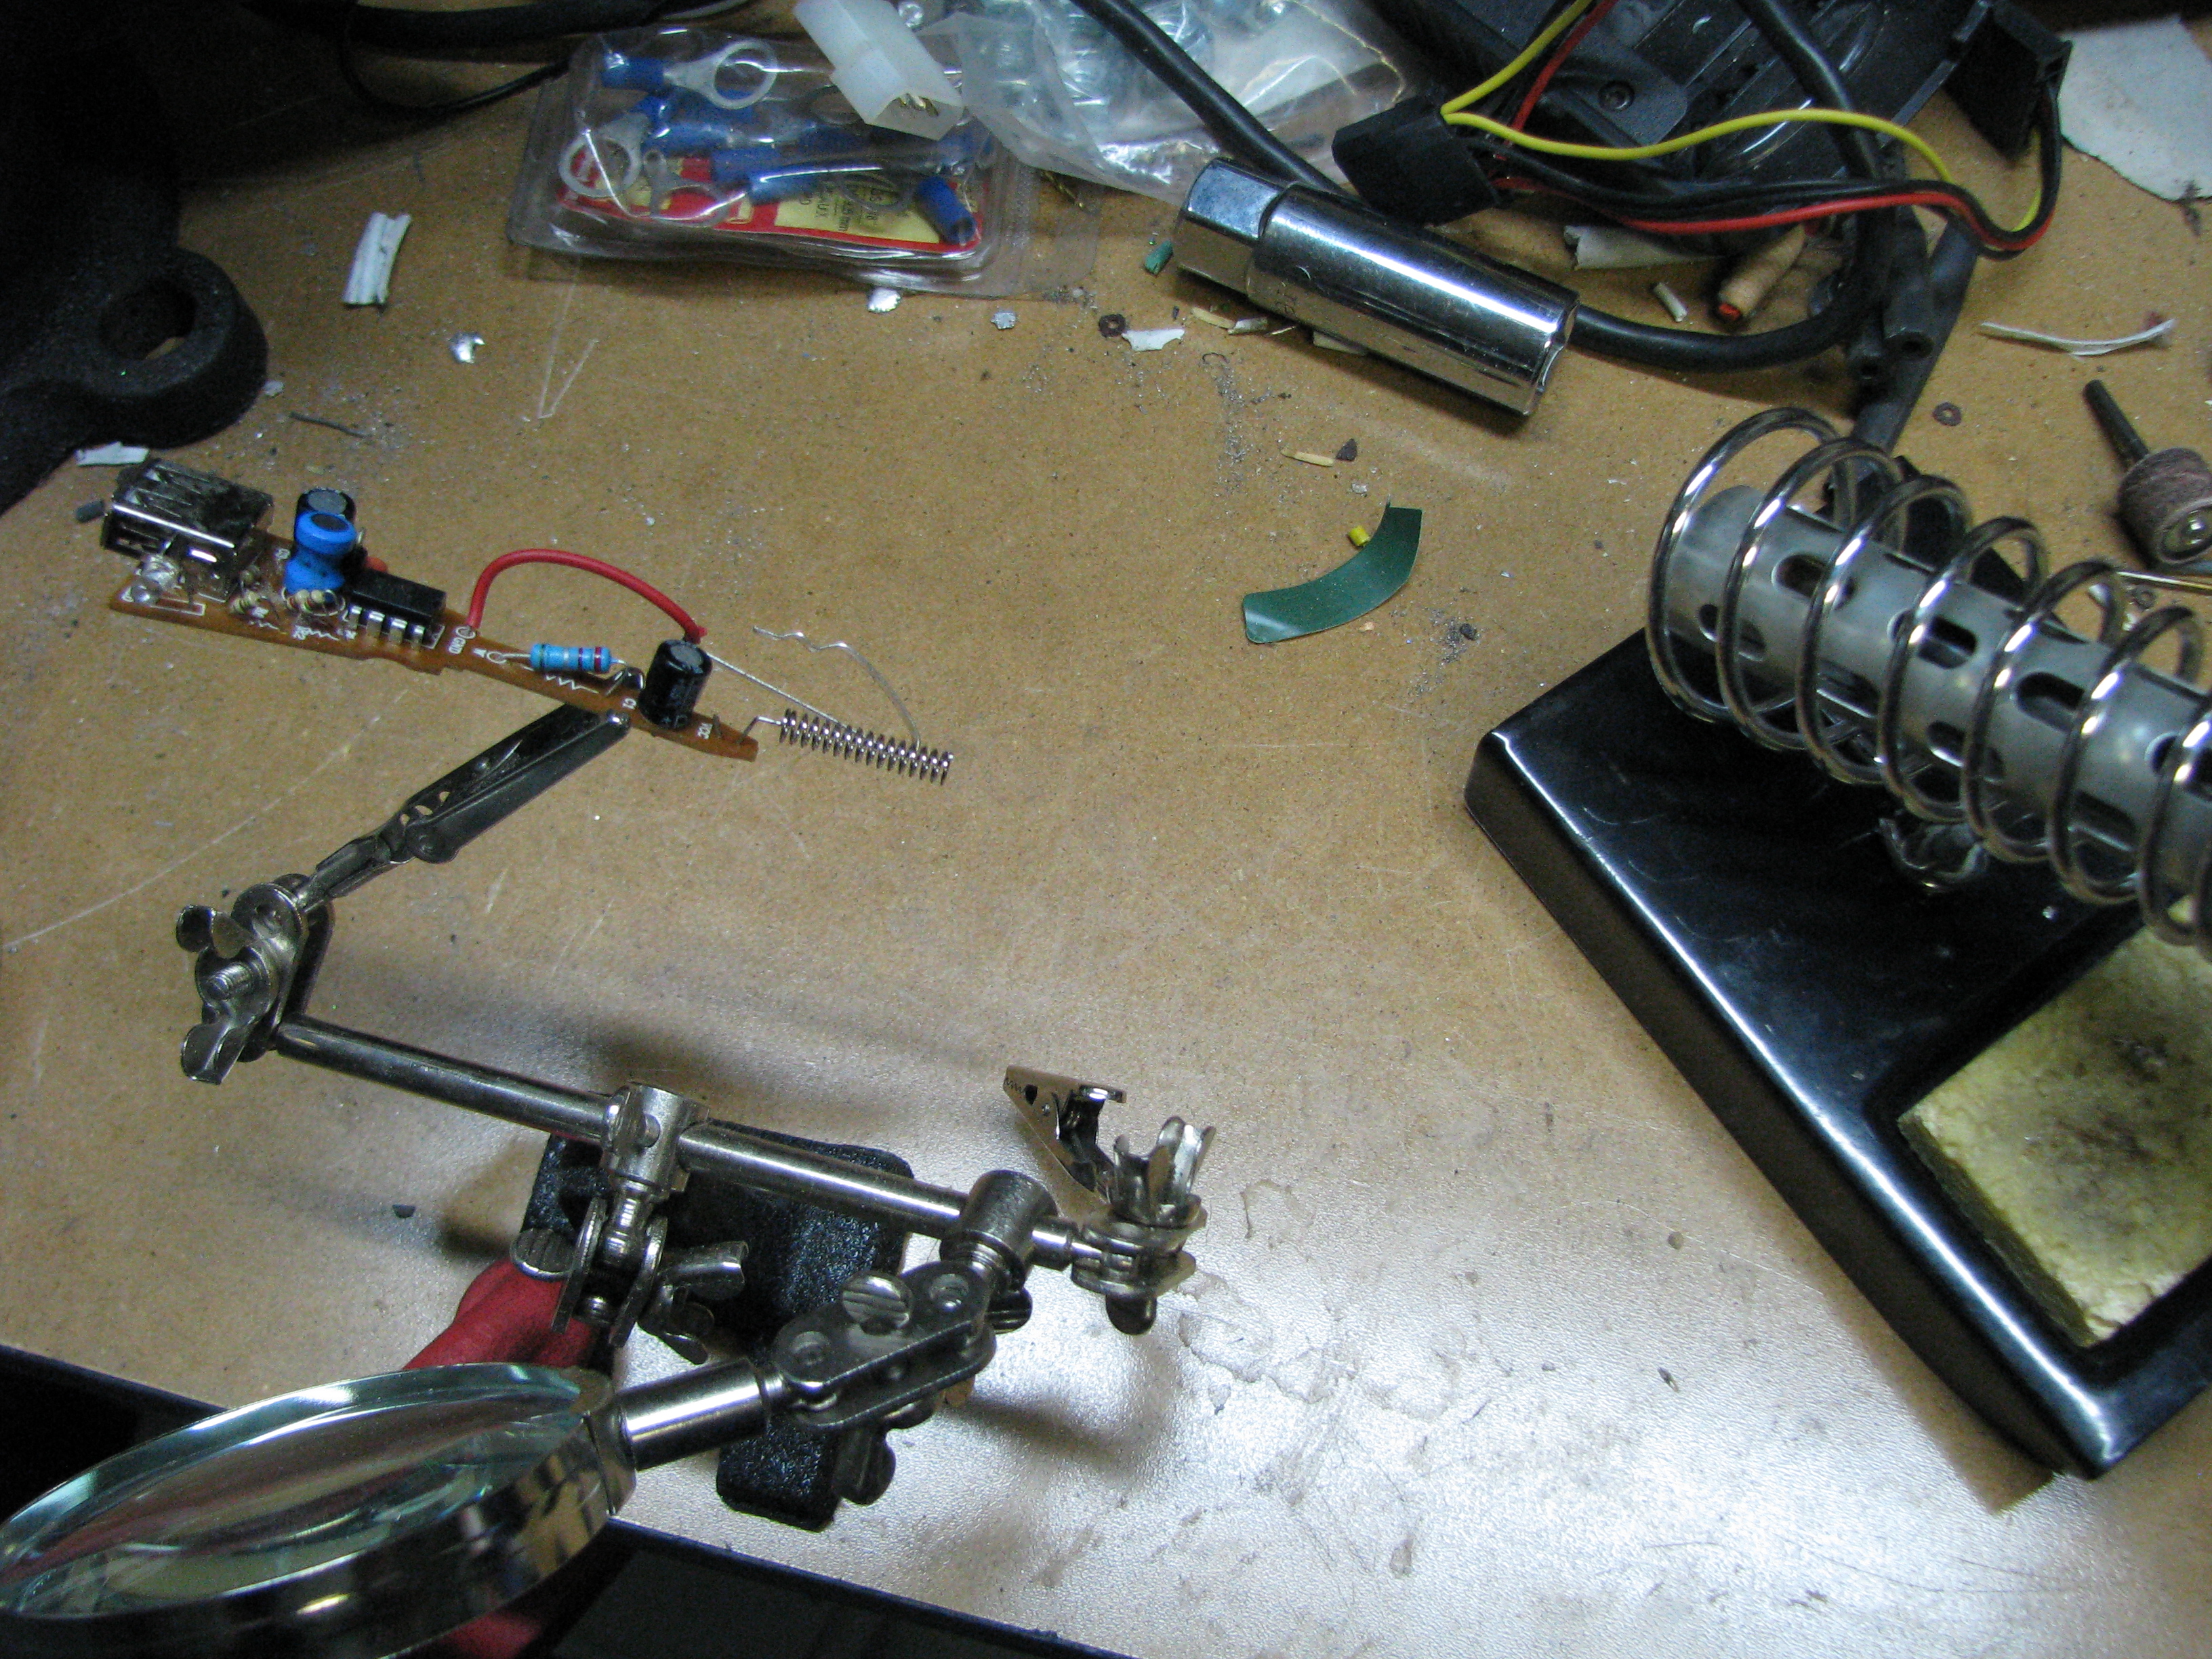 Out to the garage to desolder the wires I won't be using anymore. 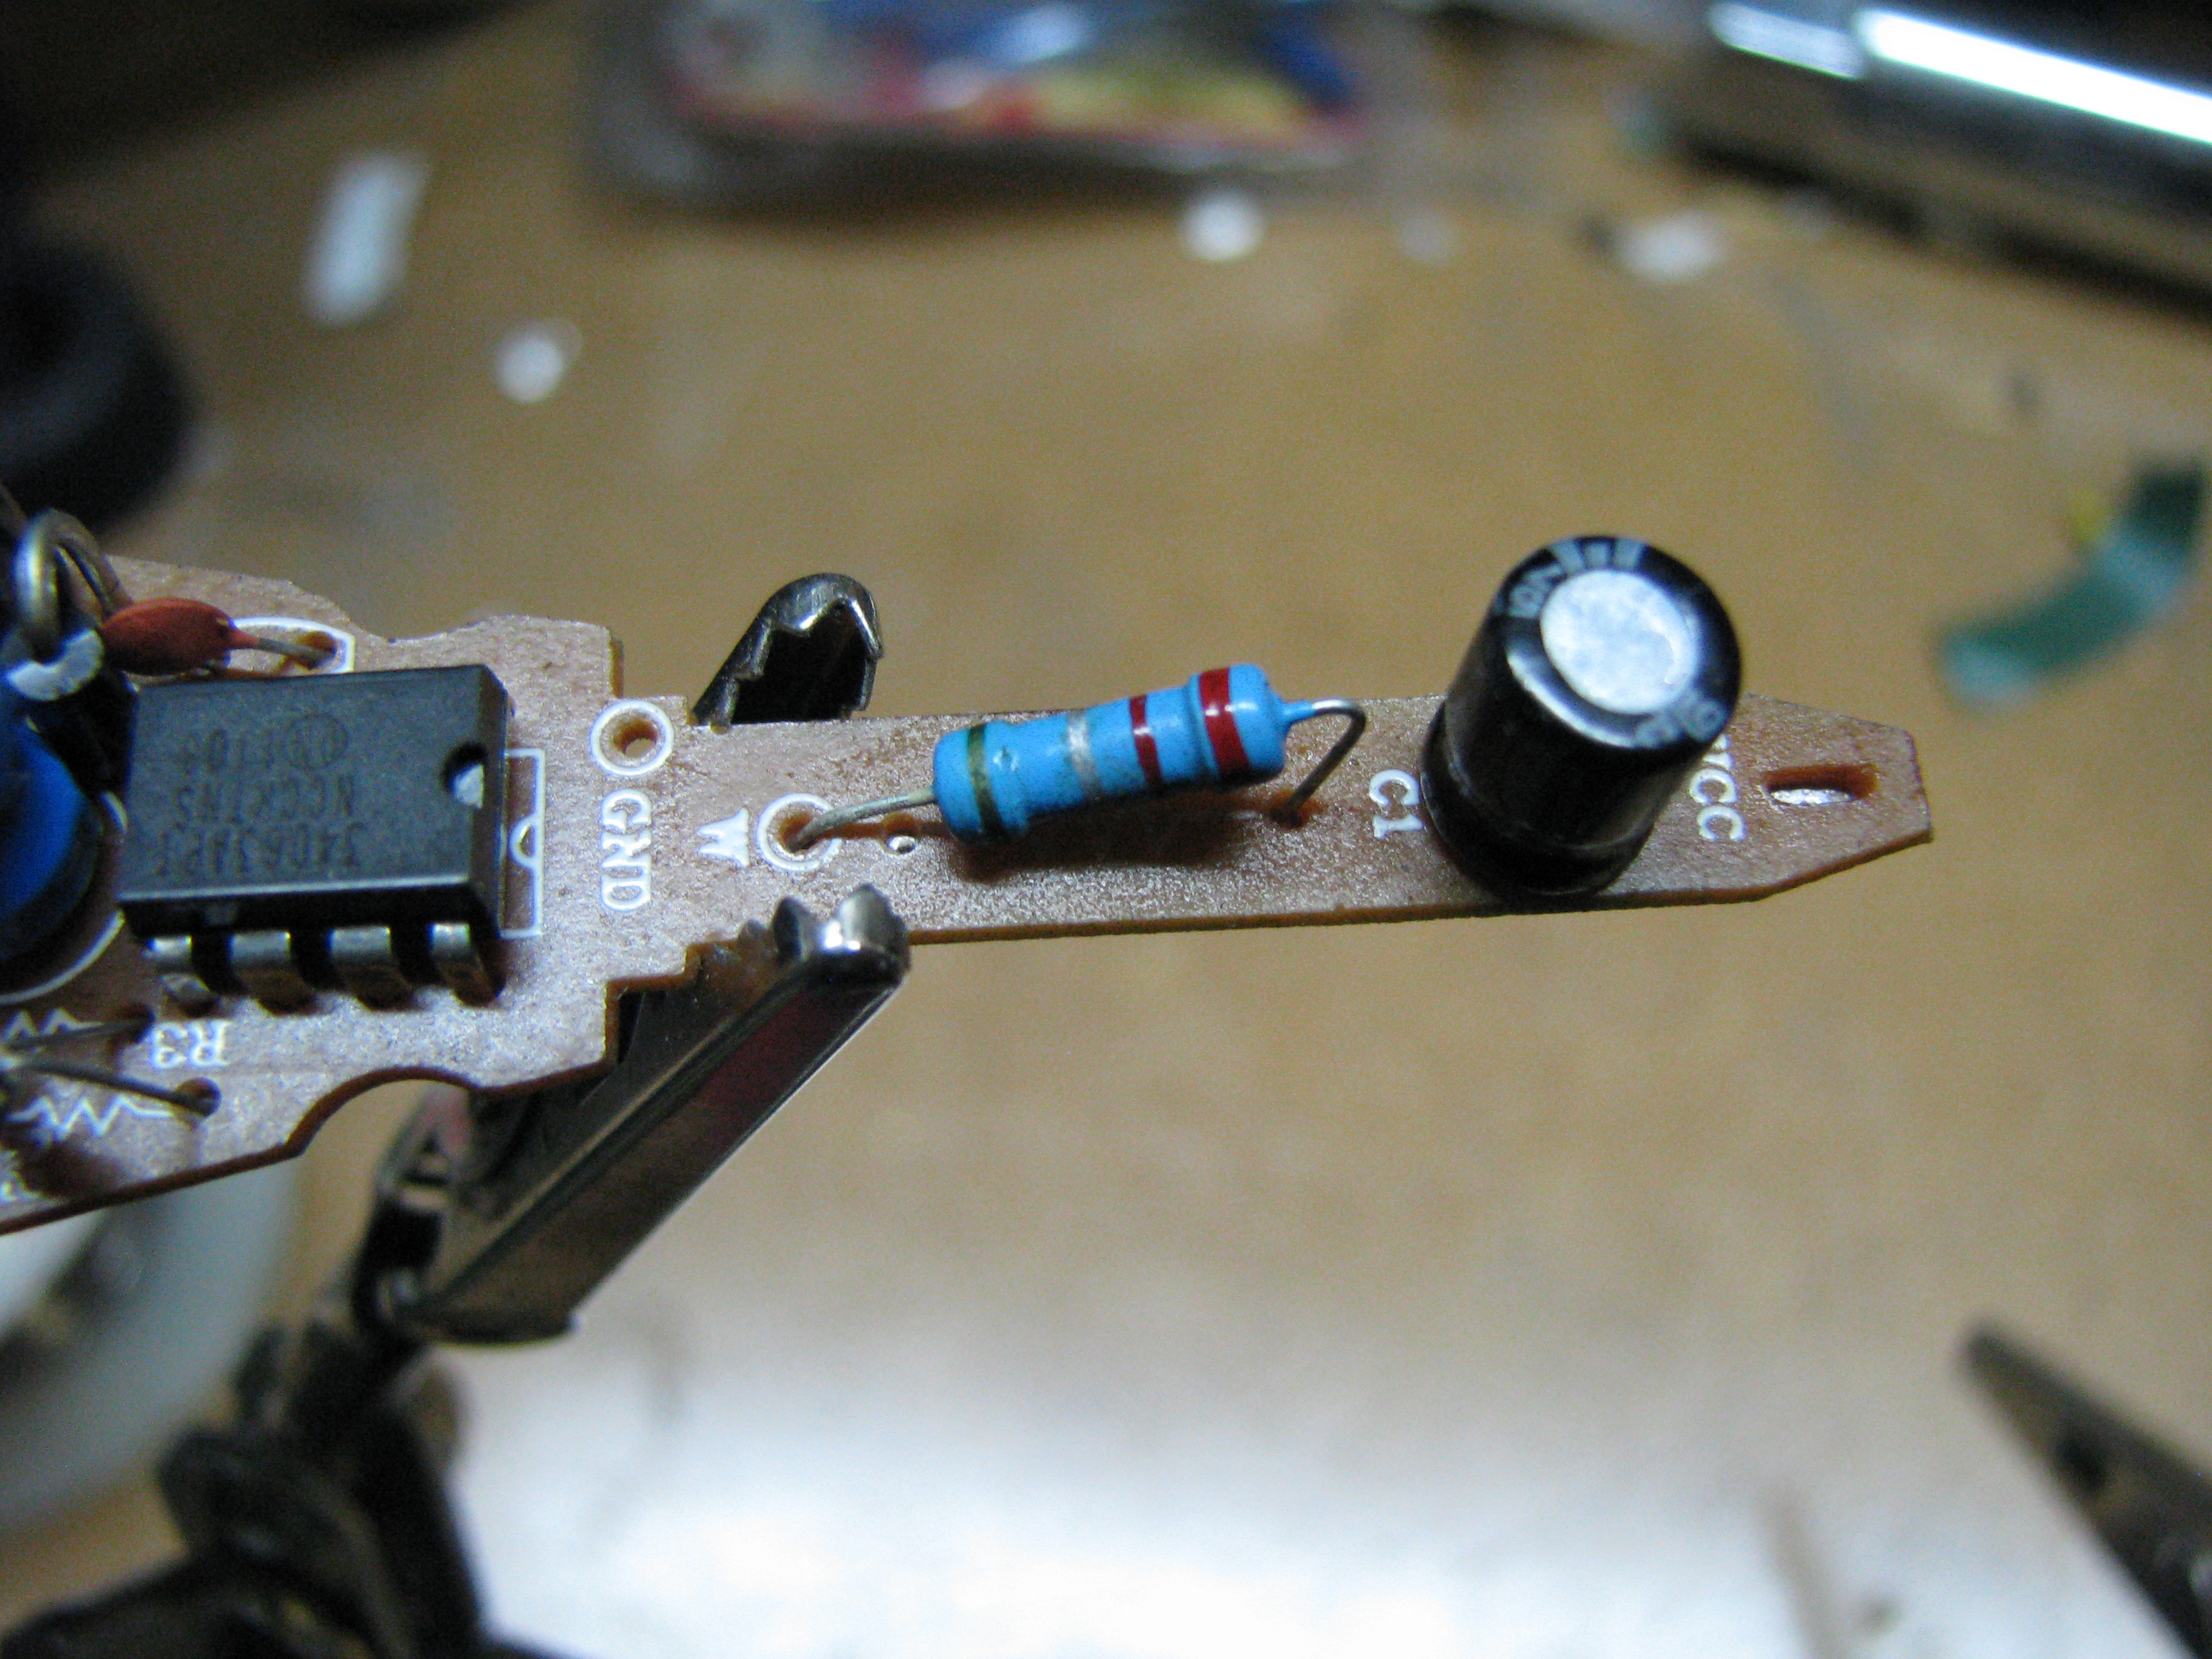 That was easy. 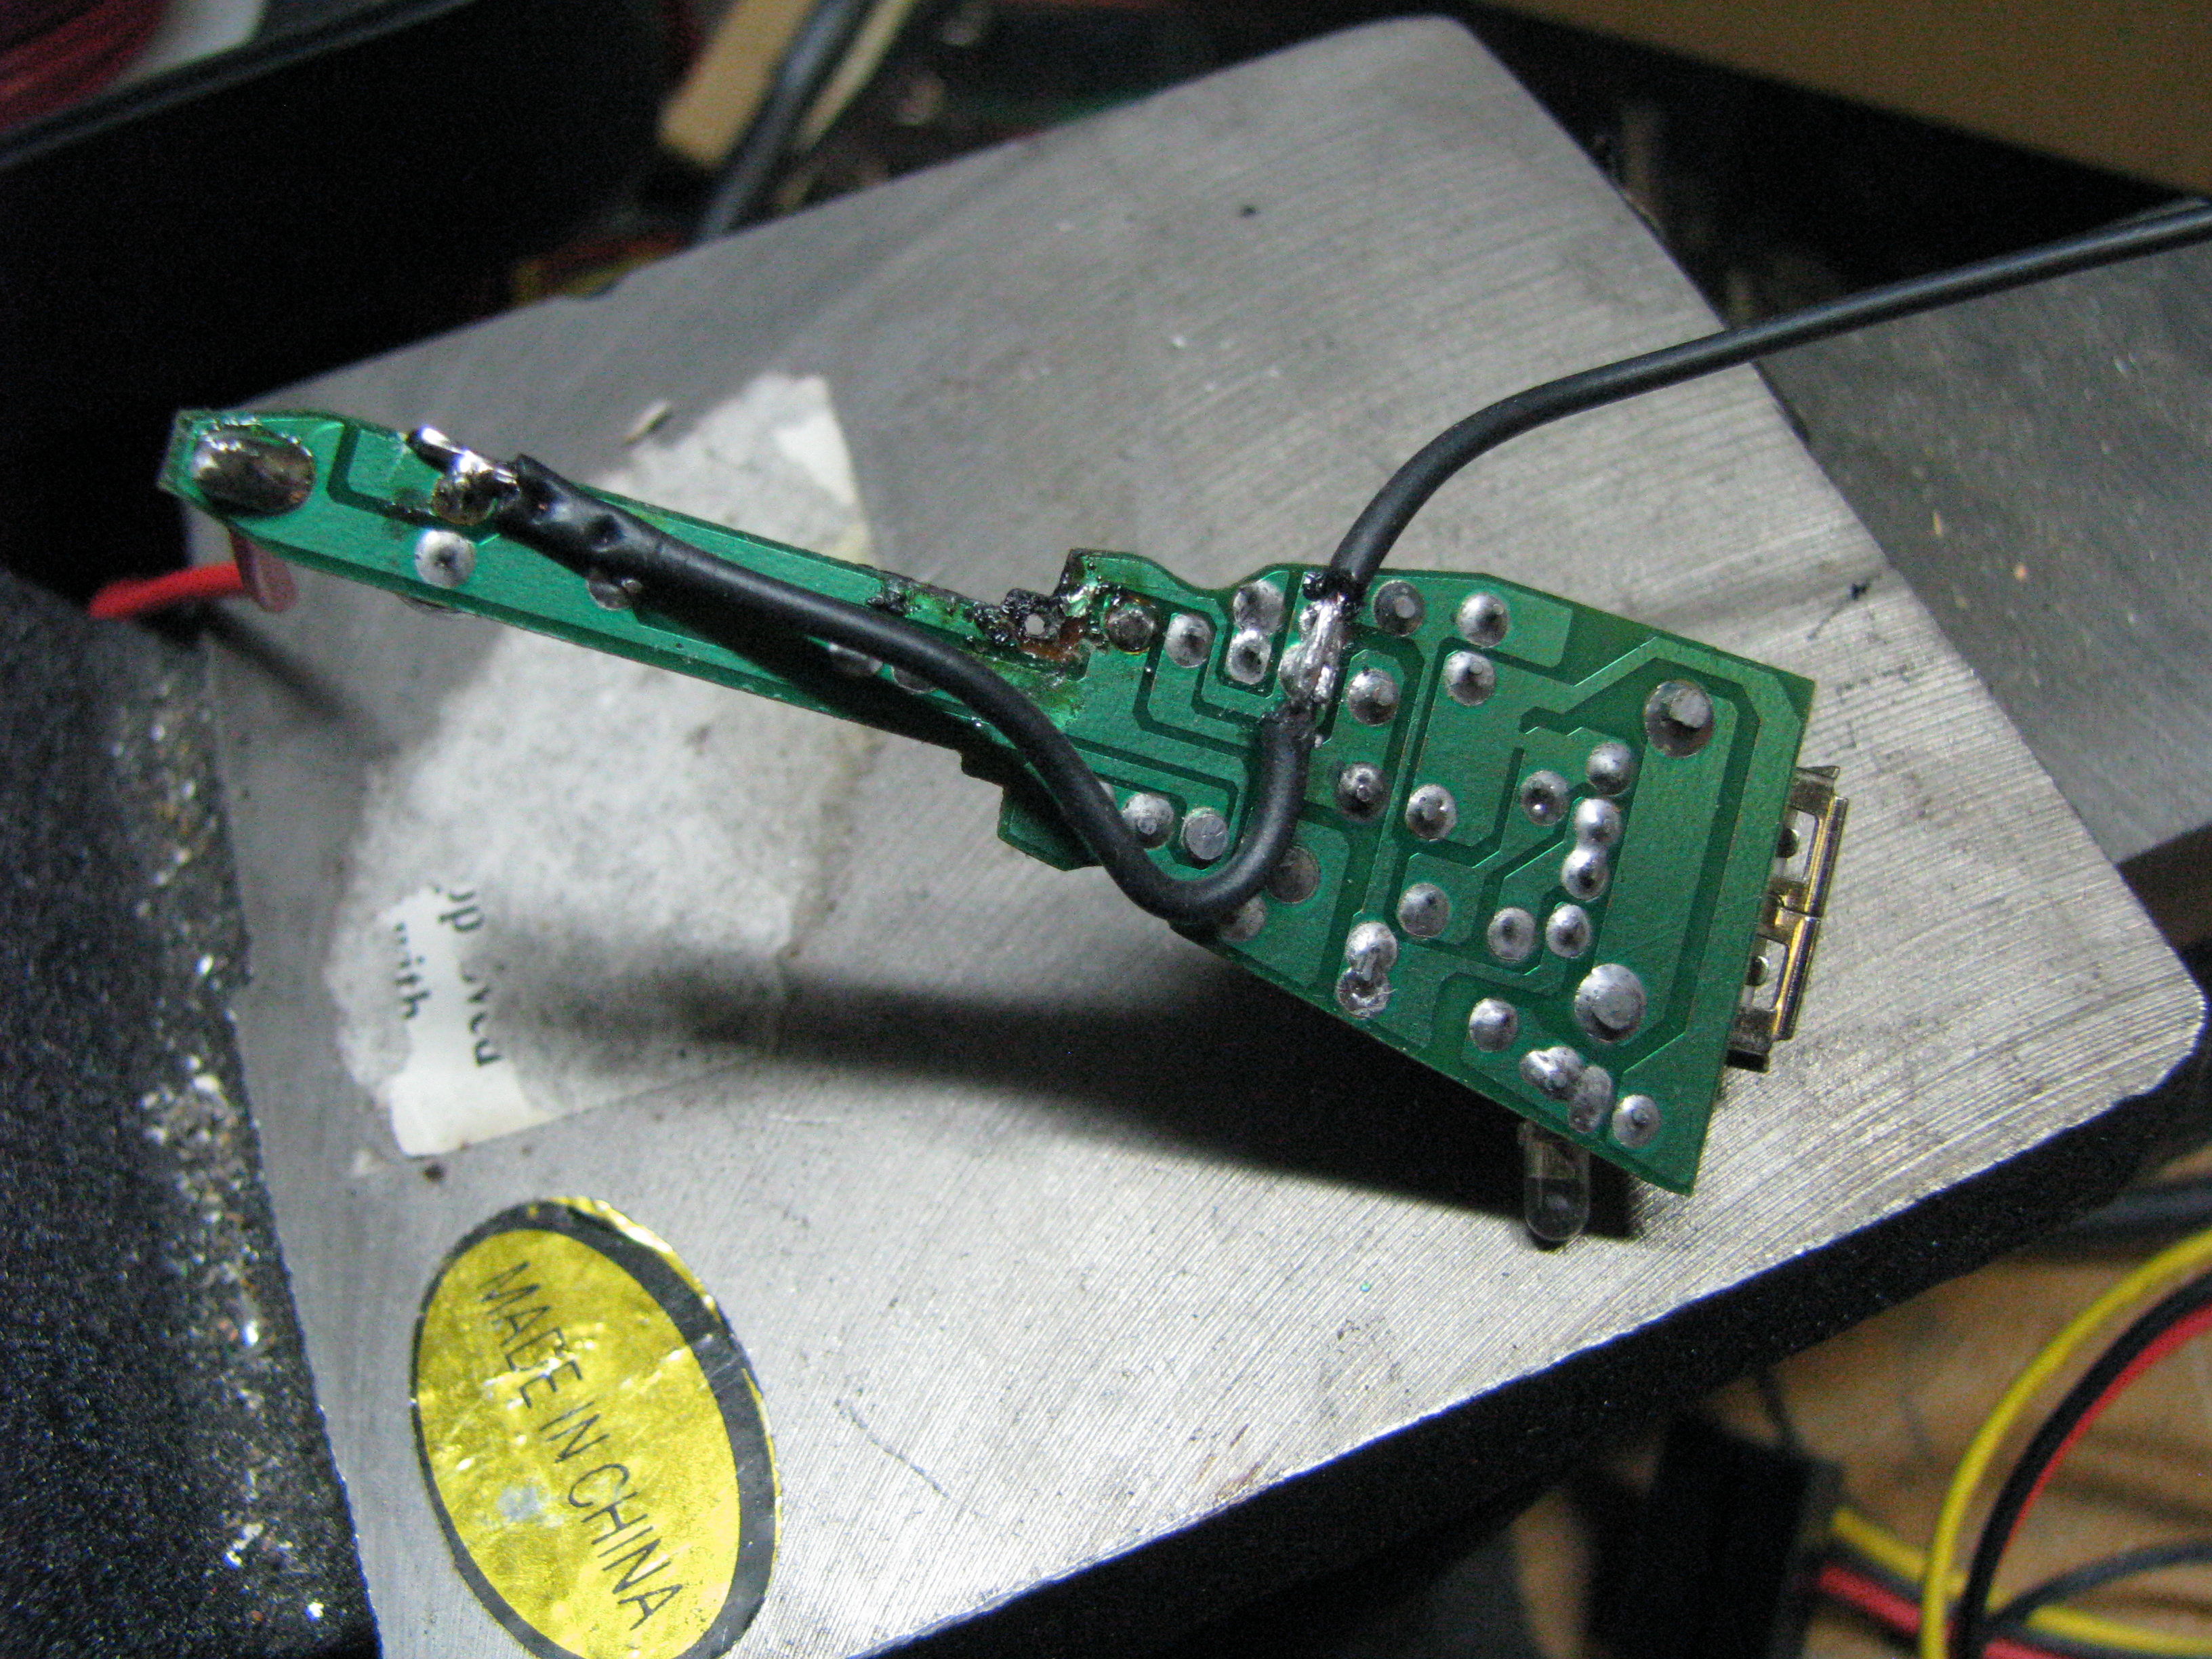 Soldering it back together, not so much. I managed to obliterate the copper trace around the ground hole, so I ended up just connecting the ground wire to another point along the trace and jumping back to the capacitor around my damage. 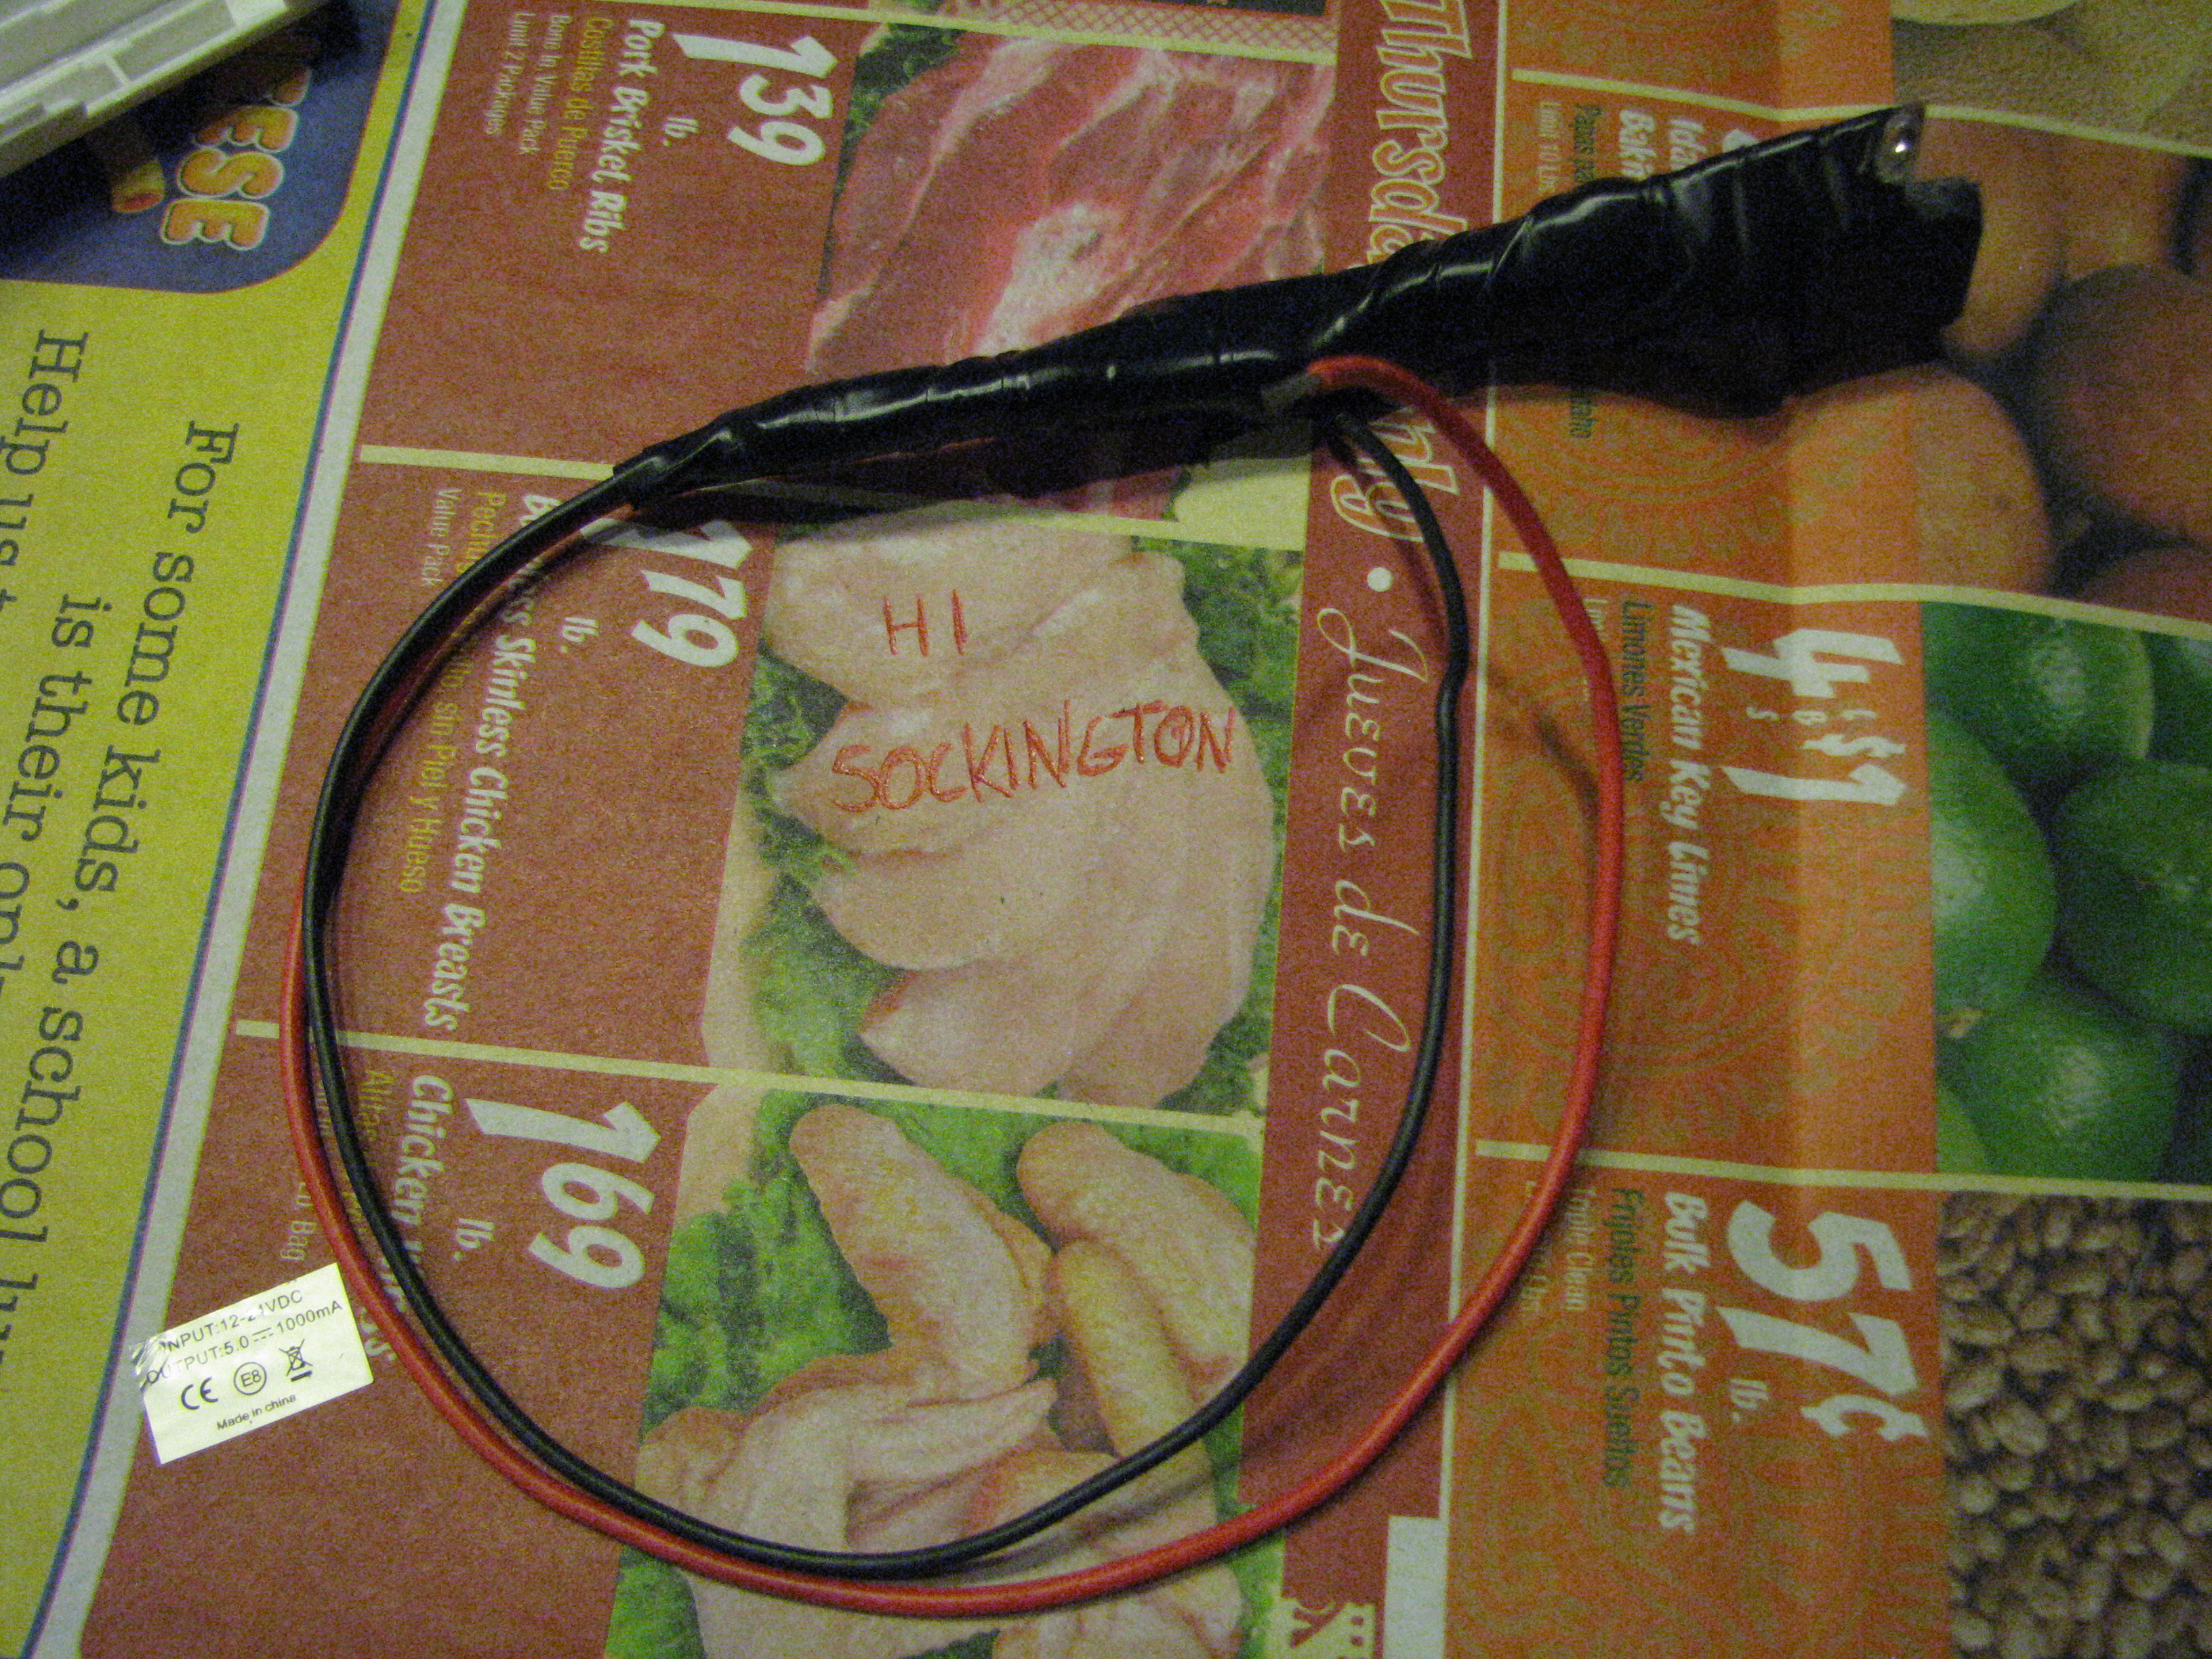 So I went with shrinkwrap of various sizes and electrical tape. I'll test it with 12V tomorrow and maybe wire it in if I get a chance.
|
|
#
¿
Sep 23, 2012 07:14
|
|
|
I'm pretty sure it treated this charger as AC and not usb. I've definitely encountered the under charge scenario, but it was on an actual usb port on my laptop.
|
|
#
¿
Sep 24, 2012 07:33
|
|
|
amenenema posted:Lovin' these AI Easter eggs I was wondering if anyone had even seen it  kastein posted:I'd very strongly suggest putting that power supply in a sealed aluminum project box, or at least adding a very conservatively rated fuse upstream of it. Chinese USB power adapters are not known for reliability or ability to keep the smoke/fire inside them, and I would hate to see the truck go up in flames because that was behind the dash. I wouldn't, it's insured and I could use it as an excuse to buy something a little less beater-tacular! In all seriousness, I actually did get it wired in the other day (took a few pics, haven't bothered looking to see if they came out - but honestly it's two wires) and it's wired into the exact same circuit it would be plugged into if I was using it in the auxiliary power socket, which has a... ...20 amp fuse Alright, I'm ordering a fuse holder since I've got $1.37 of eBay bucks to spend and nothing else to spend it on. Either that or some fuses and I'll swap it out for a much smaller one since the only other thing I might ever plug into that circuit is another 12V->USB adapter.
|
|
#
¿
Oct 4, 2012 17:28
|
|
|
I've actually got a busted small sine-wave inverter sitting in my garage you can have if you think you've got the skills to make it work. It shipped to me with a coil that had broken off, I tried to get it to work but I couldn't get anywhere with it. So, content! First, some old pics I never uploaded from when I finished hardwiring that USB plug. 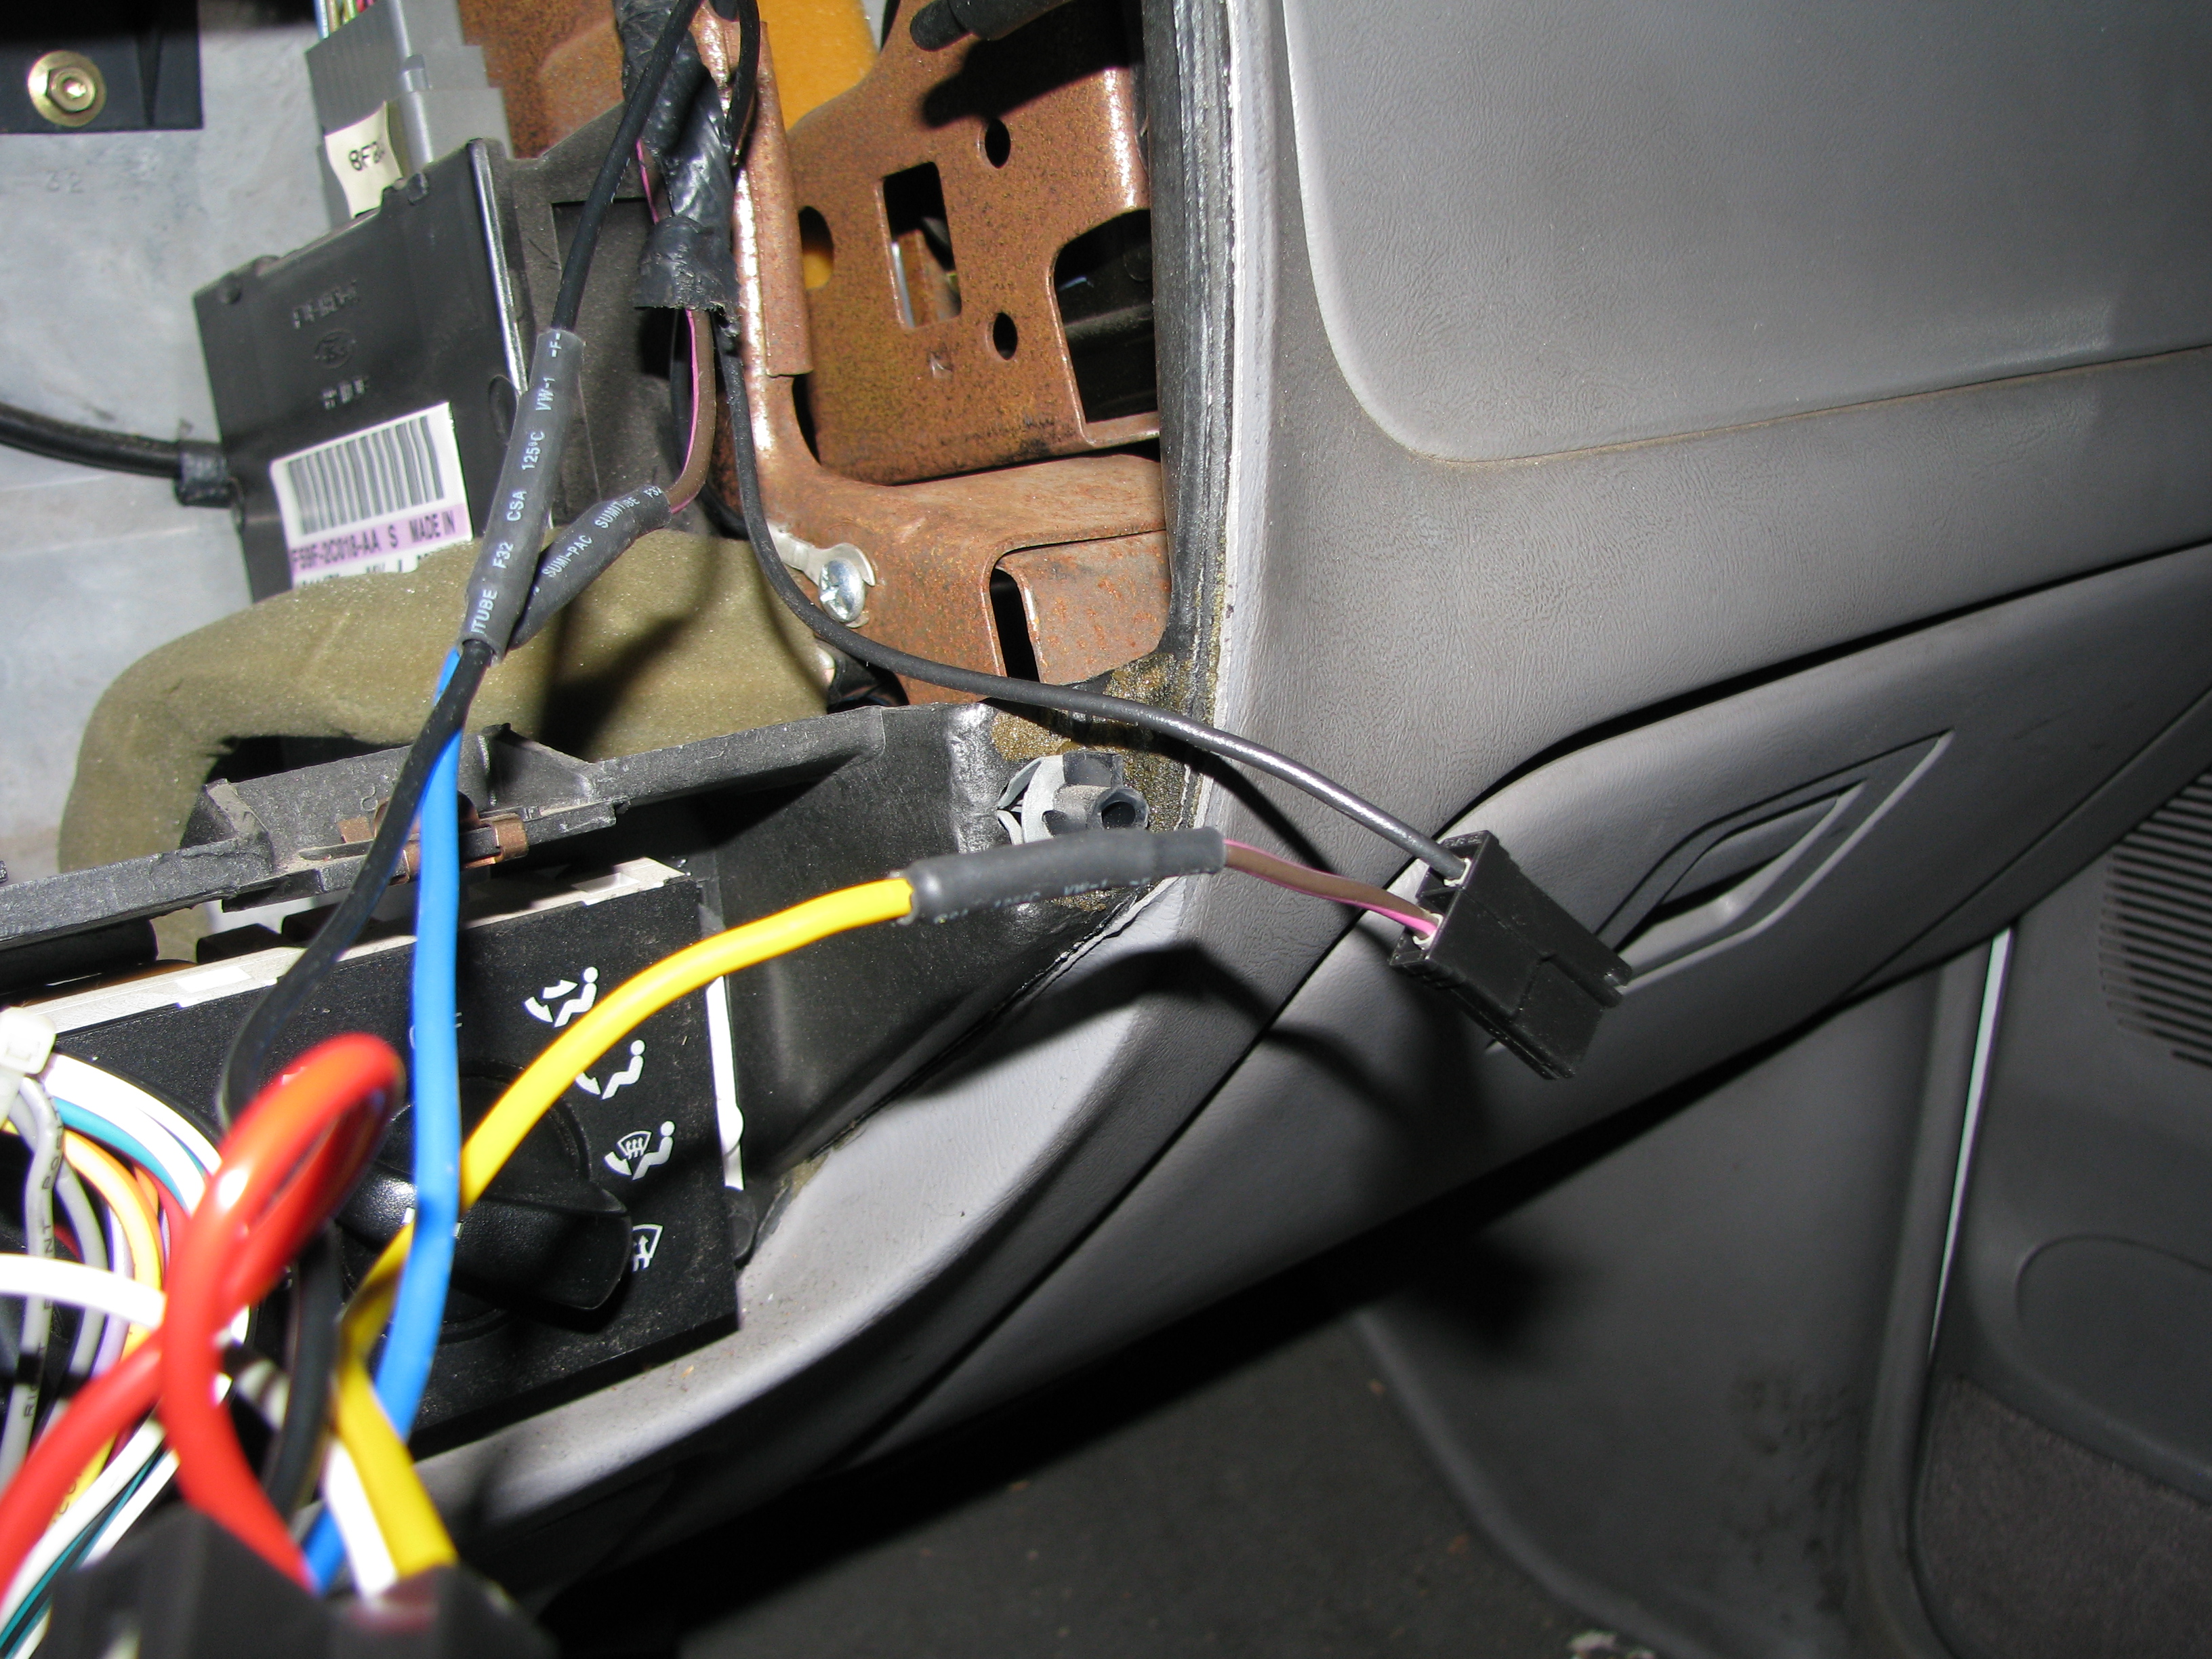 Where my wiring in the Ranger started off - already having modified that plug for the relay control. 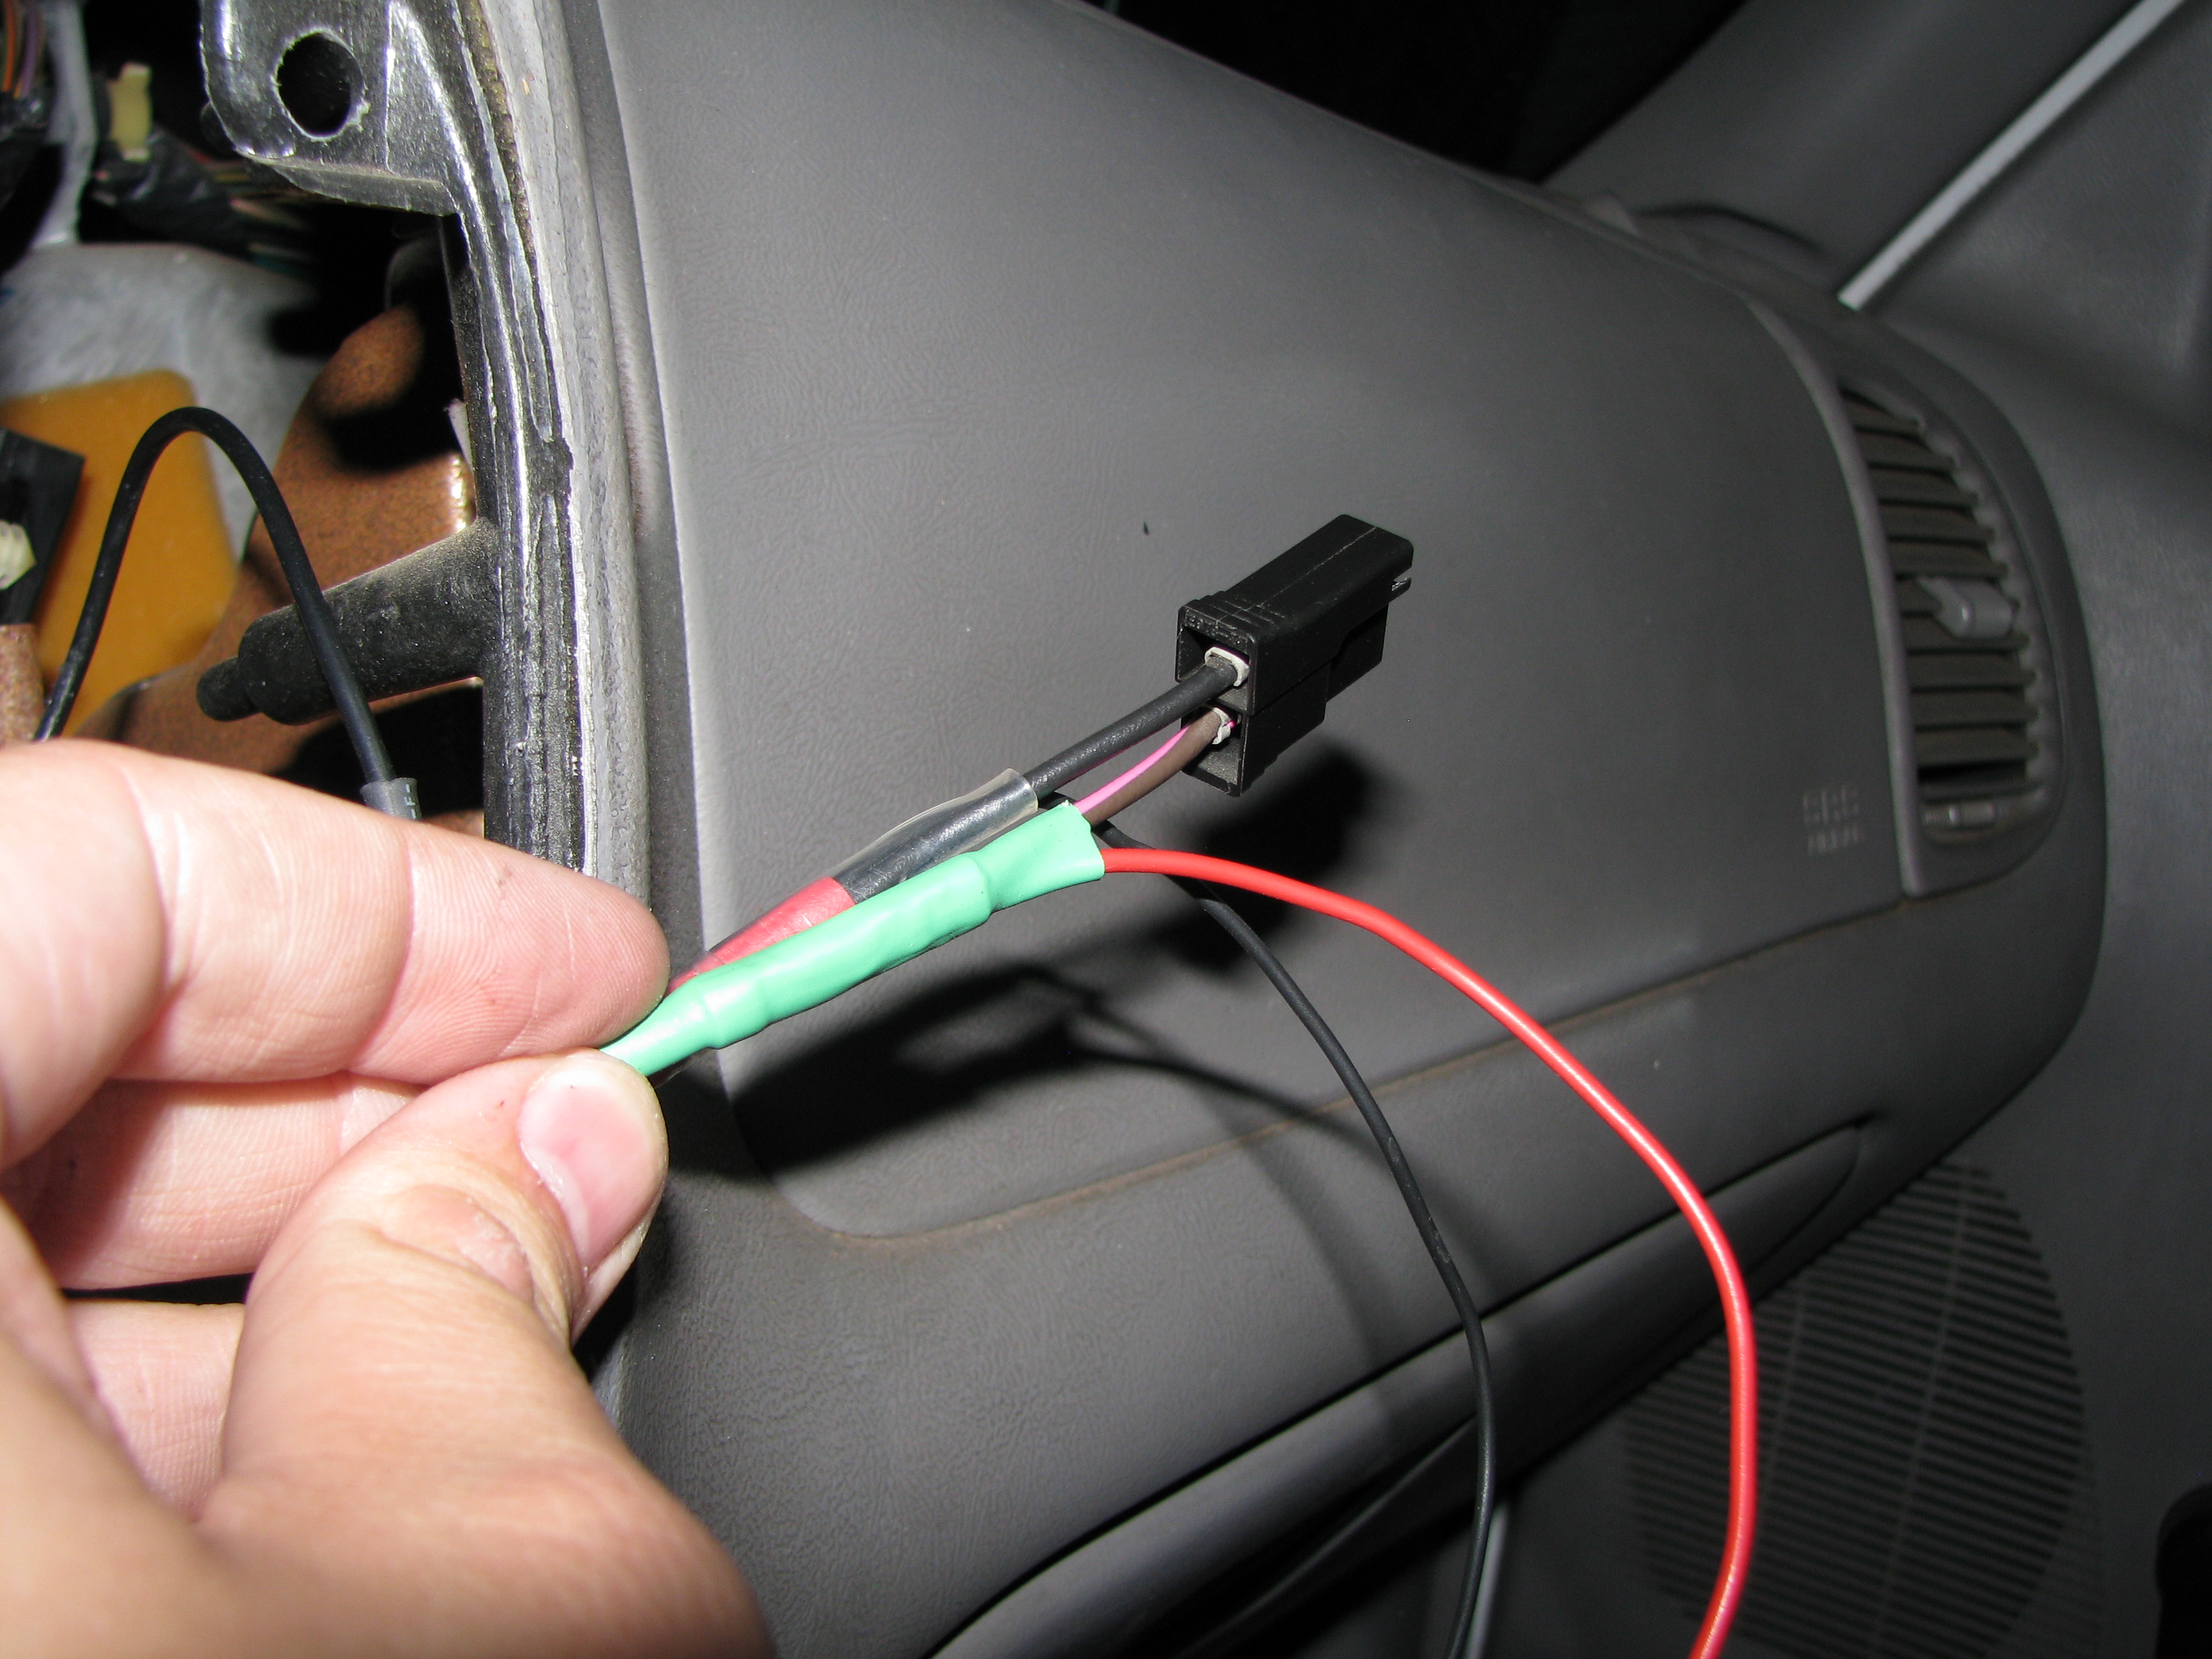 More splicing and heatshrink to power the hardwire USB. 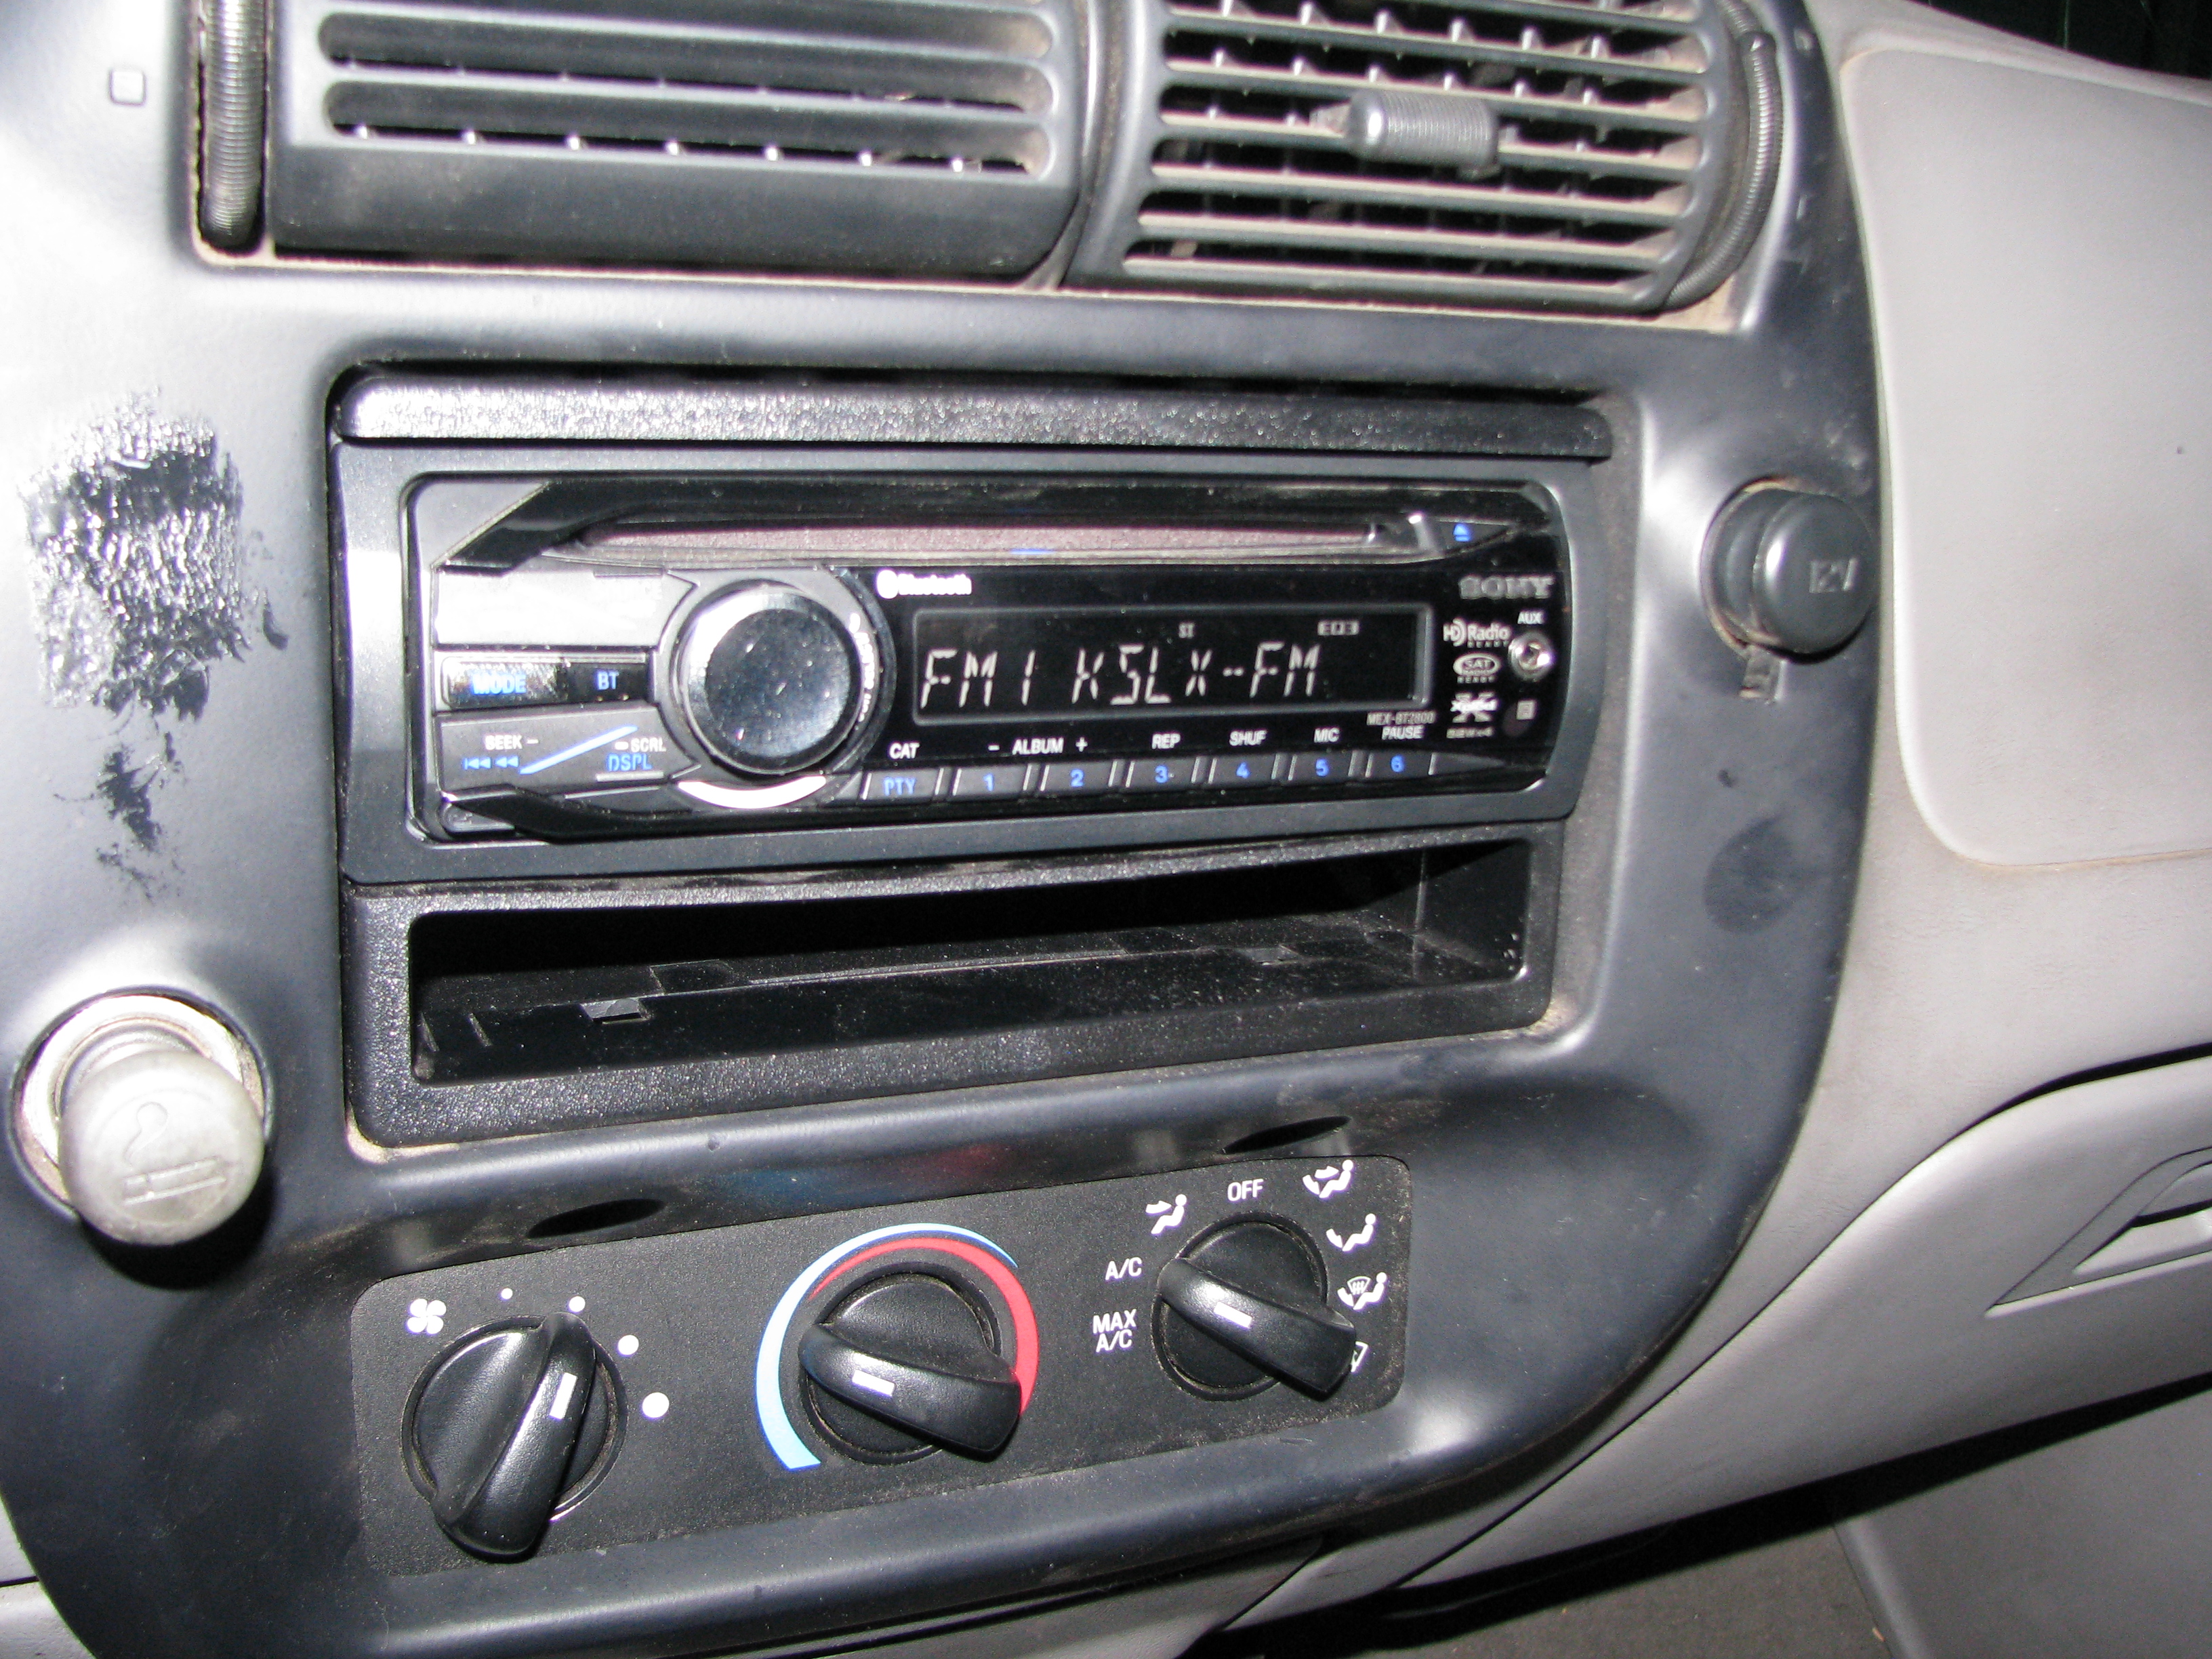 Finished product, ignore the mess of adhesive left from trying to velcro my neighborhood's gate remote on the dash. poo poo won't hold up in the heat. 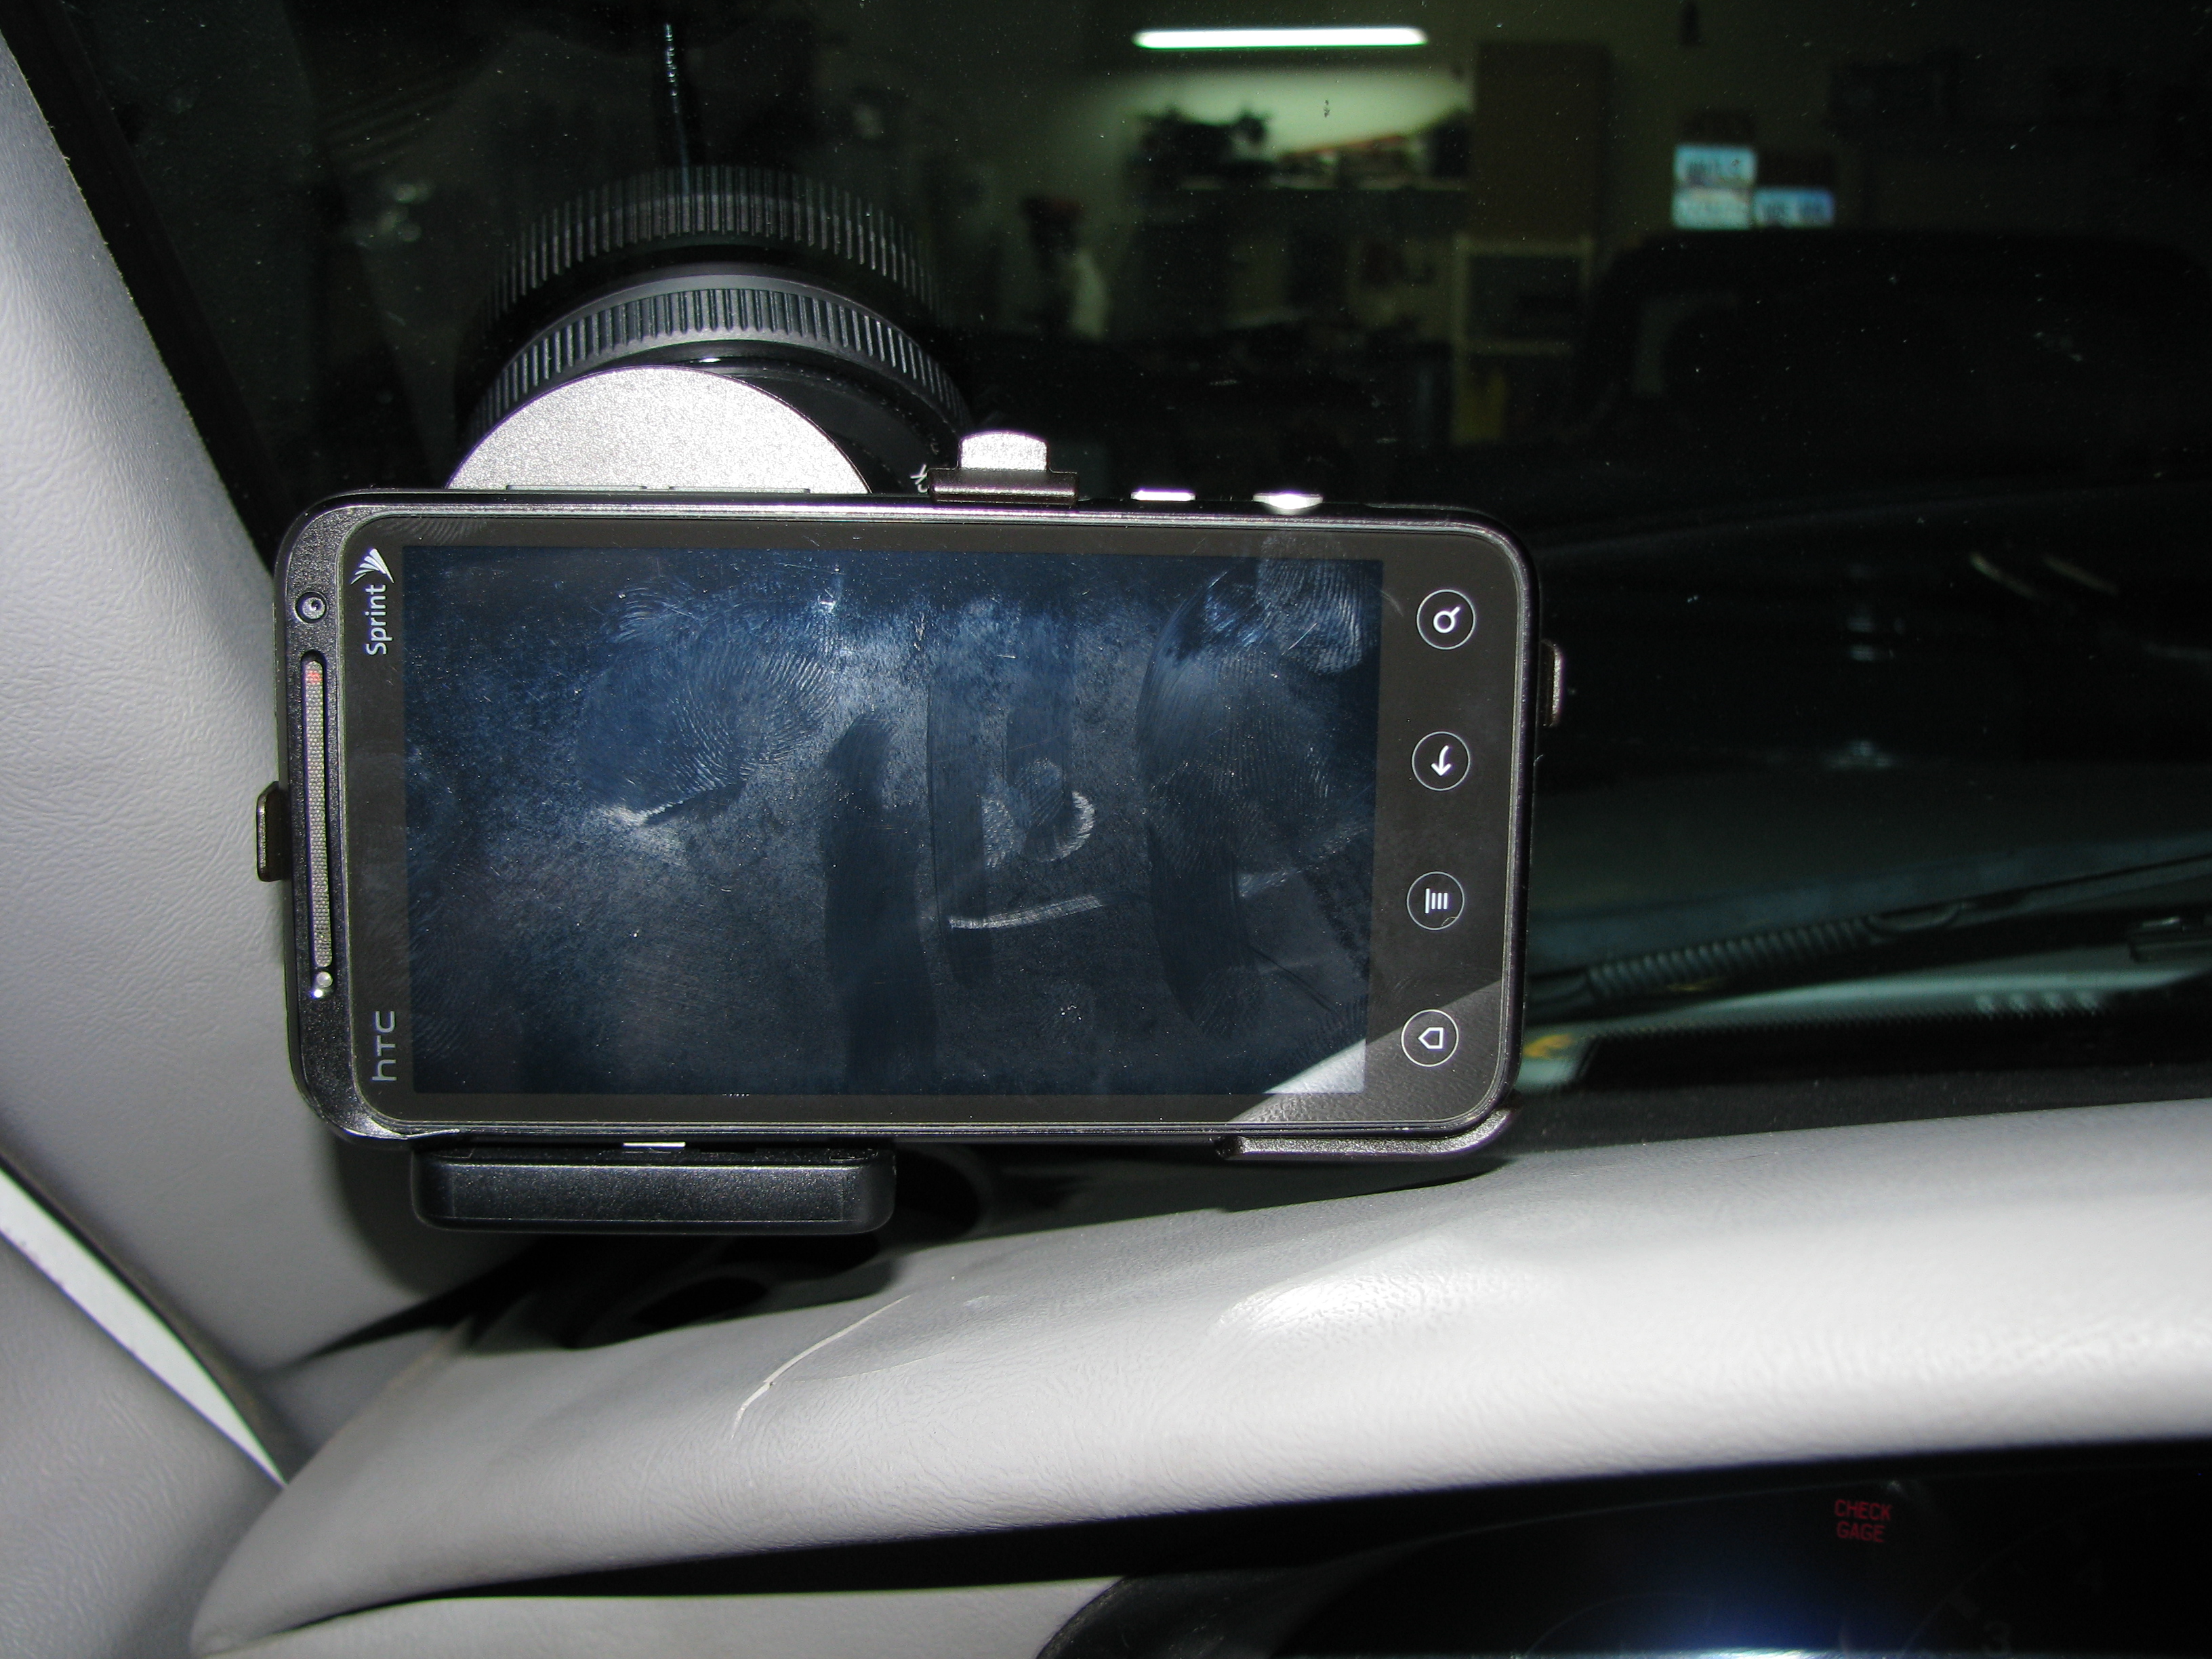 We have power! 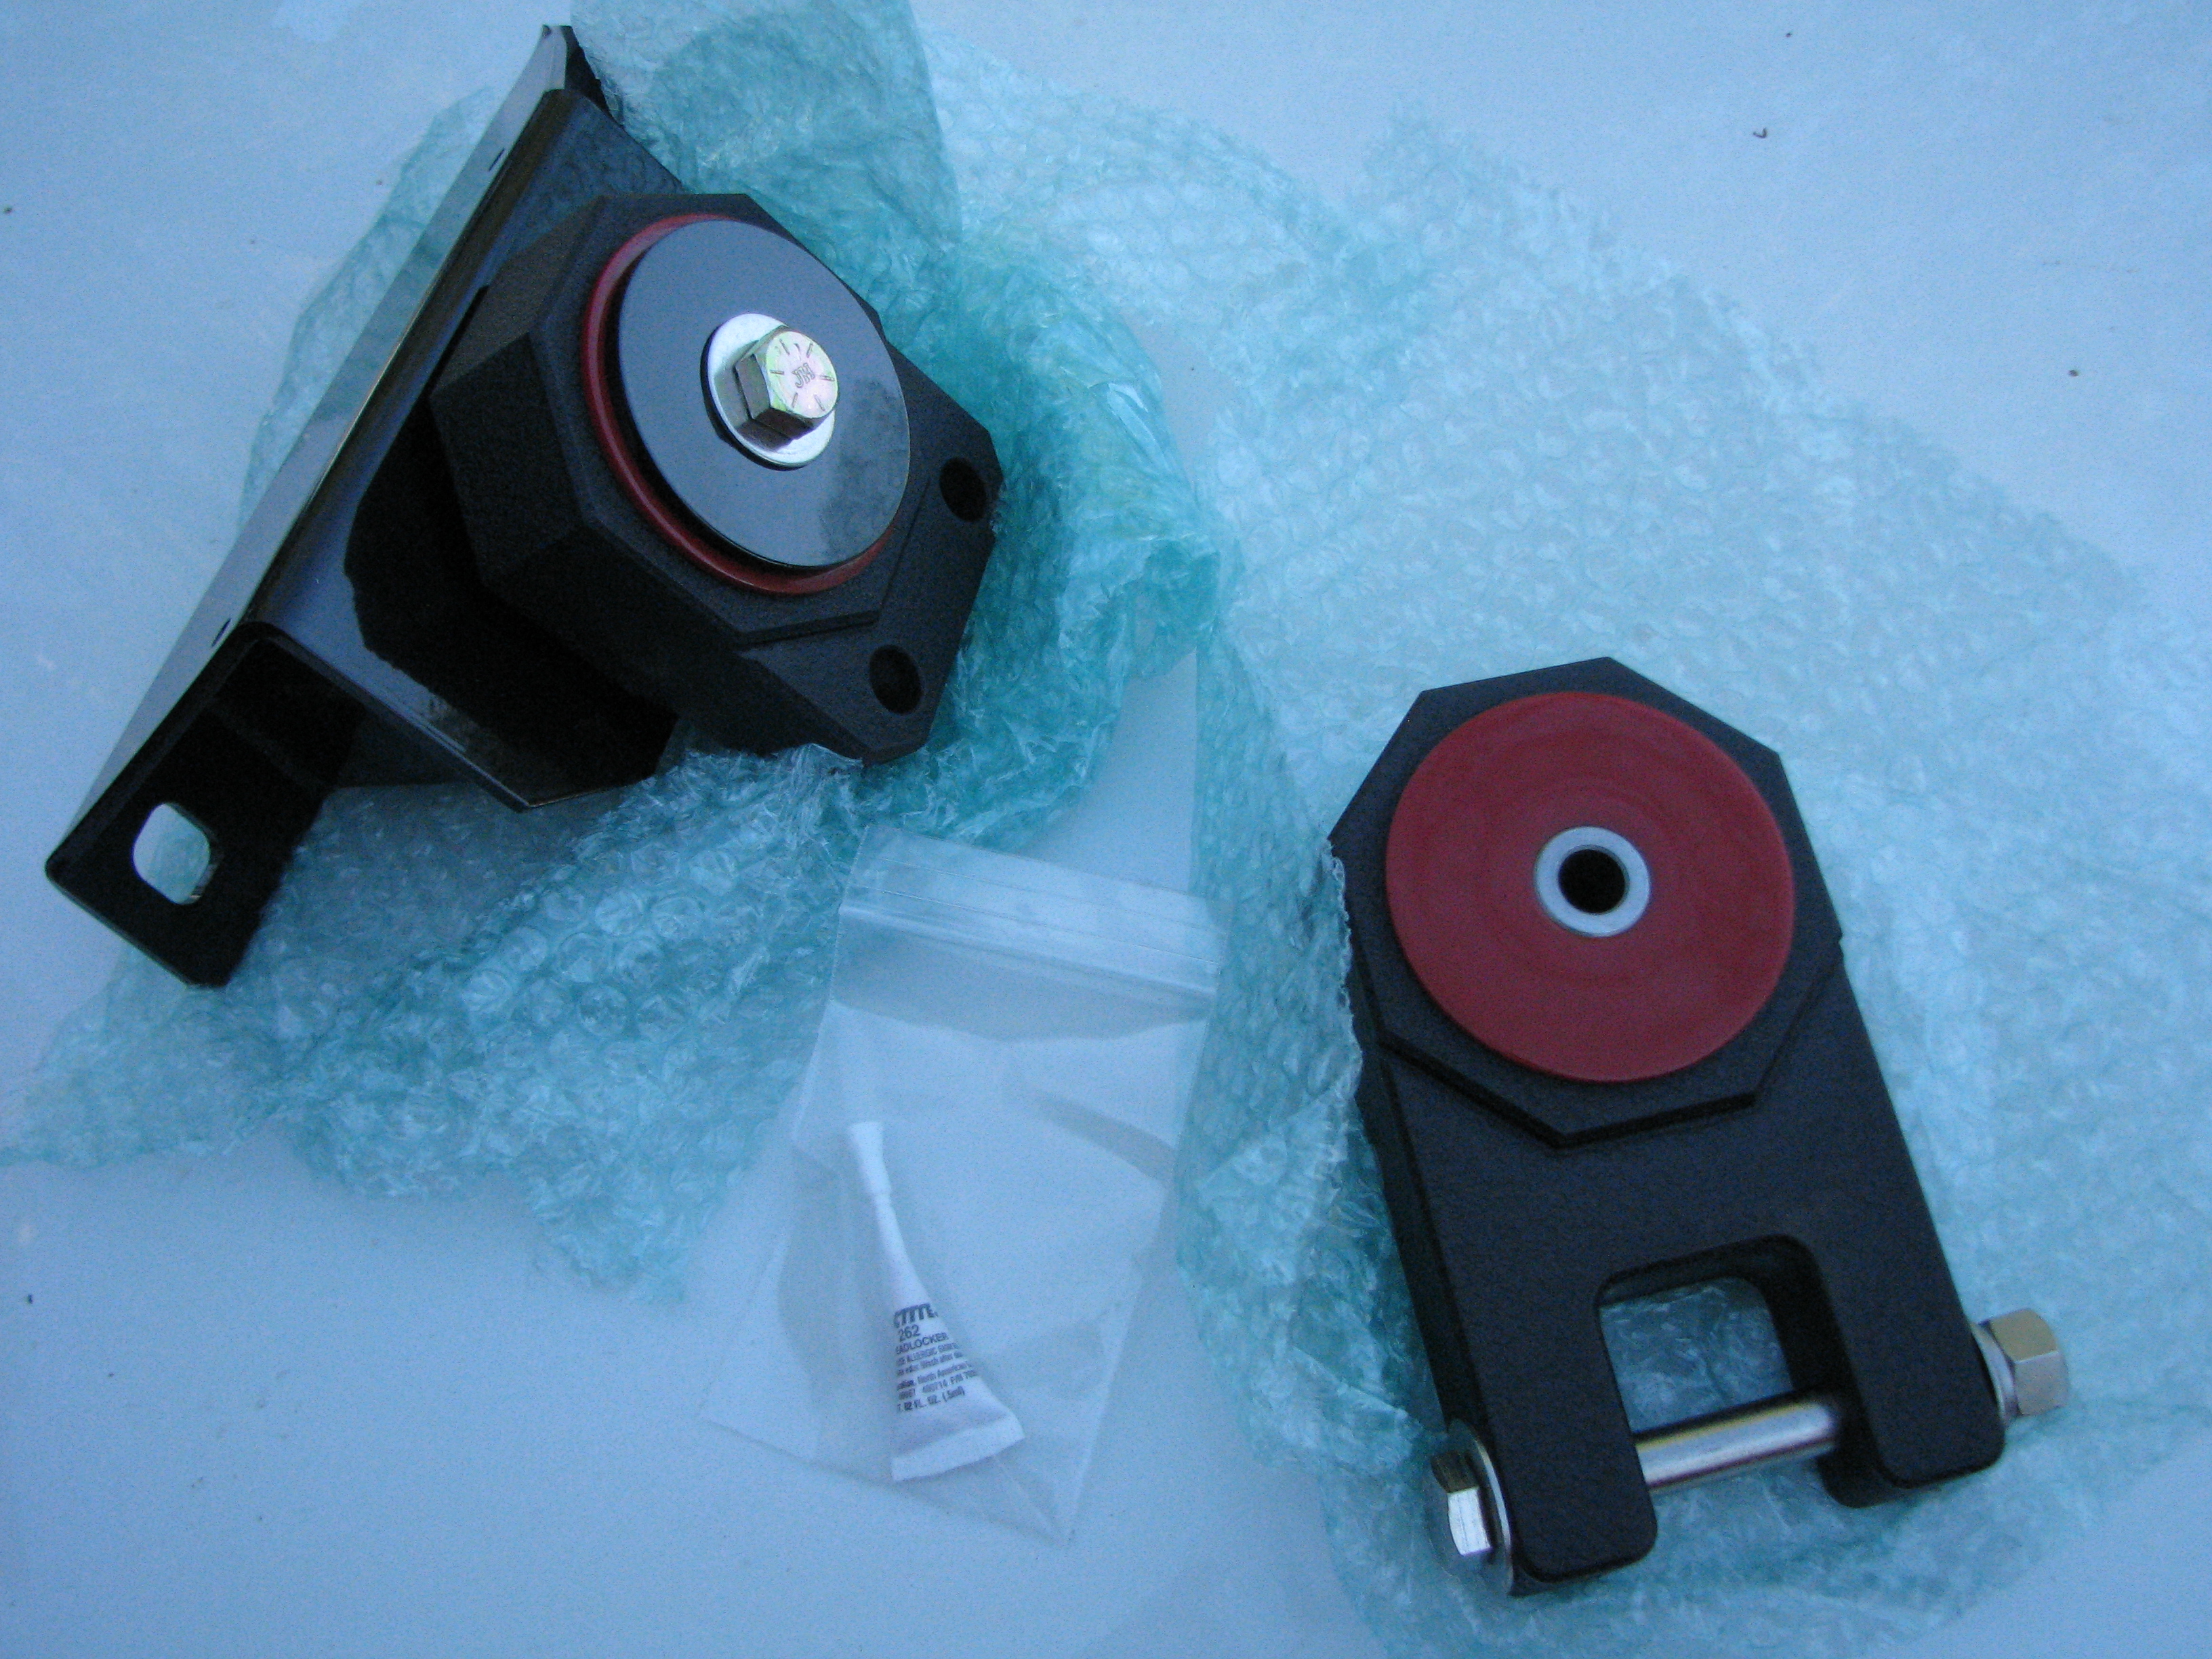 Hmm. These look beefy as gently caress but I don't think they fit the Ranger or the GMC. Wonder why they're here... 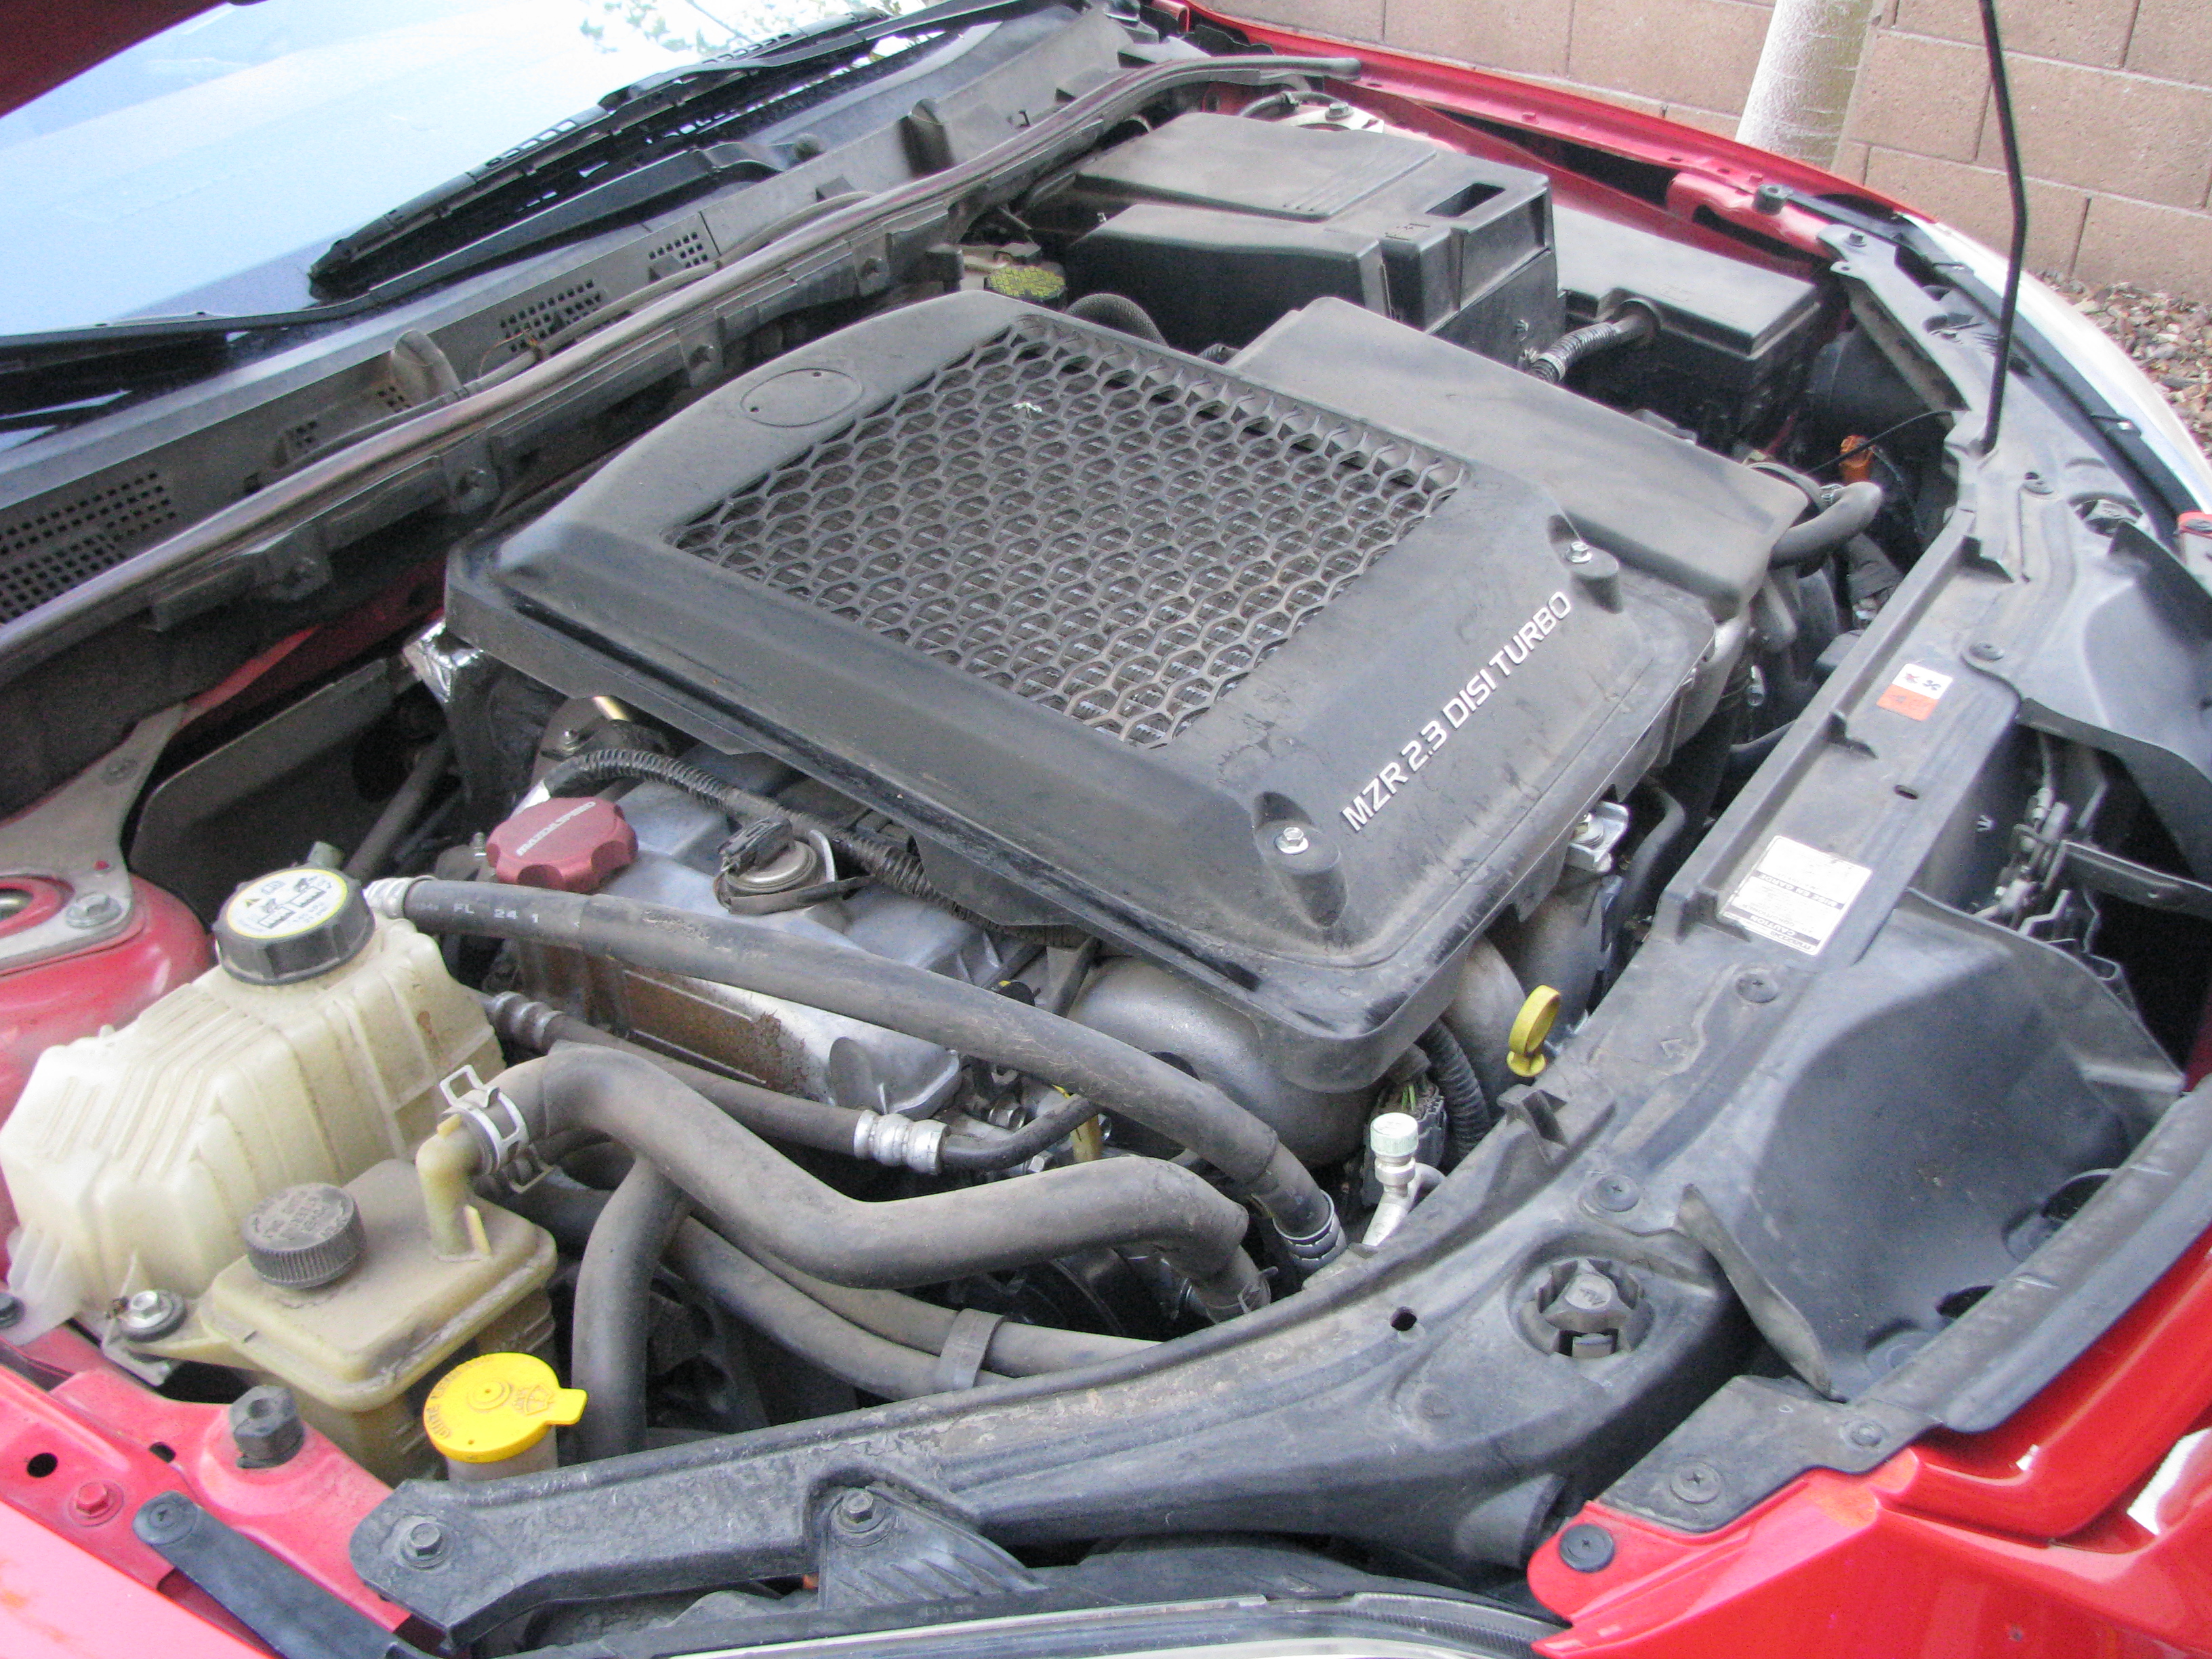 Ah right, the MS3 needs some love once in a while too. Dealer fixed an airbag issue but also discovered that the passenger engine mount was trash. Since the MS3 mounts are about as strong as melted cheese, I'm replacing both of them with JBR 70-durometer mounts. 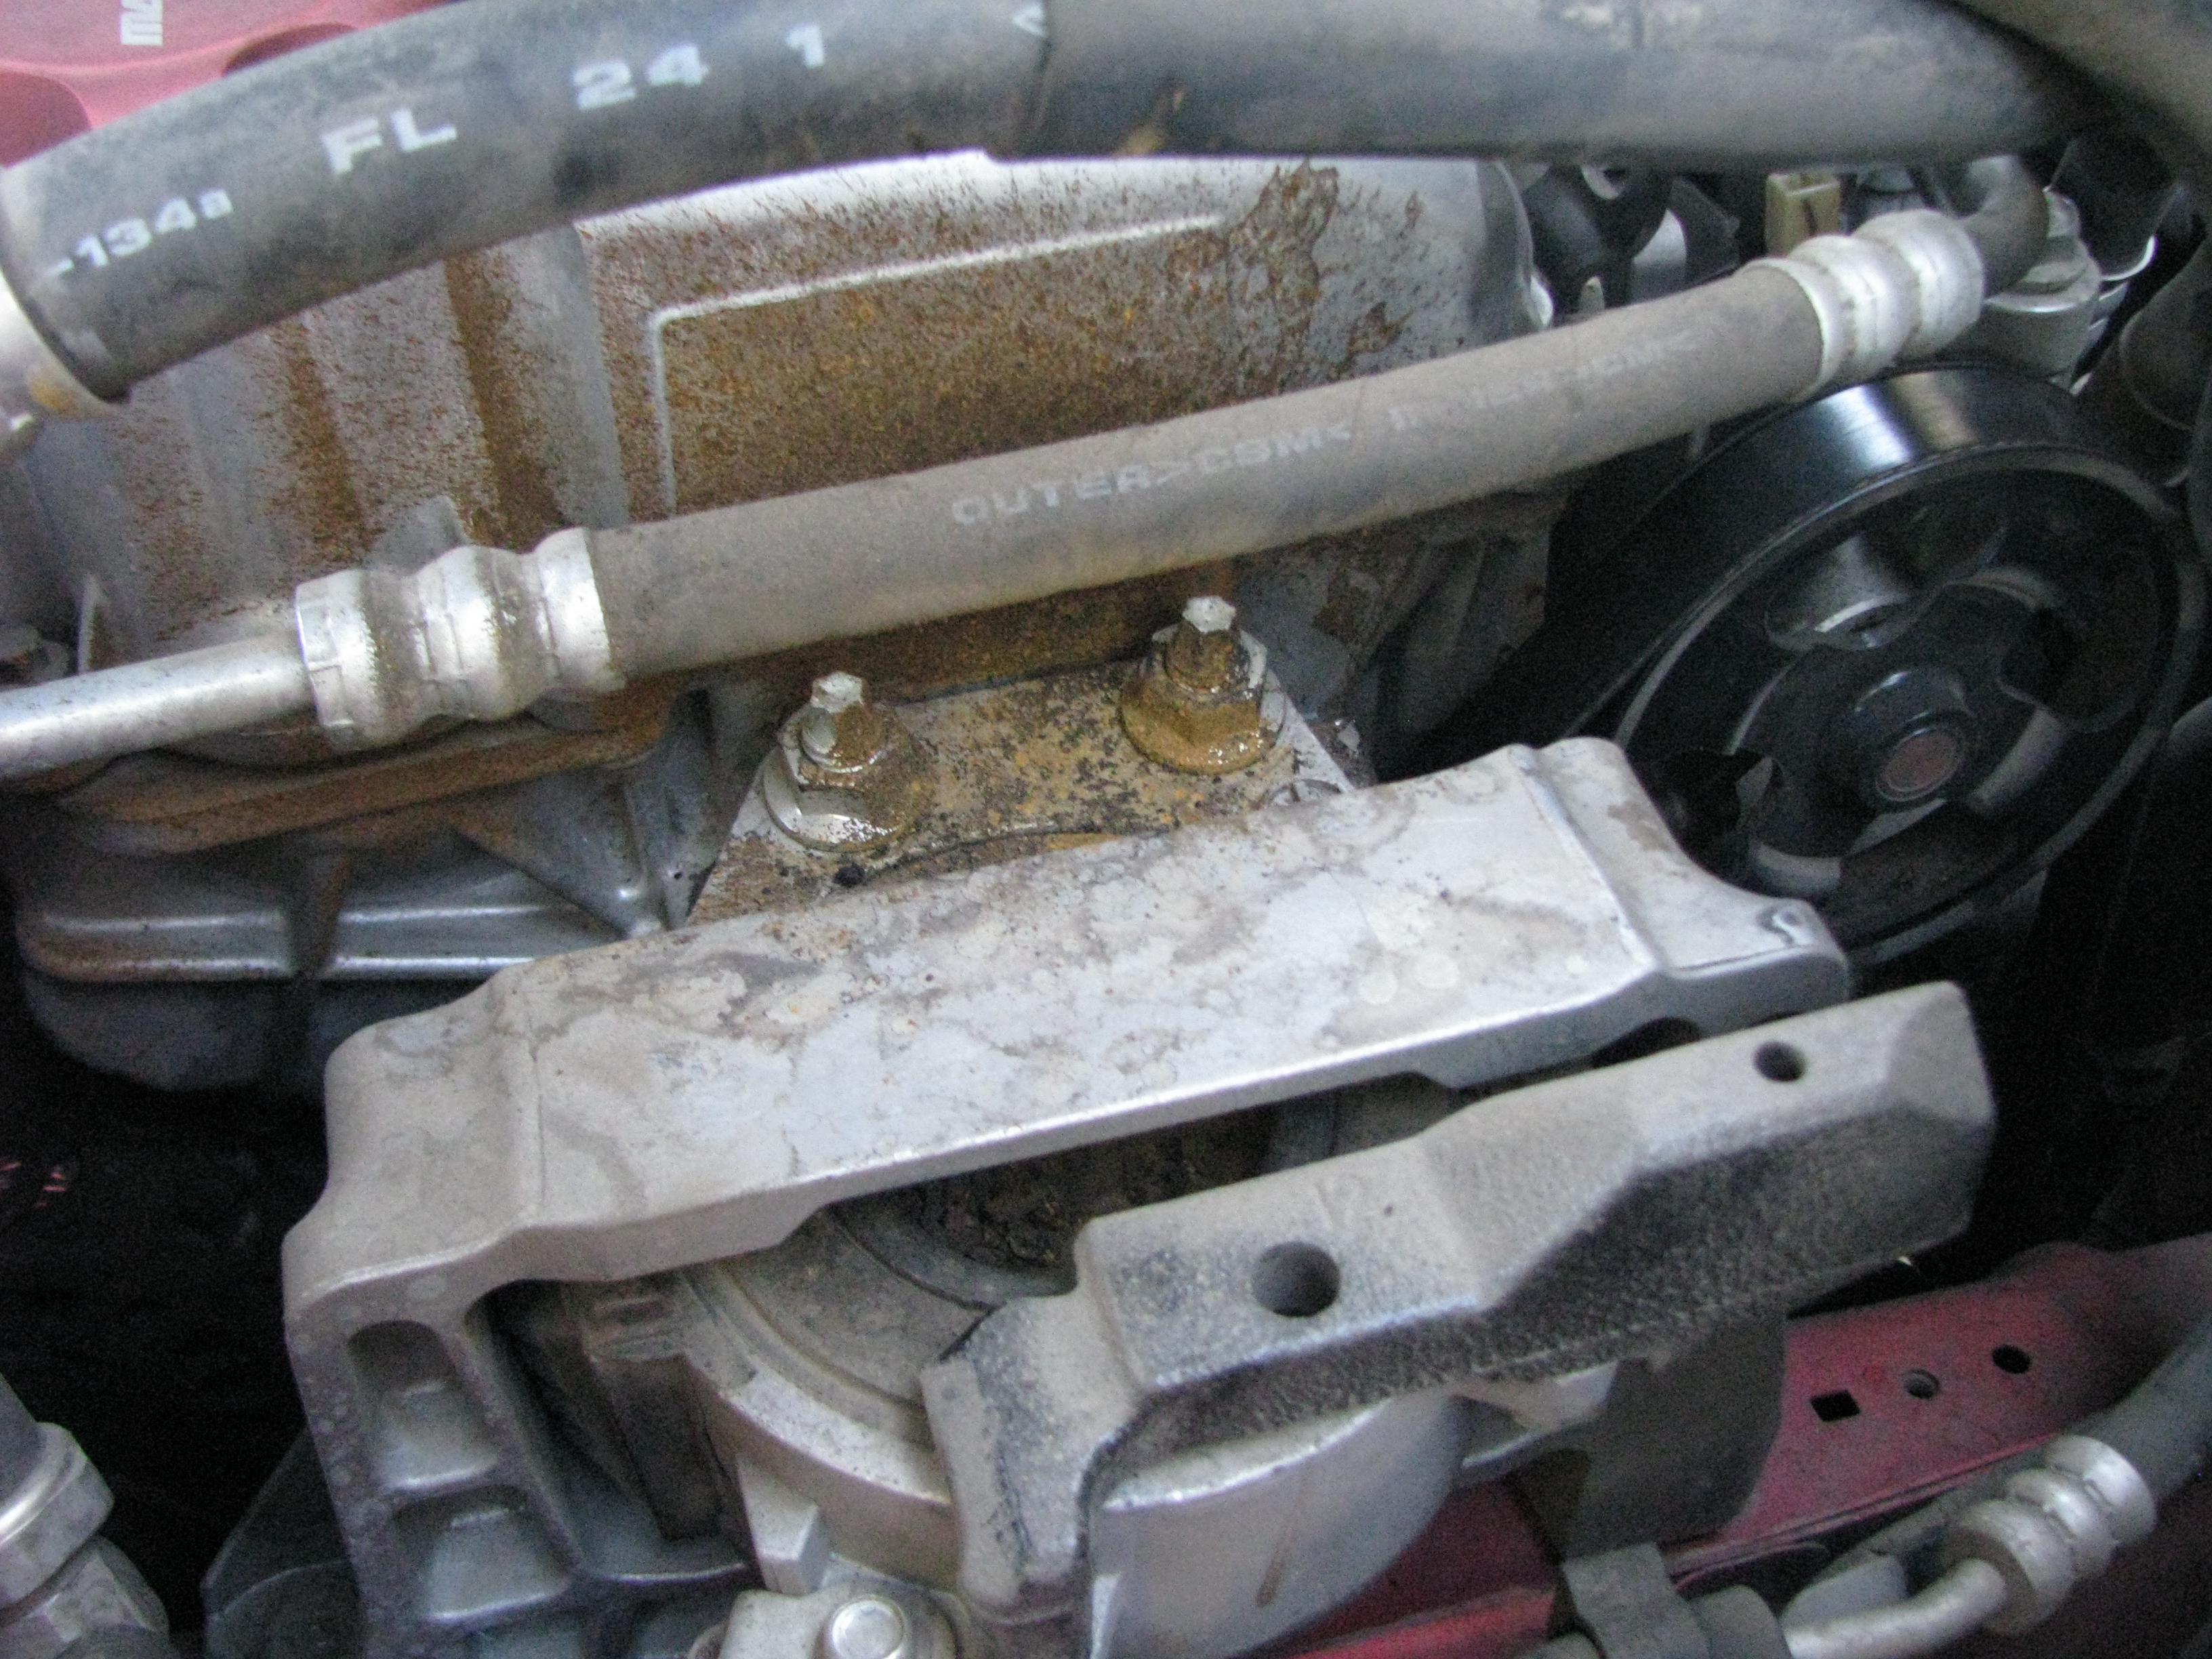 Speaking of molten cheese... I didn't know it when I came across this but the passenger mount is liquid filled. Mine had ruptured and was squirting instead of supporting. 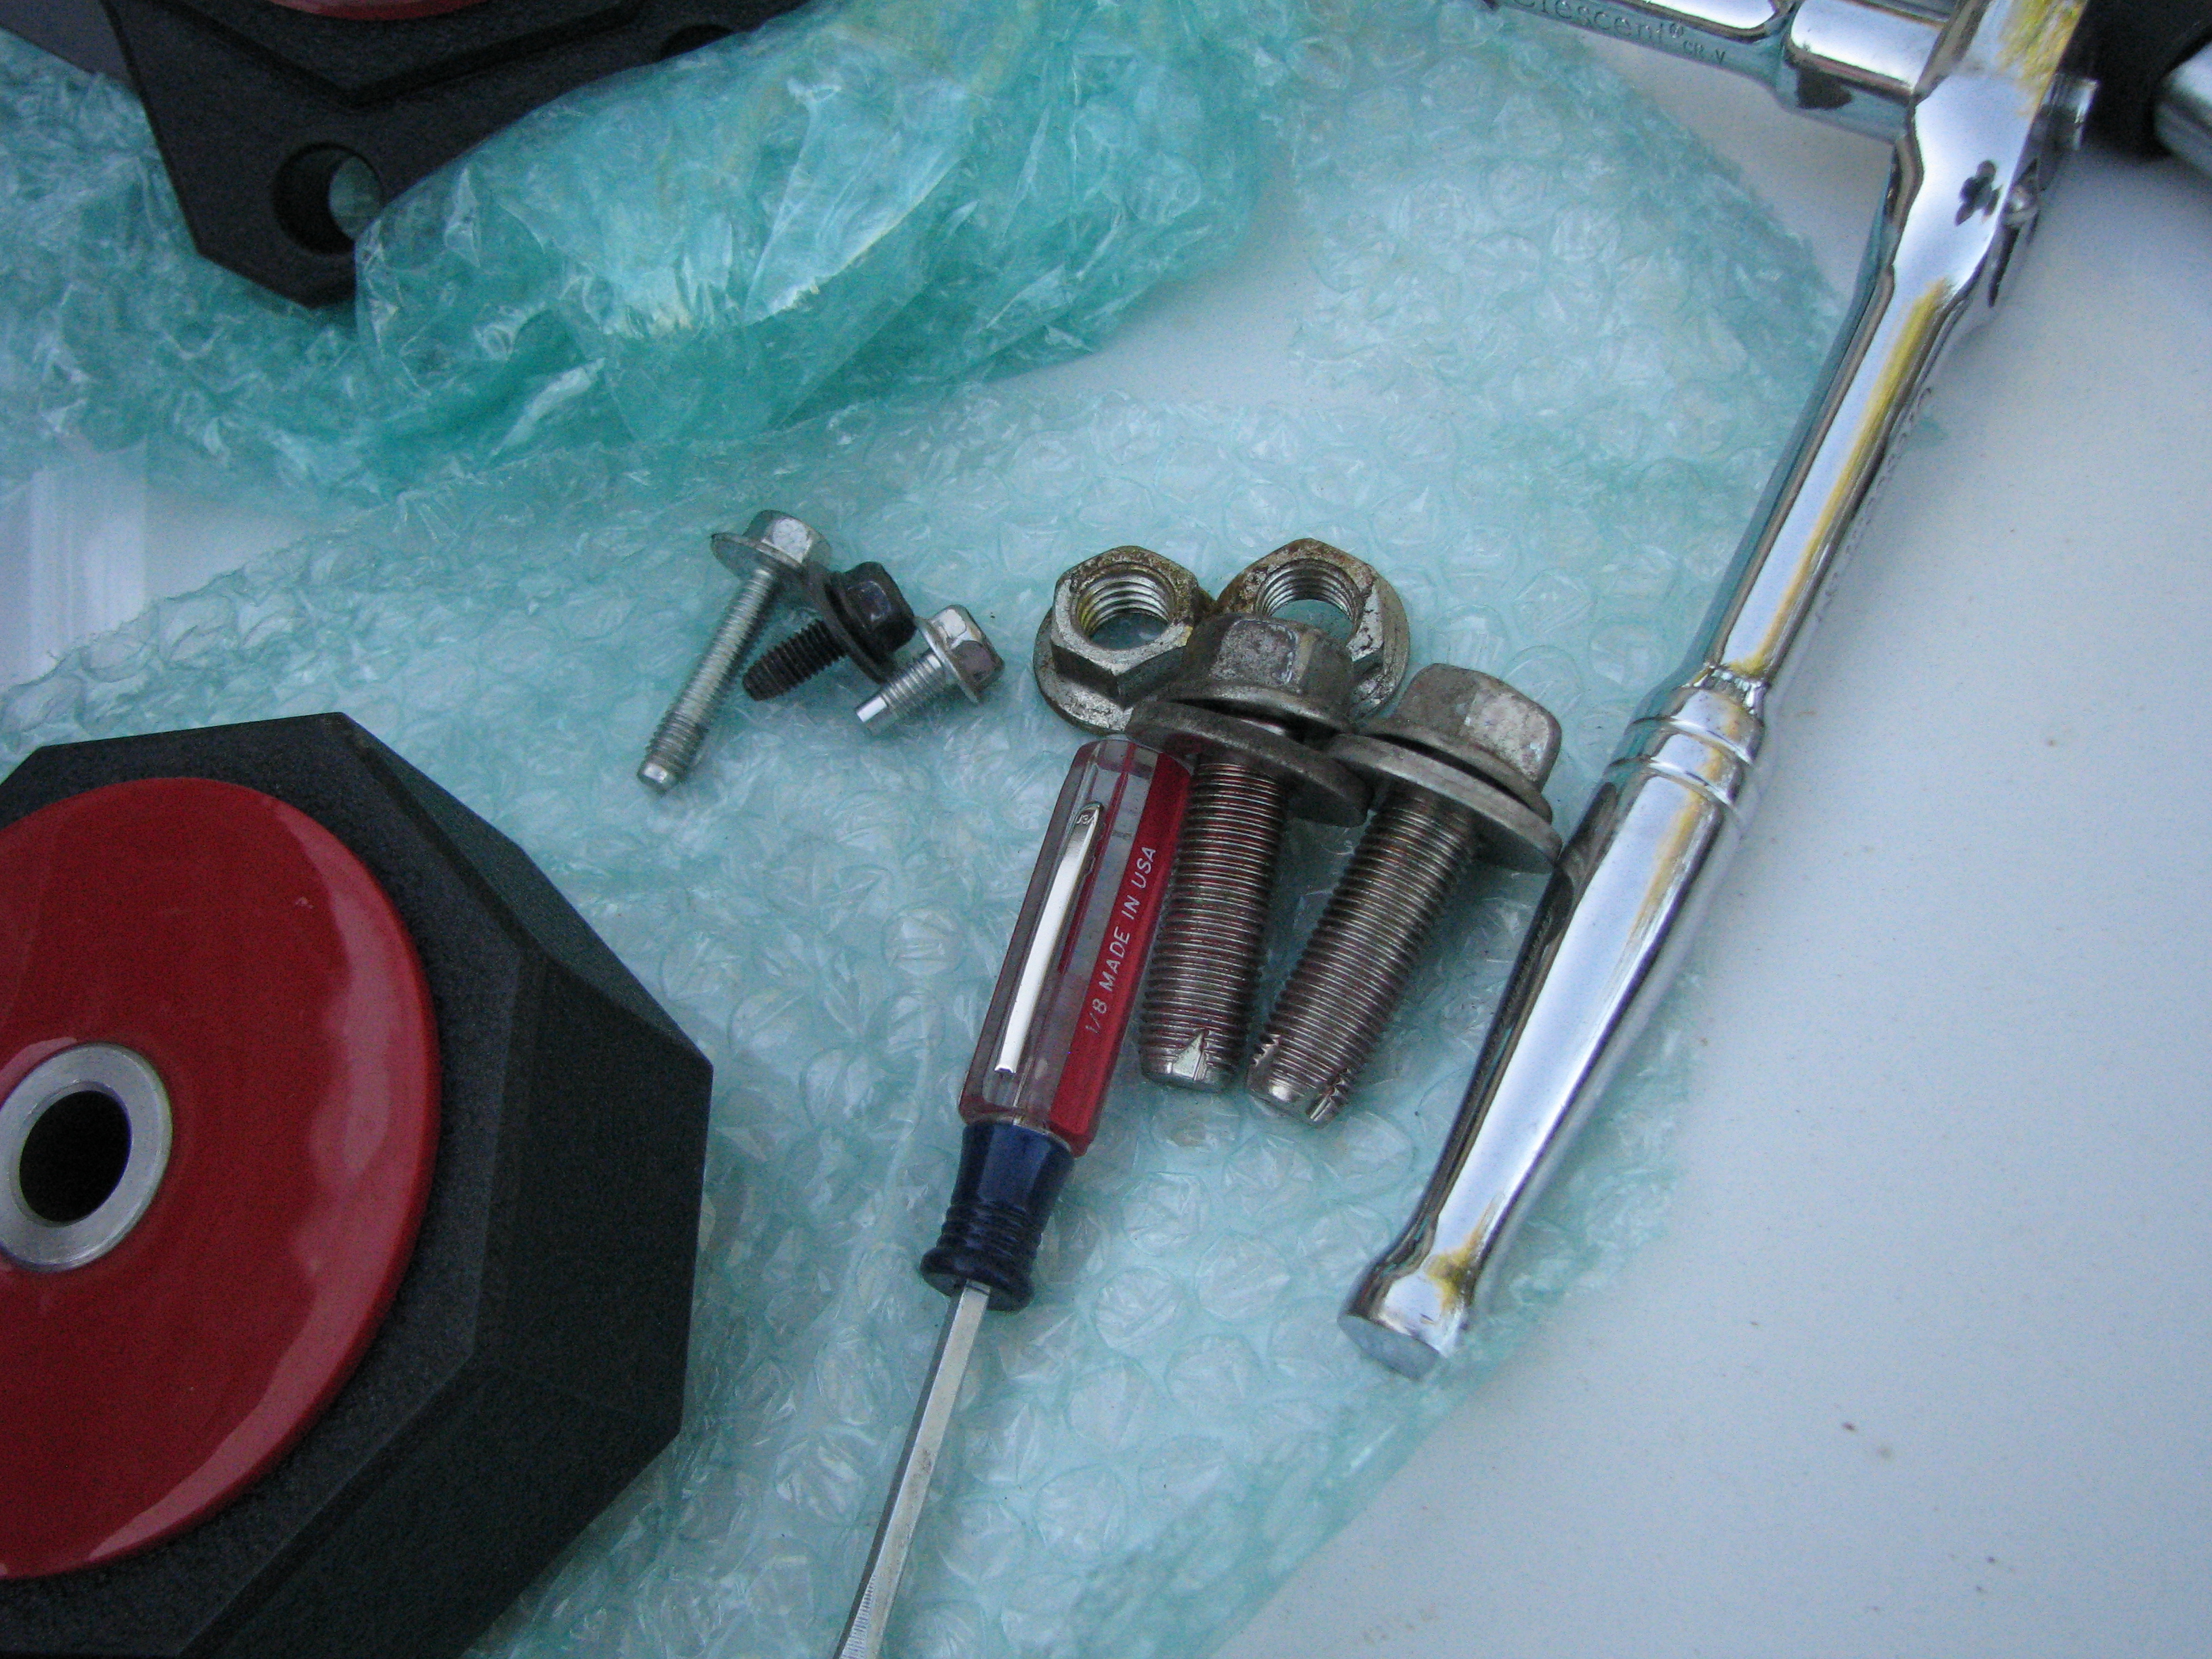 This is actually all you need to take out to pull that mount out. Kinda nice, my only previous experience with replacing engine mounts in place was the GMC right after I turned 16 and that was a very painful experience. 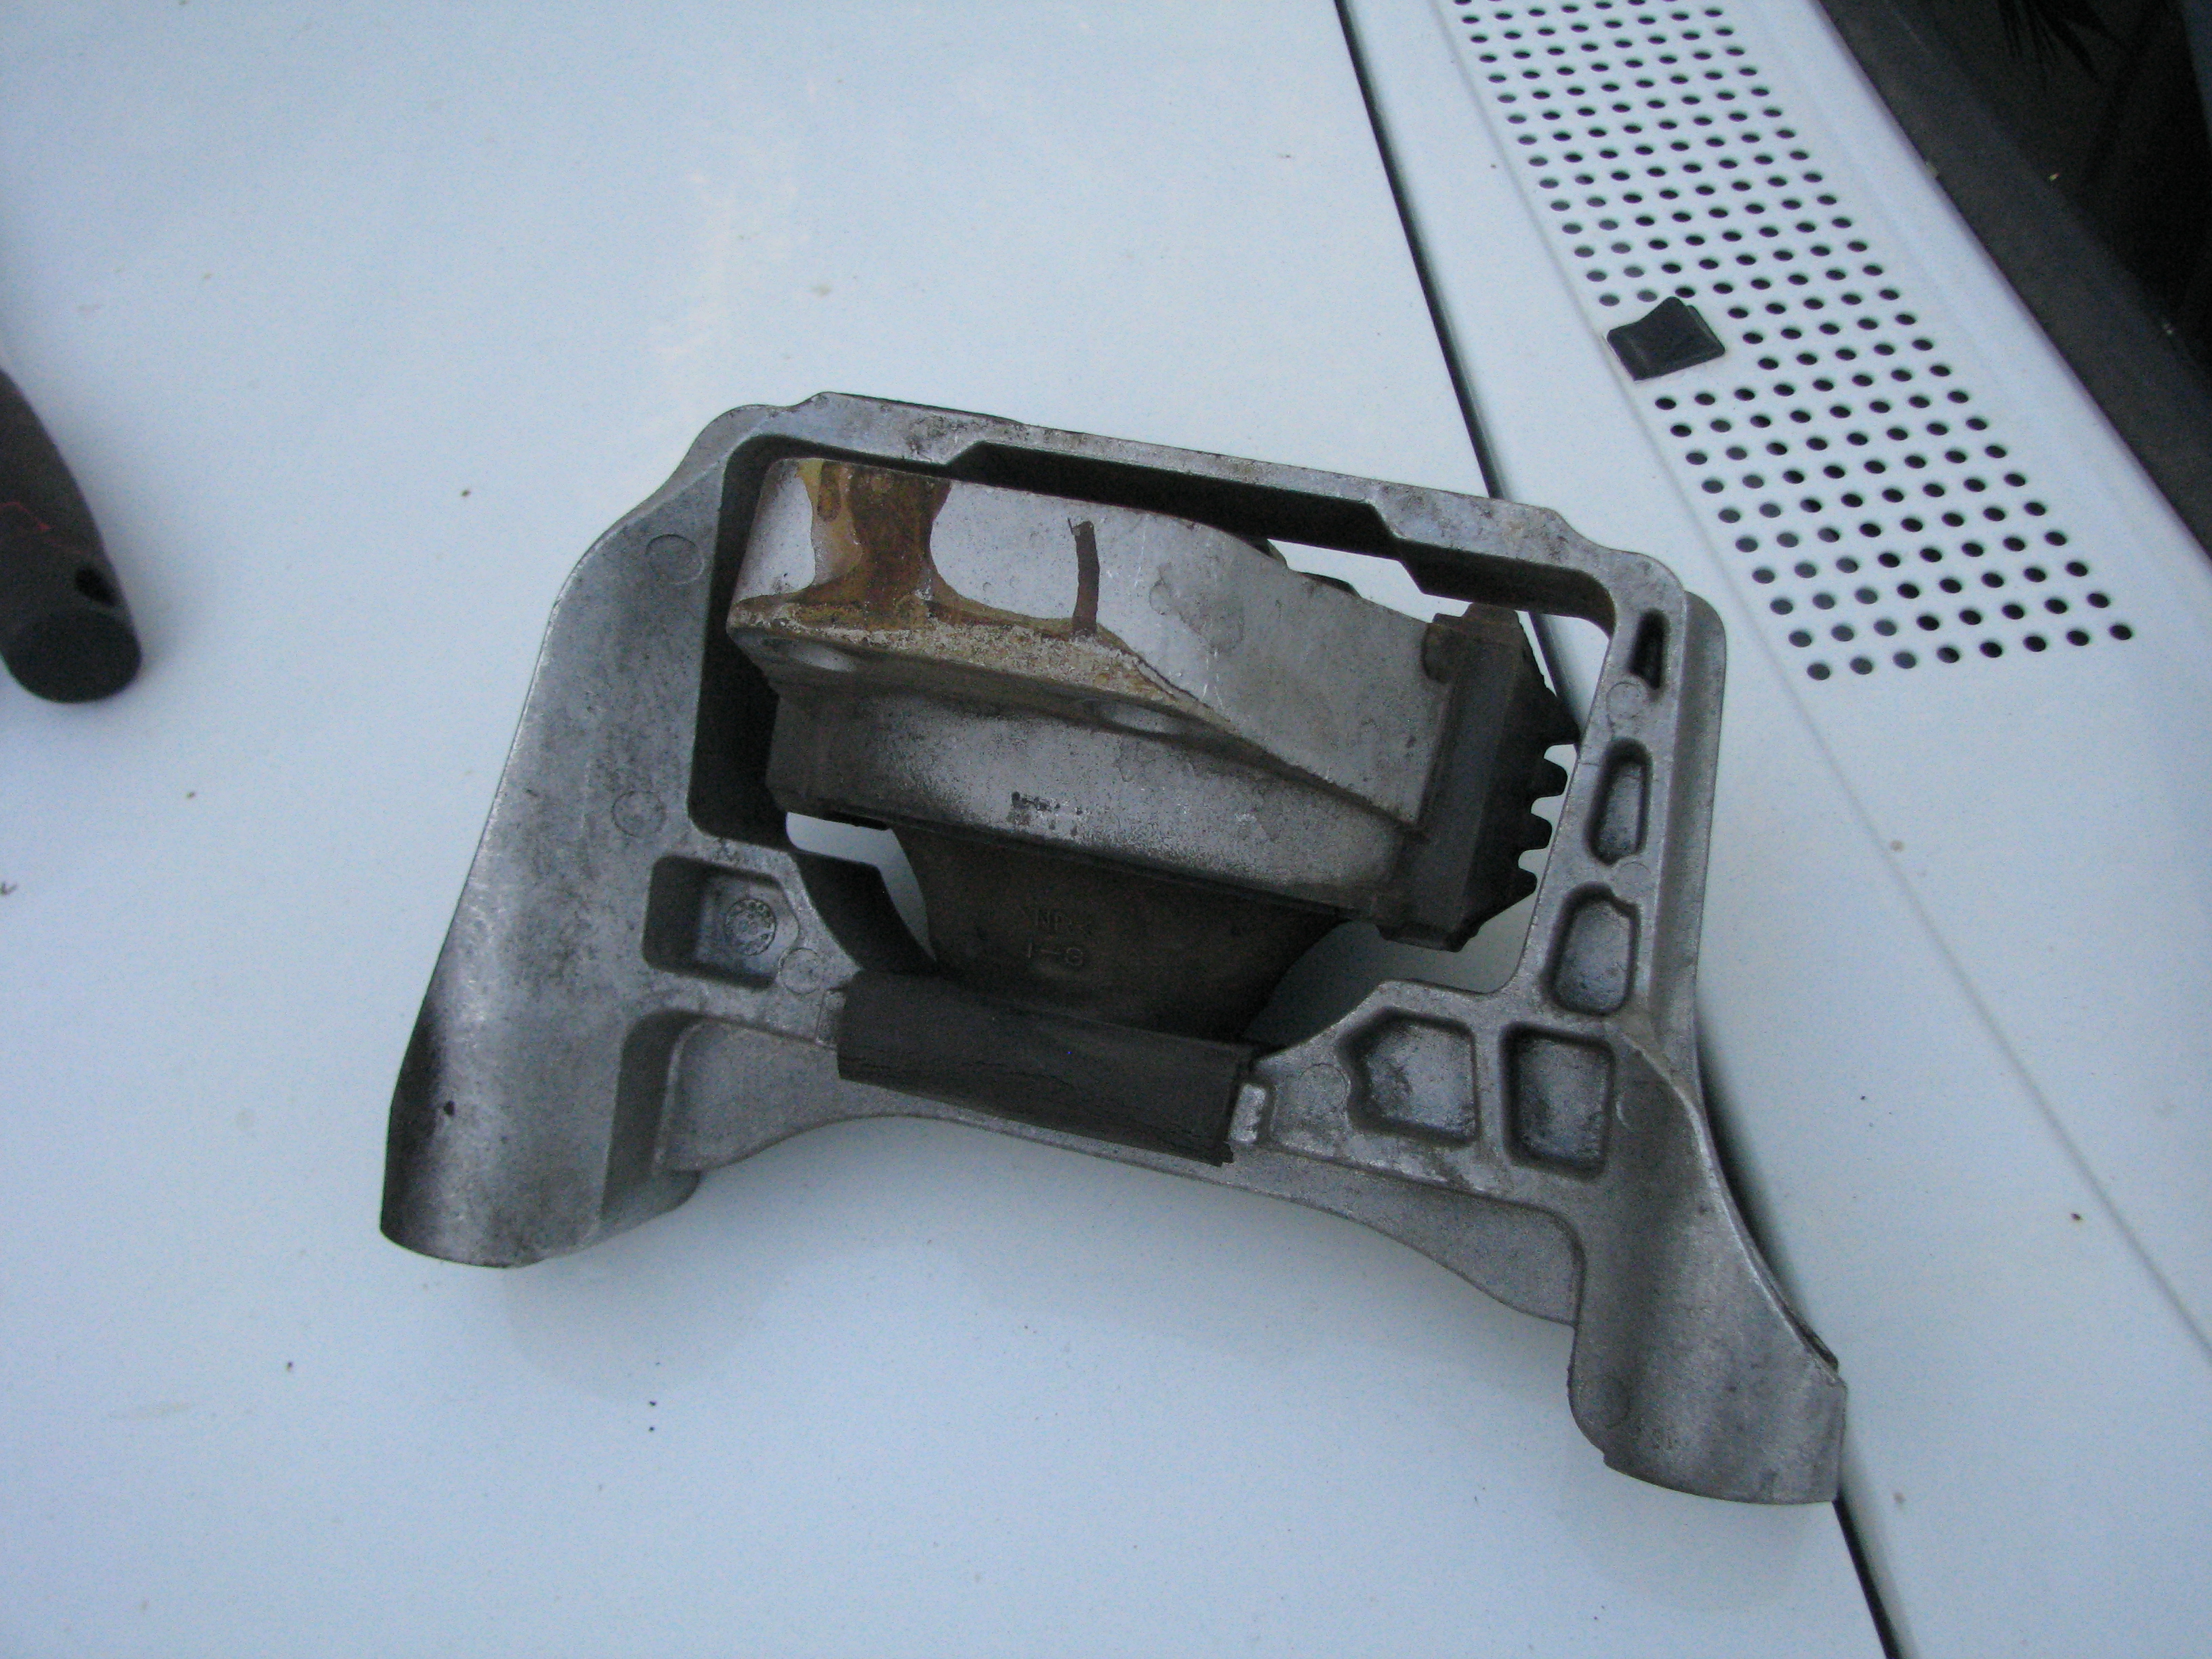 Old and busted. Not shown are the shiny marks on the inside of the outer portion where those rubber snubbers have been smacking the frame harder than they should. 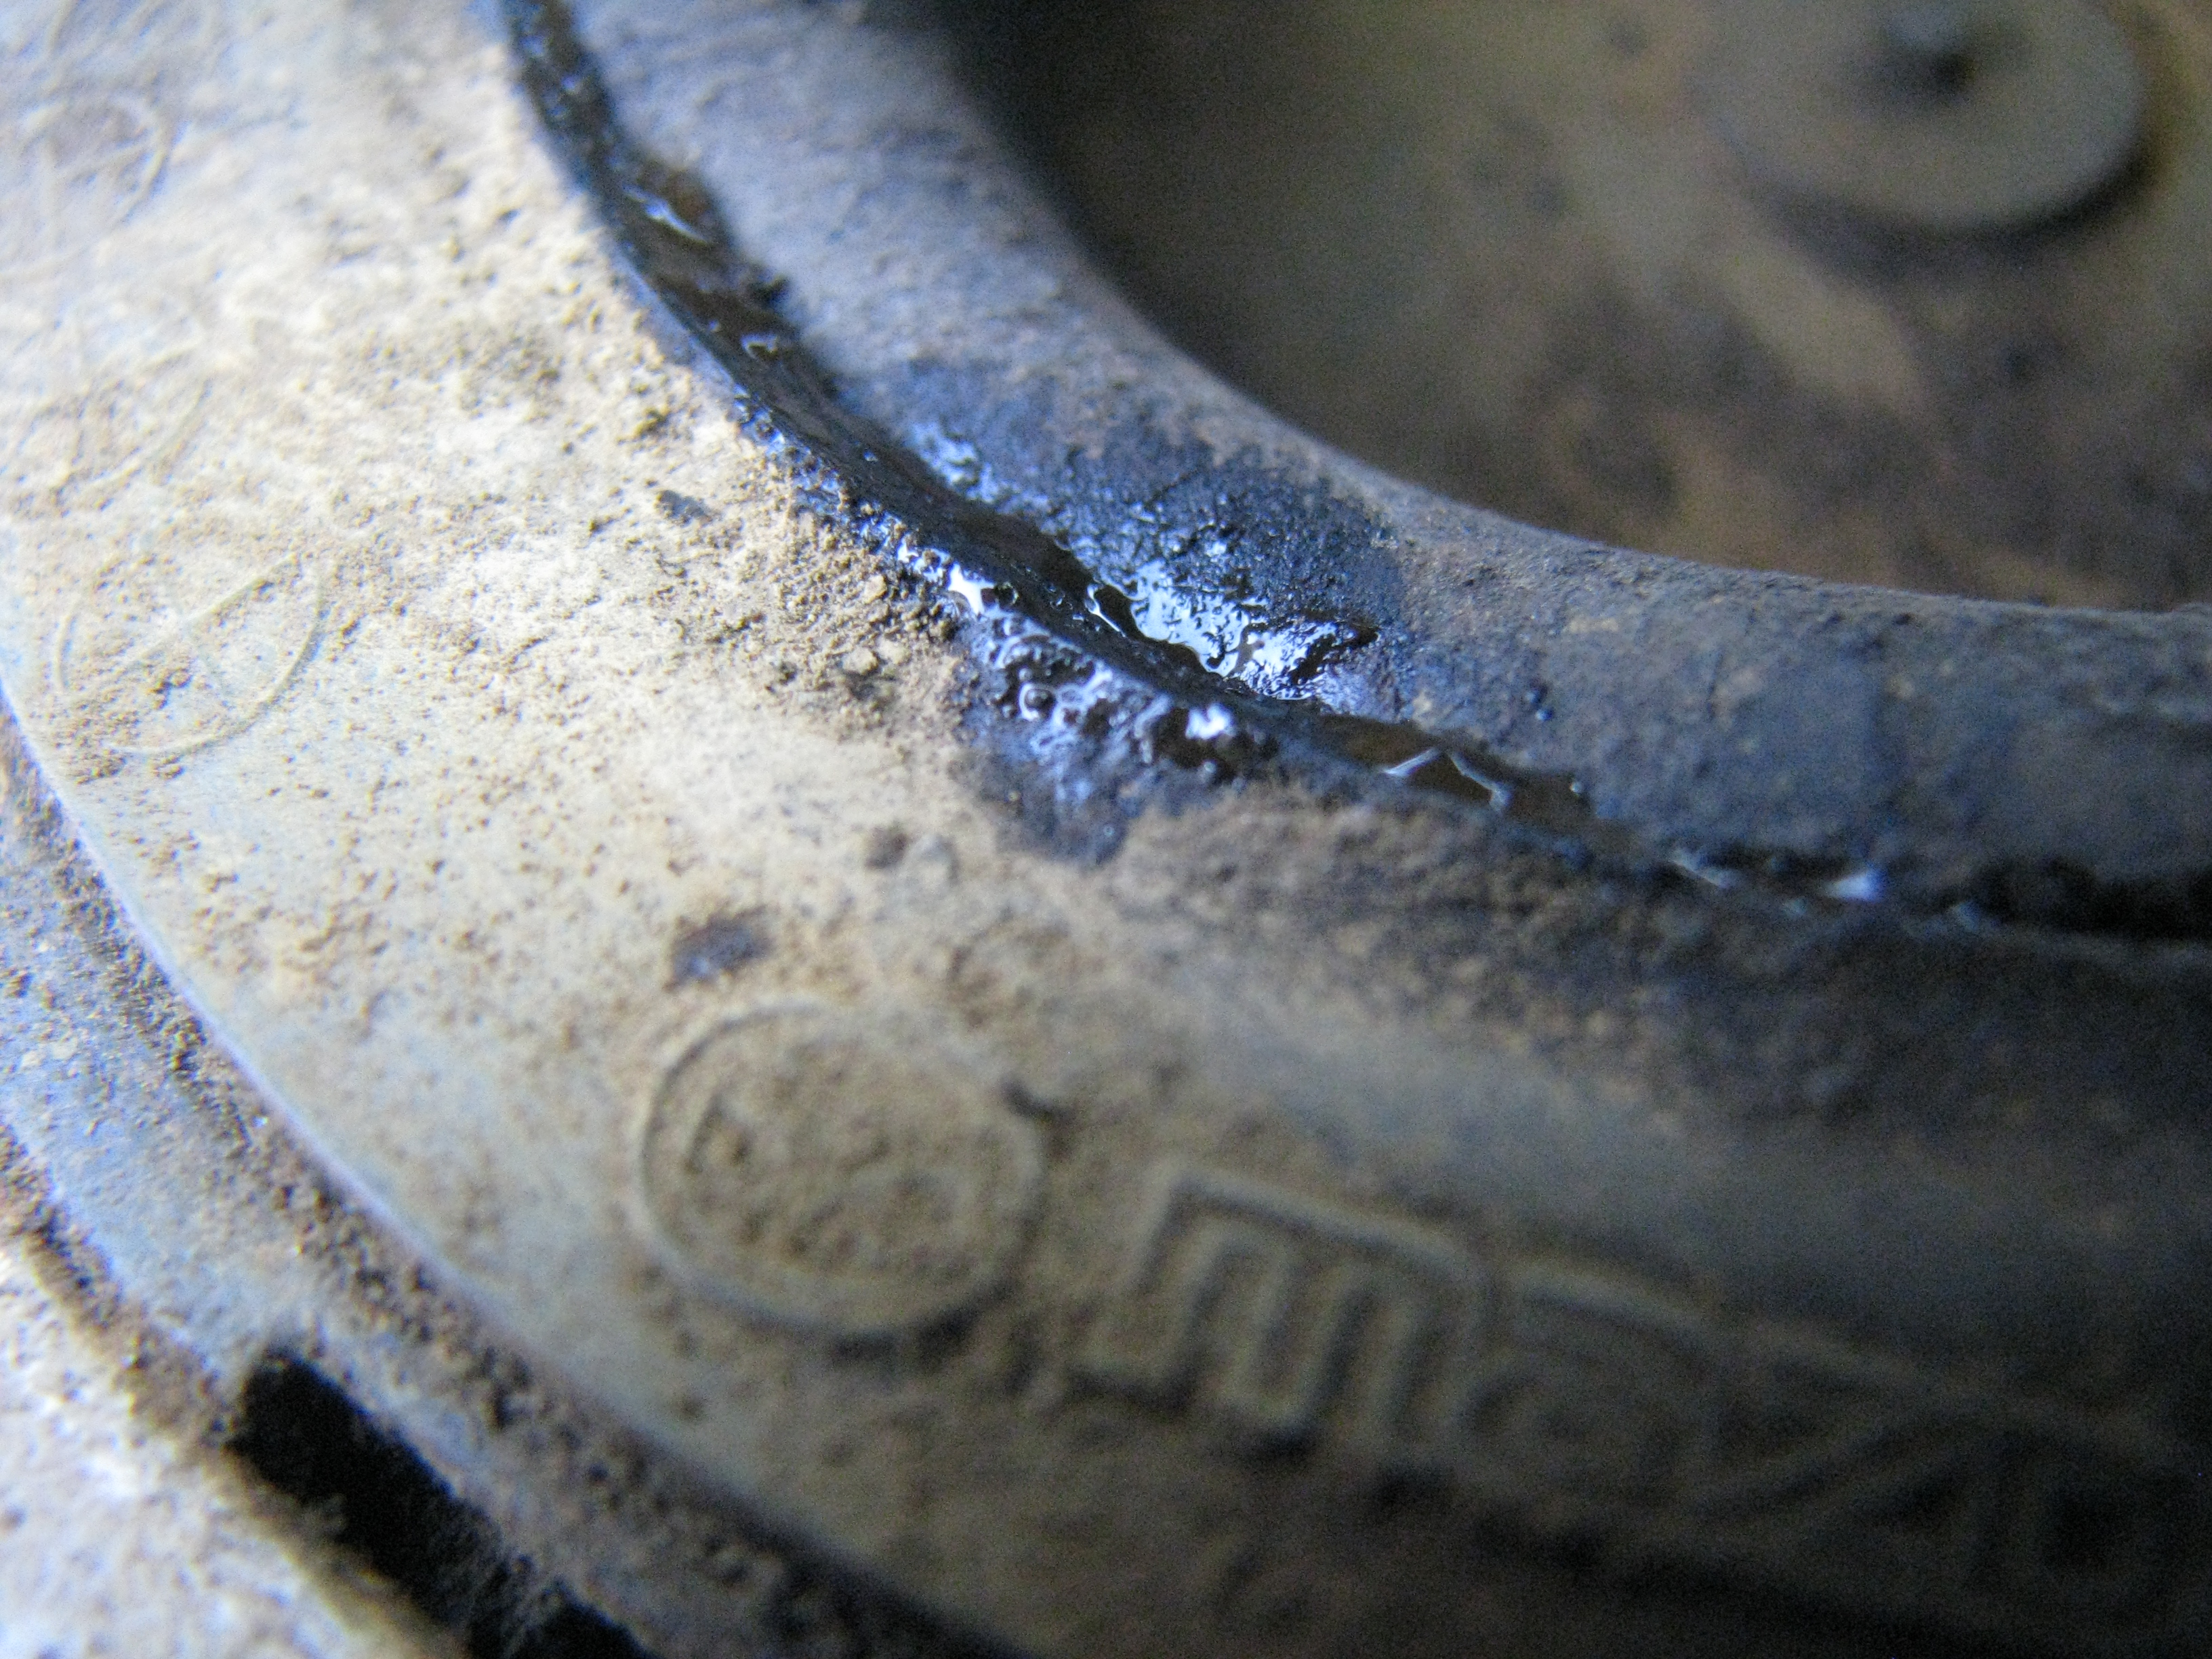 Poking and prodding at the old mount showed lots of cracks around the center, and nasty rear end orange fluid would weep out if you poked too hard. 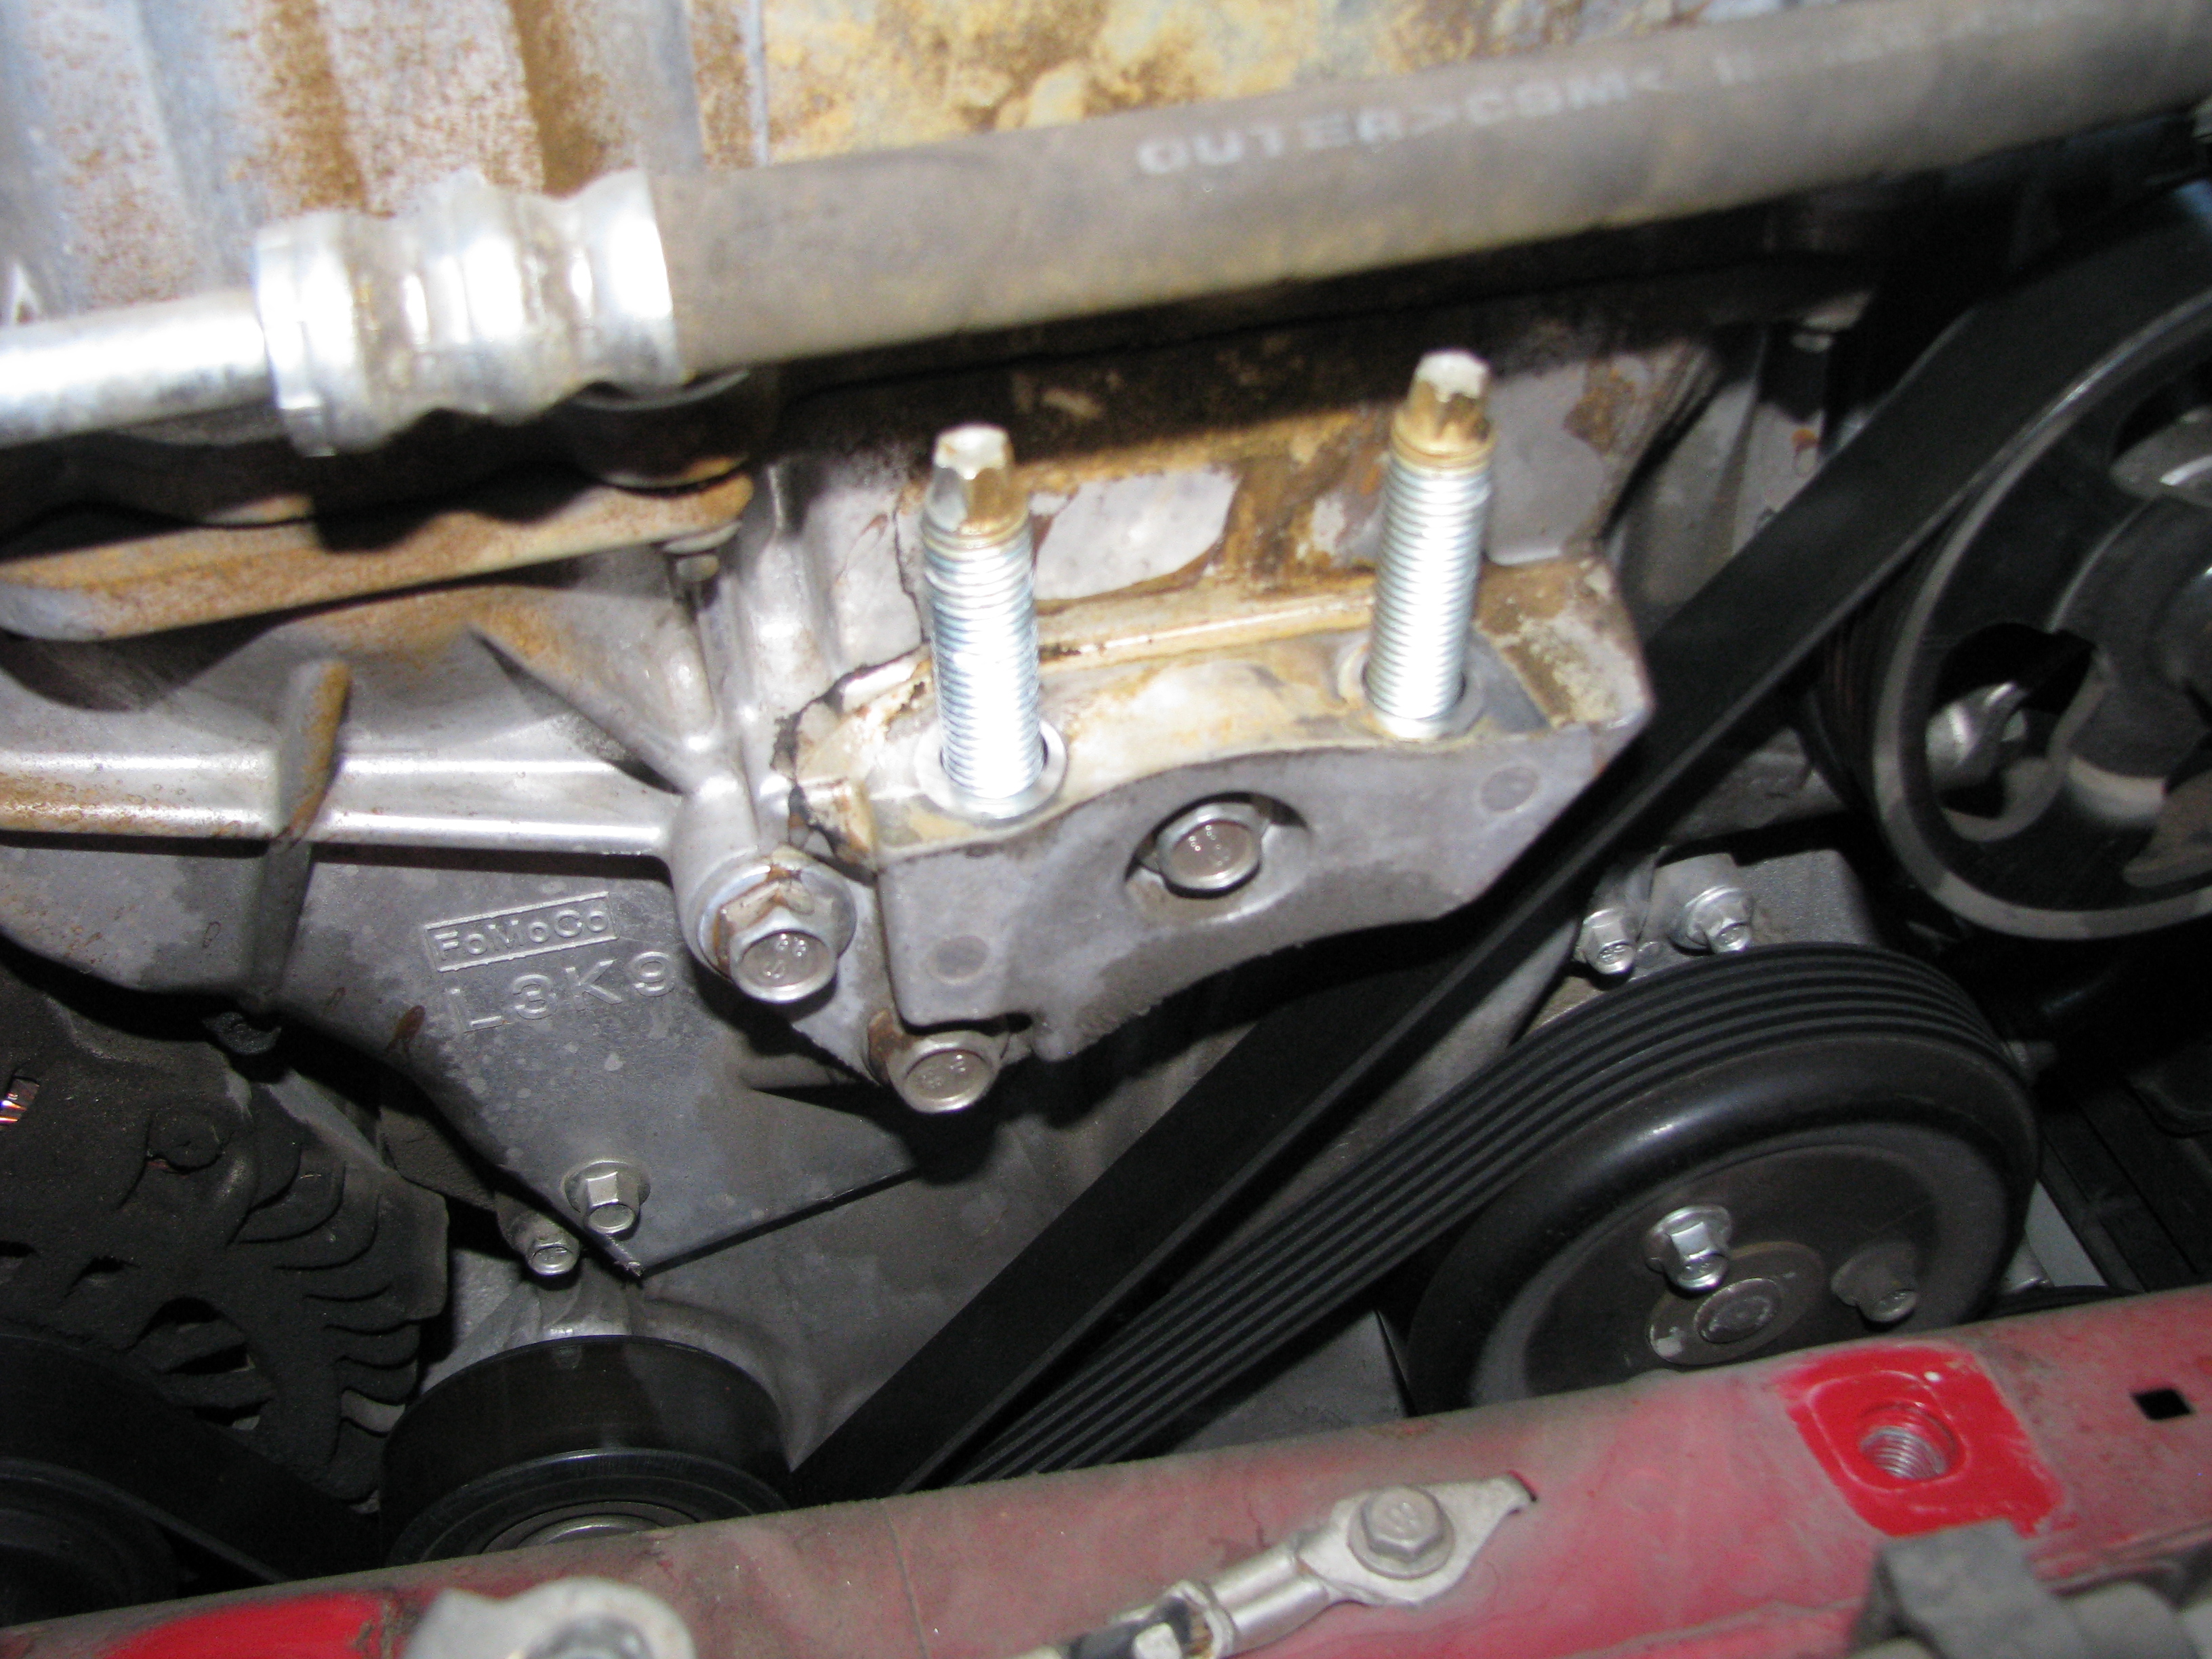 Look Tusen, another FoMoCo logo! Thankfully that orange-brown poo poo pretty much wiped away. 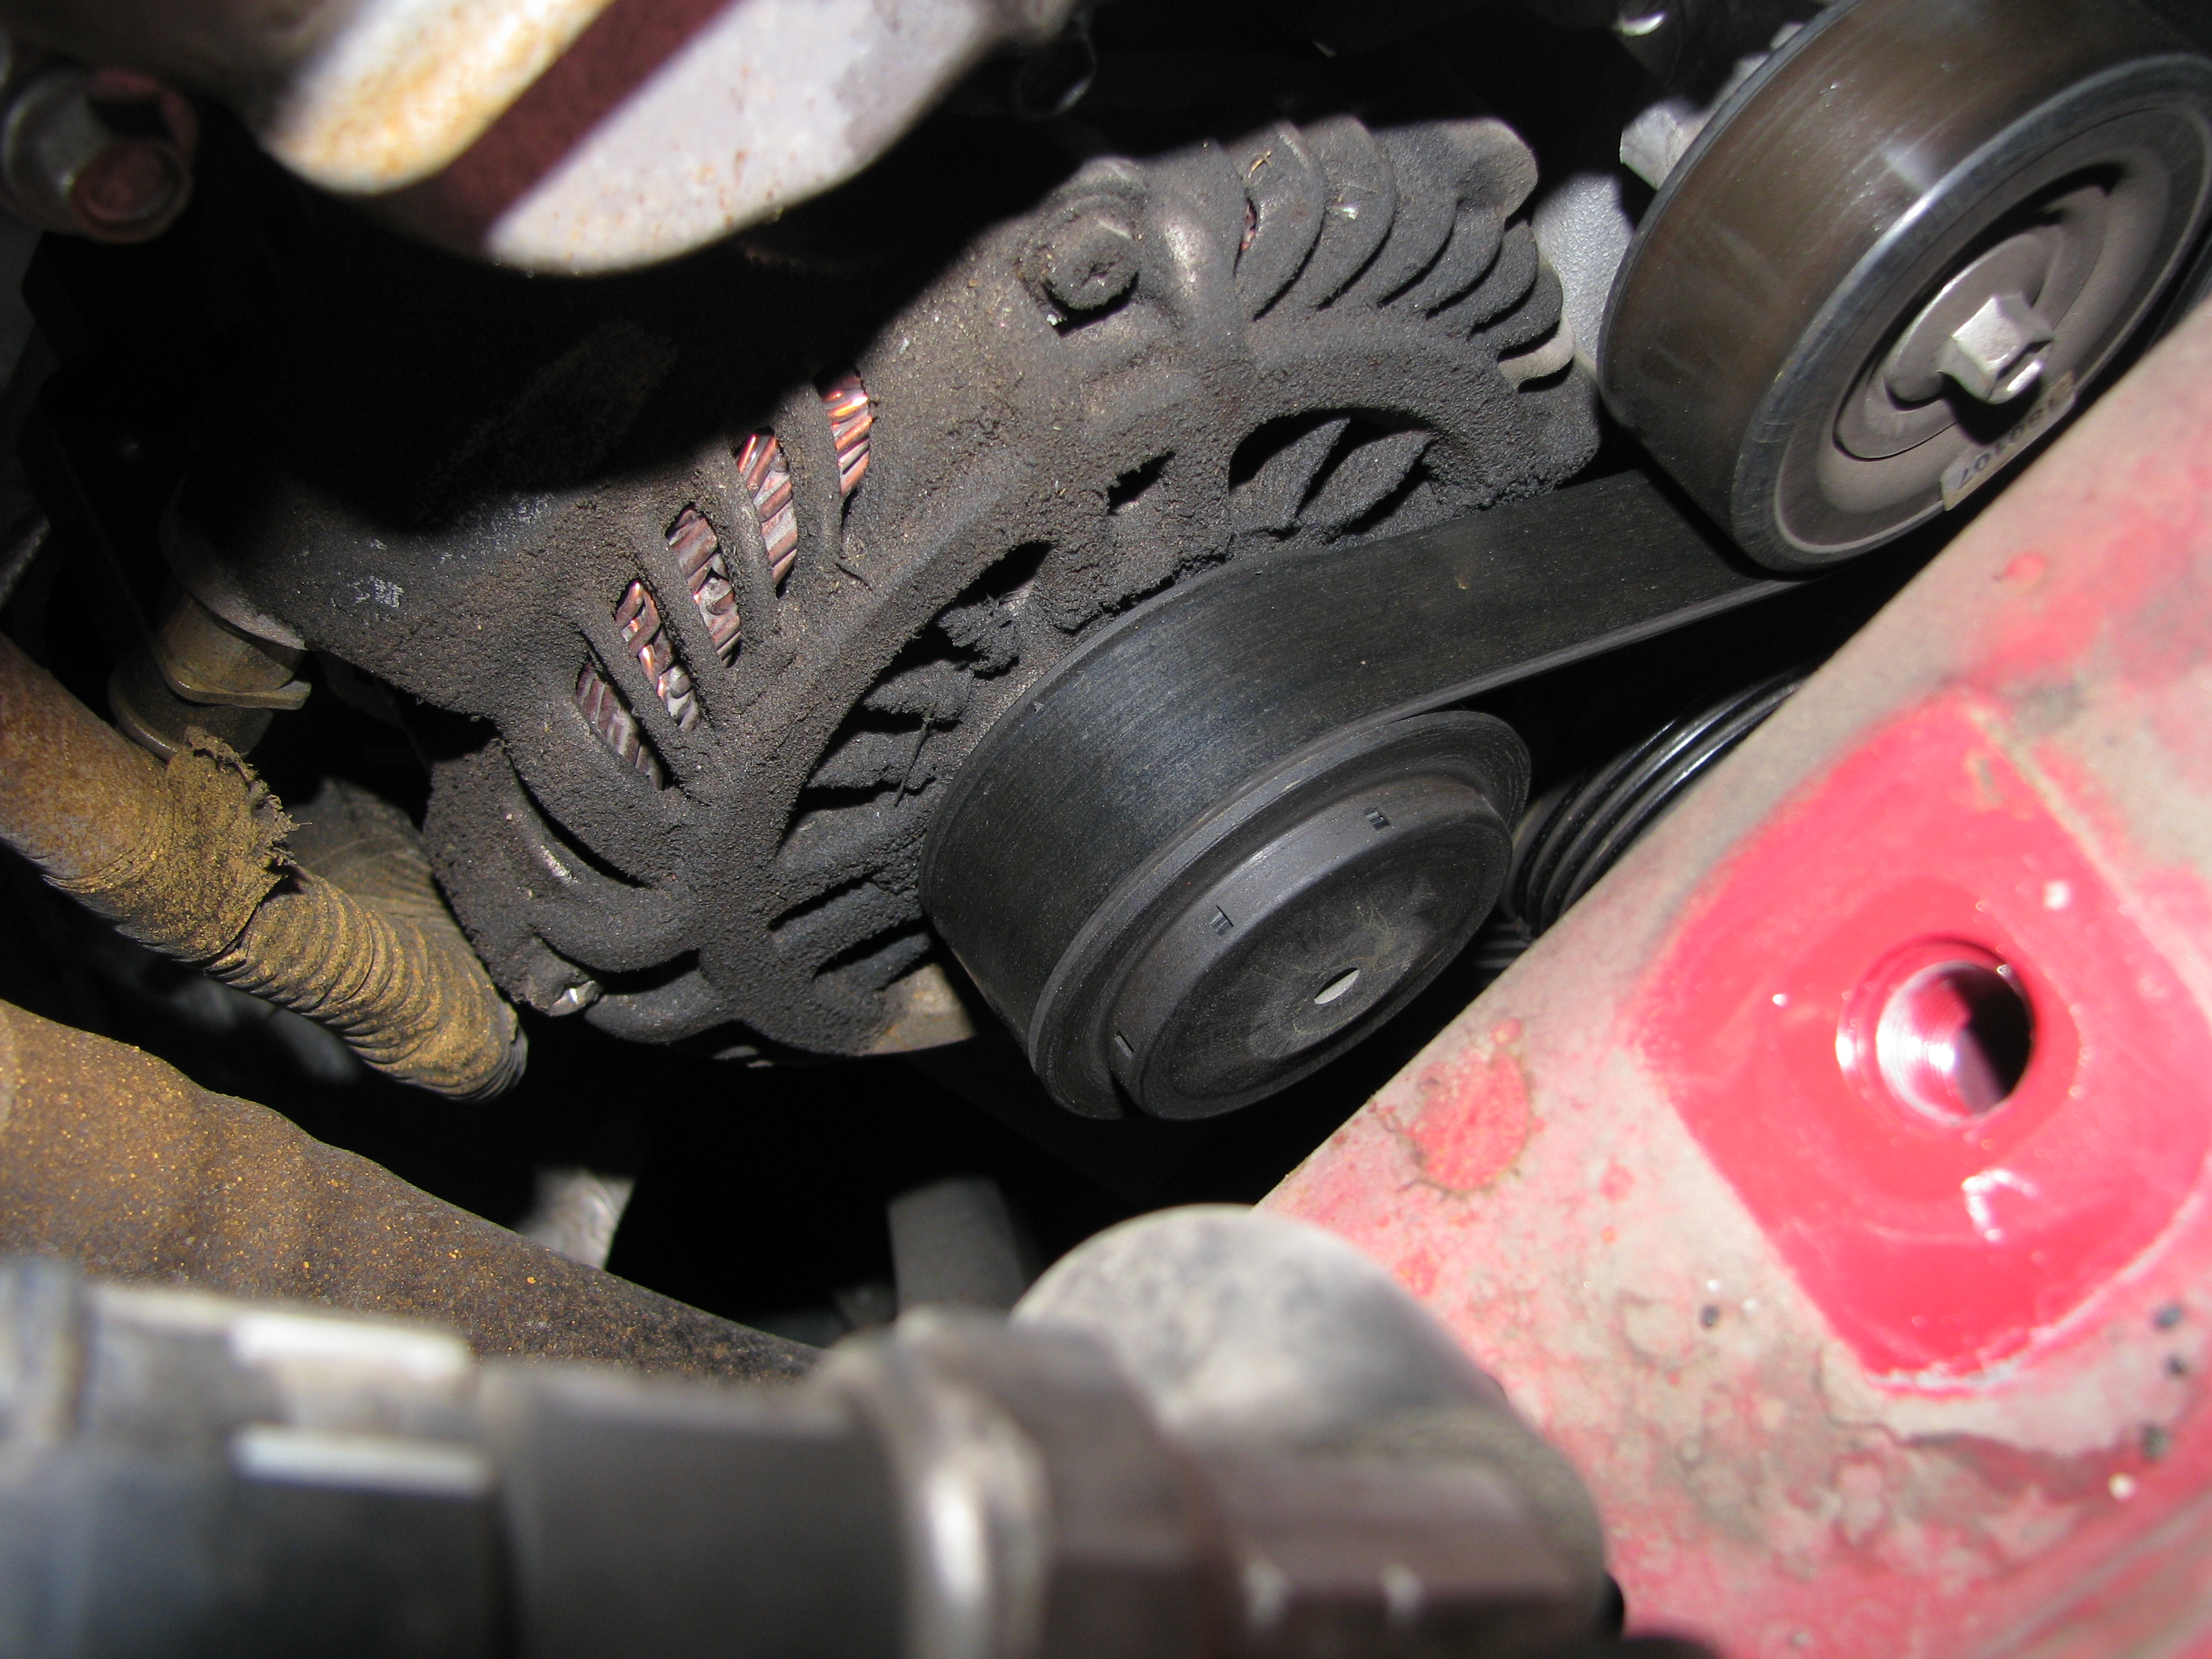 Of some concern is how much of the liquid apparently got sprayed onto the alternator - it was pretty well caked in black gunk. Hopefully I don't have to dive back in here to replace it. 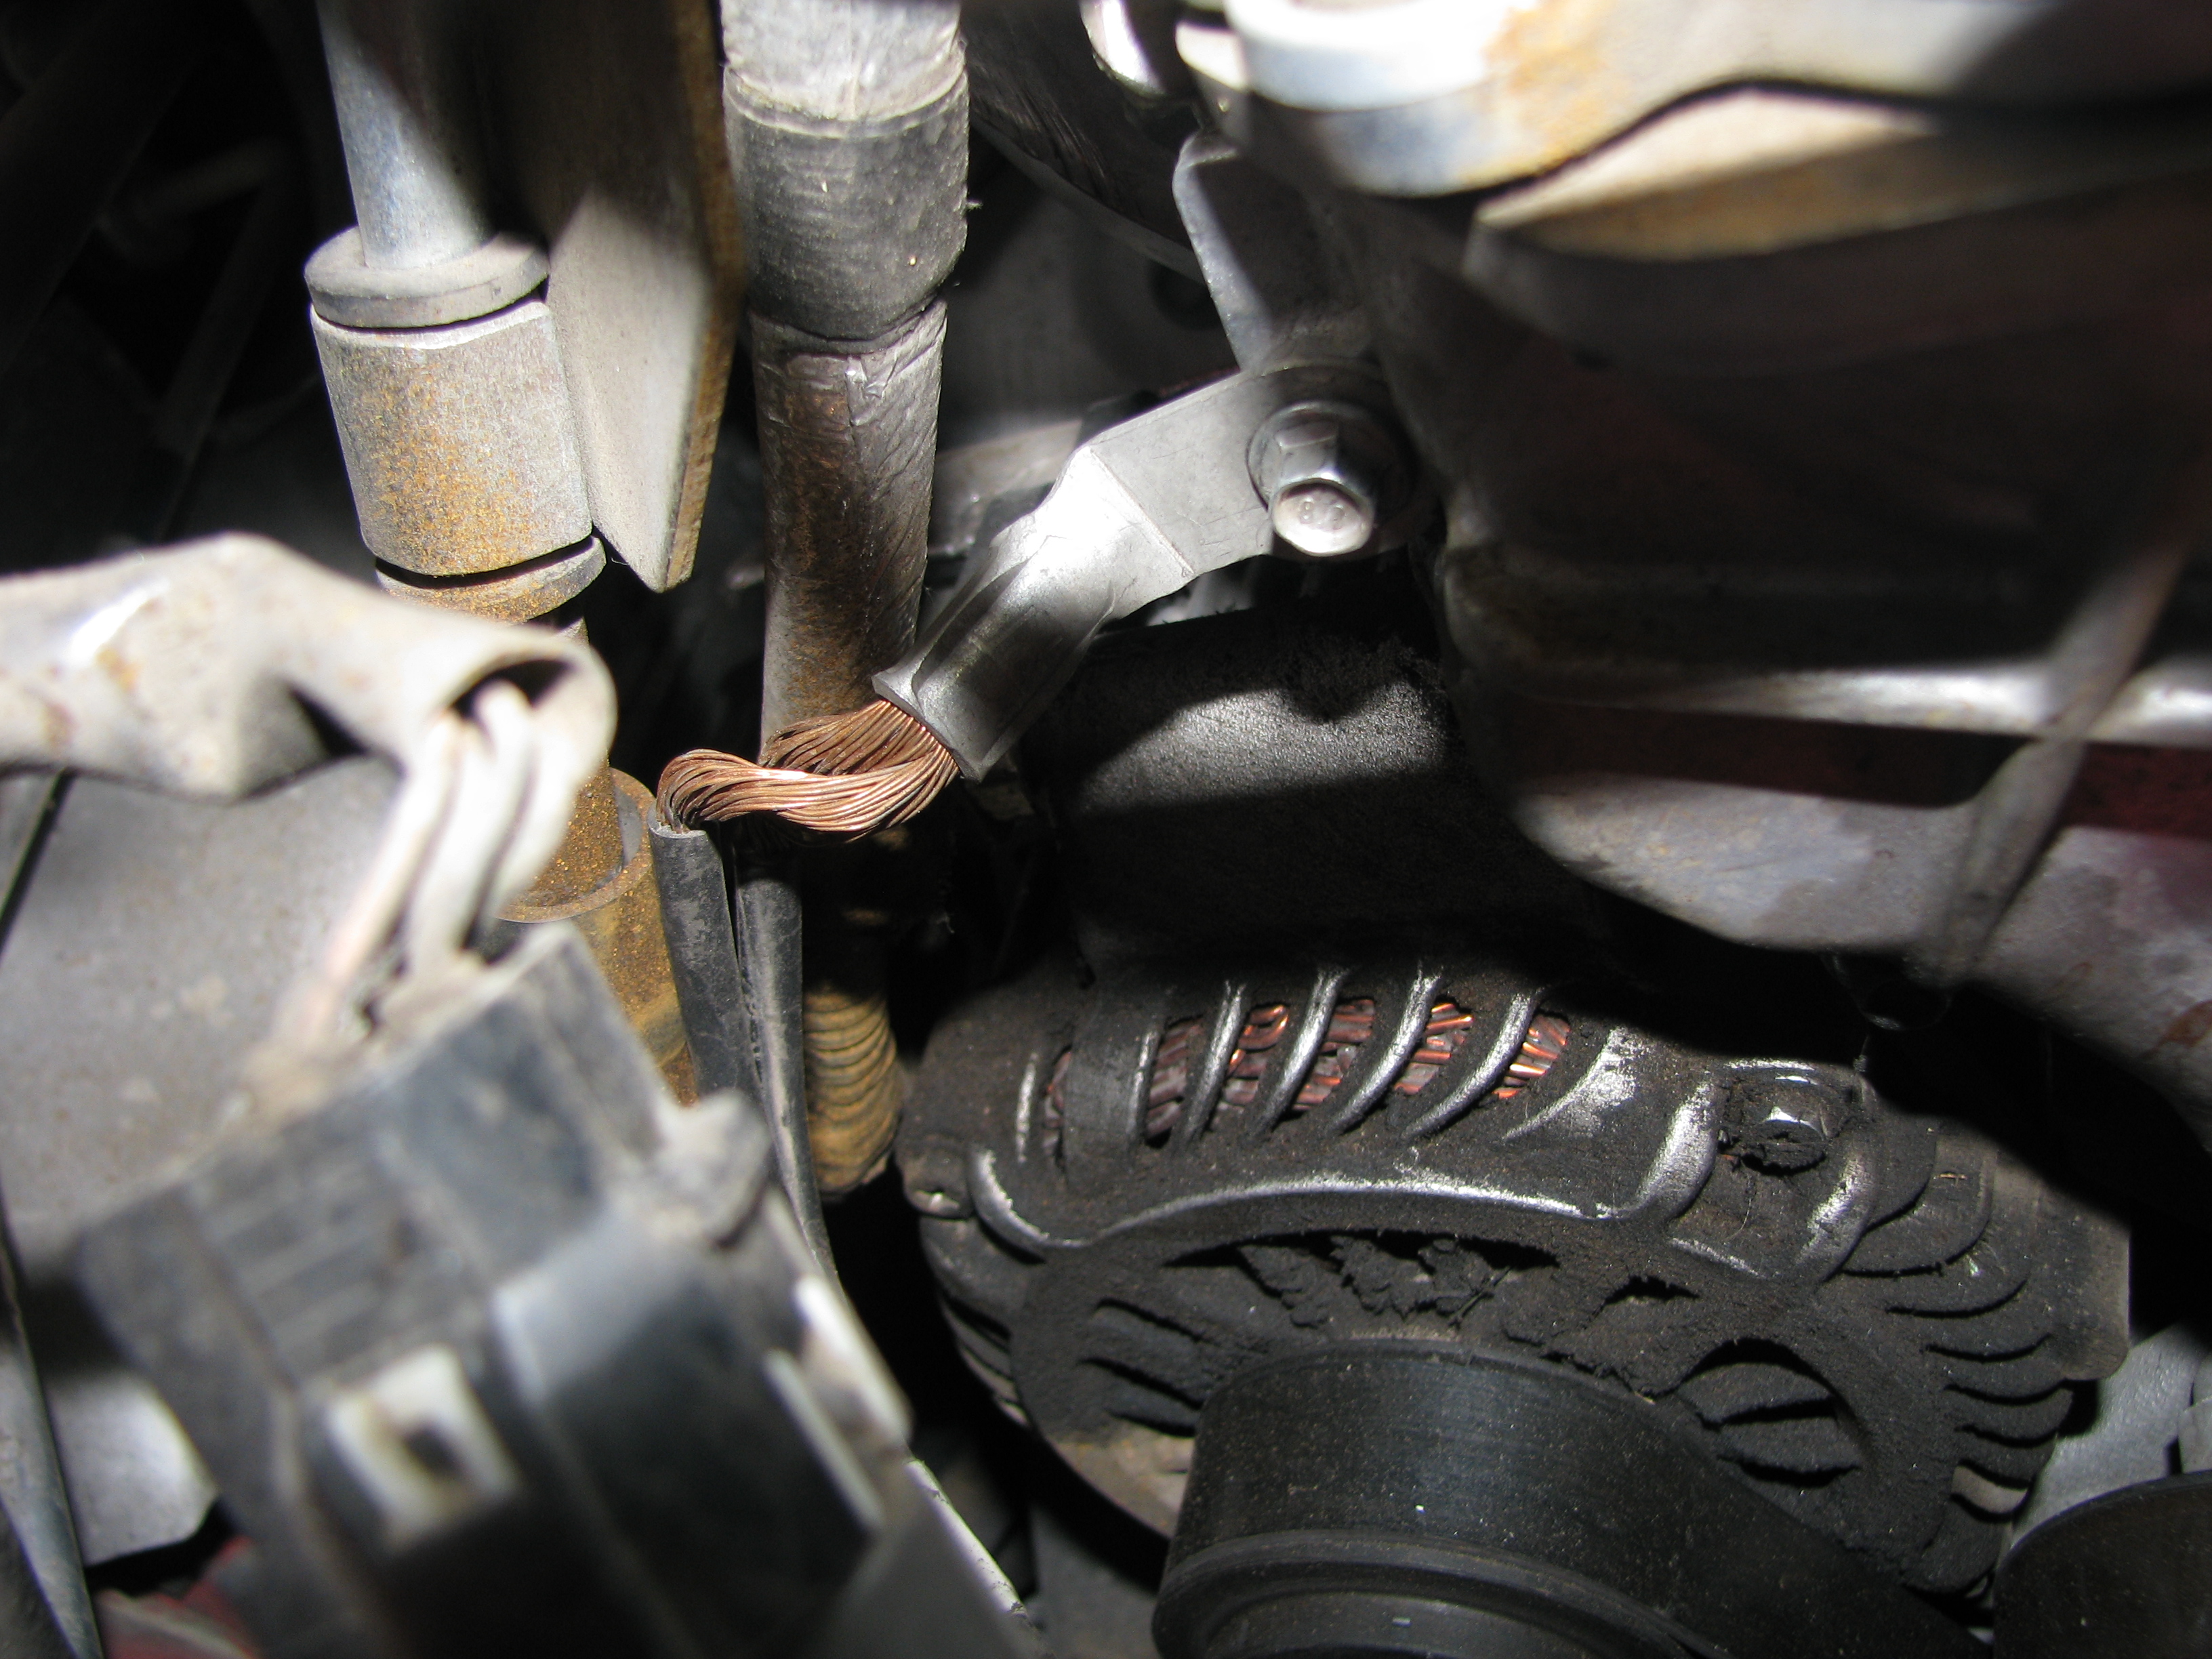 A ground cable runs from the factory mount to the subframe, but there's no provision for it on the JBR mount. Took forever to find my 8mm socket so I could put one end on the timing cover. 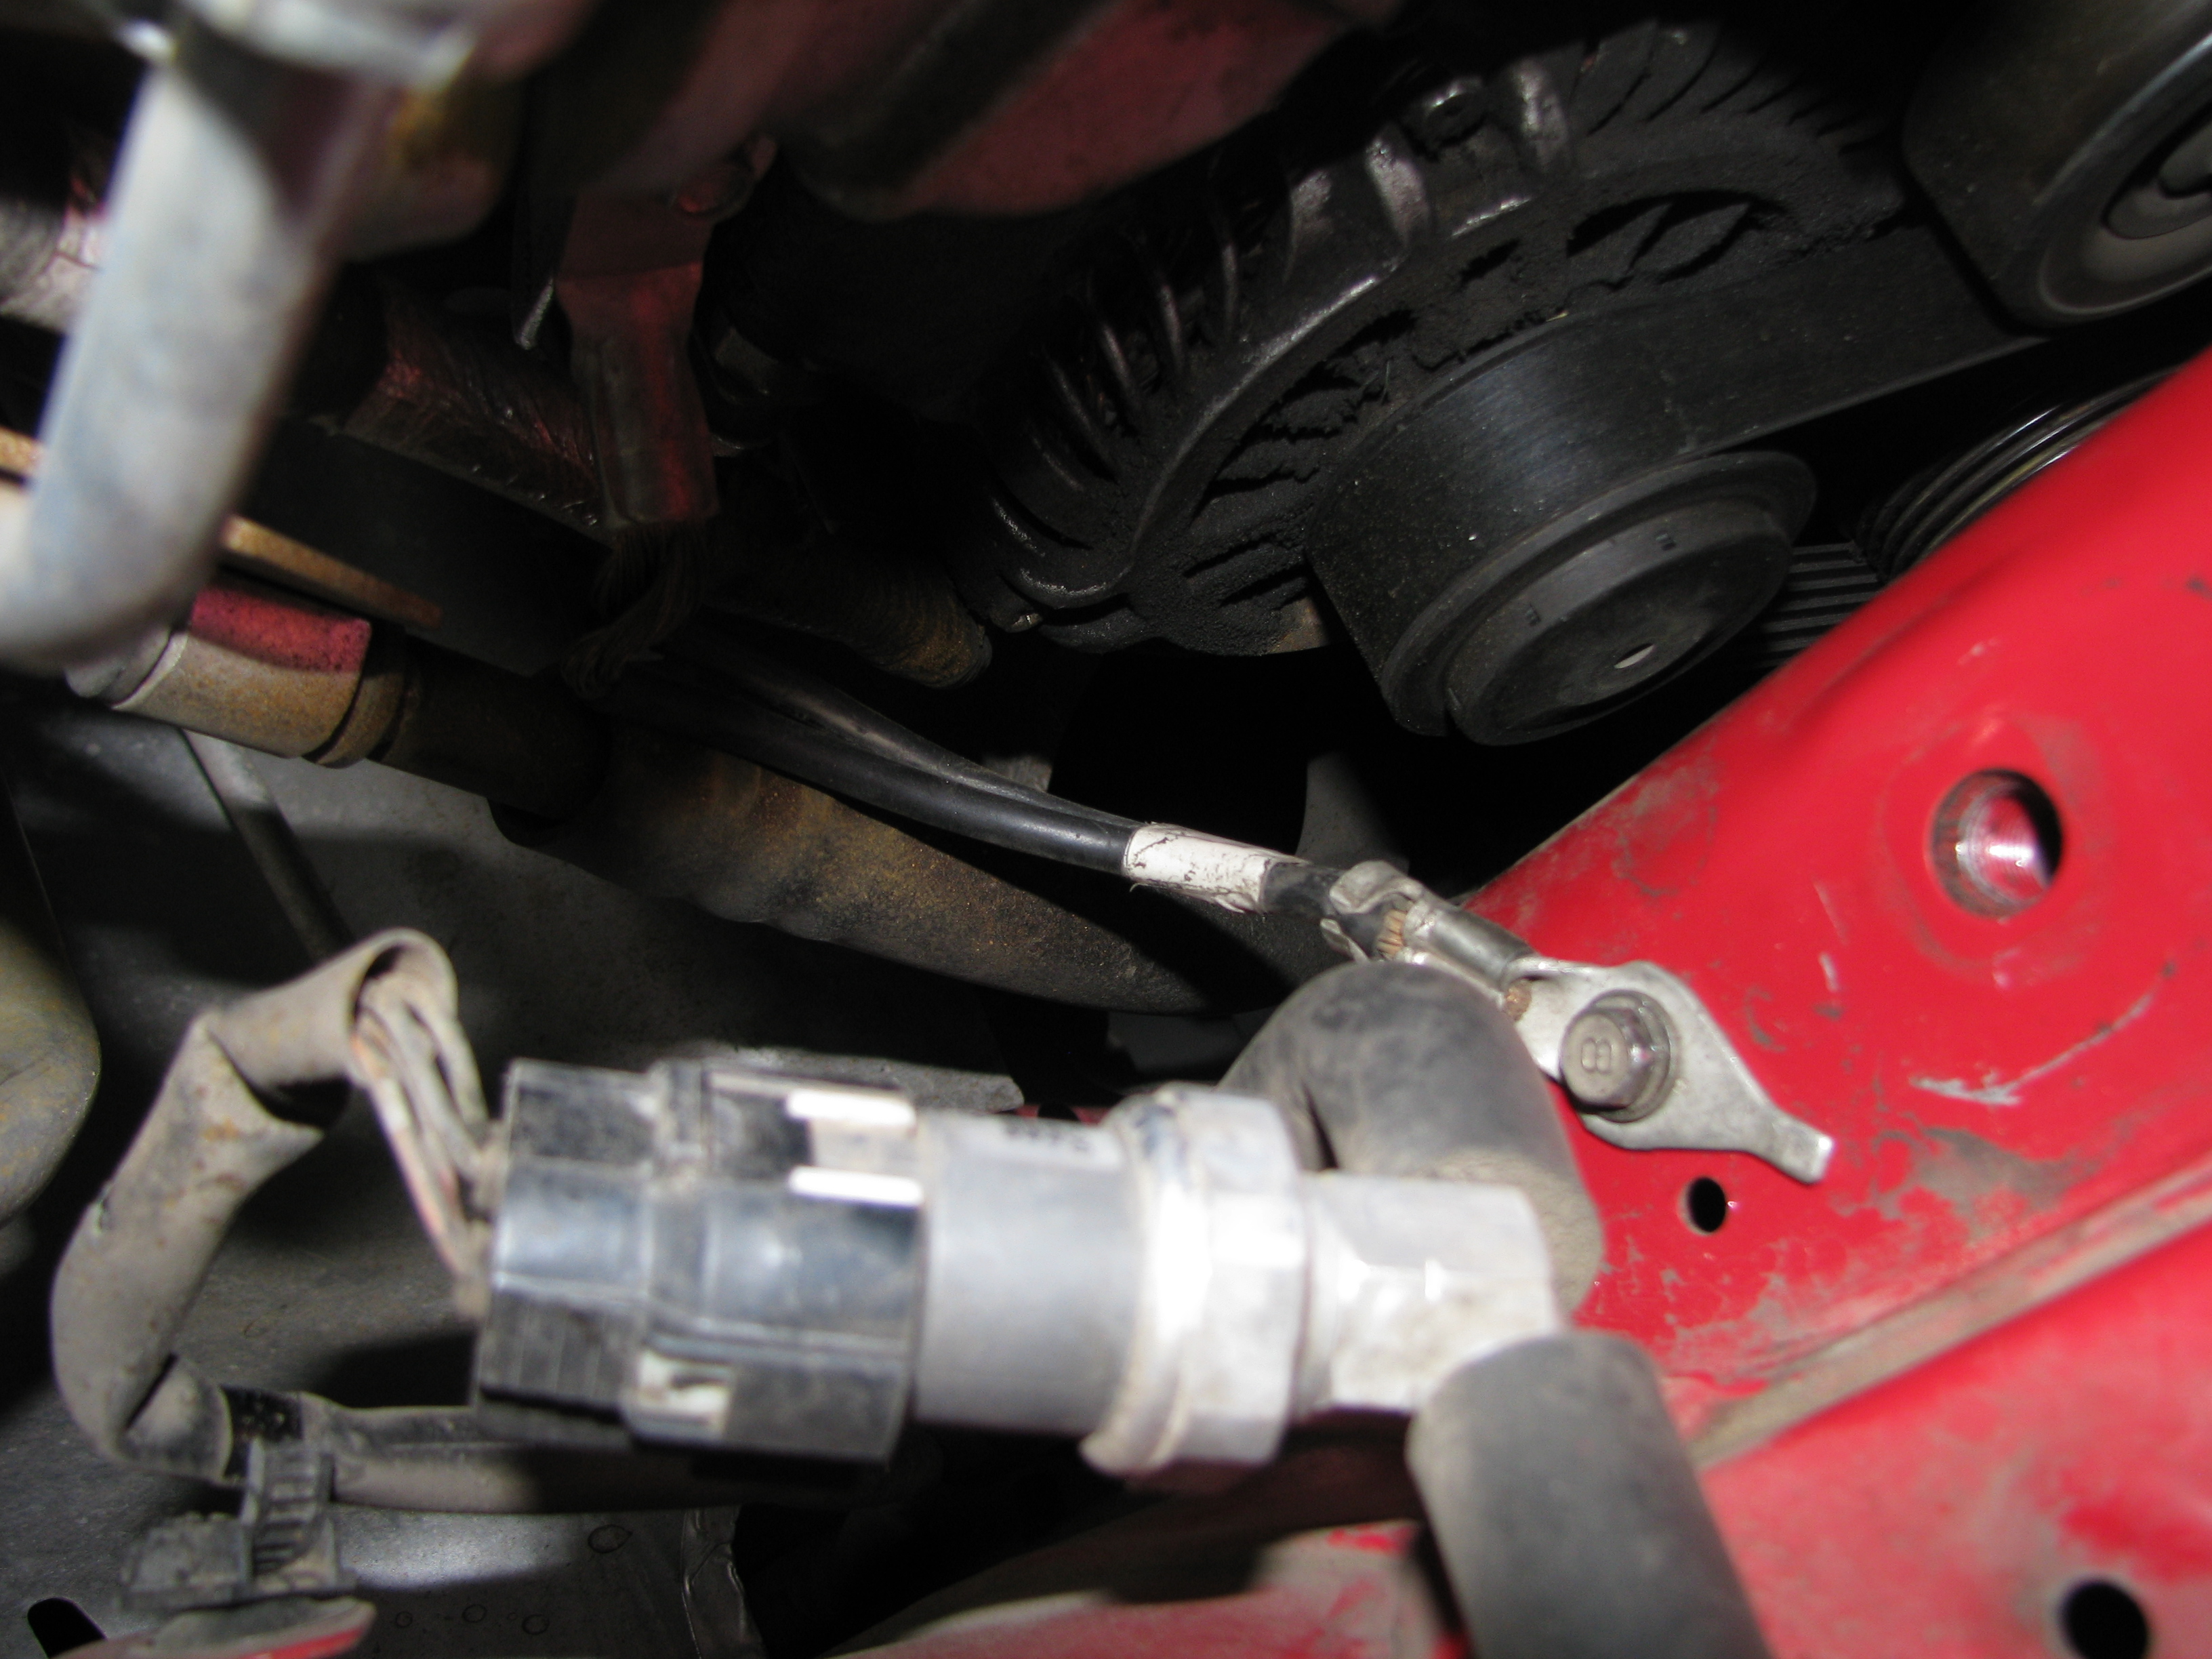 Other end to a different subframe hole, conveniently already tapped and in the perfect location. 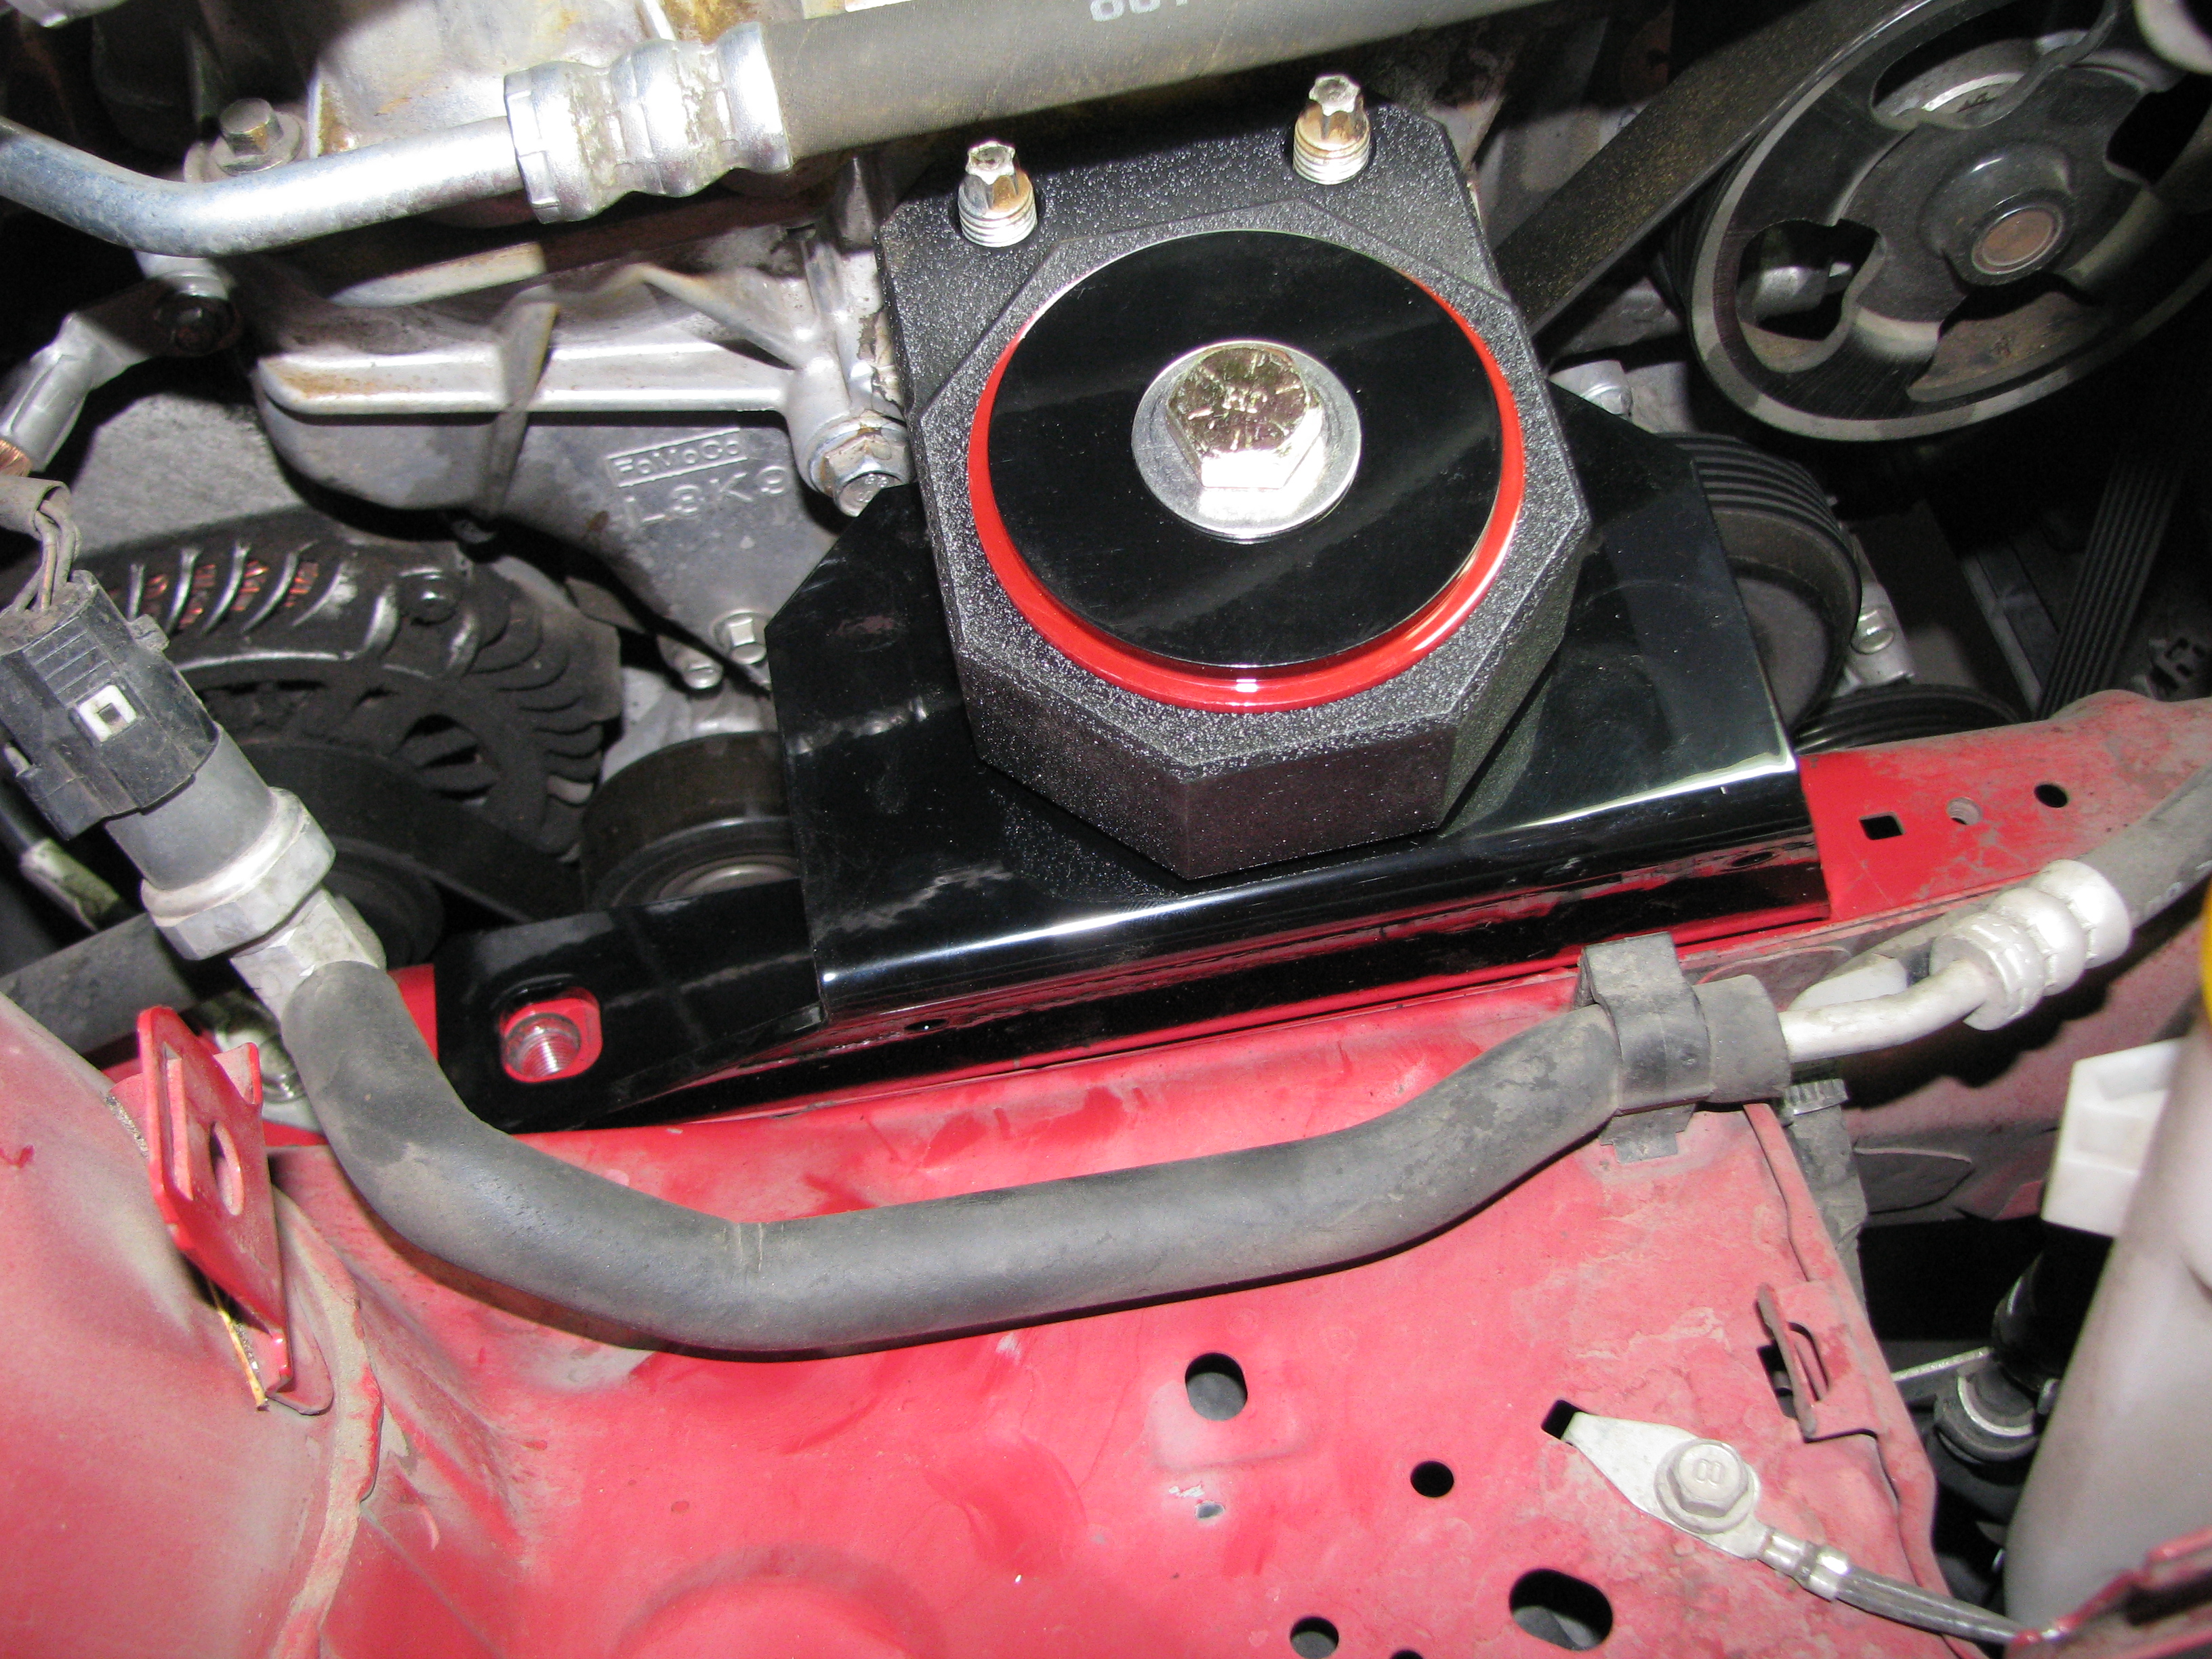 New mount just drops in at this point, though I had to jack the oil pan up a bit more here to get enough threads through the upper portion to engage the nuts. 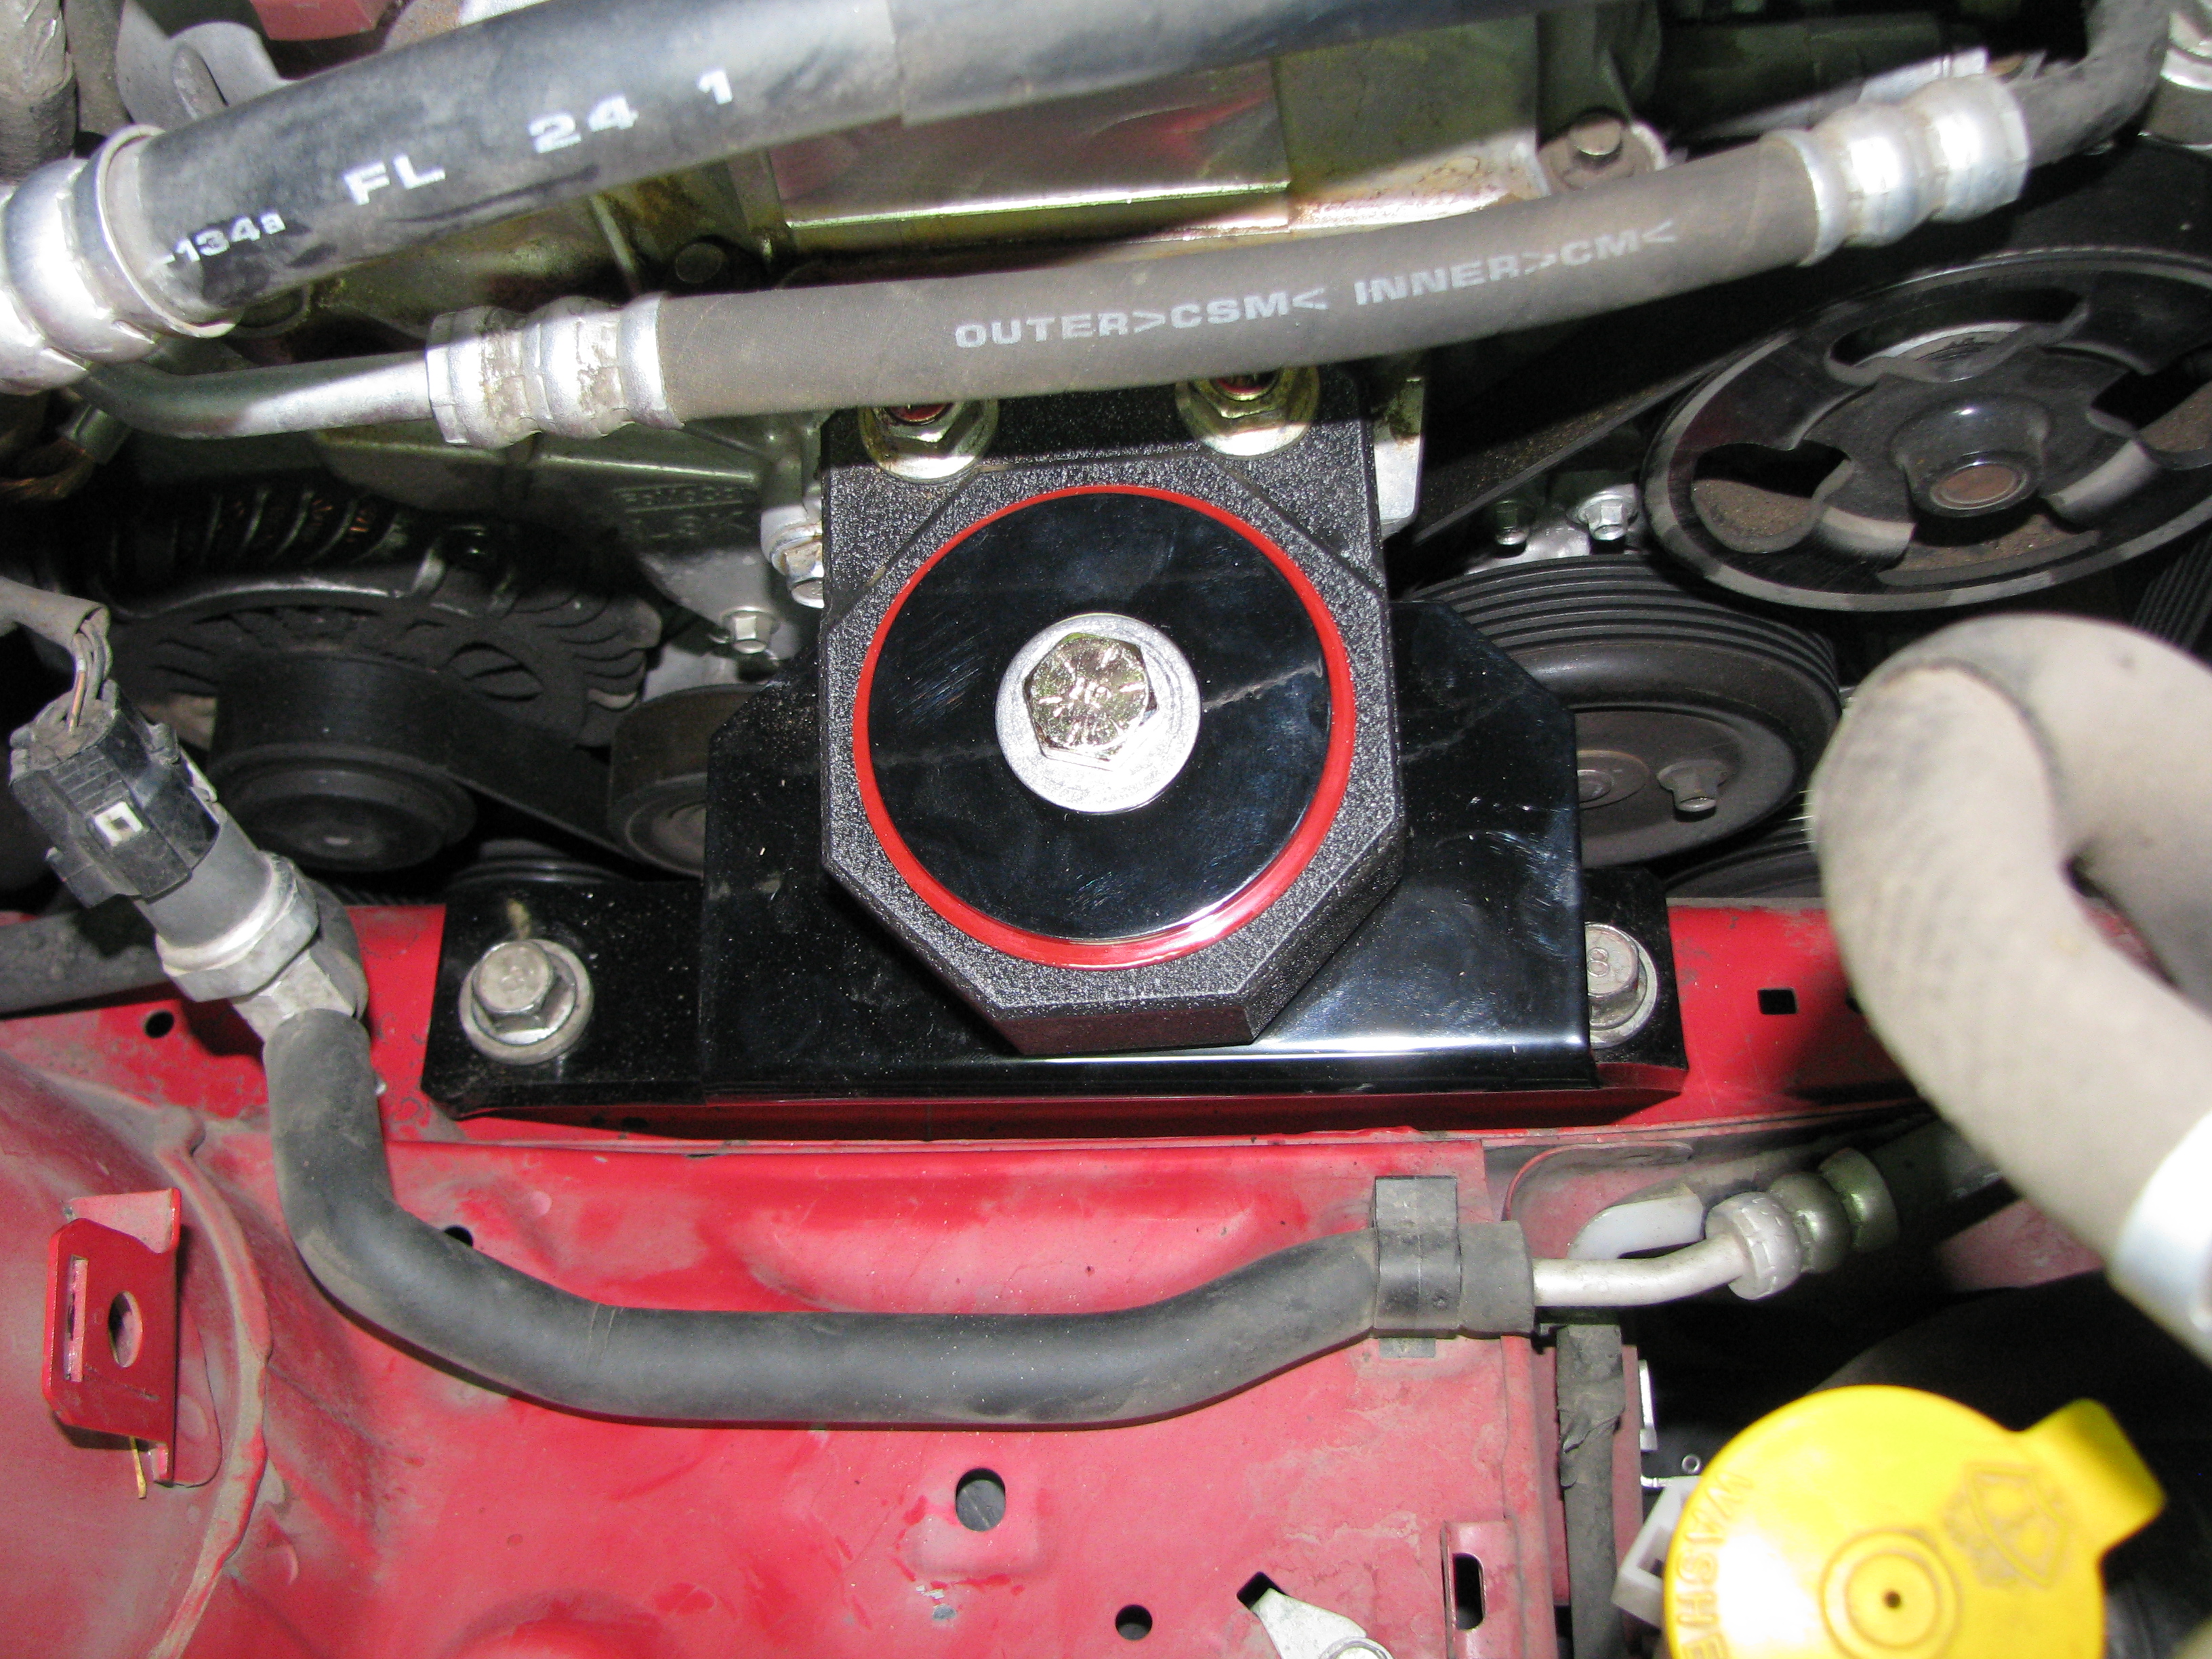 All bolted down. Took remarkably little leverage to get it all lined up. The Snapon trim tool the dealership left in the car three years ago by accident works great for holding the mount at the recommended 3/16" gap between the subframe and the mount! 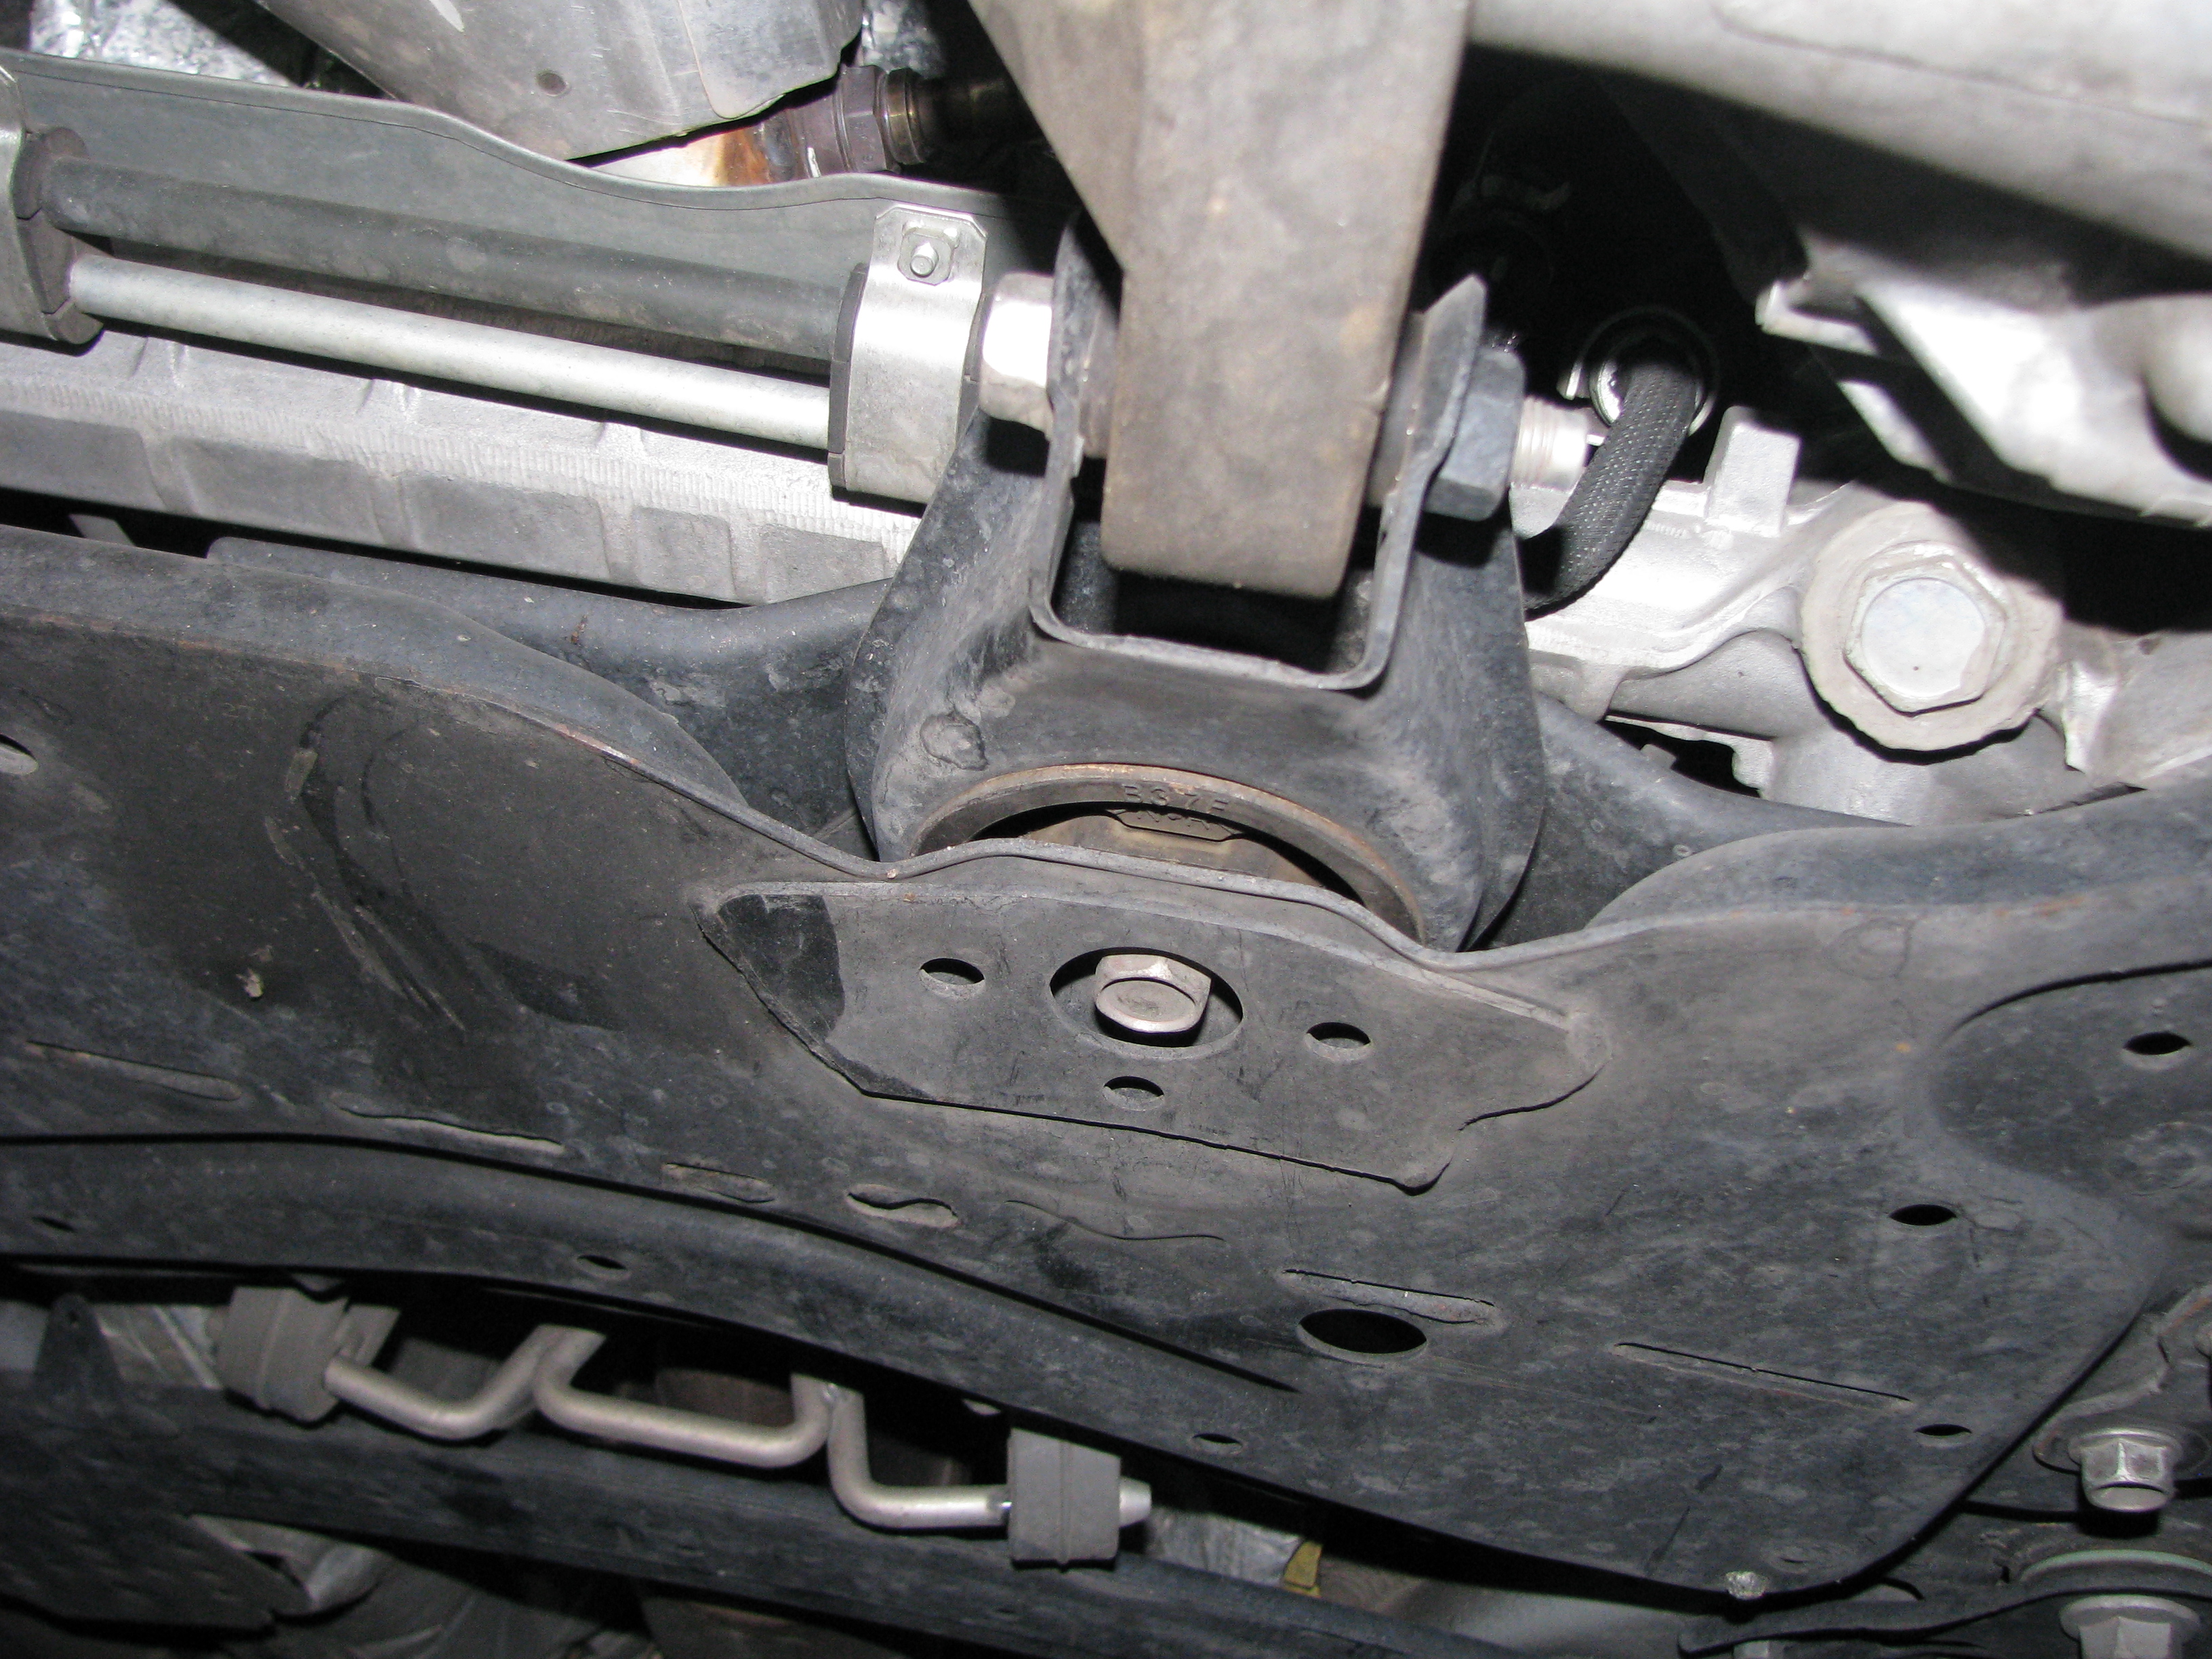 Now, the rear mount. Something many MS3 owners do proactively, even without any failure, because it's super soft. 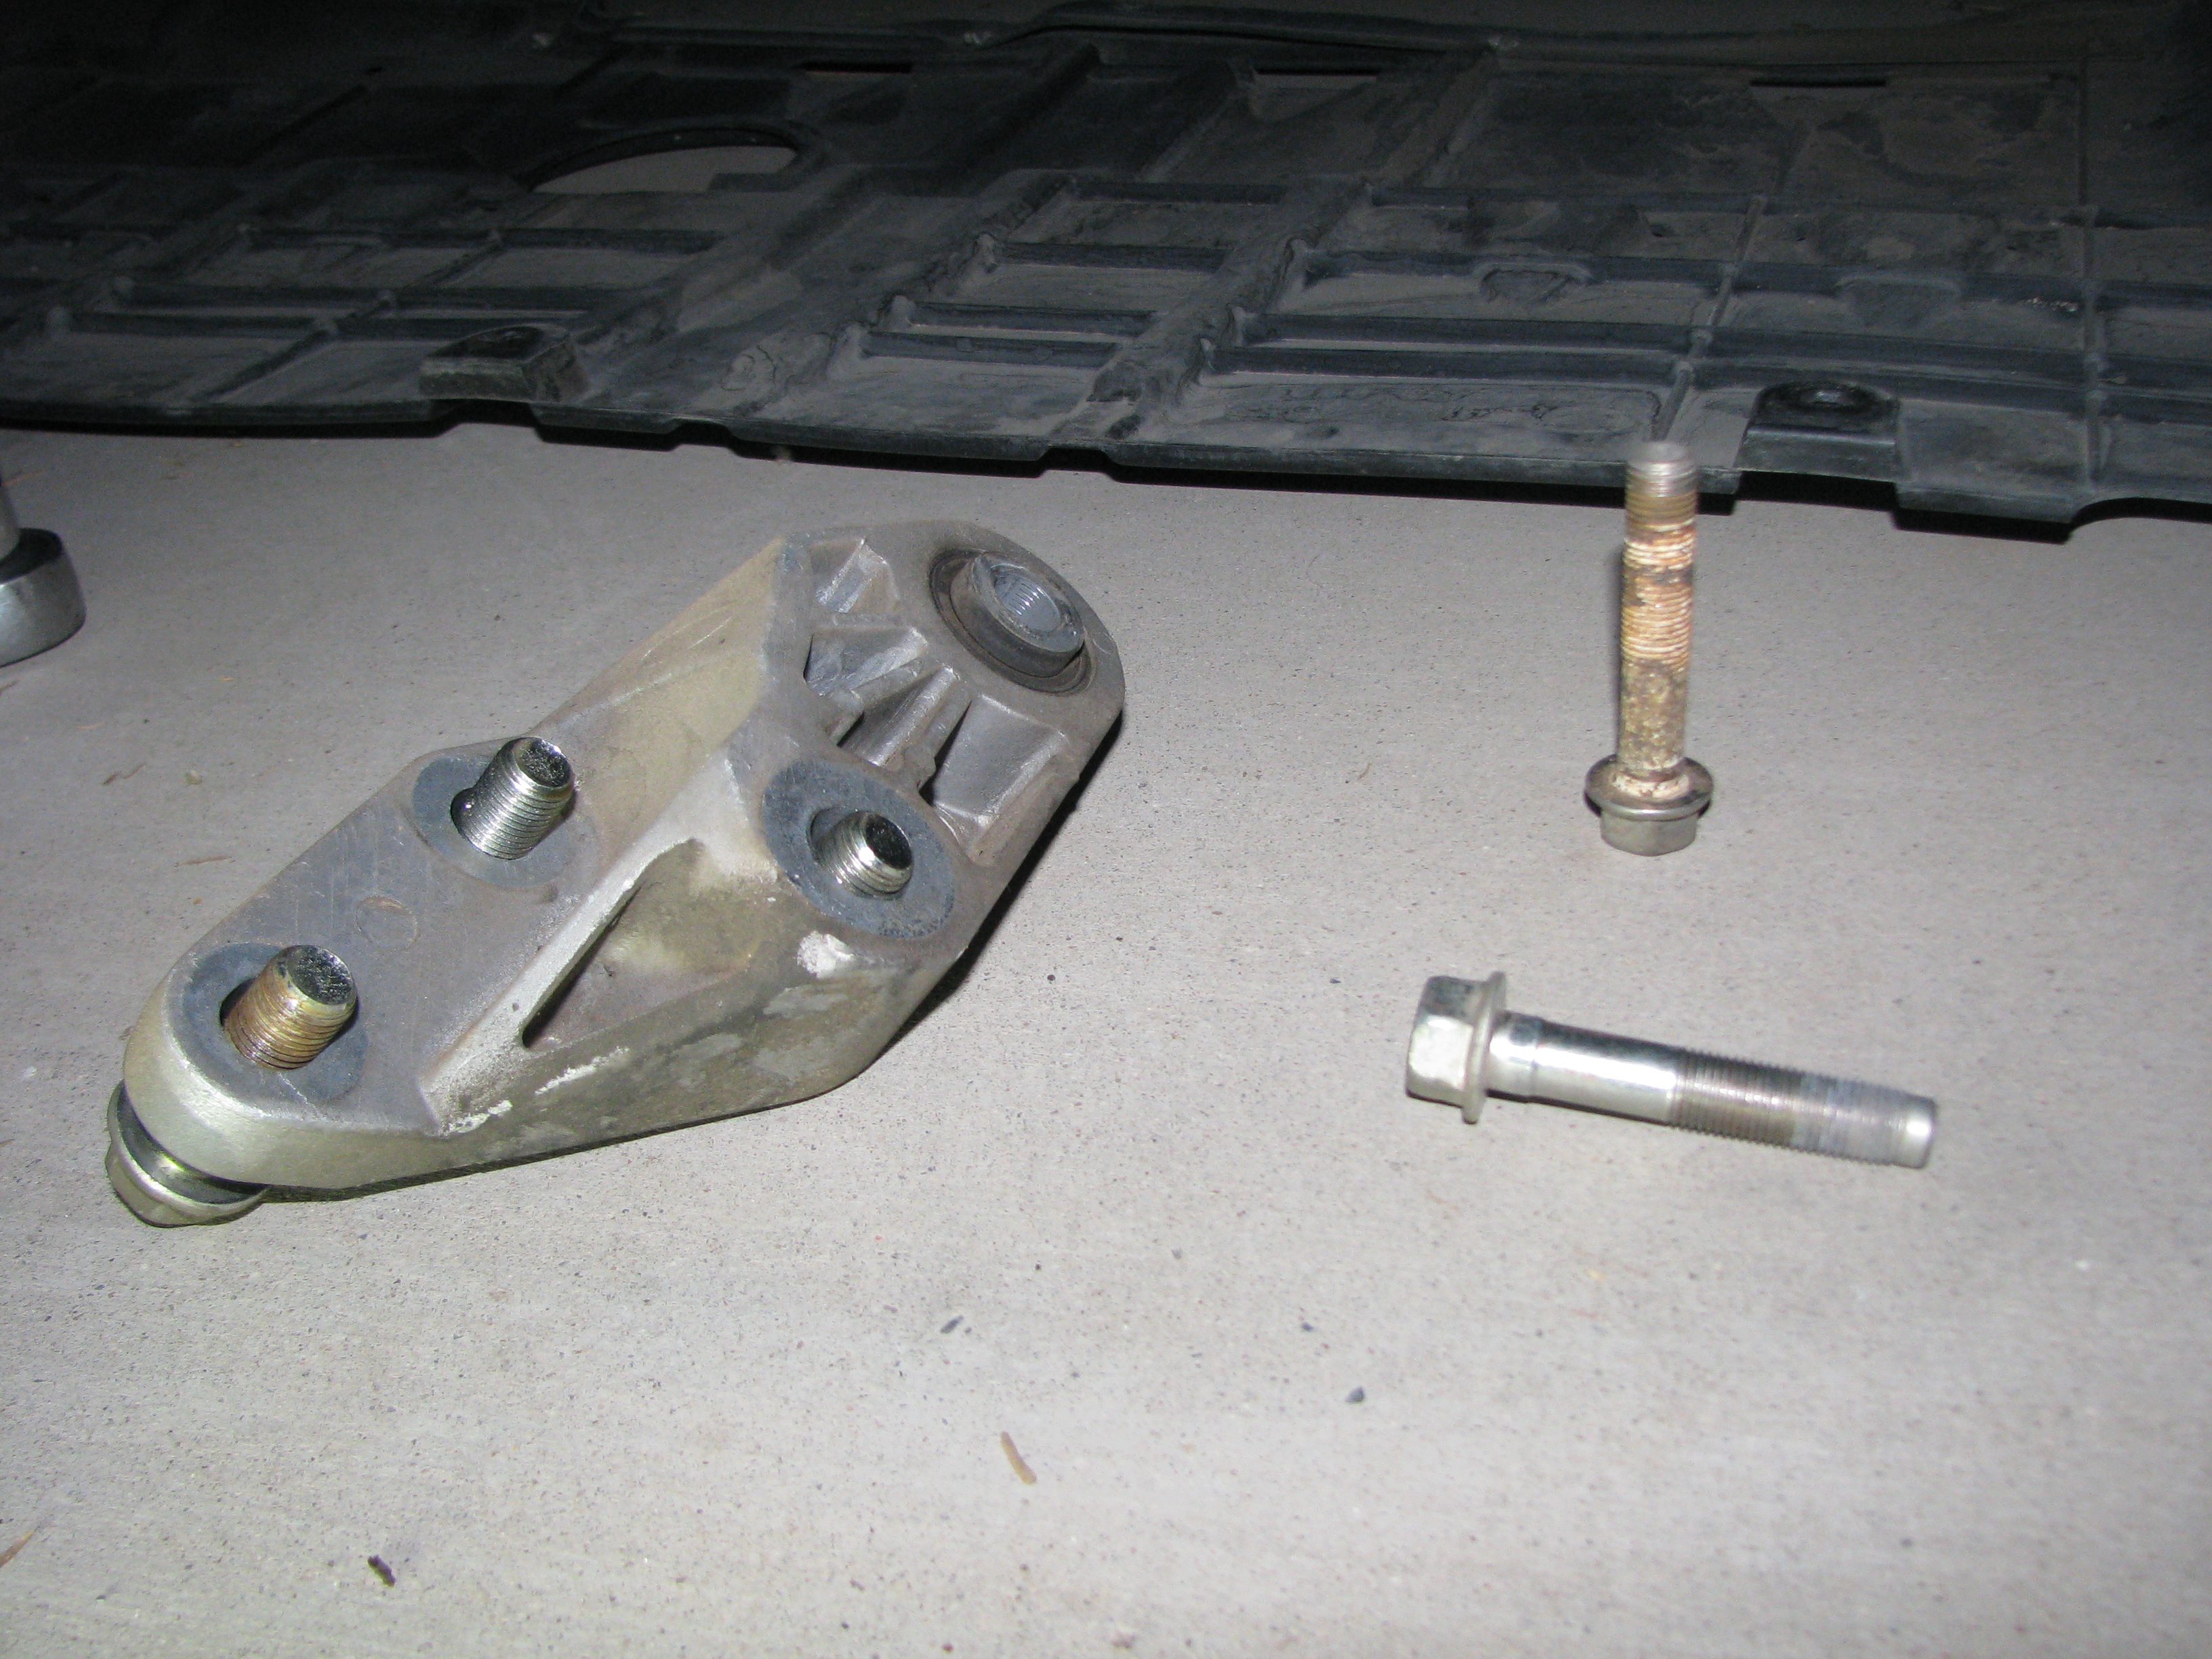 Five easily-accessed bolts and it's out. The corrosion on the one running through the bushing itself is slightly concerning; even now I'm debating figuring out the specs for that bolt and buying a replacement. 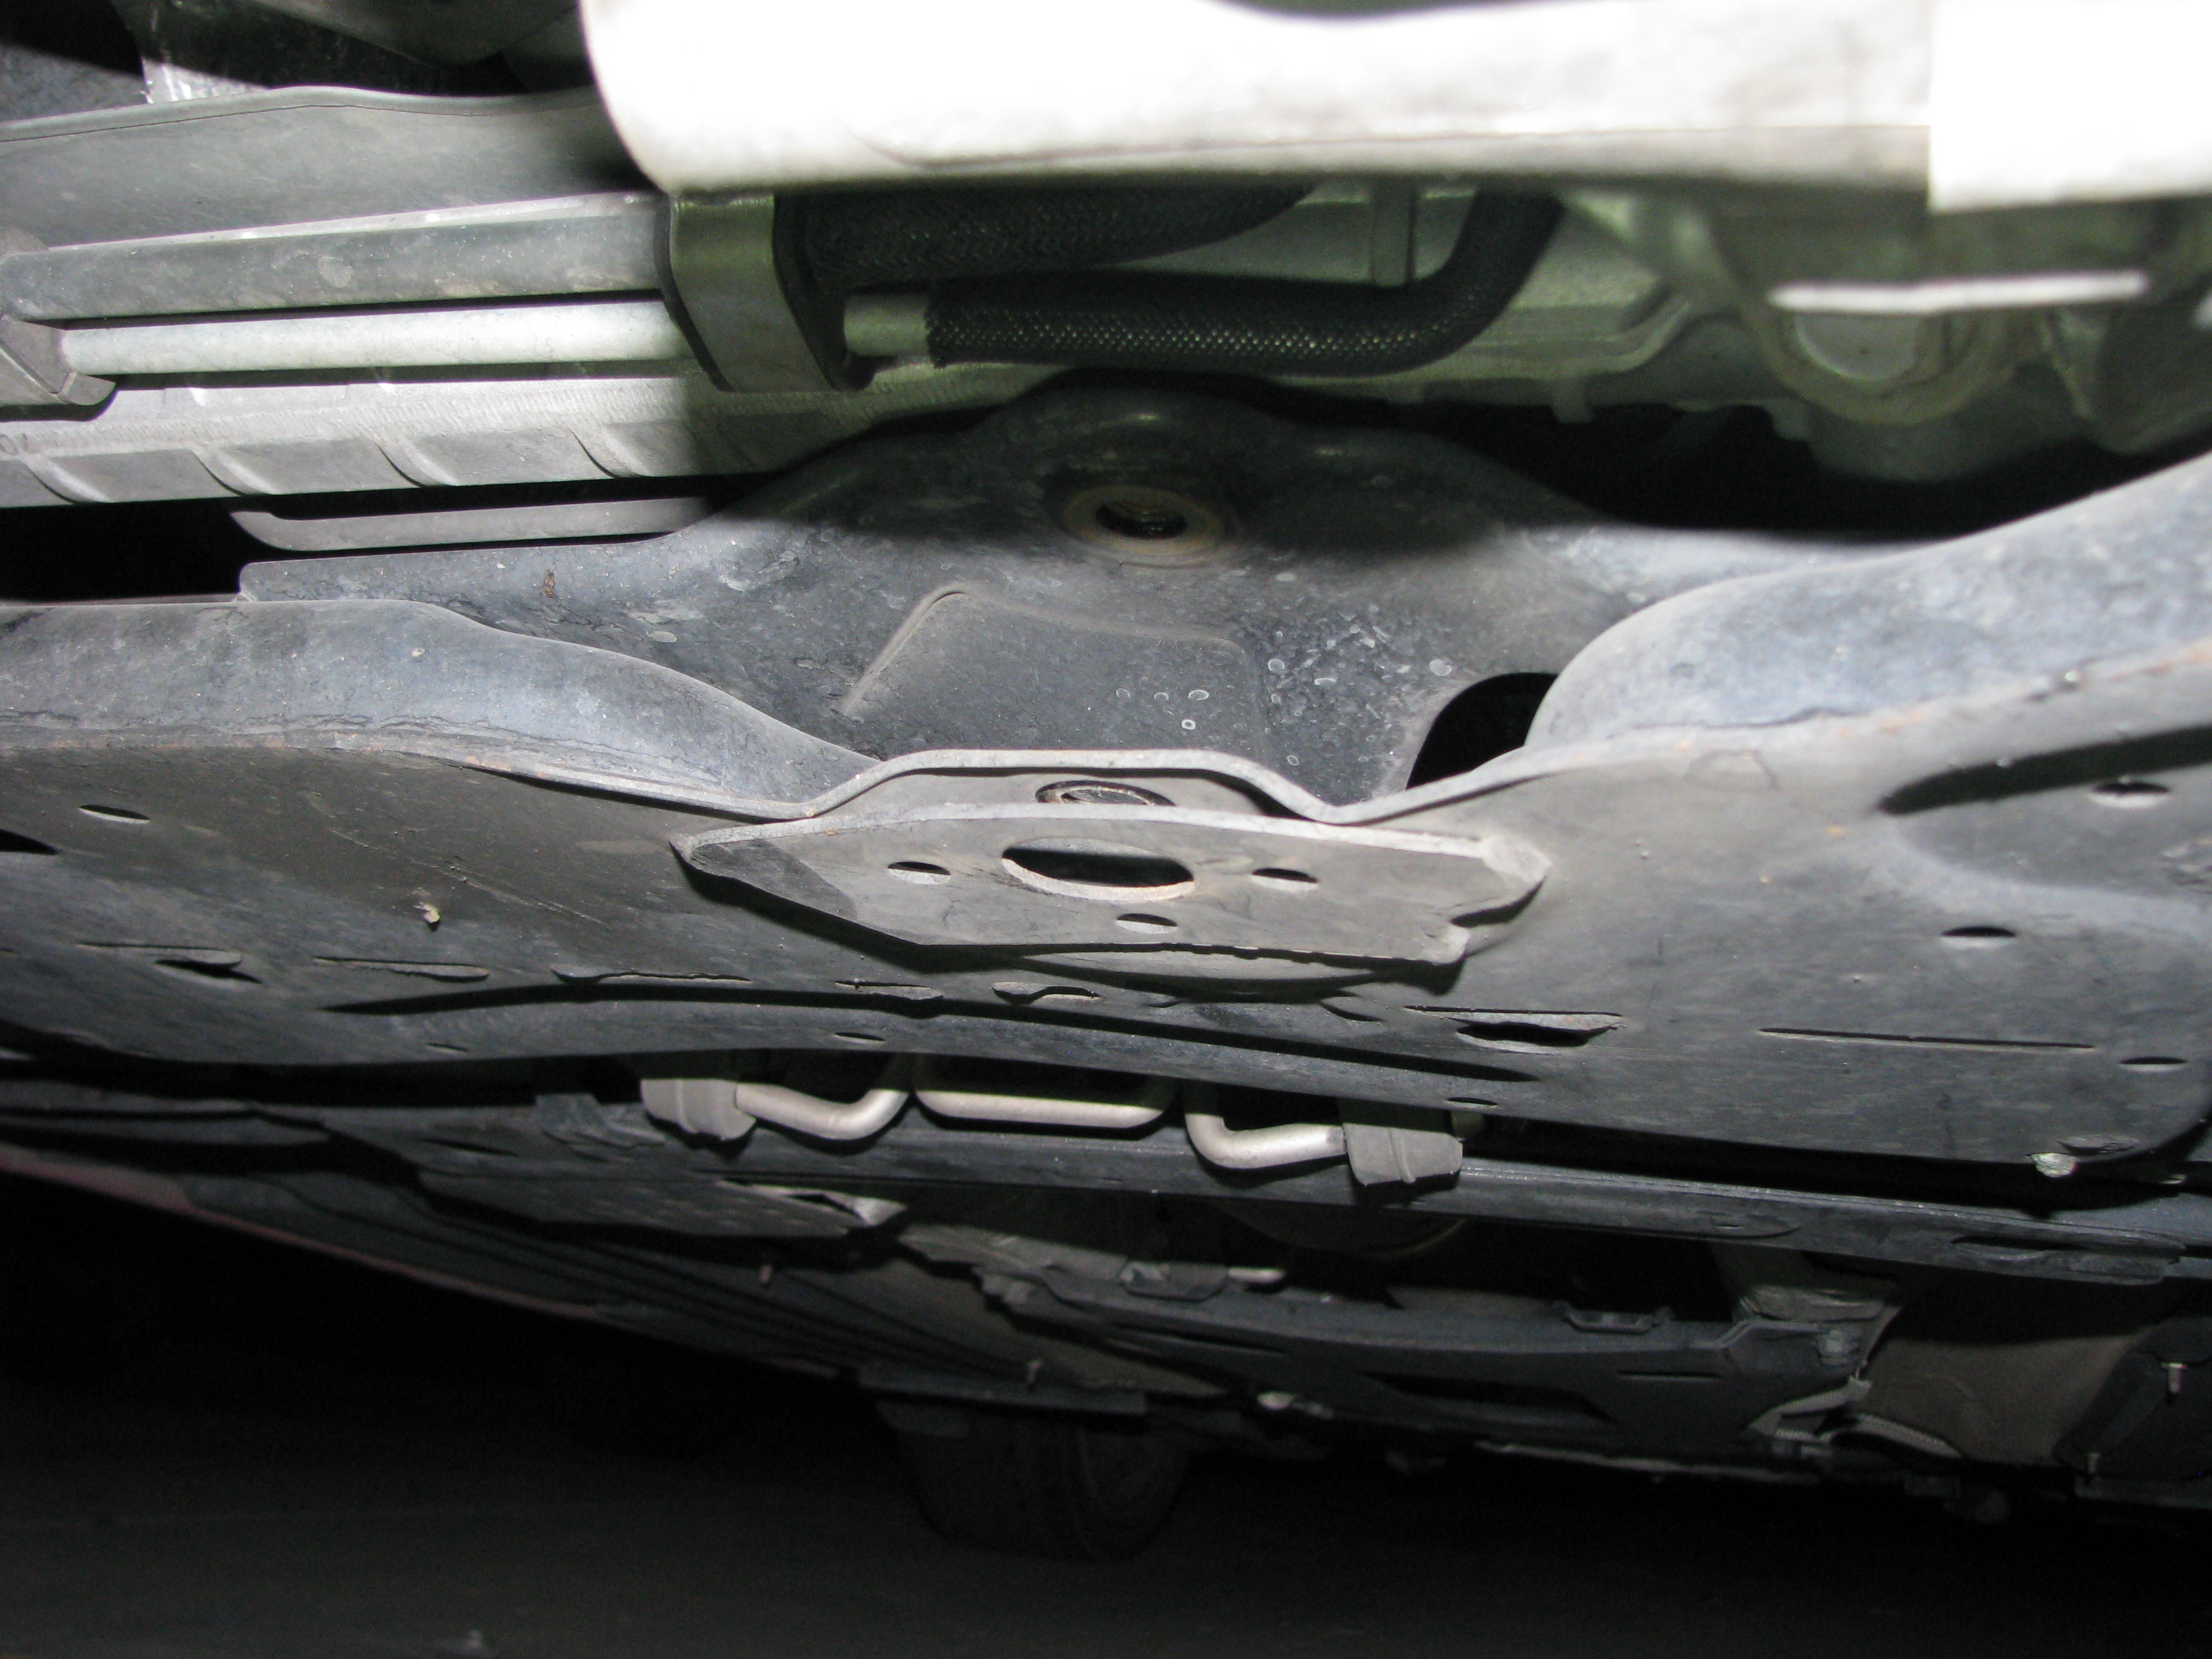 Just waiting for that giant hunk of billet aluminum and urethane to slide on in. 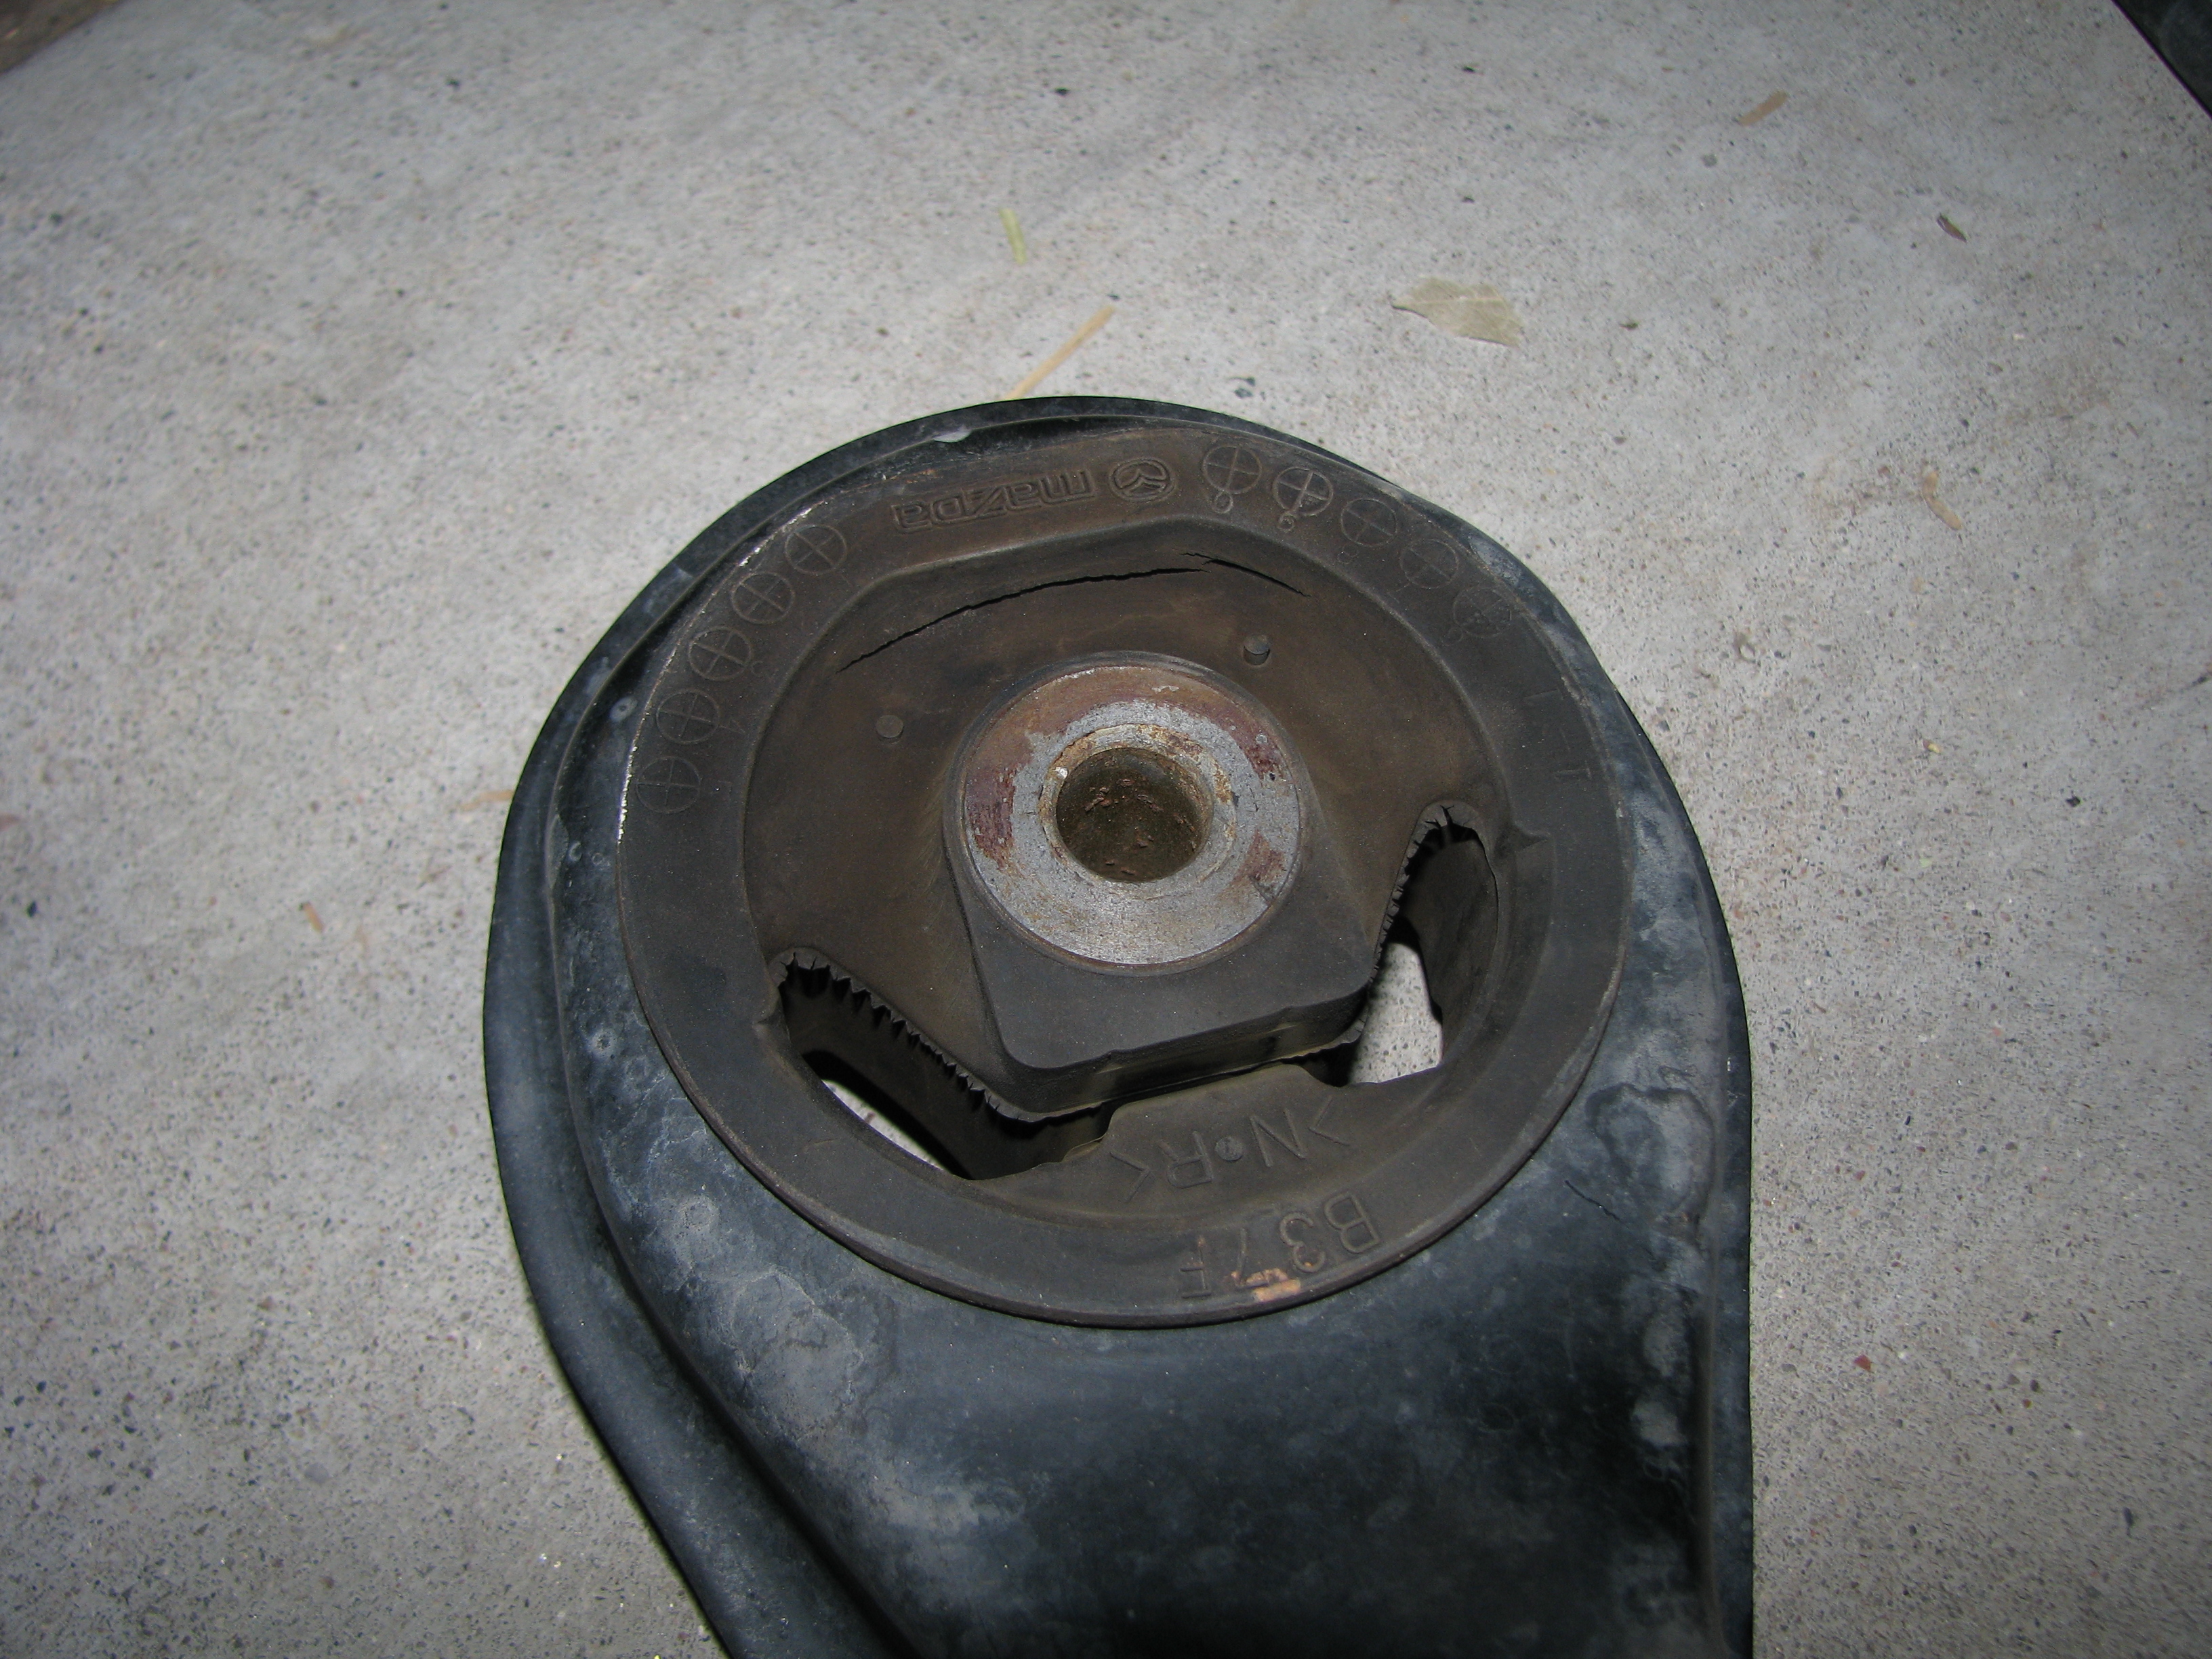 Original mount, turns out it was on its way to failure as well. 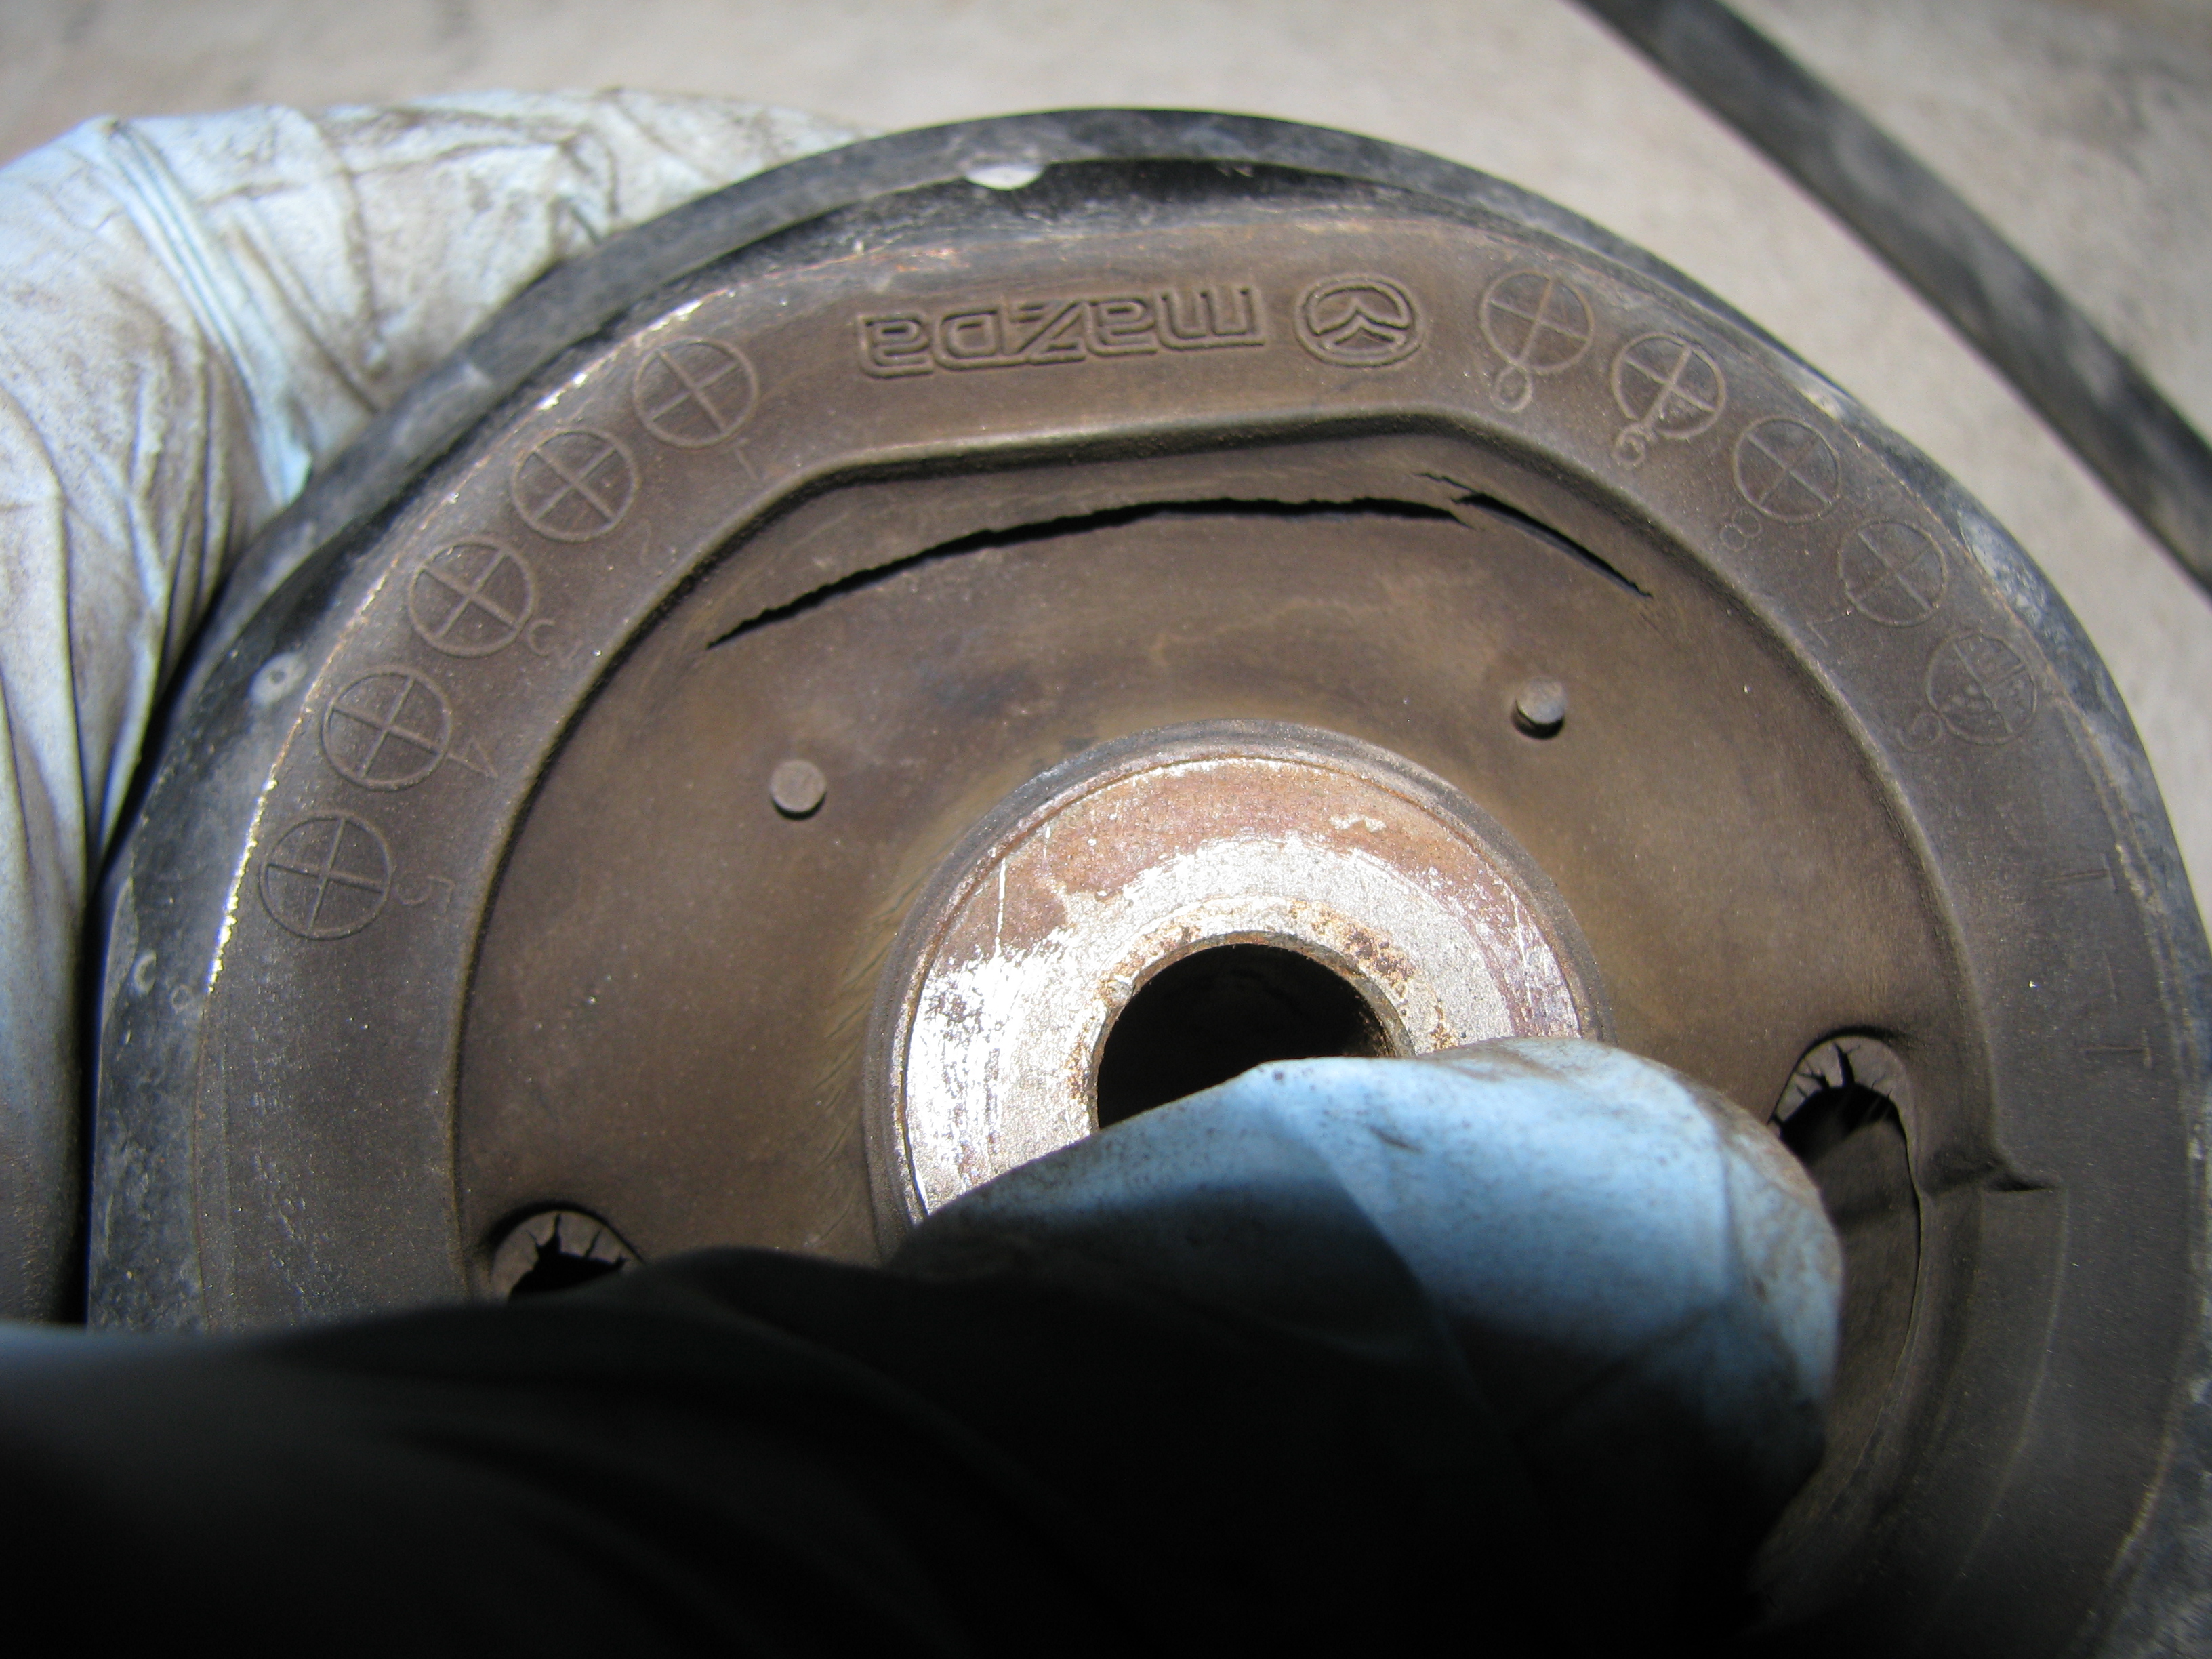 It didn't take much pressure at all on the center to make that cut open up. 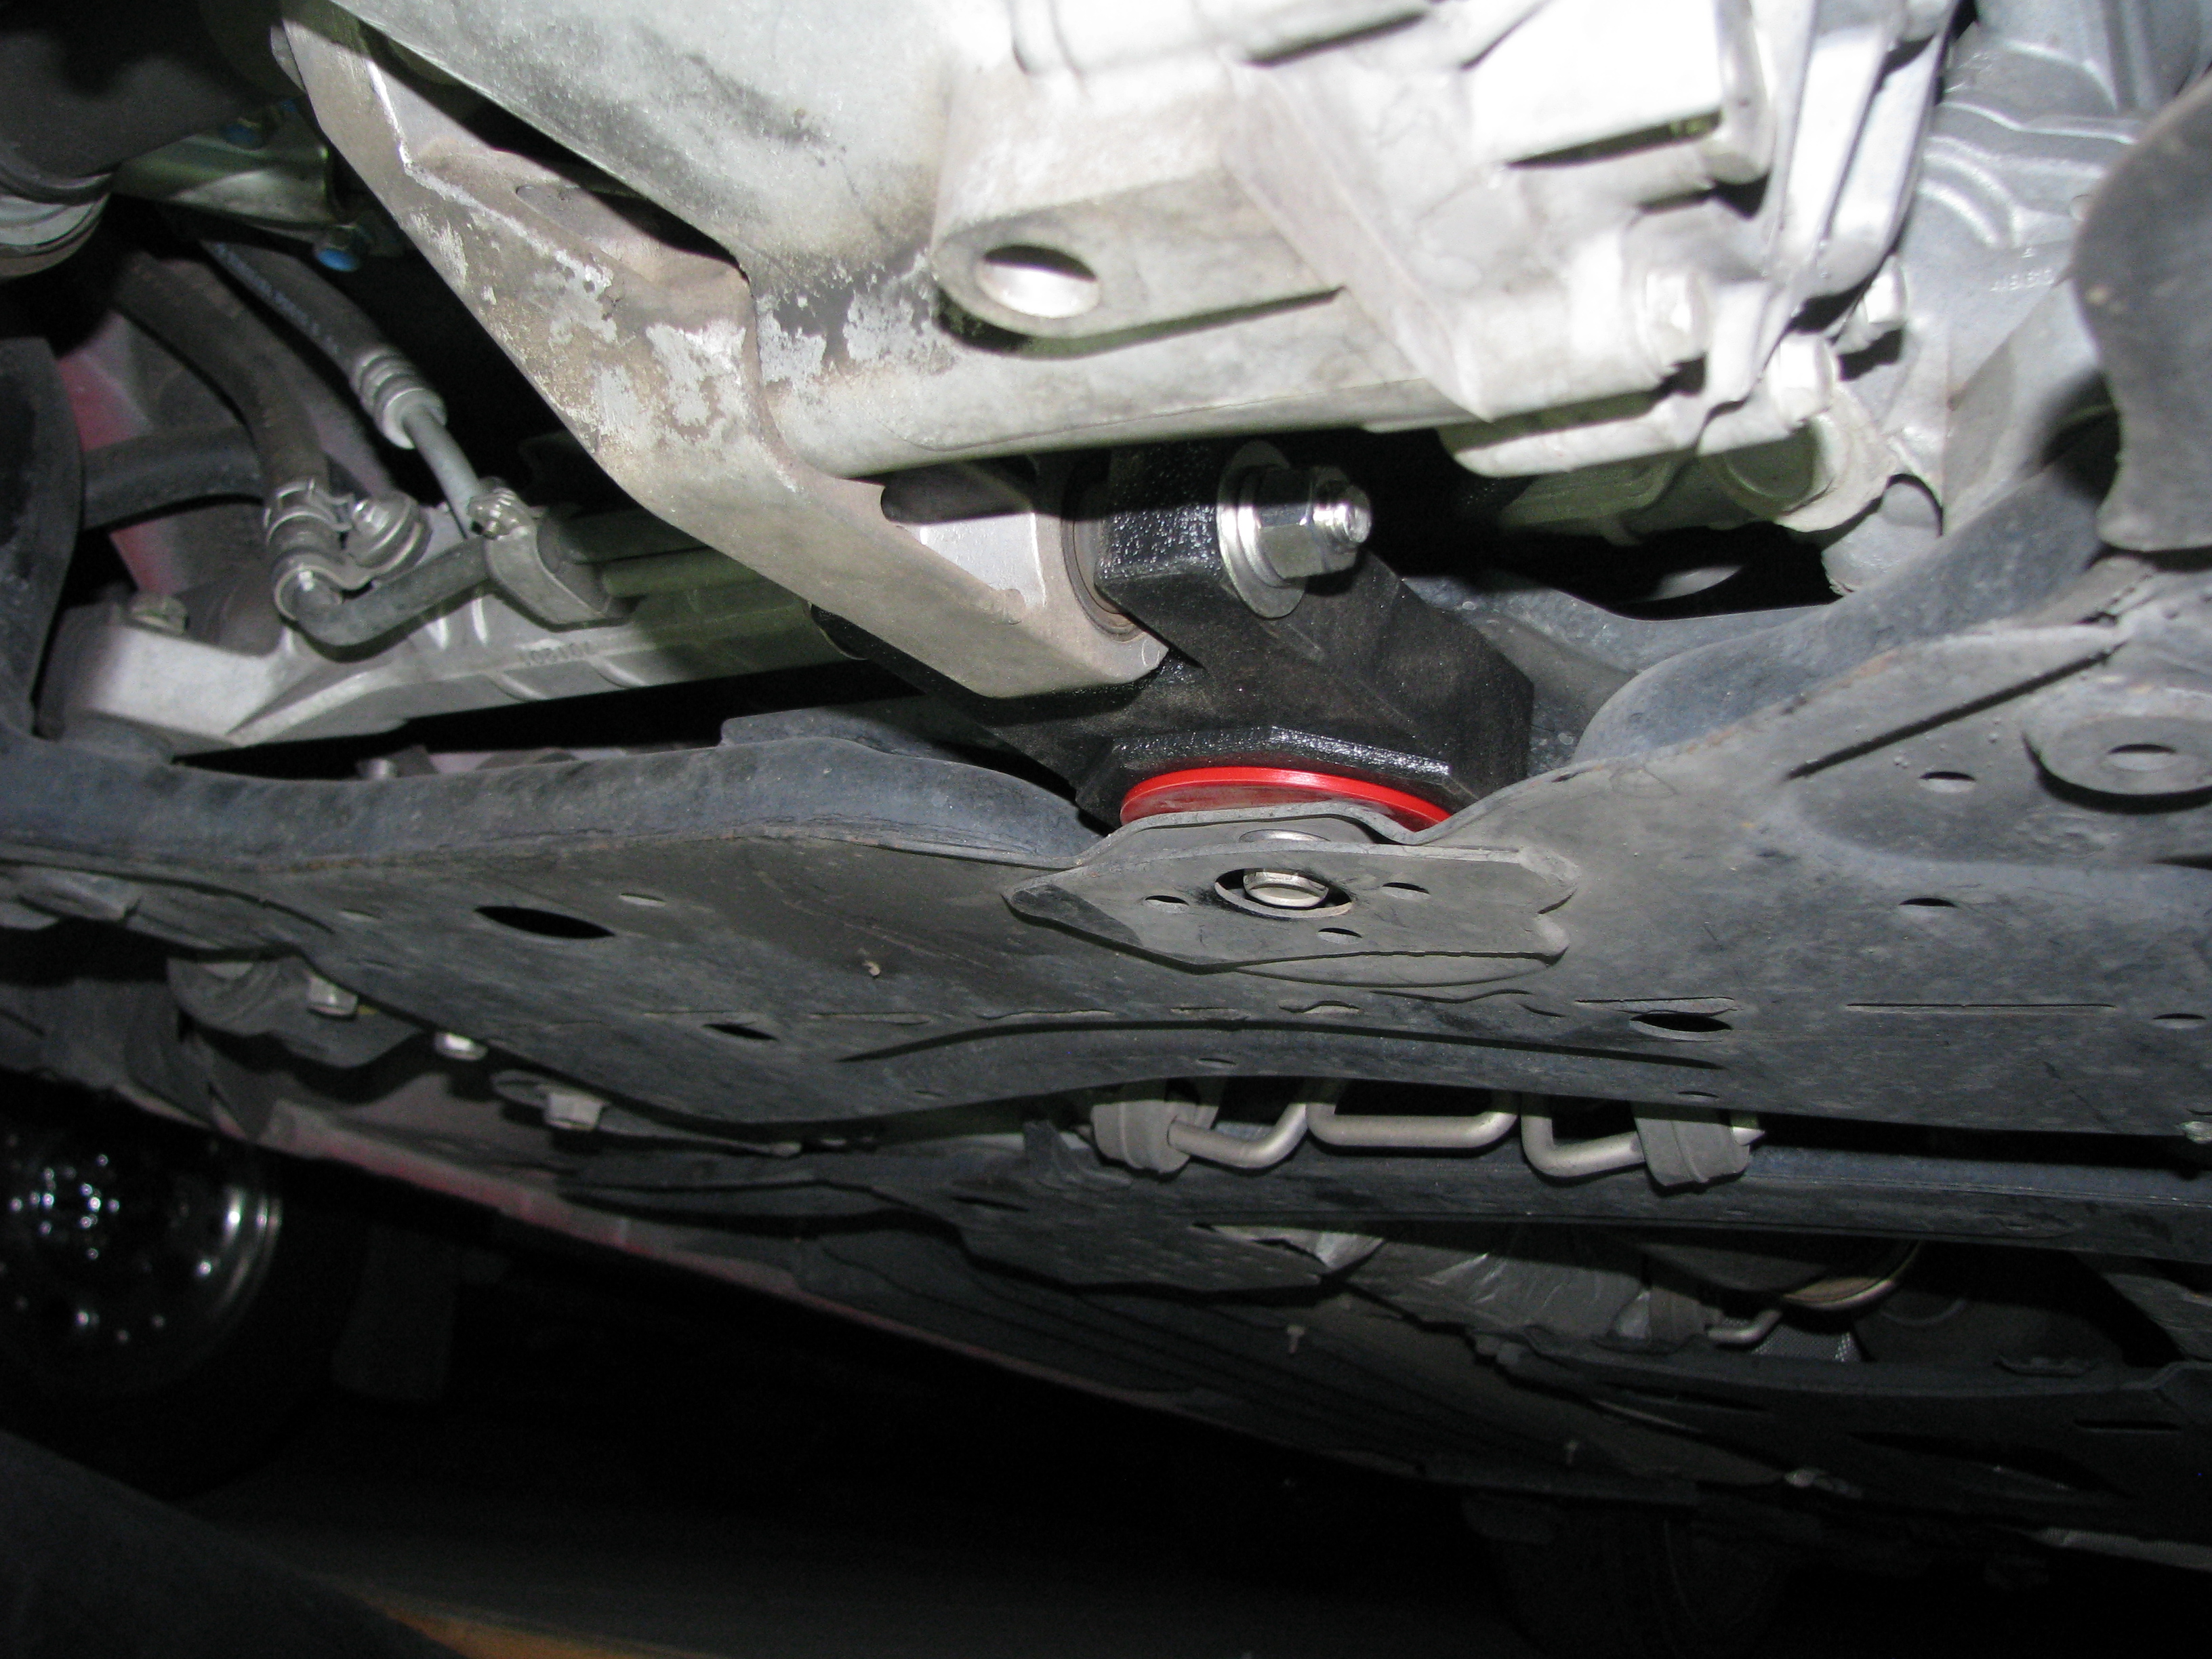 One of the few times where "installation is the reverse of removal" is actually appropriate. Trip report? Vibration increase is absolutely noticeable, even if it's not bad, but much more noticeable is the drastic increase in engine noise. It's also not bad, but it is pretty significant. These are the softest mounts that JBR makes, and some of the softest on the market (at least one of the other manufacturers won't even do less than 88 durometer for MS3s) but there is absolutely no mistaking the car for one with the factory mounts. Of course, that's also a good thing - the engine and transmission have always been flapping around up there, even when I bought the car with only 24k on the clock. I haven't had a chance to properly flog it yet but I absolutely believe everyone who says it feels like they're able to actually make use of the power the car has since the drivetrain is no longer trying to rip itself free. So they're staying.
|
|
#
¿
Nov 4, 2012 07:13
|
|
|
some texas redneck posted:After seeing the pics of the alternator location, suddenly my silver turd doesn't seem as horrible.. looks like Mazda dropped it about where my power steering pump is, with a bit more room. I will say, if my PS pump ever shits itself, it's getting abandoned and I'll be going with manual steering. gently caress pulling the intake manifold to swap a PS pump.. or PCV valve.. From what I've seen, replacing the alt isn't actually too bad - lots of room behind it there, and with the coolant / PS reservoirs out of the way and maybe the engine mount too, you have a pretty wide area to reach in from. I am actually going to have to pull the intake manifold soon and do a valve cleaning since as a DI engine, there's zero fuel coming across the back of the intake valves, so I'm quite certain they look like 116k miles of hell right now. Seat Safety Switch posted:In my experience the bushings will 'calm down' after a few weeks of driving. They just need to be smacked around a bit, then you're left with a mild increase in nvh overall. Well today, either due to already being used to it or even just a little smacking / heat cycling, it already feels a bit better.
|
|
#
¿
Nov 4, 2012 19:18
|
|
|
I stuck with the factory ECM in mine (2000 Camaro) along with sending the factory harness to Speartech (he was the only game in town at the time, I'm sure others do the same thing now) to have it modified. Came back set up so that it basically only needed me to connect the gauges, +12V constant, and +12V keyed. Add a tune to eliminate things that were removed (EGR) and it's done. Really easy to work with, honestly.
|
|
#
¿
Nov 5, 2012 01:33
|
|
|
Snowdens Secret posted:How are you planning on doing this? Walnut shells? Yep, walnut shells and maybe B12 solvent.
|
|
#
¿
Nov 5, 2012 15:58
|
|
|
Seat Safety Switch posted:In my experience the bushings will 'calm down' after a few weeks of driving. They just need to be smacked around a bit, then you're left with a mild increase in nvh overall. Yeah, they really have actually calmed down more than I expected them to. It's so nice to romp on it and not have to deal with the engine/transmission swaying in the breeze when you do. In less fun news, my Ranger started pissing coolant on the ground. Looks like the end cap on the driver's side has either come loose or cracked, I can't tell what but it's getting all wet even though the hose on that side is completely dry. Oh well, at least it was under $110 from Amazon, and Prime shipping to boot.
|
|
#
¿
Nov 26, 2012 22:33
|
|
|
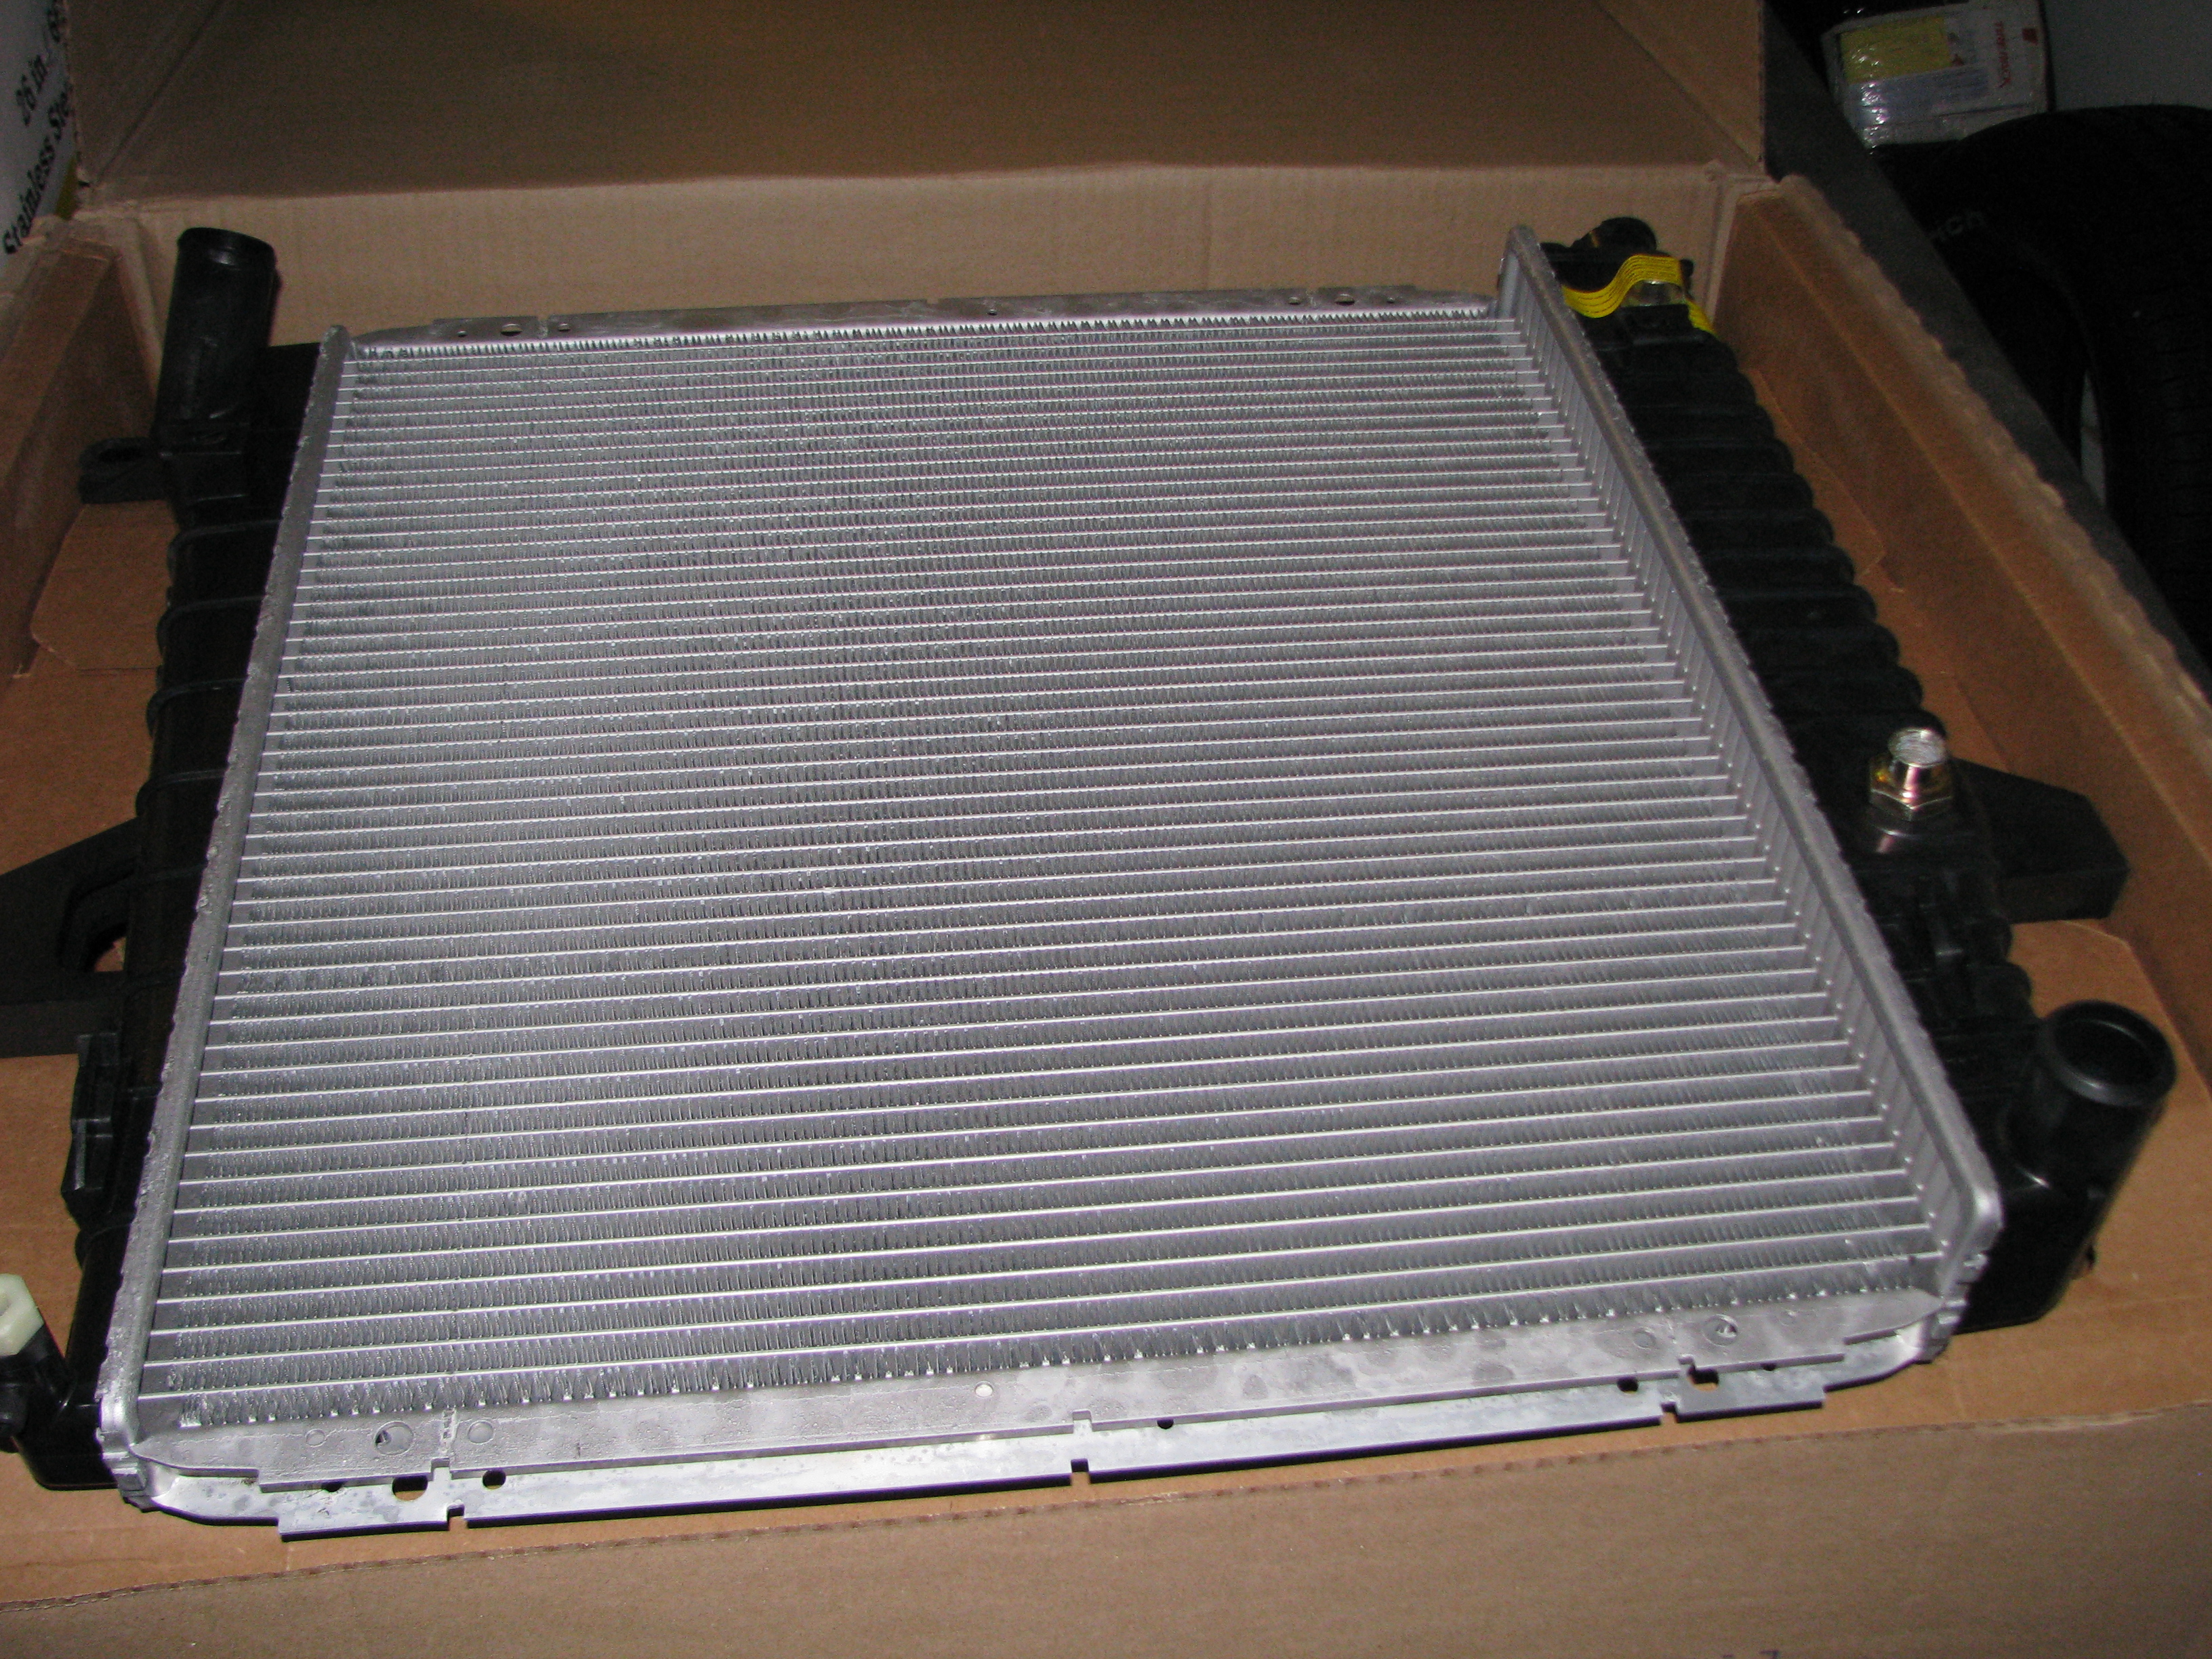 So, because Amazon is awesome, my new radiator got here fast. Box had some minor damage but the radiator was fine. 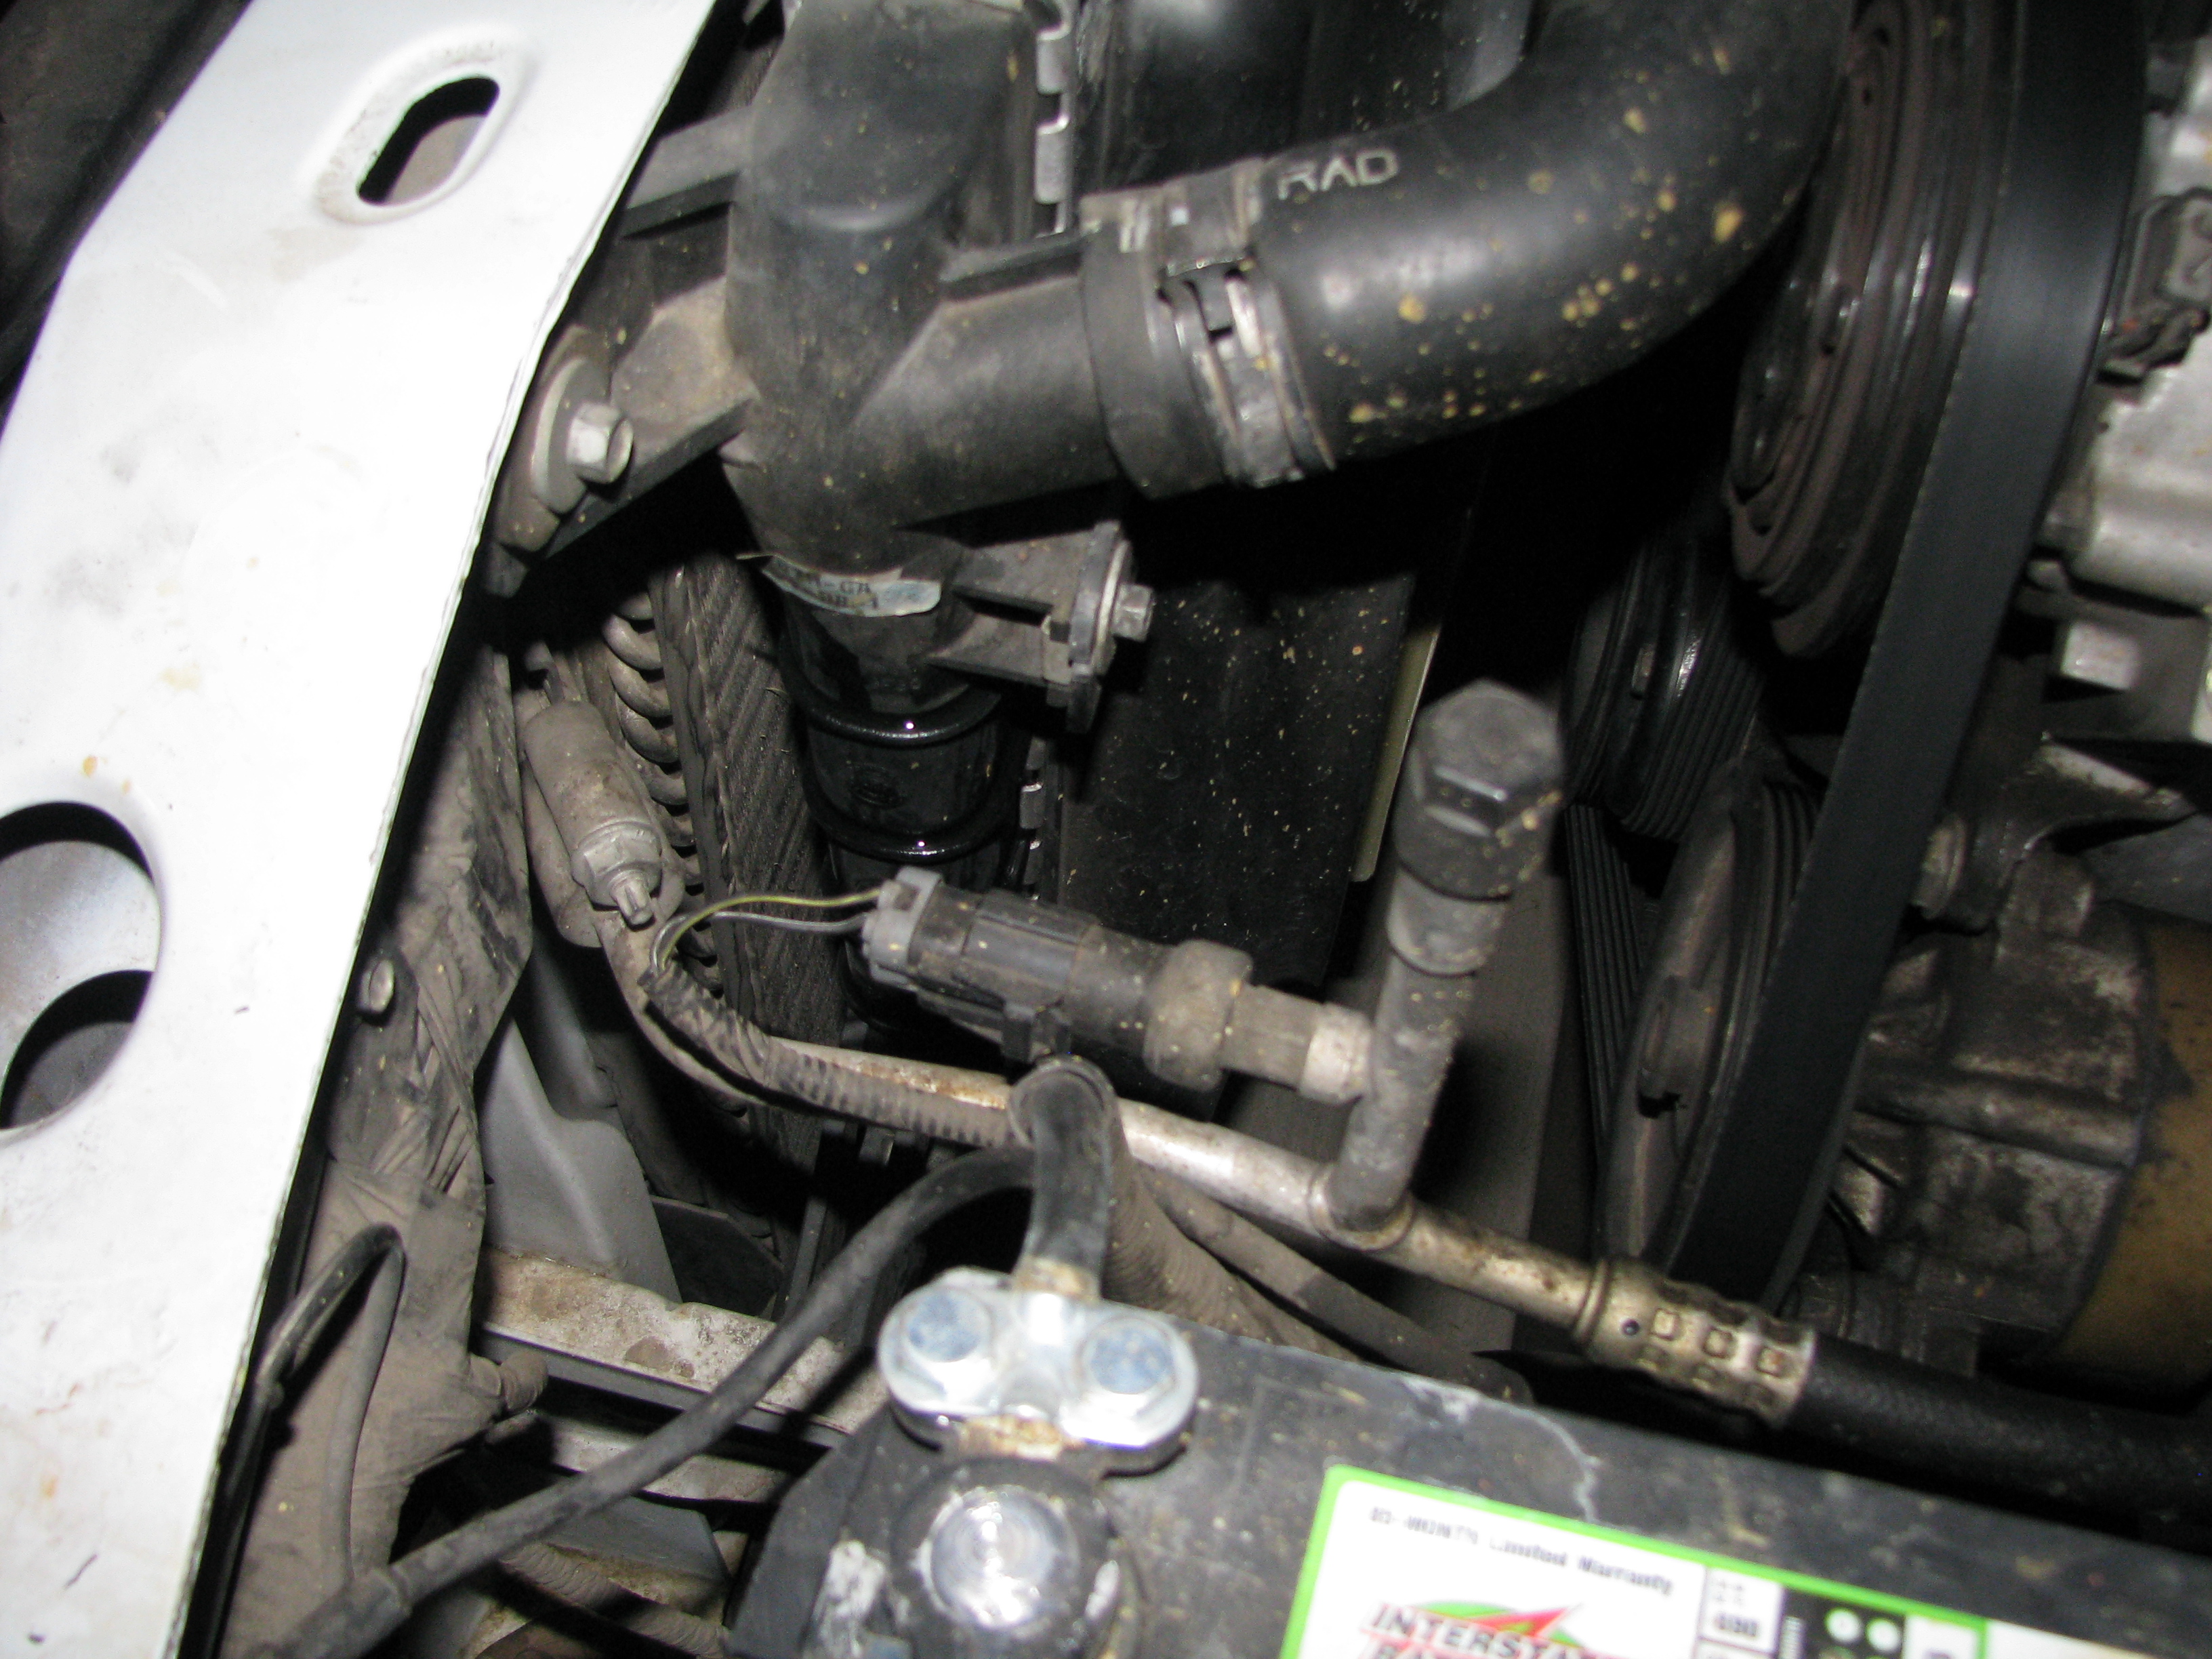 Running the engine literally just long enough to turn the truck around in my driveway made this much of a mess, but the hose is dry. Has to be an endtank issue. 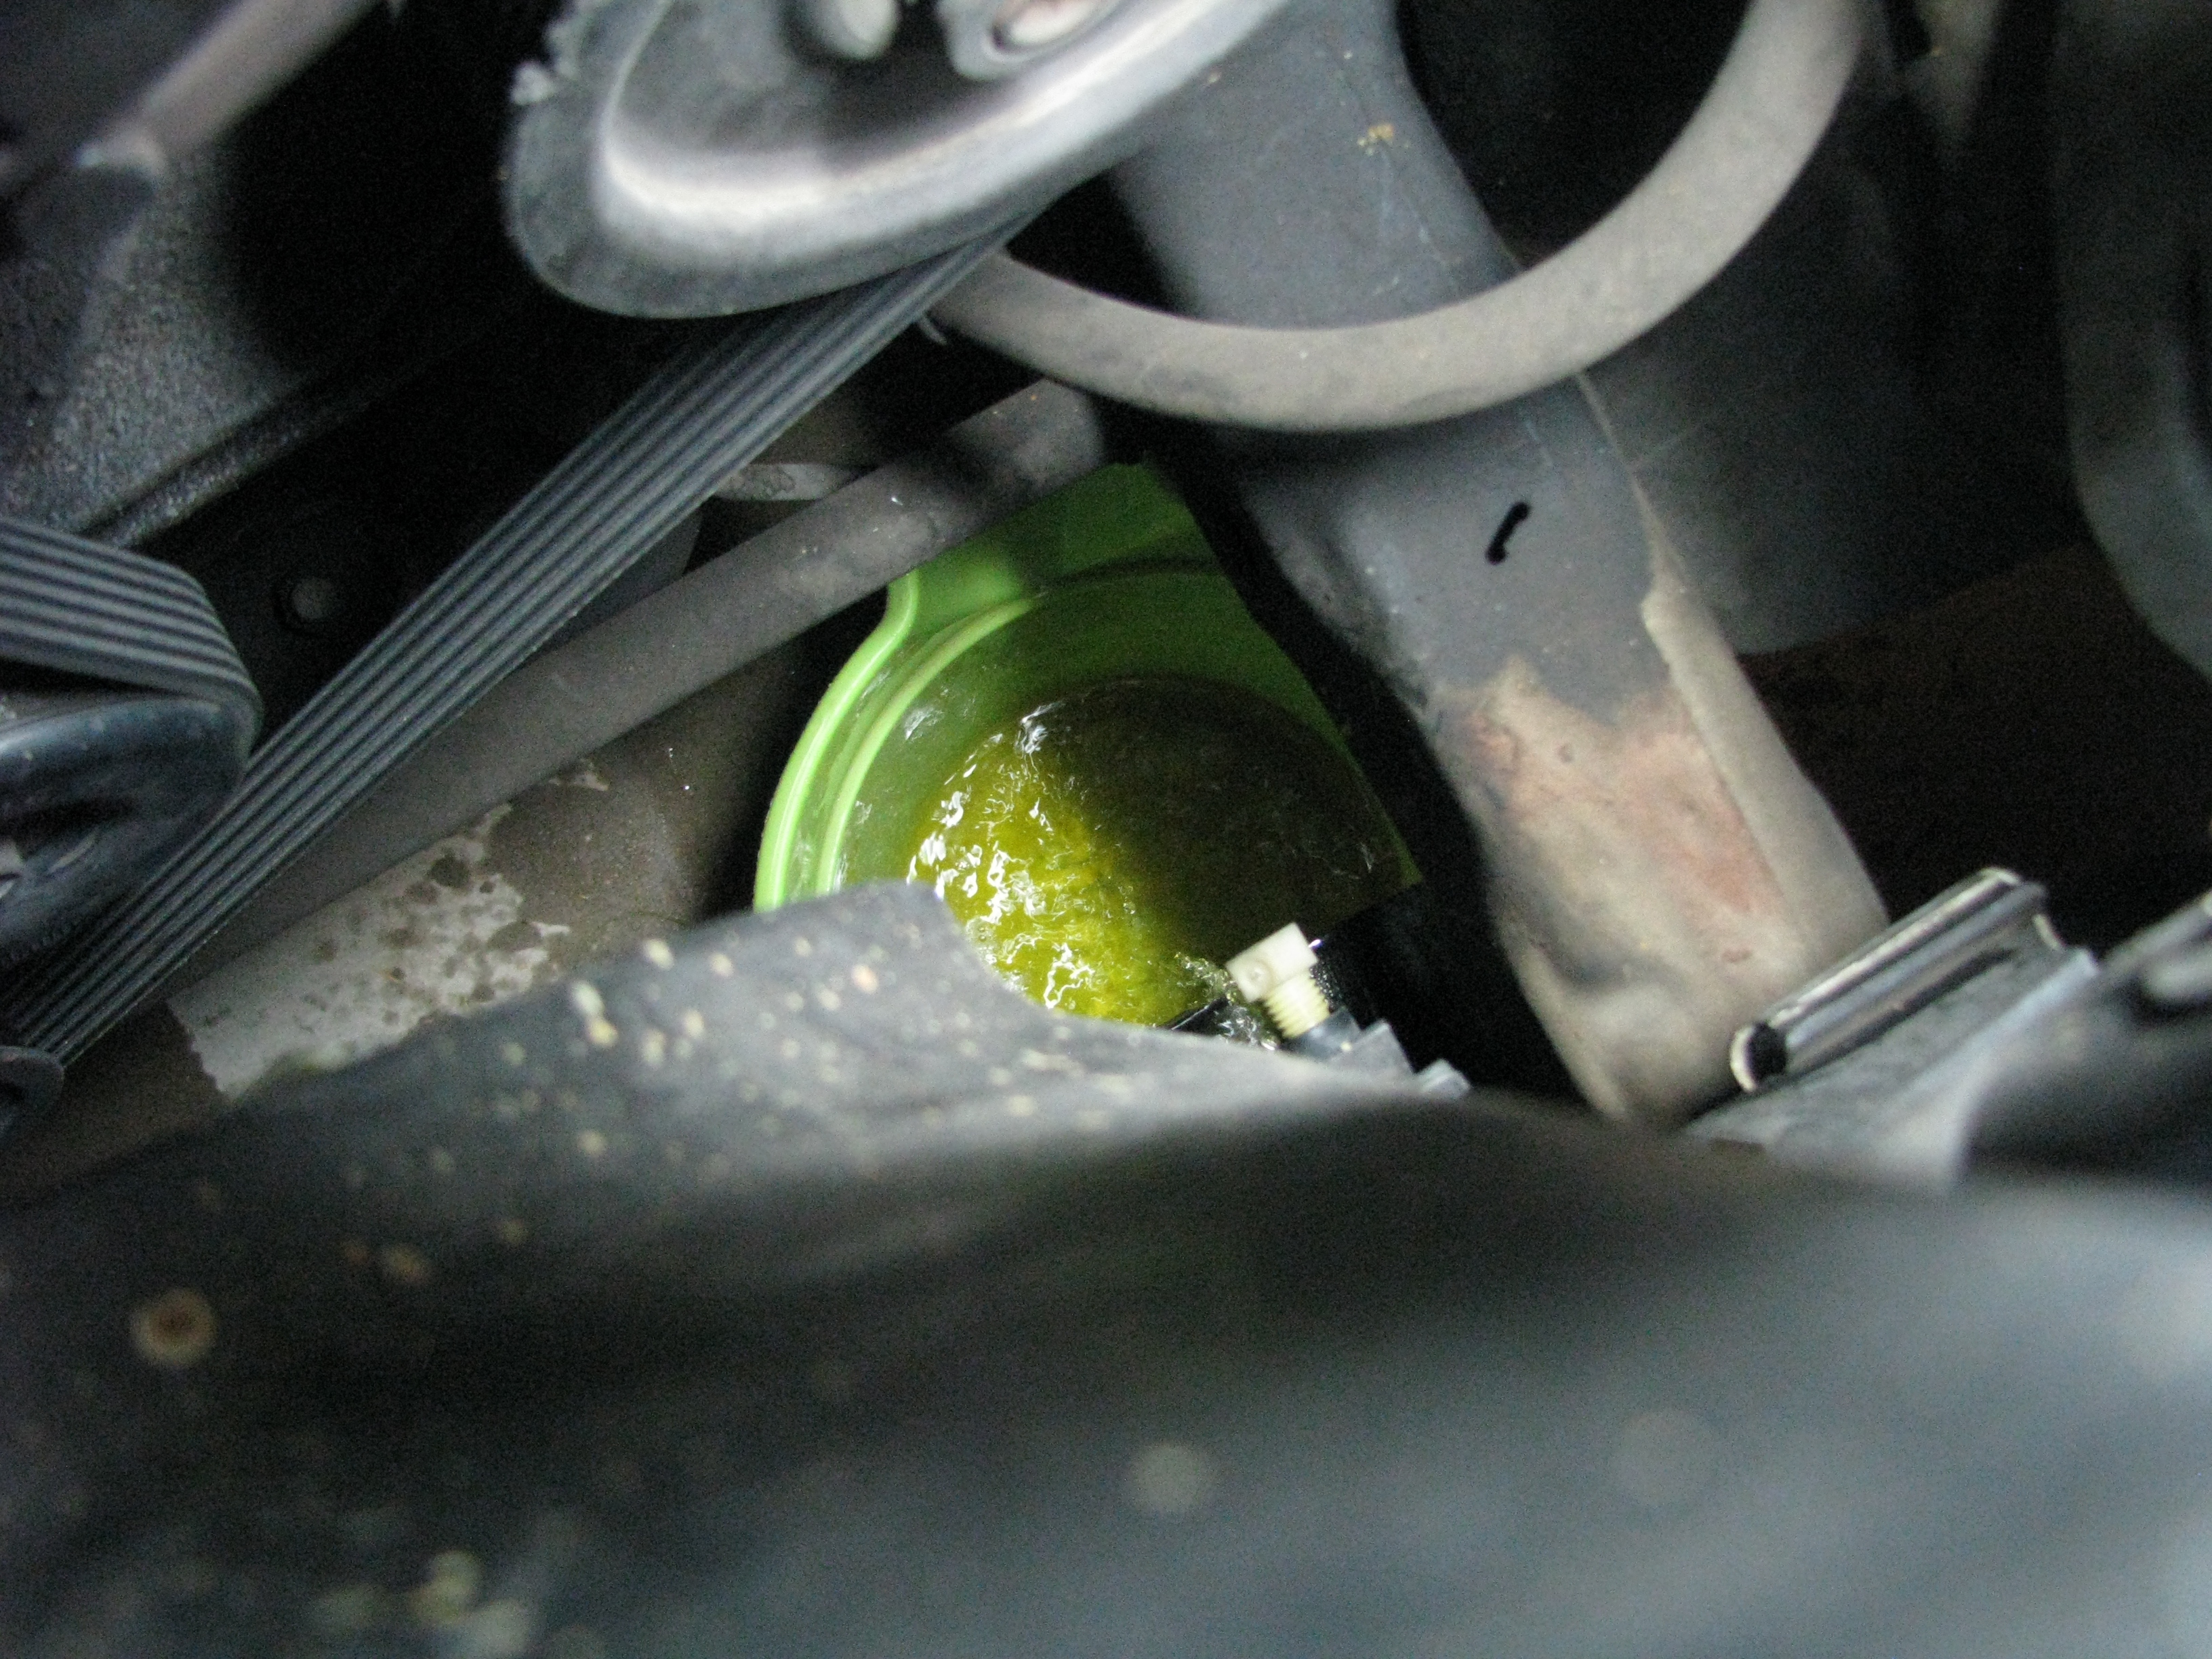 Drain the coolant, which ends up looking pretty damned brown by the time the bucket fills up. Time for fresh coolant too! Also showcased is the random missing chunk of my power steering pulley. 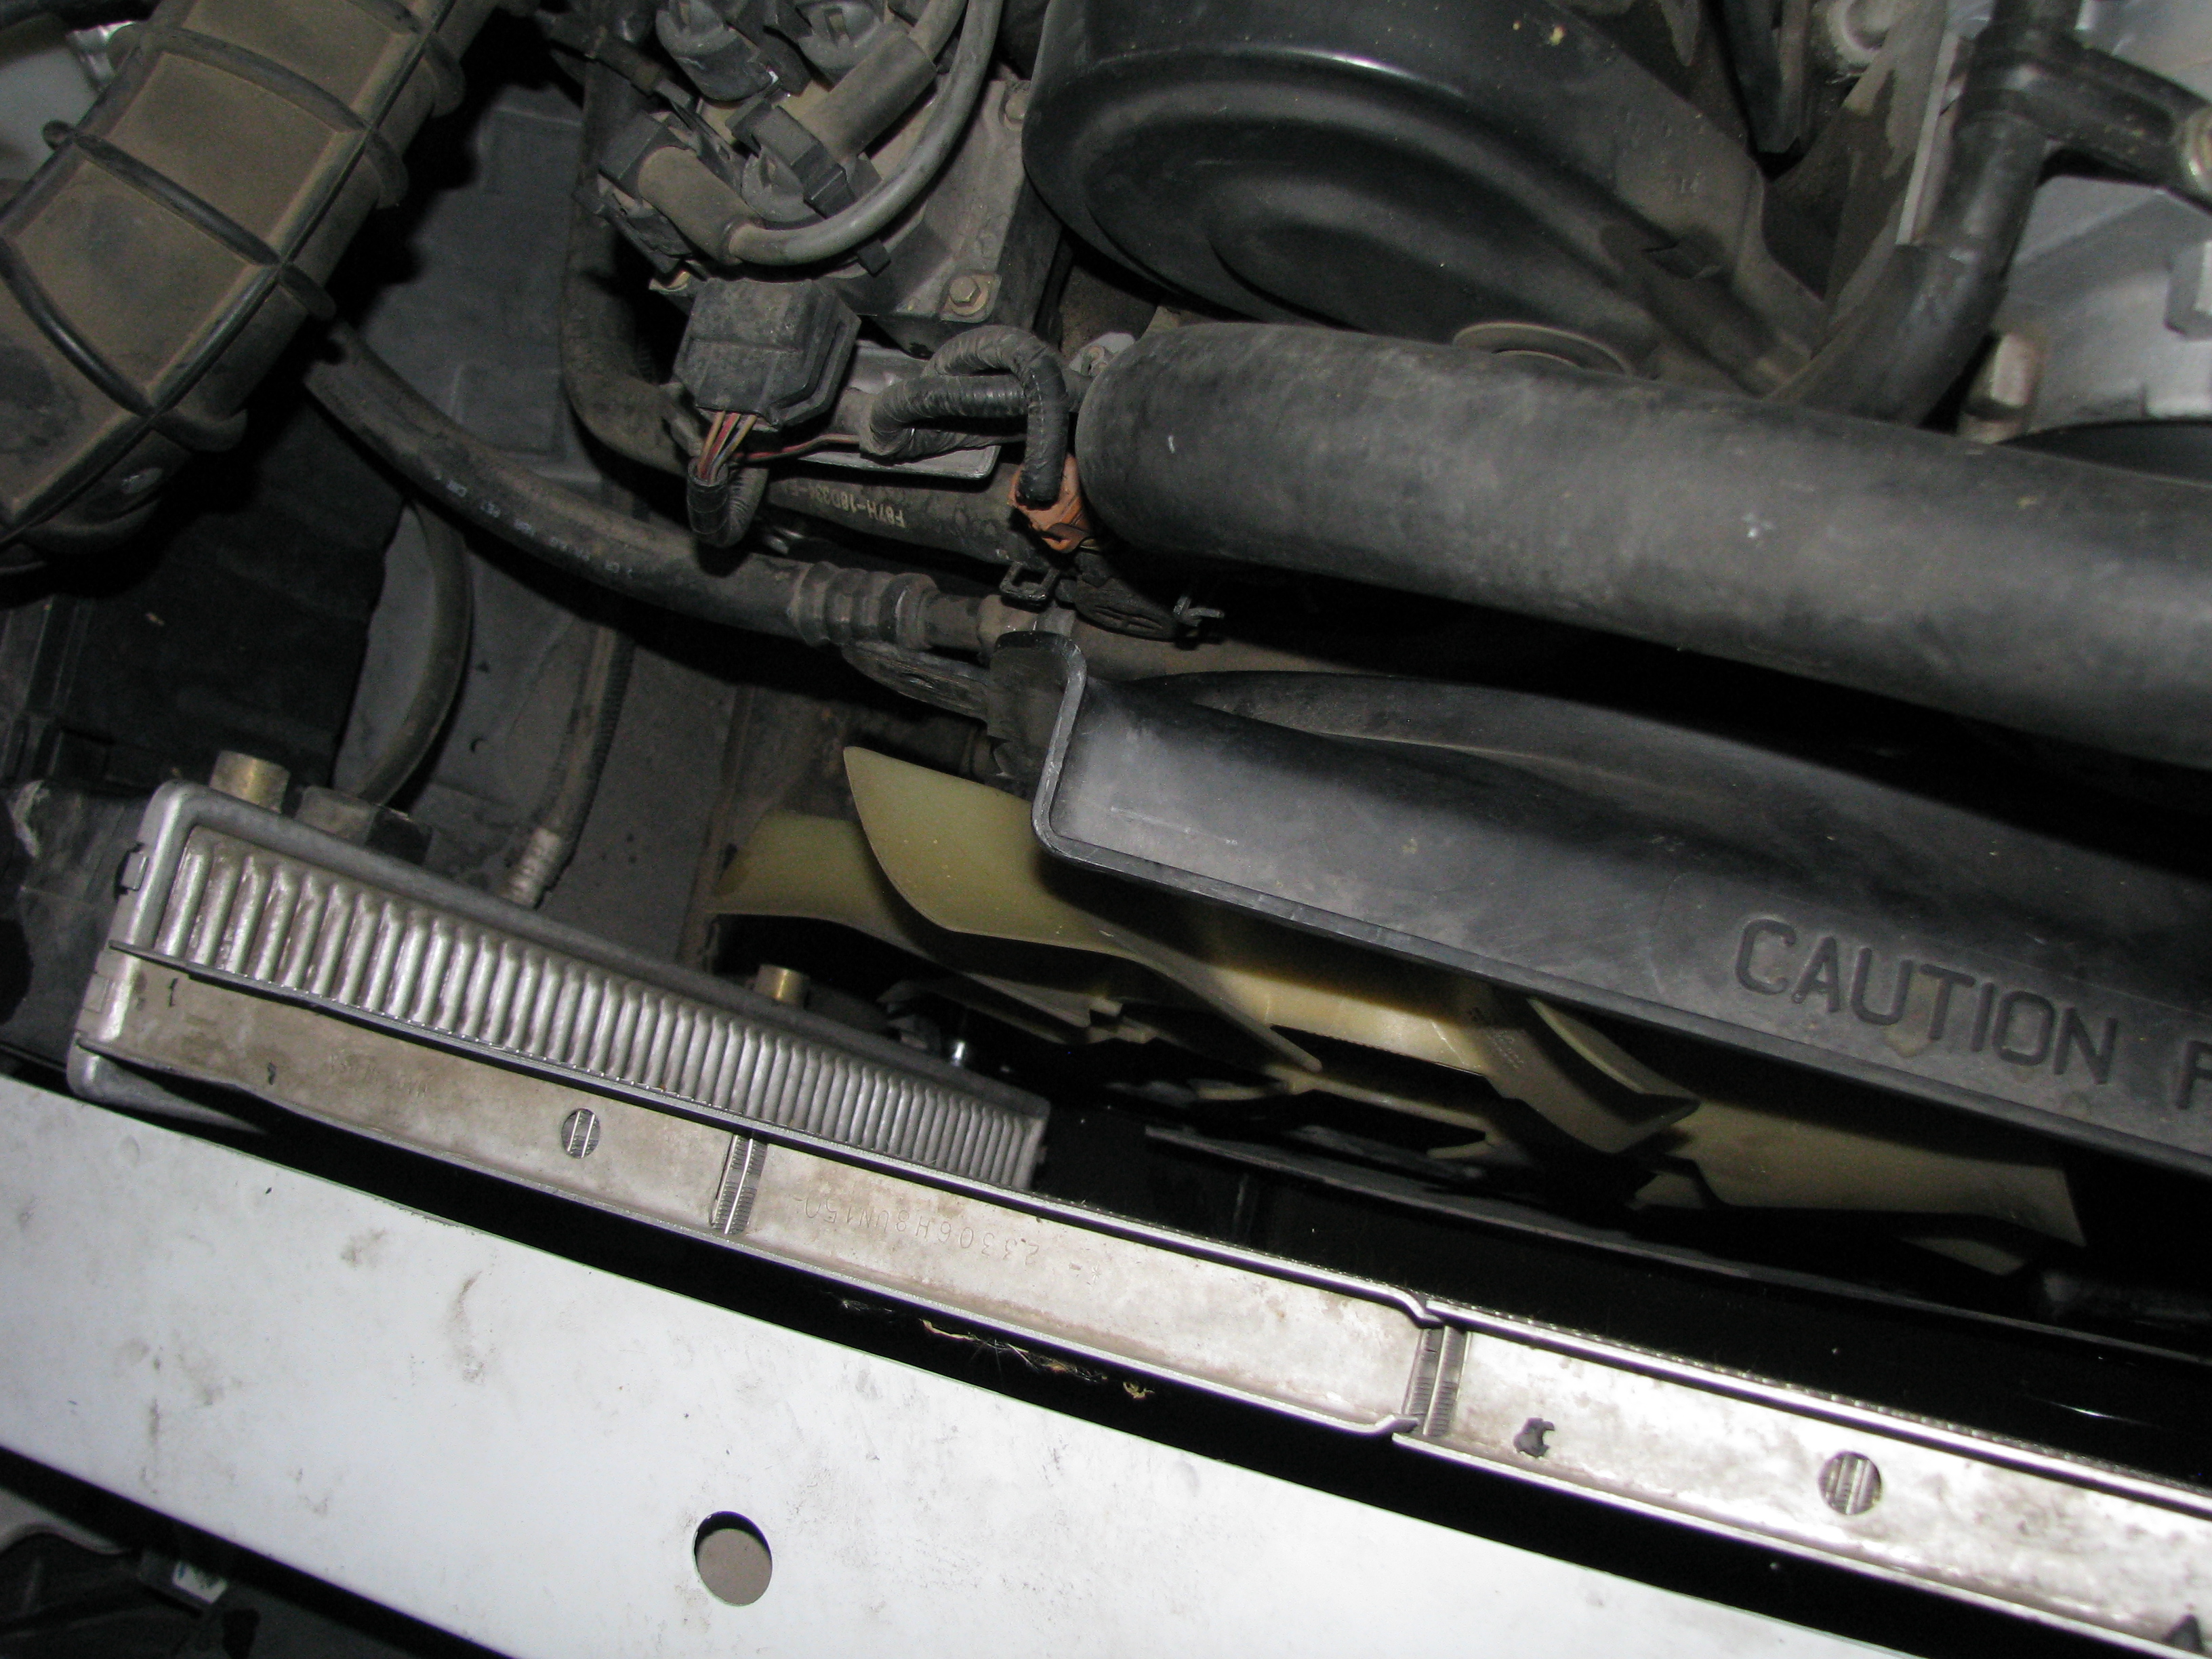 Two bolts to take the shroud off, two bolts to loosen the radiator, and two spring clamps, and the old radiator is ready to come out. 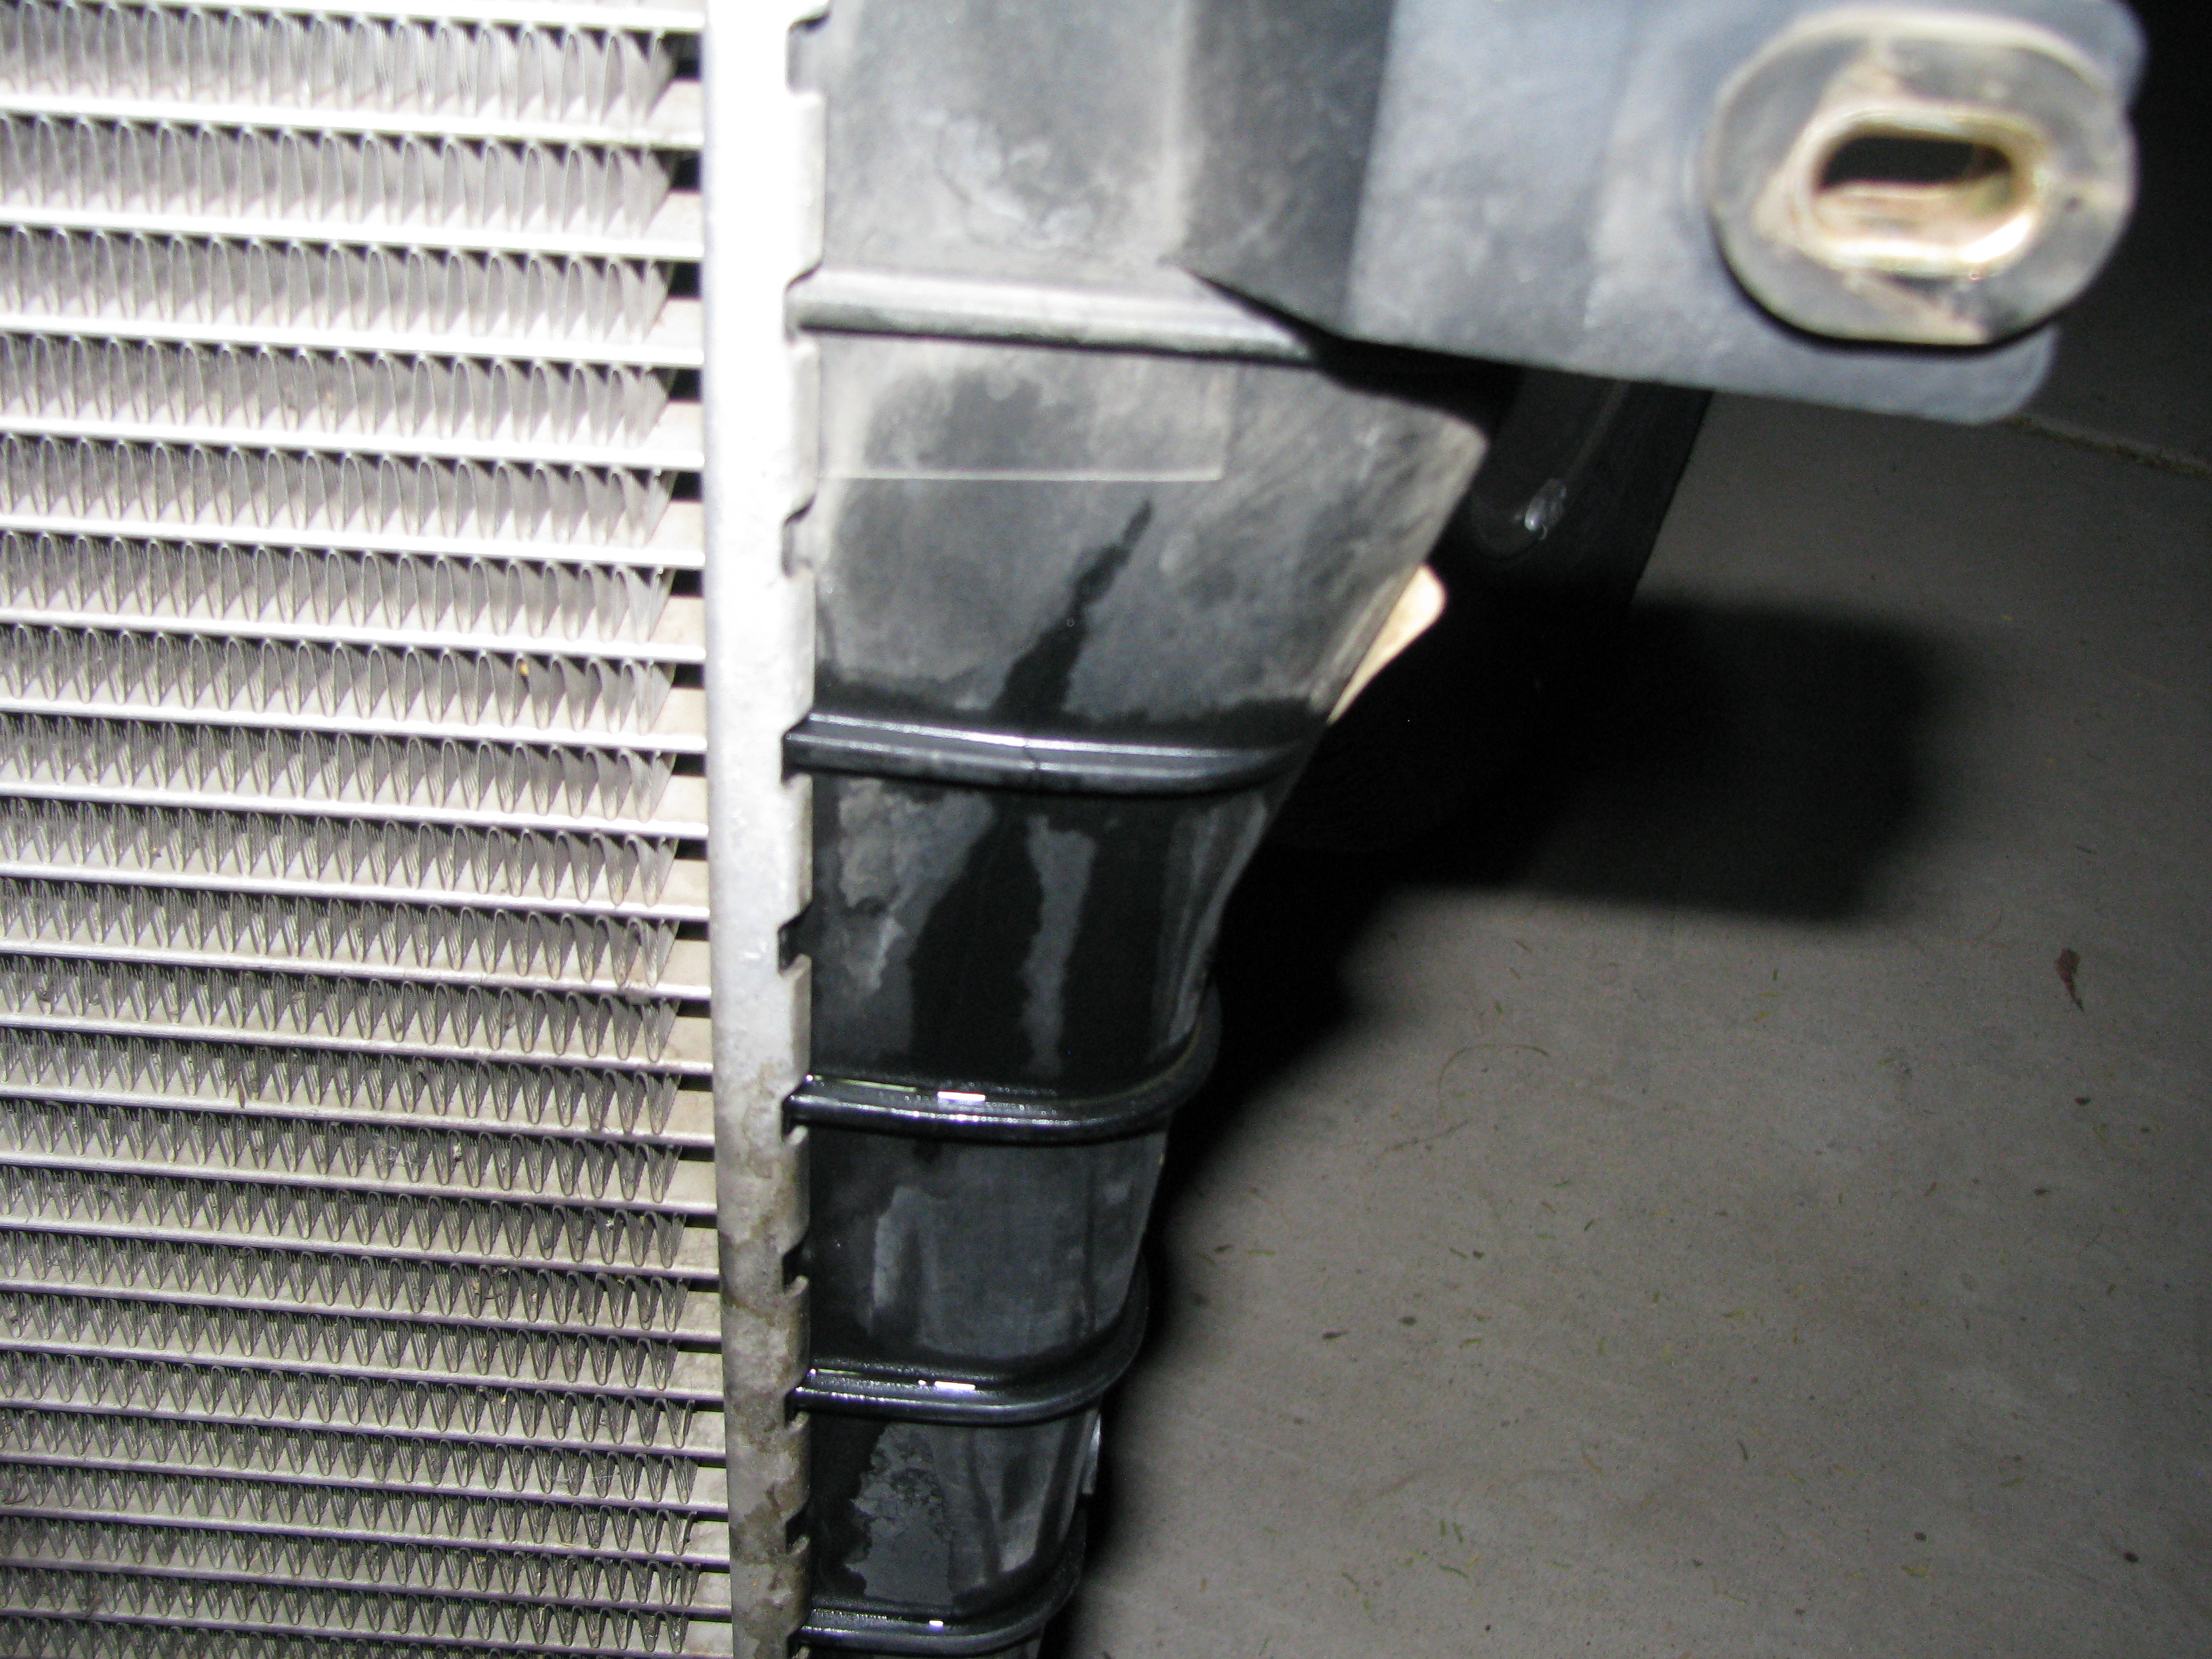 Well, there's your problem! Big crack in the end tank. Later inspection of the end tanks shows date codes on them for 1998 - so either this radiator is the factory original piece, or it was replaced at some point with one old enough to be original. 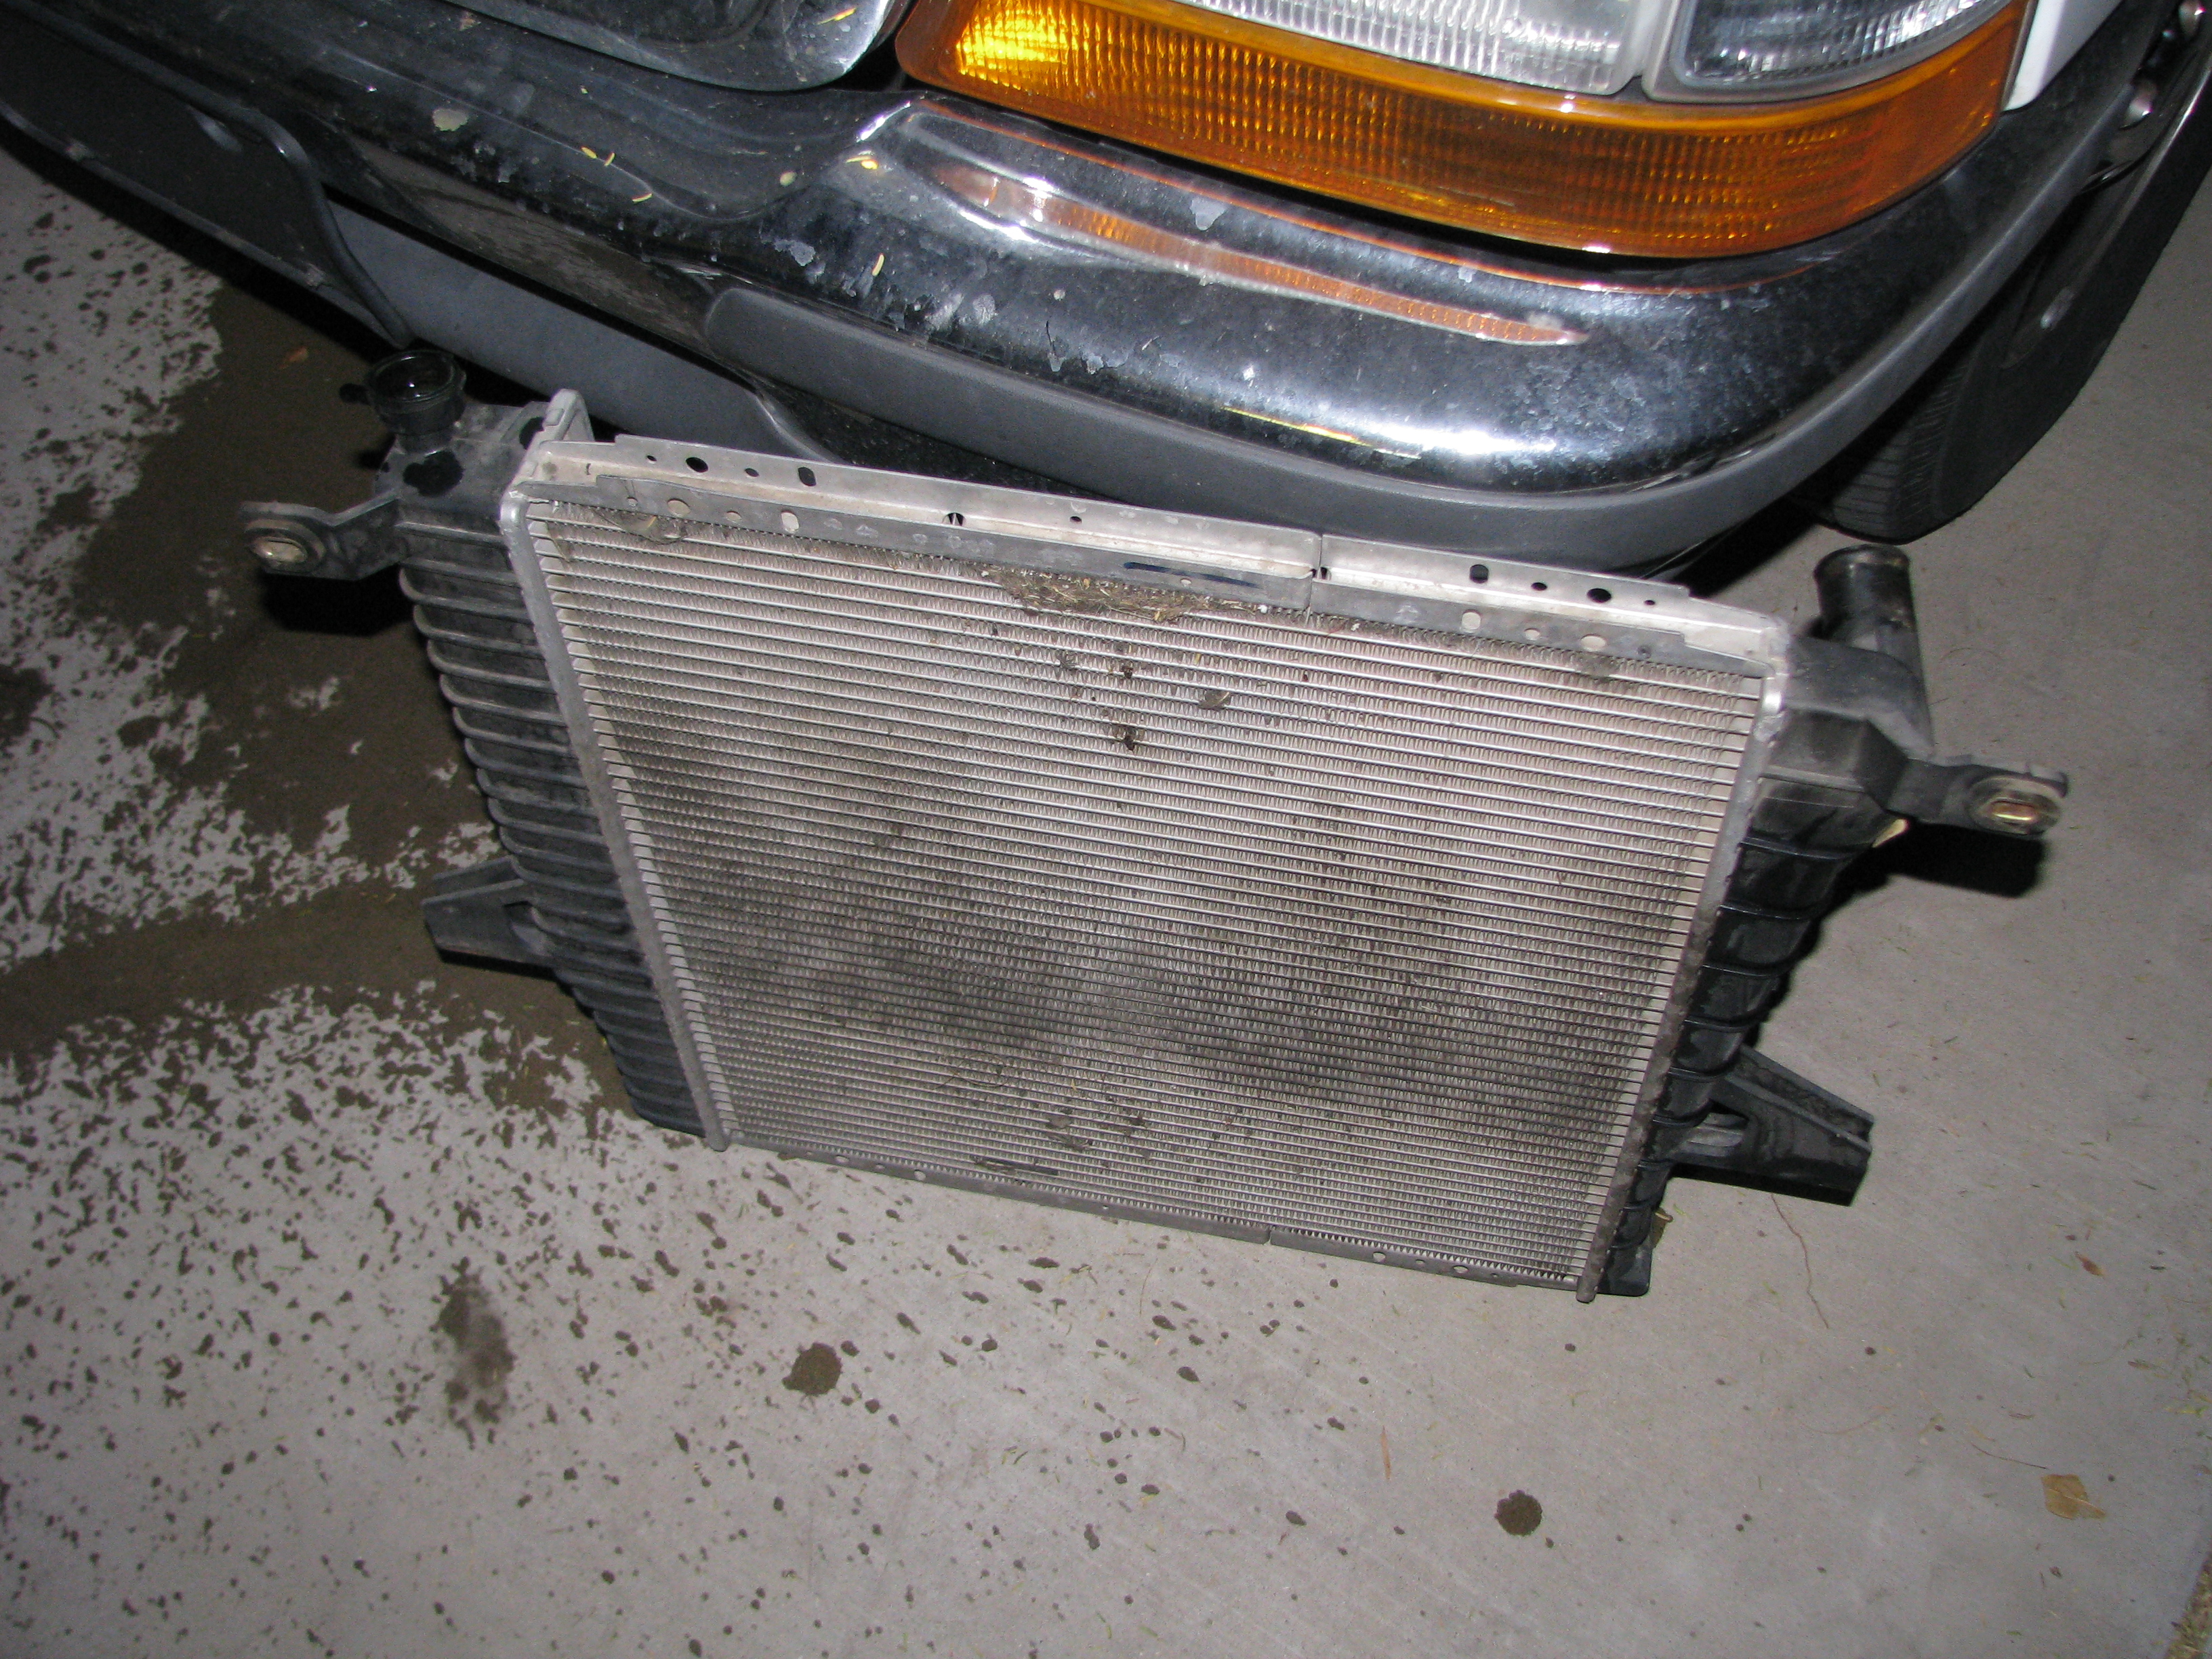 Shame, it looked like it was in pretty good shape other than the crack. Oh well.  So apparently I never took a pic of the new radiator in by itself, but it really just looks like the old one with less leaks. I picked this thing up, I'm pretty sure based on someone talking about it here. It's supposed to make filling the radiator a much easier process. 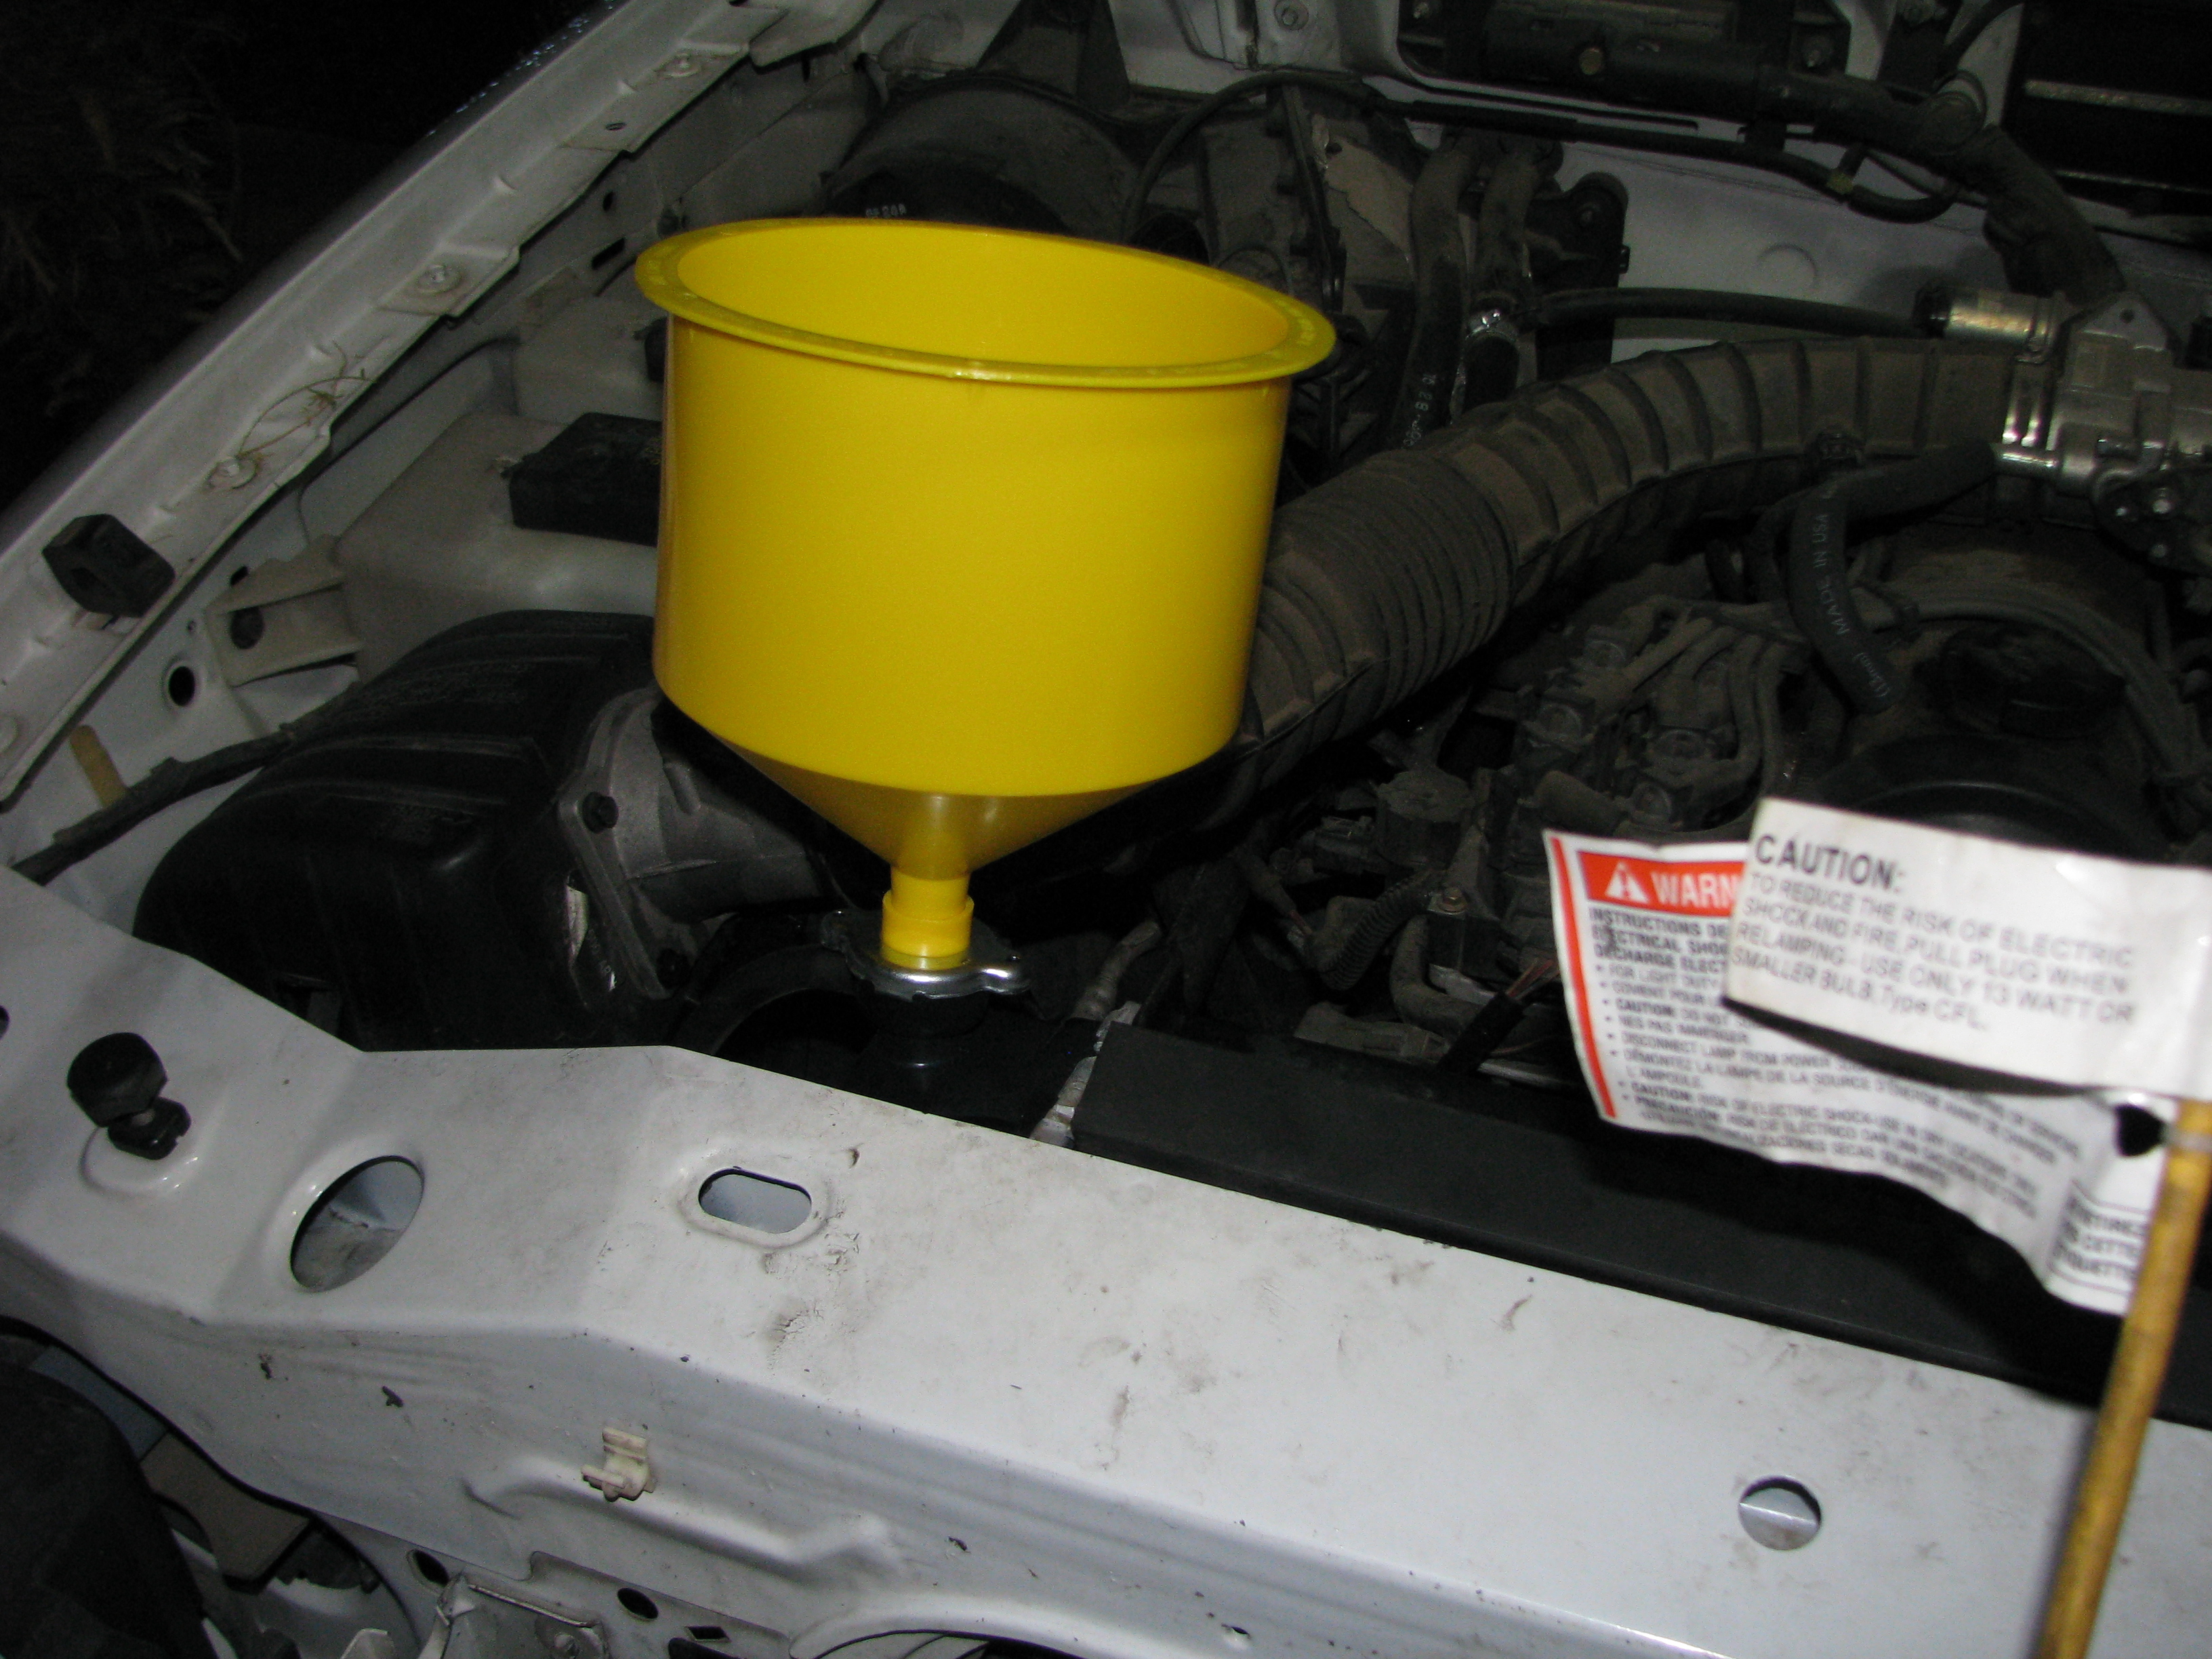 In-use shot. It comes with four different adapters that thread onto the neck of the radiator, a bunch of inserts that seal between the radiator neck and the adapter, and then the funnel itself. Stick the funnel in there and it becomes the highest point in the system by far. Dump in a gallon and a half or so of water and Prestone, fire up the engine, and wait. And wait, and wait, and wait. It does make it a one-step process but apparently enough air was still stuck in there that it took forever for the thermostat to heat up enough to actually open. I also have a sneaky suspicion that the water pump impeller may be pretty far gone, since for much of the process the temperature gauge would only go off of cold if I revved it up (and then it would do so almost instantly). Once I was convinced I'd gotten the air out, it does come with a neat little stopper - you squeeze the upper radiator hose, and then pop it in from the top of the funnel. Then you can lift the funnel off without dripping anything, pop it into the overflow reservoir, and open it back up. Not the fastest way to do it, especially for the initial radiator fill (it's at least a third smaller in diameter than the Ranger's skinny neck) but it does make it pretty low effort. I'll be giving it another use here in the not too distant future when I replace the thermostat in the MS3.
|
|
#
¿
Nov 30, 2012 06:03
|
|
|
some texas redneck posted:14 years/170k ain't bad from the original. The top tank on mine split at 165k, also the original from 1998. The radiators for the 3.0 and 4.0 V6 trucks look to be a decent bit thicker, but don't seem to be any bigger in surface area. So, progress tonight...but not much Decided to tackle the rear brakes first.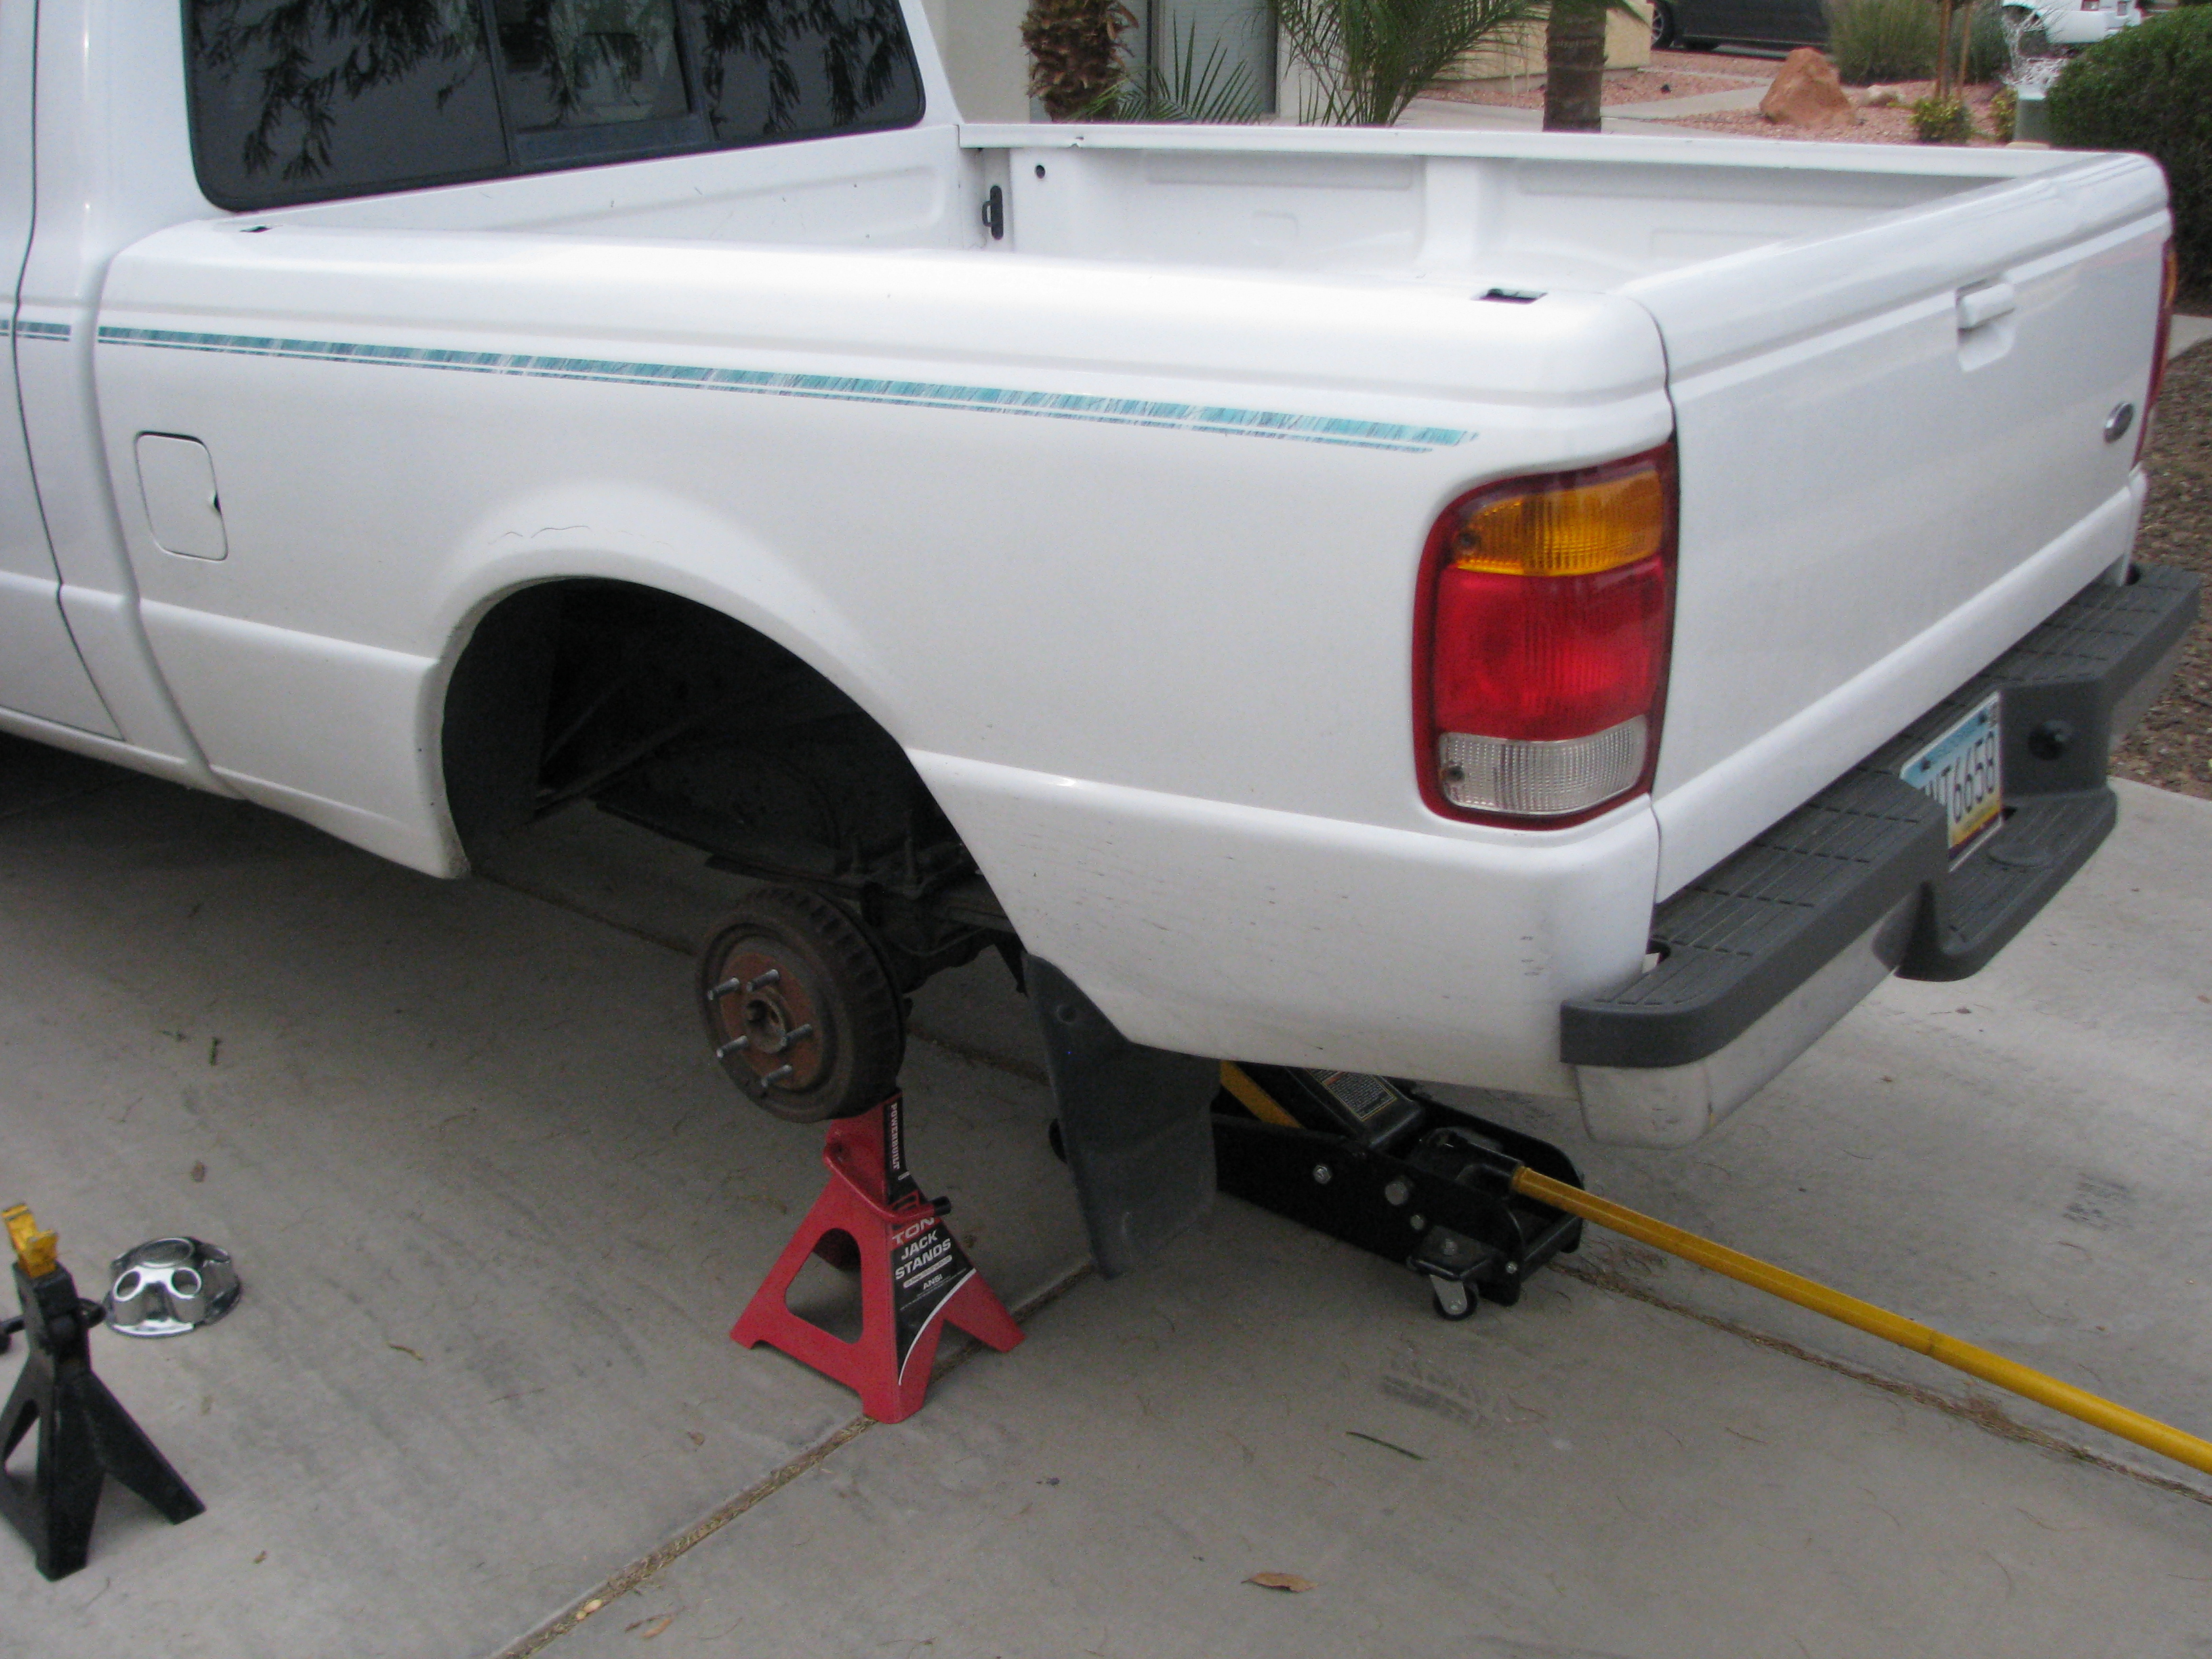 Back dat azz up. 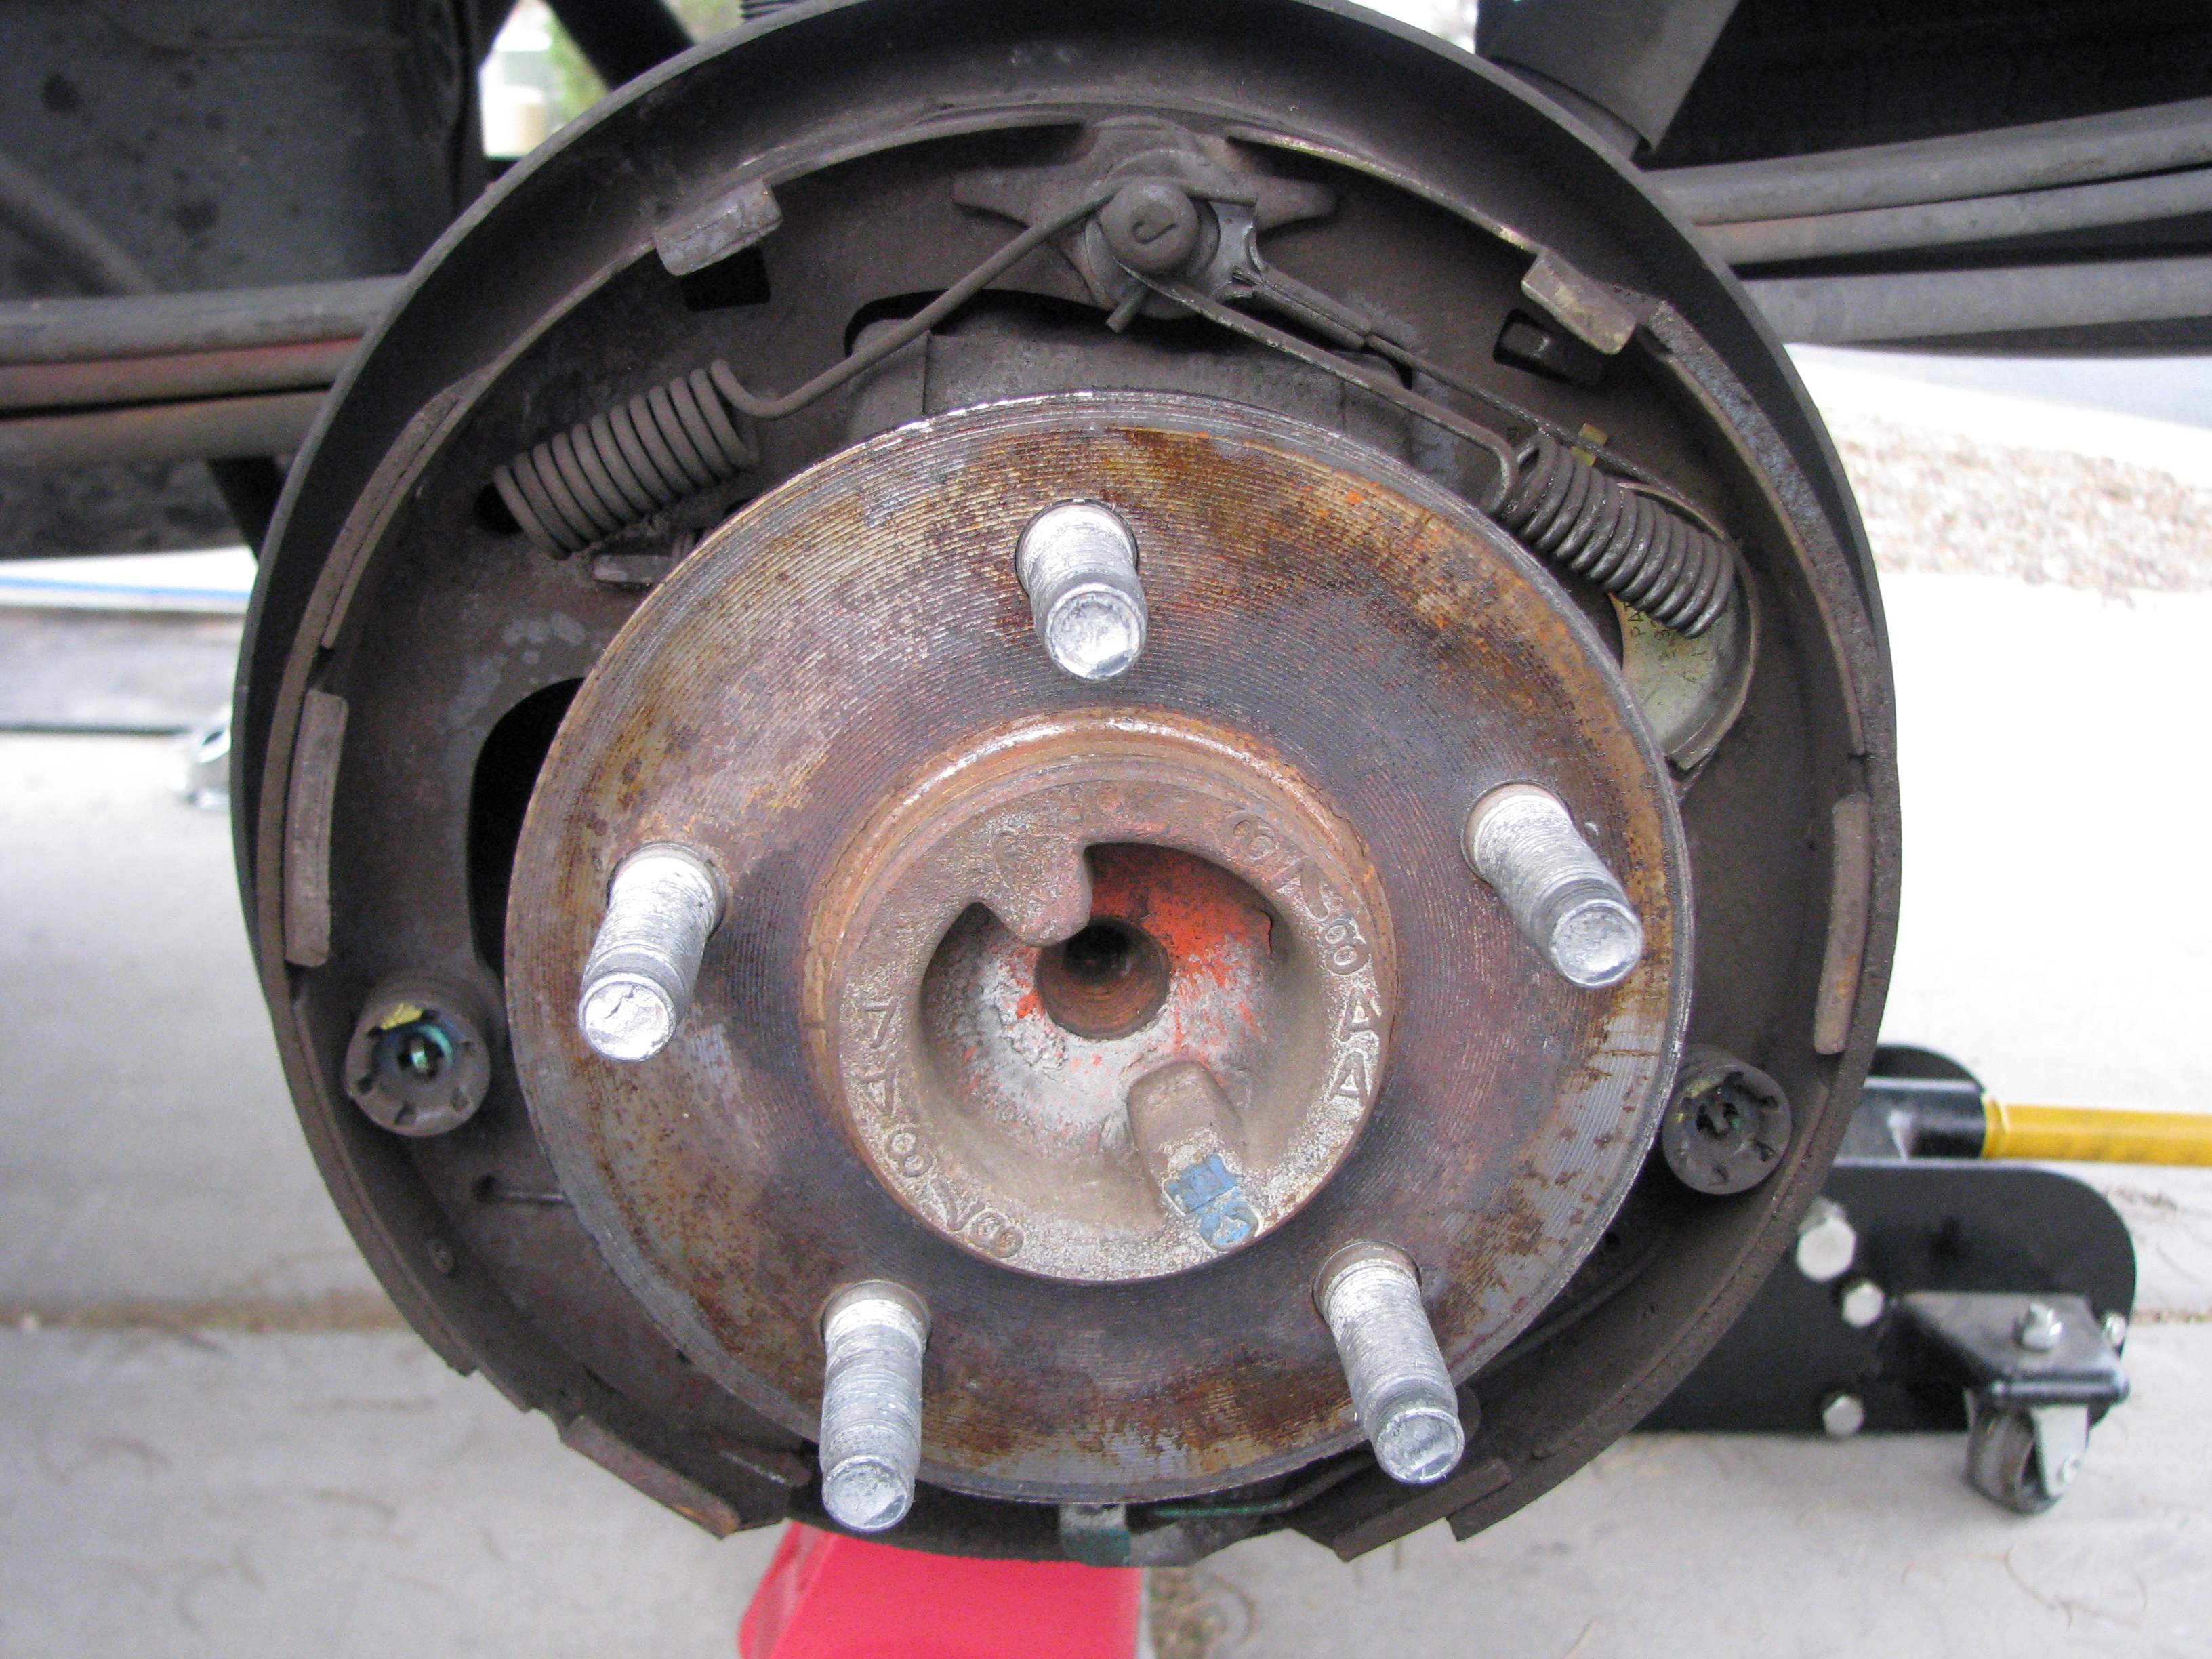 Starting with the driver's side. 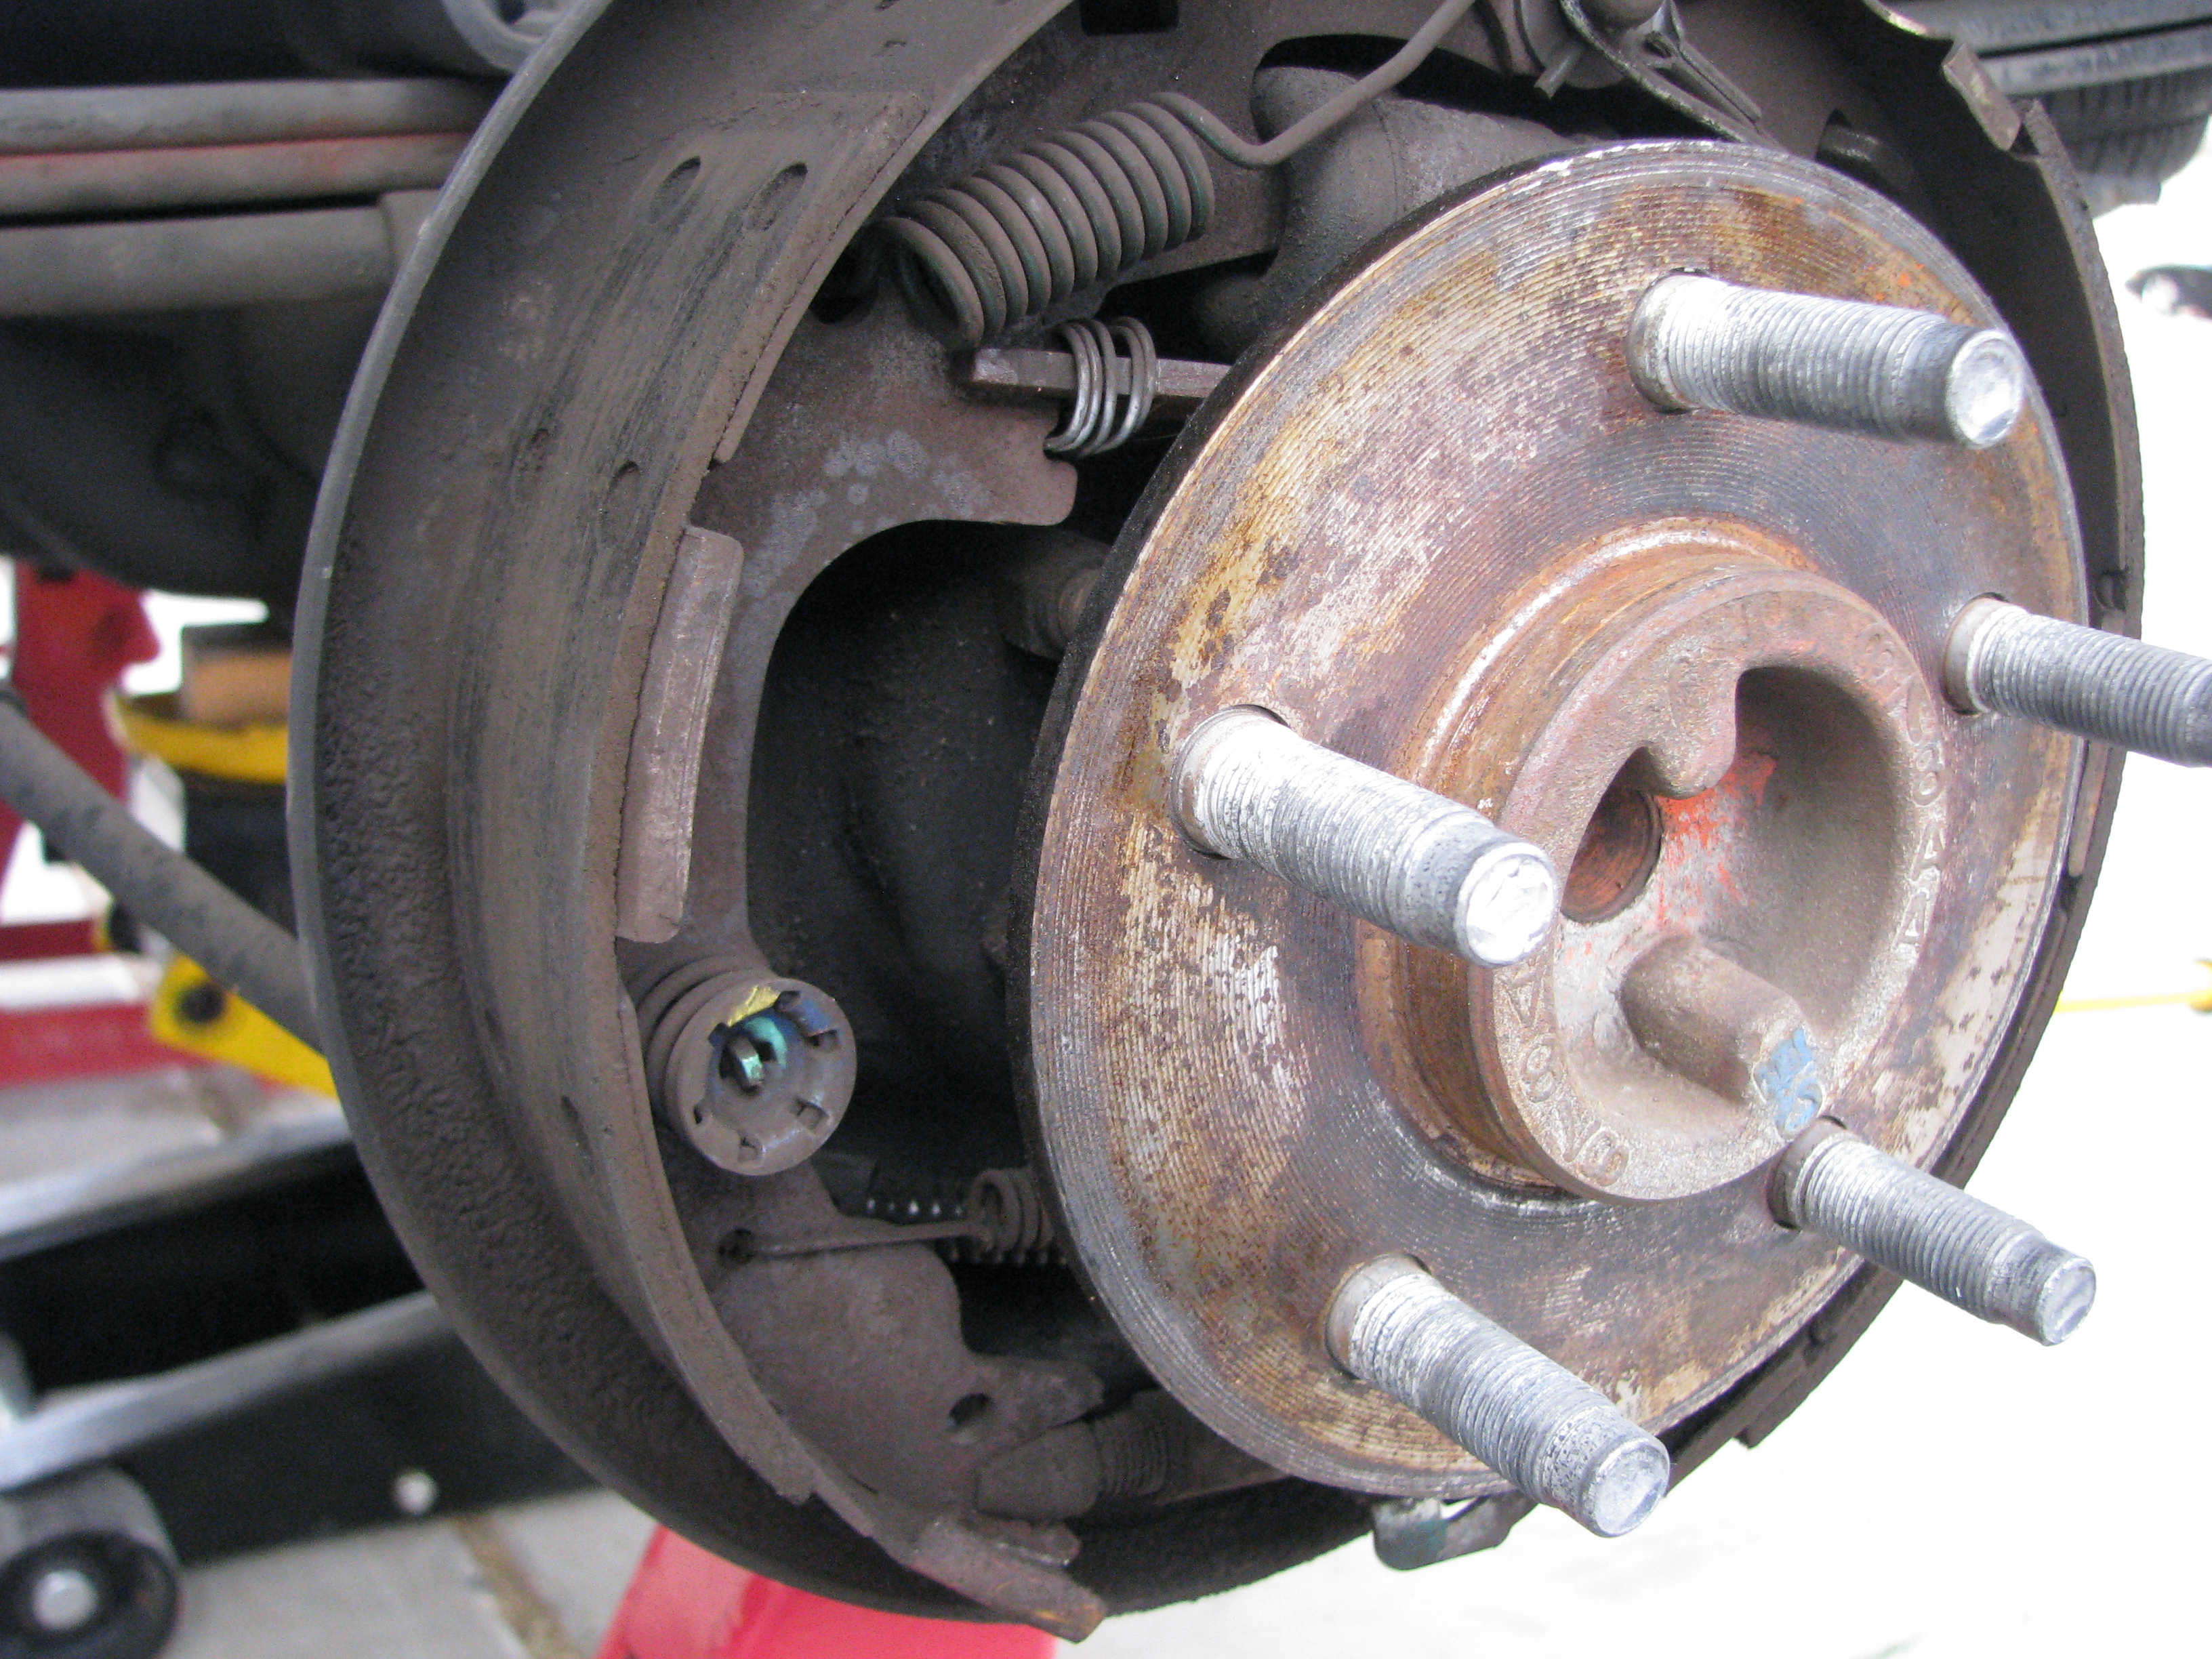 Leading pad, note the rather impressive chamfering going on here. 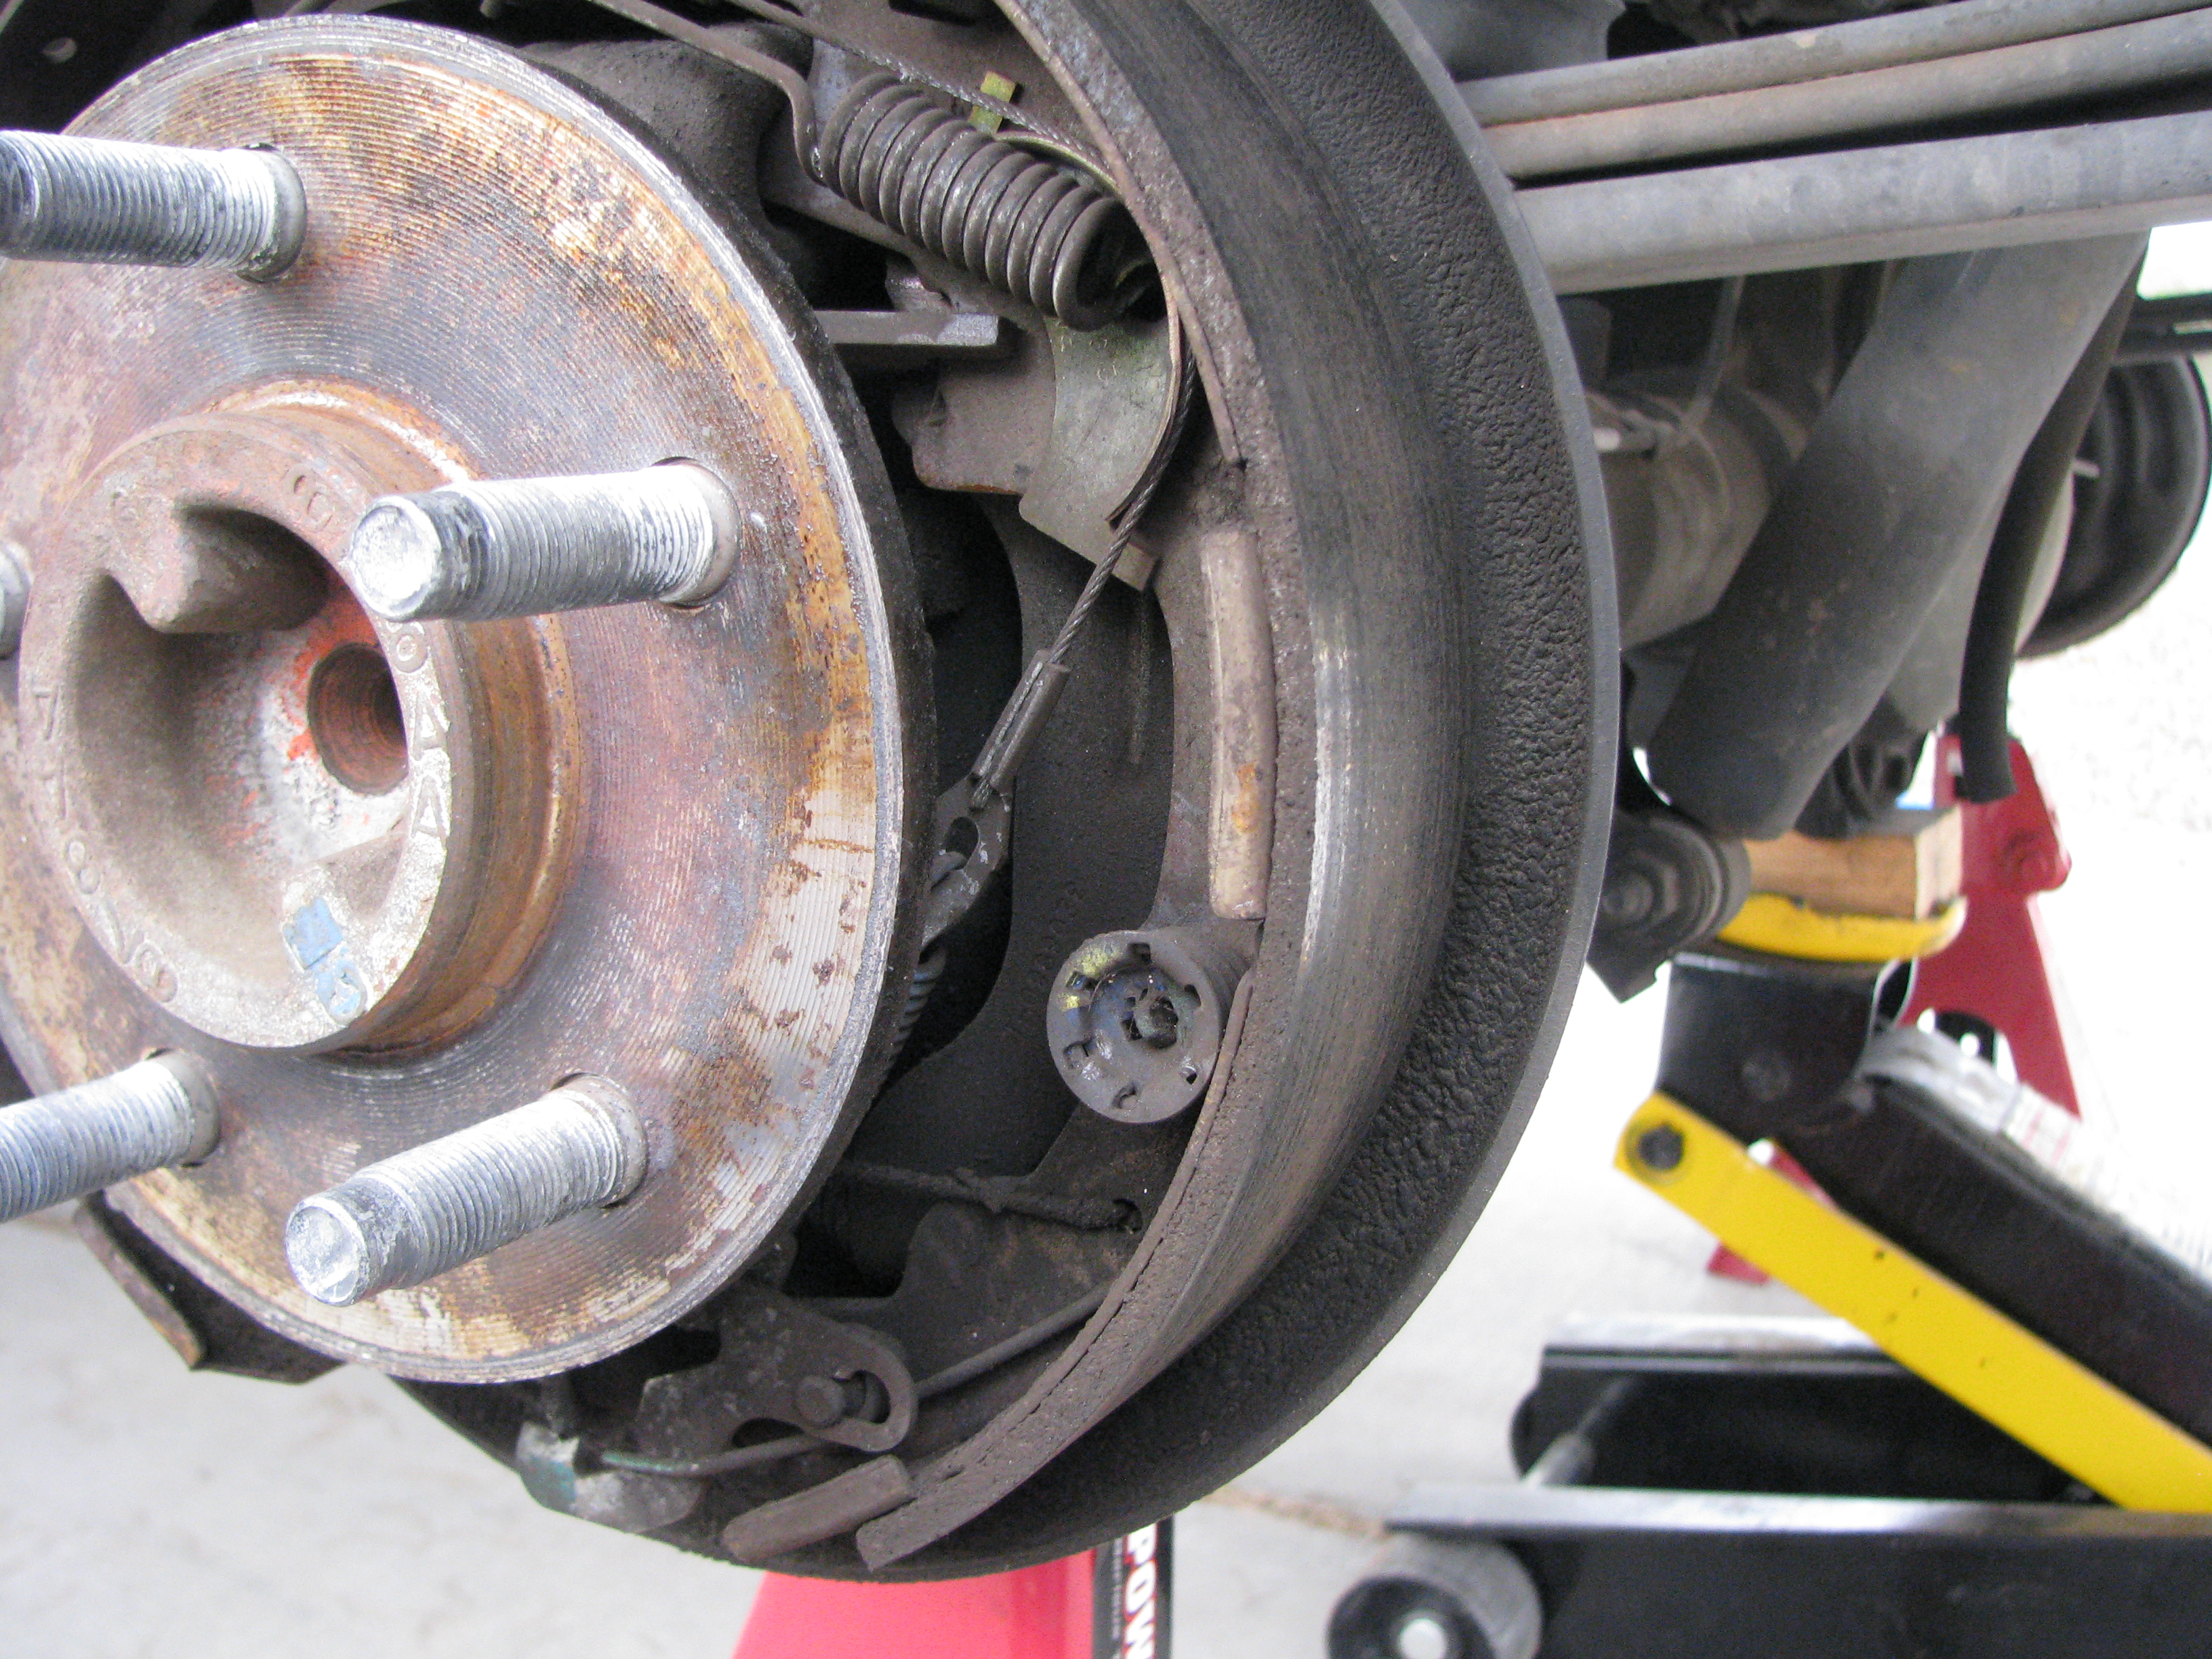 Trailing pad, much more even wear. 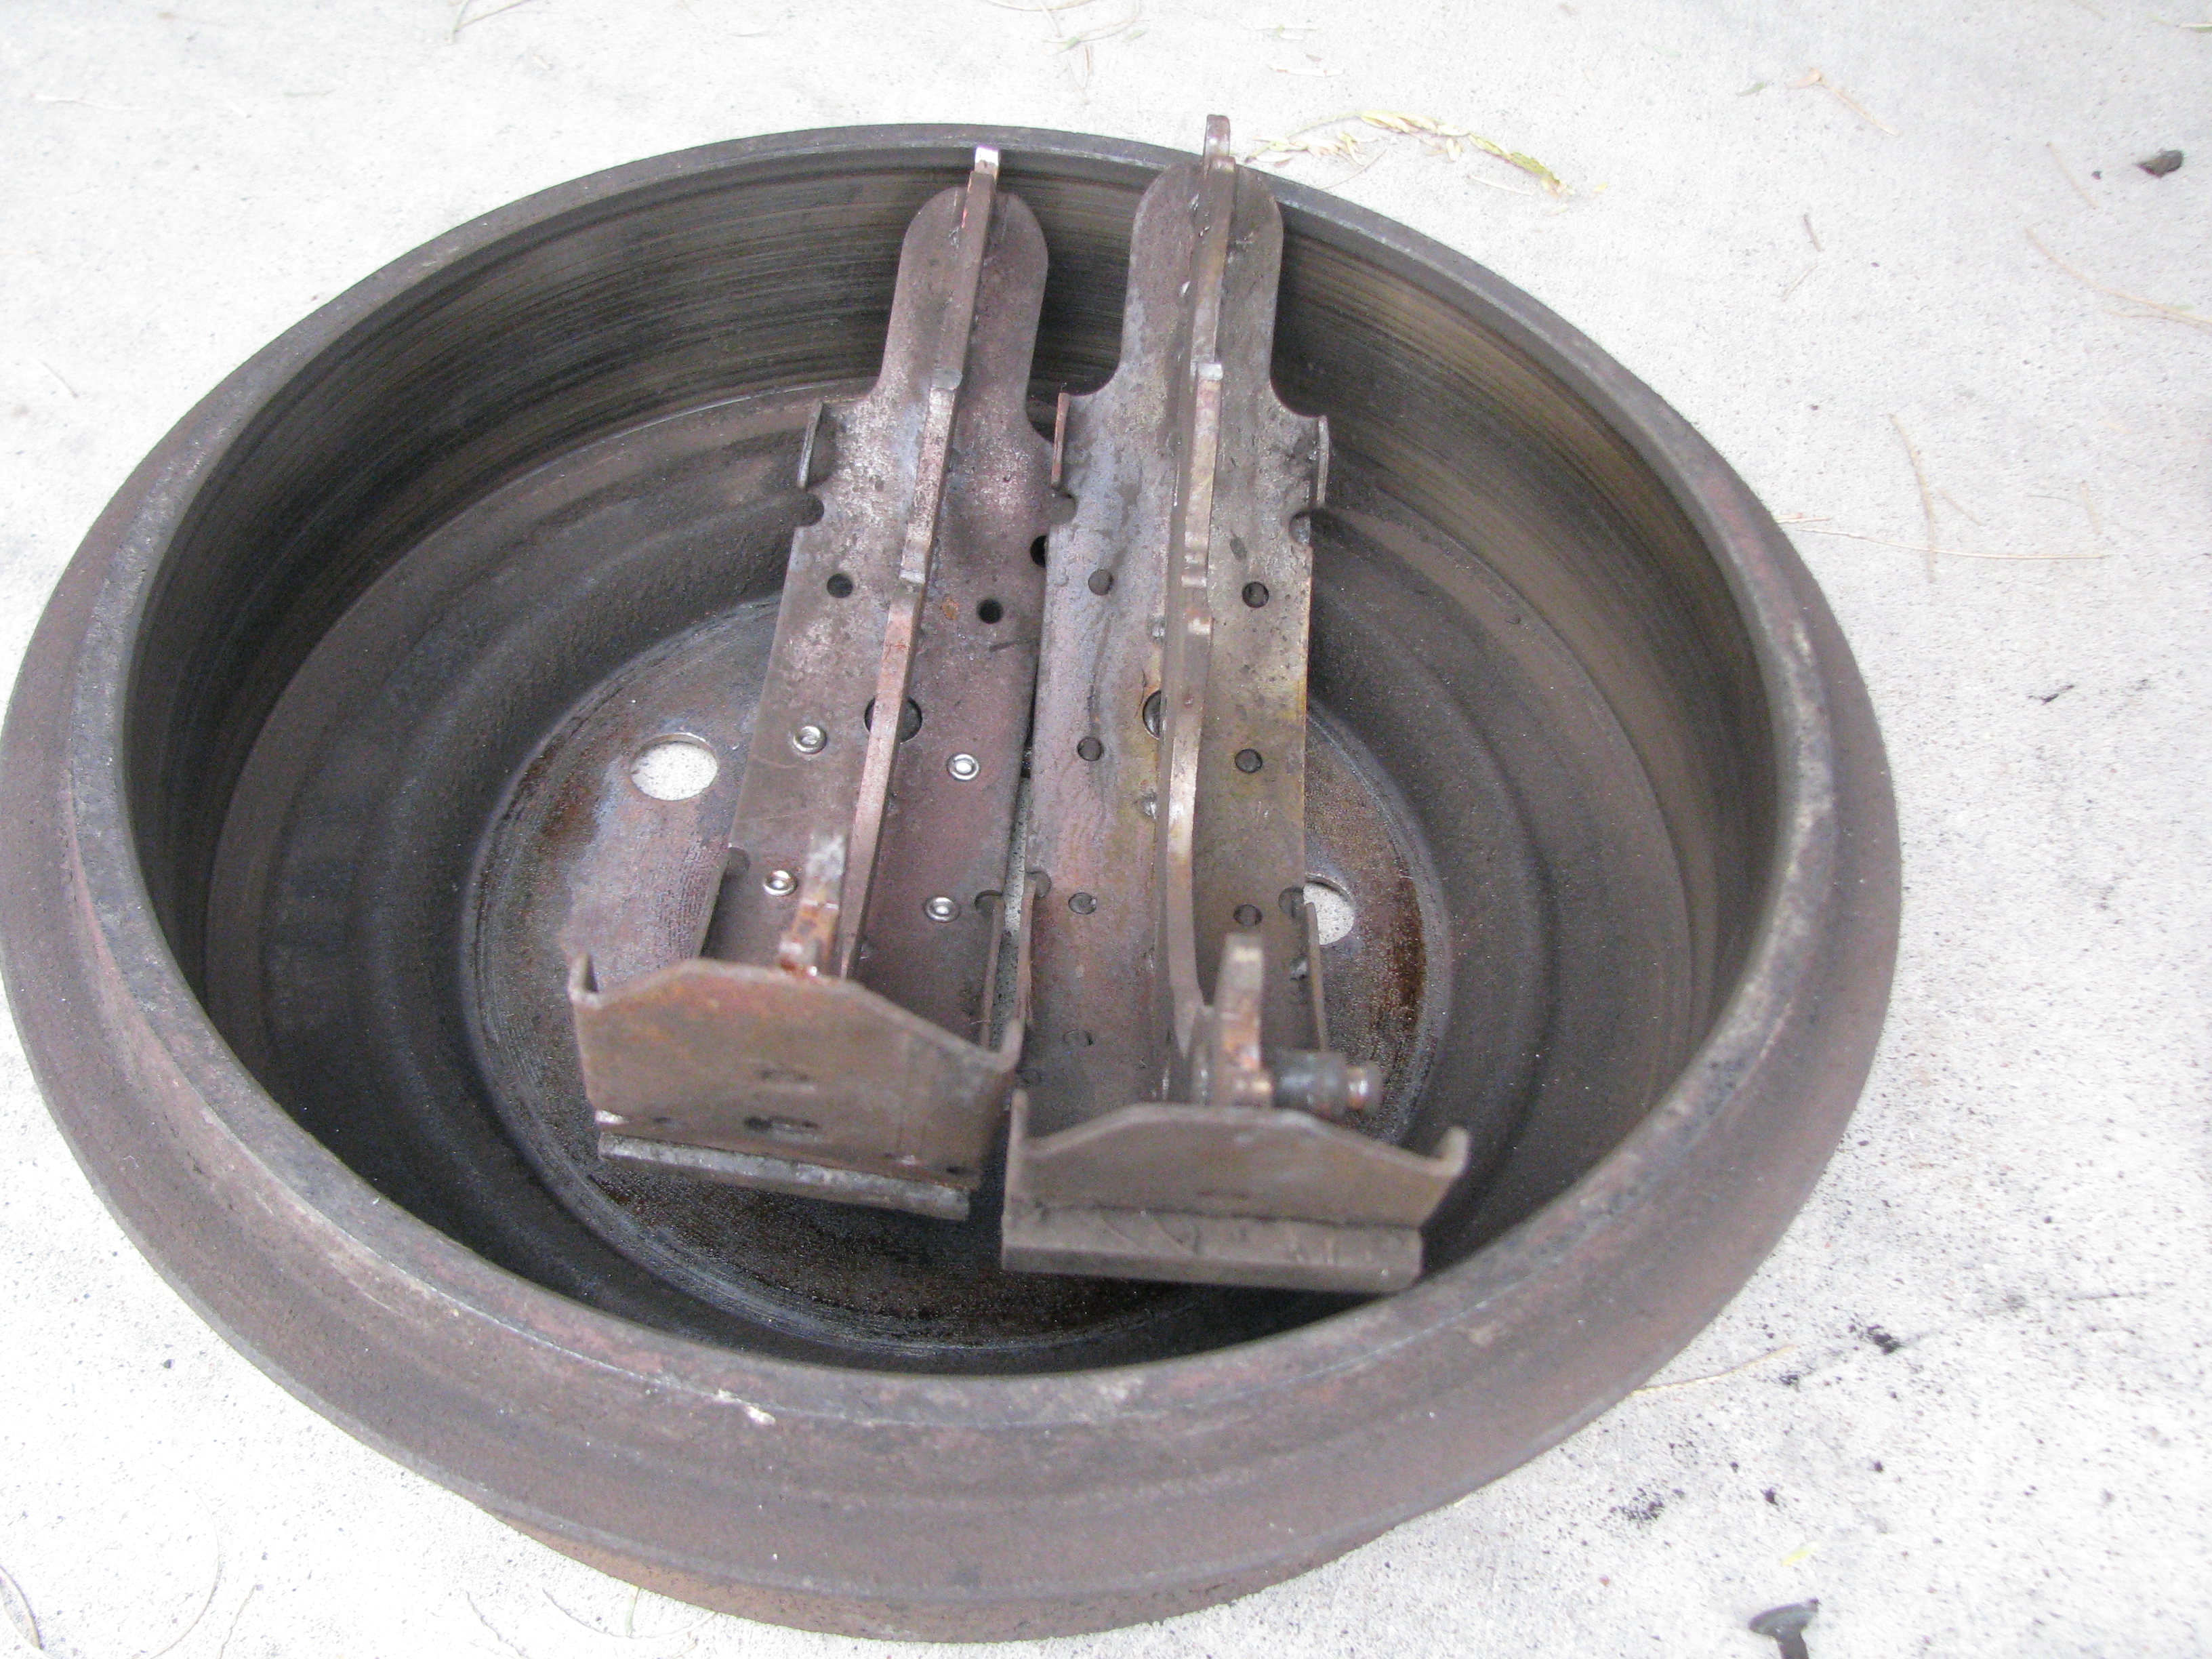 Some amount of pulling and cursing later and they're off. Oddly, the leading pad was riveted on both sides, while the trailing pad was bonded. 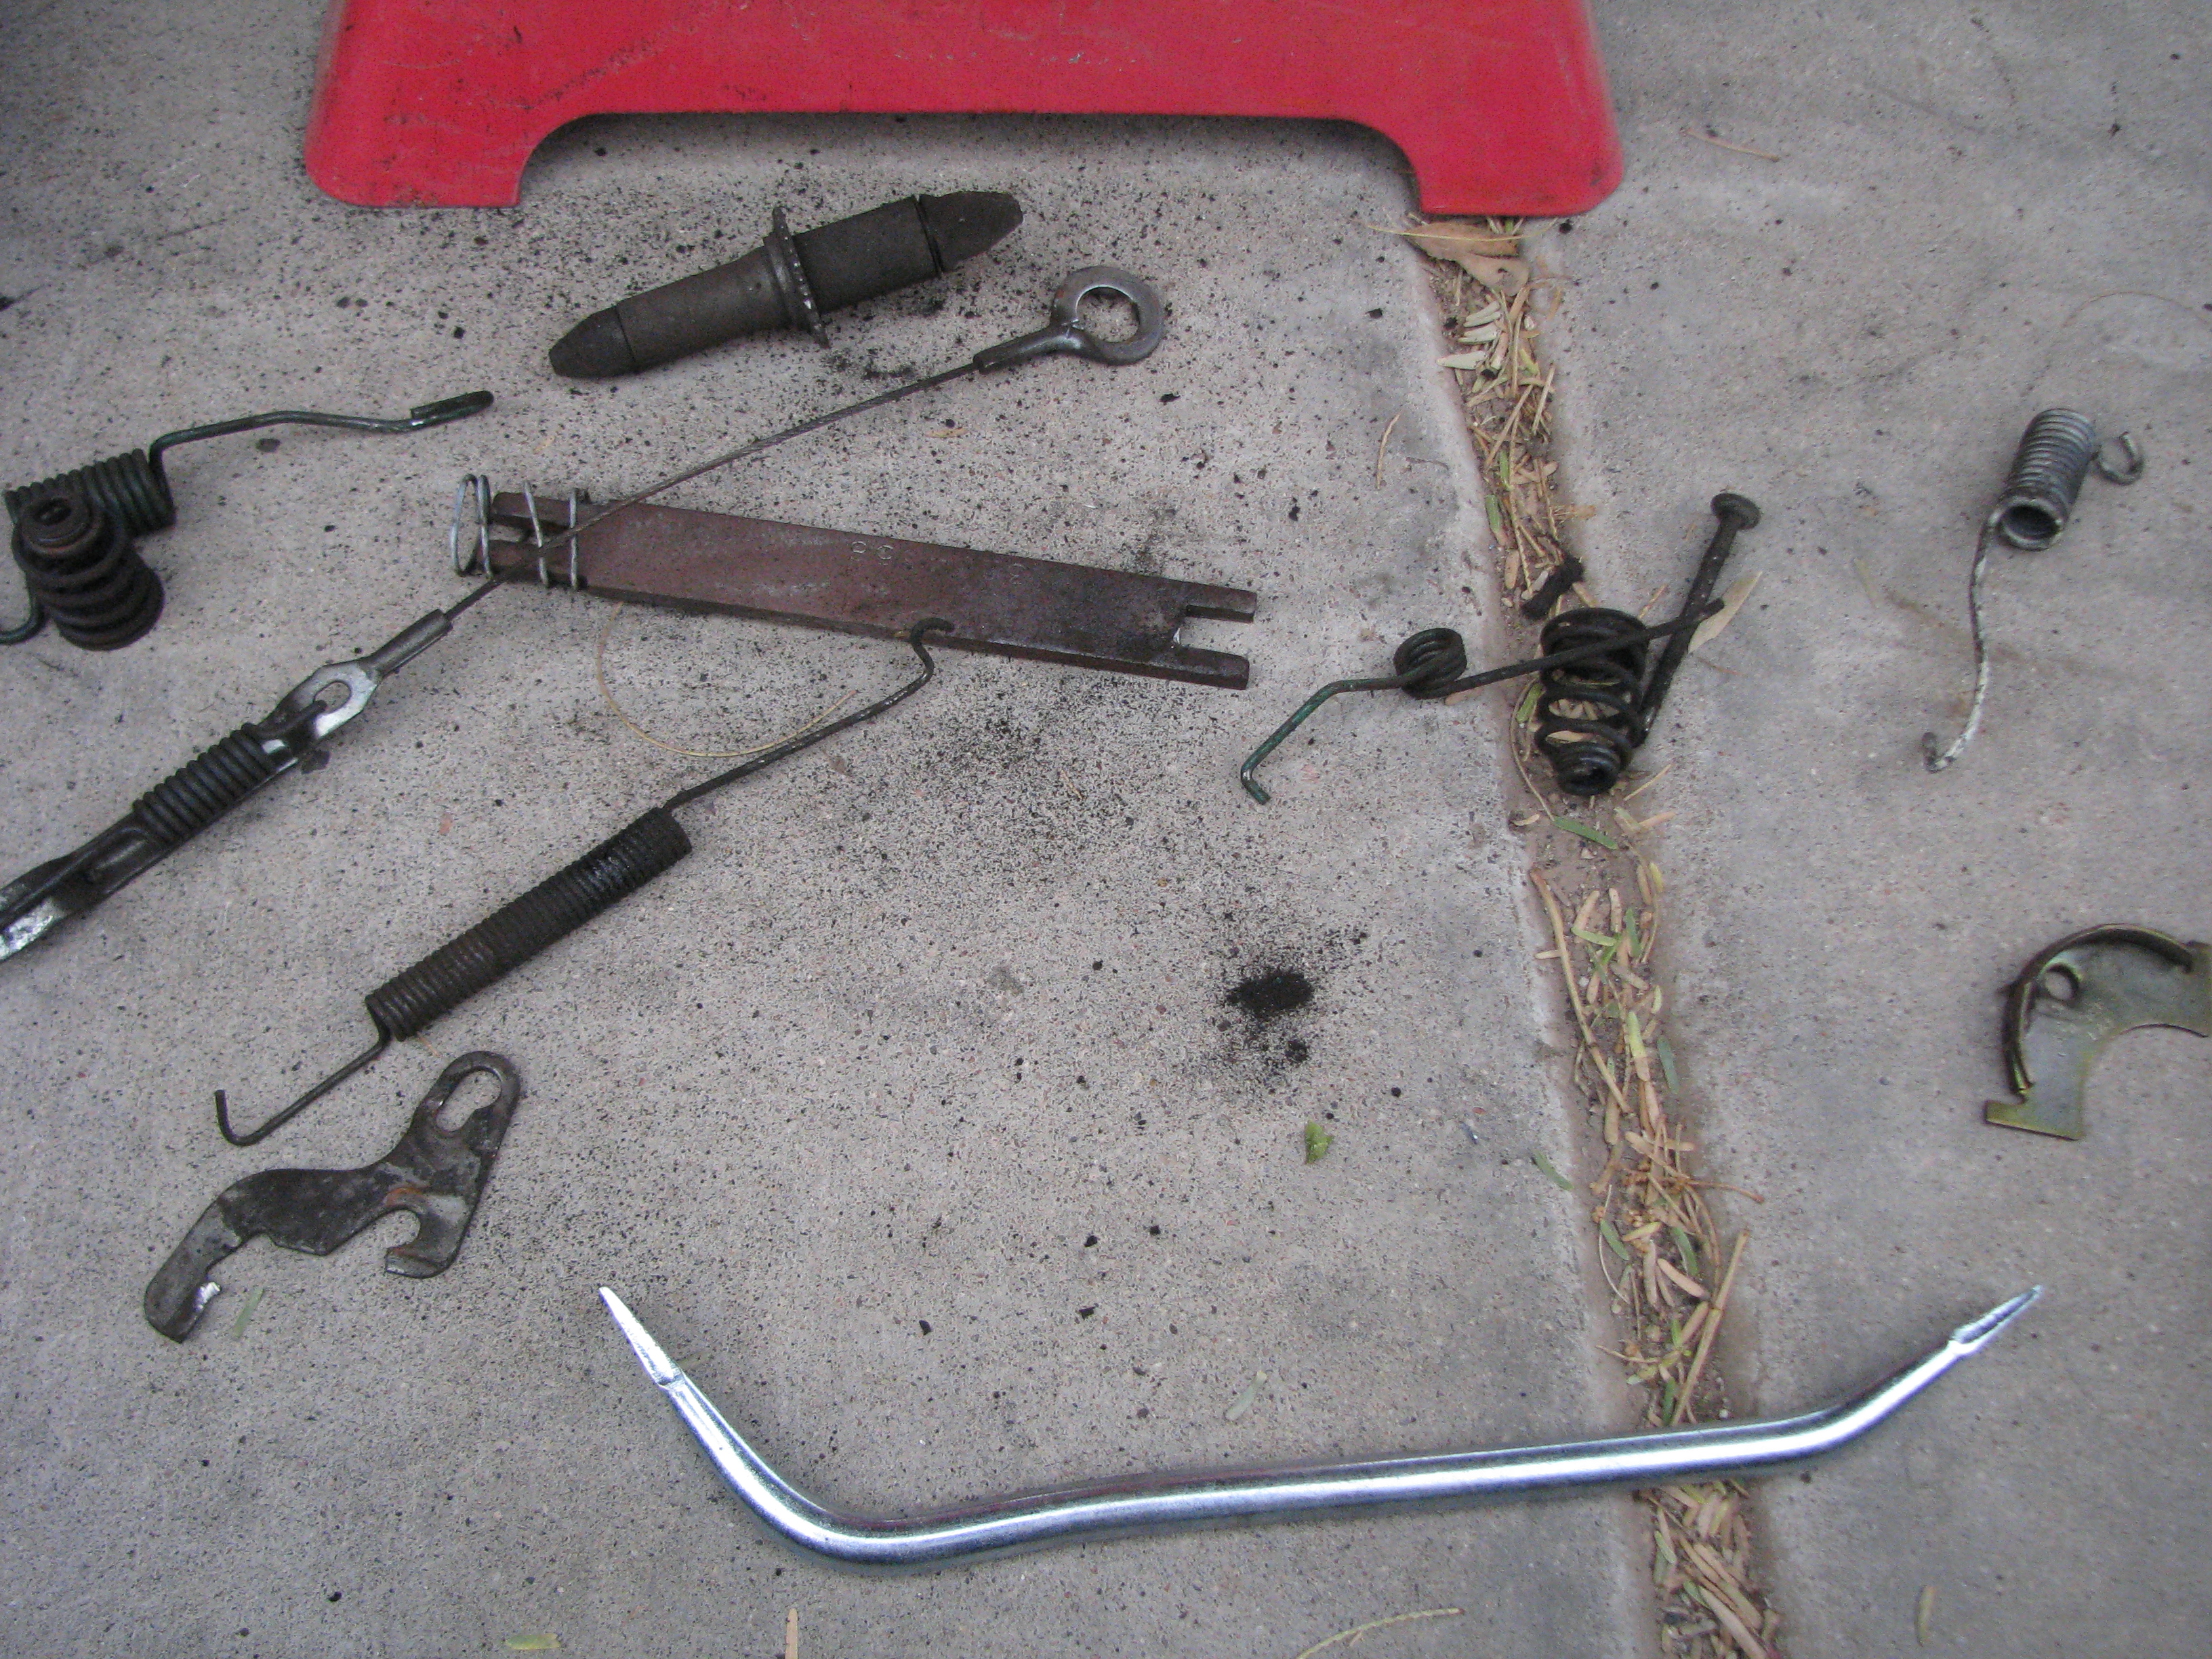 Hardware that came off of the brakes. 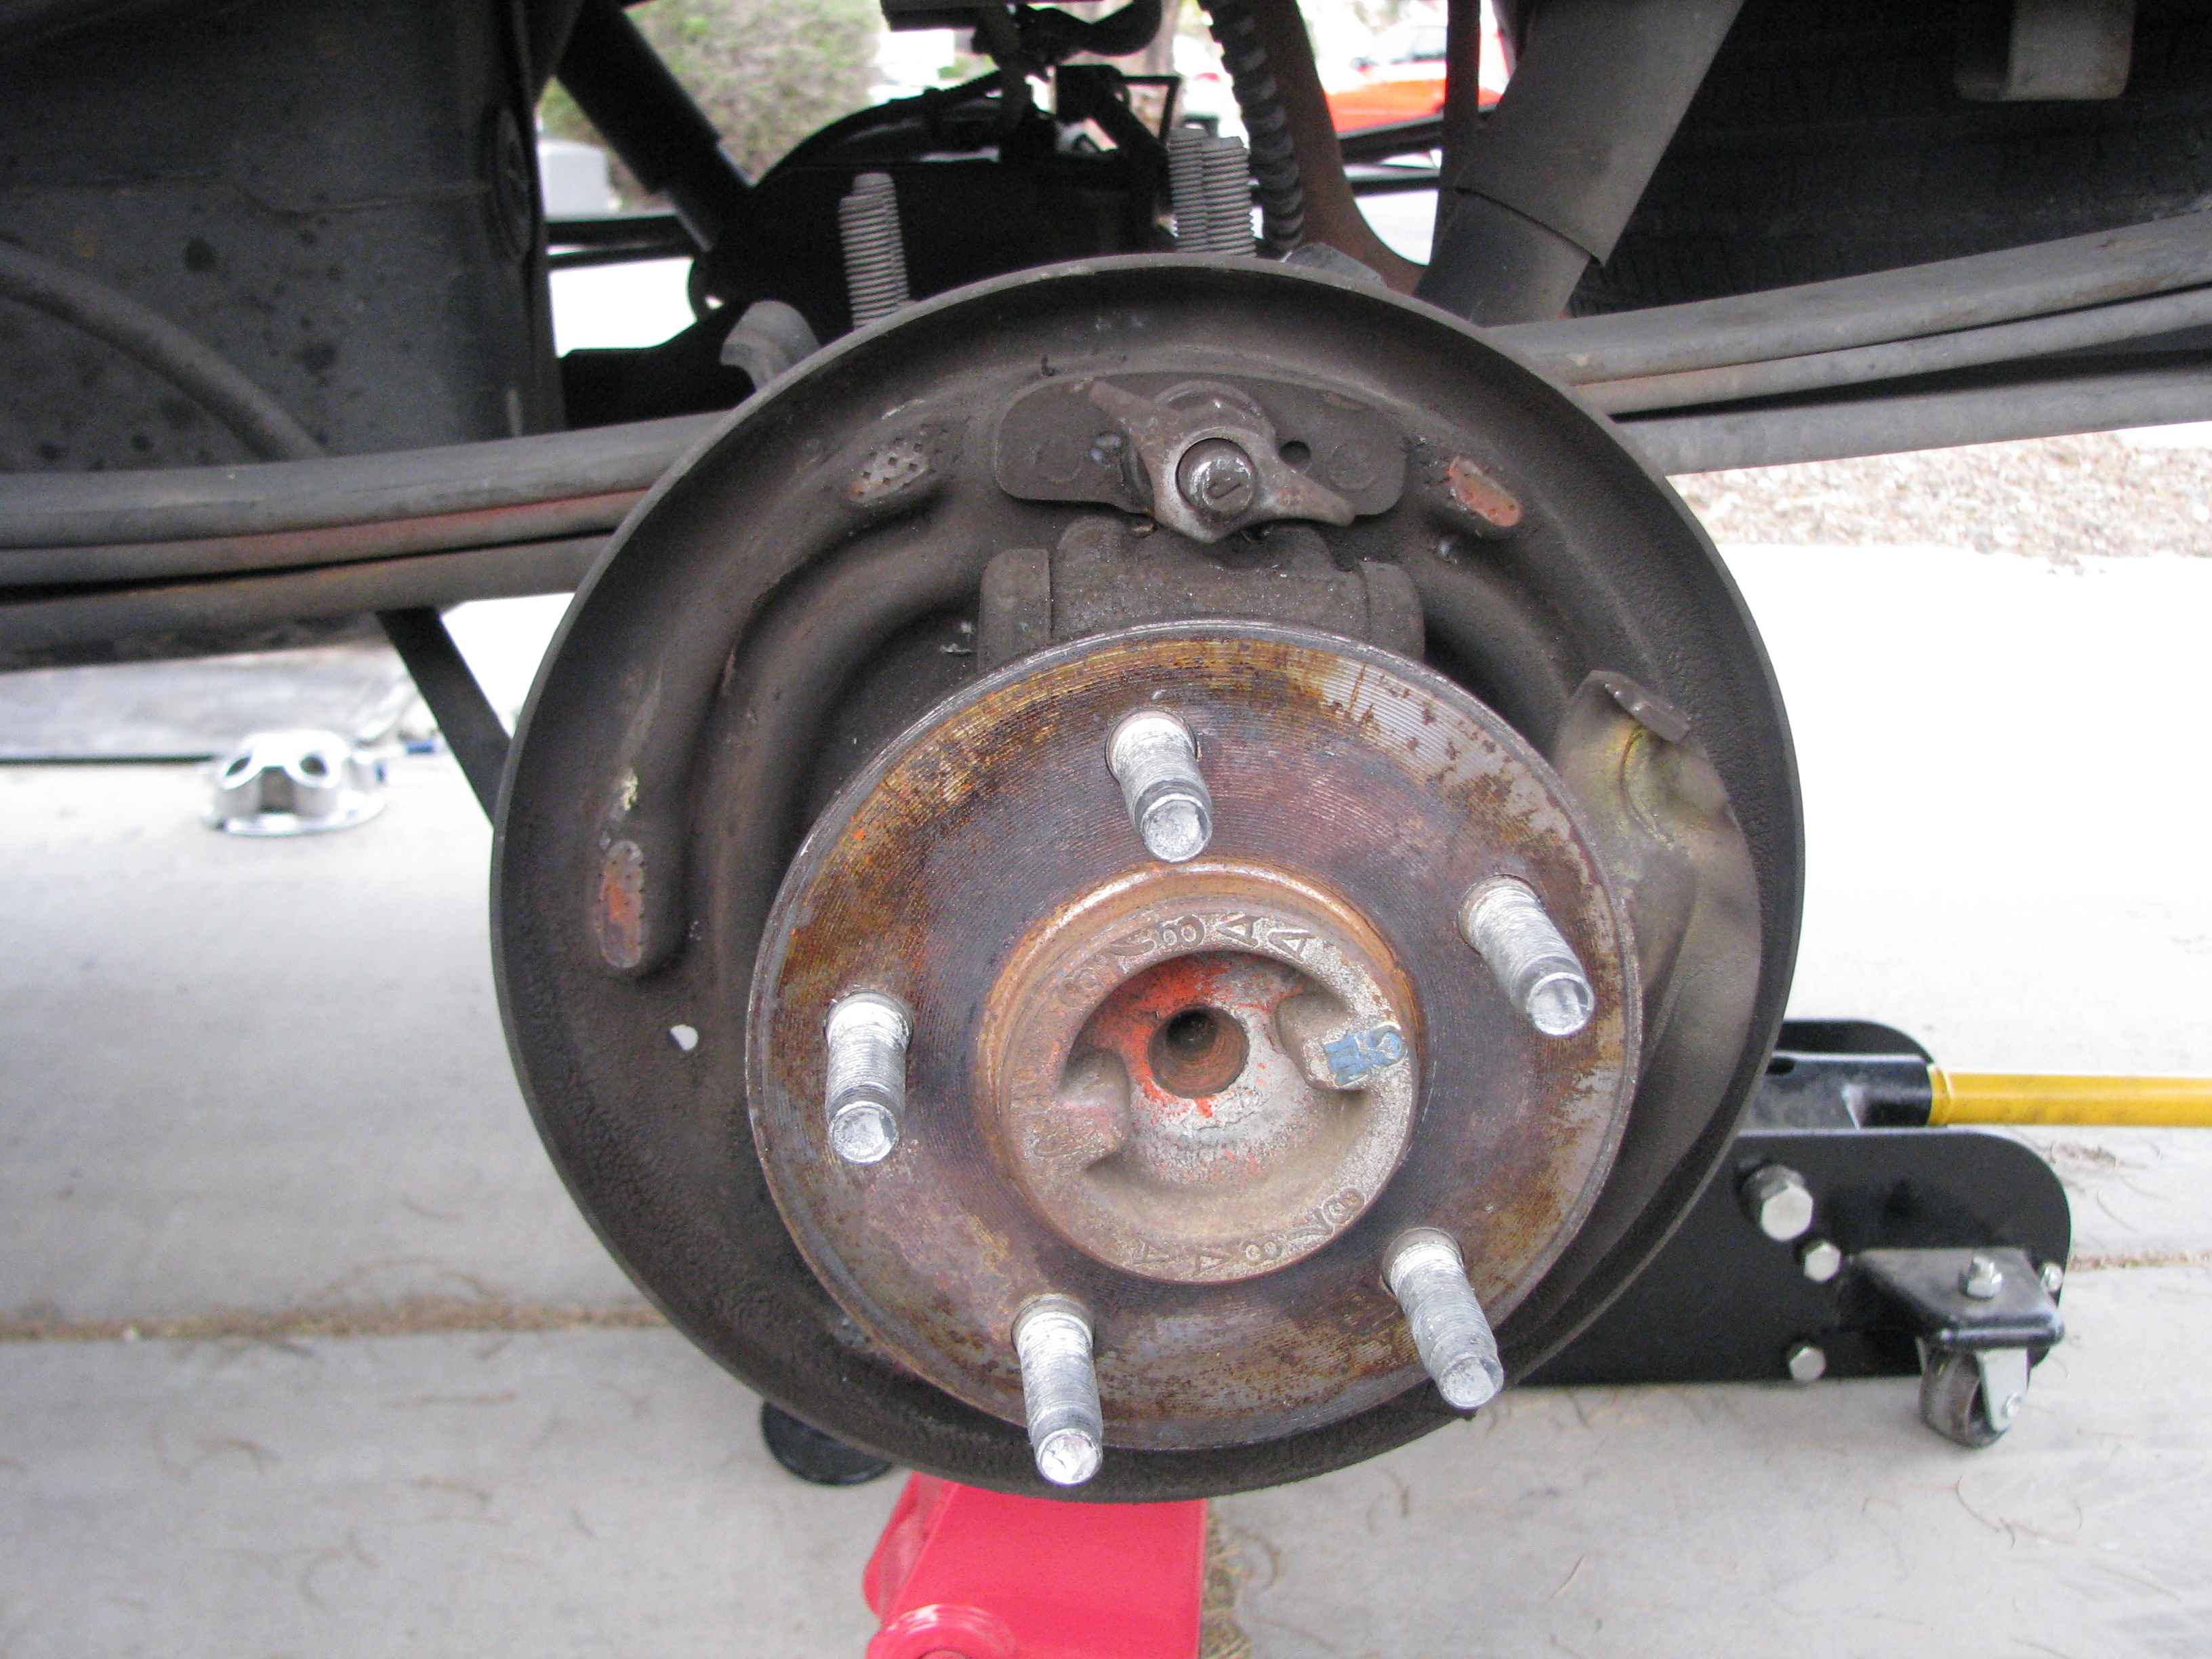 Naked brake setup. 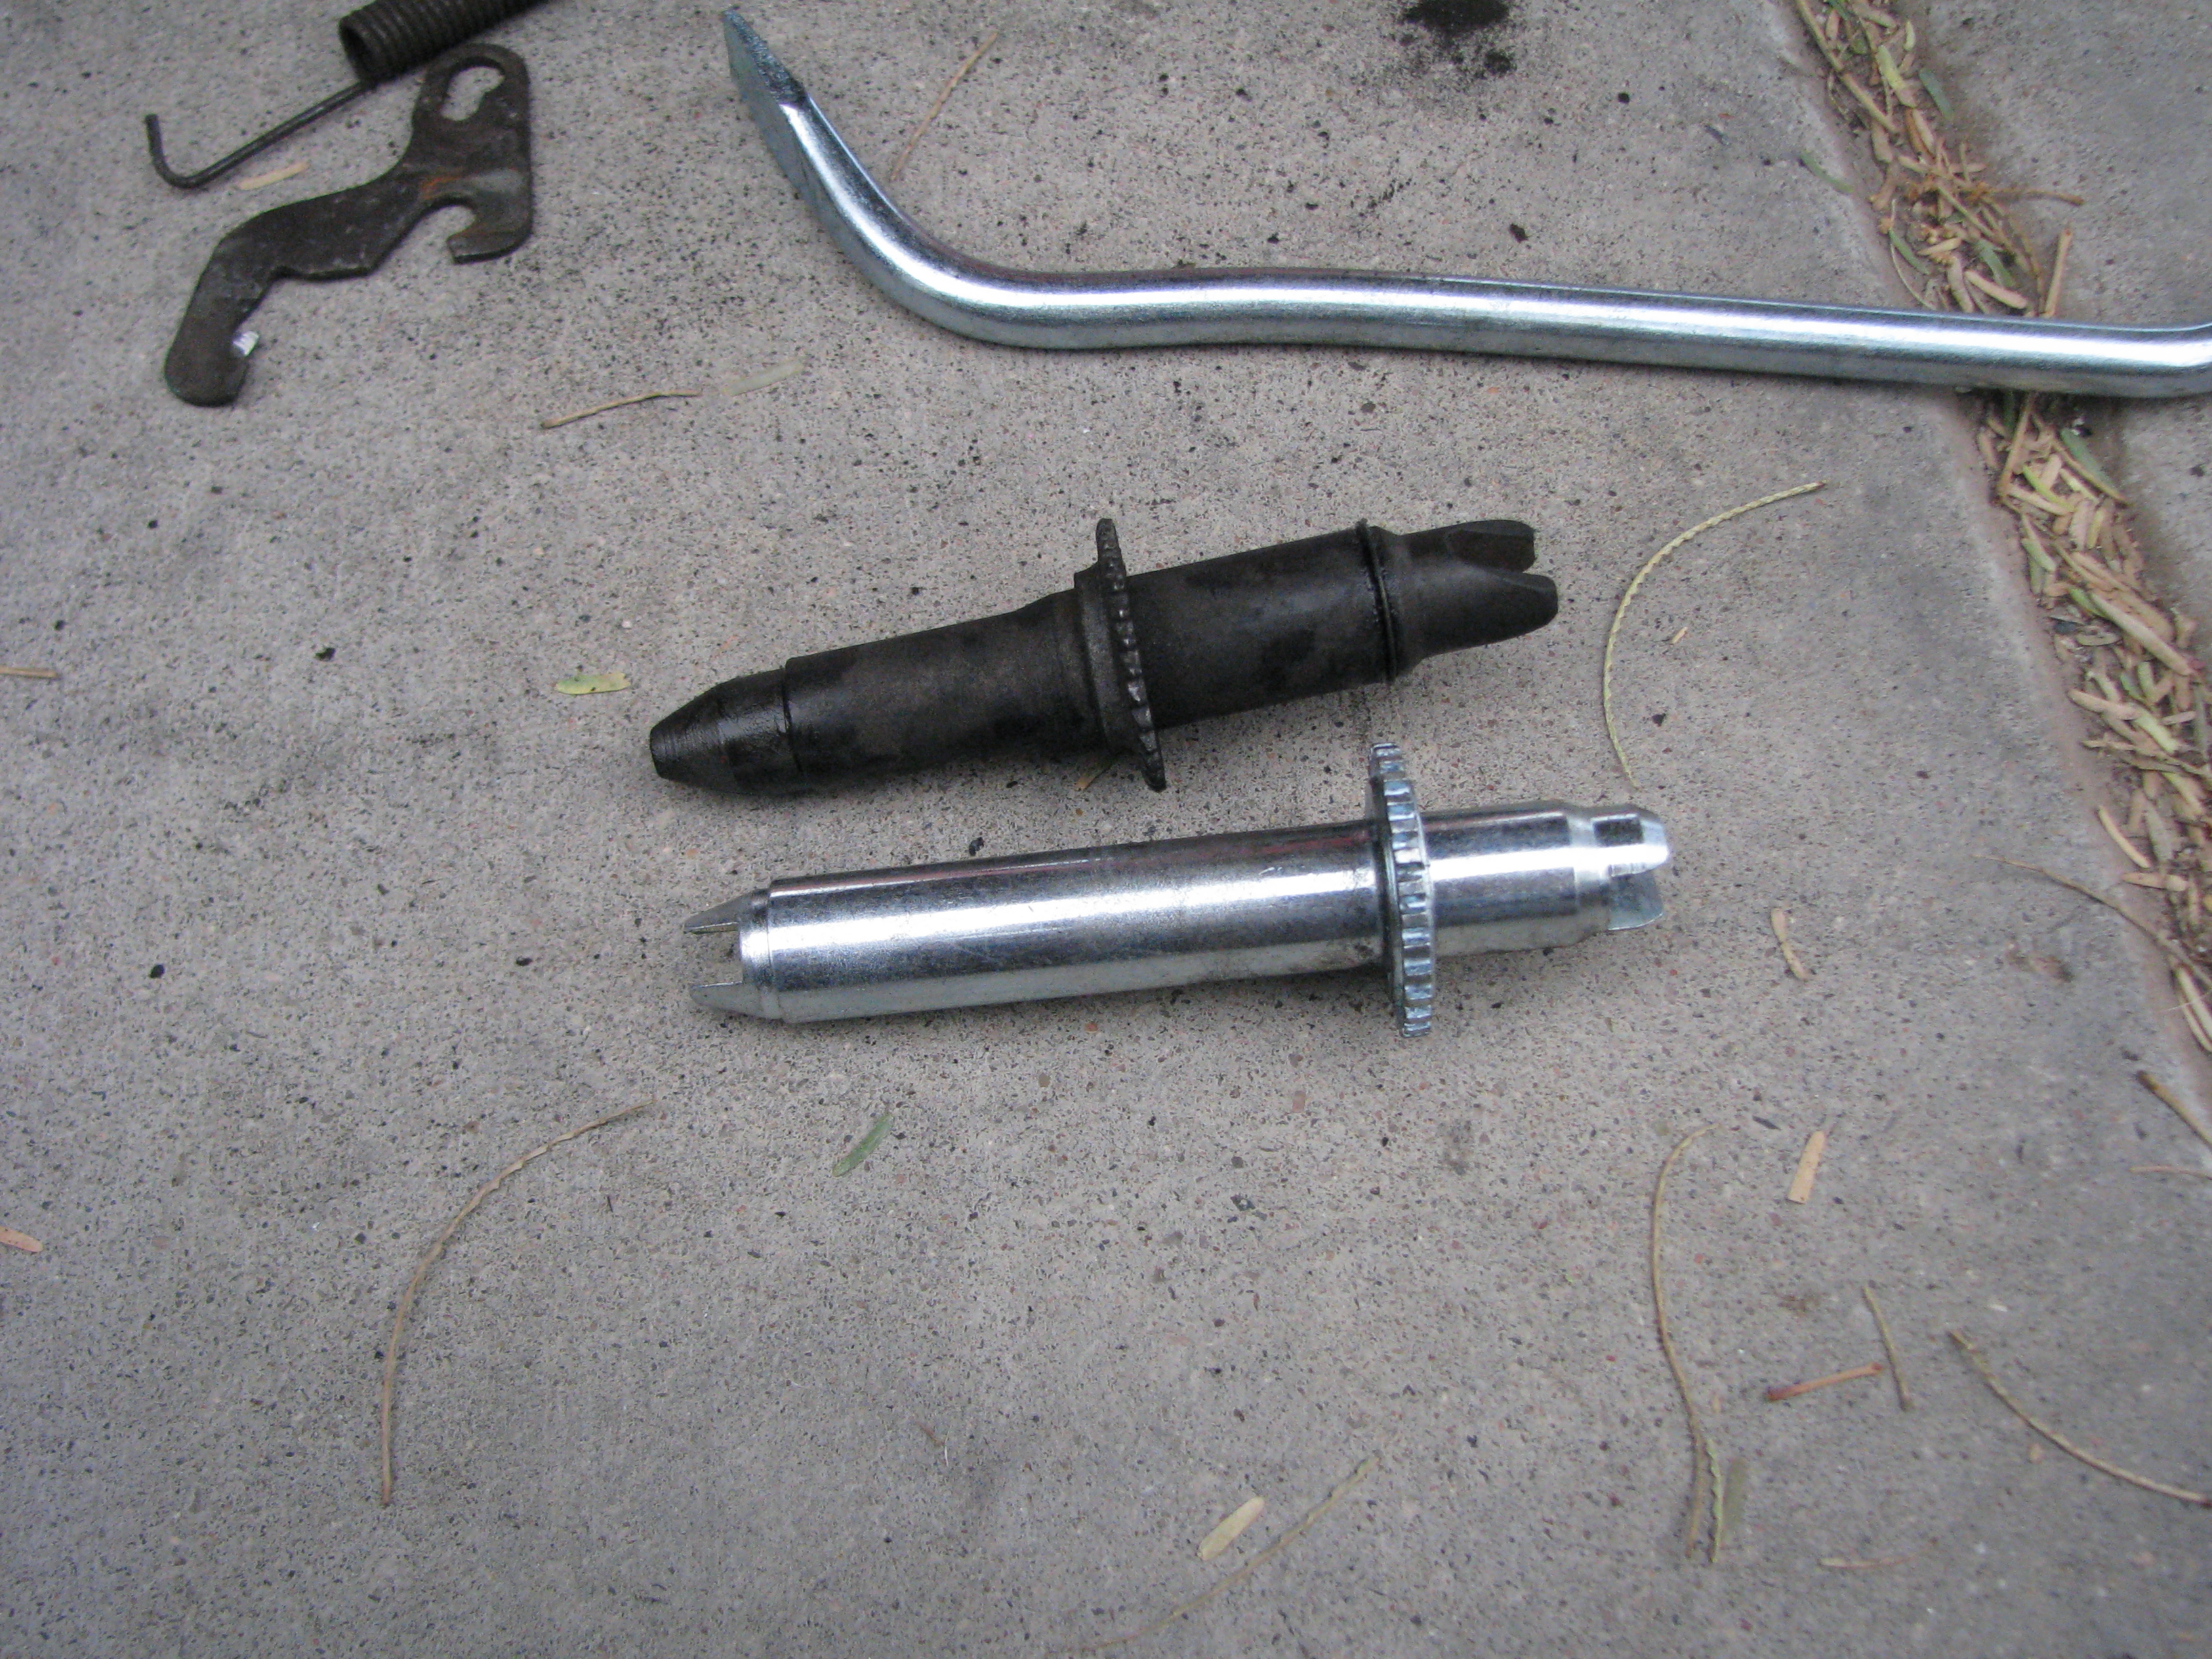 Annoyingly it looks like the brake hardware kit I bought from Rockauto must've been for the 10" brakes, and not my 9" brakes - nothing really matches up, as shown with the adjuster here. Luckily the hardware seems to be in good shape so I'm leaving it as is. It looks like I lost the pic I took of it all back together to dead camera batteries, but it looks roughly the same, just with more pad material and copious amounts of silicone lube wherever appropriate.  Passenger side now. 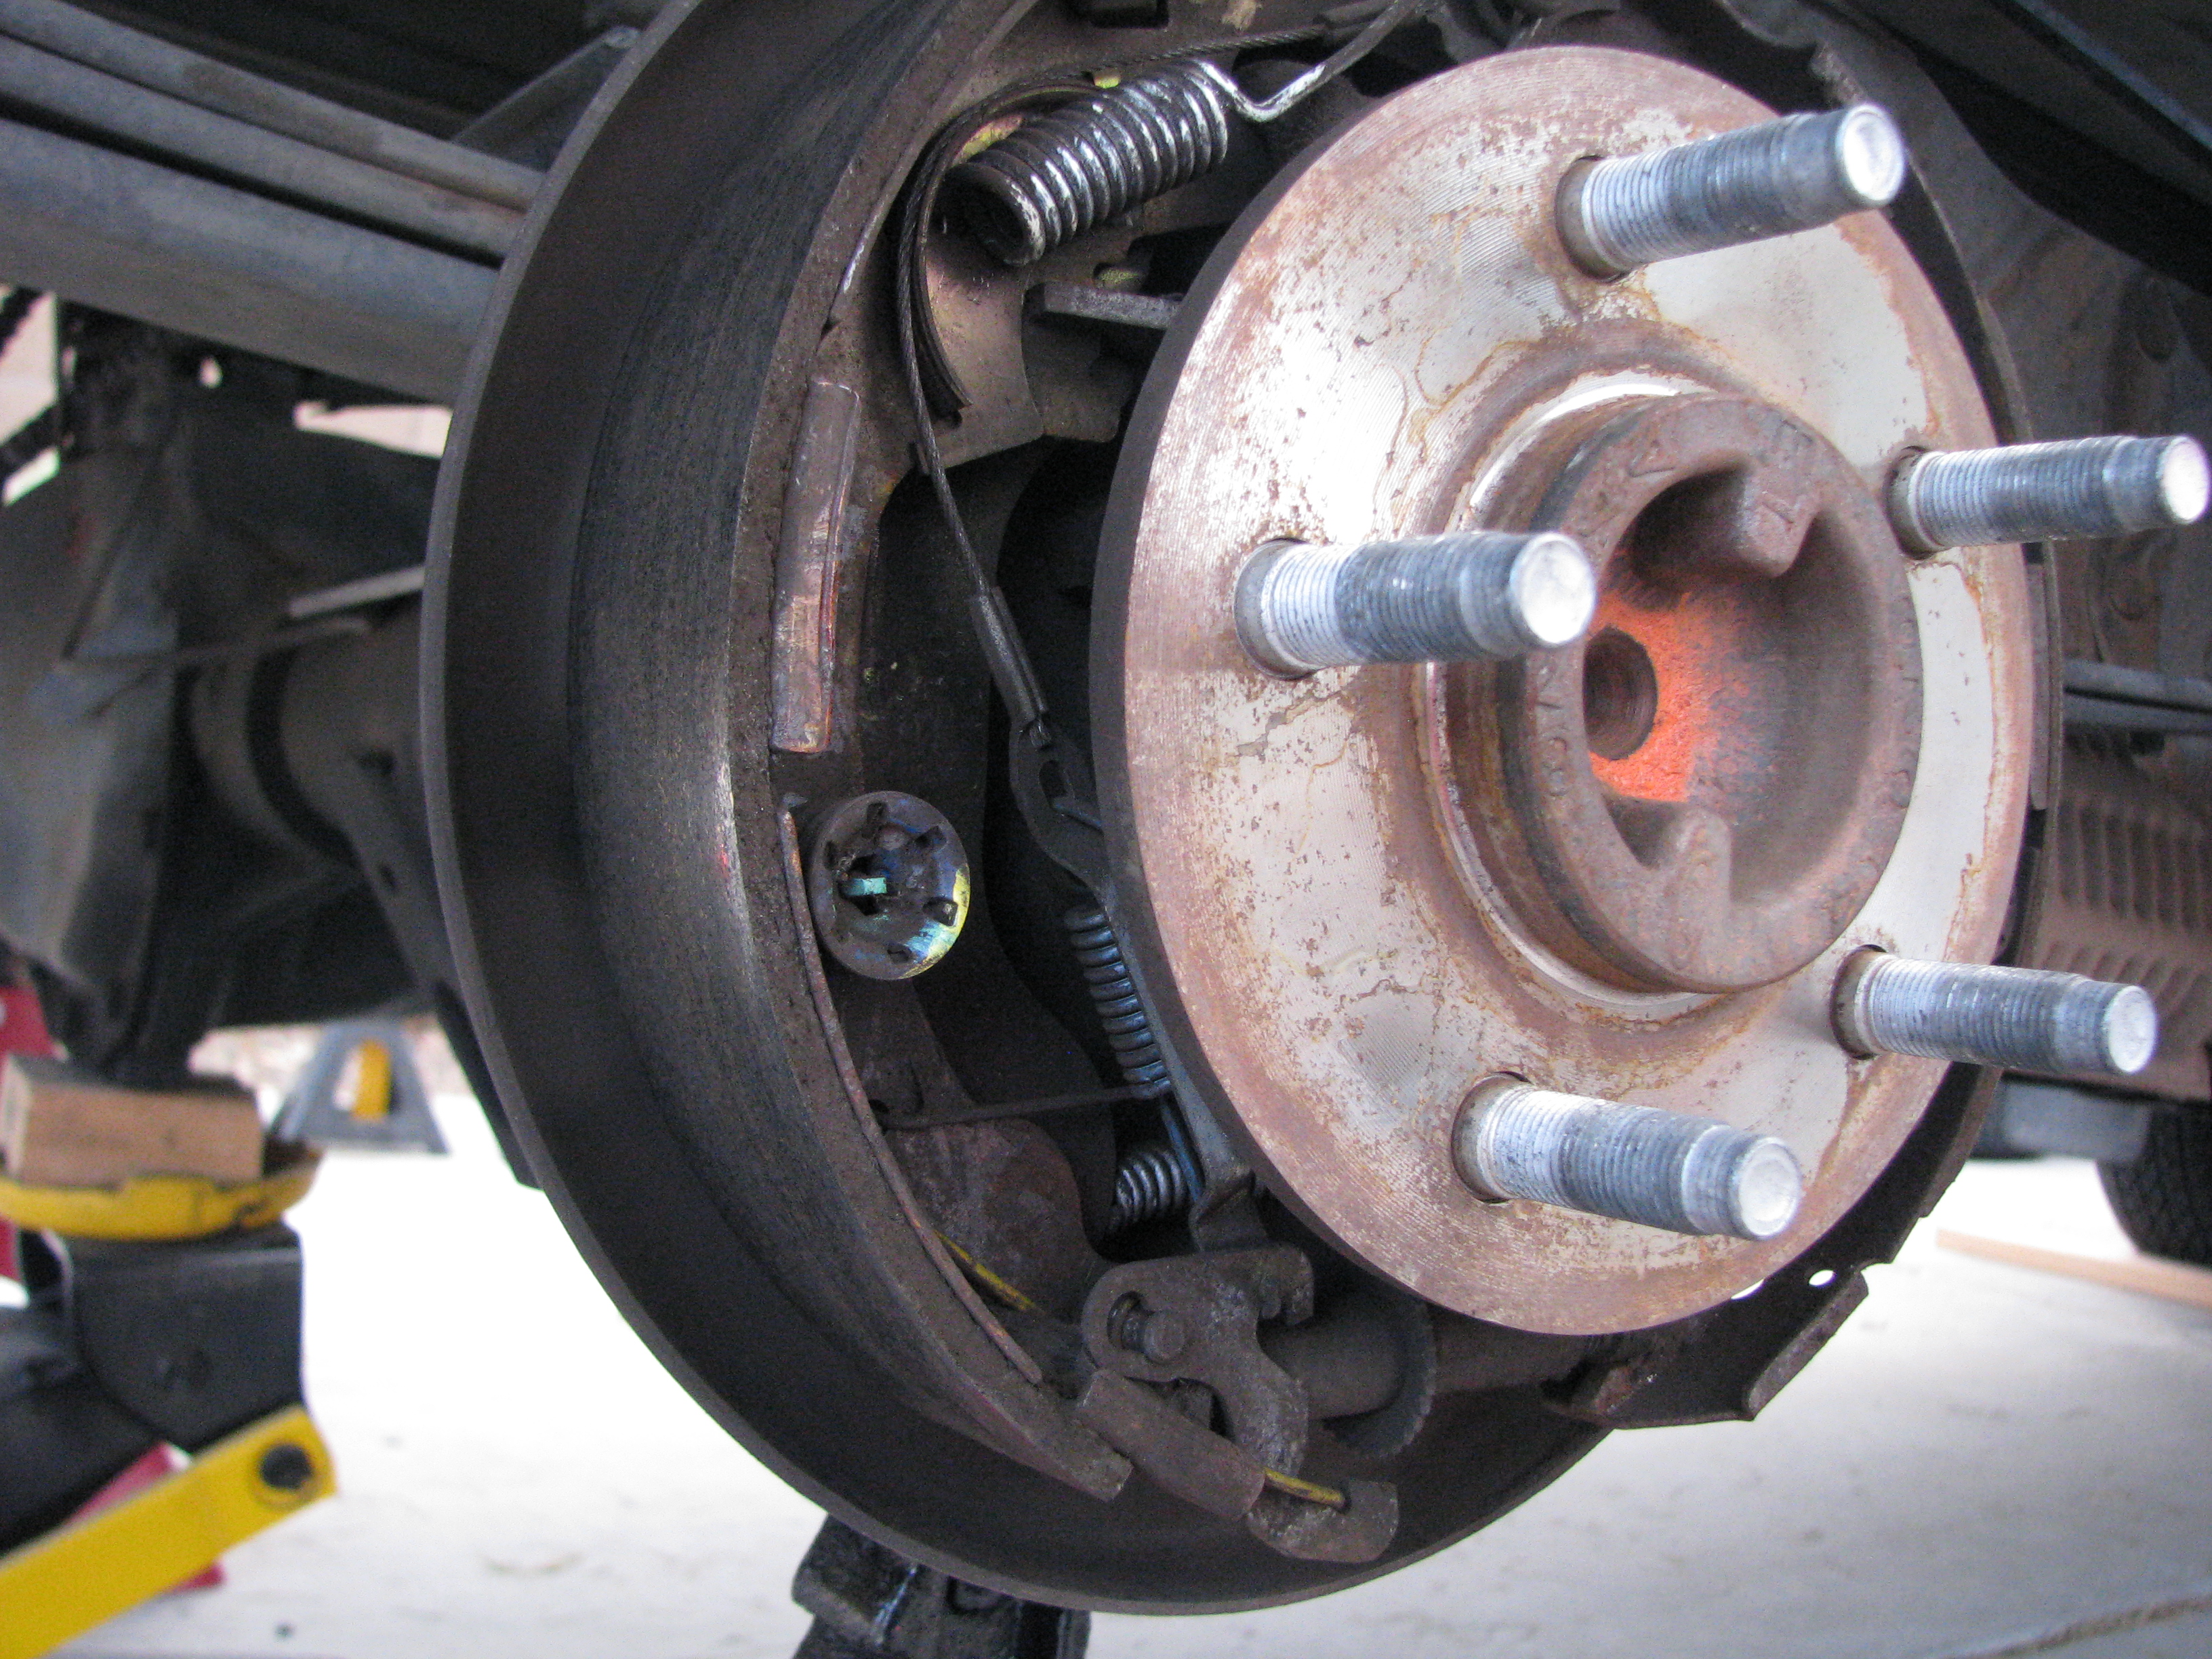 Trailing pad. Note the slack in the adjusting mechanism there, I'm hoping I can deal with that just by reassembling it better than whoever touched this last and that I don't need to go buy more parts. 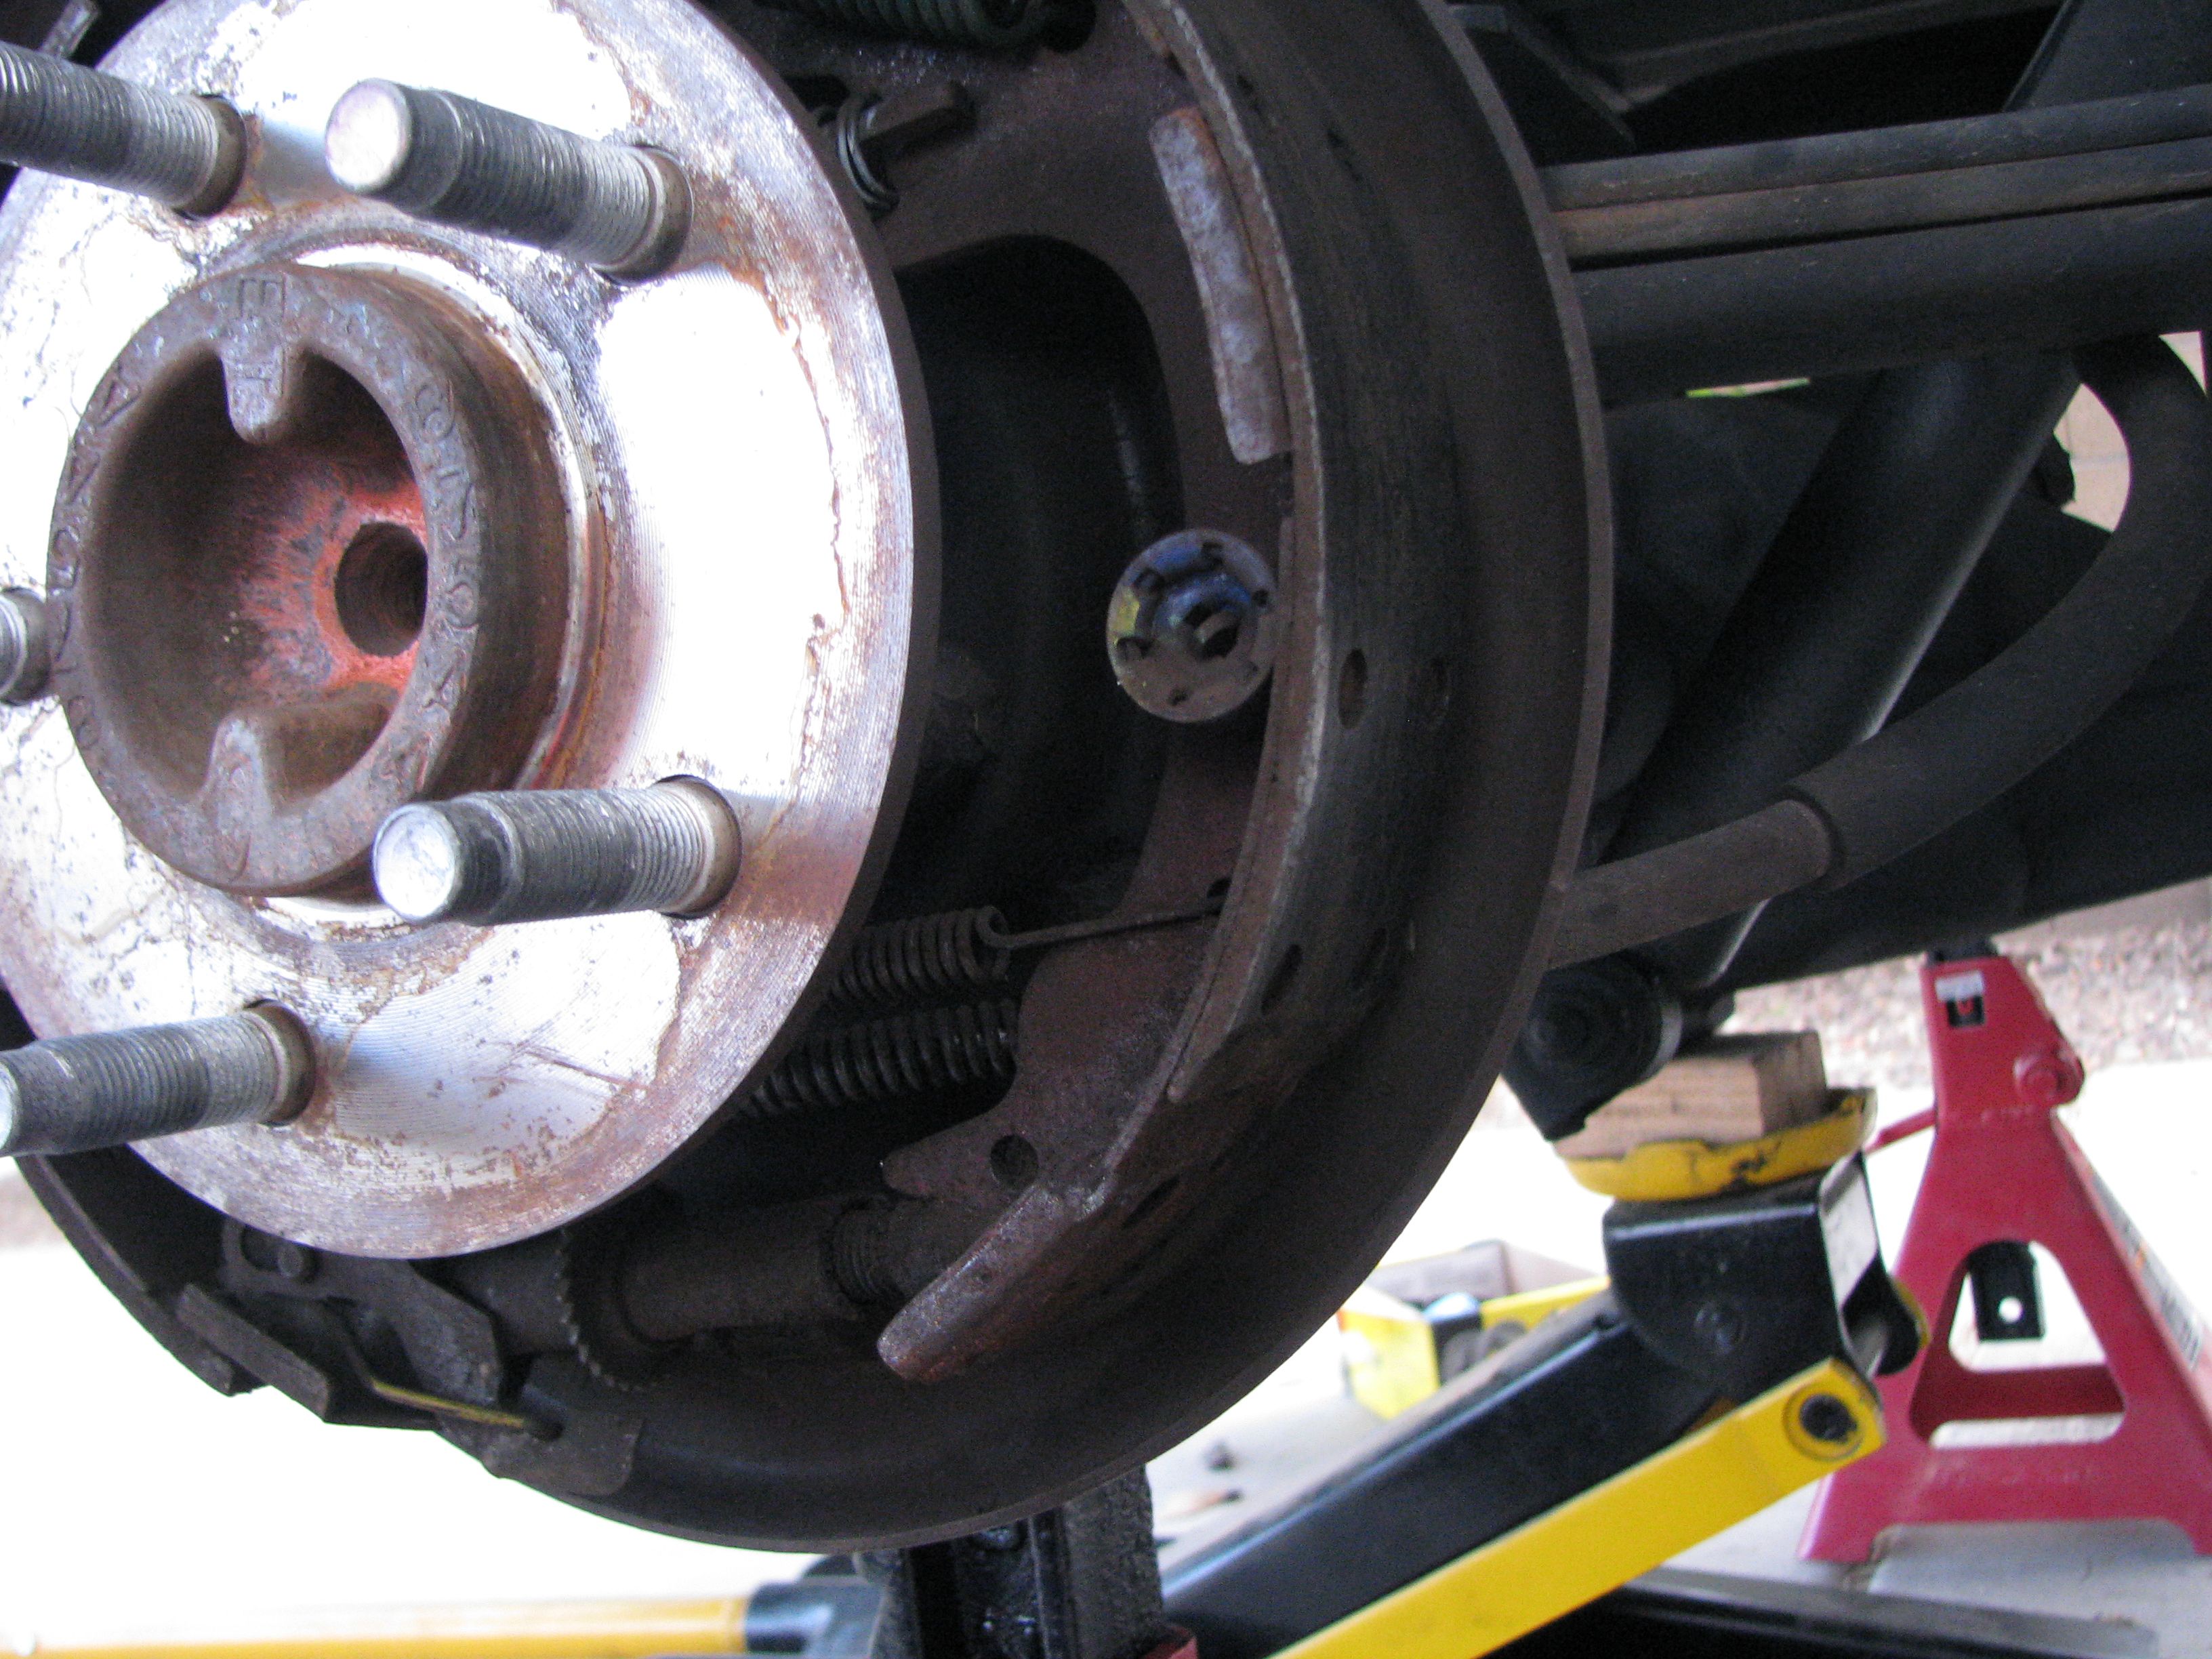 Leading pad, again with the chamfering wear. Some amount of swearing and pulling (less than with the first one, at least!) I decide to poke at the wheel cylinder, and, well... 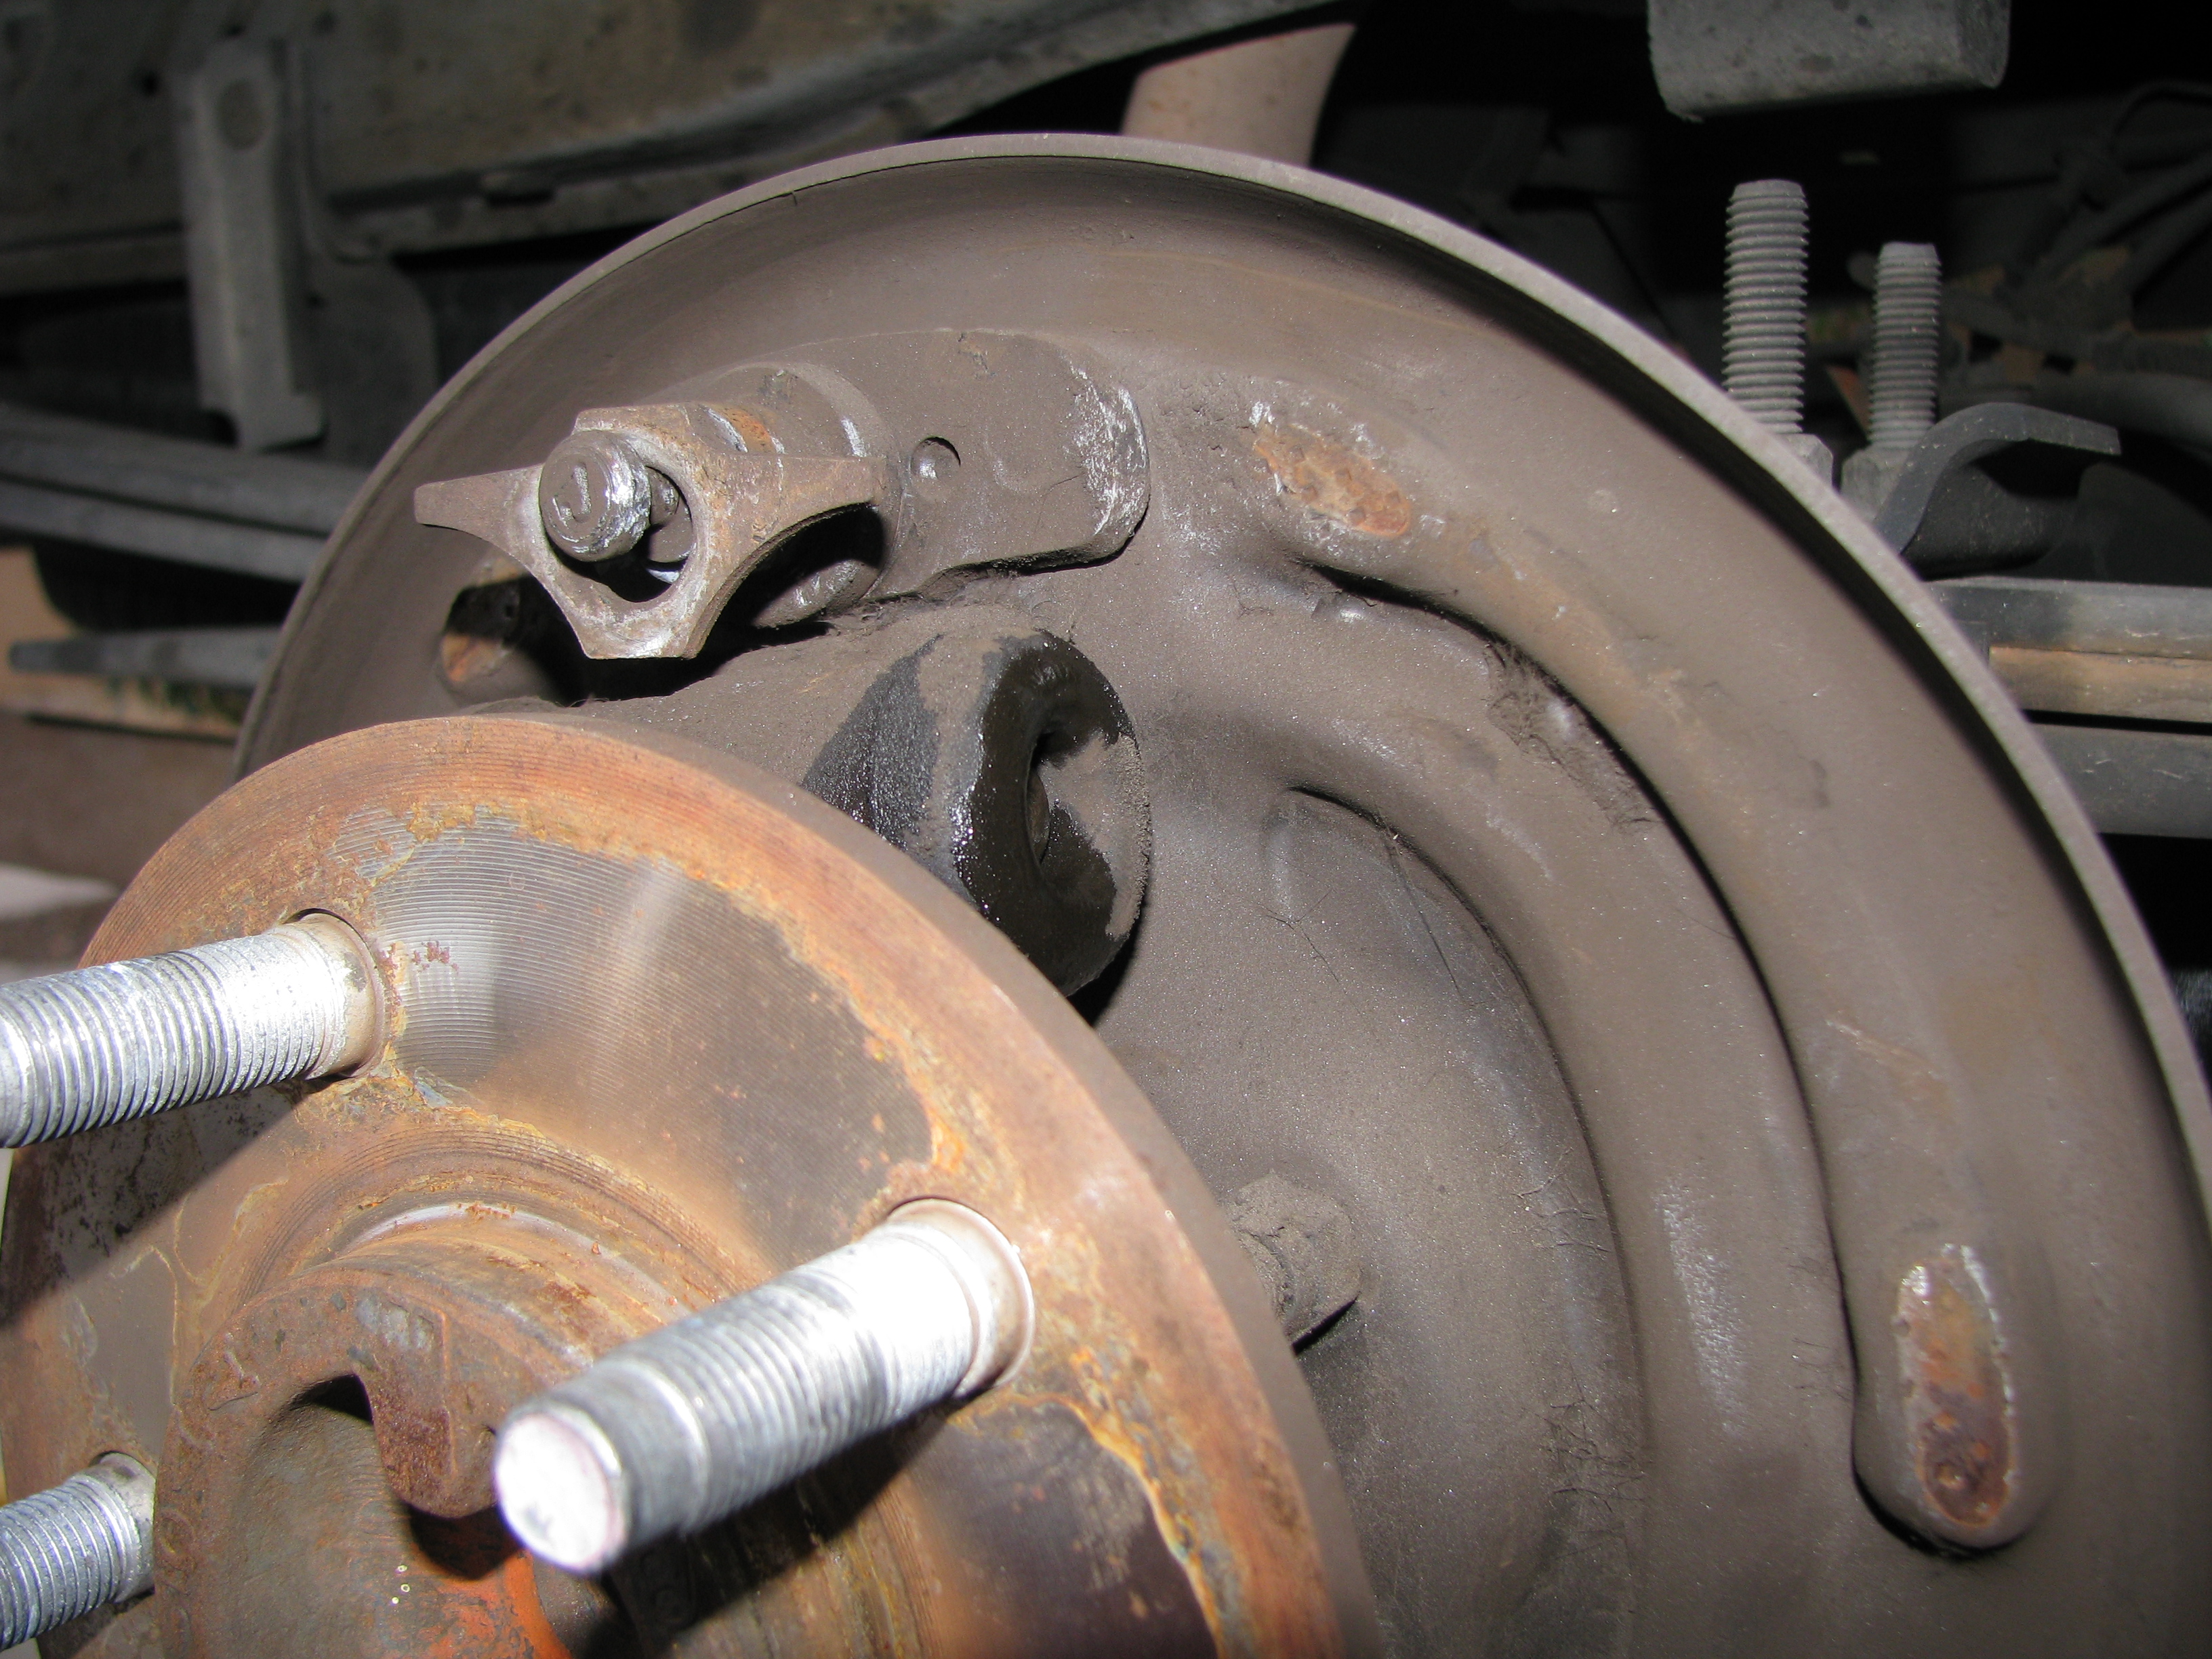 gently caress  Plus side,  It is officially Cold As Hell out (shut up, I'm a local, 45 and wet is loving freezing to me) so that's it for the night. I just love leaving a truck on jackstands with a brake line open in the rain  Just the time it took to pick everything up that was sitting in the rain made my hands hurt like hell, so I guess I'm finishing this (and maybe getting to the shocks, water pump, thermostat, plugs, and wires) tomorrow. Just the time it took to pick everything up that was sitting in the rain made my hands hurt like hell, so I guess I'm finishing this (and maybe getting to the shocks, water pump, thermostat, plugs, and wires) tomorrow.
|
|
#
¿
Dec 31, 2012 03:23
|
|
|
So no photos today because it turned into a "gently caress you, I'm getting this done" sort of day. Awoke to find a non-trivial amount of brake fluid had drained into the ziploc bag I stuck around the open brake line, so I decided I would need to bleed all four wheels and not just the right rear. In the daylight, the reason for the slack in the adjusting mechanism became obvious - this little bastard failed on the passenger side:  The small round bit that's pressed in towards the car hooks into one of the shoes to tension the adjuster cable, and it was almost completely broken off of the original part. Thankfully OReilly sells these for $2 for a pair, so I have a spare if I own this thing long enough to pull the rear brakes apart again. Once I got the parts all in, it went together relatively easily, aside from my loving Craftsman 7000lb jack failing after I lifted the front of the truck. Thankfully not while under load. I had to do the rest with a HF 3000lb aluminum jack and that thing makes some really uncomfortable creaking noises while lifting the front of that truck. Bled everything with the Mityvac with no issues and now I have better brake feel than before.
|
|
#
¿
Dec 31, 2012 23:27
|
|
|
I think drum brakes are a thing a lot of manufacturers just buy from suppliers instead of developing their own; the wheel cylinder I pulled off was a Bendix unit, for example. Also, Checker doesn't even actually list that part as being compatible with my year of Ranger, even though RockAuto does. 
|
|
#
¿
Jan 1, 2013 05:00
|
|
|
Yeah; remember that most of the metro Phoenix area is really, really new compared to most of the country. There's almost no pre-war development. You'd have to try hard to find an actual house without a poured concrete driveway. The only difference between the driveway and the garage floor is the surface texture (smoother in the garage) and the slope.
|
|
#
¿
Jan 1, 2013 05:20
|
|
|
Well, I was hoping to get the rear shocks and maybe the plugs / wires / clean the IAC out this weekend. Nope, looks like record-setting rainfall! On top of that, I have figured out why the last time it rained it seemed to stay humid in the Ranger for a long time; something is leaking. The back of the headliner is dripping wet all the way across the cab, but it doesn't go any further forward than the rear of the doors. I'm guessing it's the seal on the exterior light on the cab / over the rear window.
|
|
#
¿
Jan 26, 2013 22:54
|
|
|
Eh, soon enough it will be dried out one way or the other. It is still Arizona after all. After further research, it may actually be the rear window seal. Thankfully the window is actually bolted on, rather than held in by the seal itself, so it looks to be a relatively painless thing to reseal.
|
|
#
¿
Jan 26, 2013 23:36
|
|
|
Haven't done jack poo poo to my cars aside from changing the oil in each, and menacingly glaring at the driver's side of the block in my Ranger. It's still leaking oil, and while I thought it was the sender, a closer look makes it look relatively dry. It honestly looks like it's seeping around what appears to be some sort of nipple threaded in for PCV and that the only way I'm going to easily get to all of that is going to be pulling the intake manifold. Which, supposedly, is the easiest way to get to the driver's side spark plugs.
|
|
#
¿
Feb 18, 2013 17:51
|
|
|
Just did the plugs in my MS3; these are a tick over 60k old. Top-to-bottom is drivers side to passenger side. Only interesting bit is that the second plug came out wet and smelling of gasoline, even though the engine was stone cold. Best I can figure is that it must've injected fuel in that one right as it was shutting down and never got a spark to clear it out. Looked good in general.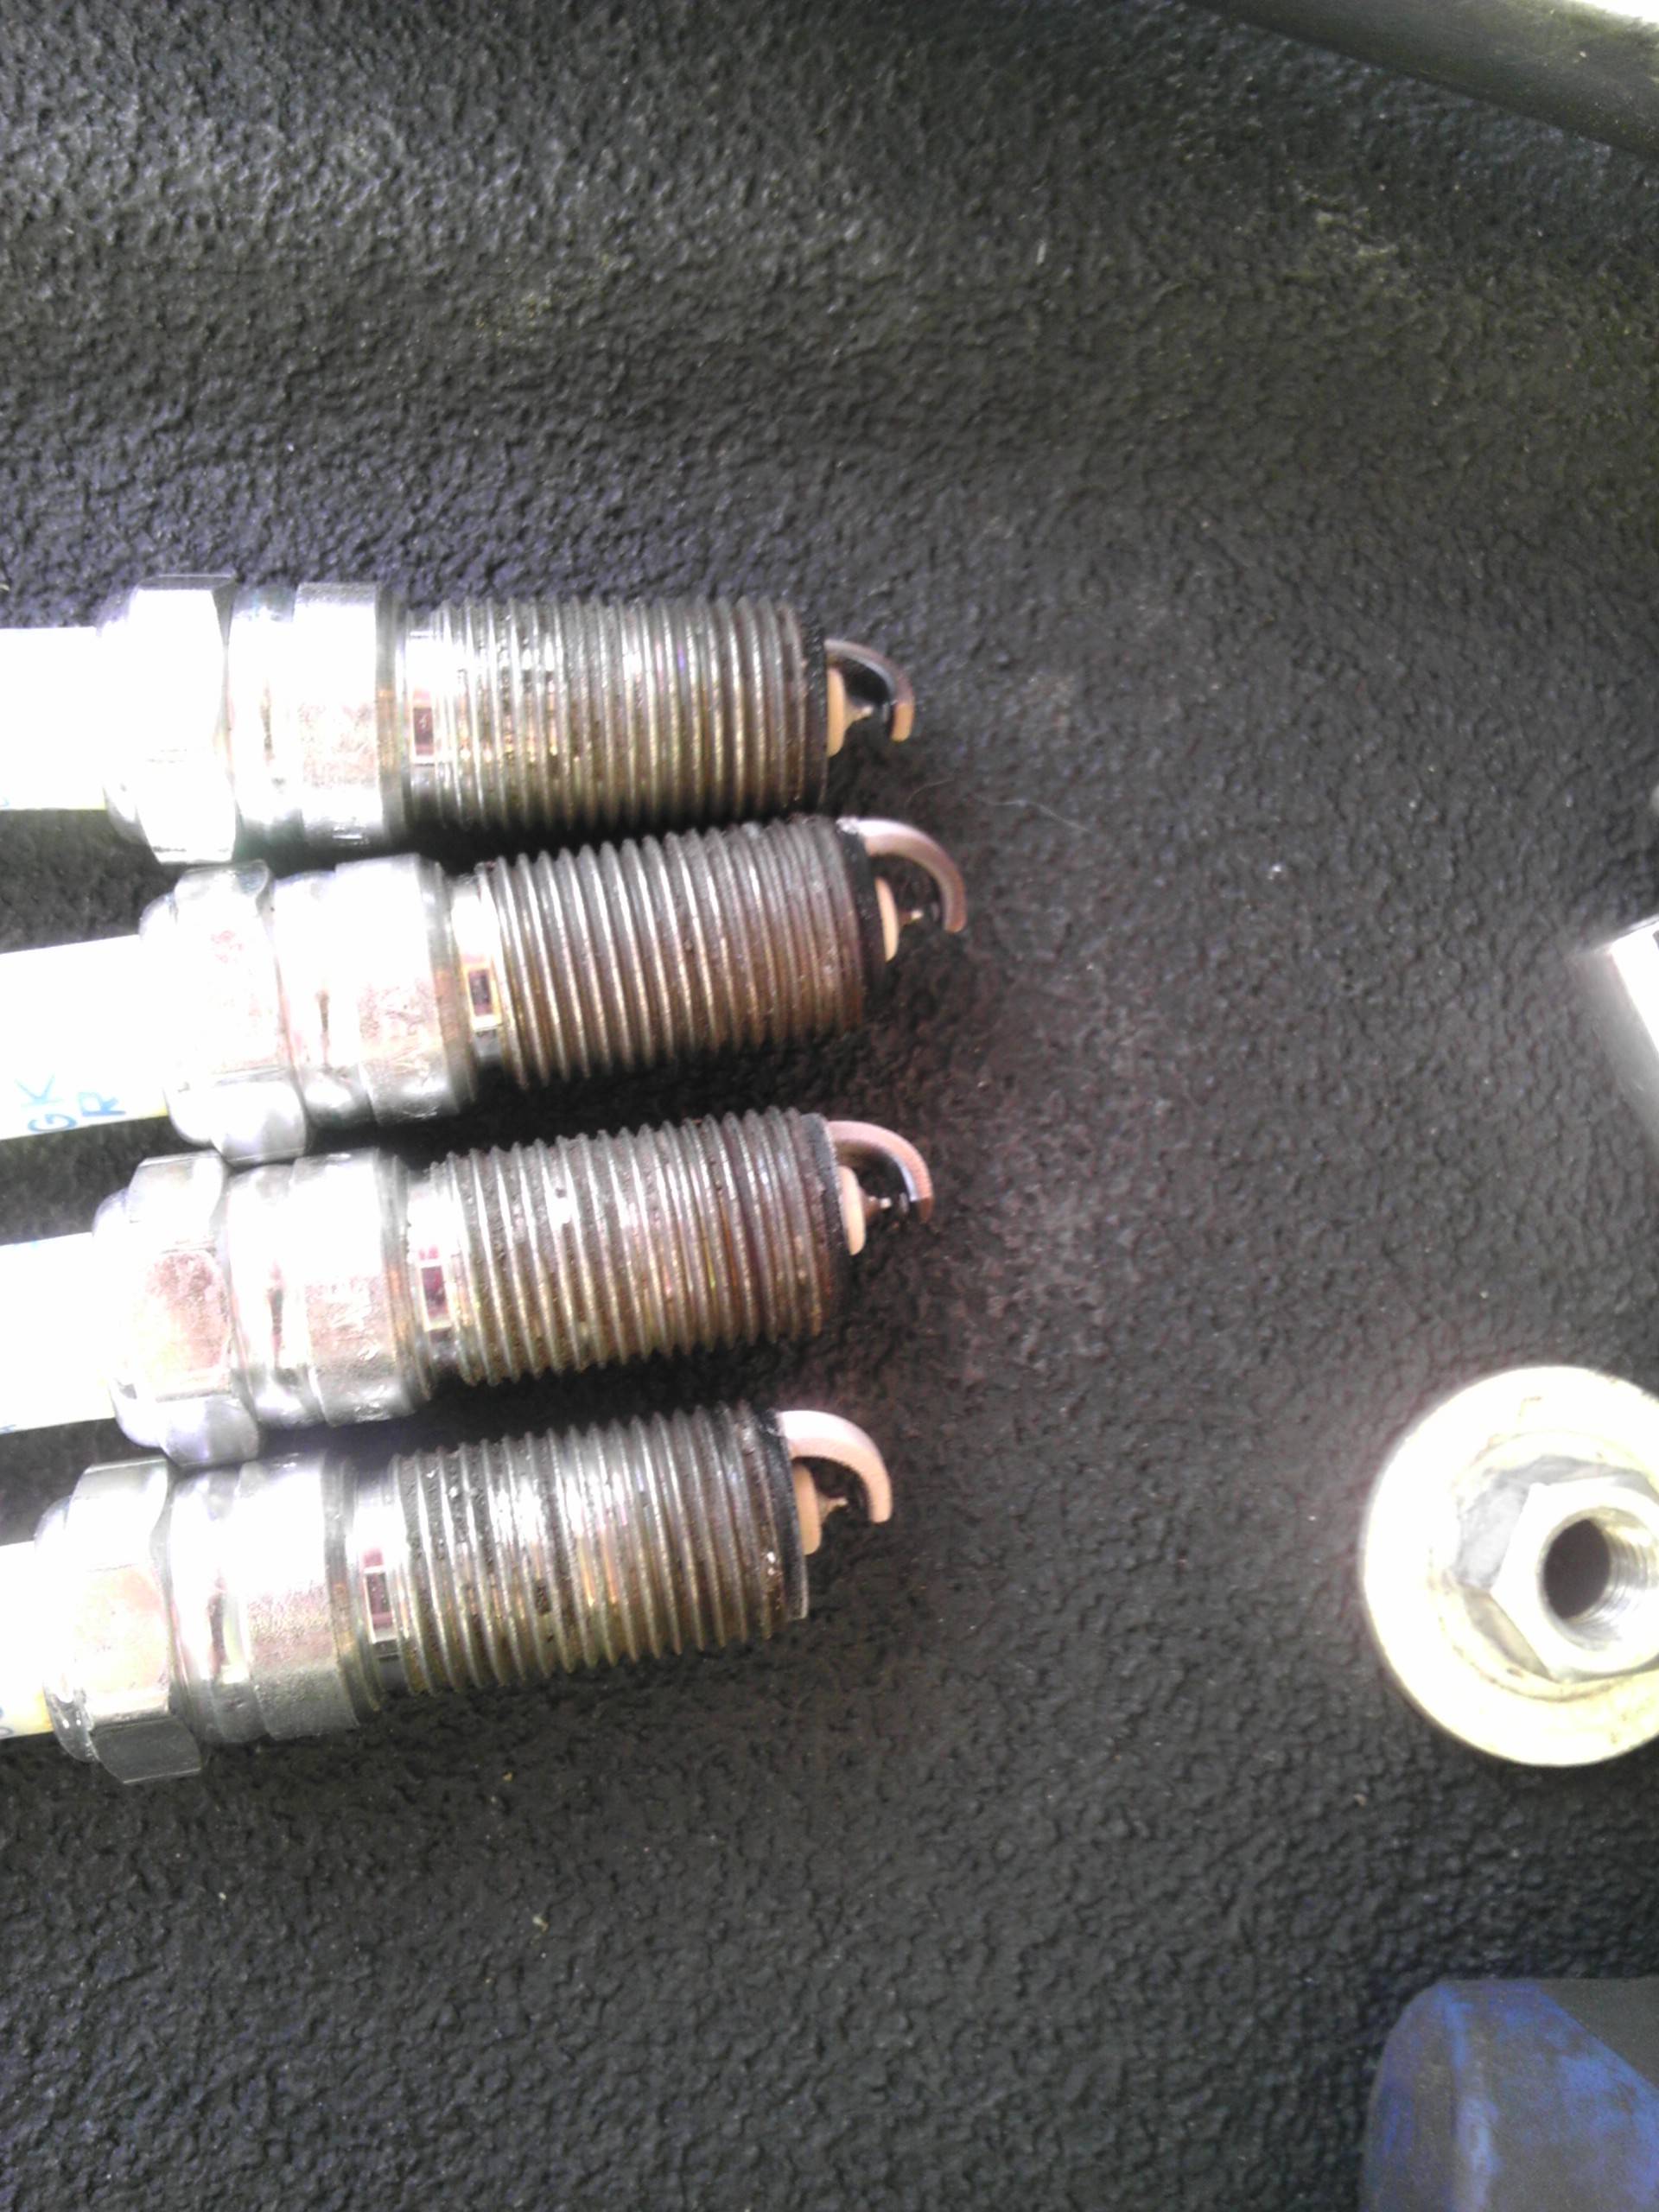 Didn't even bother wiping out the inside of the intercooler; my phone sucks at pictures but there was almost no oil residue or anything of the like on the inside. Not bad for a 121k mile car! 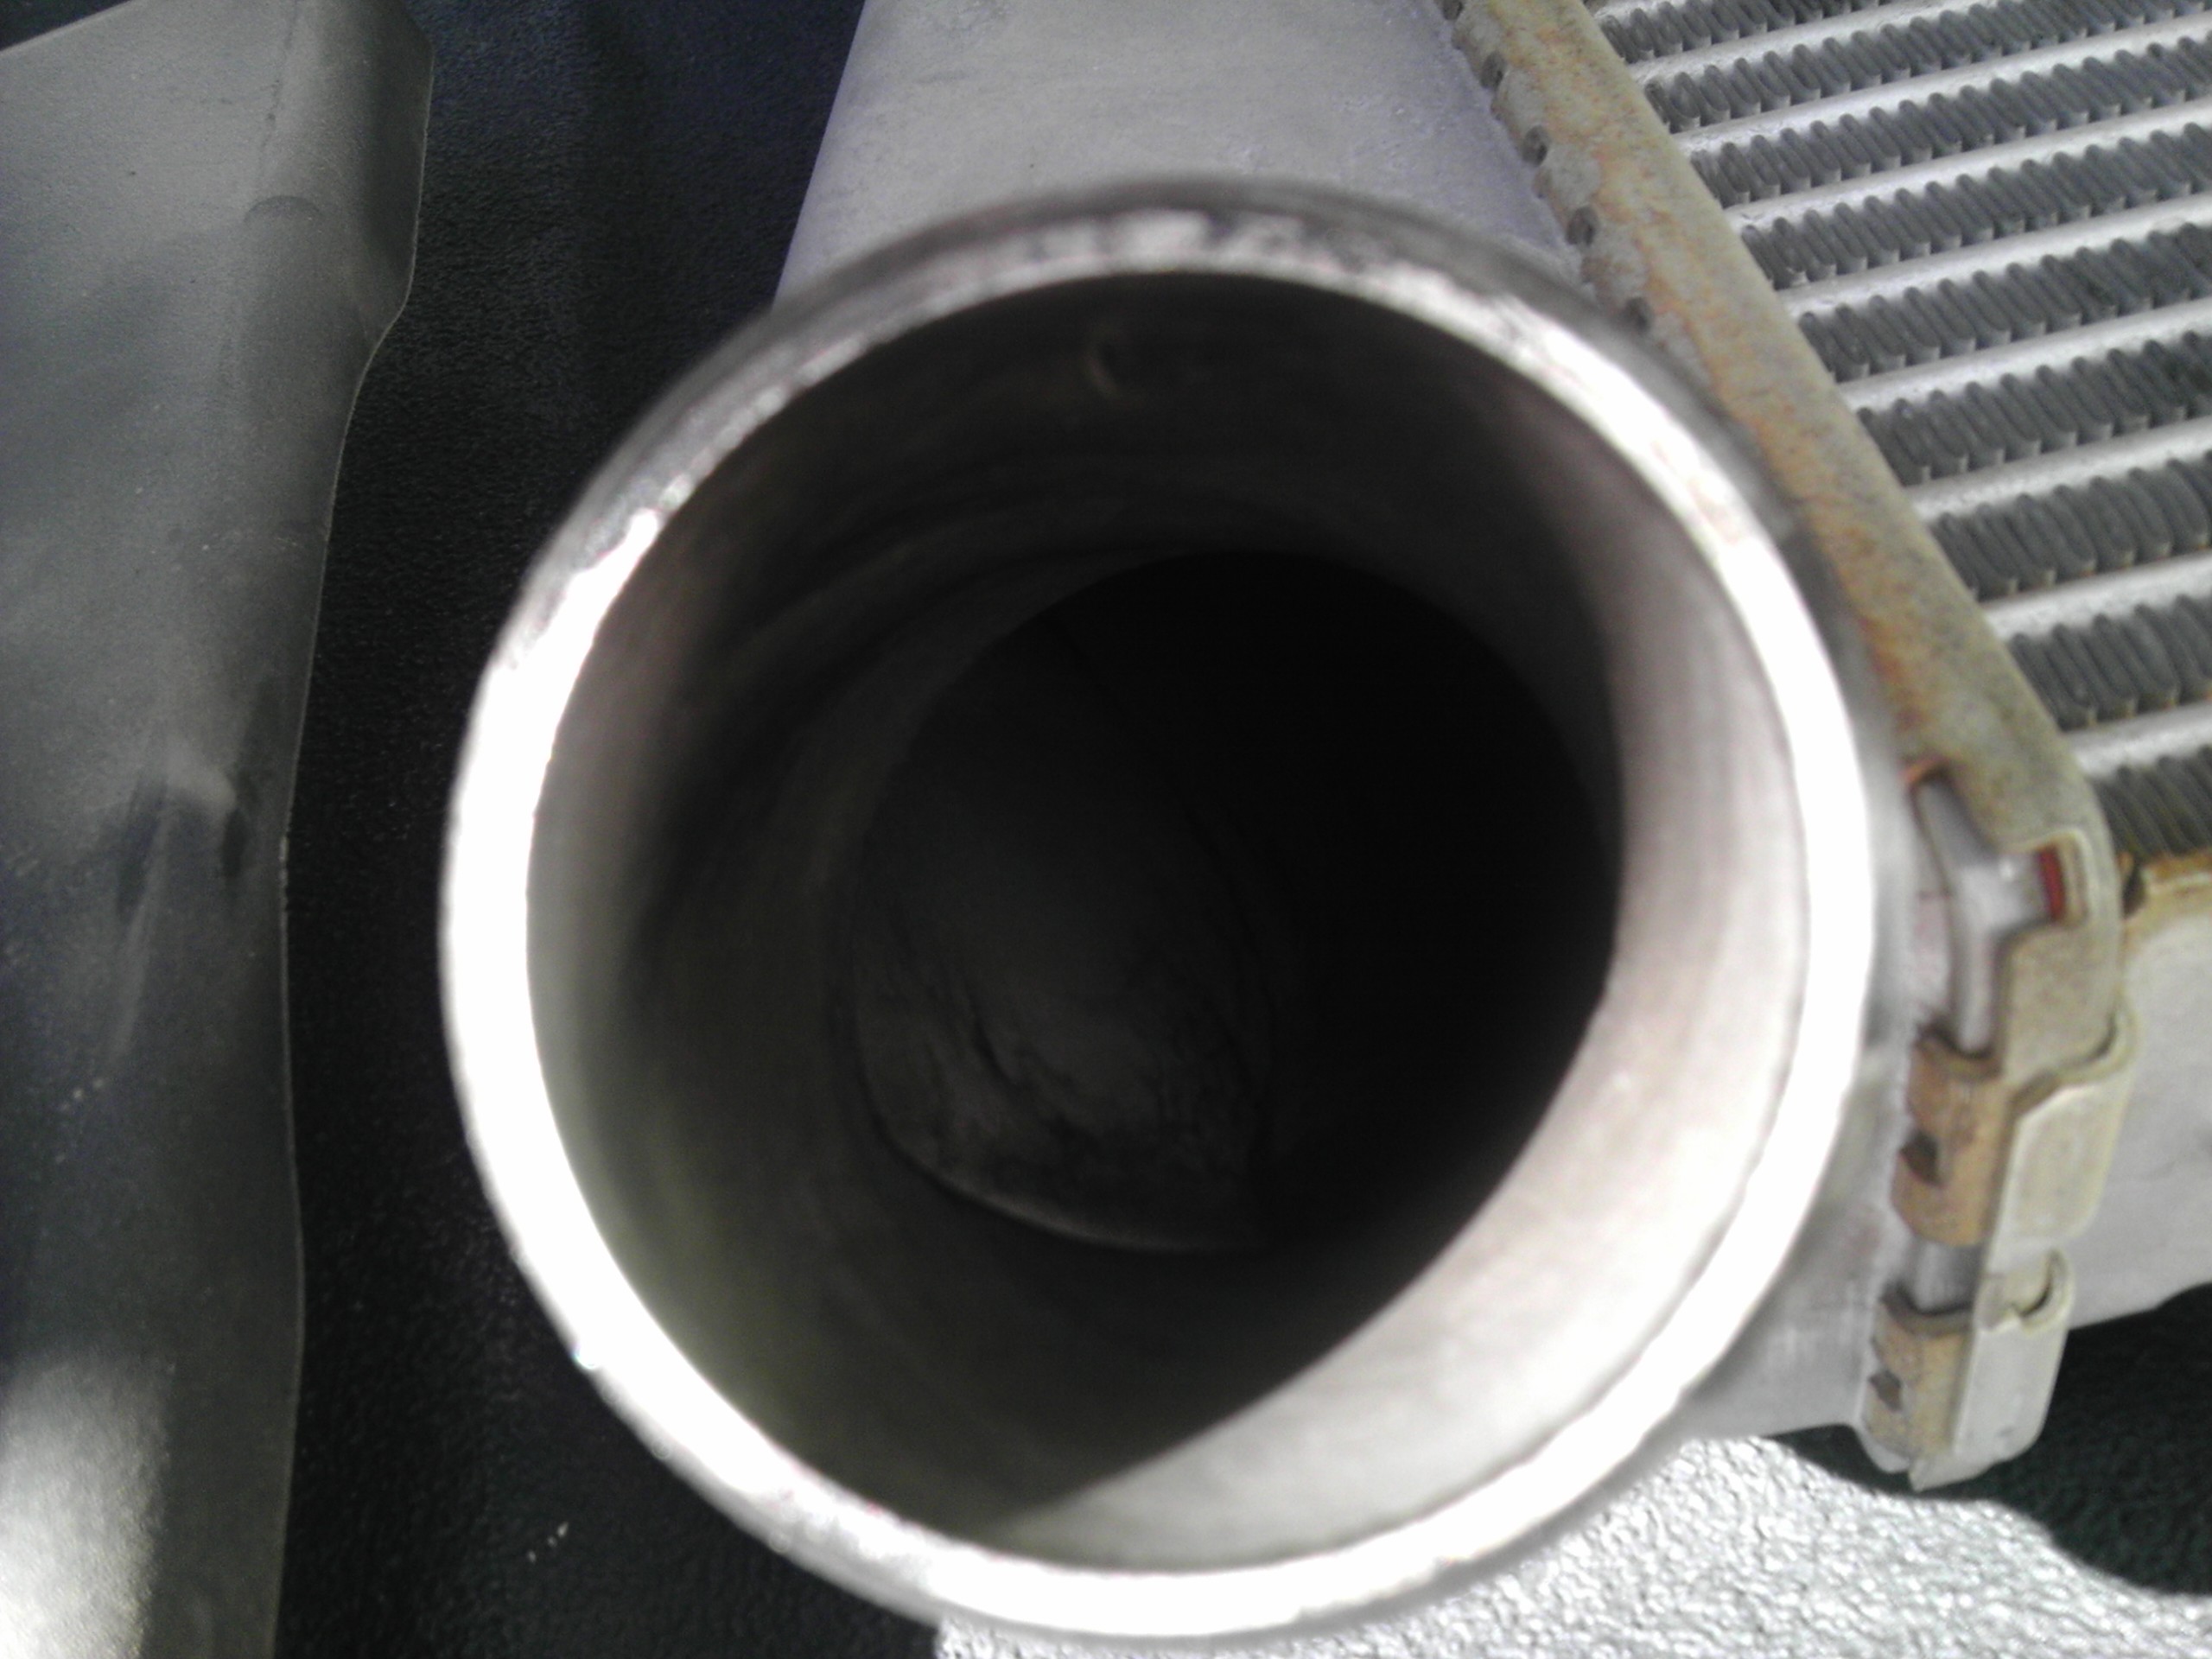 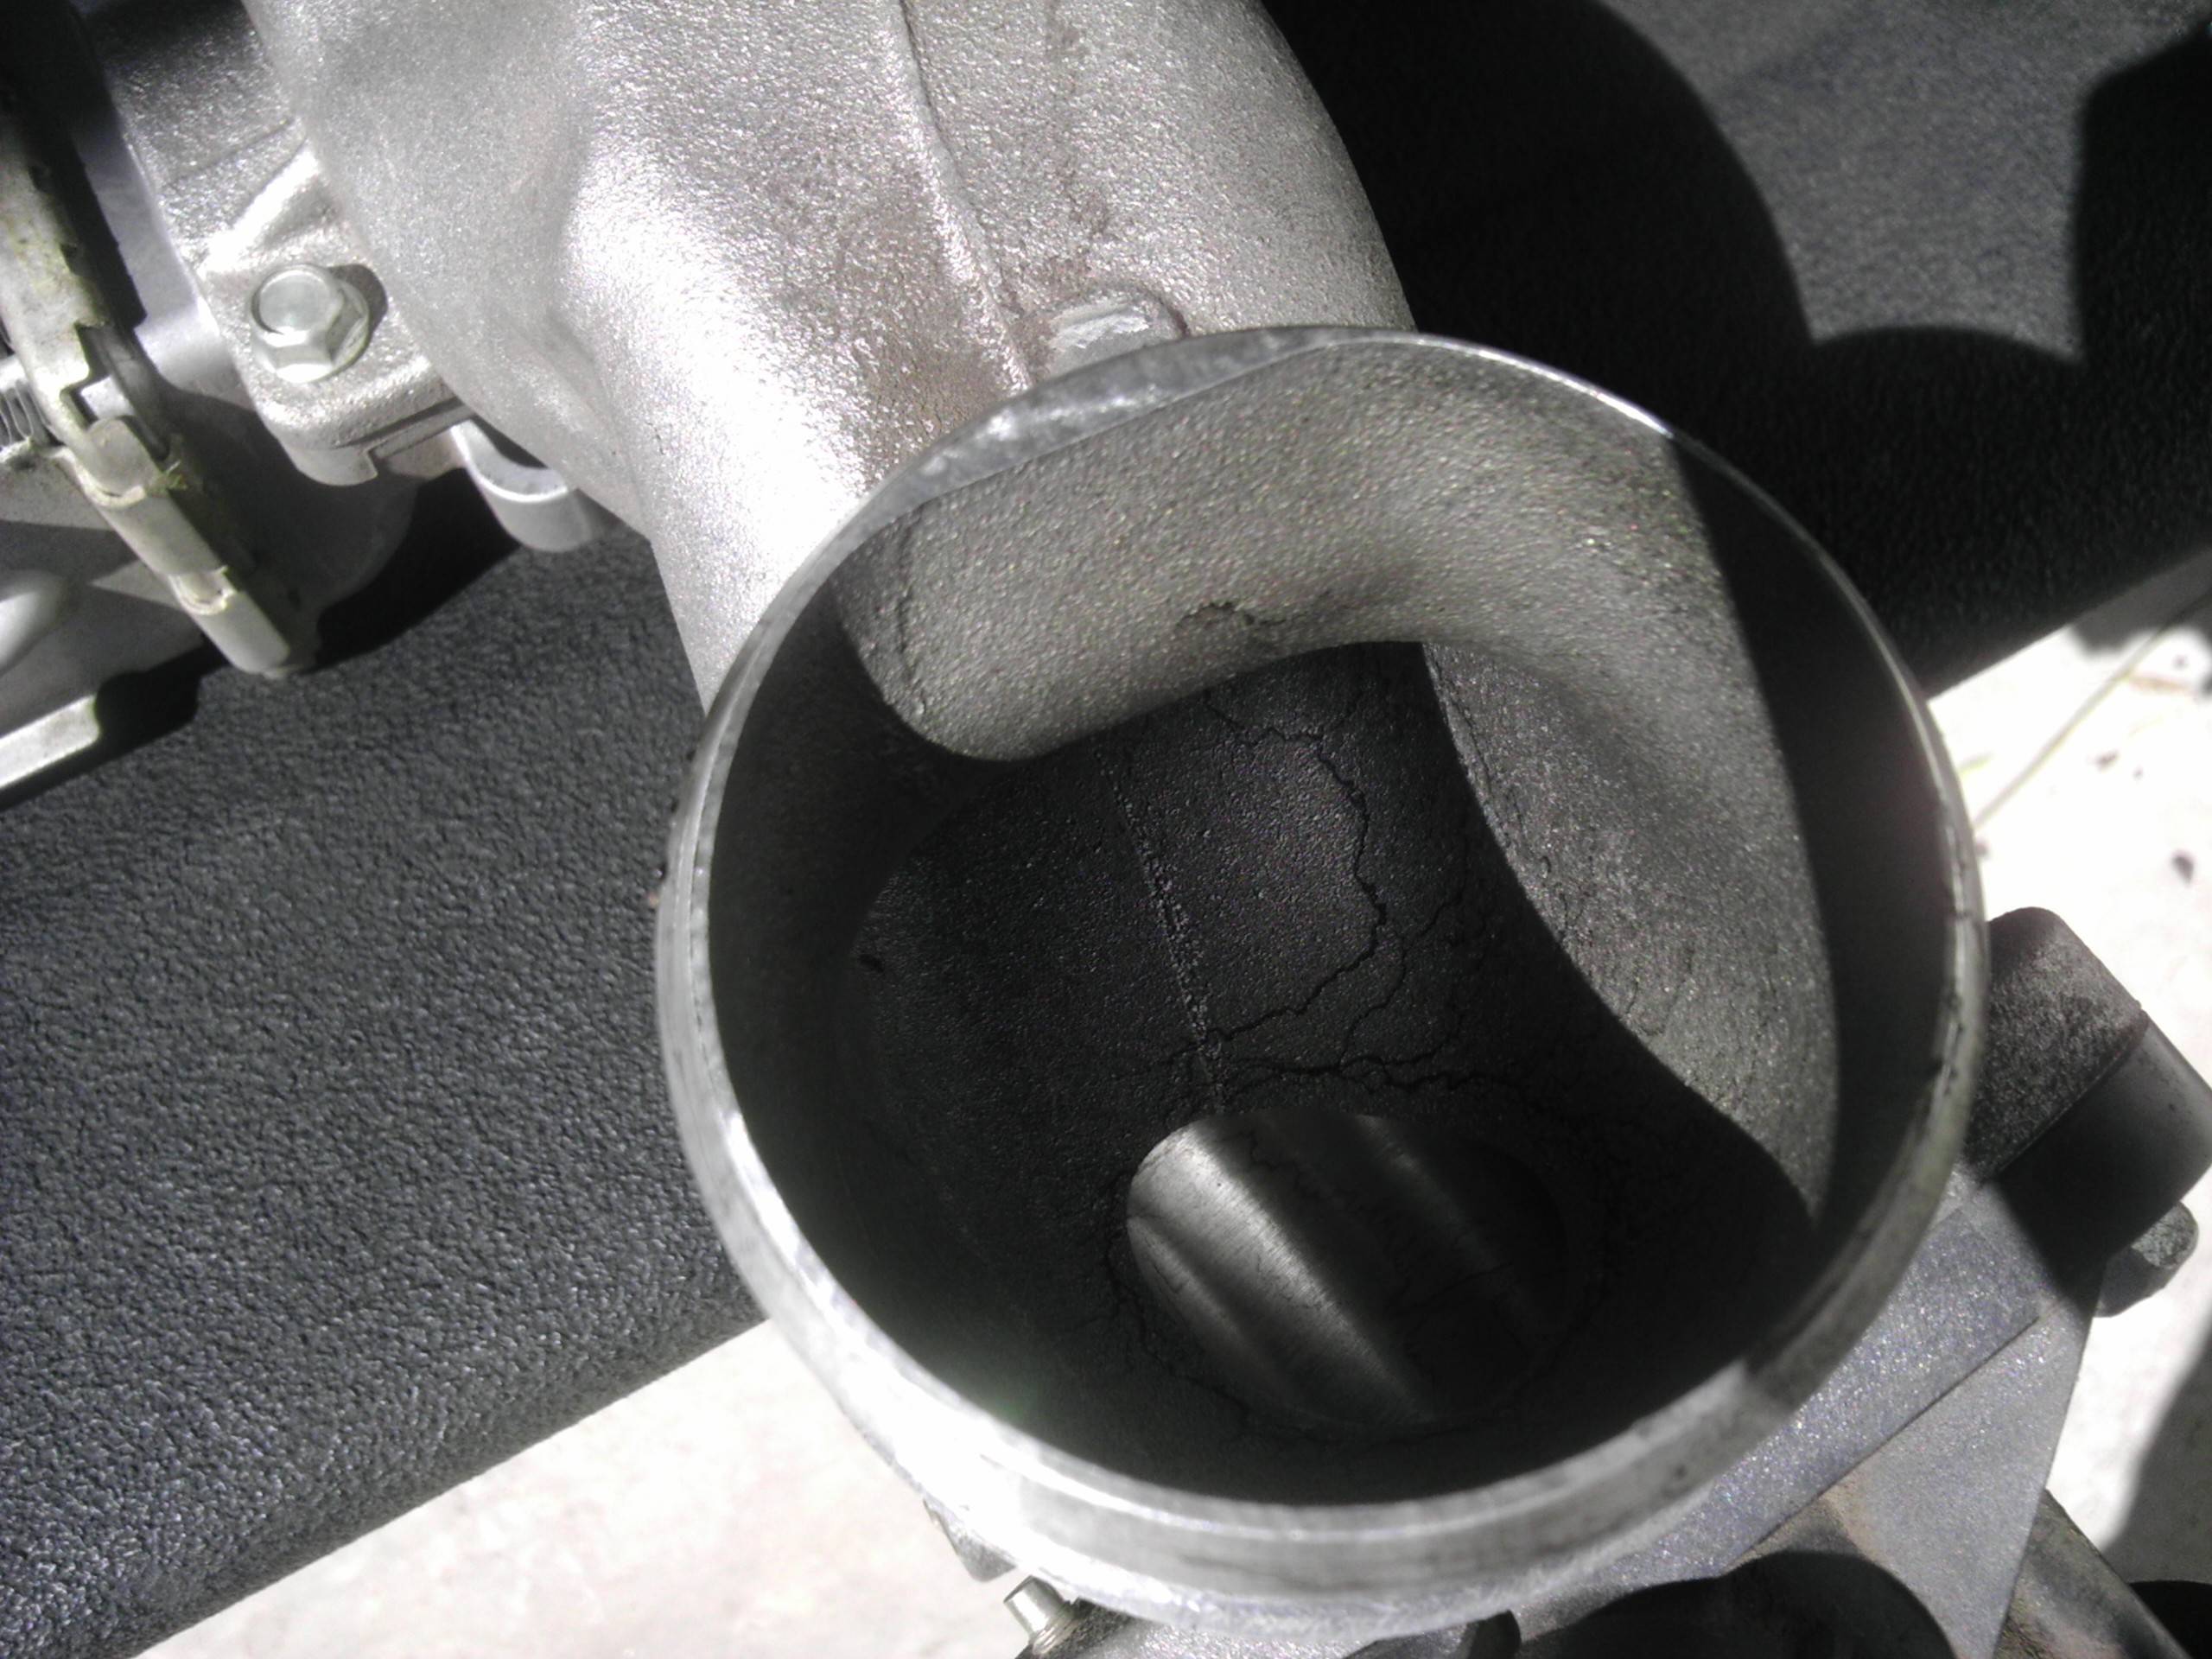 Still need to do the thermostat, air filter, and track down whatever is making the car track oddly depending on throttle; I'm guessing a lower balljoint or control arm is worn out, and at all of $240 for the parts (and some easy as hell labor) I will probably do both if I can confirm that it's one of them. IOwnCalculus fucked around with this message at 20:40 on Aug 20, 2013 |
|
#
¿
Feb 26, 2013 21:44
|
|
|
There's never been any significant fuel contamination in the oil, though, and given that it's a direct injection engine I would think a leaking injector would be spraying pretty much constantly.
|
|
#
¿
Feb 27, 2013 01:35
|
|
|
It's really not bad - no 30 second job since it's under the intercooler, but it's easy to remove (two bolts for the cover, three holding it down, inlet/outlet hoseclamps, and two clamps on the bypass valve) and then it's as clear of access as you'll get on anything.
|
|
#
¿
Feb 27, 2013 06:28
|
|
|
No progress, just some regressions. I had taken the MS3 apart a few weeks back to trace down a coolant leak (which is the lower radiator hose) and it appears that after reassembling it, somewhere there's a loose clamp because it hits a boost cut hard if I wind it out in third gear or higher. Yay. Also, just spent a weekend driving my mom's '02 Trailblazer EXT. Which has decided to have completely intermittent power steering at idle - it worked when I picked it up and when I dropped it off, but for much of the trip I was either strongarming it or having to pop it into neutral and rev it up off idle to get the pump to kick in. Some googling claims it could be either just a loose belt (no squealing to be heard, but it is worn as all hell) or some buildup in the output of the power steering pump.
|
|
#
¿
Apr 8, 2013 20:16
|
|
|
I'm not sure if the belt on it is factory (which would make it 11 years / 134k miles old!) or just a really old replacement from one of the earlier times that it crapped out yet another fan clutch - either way, the backside of the belt looks more like cord than rubbber The bizarre thing to me is that if the power steering pump is not getting driven due to a slipping belt, to me that belt should be howling for dear life. I don't know, either way I'll see if I can get her to get the belt/tensioner replaced or just do it for her and go from there on the steering.
|
|
#
¿
Apr 8, 2013 20:47
|
|
|
I actually remembered after all of the posting in here that I ended up with a Gatorback on my LS1, even. The belt in the Trailblazer actually has those same serrated teeth on the grooved side, but it's so worn that it's devoid of any marking on the smooth side.
|
|
#
¿
Apr 9, 2013 18:04
|
|
|
In Trailblazer news, the shop she took it to apparently did control arms and balljoints. While I don't doubt that they were worn to hell and back, I also don't see how it would've resulted in intermittent non-working power steering. She did say it drives a lot better so there's that. I did notice it had one hell of a tendency to wander all over the lane on California's bumpy-rear end freeways when I borrowed it. Anyway, this weekend I finally was able to clear enough time with the family to do a marathon session on the MS3. Coming into today, I needed to do all of the following: *Clean the intake valves *Replace the thermostat *Replace the driver's side coolant hose *Clean the EGR system *Clean the air filter *Figure out what's going on with the A/C (probably low on refrigerant) The downside of direct injection is that there's no fuel flowing past the intake valves - so everything the PCV and EGR spits into the intake manifold to reburn, gets stuck on the back of the intake valves and never gets washed away like in a port-injected car. Thermostat has been giving me intermittent low-coolant-temp CELs for ages, the driver's coolant hose has been seeping for a month or so, and the EGR has been kicking up an occasional low-flow code. I'm too cheap to buy an Accessport to eliminate it so I'm going to give it one more cleaning. 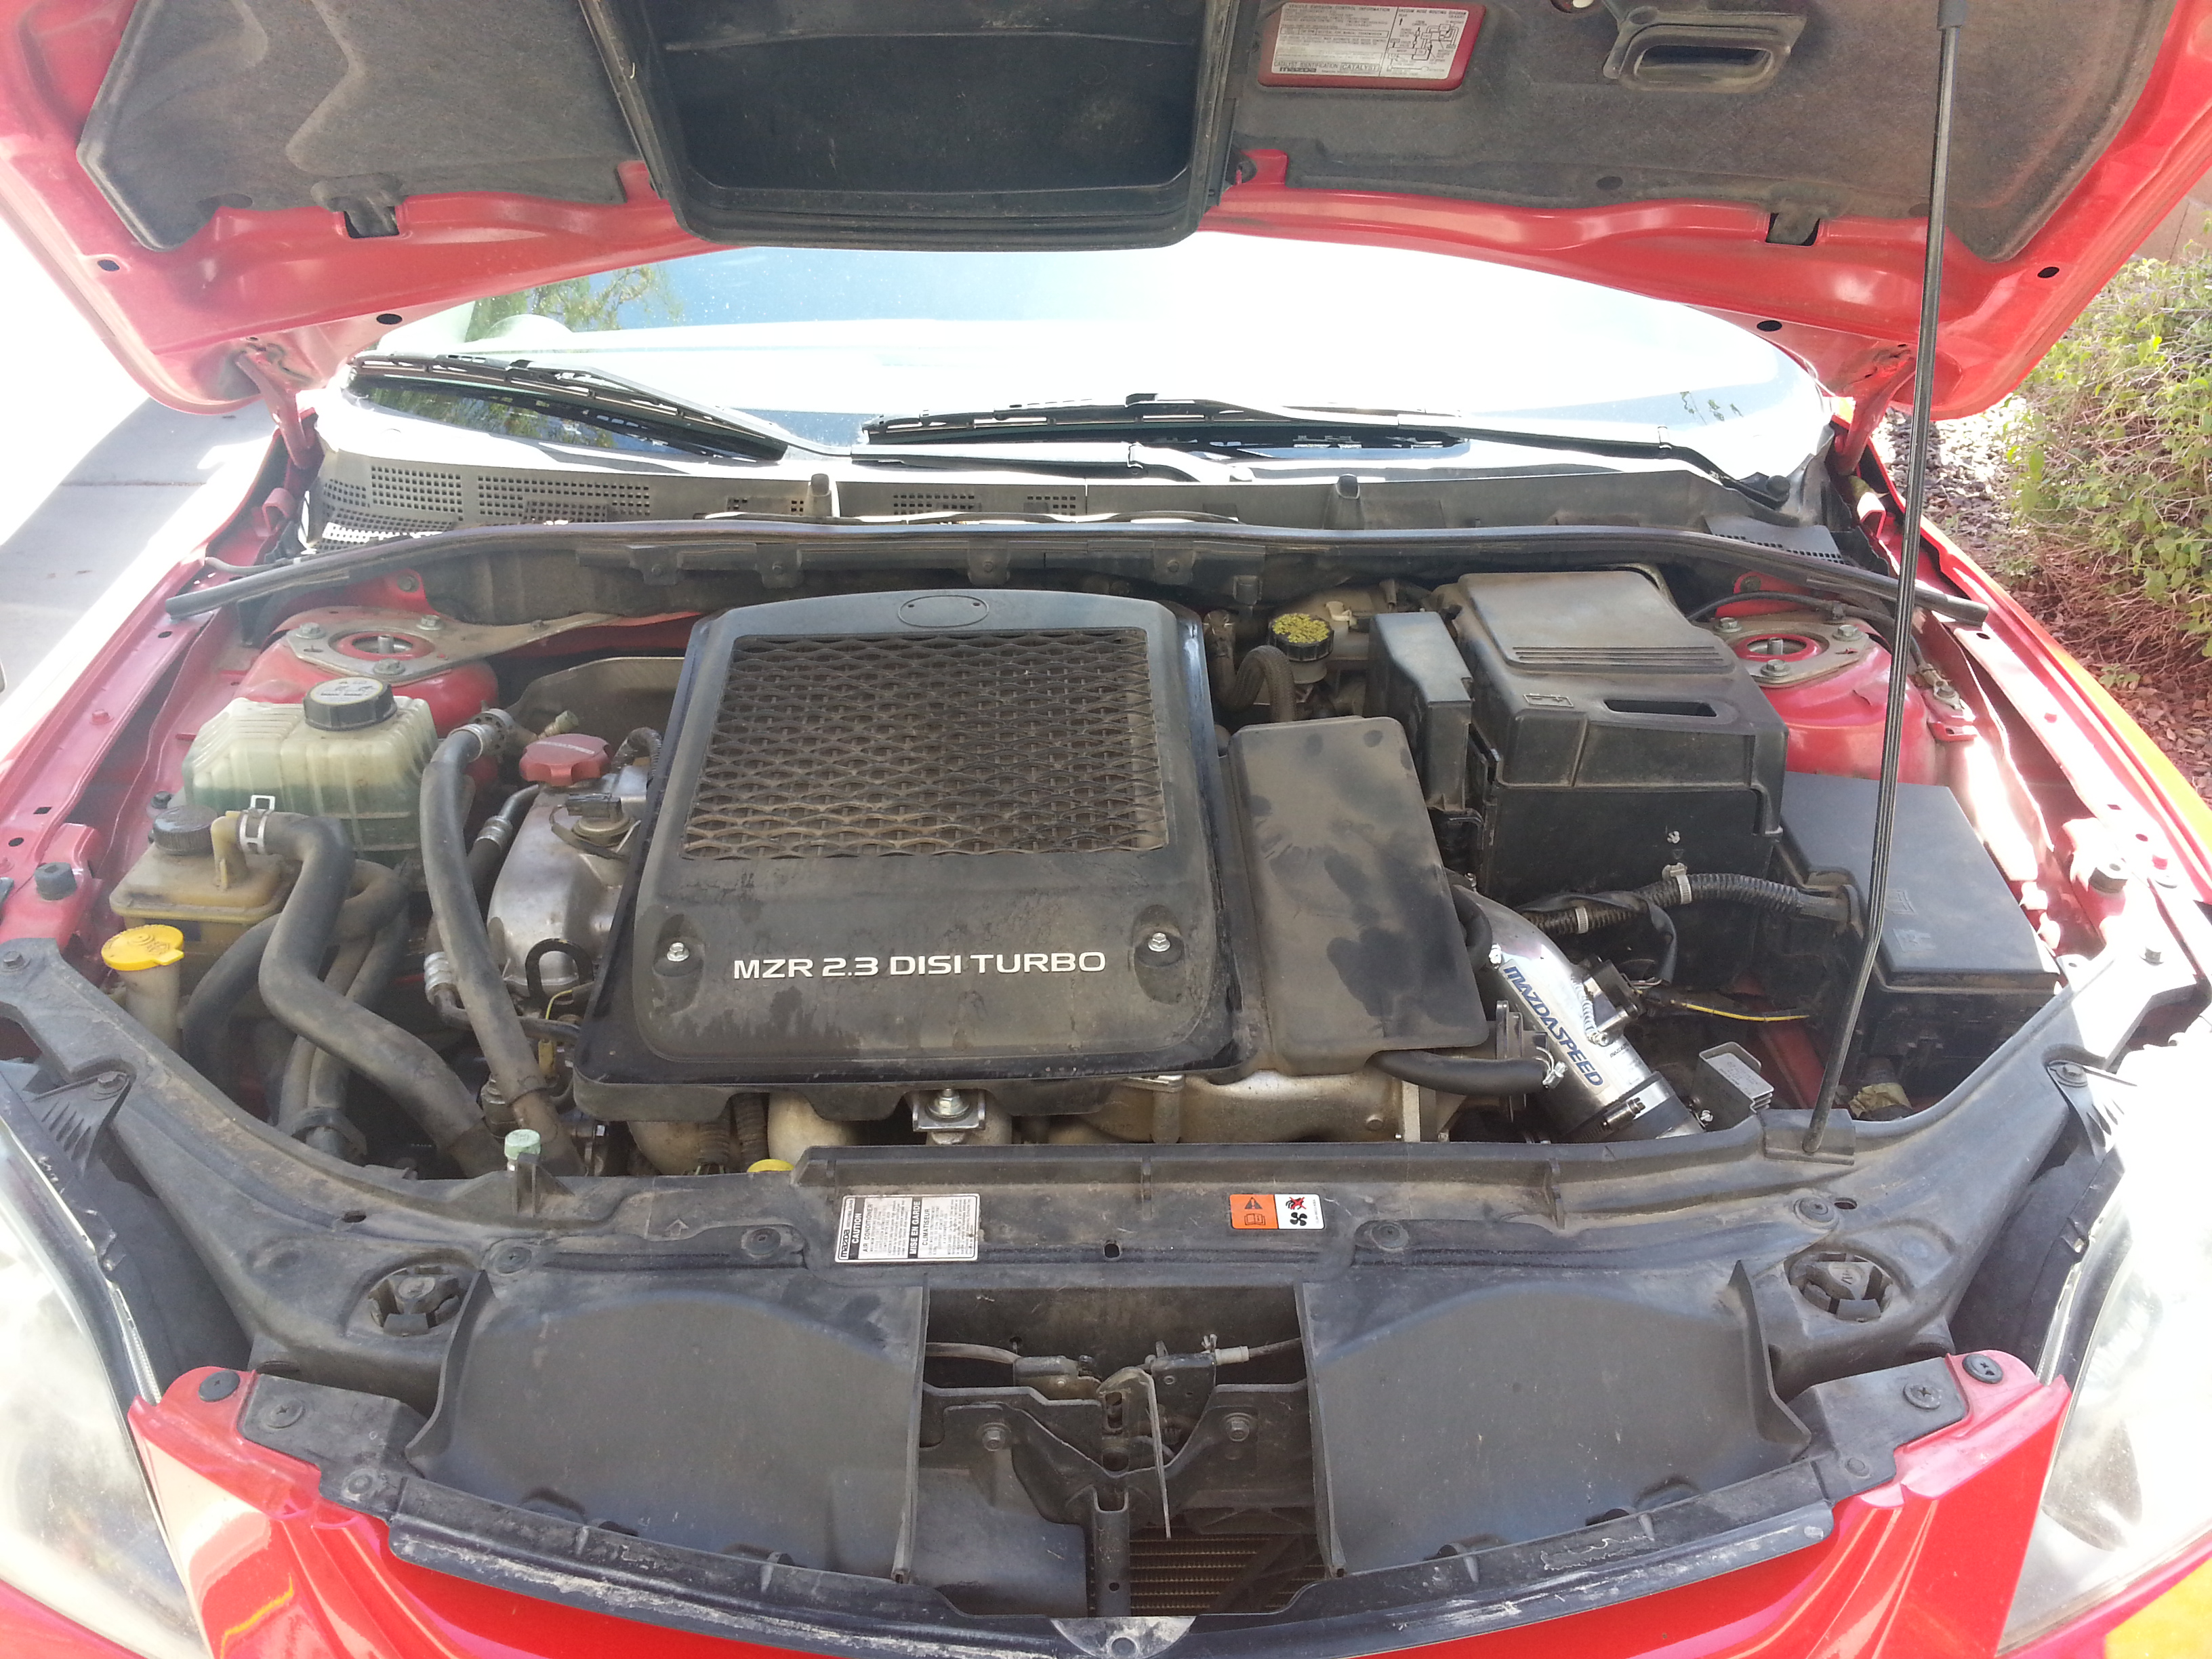 Today's patient, before digging in. 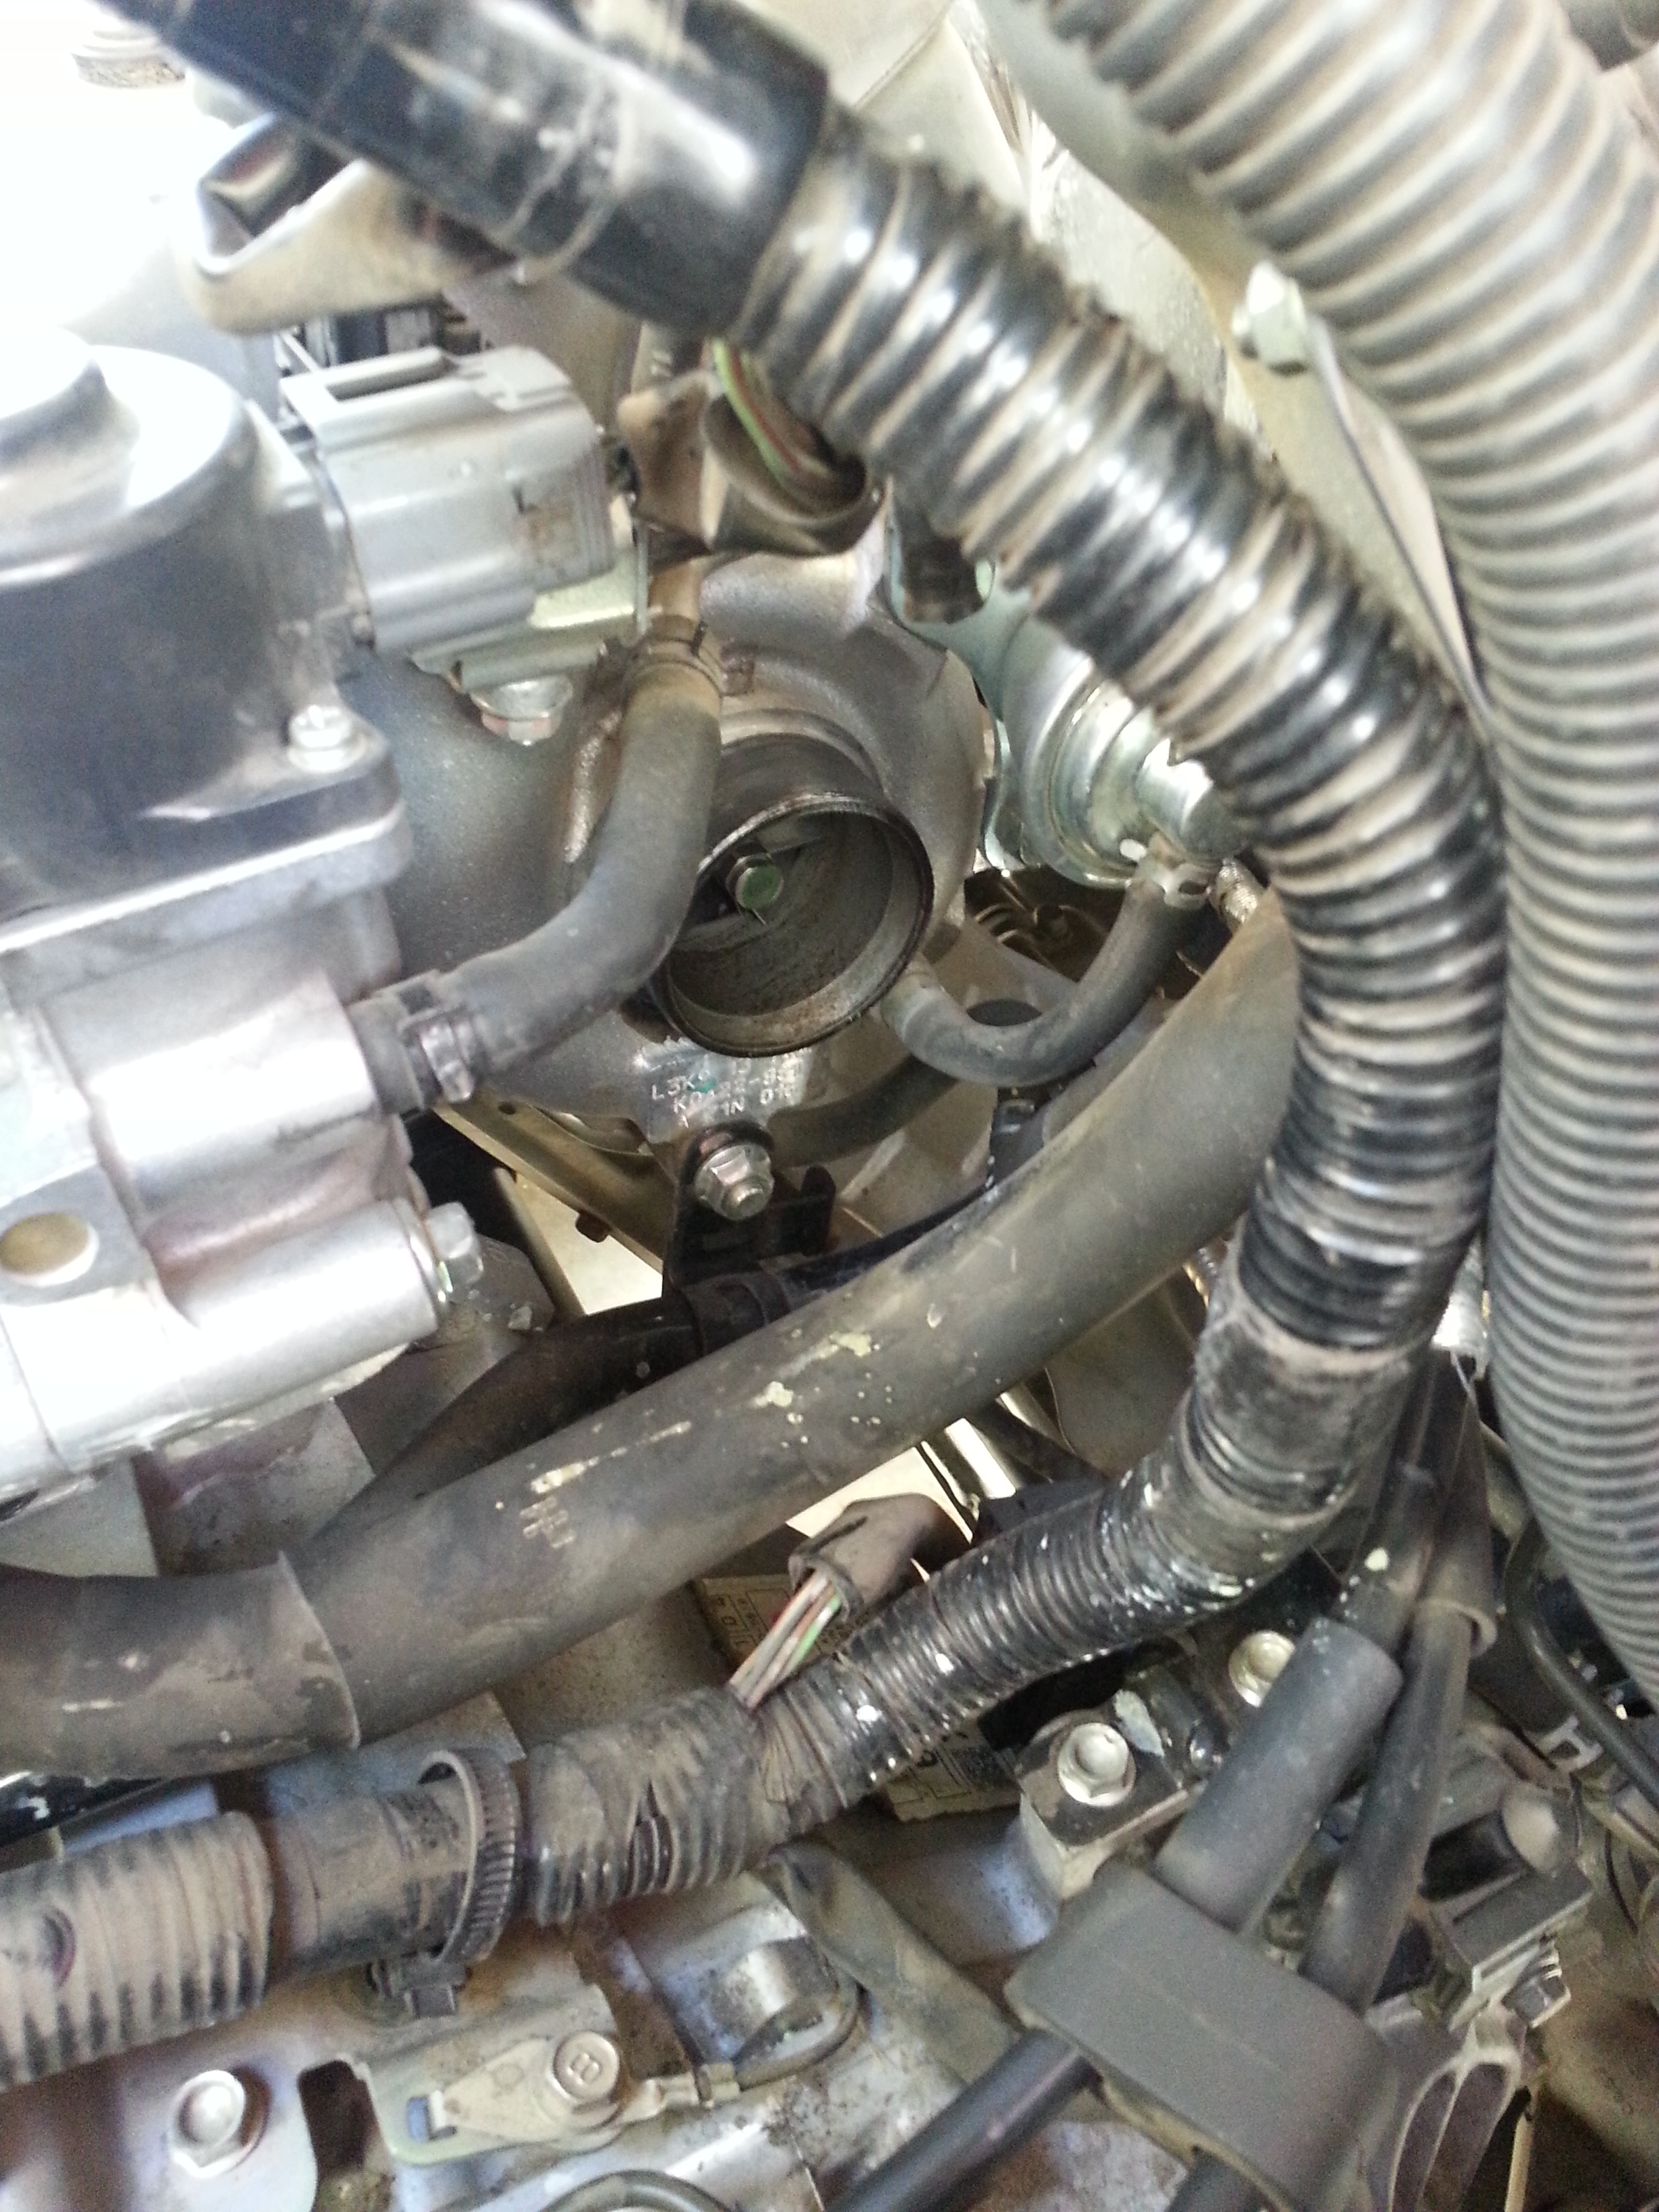 I've become entirely too good at taking it apart to this point. That turbo looks a bit oilier than it should to me, though; no smoke but I suspect that if I keep this car another two or three years I will be getting it rebuilt. 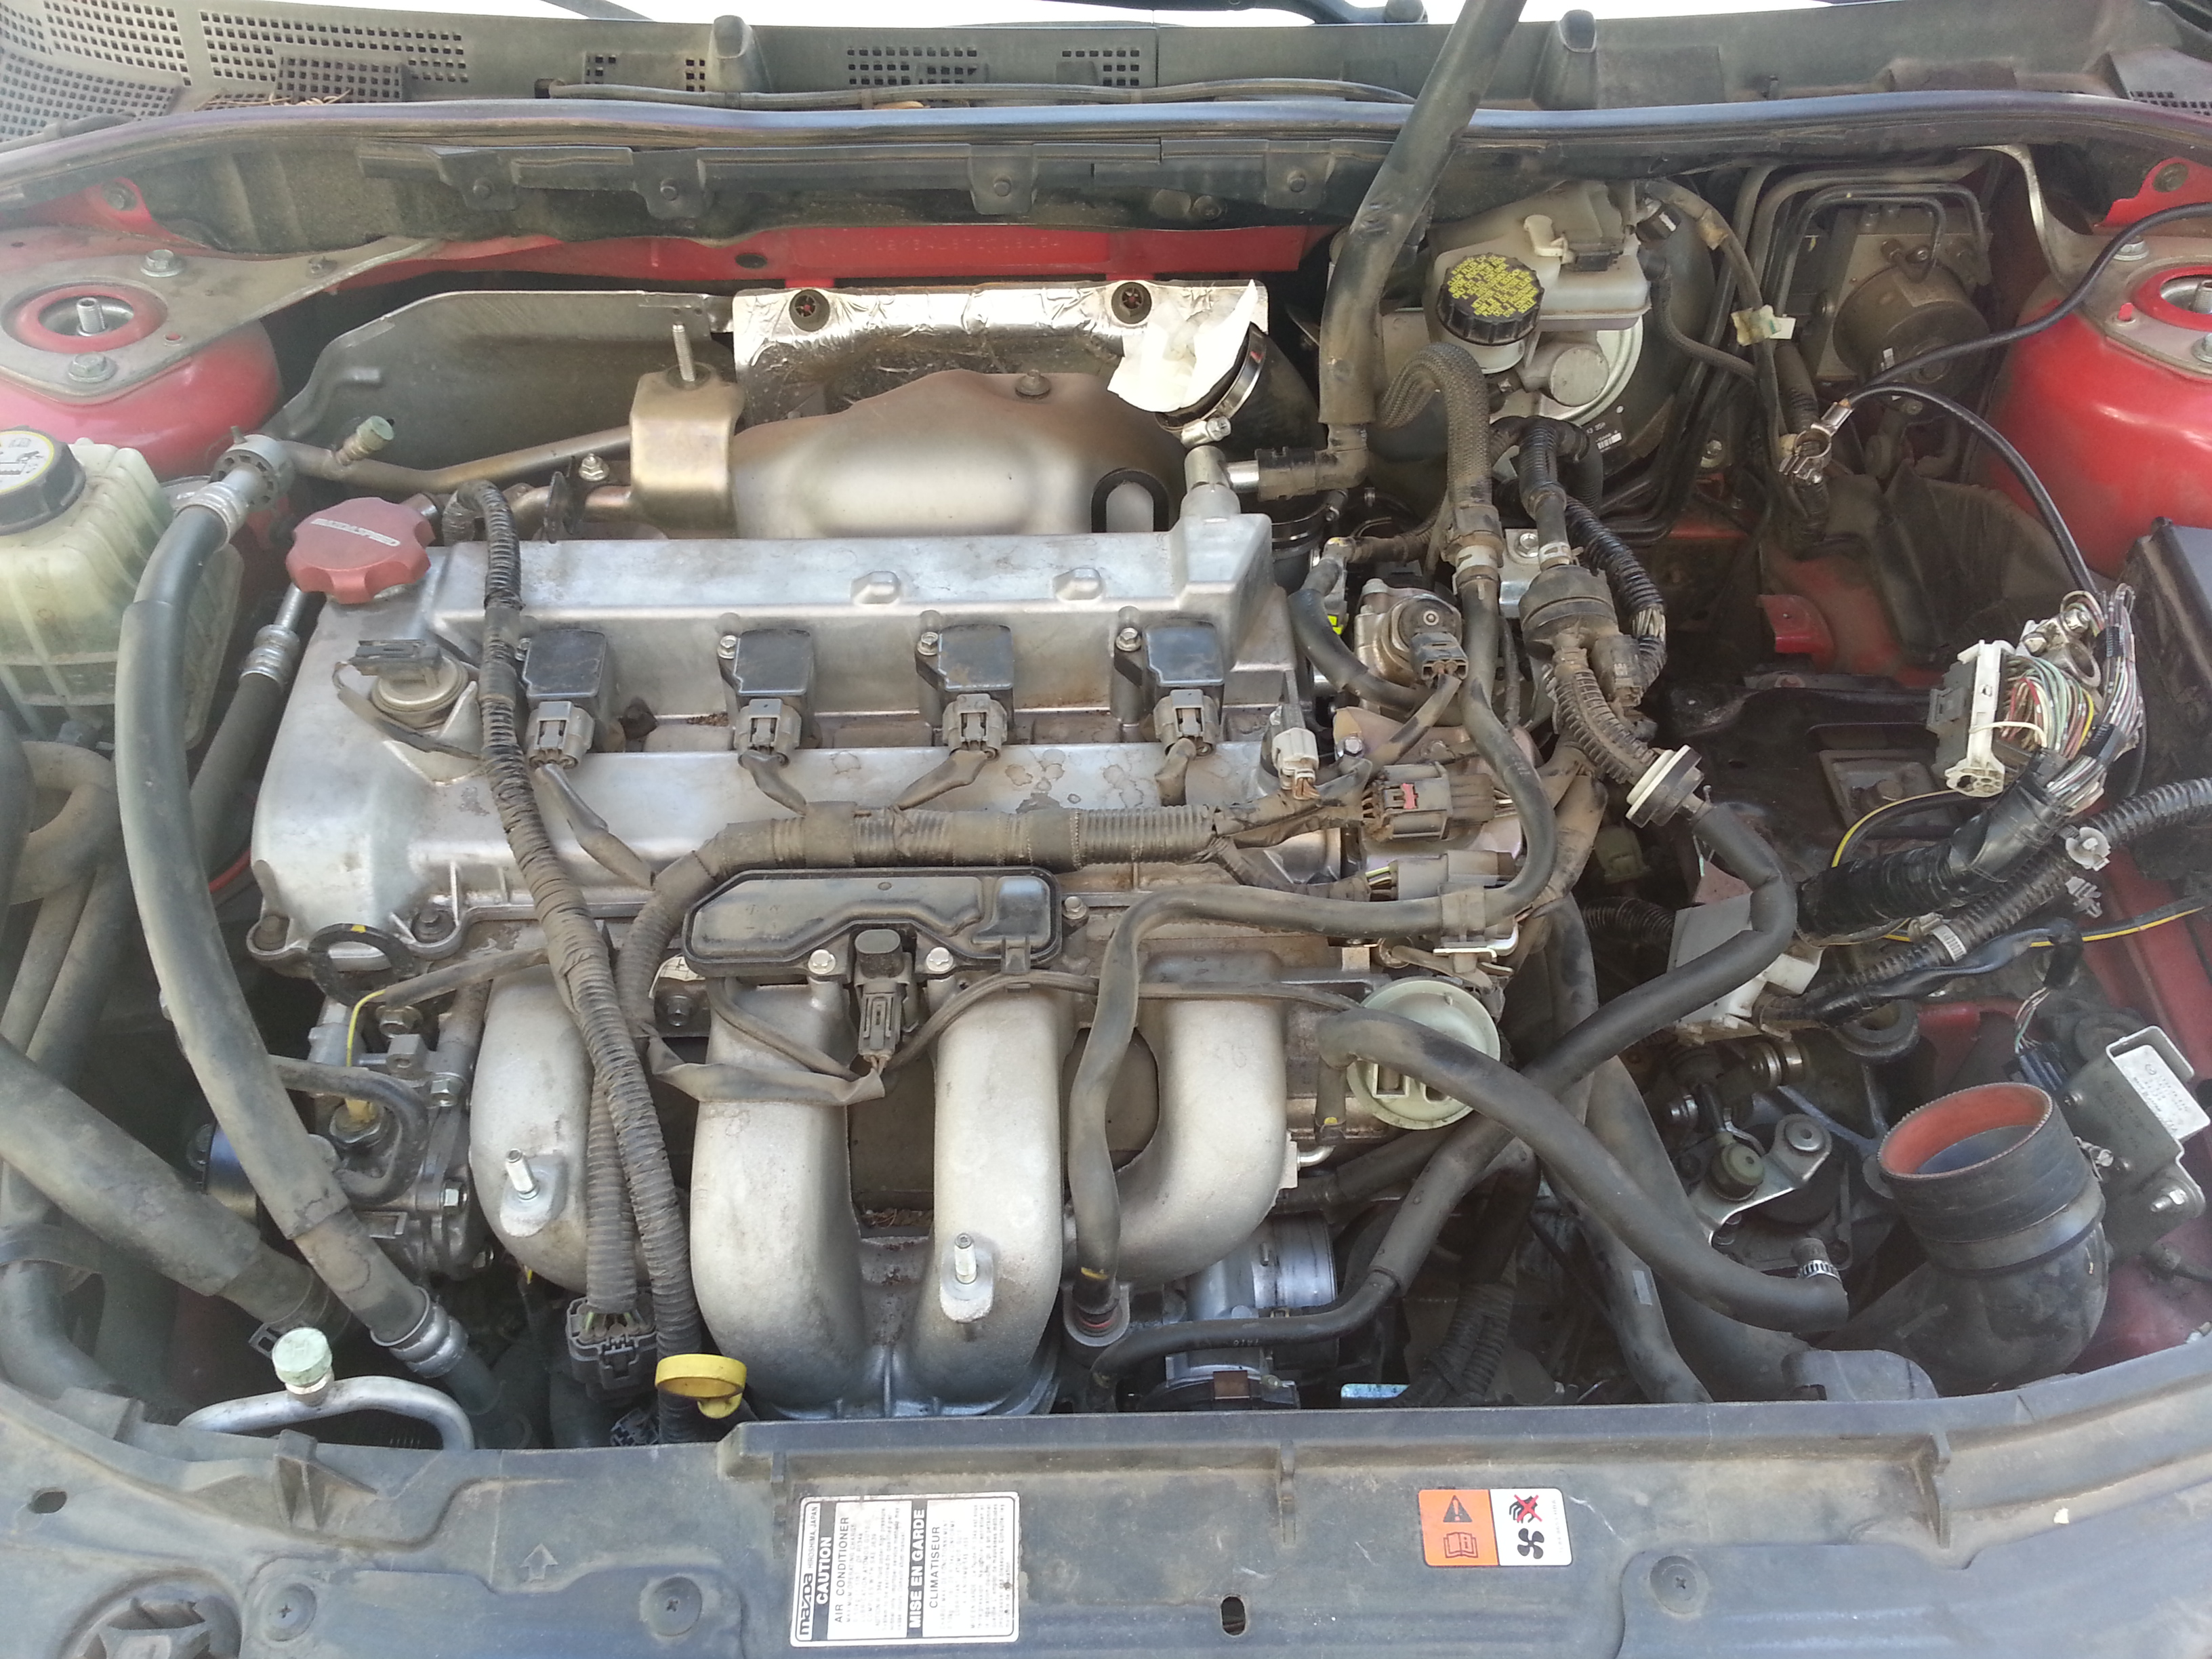 The engine bay at that point... 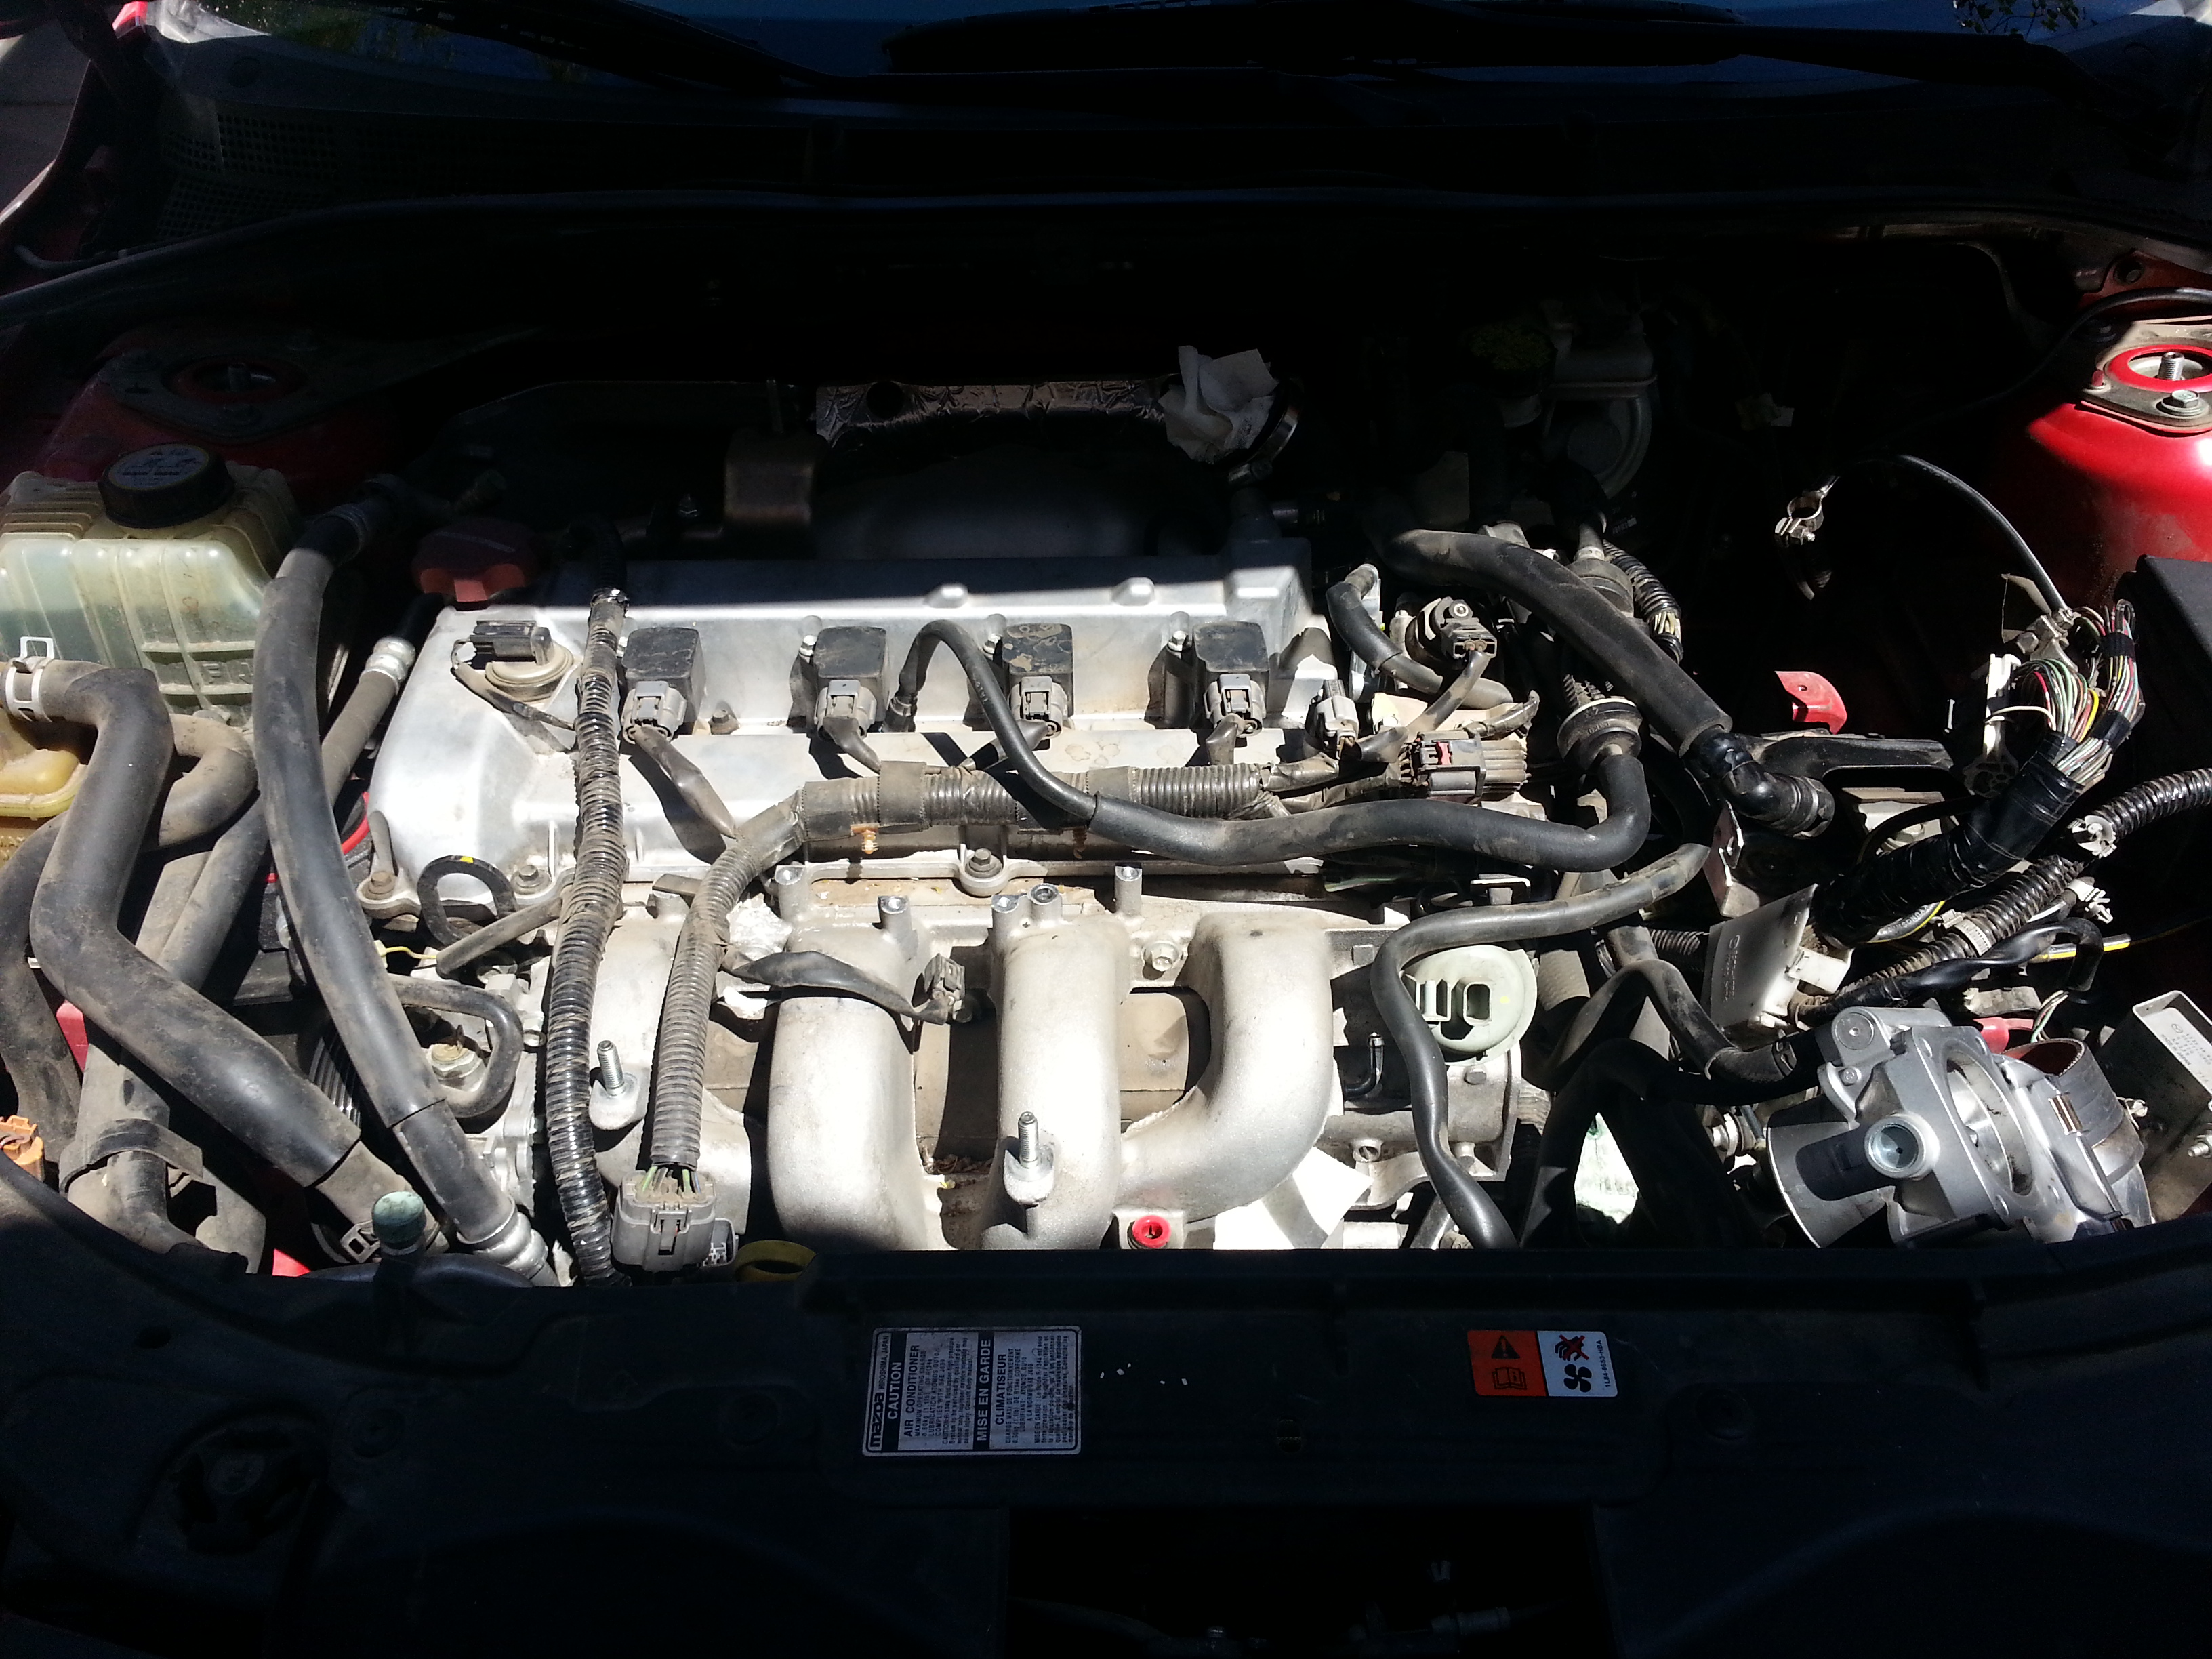 And then some time later after pulling yet more parts off. Cramming this 2.3L turbo in this bay is an exercise in making everything a goddamned rat's nest of wiring, coolant hoses, power steering hoses, vacuum hoses, and A/C hoses. 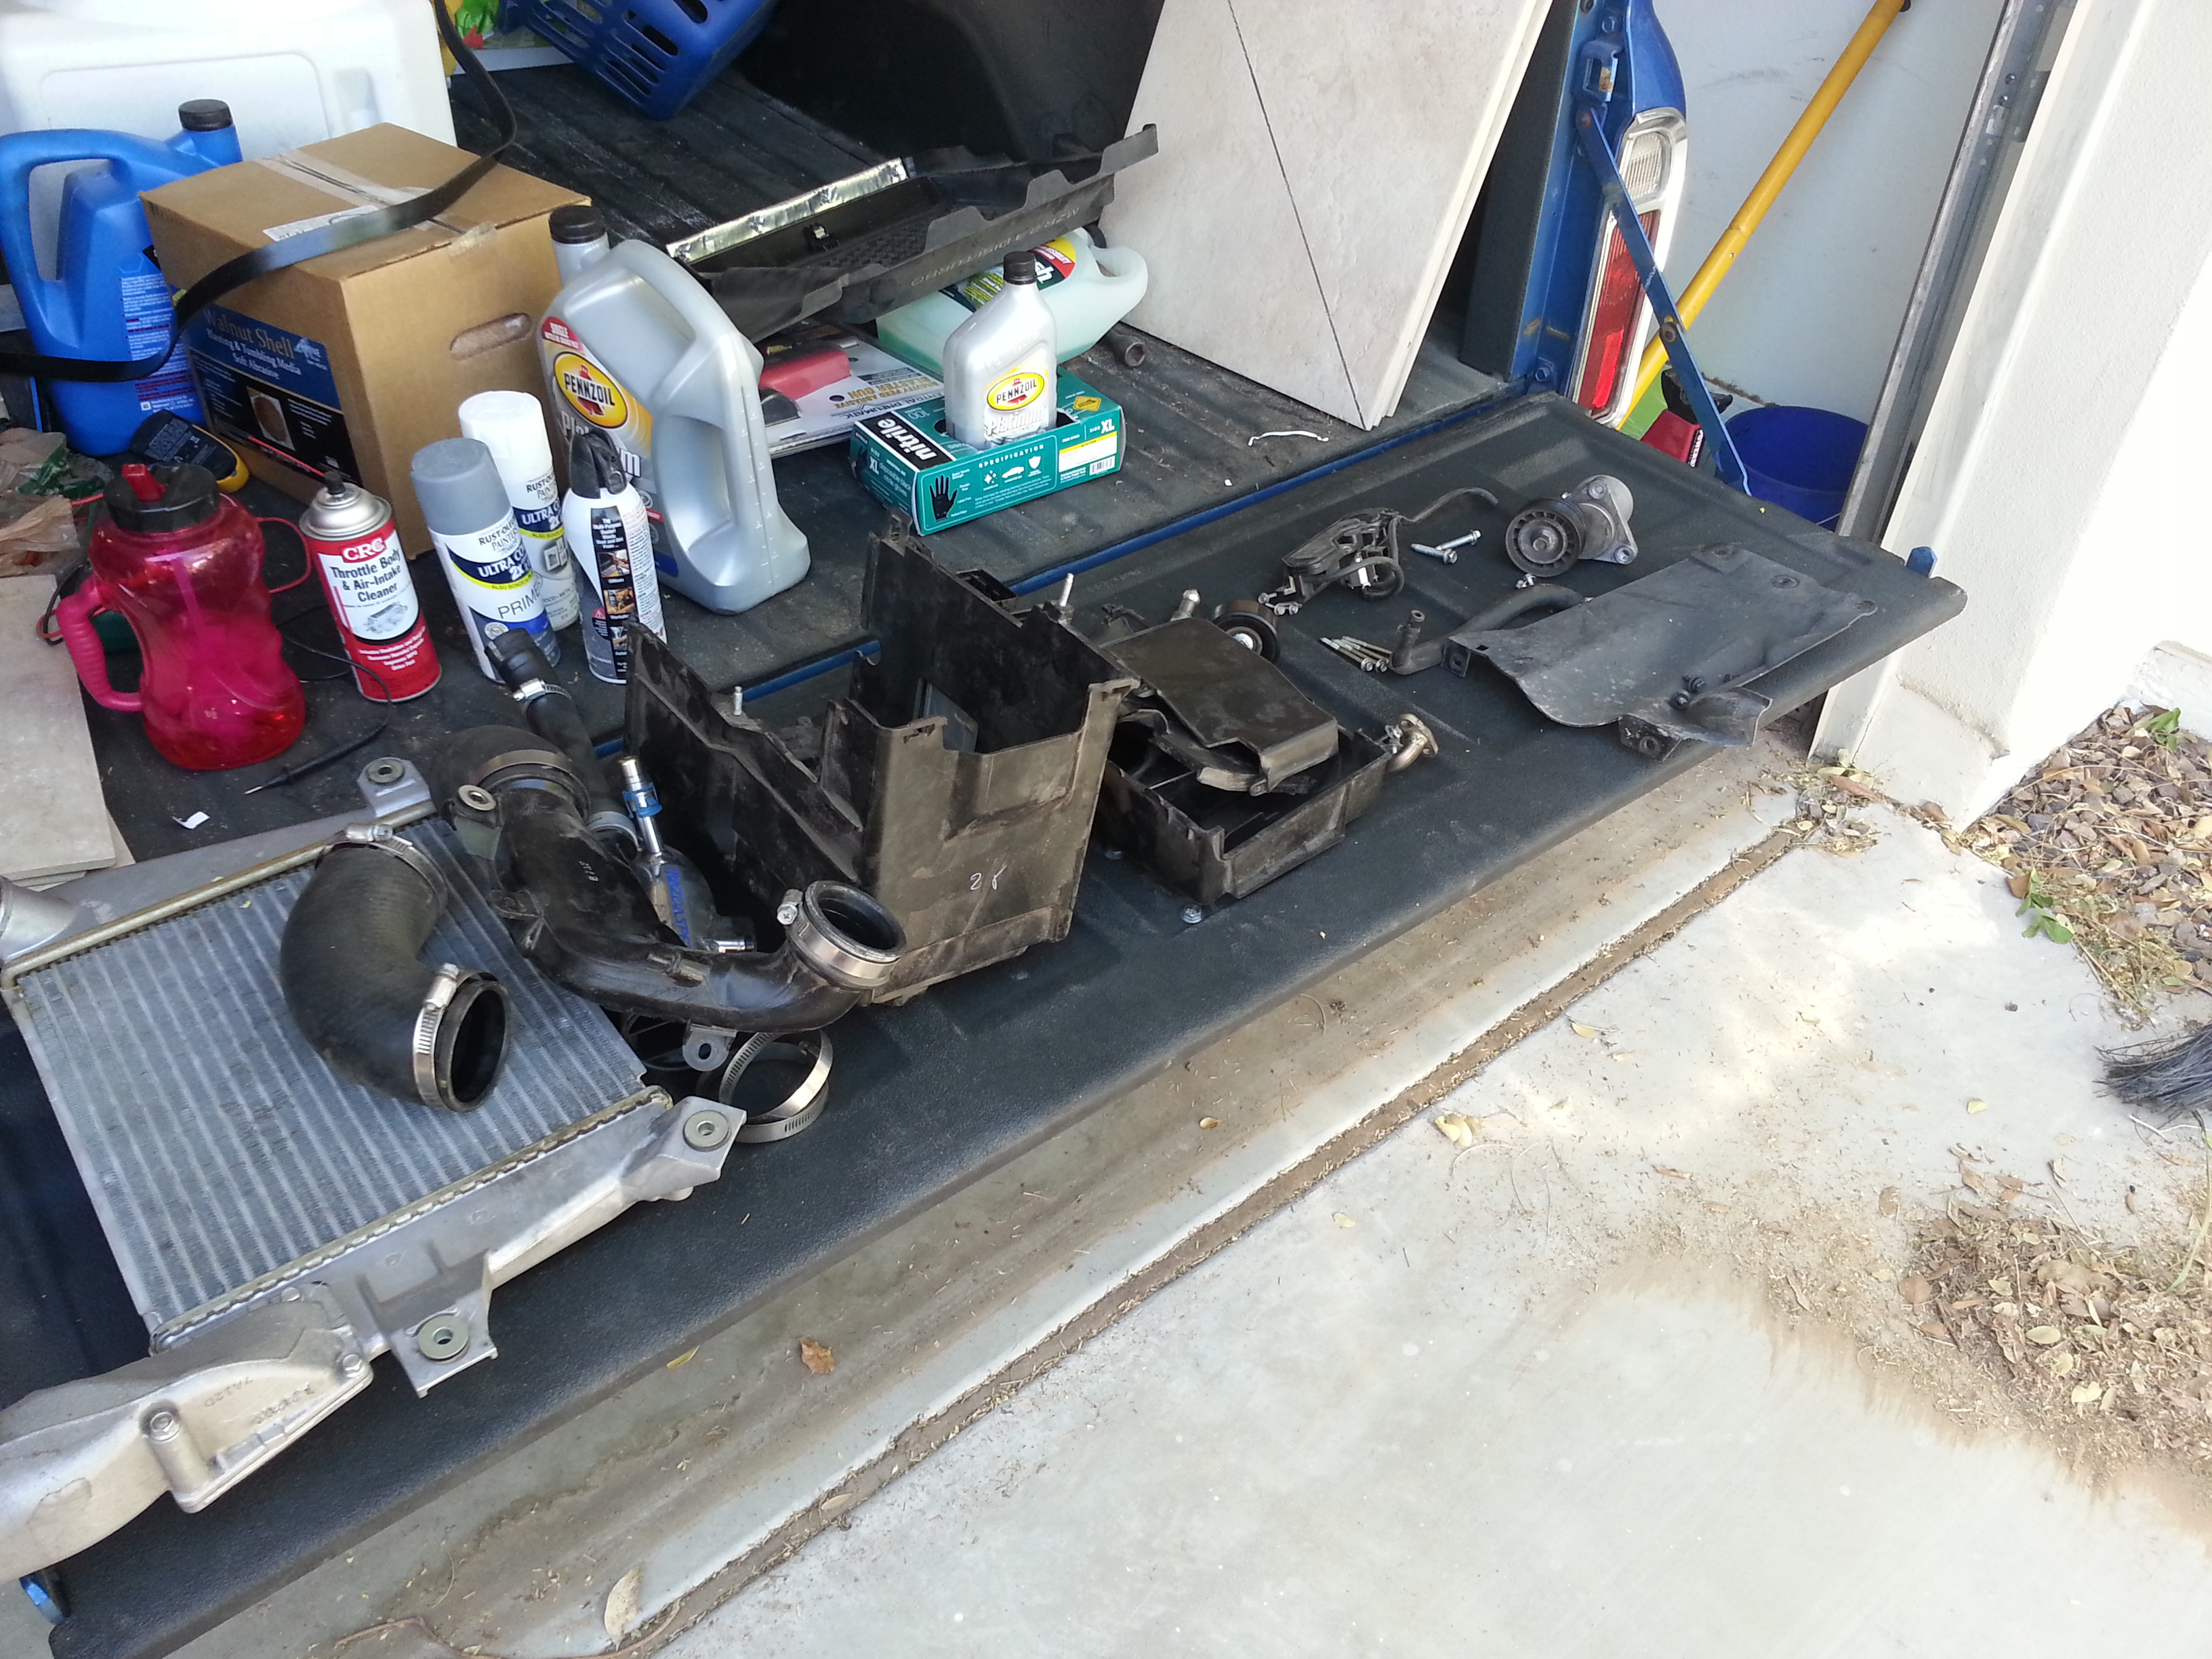 Parts pile. Most of the process is just fighting with goddamned hoses and wiring connectors. Everything has been baked under here for 123,000 miles, in all manner of Arizona summer heat no less. No connector of any sort wants to release easily, but if I break something this is the only car I have that I can put my kid into so I've got to be careful to not screw anything up beyond what I can fix in a weekend. Annoyingly, I discovered at least two other issues while crawling around the car. The tensioner and idler pulleys were both crunchy and loose at best, so I had to go pick up new ones... but there's a reason the idler at Autozone is half the cost of the other stores, it's the wrong one. It doesn't come with its own mounting hardware, yet it isn't compatible with the dust shield from the factory idler. Second issue... the driver's side CV joint is puking grease. I figured this might happen eventually, it gave me all kinds of hell when I did the struts 20k miles ago and now it's starting to leak. Given the unholy nightmare of replacing the passenger side wheel bearing (and that was when a shop did it!) I'm going to have the dealer or a local shop tackle that one for me. Fast forward to finally getting at all eight intake manifold bolts and it's off... 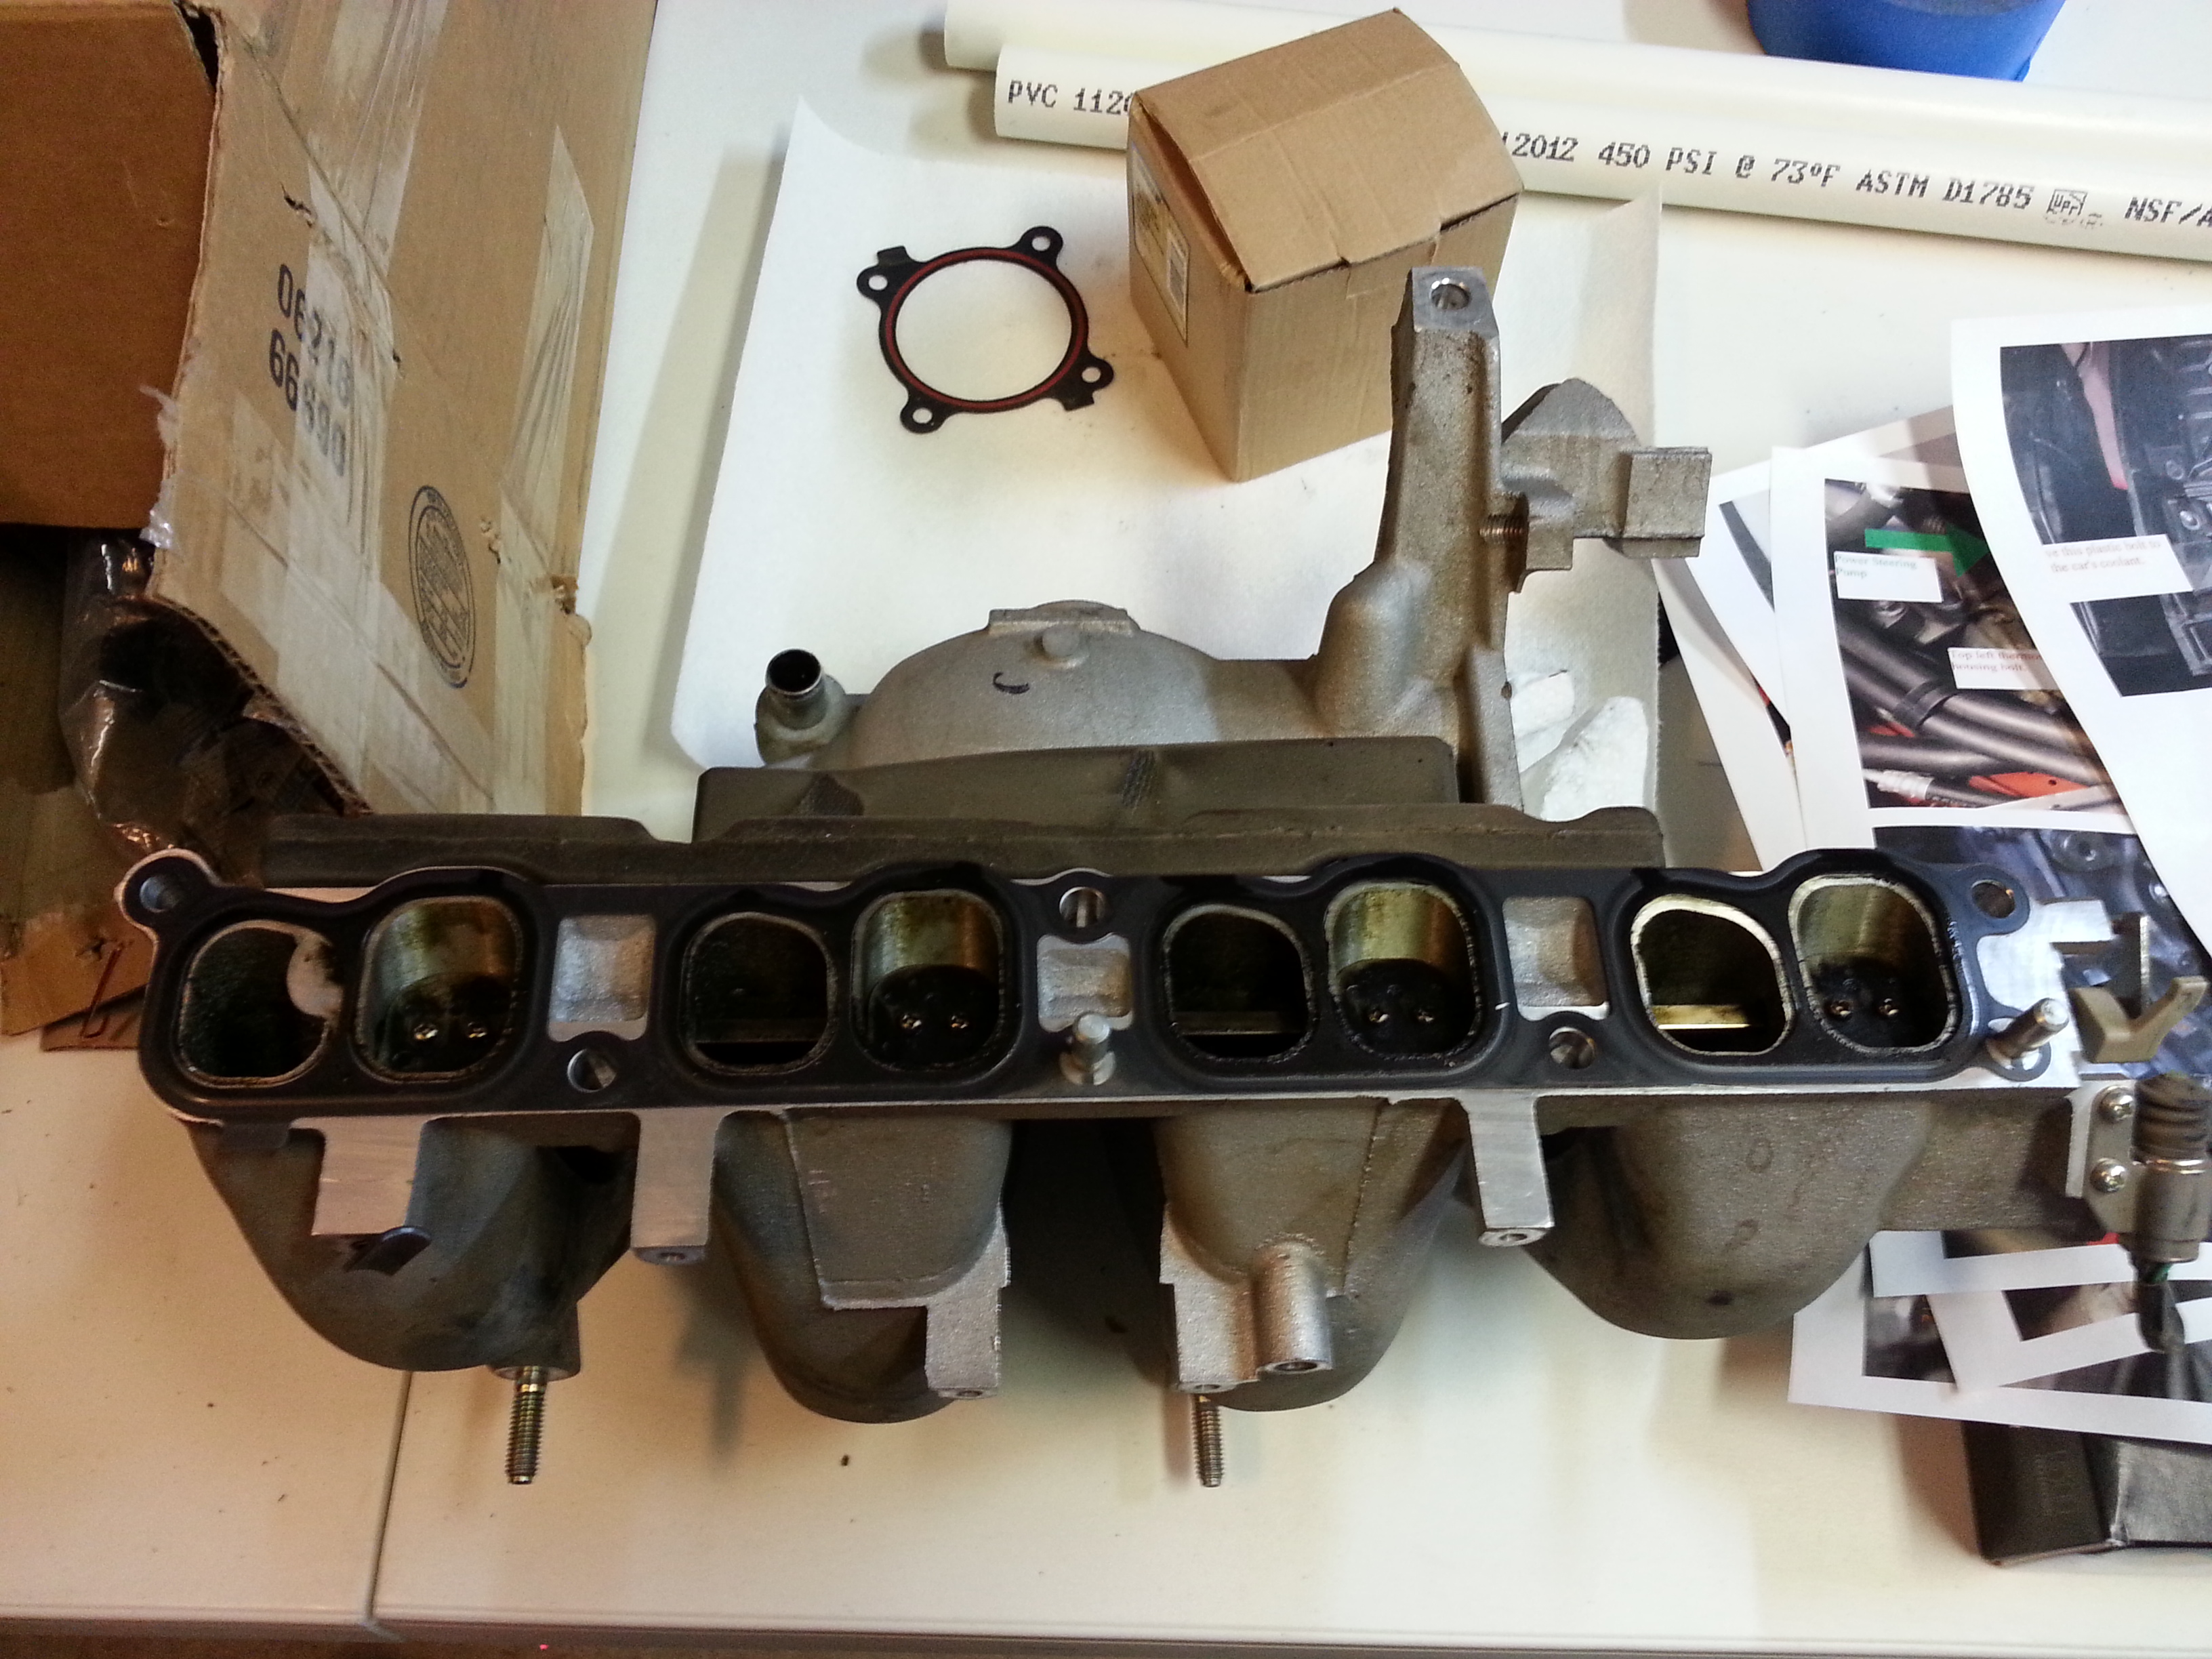 A bit on the oily side here as well. There's actually a small puddle of it in the main plenum. 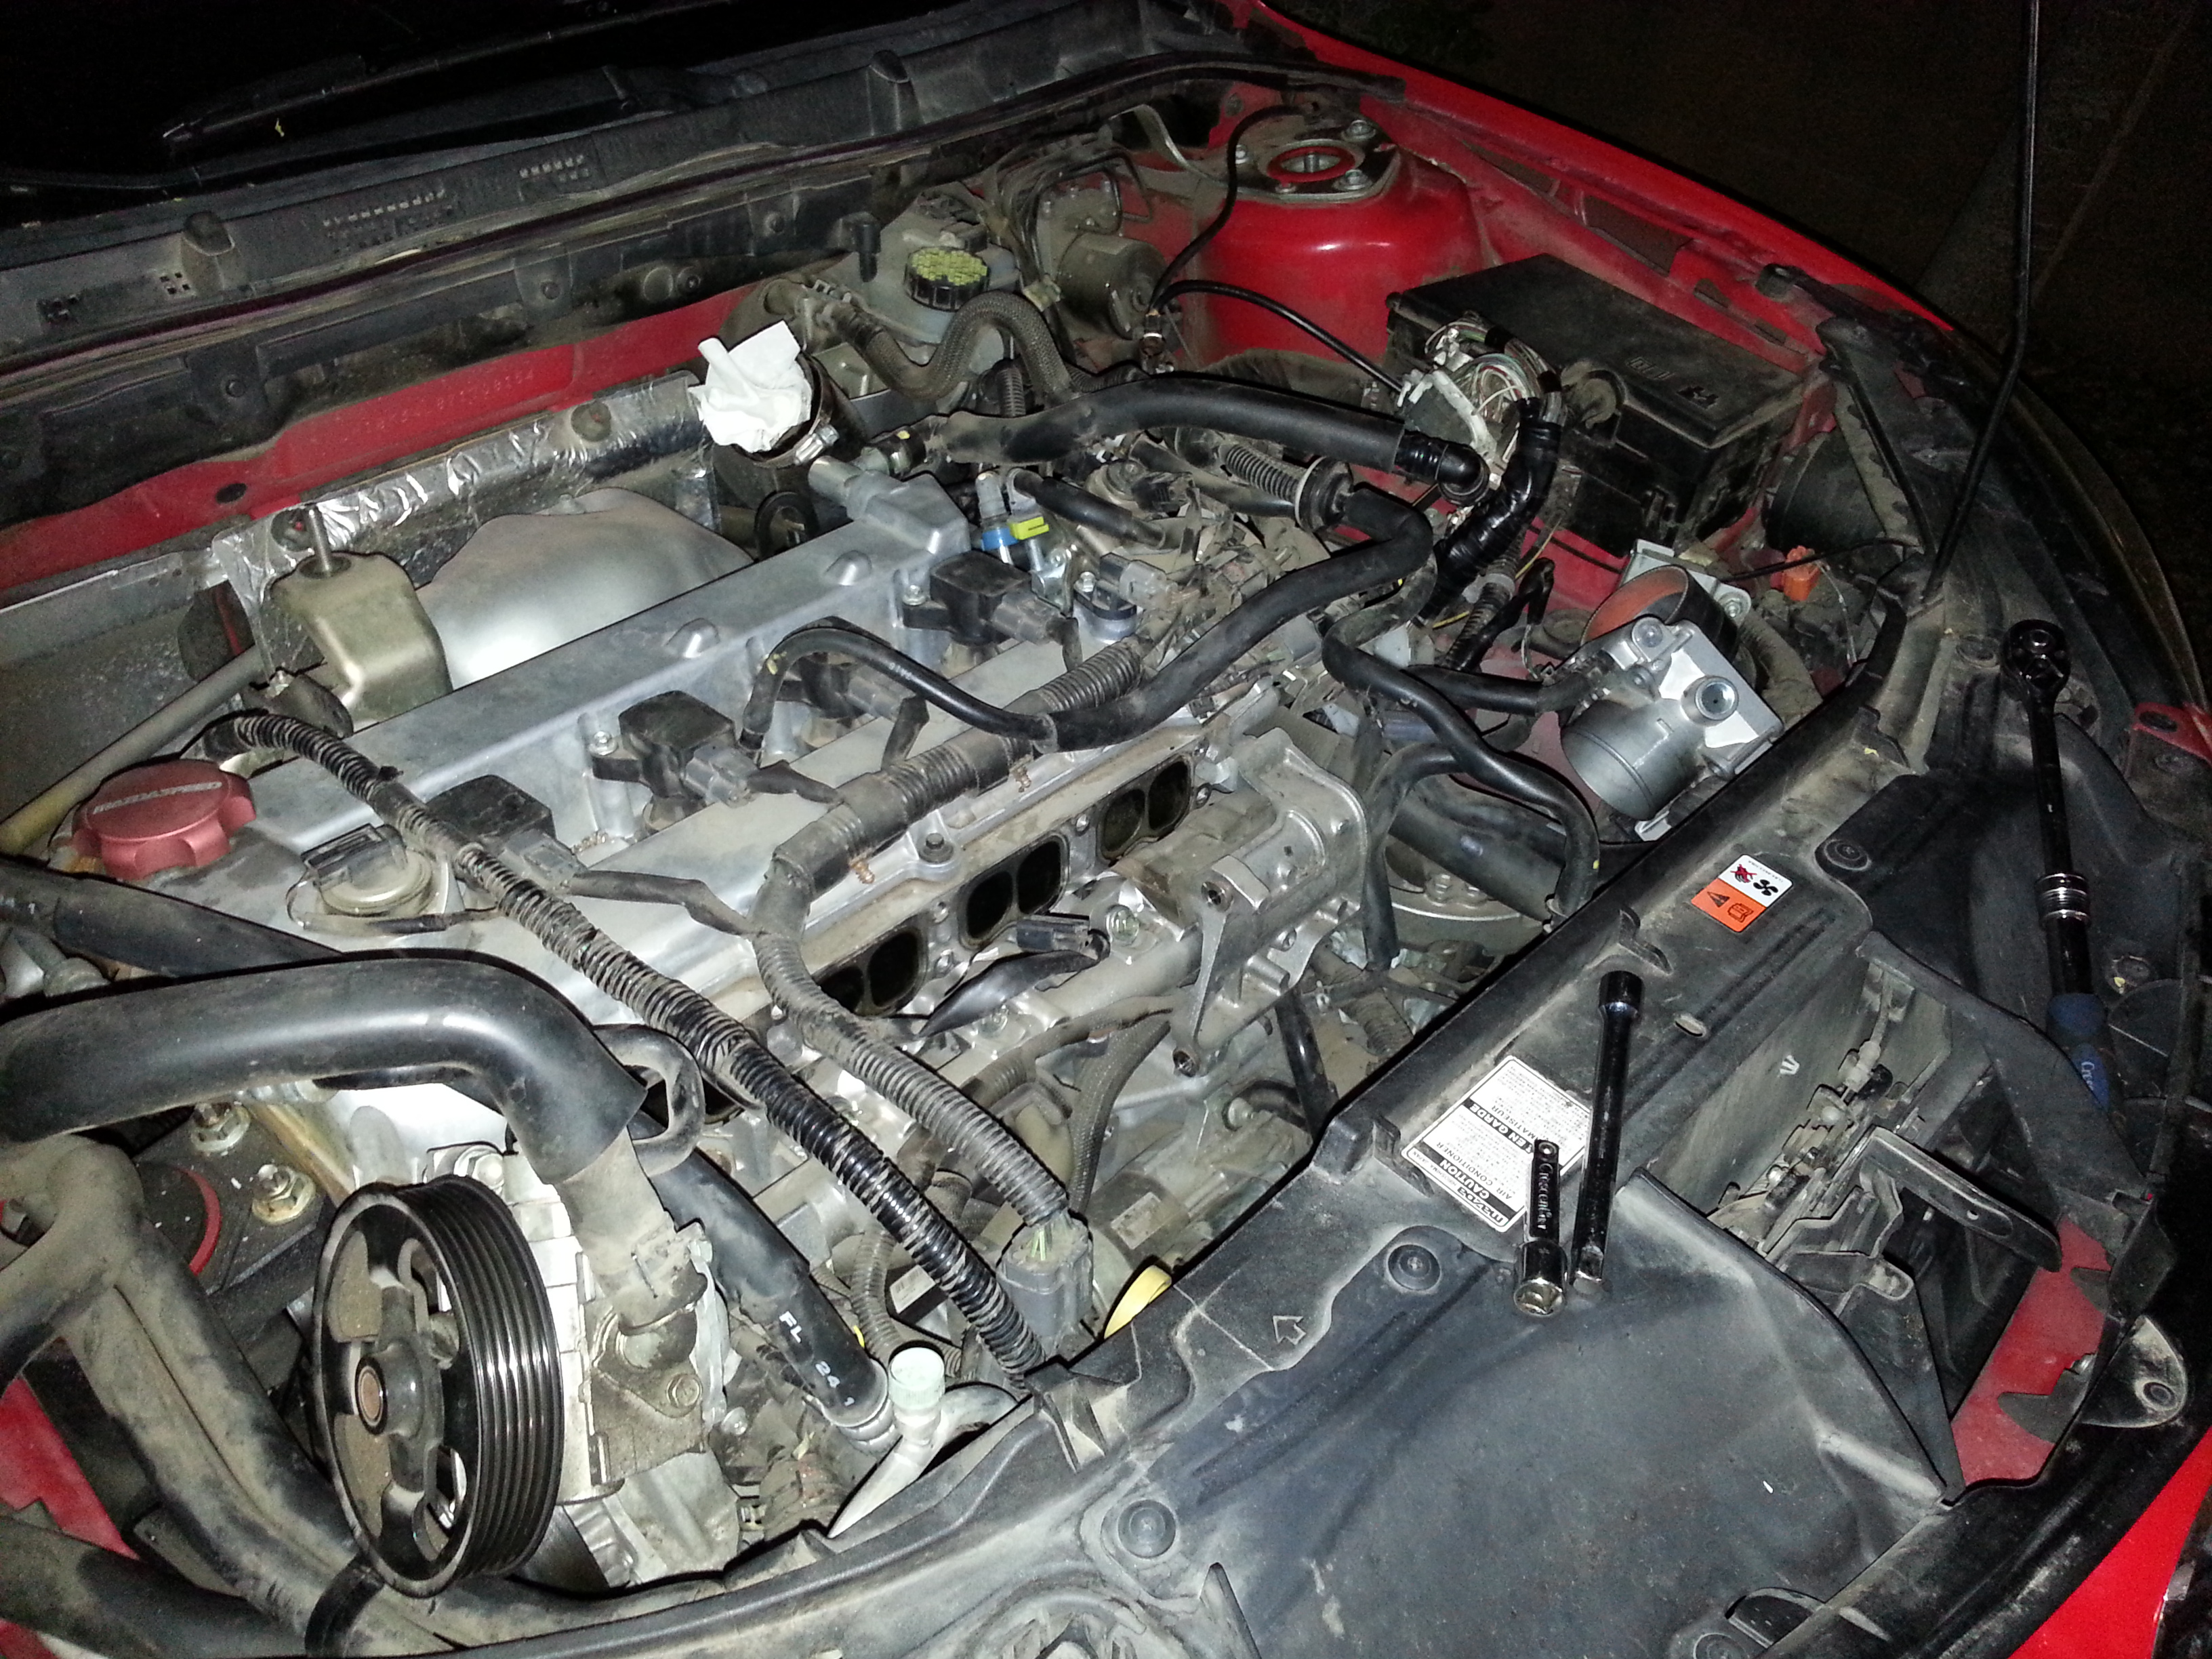 Engine bay minus the manifold. So remember what I said about poo poo building up on the intake valves? I almost want to tag these as  but you have to zoom in to see the real horror thanks to the pain of trying to focus my phone's camera on the valves at night. Strangely, some cylinders are far worse than others; must be where the heavy poo poo flows to. but you have to zoom in to see the real horror thanks to the pain of trying to focus my phone's camera on the valves at night. Strangely, some cylinders are far worse than others; must be where the heavy poo poo flows to.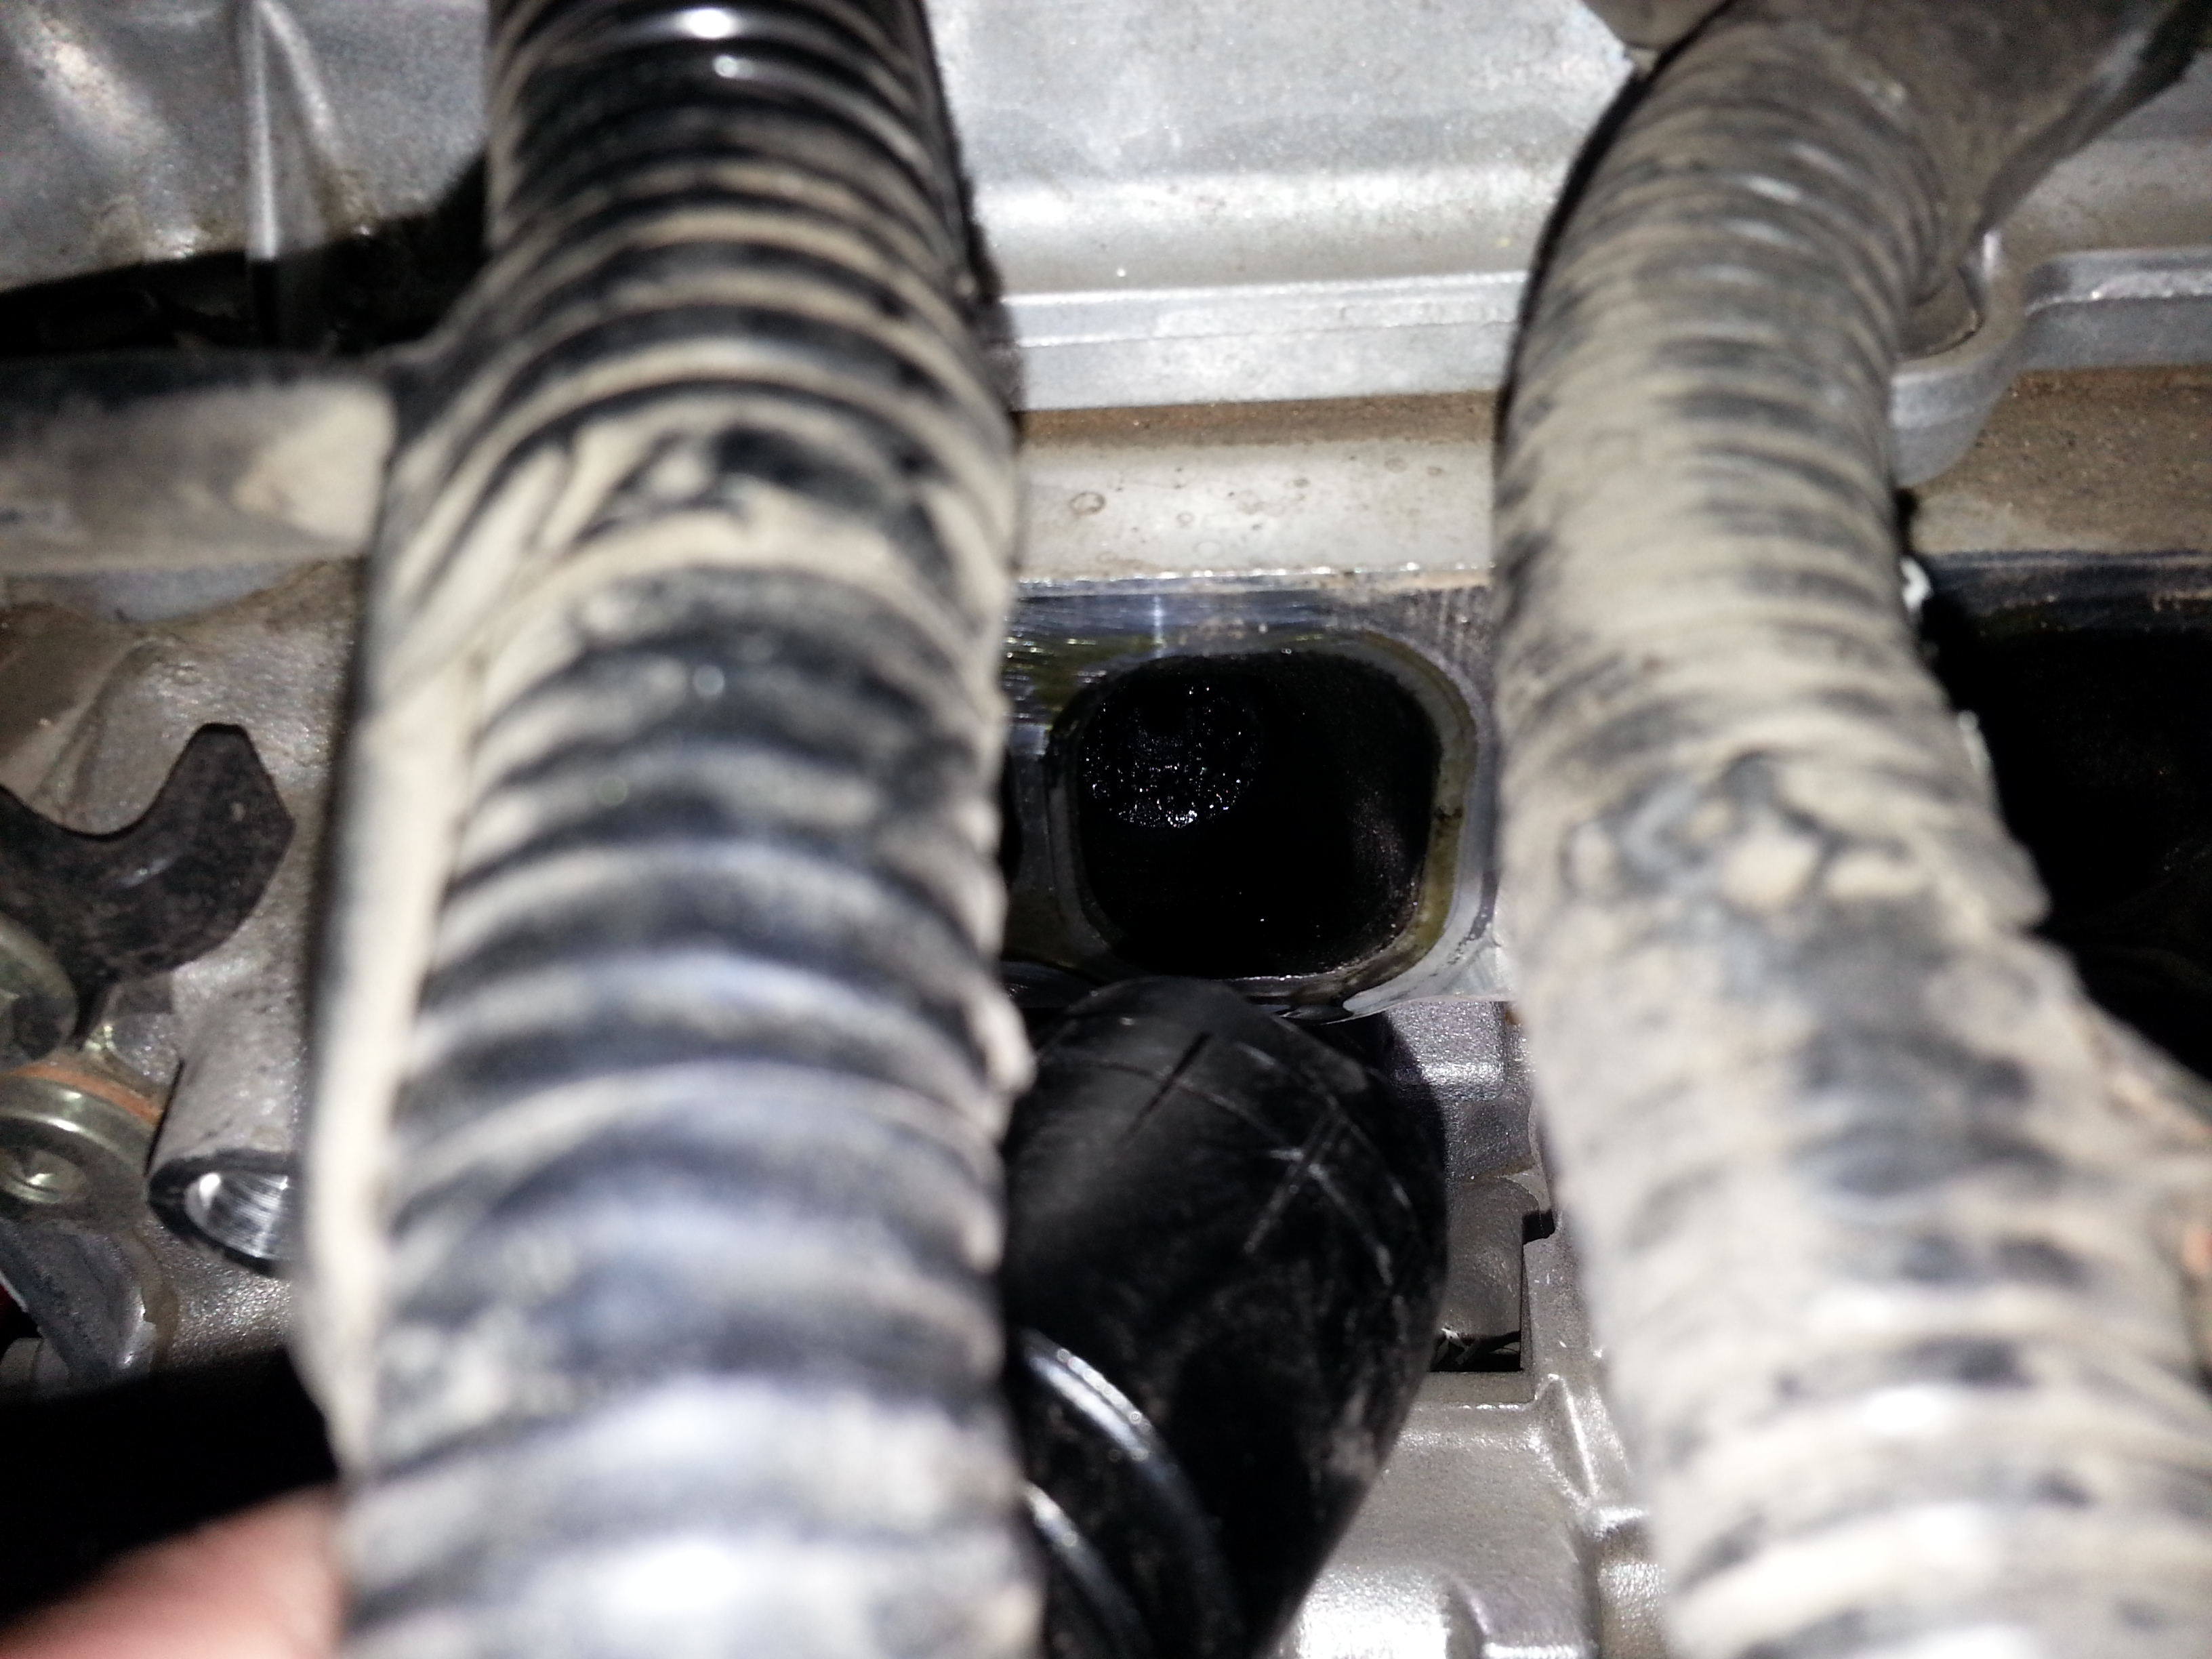 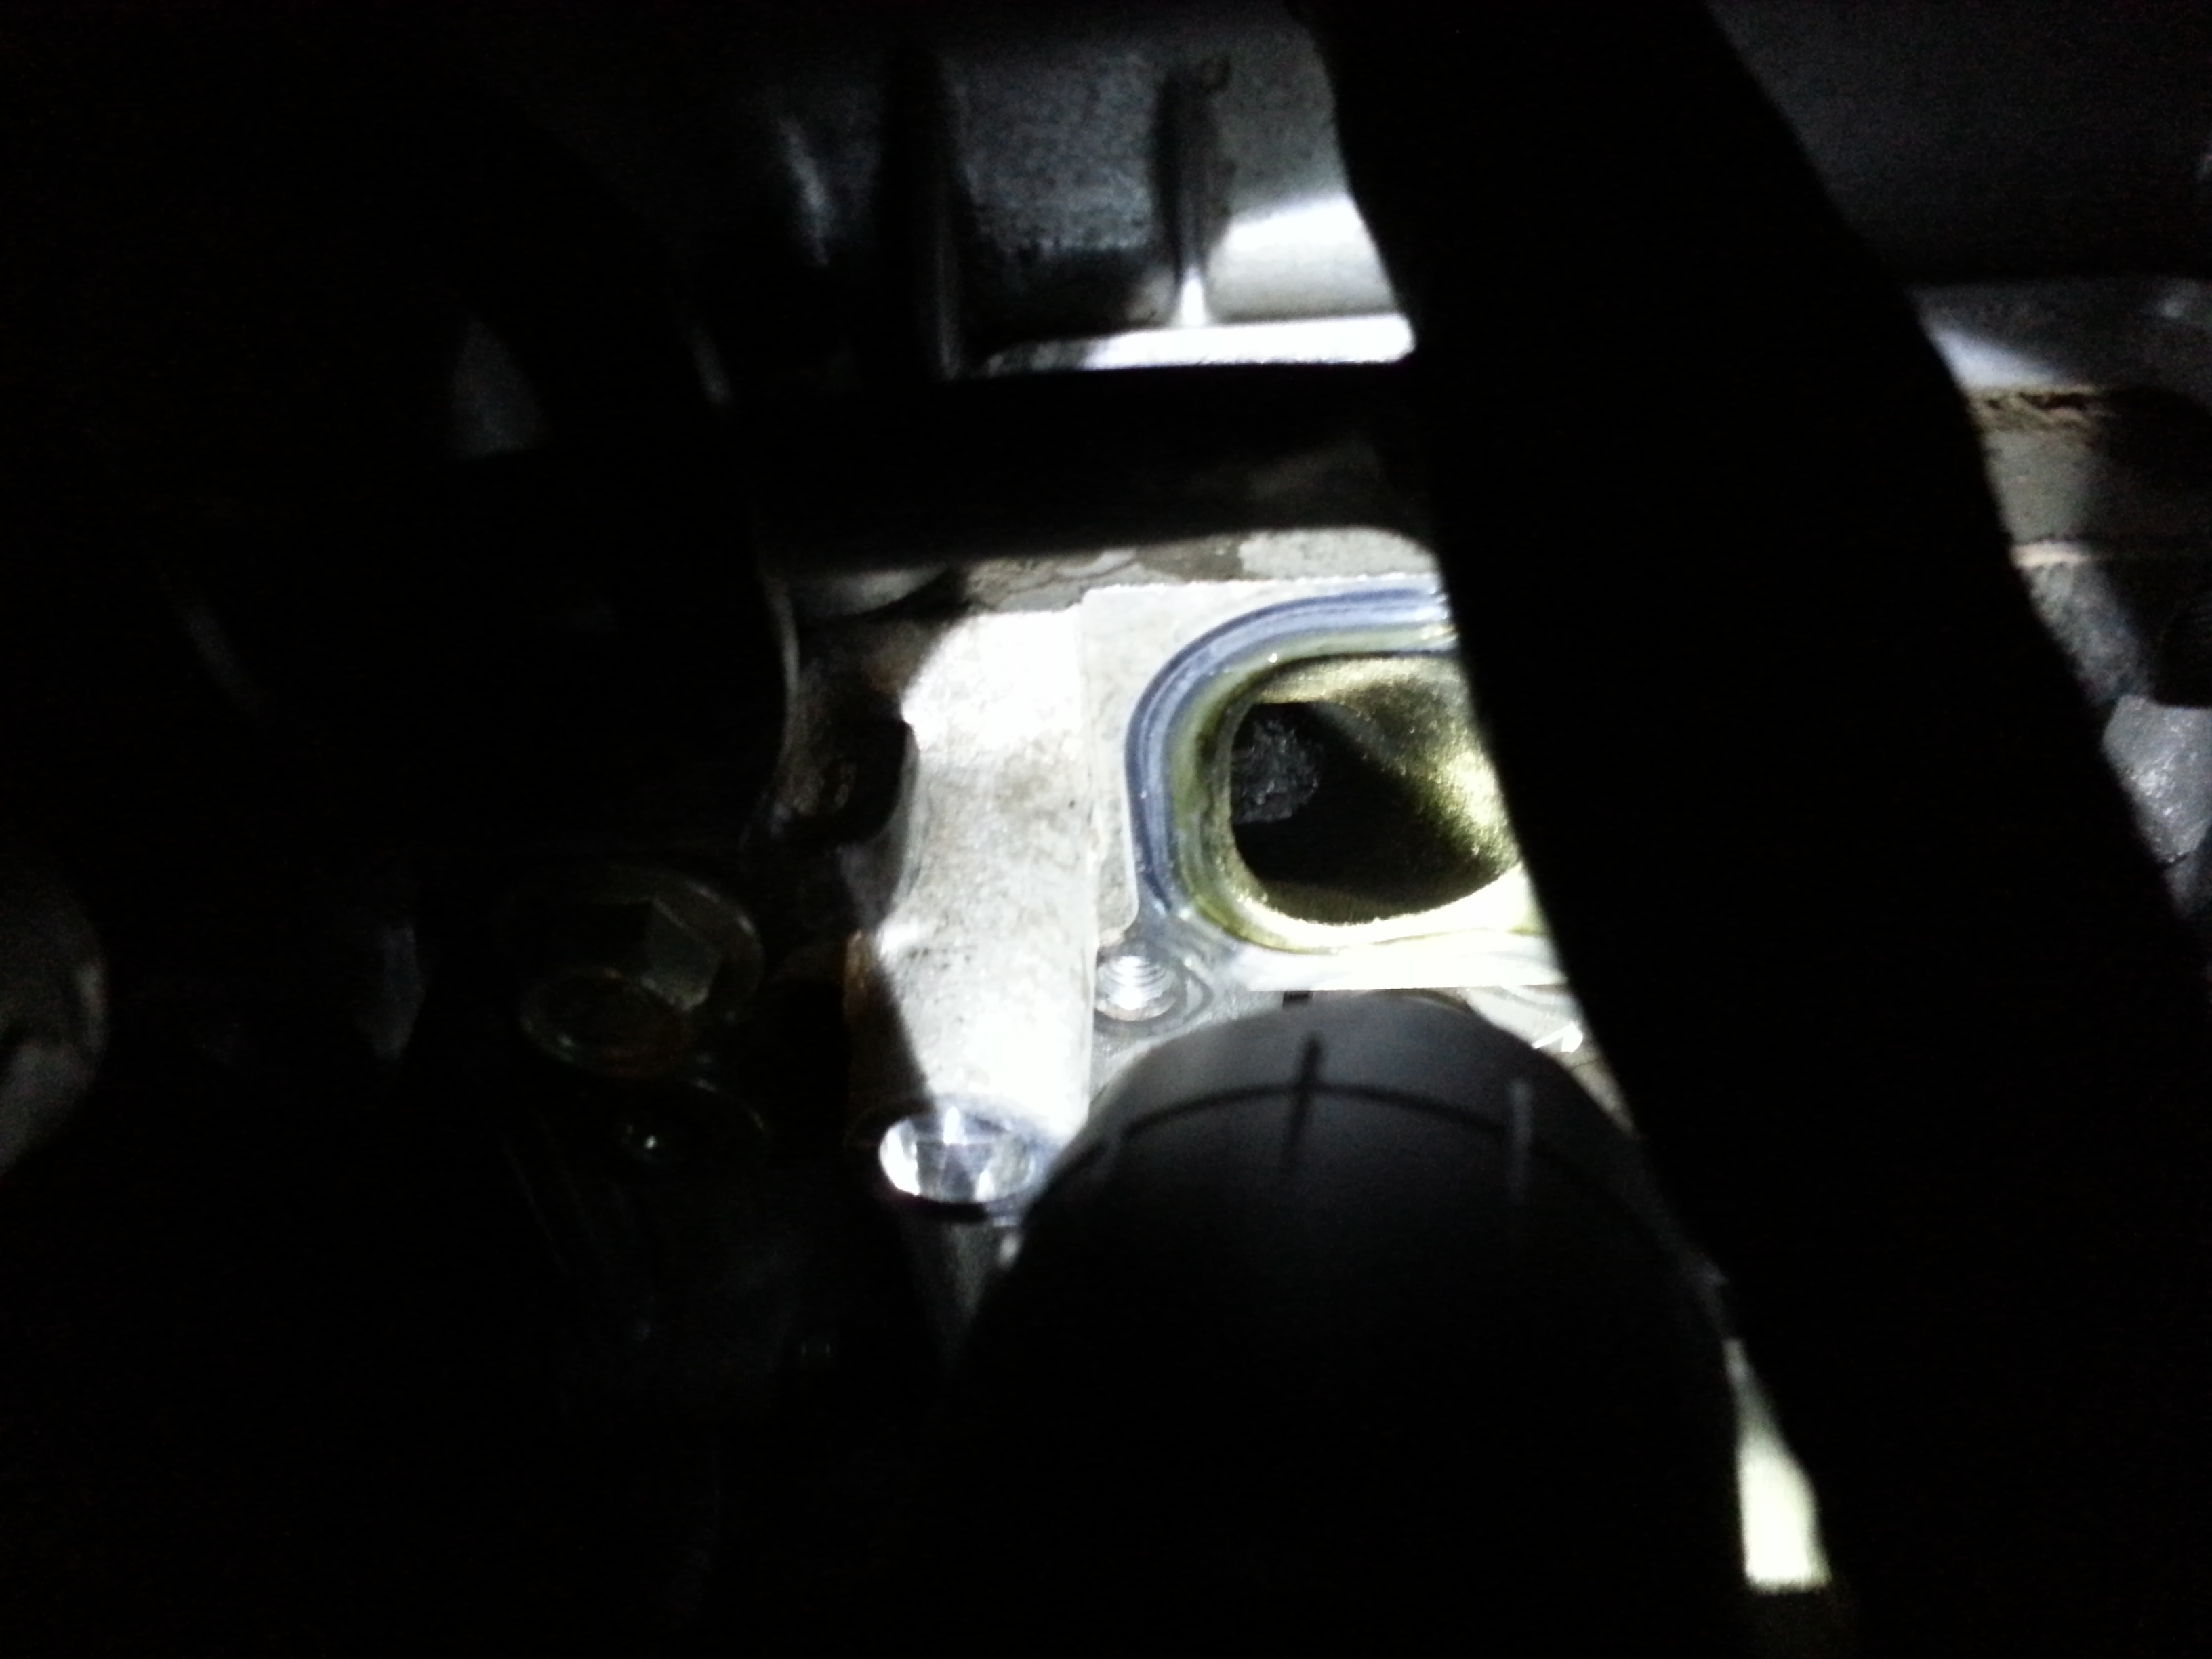 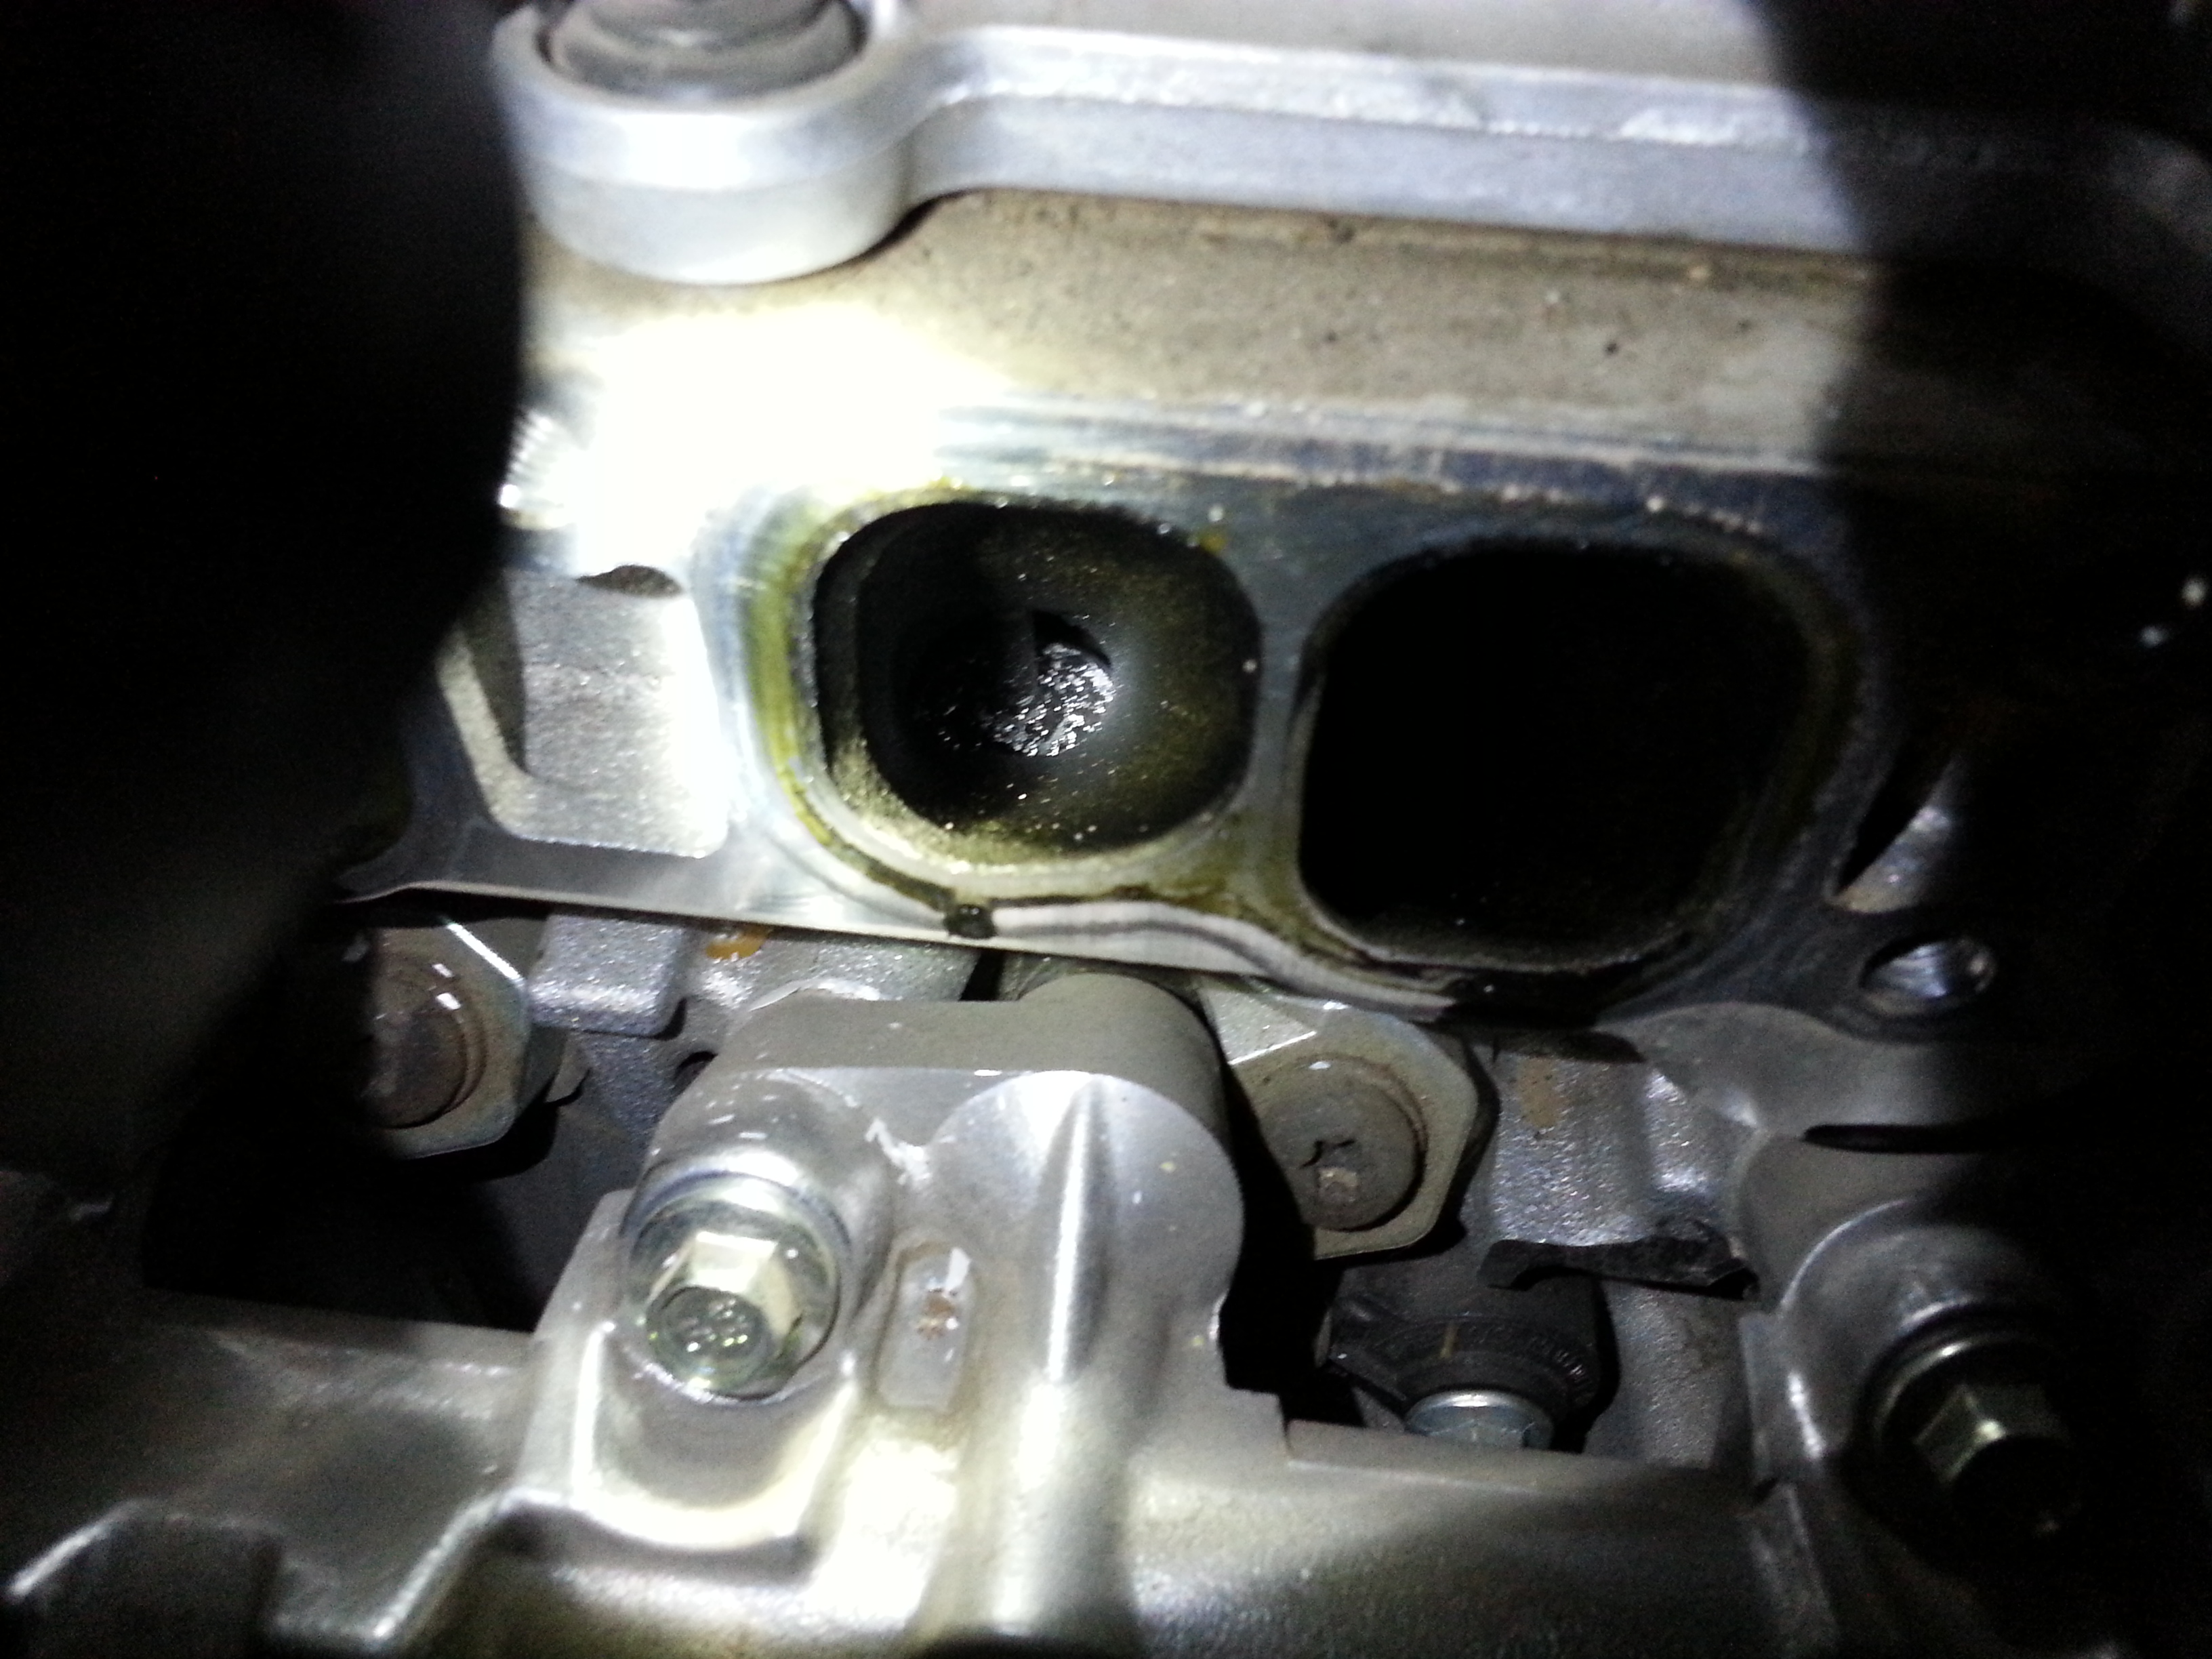 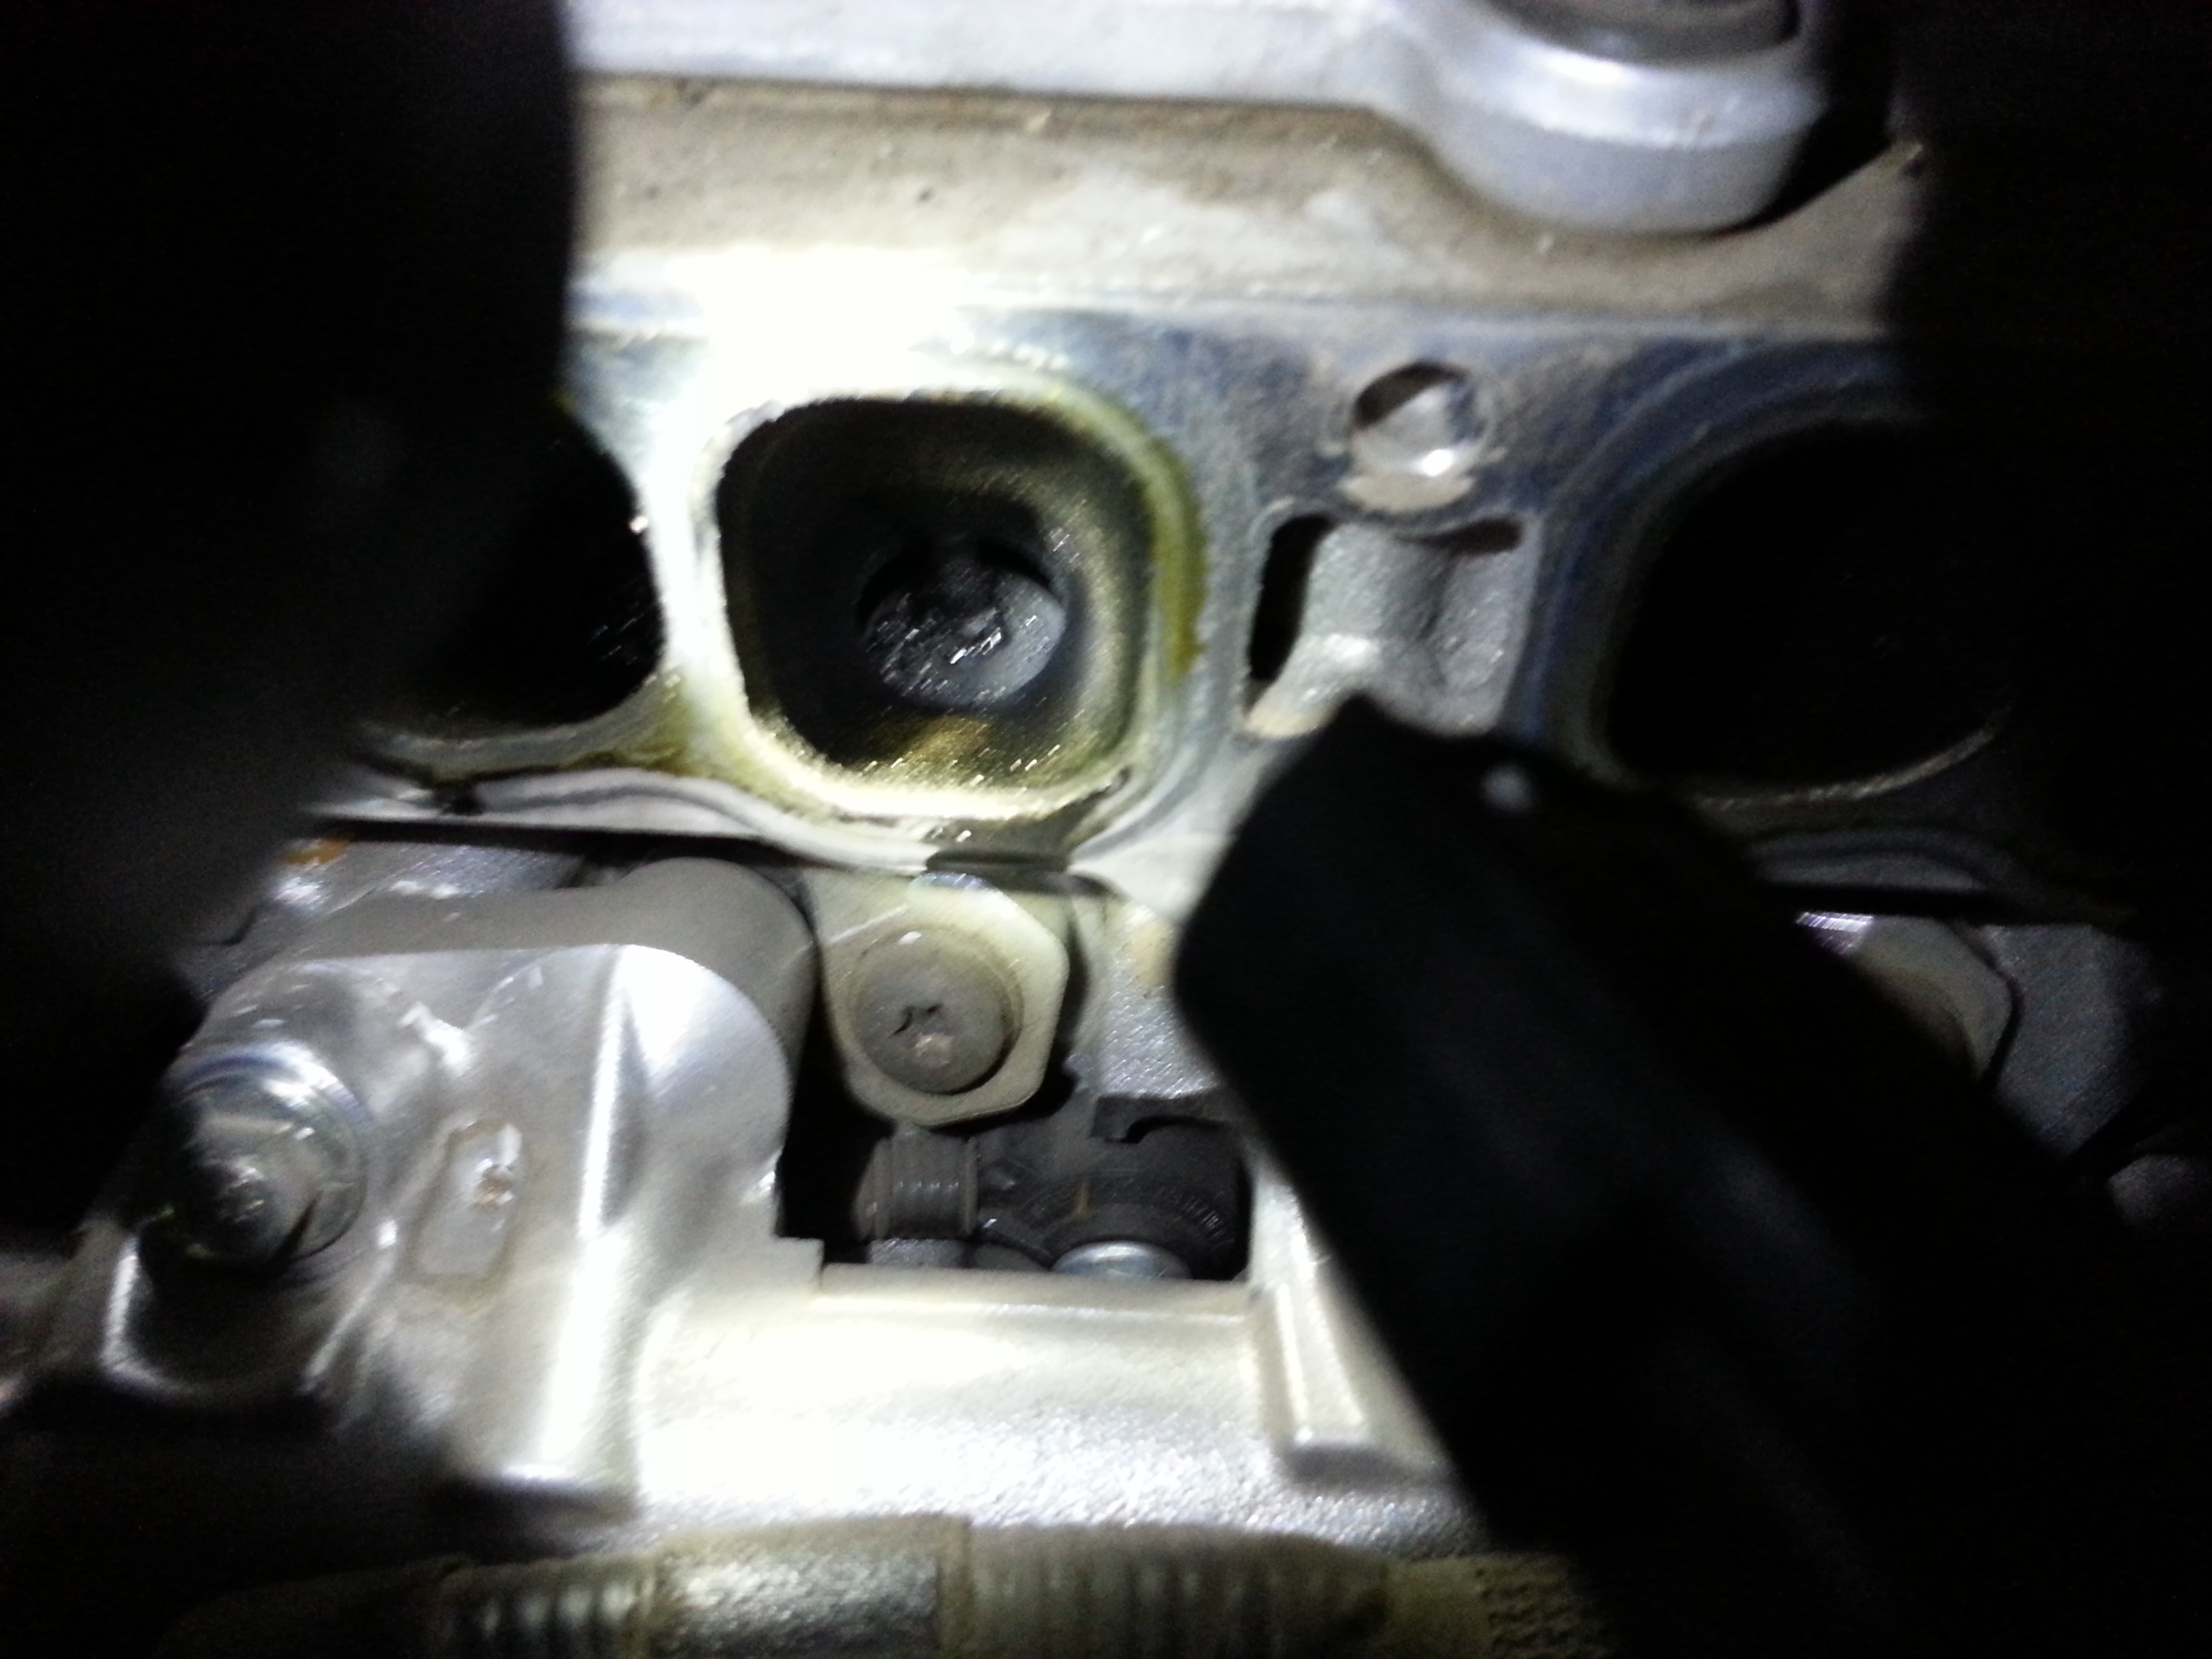 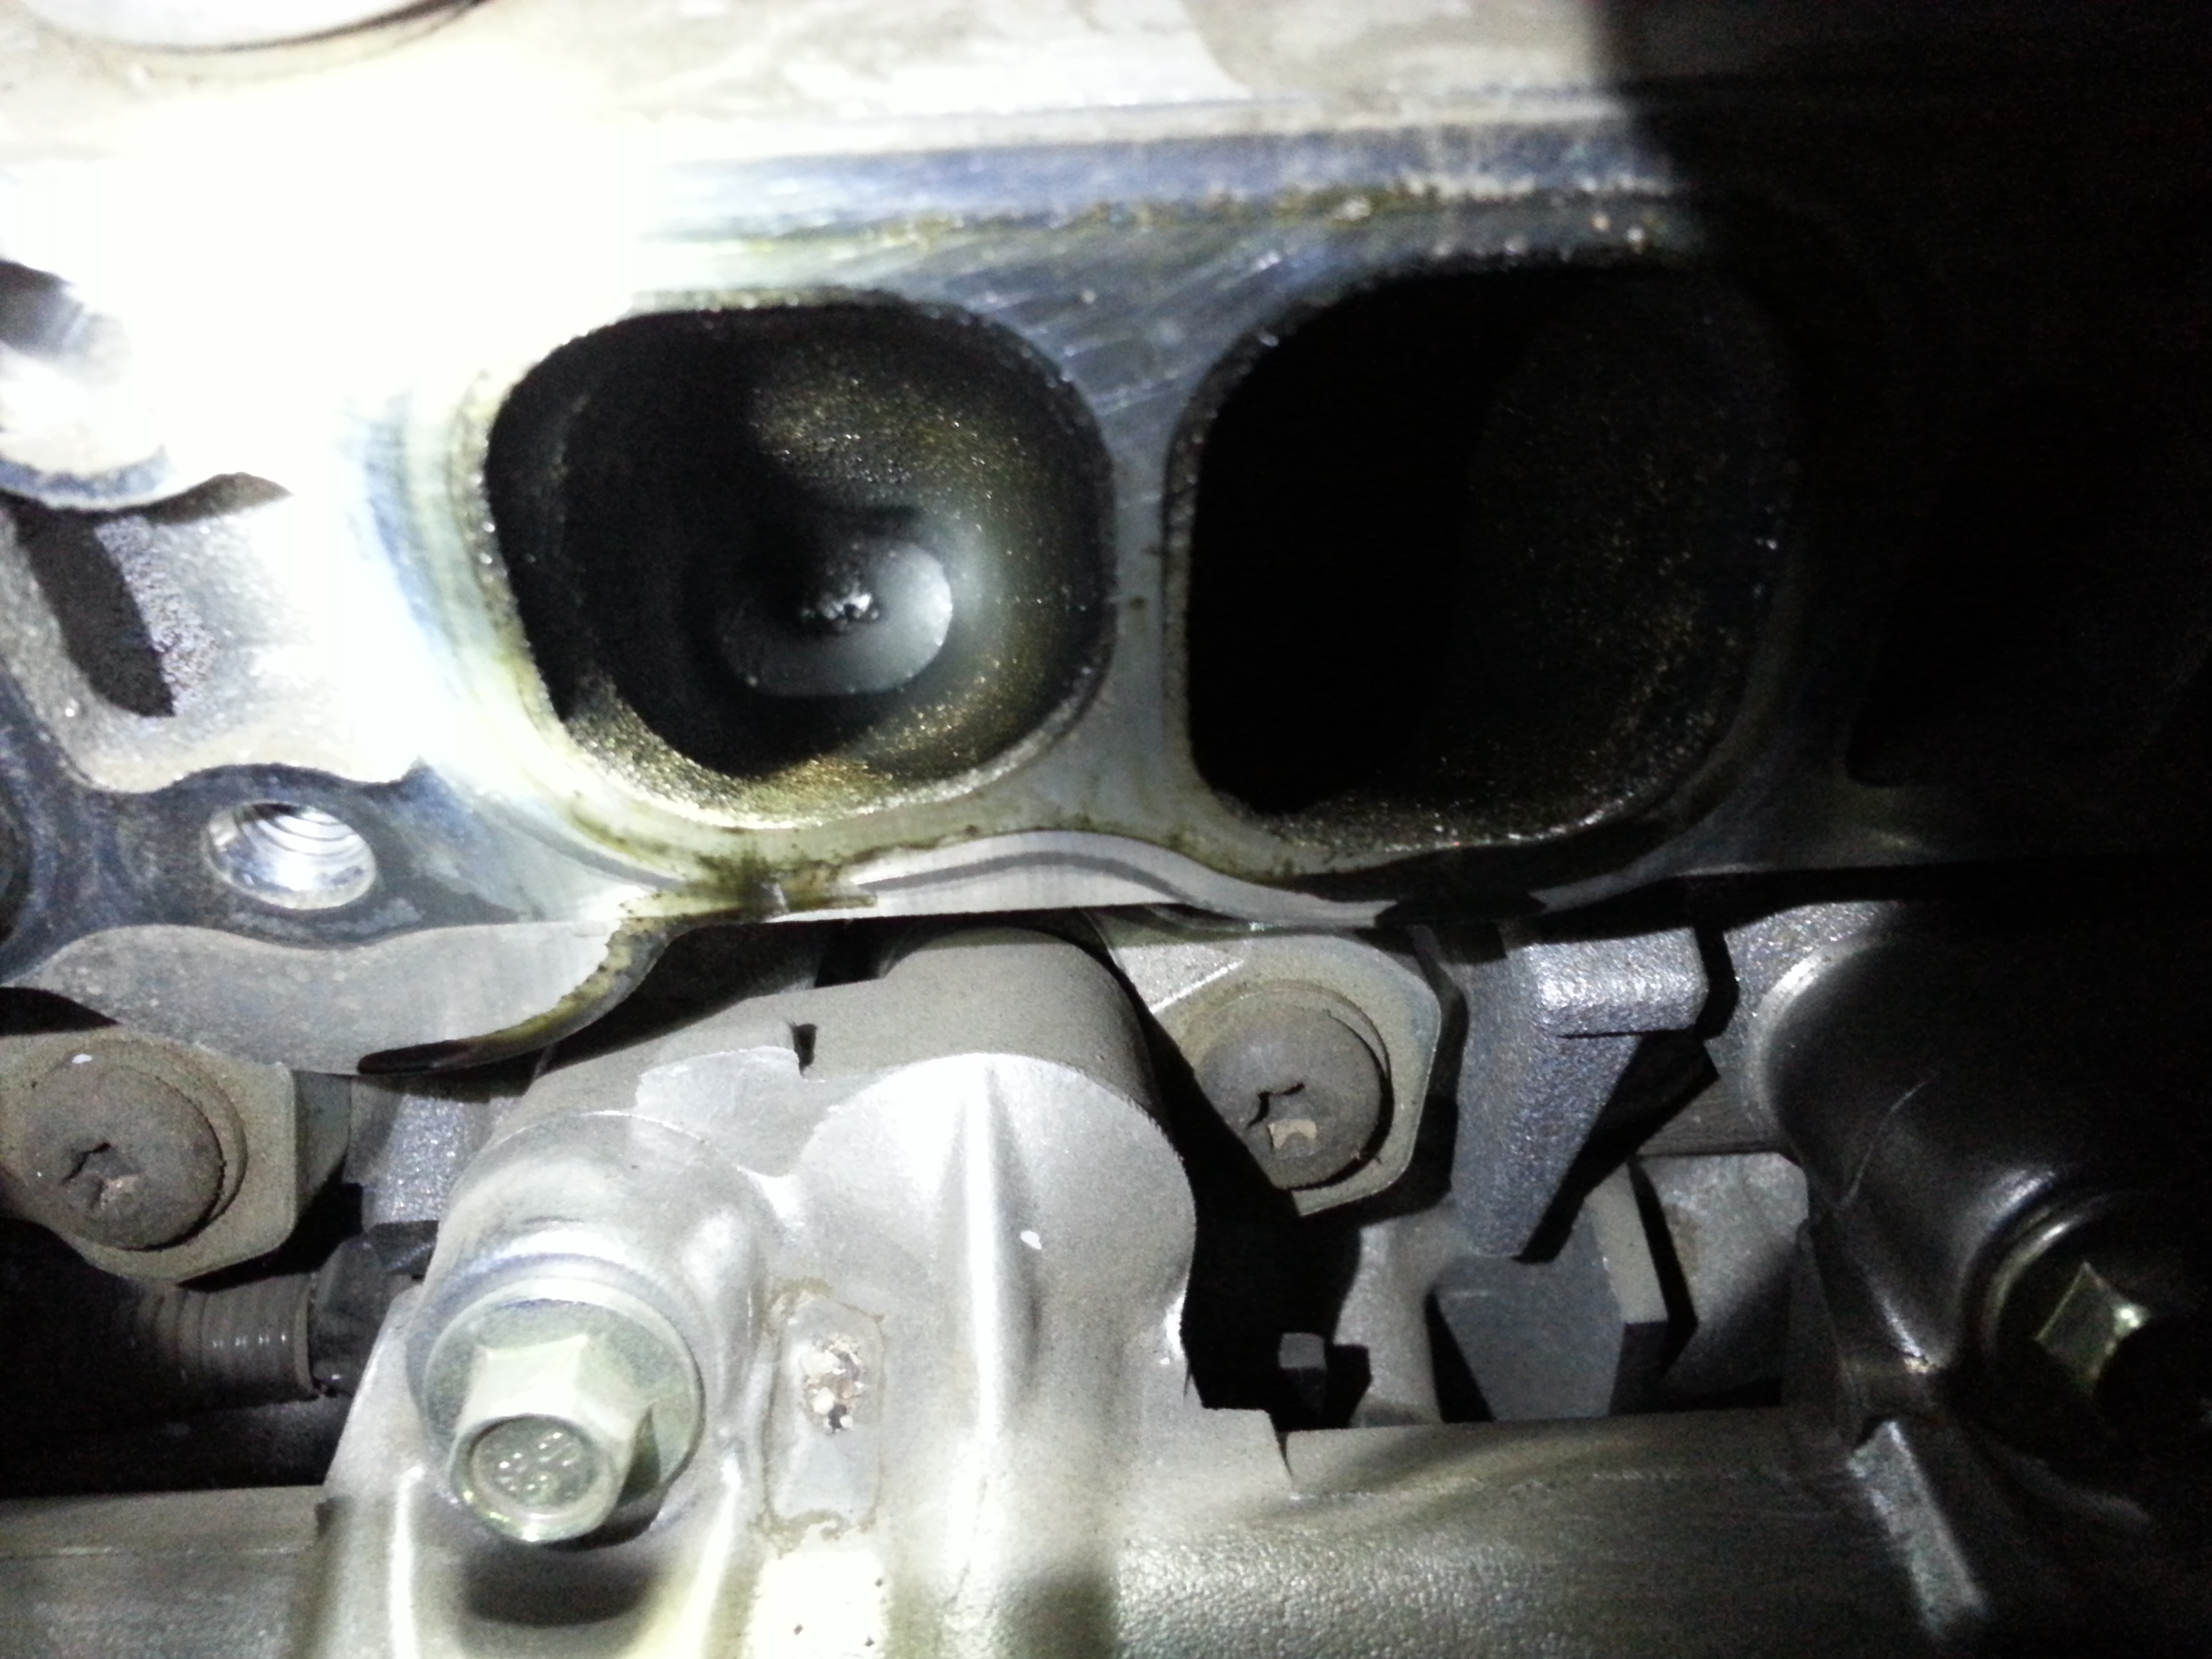 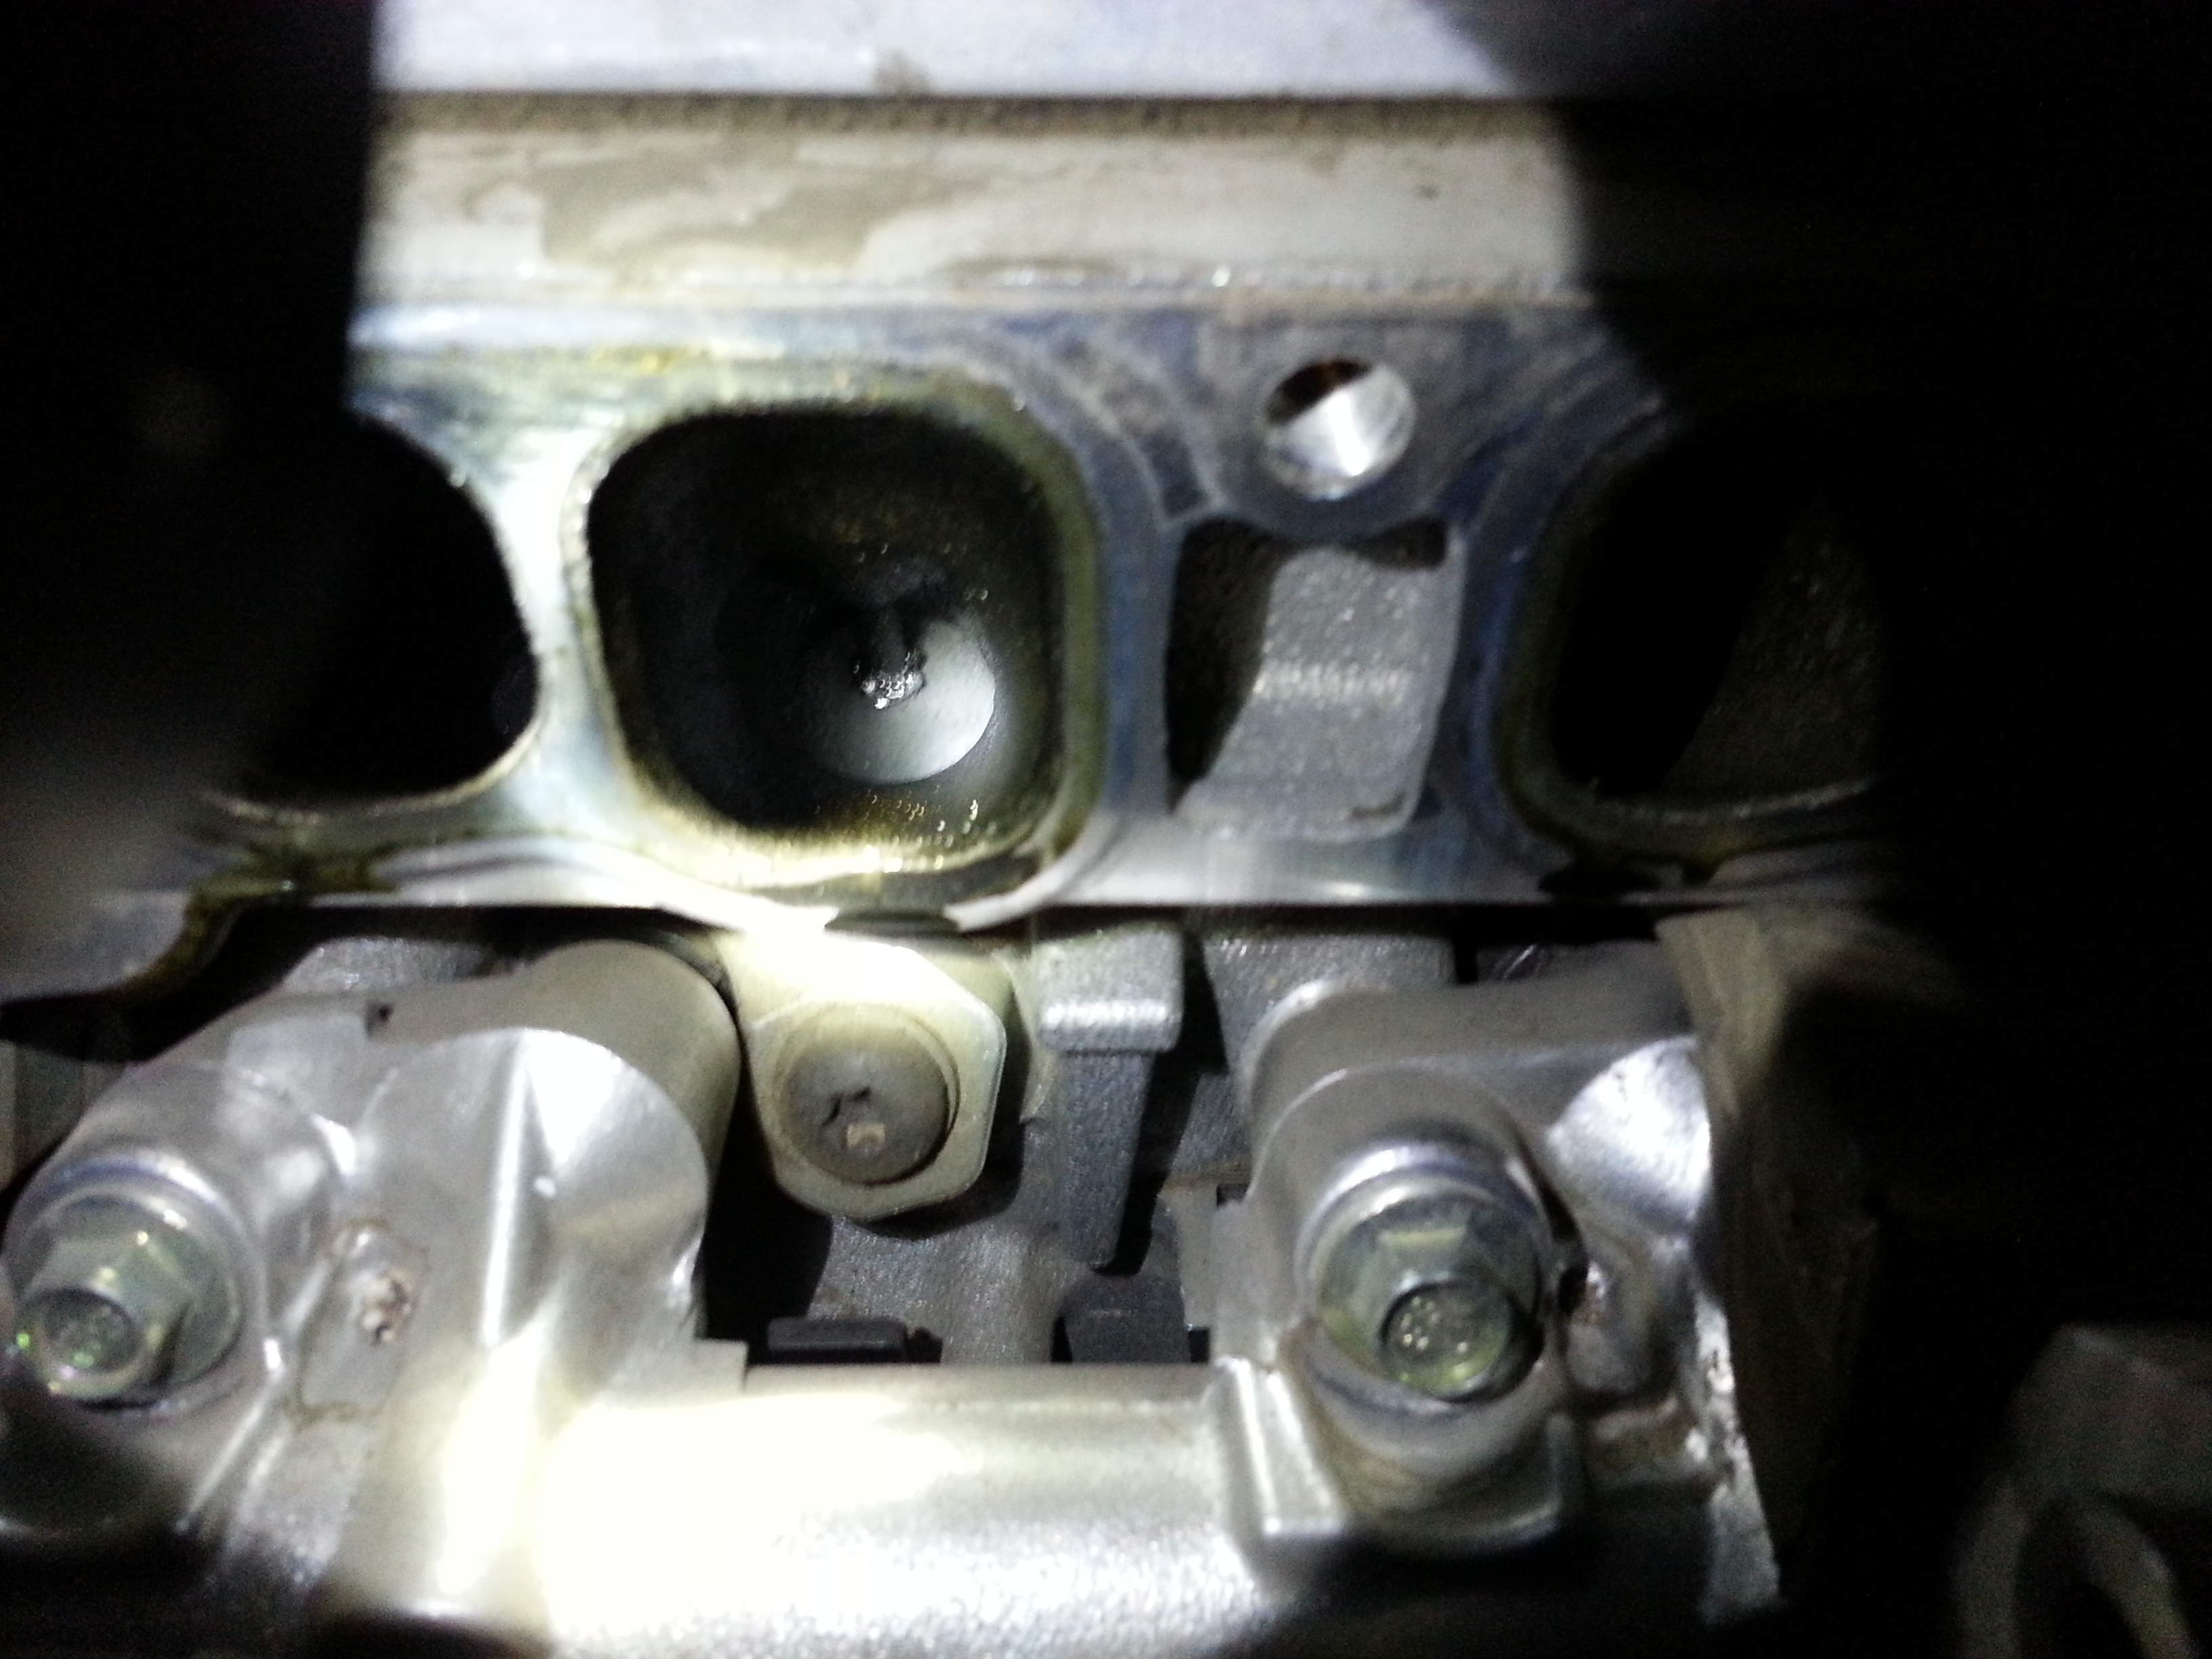 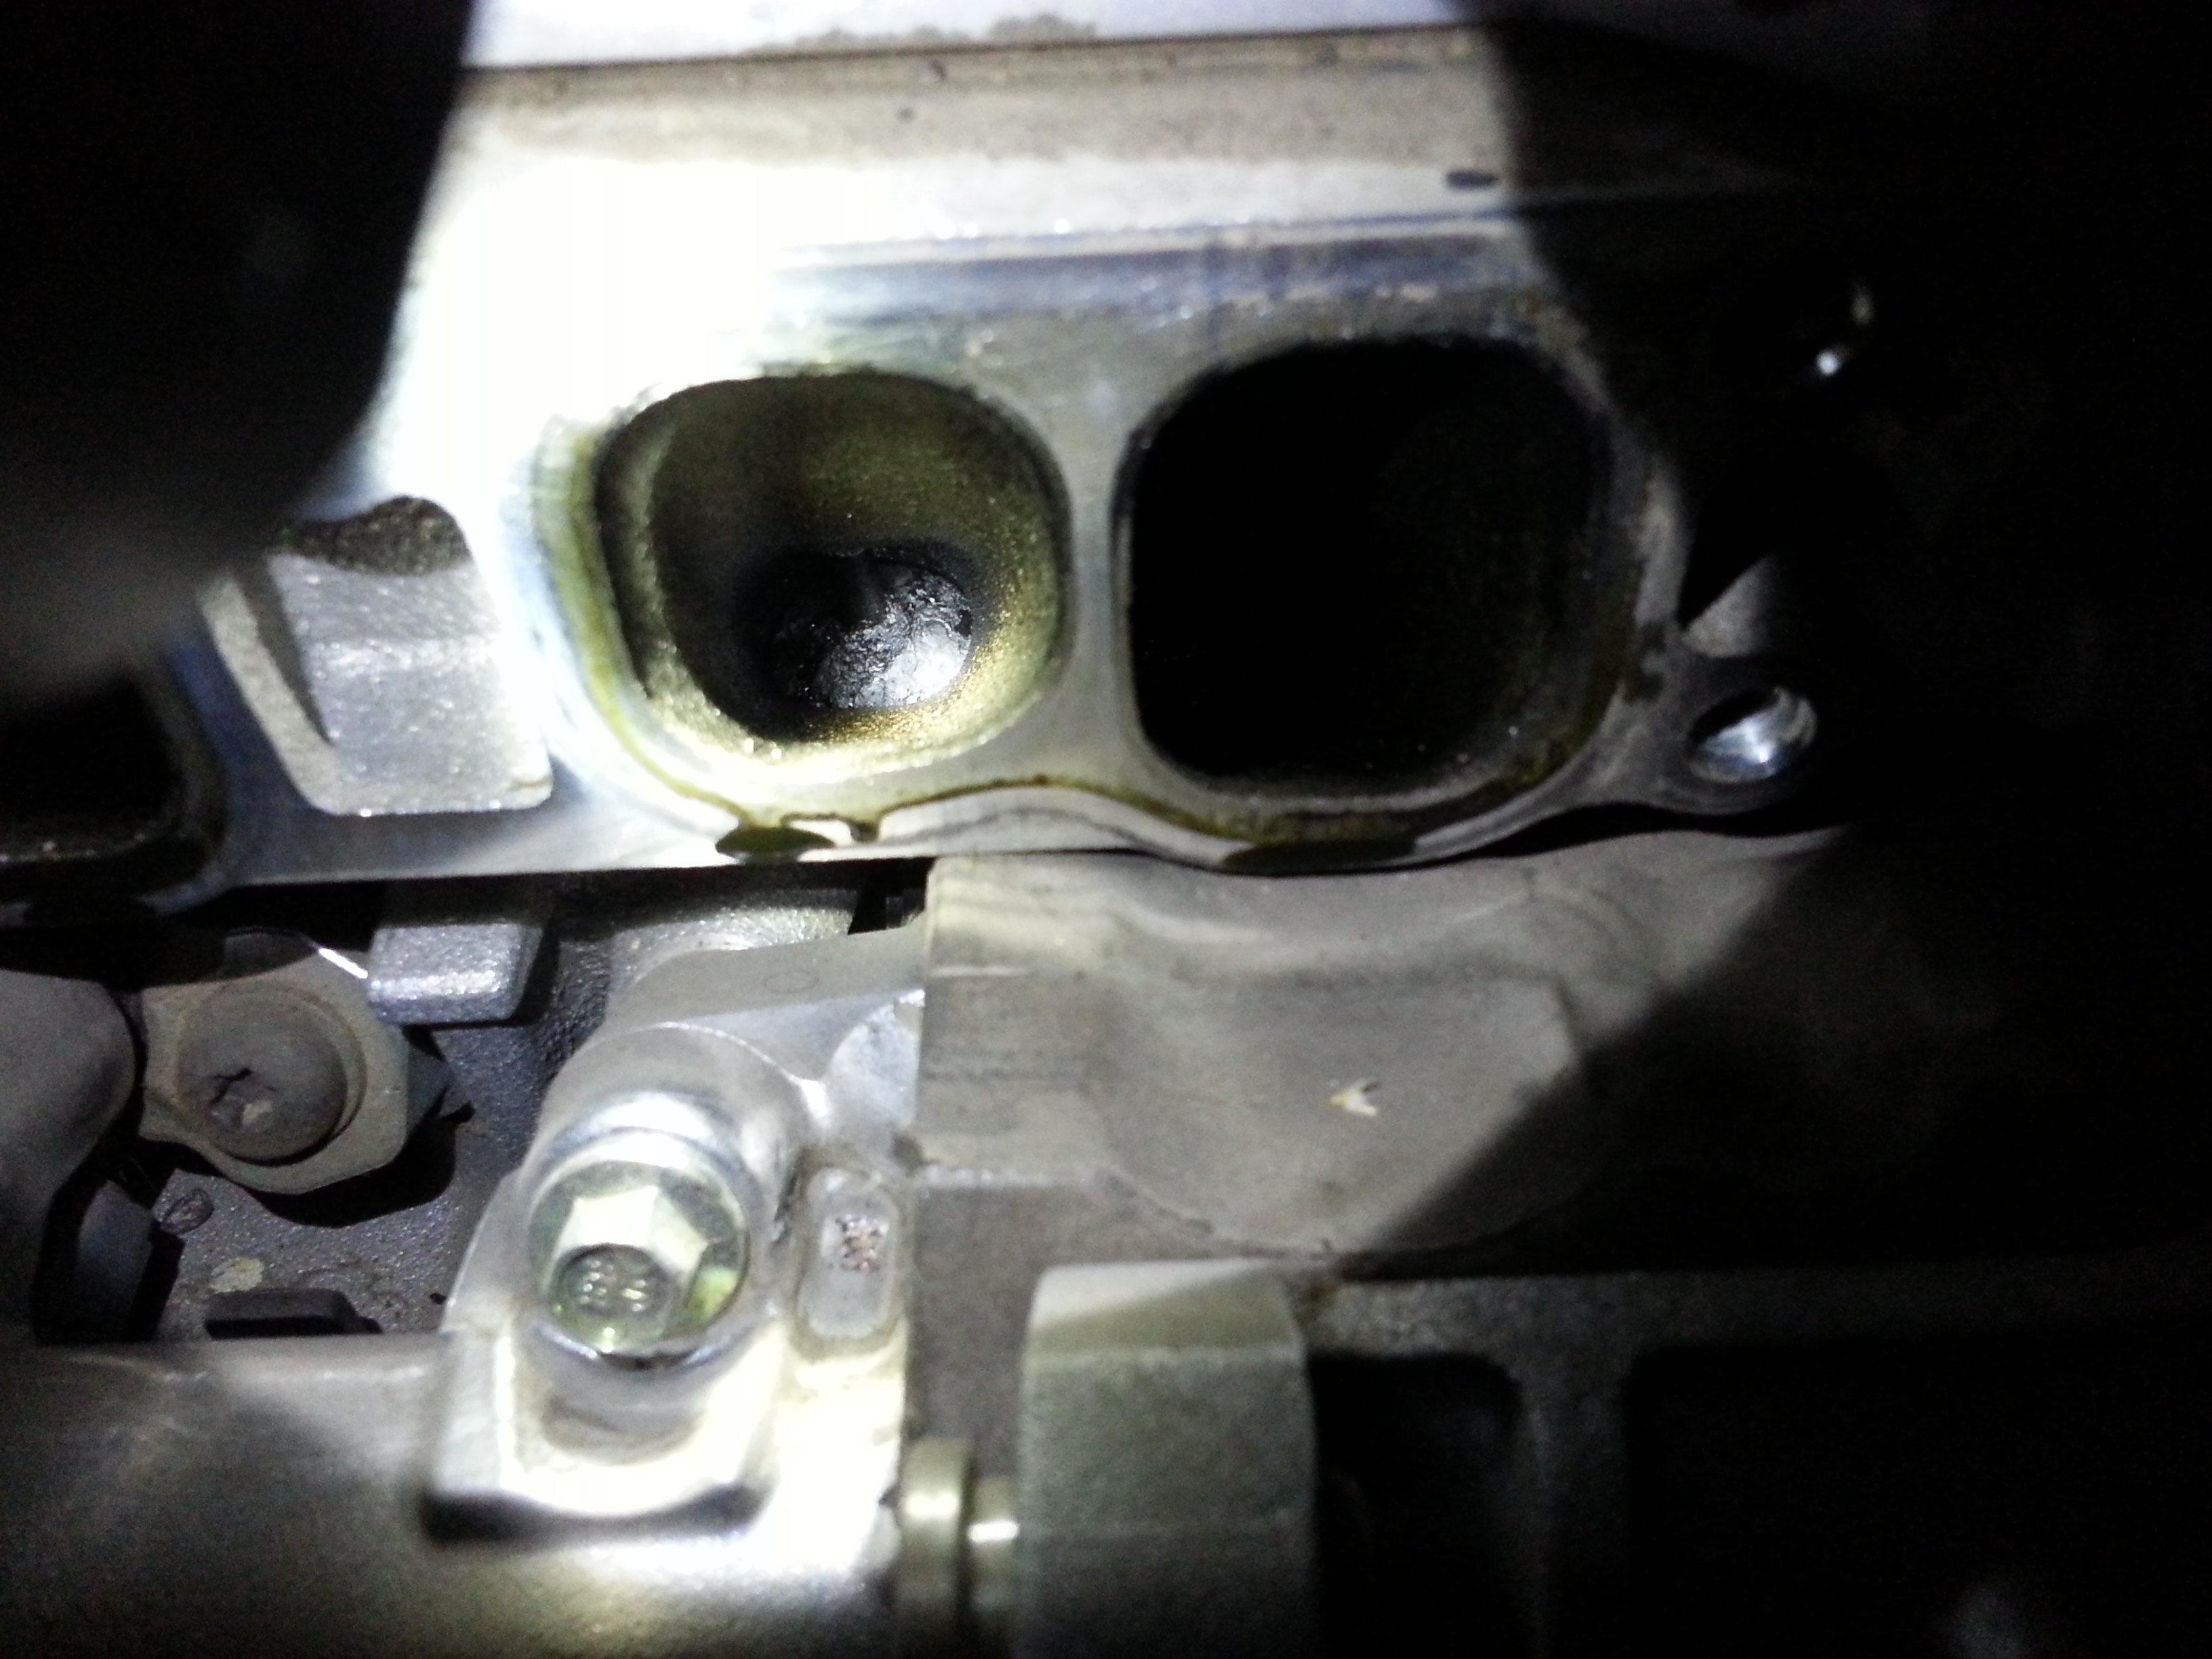 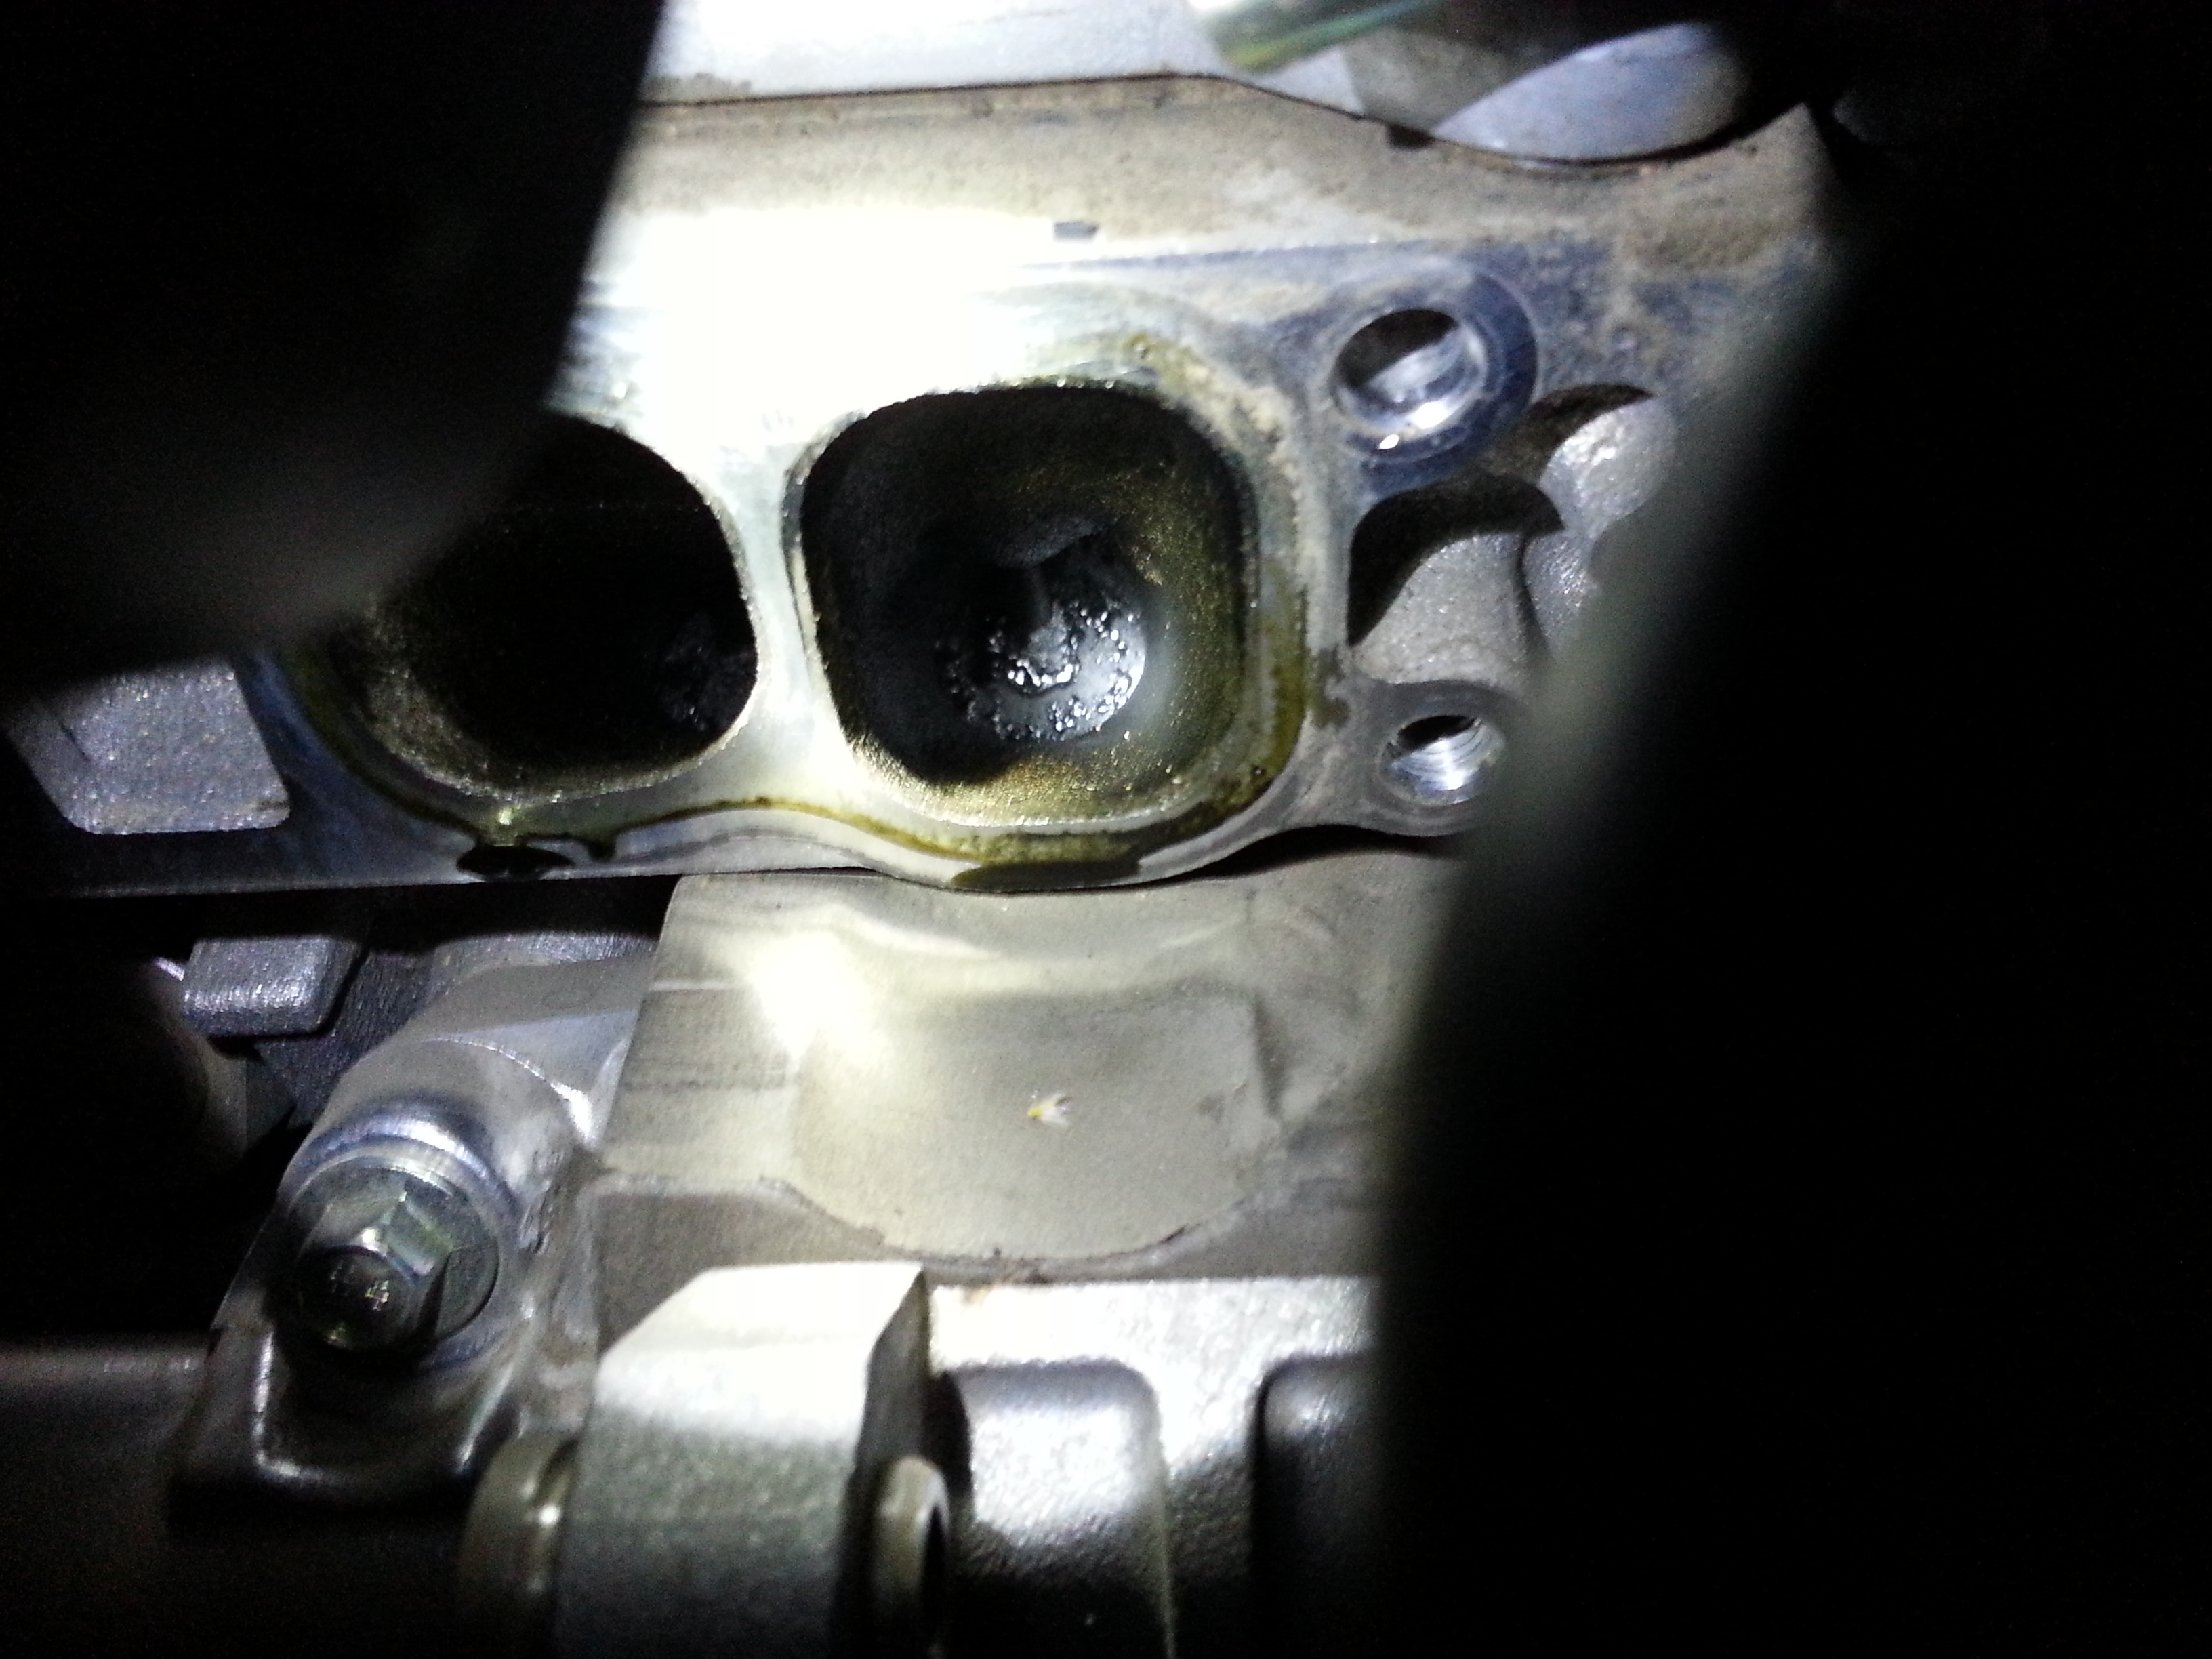 So tomorrow I'm going after that with walnut shell, actually replacing the throttle body and coolant hoses, the PCV valve (a while-I'm-at-it), and then putting it all back together.
|
|
#
¿
Apr 21, 2013 07:37
|
|
|
No after pics, mostly because I was tired of fighting the loving car every step of the way. My Harbor Freight blaster failed so I resorted to using seafoam and manual labor to get the valves 'clean enough'. It's all back together and now it properly heats up rather than running cold, is a good bit quieter with a good tensioner on it, and has fresh coolant and hoses. Only problem is it's hesitating a bit on WOT - you can feel the turbo spool, then it hesitates for a short period of time, and then it goes back to pulling normally. Does it every time I transition from WOT-off-WOT when I shift. 
|
|
#
¿
Apr 25, 2013 03:47
|
|
|
Monthly anti-archive bump. In case anyone missed it, though it's about as far from AI as it gets, the MS3 got traded in on a new CRV. I miss the retarded amount of power to the front wheels, but I love the fuel mileage and how much room there is in the back... is this what getting old is like?  Changed the oil in the Ranger tonight. Checked the coolant on a whim, the reservoir was bone dry and the radiator was low enough I couldn't actually see any. No external coolant leaks that I've found so now I'm worried that the fucker has eaten a head gasket. Going to borrow the exhaust gas tester at Autozone and see if that is the case after all.
|
|
#
¿
May 21, 2013 08:08
|
|
|
You Am I posted:I guess it wasn't a minivan you replaced the MS3 with, but yes, you are getting old. Soon you'll be looking at Camrys and telling others that "the handling isn't that bad, but the ride is so smooth!" If the Odyssey got 10MPG better and cost about $8k less, we might have I had enough repairs stacking up on the MS3 to effectively make another year of car payments, especially since I would have had to take it to a shop, and if I have to spend that much, I want something that doesn't break my back getting the kid into. I do hope that the Ranger doesn't need a head gasket, since at that point I'm either going to sell it or dump some sort of stop leak in and run it into the ground. It's not worth a weekend of work to get the head off, a week of screwed up schedule for my wife and kid while I drive the Honda to work, the expense of having the head checked out by a machine shop, and a weekend putting it back together.
|
|
#
¿
May 21, 2013 15:03
|
|
|
That was actually kind of my reaction when I first seriously looked at replacing the MS3. It's an SUV in name only, that's how. It's still a Civic underneath, just with a longer and taller body, and some damned aggressive 'eco' tuning on the K24 and five-speed. With the eco button on, it will upshift at about 2000-2500 RPM unless you really romp on it. We drive enough highway miles (bought it on the 30th and already have nearly 1600 miles on it) that we've seen at least two tanks so far averaging nearly 31MPG. Same driving in the MS3 would net 23MPG. Probably helps that everything about the CR-V is designed to make you drive it as sedately as possible. The CX-5 (at least in the 2.0L Sport trim) is actually rated for a bit better, but I'm a bit soured on DI until they figure out a better way to keep the intake valves from getting slathered in poo poo. On top of that, to get the rearview camera required stepping up to the 2.5L Touring, so no more manual, no more mileage advantage, and a $3k price hike over the CR-V. Wife didn't like the Escape, and we didn't seriously look at anything else. Ultimately, I hope to never have to put a wrench on this thing other than changing fluids and rotating tires, and if I ever need to do more, the engine bay is downright cavernous compared to the MS3's. IOwnCalculus fucked around with this message at 08:53 on May 22, 2013 |
|
#
¿
May 22, 2013 08:50
|
|
|
Yep, the MZR in the Mazdaspeed3 has EGR - I think that's why cylinders 1 and 2 were so much worse off since the poo poo coming from the EGR is aimed pretty squarely at their runners, whereas 3 and 4 were dirty but not nearly as bad. It's a problem that BMW/Mini owners are encountering too, and I think some VAG products. There's enough sticky poo poo coming out of the PCV and EGR in a gasser to make the intake valves look like hell (there was a ridiculous amount of poo poo on 1/2, easily as bad as any of the "USE OUR GAS OR ELSE" pics you see at a Chevron) enough to actually impact airflow into the cylinder. I think the only solution right now is a hybrid setup where the engine runs port-injected part of the time.
|
|
#
¿
May 22, 2013 19:36
|
|
|
FullMetalJacket posted:the ranger/b3000 is what got me interested in small trucks in the first place. Much love bro. You like it? Come take it! So the invisible water leak that I feared might've been a head gasket, finally showed itself as a water pump. All of the guides I could find online seemed simple enough - get the fan, shroud, and belt off, undo the hoses, three bolts and the pump's off. Right? Wrong. Apparently sometime between 1993 and 1998, Ford revamped just enough of the front end of the engine and accessory drive that all of the following needed to be removed and/or loosened to get at the pump (and we're not talking about full blockage - it's fractions of an inch of overlap that Ford was too loving lazy to eliminate). *Fan shroud *Fan *Lower radiator hose *Air conditioning compressor *Bolt holding A/C line to alternator bracket *Upper radiator hose, if you feel like having room (or are doing the thermostat too, like me) *Bolts holding water inlet pipe to alternator bracket *Timing belt cover (loosened only) *Yank on the water inlet pipe until it pops out of the pump As I dug in, it appears that even though this engine is set up to use rubber O-rings instead of felt gaskets...the PO had decided to slather everything in RTV, which ultimately caused the leak. I suspect that he did this to the composite pipe that goes into the waterpump with a press fit (gently caress you Ford, why did you think this was a good idea) and runs through a hole in the alternator bracket (no, really, gently caress YOU FORD). Pry as I might, all I was able to do was snap one of the mounting ears off of the pipe. So I had to pull the alternator bracket, which means I also had to remove: *Air inlet tube with MAF *Alternator *Vacuum solenoid *Coil packs *Disconnect crank position sensor, untangle wiring harness from alternator bracket Cue more cursing and I finally had the whole mess out. But that plastic tube is loving wedged in there and the only way to get a grip on it with the slightest hope of not destroying it was some pliers. Which destroyed it. So now I have to buy a new tube (dealer-only, of course - thankfully it's cheapish at $25 full retail), finish mangling / cutting the old one off so that I can separate the old water pump from the alternator bracket, and then start putting the whole loving mess together. I want to stab the PO, and stick whoever 'engineered' this cooling system design in Guantanamo Bay to rot for a few years. This poo poo is loving criminal. some texas redneck posted:Or do away with EGR entirely. I was pretty surprised to discover that my engine doesn't have it at all. I think GM has been trying to avoid it whenever possible. The LS1, for example, only had EGR in certain applications. The Corvette avoided it altogether somehow, but the Camaro had a LS1 with EGR from 1998 through 2000. In 2001, GM figured out that they could put in a smaller cam (I think with more overlap), which reduced power and eliminated the need for EGR... but then also figured out that putting the LS6 intake manifold on it offset the losses completely.
|
|
#
¿
Jun 11, 2013 07:49
|
|
|

|
| # ¿ Apr 28, 2024 15:40 |
|
|
One new tube, two o-rings, a new water pump, a new thermostat, thermostat gasket, and lower radiator hose later... so far, no leaks, though I only ran it for a few minutes because I got it finished so late. The only possible side effect is it seems like the A/C vent selector is being lazy; best I can figure is that I disturbed something in the rat's nest of vacuum lines on the passenger side and caused a small leak. But it's amazing how much better things seal when you don't try to slap RTV all over rubber O-rings!
|
|
#
¿
Jun 14, 2013 07:55
|
|