

|
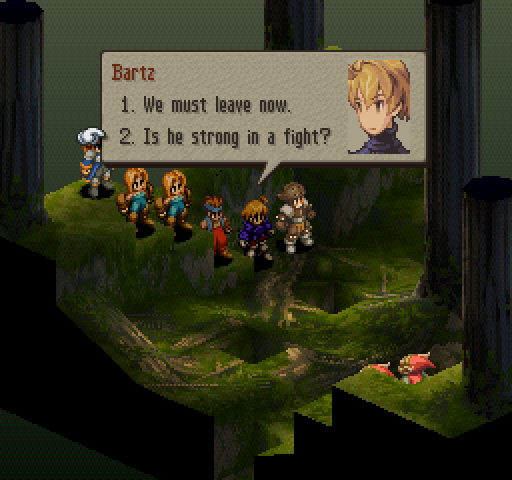
 This is now a megathread! Audience participation and after-action reports are encouraged! This is now a megathread! Audience participation and after-action reports are encouraged! Update One: Introduction, Setup, and First Steps (Gariland Magic City to Thieves Fort)  Because Final Fantasy Tactics has a Job system where you can mix and match abilities (some of which, as Orange Fluffy Sheep showed in his LP, can trivialize the game), it has extremely high replay value and the fanbase has created a number of self-imposed challenges you can try should you ever get bored of the usual game-breaking shenanigans. This challenge, as the above image and thread title suggests, is one wherein our team of five intrepid (For detailed rules, caveats, and variant challenges, see this Google doc.)  Since it takes so long to get to the actual meat of the challenge (at least 20 minutes of tutorializing that I don't need any more now that I've played through the game so many times), I'm only doing this introductory section once and will be skipping over any of the plot I don't care to discuss. Meanwhile, Alazlam blathers on regarding the Ten Things About the True History of Ivalice the Church Doesn't Want You to Know. 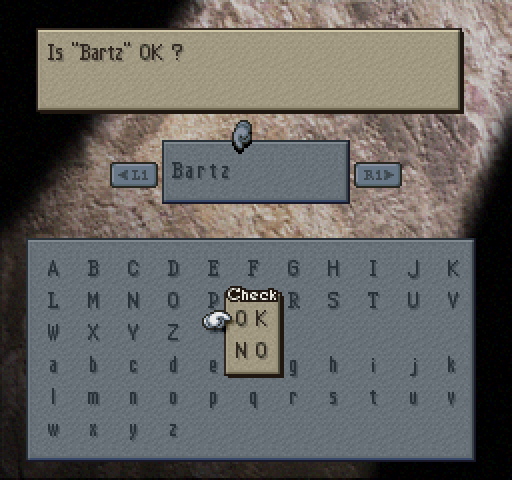 Who better to take the lead than Job Fiesta Veteran Bartz? (That totally sounds like some kind of shmup boss title.) 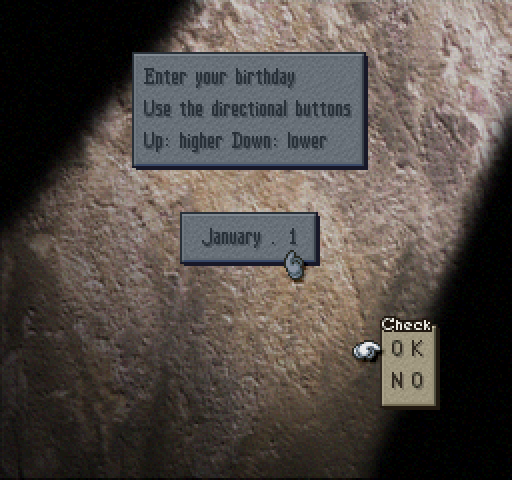 Giving Bartz the most gameplay convenient Zodiac sign (Capricorn, giving good compatibility with several end-game bosses).  If I had the means to make a fanmod, item #1 on the wishlist would be the ability to skip cutscenes. 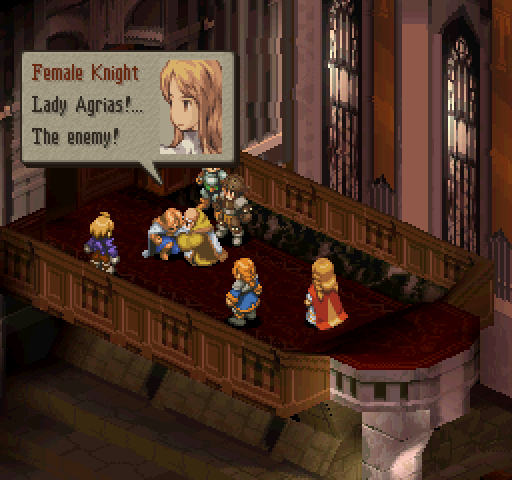 R.I.P. nameless Female Knight.  Oh, and here's some settings to streamline things a bit further... Cursor repeat speed: Fast Cursor speed on multiple heights: Fast Finger cursor repeat speed: Fastest Message display speed: Fast Show Exp and Jp gained: Off Max equip at Job change: Off 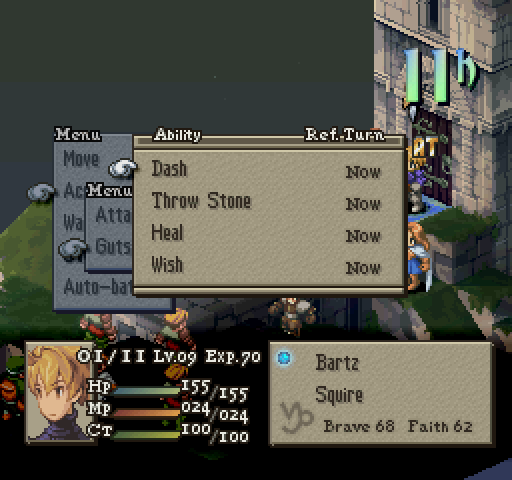 This battle is completely meaningless in the long run--Bartz is guaranteed to start Chapter One with 70 Brave and Faith, and a random amount of JP in Squire and Chemist. 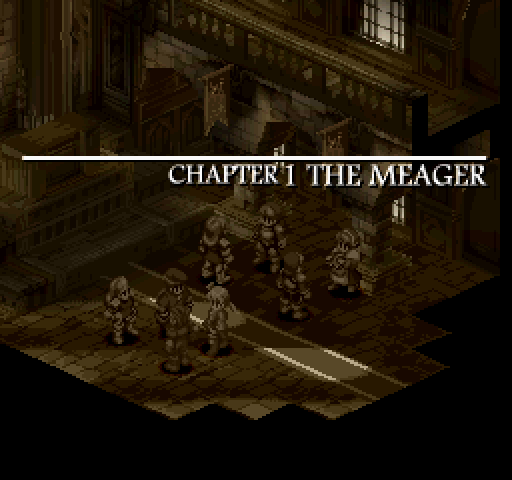 Now, it's time to roll my first Job. The RNG has spoken and it is...  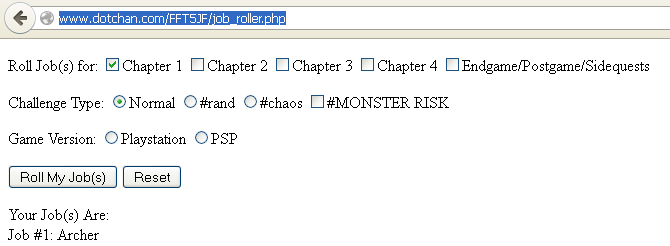 Not bad! Being able to kill (or at least seriously wound) the enemy before they can reach us is great, and Archers are a recurring enemy throughout the plot, meaning I have a Brave% chance to dodge arrows once I have that reaction ability learned. Detailed Archer Breakdown: Ability: Charge. Boring and doesn't really add that much damage; still, every little bit extra counts. Charge +10 and Charge +20 is usually not worth attempting unless you can somehow lock the enemy in place, at which point you probably have better abilities to use. Reaction: Speed Save (a less reliable Yell, but that means we can engage in action economy shenanigans if we can live long enough) and Arrow Guard (as mentioned, Archers continue to be a recurring enemy all the way into Deep Dungeon, so having the chance to not get hit at all is great). Support: Equip Crossbows (I've never used this even on a regular run, and I have no idea if I ever plan to use it now) and Concentrate (100% accuracy on almost all phsycial attacks will save my rear end especially once I come across high evade enemies like Ninjas). Movement: Jump+1; it's no Move+1, but it does still help allow access to parts of the map I wouldn't be able to reach otherwise. The current plan is to run through all variants of the run--regular, with MONSTERRISK, random, and chaos--at least once, but in case it doesn't pan out, here's a quick overview of the other Jobs I can get in Chapter One:
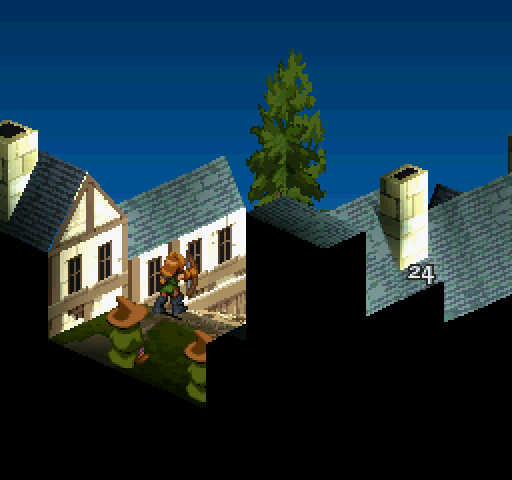
This is the first time I'm trying this challenge with the generics that the game gives me, so I'm not sure if I can unlock Archer on all of my party members in this party, but I'll do my best. 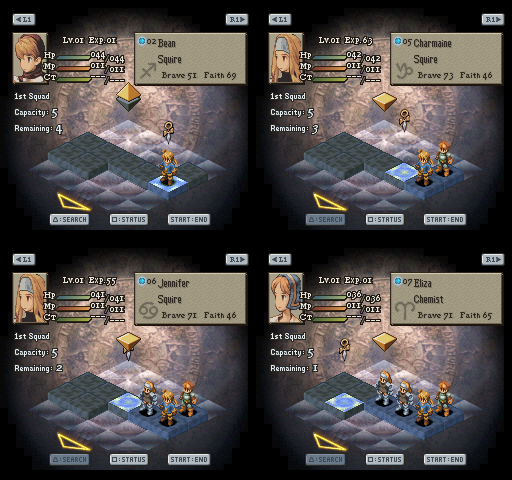 The game always pre-generates 3 male Squires, 1 female Squire, one male Chemist, and one Female Chemist with various Brave/Faith values and Zodiac signs to serve as potential squad members for this battle that are, on average, better than those you can hire from the Soldier Office unless you're willing to undergo a long Failed Interviewees Montage. I chose my squad (two males, two females) based on Brave/Faith values rather than Zodiac compatibility, because there's no guarantee that I'll get casters in this challenge. 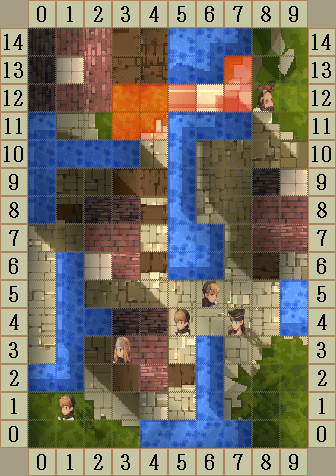 (Top-down maps courtesy of http://ffhacktics.com/. Included in each overview is a link to the unaltered map in question, which also has views of the map in isometric view from the game's four camera angles. The overview's references to cardinal directions use the same orientation as that of the maps.) Magic City Gariland Map Overview Replayable as Random Encounter: No. Allies (facing South): The squad plus Delita start at the bridge spanning the North end of town (highlighted in red). Enemies (facing North): Four Squires (one of them female, the only enemy female) and a Chemist. The Squire with a unique sprite takes point slightly South of the middle, backed up by the Chemist and another Squire; the female Squire is on the roof of the building next to them; a male Squire is behind that same building. Objective: Defeat all enemies. Magic City Gariland Battle Strategy Overview
 Fortunately, the AI doesn't take its own advice and the enemy charges in recklessly. Unfortunately, so does Delita. I ignore the Squire on the roof for now, as it'll be a while before she can reach me.  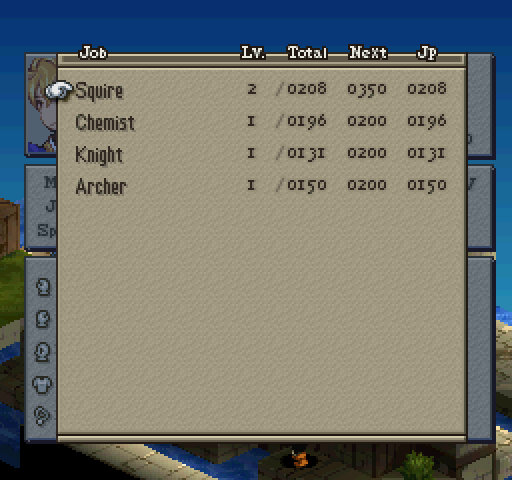 Ramza doesn't spawn with any interesting abilities besides Wish this time, but he had a bucketload of JP--he unlocks Archer on this very turn as he moves up to take a swing at the same enemy that Delita stabbed. 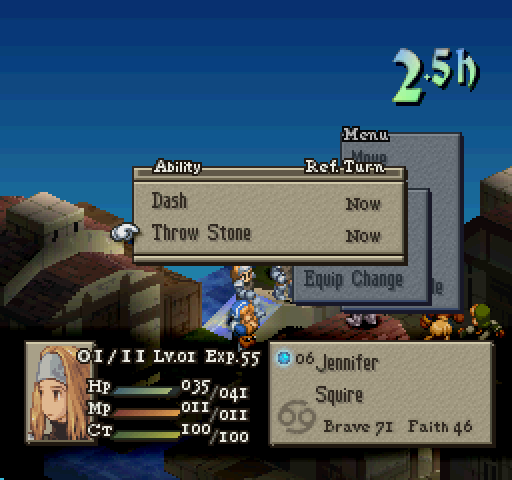 This generic female Squire spawned with Throw Rock (as did the generic male Squire that I picked), and she also unlocks Archer on her first turn. 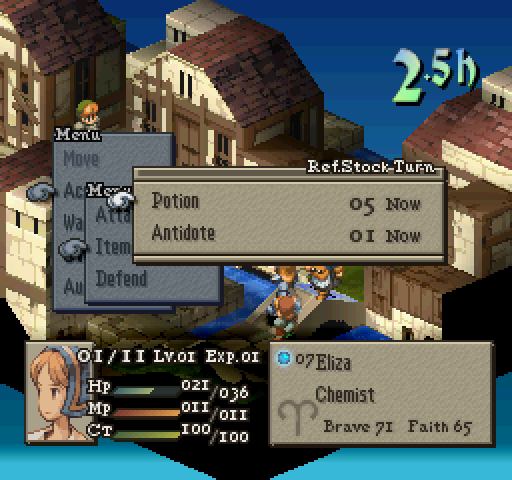 The lack of restorative items puts me on a little bit of a turn timer, and I have to be stingier than I would be otherwise--everyone's lost less than 30 HP, so I have her wait in place instead.  This is the first--and last--level up screencap because I'm lazy.   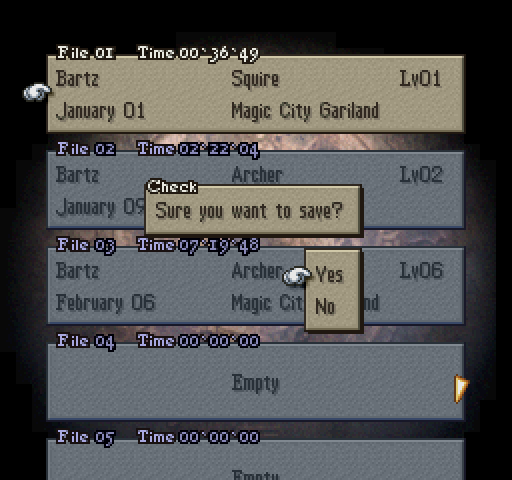 I'm dropping a save here, just past the Gariland Magic City battle and subsequent cutscene (spoiler: Balbanes dies). Future runs (if any) will be starting here, with new party members hired through the Soldier Office. (The other two save points are ones I made for the test LP--previous to this, I've also tried the challenge several times and tweaked the rules just as many times. Documentation on these runs can be read here.) 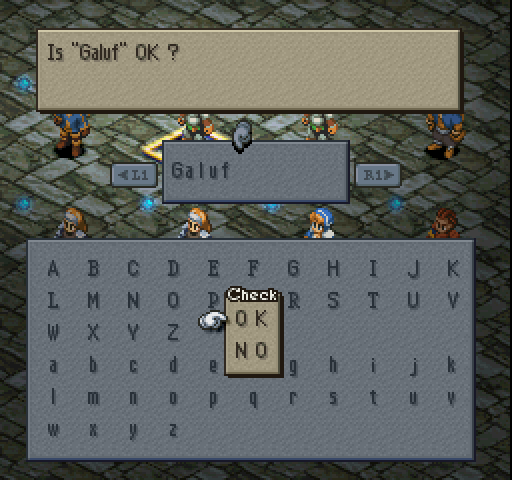 Kheldarn posted:FFTOrgASM can apply an ASM patch to a FFT ISO that will allow the Soldier Office to rename any unit. Thanks, Kheldarn! And I stick with the theme naming, because the sheer adorableness of Galuf being able to adventure together with Krile was too much for my sappy self to resist. (No, self, you are not allowed to rename Algus to DOUCHE.)  The two unused generics are stripped and kicked out because I (Like I mention in the rules document, I do this strictly for my own sanity; if you want to try these challenges without such concessions, you're free to do so.) I designed the rules so that they would work on any system, so the challenge doesn't officially start until Sweegy Woods; since Lenna and Faris don't have enough Chemist JP for Phoenix Down I'm going to have them grind in this battle, but Bartz and Galuf do so they will be Archers. 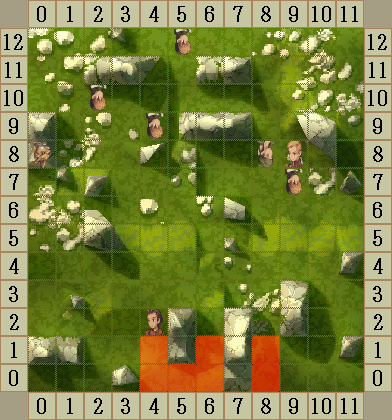 (More detailed information about random encounters can be read at http://www.gamesradar.com/cheats/11649/.) Mandalia Plains Map Overview Replayable as Random Encounter: Yes. Allies (facing North): In the story battle, the squad plus Delita start at the South end of the map, and Algus in the South-East. In random battles, you can start from either that location, from the East, or from the North. Enemies (facing North): Four Male Squires, a Male Thief, and a Red Panther. The enemies span the North end of the map (the Red Panther being farthest West), with a Squire and a Thief within melee range of Algus. Objective: Save Algus (i.e. Algus must stay above 0 HP and all enemies must be defeated) or defeat all enemies. Mandalia Plains Battle Strategy Overview
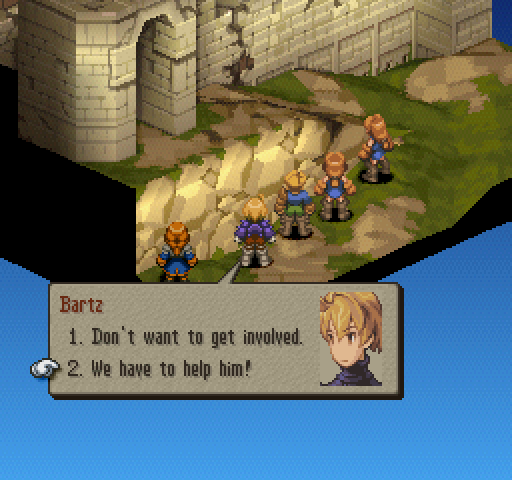
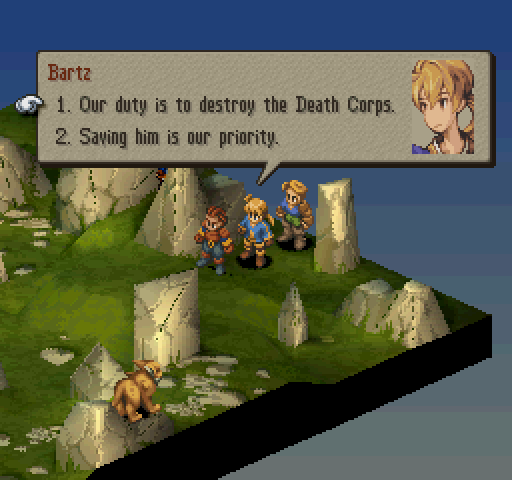 Choosing the "destroy the Death Corps" option because it boosts my Brave. And also because Algus is an rear end in a top hat. Ironically, this choice usually causes Algus to be less aggressive and flee towards the allied squad. The Thief and the Squire next to Algus take one swing each at him and then retreat to the South, but the other enemies push forward into Rock Throw range. Delita runs around mostly healing himself, but he does get a few blows in and even steals a few kills (I don't mind, though). In the meantime, everyone throws rocks except to finish off enemies. This causes three retreats, so I leave them to squat in the corner while I deal with the other enemies and then chase down the last stragglers.  I beat Mandalia Plains with zero casualties--even Algus and Delita manage to stay upright through the whole thing--and nothing of particular note happens. Two cutscenes later, I do some inventory management: I buy bow guns and then shields for my active party; Algus is also switched to Chemist and his Battle Boots go on Galuf; Krile holds onto his sword for safekeeping so I don't sell it by accident--she'll be on the bench for most of Chapter One and at least half of Chapter Two, so she doesn't need any other gear for the time being. Shopping done, I'm leaving a little bit of spending room just in case I need to retry. Ramza has Charge and Guts, while everyone has Charge and Item; Krile, not having been in any battles yet, is still warming the bench. Because I have no patience to grind unless I absolutely have to, I'm going to head straight into Dorter Trade City--over all, I'm going to be as under-leveled as I can get away with, since in this game gear is generally more important. 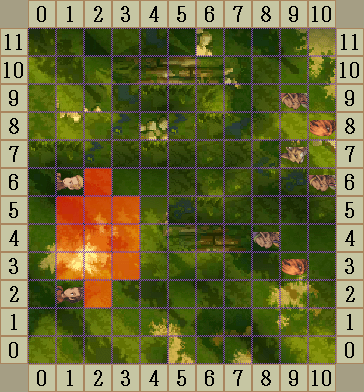 Sweegy Woods Map Overview Replayable as Random Encounter: Yes. Allies: In the story battle, the squad plus Delita and Algus start at the South-West end of the map. Besides there, I'm not sure where else you can enter the battlefield. Enemies: A Black Goblin, two Bombs, a Red Panther, and two Goblins. The Black Goblin and one of the Bombs start on the South-East side across from the log where the allies are, whereas the other enemies are on the other side of the muddy water in the North-East. Objectives: Defeat all enemies. Sweegy Woods Battle Strategy Overview
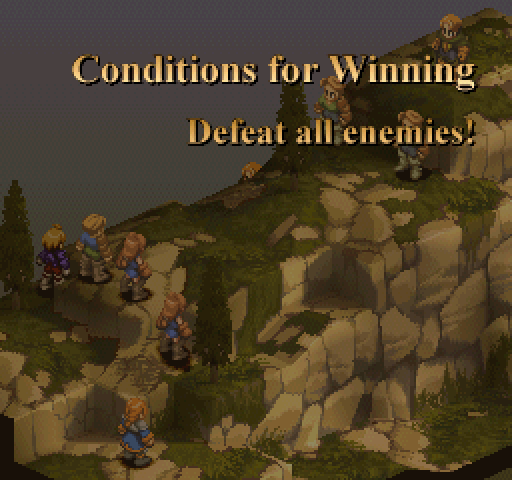
 Man, I've played through these battles so many times (especially for this LP because I kept running into dumb technical difficulty issues) that the attempts are starting to blur in my mind a little.  Algus, unsurprisingly, is the first to end up face down in the mud because he overcommits and gets swarmed.  And then Delita drops because he went to feed Algus a Phoenix Down rather than heal himself. (This turns out to be a distressingly common occurence in battle. Note to self--only have the AI learn Potion next time.)  Meh. Sell. I get a few close calls with the others, but this time I manage to heal them in time.  The battle complete with no additional casualties, I go back to Gariland to upgrade armor and grab Battle Boots for Lenna and Fairs before saving and heading to Dorter Trade City, the first real challenge the game throws at any party.  Slums in Dorter Map Overview Replayable as Random Encounter: No. Allies (facing South): The squad plus Algus and Delita start at the North end of the map. Ramza does not need to be strategically placed, as he will be moved to stand between Algus and Delita once the battle starts. Enemies (facing North): A Knight, three Archers (one without a bow) and two Wizards, all males. One of the Archers is on the roof of the building next to the squad; one archer does not have a bow and is in the alleyway next to the building; the last Archer and one of Wizard is on the buildings (or is it boxes?) to the South-East; the Knight and the other Wizard are on the ground next to those buildings/boxes. Objective: Defeat all enemies. Slums in Dorter Battle Strategy Overview
 These cutscenes make up for being unskippable by being masterfully animated. So much personality in so few pixels.  Even though I move my Archers up to deal with the Archer on the roof, the Guests still follow me in that general direction. Algus in particular moves just far enough forward that he eats an arrow and then a Fire spell. Delita wastes a Phoenix Down on him, as he eats a knife up the rear end moments later. Then Bartz, who has become the priority target, gets shot. 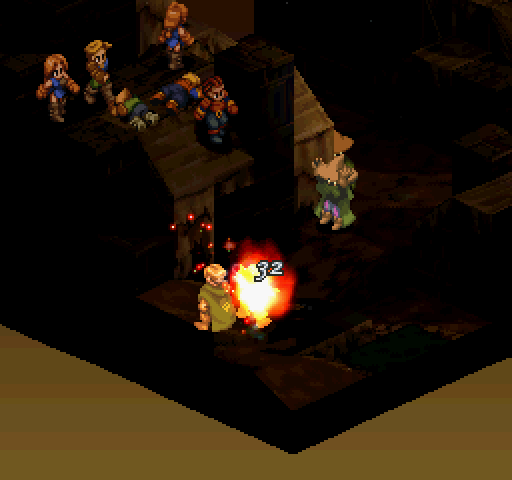 There wasn't anybody to give Bartz a Potion before the spell went off (I think), so I had him shoot the Knight then stand next to said Knight; at least that way his death would not be in vain. 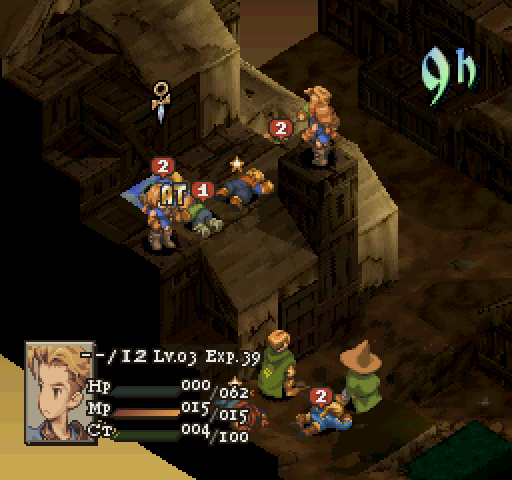  Okay, losing Galuf is bad, but not unsalvagable, as I just have to whittle the enemy down a bit before bringing everyone back to life... (I believe at this time at least one or both Wizards still had enough MP left for a single cast of Fire.) Okay, losing Galuf is bad, but not unsalvagable, as I just have to whittle the enemy down a bit before bringing everyone back to life... (I believe at this time at least one or both Wizards still had enough MP left for a single cast of Fire.)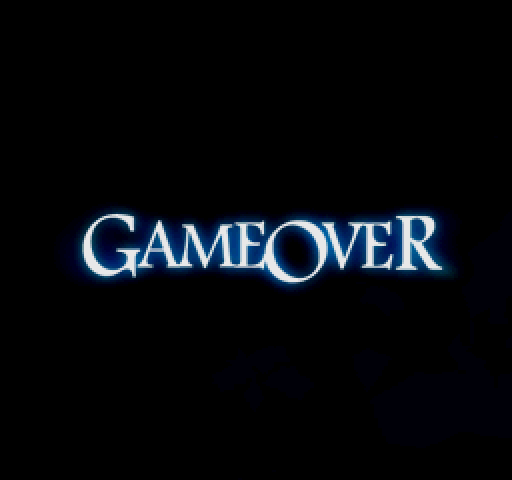  ...except Krile gets toasted and then Bartz crystallizes because I wasn't paying enough attention to CT. (Total Party Kill #1) ...except Krile gets toasted and then Bartz crystallizes because I wasn't paying enough attention to CT. (Total Party Kill #1) On the retry, Lenna (who I've sent ahead of the rest of the party to draw enemy attention) blocks a Fire spell that would've killed her. (She still drops to being swarmed by enemies, alas.)  Delita finally uses a Phoenix Down somewhere that won't result in somebody dropping dead immediately afterwards, bringing Lenna back to life. She quaffs a Potion on her turn and stays where she is, while the rest of the party finishes off the enemies they were dealing with and then moves forward as well.  I still haven't realized that the game will patiently wait for me to hit confirm before making this notification disapper, so once again I jump the gun on an item grab. (Verdict: Sell.)  The last enemy to die is the other Archer with a bow, who wisely stayed in the back as I marched my way towards him, but he couldn't run away forever. One enhanced interrogation later (mostly consisting of Algus being an elitist dickbag), I do a little more inventory management (Delita and Algus switch to Knights and upgrade with whatever stuff I have lying around) and then go into the Cellar of the Sand Mouse.  Cellar of Sand Mouse Map Overview Replayable as Random Encounter: The location is, but this specific area is not. The map changes to Zekalus Desert after the battle is over. Allies: Squad 1 (Ramza, Delita, and Generic) starts at the West side of the map and faces East (on the map, they are facing South to make it unambiguous that they are allies), whereas Squad 2 (Algus, Genric, Generic) starts at the North and faces South. Enemies: Two Monk, an Archer, and three Knights, all male, holed up in the ruins of the building to the South-East. One Monk blocks the West entrance. Objective: Defeat all enemies. Cellar of Sand Mouse Battle Strategy Overview
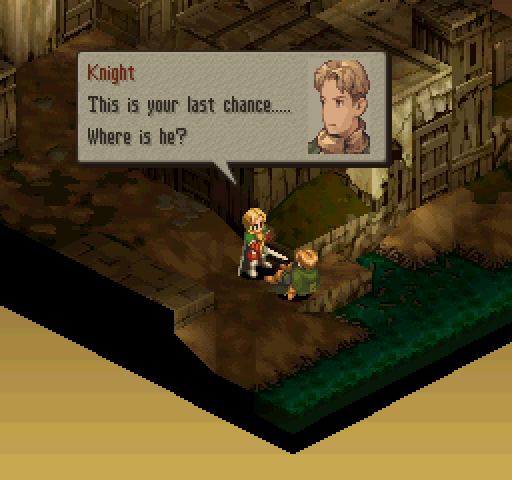
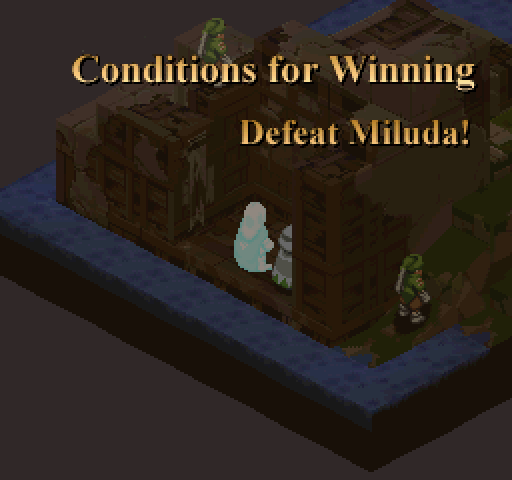
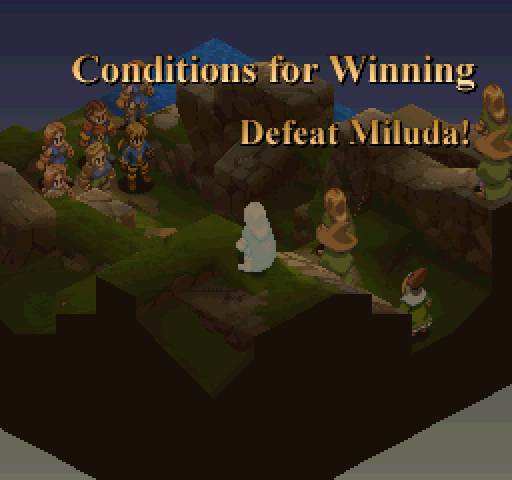
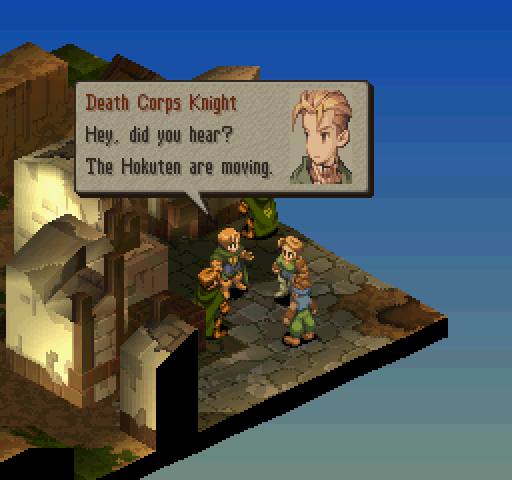 This might be my nostalgia talking, but I prefer the PSX version (minus, of course, the typos and things like "the Hokuten" being left in the script). The PSP version overdoes the "historical reenactment" aspect of the framing story, and it comes off as hokey as a result. 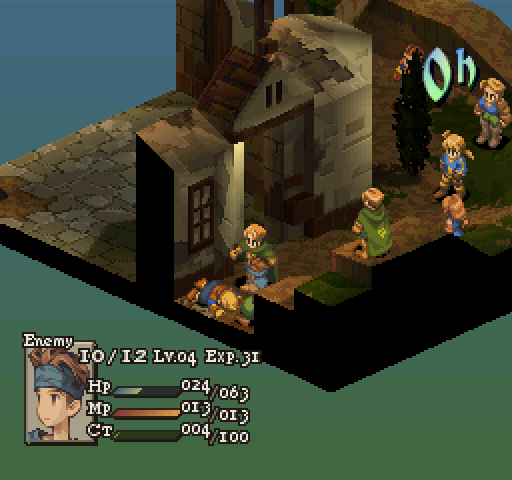 Algus' luck finally runs out and fails to dodge a fatal blow (the girls, grateful that he's being bait, support him with their arrows until the Algus drops and the Knights get too close for comfort). Meanwhile, Delita's weak HP has drawn the Monk to exit the building, so instead of chasing him down and then taking on the Death Corpse inside their own hideout, Bartz and Galuf shoot him to death and then circle around the outside. 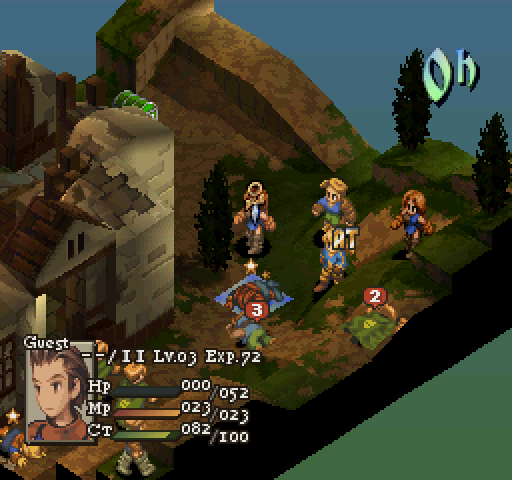 Delita really needs to remember what he said in that tutorial battle about not rushing in recklessly, but at least I'm more careful about keeping everyone else on their feet. 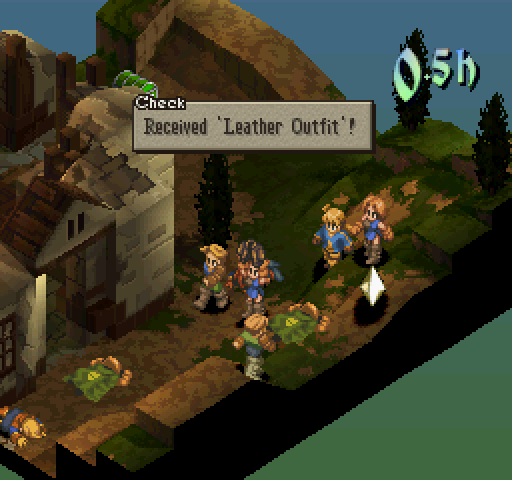 I'd put this Leather Outfit on Krile, but by the time she can be in a party there'll be better gear. Selling for cash. 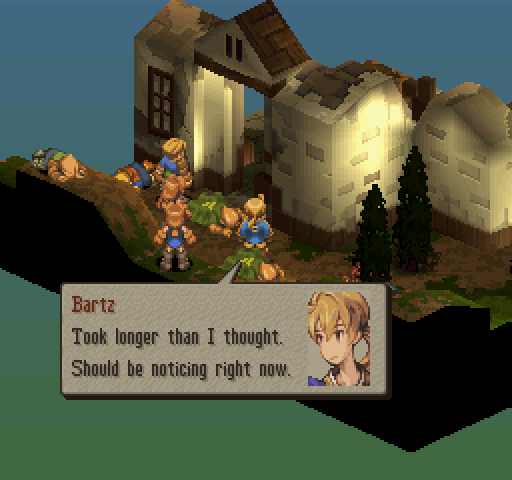 Bartz will say this no matter how long you took. This, along with other instances of unchanging dialogue, make him seem just a little bit  With 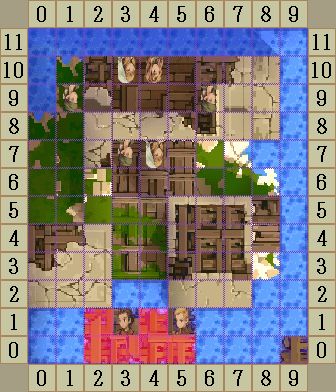 Thieves' Fort Map Overview Replayable as Random Encounter: No. Allies: The squad plus Algus and Delita start at the South end of the map. Enemies: Miluda (Knight), two female Priests, and three male Thieves. Miluda and a Priest are in the "fort" to the North, a Thief stands on the wall of the "fort", and the rest stand guard just outside. Objective: Defeat Miluda. Thieves' Fort Battle Strategy Overview
 The intention of this battle is for your party (having more levels and Job class options than I do) to rush down Miluda while only killing the few unlucky sods who get in your way. Being contrary, I'm going to try dragging out the battle as long as possible and saving Miluda for last. (This turns out to be a mistake.)  I keep forgetting that at least one of the Priests always has Black Magic as a secondary ability, so Delita and Algus are dead without having taken a turn. Lenna, meanwhile, is head over heels in love with a Thief that stole her heart. (This is also a recurring problem.) 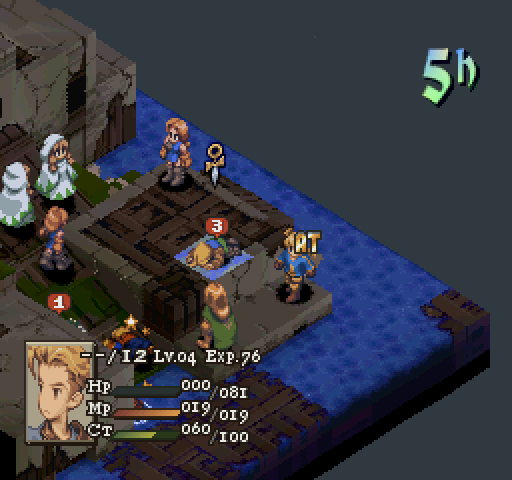 Whoops. 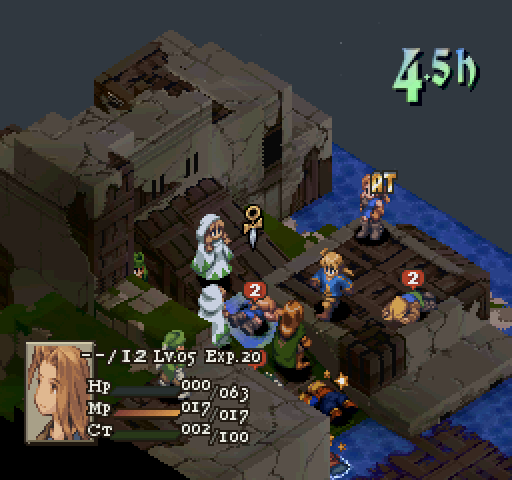 Moments later after Faris dies, Lenna does as well and I have to reset because I don't have any party members with Item any more.  (There's my second TPK.) (There's my second TPK.)I decide to grind for money and some more levels. 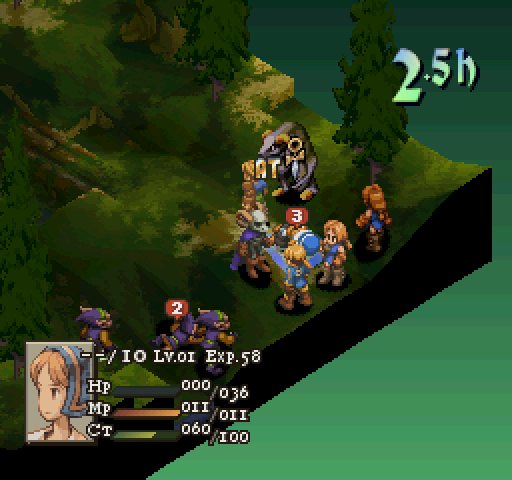 I only fought one extra battle, and nothing too interesting happened except Krile dying. 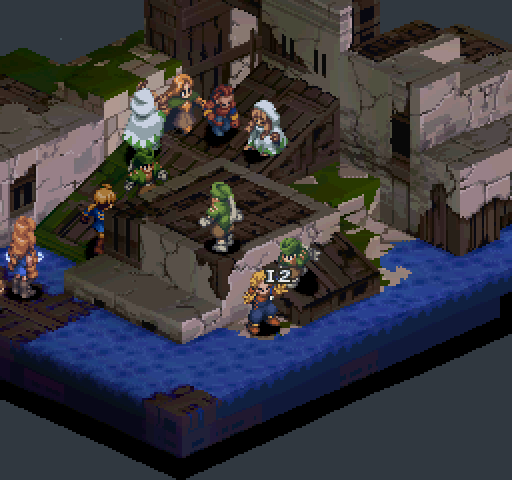 Delita (with a new helmet and shield) and Algus (switched back to Squire so he has more HP) live a little bit longer this time, and that's enough to make the difference, especially since I'm only going for Miluda this time (except a brief excursion to kill the Priests because BOTH of them had Black Magic and I was not going to let them hang around dropping Ices and Bolts on my party.) 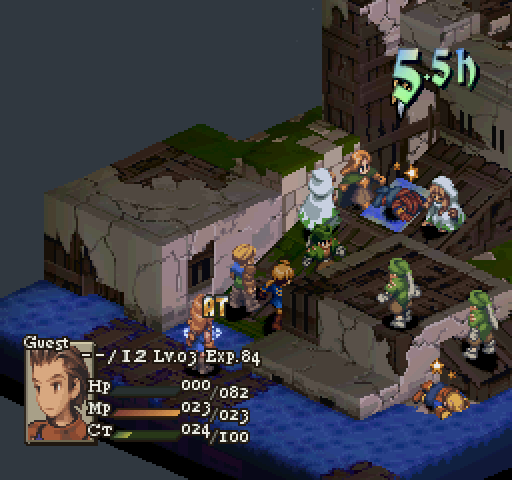 Don't worry, Delita, I've got this. In between taking out the Priests, I be sure to keep myself topped up, and then all the arrows go straight into Miluda, who can't use her Reaction ability against me because I have Concentrate. 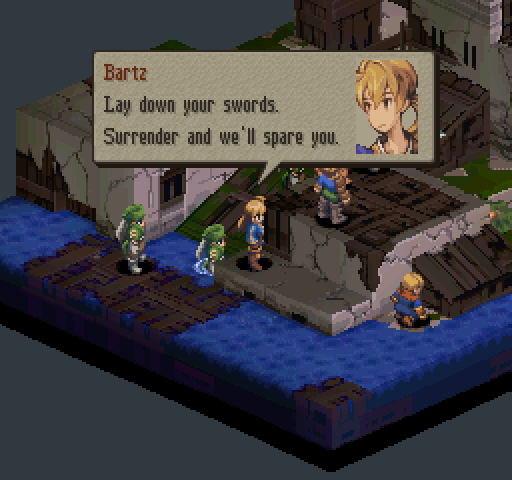 At least this time, Bartz isn't laying down his ultimatum to a field of corpses and Crystals. Algus is stipped naked before I go to Igros for some exposition, and after spending all of my money on gear and supplies, I'm going to have to catch Krile up so she can participate in the next battle (this is the only time in Chapter 1 where I get to field a full party). I also roll my next Job so I can start unlocking it...   Like in FFV, Monk will carry you in the early game. Unlike in FFV, Monks are pretty much always relevant, especially in a Five Job Fiesta. Monks give huge melee damage (and since you are in the Hokuten, you can literally go Fist of the North Star on your enemies  ), huge long-range damage, and healing (HP/MP loss, status ailments, and even death are no issue with a Monk in your party--who needs Priests?), and they have pretty good Support, Reaction, and Move Abilities as well. ), huge long-range damage, and healing (HP/MP loss, status ailments, and even death are no issue with a Monk in your party--who needs Priests?), and they have pretty good Support, Reaction, and Move Abilities as well.Detailed Monk Breakdown: Ability: Punch Art. I've already sang its praises above. Reaction: HP Restore (the chance of full heal when health reaches critical saves on a lot of Potions, but I've never used it and I generally tend to not prioritize getting it; considering how much trouble I get into I should probably consider it more), Counter (the chance to deal immediate damage against melee attacks is pretty good for softening up the enemy, but you may also deny yourself EXP and JP by doing this), and Hamedo (expensive as hell to get, but the chance to preemptively stop an attack and hurt the enemy For Massive Damage is so great that Elmdor packs this ability in the infamous Riovanes Rooftop battle) Support: Martial Arts (better barehanded damage and possibly also better Punch Arts; this, unfortunately, does not turn your casters into death machines but it has awesome synergy with Ninjas) Move: Move-HP Up (the healing per turn doesn't become better than Potions until late in the game, but it might be worth getting to tack on for Zodiac battles since you don't need the Movement ability as much) As usual, here's the brief breakdown for other Jobs:
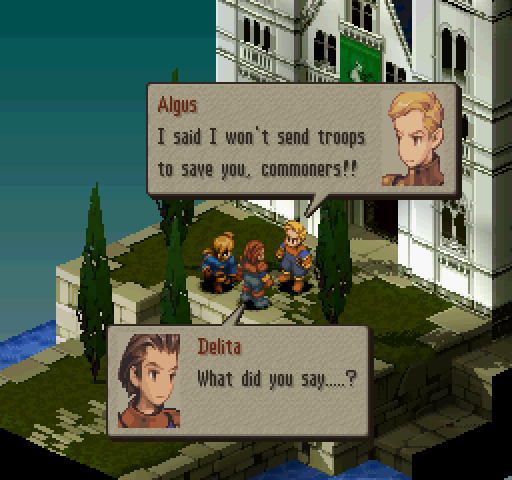 I know I said I wouldn't discuss the plot, but this little bit of dialogue has always bothered me. How the hell does Algus know Delita is a commoner? It's not like Bartz told him when he introduced them to each other. Did Algus just find out while talking to Zalbag or whoever in the castle? Or did he read between the lines of Bartz and Delita's interactions? If so, then why not show that to us or have Algus say so? It's not like this game is big on subtlety. Enough digressions. Next time, I'll (hopefully) be ready to take on the Miluda rematch and go all the way to beating Algus' face in! dotchan fucked around with this message at 22:38 on Jan 9, 2016 |
 #
?
Sep 28, 2015 03:14
#
?
Sep 28, 2015 03:14
|
|


|

|
| # ? Apr 26, 2024 10:32 |
|
|
This sounds fun. Now I'm reminded that the 1.3 Thread died. Hopefully since you're not fighting sandbagging jackasses it lasts.
|
|
#
?
Sep 28, 2015 03:38
|
|

|
Hooray! This thread is Live! I've been screwing around with a run because I've not played FFT in a while, and it shows. I had to reset on Dorter about 4 times. It took grinding to get me through it. Gonna start my own run, and use the ASM Rename patch to rename Algus to Meatbag. 
|
|
#
?
Sep 28, 2015 03:55
|
|


|
FeyerbrandX posted:This sounds fun. It is! Some Jobs definitely make things a slog, though. FeyerbrandX posted:Now I'm reminded that the 1.3 Thread died. Hopefully since you're not fighting sandbagging jackasses it lasts. Well, most of the time I'm the sandbagging jackass (especially if I have to drag a battle out for grinding). Kheldarn posted:Hooray! This thread is Live! Kheldarn posted:I've been screwing around with a run because I've not played FFT in a while, and it shows. I had to reset on Dorter about 4 times. It took grinding to get me through it. Just wait until I have to do a Chapter 1 run with Priests, meaning my damage is poo poo until I've got the JP for Holy and the MP to cast it.  Kheldarn posted:Gonna start my own run, and use the ASM Rename patch to rename Algus to Meatbag. Have fun! Let me know how it goes for you.
|
|
#
?
Sep 28, 2015 06:23
|
|
|
RNG gave me Archer for Chapter 1. By the end of it, one of my generics had mastered the job. RNG gave me Time Mage for Chapter 2, which I just started.
|
|
#
?
Oct 1, 2015 21:23
|
|
|
Update Two: Lenalia Plains to Lionel Castle With the extra skirmish I fight to unlock Monk for my party, the total extra grinding battles is now at two (I decide to leave counting deaths to the game and only count resets to TPK and/or Crystalization); mainline guys are all Level 6 (Krile is still behind at Level 3, but she'll catch up) with the best gear, with Arrow Guard in the Reaction slot and Concentrate in the Support slot. Lenalia Plateau Map Overview Replayable as Random Encounter: Yes. Allies: The squad plus Delita start at the South end of the map. Enemies: Miluda (Knight), two female Knights, two male Wizards, and a female Time Mage. Miluda, a Wizard, and a Time Mage are in the center North, with Miluda at the front; a Knight and a Wizard is on the North-West cliffs; the last Knight is on the North-East plateau. Objective: Defeat Miluda. Lenalia Plateau Battle Strategy Overview
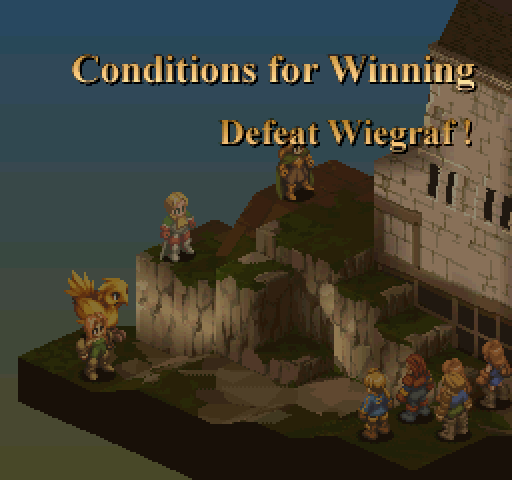
 This battle is a huge gut-punch no matter how many times I play it. Storywise, it genuinely makes you feel horrible and question whether or not you are the good guys. Gameplay wise, it's legitamitely difficult unless you over-level--the Time Mage will give the enemy a huge advantage in action economy, the two Wizards will rain death upon you, and then the Knights close in to finish off--without Miluda ever having to lift a finger. 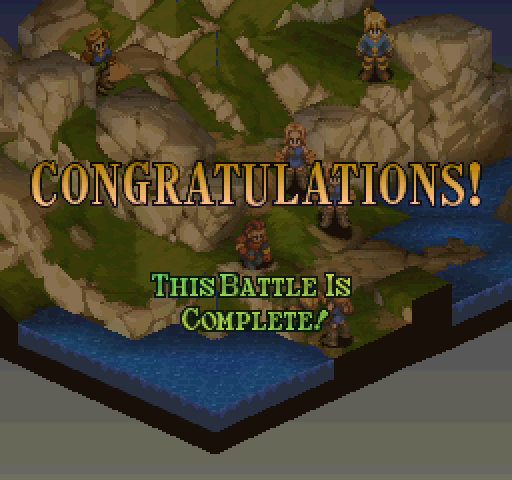 I make sure to drop the Wizards first, and then dance around the Knights while firing at the Time Mages, and drop a Knight or two before going for Miluda, as I was starting to hurt and I didn't want to play the sandbag game in this battle. I finish the battle with no casualties (in the party, at least; I don't remember if Delita died or not). Windmill Shed Map Overview Replayable as Random Encounter: This is another map that changes upon replay. Allies: The squad plus Delita starts at the South-West end of the map. Enemies: Wiegraf (Holy Knight), Boco (Chocobo), two female Knights, and a female Monk. Wiegraf, a Monk, and a Knight starts on the North-East elevated portion of the map, while the other Monk and Boco start on the ground on the North-West end. Objective: Defeat Wiegraf. Windmill Shed Battle Strategy Overview
 As if it wasn't annoying enough that I have to deal with Wiegraf's RNG roulette (the only one that's not complete rear end is Death Sentence--if it doesn't put you into critical, the enemy leaves you alone, leaving you three free turns to rain damage on them) and his...uh...groupies or whatever, Boco (soon, my friend, soon) is also there to take up a slot for the other side. (...Wiegraf's RNG Roulette would make a pretty good band name.) 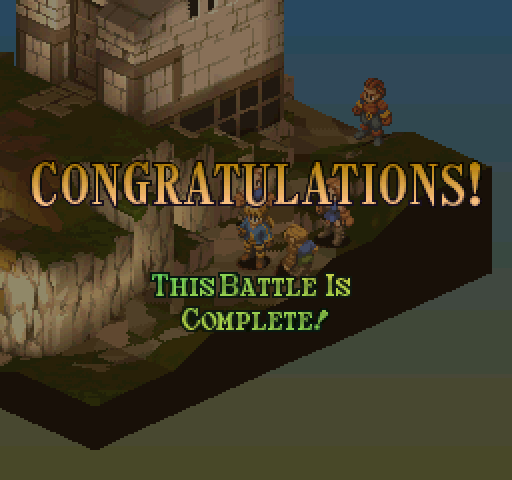 I ignore what the enemy does and focus fire on Wiegraf. Bartz gets a rare critical hit that wins the day without casualties, and the current party has enough JP to get Jump +1. That gets tacked on as the go-to Movement ability for the forseeable future. Fort Zeakden Map Overview Replayable as Random Encounter: No. Allies: Squad 1 (Ramza, Delita, Generic) starts at the North-East side of the map, and Ramza's placement doesn't matter as he will be moved up next to Delita; Squad 2 starts at the North-West side. Enemies: Algus (Knight), three male Knights, and two female Wizards. Algus, two Knights, and a Wizard are opposite Squad 1; the last Knight and other Wizard face Squad 2. Objective: Defeat Algus. Fort Zeakden Battle Strategy Overview
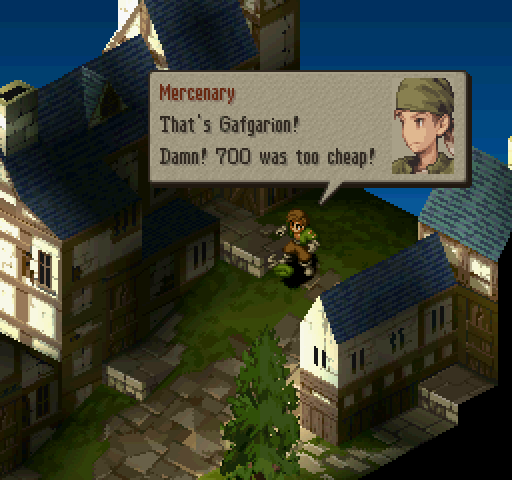
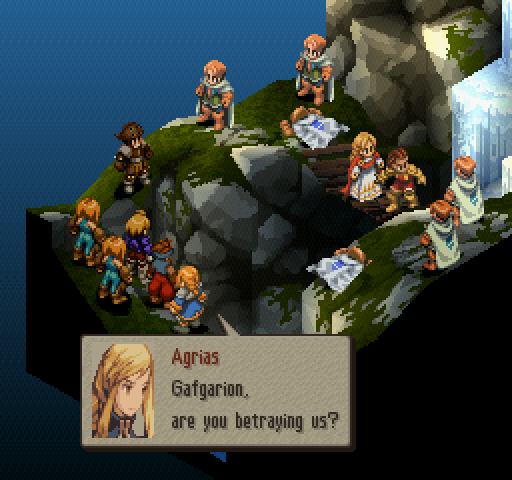
 I shouldn't have to sit through this cutscene more than once. I have enough firepower to end this fairly quickly, and I'm in a Job that extracts the most fitting vengeance.  Like so. Delita, as usual, rushes Algus in a blind rage. Squad 2 ignores their enemies and circles around towards the back of the fort in case I need their firepower to kill Algus. 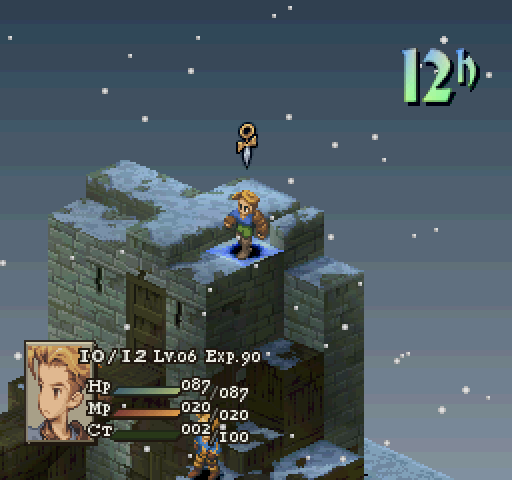 Jump +1 allows me to move on top of the fort, out of range from the Knights and the Wizards can't get to me fast enough before I drop Algus face down in the snow...except Bartz isn't far back enough and eats a Fire2 for his trouble.  Still, with the other two Archers as backup and Galuf raining pointy death from above (and Algus not triggering Auto-Potion at all), I'm in a position to end the battle without triggering any loss of Brave. 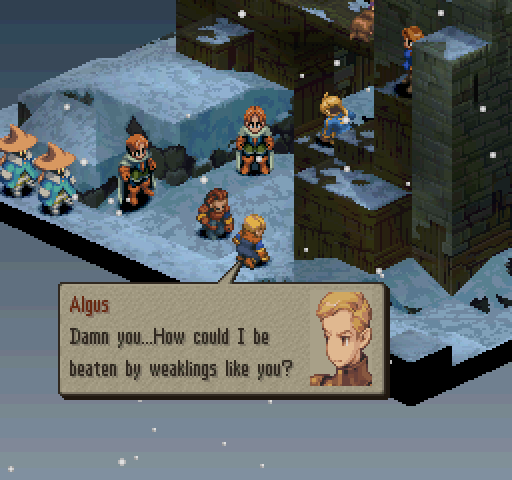  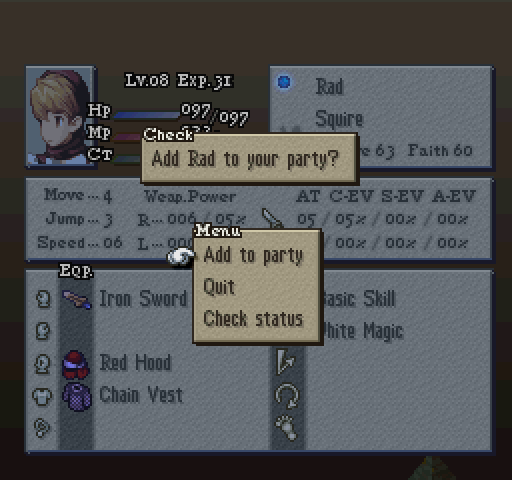 Rad, Alicia, and Lavian are recruited only for their stuff and then promptly dismissed (I usually keep them around as emergency bench members to help Bartz grind while everyone else is off doing Prepositions, but this time around I've got other plans). Then everyone except for Bartz is switched to Monk for the next battle. Dorter Trade City Map Overview Replayable as Random Encounter: No. Allies: The squad plus Gafgarion and Agrias start at the South end of the map. Enemies: Two male Thieves, two female Archers, and two male Wizards span the North end. Objective: Defeat all enemies. Dorter Trade City Battle Strategy Overview
   I move up slowly, staggering my troops so they don't get caught in Wizard spam. Meanwhile, the Archers use their height advantage to shoot at the party. That set of numbers there is Lenna failing to dodge an arrow, obscured by the tall stage geometry.  One of the Thieves spawn with Jump (enemies are generated with story progress-appropriate JP, but sometimes the secondary Abilities are a little wacky), and though it only does 20 damage, he uses it because it guarantees a hit.  Gafgarion will always use items when he's hurt (if he has Item as a secondary), even if quaffing a potion heals less than using Night Sword; this incompetence costs him his life and feeds a level to the enemy. Meanwhile, one of the male thieves charms Faris.  Dammit, Galuf, you're supposed to dodge the arrows, not get shot in the face by them. (The next one finally misses.) 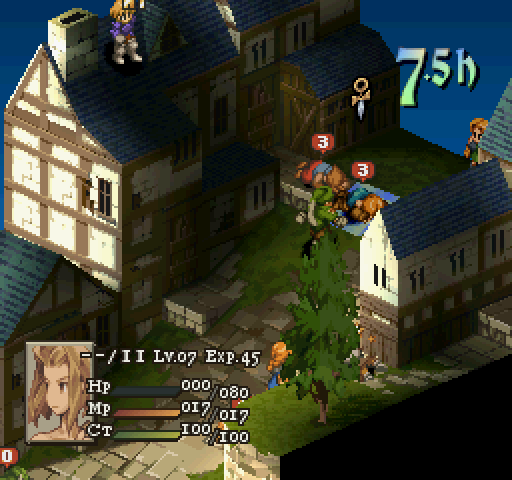  The death counter goes to 3 Total Party Kills because I have to reset before Lenna crystalizes. So I do, and take Item away from Gafgarion but make no other changes. The death counter goes to 3 Total Party Kills because I have to reset before Lenna crystalizes. So I do, and take Item away from Gafgarion but make no other changes.(Reset!) 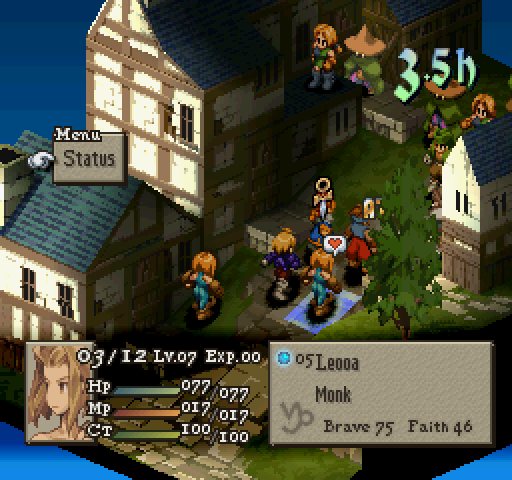 On rematch, Lenna gets her heart stolen by a best compatibility Thief.  There goes Galuf.  Faris! (That's three failed dodges now; overall, my party has been dodging more than they get hit, but it still pisses me off whenever it happens.) Seeing this screen is an immense relief, since if I'd failed a second time, I would've had to reload from Chapter One to grind levels and replay the Fort Zeakden battle. Araguay Woods Map Overview Replayable as Random Encounter: Yes. Allies: The squad plus Agrias and Gafgarion start at the West end of the map, and Boco at the South-East end. Enemies: Five Goblins and one Black Goblin, all along the East end. Objective: Defeat all enemies or Save Boco. Araguay Woods Battle Strategy Overview
 It's Boco!  Of course I'm gonna save Boco! He's the major reason why I named the party after FFV characters! (Boco will join your party either way, but the second option doesn't lose you Brave.) Of course I'm gonna save Boco! He's the major reason why I named the party after FFV characters! (Boco will join your party either way, but the second option doesn't lose you Brave.)(This is also when I make a mistake in the graphical settings and don't notice for several battles.  ) )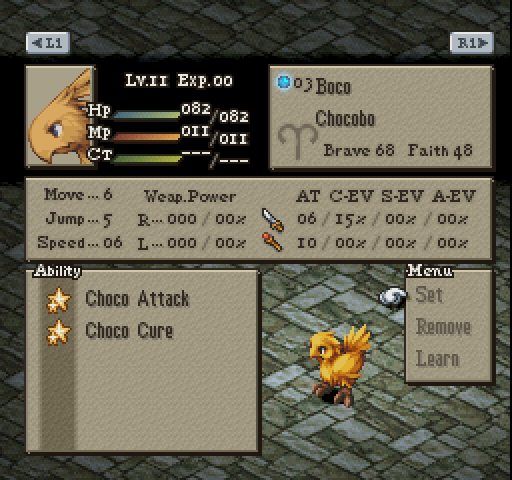 The battle is cleared with no casualties and no events of note; if we were on #MONSTERRISK and got a Monster to play with, and this is the point where somebody (I usually do a rotation starting with Galuf) gets benched in favor of one or more Chocobos. But since we're not doing that this time, Boco's just going to keep me company (and occasionally produce Chocobos that I might use in random battles). Meanwhile, Gafgarion gets stripped naked of all equipment and abilities because of Reasons. (I also do a quick check to see if Agrias' stuff needs an upgrade--she gets Gaffy's gear and the rest is sold for dosh.) Zirekile Falls Map Overview Replayable as Random Encounter: Yes. Allies: The squad plus Agrias start at the North-West corner of the map. Delita and Ovelia are on the bridge that span the two sides of the waterfall. Enemies: Five male Knights and Gafgarion (who is in whatever Job class you left him in before you started the battle). Three of the Knights are on the South-West side, two of them and Gafgarion the South-East side. Objective: Save Ovelia (defeat all enemies while keeping Ovelia alive). Zirekile Falls Battle Strategy Overview
 Oh, what a shock, I didn't see this coming at all.  I keep everyone where they are, going for the Knights closer to me. Delita goes the other way, and the Knights on the South-West end who survive his onslaught head to the bottom of the waterfall to (eventually) engage with the party.  Ovelia surprises me by whacking Gafgarion in the face, and I'm so caught off-guard that I don't screencap the moment, so you'll just have to take my word that it happened; otherwise, the battle goes by with no casualties and no other events of note. I'm going to hang onto Ovelia's Triangle Robe (it promptly goes on Galuf) and Wizard Robe (just in case I get a caster class in future Chapters) and selling the rest. Then it's Bartz's turn to be the lone Monk while everyone else goes back into Archer for this battle (as I feel range will be more important) and a revisit to old cities for equipment. Zaland Fort City Overview Replayable as Random Encounter: No. Allies: The party plus Agrias start at the bottom of the hill on the South end of the map; Mustadio starts on the wall. Enemies: Two male Wizards, two male Knights, and two female Archers. The males are right behind the wall, while the females are on the North end of the map. Objective: Defeat all enemies or save Mustadio. Zaland Fort City Battle Strategy Overview
 Picking the bigger Brave-boosting option and hoping that Mustadio will not do anything too stupid since I have to keep him alive. (And he doesn't.) In between taking out the Wizards, I move my Archers to the top of the gate and Bartz, as the lone Monk (and having no long-range damage options), takes the long way in.  The only thing of note that happens is I pick up some sell fodder and eat some dumb damage because I forgot to block the enemy Knight to the top of the Gate. Mustadio also leaves the safety of the gate to go chase down the last remaining enemy Archer, but since I'd taken pretty much everyone else out he makes it without a problem. (I do have to heal him a bit, though, since he and the Archer trade damage quite a few times.)  Switching to Archers proved to be the right choice, as I made it with zero casualties. Mustadio learns Move+1 and switches to Chemist, using Snipe as his secondary. Bariaus Hill Map Overview Replayable as Random Encounter: Yes. Allies: The squad plus Agrias and Mustadio start at the West side of the map. Enemies: Two male Knights, two male Archers, and two female Summoners. The males are on the East side of the hill, whereas the two Summoners are on the ground level. Objective: Defeat all enemies. Bariaus Hill Battle Strategy Overview
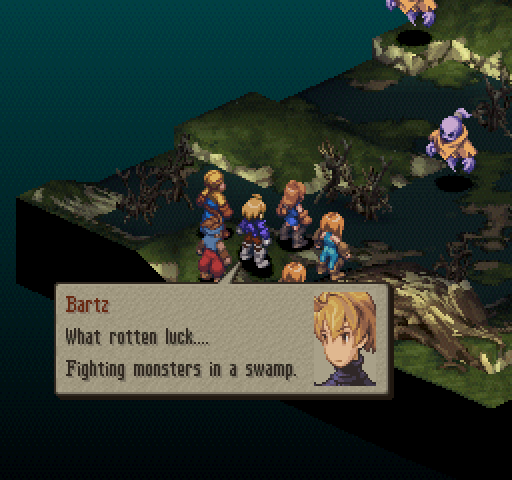
 ...but especially those Summoners!  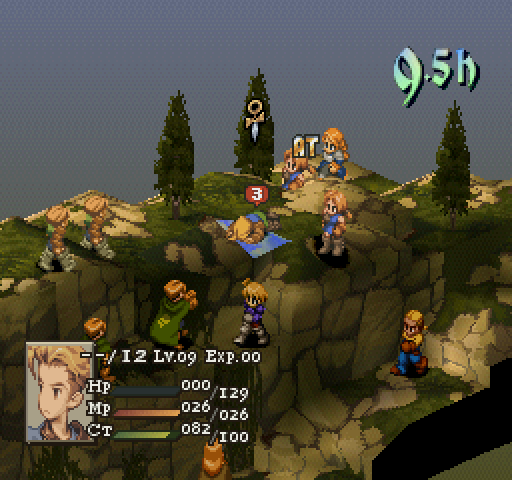 I realize too late that land elevation can also negatively affect my ability to shoot things and overcommit on Galuf; this costs him his life when that very Summoner drops a Titan on him. I'm pretty sure at least one Summoner doesn't die before she runs out of MP. 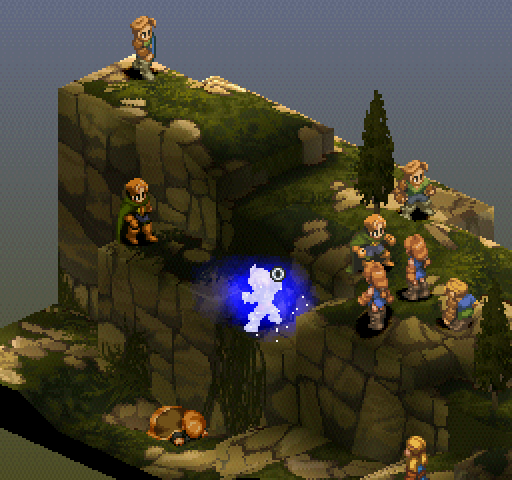 You got hit, Bartz? But you had an 80%-ish chance to dodge!  And there goes Bartz. 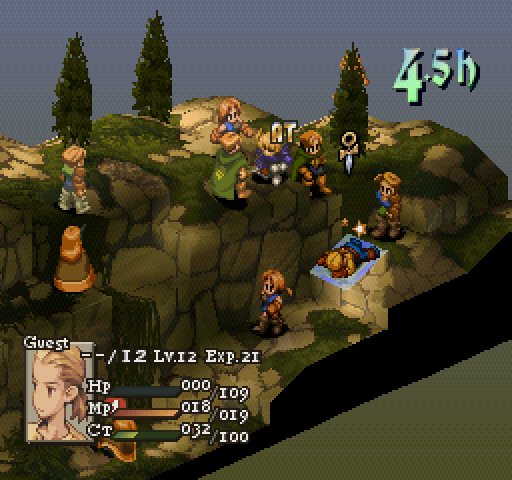 Mustadio dies, but I continue to steadfastly refuse to count Guest deaths as my fault. (I wonder if the game does.) 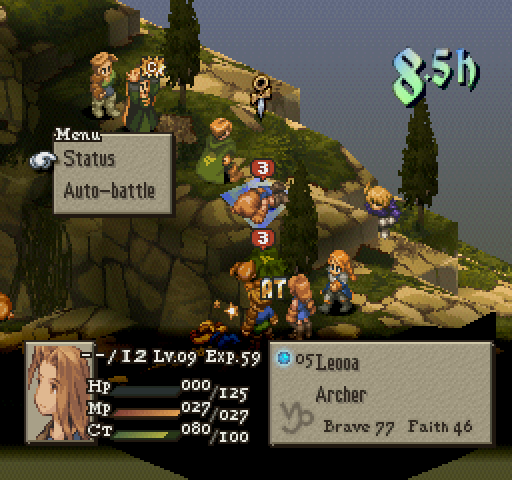 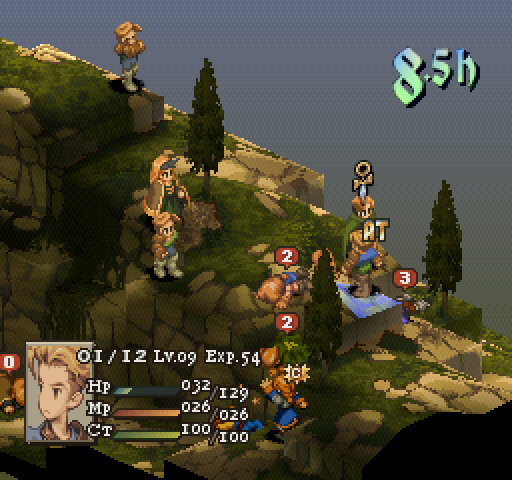 Lenna dies reviving Bartz during one of my sandbag attempts, and then Bartz eats death #2 because I didn't have him run away far enough. 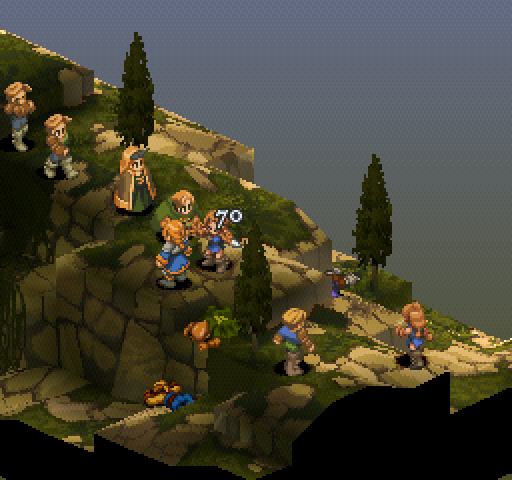 There goes Lenna again. At this point I think I started channeling Dragon Ball Abridged Piccolo and scared my roommate with my screams of "DODGE!" 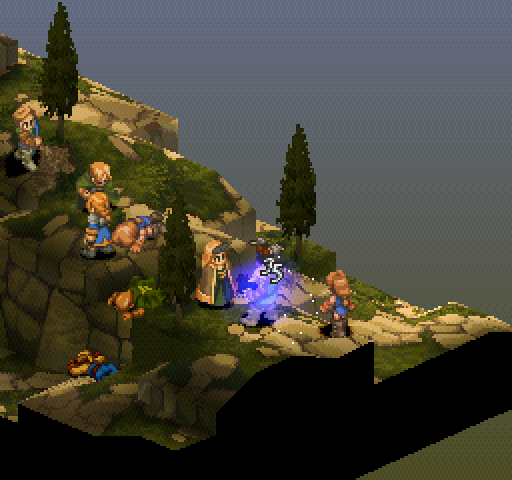 Galuf jukes the wrong way, straight into the path of death. 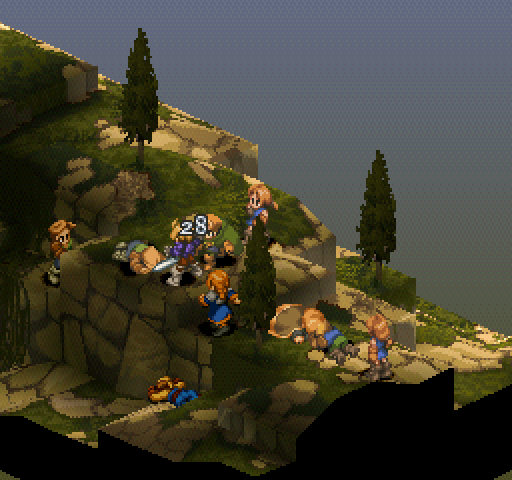 Death #3 for Bartz. Somewhere in the haze of panic, the rest of my party somehow avoids not dying and continues to alternate between sandbagging and doing damage. 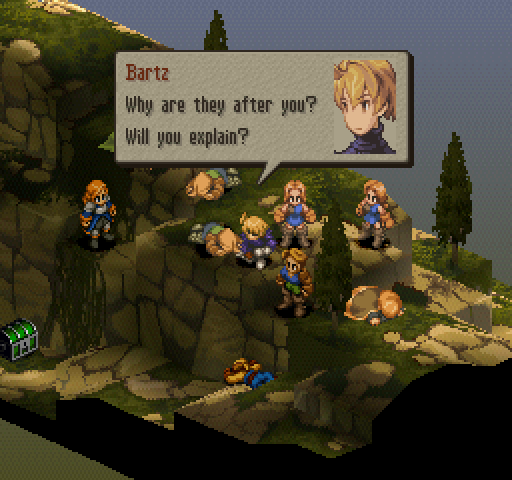 Another moment for Bartz, as Mustadio has been pushing up the daisies all this time. I guess the lack of oxygen to his brain is starting to affect him (more than it already did).Agrias graciously leaves her stuff behind before we venture forth into plot, and then it's off to Zigolis Swamp to fight monsters. Bartz makes the switch to Monk, leaving Krile as the sole archer (for now). Zigolis Swamp Map Overview Replayable as Random Encounter: Yes. Allies: The squad plus Mustadio Enemies: Depends. Usually some combination of Skeletons, Bonesnatchs, Ghouls, a Floating Eye, a Malboro, and the occasional Uribo. Objective: Defeat all enemies. Zigolis Swamp Battle Strategy Overview
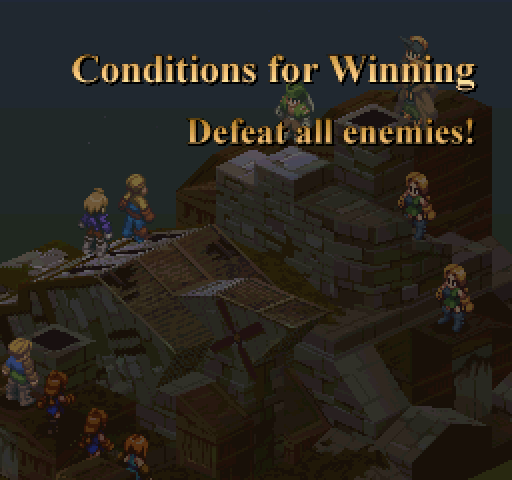
 Since I need to feed experience to Krile, I'm not going to cheese this fight with Phoenix Downs. Instead, I'm going to cheese it with my fists of fury!  ATATATATATATATA! I keep my Monks where they are for most of the battle, doing nothing except to heal themselves and/or each other and occasionally soften enemies up for Krile. 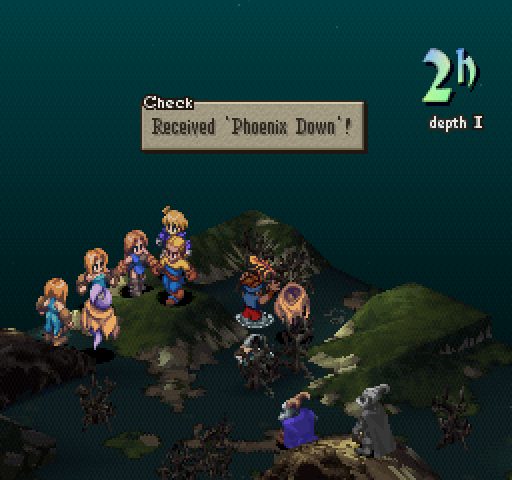 Well, that's one less Phoenix Down I need to buy, I guess. I finish the battle with no casualties and switch the Job distribution to 4 Archers / 1 Monk (Krile) because I need those Summoners dead ASAP and I don't have enough JP for Earth Slash. Faris and Galuf, having unlocked Chakra, change to Punch Arts secondary. Slums in Goug Map Overview Replayable as Random Encounter: No. Allies: The squad starts out at the East end of the map; Ramza's placement doesn't matter as he will always start on the building that has the windmill/fan thing. Mustadio starts in front of him. Enemies: Two male Thieves, two male Summoners, and two male Archers span the west side of the map, with the Archers in the South-West corner, the Archers in the North-West corner, and the Summoners in the middle. Objective: Defeat all enemies. Slums in Goug Overview
 Again, kill the casters first! (And I finally realize that I shouldn't have dithering on while making screencaps.)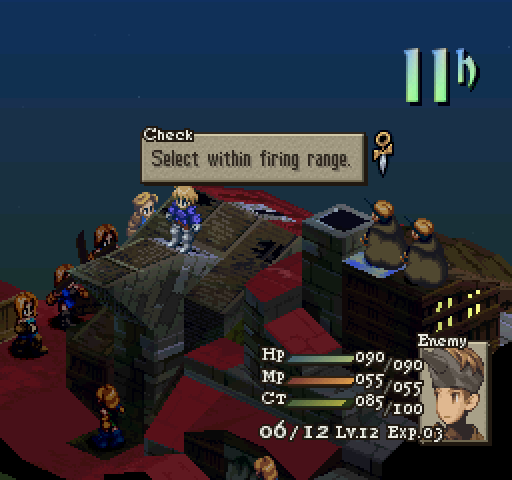 One of these days, I'll get unit placement right on the first try. 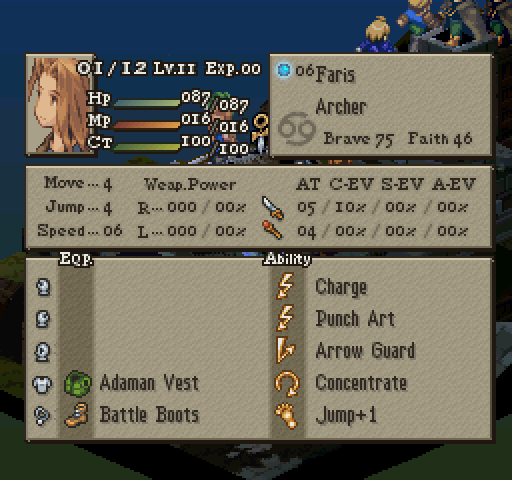 Faris gets her hat stolen. 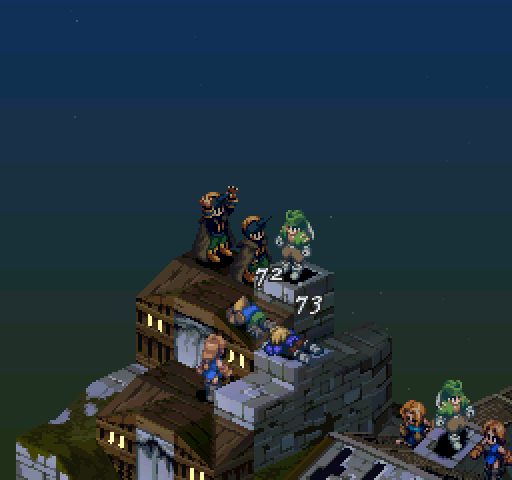 And once again I overextend, costing me two party members. 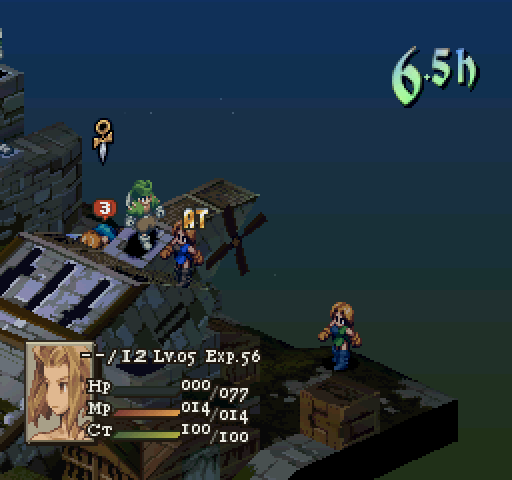 Because Krile's behind, she doesn't have Concentrate yet, and she's missing more than she hits, so she goes down without taking anyone with her.  ...and then she Crystallizes before I have a chance to resurrect her because Faris is also dead and Lenna was my only Item user left standing. TPK goes to 4. Trying again, this time with better gear. (Reset!) 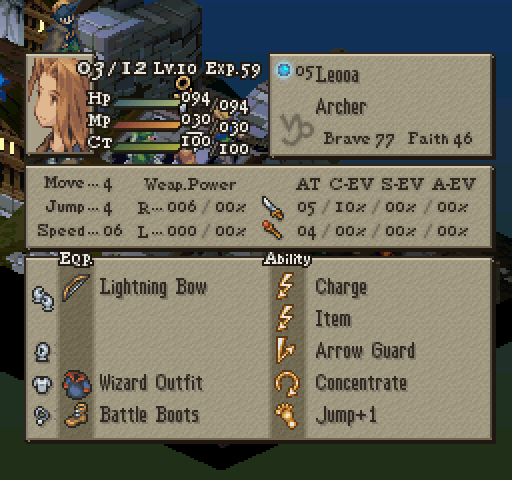 This time, I hang back and let the enemy come to me instead, shooting the Summoners only once they start casting magic. Lenna gets both her hat and her heart stolen, adding insult to the injury. Bartz chucks a rock at her.  I believe one of the Summoners has a chance to spawn with zero Summons learned; last time, this guy ran around casting Protects, and this time, he rushed forward to conk people on the head with his staff.  Why couldn't it have been a hat to replace the one that got stolen? Well, at least I made it through that battle without any casualties this time.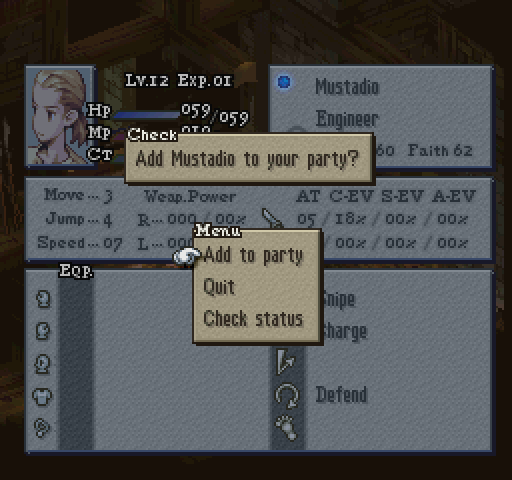 Mustadio is kept in the party purely for sidequest reasons. I don't ever plan on using him, not even for random battles. Since I got to about 50 images last time, I'm taking a break here. Next time, the rest of Chapter Two and however much of Chapter Three that gets me to ~150 total screencaps. dotchan fucked around with this message at 17:57 on Oct 23, 2015 |
|
#
?
Oct 2, 2015 03:51
|
|
|
dotchan posted:
Leooa?
|
|
#
?
Oct 2, 2015 17:32
|
|
|
Seems like it could be fun. I've never done the FFV thing, but I'm tempted to give this a shot since I've never played FFT without powergaming like an rear end in a top hat 
|
|
#
?
Oct 2, 2015 21:19
|
|

|
Mzbundifund posted:Leooa? ....gently caress, I can't believe I haven't noticed for this long. The issue has been fixed, but it'll be another 20 screenshots before reality reflects that. vilkacis posted:Seems like it could be fun. I've never done the FFV thing, but I'm tempted to give this a shot since I've never played FFT without powergaming like an rear end in a top hat Hey, fellow powergaming rear end in a top hat buddy! 
dotchan fucked around with this message at 00:59 on Oct 3, 2015 |
|
#
?
Oct 3, 2015 00:57
|
|
|
Glad I'm not the only one, so I'll come out as well as a grinding lunatic. All the monks. all at 99.
|
|
#
?
Oct 3, 2015 01:57
|
|
|
dotchan posted:
I take exception to this analysis! I've beaten an Oracle SCC, and the only status effect they have that isn't worth it (as I recall off the top of my head) is Darkness. ...okay, looking at an actual list, there's a fair number of duds. Innocent, Silence, and Berserk are interchangeable but completely shut down casters, Undead is mostly useless, and Dispel Magic and Faith are genuinely very situational. Confusion, Sleep, Don't Act, and Petrify are all very powerful in almost all situations though.
|
|
#
?
Oct 3, 2015 03:45
|
|

|
Innocent is generally worse than silence because they become immune to all other magic while under the effect. Dotchan this is a cool idea for an LP, and it's your call how you want to run it, but I really have no idea what is going on. You've got so few screenshots per fight, and most of the time you aren't even saying what your actions are. Maybe you're pointing it at people who are even bigger FFT nerds than me, but if you're going to do a weird challenge, at least tell me how you're approaching it. Are you just moving and shooting arrows at everything?
|
|
#
?
Oct 3, 2015 04:49
|
|
|
Mzbundifund posted:Dotchan this is a cool idea for an LP, and it's your call how you want to run it, but I really have no idea what is going on. You've got so few screenshots per fight, and most of the time you aren't even saying what your actions are. Maybe you're pointing it at people who are even bigger FFT nerds than me, but if you're going to do a weird challenge, at least tell me how you're approaching it. Are you just moving and shooting arrows at everything? I figured nobody would care for a turn-by-turn report of exactly what I did and how I positioned my party members (plus the enemy is always on the move and I don't always react in time to capture their actions because I'm new at the LP thing), so I went for a highlight reel style of screencapping and narration. I am assuming that people who read this LP know how to play FFT, but maybe I need to be a bit more detailed? dotchan fucked around with this message at 09:00 on Oct 3, 2015 |
|
#
?
Oct 3, 2015 08:52
|
|
|
A little more detail is probably a good idea, especially in fights that take some effort to beat. I'm thinking the big draw of a thread like this is "how does the player tackle this with these limited resources" so a little more strategy wouldn't hurt. ...sooo... can we do what they did in the FFV thread and do our own runs here as well? Because I just rolled black mage for my chapter 1 class and I'm tempted.
|
|
#
?
Oct 3, 2015 11:51
|
|
|
vilkacis posted:A little more detail is probably a good idea, especially in fights that take some effort to beat. All right. I'm going back and making top-down maps of enemy and player starting position, as well as talking a bit more about the general strategy. vilkacis posted:...sooo... can we do what they did in the FFV thread and do our own runs here as well? Because I just rolled black mage for my chapter 1 class and I'm tempted.
dotchan fucked around with this message at 00:49 on Oct 6, 2015 |
|
#
?
Oct 3, 2015 17:29
|
|
|
A bit more detail would be good. I'm pretty familiar with FFT, less so with the Five Job Fiesta, but I'm kind of lost as to what's going on. I'd also recommend dotchan posted:I figured nobody would care for a turn-by-turn report of exactly what I did and how I positioned my party members (plus the enemy is always on the move and I don't always react in time to capture their actions because I'm new at the LP thing), so I went for a highlight reel style of screencapping and narration. I am assuming that people who read this LP know how to play FFT, but maybe I need to be a bit more detailed? If it's not difficult for you, record your play time, and screen cap that after you play it back. This way you can go back and get stuff or more easily make gifs. I haven't done anything LP since participating in a DF succession thread ages ago, but it helped a lot. This is one of my favorite games and interesting challenges are worth watching, so I'm excited.
|
|
#
?
Oct 3, 2015 18:05
|
|
|
dotchan posted:
Welp. I may have to jump in myself. 
|
|
#
?
Oct 3, 2015 20:28
|
|
|
Oh you had better believe I'm getting in!  * And It Is Totally Not My Fault Chapter One: Wizard 01: L i t t l e _ m a g i c 02: Milady Miluda's Melody of Malcontent 03: Dropped It All And Ran Chapter Two: Oracle 04: 05: Bariouch Hill 06: Incredible Incompetence 07: All In The Execution 08: loving Oracles Chapter Three: Geomancer 09: Superbly Sprited 10: Some Light Reading 11: Mother loving Ninjas vilkacis fucked around with this message at 06:12 on Nov 2, 2015 |
|
#
?
Oct 4, 2015 00:34
|
|
|
vilkacis posted:It's not really what FFT is famous for, but I want to hand out a big shiny gold star for all the touches of extra effort. They didn't have to animate these little gestures, but they did, and I appreciate that. I made these thinking to inject them into my Vagrant Story LP about how amazing they were with details. Never got around to it. So here's where they go.  When Mustiado joins as a guest, he blows Ramza's cover from eavesdropping.   These two show up when Mustiado leaves the party, only to rejoin 2 minutes later again as a guest. until he joins for reals. Just incidental NPCs being crazy.
|
|
#
?
Oct 4, 2015 02:01
|
|
|
Hell yes I'm always up for more FFT.  This thread looks like it's going to be interesting. This thread looks like it's going to be interesting. But what, vilk, not as proficient with FFTPatcher as Nightmare?
|
|
#
?
Oct 4, 2015 02:26
|
|


|
Well I mean I could just run a party of archers with the stats of Cid and make his skillset require bows instead of swords, but it would kind of defeat the purpose of the challenge
|
|
#
?
Oct 4, 2015 02:41
|
|
|
vilkacis posted:Well I mean I could just run a party of archers with the stats of Cid and make his skillset require bows instead of swords, but it would kind of defeat the purpose of the challenge It would, but I can't honestly say that doesn't sound amazing. I'd love to see you give FFT the same treatment you gave FE6. Then again I struggle to see what game or main character wouldn't be improved by amazing beards. Also I'm surprised you didn't wait to see if you could get some abilities from the dead Wizards. Too risky?
|
|
#
?
Oct 4, 2015 03:28
|
|

|
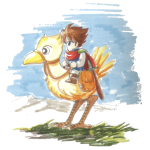
Oh, I just realised: someone, at some point, needs to ride a chocobo, because I've read OFS's LP and what there was of Prufrock's without even realising it was a thing.
|
|
#
?
Oct 4, 2015 03:33
|
|
|
It's an interesting factoid, but once you see it, that's it. Tying up one unit to be a pack mule when it'd be better used spamming chococure. Notice how no one ever does that in the enemy ranks? There's a reason. They love the gently caress out of that rear end in a top hat move :argh
|
|
#
?
Oct 4, 2015 03:39
|
|
|
That and it's pretty easy to get better move stats than a chocobo, completely negating the effort. At least black and red ones give amusing movement abilities (but make you give up their decent offense so bleh).
|
|
#
?
Oct 4, 2015 04:16
|
|

|
Blaze Dragon posted:I'd love to see you give FFT the same treatment you gave FE6. Maybe some day. I at least want to have a legit go at the challenge first. quote:Also I'm surprised you didn't wait to see if you could get some abilities from the dead Wizards. Too risky? I thought about it, but decided it was too much  . Besides, it's probably too early for them to have anything really good. . Besides, it's probably too early for them to have anything really good.edit: dotchan, how about pming a mod and changing the thread title so it says something about the thread/challenge? I mean, I like l i t t l e m o n e y as much as the next person, but it's not very descriptive. vilkacis fucked around with this message at 07:32 on Oct 4, 2015 |
|
#
?
Oct 4, 2015 07:30
|
|
|
vilkacis posted:Chapter One: Wizard Why is it even possible for Algus to spawn with Summon Magic? I know the infinite JP glitch was discovered later, but seriously. That's just kind of dumb for that to be a thing.
|
|
#
?
Oct 5, 2015 16:45
|
|
|
I'm guessing characters just randomly pick one of their available skills for each slot, and since I set the job requirements for all jobs to 0, NPCs have access to every skillset just like my party. Speaking of! 2: Milady Miluda's Melody of Malcontent
|
|
#
?
Oct 5, 2015 21:19
|
|
|
Not Schwarth Miluda's? Hey look that sentence wound up with capital first letters entirely by accident
|
|
#
?
Oct 5, 2015 23:23
|
|
|
I never noticed before, but when Zalbag attacks the theif the chocobo next to him plays its guard/evade animation. This game and the little touches it makes. 
|
|
#
?
Oct 6, 2015 00:57
|
|

|
Yeah, black mages in chapter 1 isn't so much a "challenge" as being unstoppable gods of death. It's pretty much the easiest way to breeze through chapter 1. Honestly a BM single class challenge never gets all that much harder.
|
|
#
?
Oct 6, 2015 04:32
|
|
|
AlphaKretin posted:Not Schwarth Miluda's? She'd have to start out as Martluda. Ayana posted:I never noticed before, but when Zalbag attacks the theif the chocobo next to him plays its guard/evade animation. This game and the little touches it makes. Yes. It is so good. Schwartzcough posted:Yeah, black mages in chapter 1 isn't so much a "challenge" as being unstoppable gods of death. It's pretty much the easiest way to breeze through chapter 1. Honestly a BM single class challenge never gets all that much harder. It's doing wonders for my confidence, at least! So I guess the actual challenge of this run is going to come in future chapters when I have to stop using a party of black mages. ...unless I roll something even more broken for my next class
|
|
#
?
Oct 6, 2015 11:21
|
|
|
I'm not sure I agree with the one job per chapter thing. If I wanted to be limited like that I'd do an SCC. There's a reason FF5 unlocks all the jobs by the end of the first world. Still looks like fun though, I might give it a shot.
|
|
#
?
Oct 6, 2015 12:48
|
|
|
theblastizard posted:I'm not sure I agree with the one job per chapter thing. If I wanted to be limited like that I'd do an SCC. There's a reason FF5 unlocks all the jobs by the end of the first world. Still looks like fun though, I might give it a shot. Oh. I guess I misunderstood. I thought it was Make 1 Person The Random Job, Everyone Else Can Be Whatever. Welp. Time to start over!
|
|
#
?
Oct 6, 2015 18:03
|
|
|
theblastizard posted:I'm not sure I agree with the one job per chapter thing. If I wanted to be limited like that I'd do an SCC. There's a reason FF5 unlocks all the jobs by the end of the first world. Still looks like fun though, I might give it a shot. You can't get equipment for some of the jobs until later chapters, like dragoon and samurai. So it makes sense to make it so that you won't get those jobs until you can at least equip them.
|
|
#
?
Oct 6, 2015 18:29
|
|
|
theblastizard posted:I'm not sure I agree with the one job per chapter thing. If I wanted to be limited like that I'd do an SCC. There's a reason FF5 unlocks all the jobs by the end of the first world. Still looks like fun though, I might give it a shot. The division by Chapters was based on roughly what sort of equipment is available in each and how long it would take to unlock each Job without cheat codes or excessive grinding--I'd purposely designed the challenge to be playable on any system without the use of additional tools because I wanted to maximize the ability for interested people to try it out. But if you have an alternate suggestion, I'm all ears! Kheldarn posted:Oh. I guess I misunderstood. I thought it was Make 1 Person The Random Job, Everyone Else Can Be Whatever. Welp. Time to start over! Nah, it's fine to keep going. You're just playing the game according to the (admittedly occasionally arbitrary) rules that I made up.
|
|
#
?
Oct 6, 2015 23:30
|
|
|
dotchan posted:The division by Chapters was based on roughly what sort of equipment is available in each and how long it would take to unlock each Job without cheat codes or excessive grinding--I'd purposely designed the challenge to be playable on any system without the use of additional tools because I wanted to maximize the ability for interested people to try it out. While Ninja Knives are pretty great, you are probably still happy running a Ninja out there with regular knives and if you are phyiscally attacking with a Dancer you have made deeper errors. I'd probably break the jobs into something like Tier 1- Squire, Chemist, Knight, Archer, Black Mage, White Mage Tier 2 -Thief, Monk, Oracle, Time Mage Tier 3- Summoner, Mediator, Lancer, Geomancer Tier 4- Ninja, Samurai, Tier 5- Bard, Dancer, Mime, Calculator And do unlocks along the lines of Class 1: After Mandalia Plains- Tier 1 Class 2: After Lenalia Plateau- Tiers 1 and 2 Class 3: After Dorter Trade City Chapter 2- Tiers 2 and 3 Class 4: Arrival at Lionel Castle: Tiers 3 and 4 Class 5: Start of Chapter 3: Tiers 4 and 5. I believe that all works out that every class that really needs equipment has access to what they needs when they are available.
|
|
#
?
Oct 6, 2015 23:57
|
|
|
Attacking physically with dancers is hilarious  Anyway. 3: Dropped It All And Ran Quick and easy, and now I get to roll a new class! Excitement.
|
|
#
?
Oct 7, 2015 01:03
|
|
|

|
| # ? Apr 26, 2024 10:32 |
|
|
theblastizard posted:The only weapon classes that unlock after Chapter 2 ends is the Dancer's Cloth and Ninja Knives, and armor is pretty universal, with all 3 types available from the start of the game.
|
|
#
?
Oct 7, 2015 01:14
|
|