|
Man, I love the lore-filled notes in this game so much.
|
 #
?
Jul 24, 2017 16:37
#
?
Jul 24, 2017 16:37
|
|


|

|
| # ? Apr 25, 2024 05:33 |
|
|
Oh thank God its only life loss now. The instant death used to be a real kick in the dick for this zone, thankfully I completed it, and unlocked Solipsist, back when it was bugged so there were no cats in the mouse dream.
|
|
#
?
Jul 24, 2017 17:30
|
|


|
PurpleXVI posted:Oh thank God its only life loss now. The instant death used to be a real kick in the dick for this zone, thankfully I completed it, and unlocked Solipsist, back when it was bugged so there were no cats in the mouse dream. I'm pretty sure he said there is no life loss.
|
|
#
?
Jul 24, 2017 21:33
|
|

|
Unimpressed posted:I'm pretty sure he said there is no life loss. " failure means that you lose 70% of your HP over the next few turns. It�s not too difficult to ride out as long as you pay attention to the timer and try not to fall asleep when enemies are near." I think the no life loss was only on using the altar, but maybe I misread.
|
|
#
?
Jul 24, 2017 22:53
|
|
|
PurpleXVI posted:" failure means that you lose 70% of your HP over the next few turns. It�s not too difficult to ride out as long as you pay attention to the timer and try not to fall asleep when enemies are near." Hmm, actually maybe I misread, sorry.
|
|
#
?
Jul 24, 2017 23:35
|
|
|
I picked up TOME on Steam when it was on an absurd sale a while back, dinked around in the crystal caves with a Shaloren Shadowblade for a bit before going to bed and never coming back to the game. I restarted that character today and, after reading this LP and the Crawl thread a while back, have been doing pretty drat well. Died once when a chest spawned two randoms with big piles of unexpected burst damage and actually got the chance to learn from the mistake immediately with Adventure mode. The blend of mild forgiveness via limited extra lives with the Roguelike mechanics is really nice.
|
|
#
?
Jul 25, 2017 21:31
|
|
|
yeah, this thread made me remember I picked it up in sale, been doing pretty well with Archers - deciding to go with the 'broken' class to learn basic mechanics and unlock classes/races
|
|
#
?
Jul 25, 2017 21:38
|
|


|
I tried a couple of alchemists years ago and never got past the first couple of dungeons, but now I am in the endgame for the first time with an archer thanks to this thread. Update: So near and yet so far. I got to the last fight of the game and got completely creamed. At least I unlocked a bunch of new classes to try the next time around. Delvio fucked around with this message at 03:23 on Jul 26, 2017 |
|
#
?
Jul 25, 2017 23:52
|
|

|
PurpleXVI posted:" failure means that you lose 70% of your HP over the next few turns. It�s not too difficult to ride out as long as you pay attention to the timer and try not to fall asleep when enemies are near." Unimpressed posted:Hmm, actually maybe I misread, sorry. You lose life, but you don't lose a life. Delvio posted:I tried a couple of alchemists years ago and never got past the first couple of dungeons, but now I am in the endgame for the first time with an archer thanks to this thread. The final fight is a huge difficulty jump compared to everything before it. I just won on Insane with a Skeleton Shadowblade and while I could breeze through the entire last dungeon the final fight was hellish and I honestly have no idea how I won. I do agree now that Insane is dumb and unbalanced. The difficulty comes down to what classes bosses are given, which is random, and how stupidly broken the loot you get is, which is random, so it's entirely up to chance whether the game is so easy it's boring or literally impossible.
|
|
#
?
Jul 26, 2017 04:08
|
|
|
Dire Lemming posted:You lose life, but you don't lose a life. It's weird because I remember winning before with both a paradox mage and a brawler, and their fights weren't nearly the horrifying difficulty spikes the final bosses have been in my last few attempts. Did they get buffed or something? (and this was on Normal, even; I don't want to think about what they'd be like on Insane)
|
|
#
?
Jul 26, 2017 04:48
|
|
|
Dire Lemming posted:The final fight is a huge difficulty jump compared to everything before it. I just won on Insane with a Skeleton Shadowblade and while I could breeze through the entire last dungeon the final fight was hellish and I honestly have no idea how I won. The thing about the final bosses is that they're an endurance fight, really. You can't shut them down permanently with conditions while you take your time whittling them down, they've got piles of HP and pretty hefty resistances, but they don't have a particularly staggering offense or crippling conditions to lay on you. Usually the High Peak bosses are worse because they sometimes have nuclear options that can glass you near-instantly. And a lot of classes/builds are better at laying down a rapid alpha strike, then spending fifty turns recovering resources in a corner, than they are spending fifty turns whittling someone down without a break. Or at least, that's my experience. It's less that they're objectively harder, more that they're somewhat different, similar to the Weirdling Beast fight.
|
|
#
?
Jul 26, 2017 07:00
|
|
|
vdate posted:It's weird because I remember winning before with both a paradox mage and a brawler, and their fights weren't nearly the horrifying difficulty spikes the final bosses have been in my last few attempts. Did they get buffed or something? (and this was on Normal, even; I don't want to think about what they'd be like on Insane) The standard campaign final bosses are typically a corruptor/reaver and archmage. Even on insane the two seem to usually have skills from those sets of talents. Because spells tend to drop off in power at high talent levels you'll usually have an easier time vs them then, say, a shadow blade high peak stairboss. There are exceptions though. Just generally focus on disabling Elendar so he doesn't one shot you with a mana thrust critical (aether resistance tends to be the lowest for most people).
|
|
#
?
Jul 26, 2017 12:29
|
|

|
PurpleXVI posted:The thing about the final bosses is that they're an endurance fight, really. You can't shut them down permanently with conditions while you take your time whittling them down, they've got piles of HP and pretty hefty resistances, but they don't have a particularly staggering offense or crippling conditions to lay on you. Usually the High Peak bosses are worse because they sometimes have nuclear options that can glass you near-instantly. And a lot of classes/builds are better at laying down a rapid alpha strike, then spending fifty turns recovering resources in a corner, than they are spending fifty turns whittling someone down without a break. Actually thinking about it my Archmage on Nightmare didn't have that much of a problem with the fight. I even managed to keep Aeryn alive. I think the real reason I had such a problem was that like you say my Shadowblade was great at burst offence and had like 3000 hp worth of shields for defence which is great for short fights but less helpful in long fights. Also one of the bosses rolled loving Mindslayer as their class so you have a character with already strong offence that now has extremely powerful defensive sustains, +~200% move speed from level 15 Skate, a heal that clears physical status effects and the ability to wield an extra two-handed weapon.
|
|
#
?
Jul 26, 2017 13:03
|
|
PurpleXVI posted:You can't shut them down permanently with conditions while you take your time whittling them down, 
|
|
|
#
?
Jul 26, 2017 13:52
|
|


|
I can't help but feel like that looks more like the end result of a horrifying Rogue alpha strike than an endurance match.
|
|
#
?
Jul 26, 2017 14:34
|
|
|
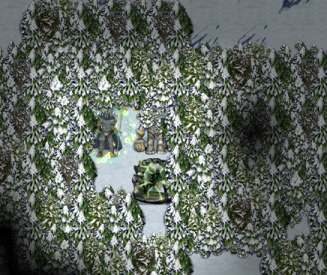 The portal to the Lost Land of Poosh is another one of those dungeons that turn up in random, out of the way spots when activated. It�s pretty hard to miss, as you can tell. Make sure you�re ready for it � you only get one shot. 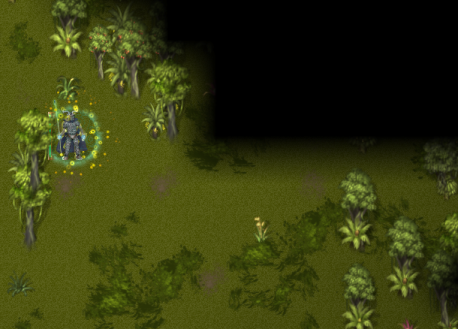 Poosh itself is fairly similar to the Trollmire, a densely forested meadow with no clear path through it.  If it weren�t for these particular enemies, Poosh would be fairly trivial to clear. Telugoroths are temporal elementals � they completely resist Temporal damage and attack with Turn Back the Clock, a projectile of temporal damage that also decreases our stats if it hits. It�s an old Paradox Mage skill that was replaced with Temporal Bolt when they were last reworked (not with 1.5, this was quite some time ago). Thankfully, we�ve got some temporal resist piercing thanks to our rare hat. Not much, but enough to do some damage. 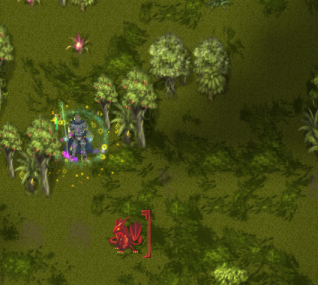 Fire dragons are the second most common enemy here. We�ll have to be on the lookout for a Fire Wyrm � we don�t want to get caught off-guard by one of those. 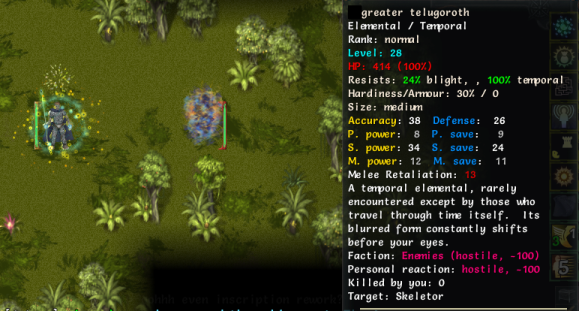 The second tier of telugoroth, Greater Telugoroths know both Turn Back the Clock and Echoes of the Past. We want to stay as healthy as possible around them, as a result. 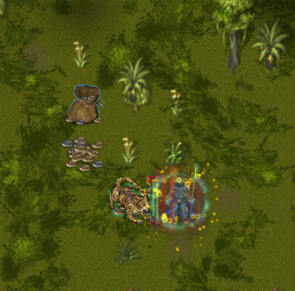 Big cats like this tiger are the third most common enemy here, and pretty much unique to this zone. They come with Stealth and a few rogue skills, but nothing particularly threatening to us. 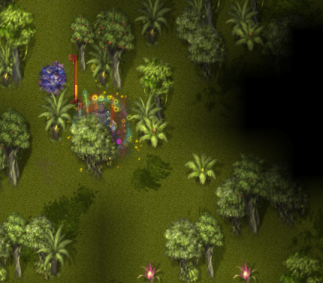 We run into a teluvorta on the second floor of Poosh. Teluvortas are variant telugoroths who know Dust to Dust and Temporal Wake, a unique skill that allows them to �dash� through space, stunning and damaging enemies in their way. 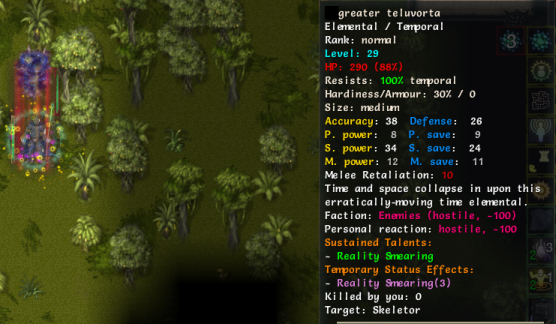 And here�s their big brother. In addition to the above skills, Greater Teluvortas also have Reality Smearing active, so using Attenuate on them will just heal them. We�ll have to stick to our physical damage spells for the most part. 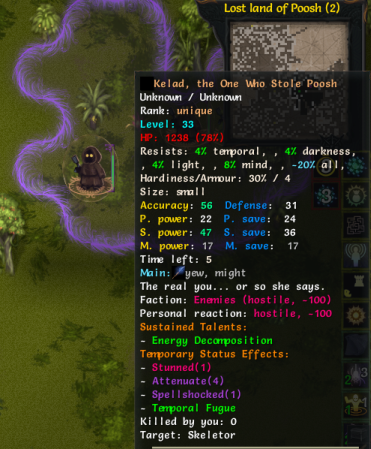 At the end of Poosh 2, we come face to face with Kelad, the one who stole Poosh. Kelad is a jawa with some Paradox Mage skills, in addition to a high level Turn Back the Clock and Body Reversion, another old PM skill that removes physical debuffs and heals him. This fight is going to be kind of a slog � thank goodness he doesn�t have Reality Smearing, at least. 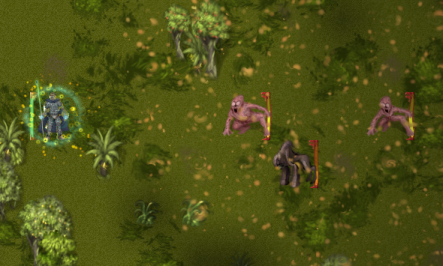 In between Kelad�s habit of teleporting away and his Temporal Fugue, it�s really hard to land any lasting damage. Also, some other temporal horrors came over to check things out. 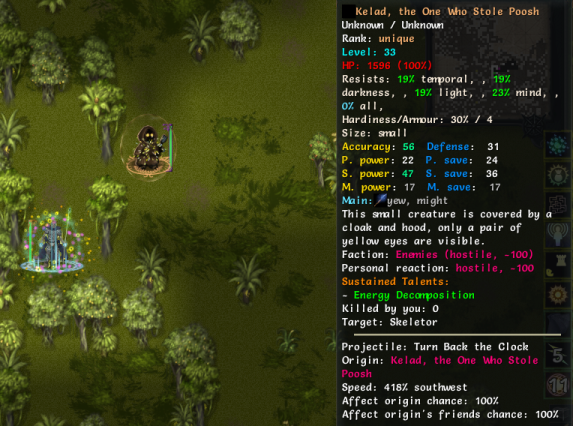 Oh, I figured out where they came from. Kelad has no sense of Paradox control whatsoever and will happily blast away, anomalies be damned. He ended up triggering the major anomaly that summons Temporal Horrors for several turns, which would normally be a bad thing if they weren�t on the same drat faction. 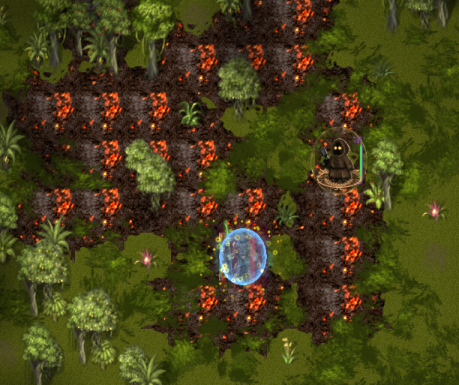 He caused a drat meteor to fall from the sky with one of his anomalies. Guess who took the brunt of the damage?  FINALLY. Oh, and over the course of the battle, he activated the anomaly that summoned temporal horrors at least twice more. We still have to clean up the last batch before we go.   For our efforts, we�re rewarded with the Heart of Poosh. It�s an artifact that boosts our damage by a tiny amount when carried, and can be activated once every hundred turns to restore our health and reduce our equilibrium by a small amount. Not much of an effect, but it doesn�t have to be actively equipped to be used, so that�s something. 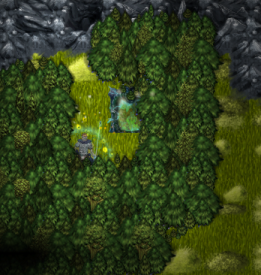 Next up, the Bearscape. As with Poosh, it turns up in random places on the map, and is pretty hard to mistake for anything else. 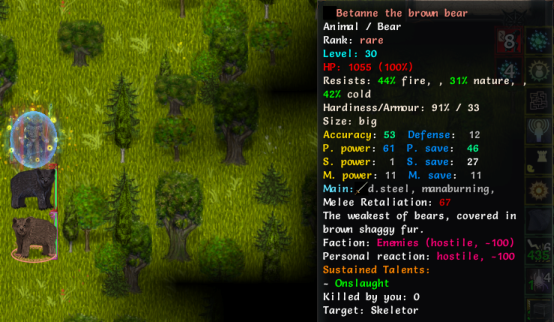 Like Poosh, it�s a densely forested area with no clear path through it. As you might expect, the primary enemy of the Bearscape is, well, bears. Big bears, little bears, rare bears�especially that last one. This area is often more dangerous than people might expect � the rare spawn rate is especially high compared to most areas on lower difficulties. However, it usually pays off loot-wise � this is the earliest area in which t5 gear will regularly drop.  Like these gloves, which would probably be a much better demonstration of the Bearscape�s usefulness if they weren�t antimagic.  To be fair, even the toughest ordinary bear is straight-up no threat whatsoever at this point, so the rares probably help to preserve some tension.  The loot from Bearscape 1. We hang on to the ones that might make nice statsticks in the future and melt down the rest, getting some useful tinker ingredients in the process. The miscellaneous bonuses from that rare staff aren�t great but we�ll switch over to it anyway, because it�s a t5 staff. 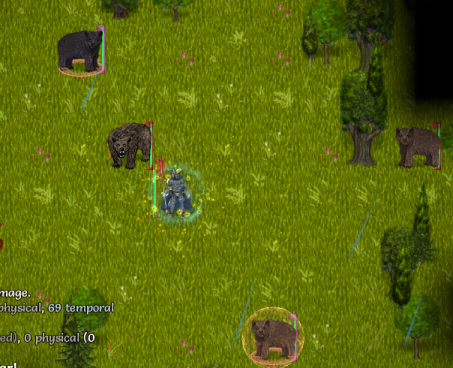 Yet more rare bears. The brawler bear kind of makes sense, the mindslayer bear slightly less so. I�ve lost count of just how many gunbears we�ve cleared out by now. 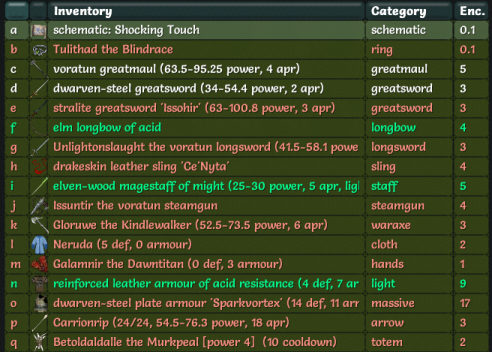 Yet more bear loot. Some interesting notes: - Almost none of the rare weapons do physical damage � the longsword does pure acid damage and the waraxe pure light damage. - The game seems really intent on giving us bonuses to lightning damage/lightning resist penetration. We have no way of doing lightning damage, nor do we intend on acquiring one. - Bonus acid damage is also a common theme - The greatsword has a ridiculous 85% chance of inflicting a gloom effect whenever it hits. As before, we hang on to the statsticks and melt down the rest. We�ll drop them off at our fortress later so they don�t clog up our inventory. 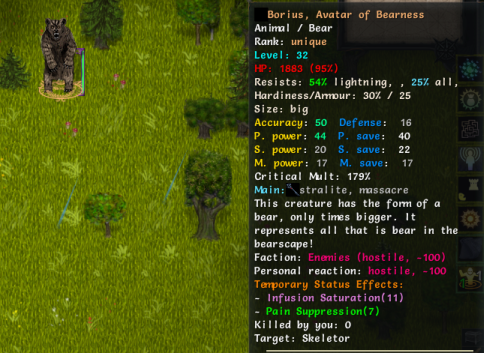 In the center of Bearscape 3, we find Borius, the Avatar of Bearness. He�s a big ol� brawler bear, but he�s not nearly as much of a challenge as Kelad was. 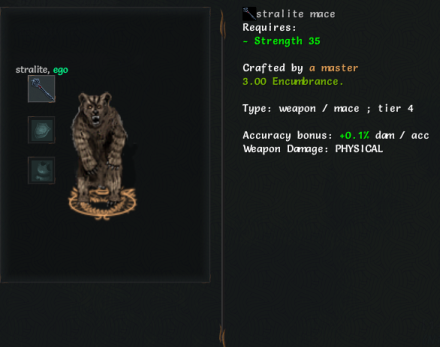 Because like the Horned Horror before him, he spawned with a weapon, rendering him unable to use practically any of his useful skills.  Finishing him off isn�t very difficult as a result. We gain an achievement from it, and a bonus item.   A fun little item. Unlike Poosh, it has to be equipped to be used. When activated� 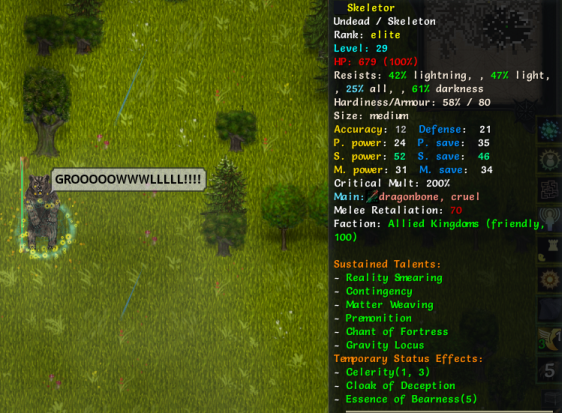 �it invokes our inner bearness, reducing the amount of damage we take by 25% for five turns. Fun, but the 100-turn cooldown and the fact that it has to be equipped means it probably won�t see much use. Now to clean up the rest of the bearscape. 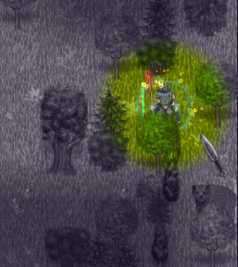 Whoa, a stealthed rogue bear ambushed us with knives. We didn�t really have to stop time to dodge them, but we might as well do it anyway. 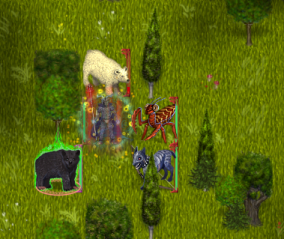 Master Summoners are not to be underestimated, regardless of bearhood. Their summons cooldown much faster, and their high-level summons lower our resistance to the appropriate element simply by being summoned near us. 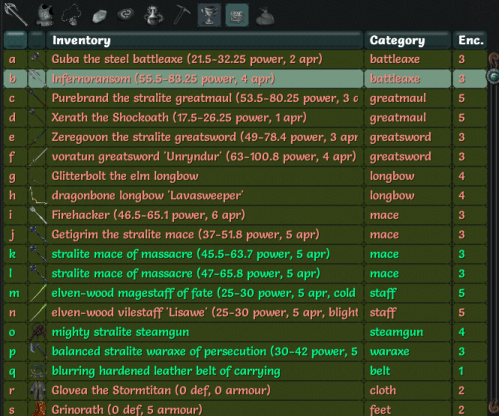 We look over at our loot list one last time before we go. Some notes: - INFERNORANSOM the battleaxe does pure fire damage and gives additional voidstalker bonuses. Would be fun on a doombringer. - In fact, fire damage bonuses seem to be the theme of the day. - A small selection of items: Firehacker the mace, Lavaoblivion the hat and Firesweeper the bow. As before, we pick out the nice statsticks and dump the rest. There�s no point trying to rework our build around the fancier items this late � we�ll find better stuff soon enough. We still have some time to spare. Let�s clear one more area. 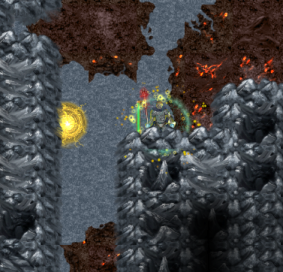 This is going to be a chancy one. As we�ve seen from Poosh, we can just about handle temporal-resistant enemies with our current resist piercing, but the sheer number of them we�ll be facing in the Temporal Rift might be a challenge even for us. Still, we�ll have to get around to it sooner or later. (We do not actually have to get around to it, it is purely an optional zone.)  We step into the Rift, and are promptly tossed into outer space once more. The first floor of the Rift is filled with telugoroths and teluvortas galore, both common and greater variants. This floor contains two passive effects of note � Out of Time Zone and Zero Gravity. Out of Time Zone increases our physical resistance, but decreases our temporal and teleport resistance. Zero Gravity is probably the more notable one � our movement speed is decreased to a third, and any weapon-based attack has a chance to knock us backwards. Melee characters who enter this zone without some method of fast travel are in for a bad time.  Ultimate Telugoroths are the final tier of telugoroth. In addition to Turn Back the Clock and Echoes From the Past, they also know Stop (an AOE stunning move) and Rethread (a temporal damage beam). Despite being the strongest variant of telugoroth, these ones still aren�t quite as tough as the Greater ones we faced back in Poosh.  On some classes, it�s better to rush through the first floor of the rift, particularly if you can�t tank too many hits from the various elementals. However, since our defenses are up to par, we can take the floor nice and slow � we�ll be far less likely to run into overwhelming trouble that way. 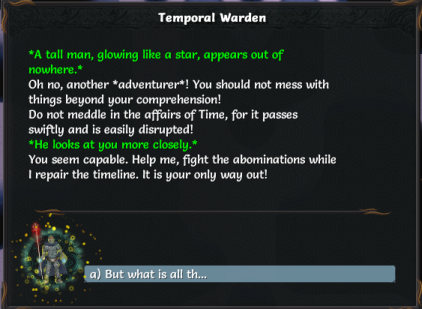 We get this message as we attempt to leave the first floor of the Rift. Well, we are pretty good at all this space-time stuff, I have to admit. 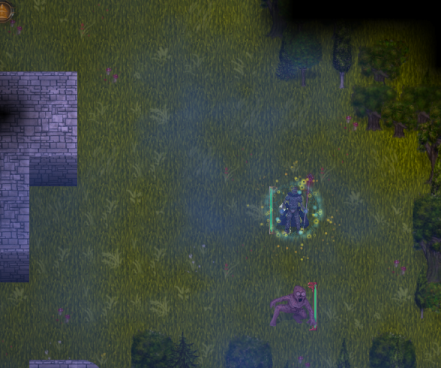 The second floor of the Temporal Rift. This place seems�familiar somehow. I wonder why. 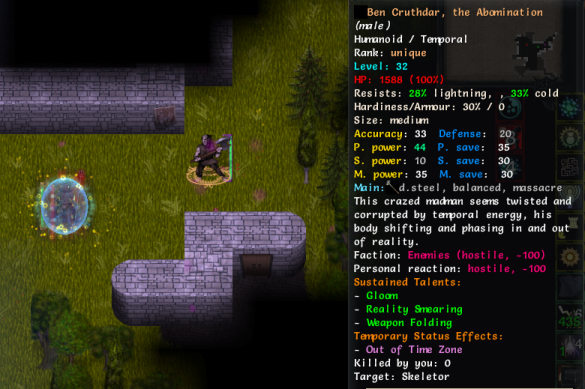 Ah, that would be why. Ben Cruthdar the Abomination is not much harder than regular Ben, though he is tankier thanks to Reality Smearing. It also means we can�t Attenuate him away, and we�ll have to resort to our other spells. 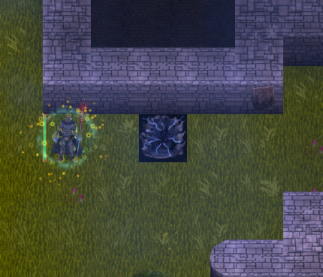 Invigorate and Reality Smearing make him a reasonably tanky foe, but he can�t do anything to damage us significantly either. Finishing him off opens up a rift to the next floor. 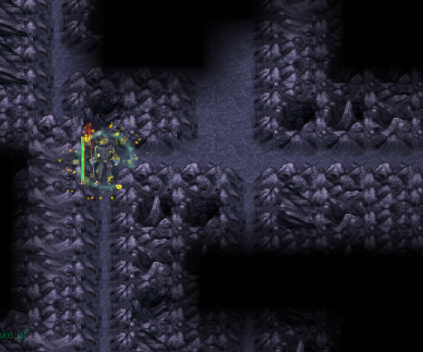 The third floor of the Temporal Rift is an ordinary Daikara level, but with Temporal Horrors replacing snow giants. This renders it much easier than a regular Daikara level. 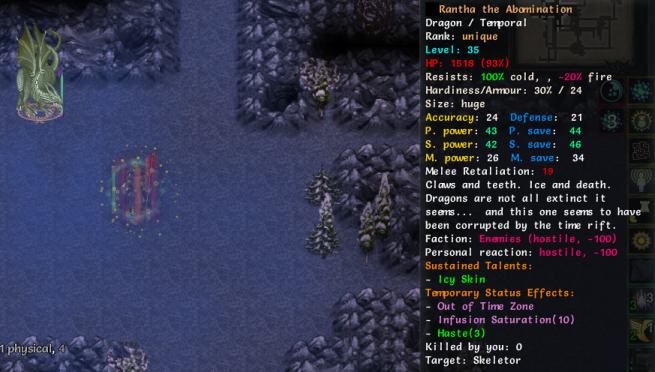 The boss of this floor is Rantha the Abomination, a variant of the Daikara boss we didn�t fight. As previously mentioned, she�s essentially an Ice Wyrm with additional freezing spells on top. The Abomination version comes with a few Speed Control passives and Haste, enabling her to attack much faster than usual.  Killing her spawns a rift to the next floor. Be careful around this rift � any terrain-altering effects in its vicinity can cause the rift to vanish, giving you no recourse but to reload your game. This can happen surprisingly easily � void horrors are common, and the void shards they spawn cause random minor anomalies when killed, many of which mess up the terrain around them. 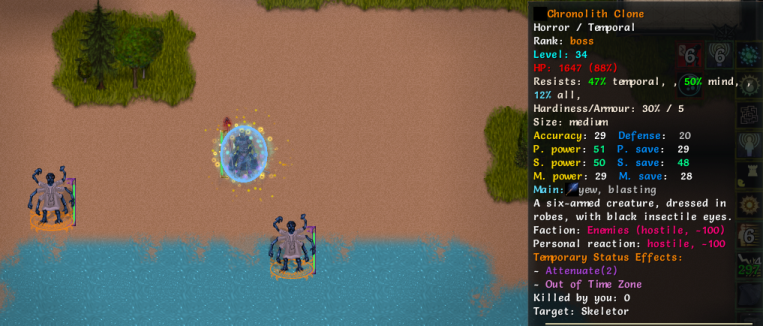 The fourth floor of the rift is a facsimile of the first floor of Lake of Nur. We don�t have to go very far before we�re confronted with the bosses of the Rift, the Chronolith Twin and Chronolith Clone. The Chronolith Twin is a gravity-focused boss � he heavily resists Physical and Acid damage, and can cast all the Gravity spells at high levels. The Chronolith Clone is temporal focused � he heavily resists Temporal and Mind damage, and can cast Temporal Bolt and Echoes of the Past. However, he usually prefers to leave the damage-dealing to his cousin, sapping our skill cooldowns with Energy Absorption and disabling our sustains with Entropy instead. Fortunately, our spell save was high enough to shrug off Entropy. With Gravity Locus still active, none of his cousin�s spells will be able to damage us at all, and we can focus entirely on bringing them down one at a time. 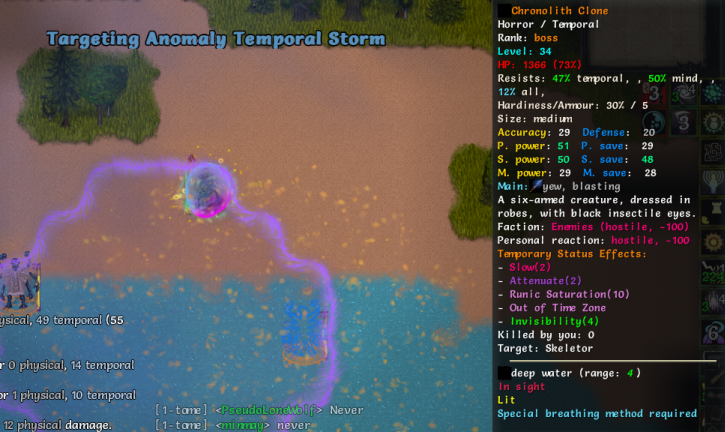 When confronted, the Chronolith twins prefer to activate their invisibility runes, then dash away into the lake while pelting enemies with spells from a distance. Being an exact copy of Lake of Nur, the water here is deep water and will cause us to lose air over time, making this battle a bit of a hassle. Good thing we�re a skeleton.  In addition, the Chronolith twins share damage with each other, so even when you�ve cornered one, you�re essentially still fighting both at the same time. It does mean that we can damage the temporal-resistant one by focusing on his physical-resistant cousin, though. 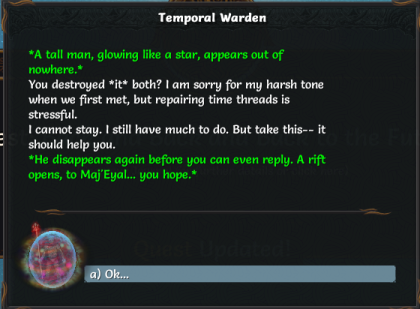 Defeating the Twins opens up a portal to Maj�eyal, and if this is your first time completing it, also unlocks the Temporal Warden class. We also get an additional reward on top of it.  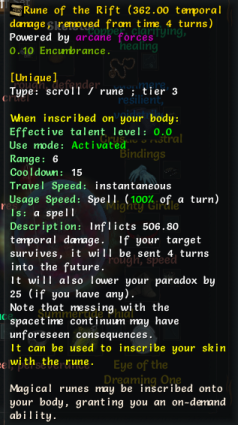 The Rune of the Rift is a rune variant of our Time Skip spell, but will lower our Paradox if we use it instead of raising it. Non-Paradox Mages can learn it too, of course. It�s a neat rune, but we don�t really need two Time Skips. We also get some loot from the corpses of the Chronolith Twins. Let�s see what we found.  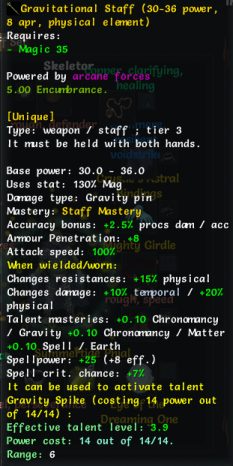 The Gravitational Staff is a staff based around Physical damage, and provides an additional boost to our gravity spells. You can see the Chronolith Twin wielding it in the above pictures, to boost his gravity damage. Might be worth using if we were going gravity-heavy, but we�re going temporal-heavy instead.  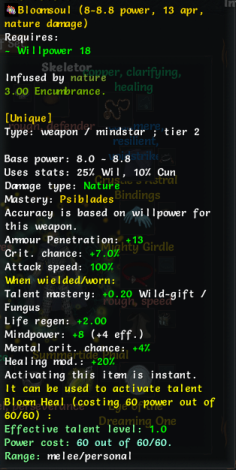 Bloomsoul is a mindstar that grants a bonus to Fungus and additional healmod, and can be activated for bonus healing. Useless to us. 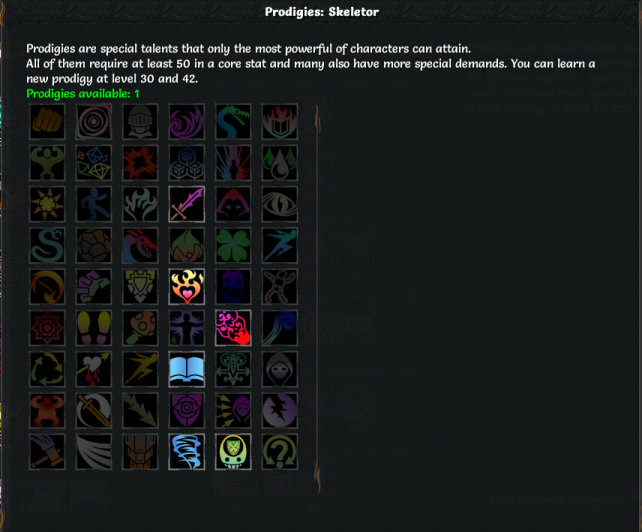 More importantly, we hit level 30 from killing the twins, which means we have a very important decision to make before we go any further. Big old prodigy post, coming up next update.
|
|
#
?
Jul 26, 2017 14:39
|
|

|
vdate posted:I can't help but feel like that looks more like the end result of a horrifying Rogue alpha strike than an endurance match. Was that not the joke?
|
|
#
?
Jul 26, 2017 15:41
|
|

|
Artificer posted:Was that not the joke? Probably. I hadn't had my coffee yet when I made that post, so I wasn't quite all there.
|
|
#
?
Jul 26, 2017 17:43
|
|
|
Oh boy, prodigies. I can't wait to see what 1.6 does to them, because they need a reworking.
|
|
#
?
Jul 26, 2017 19:19
|
|
|
Inadequately posted:More importantly, we hit level 30 from killing the twins, which means we have a very important decision to make before we go any further. Big old prodigy post, coming up next update. Spine of the World or Temporal Form. 
|
|
#
?
Jul 26, 2017 20:03
|
|
vdate posted:I can't help but feel like that looks more like the end result of a horrifying Rogue alpha strike than an endurance match. It's more that you can seriously shut them down, or at least back in the day. Action denial is good. I only remember it all vaguely at this point, but I am pretty sure I unloaded on the dudes, then leapt/ran across the arena to recharge stuff. Also I had no idea how to shut the gates from spawning stuff mechanically so that was good times. https://te4.org/characters/87492/tome/5682378a-9f13-482e-9adc-681165c5cef8 jesus this was forever ago edit- looking this over I remember that the armor The Untouchable owned bones for a rogue.
|
|
|
#
?
Jul 26, 2017 22:39
|
|
|
Big old Prodigy Post Prodigies are powerful skills that can only be learned once at level 30, and once at level 42. You can only learn one prodigy each time, and can�t learn the same prodigy twice. As with many skills, their usefulness varies widely - some are good enough to base an entire build around, others are somewhat niche but have their uses, and some are just functionally useless regardless of build. Each prodigy requires hitting 50 in the associated stat (as always, this can be accomplished through gear and/or temporary buffs), and many of them require fulfilling an additional requirement. Any prodigy that requires X amount of damage done refers specifically to your current character, but can be fulfilled by hitting the training dummy in the fortress with the associated element/weapons. Prodigies marked with an asterisk are from the Embers of Rage DLC � you must have it activated to be able to access them. Strength-based Prodigies All these prodigies require at least 50 Strength to unlock.  Flexible Combat Additional Requirements: None Type: Passive Each time you make a melee attack, you have a 60% chance to execute an additional unarmed strike. This prodigy is a lot stronger than it might seem at first glance. Taking it grants you access to glove stats and glove melee procs, which are much stronger than you might expect � it�s how brawlers stay competitive, after all. With a high-strength character, the raw damage from all those additional hits is nothing to sneeze at either. A good prodigy for melee characters focusing on multi-hit moves, and a no-brainer go-to for brawlers and Arcane Blades, who can practically double their damage output with this prodigy.  I Can Carry the World Additional Requirements: Be able to use massive armor (have level 3 Heavy Armor Training) Type: Passive Your Strength is legendary; fatigue and physical exertion mean nothing to you. Your Fatigue is permanently set to 0, encumbrance increased by 500, Strength increased by 50 and you gain an additional size category. A good �generic� prodigy for strength-based characters. +50 Strength is a pretty hefty amount, no fatigue eases up on stamina costs by quite a bit, and the bonus encumbrance is rather convenient. Combos well with Ogres, who can use the bonus size cat to reduce their ogrewielding penalty and the bonus strength for absolutely ridiculous bonuses from strength-based runes/infusions.  Irresistible Sun Additional Requirements: Have dealt over 50000 Light or Fire damage Type: Activated Range: 5 Cooldown: 25 turns Usage Speed: Standard (100% of a turn) For 6 turns, you gain the mass and power of a star, drawing in all foes within radius 5 toward you and dealing X light, fire and physical damage to each foe. Enemies closer to you take 150% damage. The damage increases with your Strength. If you�re going for maximum SUN GOD with your Sun Paladin, pick up this one. Otherwise, give it a pass. Even if your Strength-based character lacks a good AOE skill, it�s better to pick a weapon-based one than a caster-type skill like this � the damage just won�t compete.  Legacy of the Naloren Additional Requirements: Have sided with Slasul and killed Ukllmswwik Type: Passive You have sided with Slasul and helped him vanquish Ukllmswwik. You are now able to breathe underwater with ease. You have also learned to use tridents and other exotic weapons and can spit Poison as Nagas do (Exotic Weapons Mastery and Spit Poison talent level (level/10 +1)). These bonuses will be updated whenever you level up. In addition, should Slasul still live, he may have a further reward for you as thanks� This prodigy is one of the strongest prodigies a 2-handed weapon-user can take, although it might not be initially apparent why. The key is that the 5 bonus levels of Exotic Weapons Mastery are added on � if you�ve managed to nab it from a warrior escort beforehand and saved enough generics to level it to max before you take this prodigy, the prodigy will grant you a ludicrous 10/5 Exotic Weapons Mastery, boosting your damage done with exotic weapons to monstrous levels. In addition, picking up this prodigy will also grant you the eponymous Legacy of the Naloren, the strongest standard artifact trident in the game (not that there�s all that many contestants for the title, granted). It takes a bit of management and luck to get to this point, but once you do, there�s very little that can stand in your way. Wondering who or what those weird names in the Requirements refer to? We�ll find out soon�  Massive Blow Additional Requirements: Have dug out at least 30 walls/trees/etc. and have dealt over 50000 damage with two-handed weapons. Type: Activated Range: Melee/personal Cooldown: 10 turns Usage Speed: Standard (100% of a turn) You deal a massive blow to your foe, smashing it for 150% weapon damage and knocking it back 4 tiles (this ignores knockback resistance and physical save). If the knockback hits a wall it will smash down the wall, deal an additional 350% weapon damage and apply the Counterstrike effect. I don�t think I�ve ever really seen anyone take/recommend this one. It requires a wall for best effect, and you don�t want to be knocking back foes as a melee character � you want to keep them pinned so you don�t have to keep chasing them around.  Pain Enhancement System* Additional Requirements: Earn the �Size Matters� achievement on this character (deal 600 damage in a single damage instance) Type: Passive Cooldown: 18 turns When you deal a critical hit, your embedded systems activate, increasing all your other stats except Strength by 50% of your Strength for 6 turns. Note that the critical hit does not have to be specifically from a melee weapon � any type of critical hit, even from a defensive talent, will activate this prodigy. Prior to 1.5, this was the prodigy of choice for almost every character, with even Archmages maxing out their Strength to maximize this prodigy. Ironically, it doesn�t do all that much for Strength-based characters, raising every stat but their most important one. 1.5 increased the cooldown from 10 turns to 18 turns, and enthusiasm for this prodigy gradually cooled. It�s still a pretty good prodigy for magic/melee classes or bow users, particularly when combined with Arcane Might or I Can Carry the World.  Steamroller Additional Requirements: Know the Rush talent Type: Passive When you use Rush, the creature you Rush to is marked. If you kill it in the next two turns, your Rush cooldown is reset. Each time this effect triggers, you gain a +20% damage buff, stacking up to +100%. Rush now only costs 2 stamina. This is a really fun prodigy, but not one that sees much serious use. Steamroller makes you really good at clearing out trash mobs � not something most classes have particular trouble with � but doesn�t really give you any advantage against tough enemies like rares/bosses, which is where the real challenge in TOME lies. Great fun clearing out a dungeon by Steamrollering through it, though.  Superpower Additional Requirements: None Type: Passive A strong body is key to a strong mind, and a strong mind can be powerful enough to make a strong body. This prodigy grants a Mindpower bonus equal to 60% of your Strength. Additionally, you add an additional 40% Willpower modifier to all your weapons. The mindpower-focused variant of Arcane Might. Not quite as strong as that one, and as such you generally don�t find melee characters boosting their Willpower just for this one. A good prodigy for Willpower/Strength based classes such as the Mindslayer/Stone Warden though, and the Mindpower bonus is helpful enough that mind-based casters might boost Strength just to leverage this one.  You Shall Be My Weapon! Additional Requirements: Be size �Big� or larger. Also required to use the skill. Type: Activated Range: Melee/personal Cooldown: 10 turns Usage Speed: Standard (100% of a turn) You deal a massive blow to your foe, smashing it for 350% weapon damage and knocking it back six tiles. All foes in its path will be knocked to the side and stunned for three turns. You deal additional 80% weapon damage for each size category you are above �big�. As with Massive Blow, this one doesn�t see very much use for much the same reason. However, if you�re stacking size categories for some reason, you can get stupidly high weapon damage amounts with this skill, which makes it a fun one to try on certain classes. Dexterity-based Prodigies All these prodigies require 50 Dexterity to unlock.  Automated Reflex System* Additional Requirements: Have earned the �Matrix Style� Achievement on your current character�s difficulty settings and permadeath settings (achievement earned by completing the Archmage starting zone without getting hit by a projectile. Often more a matter of luck than skill, really.) Type: Passive Cooldown: 4 turns A small automated detection system is always looking for incoming projectiles. When one is about to hit you, it injects drugs into your system to boost your reactivity, granting you a free turn. Can only happen once every five turns. Kind of a niche prodigy at best. If you�re going for defensive prodigies, there�s better ones out there, and if projectiles are really a problem, it�s not too hard to stack projectile-slowing gear. You can�t leverage the free turn without enemies casting projectiles at you, either.  Crafty Hands Additional Requirements: Have talent level 5 Imbue Item (a skill from the Stone Alchemy tree, which can be learnt from alchemist escorts. Alchemists start with it unlocked.) Type: Passive You are very crafty. You can now also embed gems into helms and belts. I don�t really know why this is a dex-based prodigy, it really should be magic-based. Anyway, the Imbue Item skill allows you to imbue your body armor with a gem of its tier or lower, granting it that gem�s effects. Picking up Crafty Hands allows you to do the same to helms and belts as well. There�s pretty much no other reason to pick up Stone Alchemy unless you�re planning to also pick up Crafty Hands, but the bonuses are kind of small unless you get a good crop of artifact gems (of which there are not that many). If you�re planning to vault for gems, you could probably get a ridiculous gear set by imbuing the same artifact gem to stack its bonuses thrice.  Giant Leap Additional Requirements: Have dealt over 50000 damage with any weapon or unarmed Type: Activated Range: 10 Cooldown: 12 turns Usage Speed: Standard (100% of a turn) You accurately jump to the target and deal 200% weapon damage to all foes in radius 1, as well as dazing them for three turns. In addition, you free yourself from any stun/pin/daze effects upon jumping. Not a very hard-hitting prodigy as far as damage prodigies go, but if you�re short on mobility options and/or stun-clearing moves you could always try this one. Range 10 is a pretty hefty amount of movement.  Roll with It Additional Requirements: Have been knocked around at least 50 times. Type: Sustained Cooldown: 10 turns Usage Speed: Standard (100% of a turn) You have learned to take a few hits when needed and can roll with the tide of battle. So long as you can move, you find a way to dodge, evade, deflect or otherwise reduce physical damage done to you by 10-15%. Once per turn, if you get hit by a melee or archery attack, you move back one tile for free and gain 200% movement speed for a turn. The physical damage resistance scales with your Dexterity. Even with high Dexterity, the amount of physical damage reduced by this prodigy is pretty meh, and the constant movement backwards is just an annoyance for most characters, particularly melee ones. Could be useful if it was instantaneous (and thus you could insta-sustain it to mitigate a big blow you can see coming), but since it�s not it�s a pretty niche prodigy at best.  Swift Hands Additional Requirements: None Type: Passive You have very agile hands; swapping equipment sets (switching between your main set and offset) takes no time, nor does equipping/unequipping items. The free set/item switch may only happen once per turn. In addition, the cooldown for equipping activable items is removed � you may now activate an item�s effects immediately upon equipping it. Theoretically, one of the strongest prodigies in the game�if you�re willing to carry around the mountains of gear required to leverage it, and tedious enough to actually bother switching mid-battle. If you really must take this prodigy, it combos well with Device Mastery for lowering item cooldowns, and I Can Carry the World for a near-infinite supply of activable gear.  Through the Crowd Additional Requirements: Have had at least 6 party members at the same time Type: Sustained You are used to a crowded party. You can swap places with friendly creatures in one-tenth of a turn, can never damage or be damaged by a friendly or neutral character while this talent is active, and gain +10 to all saves and 3% global speed per friendly creature around you (up to 15% global speed). All friendly summons are also granted Through the Crowd. I�m not sure why this is a Dex-based prodigy either. The only classes that toss around enough summons to really leverage this one are the Summoner and Necromancer, though a case could be made for a Doomed with Curse of Nightmares or a Mucus-based Oozemancer. Pretty average as far as prodigies go, but there�s not that many summon-boosting prodigies, so if you�re a summon-based class and want to beef them up, might as well consider this one.  Vital Shot Additional Requirements: Have dealt over 50000 damage with ranged weapons Type: Activated Range: Depends on ranged weapon used Cooldown: 10 turns Usage Speed: Standard (100% of a turn) You fire a shot straight at your enemy�s vital areas, wounding them terribly. Enemies hit by this shot will take 450% shot damage and be stunned and crippled (lose 50% of their attack/spell/mind speed) for five turns. The chance to stun and cripple increases with your accuracy. The only damage-dealing prodigy ranged weapon-users get, but it�s a good one. 450% shot damage every 10 turns isn�t bad, and the stun/cripple chance is fairly high. Just be careful not to get pulled into it and one-shot yourself with your own Vital Shot.  Windblade Additional Requirements: Have dealt over 50000 damage with dual-wielded weapons Type: Activated Cooldown: 12 turns Usage Speed: Standard (100% of a turn) You spin around madly, generating a sharp gust of wind with your weapons that deals 320% weapon damage to all targets in radius 4 and disarms them for four turns. Note that despite requiring dual-weapon damage to unlock, Windblade can be used with any type of weapon. One of the more commonly-used damage prodigies, particularly for melee classes that lack good AOE attacks � radius 4 is a surprisingly large area, and even against a lone target 320% damage + disarm is a rather good deal.  Windtouched Speed Additional Requirements: Know 20 levels of equilibrium-using talents Type: Passive You are attuned with Nature, and she helps you in your fight against the arcane forces. You gain 20% global speed, 10% cooldown reduction on all skills and do not trigger pressure-based traps. Everyone loves global speed and cooldown reduction. Unfortunately, not everyone loves having 20 levels of equilibrium-using talents, which requires incredibly heavy investment in Harmony/Antimagic/Fungus/all of the above if you aren�t a Wilder. Worth considering if you can easily meet the requirements, though. Constitution-based Prodigies All these prodigies require at least 50 Constitution to unlock.  Armor of Shadows Additional Requirements: Have dealt over 50000 darkness damage Type: Passive You know how to protect yourself with the deepest shadows. As long as you stand on an unlit tile you gain (Con/2, min 30) armor, 50% armor hardiness and 20% evasion. Anytime you deal darkness damage, you will unlight both the target tile and your own. This one is just kind of a clunky one. Certainly, more armor is nice, but even if you can leverage this one you�ll be fumbling around in the darkness all the time, which is no fun even if you have good infravision.  Bloodspring Additional Requirements: Have let Melinda be sacrificed Type: Passive Cooldown: 12 turns When a single damage instance deals over 15% of your life, a torrent of blood gushes from your body, creating a bloody tidal wave for four turns that damages enemies hit for (100+(Con/3)) blight damage, knocks enemies back and heals you for 50% of the damage done. There are a couple of reasons why this is a bad prodigy. First off, the damage is fairly minor, which in turn means that the amount healed is pretty much negligible, especially with regards to endgame-level HP. More importantly, the additional requirements for this prodigy require completing an optional zone often thought to be the hardest in the game�and then failing at the last step. Skip this one.  Corrupted Shell Additional Requirements: Have received 7500 blight damage and destroyed Zigur with the Grand Corruptor Type: Passive Thanks to your newfound knowledge of corruption, you've learned some tricks for toughening your body... but only if you are healthy enough to withstand the strain from the changes. Increases your HP by 250, your Defense by (Con/3), your Armour Hardiness by 20% and your saves by (Con/3) as your natural toughness and reflexes are pushed beyond their normal limits. Your saves and Defense will improve with your Constitution. Average as far as prodigies go, but 250 HP is a pretty nice chunk of health. The bonus HP is about the only reason to take it, though � the Defense and saves aren�t much to write home about even with high Con.  Draconic Body Additional Requirements: Be close to the Draconic World (Consume both the Sandworm Queen Heart and an additional item we�ll be getting later in the game) Type: Passive Cooldown: 15 turns Your body hardens and recovers quickly. When pushed below 30% life, you instantly restore 40% life. This one isn�t as useful as it might seem at first � a good healing/regeneration rune and/or other methods of healing with decent healmod makes this largely redundant. Maybe take this one if you�re a wyrmic going for maximum dragonity.  Eternal Guard Additional Requirements: Know the Block talent (i.e. be a shield/saw user) Type: Passive Your Block now lasts one turn longer and does not end when hit. If you like blocking and use it often, pick this prodigy because it makes your blocks better. That�s about all that can be said about it, really. Combos well with the other shield talent.  Fungal Blood Additional Requirements: Be able to use Infusions Type: Activated Usage Speed: Instant (0% of a turn) Fungal spores have colonized your blood, so that each time you use an infusion you store X fungal power. You may use this prodigy to release the power as a heal (never more than 10�25% of max life) and remove up to 10 detrimental magical effects. Fungal power lasts for up to 6 turns, losing the greater of 10 potency or 10% of its power each turn. The amount of fungal power produced and the maximum heal possible increase with your Constitution and maximum life. This one�s a weird one. If you have the Fungus tree, there�s a certain quick infusion-cycling build that combos well with it, using the bonuses from Fungus to gain a lot of free healing and speed. It�s kind of micromanagey even at the best of times, though, and the fungal heal isn�t very potent.  Never Stop Running Additional Requirements: Know at least 20 levels of stamina-using talents Type: Sustained Sustain Cost: 10 Stamina Cooldown: 8 turns Usage Speed: Instant (0% of a turn) While this talent is active, you dig deep into your stamina reserves, allowing you to move without taking a turn. However, this costs 12 stamina for each tile that you cross. Kind of a niche prodigy, but could be a good escape talent on classes that lack them. The 12 stamina is per tile crossed, and this amount cannot be reduced in any way. The main issue is that there�s no �emergency stamina� button like there is for some other resources (the uncommon Second Wind excepted) � if you use this talent, you had better make drat sure that you can get to safety before your stamina runs out.  Spine of the World Additional Requirements: None Type: Passive Your back is as hard as stone. Each time that you are affected by a physical effect, your body hardens, making you immune to all other physical effects for 5 turns. An excellent prodigy, if not a very exciting one. Physical debuffs tend to be applied at a much higher rate and variety than other debuffs, usually because multiple effects are being procced half a dozen times by a rogue flurrying you in the face, for instance. Carry around a Wild infusion to cure the original physical effect that activated Spine, and you�re good to go. In addition, it has no cooldown, so it can be immediately reactivated upon wearing off if you�re hit with an additional physical debuff. Combos really well with classes that can self-inflict a light physical debuff on themselves to auto-trigger Spine, rendering themselves immune to more severe ones.  Subcutaneous Metallization* Additional Requirements: Have talent level 5 Thick Skin Type: Passive Cooldown: 10 turns When your life dips below 50% of your total life an automated process turns some of your lower skin layers (or other internal organs) into a thick metallic layer for 6 turns. While the effect lasts all damage done to you is reduced by a flat amount equal to 100% of your Constitution. This effect can only trigger once every 10 turns. If you�ve already gone constitution-heavy, this one�s alright. It has an uptime of over 50%, which is fairly good for a prodigy. Flat damage resistance tends to be less valuable the higher the difficulty and the further into the game you are, though. Magic-based Prodigies All of these prodigies require at least 50 Magic to unlock.  Aether Permeation Additional Requirements: Have at least 25% arcane damage resistance and have visited a zone outside of space (pretty much only the Archmage starting zone counts for this, but there�s a very rare late-game zone that also counts. It can�t really be counted on to appear, though.) Type: Passive You manifest a thin layer of aether all around you. Any attack passing through it will check arcane resistance instead of the incoming damage resistance. In effect, all of your resistances are equal to 66% of your arcane resistance, which is increased by 20% (and cap by 10%). The only build on which this prodigy is remotely achievable and/or practical is an arcane-focused Archmage. If you are going for that build, then this prodigy is okay, if not spectacular. Note that taking this prodigy means that all your other resistances max out at 52.8% (66% of your 80% arcane resistance) � on higher difficulties, stacking all resistances past this point is entirely achievable, at which point this prodigy might be actively detrimental.  Arcane Amplification Drone* Additional Requirements: Have gained the Tales of the Spellblaze achievement on your current character�s difficulty level and permadeath settings (purchase all the Tales of the Spellblaze lore pieces from the Elvala library) Type: Activated Range: 7 Cooldown: 10 turns Usage Speed: Instant (0% of a turn) You create an Arcane Amplification Drone at the selected location for 3 turns. When you cast a spell that damages the drone it will ripple the damage as 160% arcane damage of the initial hit in radius 4. This one�s a pretty fun one, converting high single-target damage to higher AOE damage. Prior to 1.5 the drone would also damage you, making this a near-unusable prodigy, but thankfully this has since been fixed. The drone has some limitations � since it counts as a neutral unit it won�t be affected by spells that don�t hurt friendlies, and it will only reflect direct damage, not damage over time effects. Still worth considering, though. Especially fun on an Arcane Blade or Corruptor.  Arcane Might Additional Requirements: None Type: Passive You have learned to harness your latent arcane powers, channeling them through your weapon. Your raw physical power is increased by 100% of your raw spellpower, your physical crit chance is increased by 25% of your bonus spell crit chance, and all your weapons gain an additional 50% Magic modifier. Arcane Might is one of those prodigies so good that people build around it � Berserkers and such will often invest in magic just for Arcane Might. The 50% Magic modifier on weapons is the main bonus, but the bonus physical power is useful too. A no-brainer for magic/melee characters like the Sun Paladin or Doombringer.  Blighted Summoning Additional Requirements: Have summoned over 100 creatures. The Alchemist Golem counts as 100 creatures for the purpose of fulfilling these talent requirements. Type: Passive You infuse blighted energies into all your summons. Your necrotic summons and wild-summons gain a bonus to Magic equal to yours. In addition, all your summons gain a bonus vim-based skill at talent level (your level * 0.06). The full list of skills would be too numerous to reproduce here. Until recently, Blighted Summoning was kind of bugged, and summons sometimes wouldn�t spawn with any vim to actually use their new talents. Has since been fixed, apparently. There�s not that many summon-boosting talents, so if you want to power them up, consider this one, but make sure to check exactly what skill your summons are going to receive. (Good luck hitting that 50 magic on an Oozemancer, though.)  Cauterize Additional Requirements: Have cast over 1000 spells and received at least 7500 fire damage Type: Passive Cooldown: 12 turns. Your inner flame is strong. Each time that you receive a blow that would kill you, your body is wreathed in flames. The flames will cauterize the wound, fully absorbing all damage done this turn, but they will continue to burn for 8 turns. Each turn 10% of the damage absorbed will be dealt by the flames. This will bypass resistance and affinity. Warning: this has a cooldown. Cauterize is another one of those prodigies that people will tell you to take regardless of class � it�s just that good. The main use of this is to mitigate gargantuan crits from out of nowhere, and it�s especially useful when fighting corruptors/gunslingers/archers. Remember to bring your own healing � Cauterize will only delay damage, and won�t mitigate it entirely.  Mystical Cunning Additional Requirements: Know how to either prepare traps or apply poisons Type: Passive Your study of arcane forces has let you learn a new way of applying your aptitude for trapping and poisons. If you know Poisons, you will learn Vulnerability Poison (an unresistable magical poison that does arcane damage, reduces all resistance by 10% and poison resistance by 50% while active) and if you know Traps, you will learn Gravitic Trap (a black hole trap that pulls enemies in radius 5 towards it while doing temporal damage). You also permanently gain +20 spell save. If you�re a rogue and are branching out into traps or poisons (and you should be, those are good trees), then this one is a pretty solid prodigy to go with. Gravitic Trap is a good way to gather enemies for either running-away or attacking purposes, and Vulnerability Poison makes stacking further debilitating poisons on enemies much easier.  Revisionist History Additional Requirements: Have time-traveled (used Timeport: Zero or any chronomancy spell that splits the timeline) Type: Activated Cooldown: 30 turns Usage Speed: Instant (0% of a turn) You can now control the recent past. Upon using this prodigy you gain a temporal effect for 20 turns. While this effect holds you can use the prodigy again to rewrite history. This prodigy splits the timeline. Attempting to use another spell that also splits the timeline while this effect is active will be unsuccessful. This one is a variant of our See the Threads spell. As long as we�re holding it, we can deactivate it to return us to the point when it was first cast at any moment. This one doesn�t get used much for the same reason as See the Threads � with experience, you can generally predict how situations will go when faced with a known threat, and it�s way too tedious to have it constantly active while scouting for unknown threats.  Spectral Shield Additional Requirements: Know the Block talent, have cast 100 spells, and have a Block value of over 200 Type: Passive By infusing your shield with raw magic, your block can now block any damage type. As with the other shield-based talent, there�s not all that much to be said about this one. If you like Block and use it often, go for it. Combos well with the other one, naturally. Runes count as spells for the purposes of this prodigy�s requirements.  Temporal Form Additional Requirements: Have cast over 1000 spells and visited a zone outside of time (The Temporal Rift or Timeport Zero) Type: Activated Cooldown: 30 turns Usage Speed: Instant (0% of a turn) You can wrap temporal threads around you, assuming the form of a telugoroth for 10 turns. While in this form you gain pinning, bleeding, blindness and stun immunity, 30% temporal resistance, your temporal damage bonus is set to your current highest damage bonus plus 30%, 50% of the damage you deal becomes temporal, and you gain 20% temporal resistance penetration. You also are able to cast these anomalies as spells: Rearrange, Temporal Storm, Flawed Design, Gravity Pull and Wormhole. While it might seem like the obvious choice for us, Temporal Form isn�t quite as useful on Paradox Mages as it is on other mages, who can use Temporal Form to switch their main damage type over to Temporal and damage enemies who resist their usual one. It�s certainly not a terrible prodigy for Paradox Mages by any means, just not as useful at it might immediately seem at first glance. Willpower-based Prodigies All these prodigies require at least 50 Willpower to unlock.  Draconic Will Additional Requirements: Be close to the draconic world (similar to Draconic Body) Type: Activated Fixed Cooldown: 15 turns Usage Speed: Instant (0% of a turn) Your body is like that of a drake�s, easily resisting detrimental effects. For five turns, no detrimental effects may affect you. If you�re willing to deal with a bit of management, Draconic Will is a solid anti-debuff prodigy, protecting you from any debuffs a full third of the time. Combos well with �frenzy� classes like Marauder or Sawbutcher, who can load up all their speed/attack buffs, Draconic Will up, and do as much damage as they possibly can during these five turns. Does not remove any debuffs already on you when activated.  Garkul�s Revenge Additional Requirements: Possess the Garkul artifact set (Garkul�s Helm and Garkul�s Teeth) and learn all five lore entries about Garkul Type: Passive Garkul's spirit is with you. You now deal 1000% more damage to constructs and 20% more damage to humanoids and giants. The unlock requirements for this prodigy can be hard to get naturally (Garkul�s Teeth are fairly rare), and the prodigy itself is a bit limited in scope. Only take this prodigy if you really want to defeat a certain postgame boss. This prodigy is actually pretty useful in the orc-based Embers of Rage campaign, where almost every enemy you face will be some variant of either a construct, giant or humanoid. You still have to learn the Garkul lore and possess the Garkul artifacts, though, and I�m not sure if the former is even accomplishable in the Embers campaign.  Hidden Resources Additional Requirements: Have killed a foe while close to death (at or below 1 HP) Type: Activated Cooldown: 15 turns Usage Speed: Instant (0% of a turn) You focus your mind on the task at hand, regardless of how dire the situation is. For 5 turns, none of your talents use any resources. This will apply even if you do not have enough resources to use the talent in the first place, unlike Highborn�s Bloom. It will also prevent talent failure from any source � high equilibrium or paradox, confusion, fear or crippling poison. A fairly underrated prodigy, in my opinion. Dependable and useful, if not especially exciting. The unlock requirements aren�t too difficult to get � find a common enemy, carefully attack yourself, activate a skill/infusion or wear gear that allows you to live below 0 HP, then nuke/smash the enemy in question. Necromancers will probably want to grab this skill ASAP to save their sanity, and never have to worry about running out of souls again.  Lucky Day Additional Requirements: Be lucky already (have +5 luck) Type: Passive Every day is your lucky day! You gain 40 Luck and a 10% chance to move out of the way of any attack. 40 Luck is equivalent to +16 accuracy and defense, +12% crit chance and +7 to all saves. Even with the 10% chance to avoid any attack, it�s still kind of meh.  Mental Tyranny Additional Requirements: Have dealt over 50000 mind damage Type: Sustained Usage speed: Standard (100% of a turn) Transcend the physical and rule over all with an iron will! While this sustain is active, 33% of all your damage is converted to mind damage. In addition, you gain +30% mind resist penetration and +10% mind damage. A pretty straightforward prodigy. You like mind damage? Then have some more. Naturally, it�s a popular pick on the mind-heavy Doomed and Solipsists, and possibly Possessors.  Meteoric Crash Additional Requirements: Have witnessed a meteor crash (Several talents/events count for this one. If you really want it, a late-game boss is guaranteed to have this prodigy, and witnessing his own meteor fulfills the requirements for this one) Type: Passive Cooldown: 15 turns When casting damaging spells or mind attacks, the release of your willpower can call forth a meteor to crash down near your foes. The affected area is turned into lava for 8 turns, and the crash itself will deal (100 + 5 * (Spellpower or Mindpower)) damage, split evenly between fire and physical. The meteor also stuns affected creatures for 3 turns. The damage and stun chance scales with your Spellpower or Mindpower, whichever is higher. A pretty fun prodigy for casters, though not the most efficient one unless you�re going heavy on fire/physical damage. The auto-meteor will not hurt you, but it will damage any of your summons in the area of effect. For fun times, pick this up as a Demonologist, level up Rain of Fire and pick up the Crown of Burning Pain for maximum meteor madness.  Range Amplification Device* Additional Requirements: Have a light radius of 10 or more Type: Sustained Cooldown: 10 turns Usage Speed: Standard (100% of a turn) Activate a special focusing device that extends all your ranged spells and psionic powers range by 3 (only works on those with range 2 or more and up to 10 max). The use of this device is very strenuous, increasing fatigue by 20% while active. The fatigue increase used to be a massive 60%, but the cost was since reduced. I�m not really sure who this one is for, since most mages/mindcasters don�t really have all that many problems with range (though extra range never hurt). Probably Doomed, I guess.  Spell Feedback Additional Requirements: Antimagic Type: Passive Cooldown: 9 turns Your will is a shield against assaults from crazed arcane users. Each time that you take damage from a spell, you punish the spellcaster with (20 + 2 * Wil) mind damage. Also, they will suffer a 35% spell failure chance (with duration equal to the cooldown of the spell they used on you). Note: this talent has a cooldown. If you�re already Antimagic you probably don�t really need additional anti-mage defenses, but a little more never hurt. The retaliation damage isn�t much, but the big draw is the spell failure chance � if the spell that procced it was one with a high cooldown, the mage in question is going to be feeling the effects of that 35% failure chance for a long, long time. Excellent when coupled with other talent-fail causing skills.  Unbreakable Will Additional Requirements: None Type: Passive Cooldown: 7 turns Your will is so strong that you simply ignore mental effects used against you. When off cooldown, this will automatically cure any mental debuffs on you. A cousin of Spine of the World. Not quite as all-round useful as that one, but it has its moments. If you�re getting really tired of being confused/silenced/hexed, consider this one. Cunning-based Prodigies All these prodigies require at least 50 Cunning to unlock.  Elemental Surge Additional Requirements: Have dealt over 50000 arcane/fire/cold/lightning/light/nature damage. Type: Passive Cooldown: 12 turns Surround yourself with an elemental aura. When you deal a critical hit with one of the above elements that does over (4*your level) damage, you have a 30% chance to trigger a surge effect based on the trigger element that lasts for five turns if applicable. Arcane -> 20% spell speed boost, Fire -> chance to cure all physical/magical debuffs, Cold -> turns your skin to ice, boosting physical resistance, armor and ice retaliation damage, Lightning -> turns you into pure lightning, causing you to ignore the first damage instance of each turn and move to an adjacent tile instead, Light -> magical shield, Nature -> protects from magical debuffs. A middling prodigy of varying use. Really depends on what your main damage type is, whether you find the associated elemental surge useful or not, and whether your crit chance is high enough to crit reliably for high damage.  Endless Woes Additional Requirements: Have dealt over 50000 acid/blight/darkness/mind/temporal damage Type: Passive Cooldown: 12 turns Surround yourself with a malevolent aura. When you deal a critical hit with one of the above elements that does over 150 damage, you have a 20% chance to inflict an additional five turn debuff on the target. Acid -> lasting acid burn that deals 6-40% of the initial damage per turn and reduces accuracy, Blight -> disease that deals 6-40% of the initial damage per turn and reduces a random stat, Darkness -> blindness, Mind -> Confusion, Temporal -> Slow A dark mirror of Elemental Surge. As before, it really depends on what your main damage type is, how useful you find the associated effect, and how often you can reliably crit. Note that if your main damage type is X, then chances are you already have a skill that applies the associated effect of X without having to go through all this Endless Woes stuff (for instance, we have multiple slow-inflicting skills as a PM).  Eye of the Tiger Additional Requirements: None Type: Passive Whenever one of your talents crit, a similar talent has its cooldown reduced. Mind/physical crits reduce mind-based/physical talent cooldowns by 2 turns, spell/steamtech crits reduce spell/steamtech talent cooldowns by 1 turn. Cannot affect the talent that originally triggered it. Another unimpressive but solid prodigy. Who doesn�t like faster cooldowns? Excellent if you can hit 100% crit rate or thereabouts early, will be triggering pretty much non-stop on a melee character with multi-hit moves.  Fast as Lightning Additional Requirements: None Type: Passive When moving with over 800% speed for at least 3 tiles in the same direction, you become so fast you can blink through obstacles as if they were not there. When moving this fast, you have a 50% chance to fully ignore an attack by displacing yourself. This can happen up to once a turn. Changing direction will break the effect. The main limitation of this talent is that in order to reach the 800% movement speed required, you pretty much have to stack multiple speed-boosting effects together, since it�s highly unlikely you�ll manage it with a single movement infusion. Even then, blinking through obstacles isn�t much of an effect, and the chance to ignore attacks barely ever comes into play (if you�re moving that fast, you can avoid pretty much every attack you can see coming by just running away).  Rakshor�s Cunning* Additional Requirements: Skeleton and Ghoul already unlocked, current character not undead Type: Passive Set up some cunning contingency plans in case of death. If you die you will have the option to raise back from the dead once, but at the cost of becoming a ghoul or a skeleton, at random. When rising this way you will lose access to your racial tree, if any, get refunded for half the points you spent in it and gain access to the ghoul or skeleton racial tree. As undead are not able to use infusions you will lose any that you may have upon turning. Absolutely no one uses this one. Being undead is a crippling enough penalty that most people would rather be dead than be one. Probably the only way to really leverage this one is to hit level 50 with a Cornac while saving up a ton of generics, then activate this skill and immediately invest in your racials for the best of both worlds. Even then, you�re still screwed over if you end up as a ghoul.  Secrets of Telos Additional Requirements: Possess the three staff parts of Telos Type: Passive You have obtained the three parts of the Staff of Telos and studied them carefully. You believe that you can merge them back into a single highly potent staff. The Staff of Telos is comprised of three parts. Two of them are associated with a late-game boss, the last is a very rare random drop. It�s highly unlikely that you�ll get this one without vaulting on a character that can actually use it. That said, if you aren�t averse to vaulting or get extremely lucky, have fun! The Staff of Telos is one of the most powerful artifact staves in the game, and a great addition to any mage. Note that the finished staff can�t be vaulted � you�ll have to rebuild it every time you want to use it on a new character.  Tricks of the Trade Additional Requirements: Have sided with the Assassin Lord in the Unknown Tunnels Type: Passive You have friends in low places and have learned some underhanded tricks. Gain 0.2 Category Mastery to the Cunning/Stealth Category (or unlock it, if locked), and either gain +0.1 to the Cunning/Scoundrel category or learn and unlock the category at 0.9 if you lack it. Additionally, all of your damage penalties from invisibility are permanently halved. Not only does this require siding with the Assassin Lord and giving up the merchant (whose true worth we have yet to see in this run, as a reminder), but the rewards are miniscule. Pass.  Tricky Defenses Additional Requirements: Antimagic Type: Passive You are full of tricks and surprises; your Antimagic Shield can absorb 10�50% more damage. The increase scales with your Cunning. At max level AM shield and max-level cunning, this is about an additional 40 elemental damage absorbed per turn. As with all flat-damage reduction talents, this quickly becomes less and less notable the higher the difficulty and the further you are in game. Go with Subcutaneous Metallization if you want a decent flat-damage reducing prodigy, Spell Feedback if you want a decent Antimagic one.  Worldly Knowledge Additional Requirements: None Type: Passive Learn any generic tree obtainable from escorts (tinker excepted) unlocked and at 0.9 mastery. Usual limitations apply: you can only learn the �betrayal� trees if you have no spells or runes, and can�t learn the magic ones if you�re Antimagic. This one essentially trades a prodigy point for a completed escort quest and a cat point. Can certainly be a good trade, depending on how lucky you�ve been with escorts and how critical said tree is to your build. Celestial/Light is the usual suspect, as you might expect. That�s about it for prodigies. By the time you read this, our first prodigy has already been chosen Hidden Resources, but I'm still open to suggestions for the second one, if anyone wants to chime in on that.
|
|
#
?
Jul 29, 2017 18:51
|
|
|
Appreciate the prodigy breakdown. No one ever seems to talk about why a particular one they run is good.
|
|
#
?
Jul 29, 2017 19:24
|
|

|
As far as I could tell, I had access to all the EoR prodigies before I purchased said expansion. Dunno if that's just some weird glitch on my part or they just changed it at some point. I've got it now so I can't really check anymore.
|
|
#
?
Jul 29, 2017 20:12
|
|
|
Tricky Defenses is pretty great on Normal and Nightmare, at least, and I got some decent mileage out of it with my Oozemancer on Insane, too. I ended up with ~200+ reduction to all non-physical, non-mind attacks from my Antimagic Shield, which translated into a lot less hurting happening. Even with Insane stuff happening, I was literally ignoring a lot of attacks like they just didn't exist. People usually warn me off Vital Shot, but last time I ran an Archer, it was pretty MVP, allowing me to one-shot-nuke a lot of enemies. Oddly enough, Meteoric Crash also comboed pretty well with that character for a pump of extra damage, plus, having it be physical/fire assisted in having a varied damage output(the only downside being that it would, yes, occasionally nuke my own oozes. I had so many of them I hardly noticed the difference, though). To me, the big draw of Lucky Day is the +12% crit chance, because if you can get to the point where crits are essentially guaranteed, you're gonna be getting close to doubling your damage/healing output(from healing talents, anyway, not infusions and activateable items, obviously). PurpleXVI fucked around with this message at 20:53 on Jul 29, 2017 |
|
#
?
Jul 29, 2017 20:49
|
|
|
PurpleXVI posted:Tricky Defenses is pretty great on Normal and Nightmare, at least, and I got some decent mileage out of it with my Oozemancer on Insane, too. I ended up with ~200+ reduction to all non-physical, non-mind attacks from my Antimagic Shield, which translated into a lot less hurting happening. Even with Insane stuff happening, I was literally ignoring a lot of attacks like they just didn't exist. People usually warn me off Vital Shot, but last time I ran an Archer, it was pretty MVP, allowing me to one-shot-nuke a lot of enemies. Oddly enough, Meteoric Crash also comboed pretty well with that character for a pump of extra damage, plus, having it be physical/fire assisted in having a varied damage output(the only downside being that it would, yes, occasionally nuke my own oozes. I had so many of them I hardly noticed the difference, though). On Insane most of my characters have between 75% and 100% critical rate by endgame, it's a really marginal ability. Steamroller is a little special in that the +100% all damage modifier it gives might be the strongest in the game outside of Garry's revenge. While it's tough to keep it rolling against uniques and bosses you can absolutely tear through rates since their HP usually tops around 1000-1500. Bouncing around with a steamroller marauder was among my most fun endgames.
|
|
#
?
Jul 30, 2017 01:59
|
|
|
Vital Shot didn't exactly get fixed, but Archers at least now have a talent that makes them immune to their own projectiles so it's a must-have for them.
|
|
#
?
Aug 2, 2017 08:44
|
|


|
I like the Bulwark. Why won't it get love?
|
|
#
?
Aug 13, 2017 01:56
|
|

|
I'm not an expert, and they're my only win, but they do seem a nice safe way to get into the game. The defense keeps you alive in the early game while you figure out how to use counter strike and assault. They get boring though, with later fights just being relatively low damage bump fests. They also run into damage walls hard, especially against healing enemies, where they just can't output enough damage to get it done.
|
|
#
?
Aug 13, 2017 06:39
|
|


|
Scaramouche posted:I'm not an expert, and they're my only win, but they do seem a nice safe way to get into the game. The defense keeps you alive in the early game while you figure out how to use counter strike and assault. They get boring though, with later fights just being relatively low damage bump fests. They also run into damage walls hard, especially against healing enemies, where they just can't output enough damage to get it done. They're basically a trap class, according to the main TOME 4 thread. Most of their tankyness comes from wearing the heavier armors, but that's not even class specific so you could just take it on a character who is better at killing things and get like 85% of the benefit of being Bulwark without the drawbacks. The dev in the main thread considers Rogue to be a better "learning" melee because while it is more complex, those extra options let you actually interact with more of the systems in the game and have solutions to problems beyond "hope my numbers are high enough to not die, and that eventually I can whittle this down". A far better choice for starter character is Archer, because they're strong as hell, ranged, and fairly hard to build wrong.
|
|
#
?
Aug 13, 2017 07:59
|
|


|
After some thought, I�ve decided to go with Hidden Resources as our first prodigy. It�s not the most exciting one, but being able to protect against both confusion and anomalies means that it�ll come in very handy in a short while. Our second prodigy might be more interesting if we�re still doing well by that point. Unfortunately, while we easily have enough willpower for it (it�s our second-most important stat after Magic, after all), we don�t have the second requirement yet. We�ll need a way to survive below 0 HP, and an enemy that poses no threat to us whatsoever. The first can be done without too much trouble, the second might be a little difficult to find in the next couple of zones.  In order to accomplish the first part, it�s time to switch out our Heat Beam rune for a medical injector. Medical Injectors have two components: cooldown mod and efficiency. We don�t have a magic-scaling one as of yet, so we�ll go with the white one for now � the cooldown mod is the lowest of them all. 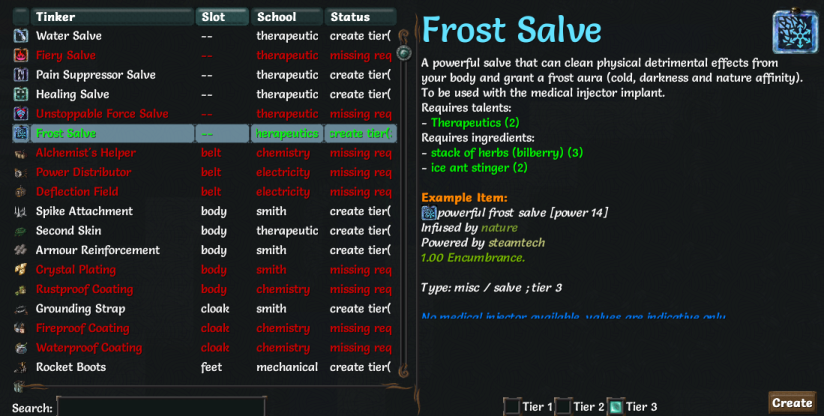 Once we have the medical injector implanted, we can use Salves from now on. As with tinkers, they require the correct ingredients to be made, with the tier of the salve dependent on ingredient tier. Unlike tinkers, salves can be used while still in our inventory, rather than having to be actually equipped. However, using a salve requires a free Medical Injector, and puts that particular medical injector on cooldown when used. As a result, a medical injector is a multipurpose cure-all, but salve use must be carefully rationed out in battle. As you can see, there are six types of salves: - Healing Salve: restores health, plain and simple. Good in an emergency, but there�s another tinker that makes this one largely redundant. - Pain Suppressor Salve: Reduces damage taken and allows us to survive with negative health for a few turns. Sort of a combination of a wild and heroism infusion, but nowhere near as good or as potent. - Water/Frost/Fiery Salve: Cures 1-3 mental/physical/magical debuffs depending on tier, and grants a small amount of affinity to the associated elements for a few turns. Unfortunately, making a Fiery Salve requires an especially rare ingredient that turns up pretty early in the EoR campaign, but won�t show up until late-game in this one. - Unstoppable Force Salve: Boosts all your saves by a massive amount, rendering you almost debuff-proof for a few turns. However, requires a water, frost and fiery salve of the same tier to manufacture and talent level 5 in Therapeutics. May or may not be useful depending on build. We�ll see how things go � we can�t make this one until we can make Fiery Salves, anyway. 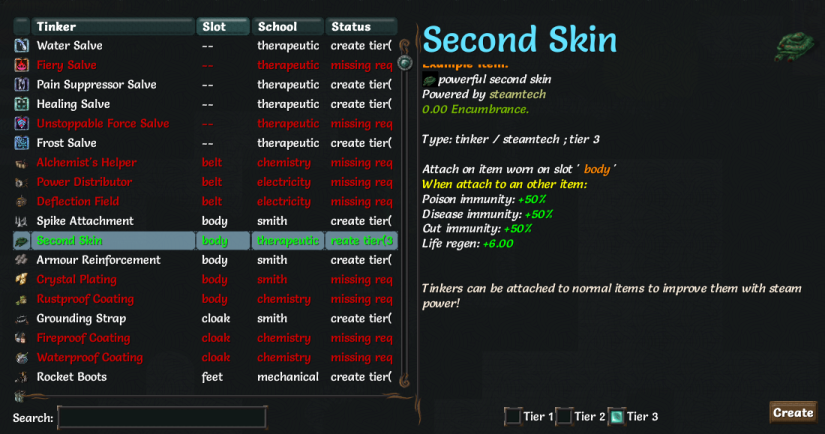 We also create the Second Skin tinker, giving us a bonus to life regen, disease and poison immunity. 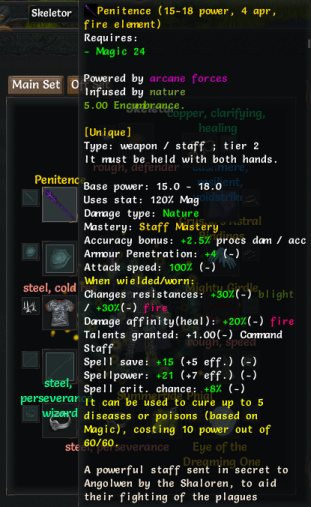 Finally, we equip Penitence. As mentioned earlier, it�s a pretty neat staff with a couple of tricks up its sleeve: 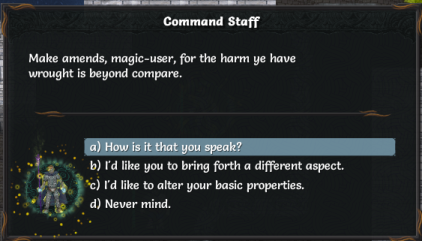 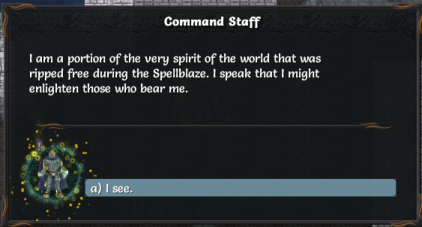 For one thing, we can chat with it when we use Command Staff. 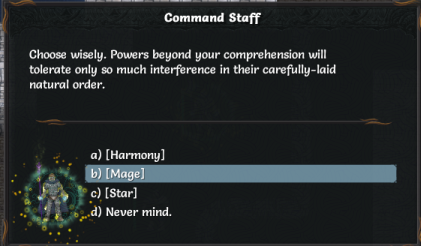 Secondly, it has a different set of elements that it can be attuned to. The staff will not let us attune it to Acid or Blight damage, but it can be attuned to Mind or Nature damage � the only staff to do so. However, as mentioned earlier, Penitence is special in that it grants no bonus to the attuned element, but grants additional damage resistance and affinity instead. 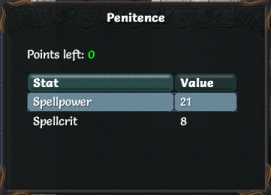 Thirdly, we can shuffle points between its spellpower and spellcrit. We crank down spellcrit a bit but crank up Spellpower, so that we can land Attenuates more easily. 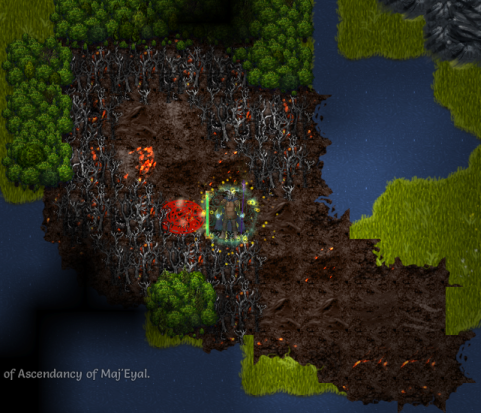 A few more adjustments, and we�re ready to go. This ominous-looking area is the Mark of the Spellblaze. Believe it or not, it�s probably the easier of the two locations we�re tackling in this update. 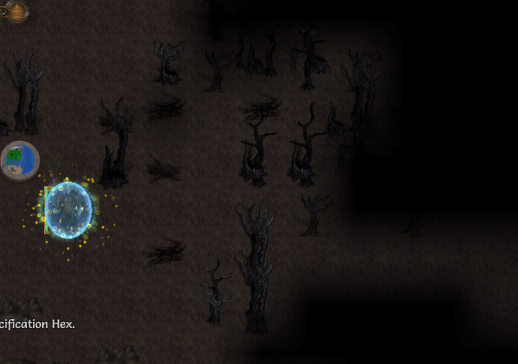 Mark of the Spellblaze consists of two floors, in the �wide-open plain broken up by trees� vein we�re all familiar with by now. So what makes it so dangerous? 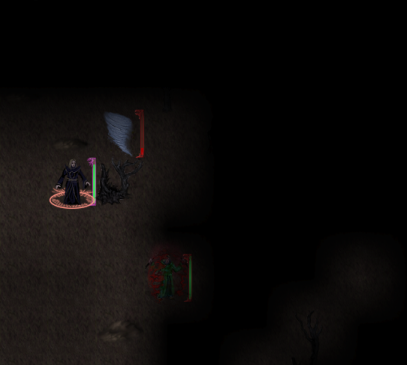 These guys. You know how one elven corruptor was a major threat back in the Rhaloren camp? The Mark of the Spellblaze consists of practically nothing but Elven Corruptor variants.  And of course, we�ll be facing multiple varieties of them at once. The one to the northwest is an elven blood-mage, a corruptor focusing on Corruption/Blood. Thanks to their AOE Blood Grasp and Blood Boil, there�s no way to effectively dodge all their attacks unless we stay very, very far away from them. The invisible one underneath us is an Elven Cultist. They can teleport us with Dark Portal, blast us with diseases, and cast tremendously powerful Soul Rots thanks to their Dark Ritual sustain, which boosts their critmult by about 33%. The one to the right is a straight-up Elven Corruptor, the most powerful variety. Elven Corruptors focus on raw blight damage, and Bone Shield ensures that most of our early attacks will just bounce right off.  This field effect is a new one. The lava floor burns us slightly, but also grants us Fire Haven. It�s a double-edged sword, boosting our fire resistance by massive amounts but lowering our blight resistance. Naturally, we want the latter and not the former for now, so we�ll have to avoid these.  Elementals like faeros and gwelgoroths are also common here. Not much of a threat compared to the elven corruptors. They belong to different factions and will fight each other on sight, which can come in handy. 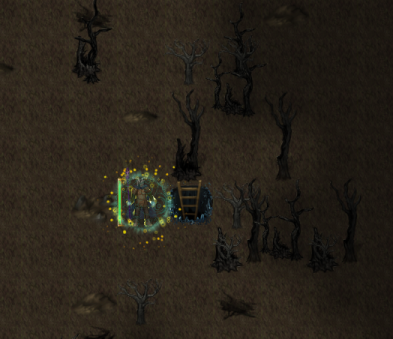 We find a neat feature � an entrance to a damp cave. The Damp Cave is a vault(?) that can show up in certain areas, most commonly in the Old Forest. 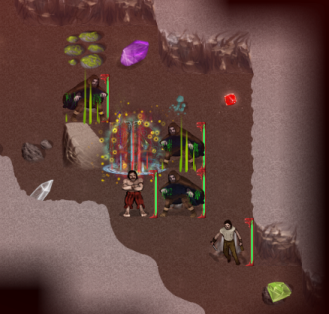 The Damp Cave is filled with rogues of all shapes and sizes. Thieves, bandit lords, rogue sappers...you get the idea. This might be a good time to try for Hidden Resources.  With careful use of Pain Suppressor salve, we pull through and nab the Hidden Resources requirement.  As you might imagine, any area in which we can lose almost all our health in a couple of turns from just common enemies can be�interesting. Things get a little messy, but we pull through and clear out the damp cave. There�s not much of worth in there aside from some gems, though. Time to move on.  On the second floor, we run into this interesting feature. This cultist-monolith combo can turn up in a few specific zones, such as this one and in Daikara. There are several cultists scattered around and standing by blue monoliths, and all are neutral unless attacked. 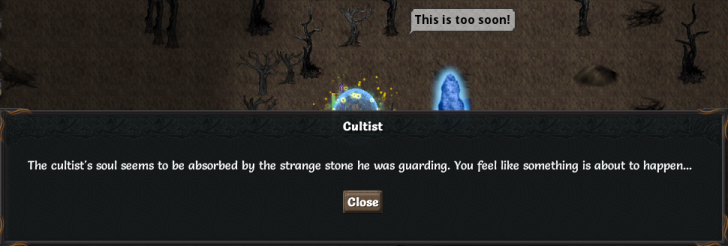 If we kill one, a 200+ turn timer starts and all the other cultists on the floor turn hostile. We have two choices � either kill as many as we can, or try to avoid them. As the timer goes by, any surviving cultists will sacrifice themselves to power up their respective monolith.   Once the timer hits zero, Shasshhiy�Kaish the demon queen is summoned at the monolith where the first cultist was killed. Her power scales with the number of monoliths activated (and thus, inversely with the number of cultists killed). However, the reward she gives also scales with her power � if you want the best loot, it�s best to kill just one cultist and wait. Sassy likes to open with a mix of hexes and melee attacks, but when pressed will use her powerful meteor-summoning spell, capable of annihilating the unprepared in one shot. Her second most troublesome attack is Inner Demons, but she rarely ever uses that move compared to her other ones.  Luckily, we finish her off before the meteors start falling.  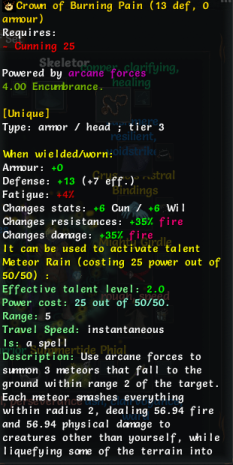 For our efforts, we�re rewarded with the Crown of Burning Pain. The Crown is a special artifact � in addition to being able to collect multiple copies of it in the same game (depending on monolith luck), its effects also scale with how strong Sassy was when you killed her. As we killed her at her strongest, we get its full effect � 35% fire resistance and bonus fire damage, and the ability to activate it to summon meteors every 35 turns. It�s a pretty fun hat on the right classes. 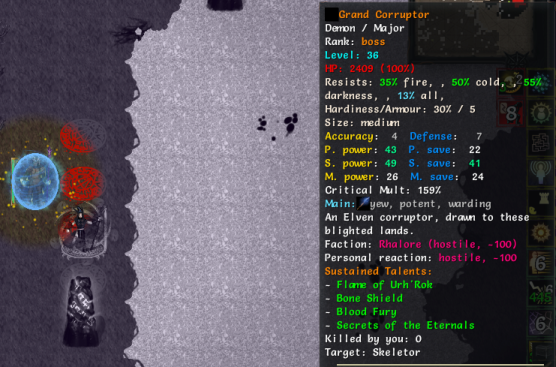 We continue slowly making our way through the floor, eventually ending up at the Grand Corruptor. As you might have guessed, he�s a high-leveled corruptor with almost every corruption spell up his sleeve. We�ll have to prepare carefully for the battle. 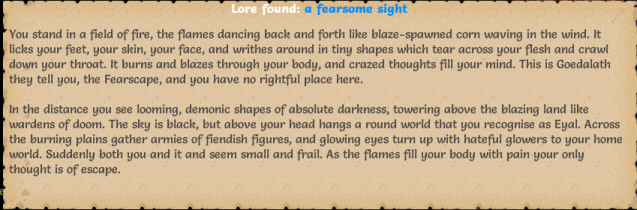  Good thing we were prepared, too. Fearscape is a spell available to Corruptors, Doombringers and Demonologists, and probably their most iconic ability. Fearscaping/getting Fearscaped by an enemy drags you both into a small fiery arena, where the flames of the Fearscape will burn any non-demon but heal demons by a small amount. (The fearscape spell tree also grants you a sustain that transforms you into a demon, so for the most part that�s no issue for the user.) Fearscape is a mildly expensive sustain � it costs 5 vim to initiate but drains an additional 1 vim per turn. However, the rewards are well worth it. The raw fearscape damage isn�t all that much to speak of in itself � the main advantage of it is isolating an enemy one-on-one, in a small arena where they have little room to maneuver or escape. The health restoration is also helpful, and fearscaping a common enemy to wait out a debilitating debuff is a useful tactic on occasion. 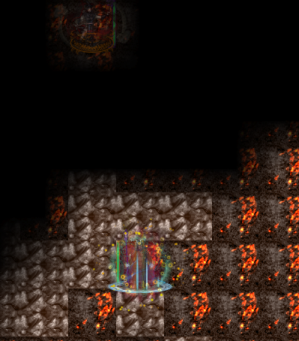 Of course, another way to mitigate the Fearscape is through just tanking the damage. Thanks to the bonus fire resistance + affinity from Penitence, we can outheal the Fearscape damage, and chill it in pretty much indefinitely. I don�t know why the Grand Corruptor doesn�t feel like engaging us (that�s him hiding up there), but it�s his loss if he doesn�t make a move. His vim pool is large but not infinite, and unlike many other vim-using enemies, he doesn�t regenerate it (although even if he did, eventually the cost of sustaining the Fearscape would take its toll). The only way he can restore it is by hitting us with Drain, which we can dodge with relative ease. 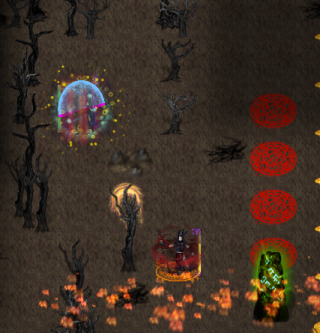 He decides to remain in hiding, promptly running out of Vim and returning us to the Mark of the Spellblaze. Without vim, he�s no real threat, and we can leisurely whittle him down. 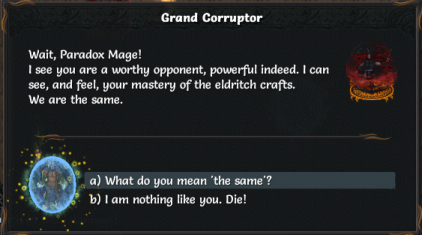 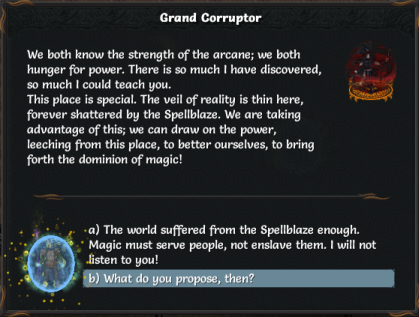 When reduced to under half health, he will initiate this dialogue if you have at least 10 talent levels in spells or spell-like abilities. 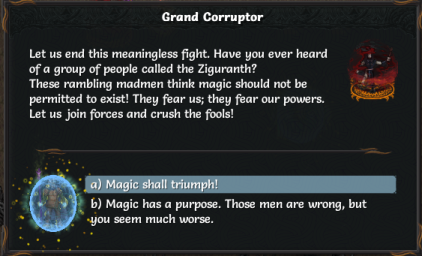 We have a choice: do we kill him, or do we help him in his quest to finish off Zigur? On one hand, we�ve already done a pretty good job with the former, and we should probably stop his mad world domination scheme. On the other hand, Zigur patrols are annoying as gently caress.   Accepting his quest teleports us to Zigur, with a few elven corruptor allies to back us up. 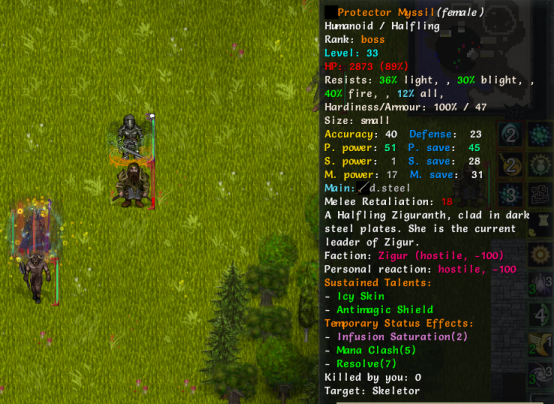 A few Ziguranth warriors stand in our way, but the real threat is Protector Myssil, a Halfling warrior with a mix of summons and wyrmic wild-gifts, as well as powerful Antimagic abilities and up to four antimagic-based prodigies. It�s a pretty annoying fight (we keep getting silenced all the time), but we manage to muddle through, eventually wiping her from existence with Echoes from the Past. The friendly corruptors don�t help much, but they prove capable distractions, at least.   We recover the Ring of Growth from her. It�s an early-game artifact ring that grants nature bonuses. Comes in handy sometimes if you need the bonus healmod and life regen.  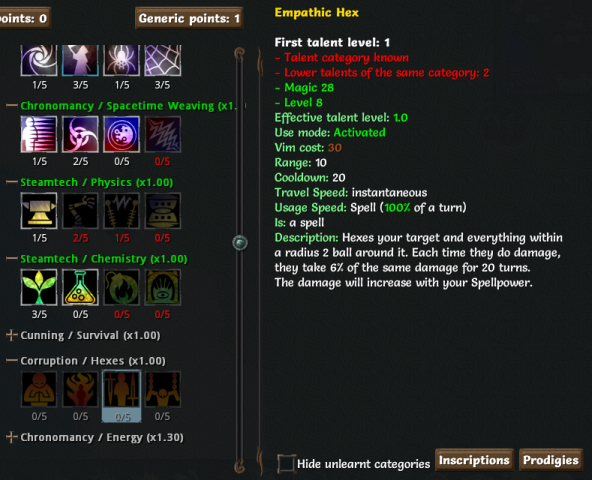 As a reward for helping him out, the Grand Corruptor teaches us the Hexes Tree. Hexes are large AOE spells that apply a debilitating 20-turn mental effect on any creature caught in the blast radius. Burning Hex increases talent cooldowns and inflicts fire damage based on resources used, Empathic Hex causes enemies to take retaliation damage based on their damage done, and Pacification Hex attempts to reapply daze every turn it lasts. Domination Hex is the odd one out � a single target spell that just turns the target unit friendly for 3-7 turns. Fortunately, it�s off-limits to enemies. As a vim-based class, Hexes are quite useful crowd-control spells on classes that tend to lack them. As a non-vim-based class, Hexes cost way too much to be useful. Without the more efficient vim-gathering methods, the only way to restore vim is through killing enemies, which is extremely unreliable. We could make it work with Hidden Resources, but it�s not really worth the bother.  Anyway, this is Zigur. These shops would be selling equipment to us, had we not killed all the shopkeepers. Zigur is a decent place to find good equipment if you can access it, but most of it is antimagic, and you�ll find no arcane-based egos here. 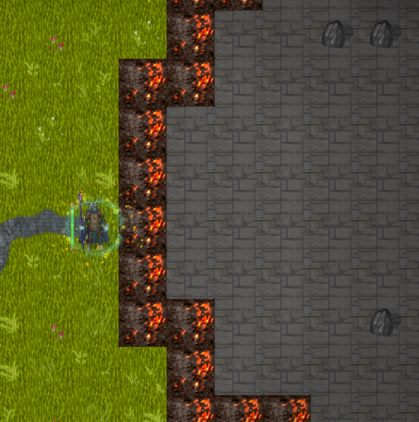 The arena in which the antimagic test is conducted, should we choose to take it. 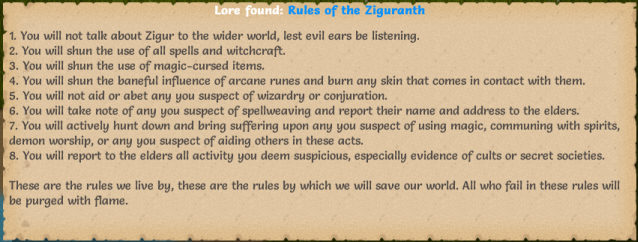 The signboard out by the front. Cheery place, Zigur.  Now that we have no more use for the Grand Corruptor, we promptly finish him off and stop his mad scheme of world domination. We don�t get anything out of it, though. Unfortunately, killing Zigur doesn�t seem to halt the spread of Zigur patrols. The Zigur cult is too decentralized, presumably. Oh well. 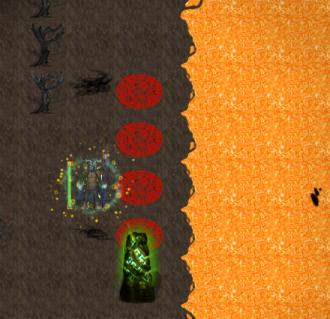 There�s one other thing we can do here. If we brought the Sandworm Queen�s Heart to this corrupted altar, we could corrupt it to gain the Corrupted Heart. Eating it grants the same bonuses, but gives the Corruption/Vile-Life tree as a locked tree instead of the Harmony tree. Both trees are not especially useful, so it�s really all up to you as to whichever one you prefer. We can only gain Draconic prodigies as an undead by consuming the corrupted heart, but we�re not planning on grabbing either one anyway. Anyway, now for our next destination. 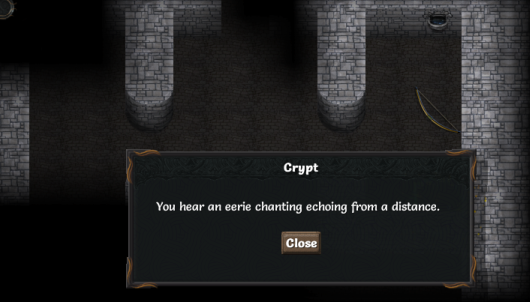 The Dark Crypt entrance appears at about level 24. As with the merchant quest, the Dark Crypt will trigger randomly while wandering on the world map, with a hidden entrance suddenly revealing itself to you. Unless you�re extremely confident and well-prepared, it�s generally best to just quietly ignore it if you trigger it that early � the crypt is usually a death sentence on higher difficulties. If you don�t care for the method of entry, there are addons that turn it into a proper dungeon entrance, allowing you to put it off until you�re good and ready. 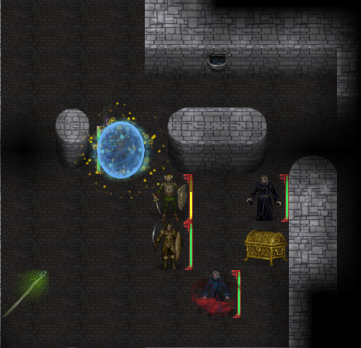 So what makes it so dangerous? Pretty much the same thing as Mark of the Spellblaze � elven corruptors by the boatload, in a tiny room that gives you very little room to maneuver. Elven warriors are also common, but as with the Rhaloren Camp, they�re mostly just there to keep you occupied while the corruptors do their work. 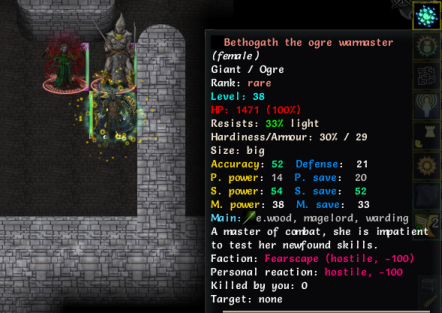 Ogres are also common here. Probably the only area where you�re likely to run into them, outside of the Conclave Vault.  Here�s where Gravity Well comes in handy � the damage over time shears away at the corruptor�s Bone Shields, plus the constant application of Slow causes enemy Shaloren to waste Timeless on curing it. 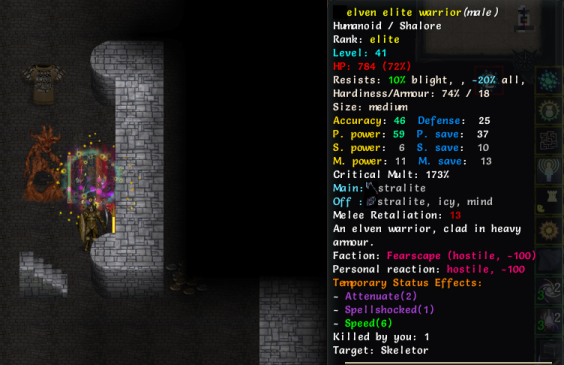 A new type of elven enemy, the Elven Elite Warrior is one tier above the regular warrior. They�re mostly just a standard bulwark, though, and not much of a threat by themselves. Also, there�s a demon statue. 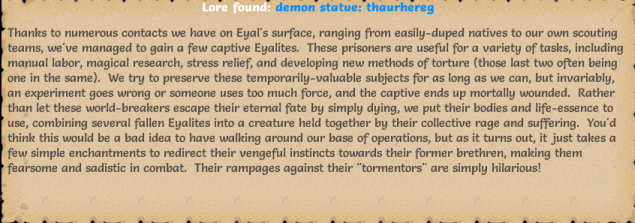 It stunned us when we touched it. Rude.  On floor three, we find some necromancer poetry. Decent, but it�s no Club Club Club. 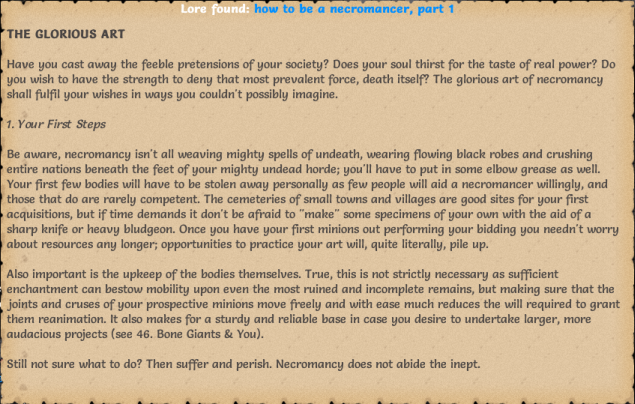 Also, more �How to be a Necromancer�. Quite a prolific author, our necromancer. 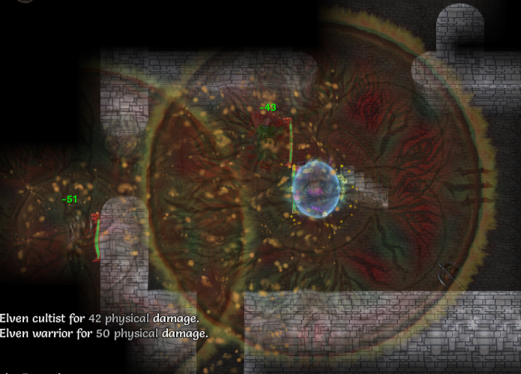 One of the main reasons why corruptors are so dangerous: Dark Portal. Dark Portal teleports the user to the target location, while all enemies in radius 3 of the target will be teleported to the user�s origin, and catch a random disease on top of that. In addition to being debilitating in and of itself, getting teleported all over the place means you have very little control over your movement. Fortunately, we�re protected from that thanks to our Kinetic Stabilizer, a tinker that attaches to our boots and renders us completely immune to enemy teleportation effects. If we don�t traverse the Dark Portal, we can�t catch any diseases. You can see why tinkers are so useful. 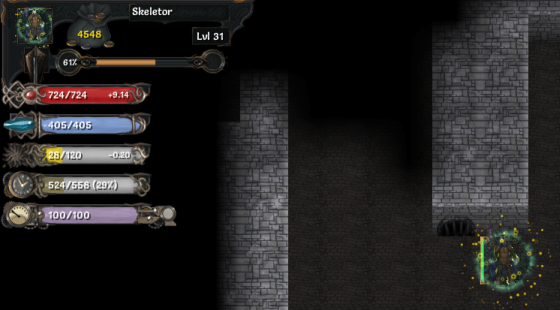 Here�s where Hidden Resources is coming in really handy. Even with almost maxed-out blight resist, we�re still taking enough damage to boost our Paradox to dangerous levels in almost every battle. Even though the failure chance might not look that high thanks to our Willpower, if our Paradox goes over 600 then we start hitting major anomaly territory, which can�t be held by Twist Fate. 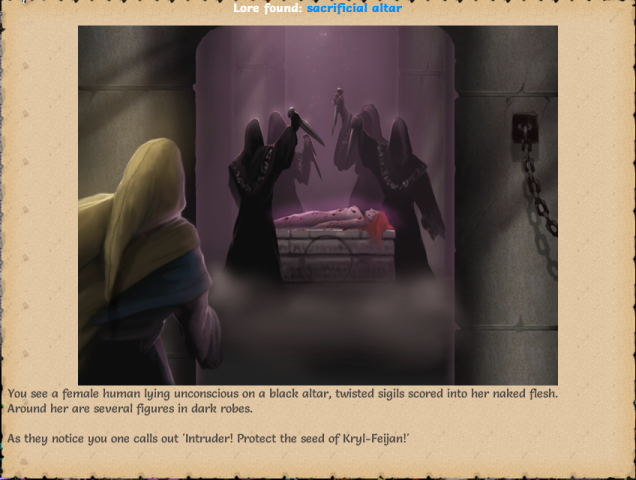 Floors 1-4 of the Dark Crypt are a standard dungeon crawl. Floor 5, however, is another thing entirely. 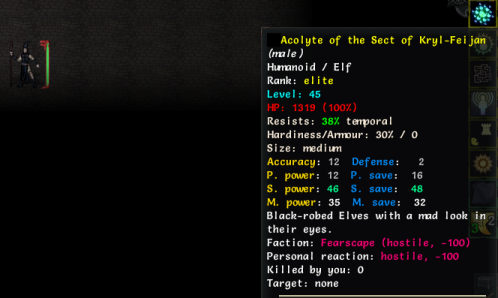 We now have 20 turns to defeat all four Acolytes of Kryl-Feijan. They�re not especially strong compared to some of this other dungeon�s denizens, but they are decently tough and will use Invisibility to run away. We get a small amount of additional time every time we kill one, but not much. I�m not certain we can manage it, to be honest. As a Paradox Mage, our main weapon is survivability and utility. We fall a little short in the pure damage department, but we�ll do our best. 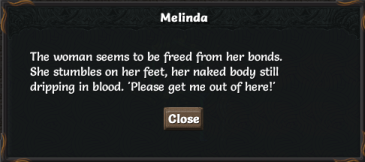  Hey, we did it! With the Acolytes freed, all we have to do is escort Melinda out. She�s a reasonably tough escort, but this is still the Dark Crypt, so that can be a bit of a challenge. If we had failed to kill all of them within the time limit, the demon Kryl-Feijan would have been summoned through Melinda�s body. Compared to some of the other enemies in the dungeon, he�s actually not too tough by comparison � he has some basic darkness/fire spells, but nothing we can�t handle at this point. Defeating Kryl-Feijan is one of the requirements for the useless Bloodspring prodigy. 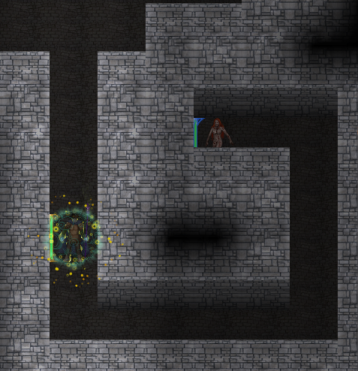 Melinda is decently tough for an escort, but this is still the Dark Crypt, so actually escorting her to the exit is still a bit of a challenge. However, there�s a bit of a trick with rescuing Melinda, which almost everyone takes advantage of. Unlike regular escorts, Melinda will follow you around rather than charge ahead, standing still if you move out of sight. As a result, you can just dig a spiraling path in the side of the starting room, lead her in and then teleport/speed boost away. Melinda will stay there, and you can wander off, clear out the rest of the dungeon, then come back for her. 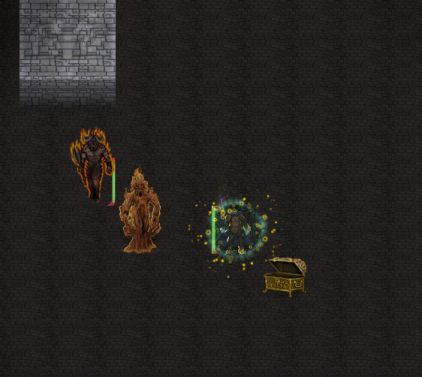 This demon statue is just a forge-giant � we�ve seen those before. It summoned an uruivellas on us, a demon akin to a souped-up minotaur with extra fire skills. Bulky, but not much of a problem. 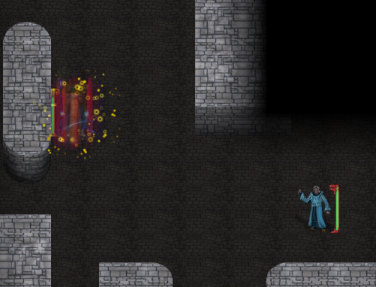 Clearing out the path to the exit. Elven Tempests and Mages are common alongside the corruptors. Their spells are not to be underestimated � don�t consider yourself safe just because you�ve maxed out your blight resist.   And once the path to the exit is clear, it�s a trivial matter to escort Melinda there. She tends to fall out of sight if your movement speed is too high, though, so make a note of that. 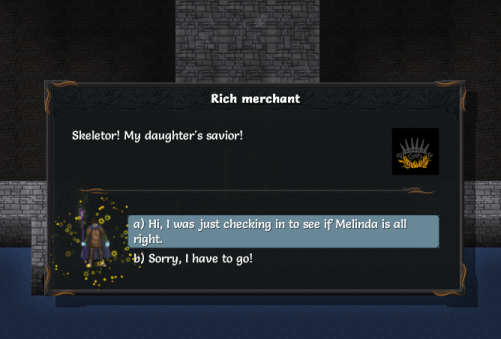 Now that Melinda has been rescued, we can check out this shop at the bottom of Last Hope. Prior to the completion of this quest, we�d just be turned away if we tried to interact with it � a sad voice would inform us that the store was closed. 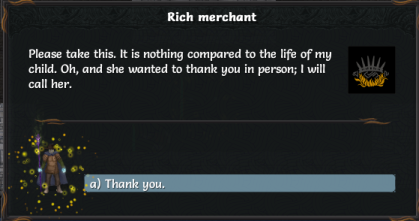 Completing the quest grants us a random artifact � hardly worth the trouble, in most cases.  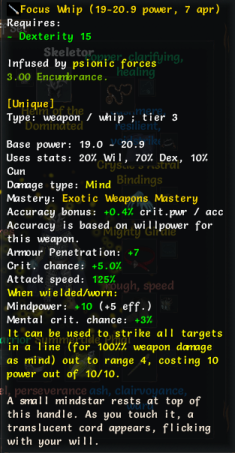 The Focus Whip is one of the few whips in the game, and that�s about all that can be said about it, really. Mindpower users are generally better off with a regular set of mindstars, and there are very few whip-reliant exotic weapon builds. Still, could work on some classes, if it hasn�t been outclassed by the time you find it. Anyway, that�s about it for this update. We�ll be taking on the biggest and baddest dungeon in Maj�eyal in the next one, so look forward to that.
|
|
#
?
Aug 13, 2017 11:13
|
|
|
Inadequately posted:Once the timer hits zero, Shasshhiy�Kaish the demon queen is summoned at the monolith where the first cultist was killed. Her power scales with the number of monoliths activated (and thus, inversely with the number of cultists killed). However, the reward she gives also scales with her power � if you want the best loot, it�s best to kill just one cultist and wait. quote:Defeating Kryl-Feijan is one of the requirements for the useless Bloodspring prodigy.
|
|
#
?
Aug 13, 2017 12:48
|
|


|
MagusofStars posted:Defeating Sassy and Kyrl in the same game are also part of the requirements to unlock the Doomelf race for use. It's a fairly interesting race, so it's probably worth doing. Doomelves are great, yeah. It's one of those things that's only worth doing once, though.
|
|
#
?
Aug 13, 2017 12:58
|
|
|
Oh man I look forward to future updates on the Melinda "storyline."
|
|
#
?
Aug 13, 2017 14:42
|
|
|
Welcome back! This LP played a good part in getting me to finally start playing the game. ")
|
|
#
?
Aug 13, 2017 17:32
|
|
|
   What?!? Just because you rescued me from a moderately-to-extremely gruesome death, you think that entitles you to take liberties?! What?!? Just because you rescued me from a moderately-to-extremely gruesome death, you think that entitles you to take liberties?! She looks at you cheerfully. Just kidding. I would love that!  This was such a lovely idea! I have had a wonderful time with you today. This was such a lovely idea! I have had a wonderful time with you today.She looks longingly into your eyes. You lean in close to kiss her... Just before your lips touch, you get the feeling that something is very wrong.  Melinda begins to glow with an eerie aura. Suddenly, she unleashes a powerful wave of blight!  What just happened?! What just happened?! I�m sorry I didn�t manage to protect you and as you were about to die, you�fired a powerful wave of blight. But I have never cast a spell in my life! There must be some of that demon�s taint still inside you. This is terrible! What is happening to me?!? You must help me! I will. We will find a cure for this together. I�m a very lucky girl, am I not� This is the second time I�ve had you to save me now. Over the past few weeks you�ve been very important to me, and I�m glad to have you. This is certainly not the place to talk, though, let�s go. You�re right, let�s get out of here. I�m sorry I didn�t manage to protect you and as you were about to die, you�fired a powerful wave of blight. But I have never cast a spell in my life! There must be some of that demon�s taint still inside you. This is terrible! What is happening to me?!? You must help me! I will. We will find a cure for this together. I�m a very lucky girl, am I not� This is the second time I�ve had you to save me now. Over the past few weeks you�ve been very important to me, and I�m glad to have you. This is certainly not the place to talk, though, let�s go. You�re right, let�s get out of here. I have come across a strange thing indeed. I have come across a strange thing indeed.You tell him about Melinda.  Demonic taint. Yes, I have a way to help in the archives. However, this is a long process, the subject will need to live here for a while. She will have to spend eight hours per day in the regeneration tank. This is great news! I will tell her at once. Demonic taint. Yes, I have a way to help in the archives. However, this is a long process, the subject will need to live here for a while. She will have to spend eight hours per day in the regeneration tank. This is great news! I will tell her at once. About what happened on the beach, I think I have found something. Please tell me you can help! Yes, I think so. Sometime ago I assumed ownership of a very special home� About what happened on the beach, I think I have found something. Please tell me you can help! Yes, I think so. Sometime ago I assumed ownership of a very special home�You tell her all about the Fortress. An ancient fortress of a mythical race?! How exciting! And you say it could cure me? The Fortress seems to think so. I know this might sound a bit�inappropriate�but you would need to come live there, at least for a while.She looks at you cheerfully. Ah, the plan to sleep with me is finally revealed! Shh you dummy, I thought we were past such silliness. I will come, both for my health and because I want to be with you.She kisses you tenderly. Then, m�lady, if you will follow me� Are you settling in fine? Well, let me say that that tank is dreadful, but that butler says it is the only way. I am starting to feel better, too. However, I must say I get bored around here a little. Do you remember, I once told you I want to open my own little shop in Derth? Maybe we could find a way to get me there during the day and return for my treatment during the night? Oh yes, I think we could arrange that. Shadow, would it be possible to create a portal for her? Yes, master. I will arrange for that right now. She will be able to come and go unnoticed. Oh, this is great, thank you! My own secret lair, my own life. I only wish your happiness, I am glad to provide. Are you settling in fine? Well, let me say that that tank is dreadful, but that butler says it is the only way. I am starting to feel better, too. However, I must say I get bored around here a little. Do you remember, I once told you I want to open my own little shop in Derth? Maybe we could find a way to get me there during the day and return for my treatment during the night? Oh yes, I think we could arrange that. Shadow, would it be possible to create a portal for her? Yes, master. I will arrange for that right now. She will be able to come and go unnoticed. Oh, this is great, thank you! My own secret lair, my own life. I only wish your happiness, I am glad to provide.Looking all glamorous, she comes closer. Now, my sweet one, where were we the last time? My memory fails me, care to help me remember? Let's never speak of this again.
|
|
#
?
Aug 13, 2017 18:02
|
|
|
voted 5 went hog wild
|
|
#
?
Aug 13, 2017 18:07
|
|
|
Holy crap. That was absolutely worth the wait (although I guess it wasn't that long a wait after the last update but whatever). Magical.
|
|
#
?
Aug 13, 2017 19:08
|
|
|
A rogue-like is the last place I would expect a wish-fulfillment scenario. Kudos on the presentation, giving it the seriousness it probably deserves.
|
|
#
?
Aug 13, 2017 19:26
|
|
|

|
| # ? Apr 25, 2024 05:33 |
|
|
That's was amazing, and absolutely the treatment that section deserves.
|
|
#
?
Aug 13, 2017 20:06
|
|