


|
Peace through Power - Let's Play (every) Command and Conquer (PC) Welcome to this Command and Conquer Anthology Let's Play. Join me on this magical ride through 15 years of strategy gaming featuring one of the most iconic series in gaming. From its meteoric rise to its slow and painful downfall, I'll be going through the entire series, game-by-game, expansions included. 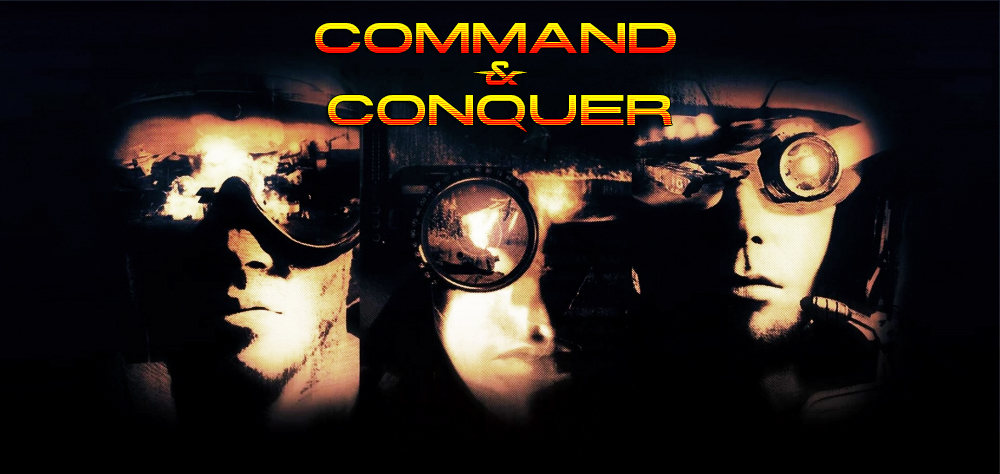 How this will work I'll be going through each game, chronologically. As every game features 2 factions, with entirely different campaigns, I will be showing off one "run" through each campaign, with additional posts revealing "missed" content, as Command and Conquer (and a few other early titles) featured branching paths. Anything that is the "main" content will be in video form, and the "missed" missions will be given an overview via Screenshots. I will also attempt to showcase all the available songs and/or cutscenes, as the games have a healthy amount of unique videos depending on whether you succeed or not. This may be harder to do with Command and Conquer (Tiberian Dawn), as the games sometimes use an old, proprietary file format that makes it difficult to capture footage, or extract the video files and recording them with the help of some lucky charms. What games should we see/expect?  1995 � Command & Conquer 1996 � Command & Conquer � The Covert Operations (+Sole Survivor content) 1996 � Command & Conquer: Red Alert 1997 � Command & Conquer: Red Alert � Counterstrike 1997 � Command & Conquer: Red Alert � The Aftermath 1998 � Command & Conquer: Red Alert � Retaliation 1999 � Command & Conquer: Tiberian Sun 2000 � Command & Conquer: Tiberian Sun � Firestorm 2000 � Command & Conquer: Red Alert 2 2001 � Command & Conquer: Yuri's Revenge 2002 � Command & Conquer: Renegade (Or Renegade X) 2003 � Command & Conquer: Generals 2003 � Command & Conquer: Generals � Zero Hour 2007 � Command & Conquer 3: Tiberium Wars 2008 � Command & Conquer 3: Kane's Wrath 2008 � Command & Conquer: Red Alert 3 2009 � Command & Conquer: Red Alert 3 � Uprising 2009 � Command & Conquer: Red Alert 3 - Commander's Challenge 2010 � Command & Conquer 4: Tiberian Twilight --- I'm not against mods, but I have no clue which ones are good or bad, and will consider adding any to the list upon request --- I will preface by saying I am not the best strategy player ever (Company of Heroes proved that one!) but I shall attempt to play on the harder difficulties, when available.  And since this entire thing is being done chronologically, that means ABSOLUTELY NO SPOILERS AT ALL ABOUT ANYTHING!  NO. SPOILERS. Not even tags. NO. SPOILERS. Not even tags. The Command and Conquer series has very little in terms of adaptations or spin-off content, having, I think, one "expanded universe" book sold in 2009, so let's just let things play out as the games intended them to. Thanks! 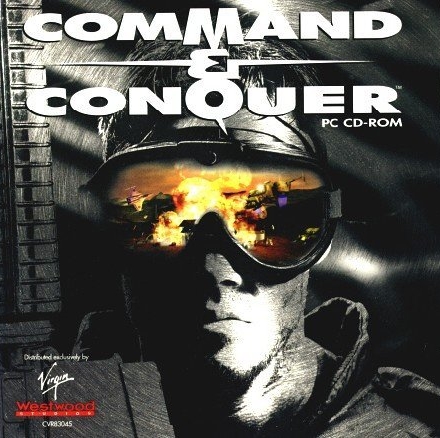 https://www.youtube.com/watch?v=k3CLSOFvhDo  The year is 199X. A crashed meteorite in Italy sees the spread of a new, and deadly, material - Tiberium. Since its first arrival, Tiberium has spread to numerous locations around the globe, with the Global Defense Initiative (GDI) and Brotherhood of Nod (NOD) vying for control over this new "natural" resource.  The Brotherhood of Nod  Known as The Brotherhood, The Ways of Nod, Sha�Seer among the tribes of Godan [ref: INTERPOL FILE ARK936 - Aliases of the Brotherhood]. Founded: Date unknown: exaggerated reports place the Brotherhood's founding before 1,800 BC. Ideology: To unite third-world nations under a pseudo-religious political platform with imperialist tendencies. In actuality, it is an aggressive and popular neo-fascist, anti-West movement vying for total deomination of the world's peoples and resources. Operates under the popular mantra, "Brotherhood, unity, peace". Current Head of State: Kane; also known as Caine, Jacob (INTERPOL FILE TRX11-12Q); al-Quayym, Amir (MI6 DR-416.52) Base of Operations: Global. Command posts previously identified at Kuantan, Malaysiaa; somewhere in Ar-Rub' al-Khali, Saudi Arabia; Tokyo, Japan; Caen, France. Military Strength: Previously believed only to be a smaller terrorist operations, a recent scandal involving United States defense contractors confirms that the Brotherhood is well-equipped and supports significant land, sea, and air military operations. Economic Strength: Considerable operating assets believed to be in excess of US$255.2 billion, based on audits of seized financial records (see CIA DOCKET 3231.54-776 FIA). Political Strength: Believed to be the sole backers of the Fist of Allah party in Jordan (52%); United We Stand America party in the United States (12%); Albion First! party in the United Kingdom (25+%), among others. (See Brookings Institution publication A42962-94 for full disclosure.) Affiliations: Irish Republican Party; Islamic Jihad; Khmer Rouge; others (See document: Brotherhood of Nod Splinter Groups.) [SEE ALSO: Mobius, Dr. R.H.; terrorist activities; United States Global Defense Act; Report of World Energy Radical Redistribution, US Congressional Report, 1994, File XXY22] [NOD SUB-FACTIONS] [ACCESS DENIED] The Global Defense Initiative  Commonly, GDI. Before 1990, known as Special Operations Group Echo, Black Ops 9. Founded: 12 October 1995, in acordance with the United Nations Global Defense Act (UNGDA) Ideology: To enforce the United Nations Global Defense Act and upholds the ideals as outlined in the United Nations Charter. Current Head of State: Brigadier General Mark Jamison Shepherd, Chief of Staff, United Nations Military Command. Base of Operations: United Nations Military Command center, location REDACTED Military Strength: Within parameters of the UNGDA, Article V, Section 3A, Paragraph 12. Economic Strength: Funded by United Nations and various national governments, public organizations, and private enterprise. Political Strength: Not applicable: operates within parameters of the UNGDA and under the orders of the United Nations Security Council. Affiliations: United Nations [SEE ALSO: Shepherd, M.J.; United Nations, 1995 to present; United Nations Global Defense Act, 1995; Mobius, Dr. R.H.] [GDI SUB-FACTIONS] [ACCESS DENIED] NOD Mission Playlist Nod Mission 01 Nod Mission 02 Nod Mission 03 Nod Mission 04 Nod Mission 05 Nod Mission 06 Nod Mission 07 Nod Mission 08 Nod Mission 09 Nod Mission 10 Nod Mission 11 Nod Mission 12 Nod Mission 13 NOD Map Dissection 01 NOD Map Dissection 02 NOD Map Dissection 03 NOD Map Dissection 04 GDI Mission Playlist GDI Mission 01 GDI Mission 02 GDI Mission 03 GDI Mission 04 GDI Mission 05 GDI Mission 06 GDI Mission 07 GDI Mission 08 GDI Mission 09 GDI Mission 10 GDI Mission 11 GDI Mission 12 GDI Mission 13 GDI Mission 14 GDI Mission 15 GDI Map Dissection 01 GDI Map Dissection 02 GDI Map Dissection 03 Covert Operations GDI - Blackout GDI - Hell's Fury GDI - Infiltrated! + Covert Ops Map Dissection 01 GDI - Elemental Imperative GDI - Ground Zero GDI - Twist of Fate GDI - Blindsided + Covert Ops Map Dissection 02 NOD - Bad Neighborhood NOD - Deceit NOD - Eviction Notice NOD - The Tiberium Strain + Covert Ops Map Dissection 03 NOD - Hostile Takeover NOD - Under Siege: C&C NOD - NOD Death Squad NOD - Cloak and Dagger Covert Ops Map Dissection 04 Bonus Mission Pack N64 Missions 01 N64 Missions 02 N64 Missions 03 N64 Missions 04 N64 Map Dissection 01 PSX Missions 01 PSX Missions 02 PSX Missions 03 + PSX Map Dissection 01 PSX Missions 04 PSX Maps 02 The Endings PAT SUX Artwork  by PurpleXVI 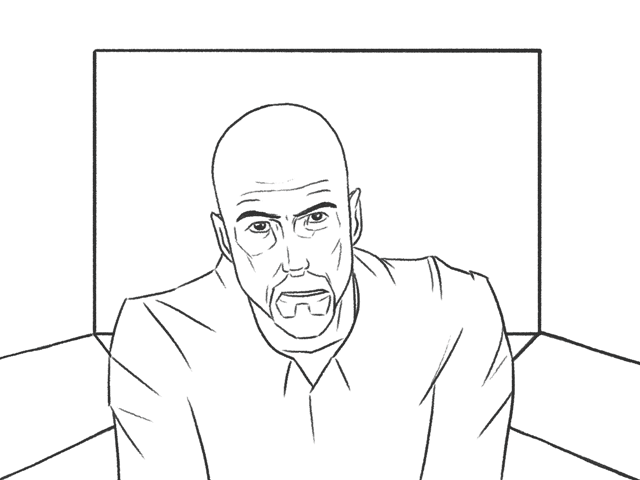 by Fish Noise Jobbo_Fett fucked around with this message at 15:19 on May 26, 2019 |
 #
¿
Nov 24, 2018 07:04
#
¿
Nov 24, 2018 07:04
|
|


|

|
| # ¿ Apr 25, 2024 08:36 |
|
|
  Name: Greg Burdette Aliases: None Affiliation: Unknown, possible NOD Occupation: News Reporter Voiced/Played by: Eric Randall Greg Burdette is, or was, a News Reporter for WWN. Currently working with, or for, Kane in spreading disinformation about GDI.  Name: Dr. Mobius Aliases: None Affiliation: Unknown Occupation: Tiberium Expert Voiced/Played by: Richard Smith As the only leading expert (that is mentioned) on Tiberium, it stands to reason that people are listening to what the Dr. has to say. Predicts that Tiberium will potentially overrun the entire planet. Author's note: Portrayed as crazy by Nod and... crazy by GDI, he's the only person that understands Tiberium? A little strange, but let's roll with it.  Name: Nikoomba Aliases: None Affiliation: None Occupation: Village Leader Voiced/Played by: Unknown A village leader who was murdered by Nod forces in Libya.  Name: Seth Aliases: Unknown Affiliation: NOD Occupation: Voiced/Played by: Eric Gooch The so-called Right Hand of Kane, Seth is the liaison between low-ranking members and Kane. He has sent the Commander out on numerous missions, at the behest of Kane, and seemingly uses him to further increase his status in the Brotherhood of Nod. It appears that not all has gone according to plan, however, and now sees the Commander as a possible threat to his ambitions. Executed by Kane after he tried to usurp control of the Brotherhood.  Name: Kane Aliases: Caine, Jacob; al-Quayym, Amir Affiliation: NOD Occupation: Leader of the Brotherhood of Nod Voiced/Played by: Joseph D. Kucan The leader of the Brotherhood of Nod, Kane is shrouded by mystery. No one knows much about him, and the mythos surrounding him tells of tales of alternate identities, immortality, or simply rumours and hearsay. Murdered Seth after he tried to usurp control of the Brotherhood of Nod. Discoverer of Tiberium (Unsubstantiated) and believes it is the future of mankind. Appears to always carry a pistol at his side, a Beretta 92FS. May have plans to use the Ion Cannon against GDI.  Name: Frank Klepacki Aliases: The Big F, K-Note, Father Sound Affiliation: Frank works for no one but himself Occupation: Legend Voiced/Played by: [REDACTED] Who is Frank Klepacki? Very little evidence, other than his musical entries in the game, supports the theory that Mr. Klepacki, if that is his real name, has ever existed on planet Earth. Rumours have made the rounds on the internet that he is simply a Tommy Tallarico expy, or an even wilder theory that the music was created during a darker period of time in Koji Kondo's life.  Name: Commander Aliases: Unknown Affiliation: Unknown Occupation: Commander within the Brotherhood of NOD Voiced/Played by: N/A Led NOD forces to victory against the GDI in Africa. Helped Kane to gain control of GDI's Ion Cannon and used it to attack at least one world superpower. Name: Commander Aliases: Unknown Affiliation: Unknown Occupation: Commander within the Global Defense Initiative Voiced/Played by: N/A Led GDI forces to victory against the Brotherhood of Nod in Europe. Developed a taste for destroying churches and committed multiple war crimes due to the "Take No Prisoners" stance of GDI at the time.  Name: Commander Carter Aliases: Unknown Affiliation: GDI Occupation: Voiced/Played by: Bill Collins Its unknown if Commander Carter is of an equal rank as the GDI Commander, nor if he's Navy, Army, or something else. Regardless, he and the GDI Commander have worked together on numerous occasions, to good effect. Is believed to be the originator of the "the naughties" [Sometimes said "Noddies"] term. Has recently come down with Tiberium poisoning, yet has chosen to remain in command. Killed in action while leading his forces against a Nod base. Author's note: It's okay, Carter, I'll acknowledge your sacrifice for GDI.  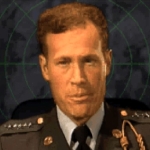 Name: Brigadier General Sheppard Aliases: Unknown Affiliation: GDI Occupation: Supreme Commander of GDI Voiced/Played by: Eric Martin Stoic, and seemingly unemotional, Sheppard is the upper echelon of GDI command. He's also the first to come under fire by the media, and spends considerable time at press events and in meetings with political and military leaders. Author's note: A rather bland character in my opinion, and one that only attempts to redeem himself about 3/4 of the way into the campaign; far too late to salvage anything meaningful.  Name: Colonel Morelli Aliases: Unknown Affiliation: GDI Occupation: Air Support Commander (UNCONFIRMED) Voiced/Played by: Wendy Bagger Colonel Morelli is constantly taking to the skies to provide vital air support to local GDI forces. Has been able to turn the tide of a battle on numerous occasions with her squadron of A-10s. Author's note: There's not much to Morelli's character, but that's a bad thing. If anything, it would've been nice to know more about what she does and why we always see her in flight.  Name: EVA(?) Aliases: Unknown Affiliation: GDI Occupation: Computer(?) Voiced/Played by: Kia Huntzinger EVA appears to be the central command for GDI. It is unknown at this time why both the NOD and GDI commanders appeared to be equipped with, or have access to, it. Author's note: While certain details are revealed in the installation video (which we have yet to see), EVA remains a mysterious entity.  Name: [REDACTED] Aliases: DELPHI Affiliation: GDI Occupation: Spy Voiced/Played by: [REDACTED] A GDI Operative, he helped locate Kane's bio-chemical research lab. Also provided information during Operation "Hell's Fury".  Name: Unknown Aliases: None Affiliation: None Occupation: Talk Show Host Voiced/Played by: R.C. Favero A talk show host for a science show who interviews Dr. Mobius.  Name: Unknown Aliases: None Affiliation: None Occupation: Reporter Voiced/Played by: Marcia Swayze A reporter for W3N Live. Brotherhood of NOD Units  MINIGUN INFANTRY ARMOR: NONE COST: 100 SECONDS TO PRODUCE: 7 RANGE: SHORT WEAPON: M-16 RIFLE Equipped with the M-16 Machine Gun, this troop is the key player in Nod�s forces. En masse, this unit is very useful against slow-moving armored units like tanks. Just remember that large tanks can easily crush your infantry and flame-based weapons can quickly reduce entire squads to ash. Author's notes: Minigunners suck. They are pure cannon fodder and should only be used in the absence of anything else.  NOD BUGGY ARMOR: LIGHT COST: 300 SECONDS TO PRODUCE: 20 RANGE: SHORT WEAPON: M60 MACHINE GUN These all-terrain vehicles are armed with an M60 machine-gun in a turret. Faster than GDI�s Hum-vee, the Buggy has sacrificed some armor for this advantage. Used in hit and run tactics on infantry and other lightly armored targets, the Buggy shines. Against armor, it dies. Author's notes: The buggy is the cannon fodder of NOD's vehicle arsenal. They are better than minigunners in every way, but only useful against enemy infantry.  MCV ARMOR: MEDIUM COST: 5000 SECONDS TO PRODUCE: 333 RANGE: N/A WEAPON: NONE The mobile construction vehicle lets you search for suitable base sites. Once one is found, convert the MCV into a full-service Construction Yard and use it to build other structures. Since this vehicle is slow, unarmed, and expensive, you will want to keep it well guarded with other units. Author's notes: As important as the building, the MCV in vehicle form allows you to set up the ideal location for your base, but be warned, it is an irreversible action.  HARVESTER ARMOR: HEAVY COST: 1400 SECONDS TO PRODUCE: 93 RANGE: N/A WEAPON: NONE This armor-plated vehicle seeks out and scoops up raw Tiberium, then transports it to refineries for processing. It is slow and unwieldy and will need to be protected. Its good points are that it can take a beating before being destroyed and it is proficient at crushing enemy infantry. Author's notes: The all-important harvester. Protect these at all costs!  ENGINEER ARMOR: NONE COST: 500 SECONDS TO PRODUCE: 33 RANGE: N/A WEAPON: NONE Engineers are used to capture enemy buildings. Since they carry no weapons, they are extremely vulnerable on the battlefield and must be directed very carefully. Loading them into an Chinook is an ideal way to move them about the battlefield. Dropping a Chinook full of Engineers in an enemy�s base is a commonly employed tactic. Author's notes: Even the game agrees that mass capture tactics are good.  ROCKET SOLDIER ARMOR: NONE COST: 300 SECONDS TO PRODUCE: 17 RANGE: MEDIUM WEAPON: LIGHT TOW ROCKETS These infantry units are slower and easier to kill than other infantry, but can tear through armor faster than any other infantry unit. Their major advantage is the ability to attack airborne units. Most effective as a support unit in diverse groups. Author's notes: The anti-armor infantry unit for NOD. They aren't bad, can shoot air units, but are one of the slowest units in the game. This ensures that any attack will progress slowly, or see everyone else die... right before they do.  RECON BIKE ARMOR: LIGHT COST: 500 SECONDS TO PRODUCE: 33 RANGE: MEDIUM WEAPON: DRAGON TOW ROCKETS Mounting twin rocket launchers, the cycles have great flexibility, serving multiple roles in Nod�s forces. Learn to use these units in packs, hunting down lone units or harvesters. When in guard mode, they will shoot at enemy aircraft, making them ideal at destroying incoming aerial assaults. Their speed makes them an ideal scouting unit as well. Author's notes: I don't like the recon bike, simply because its so fragile, but at least it shoots air uni~oh right I ALWAYS FORGET TO GUARD. The best reason to use bikes is to scout territory, or in large packs.  LIGHT TANK ARMOR: MEDIUM COST: 600 SECONDS TO PRODUCE: 40 RANGE: MEDIUM WEAPON: 75MM APDS This highly-mobile tread vehicle, delivers maximum weaponry and personnel destruction with minimum weight, maintenance and weaponry. Faster than any other tank on the battlefield, these units can reach a target quickly. Used in conjunction with aerial assaults, these units are very effective. Author's notes: What aerial assaults?!  FLAMETHROWER INFANTRY ARMOR: NONE COST: 200 SECONDS TO PRODUCE: 13 RANGE: SHORT WEAPON: FLAMETHROWER Effective for maximum close-range destruction. Produces fire which burns more slowly than normal, allowing more effective elimination of humans and armament. Be careful when using these troops in groups�if one unit gets in front of another, chances are that the unit in front will catch some of the damage from the back unit. Spread them out. Author's notes: The slow burning fire stuff is just fluff, but you should honestly be careful with multiple flamethrowers. No joke, anything over 1 is dangerous to all sides.  COMMANDO ARMOR: NONE COST: 1000 SECONDS TO PRODUCE: 67 RANGE: LONG WEAPON: SNIPER RIFLE AND C-4 EXPLOSIVE PACKS The Commando uses a Raptor 50cal. assault rifle with suppressor that is able to take out infantry units from extreme range. In addition, the Commando also carries C-4 explosives. When placed in enemy structures, these explosives will level the target structure in seconds. Author's note: The best infantry in the game, bar none. Sure, he can't snipe helicopters or A-10s, but the Commando can eliminate any infantry unit at the drop of a hat, and blow up any building left unguarded. The only downside, apart from the lack of anti-armor, is the fact that blowing up buildings produces enemy soldiers, which get first dibs at shooting the Commando.   MOBILE ARTILLERY ARMOR: MEDIUM COST: 450 SECONDS TO PRODUCE: 30 RANGE: LONG WEAPON: 155MM BALLISTIC CHARGES This massive cannon has great range and ballistic power. This unit is very slow. Any attacks using this unit have to be orchestrated carefully�just getting the unit to its target can be difficult. However, once it gets within range, little stands in the way of its firepower. By nature, artillery is somewhat innacurate. Author's note: I overvalue their cost in the next video (I think), but that still doesn't mean I'll take an artillery piece over a Light Tank. Slow to turn, slow to move, slow to shoot. Its just slow. Oh, and the typo is in the manual.  FLAME TANK ARMOR: MEDIUM COST: 800 SECONDS TO PRODUCE: 53 RANGE: SHORT WEAPON: TWIN FLAME CANNONS Especially useful against infantry and structures, the Devil�s Tongue Flame Tank can mow through swarms of infantry with little or no damage to itself. To top off its destructive capabilities, the flame tank is fast, able to avoid some of the slower firing weapons and get close to its target quickly. Author's note: So it turns out you need a Comms. Centre to build these guys. Damnit... The flavor text is serious, they will absolutely slaughter infantry and scorch buildings. Truly a force to be reckoned with. Oh and I found out the Cargo Plane has its own entry  CARGO PLANE ARMOR: HEAVY COST: N/A SECONDS TO PRODUCE: N/A RANGE: N/A WEAPON: NONE This carrier ships purchased units to the Brotherhood of Nod via the Airfield. Any units ordered will be shipped in as soon as possible. Only one transport plane can be on the board (per Airfield) at any one time. Author's note: You go, plane!  STEALTH TANK ARMOR: LIGHT COST: 900 SECONDS TO PRODUCE: 60 RANGE: MEDIUM WEAPON: DRAGON TOW ROCKETS This lightly-armored tank is equipped with the Lazarus shield, cloaking it from enemy sight. This shield is neutralized during firing, giving the tanks the ability to �appear� out of thin air. Although vehicles and most structures are not able to see the tank while cloaked, infantry and Guard Towers will reveal the tank if it gets too close to them. Author's note: Great for scouting, ambushes, and hit-and-run attacks, the Stealth Tank is one of the better NOD weapons in the Commander's arsenal. However, the ability to remain permanently cloaked (under normal conditions) does come at a price of being weak defensively. Works best in numbers. Brotherhood of NOD Buildings  CONSTRUCTION YARD ARMOR: MEDIUM COST: N/A SECONDS TO PRODUCE: N/A POWER USAGE: NONE PURPOSE: PRODUCES STRUCTURES The Construction Yard is the foundation of a base and allows the construction of other buildings. You must protect this structure! Without it, you cannot build any new structures. The Construction Yard is fairly strong, but as with almost all structures, it is vulnerable to Engineers. Try surrounding your Construction Yard with walls to keep out unwanted guests. Author's notes: THE main building for your base. Lose this, and you can no longer construct new buildings.  POWER PLANT ARMOR: MEDIUM COST: 300 SECONDS TO PRODUCE: 20 POWER USAGE: NONE PURPOSE: PROVIDES POWER TO BASE This unit provides power to the structures in your base. Power output is directly related to the Power Plant�s condition, so protect them during battles. If they get damaged, you must repair them quickly or else some of your base defenses may cease to function. The Power Plant outputs 100 units of power. Author's notes: The third-most essential building in your base (the refinery is the 2nd). Without power, your unit production slows to a crawl and certain buildings or functions won't work.  HAND OF NOD ARMOR: MEDIUM COST: 300 SECONDS TO PRODUCE: 20 POWER USAGE: 20 PURPOSE: PRODUCES INFANTRY This creates elite infantry units for the Brotherhood of Nod. Building multiple barracks will decrease the time necessary to train a soldier. Author's notes: The tip about building multiple Hands of NOD to train infantry faster is not a myth, but I always forget its a legit thing.  REFINERY ARMOR: MEDIUM COST: 2000 SECONDS TO PRODUCE: 133 POWER USAGE: 40 PURPOSE: CONVERTS TIBERIUM TO CREDITS This unit processes Tiberium into its component elements. Building the refinery immediately deploys a Tiberium harvester and each Refinery can handle an infinite number of Harvesters. The refinery stores 1,000 credits of processed Tiberium. Author's notes: A refinery can handle an infinite number of harvesters, one at a time. It's always best to build a second refinery if tiberium is abundant in the area.  SILO ARMOR: LIGHT COST: 150 SECONDS TO PRODUCE: 10 POWER USAGE: 10 PURPOSE: HOLDS REFINED TIBERIUM This unit stores up to 1,500 credits of processed Tiberium. When the Refinery fills to its maximum capacity of Tiberium, you will want to build Silos to handle the excess storage load. Guard it carefully. If destroyed or captured, the amount stored in the silo is deducted from your account. Author's notes: I NEVER build silos unless I'm just pissing money away (or trying to get some distance between my defenses and my buildings.  COMMUNICATIONS CENTER ARMOR: MEDIUM COST: 1000 SECONDS TO PRODUCE: 66 POWER USAGE: 40 PURPOSE: BASE RADAR & COMMUNICATION Allows the use of the radar screen as long as there is sufficient power. The radar screen allows for long-range views of the battlefield and for commanding units over great distances. When playing as Nod against GDI in the solo play missions, destroying GDI�s Radar Facility will keep GDI from launching A-10 airstrikes against you. Author's notes: A building with very little purpose for NODs forces, the communications center basically only gives you the radar/minimap. We'll see what the A-10 airstrikes are like soon enough, so don't worry about seeing those in effect.  SANDBAG BARRIER ARMOR: LIGHT COST: 50 SECONDS TO PRODUCE: 3 POWER USAGE: NONE PURPOSE: BASE DEFENSE Used to deter the enemy from advancing. Sandbags provide limited cover and may slow units down. Only explosive weapons such as grenades, missiles, and shells can damage Sandbags. Author's notes: Not sure what the "provide limited cover" is supposed to be exactly, although I haven't checked the rules on it. The 2nd part is true, and annoyingly so at times.  SAM SITE ARMOR: HEAVY/LIGHT COST: 750 SECONDS TO PRODUCE: 50 POWER USAGE: 20 PURPOSE: DEFENSIVE ANTI-AIRBORNE UNIT Fires surface-to-air missiles at airborne GDI units. When the it is recessed in the ground, it is difficult to harm. However, when the launcher is exposed, it will damage more easily. Position these around your base in a triangular layout. This gives you the best chances of destroying aerial threats before they can cause serious damage to your base. Author's notes: Due to the limits on distance (you need to build adjacent), you either need to build out or accept that their range will be poor, especially against A-10 strikes.  AIRSTRIP ARMOR: HEAVY COST: 2000 SECONDS TO PRODUCE: 133 POWER USAGE: 30 PURPOSE: WEAPONS RECEIVING AREA Nod buys all its units. The Airfield allows cargo planes to land and deliver equipment. It is functionally equivalent to the GDI Weapons Factory. However, you do not instantly get the unit when it is complete�it must be flown in, so plan accordingly. Building multiple Airfields will increase the ordering speed, and will enable you to have two units delivered at a time. Author's notes: I don't think I ever bothered building a second one, mostly due to money concerns.  TURRET ARMOR: HEAVY COST: 600 SECONDS TO PRODUCE: 17 POWER USAGE: 20 PURPOSE: BASE DEFENSE For broad sweep, short-range protection against heavy assault vehicles. This is the staple of Nod�s base defense, so be sure to have several of these around your base entrances. Fire-power wise, they are the equivalent of a medium tank�s cannon�without the mobility. Author's note: Its a strong defensive building, able to dispatch vehicles with relative ease, but suffers from a slow turret rotation and lackluster performance against infantry (unless its accurate!)  REPAIR FACILITY ARMOR: LIGHT COST: 1200 SECONDS TO PRODUCE: 80 POWER USAGE: 30 PURPOSE: VEHICLE REPAIR The repair facility allows you to repair damaged units. Moving a vehicle onto the repair pad will begin the repair process. All repairs are deducted from your credits. If you run out of credits while repairs are in progress, repairs will stop. Damage to the facility significantly slows repair work. (Unless the Rules.ini file is lying, these are the following stats for the Repair facility RepairPercent=20% ; percent cost to fully repair as ratio of full cost RepairRate=.008 ; minutes between applying repair step) Author's note: Extremely useful if running on a small income or to save powerful units! If you have neither, you can skip it.  CHAIN LINK BARRIER ARMOR: MEDIUM COST: 75 SECONDS TO PRODUCE: 5 POWER USAGE: NONE PURPOSE: BASE DEFENSE Chain Link function in the same way that the sandbags so, but they provide more defense. Only explosive weapons such as grenades, missiles, and shells can damage a Chain Link fence. Author's note: Woo?!  OBELISK OF LIGHT ARMOR: MEDIUM COST: 1500 SECONDS TO PRODUCE: 100 POWER USAGE: 150 PURPOSE: LASER-EQUIPPED BASE DEFENSE This high-power laser effectively destroys troops and armament at long range. It is the most powerful on-board weapon in the game. Its slow recharge time means that it cannot be the only weapon defending your base, however. Make sure you have excess power before building these, because damage to your power plants will keep the obelisks off-line. Author's note: These can totally be the only base defense you build, manual  . The only two weaknesses for the Obelisk are that it can be destroyed a little too easily in my opinion, and that it requires a large amount of power to maintain. . The only two weaknesses for the Obelisk are that it can be destroyed a little too easily in my opinion, and that it requires a large amount of power to maintain.  ADVANCED POWER PLANT ARMOR: MEDIUM COST: 700 SECONDS TO PRODUCE: 47 POWER USAGE: NONE PURPOSE: PROVIDES POWER TO BASE This high-yield structure handles the energy strains of some later, more power-intensive structures. It may cost a bit more than the original Power Plant, but it generates double the amount of power (200 units). Author's note: Costs more than twice that of a Power Plant but only gives twice the power output? Why? Only real reason to build it is to save space in your base. -Only learned this after this mission-  TEMPLE OF NOD ARMOR: HEAVY COST: 3000 SECONDS TO PRODUCE: 200 POWER USAGE: 150 PURPOSE: NUCLEAR MISSILE Houses the central computer core that is the hub of all Nod communications and center of Nod command. It is heavily armored. This structure also gives Nod players the ability to fire nuclear missiles. Author's note: No real use outside of giving the player the Nuclear Missile, which is amazing. In the final NOD Mission, I could only get it to give me one nuke. Global Defense Initiative Units MINIGUN INFANTRY ARMOR: NONE COST: 100 SECONDS TO PRODUCE: 7 RANGE: SHORT WEAPON: M-16 RIFLE Equipped with the GAU-3 �Eliminator� 5.56mm chaingun, this troop is the key player in the GDI forces. En masse, this unit is very useful against slow-moving armored units like tanks. Just remember that large tanks can easily crush your infantry and flame-based weapons can quickly reduce entire squads to ash. Author's notes: Interestingly, the GDI actually use a different weapon then the NOD minigunners. In lore, anyways.  HUMM-VEE ARMOR: LIGHT COST: 400 SECONDS TO PRODUCE: 27 RANGE: SHORT WEAPON: M-60 MACHINE GUN These all-terrain attack vehicles are fast and very useful against infantry and can wipeout large numbers of Attack Cycles when used en masse. Its light armor makes it vulnerable to any explosive weapon. Author's notes: Similar to the NOD Buggy. Takes longer to build and costs more, but has the same armor class listed in the manual; strange. MCV ARMOR: MEDIUM COST: 5000 SECONDS TO PRODUCE: 333 RANGE: N/A WEAPON: NONE The mobile construction vehicle lets you search for suitable base sites. Once one is found, convert the MCV into a full-service Construction Yard and use it to build other structures. Since this vehicle is slow, unarmed, and expensive, you will want to keep it well guarded with other units. Author's notes: As important as the building, the MCV in vehicle form allows you to set up the ideal location for your base, but be warned, it is an irreversible action.  HOVER CRAFT ARMOR: HEAVY COST: N/A SECONDS TO PRODUCE: N/A RANGE: N/A WEAPON: NONE This heavily-armored unit deploys men and vehicles during amphibious assault. It is not buildable in any missions, including multiplay. Author's notes: This needs an entry, although the player can never control it.  GUNBOAT ARMOR: HEAVY COST: N/A SECONDS TO PRODUCE: N/A RANGE: LONG WEAPON: TOMAHAWK MISSILE Heavily armored, and armed with surface-to-surface missiles, this unit is the backbone of GDI�s naval forces. This unit makes special appearances in GDI missions, but is normally unavailable. Author's notes: Here's another unit we can't build.  GRENADIER ARMOR: NONE COST: 160 SECONDS TO PRODUCE: 7 RANGE: SHORT WEAPON: HIGH EXPLOSIVE GRENADE The Grenadier is a very useful all-purpose infantry unit. This troop is faster, can see further, and hit harder than normal infantry. The grenade this unit throws can not only go over walls, but can destroy them as well. They �splode good, too!! Author's note: YES. GRENADIERS. YEESSSSSSSSSS. On a more serious note, these guys are great for their cost, speed, and attack, but beware of bunching them up as they are highly explosive.   A-10 GROUND SUPPORT AIRCRAFT ARMOR: HEAVY COST: N/A SECONDS TO PRODUCE: N/A RANGE: LONG WEAPON: NAPALM BOMBS These units are highly maneuverable, ground-hugging craft that level enemy units with napalm. When playing as GDI in the solo play missions, destroying all Nod SAM sites will give you access to the A-10 airstrikes. Since the A-10 bombs in a line, it is a good idea to pick a target that is part of a group. You can do damage to more enemies this way. Author's note: Oh hey, there's an entry for this in the manual!  APC ARMOR: HEAVY COST: 700 SECONDS TO PRODUCE: 47 RANGE: SHORT WEAPON: M-60 MACHINE GUN The Armored Personnel Carrier (APC) transports and protects up to five troops heading to and from battle locations. Its heavy armor, fast speed, and long sight range make it an ideal scouting unit. It is also useful for crushing infantry. Author's note: It's also incredibly useful for throwing engineers into the enemy base and capturing everything while they watch in horror!  MEDIUM TANK ARMOR: HEAVY COST: 800 SECONDS TO PRODUCE: 53 RANGE: MEDIUM WEAPON: 105MM APDS From its single barrel, the Medium Tank fires armor-piercing shells. It is faster, heavier and more destructive than Nod�s Light Tank. This is one of the best all around vehicles in the game. It is effective against both vehicles and structures, but can be taken down by groups of infantry or aerial units. Author's note: Other than being vulnerable to certain infantry (or the micromanaged kind) and choppers/a10s, this is great bang for your buck and should be your go-to vehicle of choice... until Mammoth tanks show up, of course  . .  TRANSPORT �CHINOOK� HELICOPTER ARMOR: MEDIUM COST: 1500 SECONDS TO PRODUCE: 100 RANGE: N/A WEAPON: NONE Provides field transportation for all infantry, rapidly deploying new troops into, or out of battle. This unit is basically an aerial version of the APC without the weapon. Author's note: Great if your opponent is missing air defense weapons in critical areas, and even better if you can combine it with attacks to distract. Its usually a one-way trip for this unit, when moving into an enemy base. COMMANDO* ARMOR: NONE COST: 1000 SECONDS TO PRODUCE: 67 RANGE: LONG WEAPON: SNIPER RIFLE AND C-4 EXPLOSIVE PACKS The Commando is part of the GDI Elite Forces Unit. This unit uses a Raptor 50cal. assault rifle with suppressor that is able to take out infantry units from extreme range. In addition, the Commando carries C-4 explosives. When placed in enemy structures, these explosives will level the target structure in seconds. Author's note: The lore text here is why I think that Nod has one Commando, whereas GDI has an entire team of them. GDI also started out as a SpecOps group. Maybe one of them defected to Nod? Its all headcanon, loosely based on text from the manual, which could just be an error/typo anyways, but I like the interpretation.  MOBILE ROCKET LAUNCH SYSTEM (MRLS) ARMOR: LIGHT COST: 800 SECONDS TO PRODUCE: 53 RANGE: LONG WEAPON: 227MM MISSILES Mobile devastation. GDI�s longest-range attacker fires 227mm rockets and is effective against just about everything, including aerial threats. With no short-range fighting ability, this unit needs close-quarter backup. This is an attack only vehicle. Keep it in the background and don�t let enemies in close to it. Author's note: This unit is entirely forgettable in GDI's unit lineup and I think I forget about it until like... 4 missions from now.   ORCA VTOL ASSAULT CRAFT ARMOR: LIGHT COST: 1200 SECONDS TO PRODUCE: 80 RANGE: LONG WEAPON: DRAGON TOW ROCKETS This vertical takeoff and landing (VTOL) craft carries five salvos of TOW rockets. ORCAs are exceptionally useful for taking out enemy armor like Harvesters. When used in conjunction with Ion Cannon strikes, then can easily destroy enemy structures. When an ORCA runs out of rockets, it must return to base for reloading. Author's note: Aside from not being able to reveal LOS itself, this unit has few drawbacks. No GDI force is complete without a few of these to harass and destroy Nod forces on the map.  MAMMOTH TANK ARMOR: HEAVY COST: 1500 SECONDS TO PRODUCE: 80 RANGE: MED/LONG WEAPON: DUAL 120MM APDS / MAMMOTH TUSK MISSILES Armed with dual 120mm cannons and Mammoth Tusk Missiles, this giant is a very versatile attack unit. These weapons help compensate for its lack of speed and mobility. When this unit takes a lot of damage, it can slowly regenerate its health back up to 50%. When the Mammoth tank is placed in guard mode, it can fire at aerial units. Author's note: This is the best unit ever and I will never acknowledge that a unit is cooler than a twin-barreled tank with rockets, self-regeneration, and is called the Mammoth tank. Global Defense Initiative Buildings CONSTRUCTION YARD ARMOR: MEDIUM COST: N/A SECONDS TO PRODUCE: N/A POWER USAGE: NONE PURPOSE: PRODUCES STRUCTURES The Construction Yard is the foundation of a base and allows the construction of other buildings. You must protect this structure! Without it, you cannot build any new structures. The Construction Yard is fairly strong, but as with almost all structures, it is vulnerable to Engineers. Try surrounding your Construction Yard with walls to keep out unwanted guests. Author's notes: Just like NOD, this is the be all end all of any base. POWER PLANT ARMOR: MEDIUM COST: 300 SECONDS TO PRODUCE: 20 POWER USAGE: NONE PURPOSE: PROVIDES POWER TO BASE This unit provides power to the structures in your base. Power output is directly related to the Power Plant�s condition, so protect them during battles. If they get damaged, you must repair them quickly or else some of your base defenses may cease to function. The Power Plant outputs 100 units of power. Author's notes: Same output and cost as NOD.  INFANTRY BARRACKS ARMOR: MEDIUM COST: 300 SECONDS TO PRODUCE: 20 POWER USAGE: 10 PURPOSE: PRODUCES INFANTRY This structure is a field training center for all available infantry units. Building multiple Barracks will increase the rate at which infantry are produced. Author's notes: Once again, no change from NOD. COMMUNICATIONS CENTER ARMOR: MEDIUM COST: 1000 SECONDS TO PRODUCE: 66 POWER USAGE: 40 PURPOSE: BASE RADAR & COMMUNICATION Allows the use of the radar screen as long as there is sufficient power. The radar screen allows for long range views of the battlefield and for commanding units over great distances. When playing as Nod against GDI in the solo play missions, destroying the GDI�s Radar Facility will keep GDI from launching A-10 airstrikes against you. Author's note: Gives us access to the allmighty A-10 Strike (A-10 Strike may or may not actually be allmighty).  HELIPAD ARMOR: MEDIUM COST: 1500 SECONDS TO PRODUCE: 100 POWER USAGE: 10 PURPOSE: HELICOPTER LANDING Building the Helipad allows the use of the ORCA attack aircraft. The Helipad is also the rearming station for the ORCA. If the Helipad is lost, the ORCA will not be able to reload. Any ORCA can use any Helipad on your side. Author's note: Comes with a free Orca on deployment, I constantly forget to simply sell the helipad and rebuild another instead. Offers no protection to an Orca on the landing pad if attacked.  GUARD TOWER ARMOR: LIGHT COST: 500 SECONDS TO PRODUCE: 33 POWER USAGE: 10 PURPOSE: DEFENSE Armed with a high-velocity machine gun, this structure provides manned defense against Nod ground attack. The Guard Tower is exceptionally useful against infantry and other light units, and since it doesn�t require any power, it will remain functional when your base loses power. It can also detect Nod Stealth Tanks when they are near. Author's note: Your basic defensive building for GDI. Personally, I don't like it as much as NOD's turret, SILO ARMOR: LIGHT COST: 150 SECONDS TO PRODUCE: 10 POWER USAGE: 10 PURPOSE: HOLDS REFINED TIBERIUM This unit stores up to 1,500 credits of processed Tiberium. When the Refinery fills to its maximum capacity of Tiberium, you will want to build Silos to handle the excess storage load. Guard it carefully. If destroyed or captured, the amount stored is deducted from your account. Author's note: Performs the same function as NOD's silo.  WEAPONS FACTORY ARMOR: MEDIUM COST: 2000 SECONDS TO PRODUCE: 133 POWER USAGE: 30 PURPOSE: PRODUCES HEAVY VEHICLES & AIR POWER This structure builds GDI�s vehicles. It is well armored, but is also a favorite target for enemy Engineers. If your Weapons Factory is captured, not only do you lose the ability to build vehicles, but the enemy is able to build your vehicles in addition to his own. Building multiple Weapons Factories will decrease the amount of time it takes to create a vehicle. Author's note: As far as I know, the "bonus" for multiple Weapons Factories is capped at 2, but to be honest I never have enough cash to build more than that.  ADVANCED GUARD TOWER ARMOR: MEDIUM COST: 1000 SECONDS TO PRODUCE: 66 POWER USAGE: 20 PURPOSE: DEFENSE Provides strong fortification against ground and air units. The Advanced Guard Tower (AGT) fires Tomahawk missiles at considerable range, but it requires power. Because of the AGT�s long range, it cannot hit units that are directly adjacent to it. It is always wise to back up the AGT with another defense like the Guard Tower. Author's note: Honestly, the "AGT" is nice and all but, like the Guard Tower, I just don't care for it.   ADVANCED COMMUNICATIONS CENTER/ION CANNON ARMOR: HEAVY COST: 2800 SECONDS TO PRODUCE: 186 POWER USAGE: 200 PURPOSE: PARTICLE BEAM CANNON An upgrade to the Communications Center, this structure not only provides radar, but is the uplink center for the Ion Cannon�GDI�s most devastating weapon. Once charged, it can unleash a blast on an unsuspecting target. The Ion Cannon requires power to charge: If your base is under powered, it will stop. To fire, left click on the Ion Cannon icon in the sidebar. Author's note: The Ion Cannon really sucks when compared to the Nuke. The Ion Cannon doesn't kill everything in 1 hit, has little to no area of effect, but at least it recharges faster than a nuke? Really though, the cost investment (in the building, power, and defenses) isn't worth it, outside a few specific uses. Jobbo_Fett fucked around with this message at 04:13 on Dec 23, 2018 |
|
#
¿
Nov 24, 2018 07:06
|
|
|
https://www.youtube.com/watch?v=k3CLSOFvhDo Command and Conquer Intro Video Channel 12: The Grain Trade Center is bombed by terrorists. NOD is suspected to have been responsible. Channel 7: The security commission is still in session, due to NOD terrorist actions. Channel 319: A softcore porn movie is playing. Channel 120: The nature channel visits an unnamed desert. Channel 56: A fitness show is currently showing. Channel 213: Harvesters seen collecting raw Tiberium. Channel 2: Current events and information regarding Tiberium deposits. Channel 116: Engine Oil, not just for cars anymore! Channel 88: A channel with children's entertainment. Channel 438: News regarding a new study on Tiberium by Dr. Moebius. Channel 21: Bob Ross' successor. Channel 14: The $PERRY Financial Network. Channel 252: Greg Burdette(?) reporting GDI movements from the Mediterranean. Channel 3: A re-run of a Steven Seagal movie.  Name: Greg Burdette Aliases: None Affiliation: Unknown Occupation: News Reporter Voiced/Played by: Eric Randall Greg Burdette is a News Reporter for WWN. Name: Dr. Mobius Aliases: None Affiliation: Unknown Occupation: Tiberium Expert Voiced/Played by: Richard Smith A researcher and expert on Tiberium, he is apparently in the process of refuting claims that Tiberium may be dangerous. https://www.youtube.com/watch?v=GiGRKiry7iU NOD Mission 01  As the newest commander in the Brotherhood of NOD, we are introduced to Seth (Just Seth). He is Kane's Right Hand, he tasks us with a simple assassination mission of one "Nikoomba". Location: ???? (Presumably, Northern Africa) Objective: Assassinate Nikoomba Briefing: In order for the Brotherhood to gain a foothold, we must begin by eliminating certain elements. Nikoomba, the nearby village's leader, is one such element. His views and ours do not coincide, and he must be eliminated. Author's note: Pay special attention to the wording. "His views do not coincide with ours, and that makes him dangerous." "From God, to Kane, to Seth" and even the group's name: The Brotherhood of NOD. Is this a religion, a cult, or something worse? Name: Seth Aliases: Unknown Affiliation: Unknown Occupation: Right Hand of Kane Voiced/Played by: Eric Gooch The so-called Right Hand of Kane, Set is the liaison between low-ranking members and Kane. Name: Nikoomba Aliases: None Affiliation: None Occupation: Village Leader Voiced/Played by: Unknown  MINIGUN INFANTRY ARMOR: NONE COST: 100 SECONDS TO PRODUCE: 7 RANGE: SHORT WEAPON: M-16 RIFLE Equipped with the M-16 Machine Gun, this troop is the key player in Nod�s forces. En masse, this unit is very useful against slow-moving armored units like tanks. Just remember that large tanks can easily crush your infantry and flame-based weapons can quickly reduce entire squads to ash. Author's notes: Minigunners suck. They are pure cannon fodder and should only be used in the absence of anything else. NOD BUGGY ARMOR: LIGHT COST: 300 SECONDS TO PRODUCE: 20 RANGE: SHORT WEAPON: M60 MACHINE GUN These all-terrain vehicles are armed with an M60 machine-gun in a turret. Faster than GDI�s Hum-vee, the Buggy has sacrificed some armor for this advantage. Used in hit and run tactics on infantry and other lightly armored targets, the Buggy shines. Against armor, it dies. Author's notes: The buggy is the cannon fodder of NOD's vehicle arsenal. They are better than minigunners in every way, but only useful against enemy infantry. Jobbo_Fett fucked around with this message at 01:07 on Nov 30, 2018 |
|
#
¿
Nov 24, 2018 07:06
|
|
|
wedgekree posted:Awesome! Just in time for the remaster! I'm torn on the remaster at the moment, but I think if they are given the time and resources they need, it'll be a hit. Hopefully, it won't cost too much. Edit: As with the mod suggestions for C&C Tiberian Dawn (and later entries in the series), Jobbo_Fett fucked around with this message at 07:16 on Nov 24, 2018 |
|
#
¿
Nov 24, 2018 07:12
|
|
|
wedgekree posted:As the thread gets to a point where the seriesis past them, is it okay to talk about the books/other sorts of stuff? Absolutely. A cave-at will exist for Renegade because of plot reasons, but as long as something is no longer spoilers and content that won't be seen from the games, I would appreciate any cool additional information.
|
|
#
¿
Nov 24, 2018 07:21
|
|
|
wedgekree posted:Is also talking about (broad) tactics and general stylistic choices/designs for each faction okay or want to get in a few missions with them? Just really appreciate the design of C&C from an early RTS perspective and how they made factions different. Lets hold off on deep dives for fsctions until a few more missions, just because of story and other things that we'll see.
|
|
#
¿
Nov 24, 2018 15:46
|
|
|
Mordja posted:Modwise, Mental Omega for RA2 and Twisted Insurrection for TS (now standalone, I think) are kind of fanmade sequels/re-imaginings with their own bigass campaigns you can play if you really want to keep playing C&C until heat death. I learned of TI recently and I was super turned off by how it plays but I'll definitely give it a look once we get to TS.
|
|
#
¿
Nov 24, 2018 15:48
|
|
|
FoolyCharged posted:Ooh, looking forward to this thread. I quickly checked and I didn't see any multiplayer functionality, but a google search reveals that some people are trying to keep the multiplayer side alive with "Revora"** I believe. Either way, we'll cross that bridge when we get there ")
|
|
#
¿
Nov 24, 2018 18:48
|
|
|
Mraagvpeine posted:I see C&C 3 and 4, but not 2. Is there a 2? Gun Jam posted:Tiberian Sun. This is correct, the 2nd Tiberium game is Tiberian Sun. I will be making a post about OpenRA at some point, as well as the various other freeware methods of acquiring C&C (and other games)
|
|
#
¿
Nov 24, 2018 22:30
|
|
|
I noticed I missed the briefing text for the first NOD Mission "Briefing: In order for the Brotherhood to gain a foothold, we must begin by eliminating certain elements. Nikoomba, the nearby village's leader, is one such element. His views and ours do not coincide, and he must be eliminated." Each mission will have a cutscene (usually with lovingly produced FMV) and will have a text briefing once the mission has started. It's quite handy to check it out, as it will sometimes impart knowledge not gained in the video, or maybe a useful hint as to how to achieve your goals. Similarly, I forgot all about Nikoomba! Look, if someone's gonna get a name, I should try to immortalize that fact. Name: Nikoomba Aliases: None Affiliation: None Occupation: Village Leader Voiced/Played by: Unknown The above has been retroactively added to the first mission post. As well, the game manual has something rather interesting, and probably telling of how gaming once was. At the back, the manual includes tutorials for the first three missions of each campaign. These are rather wordy, considering the mission at hand, but it is included in full. quote:Nod Tutorial
|
|
#
¿
Nov 25, 2018 03:55
|
|
|
NOD Mission 02 https://www.youtube.com/watch?v=QYD97wFFHOc NOD Mission 02  EGYPT Population: 56,386,000 Expendability: 75% Capital: Cairo Government: Republic Govt Corruptability: 18% Net Worth: $39.2 Billion Point of Conflict: Al-Alamyn Military Strength: Formidable Military Resistance: 82% Kane wants us to establish a foothold in Egypt by creating a forward post and eliminating GDI forces in the nearby area. As we have yet to prove ourselves, we must do so with limited resources and units, although, thankfully, we'll be able to construct a base this time. Location: Al-Alamyn, Egypt Objective: Eliminate the GDI presence in Egypt. Briefing: GDI has kept a stranglehold on Egypt for many years. Set up a forward attack base in your area. To do this you must double click on your Mobile Construction Vehicle (MCV). From here you can begin to build a base. This area contains plenty of Tiberium, so establishing the base should be easy. Author's note: "Back so soon?" This seems like a strange thing to welcome you back. Its not like Nikoomba was heavily guarded or anything. It's also interesting to hear Seth talk about expendable units. One must be prepared to sacrifice himself for the "Greater Good" within the Brotherhood of NOD. Name: Commander Aliases: Unknown Affiliation: Unknown Occupation: Commander within the Brotherhood of NOD Voiced/Played by: N/A CONSTRUCTION YARD ARMOR: MEDIUM COST: N/A SECONDS TO PRODUCE: N/A POWER USAGE: NONE PURPOSE: PRODUCES STRUCTURES The Construction Yard is the foundation of a base and allows the construction of other buildings. You must protect this structure! Without it, you cannot build any new structures. The Construction Yard is fairly strong, but as with almost all structures, it is vulnerable to Engineers. Try surrounding your Construction Yard with walls to keep out unwanted guests. Author's notes: THE main building for your base. Lose this, and you can no longer construct new buildings. POWER PLANT ARMOR: MEDIUM COST: 300 SECONDS TO PRODUCE: 20 POWER USAGE: NONE PURPOSE: PROVIDES POWER TO BASE This unit provides power to the structures in your base. Power output is directly related to the Power Plant�s condition, so protect them during battles. If they get damaged, you must repair them quickly or else some of your base defenses may cease to function. The Power Plant outputs 100 units of power. Author's notes: The third-most essential building in your base (the refinery is the 2nd). Without power, your unit production slows to a crawl and certain buildings or functions won't work. HAND OF NOD ARMOR: MEDIUM COST: 300 SECONDS TO PRODUCE: 20 POWER USAGE: 20 PURPOSE: PRODUCES INFANTRY This creates elite infantry units for the Brotherhood of Nod. Building multiple barracks will decrease the time necessary to train a soldier. Author's notes: The tip about building multiple Hands of NOD to train infantry faster is not a myth, but I always forget its a legit thing. REFINERY ARMOR: MEDIUM COST: 2000 SECONDS TO PRODUCE: 133 POWER USAGE: 40 PURPOSE: CONVERTS TIBERIUM TO CREDITS This unit processes Tiberium into its component elements. Building the refinery immediately deploys a Tiberium harvester and each Refinery can handle an infinite number of Harvesters. The refinery stores 1,000 credits of processed Tiberium. Author's notes: A refinery can handle an infinite number of harvesters, one at a time. It's always best to build a second refinery if tiberium is abundant in the area. SILO ARMOR: LIGHT COST: 150 SECONDS TO PRODUCE: 10 POWER USAGE: 10 PURPOSE: HOLDS REFINED TIBERIUM This unit stores up to 1,500 credits of processed Tiberium. When the Refinery fills to its maximum capacity of Tiberium, you will want to build Silos to handle the excess storage load. Guard it carefully. If destroyed or captured, the amount stored in the silo is deducted from your account. Author's notes: I NEVER build silos unless I'm just pissing money away (or trying to get some distance between my defenses and my buildings. MCV ARMOR: MEDIUM COST: 5000 SECONDS TO PRODUCE: 333 RANGE: N/A WEAPON: NONE The mobile construction vehicle lets you search for suitable base sites. Once one is found, convert the MCV into a full-service Construction Yard and use it to build other structures. Since this vehicle is slow, unarmed, and expensive, you will want to keep it well guarded with other units. Author's notes: As important as the building, the MCV in vehicle form allows you to set up the ideal location for your base, but be warned, it is an irreversible action. HARVESTER ARMOR: HEAVY COST: 1400 SECONDS TO PRODUCE: 93 RANGE: N/A WEAPON: NONE This armor-plated vehicle seeks out and scoops up raw Tiberium, then transports it to refineries for processing. It is slow and unwieldy and will need to be protected. Its good points are that it can take a beating before being destroyed and it is proficient at crushing enemy infantry. Author's notes: The all-important harvester. Protect these at all costs! ENGINEER ARMOR: NONE COST: 500 SECONDS TO PRODUCE: 33 RANGE: N/A WEAPON: NONE Engineers are used to capture enemy buildings. Since they carry no weapons, they are extremely vulnerable on the battlefield and must be directed very carefully. Loading them into an Chinook is an ideal way to move them about the battlefield. Dropping a Chinook full of Engineers in an enemy�s base is a commonly employed tactic. Author's notes: Even the game agrees that mass capture tactics are good. Jobbo_Fett fucked around with this message at 01:07 on Nov 30, 2018 |
|
#
¿
Nov 26, 2018 03:03
|
|
|
DeathChicken posted:I don't think ever actually played this first game. I began with Red Alert on the Playstation, which I loving loved (in spite of playing an RTS on a console. Shh, I didn't have a worthwhile PC then) This is basically the first time I'll be actually playing through Tiberian Dawn myself  Also have a gif 
|
|
#
¿
Nov 26, 2018 05:44
|
|
|
Crane Fist posted:Sometimes when I'm concentrating real hard I whisper to myself This is getting close to spoilers; everyone please watch out lines you quote. Thanks
|
|
#
¿
Nov 26, 2018 06:42
|
|
|
Crane Fist posted:Yeah good point no tags, please quote:And since this entire thing is being done chronologically, that means ABSOLUTELY NO SPOILERS AT ALL ABOUT ANYTHING! NO. SPOILERS. Not even tags.
|
|
#
¿
Nov 26, 2018 07:09
|
|
|
Let's save branding and odd choices for when we get to Generals (in like 4 years)
|
|
#
¿
Nov 26, 2018 18:32
|
|
|
FoolyCharged posted:One thing I think I noticed in the video. Taking the gdi barracks didn't give you a gdi trooper option in the build menu. Was stealing the opposing tech tree not a thing in the first game? While there is different flavor text for each unit, the GDI minigunner is exactly the same as the NOD minigunner. The same applies to the GDI and NOD engineers, MCV, and Harvesters.
|
|
#
¿
Nov 26, 2018 19:46
|
|
|
Broken Box posted:I dont know how willing you are to check the .ini files or look up online the exact stats for unit health, damage, range, attack speed, weapon/armor type, etc. but it'd be interesting to see your breakdown on how units function and feel to use vs. your postings of how units are described in the manual vs. the actual hard numbers. I'll certainly look into it, but a post won't be forthcoming until we get deeper into the campaign.
|
|
#
¿
Nov 26, 2018 20:57
|
|
|
NOD Mission 03 https://www.youtube.com/watch?v=op6VmaPMMOY NOD Mission 03 SUDAN Population: 28,305,000 Expendability: 50% Capital: Khartoum Government: Military Govt Corruptability: 52% Net Worth: $12.1 Billion Point of Conflict: Al-Ubayyid Military Strength: Respectable Military Resistance: 72% Seth compliments us, and tells us he'll put in a good word for us with Kane. We have nothing to emphasize the need for rescuing the prisoners held here, but we may just not be privy to that information. Location: Al-Ubayyid, Sudan Objective: Capture the prison; do not destroy it! Briefing: GDI has established a prison camp, where they are detaining some of the local political leaders. Kane wishes to liberate these victims. Destroy the GDI forces and capture the prison, do not destroy it. Author's note: I always hear Seth's claim as being very boastful, as if he's hiding something. Anyone else get that vibe? COMMUNICATIONS CENTER ARMOR: MEDIUM COST: 1000 SECONDS TO PRODUCE: 66 POWER USAGE: 40 PURPOSE: BASE RADAR & COMMUNICATION Allows the use of the radar screen as long as there is sufficient power. The radar screen allows for long-range views of the battlefield and for commanding units over great distances. When playing as Nod against GDI in the solo play missions, destroying GDI�s Radar Facility will keep GDI from launching A-10 airstrikes against you. Author's notes: A building with very little purpose for NODs forces, the communications center basically only gives you the radar/minimap. We'll see what the A-10 airstrikes are like soon enough, so don't worry about seeing those in effect. Jobbo_Fett fucked around with this message at 01:08 on Nov 30, 2018 |
|
#
¿
Nov 27, 2018 03:51
|
|
|
EclecticTastes posted:I would say that the minimap is absolutely essential to playing C&C; the lack of Fog of War means that as long as you've got your radar up and running and have explored far enough, you can always see enemy attacks well before they arrive. It also adds an additional dimension to multiplayer, allowing you to all but blind an opponent by striking at their radar building. Later games, especially, allow for some avant-garde tactics involving taking out the enemy's minimap right before launching an attack from an unexpected angle. Having to find both your units and their own manually will buy you a few precious seconds to wail on their base. When talking about multiplayer, sure, but in the single-player missions its been quite pointless so far =\ Edit: Keep in mind I'm talking about Tiberian Dawn only, because 1. We haven't gotten to other games yet and 2. The maps at the "higher resolution" aren't big enough to require a ton of scrolling. Jobbo_Fett fucked around with this message at 04:21 on Nov 27, 2018 |
|
#
¿
Nov 27, 2018 04:12
|
|
|
EclecticTastes posted:Point taken, I haven't played the original C&C since, like, '98 or '99, back when 800x600 was top of the line. Yeah when you fullscreen 640x480 its super useful to have the minimap but when I'm at almoat double that resolution, well... youve seen the first 3 maps so far, they aren't huge by today's standards. That being said, Fog of War is definitely nerve wracking and, when screens were tiny, every map felt big.
|
|
#
¿
Nov 27, 2018 05:04
|
|
|
Thotimx posted:I always thought of it as more Seth reminding you how much more important he is. Not just in a boastful way, but a more a 'make sure you mind your place you greenhorn' kind of thing. Personally, I've always preferred doing one complete campaign and then seeing how the other is different. I could change to an alternating thing if the thread is overwhelmingly for it. And yeah I could that other way of taking Seth's little speech Nalesh posted:I can't get over how short the range is of units removing fog of war, I didn't remember that at all. Yeah, LOS by units is laughably small in some cases that I'll have to talk about it in a video. Theres even one unit that does not reveal ANY LOS (to my knowledge), and we've already seen it. Anyone care to guess?
|
|
#
¿
Nov 27, 2018 12:58
|
|
|
FoolyCharged posted:The harvester? Nope, that one can see things.
|
|
#
¿
Nov 27, 2018 13:14
|
|
|
UED Special Ops posted:Pistol-wielding civilian from Nod mission 1. Winner winner chicken dinner They never get a unit picture, you can't build them, their health and damage are incredibly low, but "Technicians", as they are called, reveal NO LOS. You get them at random when you sell a building or when a building is destroyed. Yeah, randomly.
|
|
#
¿
Nov 27, 2018 13:21
|
|
|
Fish Noise posted:Is this where we start posting those recent KANE-SENPAAAIII images? How would we know its Kane when we haven't seen him yet?
|
|
#
¿
Nov 27, 2018 14:41
|
|
|
Groetgaffel posted:Don't know if anyone else agrees, but I think your voice is a little bit low compared to the game volume K, I'll try to fix that for the next video.
|
|
#
¿
Nov 27, 2018 16:24
|
|
|
Mordja posted:I actually played the original C&C after Starcraft and, not knowing when either came out, it actually felt way more modern to me. The fact that there was no selection limit, the fact that projectile weapons could actually miss their target (probably just a dice roll, but still), that tanks could just straight up run over infantry who could try and scatter out of the way. It just felt so much more "real." And then I played stuff like Homeworld and Total Annihilation and ooooh boy, was Blizzard's style of RTS dead to me from there on out. Starcraft also has a "shot miss" function, but its high ground vs low ground (I believe its 25% chance to miss if shooting from low ground to high ground). I actually came across a post online that has all the rules from the C&C Tiberian Dawn, and for each unit. I haven't check the actual game files, which would certainly have them there. I'll start posting some as we get a little further into the campaign.
|
|
#
¿
Nov 27, 2018 16:57
|
|
|
Its a good thing that video is giving a playback error because it would suck if people started posting spoilers when i said no spoilers.
|
|
#
¿
Nov 27, 2018 20:30
|
|
|
bunnyofdoom posted:We getting a unit summary for rocket launcher dudes? Oops... yeah, next mission.
|
|
#
¿
Nov 27, 2018 23:37
|
|
|
NOD Mission 04 https://www.youtube.com/watch?v=RmSX44scaEM NOD Mission 04 CHAD Population: 5,238,000 Expendability: 80% Capital: N'Djamena Government: Republic Govt Corruptability: 85% Net Worth: $1 Billion Point of Conflict: Mao Military Strength: Laughable Military Resistance: 35% BROTHERHOOD. UNITY. PEACE. Location: Mao, Chad Objective: Eliminate GDI presence in the region. Briefing: A small village friendly to our cause has been increasingly harassed by GDI, and the Brotherhood wishes you to assist them in their efforts. Seek out the enemy village and destroy it. The event will be disguised as a GDI attack. Author's note: Where's Seth? Who, or what, is EVA? Is that Kane? Is "he" even real, or is this some sort of trick? I HAVE QUESTIONS! ROCKET SOLDIER ARMOR: NONE COST: 300 SECONDS TO PRODUCE: 17 RANGE: MEDIUM WEAPON: LIGHT TOW ROCKETS These infantry units are slower and easier to kill than other infantry, but can tear through armor faster than any other infantry unit. Their major advantage is the ability to attack airborne units. Most effective as a support unit in diverse groups. Author's notes: The anti-armor infantry unit for NOD. They aren't bad, can shoot air units, but are one of the slowest units in the game. This ensures that any attack will progress slowly, or see everyone else die... right before they do. RECON BIKE ARMOR: LIGHT COST: 500 SECONDS TO PRODUCE: 33 RANGE: MEDIUM WEAPON: DRAGON TOW ROCKETS Mounting twin rocket launchers, the cycles have great flexibility, serving multiple roles in Nod�s forces. Learn to use these units in packs, hunting down lone units or harvesters. When in guard mode, they will shoot at enemy aircraft, making them ideal at destroying incoming aerial assaults. Their speed makes them an ideal scouting unit as well. Author's notes: I don't like the recon bike, simply because its so fragile, but at least it shoots air uni~oh right I ALWAYS FORGET TO GUARD. The best reason to use bikes is to scout territory, or in large packs. MISSION 02 MANUAL TUTORIAL quote:Mission Two I misspoke, the manual only has the first two missions as tutorials Jobbo_Fett fucked around with this message at 01:11 on Nov 30, 2018 |
|
#
¿
Nov 28, 2018 00:47
|
|
|
By popular demand posted:Do not disappoint Kane a second time. After this last briefing, I'm not too sure if Kane isn't just some AI program  And computers can't be disappointed 
|
|
#
¿
Nov 28, 2018 00:48
|
|
|
bunnyofdoom posted:Unlike your parents. Wow...
|
|
#
¿
Nov 28, 2018 01:38
|
|
|
Aces High posted:mea culpa Jobbo, just got excited about other C&C enthusiasts No worries, I'm not against anyone (re)posting speedrun/multiplayer games after we've gone through the campaigns, just not before we see how things develop.
|
|
#
¿
Nov 28, 2018 03:36
|
|
|
EclecticTastes posted:The soundtrack is one of the strongest points in favor of C&C being the best drat RTS series ever. Frank Klepacki is a goddamn musical genius, and he managed to top himself with each successive game he worked on, until he reached absolute perfection with RA2 and just maintained that quality for the remainder. Name: Frank Klepacki Aliases: The Big F, K-Note, Father Sound Affiliation: Frank works for no one but himself Occupation: Legend Voiced/Played by: Unknown Who is Frank Klepacki? Very little evidence, other than his musical entries in the game, supports the theory that Mr. Klepacki, if that is his real name, has ever existed on planet Earth. Rumours have made the rounds on the internet that he is simply a Tommy Tallarico expy, or an even wilder theory that the music was created during a darker period of time in Koji Kondo's life. [VIDEO REDACTED] A young Frank Klepacki on [REDACTED], or simply a hoax video? Whatever the case may be, he is credited for Original Soundtrack for Command and Conquer (Tiberian Dawn). More to follow at a later date...
|
|
#
¿
Nov 28, 2018 06:42
|
|
|
Lets try not to spoil any weird/crazy things that may or may not come up ya?
|
|
#
¿
Nov 28, 2018 06:52
|
|
|
Crazy Achmed posted:Oh god. That first medium tank is a monster I'll never forget, I think the first time I played this mission it came out of nowhere and ran everybody over in one swoop. It needs to be emphasised how close this was to happening during the video, those things move slightly faster than bazooka guys run iirc and the AI is good at tracking clumps of infantry. I ragequit a few times when I was a kid after watching my glorious army get turned into a red paste. If only I'd known about the "X" shortcut (Hitting X with infantry selected forces them to scatter in random directions)
|
|
#
¿
Nov 28, 2018 14:14
|
|
|
Szurumbur posted:I know it'd be only for my convevience, but would you mind labeling the videos' urls with titles? Like so: NOD Mission 4. It'd be easier to know what you're linking to, and even though there are add-ons to certain browsers that allow one to see the title of video, I don't think Firefox has one. I just embed the videos in the post. I assumed most everyone would browse like that, but yeah I'll go through the previous posts and add a titled link under each video.
|
|
#
¿
Nov 29, 2018 14:18
|
|
|
Crazy Achmed posted:Yep, I never knew about the X key for quite some time - was it even in the manual? Off the top of my head there's also a "force move" command that seems designed to let you order a tank to squish rather than fire on infantry, and a "guard" command that gives you something akin to an actual attack-move (tell your army to guard one tank/buggy, then drive that around and everyone will have a decent autoattack rather than standing around watching their mates standing six feet away get blown up by a grenadier) Yes, the manual does! Its at the back of the book, but before all the unit/building blurbs, and the tutorials. Here's a direct copy-paste of the manual. quote:Advanced Game Controls Interesting to note that a lot of these controls would become essentials to RTS pro-gaming. Also that "Control Groups" as we know them were called "Teams".
|
|
#
¿
Nov 29, 2018 14:23
|
|
|
NOD Mission 05 https://www.youtube.com/watch?v=n_yWCeivBfU NOD Mission 05 MAURITANIA Population: 2,059,000 Expendability: 50% Capital: Nouakchott Government: Islamic Republic Govt Corruptability: 48% Net Worth: $1 Billion Point of Conflict: Tidjikdja Military Strength: Laughable Military Resistance: 24% After a nice informational video on Tiberium, what it is and how it spreads, we are made aware that the eye of Kane is on us now, moreso than ever before. Strange, however, that Seth wouldn't be Kane's personal commander, or that we should worry about failing Seth, and not Kane. Location: Tidjikdja, Mauritania Objective: Deploy SAMs to defend your base, then eliminate GDI presence on the map. Briefing: Our brothers within GDI tell us of A-10 strike jets scheduled to be deployed here soon. Our suppliers have delivered new Surface to Air Missiles to aid you. Use the SAMs to defend your base, then seek out their base and destroy it. Author's note: Seriously, what's Seth's deal? LIGHT TANK ARMOR: MEDIUM COST: 600 SECONDS TO PRODUCE: 40 RANGE: MEDIUM WEAPON: 75MM APDS This highly-mobile tread vehicle, delivers maximum weaponry and personnel destruction with minimum weight, maintenance and weaponry. Faster than any other tank on the battlefield, these units can reach a target quickly. Used in conjunction with aerial assaults, these units are very effective. Author's notes: What aerial assaults?! FLAMETHROWER INFANTRY ARMOR: NONE COST: 200 SECONDS TO PRODUCE: 13 RANGE: SHORT WEAPON: FLAMETHROWER Effective for maximum close-range destruction. Produces fire which burns more slowly than normal, allowing more effective elimination of humans and armament. Be careful when using these troops in groups�if one unit gets in front of another, chances are that the unit in front will catch some of the damage from the back unit. Spread them out. Author's notes: The slow burning fire stuff is just fluff, but you should honestly be careful with multiple flamethrowers. No joke, anything over 1 is dangerous to all sides. SANDBAG BARRIER ARMOR: LIGHT COST: 50 SECONDS TO PRODUCE: 3 POWER USAGE: NONE PURPOSE: BASE DEFENSE Used to deter the enemy from advancing. Sandbags provide limited cover and may slow units down. Only explosive weapons such as grenades, missiles, and shells can damage Sandbags. Author's notes: Not sure what the "provide limited cover" is supposed to be exactly, although I haven't checked the rules on it. The 2nd part is true, and annoyingly so at times. SAM SITE ARMOR: HEAVY/LIGHT COST: 750 SECONDS TO PRODUCE: 50 POWER USAGE: 20 PURPOSE: DEFENSIVE ANTI-AIRBORNE UNIT Fires surface-to-air missiles at airborne GDI units. When the it is recessed in the ground, it is difficult to harm. However, when the launcher is exposed, it will damage more easily. Position these around your base in a triangular layout. This gives you the best chances of destroying aerial threats before they can cause serious damage to your base. Author's notes: Due to the limits on distance (you need to build adjacent), you either need to build out or accept that their range will be poor, especially against A-10 strikes. AIRSTRIP ARMOR: HEAVY COST: 2000 SECONDS TO PRODUCE: 133 POWER USAGE: 30 PURPOSE: WEAPONS RECEIVING AREA Nod buys all its units. The Airfield allows cargo planes to land and deliver equipment. It is functionally equivalent to the GDI Weapons Factory. However, you do not instantly get the unit when it is complete�it must be flown in, so plan accordingly. Building multiple Airfields will increase the ordering speed, and will enable you to have two units delivered at a time. Author's notes: I don't think I ever bothered building a second one, mostly due to money concerns. Sorry guys, would've had this out sooner but holy crap the encoding just would NOT register my commentary track for some godawful reason. Jobbo_Fett fucked around with this message at 05:55 on Nov 30, 2018 |
|
#
¿
Nov 30, 2018 04:49
|
|
|
UED Special Ops posted:Ahh C&C1 A-10 warthog strikes, the bane of NOD missions at times. Speaking of those, are you going to talk about how the AI them works or can that be talked about in the thread? Also, noticed that the note on flamethrowers is the same as sandbags. Whoops, fixed the sandbag note. The A-10 Strike always feels random or like.. closest enemy to the comms center? I def won't say no to some more knowledge kn how the AI uses them
|
|
#
¿
Nov 30, 2018 05:56
|
|
|

|
| # ¿ Apr 25, 2024 08:36 |
|
|
Thotimx posted:Totally forgot about Mechanical Man. Far catchier than it has any right to be. I could be wrong on this but I think Mechanical Man is an expansion song and, due to the nature of the patches and such, they are in the normal song rotation. As for Seth, he's clearly doing what he can to further his own goals, or at the very least impress Kane (whoever he is). The way he addresses us makes me think he doesn't actually like the commander, and that we're just being used. I swesr in a trial run being at low power slowed production time and ill make a tiny video demoing it if I can replicate it again.
|
|
#
¿
Nov 30, 2018 12:44
|
|