


|
Heya. Back in the HCH (nee DIY) feedback thread, the mods suggested people make their own project threads for larger projects. So here's mine. I'm making a cabinet for our dining room, which will contain our board games, which are currently on some garbage shelving that I think predates Ikea. Here's the model of what I'm making: 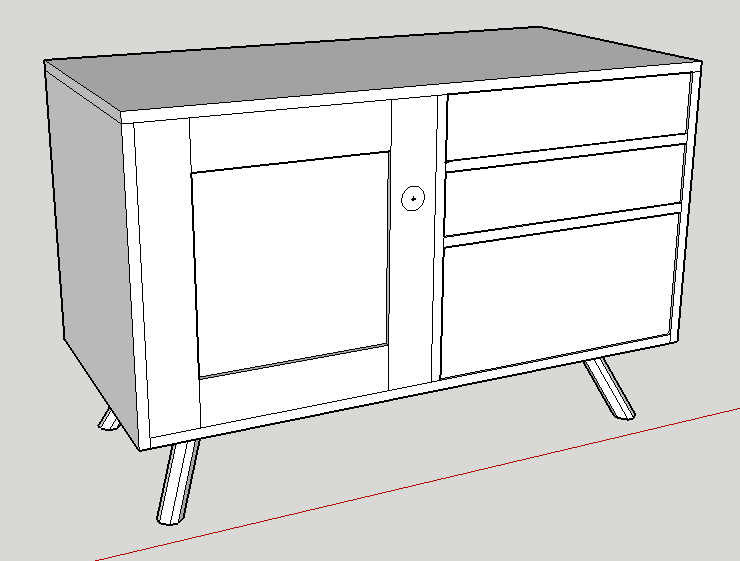 If you don't know me from the woodworking thread, I only use hand tools for my furniture building. You can see and read about some of my previous projects here. I find hand tool working more fun than power tools, and since I'm doing this as a hobby and not a job, I just do what's more fun. I'm one of those sickos who enjoys physical labor, so for me power tools have a lot of downsides (big, heavy, expensive, dusty, loud, and scary) without many upsides. Here's my toolchest. Almost everything I use for my projects fits in here. 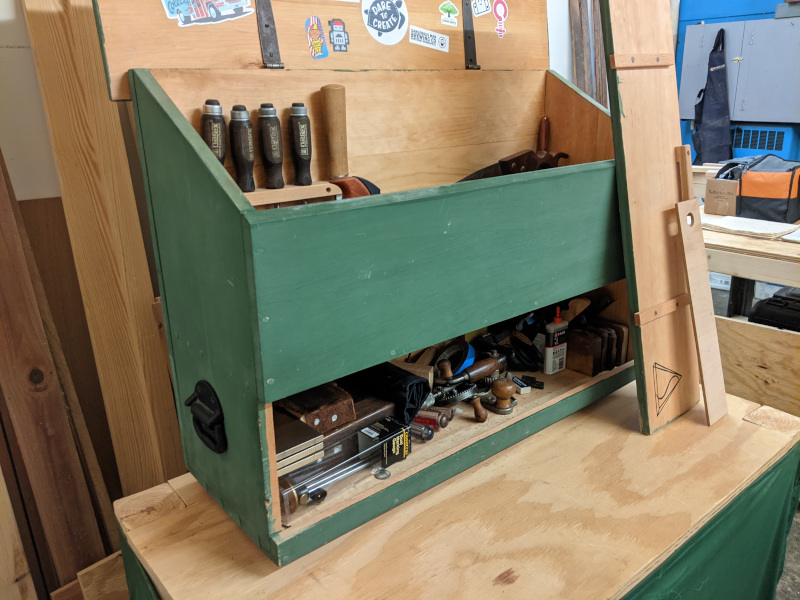 The most common tools are up top. These are my planes, saws, chisels, and some other things I don't want getting banged up down below. In the lower compartment are some marking gauges, sharpening and other tool maintenance stuff, pencils, lumber crayons, drilling tools, etc. 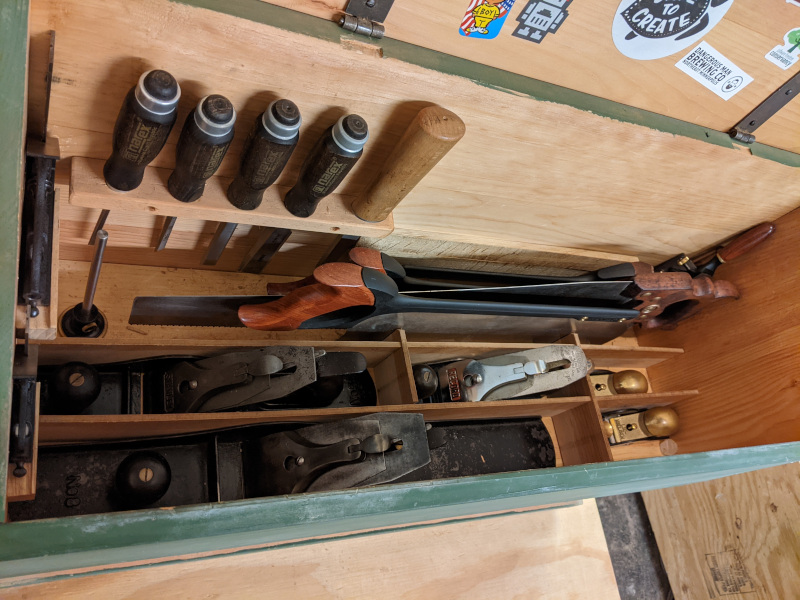 Here is the view from my bench. I rent shop space in the basement of an artist studio building. The building used to be a General Mills research laboratory and office complex. I share the space with my neighbor, that's all his stuff in the background. 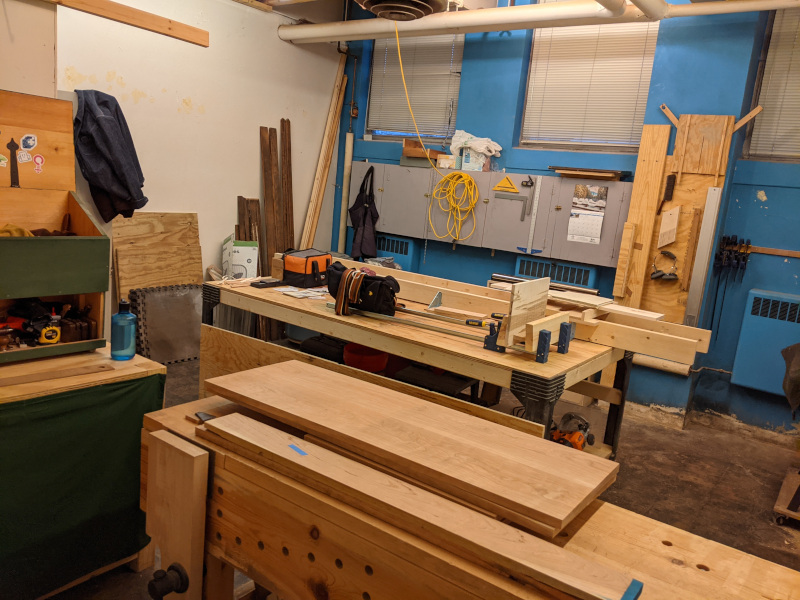 I actually started this project some months ago. I initially designed the cabinet back in January. Then COVID happened, and then George Floyd was murdered (I live in the Twin Cities), and then my father's health failed (he died last month, not unexpectedly), and everything else you already know about from this year happened. So it hasn't been a great year for mental health/productivity. But I managed to sneak in some time here and there. Back in August I made a bulk order (300 bf) of rough sawn black cherry, in order to avoid spending hours at the lumber yard picking through stacks during the pandemic. This should be enough wood for at least my next three or four projects. 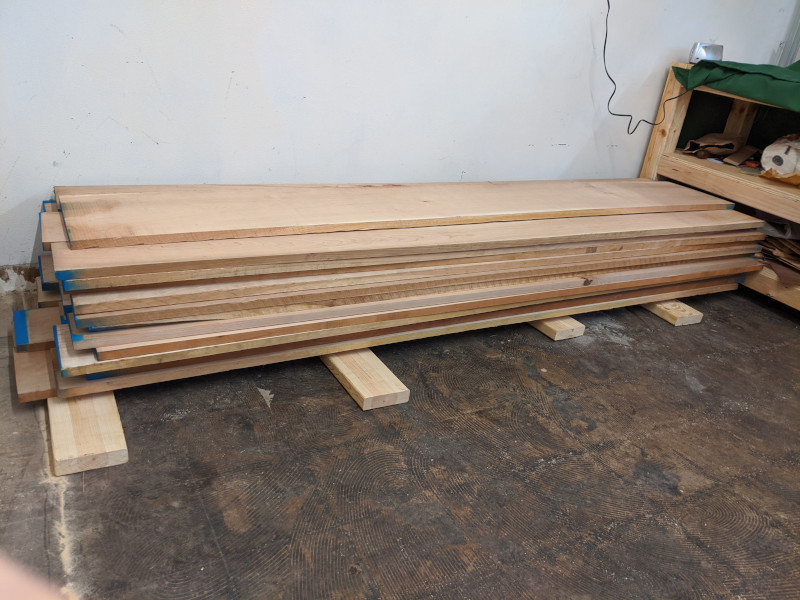 I worked on it here and there through the end of the year. Here's where the project stands as of this morning. It doesn't look like much, but this actually represents a lot of work. I got all the boards for the project picked out from the stack, broke them all down to rough size, then got all four of the main case boards into shape and glued up into panels. Also notice the stacks of boards in the background with blue tape; those are the rough boards for the dividers, door, drawers, etc, waiting for their turn to be worked on. 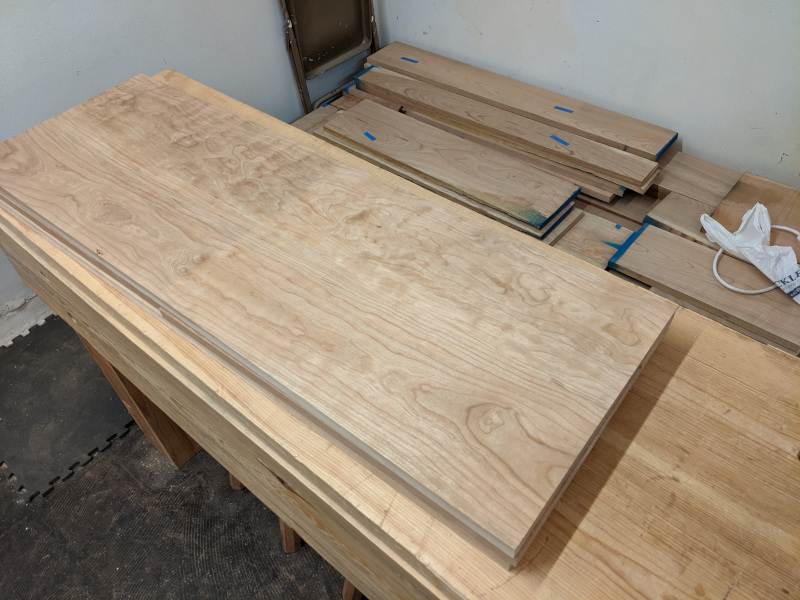 In this thread I'm planning to do a brief update any time I go into the shop to work on it. This will probably be once or twice a week, assuming I don't get snowed in (Minnesota!). If anyone has any questions or thoughts about what you see, please feel free to post. If I don't have much to say about the project and feel like writing, maybe I'll come up with some topics to share about my tools, or the studio space, or whatever.
|
 #
?
Dec 13, 2020 19:46
#
?
Dec 13, 2020 19:46
|
|


|

|
| # ? Apr 25, 2024 13:48 |
|
|
Here's today's update. I figured out where the project was since I last left it some months ago, and then got all of the case panels planed to equal width. Next time I'm planning to get the divider panel glued up, and then start in on the main case dovetails.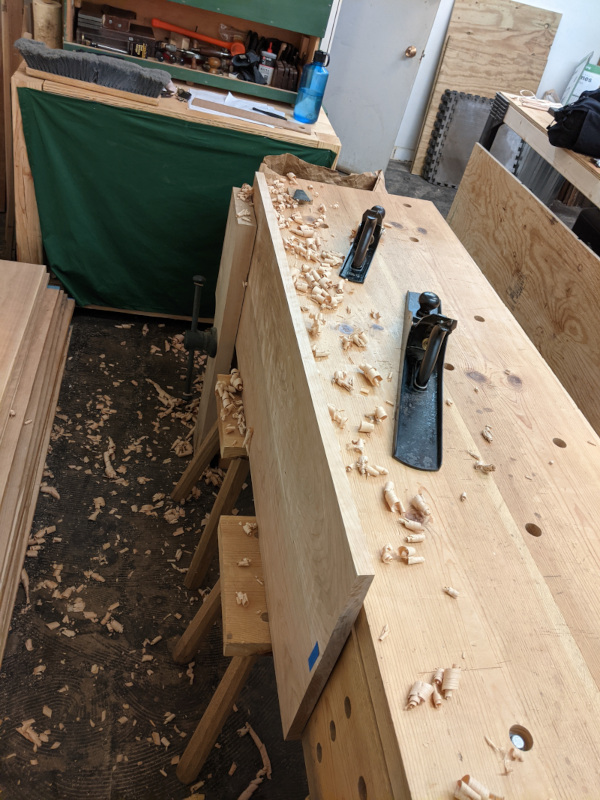
|
|
#
?
Dec 13, 2020 19:49
|
|
|
Excited for this thread-please post a link to in the in Woodworking thread or the bookmark browsers will never see it. Liked, subscribed, clicked the bell icon. That's an impressive amount of hand planing. I know you're pretty traditionalist-do you glue your edge joints with hot hide glue or yellow glue or what?
|
|
#
?
Dec 14, 2020 03:02
|
|

|
Interesting solution to support the board from below with those saw benches for planing. Do you have anything special planned for holding boards in place for dovetailing? I've found that clamping one end in the vice, and a holdfast through the apron on the other end to be a bit lacking in the firmness department.
|
|
#
?
Dec 14, 2020 15:51
|
|

|
Here's how to process boards to glue up into a panel. Step 1) Flatten one face. I do either the concave face or, if it's already pretty flat, the show face. I didn't bother with that low far corner since I knew it'd be ripped off later. 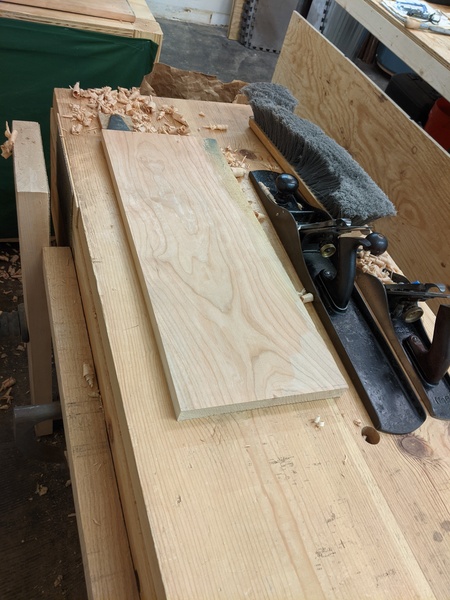 Step 2) Straighten the glueup edge and make it square with the face you flattened. 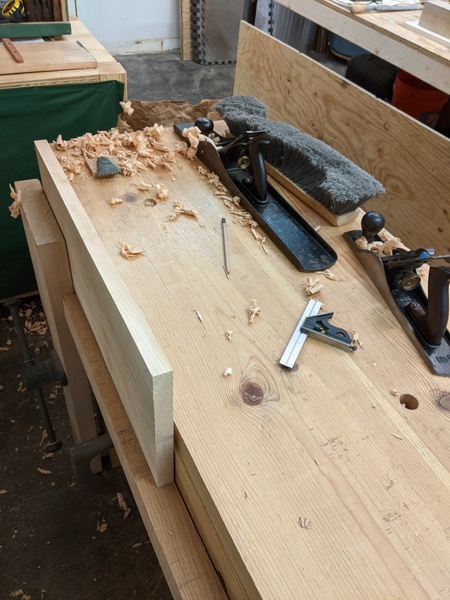 Step 3) Strike a line half of your desired panel width and rip off the outside edge. Hit the sawn edge with a plane to clean it up for the clamps, but don't bother truing it up. 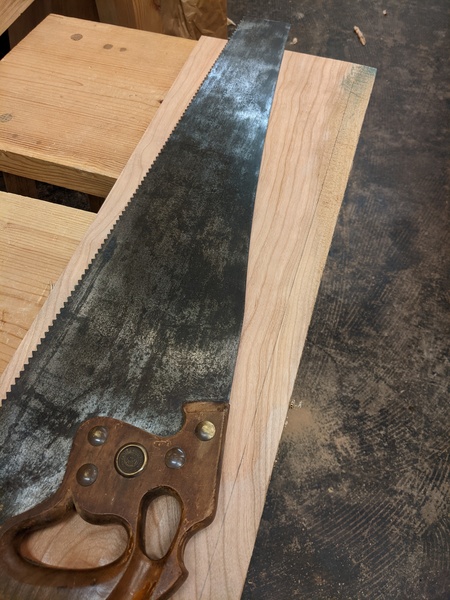 Step 4) Do all that on the other board. 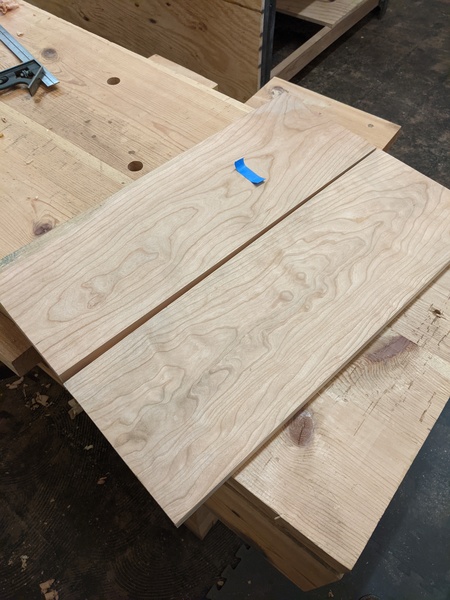 Step 5) Face the flat faces against each other and align the glue edges. Hit them with your try plane. This gives them the same-but-opposite angles, so they glue up flat even if your edges aren't exactly square to the faces. This is the clumsiest step due to that clamp on the near end. Would be nice to find a better solution here. 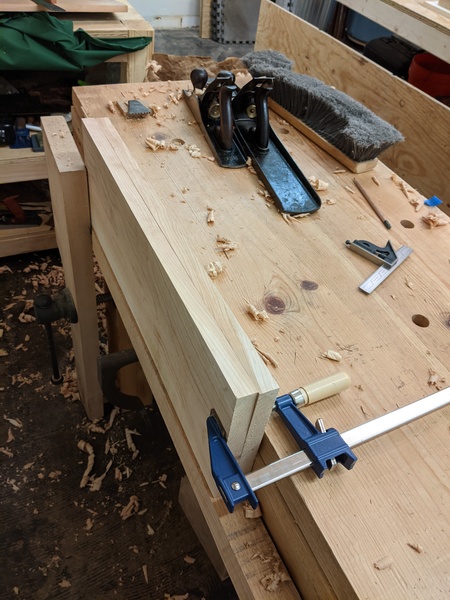 Step 6) Glue 'em up. After the glue dries, you can clean up the back face and plane the outside edges down to the panel's final width. 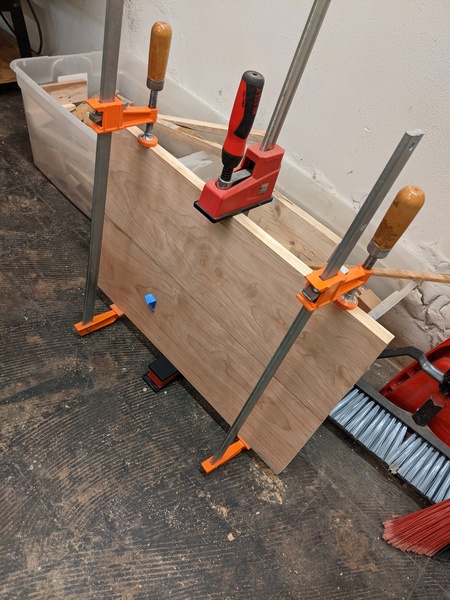 So that's the divider panel ready to go. I then was going to move on to the dovetails, but I found out the panels I glued up earlier this year had warped. This is why you don't let them sit for months. One of the purposes of joinery is each board works to hold the others in shape. If you just let them sit, they'll warp like this. I've heard some professionals will actually wrap their prepared panels in plastic and put heavy weights on them to keep them flat until they're ready to be used. 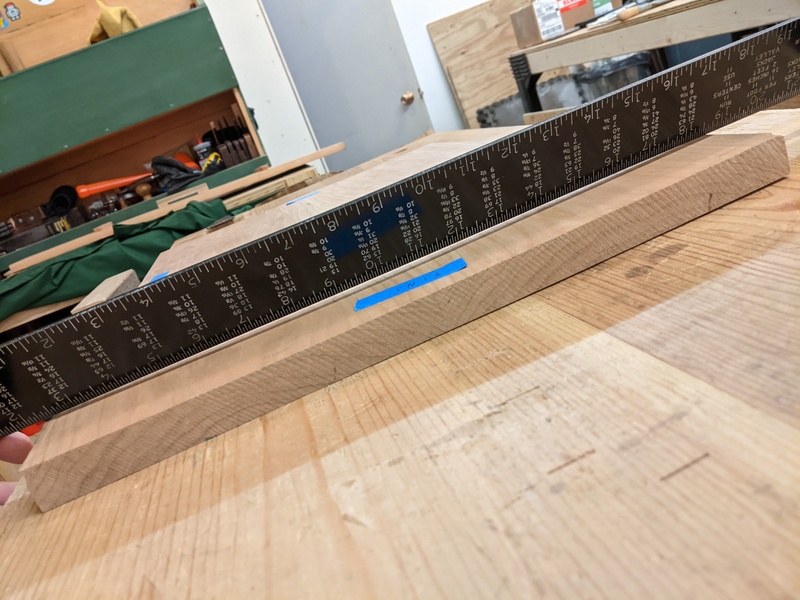 So anyway I flattened those four panels. Only two needed any significant work. Then it was late enough in the morning that I didn't think I'd have time to lay out cut dovetails, so I sharpened all of my dovetail tools, called it a day, and went to work.
|
|
#
?
Dec 15, 2020 00:18
|
|
|
Kaiser Schnitzel posted:Excited for this thread-please post a link to in the in Woodworking thread or the bookmark browsers will never see it. Liked, subscribed, clicked the bell icon. Ooh the coveted notification bell. I use Old Brown Glue for most stuff, yeah. Anything where the joint could be visible. It's easier to clean up and doesn't affect finish in the same way that yellow glue does. I do use yellow glue for things that aren't visible (e.g. laminations, some internal joinery) since it's stronger and I don't have to heat it up. Just Winging It posted:Interesting solution to support the board from below with those saw benches for planing. Do you have anything special planned for holding boards in place for dovetailing? I've found that clamping one end in the vice, and a holdfast through the apron on the other end to be a bit lacking in the firmness department. That's actually exactly how I do it for boards that are short enough. It's never given me a problem. But for long boards, like the bottom board on this project, what I've done in the past is hang it off of the edge of the bench top and actually climb up on top of the bench and saw the tails facing the floor. It's awkward but works well enough. I think I heard of someone (Becksvoort?) who actually built a dovetail setup on his staircase in order to cut tails on long boards. Edit: Ah ha! Found it. https://www.instagram.com/p/BtY8abXgsBC/ https://www.instagram.com/p/BtY9xFSAxOw/ ColdPie fucked around with this message at 00:48 on Dec 15, 2020 |
|
#
?
Dec 15, 2020 00:28
|
|
|
I see, I haven't done much dovetailing on wide panels so maybe I overestimated the amount of firmness you need for that. Using your stairs as a clamping jig though is ingenious.
|
|
#
?
Dec 15, 2020 01:12
|
|
|
ColdPie posted:Ooh the coveted notification bell.
|
|
#
?
Dec 15, 2020 01:42
|
|
|
Spent the morning at the shop. Remember I said my shop is in the basement of an old GM research building? This thing was sitting in the hallway today. New Brunswick Scientific SF-116, manufacture date in 1981. According to some eBay listing (asking $1,000!), it is a "fermenter bioreactor". It has beer brewing words like "sparge" on it. Dunno. Click for huge if you want to read all the labels. Anyway, today was dovetail day 1, although I didn't make as much progress as I wanted. I spent a ton of time thinking and re-thinking through the joinery for half-blind dovetails with a let in for the rabbet for the back boards (a rabbet is a groove cut along the edge of a board). Probably spent over an hour on layout alone, since I've never cut this joint before. I'm starting with the joinery that won't be visible, on the bottom of the cabinet. This lets me practice and learn where I need to improve before moving on the very visible upper dovetails. As expected, the board was too tall to cut the tails upright. So I climbed up on the bench and did it facing the floor. Went well, although I cut too far on the back side (bottom of the case), as you'll see in a moment. 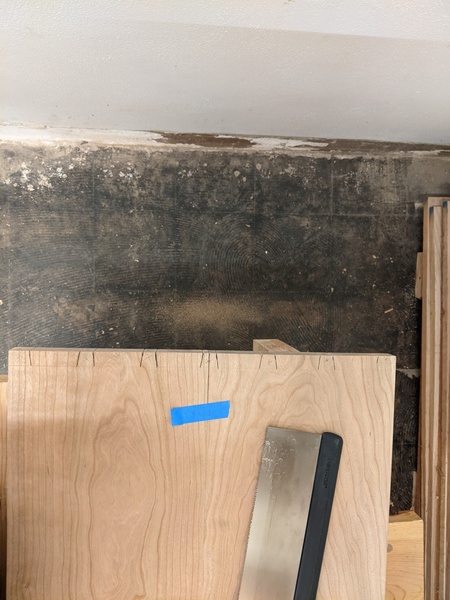 I use a fretsaw to cut out the bulk of the waste. Then I chopped down to the baseline with chisels. 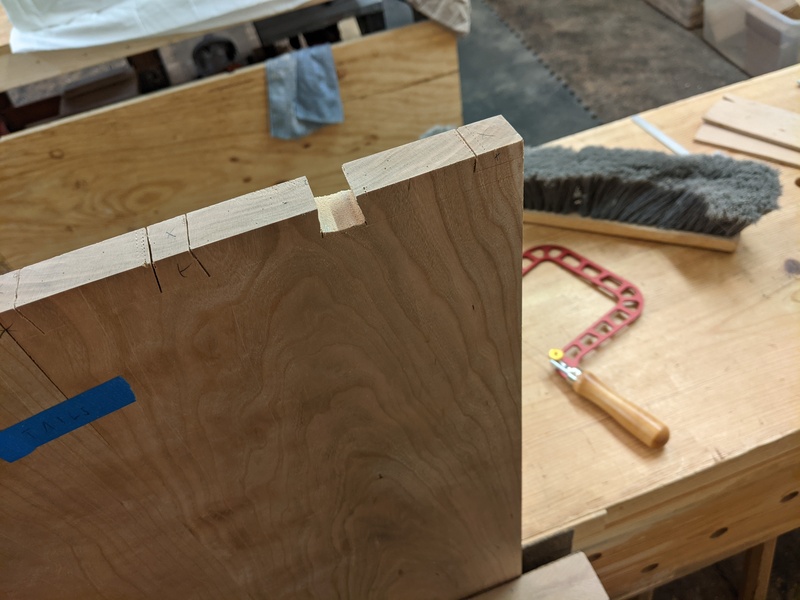 Here's transferring the tails onto the pin board. Why is everything I build so freaking big? 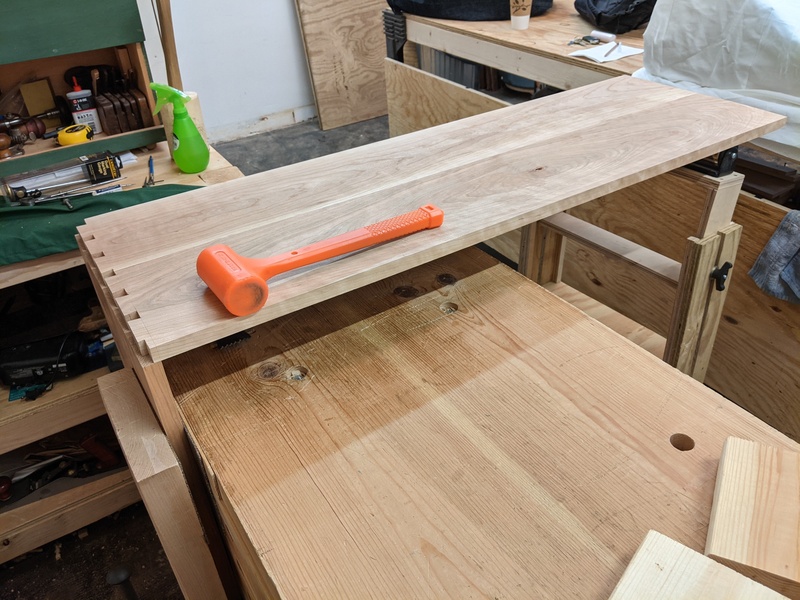 After transferring the tails over to the pin board, I cut the rabbet with a Veritas skew rabbet plane I bought from a local goon. The skew on the blade is critical, as you can't always cut with the grain when cutting a rabbet. That happened here. The skew gives the blade a lower effective cutting angle, which means less tearout.  Chopping the first few pins took way, way too long. I was being too careful when removing the bulk of the waste. I switched to be far more aggressive. The picture shows where I am now doing my first initial chopping, almost all the way back to the baseline. From there it's just one more rough, and then one more careful, chop back to the baseline, and then once more into the end grain, across the end of the tail line. 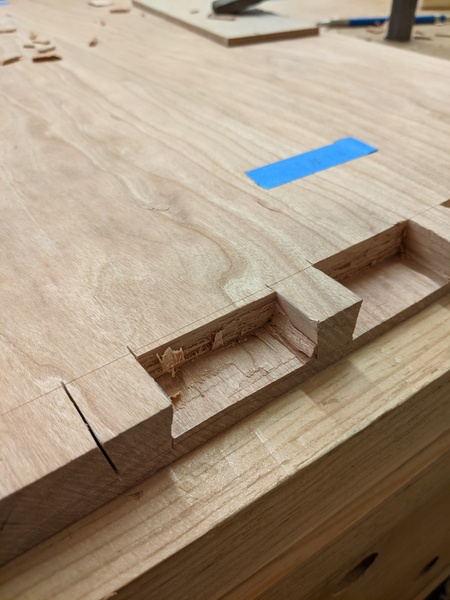 So how'd it turn out? Eh, OK. I would not be happy if this was one of the visible joints. Learned some good lessons. I need to make sure the inside face is on the far side of the board when cutting tails, in case I blow past the baseline again. Here the too-deep cut is on the bottom, so who cares. When cutting the pin sockets, I need to stay clear of the layout lines and pare towards them when fitting. There are a lot of gaps in this joint, which means I cut too far into the waste. Also I somehow knocked off the front corner of the side board (leftmost pin in the photo), which sucks because that'll be very visible. Maybe the edge chamfer will hide it. However, you can see the joinery correctly accounted for the rabbet, so my plan worked out. But, I don't like the way the layout lines look over that half-pin, or the baseline extending across there. Honestly I've never liked visible baselines on dovetails. Maybe I'll do it in pencil next time. 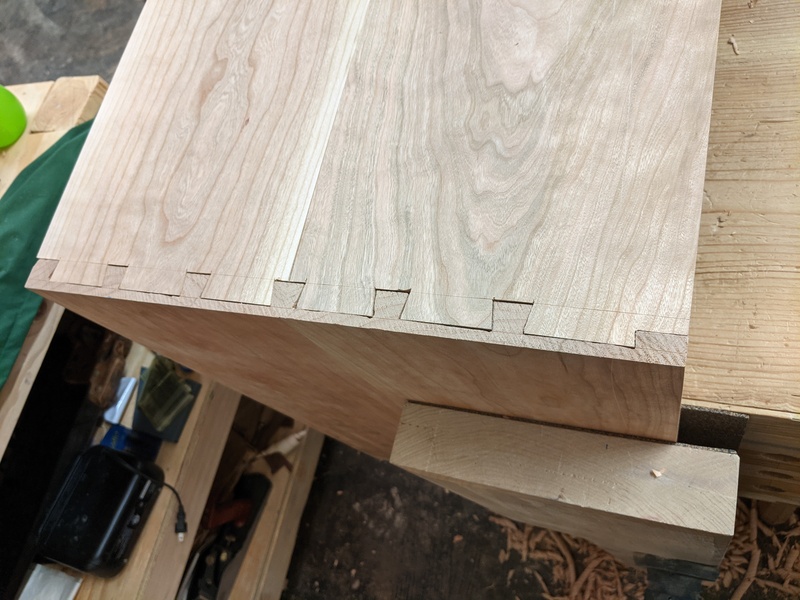
|
|
#
?
Dec 20, 2020 20:52
|
|
|
Well, another disappointing day in the shop. The 2nd set of dovetails also turned out pretty crappy. The test joint I made a while ago turned out fine, so I think my technique is all right. I suspect the boards have too much cup, and that's somehow causing this problem. I'll have to stop and understand what's going wrong before I keep going. If the cup is the problem, I might try out Schnitzel's suggestion before taking more thickness off.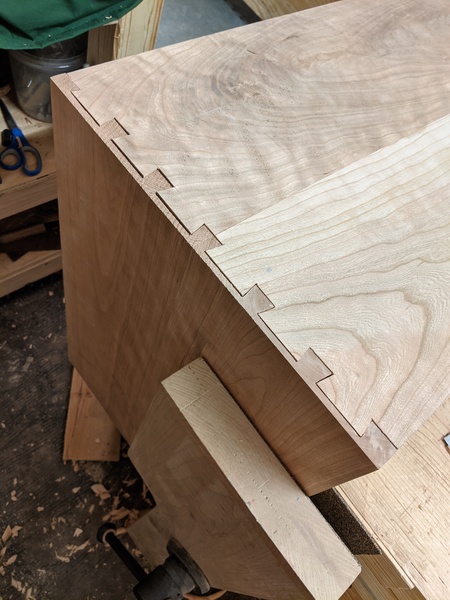
|
|
#
?
Dec 21, 2020 22:33
|
|
|
I usually cut pins first because I find it easier to mark them cleanly and remember to stay inside the lines vs. outside the lines, but they both work. Another trick I've figured out is to have the board you are tracing off of be slightly below the baseline (I think-I'd really need one in front of me-make it so you are scribing the correct angles but the triangles are smaller-may work the opposite with tails first? ). That will make your tracings ever so slightly smaller and make the females you cut out be too tight instead of too loose. Still only chop to the baseline, but it gives you room to pare the joint perfect. Once you can get the joint started going together, you can see what is rubbing and pare back to get a nice fit. It also helps to slightly undercut the front edge (towards the drawer face) of the cavities for the tails on the pin board. If its angled at all the other way, it will push the tail board out and make a joint that could glue tight be loose. Hopefully that make sense-it's hard to use words to describe dovetails. I'm always amazed how much better dovetails look after they are glued up and sanded/planed flush too, and they are plenty strong even if they aren't perfectly pretty. I've seen much sloppier on 200 year old antiques that are still going strong.
|
|
#
?
Dec 22, 2020 00:37
|
|
|
The best dovetails I've done to date were tails first, then I cut the pins just slightly on the waste side of the line, so they're too small initially, then chiseled them out to the exact fit. Similar to what Kaiser Schnitzelis describing I think, but the opposite. Even my not great dovetails look good after rubbing some sawdust and glue into the gaps �\_(ツ)_/�
|
|
#
?
Dec 22, 2020 03:44
|
|


|
Boring update. I knew today was going to suck, and it did. Diagnosing your failures is never fun. I'm pretty sure what went wrong was the boards just weren't flat enough. My guess is the ends of the tails pushed against the baseline of the pins, which flattened the warped boards while driving the joints together. That altered the angles of the walls, so I had to clear more wood to get them to join, and that together with my frustrated carelessness caused the huge gaps. I think the boards have warped even more since I cut the dovetails. Today the low center on the inside was probably 3/16" below the edges, I don't think I would've let that slide even by my lax standards. So my plan is to re-flatten the boards (again) before cutting the next set and hope for the best. If they suck again, I might look at applying a molding to hide them (but I think I'd have to adjust my design, since I don't think moldings would look good with the stick legs). Anyway here's the bottom tails about as good as they're getting. They look a tad better when clamped up, but still pretty terrible. Better luck next time. Third image is my pratice joint in scrap for comparison. 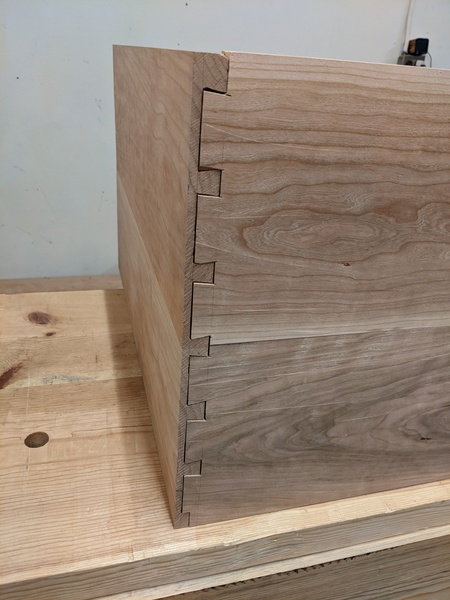 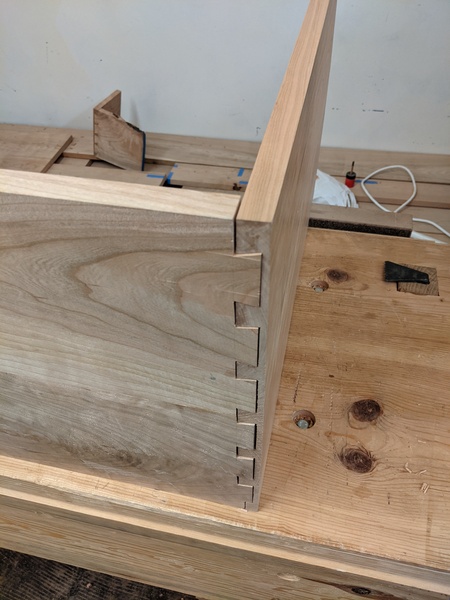 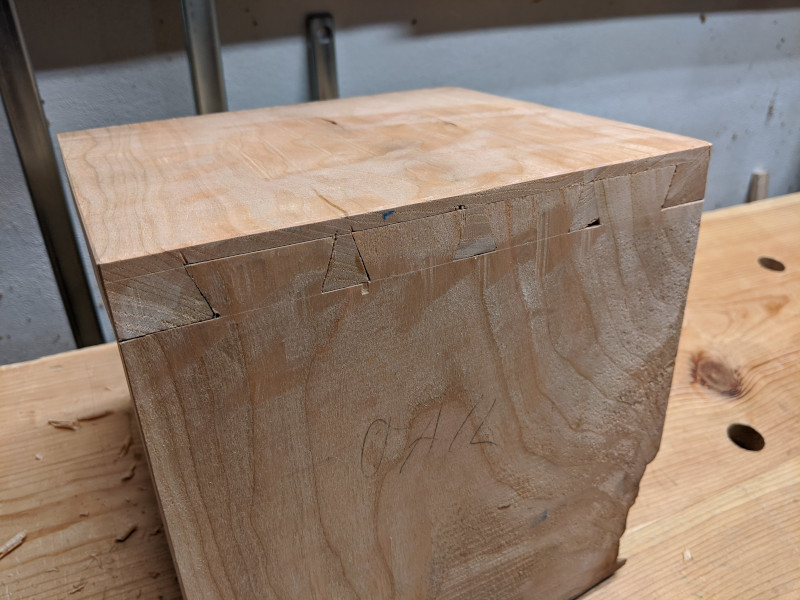
|
|
#
?
Jan 3, 2021 20:49
|
|
|
Today I reflattened the top and sides, and cut the tails in one of the sides. I decided to do one fewer tail, both to hopefully make fitting easier, and to cover up some ugly end grain in what would have been the center pin in the top. I'm still surprised how much these panels moved after they were glued up. The weather here is so dry, I had to tighten all my bench plane handles. You ever heard of a spill plane? Apparently they were used in some places to cut these long, spiral shavings which would hold a flame for a long time for lighting a bunch of candles, etc. I got a bunch of those long, curly shavings when cutting the rabbet in the top for the back boards.   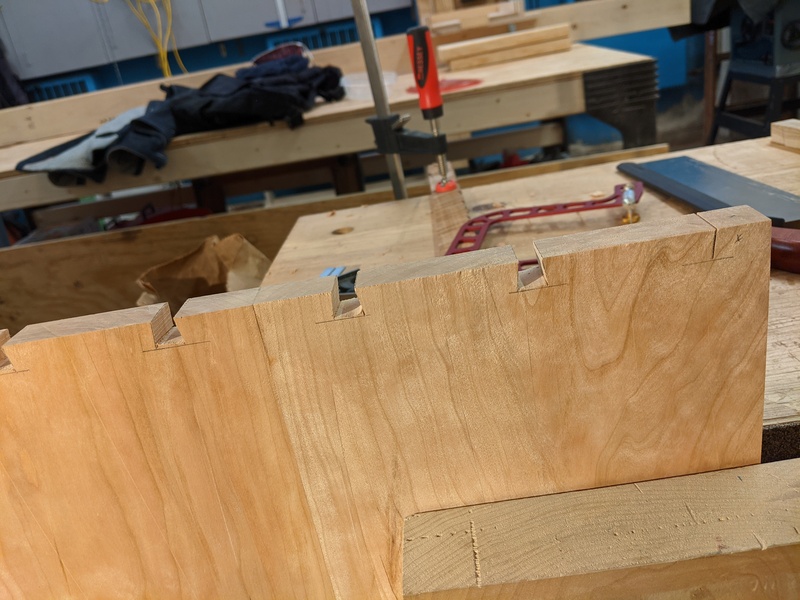
|
|
#
?
Jan 10, 2021 20:13
|
|
|
Decent morning at the shop today. Got the sockets chopped out and I'm reasonably happy with them. The only big mistake is a couple of the sockets were cut about 1/16" too deep. Not sure how that happened, maybe the board shifted while I was laying out or something. Transferring the tails to the pin board. 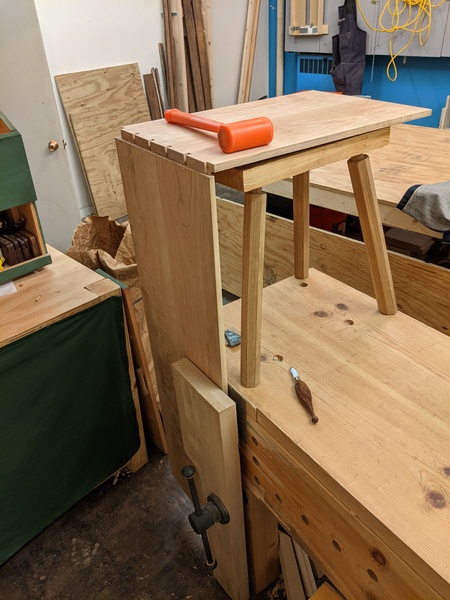 Here you can see the sapwood in the end grain at the very center, which I eliminated by putting a tail across the center. 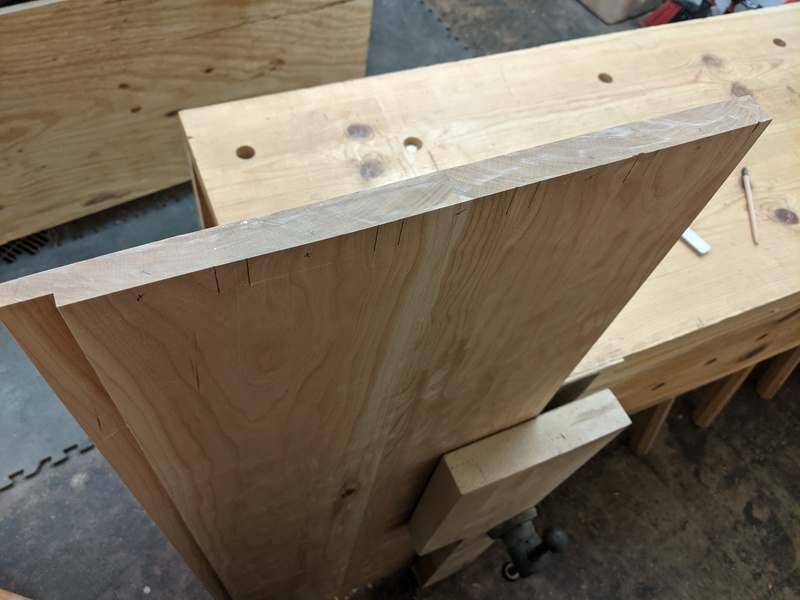 Light helps show the layout lines. 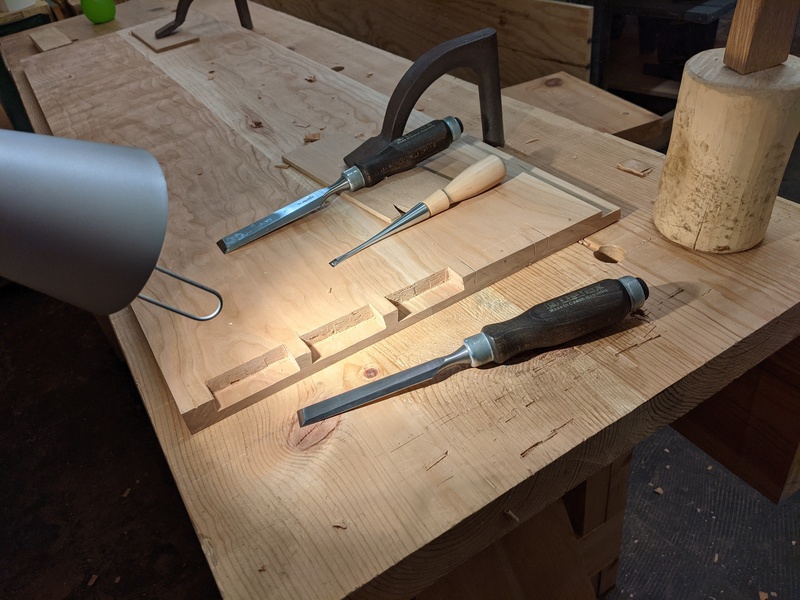 The final joint. You can see the gap on the far two sockets. In any case, far better than the mess the other two joints turned out to be. 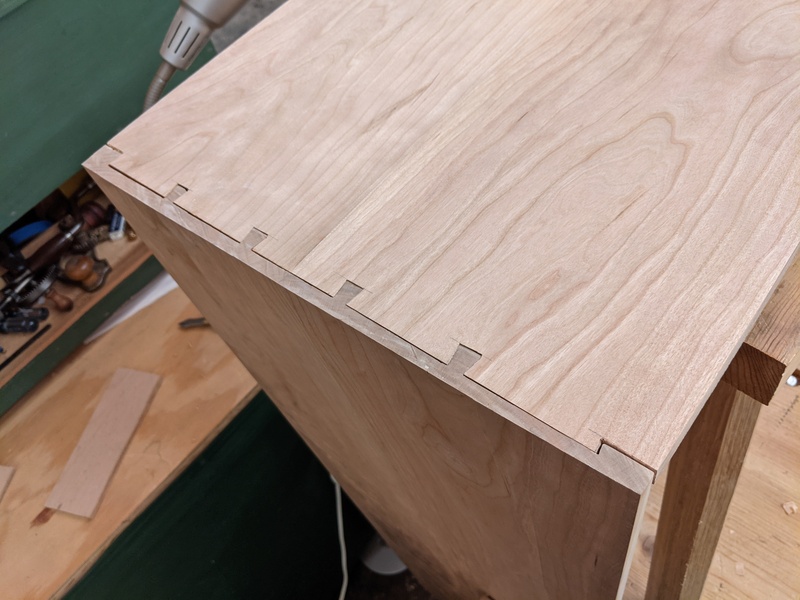
|
|
#
?
Jan 11, 2021 22:35
|
|
|
Your mallet has strong primitive energy and I want to know more.
|
|
#
?
Jan 12, 2021 00:45
|
|
|
Haha, yeah, I call it my ugly mallet. The oak handle came from a crappy German-style mallet that I made. It broke after just a couple uses. By coincidence I trimmed off a wild branch from the maple tree in our back yard shortly after, so I cut off a chunk of that fresh maple, stripped the bark and shaped it a little with a spokeshave, then stuck it on the handle tang with some glue and let the wood dry tight around the joint. Been working great for years, but it is a bit frightening to look at. The directionality of the handle means two sides of it see a lot more use than the other two sides, so it's become a bit deformed.
|
|
#
?
Jan 12, 2021 13:36
|
|
|
Cut the last set of case tails this morning. For laying out dovetails, I use the "two dividers" method. The smaller dividers holds the size of the pins on the ends. In this case, that's the same width as the rabbet for the back. The larger dividers holds the size of one tail plus one pin. You walk from one of the end pin marks, across the board however many tails you want. Then walk back from the other end pin mark. Adjust until you like the size of the pins between the tail marks. I do that in some scrap marked to the width of the board, but I think experts could probably just do it straight into the end grain. If you look close in this photo you can see the divider marks I made before the pencil lines.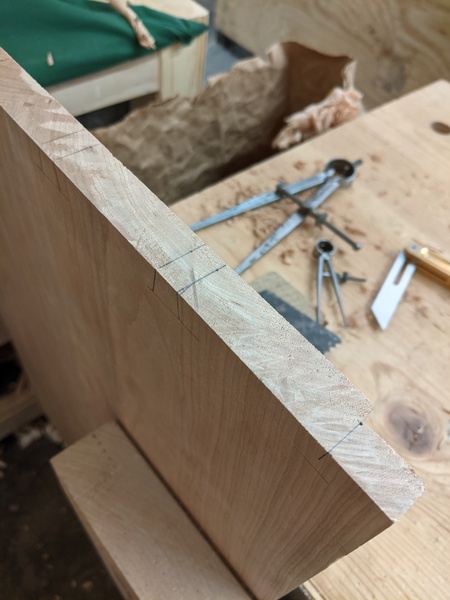 Bonus ugly mallet. 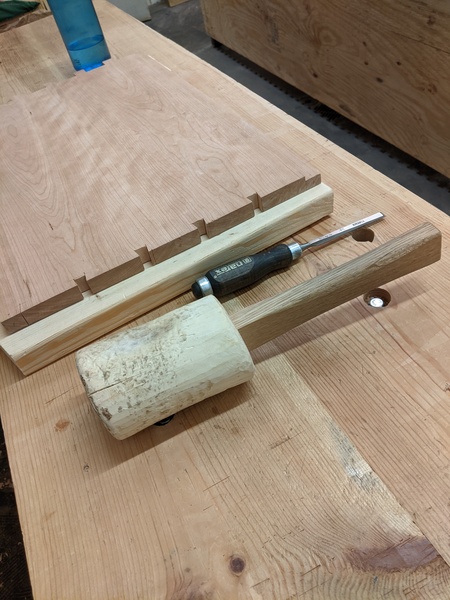
|
|
#
?
Jan 19, 2021 01:06
|
|
|
This is beautiful. I intend to make a record console and am hyped to have this as inspiration. Nice job, ColdPie.
|
|
#
?
Jan 19, 2021 15:28
|
|


|
Didn't go in Sunday because it snowed, and today was a short morning at the shop, as my wife needed the car, but I didn't want to skip two full weeks between shop visits. Just got the tails transferred and saw kerfs cut, then sharpened the chisels for next time.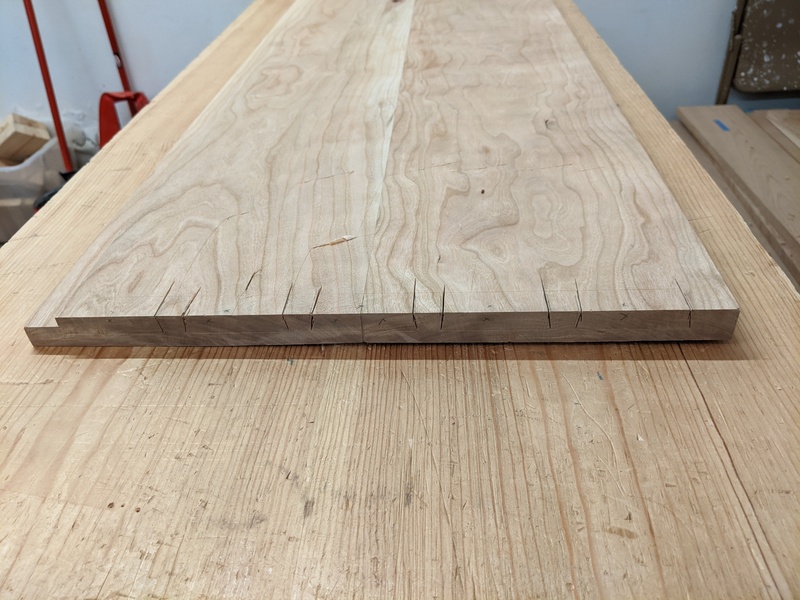 To make up for it, here's the sign you see when you walk into my building. It's cool working in an artist studio building. The buildings are connected by either skyways or underground tunnels, which is a common thing for building complexes here in the frozen north, so you don't even have to go outside to move around. I think there are eight buildings in the whole complex, this sign is just for these three closely connected buildings. In the Before Times, there were one or two big open studio days a year, usually coinciding with other big art crawl days around the Twin Cities. A couple years back I even shook hands with another goon whose partner worked out of one of the other buildings. There's a lot of different types of artists scattered around the buildings: painters, collage, photographers, fiber arts of all kinds, I think there's a large metalworking studio tucked away in one of the basements. There's even a huge glass blowing studio, which I intend to give its own writeup sometime. There are also some businesses. Up in the offices, I saw one place that will buy/take old trophies and re-plaque them, which I thought was a cool idea. Since it used to be a GM lab, it is prepped for food work, so there's a number of caterers and kitchens that supply retail shops around the cities, as well as a coffee roaster. 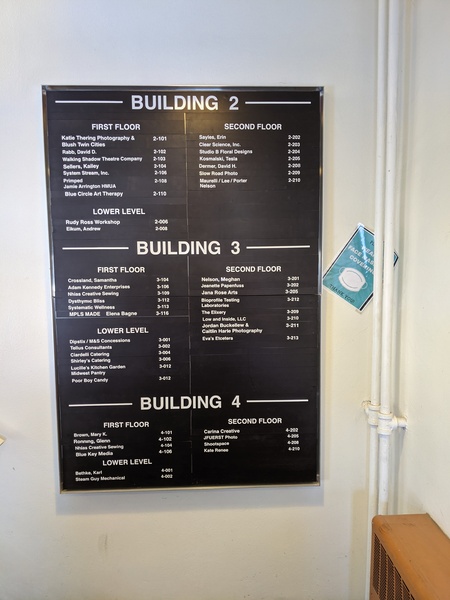
|
|
#
?
Jan 25, 2021 23:48
|
|
|
I noticed you've sawn consitently past the baseline. Does that offer any advantage when removing the waste, or is it easier not worrying about sawing exactly to the baseline as no-one will see the inside of these corners anyway?
|
|
#
?
Jan 28, 2021 15:00
|
|
|
Yeah, both. It gets you a little deeper into the corners of the sockets so there's less you have to separate freehand with a chisel, so it's less work and the sawplate is more accurate. Like you say, they'll be hidden behind a door on one side, and behind drawers on the other. I wouldn't do it if these were more visible joints, like open cabinet bays.
|
|
#
?
Jan 29, 2021 00:15
|
|
|
Here's an example of the half-blind dovetail sockets. You can see the unsevered corner waste in the nearest socket. I drew a couple lines onto the socket behind that one, showing where the unsevered waste would be with shallower saw cuts which don't go past the base line. Not having to freehand chisel so near a visible surface is a pretty big plus. I use the fishtail chisel to sever the fibers deep in the corners, then pare it off with a chisel, referencing the chisel against the pin wall made by the saw kerf. Here's the final joint. Not surprisingly, the latest one is the best one. 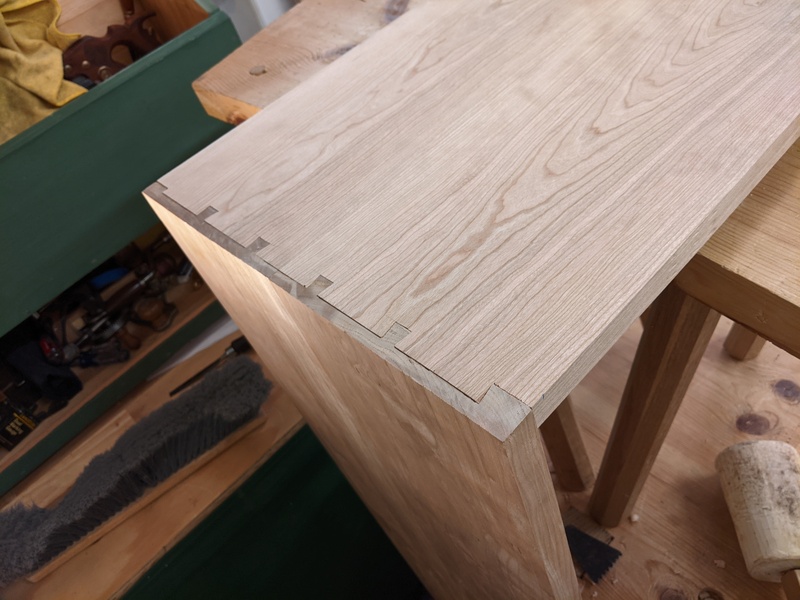 And here's the case all together, 4' wide and 2' tall. 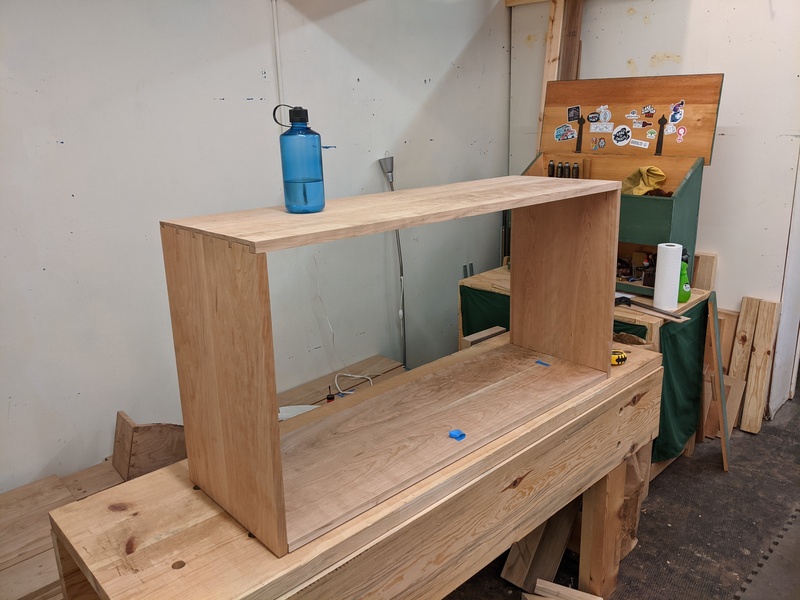 The top two joints look pretty decent, I am satisfied with them. The bottom two joints are a mess. The worst corner (front right) is shown below. The huge gap in the front there is because that board now has a cup. I think I can mostly solve it by removing thickness from the inside center of the board, which should shrink that gap, at the expense of making the dovetails even crappier (I'll have to shave down the ends of the center couple tails.) But they're not visible, so whatever. I was also thinking maybe I could instead glue a little scrap in there to fill the gap, but that would some very short grain. Dunno. I also screwed up a bit and forgot to match the length between the baselines on the top and bottom boards, so the inside-bottom of the case is 1/4" longer than the top. That's totally on me, I knew I needed to do that and just forgot. That leads to a little bit of a trapezoid shape, 1/8" out of square on both bottom corners. But I think it's slight enough that I won't bother fixing it. 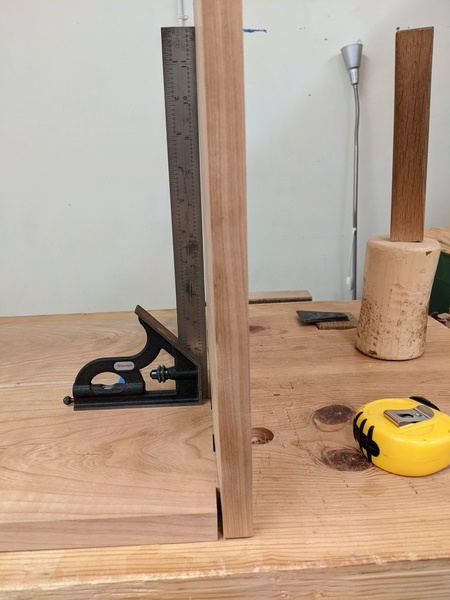 After I try to make those joints a little less lovely, next on the list is to cut the joinery in the top and bottom for the vertical center divider. I am probably going to do dadoes to capture the divider, but I'm also thinking about doing sliding dovetails. This would have a big advantage of joining the top and bottom together directly. The way I did the dovetails on the bottom board, it is not secured against gravity (with no glue/friction, the bottom would just fall downwards if you lift the case up). It would also help with preventing cupping/bowing in the top and bottom boards. However, I don't think I would have the accuracy required to do two good sliding dovetails across the entire 18" depth of the case. So I was thinking of doing dadoes, and then driving two or three nails in from the bottom to help secure it.
|
|
#
?
Jan 31, 2021 23:58
|
|
|
Let's talk dovetail repair. This was my first time doing something like this. The problem was caused by a cup introduced in the side board, causing the center to make contact while the edges were still loose. After planing the inside face of the side board flat, it introduced this big gap due to the ends of the tails bumping against the inside edge of the sockets. 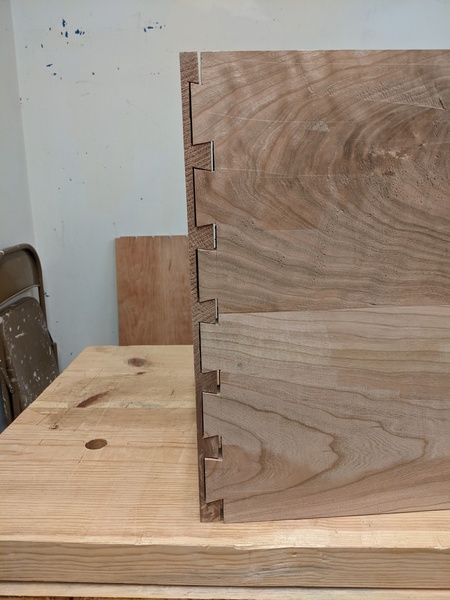 Solution? Cut off the ends of the tails by the width of the gap. 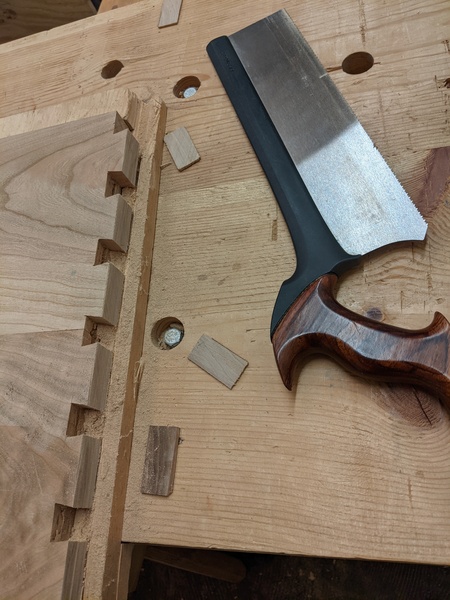 Now the joint looks tight, but there's a new problem. Moving the tails further into the sockets introduced some play between the tail sides and the socket walls. It's a bit hard to see in this photo (look at the topmost full pin), but when putting the joint together, the pins would slight right onto the tails with no friction. That's bad, since most of the glue strength in a dovetail joint comes from the contact between those side walls. Everything else involves end grain, which provides very little glue strength. 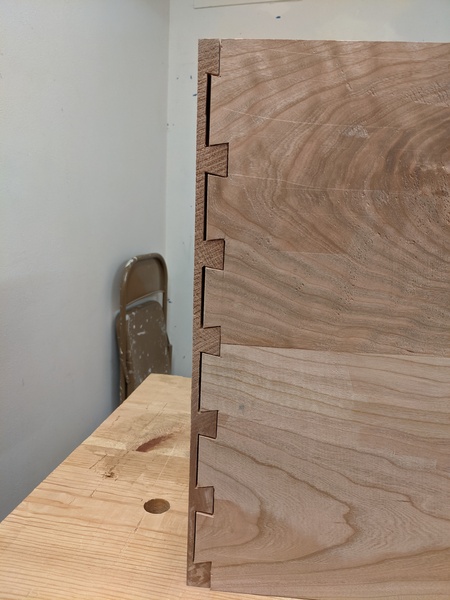 So I fashioned these little wedges from some scrap. This restores some of the material of the sockets, so I can then re-transfer the tails and pare down the new wood to restore the tightness of the joint. 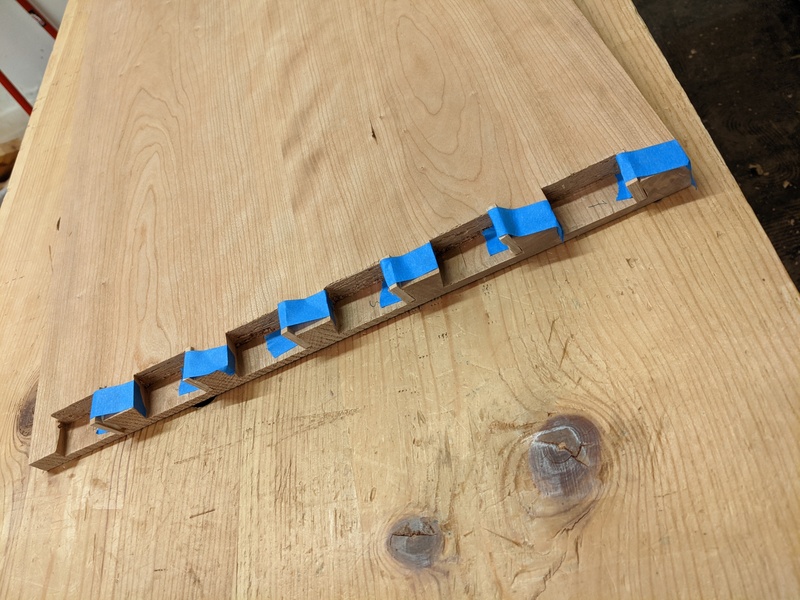 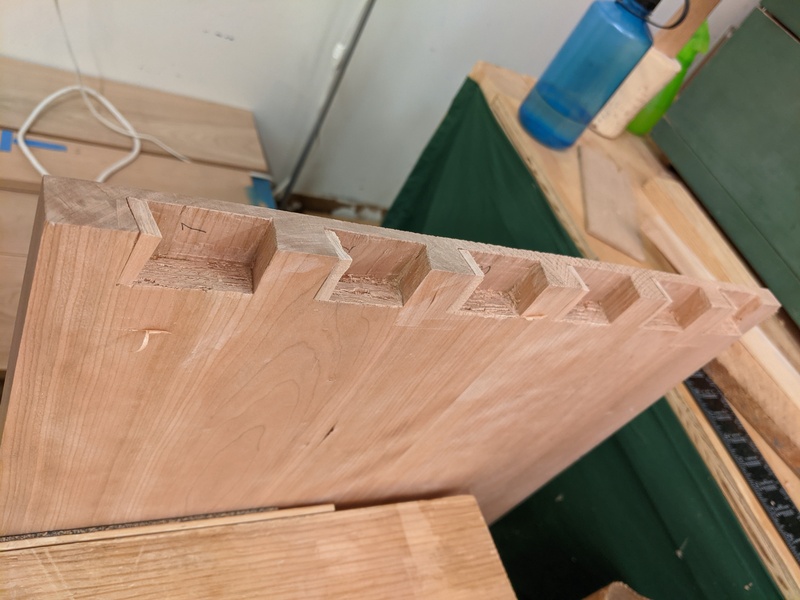 Here's the joint after refitting. If you look close, you can see the little sub-mm scraps that remain after refitting the joint. It looks terrible, but it's not a visible joint, and this should make it strong again. If this was a visible joint, I probably would have just cut the end of the top and bottom boards off and re-cut those parts of the joint from scratch, sacrificing some of the final cabinet width. 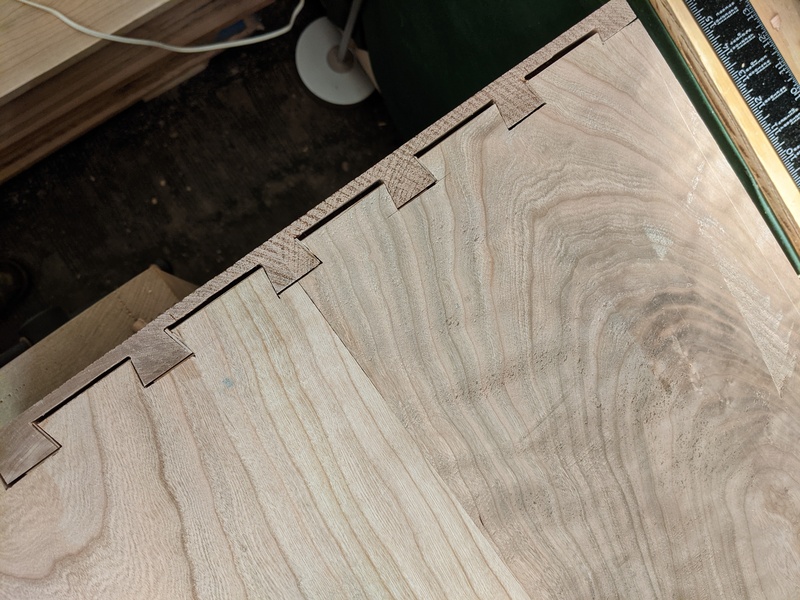 And the visible part of the joint looks nice and tight now. 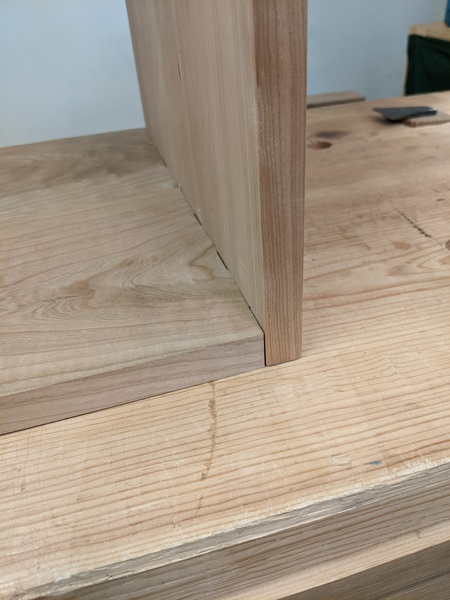 One thing I'm a little concerned about is the dryness of this wood. I haven't measured it (yet), but I think the shop is amazingly dry, thanks to Minnesota weather and indoor heating. So I worry a bit that these nice tight joints will explode when they expand during our humid summers. We get both extremes here. I guess we'll see? ColdPie fucked around with this message at 15:24 on Feb 7, 2021 |
|
#
?
Feb 7, 2021 15:21
|
|
|
That's a really great solution. You could even do it on the pin boards too to fill those gaps if you wanted-it would still be a long grain/long grain glue joint on the patch, and I think the back of the tails like that do help keep things square, but it's definitely not necessary. Using the same wood it will probably hide pretty well under finish too. My old boss used to say the difference between an amateur and a professional is that a professional knows how to I don't think you'll have problems with the joints smooshing together as the humidity rises. I've occasionally seen dovetailed drawer or case sides split, but it's usually been different species mixed together (or bad construction like glued in cross grain drawer runners), and most often oak drawer sides. Maybe the mahogany drawer fronts dried out well on the trip across the ocean and the oak for the drawer sides wasn't very dry, or maybe just that the nice wood for the drawer fronts (walnut, mahog, cherry) is much more stable than oak which likes to move around, or it may have been from the drawer getting dropped or something.
|
|
#
?
Feb 7, 2021 19:12
|
|
|
I hope you're right because this wood is dryyyy.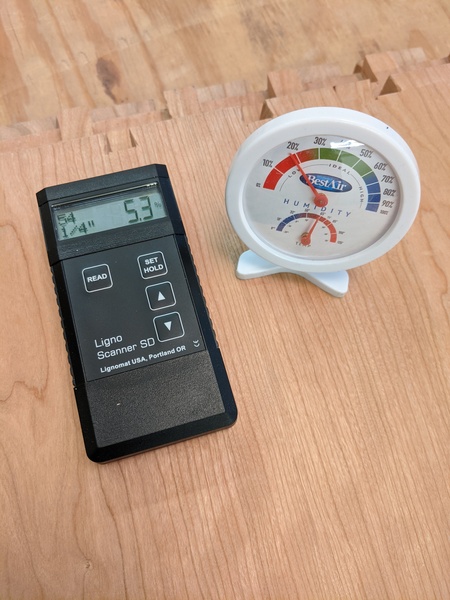 Today I prepped the center divider. Since every face and edge of this board will either be used for joinery or be visible, I bothered to make it completely square. All edges parallel and two parallel faces. After making one face flat, you set your depth gauge to the board's narrowest point (or your desired final thickness), then transfer that face's flatness to the other face with a depth gauge. Put on some active music, set your plane to a heavy cut, and take the whole opposite face down to that line. 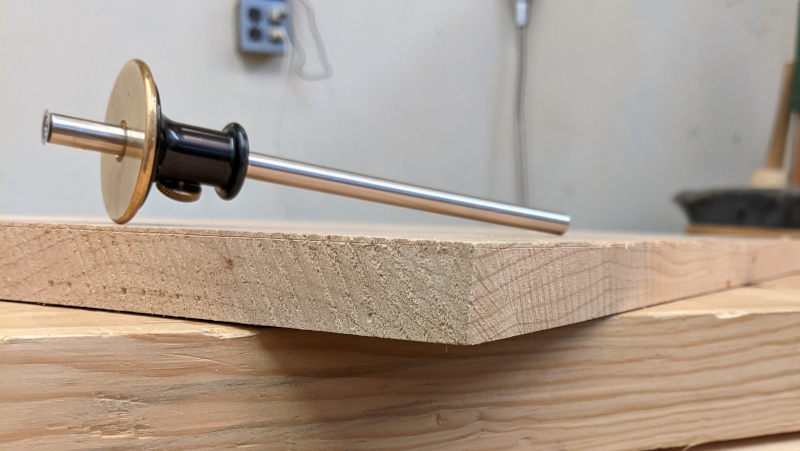 Next time I'll cut the dadoes for the center divider into the case. After that comes the webbing for the drawers, which is something I haven't done before. I'll be following this example, out of the Hayward collection from Lost Art Press. A front rail, into which the two runners are mortised, then fit into dadoes in the case's side and center divider. 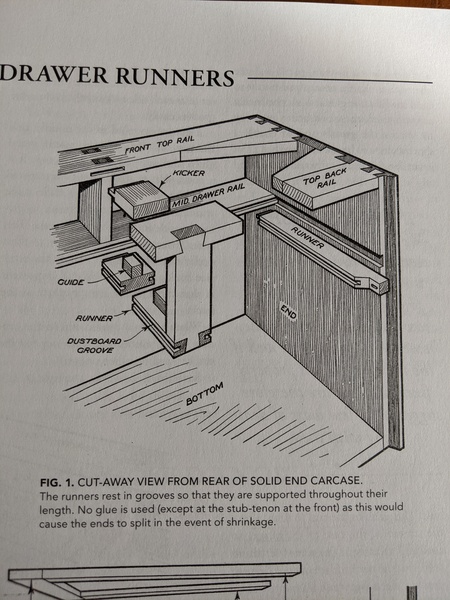
|
|
#
?
Feb 7, 2021 21:04
|
|
|
The grooves in the sides of the runners indicate there�ll be a �dustboard� separating the drawer openings. Are you going to have them? I don�t think I�ve seen that before in old furniture here.
|
|
#
?
Feb 7, 2021 21:20
|
|

|
This morning I got the center divider installed. I use my fine crosscut saw to cut the walls of the dado, then a chisel to take out the bulk of the waste and a router plane to take it down to the right depth (forgot to take a picture).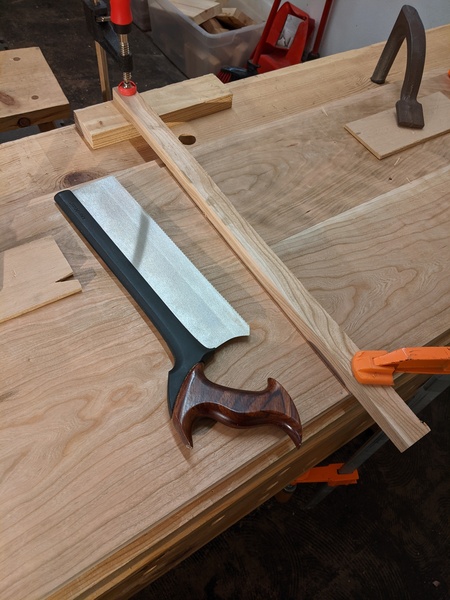 After cutting the first one, I mark the depth of the cut for the other dado referencing off the first one. 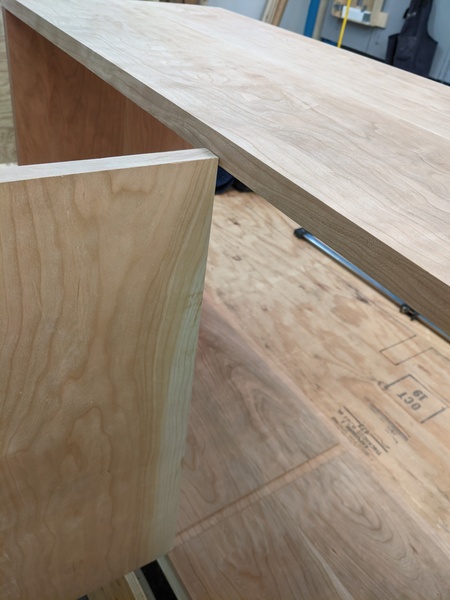 These drawers are gonna be pretty huge. I hope they're not too heavy and difficult to open. I need to start thinking about what I want to do for drawer pulls. I was planning just one center pull, but maybe a pull on each side would work better for such large drawers. For the large drawer, I was planning like a half-moon shape cut out of the top of the drawer face, since it's low down. I'll have to sketch this out a bit and look up some references. 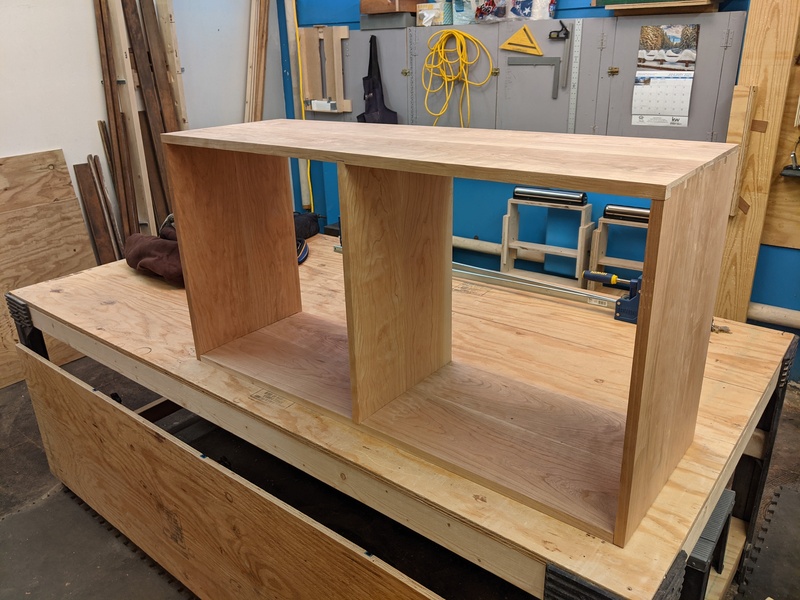
|
|
#
?
Feb 9, 2021 01:13
|
|
|
Kaiser Schnitzel posted:That's a really great solution. You could even do it on the pin boards too to fill those gaps if you wanted-it would still be a long grain/long grain glue joint on the patch, and I think the back of the tails like that do help keep things square, but it's definitely not necessary. Using the same wood it will probably hide pretty well under finish too. My old boss used to say the difference between an amateur and a professional is that a professional knows how to I've been waffling on whether I want to put in the effort to close up those gaps like you say. Granite Octopus posted:The grooves in the sides of the runners indicate there�ll be a �dustboard� separating the drawer openings. Are you going to have them? I don�t think I�ve seen that before in old furniture here. I think in that diagram, the area below the drawers is an open bay, so the dustboards separate the drawers from that space. I've just got a stack of drawers, so I'm not doing any dustboards, no.
|
|
#
?
Feb 9, 2021 01:14
|
|
|
Last night I got started on the drawer webbing. I grabbed this board out of the stack. It was a good width (5") and had a few knots and gnarly grain, and since I really only need one decent looking edge for these, it's a good opportunity to avoid wasting that nasty wood.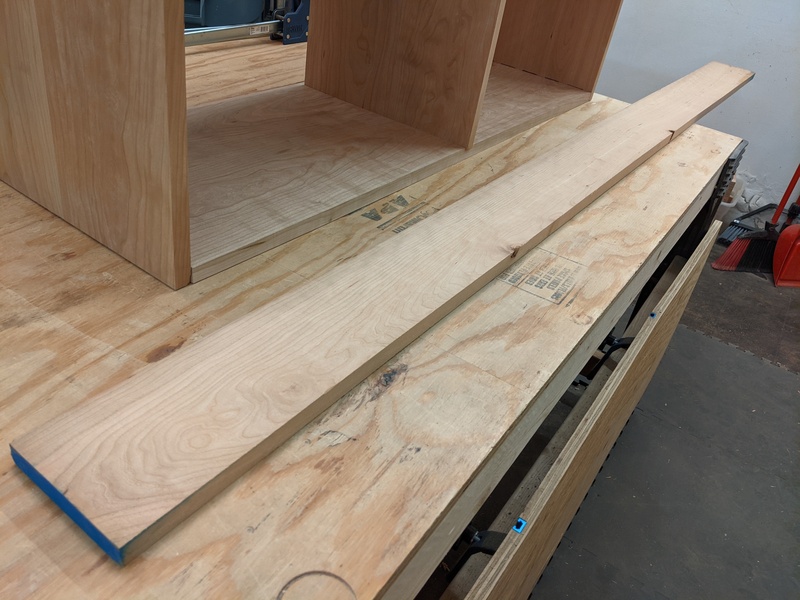 After crosscutting the pieces out, I marked a parallel line down the middle with my crappy homemade panel gauge. I think it was Shannon Rogers where I first heard that your fastest plane is your saw. Marking the saw line parallel to one edge means, no matter what, there is at most one edge which you'll need to make parallel with a plane. In this case parallel doesn't really matter, but you might as well do it this way anyway. 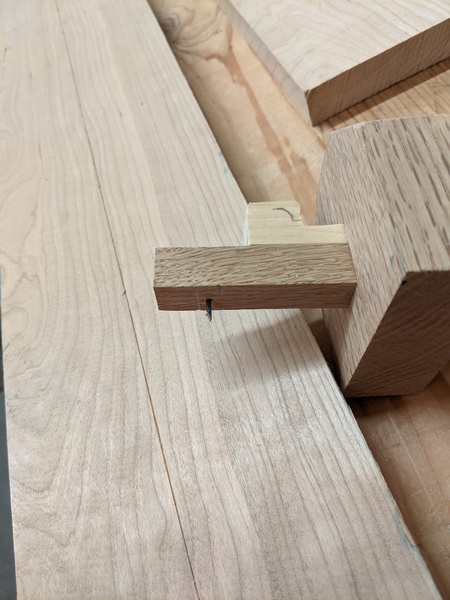 For short rips like these, I use my vise. Way easier than trying to hold a short, narrow board down with my knee on the sawbenches. 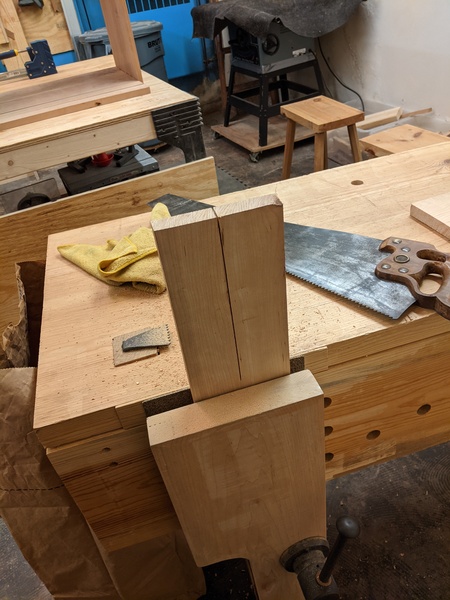 Processing these short sticks is so pleasant after the rigamarole of trying to flatten those wide and long panels. No need to secure them or mess around with straightedges. Just a few passes with the No 8 up against the planing stop gets them flat with no questions. 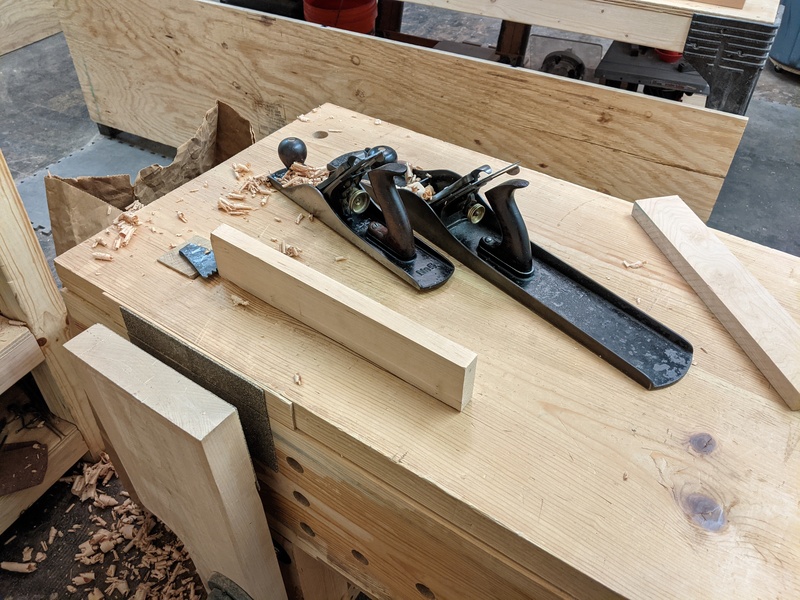 I thought it'd be fun to shoot a video of processing one of the boards. If you'd like to watch a guy plane a board for three minutes, you are in luck!! This is pretty much the least amount of processing you can do to a board, although getting the first edge square to the face gave me some trouble so it took some extra time. For these boards, I really only need one flat face (for the drawer to ride on) and one square edge (to fit into the dado). The edges and faces don't really need to be parallel with each other. So I didn't bother doing that, just got rid of the machine marks and made everything roughly square so it's nice to work with. https://www.youtube.com/watch?v=kSKsLgDdf0A Repeat for the other five boards, and they're all ready for joinery. As shown in the diagram above, the short boards will be tenoned into the long rails, and then slotted into dadoes in the center divider and right wall. The drawers will then rest on that assembly. 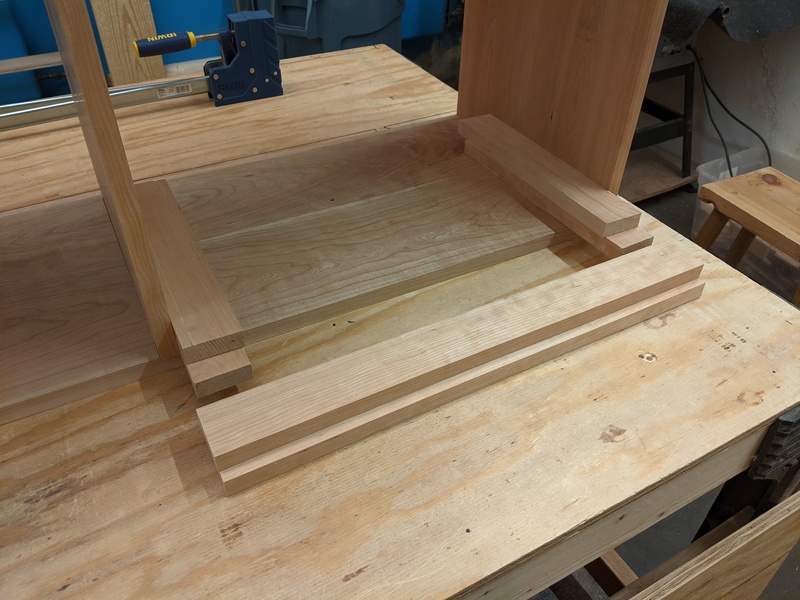 I laid out where the drawers will go, just to see how it actually looks in the real world instead of a CAD model. I waffled a bit on whether to shrink the lowest drawer in order to expand the others, maybe even do even thirds. But in the end I think I'll stick with the original plan. 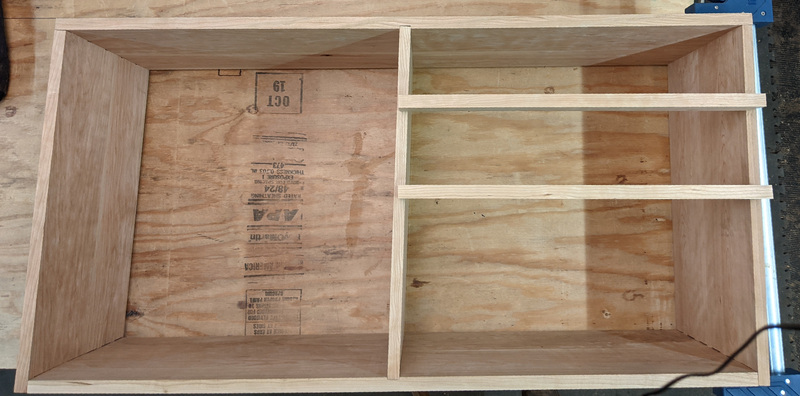
|
|
#
?
Feb 14, 2021 00:28
|
|
|
As a matter of fact, I do like watching a guy plane boards. Breaking out the big plane is always nice. This also highlights something that took me a while to really grasp, that there's no need to plane all your material 4-square unless the situation really requires it. Getting a face flat, and an edge square to it is often enough, and just making the other surfaces just look nice enough is a lot less fiddly and effort than making them all parallel. Which is important when you're doing it all by hand.
|
|
#
?
Feb 14, 2021 17:16
|
|
|
Got the webbing joinery done today. Tenon layout using two marking gauges. One with two cutting wheels, to mark the thickness of the tenon matching the width of the chisel, and the other to mark the shoulders. 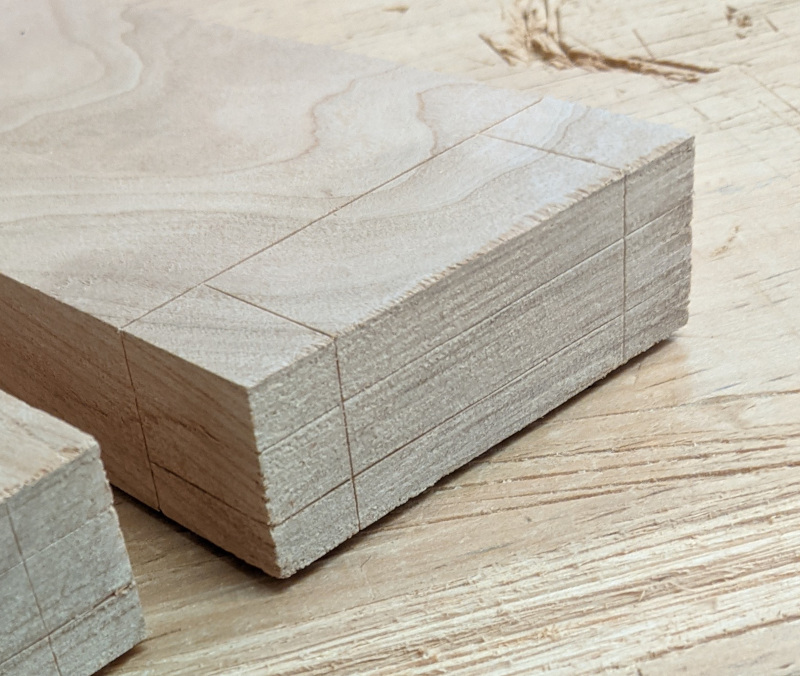 Chopping mortises with the pigsticker. Narrow chisel clears waste, and the square matches the tenon length to check for depth. I was a bit concerned about blowing out the end grain while levering the chisel, but it wasn't a problem. 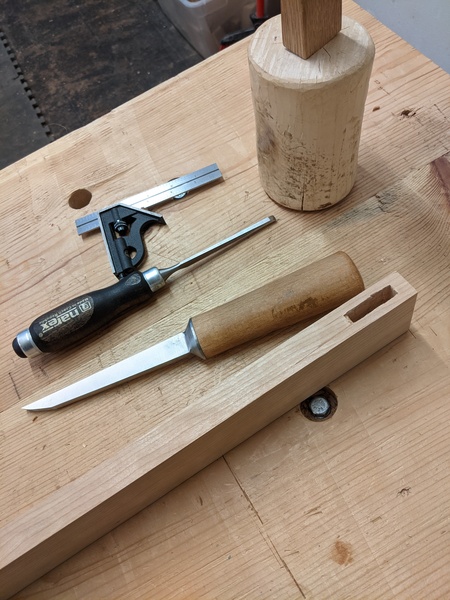 Looking good. Coming up next are the dadoes in the case to fit the webbing. 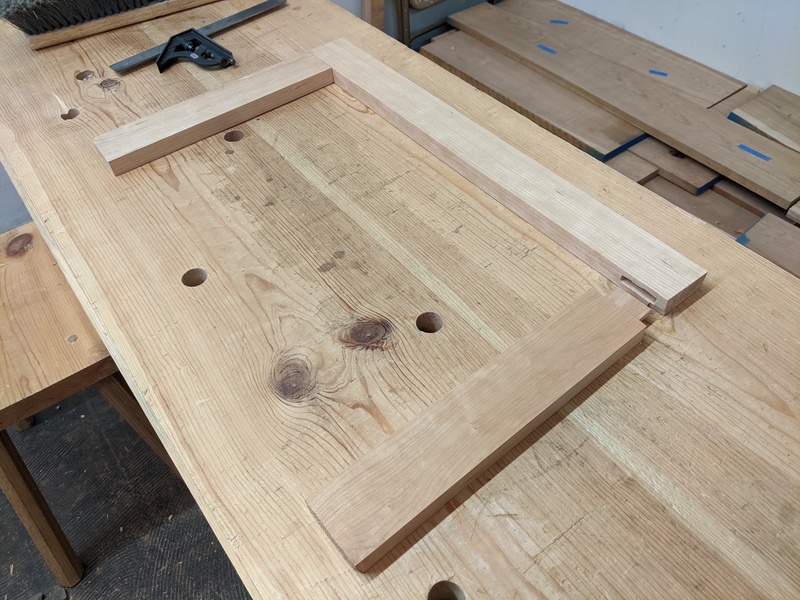
|
|
#
?
Feb 15, 2021 01:58
|
|
|
Just Winging It posted:As a matter of fact, I do like watching a guy plane boards. Breaking out the big plane is always nice. This also highlights something that took me a while to really grasp, that there's no need to plane all your material 4-square unless the situation really requires it. Getting a face flat, and an edge square to it is often enough, and just making the other surfaces just look nice enough is a lot less fiddly and effort than making them all parallel. Which is important when you're doing it all by hand. My No 8 is maybe my favorite tool. It is huge and old. Almost ten pounds, just under two feet long, and the cutting edge is three inches wide, which just barely fits on my sharpening stones. According to the online dating tools, it's a type 8 which dates to between 1899 and 1902, which means it is older than any living person. It might be the oldest tool I own, and it's definitely the oldest tool I have a definitive date for. I bought it locally from a guy on Craigslist. I went to buy a wooden try plane, saw this on his shelf and asked if he'd sell me that instead. If I remember right, I paid $100 for it. Mine happens to have a corrugated sole. It's wonderful to use. Unlike the No 5, which is mostly used for boring donkey work, or the No 4, where you're cursing every imperfection, the No 8 just plows through anything and makes stuff flat, it's a great feeling. It doesn't take any guff. It's stamped on both sides with HJE. I wonder who HJE was and when they were using this plane.  
|
|
#
?
Feb 15, 2021 02:09
|
|
|
I love my type 8 no 7, and I also really love thinking about the kind of industry that existed when it was built, and the kind of people who purchased and used handplanes in that era. It's fascinating and super cool.
|
|
#
?
Feb 15, 2021 07:12
|
|


|
Dadoes all day. If I was going to use a power tool, I think a handheld router would be at the top of the list. I hate cutting dadoes. Here's a picture of my old router plane. These things are surprisingly expensive, I think I paid like $90 for it, which is almost enough to get you a brand new Veritas. I don't really like using it, because it really mars the surface of the work. It has a couple of screwholes, where you can mount a block of wood to the sole, which would damage the work less. I should probably make one sometime. 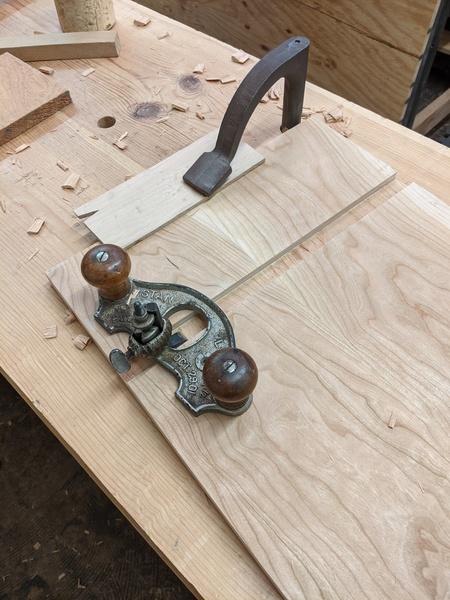 One thing hand tools are really bad at is stopped joinery. Hand tools are designed to work all the way through the piece, not end at some point. I didn't want to blow the dado through the rabbet for the back boards, so I stopped short and worked with a chisel to sever the fibers before routing them out. 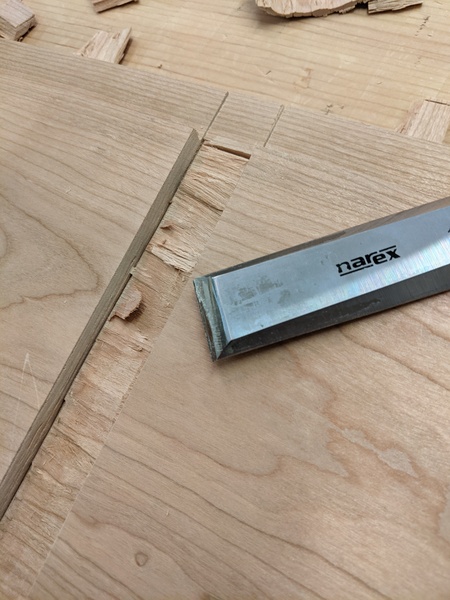 It's coming together! 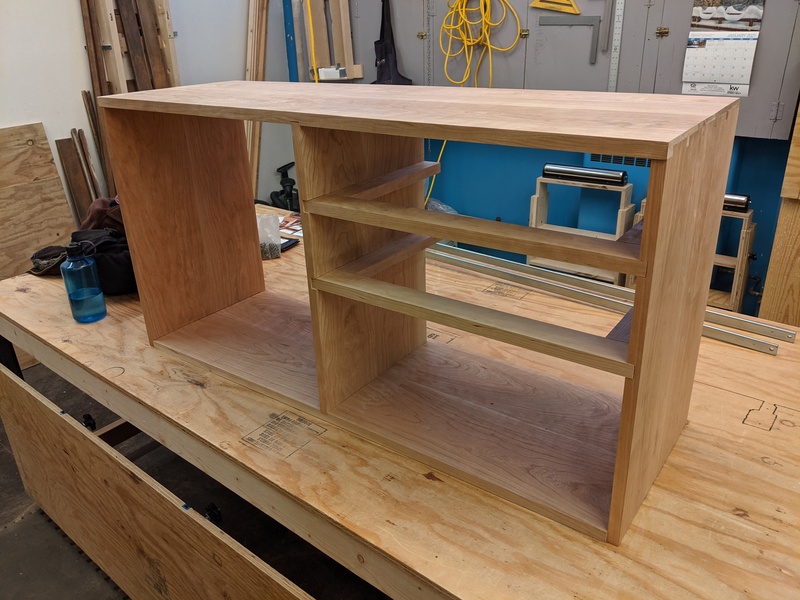 And a shot from the rear. Yeah, my shop's right next to the toilet. 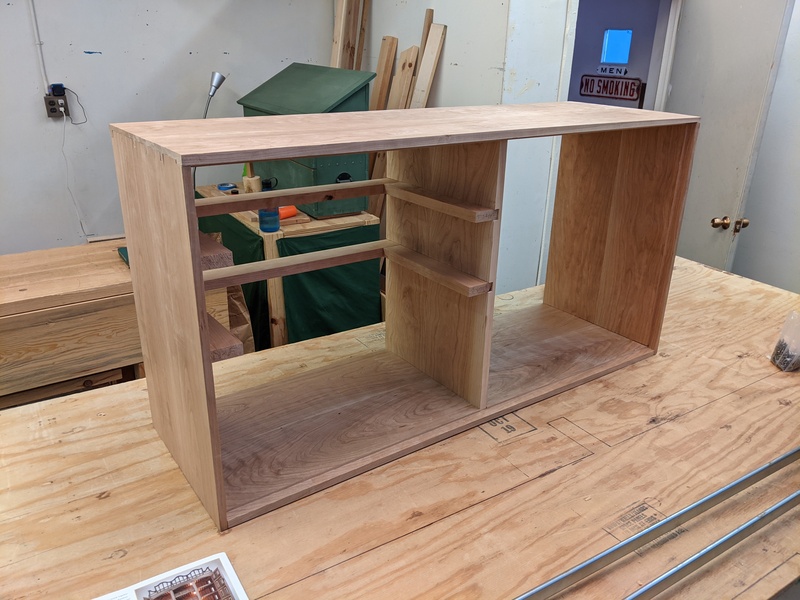 Next I need to take down the front edge of all of the case boards to clean them up and match widths. After that, I'm going to work on making and mounting the legs. Then it's on to a variety of final cleanup tasks before I glue the whole thing together.
|
|
#
?
Feb 23, 2021 00:00
|
|
|
As you can see in the original CAD model at the top of the thread, I'm doing staked legs. The legs have conical tenons which slot into a matching mortise in the bottom of the case. I've done this joint a few times before, you've seen it in this thread on the sawbenches in various photos. However I have never really successfully done the joint, as you can see in this photo of a little stool I made.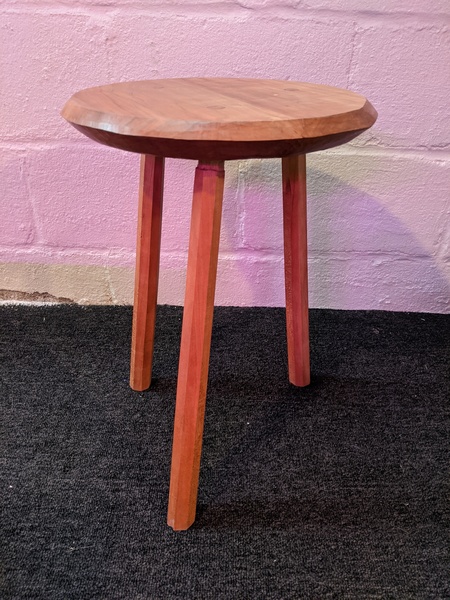 Getting the angles of the mortise all correct is really challenging. In the past, I've just used a line on the work piece to align the drill bit, and a sliding bezel to spot the elevation, all just done by eye. It works out all right, but every time at least one leg turns out wonky. So this time, I'm going to make a template with a mortise angle which looks right, then use that template to guide the drill bit so each mortise will hopefully end up at the same angle. But before that, I need some more material to mortise into. The thickness of the bottom piece is about 7/8", which isn't enough for the mortise. So I used some of the crappier wood from my pile to put a little extra meat onto the bottom. Since these will never be seen, I didn't bother to do more than knock off the saw marks and put a little taper on each side. I just used Titebond since hide glue is more finicky and wouldn't provide any advantages on a lamination glue up like this. I also need to laminate some leg stock. I'd like the legs to be at least 2" square, before I turn them into octagons. I have some left over 6/4 cherry from a table I built, which I can rip and laminate together to get that thickness. 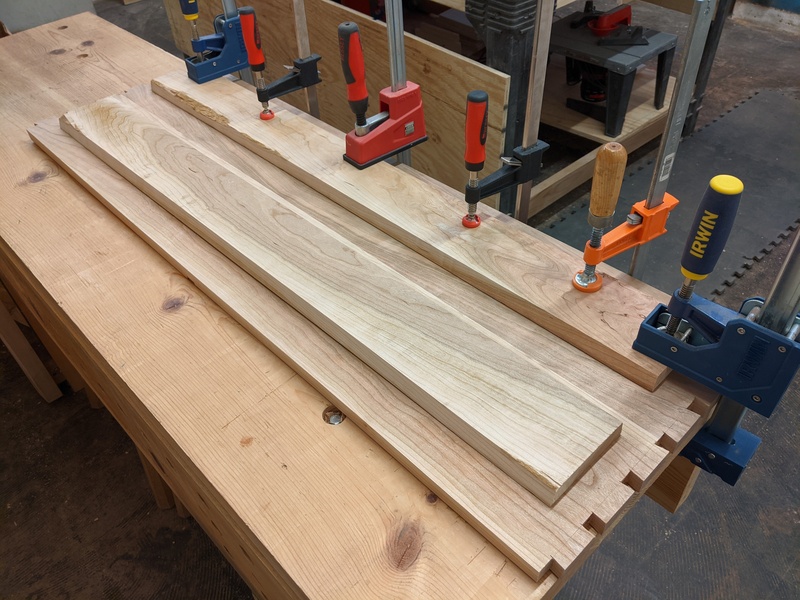
|
|
#
?
Mar 1, 2021 00:12
|
|
|
I'm keen to see you do conical tenons and mortises well because I am becoming something of an expert at loving them up
|
|
#
?
Mar 1, 2021 01:39
|
|


|
Uhhhh. Wth is this doing in a 'hand tool' shop?: Are the planer, jointer and tablesaw always just out of frame too 
|
|
#
?
Mar 1, 2021 18:46
|
|
|
Kaiser Schnitzel posted:Uhhhh. Wth is this doing in a 'hand tool' shop?:
|
|
#
?
Mar 1, 2021 19:21
|
|

|
|
| # ? Apr 25, 2024 13:48 |
|
|
Busted! No posting jail can hold me!! YOU'LL NEVER TAKE ME ALIVE, SCHNITZEL!!!!
|
|
#
?
Mar 1, 2021 22:43
|
|