


|
The big thing that gets me about the Berry Smoothie in particular is that there's no real mid-tier TP healing item; a couple heal 12 TP, Queens Dinner heals 15, and the smoothie for 99. I ended up using a ton of Smoothies, if only because by endgame the doughnut just wasn't cutting it and there's literally no other option. I really would've liked something that healed 20-25 TP, as an option at least.
|
 #
?
Sep 7, 2021 06:31
#
?
Sep 7, 2021 06:31
|
|


|

|
| # ? Apr 26, 2024 12:58 |
|
|
Arzaac posted:The big thing that gets me about the Berry Smoothie in particular is that there's no real mid-tier TP healing item; a couple heal 12 TP, Queens Dinner heals 15, and the smoothie for 99. I ended up using a ton of Smoothies, if only because by endgame the doughnut just wasn't cutting it and there's literally no other option. If anything yeah that was a rather kind of gaping hole in the design space of Bug Fables. Like TP doesn't have to be expanded all that much for much of the game, but if you go with big TP builds, you have no midgame equivalent and are forced to use Berry Smoothies because a Crisbee Donut and Queens Dinner are classified as big TP heals even though you get them early and they don't heal that much if you are using a TP focused build. In that case I would say buyable Dark Cherries are absolutely justified, namely because there isn't something to accommodate that kind of build in this game, which seems pretty odd. While Paper Mario only has the Syrup items as basic items for 5, 10, and 50 FP restores. There are a lot of inbetween FP restoratives you can get with cooking. I will say I kind of get the sense some design decisions focused a little too much on MP focused builds since your stats aren't going to be too high in such builds. Like I get that's one of the best ways to play the oldschool Paper Marios, but even then it the thing Arzaac mentioned kind of really brought it to light for me. Araxxor fucked around with this message at 09:13 on Sep 7, 2021 |
|
#
?
Sep 7, 2021 07:02
|
|

|
I vote to clean out Shades' stock.Explopyro posted:
Oh my god. I never spied these guys as Kabbu and I had no idea he was a Kamen Rider Double fan. 
|
|
#
?
Sep 7, 2021 08:41
|
|
|
Twelve by Pies posted:I vote to clean out Shades' stock. Wait, since this is Bug Fables... wouldn't it be Kamen Spider? 
|
|
#
?
Sep 7, 2021 08:44
|
|


|
Spiders are pretty much always villains in the Kamen Rider series though, and in fact are frequently the first enemy a Rider will fight. And a spider is the first boss in Bug Fables, hmm... Actually there is one spider themed Rider, Leangle in Kamen Rider Blade. However due to being improperly sealed the first time, the Spider Undead is able to exert its influence on Mutsuki (the guy who uses the Leangle system) and slowly corrupt him into being evil. Eventually it gets properly sealed though and Mutsuki is freed of its influence.
|
|
#
?
Sep 7, 2021 09:08
|
|
|
Twelve by Pies posted:Oh my god. I never spied these guys as Kabbu and I had no idea he was a Kamen Rider Double fan.  That phrase and the various belt voiceclips from that season are burned into my brain. That phrase and the various belt voiceclips from that season are burned into my brain.
|
|
#
?
Sep 7, 2021 09:46
|
|
|
Ironically, that was the thing I'd posted and wasn't sure if I posted before. He should be a fan of Kamen Rider Double because Kamen Rider Double is the best. 
|
|
#
?
Sep 7, 2021 12:20
|
|

|
Araxxor posted:I think the availability of the Megaelixir depends on the game. In a lot of games with a limited amount of Megaelixirs, it'll never be truly mandatory to use, otherwise that would make a save file unwinnable. This is a good point, and I think one of the things that was essential to them working so well (IMO) here is that none of the items were essential. The game never asks you to do anything where these items would be required, but they're just different enough from the other things you have access to that they can open up new strategies if you want them to. If limited-quantity items are required to succeed in specific places, that's bad difficulty design since it just comes across as an arbitrary screw-you (unless it's a Roguelike, where that's fair enough). You don't want consumables like this to function as keys to specific locks, that the player has the option to arbitrarily waste if they want to make the game unwinnable. The best compromise, I think, is often along the lines you're describing, where an item is limited in quantity early in the game and becomes freely available at some later point. Bug Fables actually dabbles in this too (e.g. the Magic Seed in Snakemouth Den is unique until Chapter 2, there are two Shell Ointments available until you can buy them in Chapter 6, arguably Tangy Berries fit the same pattern as solely a rare drop until Metal Island). This was also something I enjoyed quite a bit in the Paper Mario games (I'm pretty sure the originals did it, but I'm honestly mostly thinking of Master Quest here, which used this pattern very frequently). Alxprit posted:My TP heavy strategies loved Berry Smoothies. A lot of my damage came from using expensive skills that we haven't seen yet, and I'll be sure to mention them when the time comes. Therefore, for me Crisbee Donuts were pointless except as an ingredient for Queen's Dinner. I think my max TP by the end of the game was like, 50-something. It might not be the ideal way to play, but it's the way I felt comfortable. Arzaac posted:The big thing that gets me about the Berry Smoothie in particular is that there's no real mid-tier TP healing item; a couple heal 12 TP, Queens Dinner heals 15, and the smoothie for 99. I ended up using a ton of Smoothies, if only because by endgame the doughnut just wasn't cutting it and there's literally no other option. Araxxor posted:If anything yeah that was a rather kind of gaping hole in the design space of Bug Fables. Like TP doesn't have to be expanded all that much for much of the game, but if you go with big TP builds, you have no midgame equivalent and are forced to use Berry Smoothies because a Crisbee Donut and Queens Dinner are classified as big TP heals even though you get them early and they don't heal that much if you are using a TP focused build. This, I think, was absolutely a genuine design misstep. It is really weird that there's this huge gap in the itemisation; I'm not sure if this is due to the devs assuming/intending most people would invest most heavily in MP (which is plausible but I'm not aware of them having commented on this either way), but regardless it arbitrarily makes things awkward for players who choose to take certain approaches. Theoretically "this build is viable but requires you to rely on more expensive/rare consumables" can be a reasonable tradeoff, but I'm not convinced it's great design, and can feel like arbitrarily punishing builds the devs don't like. (I also can't say I love how the incredible item variety in the first half of the game collapses down to most people relying on the same 5-6 things in endgame.) In addition to the lack of TP options bridging between 12, 15, and 99, the HP recovery situation might be even more odd. The best single-target HP healing item is... Leaf Omelet, at 9 HP. We have Tangy Carpaccio at 12 to all, and Queen's Dinner at 15, but I always thought it was a bit weird there was no "full heal"/99 HP single target item. While I absolutely wouldn't recommend doing it (honestly, even if better healing items did exist), if you invest really heavily into HP you can get into the range of 30-40 max HP per bug, and it's awkward that doing so leaves those players starving for decent healing options. (Maybe the better solution here would have been to either decouple Berry Smoothies from Dark Cherries, or make the other recipe for them available earlier. I agree that the heaviest TP builds can be very dependent on them.) On my first playthrough I actually didn't go MP-only, I alternated every level (because that's how I typically played Paper Mario as a kid before I knew better, I thought it was playing fair since I had the impression that was what the devs thought you would do). I definitely used quite a few Berry Smoothies on that playthrough, I think I had somewhere around 35-40 maximum TP by the end? I definitely relied a lot more on Queen's Dinners though, in part because they were the best solution available for HP recovery, and didn't have TP problems because I was recovering it incidentally whenever I used those. Alxprit posted:I don't think Dark Cherries being buyable is a bad thing. I get the "respect" out of trying to use them as findable things, but also, the way you're playing the game I don't think much of the Dark Cherry recipes will actually be that useful anyway. If I had to pick one that I think you'll get use out of, it'd be Cherry Bombs. You don't have enough TP for Berry Smoothies to matter, you'll probably never play badly enough that you'll need the multi-revive, and the baked dish could have its uses but you could also just use Kut's Tangy Carappicio instead. So, count that as a suggestion, I suppose? And definitely get at least HP Plus and Poison Defender, if not everything. It's definitely a personal taste thing, and as I said, I don't begrudge Bug Fables making them buyable (though, maybe not right away, I do think that's a bit awkward. "You found a super rare thing! Here, now you can have as many as you want, they're not going to feel rare any more."). Most players probably prefer it this way. It's possible the real thing I'm taking issue with is the way money becomes no object about halfway through the game, so resource management just stops being a thing entirely (I hit that point a bit early in the LP, honestly, but it's more or less inevitable in the long term); if the 50 berry price tag was actually significant, I think buying them would feel less like abusing the system. I'm almost certain "berries stop mattering" was something the devs actually wanted and designed toward (given how the bank works and how many different ways there are to rack up loads of berries at minimal risk), and I can see some reasons they might want to do that, but I'm not convinced it was the best decision. I absolutely want to show off Cherry Bombs at some point, I just have to figure out the right fight for them. I was leaning toward probably making one Miracle Shake (not because I intend to use it, just because I think it's a good idea to have one and I don't want to model bad advice) and one Cherry Bombs. Twelve by Pies posted:Oh my god. I never spied these guys as Kabbu and I had no idea he was a Kamen Rider Double fan. Yapping Eevee posted:I was gonna post this if you didn't. Leraika posted:Ironically, that was the thing I'd posted and wasn't sure if I posted before. I am so glad I ended up spying with Kabbu here so you all could see it, but it was a total coincidence on my part. I just thought it'd been a while since he had a turn and had no idea this was a reference (though I did think the line sounded a little weird, so in retrospect that makes sense). That was lucky. Sometimes I wonder if there are other jokes and references like this hiding in the other spy text that nobody's pointing out because it's all buried in the bestiary entries...
|
|
#
?
Sep 7, 2021 16:11
|
|

|
I never really felt the need for Dark Berries in game. By the time they became available for me I'd snapped the game over my knee so they were too prohibitively expensive for sustain and boss fights simply didn't last long enough to warrant their use. (This is obviously somewhat influenced by how quickly I realised that HP and TP past a small amount were trap choices) Personally I don't think Elixirs/MegaElixirs are bad design, no less than Magnum bullets or Rocket Launcher ammo is in Resident Evil. That is to echo the above which is that if an item is required for progression it should be ubiquitous, but it's also fine to have a very small number of very powerful items. Managing resources without knowing what's necessarily coming in the future is part of the skill of a game with limited resources in general. (Where this idea becomes controversial is when you take this attitude for permanent increases, like level ups like in Bug Fables, where HP for example might provide a temporary boost but long term screws you) Where things become problematic is where very powerful items aren't required and are ubiquitous because it breaks the difficulty curve and where items aren't readily available but are required, so you get screwed because you decided to drink a megaelixir on the third boss instead of saving it for the boss that requires you to use 10 of them.
|
|
#
?
Sep 7, 2021 16:47
|
|

|
Natural 20 posted:I never really felt the need for Dark Berries in game. By the time they became available for me I'd snapped the game over my knee so they were too prohibitively expensive for sustain and boss fights simply didn't last long enough to warrant their use. (This is obviously somewhat influenced by how quickly I realised that HP and TP past a small amount were trap choices) I don't know that I would say they're trap choices, precisely (it is definitely possible to finish the game even with nothing but HP, though admittedly that's a wacky challenge run; mostly/all TP is plenty viable, it's just not really my style), but I know what you mean. If I had one complaint to make about this game, I think it would be that a lot of the effective strategies it pushes you towards make the battles too short (and when you steamroll the enemies with huge damage, all the fights feel the same since you miss out seeing the behaviours that make them unique). I'm deliberately trying to strike a balance for the LP between playing well and still letting the bosses do their thing, though I'm not sure how well that's actually working. One of the reasons I really enjoyed Hardest and Tuffbugs modes was that I found the maximum DPS glass cannon approach stopped working, it was just too risky and the bosses finally had enough durability that I needed to survive more than a turn or two. It's especially true for the boss rushes, the best burst damage strategies just don't work for multiple fights in a row the way they do for a single boss, and that can make you get creative and try out defence strategies etc. Natural 20 posted:Personally I don't think Elixirs/MegaElixirs are bad design, no less than Magnum bullets or Rocket Launcher ammo is in Resident Evil. I would have included those in the same overall category, I'm using the term to mean any consumable item that is some combination of rare and difficult/impossible to replace. And I think it's important to emphasise that they absolutely can be bad design, and that they do make the game worse for some players even when done well. I've just come around in recent years to think that, done well, they add a certain je ne sais quoi that I enjoy, and which I really feel the lack of when it's absent. Natural 20 posted:That is to echo the above which is that if an item is required for progression it should be ubiquitous, but it's also fine to have a very small number of very powerful items. Managing resources without knowing what's necessarily coming in the future is part of the skill of a game with limited resources in general. (Where this idea becomes controversial is when you take this attitude for permanent increases, like level ups like in Bug Fables, where HP for example might provide a temporary boost but long term screws you) I agree with pretty much all of this (though, on the subject of level-ups, I do think you're catastrophising a little; it's hard to be truly screwed, at least on Normal/Hard, and Bug Fables does eventually offer a respec option though I do think it becomes available later than it should have). The interesting thing is that items like this don't even have to be incredibly powerful, they just have to be unique or interesting in some way relative to the more common items. That's one of the things I think Bug Fables got right with the Dark Cherry items (barring Berry Smoothie, as we've discussed; if there were a 25ish TP item then it would apply to that too): while they're all strong, they're all kind of niche in different ways, and the power delta relative to other items isn't enormous (is the extra 2 damage from a Cherry Bomb worth not being able to plan around the status or defence piercing? well, sometimes). I also like how, as a cooking ingredient, they're customisable, so the game can give you fewer of them and still leave the player feeling like they have a surplus of whichever item they like best. (Also, as of v1.1, there's no longer any need to make at least one of each item for recipe book completion, since you can purchase recipes from a certain NPC later Yel, the food critic, who appears on Metal Island from Chapter 6)
|
|
#
?
Sep 8, 2021 05:23
|
|
|
Explopyro posted:
I can confirm, after finding out how Vi reacts so weirdly with attack up, it's hard to mentally pivot to trying another strategy. Mechanically, it's not hard to pivot, just. Bee goes brrr.
|
|
#
?
Sep 8, 2021 09:48
|
|
|
no bees go buzz
|
|
#
?
Sep 8, 2021 10:46
|
|


|
38: The Magician and the Fool 17 - Ant Kingdom 17 - Ant Kingdom Once again, we're starting off with a bit of management. First off, I dropped off the two Dark Cherries we found last time with Amber; I'm sure we'll make use of them soon enough, but for now they can go into storage so they don't clog up our inventory. 34 - Dodgy Business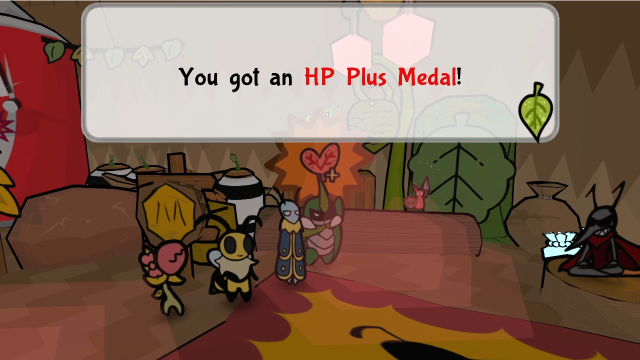  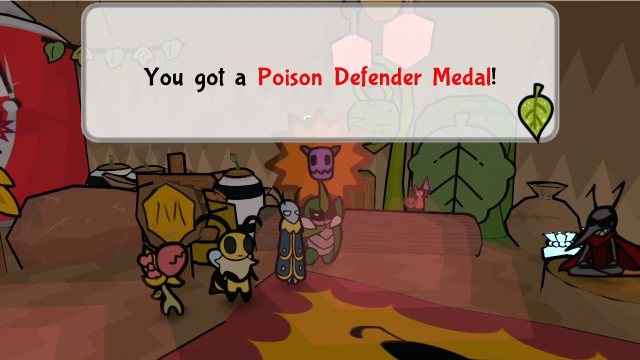 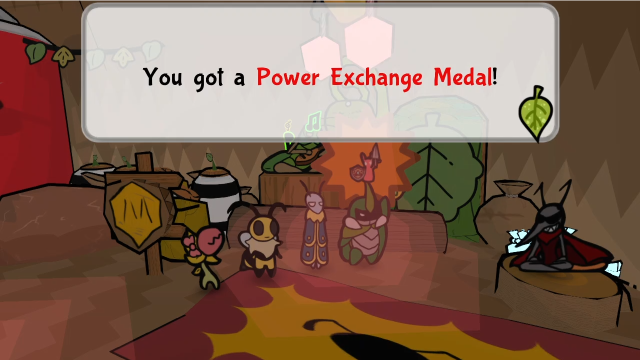 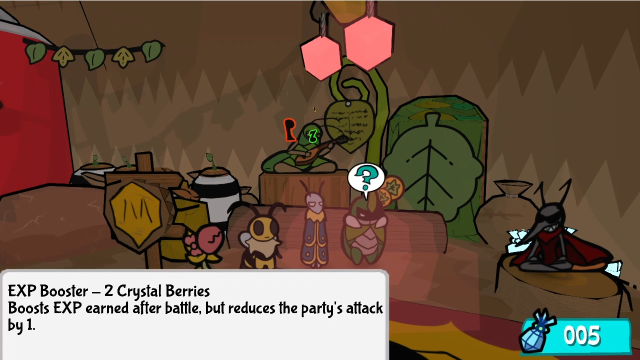 Next stop is Shades' place, since the thread universally voted to buy him out (with the exception of EXP Booster, that's for challenge runs). We're down to 5 Crystal Berries now, but these are all useful medals we'll be glad to have. 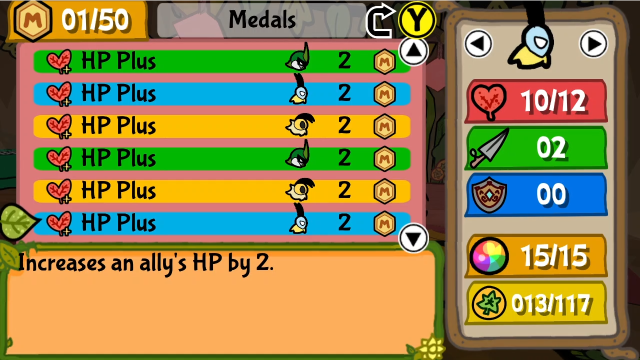 Now that we have a full complement of six HP Plus medals, we can start really thinking about how to distribute them. For now, I'm just going with two for each bug, but I'll probably change that around soon enough (Kabbu might want a greater share for tanking purposes, or we might consider not using all of them to free up MP for something else). 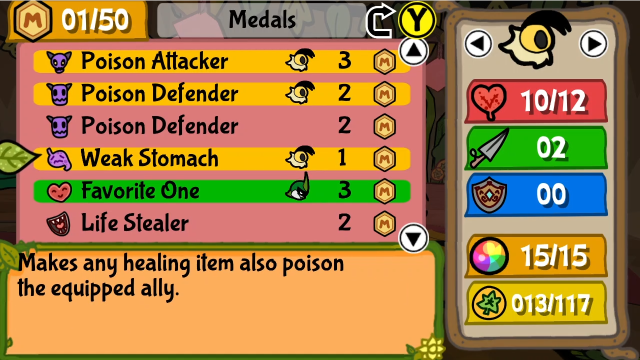 And Vi's back to carrying the poison medals again, though for now she's only getting one of each, I didn't quite have the MP for the second copy of Poison Defender and she honestly doesn't want it that badly. 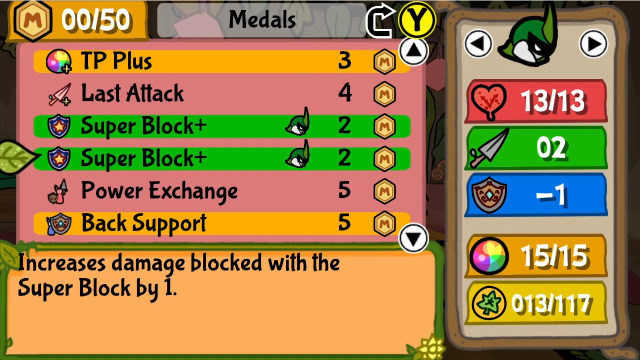 Kabbu can get the second Super Block+ for now. I generally like them better on him than the other bugs because of the synergy with Spiky Bod (each copy is 1 more point of counter damage per Super Block).  Now, let's get moving. Our first stop today is going to be in the Far Grasslands (the small preview area we could access from the Power Plant). 56 - Lands Untamed  This root was blocking us before, but we can dig under it now and see a bit more of this area.   The first thing we encounter on the other side is yet another new enemy. (It's a bit hard to see in this area sometimes thanks to all the foliage; the game does its best to make it selectively transparent, but there's only so much that can do...) 04 - FIGHT!  We've seen the Mantidfly before, but let's find out what's up with the spider.   Well, and steal. I must make sure our inventory remains safe! Well, and steal. I must make sure our inventory remains safe!Jumping Spiders are another Chapter 5 enemy. Apparently their attacks can steal items if not blocked, though I don't think I've ever personally seen it happen.  Let's relay to Kabbu and have him hit it.  Leif freezes the Mantidfly to keep it out of our hair while we deal with the spider.   Conveniently it's not quite dead, so we'll get to see at least something it can do.  As you might expect from a jumping spider, it attacks by jumping on us.  Conveniently, we're in a good position to clean everything up this turn.  Kabbu finishes off the spider.    While Leif, Vi, and Chompy have exactly enough damage between them to kill the Mantidfly.  The enemies here are still worth ludicrous EXP.  Past the spider is a path leading to a new area.  This place seems... strange. We immediately see big spiderwebs.  Shadiest place in a while, huh. Shadiest place in a while, huh. Can't say we're not curious. I'd rather we focus on the mission... but surely a small detour would not hurt? Can't say we're not curious. I'd rather we focus on the mission... but surely a small detour would not hurt?Well, our party is curious, so let's check it out further.  The signs are certainly inhospitable. 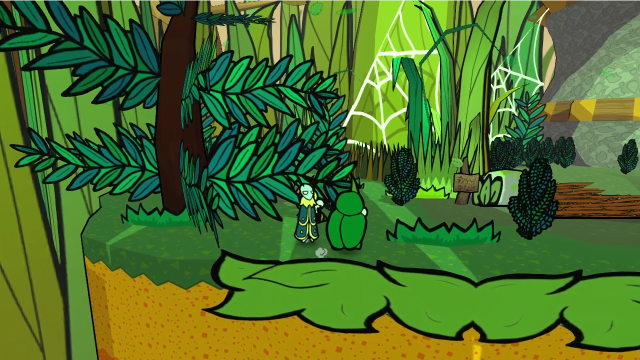 Is that some kind of building?  More pleasant signs.  Yeah, that's definitely some kind of tower. Who could live here? Climbing up on the rocks here, we get a prompt that allows us to inspect it. Let's do that. A tower, in this wild place? Let's break in. Aw yes! We're on the same page! I-Isn't it private property!? After that conversation, we get a discovery. 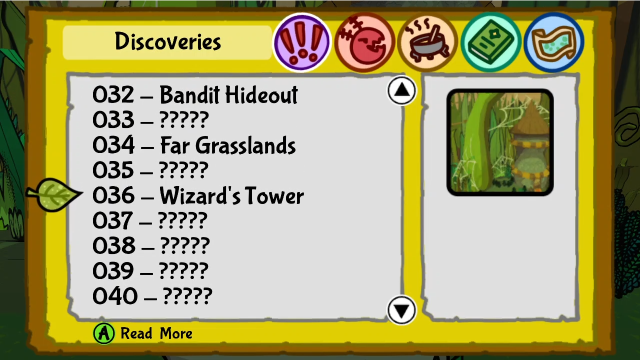 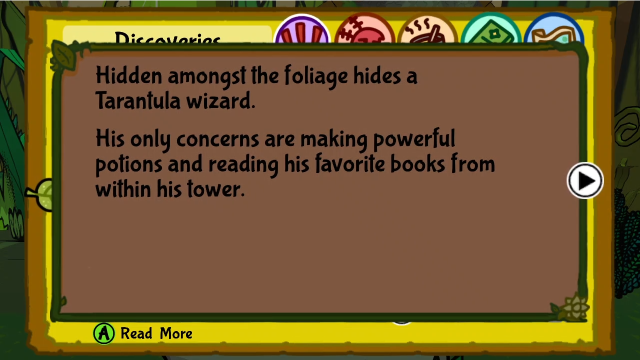 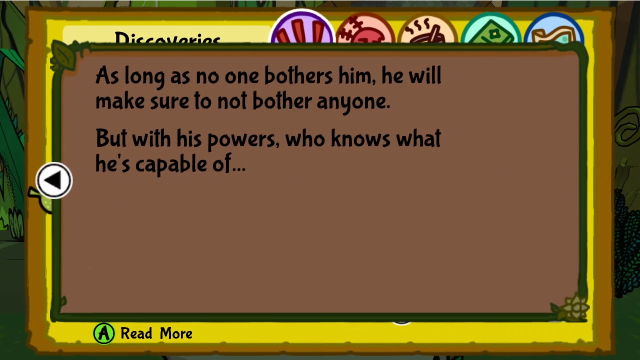 Awkwardly, the discovery text here might be a bit too informative. Still, this certainly sounds like an interesting person we should try to meet. 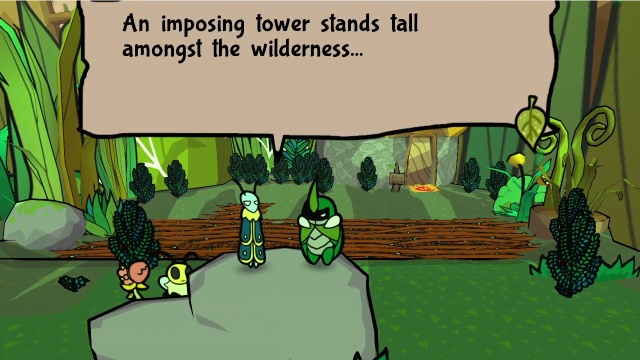 Interacting with this spot again just produces this text.  To get closer to the tower, we need to use Leif's bubble shield to cross the brambles.  More of the same.  Whoever lives here, though, they're serious about not wanting visitors. The front door is firmly shut, we can't get in that way.  Cutting some weeds over this side, though, reveals a hole in the ground. Maybe we can jump down?  25 - Caves 25 - Caves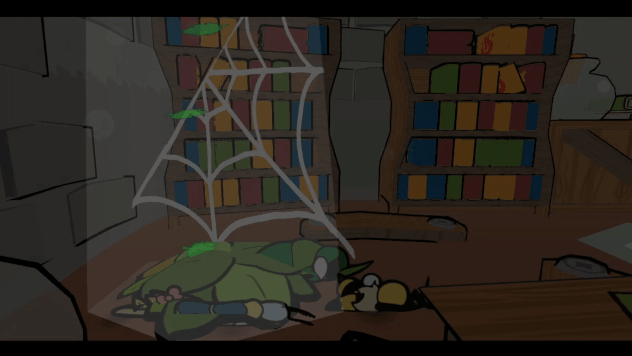 Team Snakemouth lands with a crash in what looks like an underground library. 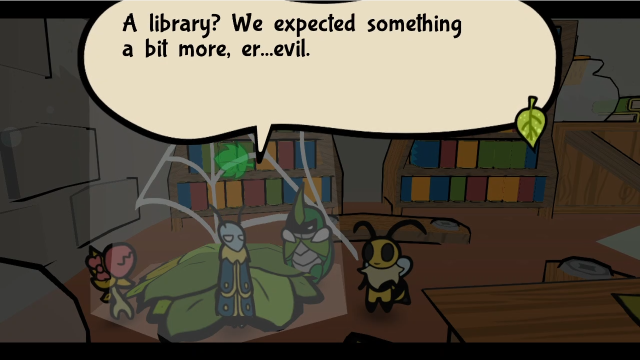 Bleh. I hate when the treasure turns out to be books. This must be someone's residence! We're... we're tresspassers! Shh. Relax. We've just gotta get out before- Bleh. I hate when the treasure turns out to be books. This must be someone's residence! We're... we're tresspassers! Shh. Relax. We've just gotta get out before- 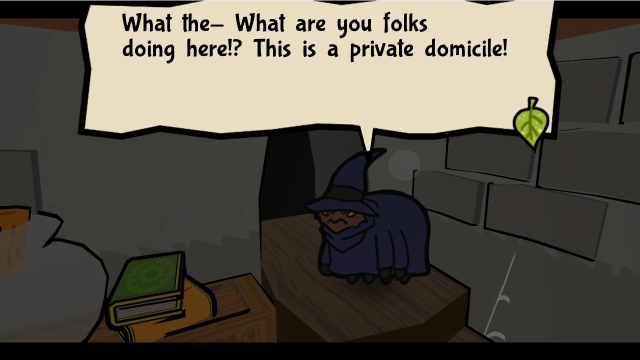 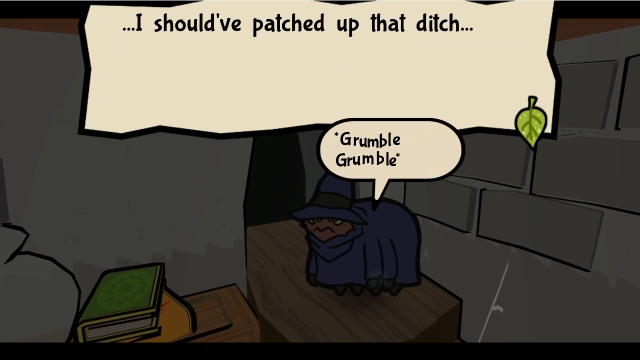  Get outta here, aight? Or I'll kick you out myself! And don't you dare touch any books! I'll track you down! Get outta here, aight? Or I'll kick you out myself! And don't you dare touch any books! I'll track you down!Someone's grumpy, but can you blame him?  W-Was that a spider? Seemed more like a friendly neighborhood Tarantula. We... we could've gone to prison... Guess we'd better get out before he calls explorers on us. W-Was that a spider? Seemed more like a friendly neighborhood Tarantula. We... we could've gone to prison... Guess we'd better get out before he calls explorers on us.Well, while we're here, we may as well have a look around. Let's check for a banter first though: Yay... so many books... This Tarantula is quite well read! There's a few classics in here! Oh, we've been meaning to read this one. "World Round Pastry". Maybe if we don't take it outside, he won't mind? Absolutely not! We can't risk it!This is cute. (And of course Leif found a book about food immediately.) 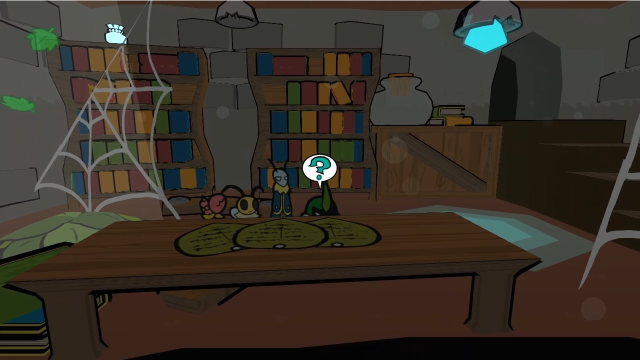 Ooh, that's a Crystal Berry up on the shelf. We'll definitely want to take that with us. (Hey, it's not a book, maybe wizard friend won't miss it?) Before that, though, we can read the papers on the table: 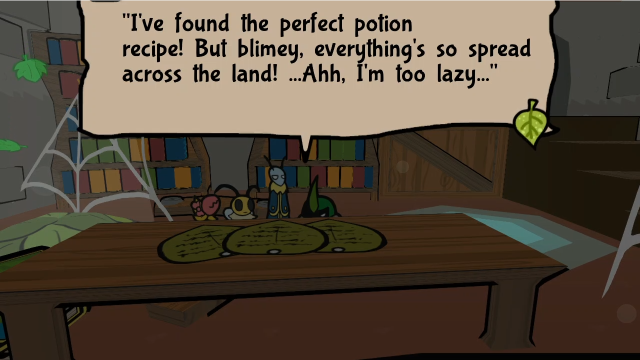 Hmm, maybe we'll be able to help him out with that. 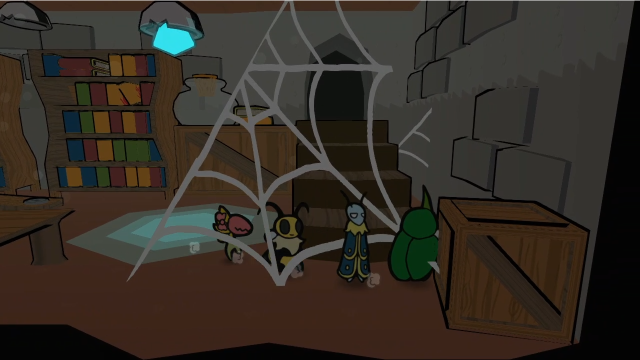 On the eastern side of the room, there are stairs up toward the exit. Before that, though, there's something sneaky here: 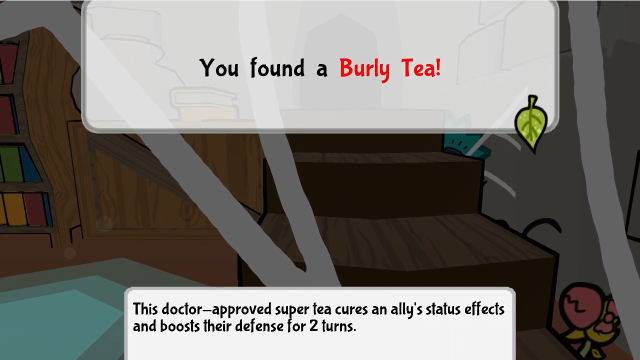 There's a little gap between the stairs and the wall, where we can find this Burly Tea.  We can use the miscellaneous junk to climb up on top of the bookcase.   And Vi can grab the Crystal Berry with her Beemerang. We're a bit low on these after spending so many, so this is much appreciated.  There's nothing else to do in this cellar, so let's head upstairs and see what else is here.  We come out on the ground floor. There's a save crystal here, but it looks like the front door is locked, so we can't actually get out... Wow! Look at all the flying books! Weird, we can't feel any magic here. The Tarantula must not use any crystals. I understand your awe, but the door is locked! We'll... have to ask for help. Gulp.Nothing else for it, let's head upstairs.  We have a bit of a ways to climb; the camera angle rotates around as we do. I love the aesthetic here, the room's full of rainbow smoke and flying books.  At the top, we find an exit to another room.  It's the wizard's room, of course. Is that a gacha machine? (We'll get to that.) First off, let's see what our team have to say: That's a dream catcher! Incredible! It's unusual to see you so pumped up! Mother always nagged father to buy her one. They were very expensive, though. Bleh, who's gonna pay up for that? Those don't even work! But this one's owned by a wizard. Maybe... ...Ah, we don't really need it any more, do we...? Leif...That's a bit sad.  We're going to have to ask him to let us out.  ...You're still here!? Can't you see I'm busy!? The door's locked. We literally can't leave. Not without breaking something... O-Oh. Sigh... Blimey. I get really into my potions. ...You're still here!? Can't you see I'm busy!? The door's locked. We literally can't leave. Not without breaking something... O-Oh. Sigh... Blimey. I get really into my potions. ...It is? I'm a wizard! You dare underestimate me!? Um, thanks for letting us out. Our apologies for breaking in. It's whatever. All I care about is finishing this brew! ...It is? I'm a wizard! You dare underestimate me!? Um, thanks for letting us out. Our apologies for breaking in. It's whatever. All I care about is finishing this brew!Well, that was painless enough. (I like this guy.)  Still, seems like we're not done here quite yet. We can clearly talk to him again. Sir wizard? Yes! You seem... troubled. We're explorers, yes? Good for you. What he means is, it seems like you need help. Do you know anything about extracting the magical compounds of materials? Nooooope. And you boast you can help me!? Well... can't we? ... There's a potion I want to make. But its materials... I'd have to travel everywhere! I hate leaving the tower! What kind of ingredients? Yes! You seem... troubled. We're explorers, yes? Good for you. What he means is, it seems like you need help. Do you know anything about extracting the magical compounds of materials? Nooooope. And you boast you can help me!? Well... can't we? ... There's a potion I want to make. But its materials... I'd have to travel everywhere! I hate leaving the tower! What kind of ingredients?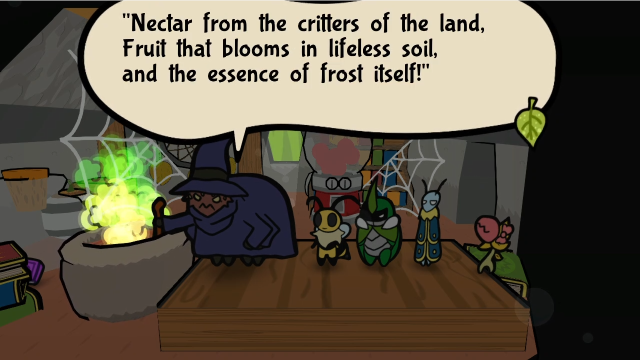 That sounds super cool! So what's the ingredients? That sounds super cool! So what's the ingredients?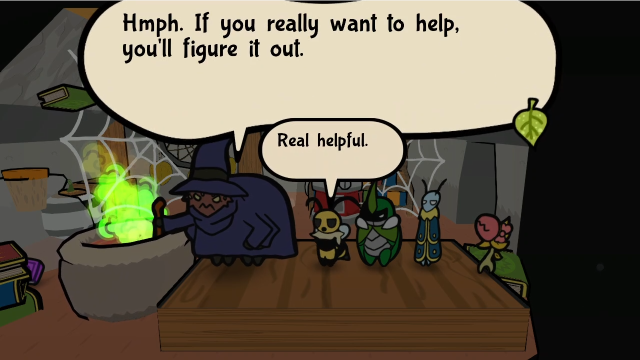 A riddle from one of the 10 great sorcerers! We'll try. Make it worth our while. A riddle from one of the 10 great sorcerers! We'll try. Make it worth our while.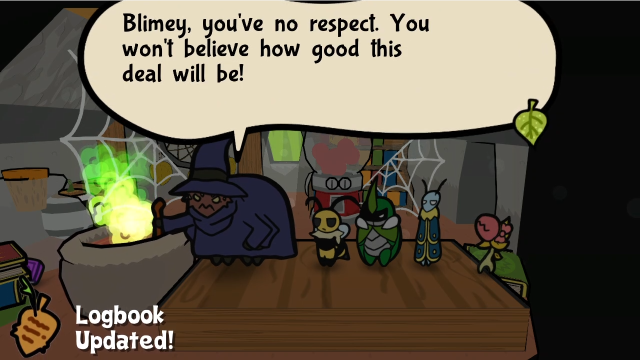 Honestly, I don't blame him being a bit cheesed off at us for that. Still, as the logbook notification suggests, we've gotten ourselves a sidequest. 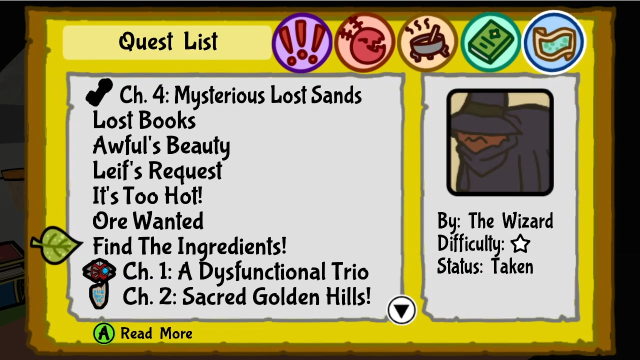  It automatically gets added to our log. We'll need to figure out what these three components are and bring them back for him.  If we talk to him again, he'll ask us this. If we say no: Then begone and only come back when you have them!And if we say yes without them: You're still missing some! Weren't ya gonna help?After either line, he'll repeat the clue again. I guess that's helpful for anyone who didn't realise it's also in the quest log. There's a banter about the wizard too: This tower is incredible. Did he build it all by himself? I hope so. It'd cost a fortune to buy... He truly seems to be a sorcerer. It must've been child's play!Incidentally, while the game only ever refers to him as "The Wizard", the artbook does give this character a name. He's apparently called Tarantular.  Before we leave, there's a bit more to see around his room. For instance, you might've noticed this peeking out of a corner:  Blimey! That book's... garbage! Take it with you. Bleh. If it's bad, I don't want it. Blimey! That book's... garbage! Take it with you. Bleh. If it's bad, I don't want it. G-Guh... Hm. Maybe Reeves will take interest in it...? G-Guh... Hm. Maybe Reeves will take interest in it...?That's right, after all this time, it's the third Bad Book! (And also some fun dialogue. I love a good bookish grump. We'll deliver this soon enough.) 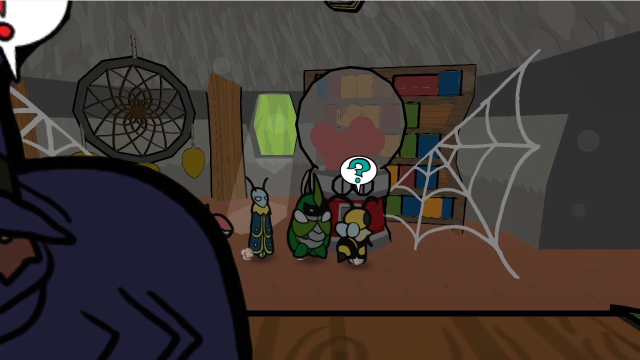 There's also this gacha machine. 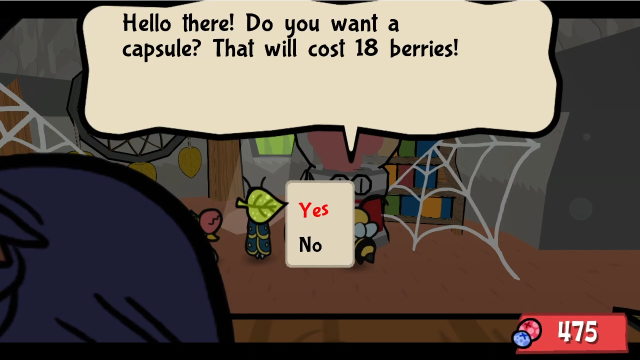 The gimmick here is that the price varies randomly each time (as far as I know, it can range from 10-19 berries). Let's see what we get? 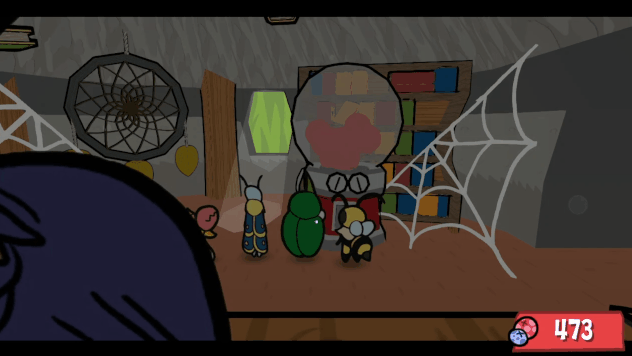 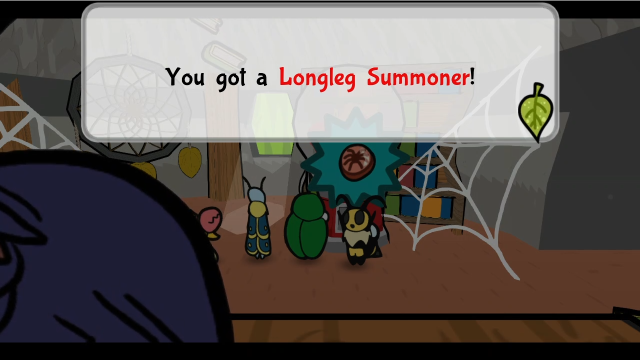 No matter what you pay, all the capsules are the same. 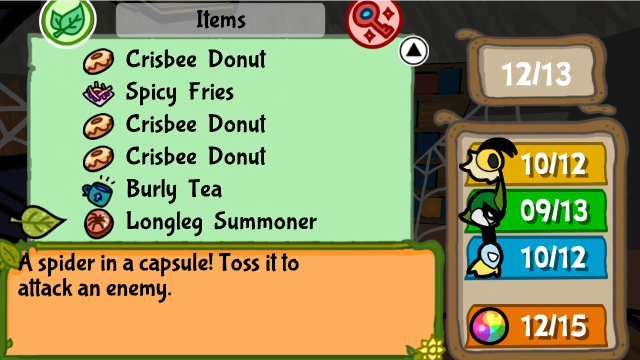 It's a new kind of combat item. We'll test this out shortly. In addition to using them in combat, you can also use this as a means of (slowly) grinding money: Longleg Summoners always sell for 18 berries, regardless of what you pay for them.  Let's head back down. The banter in this room has updated now, too: Wow! Look at all the flying books! Weird, we can't feel any magic here. The Tarantula must not use any crystals. He must be one of the 10 sorcerers! What an honor! To think we'd trespass his property... Eh, we're helping him out. So it's okay! Right.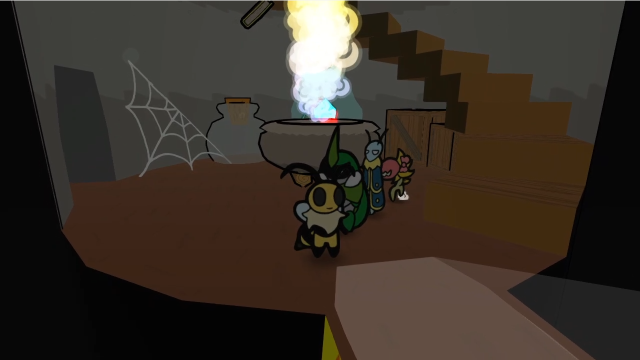 The door is open now, so we can leave. 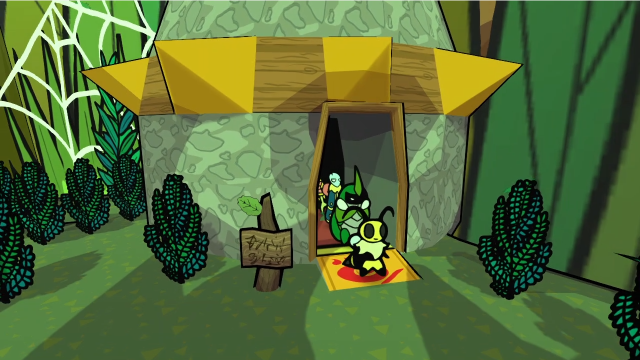 Conveniently, it will stay open, so we don't have to go back in through the cellar again. 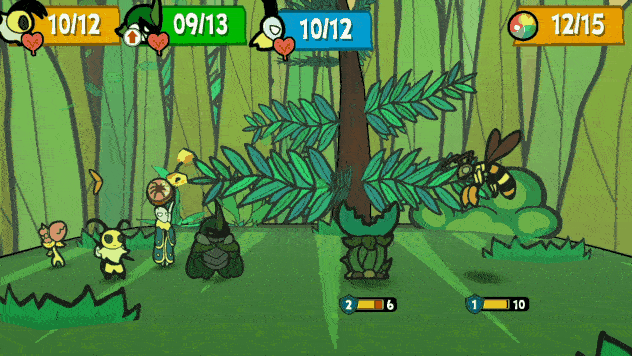 On the way back, an opportunity presents itself to demonstrate the Longleg Summoner. Using it, well, summons a longleg spider that will then stomp on the targeted enemy (no, I don't really get how that works). It attacks a single enemy for 6, and ignores 1 point of defence (as seen here against a Wild Chomper which has 2 defence). Against a single target, these can output more damage than most of the bombs we can make (and they're significantly cheaper than Cherry Bombs). They're not bad at all, though I'll admit I don't make frequent use of them. 18 - In the Court of the Ant Queen Let's stop in at the library and deliver that book to Reeves.    Ah! This is one of the worst ones! Let's see... Ah! This is one of the worst ones! Let's see... NO! THIS ONE'S TOO AWFUL! Sir, please remain calm. This is a library! This book was perfect. Such a beautiful story... Incredible prose! Tight pacing! Amazing characters! ...And it's a bad book? NO! THIS ONE'S TOO AWFUL! Sir, please remain calm. This is a library! This book was perfect. Such a beautiful story... Incredible prose! Tight pacing! Amazing characters! ...And it's a bad book?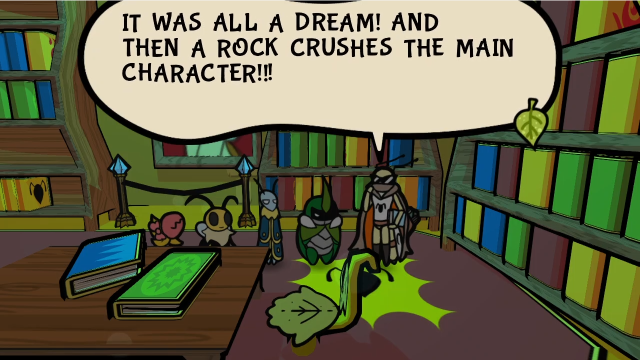 Yikes... This is too much, even for me. I'll destroy it later... Thank you for everything, explorers. Here's my last reward. Yikes... This is too much, even for me. I'll destroy it later... Thank you for everything, explorers. Here's my last reward. Uh, hope you enjoyed them... Uh, hope you enjoyed them... That completes Reeves' quest. The real reward here is the dialogue, of course (can you imagine actually reading this book? He paints a surprisingly vivid picture of it). ...I really wish I could introduce Reeves to the Wizard. They'd either be fast friends or despise each other and either way it'd be amazing.  If we talk to Reeves again after completing the quest, this is all he has to say. Speaking of sidequests, let's see what we can do about those potion ingredients. 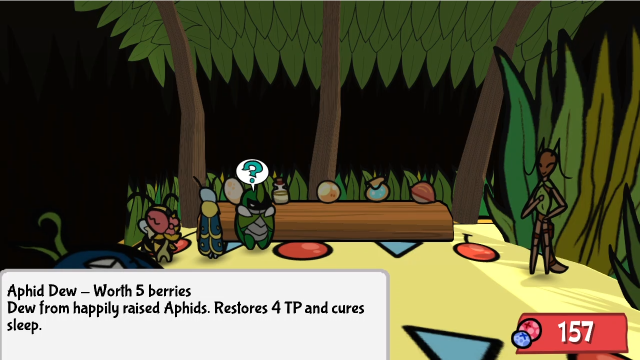 "Nectar from the critters of the land" refers to Aphid Dew. It's a reasonable clue, so long as you remember that's an item that exists; considering it's only available from this one shop in the Golden Settlement, it's an easy thing to forget about. The other two ingredients are a bit trickier, and honestly the clues aren't going to help us find them. They'll identify the correct thing once we find it, but that's a different matter. 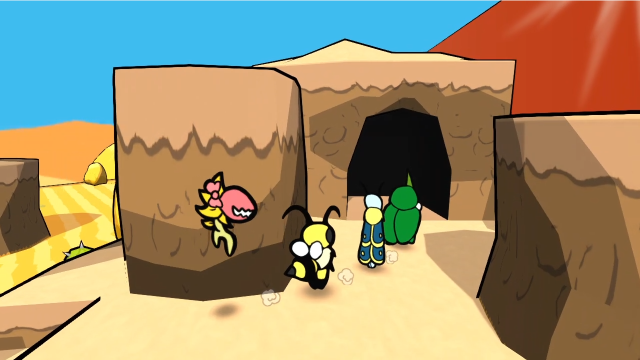 Let's head back into the Bandits' Hideout. I realise this will seem like it's coming out of nowhere, but there are actually a couple things worth seeing here. 47 - The Bandits' Hideout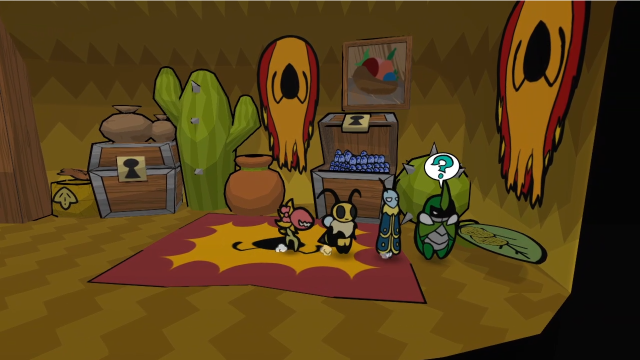 Among other things, if we come back to Astotheles' room, we can read his journal. A bit of insight into his character there. 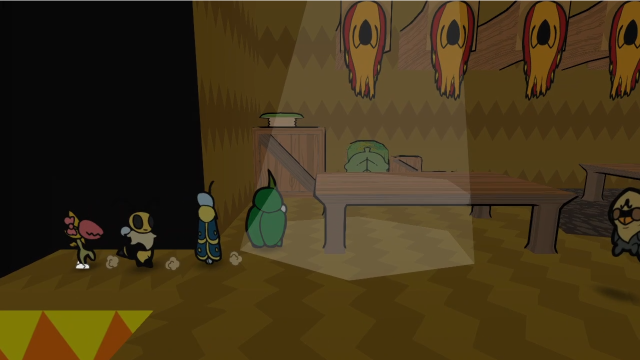 Let's go back to their kitchen.  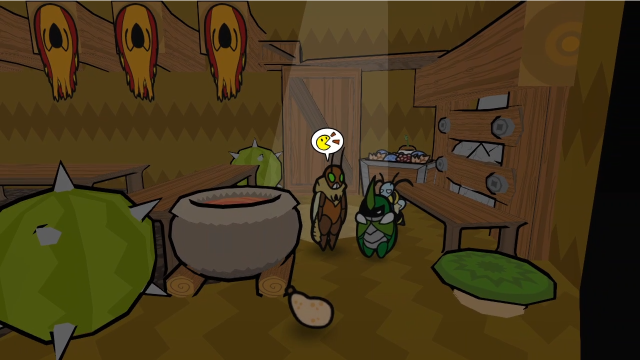 There's someone new behind the counter now.  He won't fight us. (There are some other bandits wandering the hideout still, who we can fight as usual, but this one is friendly.) There's also a banter: A bandit! Chill, Vi. He doesn't seem to want to fight. Indeed. We can't just go around hitting everyone! Hmph!(As far as I can tell, the cook is just one of the cricket bandits with his hood down.)  Just south of the cook, we can find a new item. This Squash is the "fruit that blooms in lifeless soil". Normally, these can only be found in an area called the Forsaken Lands, which we won't be able to go to for quite a while yet, but the bandits seem to be able to source them somehow. I used to think there was only the one available, but it apparently respawns here periodically, so with enough patience you can keep coming back to collect as many as you want. In addition to its use in the sidequest, this can be used in a handful of recipes: "Some mashed Squash, simple but good! Restores 2 TP and gradually restores 2 TP for 2 turns." Sell: 3 berries Made by cooking a "Candy made from squash and a lot of sugar! Restores 5 TP and then 2 TP for 3 turns." Sell: 8 berries Made by combining "A delicious and smooth tart made out of squashes. Grants increased attack and TP regeneration for 3 turns." Sell: 6 berries Made by combining  "This pie makes you feel as strong as a plumpling! Grants increased defence and TP regeneration for 3 turns." Sell: 12 berries Made by combining  The real highlights here are Squash Tart and Plumpling Pie: the other boosting items we've had access to lasted for 2 turns, but these last for 3, which is a substantial upgrade. They also work to trigger Weak Stomach. I always transition to these as my boosting item of choice once it's reasonably easy to acquire Squash in bulk (right now it's inconvenient enough I don't think it's worth the bother). Squash Puree and Squash Candy are okay, but I usually prefer to stick with Crisbee Donuts for TP restoration. When you need TP, you generally need it now rather than later. Unfortunately, the third item the Wizard wants us to find, "the essence of frost itself", is out of reach right now. We'll hang on to the others, and keep our eyes peeled for something that might meet that description; it'll come along in due course. (This is where I apologise and admit to screwing up. I had forgotten we still don't have access to that item when planning out the updates; I fully intended to complete the quest here and demonstrate the reward in the next big fight, but obviously I can't exactly do that. We will eventually see it, no need to worry, it's just that these things don't quite flow together as nicely as I had hoped they would. Mea culpa.)  Let's head to Metal Island now. 34 - Dodgy Business Specifically, the Spy Card arena. Remember this crack in the wall? We can now dig through.  ...That may not have been the best idea. 13 - It's Getting Scary! 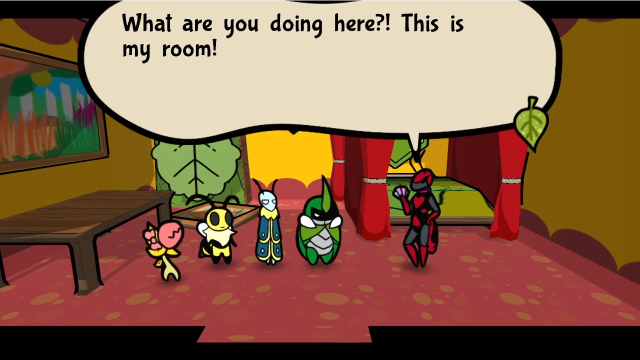  Aaaaah! You destroyed the wall! You think I won't mind because I'm rich!? How dare you! I thought you were decent bugs! Aaaaah! You destroyed the wall! You think I won't mind because I'm rich!? How dare you! I thought you were decent bugs!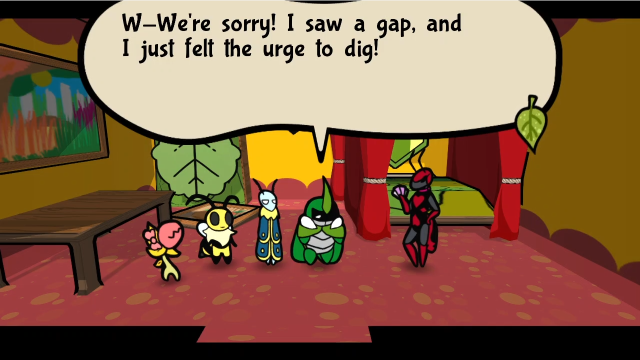 Yeah. You've really gotta complain to management. And you're blaming ME for the hotel's faults!? Err, no... just... Yeah. You've really gotta complain to management. And you're blaming ME for the hotel's faults!? Err, no... just...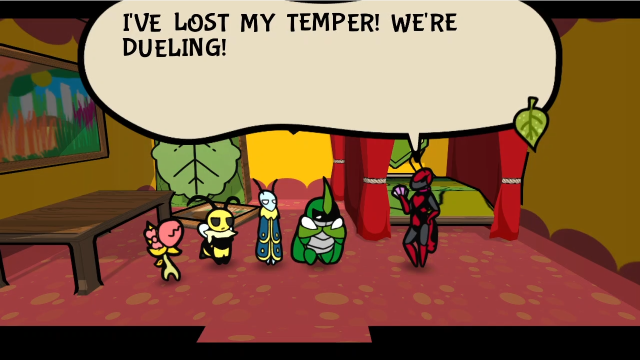  Click me for video! 29 - Team, This One's Stronger! Click me for video! 29 - Team, This One's Stronger! 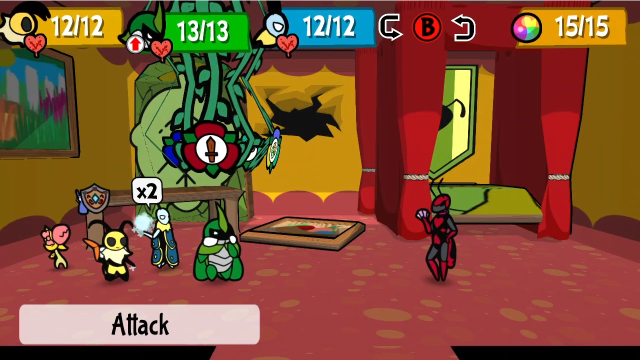 Well, that escalated quickly! Looks like we're going to have to fight Carmina. Let's see what we're dealing with here.  Ah, crud. She heard us. Let's see where that roulette lands... Ah, crud. She heard us. Let's see where that roulette lands...Roulette, eh? Looks like her love of games of chance even extends to her fighting style. We'll see how this works soon enough.  Also, this fight might go pretty long: 85 HP and 1 defence is a lot of durability. I suspect the devs were assuming most people would come here a bit later.   Leif relays to Kabbu to get an extra point of damage through her defence.   So far, so good. What's she going to do?  At the start of each turn, Carmina spins a giant roulette wheel. This can have all sorts of unpredictable effects, both on her and on us; each time it shows up, there will be six icons present, though that's only a subset of the possible effects. This time, she healed herself for 5 HP and undid most of our damage. Goody.  After spinning the wheel, she goes directly into attack mode. This attack has her chuck 2-3 cards at a single bug, each of which hits for 4 damage; it can also inflict status effects if not blocked, depending on the colour of the card. Leif only got poisoned here, since the first card was a neutral one; other cards can inflict Sleep or Numb also. Carmina really isn't messing around, this attack can get nasty.  We've barely made any progress here: the healing undid most of our work, and she took a big chunk out of Leif.   For now, we'll just have Kabbu keep hitting her.  Vi can heal Leif with Secret Stash, conveniently curing his poison too.  While Chompy goes for the kneecaps again. What'll it be this time?  Oh. The roulette results aren't always good for her. In this case, Carmina puts herself to sleep, which immediately ends her turn (though, unfortunately, this does mean she gets more healing). Still, it's a bit of a reprieve regardless.  We could leave her asleep, but that would be counterproductive: she'd just heal more.     Okay, now it's her turn and...  Wait, what? She skipped her turn? This is a bit of an odd glitch. If you hit an enemy while they're asleep, it will immediately wake them up, but for some reason this also causes them to skip their next turn. As you might imagine, this is pretty exploitable if you actively use sleep attacks (e.g. you can put an enemy to sleep, then wake them up the same turn to disable them without them getting to heal). I don't like to proactively take advantage of this (it feels cheesy), but the game's handed it to us here so we may as well capitalise on it. Let's keep attacking.     Spin the wheel again?  Ouch. This is one of the nastier effects, putting our entire team to sleep. 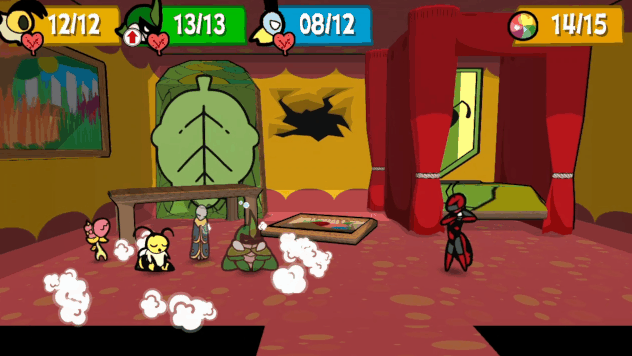 And she throws cards again. At least this wakes Vi up, and the poison isn't exactly unwelcome. 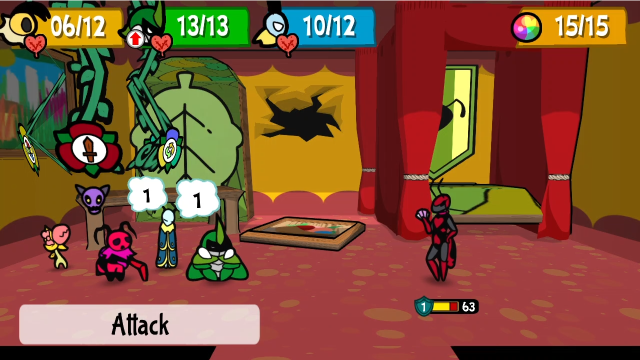 Well. The sleep gives us some passive healing, at least, but the loss in action economy really hurts. Still, with Vi poisoned, we can at least try to deal some damage. 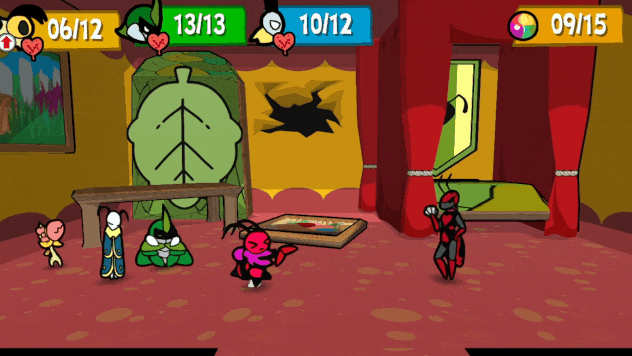 We can put her in front and do a Hurricane Toss. Without any charges it's just 8 damage, but that's still more than we could have done otherwise. (In retrospect, Needle Pincer would actually have done more, at 4 + 3 + 3.) 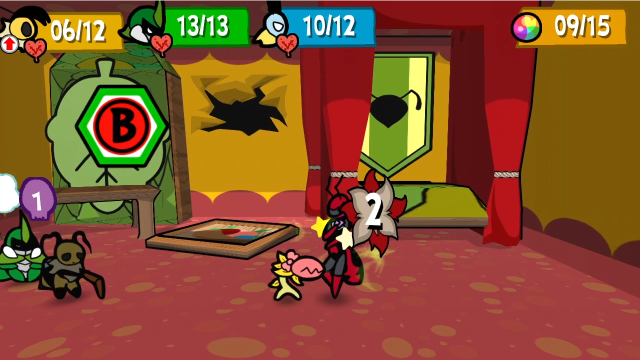 Chompy, of course, keeps chomping.  Oh no. This is one of the more annoying results. The ink blot inflicts a status effect we haven't encountered yet: it's called "Inked", and it makes the affected characters unable to use skills. Unlike other negative status effects, this one also can't be cured (even by items which "cure any status effect"), you just have to wait it out. It can really throw a wrench in your plans if you weren't expecting it. 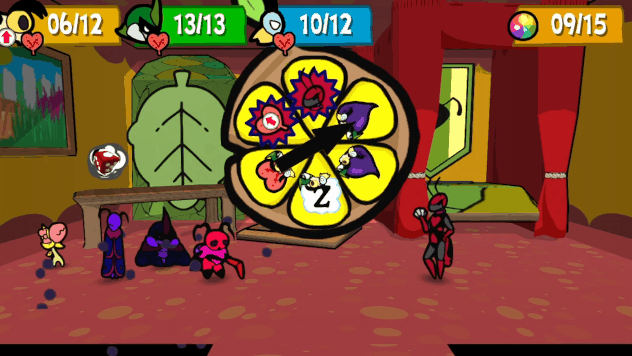 We also see a new attack from Carmina this turn. The dice bomb deals a random amount of damage, as shown on the die, but it's a bit weird. This attack cannot be blocked, and the damage ignores defence, but it can still be increased if Carmina has Attack Up (which she can get from spinning the wheel).  With the whole team inked, our options are limited. 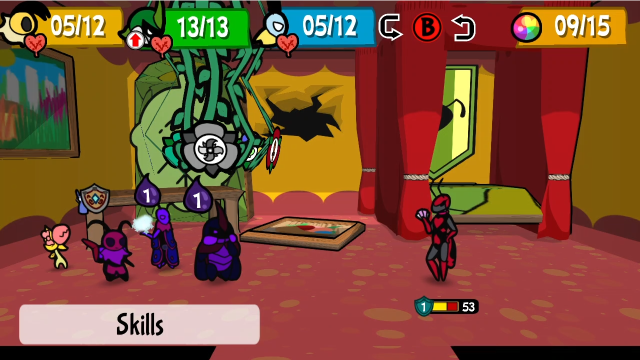 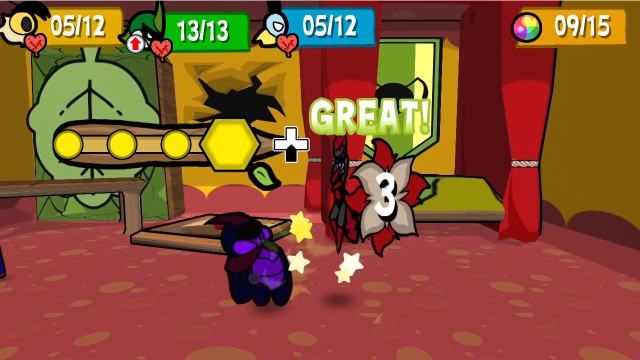  Let's get Kabbu in front and have him do the attacking, it's the best we can manage right now. 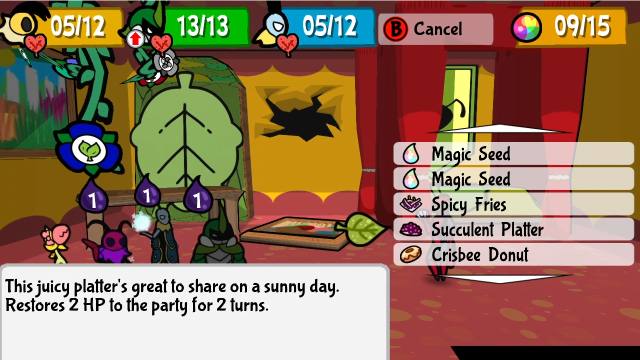 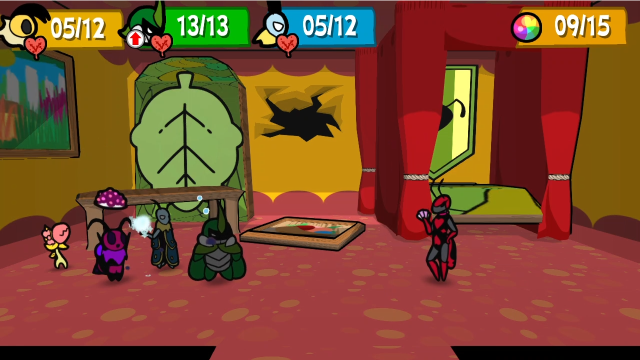 Notably, ink only prevents the use of skills, items are still fair game. I ended up going for this Succulent Platter; it's a bit risky not to get the healing right away, but this will also help keep Vi's poison bonuses going. 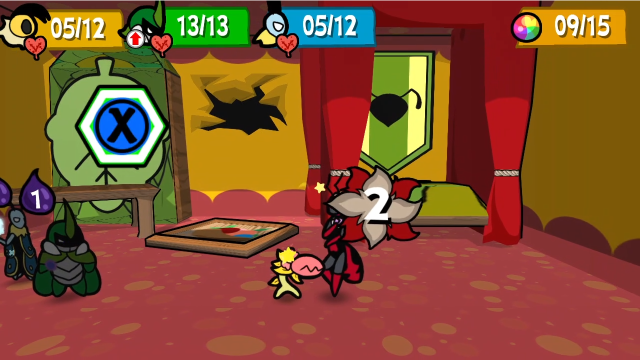 Chompy chomp. 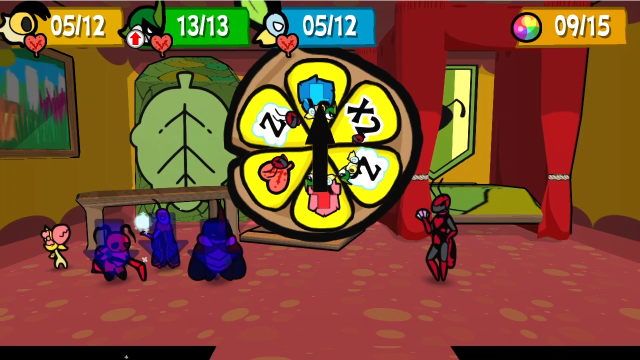 This time, the wheel gives us all Defence Down. That could be a problem. 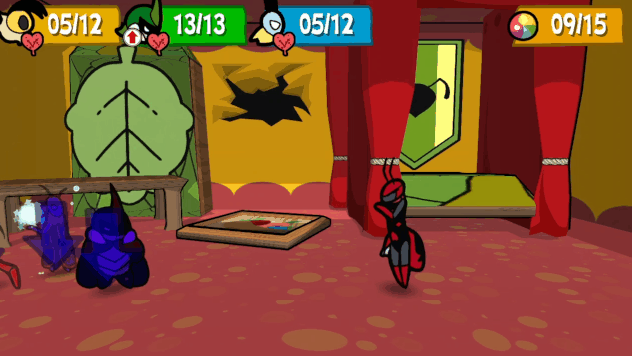 We also get to see the last of Carmina's attacks. This blown kiss attacks with a base damage of 4, always inflicts Defence Down for 2 turns, and inflicts Numb if not blocked. The debuff duration will stack with the one that was just inflicted, so Kabbu's defence is going to be lowered for quite a while after this. At least it wasn't the cards, I suppose. 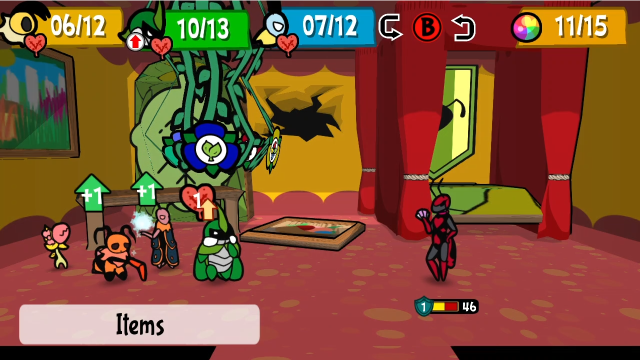 At least the ink status is gone now. Between that and finally getting a charge-up from Kabbu being hit, this seems like a good time to try to do some damage. 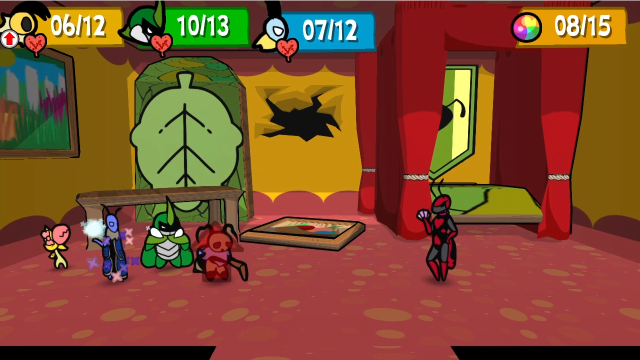 Let's get Vi in front and have Leif Empower her. 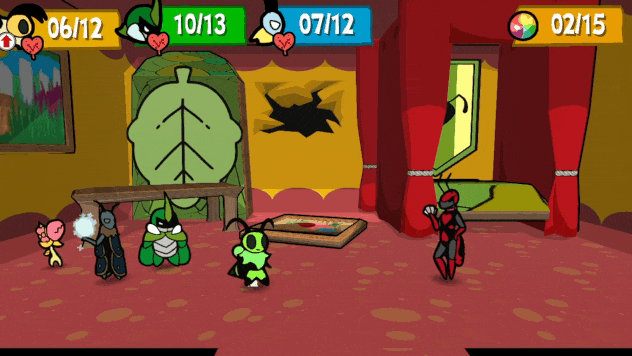 Much better. 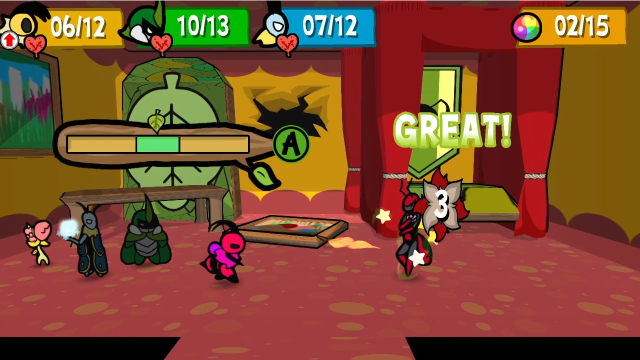 After a relay, she can attack again.  And Chompy is helping.  Oh, goody, more ink.   At least she rolls badly on the dice this time around.  We could be in worse shape, although being inked is never pleasant.    We're left with little choice but to keep attacking. At least Vi can still take advantage of Poison Attacker and Empower.  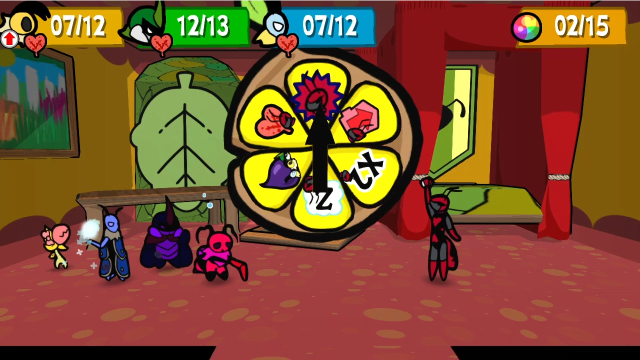 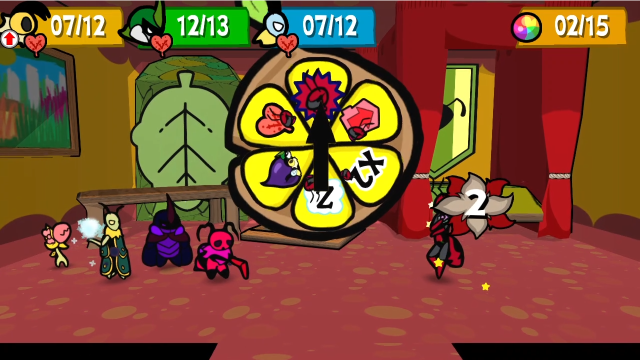 Hey, Carmina, stop hitting yourself. 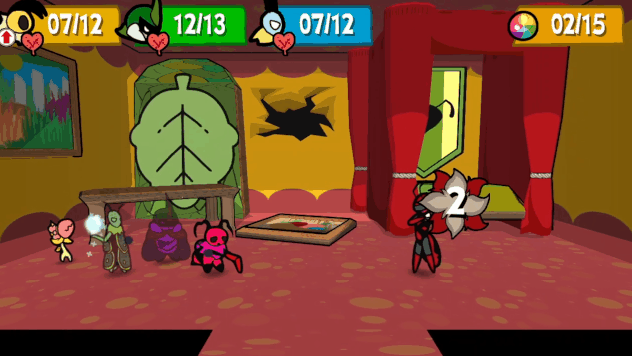 Okay, I take it back, you can hit yourself all you want! It's better than this! (Vi could have survived this if I'd blocked every card perfectly, but that's a tall order here.) 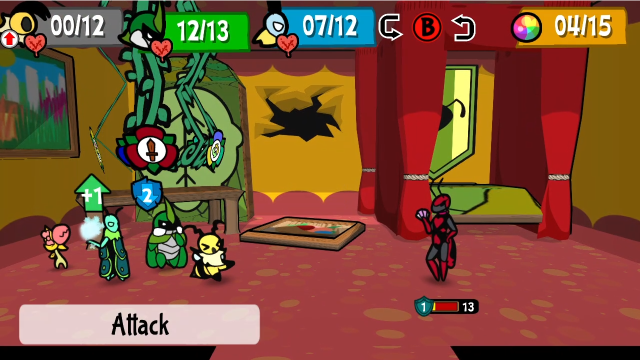 Carmina's pretty low on health; we should be able to finish this soon. First things first, though...   Let's get Vi back up.  She'll get a bit of damage in...  Before Leif uses Frigid Coffin to freeze her. She only has 50% resistance at base, and we haven't frozen her before, so the odds of succeeding are quite good. (In retrospect, I sequenced this turn inefficiently, I should have had Kabbu use the Magic Seed instead of letting Leif gain exhaustion.)  Let's not forget we can have Chompy do nothing; wouldn't want to break the freeze early.  And, with that, we can bring the fight to a close.      This fight against Carmina is pretty interesting, if weird. I'm never quite sure if I like it. For all that the AI for every enemy in Bug Fables involves RNG, this fight is much more capricious than most, and almost any strategy you use will require a certain amount of luck. Staying on top of healing makes this a lot less fraught, but even then some bad luck with sleep or ink can quickly cause the fight to turn against you. It's not hard to feel backed into a corner in this fight; it can feel rewarding to salvage the sticky situations it puts you in, but it can also get frustrating if you end up on the back foot due to RNG. And sometimes, Carmina just gets unlucky and clowns on herself, which is funny but makes for an unsatisfying battle. Also, it's worth noting, the Inked status effect was a new mechanic added in v1.1; it only appears in a few select boss fights, but this is one of them. Those spaces didn't appear on her wheel in prior versions.  Here's a demonstration of the fact that status-recovery items (like Queen's Dinner) don't do anything about ink. (I'm genuinely not sure if this is intentional, or if the "all status effects" is a hard-coded list they forgot to update, but regardless this is how it works.) There are some other interesting effects on the roulette that we didn't see this time around: 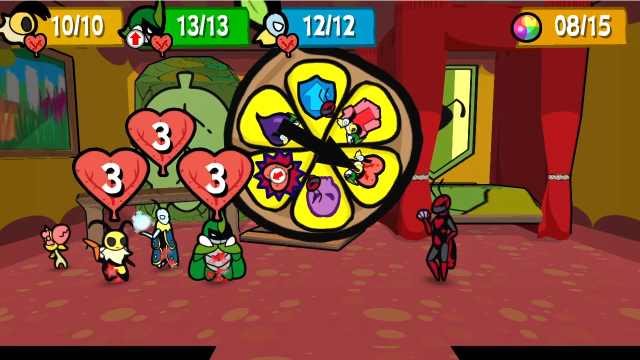 This space will heal Team Snakemouth for 3 HP each. 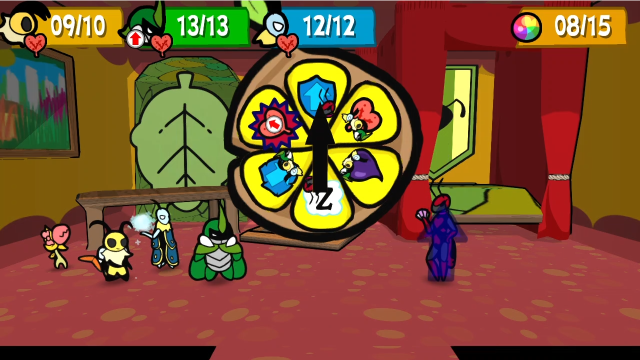 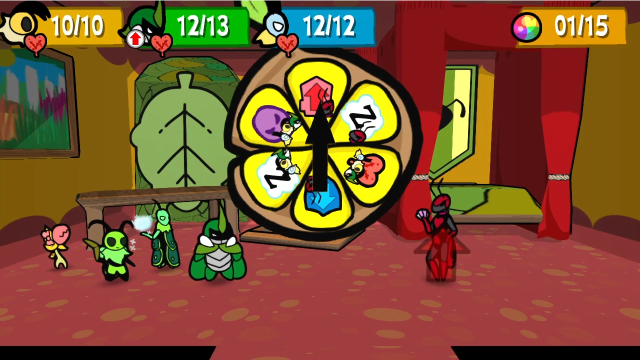 She can boost her attack or defence. 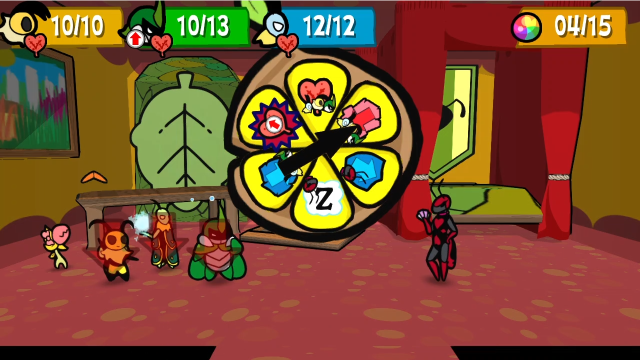 She can inflict Attack Down on our entire party.  She can poison herself (or all of us).  And finally, there's this space, which is absolutely terrifying. As you might expect, this gives her an extra turn. It's not like a Hustle Berry, though: it's an extra turn this turn. Meaning, as soon as she's done attacking, she'll get to spin the wheel again and then attack again after that. If you're really unlucky, this can chain. I've seen her spin this twice in a row and end up taking three full turns; it is pain. (Here is an alternate take where that happened, if you want to see it.) This fight is very unpredictable, and can turn against you with next to no warning.  We ARE sorry, but no. ...*Sigh*. I'll go tell management about the gap... We're... we're truly sorry! Whatever. Get out. I've got to prepare for the tournament. We ARE sorry, but no. ...*Sigh*. I'll go tell management about the gap... We're... we're truly sorry! Whatever. Get out. I've got to prepare for the tournament.After the fight, she just dismisses us. This fight isn't associated with a sidequest or anything, it's just... here. There isn't any reward, outside of the usual things, like getting Carmina's entry in the bestiary and associated Spy Card (which we saw her play against us quite a while ago!), and the usual Hard Mode medal. I think this is probably the most secret of the optional bosses in Bug Fables, it's really easy to overlook and I'm pretty sure on my first playthrough Carmina was the last entry I needed for bestiary completion.  *Sigh* ...Why did I teach you how to play... *Sigh* ...Why did I teach you how to play...Trying to talk to Carmina again is not very productive. (She was a lot more friendly to us in the tournament, wasn't she? It seems a shame to leave things like this but, well, we don't have much choice...) There is also a new banter: Carmina's a pretty formidable duelist. And she can fight well, too! Team, perhaps we should discuss Carmina... outside of her room?Always fun when the game hangs a lampshade on things like this. Well, regardless, there's nothing else to be done here. Guess we can always go check in with Artis... 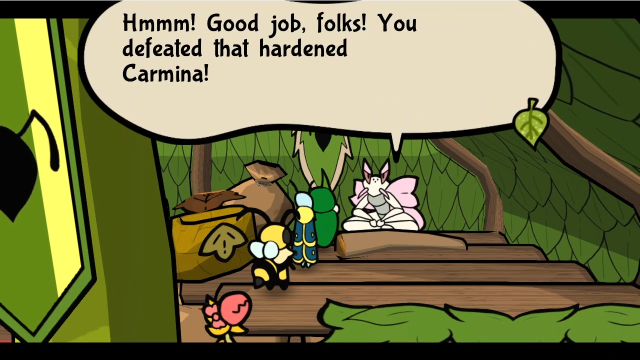  Was it too challenging for ya? You deserve a reward. Here, take this! Was it too challenging for ya? You deserve a reward. Here, take this!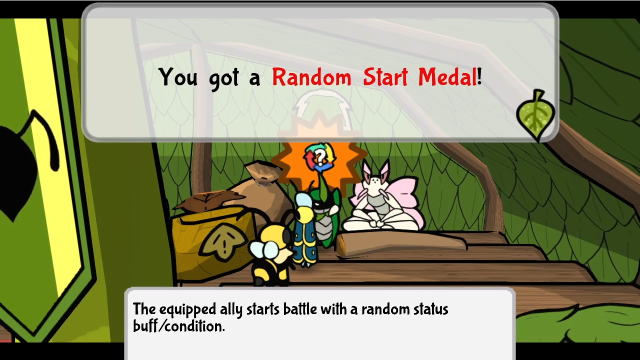 Come back later when you've bonked some extra hard heads with that Medal, will ya? Come back later when you've bonked some extra hard heads with that Medal, will ya?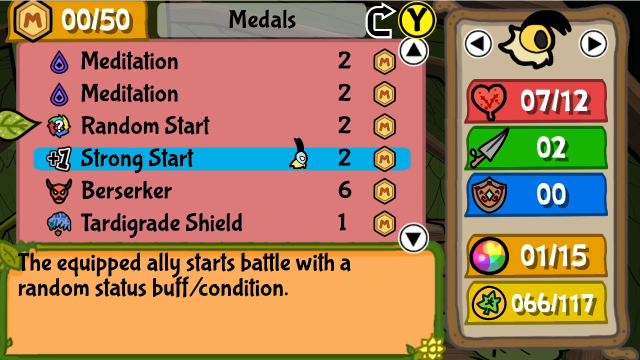 Our Hard Mode reward for beating Carmina is, fitting the theme of the fight, the You may notice that, with the exception of poison, all of those are unequivocally positive (and poison's not exactly that bad). And, for that matter, poison is a really easy thing to take advantage of, so that may as well be a positive effect. If you're already using poison medals on someone, giving them this is a pretty easy sell. I don't use it all that often, honestly, but you can definitely have some fun with this. Next time, we'll finish exploring the desert and go hunting for ore in Stream Mountain. That's the last remaining sidequest before we can finally get back to... story progress? Explopyro fucked around with this message at 05:15 on Oct 5, 2021 |
|
#
?
Sep 13, 2021 08:43
|
|
|
Kabbu is so adorable, especially when he gets flustered by meeting somebody he holds in high regard, like Venus or the tarantula mage. Don't worry about not being able to complete the sidequest yet, it's not like Bug Fables is the only game that has long running side quests. The party fell down a hole twice this update, they should be more careful. But it's still cute how they spin around after waking up. The whole game is just so wholesome (usually), I really appreciate it in these times.
|
|
#
?
Sep 13, 2021 09:50
|
|

|
I love that they made sure to give Chompy fall down and stand up animations that match the team's. It's adorable
|
|
#
?
Sep 13, 2021 15:13
|
|


|
Honestly, it wouldn't surprise me if it was intentional that Inked doesn't get cured by items. All the other status effects are actual biological conditions, so it makes sense that they would be cured by eating something; after all, you eat pills to get over your sickness in the real world, right? But Inked seems to be literally coating your party members in ink, so why would eating something remove that status? It's not like you can eat something and get cleaner in the real world. Of course, by the same token, since the status was only added in a later update, it also wouldn't surprise me if it was just an oversight.
|
|
#
?
Sep 13, 2021 21:01
|
|

|
Okay yeah this was the first time I heard of that status effect and was confused cause I beat the game before that update came out. Wouldn't be surprised if it was just an oversight.
|
|
#
?
Sep 14, 2021 01:41
|
|
|
Carmina is kind of rude as a boss battle considering that unlike most other optional/secret bosses, there isn't a save crystal right before her, and it's easy to accidentally stumble on it while you're gathering goodies that opened up from Kabbu's new digging ability, so you're probably just expecting a small room with another crystal berry/lore book and not a boss who might kick the absolute poo poo out of you.
|
|
#
?
Sep 14, 2021 02:47
|
|
|
First off, if anyone is curious to see Carmina chaining the x2 space multiple times, I uploaded the take where that happened. (I found this take unsuitable for the LP because the inked status effect never happened in it, and I thought that was important to discuss, but I still have the footage.)Torrannor posted:Kabbu is so adorable, especially when he gets flustered by meeting somebody he holds in high regard, like Venus or the tarantula mage. He really is. Torrannor posted:Don't worry about not being able to complete the sidequest yet, it's not like Bug Fables is the only game that has long running side quests. Oh, that's not what was frustrating me, it was more to do with the interruption of my plans (and I'm more annoyed with my bad memory than anything else). Honestly, it wouldn't be the first time this sidequest has annoyed me in that way either: I had previously forgotten the root was there and planned to complete it in the Broodmother update. I was planning to use a strategy involving the reward for that quest in the Carmina fight, and now I'm going to have to find another place for it. It's not the worst thing, it just annoys me. Torrannor posted:The party fell down a hole twice this update, they should be more careful. But it's still cute how they spin around after waking up. Wholesome isn't a word I would have thought to use, but it fits. I always enjoy spending time in this world. Slaan posted:I love that they made sure to give Chompy fall down and stand up animations that match the team's. It's adorable They could easily have gotten away with ignoring it, too, on the excuse that she's an optional character, but I'm glad they didn't. serefin99 posted:Honestly, it wouldn't surprise me if it was intentional that Inked doesn't get cured by items. All the other status effects are actual biological conditions, so it makes sense that they would be cured by eating something; after all, you eat pills to get over your sickness in the real world, right? But Inked seems to be literally coating your party members in ink, so why would eating something remove that status? It's not like you can eat something and get cleaner in the real world. This is definitely a possibility, I'm genuinely not sure. Both explanations seem equally plausible to me, which is why I'm not saying one way or another. Being uncurable forces you to engage with it as a game mechanic, and that might have been something they were going for. Araxxor posted:Okay yeah this was the first time I heard of that status effect and was confused cause I beat the game before that update came out. It only appears in three fights, total (Carmina, Riz, and Delilah are the only characters who can inflict it, as far as I know), so it's also entirely possible someone could play through the game on the current version and still never encounter it. I'm not sure if they thought the fights they added it to were uninteresting and needed a bit more spice, or if they came up with the idea for 1.1's new superboss fight and then decided they'd rather not have the status effect be exclusive to it. Twelve by Pies posted:Carmina is kind of rude as a boss battle considering that unlike most other optional/secret bosses, there isn't a save crystal right before her, and it's easy to accidentally stumble on it while you're gathering goodies that opened up from Kabbu's new digging ability, so you're probably just expecting a small room with another crystal berry/lore book and not a boss who might kick the absolute poo poo out of you. Yeah, this can be awkward. There is at least a save crystal in the auditorium, which is right before this room, but players aren't necessarily going to know it's a good idea to save before digging through the crack.
|
|
#
?
Sep 14, 2021 17:01
|
|
|
39: Crossing the Streams 06 - Outskirts  The last loose end we can wrap up before getting back to the plot is Stream Mountain. Butomu's quest for ore is the starting point, but there's more there than just that. We'll be starting with that, though.   Also, moving some medals around again. We're going to take a break from poison strategies so I can fit in Triumph Buzz and Victory Buzz, as they make exploration a lot less annoying.  So, how do we get to Stream Mountain, exactly? We've seen the exit before, at the oasis in the Lost Sands, but there's no way up from that side. There's a single spot on the Lost Sands map we haven't been to yet, so let's start from the Outskirts entrance and see if we can't get there. 36 - Lost Sands  We need to take the northwest exit from this first screen.  And here's where we can find a new path!  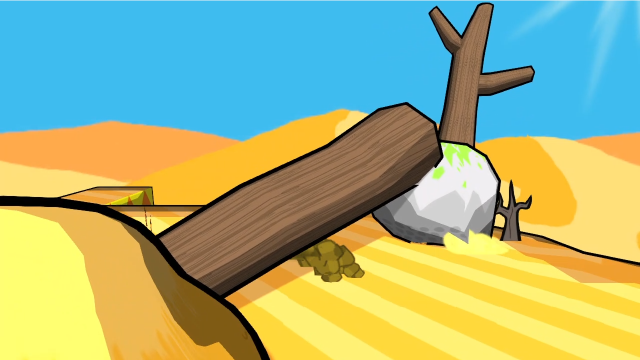 Specifically, with our digging ability we can now get under this fallen log.  The exit here leads to the place we haven't been, but this enemy's in the way first. 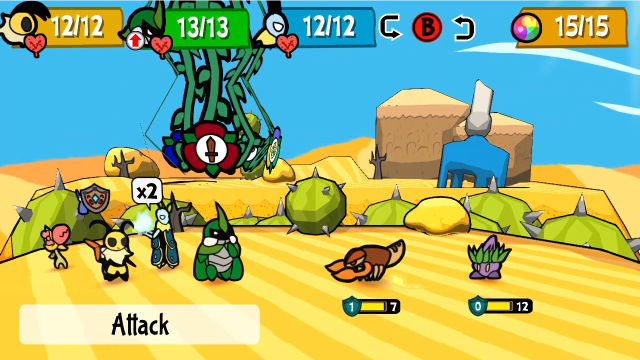 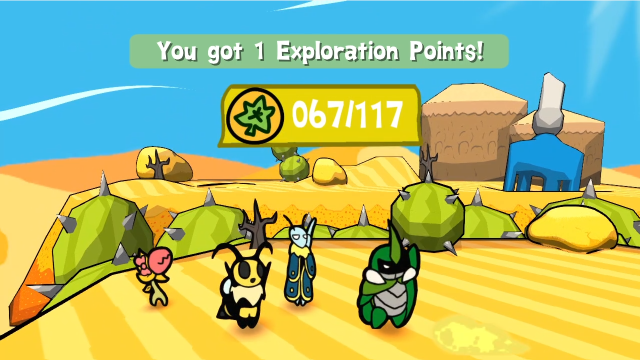 These enemies are basically trivial now, but this is technically a new battle.  Let's head north.  Looks like we found it. There's also a save crystal in case we need it. Fancy place for a cave. This has gotta be Stream Mountain! What an imposing name! It must be extremely dangerous! Nah. There's just water coming out of the side! That's it? Hm. Still, call it intuition, but... We feel the need to explore it. Let's do it! Before we cross that bridge (is that a toy rake?), let's take a quick detour east.  It's the big central sand pit area! This side has been taunting us since we first saw it, but now that we've reached it we can knock down both of the twigs.    With this done, we've finally opened all the paths in this room. This theoretically means getting around the Lost Sands is now a lot easier, but at the same time, we're nearly done with everything here, so it ends up feeling a bit pointless. Still, a shortcut is a shortcut. Let's head back.   Crossing the rake leads to a cave entrance. Let's go inside. 25 - Caves The first thing we see on entering is the notification for a new discovery. Let's check that out.    Well, that sounds ominous. (If you remember all the way back to when we saw the Bounty postings, Stream Mountain might sound familiar...). Anyway, Stream Mountain is yet another optional dungeon for us to explore. There should also be a banter, let's check that. This must be Stream Mountain, the source of the desert's oasis. It's, like, underground water coming up and stuff. Right? Indeed. Defiant Root's well must be linked to this place too. There are stories about the strong monsters here... we must tread carefully.I'm not actually sure what Stream Mountain is supposed to be, in-universe. It's smack in the middle of the Lost Sands (which are, explicitly, a sandbox), but this place is more reminiscent of a natural cave formation, and it isn't clear to me where the water comes from. Anyway, let's have a look around. 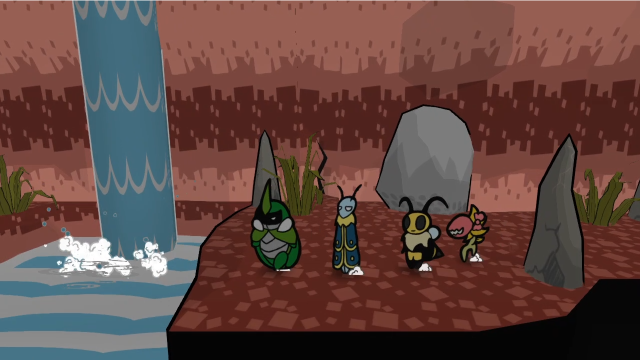 It isn't long before we might find ourselves stymied. Just west of the entrance is this stream, which is too wide to jump across. We could assume we need a new movement ability, and come back later, or... 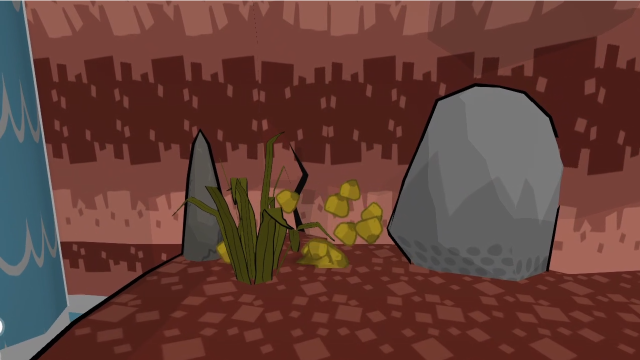 We could dig underground and head into this cracked wall. You could be forgiven for not noticing it earlier, what with the grass right in front of it. 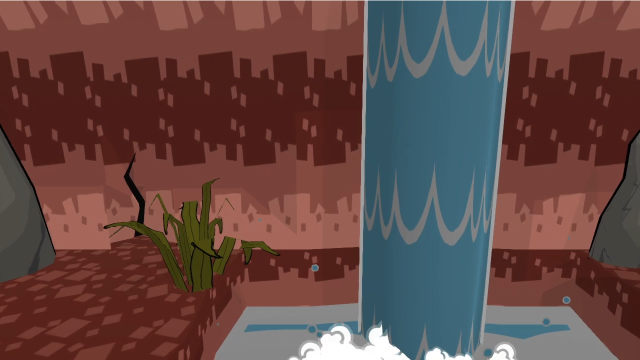 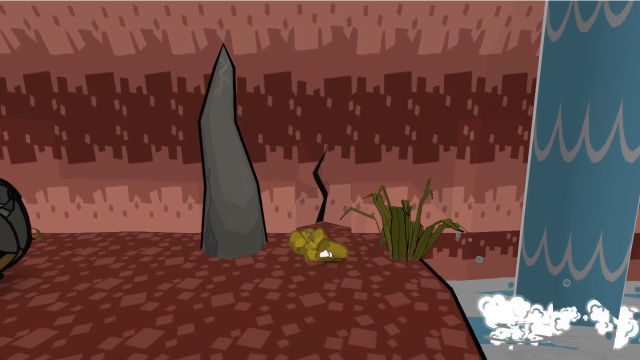 There's a narrow path behind the crack which we can follow to come out on the other side. (It can be a bit tricky to actually get through here, since you can neither see the team nor the exact shape of the path and need to kind of feel your way through.) 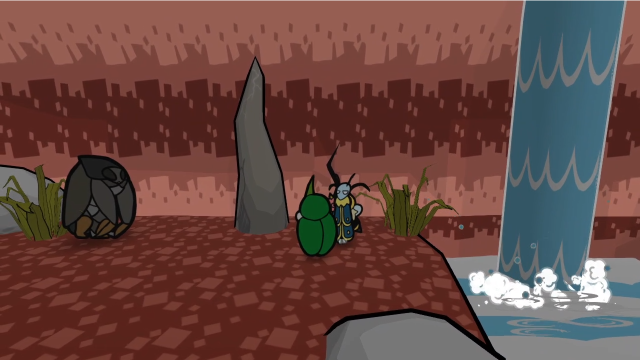 We are immediately faced with an intimidating-looking new enemy on this side.  These things can get pretty aggressive, spotting us from a decent distance and pulling boulders out of the ground to chuck at us. Thanks to Crazy Prepared, I don't take a first strike, but even so... 04 - FIGHT! Let's find out what this thing is.  I know it's no Spider, but...-?! Whoa! It's got a giant rock! Kabbu, hurry up and hit it! I know it's no Spider, but...-?! Whoa! It's got a giant rock! Kabbu, hurry up and hit it!These are loosely based on the Belostomatidae, or "giant water bugs" (among other names). They're really bulky, with a solid combination of HP and defence. 2 defence is enough that you need to actively think about how you're going to get through it (though we have plenty of ways to do that). We'll find out what she means about giant rocks eventually, I'm sure.   We'll start off just by having Kabbu hit it a few times. His innate 1 pierce really comes in handy. 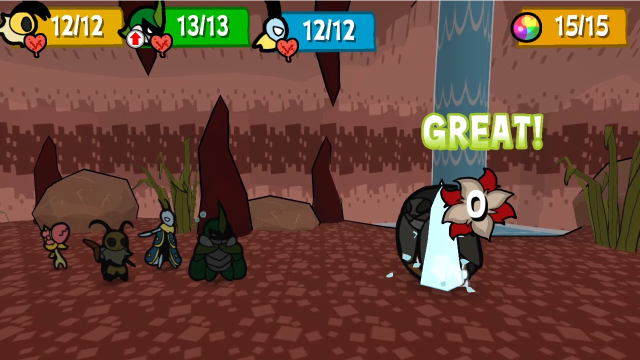 Leif and Vi can't even scratch it with their basic attacks. 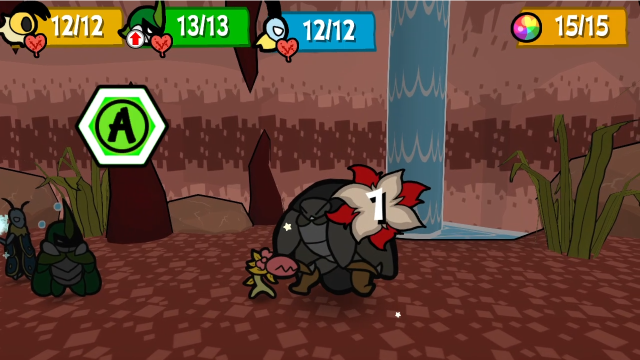 And Chompy's only able to contribute thanks to the Pretty Ribbon.  On its turn, we see its most straightforward attack: it just walks up and smashes someone for 4 damage. I find this attack one of the easier ones to block, with how telegraphed it is.  I decided to have Leif use Empower on Kabbu, so he can get a bit more damage through. Break might have been better, but Empower's the one I happened to have equipped. 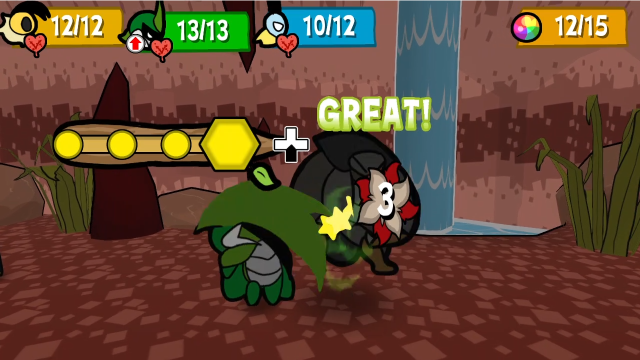  That's definitely an improvement.  Chompy is still helping.  This time, it punches Vi.  After two turns, it's down to 8 HP, well within range of us finishing it off.  Kabbu's Under Strike is a decent choice against these, since it pierces all defence.  And with a relay, he deals the final hit too.   Triumph Buzz and Victory Buzz kick in at the end of the fight, recovering most of the resources we used (just assume this is happening every fight for the rest of the update, I don't think it's worth showing evey time). This is a big help in here, since the enemies here can be a real pain to take down without some TP expenditure. Most of the enemies here will eventually reappear in Chapter 6, though it feels more like they're Stream Mountain enemies that cameo there rather than being properly Chapter 6 enemies.  Belostoss are also worth quite a lot of EXP at our level. 25 - Caves Interestingly, like the Chomper Brutes, these are another enemy that inexplicably like to drop cooked food items (and, once again, I think version 1.1 either added this or increased the drop rates, I don't remember them being so generous before that).  In this case, just a Baked Yam, but there are a decent variety of things available. It makes managing resources in here slightly less painful. 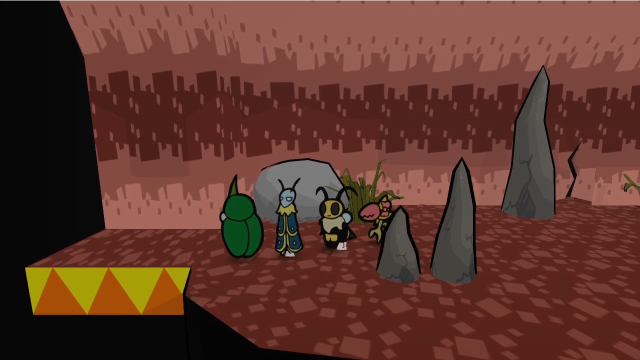 Past the Belostoss is the path forward. There isn't a whole lot going on in this room. 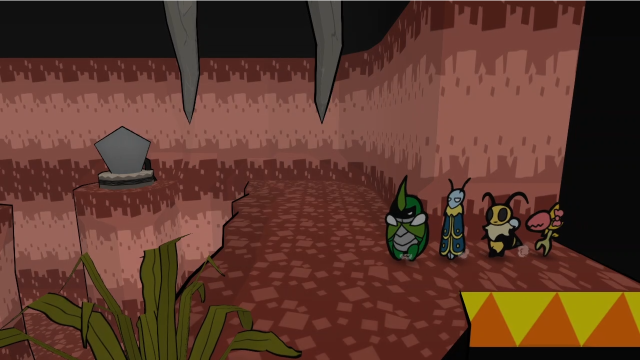 That's certainly about to change, though! Let's see what our team think before we start messing with things in here. Ugh. Water. And water spiders. This is the worst combination. This ancient crystal seems to be linked to the tide! Let's lower it and keep it low, then. I think we should try going up too, though...Water level puzzles! 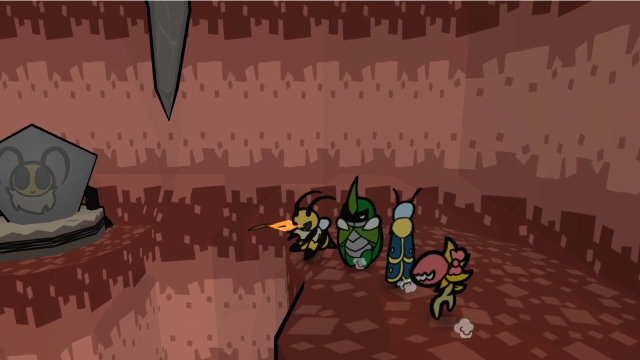 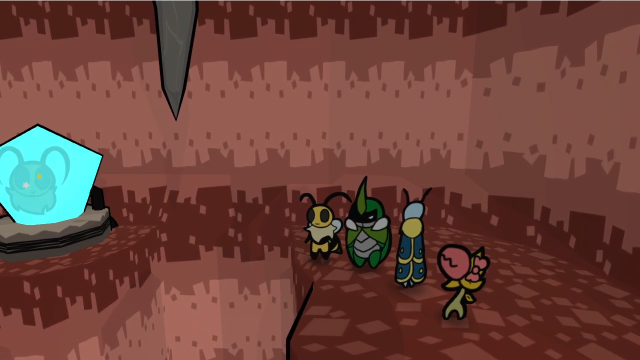  Hitting this big crystal causes the pit to fill with water; hitting it again will drain everything out.  The water striders rise up with the surface level, too. With the pool full, though, we can't get anywhere; we're going to have to lower it again and investigate further.  Easy enough to lower it again.  Let's jump down into the pit and have a look around. First things first, the strider is a new enemy, we should probably deal with that...  04 - FIGHT! 04 - FIGHT!  Looks like there are two of them. 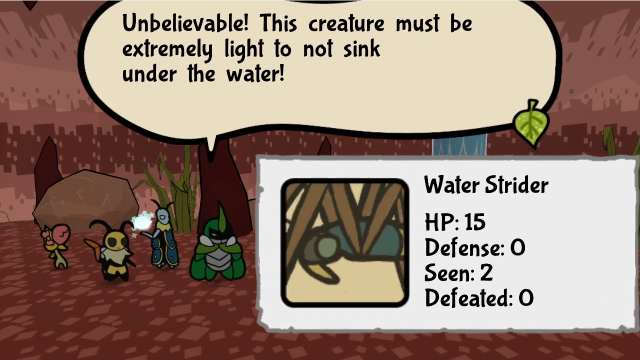 Yet, its attacks are quite pressurized... We must not drag this battle out! Vi, keep it low to the ground! Yet, its attacks are quite pressurized... We must not drag this battle out! Vi, keep it low to the ground!These aren't quite as bulky as the Belostoss are, but they can present problems in their own way. (These are obviously based on Gerridae, commonly known as, well, water striders. They're known for being light enough to walk on water without breaking the surface tension. They are insects though, not spiders; maybe Leif was talking about something else in here?)  That's a hefty amount of HP to chew through, but at least these have no defence. 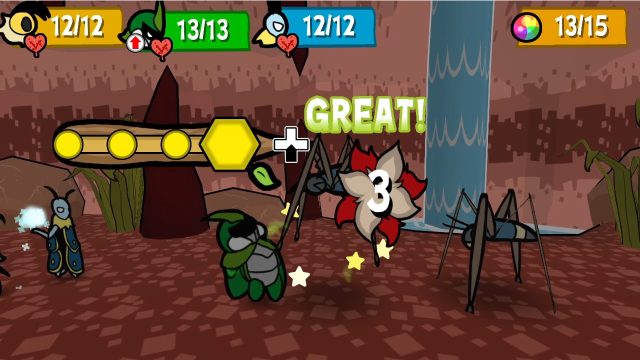  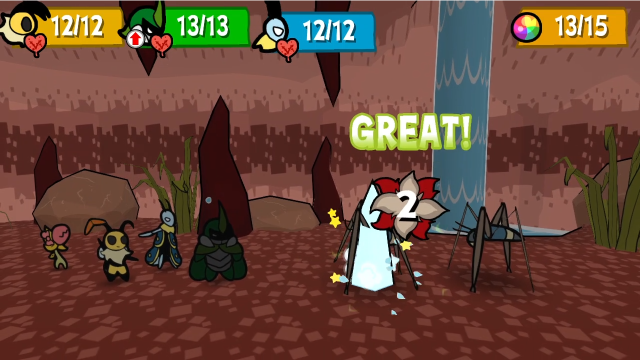 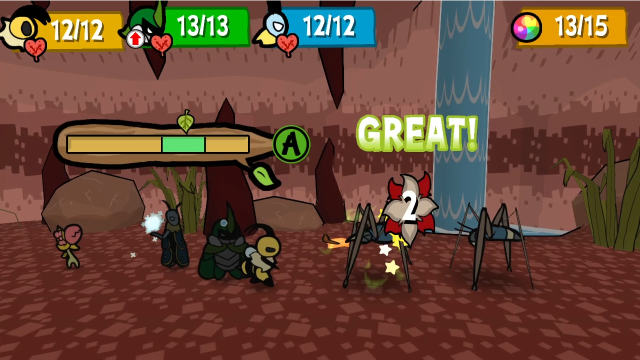 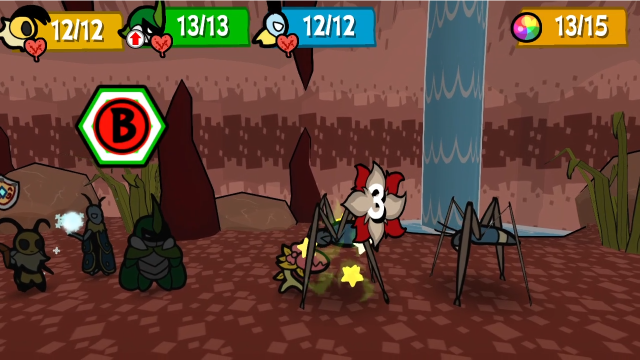 The damage adds up a lot faster when they have no defence!  The main thing the striders do is this charging attack where they launch themselves into us (interestingly, if you miss the block, they'll charge right through instead of bouncing off).  The second strider charges Kabbu, which was quite unlucky for it. A Super Block from him now deals 3 points of counter damage, now that he's wearing both Super Block+ medals.  Significantly less scary now.  First off, we'll have Kabbu finish the one in front.    While everyone else starts in on the next one.  Here's their other attack, which is a bit scarier than the charge. The striders can spit a volley of water droplets at us, hitting 2-3 times for 3 damage each. (It can change targets between shots, Kabbu just got unlucky this time.)  And after attacking, it raises itself up tall. The striders can do this after either attack, though they don't always; it's effectively as if they were flying for targeting purposes.  Being up high is usually just a minor annoyance, though. It's not going to help the thing here.  Vi finishes it off.  Water Striders aren't worth nearly as much EXP as Belostoss, but they're still giving us plenty. 25 - Caves With the strider out of the way, let's take a closer look at this area.  There's a cave entrance down here, but we'll ignore that for the moment (Butomu's quest says the ore can be found at the peak, so let's go up first). Let's knock down some twigs. 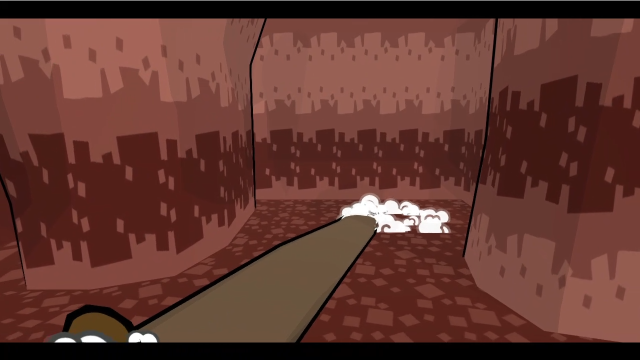 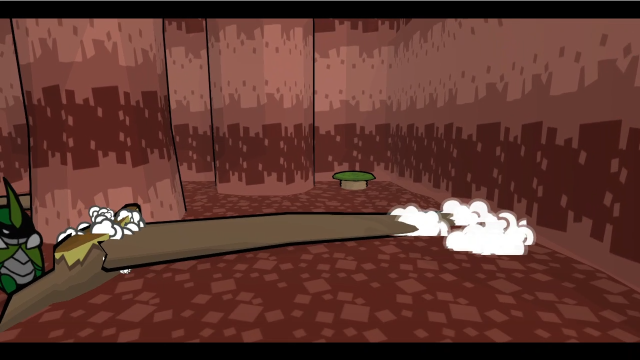 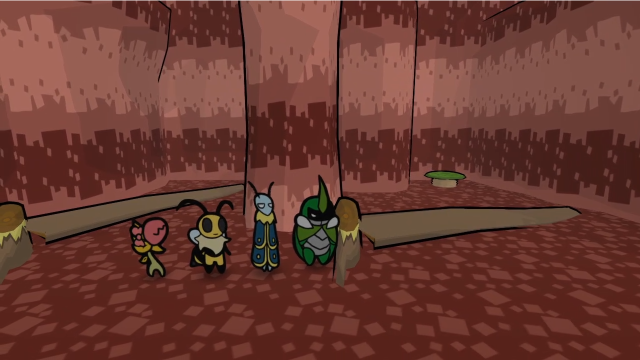 What good did that do us...? 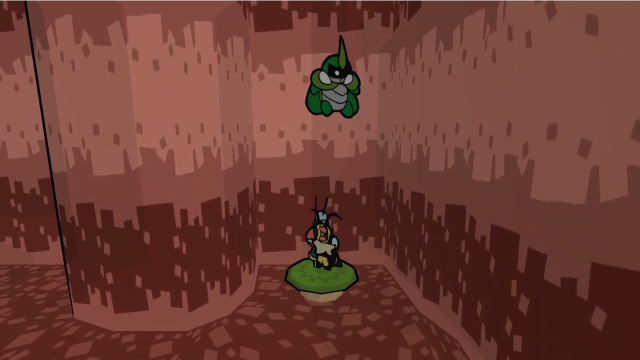 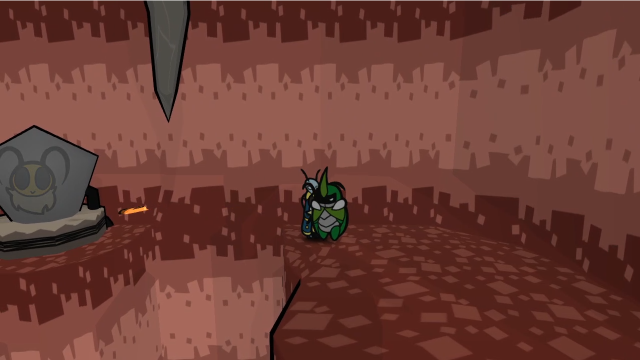 Let's try raising the water level now.   Looks like the twigs float on water! We can now use them as a way to get across. It's neat recontextualising the twigs a bit like this, since we'd been used to just bridging gaps with them. (If you come here a bit later in the game, there's an easier way to cross water that makes it unnecessary to do this: in fact, the first time I explored this area, I completely missed the bottom level in this room because I just raised the water and went right through...) 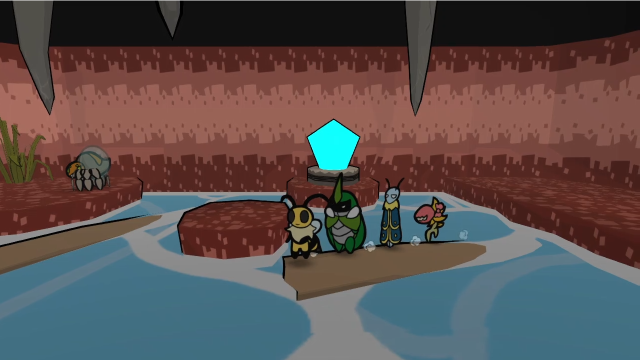 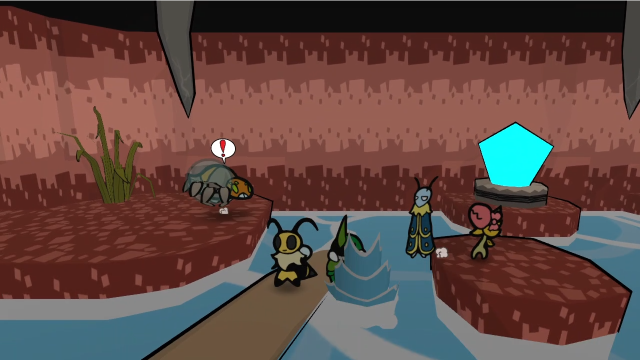 Looks like there's yet another new enemy here! 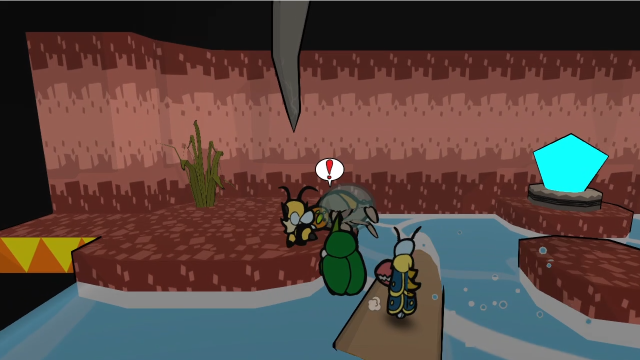 We get ambushed as soon as we step ashore, I couldn't have avoided this one if I'd wanted to. 04 - FIGHT! 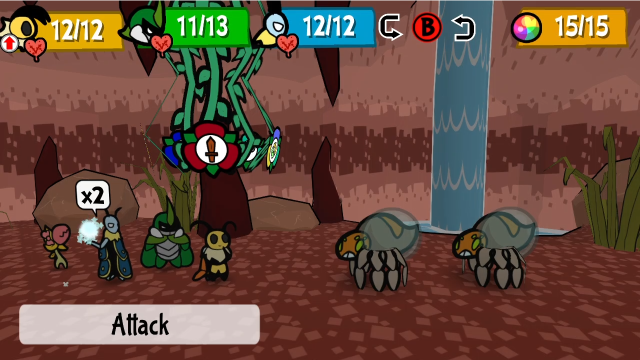 Another new enemy that comes in pairs. Let's see what these are about.  It uses its bubble to avoid attacks for a turn as well. Let's prepare to strike back. It uses its bubble to avoid attacks for a turn as well. Let's prepare to strike back.These must be the "water spiders" Leif was complaining about earlier. They're not as scary as Spuder, at least? (These are based on the diving bell spider,Argyronetica aquatica, which live underwater in bubbles of trapped air.)    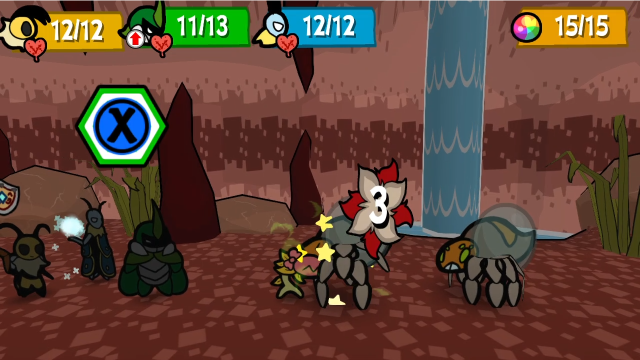 Everybody attacking isn't quite enough to take down the one in the front, so let's see what these things can do. 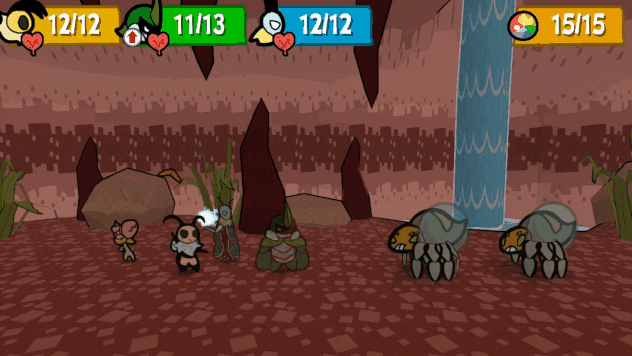 Diving Spiders have a fairly simple attack: they spit droplets at us. Some of them are just water, and some of them are poisonous (if we don't block), but they all have a base damage of 3. Like a lot of these attacks, it can hit 2-3 times, and is capable of switching targets. 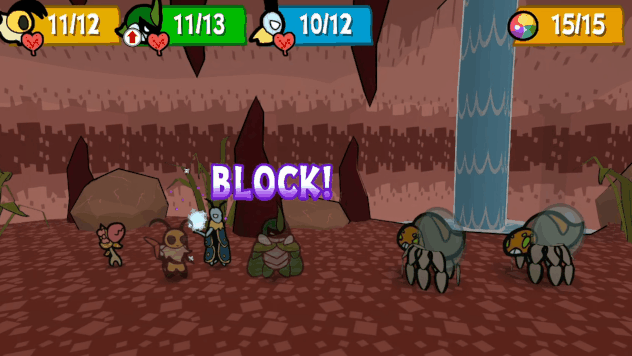 After shooting, it encloses itself in a bubble. This is pretty much the same as Leif's Bubble Shield, it's impervious to damage (with only a few exceptions). 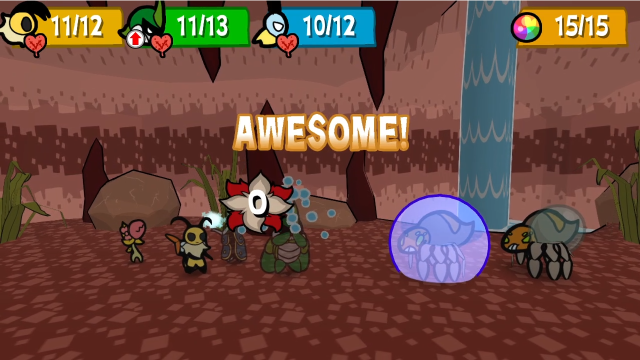   The second spider gets a full three shots, and I mess up blocking and get a few bugs poisoned.  Then it, too, shields. Diving Spiders are a very predictable enemy and more or less always do the same thing.  Well, that's annoying. Can we do anything this turn? 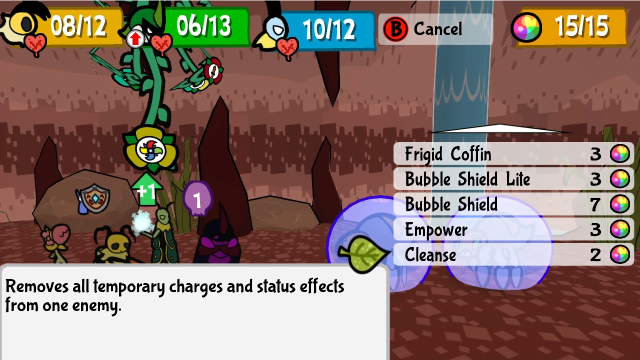 If we don't want to spend the whole turn twiddling our thumbs (or doing recovery), Leif's Cleanse skill can come in handy. 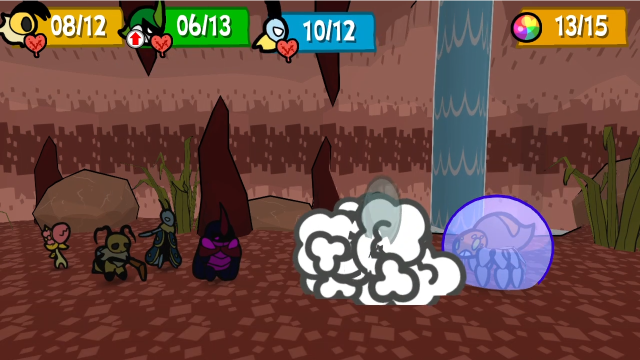 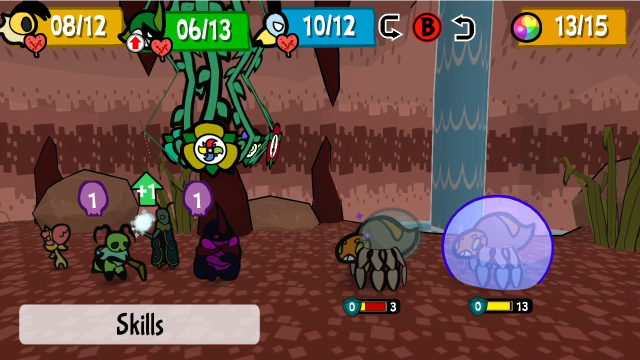 Cleanse just straight-up removes the shield, leaving them vulnerable again. 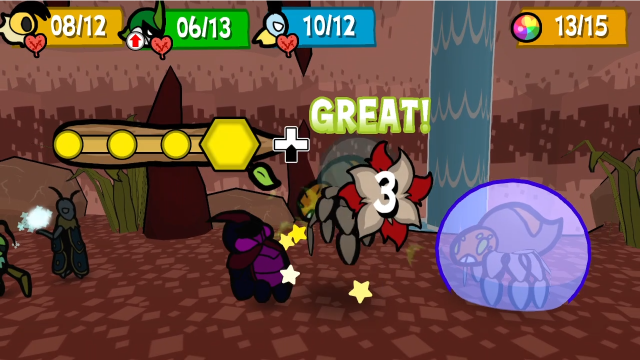 Kabbu takes advantage and finishes it off.   Rather than unshield the second spider, I elected to have Vi use her stash to heal Kabbu.  Chompy's not getting through that. (I could have ordered her to do nothing, but this way we can see the shield in action.)  While shielded, they still just attack with the same pattern (though, obviously, they don't renew the shield afterward). 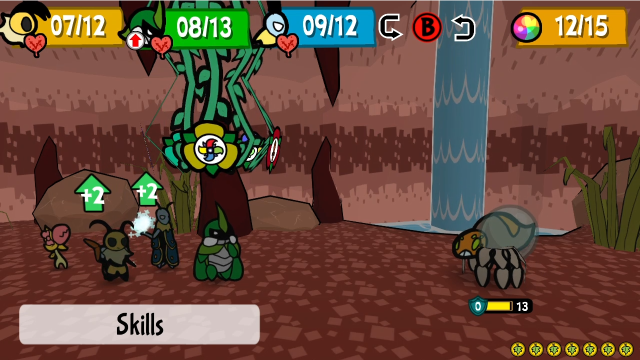 The shield only lasts a single turn. With those charge-ups, we can now just finish it with normal attacks. 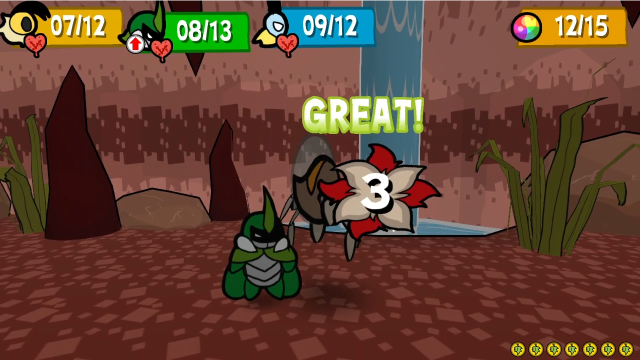 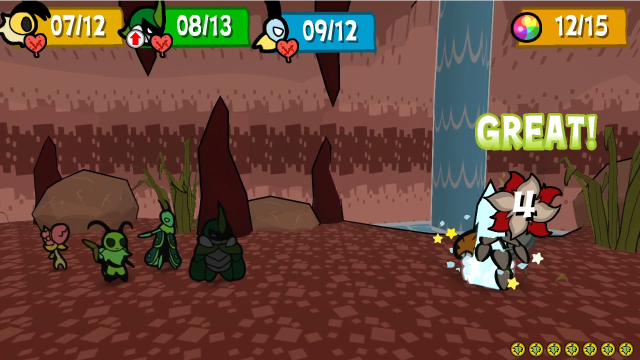 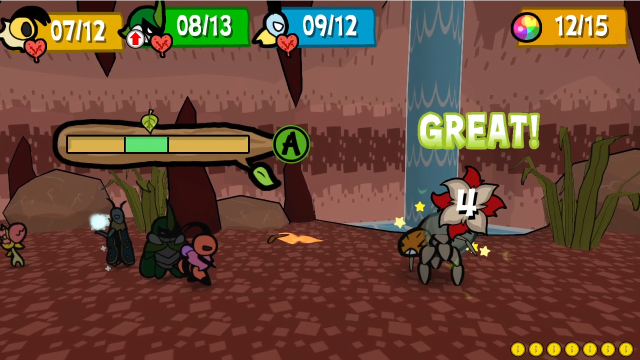   That wasn't too bad. These are also worth decent EXP, more than the striders at any rate.  For better or worse, most of the berries they left behind ended up falling into the drink. The game is generally nice and tries to respawn items if they fall into water or a pit, but sometimes (like here) it gets into a loop and they immediately fall right back in again.  Let's head to the next area.  This is a pretty big room, and we can already see it's probably going to be a vertical one, there are bounce mushrooms over to the left. Let's check the banter. Up, and up we go! To the very toppest of tops! You're getting way too excited there, buddy. Nonsense. We will proclaim ourselves conquerors of this heap, and none will stop us. Well said! Let us climb with haste! Okay...Kabbu is weirdly enthusiastic about heights, sometimes. It's cute.  Before climbing, though, let's deal with this Belostoss.  It's still just the one.  Let's Empower Kabbu, like last time.     This isn't a huge amount of damage, but it gets the job done.  This is new! In addition to the punching, this is the other major thing they can do: throwing boulders. This looks a lot like Kabbu's Boulder Toss skill, but it doesn't do any splash damage, just hits one character really hard (okay, I missed blocking here and Kabbu has Favorite One on, it's 6 damage at base). The peculiar thing about this attack is that, sometimes, Belostoss will stop after pulling up the boulder, and just stand there holding it over their head until throwing it the next turn. If they do that, you can hit them with a flipping attack to make them drop it. (The faster variant is apparently a Hard Mode exclusive thing; on Normal, they only have the two-turn version of this attack.)  Let's just end this.    Vi's Needle Pincer is another great way to deal with high-defence enemies.  And Kabbu finishes things off.   It's also enough EXP for us to rank up! 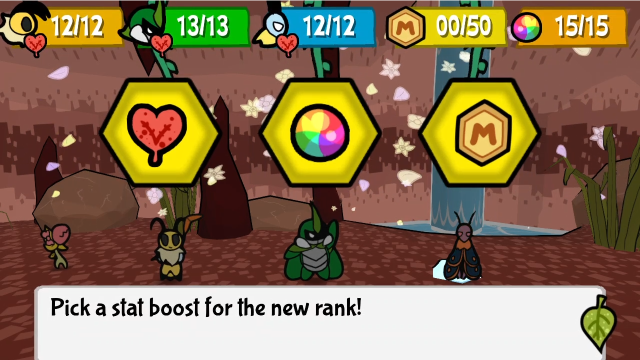 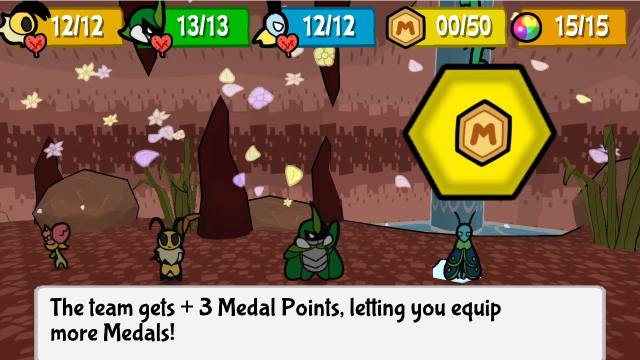 Of course, we're going to get more MP.  Also, as a bonus, we learn a new skill! This sounds a bit weird, though, doesn't it? Since when did Kabbu have ice skills? More on that in a moment. 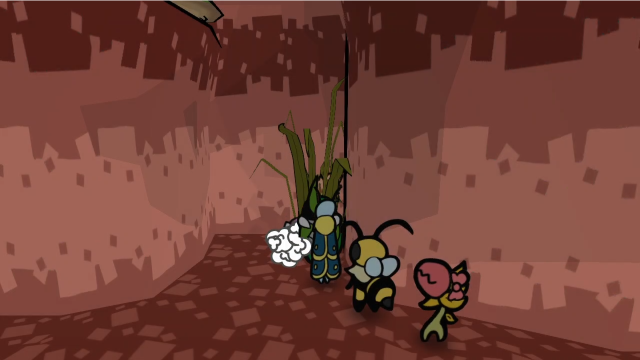 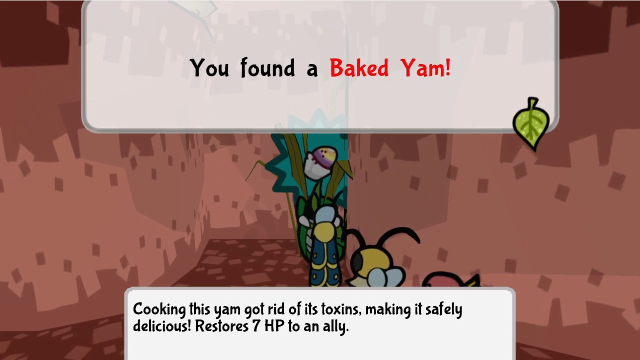 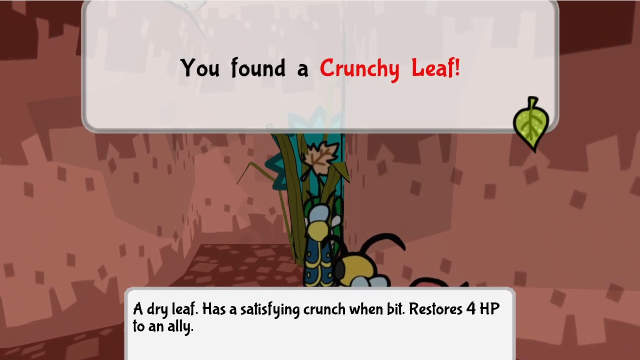 Loads of items, though nothing particularly interesting. Still, I won't complain. Let's check out Frozen Drill.  Wait a second...  Frozen Drill shows up in Leif's skill page too. That's because, for all the message said Kabbu learned it, this is actually something new: it's our first Team Skill! (Is this why they've been called Teamwork Points the whole time?) Team Skills are what they sound like: they involve multiple bugs at once and combine their abilities. They show up in the same skills menu as everything else, and any bug involved can initiate them (in this case, either Kabbu or Leif can choose Frozen Drill on their turn). They cost an action from every bug who participates, though, so they do have a downside (though if one of the bugs has no actions remaining, you can still do the skill, it'll just take the action on credit and have them start with one fewer on the next turn). We're going to have to try this out.  For now, though, let's go climbing.  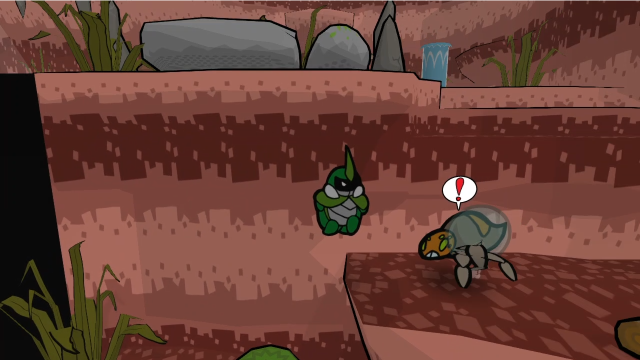 Oh look, a guinea pig! 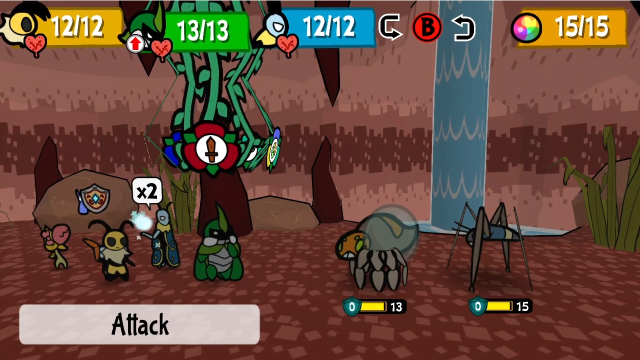 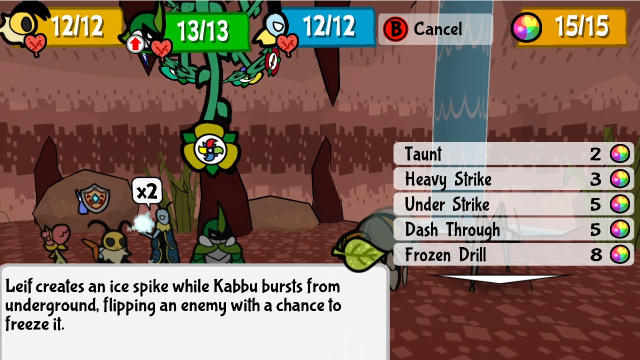 Let's do it. 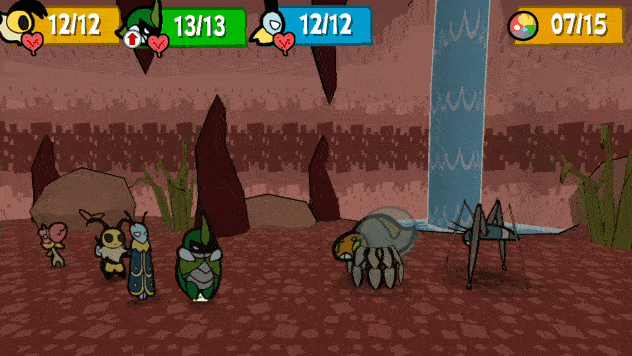 That spider is very, very dead. So... how does this work? Frozen Drill uses the attack stats of both characters, the base damage is (Kabbu's attack + Leif's attack)/2, rounded up (accounting for all charges, positioning bonuses, etc). It hits four times: the first three pierce 1 point of defence (with all the usual caveats), and the final hit deals +1 damage and can freeze. This attack also flips enemies if possible. It's a bit impractical to use, considering it costs both Leif and Kabbu a turn (and Vi's Hurricane Toss or Needle Pincer are usually more efficient), but it's definitely powerful and sometimes it's just the thing you need. If Kabbu and/or Leif end up with some surplus charges on them, this isn't a bad way to spend them. (Also, we're not quite done yet...)    We'll take a chunk out of the Water Strider too.    It plinks away at us a bit, but we can easily finish off the strider now.   Okay. So what did I mean by saying we haven't seen everything with Frozen Drill yet?  Let's do something a bit goofy, and put the Berserker medal on Kabbu. 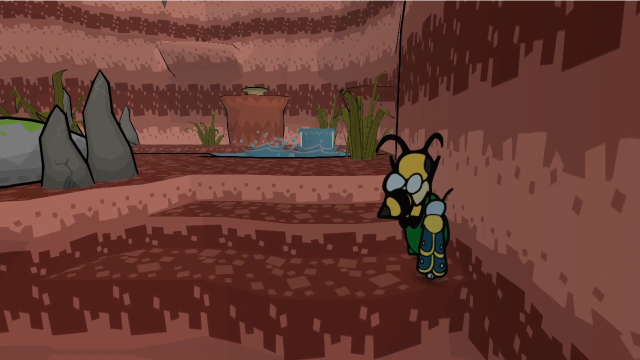 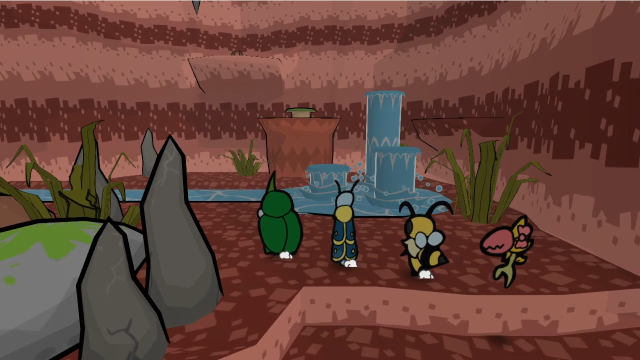 Those geysers are obviously a puzzle, and we'll get to them in just a moment. 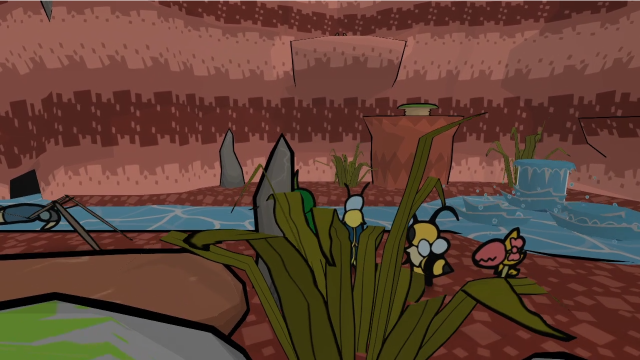 There's a convenient experimental subject just over here, so let's do that first. 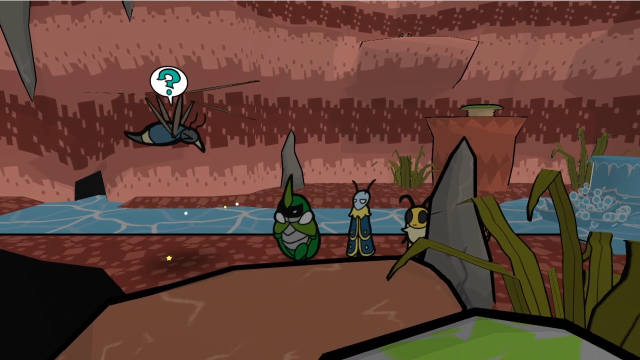  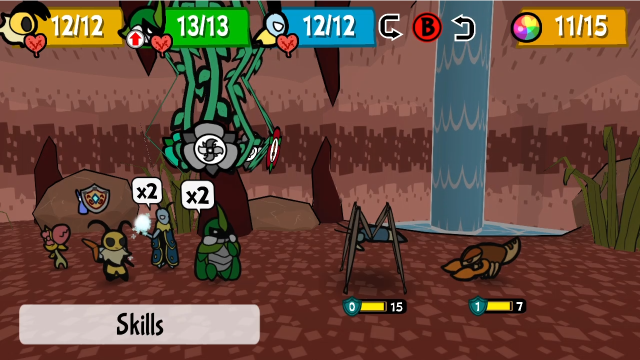 So... well, Kabbu can't use skills, that's how Berserker works... 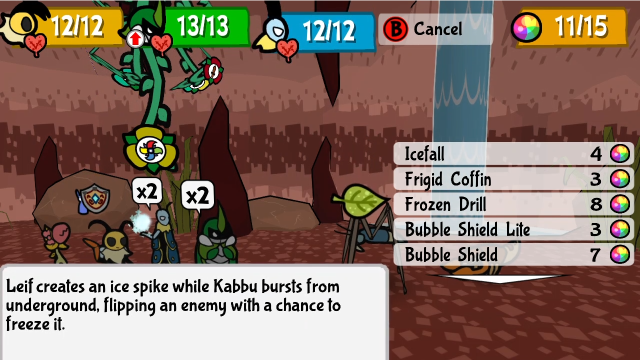 But team skills appear in both characters' skill menus, and Leif can select it just fine. (Also, you can notice a side-effect of the Berserker medal here: Kabbu's in his angry pose all the time in battle now.) 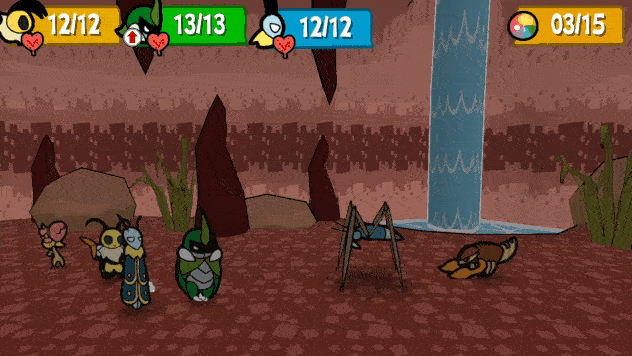 The attack boost from Berserker gets applied to the team skill at full power. This is absolutely brutal. (Remember, nobody had any charge-ups or attack buffs here. This is base attack + positioning bonus + Berserker, nothing else.) If you want to use Berserker, this is one of the best ways to take advantage of it. I honestly consider it more of a gimmick strategy than anything else, though, because the downsides of Berserker are so significant. Being unable to block and relay locks out a lot more options than you might think at first, and no matter who you give Berserker to, though, you're giving up important utility (whether it's Vi's healing, Leif's freezing and buffs, or Kabbu's taunting and revival). These are all significant tradeoffs, and I don't think any of them are quite worth it. 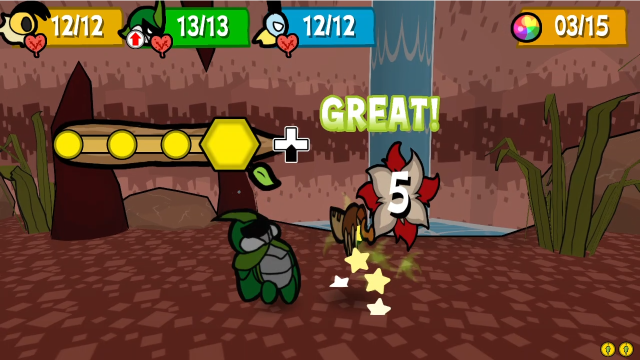 Oh, right, there was a Psicorp here too. Let's fix that. (Even with exhaustion, Berserker makes big numbers happen.) Chompy can finish it off from here.  As per usual, EXP gain starts dropping off post level-up. 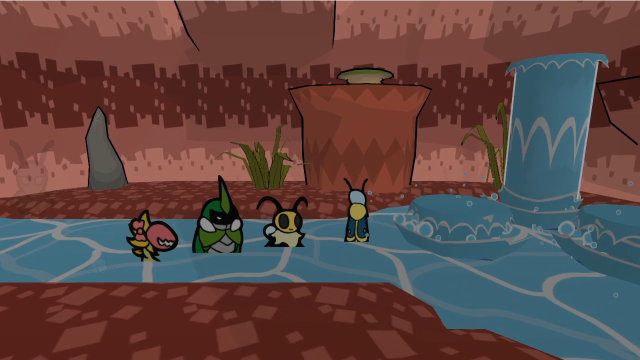 Now, to return to the geysers. This is something of a timing puzzle: we're going to have to build a staircase by freezing them when they're at appropriate heights. (Let's not forget that, while they thaw naturally if left alone long enough, Kabbu can also shatter them with his horn if we need to unfreeze them early.) 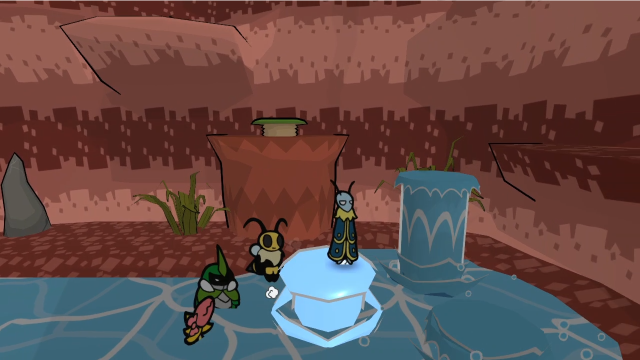 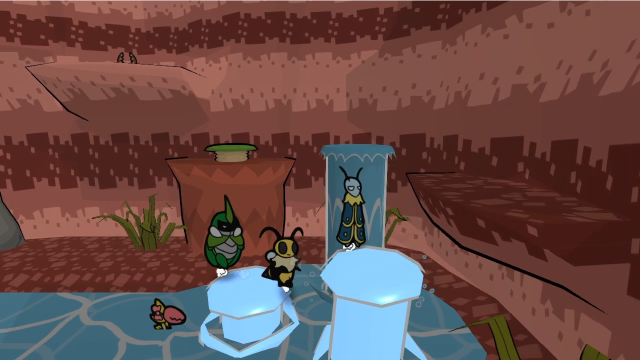 So far, this is straightforward. However, it's usually not possible to jump from here to the ledge when the geyser's at a height we could reach from below... 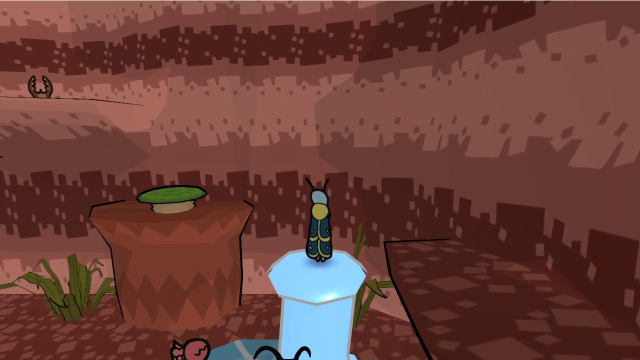  So it's usually easier to freeze this one and use it to get to the ledge.   It might have been possible to just go straight to the left, but it's better to play it safe. Letting this geyser thaw and then freezing it again at a higher point makes it a lot easier to make the jump.   There we go.    Our prize is a new medal. We've discussed in the past the various peculiarities of how that ability works, but the short version is that under the hood it's actually just adding +1 to damage if the enemy has positive defence. This means that this medal can produce extra damage in some circumstances. We've already discussed what happens when an enemy has 1 defence and a Defence Down debuff, for instance. Additionally, this medal stacks with Kabbu's innate 1 pierce, and with other copies of itself. If Kabbu equips an Antlion Jaws medal and attacks an enemy with 1 defence, he'll deal 1 more point of damage than you would expect (e.g. Kabbu has 3 attack, enemy has 1 defence, he will deal 3+2-1 = 4 damage; if that enemy had Defence Down, it would be 5 damage). This is weird and unintuitive, but can be very effective. As an aside, this seems like a good time to point out something I like about the way Bug Fables handles attack increases. You may have noticed that, so far, every medal that increases our attack has some kind of drawback associated with it. Favorite One makes us take more damage and manage charges, Last Attack only activates on low HP, Power Exchange reduces defence, Poison Attacker requires us to get and stay poisoned, and now Antlion Jaws only affects normal attacks (and only against certain enemies). This is very definitely a trend. The game's not saying we can't have attack boosts, but we have to pick an approach and figure out how we're going to work around the drawbacks (or turn them into advantages somehow). This is a good way to make build decisions interesting and encourage variety, rather than (say) just being able to slap on a Power Plus or two and call it a day.  Back to exploring. Heading west from the geysers just leads us to the path onward. The beam of light suggests maybe this will take us outside?  Yes indeed. Looks like we've reached the end of the line. Is that the ore?  Yes it is.  To the south, there's a switch and an elevator here.    Hitting the switch turns the elevator on, which means we can now get back in from the oasis side as well. Very convenient. (You don't want to jump down without hitting this, that way lies frustration.) Let's head back to Defiant Root and deliver the ore. 37 - Defiant Root  Butomu is in the smithy by the shops. 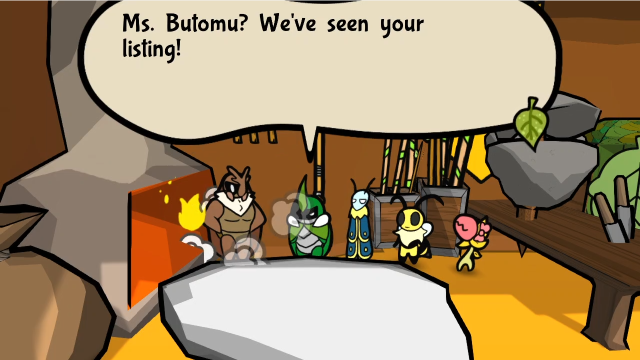 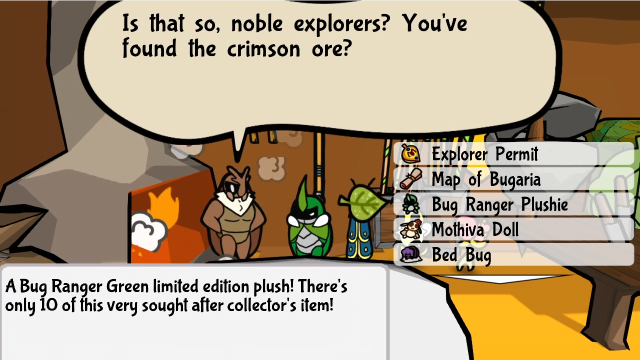 Before we give her the ore, we have to try this.  Hrm. No, this will not do. You must have made a mistake. Hrm. No, this will not do. You must have made a mistake.Sadly, she doesn't have a special reaction.  Let's give her the ore.  No problem. Pardon me, but I will get to work immediately. I've been itching to finish this Medal. No problem. Pardon me, but I will get to work immediately. I've been itching to finish this Medal. Things fade out for a moment while we hear sounds of her working...    Hohoh! Sorry... I thought I made it light enough for you brave folk! Hohoh! Sorry... I thought I made it light enough for you brave folk!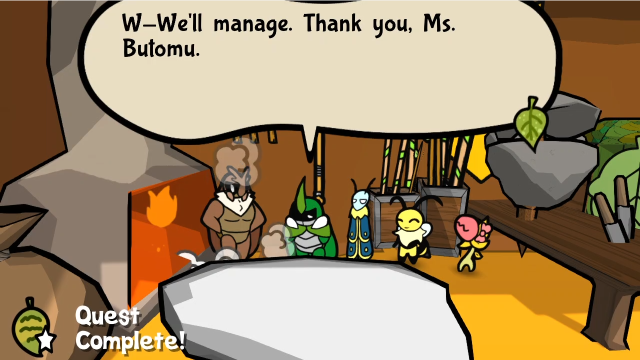 That's the quest completed. Simple enough!  You don't want to equip this on someone who's doing poison strategies, though. It doesn't prevent the poison damage, but taking poison damage is enough to shut it off, so unfortunately you get the worst of both worlds.  Talking to Butomu again, this is all she has to say. 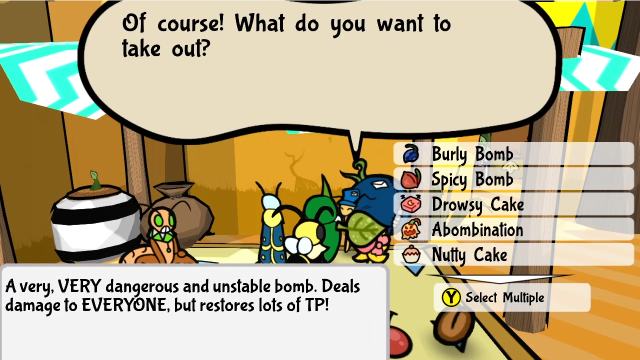 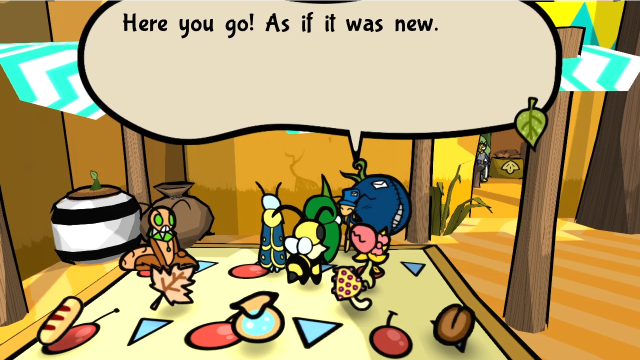 On the way back, let's check in with Amber briefly... I'm just going to take this Abombination out of storage and hang it on the mantelpiece over here.  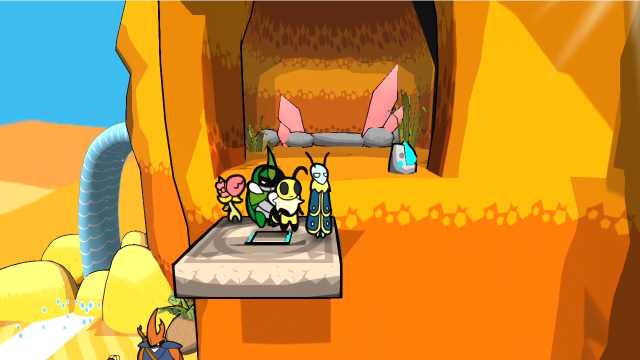 Let's head back inside, we're not done with Stream Mountain just yet. 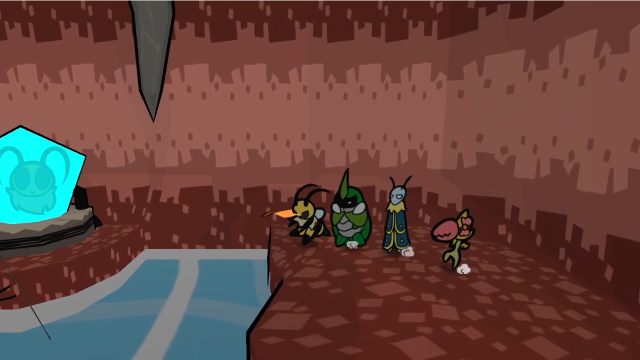 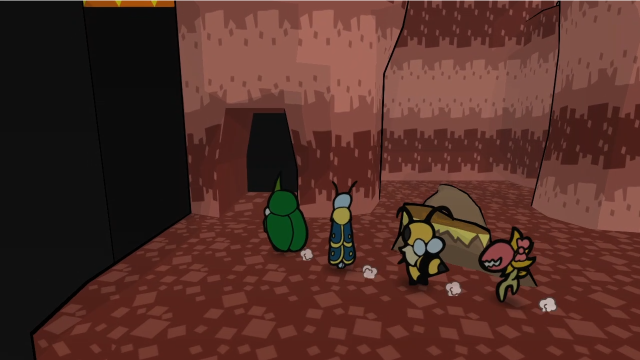 After all, we can't forget about this lower path we didn't take! We'll pick up here next time. Until then! Explopyro fucked around with this message at 16:07 on Sep 21, 2021 |
|
#
?
Sep 20, 2021 08:51
|
|
|
Explopyro posted:These must be the "water spiders" Leif was complaining about earlier. They're not as scary as Spuder, at least? These enemies are based on diving bell spiders which live almost entirely underwater, and create an air bubble around their bodies due to the hair on it. That's why the diving spiders have a little bubble around their abdomen.
|
|
#
?
Sep 20, 2021 10:10
|
|
|
This would be a good game if it weren't for the consistent misspelling of "whoa." Bunch of dumb bugs going around shouting woe-ah all the time.
|
|
#
?
Sep 20, 2021 12:47
|
|
|
It took me forever to find Stream Mountain's entrance. Pretty sure I had those abilities you mentioned at the time as well. But I also still found the area's enemies interesting and challenging at times. There being this whole optional mini-dungeon hidden in plain sight is really cool, in my opinion. As for "Double Techs", I only used one in particular later game, since it seemed the only one that had enough advantages to make up for the extra action use. Sadly, most people seemed to have the same idea and it got nerfed in v1.1. At least I got to enjoy it for my first playthrough!
|
|
#
?
Sep 20, 2021 15:26
|
|

|
There's a fair few spots where it can just be hard to remember there's a fallen branch you can dig under or similar. Especially as some games would have the structure just be a cute wall. Admittedly I also missed the bottom left exit to the desert town that leads to the caravan shop for I think an entire chapter. Which also leads to a nice looping shortcut. Sometimes your brain just blanks stuff. I do wish something told the player about how the action cost of the team attacks work. And/or how Bubble Shield uses 2(?) of Leif's actions.
|
|
#
?
Sep 20, 2021 15:54
|
|
|
Yay, caught up with the thread! This game is adorable. Given the topic of being able to just walk across the water later (and Venus likely isn't the right deity to be granting Kabbu water-walking skills) I'm going out on a limb to guess one of the field abilities will be for Leif to create a frozen path to walk on.
|
|
#
?
Sep 21, 2021 02:47
|
|

|
Twelve by Pies posted:These enemies are based on diving bell spiders which live almost entirely underwater, and create an air bubble around their bodies due to the hair on it. That's why the diving spiders have a little bubble around their abdomen. Thanks for this! I knew they were a real thing, but I blanked on the exact name and I guess I didn't search hard enough. I'll edit something into the post about this. Telegnostic posted:This would be a good game if it weren't for the consistent misspelling of "whoa." Bunch of dumb bugs going around shouting woe-ah all the time. I can't say I'm not annoyed by it, because I am (the other thing that gets me is the consistent use of "anyways" where they should be saying "anyway"). Nothing's perfect. I try to convince myself it was a deliberate attempt to get the dialogue to feel more slangy and informal (you'll notice that Vi talks like this a lot more than the others, and she's supposed to sound young and immature), but even then I'm not sure it actually works that well. As far as I know, English isn't the main writer's first language, so I'm personally inclined to be forgiving (although I definitely think they could have stood to do another pass of editing and/or proofreading). Alxprit posted:It took me forever to find Stream Mountain's entrance. Pretty sure I had those abilities you mentioned at the time as well. But I also still found the area's enemies interesting and challenging at times. There being this whole optional mini-dungeon hidden in plain sight is really cool, in my opinion. A lot of the optional areas here can be pretty easy to overlook, I agree (and for all Stream Mountain is in the centre of the desert area, it's surprisingly tricky to find the one specific path that will actually get you to the entrance). I don't remember what point in the game I first came here, but it was definitely later than this (I know I had Leif's next field skill at least). I'm doing things as early as possible for the LP because that helps me give things structure, but I don't know that I would necessarily recommend that to someone playing casually, the nice thing about this kind of content is you can do it whenever you like. Bug Fables is really generous with giving us side content and optional areas, though my favourite (and I think most people's favourite) is still to come. The enemies here are well-designed, I think, they're obviously a bit easier if you come later but they're still nontrivial and interesting. Alxprit posted:As for "Double Techs", I only used one in particular later game, since it seemed the only one that had enough advantages to make up for the extra action use. Sadly, most people seemed to have the same idea and it got nerfed in v1.1. At least I got to enjoy it for my first playthrough! Oh, yeah, that one was really good (although in retrospect I do think I may have overrated it a bit). It's still fine, but between the nerf to it (and the buff to Needle Pincer, it didn't used to get an extra hit from ADBP Enhancer) it's very overshadowed now, and hard to justify using. I think all the team skills have a bit of a problem where they're not quite worth two actions, even if you go out of your way to boost them (or even go the Berserker route), but at the same time, they're all perfectly usable if you want to, and they look cool. It's really tricky to balance something like this, I don't think you want to make them so good they're the obvious best option, but I think they could all have used at least a bit of a buff (maybe shave a few TP off the cost?) to be competitive with the solo skills. Tylana posted:There's a fair few spots where it can just be hard to remember there's a fallen branch you can dig under or similar. Especially as some games would have the structure just be a cute wall. Especially at this point in the game, a lot of things opened up at once, and it's easy to overlook a few of them. There's just a smattering of Metroidvania-type design here, and that can be its own kind of problem (if the entire game is doing that, it puts you into a frame of mind to be paying attention to it, but when it's occasional the player tends to focus on other things). I like it, though: it makes the world feel more interconnected, and if you do overlook a thing and have to come back, at least it makes the experience of your playthrough a bit different (nothing in this game is permanently missable, and none of the optional content is essential for the critical path). Honestly, I can't blame you for missing the southwest exit from Defiant Root either, you're not the first person I've heard that from. Tylana posted:I do wish something told the player about how the action cost of the team attacks work. And/or how Bubble Shield uses 2(?) of Leif's actions. This is definitely something the game could have stood to explain a bit better, certainly. I'm honestly a bit surprised there's no tutorial dialogue or anything the first time you get a team skill, but then they all unlock in different ways and there's no natural place to put it (maybe that's something they should have fixed, make Frozen Drill unlock at a fixed time instead of level and have a tutorial there?). I thought it was pretty intuitive and didn't take long to figure it out, but there's no reason we should have had to. The description for Bubble Shield does say "Leif will then be unable to act for 1 turn", but I agree the actual mechanics could have been explained better. (The other thing I really wish the game had taken some time to explain is the enemy status resistance system. I really enjoy the extra layer of what's effectively resource management that it adds, but a player is less likely to be able to understand and engage with it unless they've read some external materials, they're more likely to just feel like they start getting unlucky later in fights.) OneWingedDevil posted:Yay, caught up with the thread! This game is adorable. The more the merrier! I'm glad you're enjoying it. OneWingedDevil posted:Given the topic of being able to just walk across the water later (and Venus likely isn't the right deity to be granting Kabbu water-walking skills) I'm going out on a limb to guess one of the field abilities will be for Leif to create a frozen path to walk on. I technically didn't say we'd be able to walk across water, just that there was a way to cross it without the stick bridges. But this guess is very close, yes.
|
|
#
?
Sep 21, 2021 16:01
|
|
|
Wait, hold on, the difference between "woah" and "whoa" is more than just personal preference?
|
|
#
?
Sep 21, 2021 20:24
|
|
|
H before A, except after J or when sounding like K as in keighbor or kway
|
|
#
?
Sep 21, 2021 20:26
|
|

|
Whoa is technically correct, but either is acceptable in common usage.
|
|
#
?
Sep 22, 2021 00:49
|
|

|
I wouldn't have been surprised to see a garden hose inside Stream Mountain, but I guess that wouldn't have made sense. If the humans really have vanished (perhaps just from this house), the water would have been turned off.
|
|
#
?
Sep 22, 2021 05:32
|
|
|
40: Tide Goes In, Tide Goes Out (You Can't Explain That) 25 - Caves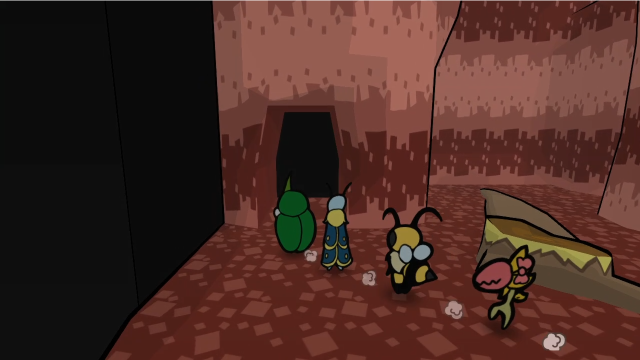 Last time, we explored the upper levels of Stream Mountain and found some ore. Today, we're plumbing the depths and finishing up the area. 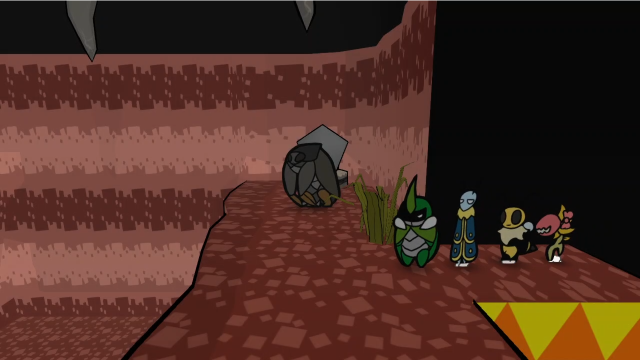 Through the entrance is a big room with another of those water-level control crystals. Let's get our bearings. Is this a dead end? We can feel something... Let's move the water around! Can't give up without looking for clues!The banter doesn't tell us much, but we definitely need to investigate.  First up, though, let's get the enemies out of the way.  It's neat to see them mixing up the new enemies with ones from outside, even if they're not much by way of challenge (the Psicorp's main function in this battle is to annoy us by making it harder to get to the Belostoss). It helps make the biomes feel connected.  Belostoss are still worth loads of EXP. We're actually seeing the EXP cap here, which would explain why it didn't decrease post ranking up (in fact, Belostoss is one of a few 'large' enemies that have a higher cap of 20, instead of the usual 15). The per-enemy EXP cap, by the way, is a big part of why the EXP Booster medal is rarely worth using.  Let's head down and see what's going on on the lower level.  There are lots of twigs here, clearly we're going to have a lot of platforming ahead of us once we raise the water level. Before that, though, we should clear out all the water striders: even if we weren't in the habit of fighting everything, they'd get in our way while platforming so they have to go.  It's just a straightforward fight with two of them.  There's definitely a big contrast in the EXP gain between these and the Belostoss.   There's the exit to the next room, but how do we get up there?  First things first, though, let's get rid of this other strider that was peeking out from the corner.  This fight's a bit more interesting, since it's a new combination. Still, it may take a while to chew through all that HP, but it's not terribly challenging.  This isn't bad, though!   We've been finding a lot of these, haven't we? They can actually drop other food items too, I swear.   Also, this Clear Water was just sitting here on the floor, for some reason. I think it's here for flavour reasons, this being a watery dungeon; it actually respawns every time you reenter this room, as far as I can tell. I don't have room, so I'm not going to bother taking it with me.  With the enemies cleared out, let's get started on the puzzle of this room. If you look near the top, that looks like a stick we can knock down, so let's start there. We'll need to head up and raise the water level to reach it.    The path across these sticks is a bit circuitous, and it can be tricky staying on top of them and not falling into the water. Thankfully, if we do fall in, there's no penalty and we can just try again. That doesn't mean it can't get annoying, though.  We made it, at least.   And that's the stick down. Does this path get us there? 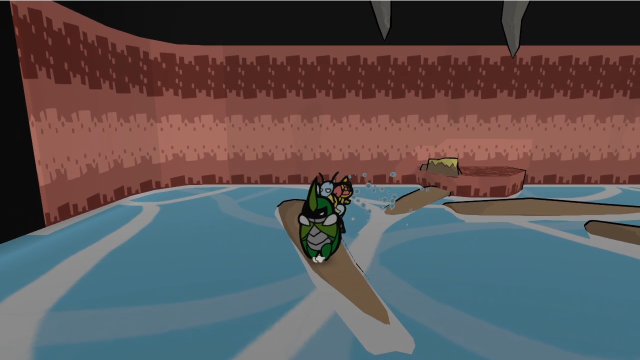 Well, it gives us a way to get over to this stick, but... the water level's too high, it's covering the exit! What to do? 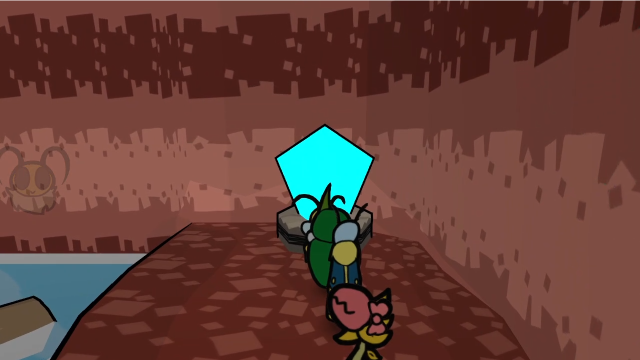 We need to head back to the crystal. We can't just lower the water, or we won't be able to get up high enough... 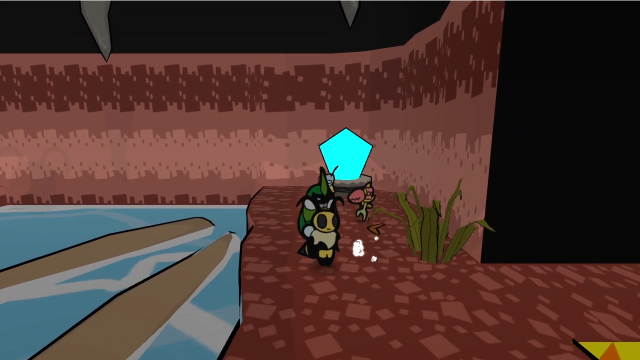 So let's set Vi's Beemerang spinning, then head back over the sticks again. This does mean we have to platform while also holding down (B), but it means we can wait to start lowering the water until we're in position to jump over to the exit. 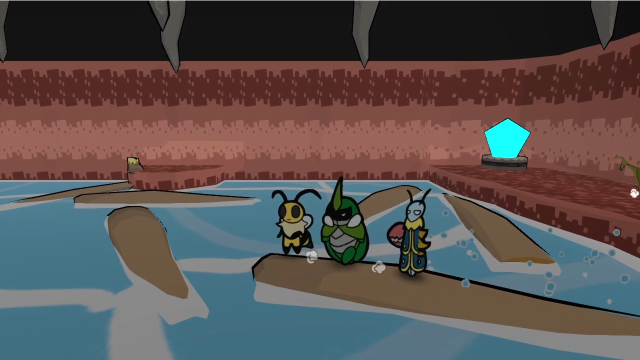  Now we release the Beemerang so it hits the switch.   As the surface lowers, we can ride the stick down and jump off to the ledge.  Now we can actually move forward! This room isn't that hard to navigate once you know the trick of it, but it can take bit to see the solution if you're not trying to think outside the box. It's a neat little puzzle. 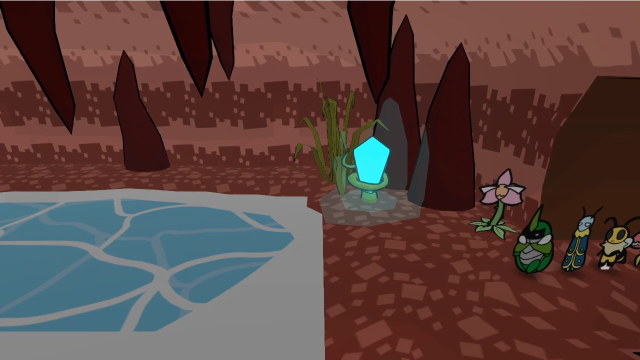 Hmm... a big empty room, with one of Venus' buds and a save crystal. That's not suspicious at all. Stream Mountain's depths are super lame! Where's the treasure!? Be careful, everyone. We feel extremely powerful magic! If even Leif is wary, we'd best be on guard. Watch your step, Vi!There's definitely going to be something here. Let's check in with Venus, too.   Let's take her up on the healing, absolutely.  Now, before we walk into this obvious boss fight, let's rearrange some medals. 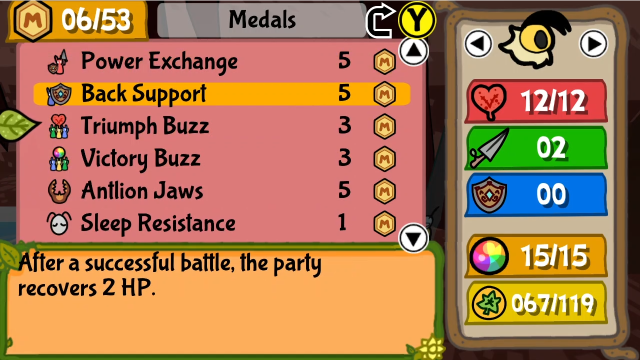 First things first, let's take off Triumph Buzz and Victory Buzz. They're really good for exploration, but they serve zero purpose in boss fights and we don't need them taking up MP that could be doing something else. 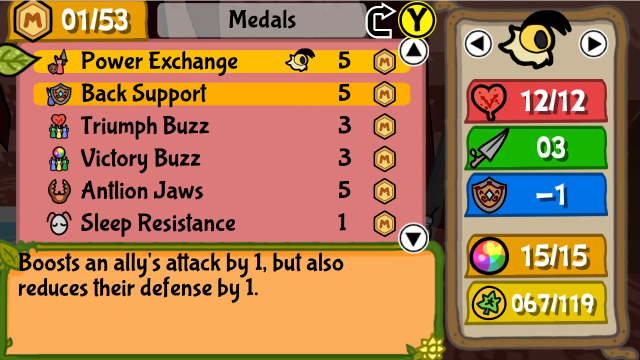 Vi's going to put on Power Exchange. A bit of extra attack could come in handy. 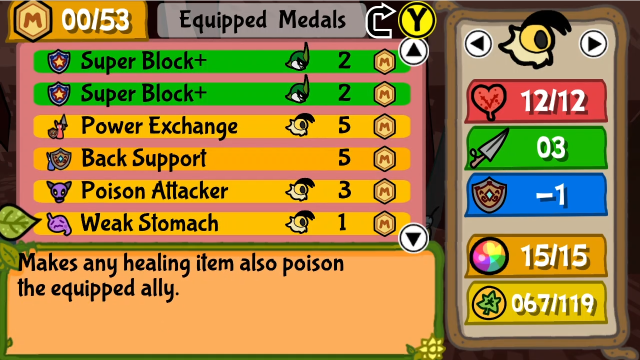   Otherwise, I haven't changed a whole lot here (though, notably, Vi's only got the offensive portion of the poison medals, I didn't quite have the MP to fit in Poison Defender).  Let's head in.  The room shakes...  and the Tidal Wyrm emerges!  Click me for video! 35 - Reckless for Glory! (Bonus Boss) Click me for video! 35 - Reckless for Glory! (Bonus Boss)  This thing certainly looks intimidating! Tidal Wyrm is another of the Bounties. Let's spy, of course. 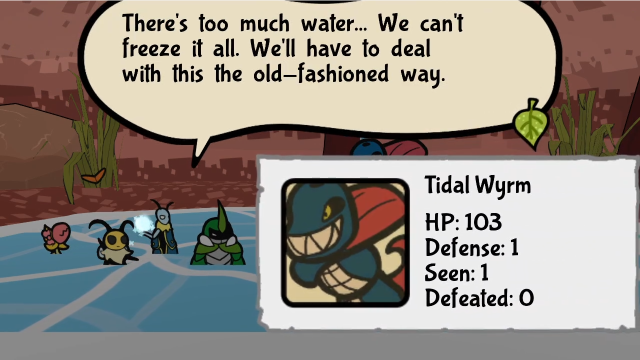 Its tail is constantly barraging us... We must make the time to incapacitate it. Its tail is constantly barraging us... We must make the time to incapacitate it.As far as I can tell, this thing is just straight up an Eastern-style water dragon? (Albeit a bug-sized one.) It doesn't seem to be based on any particular form of wildlife, unlike most of the other enemies in this game. It feels a bit incongruous, honestly. 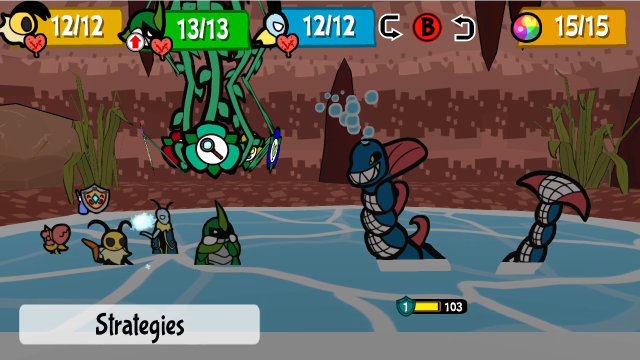 Also, that's a lot of durability! 103 HP and 1 defence is going to take a while to get through. We do have the tail to think about too, though: it may not have a visible HP bar, but it's available to be targeted separately. So let's try something... 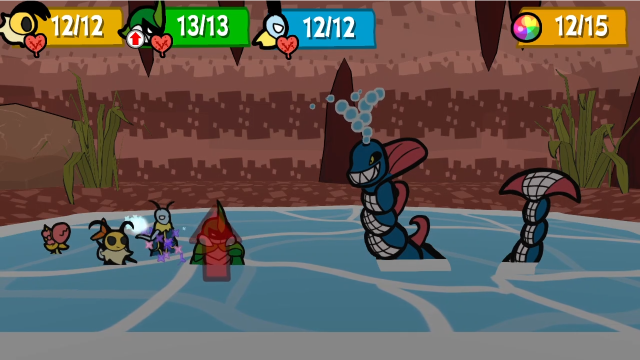 Leif empowers Kabbu. 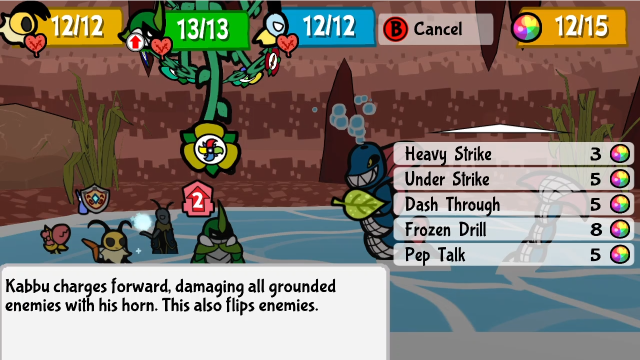  Kabbu's Dash Through is a pretty solid choice here, hitting both the main body and the tail (and also piercing defence for good measure). It's one of the better ways to get damage in on both simultaneously; they're just a bit too far apart for Under Strike to hit at once.   Vi and Chompy will just attack normally, though the defence gets in their way a bit.  To start off, the Tidal Wyrm bites Kabbu. This attack has a base damage of 5, but it's not all that scary (and Super Blocking takes a lot off of of it, not to mention some nice counter damage).  After the head attacks, the tail also gets a turn. The tail only has one move, though, launching water droplets into the air that fall two turns later.  Not bad for one turn in. Let's see what we can do now.  Another Dash Through, and...   So here's the core gimmick of the fight. The tail actually has its own HP, tracked separately from the main body (specifically, it has 10 HP and 1 defence), and when you kill it the Tidal Wyrm collapses. While collapsed, its defence drops to 0. Which means we should get some attacks in.   I decided to have Vi use a Crisbee Donut instead of attacking, though. We blew through a lot of our TP on Dash Through and we'll probably want more soon enough. (Also, this way she poisons herself and saves her charge.)  Chompy attacks too. 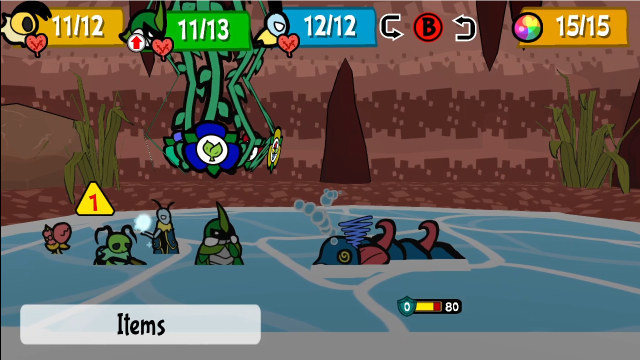 In addition to the lowered defence, knocking down the Tidal Wyrm makes it skip its next turn. It doesn't do anything to us, and we can just keep beating up on it. 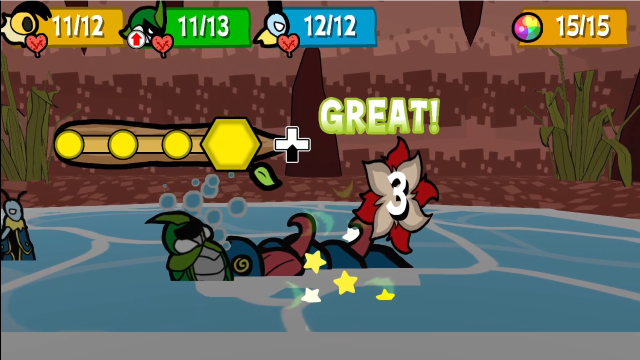 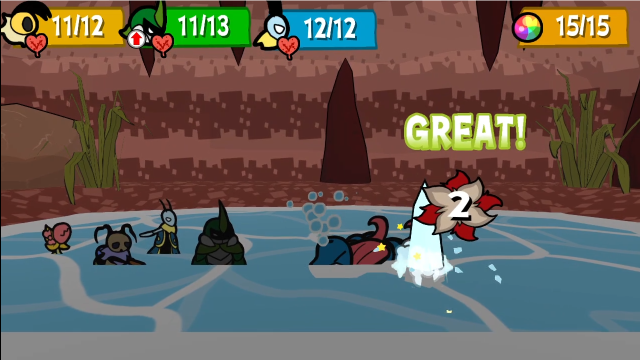 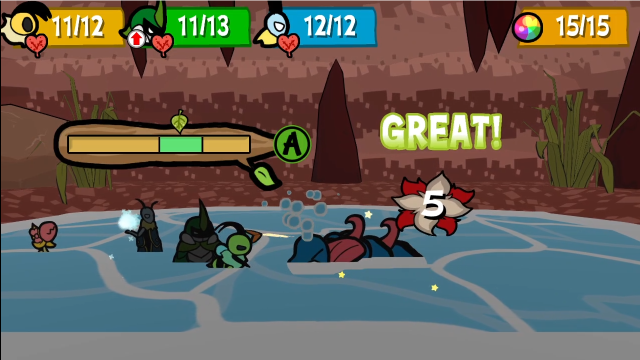 I dithered a bit here, before deciding to have Vi just attack instead of going for a bigger move. This was probably a mistake, though it didn't end up hurting me very much. 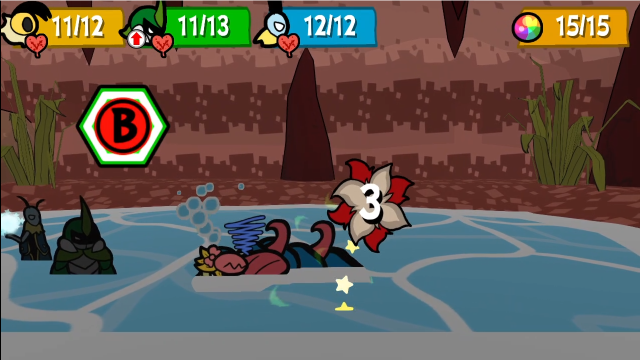 Chompy, of course, continues to chomp. 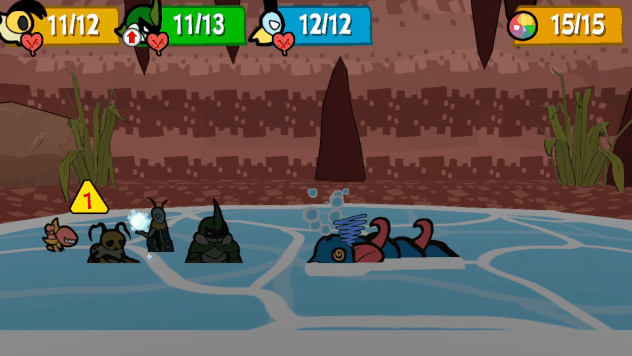 Our reprieve is over, though. It always gets up the following turn. 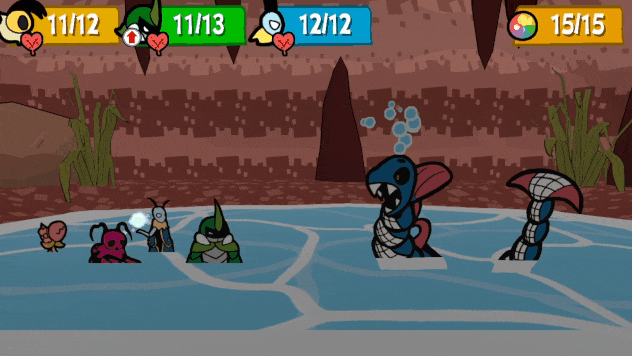 It gets to attack immediately, too. This water breath is its most dangerous attack, hitting the entire party for 5 base damage (filling the bar counts as a normal block; you can also Super Block, if you press (A) with perfect timing after the bar disappears, to reduce it further, although that's very hard to do consistently). 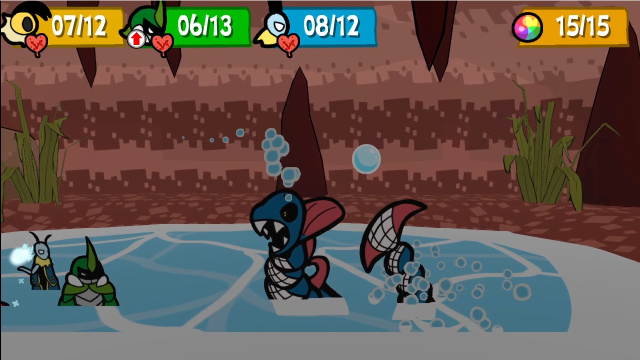 The tail's back too, immediately launching another water droplet.  And the first droplet falls on Vi. This delayed attack has 4 base damage, so it's not completely negligible, but it's not exactly the biggest threat in this fight. Still, there's a lot going on here, and the damage can build up quickly!  Everyone's looking a bit worse for wear here, but so is the boss at least.  Kabbu attacks as usual.  Then we'll have Vi attack to make use of her boosts (she's still poisoned for now)...   Before Leif relays to her so she can heal everyone. I don't want to take chances here, and Vi's low enough that another water breath attack would almost certainly KO her. It's a shame to lose the poison bonus, but better safe than sorry.  Chompy does her thing.  On its turn, the Tidal Wyrm decides to show us yet another new behaviour: calling for reinforcements. A Water Strider shows up.  And attacks us immediately.  As usual, more water bombs are incoming.  Hmm... how are we going to deal with this? Let's get creative, shall we?   First things first, Leif shields everyone.  Remember this thing?  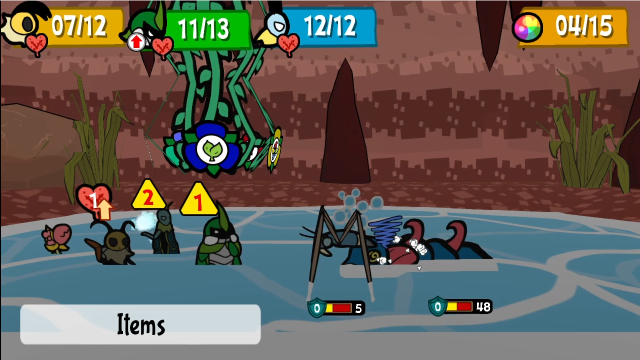 As it turns out, Abombination's damage ignores defence. And its 10 damage is perfect for taking out the tail, while also inflicting heavy damage on the main body and the strider. It does break our shield, but that served its purpose protecting us from the blast. I don't use this item all that often, but it really shines in this fight. 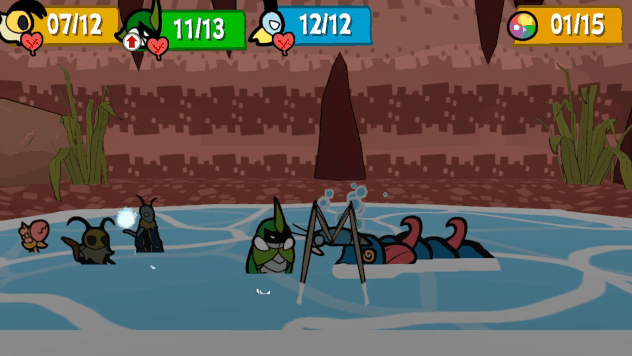 Did you expect to see Heavy Strike again? With the strider at 5 HP, it was the perfect way to finish it off. 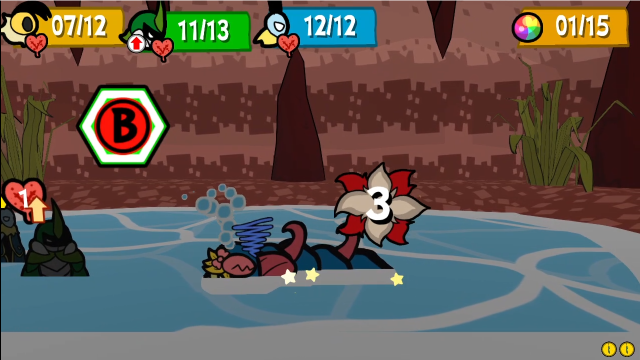 Leaving Chompy free to hit the Tidal Wyrm. 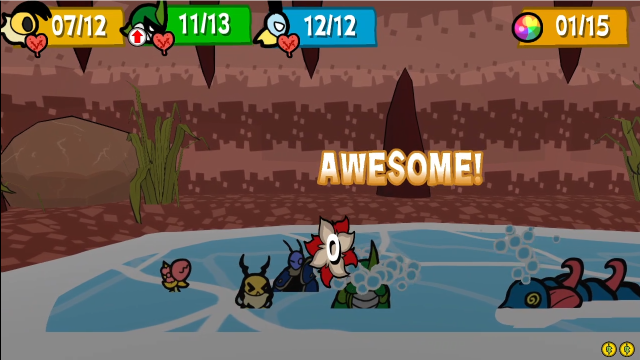 The boss might not be attacking us, but we're still due to be hit by falling water. At least Kabbu managed to Super Block.  We're getting close now. We should be able to get some heavy damage in on this turn.  First up, though, we're going to need some TP.  Even though Leif is out of actions, he can still participate in Frozen Drill if Kabbu initiates it. (Also, despite having no actions, Leif doesn't get an exhaustion penalty here, he didn't take actions this turn to gain any.) He'll still be down an action next turn, but this is probably worth it.  Chompy does her thing again.  This hurts, though. The Tidal Wyrm gets up and hits us with water breath.   The usual water droplet things: a new one gets launched, and an old one falls. You get used to seeing that in this fight.  We're getting very close now, though we can't quite finish things this turn. Annoyingly, because Leif is down an action thanks to Frozen Drill, we can't change our formation; it would have been nice to be able to get Vi in front for a stronger attack, but we can't.  Instead, we'll just have her Hurricane Toss from the rear. It's still good damage, though not quite as good as it would have been. 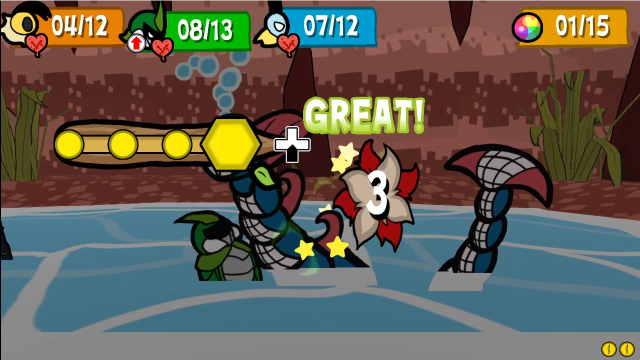 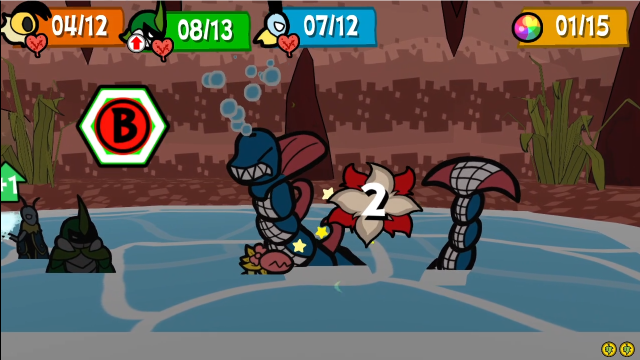 While Kabbu and Chompy will just attack normally. 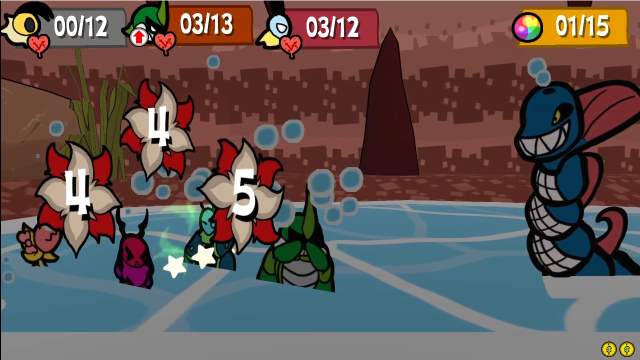 This is pretty painful, though. I left Vi on low enough HP that the water breath attack was enough to KO her, and the other two are dangerously low also. In retrospect, it might have been a better idea to use Sharing Stash again instead of trying to attack. That said, we weren't at any risk of losing the fight here, and we should still be in a good position next turn. 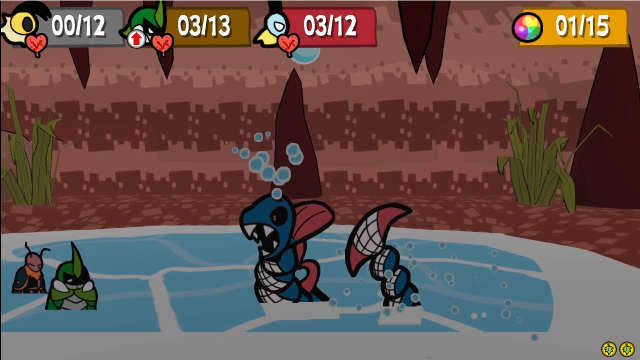 And the usual water droplet.  Even though Vi's gone down, it's not really a problem, because we have the fight won.   There we go.  Tidal Wyrm actually has a unique death animation, rearing back before slowly sinking beneath the water. 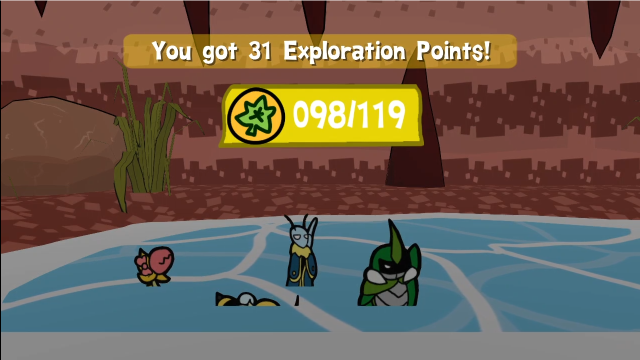 And we get a nice haul of EXP for our trouble. (Poor Vi though, face down in the water.) 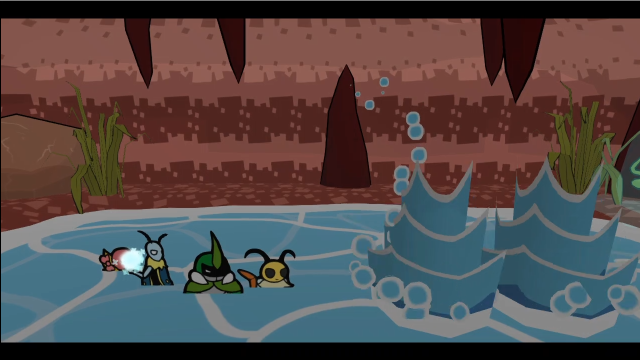 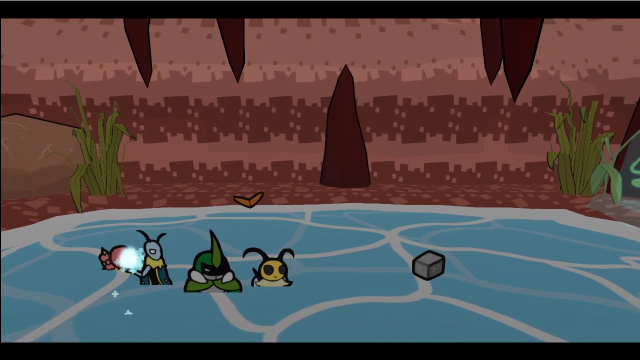 As the Tidal Wyrm disappears, it also leaves behind some sort of item. 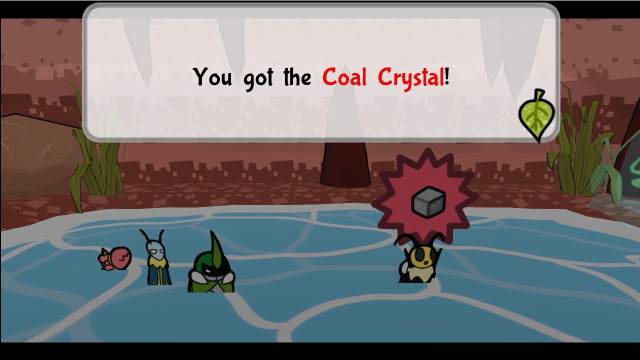 Vi picks it up automatically, just like the Crystal Fang the Devourer left behind. I'm sure Doppel is going to want this. 25 - Caves And with that, our second Bounty has been dealt with! There's also a new banter here now: With the beast defeated, this is nothing more than a puddle. Mhm. Let's go back. Might as well raise the water and drown this place in history's waves. Why're you two being all sappy...?I do like this one, the contrast between Kabbu and Leif trying to be solemn and Vi just not getting it amuses me. Tidal Wyrm is just a really solid fight. Its gimmick is pretty simple, and it doesn't have particularly diverse attack patterns (we saw all of its moves in that fight), but it can put out a lot of damage and doesn't let up on the pressure unless you spend valuable time and actions attacking the tail (which slows down your progress damaging the actual body). There are a lot of different ways you can approach this one. So before we leave, let me show you another run of the fight where I take a very different approach. A bit of setup first:  I went out and fought some enemies, deliberately getting Vi low on HP.  As well as redistributing her HP Plus medals between Kabbu and Leif, since she won't be needing them.   Here's the medal setup I'll be using. This is going to look pretty strange, but there's a method behind the madness. We're boosting Vi's attack to a very specific level, which right now means we need Berserker, as well as Power Exchange and Last Attack (which is the reason we're starting with her on low HP). She's also getting Strong Start, to take extra advantage of that on her first turn. She gets First Plating as a bit of insurance against mistakes, since pretty much any hit would mean she's going down. Leif, meanwhile, gets Antlion Jaws, to help him get through the Tidal Wyrm's defence; he, too, needs to be able to hit some very specific numbers. It'll all make sense soon. Click me for video! 35 - Reckless for Glory! (Bonus Boss)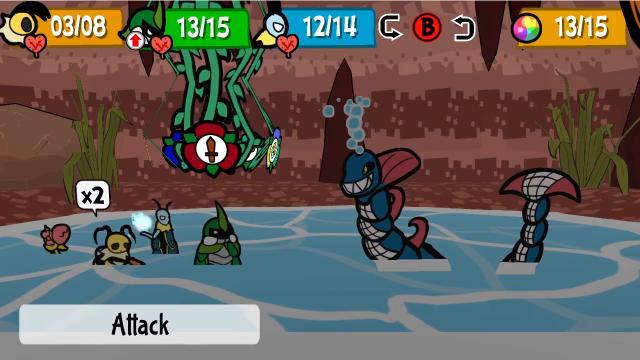 We'll start the fight with Vi in back for now. 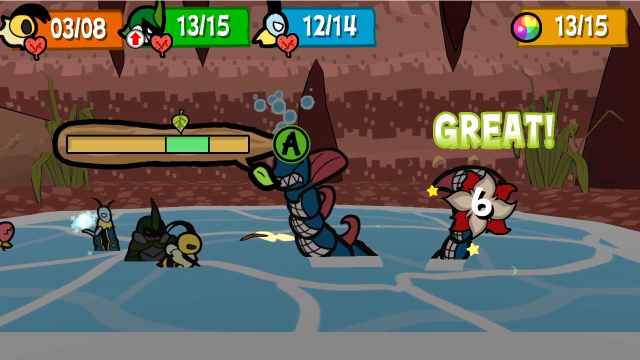 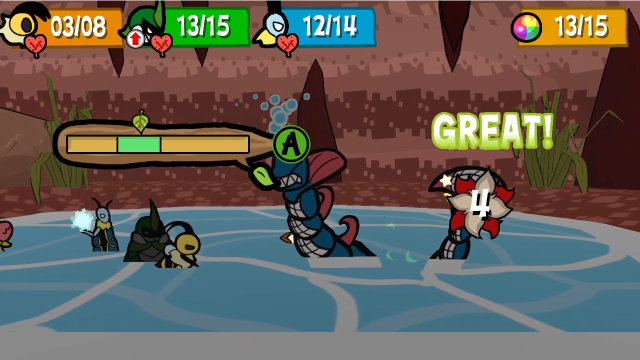 With that specific combination of attack boosts and Strong Start, Vi can deal exactly 10 damage to the tail, immediately knocking down the Tidal Wyrm. 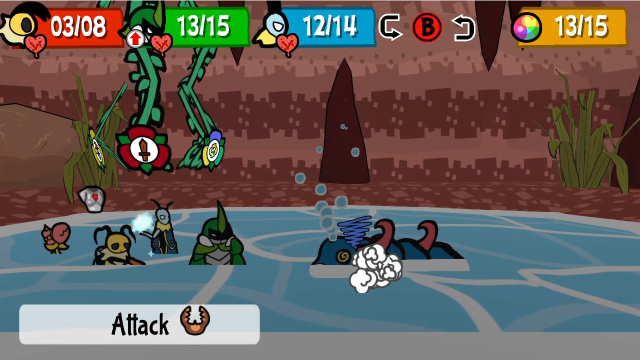 Leaving the others free to attack. 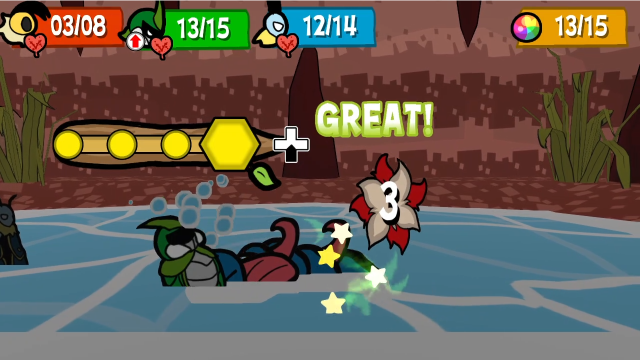 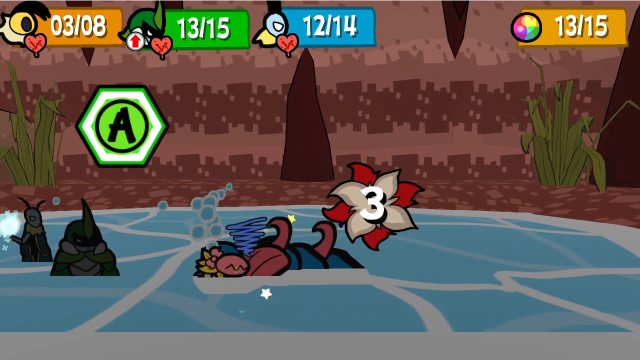 I'll spend a turn spying, still, but Kabbu and Chompy can get damage in. 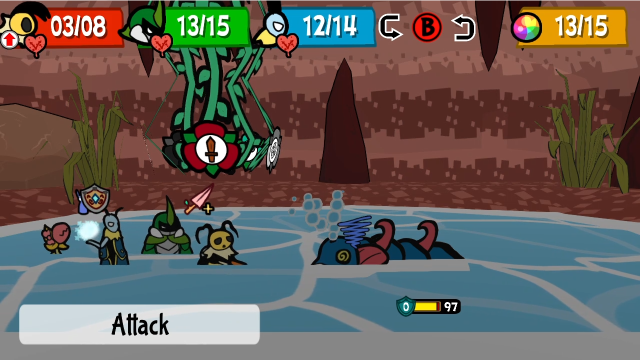 Now, we can move Vi to the front, where she'll be for the rest of the fight. 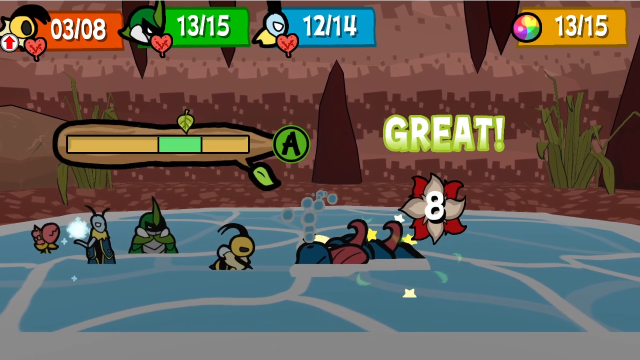 With all the boosts we gave her, she can hit for 8 with normal attacks now. That's a lot! 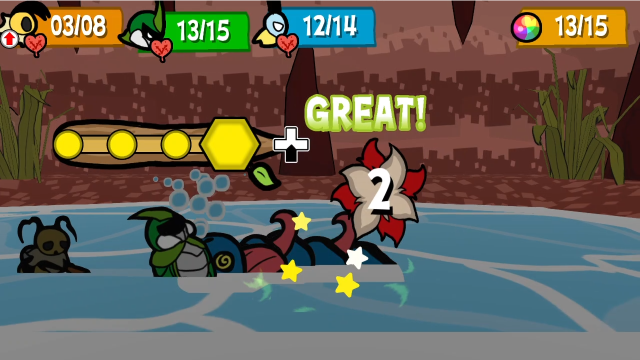 Kabbu does his part, though it looks underwhelming by comparison.  And we'll have Leif use Bubble Shield Lite to keep her safe when it gets back up. 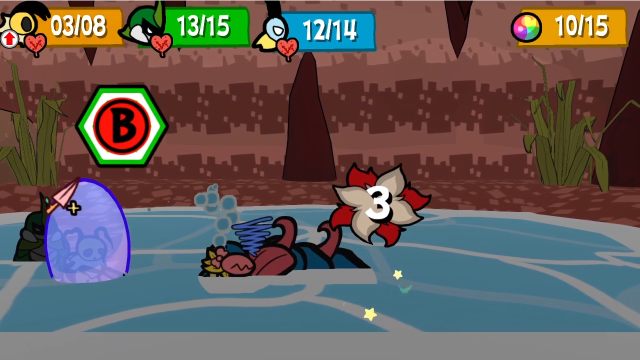 Chompy contributes. 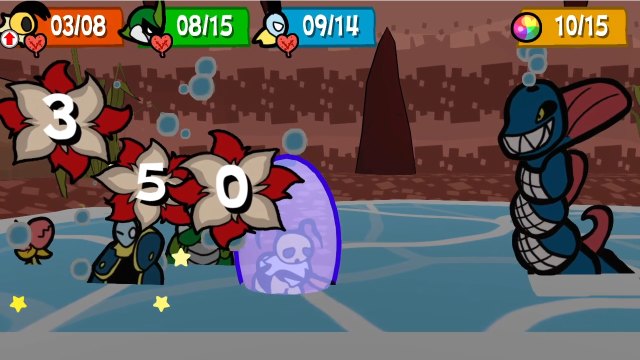 There we go. Water breath is still scary, but we can manage; if we need to heal Leif or Kabbu at some point, that's fine, the important thing is that Vi stays alive and stays at 4 HP or lower. 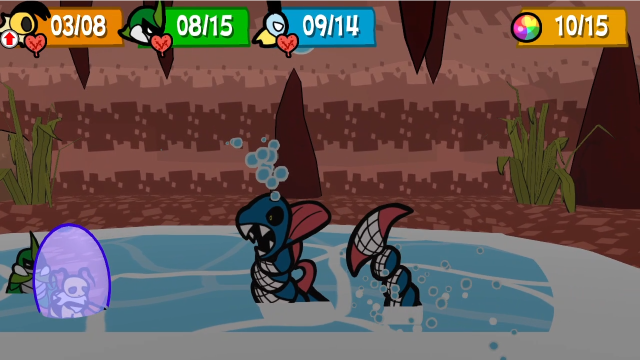 And, of course, we still have to deal with the droplets. 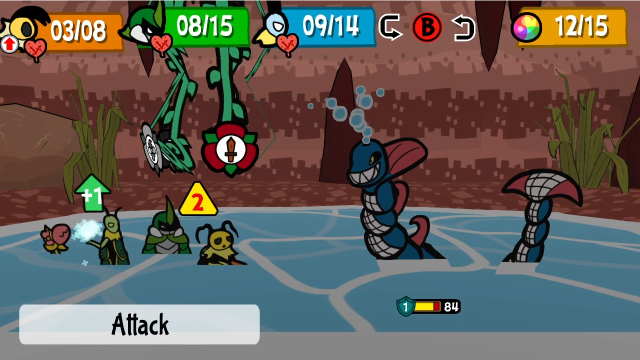 Now here's where the magic happens. 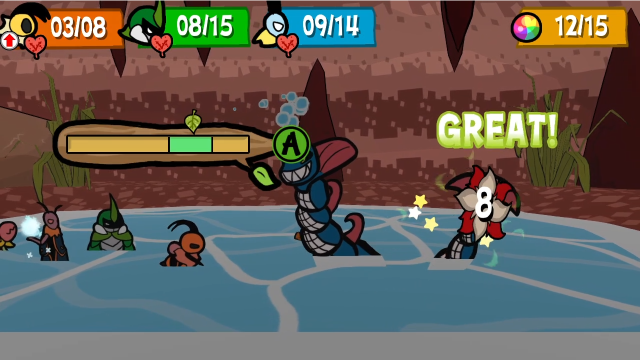 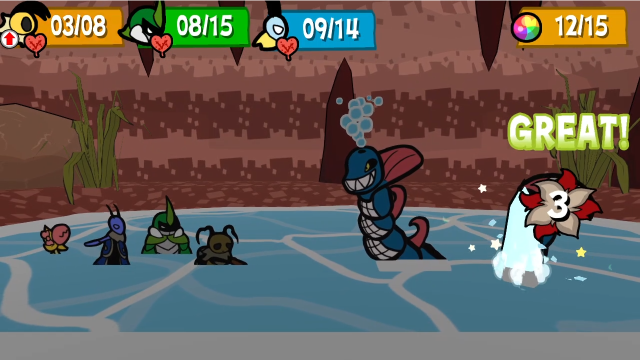 Vi and Leif can immediately take out the tail again. (Thanks to Favorite One, we're doing a bit of extra damage here, but we'd be fine even without that. The reason Leif has Antlion Jaws is that, if we didn't have those charges, we could have Vi do 7, Leif attack for 2, then Kabbu relay to Leif again for the final 1 point. Without it, we wouldn't be able to KO the tail without spending TP, and giving Antlion Jaws to Vi wouldn't work because Berserker prevents her being relayed to.)  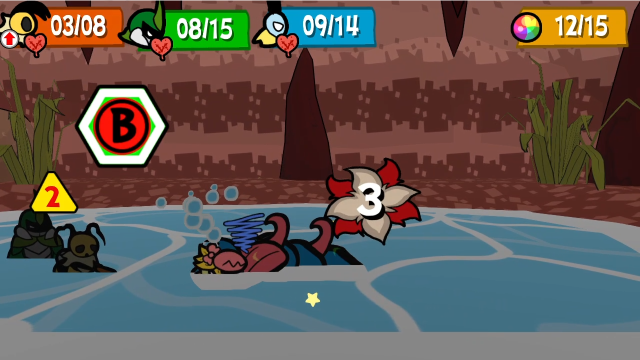 We continue doing the thing.  At this point, you know the drill. We can keep this going more or less indefinitely.      This could cause problems, though. The one thing that can throw a wrench into this strategy is the adds.  The strider going after Vi is a stroke of luck, though (it's more likely since she's in front, but still).   The delayed attack was also targeting Vi; it's always nice when that works out. (With this strategy, if it targets her, it'll always be on a turn when she's shielded, which is pretty nice. And we don't really care if it hits one of the others.) Let's deal with this the best we can, I guess.    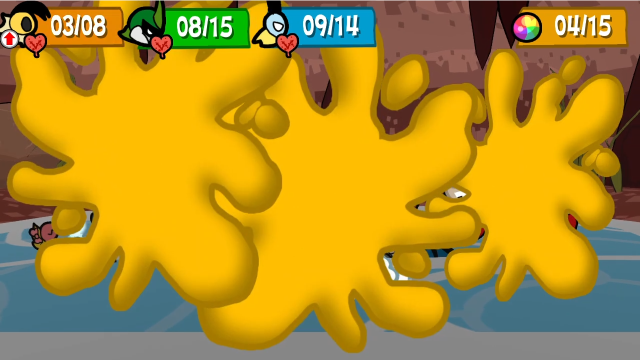 Abombination time! It's still the best way to quickly clear out these things, and keep Tidal Wyrm under control. Leif being down an action next turn will be annoying, but we can handle it. 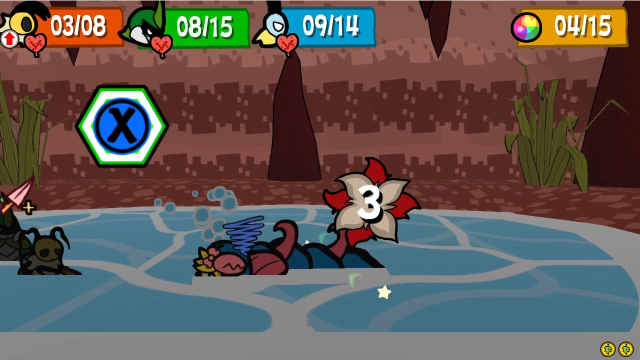 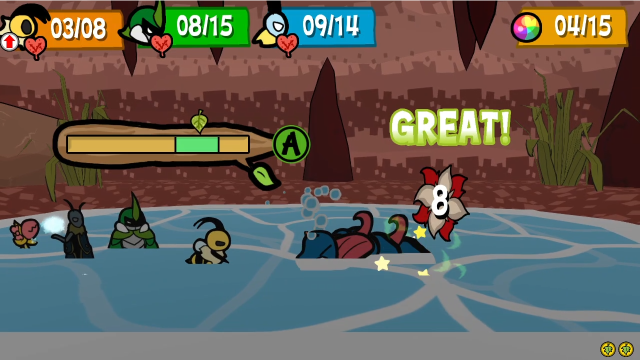 We do more damage. 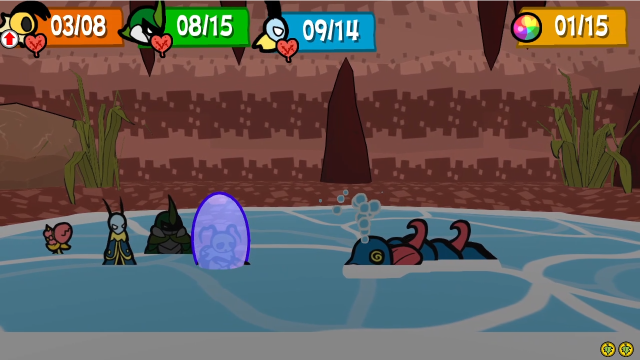 Leif may have been down an action, but Kabbu can relay to him so we can still shield Vi in time. Crisis averted!   The bite attack is always good to see, but especially when fully negated by the shield.   A new bubble, of course, accompanies yet another one being nullified by shielding Vi.  And now we're back to where we were before.    Here's the basic setup finally coming into play: with the specific attack boosts we've given Vi, and with Antlion Jaws on Leif, we can do exactly 10 damage to the tail.  That means we spend the turn with only Chompy doing damage, of course, but we'll get our opening immediately after.   That's better.  We'll have Kabbu restore some TP, just in case we need it. (We do have TP Core on, but that's not quite enough to fuel the shield indefinitely.)  Again, we shield Vi. 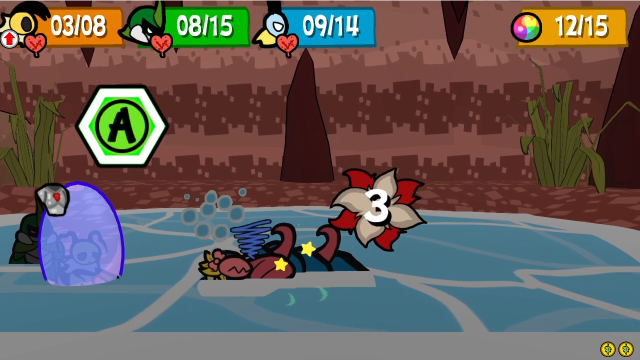 And Chompy continues chomping. 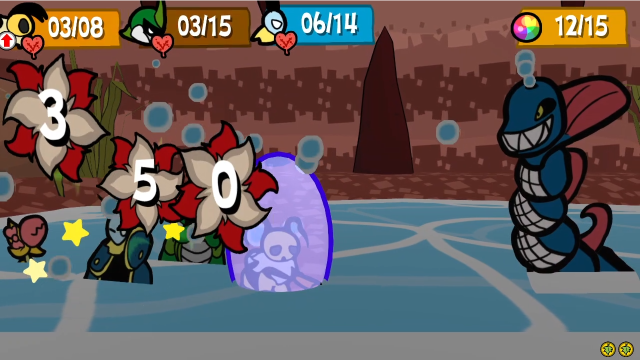 The water breath hurts, but it's better than reinforcements. 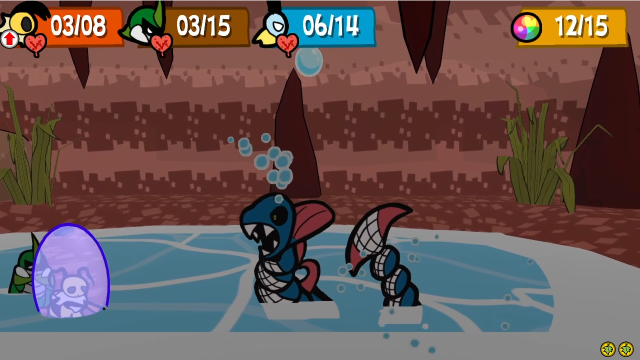 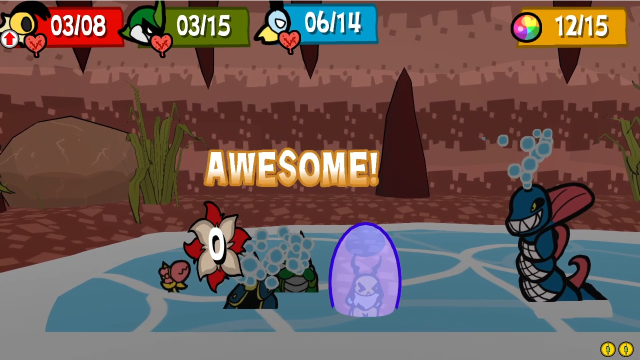 More water droplet things happen. 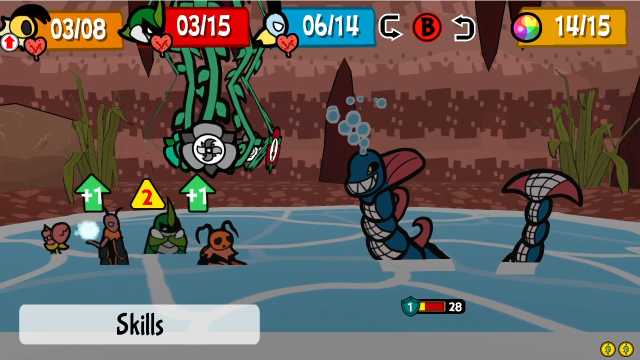 Despite the HP situation, we're in pretty good shape. 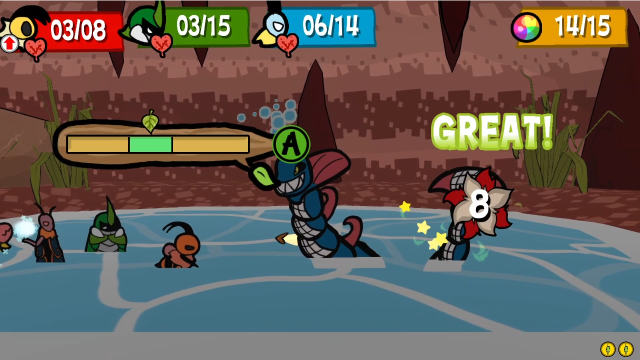 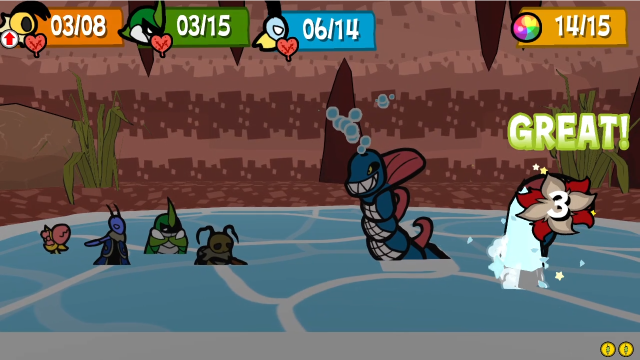 First things first, we'll knock it out again. 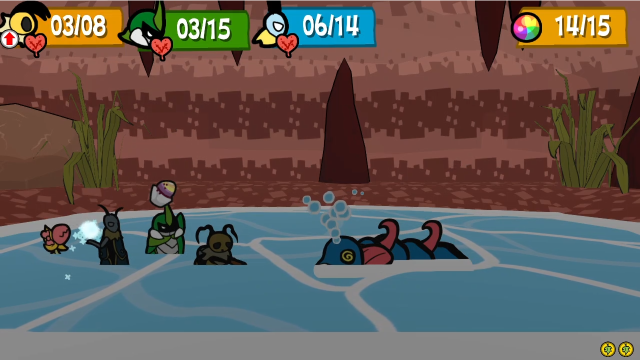 While Kabbu can eat one of the many Baked Yams we've been accumulating. That's all we needed, Leif's still healthy enough to survive a hit from anything. (It's definitely important to stay on top of healing with this strategy so that nobody goes down. This setup minimises the number of times Tidal Wyrm gets to attack, but that's not the same thing as being completely safe, and any character going down will probably be enough to break our loop.)  The usual thing.  Getting close to the end.   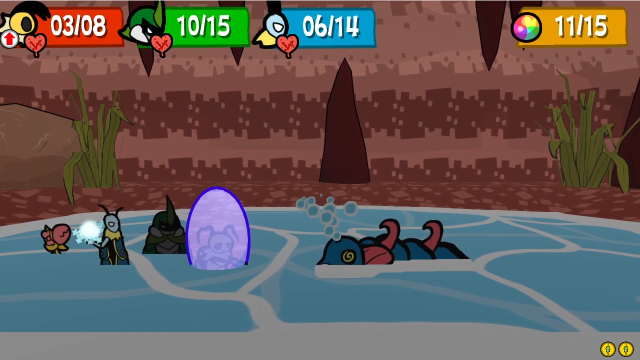 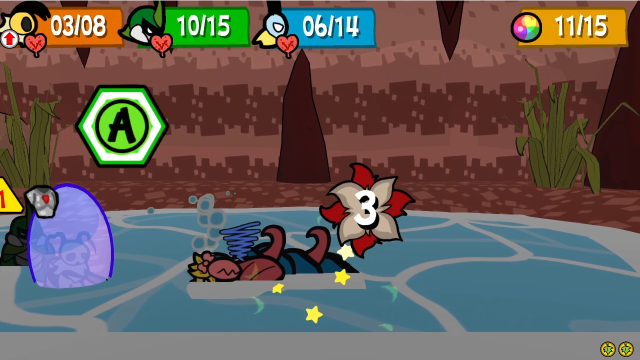 Rinse and repeat. 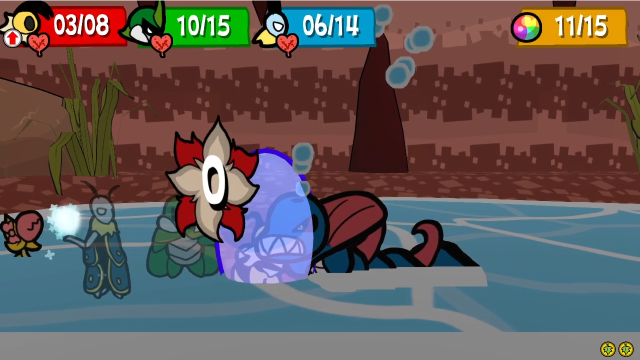 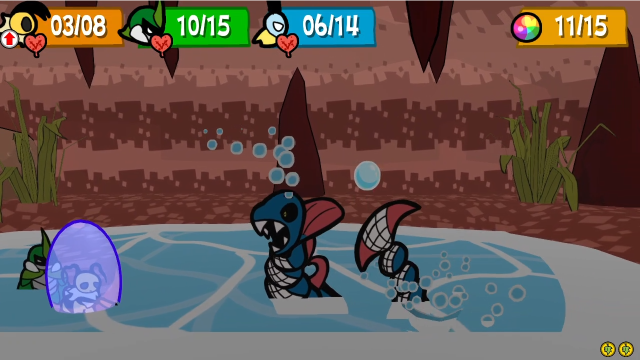  We're fine.  We could finish it off here by just attacking the face directly, but on principle, let's keep doing the pattern anyway.   Tail goes down. 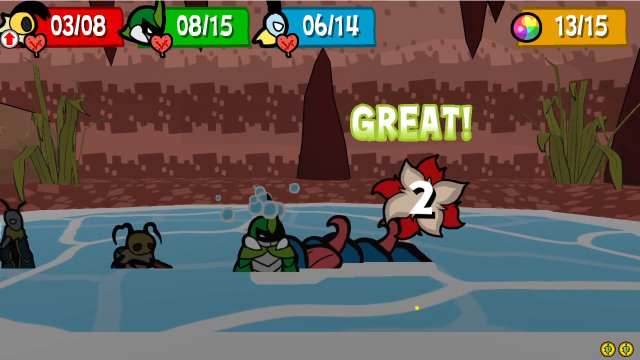 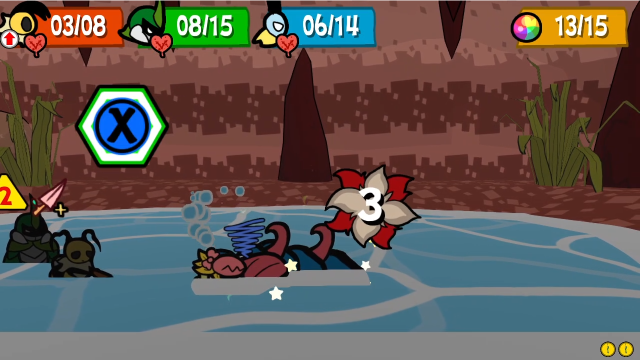 Kabbu and Chompy do their thing. 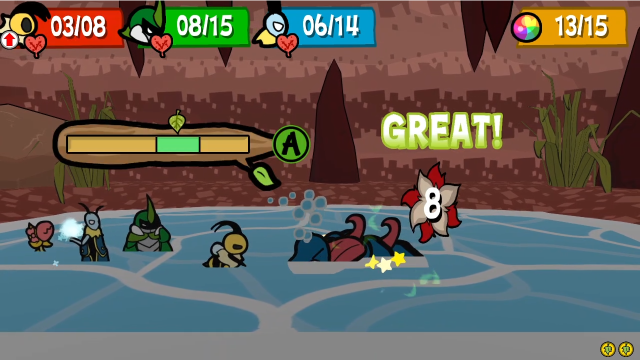 And Vi deals the final blow! 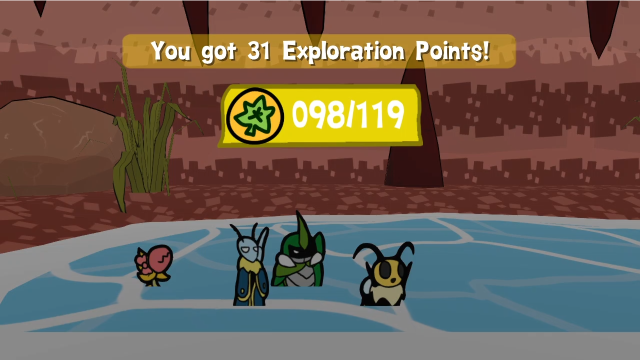 I wouldn't say this strategy is foolproof, or even necessarily better than the more conventional approach we took the first time, but it's pretty safe as long as you're paying attention, and I enjoyed finding a situation (other than Team Skills) where the Berserker medal is advantageous. Just to be clear, I should also add: the tail's HP changes depending on the difficulty settings, and if you're facing tougher versions of this fight (whether on a bonus difficulty, or in B.O.S.S. on EX mode), neither this tactic nor the Abombination are quite so spectacular. It's often better there to just find ways to mitigate or outheal the damage and fight through its attacks, rather than wasting time playing around with the tail. Here, though, the numbers work out perfectly (and I wouldn't be all that surprised if they were intended to). 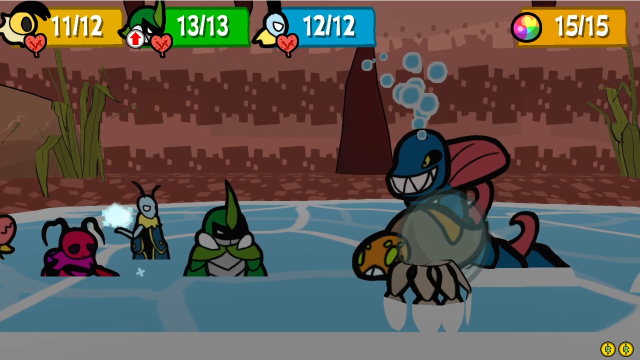 The one thing we didn't see in either run of this fight is that, in addition to Water Striders, Diving Spiders can also show up when it calls for reinforcements. They're a bit more annoying with their ability to shield, but a timely application of Cleanse can take care of that too (if you relay to Leif, he can still shield the team so they can use an Abombination, and that 10 damage + 3 from Chompy is enough to kill a 13 HP Diving Spider in one turn also). I don't have as much to say about the Tidal Wyrm as I did about the Devourer, for better or worse. It's a solid, well-designed fight, but perhaps due to the fact its gimmicks are more straightforward and you're unlikely to get to it without having access to the tools you need to beat it (given where and when it's located in the game), it doesn't tend to make nearly as memorable an impression. Anyway, let's get out of here. 25 - Caves Venus is still here to heal us on the way out. 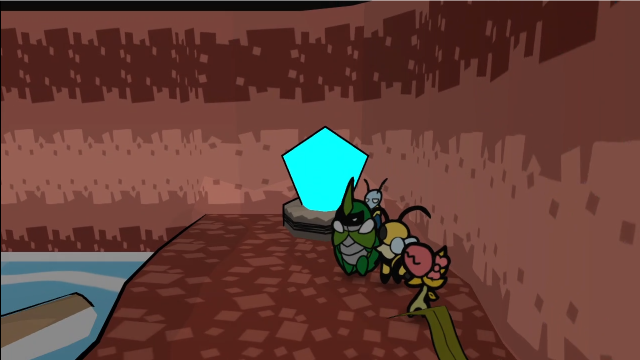 There's no real reason to do so, but I always like following Leif's suggestion to raise the water level as we leave. 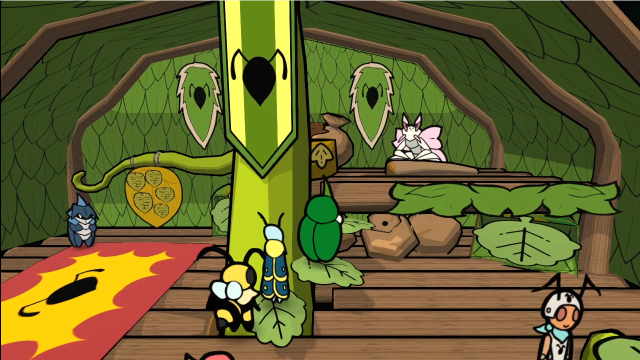 Tidal Wyrm is a Bounty, so we don't get a Hard Mode reward from Artis. 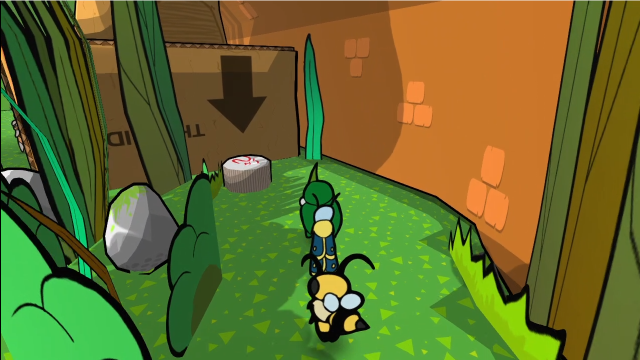 34 - Dodgy Business 34 - Dodgy Business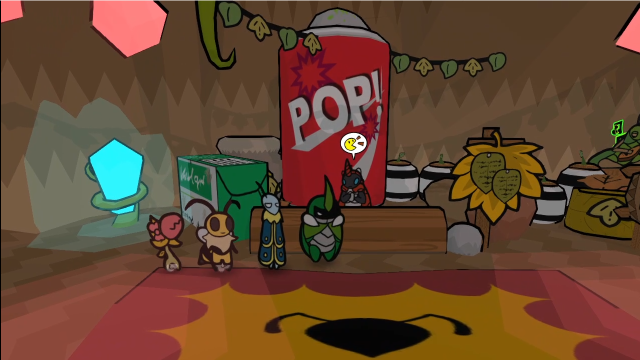 Instead, we need to check in with Doppel at the tavern. 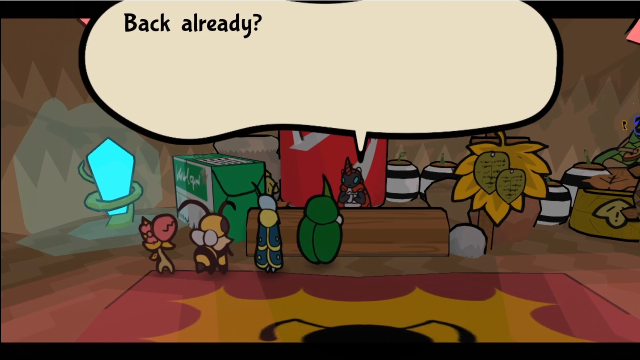 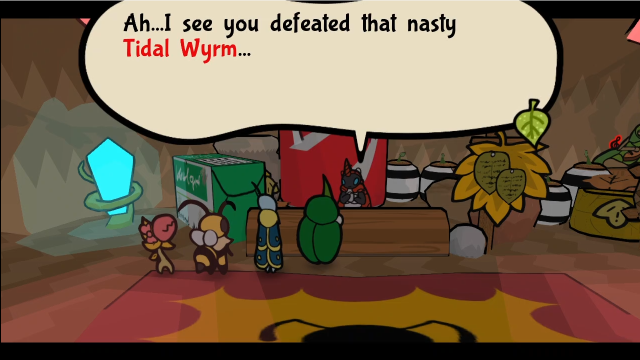  May I have that crystal it dropped? May I have that crystal it dropped?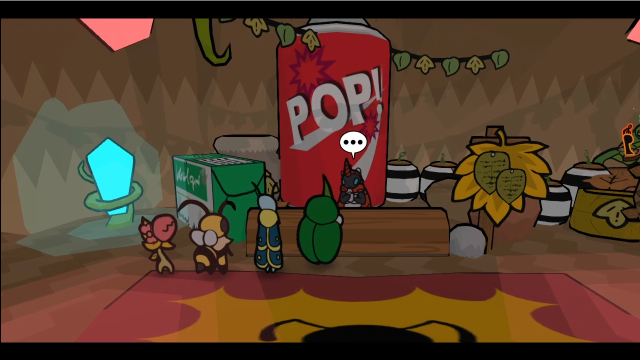 ...Yes, this is a genuine deal. Here is your reward. ...Yes, this is a genuine deal. Here is your reward.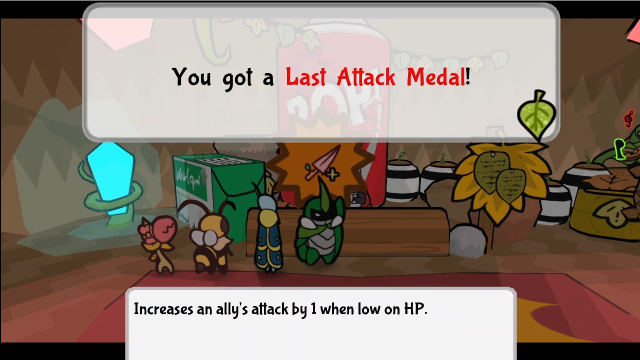 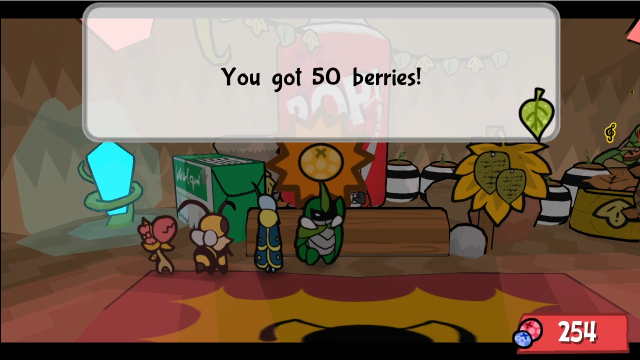 Nice doing business with you. Please find the other bounties and your reward will be waiting. Nice doing business with you. Please find the other bounties and your reward will be waiting.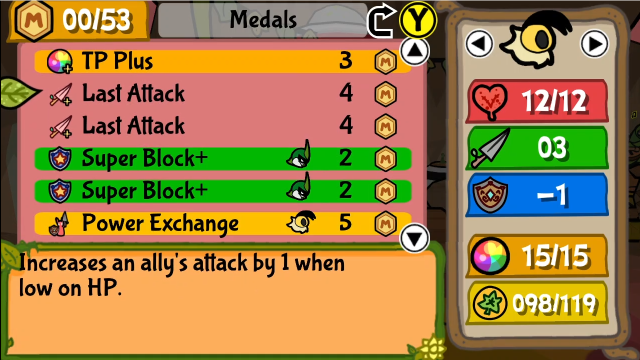 We get our second copy of It's hard to stress enough just how powerful this can be; if I'm not using it much, it's mainly because I want the fights to go on long enough that the enemies have time to show off what they're about. With that, we're finished with Stream Mountain. What a fun little side dungeon. Stream Mountain was also the last bit of side content we had available to do. This means that next time we'll finally get back to our mission, and make our way to the Sand Castle. Plot awaits! I'll see you then. Explopyro fucked around with this message at 03:01 on Sep 26, 2021 |
|
#
?
Sep 26, 2021 01:21
|
|
|
Looks like the music image link after the bounty fight is missing the leading "[" character.
|
|
#
?
Sep 26, 2021 02:34
|
|
|
OneWingedDevil posted:Looks like the music image link after the bounty fight is missing the leading "[" character. Thanks for the catch. Should be fixed now. Torrannor posted:I wouldn't have been surprised to see a garden hose inside Stream Mountain, but I guess that wouldn't have made sense. If the humans really have vanished (perhaps just from this house), the water would have been turned off. I meant to respond to this earlier. I've definitely thought along similar lines from time to time (I halfway wondered if Stream Mountain would have ended up being some kind of sprinkler). As you say, it would have raised further questions, but so does the version they gave us, so I'm not sure whether or not that would have been better. I will say that we will learn more later about the state of human technology in this world, but I shouldn't say anything further on the subject for now.
|
|
#
?
Sep 26, 2021 03:05
|
|
|
Fun fact, the Abombination actually got nerfed in an update. There was a very easy cheese strat you could use (though it was kind of costly and time consuming to set up.) with it. Originally the Abombination did not break bubble shields. This meant that you could just use Bubble Shield and then an Abombination repeatedly for 10 guaranteed damage each turn. And the 3rd bug could just relay the turn to Lief to keep the feedback loop up, since the Abombination also restores 40% of your TP on use, so you could keep up this strategy as long as you had Abombinations left. Needless to say this got nerfed into breaking shields on use so you couldn't do an easy safe loop like that. Another nerf that happened was that the TP restore no longer takes place unless it actually damages you, so you can't keep up the loop as easily.
|
|
#
?
Sep 26, 2021 04:24
|
|
|
Ah, Tidal Wyrm... it was a welcome surprise at the end of this area. Playing on normal, I remember still being somewhat impressed with the relative difficulty of this fight compared to what surrounds it, even if you get to this area a little late. I think with my more conservative strategies I was having trouble attacking both the tail and the body, and also taking advantage of when the wyrm was down for attacking it. I was able to best it on my first try though, I think. It's a meaty enemy! I don't think I used Kabbu's skills for attacking nearly as much and I probably would have had an easier time of it if I thought about it. I'm excited to reunite with the main plot though! I liked the next dungeon a lot and its boss was very interesting!
|
|
#
?
Sep 26, 2021 06:03
|
|
|
Explopyro posted:As far as I can tell, this thing is just straight up an Eastern-style water dragon? (Albeit a bug-sized one.) It doesn't seem to be based on any particular form of wildlife, unlike most of the other enemies in this game. It feels a bit incongruous, honestly. I think it's meant to be a lugworm. Long tideline-dwelling worm with bristles along the middle, lives in a U-shaped burrow with head and tail at each end. 
|
|
#
?
Sep 26, 2021 12:58
|
|

|
Araxxor posted:Fun fact, the Abombination actually got nerfed in an update. There was a very easy cheese strat you could use (though it was kind of costly and time consuming to set up.) with it. Oh yes. I thought I discussed this before when we first learned how to make them, but it's worth going into detail, so thanks for elaborating. I'm pretty sure this was another v1.1 change, the broken version lasted a surprisingly long time. It's definitely a lot more balanced now, I approve of the change. You can get kind of close to the old functionality in the current version by pairing them with Hustle Candy and using that on Leif instead of relaying (this almost covers the TP cost of Bubble Shield, and negates the action penalty), though it's still nowhere near as broken since it leaves you unprotected on the enemy's turn. Kappy used this to good effect in his Rank 0 Tidal Wyrm fight, for instance. I'm not sure how much application it has more generally, though (maybe it could be handy against some later bosses that also summon adds). Alxprit posted:Ah, Tidal Wyrm... it was a welcome surprise at the end of this area. Playing on normal, I remember still being somewhat impressed with the relative difficulty of this fight compared to what surrounds it, even if you get to this area a little late. I think with my more conservative strategies I was having trouble attacking both the tail and the body, and also taking advantage of when the wyrm was down for attacking it. I was able to best it on my first try though, I think. It's a meaty enemy! I don't think I used Kabbu's skills for attacking nearly as much and I probably would have had an easier time of it if I thought about it. It is a good boss and usually makes for a satisfying fight. (I definitely remember using a few Queen's Dinners the first time I fought it!) I think Tidal Wyrm is another boss that ends up rewarding aggression in this game, because the longer you let it live, the longer it has to wear you down with the water breath attack and the constant barrage of falling droplets. I go back and forth on whether I think attacking the tail is a trap option, because in terms of actually progressing the fight it's a complete waste of your damage (but, on the other hand, it can get you a bit of breathing room, and you can do more damage when the defence is lowered). If you're willing to abuse the interaction, Break + Hurricane Toss while it's up might be the best way to deal with it. Black Robe posted:I think it's meant to be a lugworm. Long tideline-dwelling worm with bristles along the middle, lives in a U-shaped burrow with head and tail at each end. It certainly could be! I'm not going to rule it out, at any rate; thanks for finding that. If it is, though, the devs have never said anything that would confirm it. I looked up Tidal Wyrm's entry in the art book and they don't have any notes on the inspiration except to say that the final design was something of a compromise. Apparently, they'd originally been designing an antlion boss thinking it would fit the desert setting, and changed it to this once they decided to have Stream Mountain be a watery area because the habitat no longer fit it. I think the only remnant of that is the fact that part of it remains below the surface you stand on while fighting it.
|
|
#
?
Sep 27, 2021 03:19
|
|
|
Well, this is awkward. I had been hoping to have an update ready to go for today, but some things came up this week and I didn't have as much time to work on it as I'd hoped. Depending on how things go, I may have it ready by tomorrow, but Monday's looking more likely. But. We need to talk about something else. I just saw this thread and read the blog post it linked to. (I recommend reading this if you care at all about abuse in the gaming industry, but let me give a content warning, it's a firsthand account of industry abuses and discusses workplace sexism, sexual harassment, gaslighting, and rape among other things.) The writer of this piece is the person who previously wrote the Dangen Warning, an expose of abuses and unprofessional business practices by Dangen Entertainment as experienced by the dev teams of two games, Devil's Engine and FIGHT KNIGHT. I had previously refrained from discussing it in this thread for a few reasons: (1) it's not precisely germane: the Bug Fables team are unconnected to any of this, said they had no problems and Dangen were honouring their contract appropriately, and did not encourage a boycott of their game (unlike the Devil's Engine team) (2) the situation was messy and I didn't feel like I had access to enough of the story to draw firm conclusions and (3) while it does look damning, the person responsible for the worst of it was removed from the company. In short, I didn't think it was relevant enough, and I wasn't confident I fully understood what happened. So why now? Well, this new article is harrowing and makes everything seem so much worse (in particular, some of the devs involved come off very badly: it sounds like the writer's primary regret is that the way she framed things previously allowed some of them to present themselves as victims when they were also abusive to her). Especially in the context of the recent and ongoing conversation about abuses at high-profile studios like Blizzard, this seems important. Also, I recently learned that FIGHT KNIGHT (which I thought was a dead project) is slated for release this year, but given the contents of the blog post (which claim its primary creator is an abusive rapist) I do not think anyone should be supporting it. We were going to have to talk about FIGHT KNIGHT at some point, because Bug Fables contains a minigame based on it (while Bug Fables was in development, they were seen as something of 'sister projects', being crowd-funded around the same time and going through the same publisher, so they incorporated it as a reference). But as it will still be quite some time before I get to it in the LP, I didn't want to wait to talk about it when the article in question was posted yesterday and I could raise awareness of it now. What does this mean for my LP specifically? Well, nothing. Everything will continue as normal. Again, none of this has any direct connection to Bug Fables (or, for that matter, CrossCode, another excellent game; Dangen only publishes its Japanese localisation), but I thought it was important enough I would be remiss not to address it. Feel free to discuss this or not, as you please; I realise this is heavy and unpleasant subject matter. The usual content will resume in a day or two.
|
|
#
?
Oct 2, 2021 16:59
|
|
|
41: Emergent Mysteries 37 - Defiant Root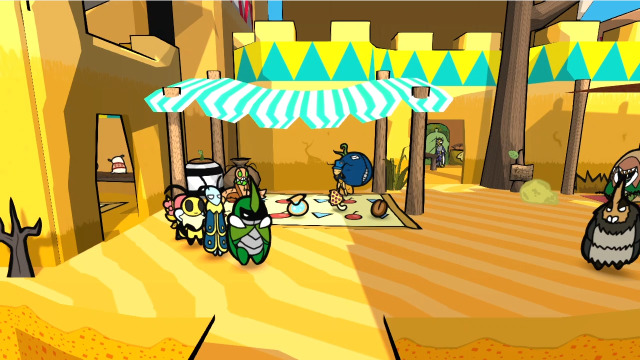  We're starting out in Defiant Root, because I needed to restock on doughnuts again. I've been going through a lot of these, what with all the boss fights. While here, I noticed that some of the NPCs have new dialogue (some of which we should probably have seen a bit earlier than this), so let's take a quick look around.  For instance, Dran here seems to think we're still looking for the keys.  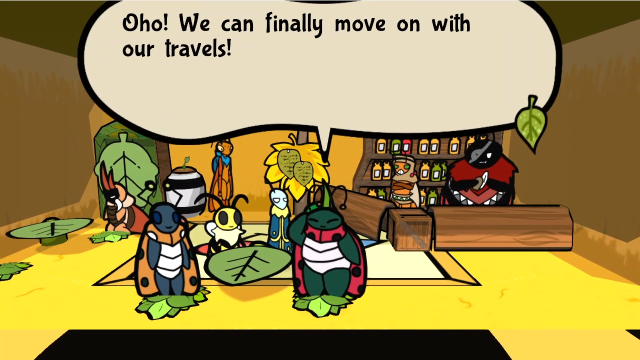  But first, let's eat a bit more before leaving, this food is really nice! But first, let's eat a bit more before leaving, this food is really nice!While others, like Rob and Bub here, tell us our victory over the bandits is having some effects.   My guess is that someone went up and took care of business at their hideout. At least now I can worry less about having my cargo stolen. My guess is that someone went up and took care of business at their hideout. At least now I can worry less about having my cargo stolen.The bartender has noticed, too. (Should we tell him it was us?) 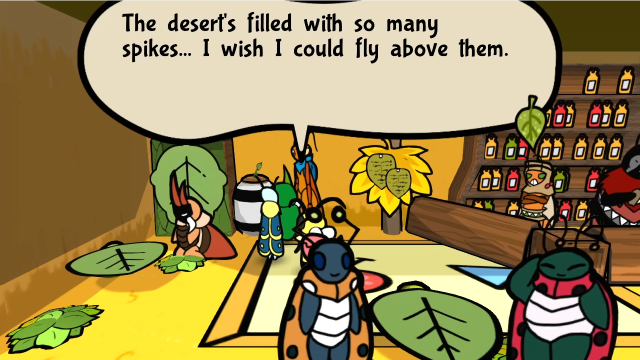  If I could build some sort of giant bubble... I'd walk all over them to show them who's boss! If I could build some sort of giant bubble... I'd walk all over them to show them who's boss!This is kind of interesting, too. (Well, not the hint, which we're seeing too late for it to be helpful.) We didn't see this mantis last time we were in here, but this is Mar. He's another dev avatar: specifically, the game's main programmer. If I had to guess, he probably showed up here at the same time as Genow (who, you may recall, traded us cloth as part of the sequence for Vi's Request).  Back outside, this person can tell us the museum curator apparently has information about the Sand Castle. We should check that out. 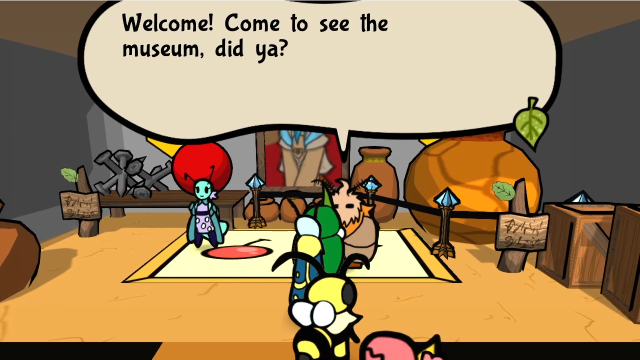 Actually, we'd like to ask you if you know anything about the Sand Castle. Actually, we'd like to ask you if you know anything about the Sand Castle. The Sand Castle? Hmm... It's Roach made, that's for sure! They say there was an old Roach village near the oasis south of town. I'm sure those old ruins hold some important things, castle or not. Shame I'm too old to explore the desert alone! The Sand Castle? Hmm... It's Roach made, that's for sure! They say there was an old Roach village near the oasis south of town. I'm sure those old ruins hold some important things, castle or not. Shame I'm too old to explore the desert alone!This is another hint that we were definitely meant to find earlier; those are the ruins where we found Hawk and got half of the key from him. Anyway, let's head out to the desert. We have the Sandcastle Key, and we know where to use it (we saw Stratos and Delilah there a long time ago). We'll head to the easternmost side of the desert, then make our way north. 36 - Lost Sands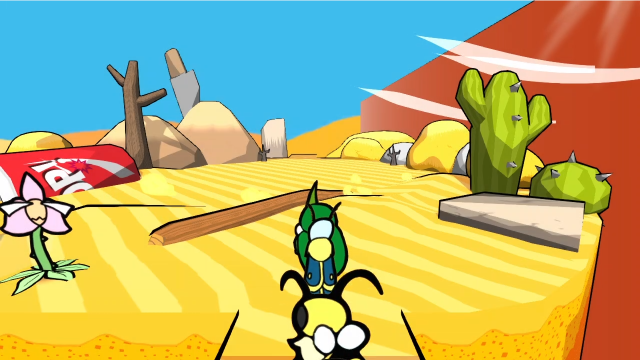 When we get to this screen, one of Venus' buds is waiting for us. She wasn't here before. That's probably indicative of something.  If her presence wasn't enough, her dialogue makes the warning explicit. We don't need healing, though, so let's press forward regardless.  As soon as we set foot in the northern half of this area, the ground starts shaking.   Seems like a solid plan...  13 - It's Getting Scary! 13 - It's Getting Scary!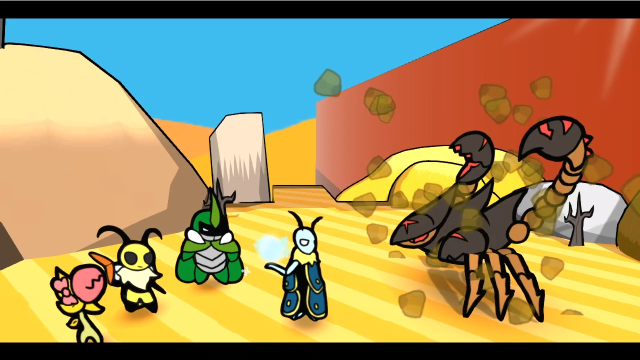 Guess we weren't fast enough. 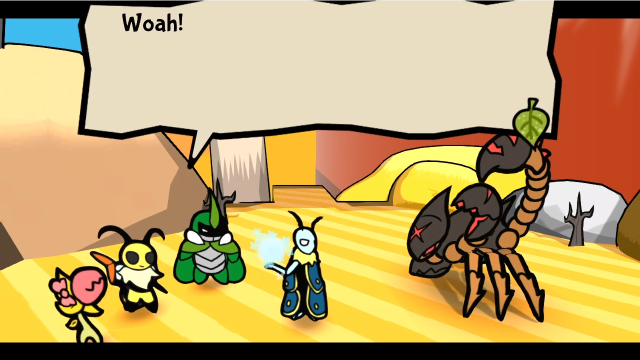 What a vicious beast! They really aren't making getting all the artifacts simple. Eep! We better stop talking, and start fighting! What a vicious beast! They really aren't making getting all the artifacts simple. Eep! We better stop talking, and start fighting!Well, for all this is an ambush, we know what to do.  Click me for video! 29 - Team, This One's Stronger! (Miniboss) Click me for video! 29 - Team, This One's Stronger! (Miniboss) 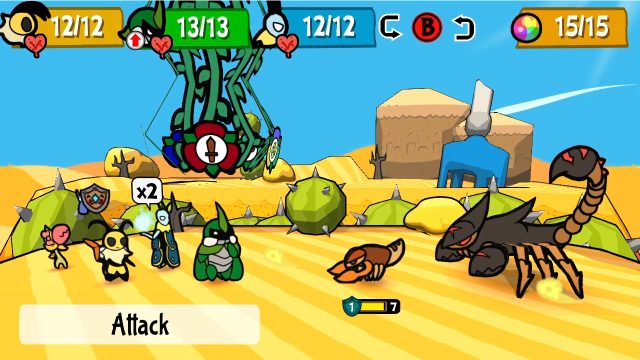 Surprise miniboss fight! That is one big scorpion. It comes with a friend, too, although a single Psicorp isn't particularly intimidating to us now. Let's get a handle on what we'll be dealing with here. 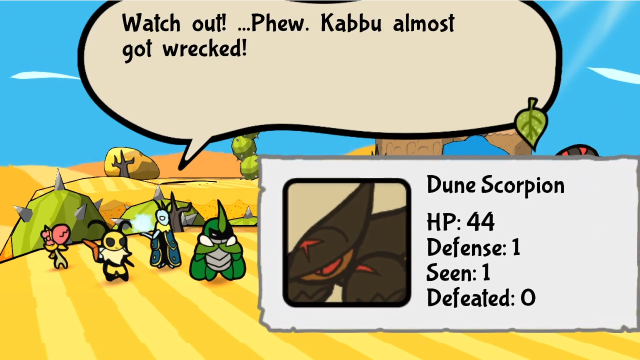 This thing's way angrier than a Psicorp! We've got to knock it out! This thing's way angrier than a Psicorp! We've got to knock it out!Does anyone else find it a bit strange the spy dialogues are consistently written as though they're occurring partway through the fight? Most players are going to see it right at the start, which makes some of the lines feel a bit incongruous when they comment on a thing that hasn't happened yet. The Dune Scorpion would probably look a lot more intimidating if we hadn't spent the last couple of updates gallivanting around the world and taking down superbosses. Still, let's not underestimate it. 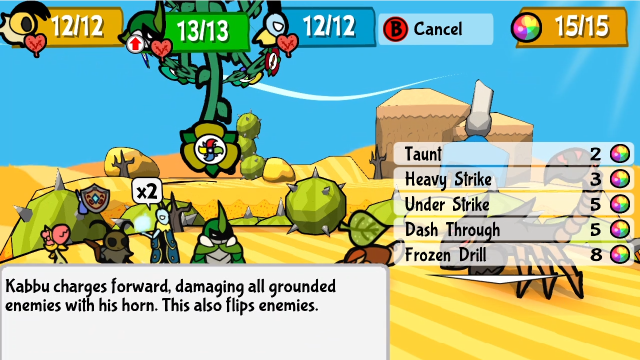 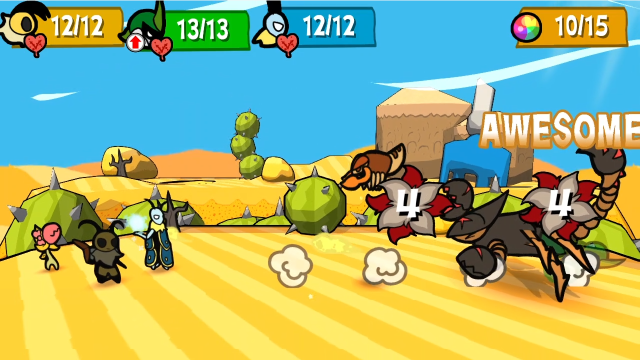 The Psicorp has low enough HP that it's almost always a good idea to just swat it on the first turn. Dash Through conveniently lets us get it most of the way gone, while also getting a hit in on the boss behind it. 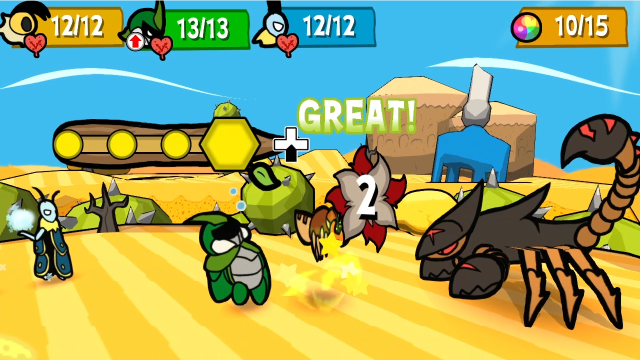 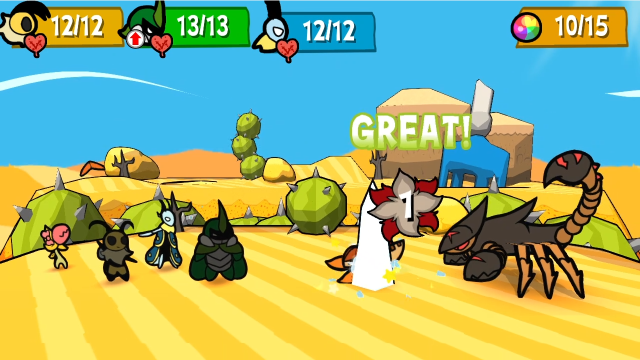 Leif relays to Kabbu for a second hit, then finishes it off himself. 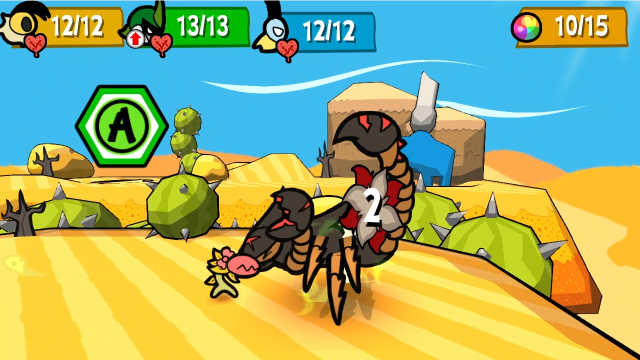 Which leaves Chompy free to bite the scorpion right in the face. Whatever else you might say about her, she's very brave for her size. 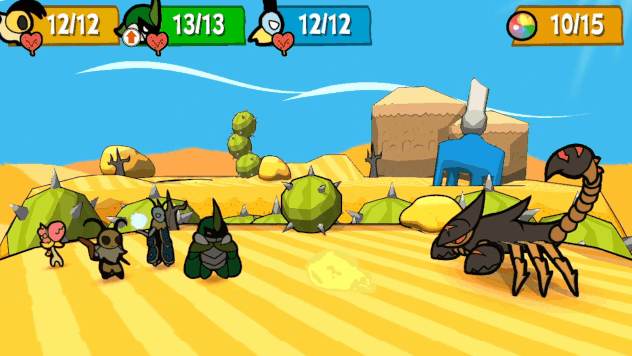 On its first turn, the Dune Scorpion uses a straightforward pincer attack. This hits for 4 base damage, and while it didn't do so here, it will sometimes follow up with a swipe from the second claw (for an additional 4). 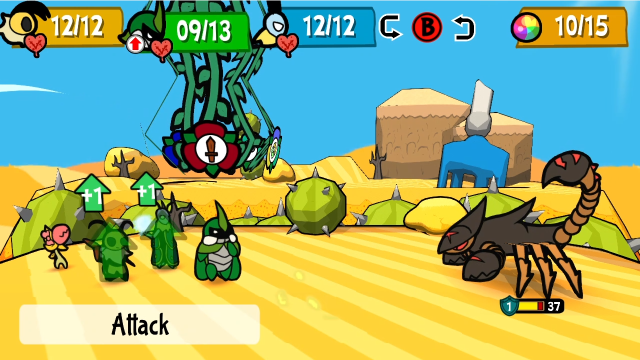 One turn in. Let's just attack for now. 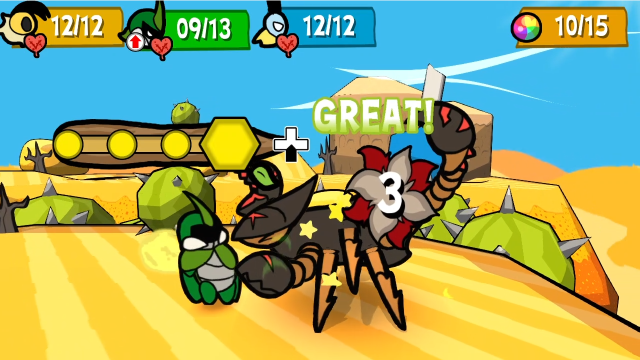 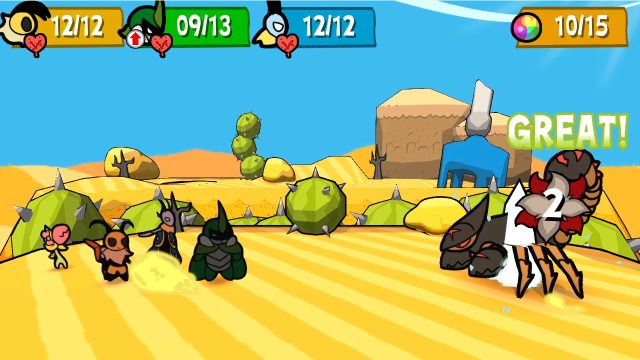 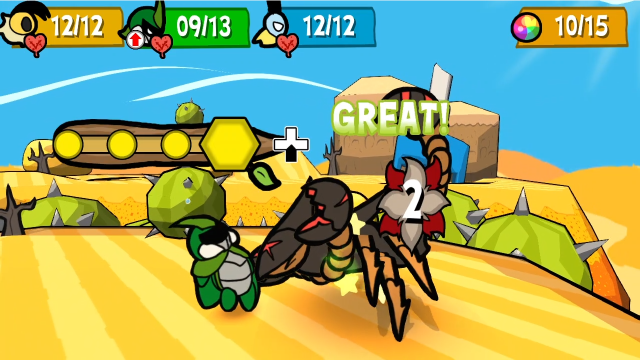 Vi relays to Kabbu to keep her charge, though. 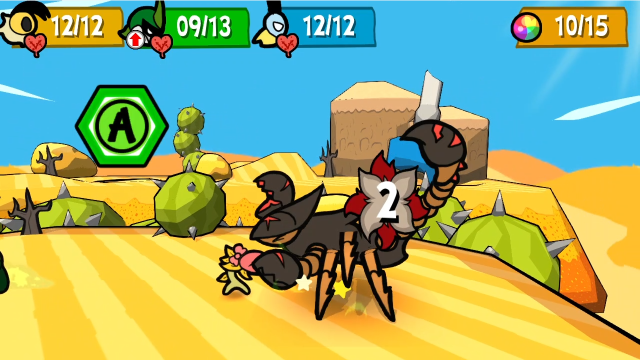 Chompy, of course, keeps chomping.  On its turn, the Dune Scorpion hurls a boulder at us! This is definitely its scariest attack, hitting the entire party for 5 base damage. This adds up very quickly, you need to stay on top of it. 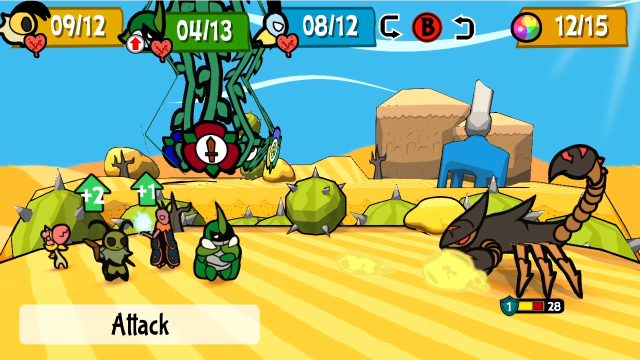 We're definitely going to need to heal at least Kabbu this turn. 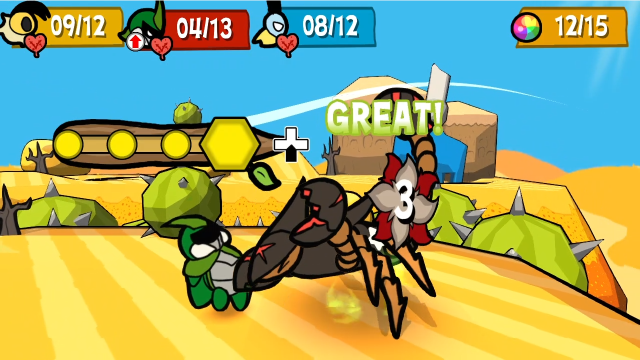 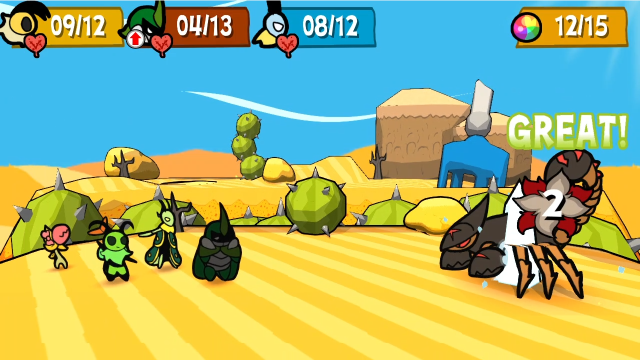 We'll have him and Leif attack normally.  While Vi pulls out Sharing Stash (and conveniently keeps her charges still). It's kind of neat she ended up getting only mushrooms this time.  Chompy does her thing.   Ouch. The boulder toss really hurts, especially when you get it multiple turns in a row. Good thing we healed.  So, remember when I said not to take this boss too lightly? I'm about to do that. If we got aggressive (like, say, with Hurricane Toss), we could finish it off this turn, but we're only three turns in and I wanted to let it show us a bit more of what it could do.  So instead, Vi just attacks normally, wasting the charges.    And the others each do their part.   Here's the mistake. I should have healed again. Because I didn't, Kabbu was low enough that the boulder did him in.  This isn't looking great. Still, we're not in that bad a position, and Vi and Leif should be able to handle it from here.    We'll just keep attacking. Once again, more aggressive play could have ended things this turn, but I didn't quite want to.  There we go. Here's the Dune Scorpion's last remaining attack - when it goes into melee and raises both pincers instead of one, it's going for its tail attack. This does 4 base damage, and randomly causes either sleep or poison if it isn't blocked.  Now there's no point messing around any further.  Leif finishes it off with Frigid Coffin.   It also gives us exactly the amount of EXP we need to reach Rank 18. Convenient!  We get more MP. There's no special bonus at this rank. Dune Scorpion is a very straightforward boss, which leaves it feeling a bit anticlimactic to me; even if you weren't doing the optional content, it comes after Astotheles, who has one of the more interesting gimmicks. Still, as we saw here, it's a fight worth taking seriously: it can put out a lot of damage very quickly, especially with the boulder attack (its damage output is very similar to Tidal Wyrm, in fact). 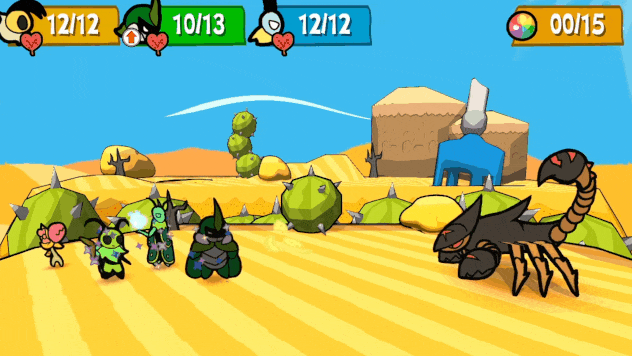 Here's the one thing we didn't see: the claw swipe hitting twice. Both hits do the same 4 damage. The second hit seems to be fairly rare, though; I don't know the exact odds, but I'd guess it's significantly lower than 50%. 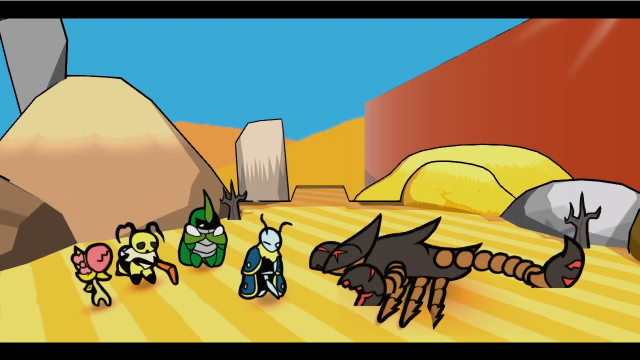 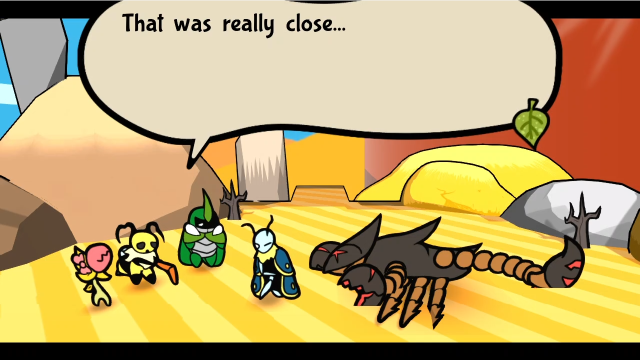 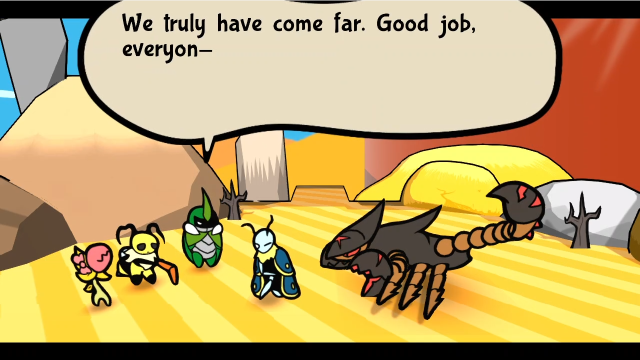 13 - It's Getting Scary! 13 - It's Getting Scary!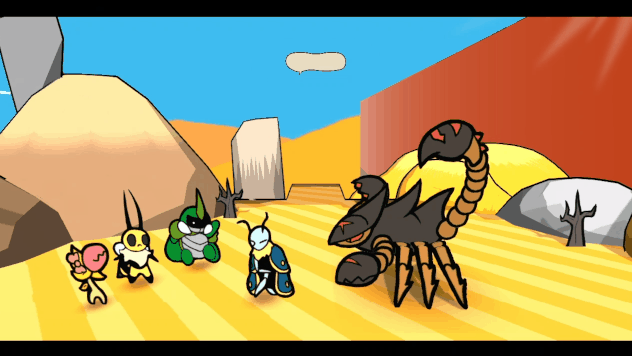 The music cuts out as soon as the stinger hits Leif. I guess it wasn't dead after all, but... what's going on here? 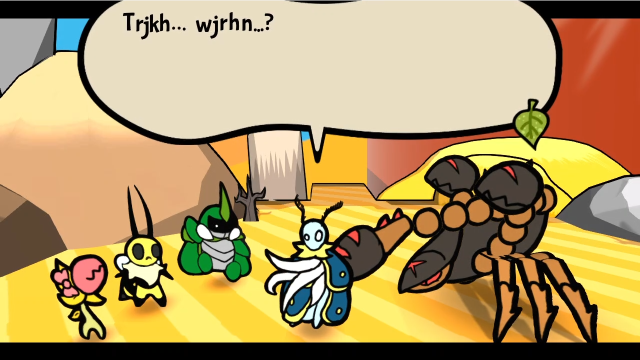 W-What the... What is this!? Leif!? ...Curses, what do we- W-What the... What is this!? Leif!? ...Curses, what do we-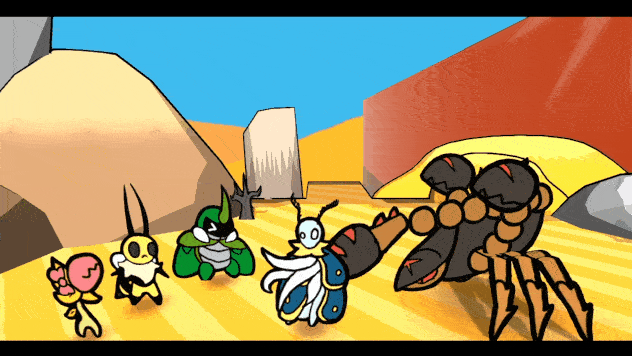 Zasp ex machina! (Were you expecting that?) He appears out of nowhere and finishes off the scorpion. 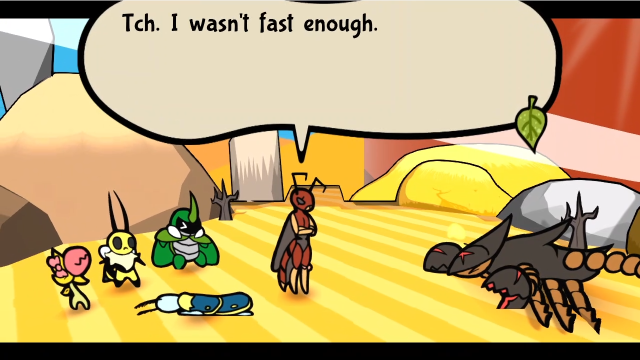 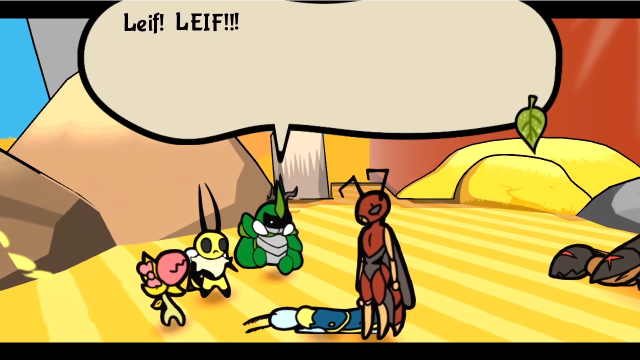  There's no time! Do as I say, if you value your friend's life! There's no time! Do as I say, if you value your friend's life!Everything fades to black, while they attempt to take Leif to safety. 048 - The Ones Who... (Recommended listening!) 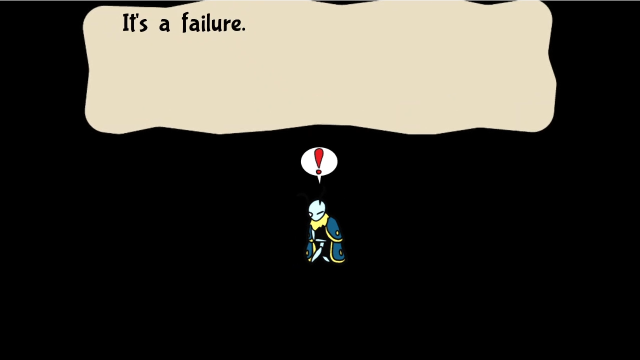  Yet another one... Disgusting. If it keeps up like this, our research... Yet another one... Disgusting. If it keeps up like this, our research...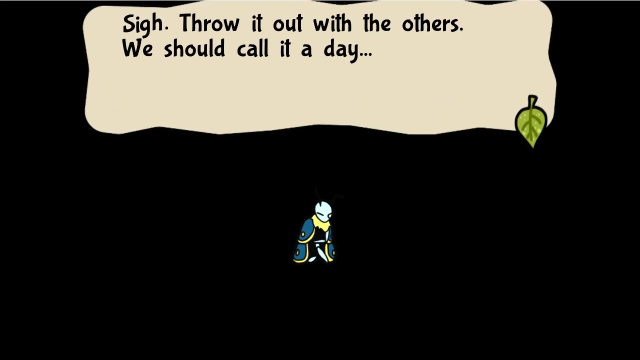 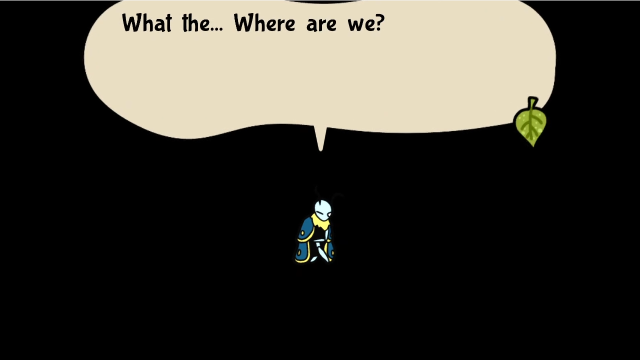  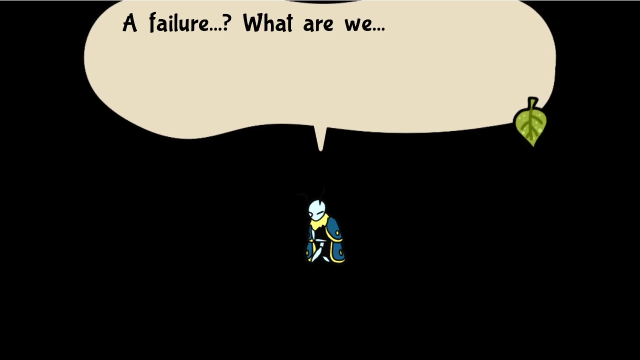  The screen fades to white (and the music goes silent again), while Leif ponders these voices. Is this a memory...? But if it is, just what is he remembering?    Oi. Knock it off already! He lives. I made sure to treat the wound. Just what were those things coming out of him...? Oi. Knock it off already! He lives. I made sure to treat the wound. Just what were those things coming out of him...? I... I can't lose someone again! Then stop shaking him! He'll come around. I... I can't lose someone again! Then stop shaking him! He'll come around. Leif! Goodness gracious, you had me in the most deep of panics! No kidding, he's been shouting for hours... U-Um, but I was really worried too! ...Zasp? W-Where are we? What happened? You let your guard down like a fool, and got shanked. Zasp jumped in and broke that scorpion's face! Don't thank me. I had a debt to settle. Those things inside us... What kind of abomination are we...? ... Leif! Goodness gracious, you had me in the most deep of panics! No kidding, he's been shouting for hours... U-Um, but I was really worried too! ...Zasp? W-Where are we? What happened? You let your guard down like a fool, and got shanked. Zasp jumped in and broke that scorpion's face! Don't thank me. I had a debt to settle. Those things inside us... What kind of abomination are we...? ...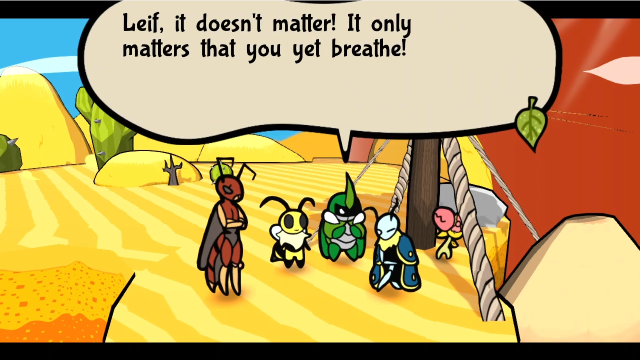 I've lost so many... I truly feared we would lose you. So it doesn't matter. Y-Yeah! The doctor said you had weird stuff in you, anyways! Vi, Kabbu... How touching... I guess my work here is done. Zasp, even with what you said... Thank you. It's hard to find good friends. You'd best go get that artifact, before Mothiva ends her vacation. I've lost so many... I truly feared we would lose you. So it doesn't matter. Y-Yeah! The doctor said you had weird stuff in you, anyways! Vi, Kabbu... How touching... I guess my work here is done. Zasp, even with what you said... Thank you. It's hard to find good friends. You'd best go get that artifact, before Mothiva ends her vacation.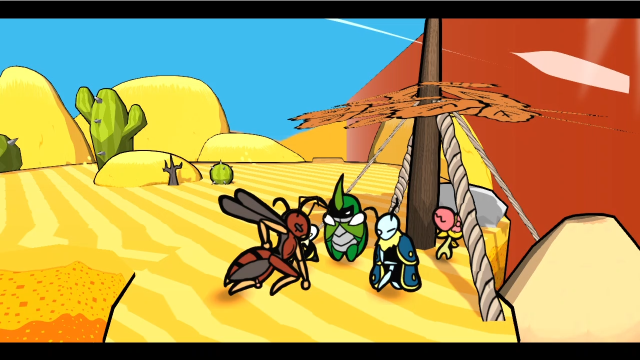  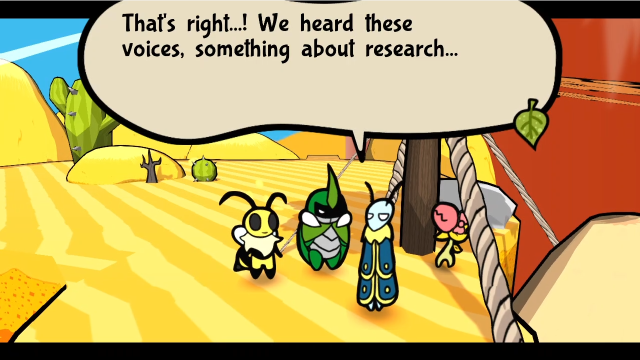 It must be connected to us. We can't stop now. What if the castle holds answers? Are you gonna be okay? It was looking super bad... It doesn't matter if Mothiva gets the artifact. We could always go rest at the inn... No. We can feel that it's important... We will go. We must go. Would you help us just a bit longer? It must be connected to us. We can't stop now. What if the castle holds answers? Are you gonna be okay? It was looking super bad... It doesn't matter if Mothiva gets the artifact. We could always go rest at the inn... No. We can feel that it's important... We will go. We must go. Would you help us just a bit longer?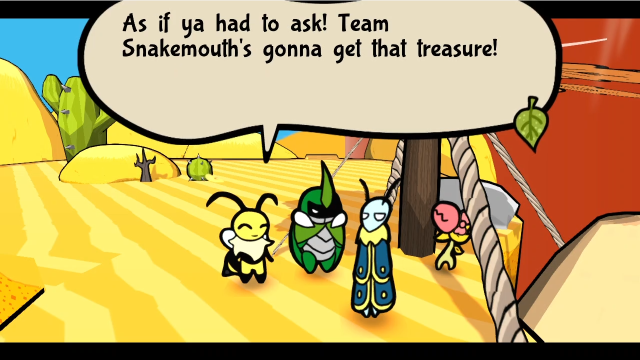 Then it is settled. Let us proceed to the Sand Castle! 36 - Lost Sands Then it is settled. Let us proceed to the Sand Castle! 36 - Lost Sands With that, we regain control. This is an excellent scene, but I don't have much to say about it. The mysteries only deepen still. I do quite enjoy how cavalier everyone is about what's happening to Leif: whatever it is, it happened, but he's still alive and we can't do anything about it for now, so we're going to move on and hopefully learn more later.  This location might not immediately look familiar, given the position we start in, but if we head north...  We're right back to the screen where we fought the scorpion. Venus is gone already, though; she was just here to make sure we could heal before facing it.  Now we can head north without interruption. 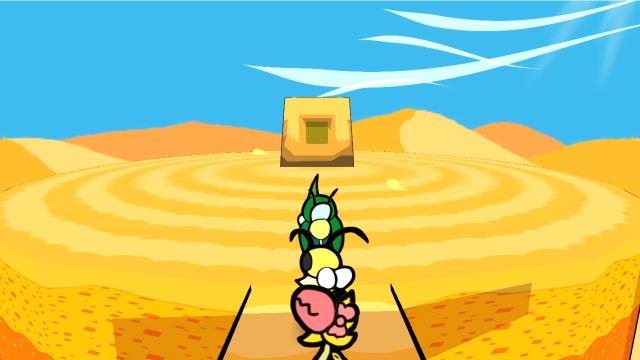 And here we are! 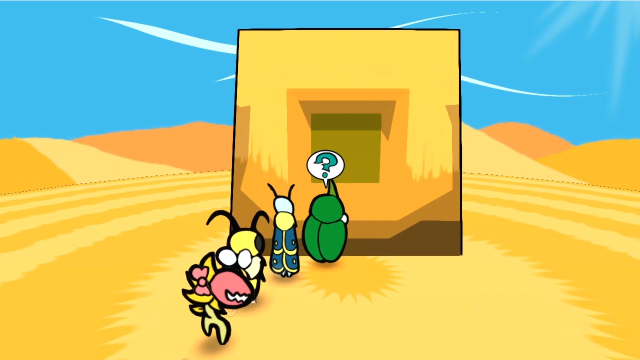 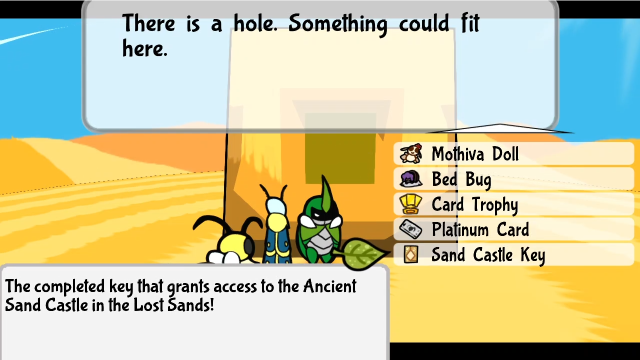 Let's put the key in. 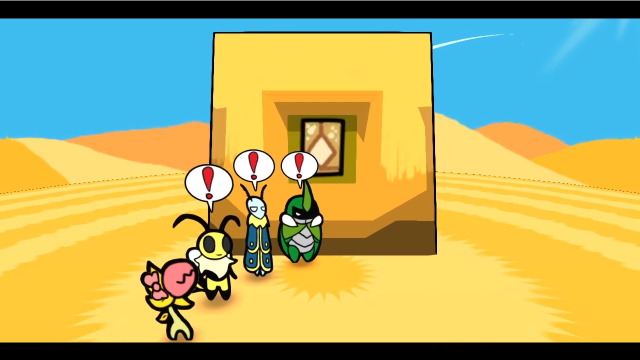 The ground starts shaking...  Click me for video! 49 - Rise from the Sands Click me for video! 49 - Rise from the Sands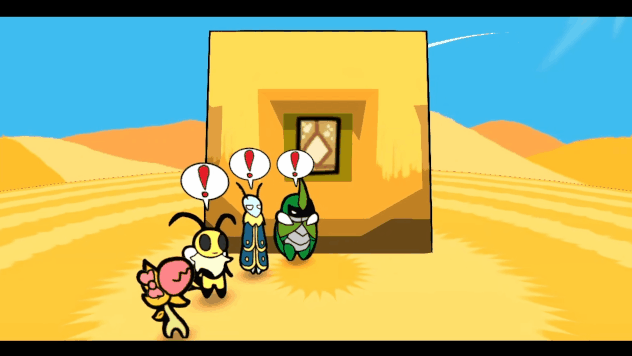 The pillar sinks into the sand...  Which starts flowing and then rises up...  Then begins to fall away... 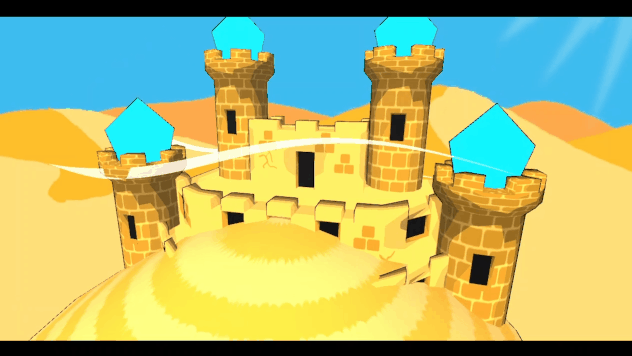 Exposing the Sand Castle at last. (This scene looks fine in the GIFs, but really deserves to be seen in video form along with the music. Anyone who's played Paper Mario 64 will immediately be taken back to Dry Dry Ruins, it's very clear this is an homage to it.)  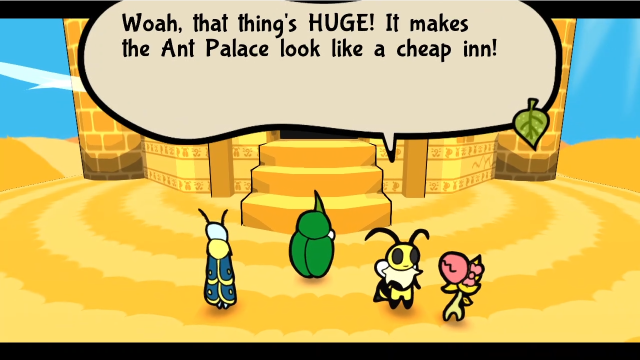 Truly, I have never seen such an impressive structure. I wonder if it'd make the Queen somewhat jealous? Truly, I have never seen such an impressive structure. I wonder if it'd make the Queen somewhat jealous?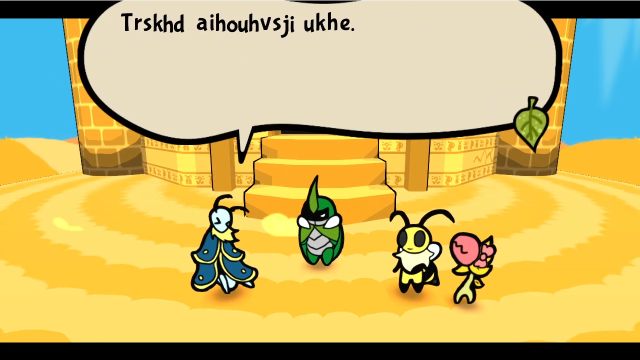 So the artifact must be here, then... Will you truly be okay, Leif? We really can just go back if you feel bad, y'know? Thank you for your concern, but we'll manage. Be ready, though. This doesn't look like an easy place to explore. So the artifact must be here, then... Will you truly be okay, Leif? We really can just go back if you feel bad, y'know? Thank you for your concern, but we'll manage. Be ready, though. This doesn't look like an easy place to explore. We're back in control again. We could head back to Artis to get our Hard Mode reward for beating the Dune Scorpion (and if you're playing along, you might want to, it's a good one), but I don't want to break the momentum here. The Sand Castle is our big dungeon for the chapter, and it's certainly been long enough in coming! (because I've been doing all the side content, shh) Before we go in, though, let's have a quick look at the complete, unredacted Lost Sands map. Stream Mountain and the Sand Castle were our last unexplored locations, we've now seen the entire area. 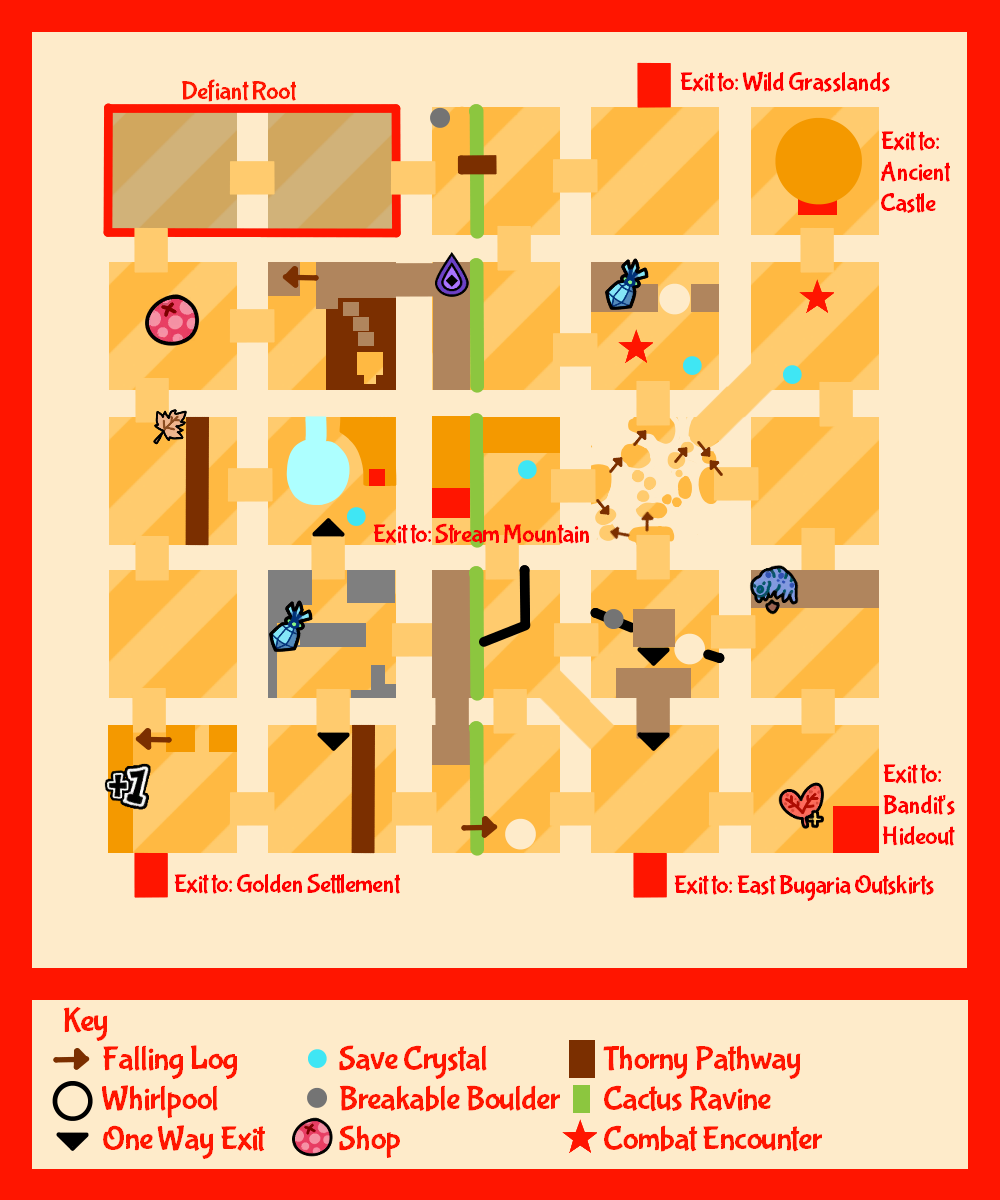 Also, now that the castle's emerged, there's a new banter here. This looks like a daunting climb... Getting second thoughts? Never ever! Besides, we promised to help you out! That's right. Not even the tallest mountain will deter me! Heh...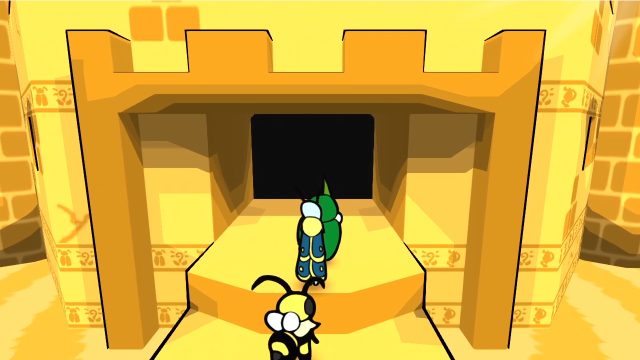 In we go. 50 - Lost Castle of Ancient Worship (Recommended listening!)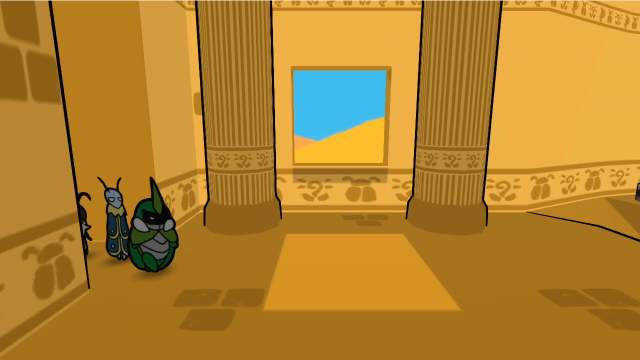 This place is huge! We'll get our bearings in a moment, but first, let's see what our party think. This place reeks of ice magic. I got used to only you being able to do it, Leif! I don't like the cold at all... This is no ordinary castle, evidently. Let's make sure not to be caught off guard once more. No kidding.Poor Leif. You don't have to rub it in, Kabbu. 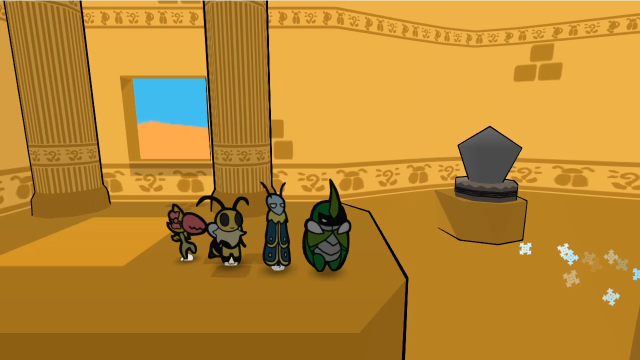 What's going on here? There's a big pit in front of us which we can't cross, but those sparkles and the big crystal switch are certainly suggestive... 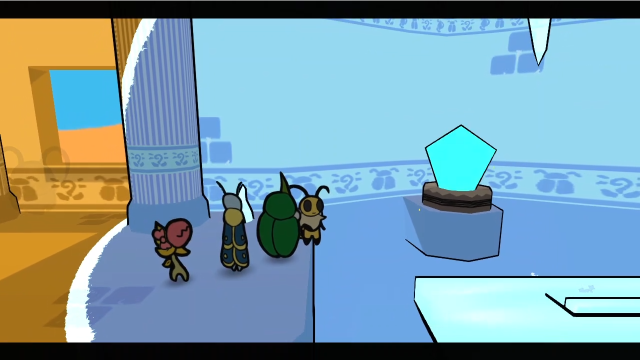 Hitting the switch with Vi's Beemerang turns it on, and it releases a wave of ice magic in a big circle around it. Suddenly, the sparkles are replaced by an icy platform! 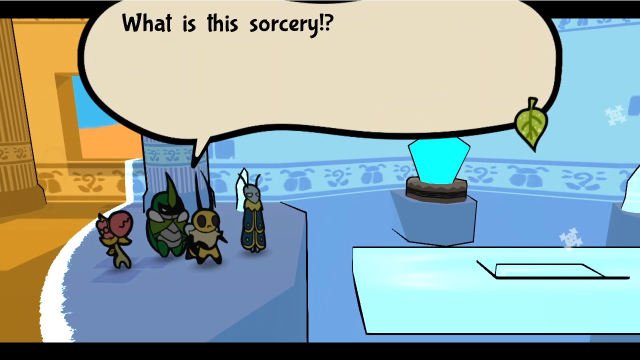 Ice magic. Thought you'd seen it before. It's not the same! Ice magic is your thing! True. Could this place be related to us? Only one way to find out! Time to explore! Let's be careful, please. We've let our guard down too many times during this mission... Ice magic. Thought you'd seen it before. It's not the same! Ice magic is your thing! True. Could this place be related to us? Only one way to find out! Time to explore! Let's be careful, please. We've let our guard down too many times during this mission... After that conversation, we regain control.  And with the crystal powering it, we can cross the newly formed ice bridge.  There's a new enemy waiting for us on the other side, too!   This thing looks very strange. Let's find out what it is?  Its ice version is weak to my horn! We must make sure to take note of which attacks are causing more damage! Its ice version is weak to my horn! We must make sure to take note of which attacks are causing more damage!Kabbu's commentary is quite informative here. Krawlers have different forms, depending on the circumstances when you encounter them. This one's in the sand form, but if we'd touched it inside the cold zone, it'd have been in the ice form instead. The ice form is also one of a handful of enemies that takes weakness damage from Kabbu's horn attacks, and in fact this is the first time we've encountered a weakness to something other than ice.  One of these by itself isn't terribly scary.  Kabbu attacks normally for now.  The sand form is weak to ice.  Even that weakness isn't enough for Leif to get through with doubled exhaustion, though. (I thought it was neat to show you still get the "SUPER!" message for weakness damage even when it deals zero.)   Vi and Chompy struggle a bit with this thing's defence.  On its turn, the Krawler attacks by charging at Kabbu. This attack is the same regardless of whether it's in sand or ice form, dealing 4 base damage.  It's nearly dead.  We finish it off.  We're a bit overlevelled, so we're only getting pity EXP from the enemies in here. Such is the consequence of completionism. 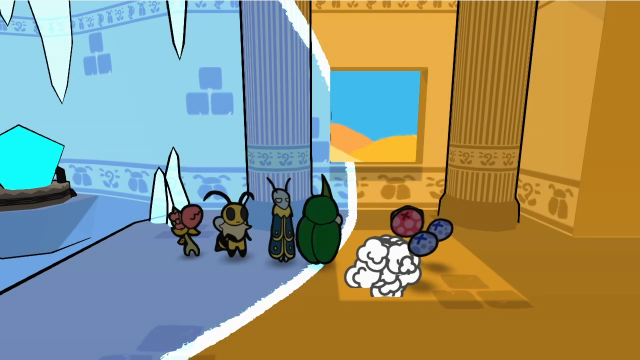 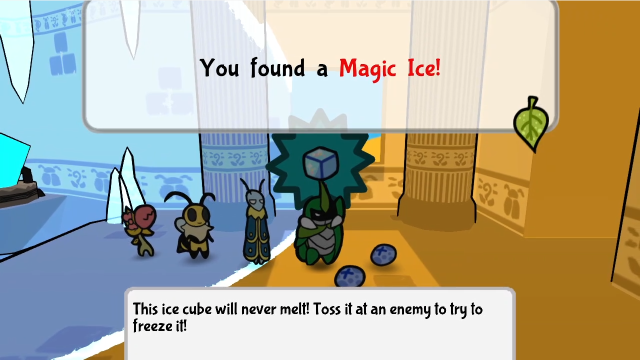 It leaves behind a new item, too. "This refreshing treat's just a bit TOO cold! Restores 4 HP to an ally and 4 TP. It may cause brain freeze!" Inflicts freeze (2 turns) Sell: 5 berries Made by cooking a "Salad made by freezing down leaves. Restores 8 HP to an ally, but it may cause brain freeze!" Inflicts freeze (2 turns) Sell: 8 berries Made by combining  "This creamy treat is SO amazing it's worth risking a brain freeze! Restores 10 TP." Inflicts freeze (2 turns) Sell: 7 berries Made by combining "This honey flavored ice cream's a real guilty pleasure! Restores 5 HP and 10 TP. It may cause brain freeze!" Inflicts freeze (2 turns) Sell: 9 berries Made by combining  "A special pie that is best served cold. Restores 6 HP to an ally and 10 TP, but it may cause brain freeze!" Inflicts freeze (2 turns) Sell: 9 berries Made by combining "A bomb colder than cold! Toss it on enemies to freeze them!" Causes 5 damage to the targeted enemy Causes 3 damage to other enemies in blast radius Inflicts freeze (1 turn) on enemies hit Sell: 15 berries Made by combining There is a definite theme to these items. (Also, hey, we can finally make that Honey Ice Cream they were selling in the factory gift shop. It's also possible to see Frost Pie before this, it's one of the food items droppable by Chomper Brutes and Belostoss.) It's hard to justify using these unless you're equipping Freeze Resistance medals to prevent being frozen (or, I guess, using a strategy that requires being frozen, but we don't know of any reason to do that yet). Honey Ice Cream and Frost Pie are pretty strong number-wise, though, so equipping medals to use them isn't necessarily the worst idea (especially, perhaps, for players who didn't complete Crisbee's quest and can't get the doughnuts). I can't say I care for Frost Bombs very much, because Leif's skills are generally better at freezing things (Frigid Coffin pierces resistance and freezes for longer, and Icefall can be aimed more precisely than bombs for area-of-effect freezing). It's not a bad item, but I like the other bombs a lot more. In addition to these recipes, Magic Ice also has a couple of other uses. This is "the essence of frost itself" that our wizard friend was looking for, so we'll have to make sure to save one for him. And speaking of sidequests, this is another item that can be given to Eremi in Defiant Root to complete the "It's Too Hot!" quest, though it's still not considered the best solution for her. Whew. There was a lot to say about that item. 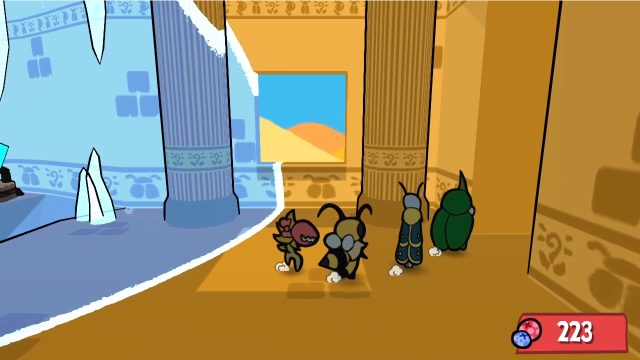 Let's take it with us and head further in. 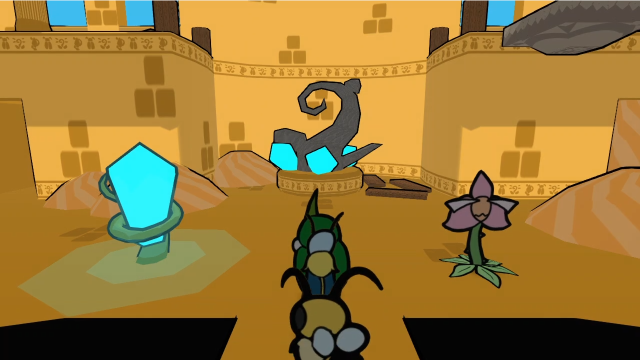 We're in some kind of central chamber now. There's a save crystal and one of Venus' buds here, definitely making it look like this is going to be a hub we revisit multiple times. This is the main room? I thought it'd be more like the Ant Palace! It doesn't look like a cozy place to live in, for sure. That statue... Is that the Everlasting Sapling? Perhaps this is a place of worship? It'd make sense if an artifact is here. It's not a castle without treasure, so let's check every corner!Intriguing. 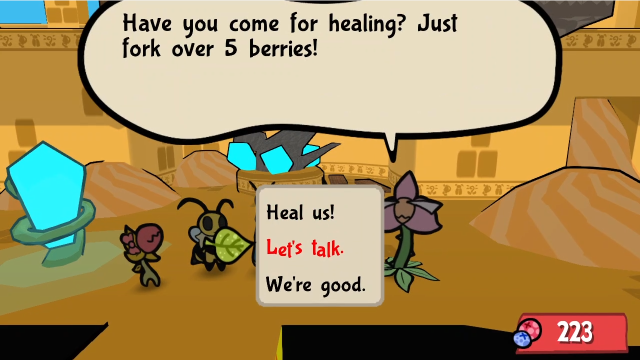 Venus offers to heal us, of course, but we don't need it. Let's see what information she has for us. 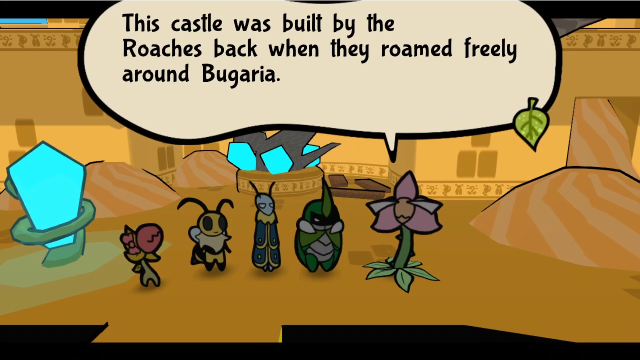  Ah, it still feels like it was yesterday when they were scurrying around the land trying to get stuff together! I tell you, the Sapling brought a lot of blessings but also curses to them... Don't make the same mistake. Ah, it still feels like it was yesterday when they were scurrying around the land trying to get stuff together! I tell you, the Sapling brought a lot of blessings but also curses to them... Don't make the same mistake.She's certainly feeling talkative this time! That's definitely interesting. How much does she remember about the Roaches? 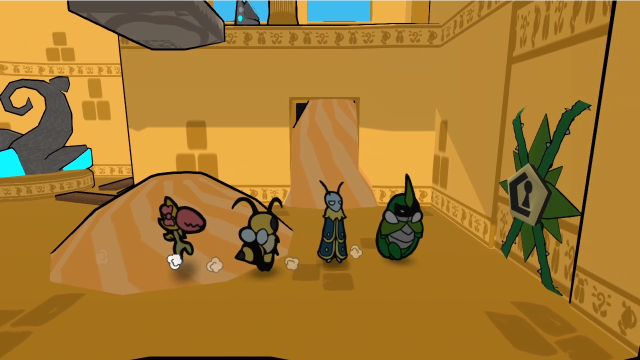 On the east side, we quickly run into a dead end. The north exit is blocked by a sandfall, and the door east is locked.  Heading west is a bit more productive, there are definitely paths we can take here. First, though, we should take care of this enemy. 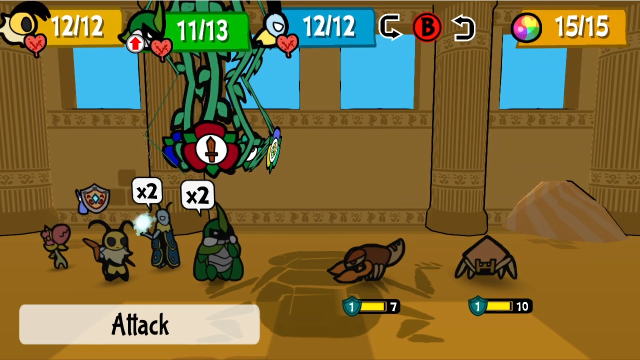 It's a Psicorp and a Krawler.  This battle wasn't interesting enough to show in full, but we do get to see the Krawler's other attack! In sand form, it can fire this electric laser. Its base damage is 3, and can inflict Numb if not blocked.  Still only pity EXP.  We have two doors to choose between. Let's head west first, I suppose.  What's this room? That's a new kind of ice-generating crystal... That's one big ice cube! It's more of a rectangular cuboid, Vi. The heck!? It seems quite easy to push... I just wish I could ride it as it slid by!Looks like we're going to have a sliding ice block puzzle in here. Lovely. Before we try to solve it, though, let's explore a bit more and get our bearings.  That switch to the north looks like where we need the ice block to ultimately end up. 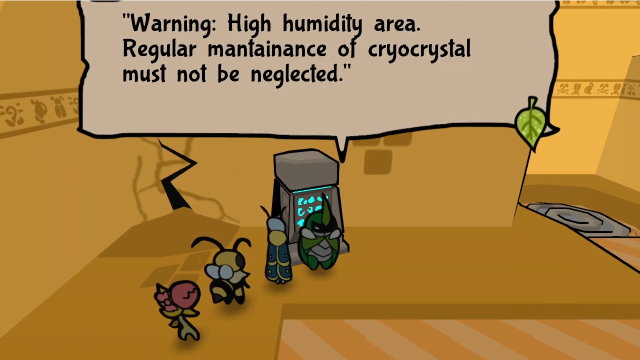 There's a sign here. Of course, we should also check out the cracked wall. 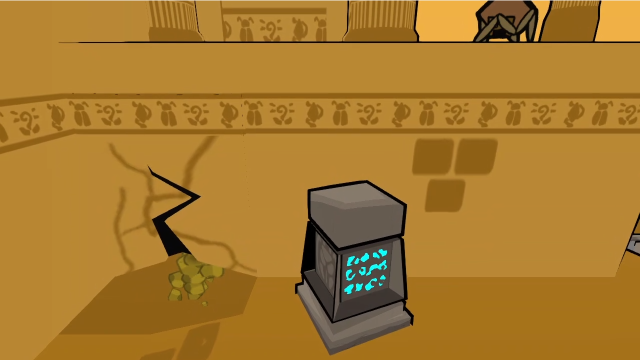 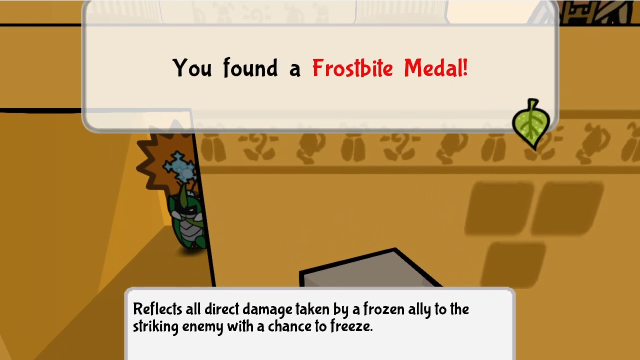 Digging allows us to go underneath into this little alcove and find the Frostbite medal! This completes the set of medals that reward us for having a bad status. 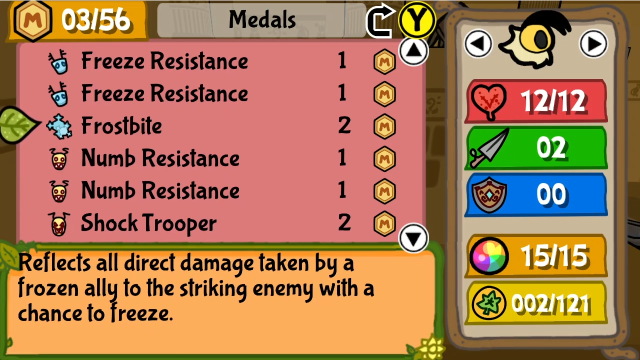 I find it difficult to think of ways to make good strategic use of this: you can have Kabbu taunt, then someone else freeze him with an item, but with those same two actions you could have had someone throw a Frost Bomb instead, or just use Leif's ice magic. I guess if you wanted to heal him and/or taunt anyway, nullifying an attack and countering is a nice bonus to have on top of it? But then, it's also only effective against enemies that make contact. The effect is powerful, but it's very situational and requires a lot of setup. I did find out in testing that it utterly shreds Golden Seedlings, though, so that's fun. The retaliation damage goes right through their defence gimmick, and it prevents the massive damage they would otherwise do to Kabbu. This medal was buffed substantially in v1.1, and the previous version was so bad I don't hesitate to call it useless. It halved damage taken instead of nullifying it, and didn't deal retaliation damage, instead only attempting to freeze the attacker. I think I got used to it being worthless and never revisited it after the buff; the new version is gimmicky, but at least it does something good. 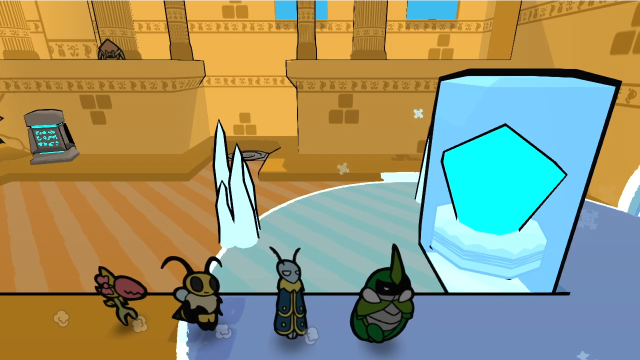 Let's take a crack at this puzzle. It might not be completely obvious why yet, but this is a puzzle best solved by more or less feeling your way through. Let's send the block left first. 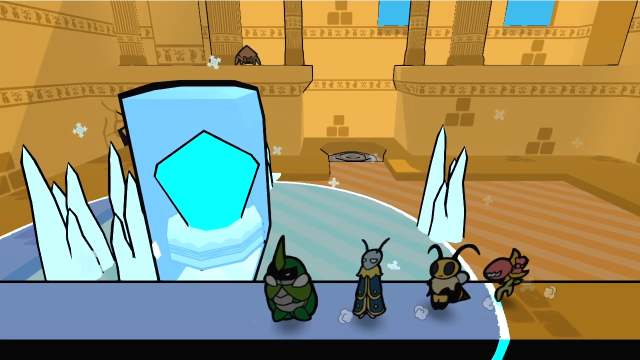 Now the gimmick becomes obvious: the ice magic field travels with the block, and in addition to making the surface icy so it slides, it causes these icicles to appear when it gets into range. This means that, for the purposes of the sliding puzzle, we can't see all the obstacles until the block is in range, and every move is something of a leap of faith. For now, let's send it up. 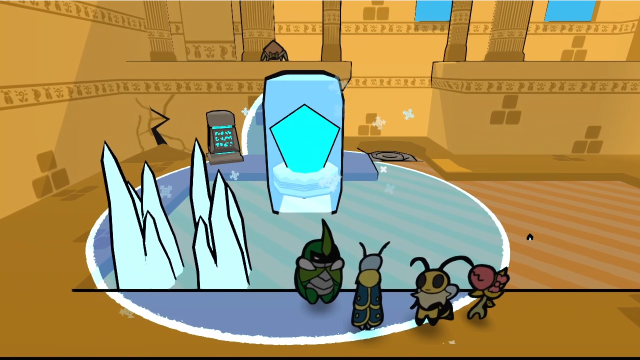 The icicle we could barely see there stops its travel. 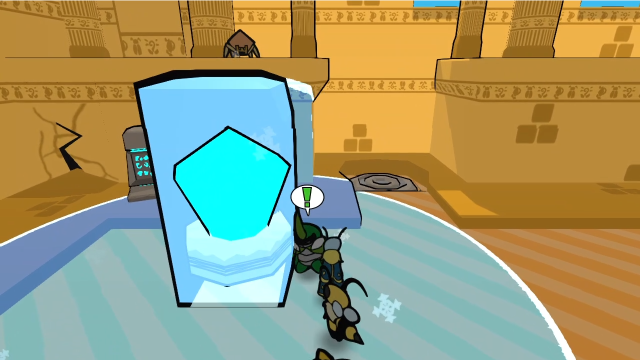 Now we send it west again...   Then down, to stop at those icicles we saw earlier.  Then east. This is the tricky bit to see, because the icicles that stop it are out of the radius while we're getting it into position. But we knew they would be there, and as such we've solved it.  All that's left to do is send it north to the switch.   Pressing the switch causes a door to open on the upper level, but there's no way to get up there from this room. We'll have to come back from elsewhere, it seems, but at least we've removed an obstacle.  There's nothing else we can do in this room for now, so let's head back to the central chamber.  Now to check out the northern door.  This room looks complicated. Let's check the banter first. Goodness. This area is truly enormous! Because the castle wasn't grandiose enough, apparently. It's really cold down here, bleh. The sun has never graced this room, it couldn't be helped. Let's watch our step, then. We'd hate to get trapped in yet another basement...I guess we're supposed to have gone down a level. That wasn't apparent from how the entrance looked up above, but I guess it makes sense. 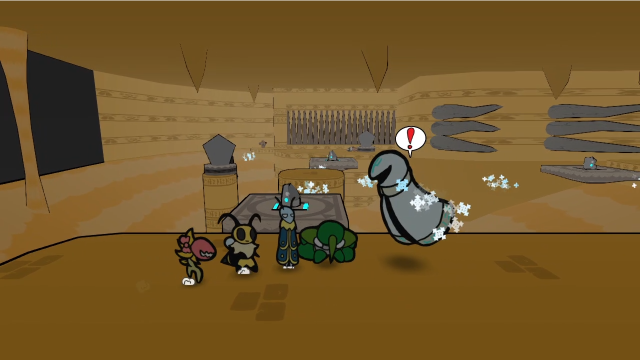 Before anything else, this wizardy thing wants a piece of us. 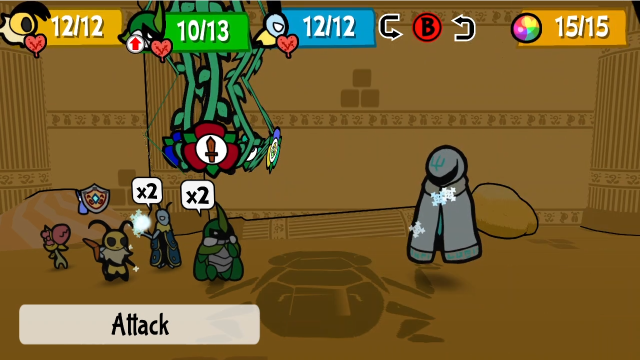 It certainly looks intimidating. Let's see what's going on with it. 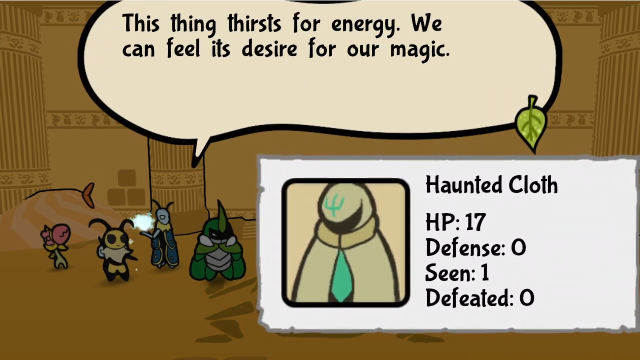 But we're not eager to share. Time to bring it down. But we're not eager to share. Time to bring it down.Spooky. 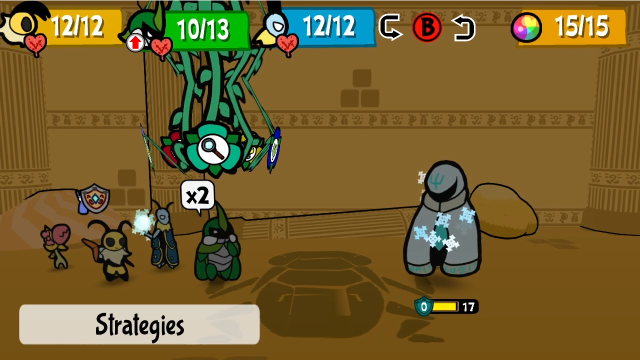 It's also fairly bulky, at 17 HP it's definitely one of the stronger enemies here.   Haunted Cloth is another enemy that's weak to Kabbu's horn attacks, though, so that 17 HP goes down a lot faster than one might otherwise think. 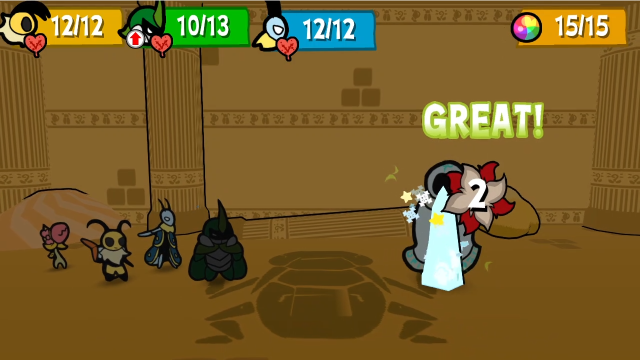 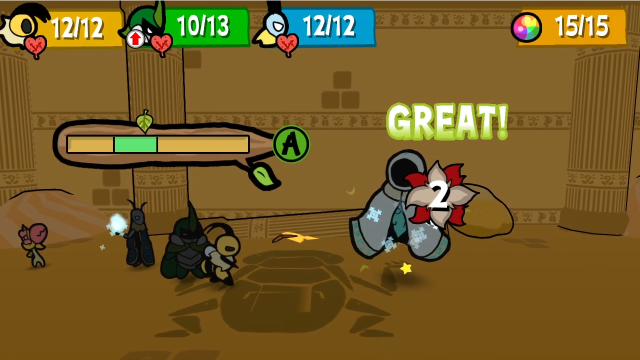 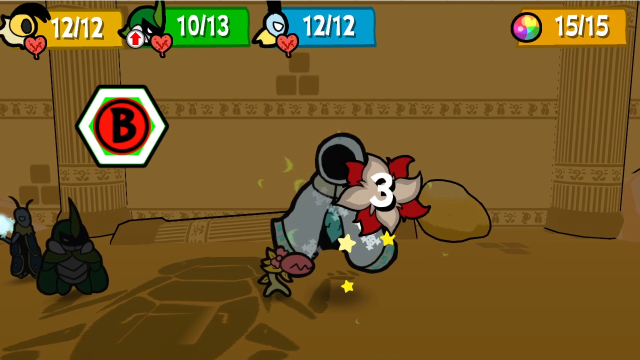 See? Almost dead already. 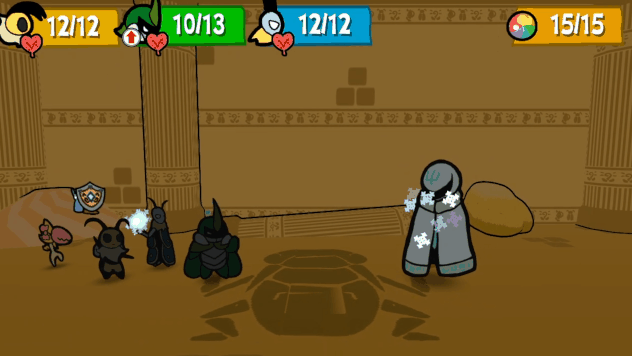 That said, these things are not to be taken lightly. It can envelop one of our bugs and try to drain their life (this normally does 1 HP per pulse, but Kabbu has Favorite One on), healing itself equal to the damage. This attack keeps going until you successfully finish the action command; if you don't fill the bar it will just keep going until the bug is out of HP. It has a few other attacks, too, but we won't see them this fight. 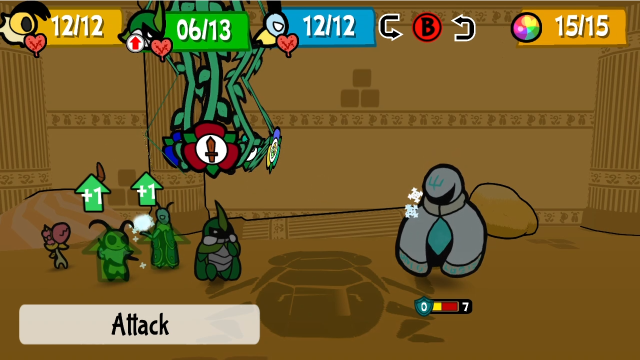 Two attacks from Kabbu finishes it right off.  These, too, are only giving us pity EXP. Oh well. 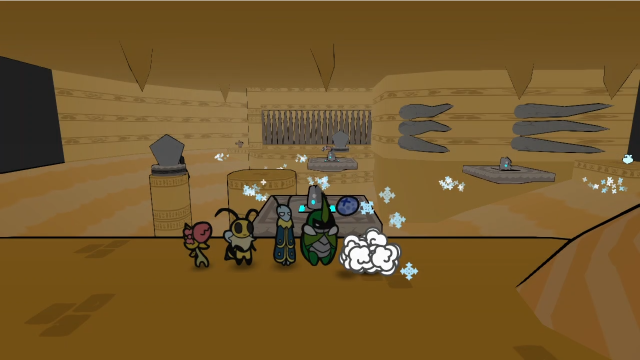 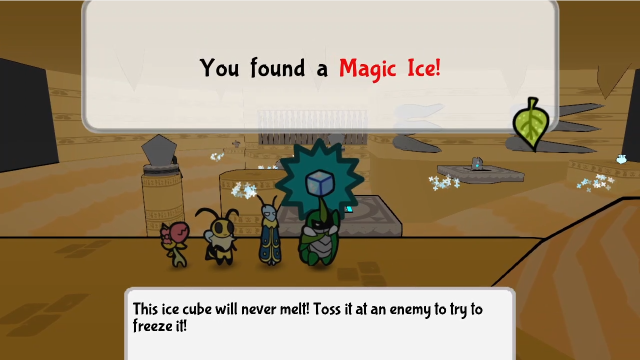 Haunted Cloths can also drop Magic Ice for us. It's a very common thing to find after battles in here. 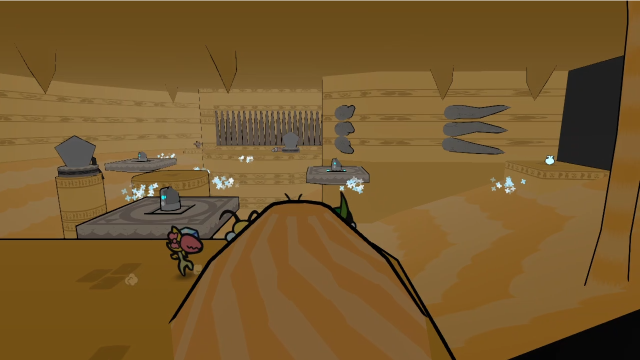 In the far corner of this room, that looks like a Crystal Berry. We'll have to figure out how to get over there. 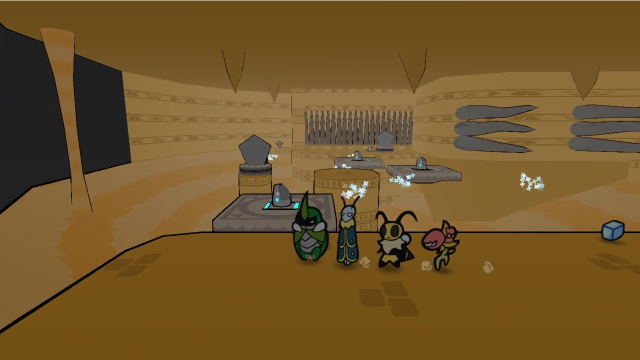 First things first, though, let's deal with the western half. 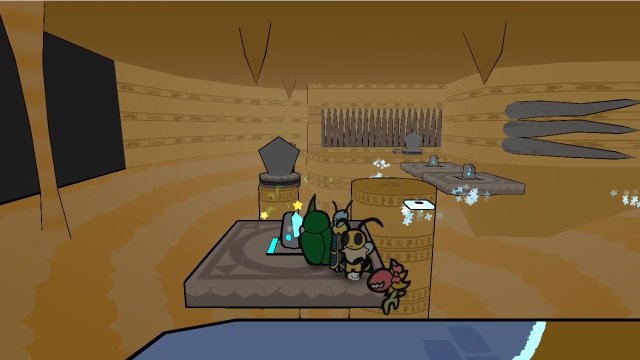 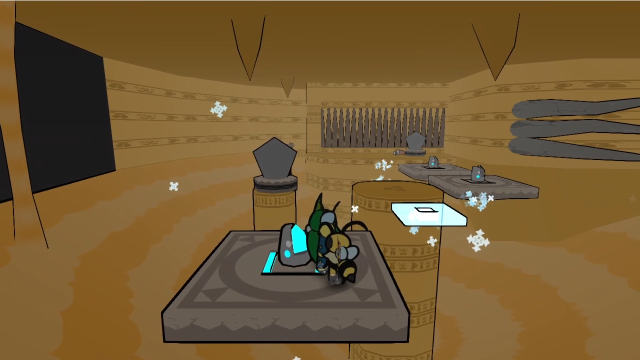 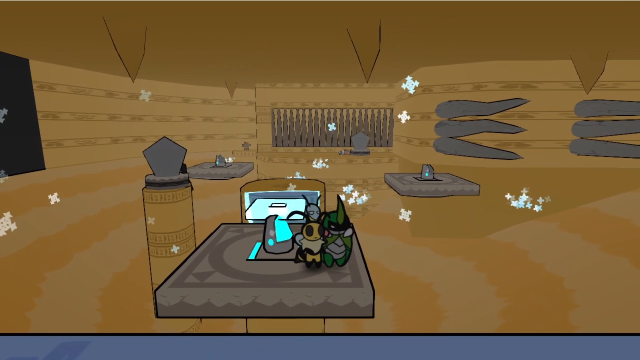 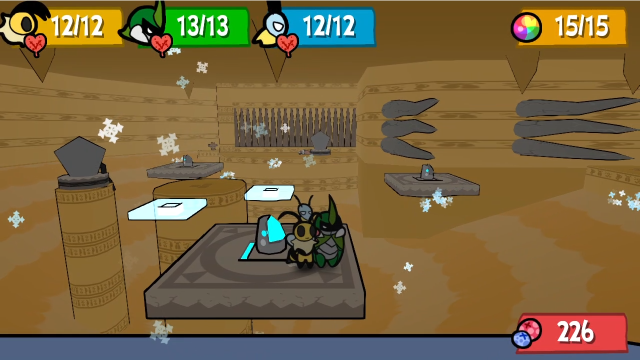 The switches on these moving platforms, despite not looking like the big crystals, also generate ice magic fields that are capable of making platforms appear. Because the platforms are moving, though, the fields move with them and the platforms can appear and disappear. 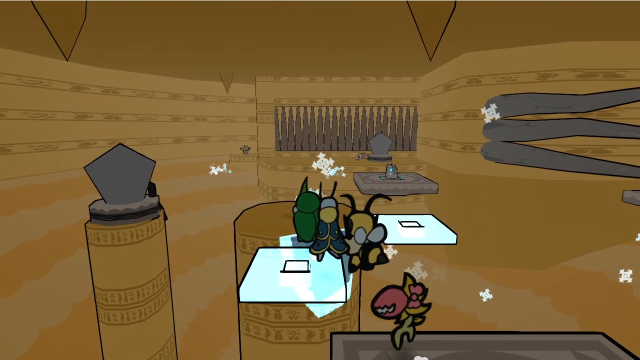 This platform's always stable, though, so it's easy to get to the pillar at least. 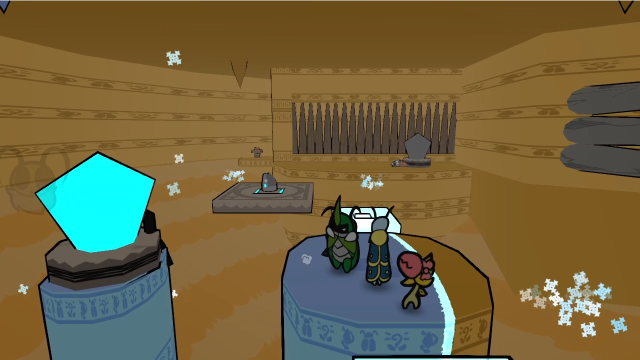 Now we hit the big crystal. This doesn't move, so we can be sure these platforms are stable; now we can get to the next moving platform and see what's going on toward the back of the room.    Now we activate the switch on this platform.  This gives us access to the rear ledge.  Let's deal with this enemy first. (Do notice the big platform to the left of us, though, the switch moved far enough back that way to make it appear.)  It's an Arrow Worm and a Krawler. We haven't seen an Arrow Worm in a while!  As proof of concept, let's freeze the Krawler while we take out the Arrow Worm.  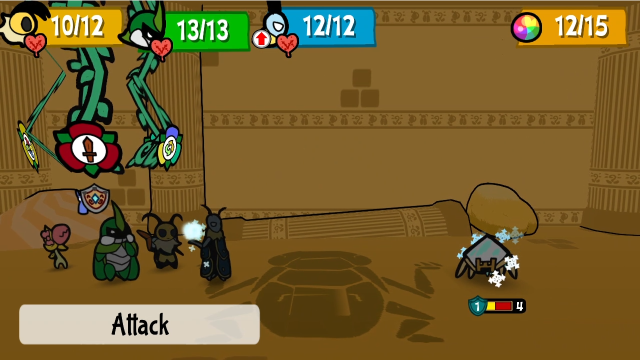 After we break the Krawler out of the ice, it's swapped to its ice form. (Do note that a damaging ice attack isn't enough to change its form, you have to successfully freeze it.) 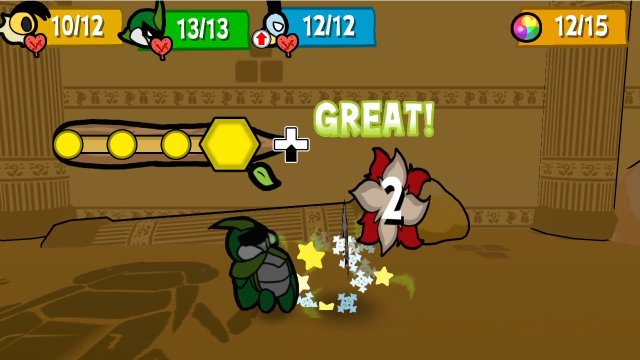 Although this is weird; seems like we may have found a bug. It appears that, while they correctly lose their ice weakness when changing from sand to ice form mid-battle, they don't gain the weakness to Kabbu's horn. They do have the horn weakness if they begin the battle in ice form. How odd. 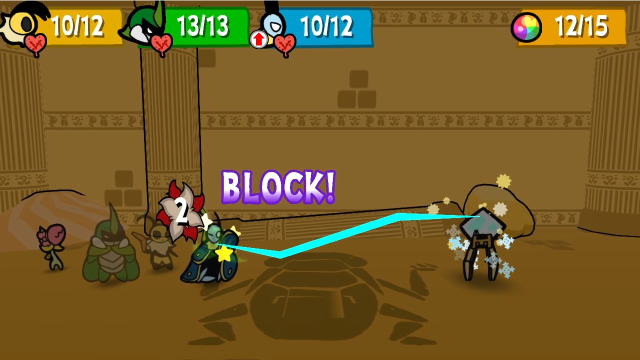 When in ice form, instead of the electric beam, they instead have an ice beam that freezes if not blocked. It's otherwise the same attack.  Pity EXP.  Now, what do we do?  We can try hitting this switch...  But it's a false lead. It doesn't reach far enough to enable the far platform, and it doesn't do us any good otherwise either.  It does, at least, keep the platform up that lets us get back to this moving one. 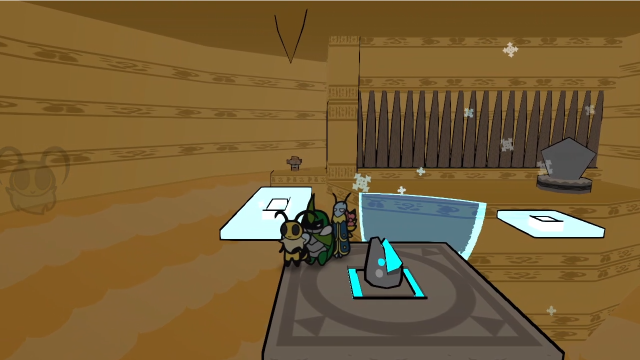 The moving platform's crystal makes this long platform appear, but it occasionally gets out of range, so the platform pops in and out of existence periodically. 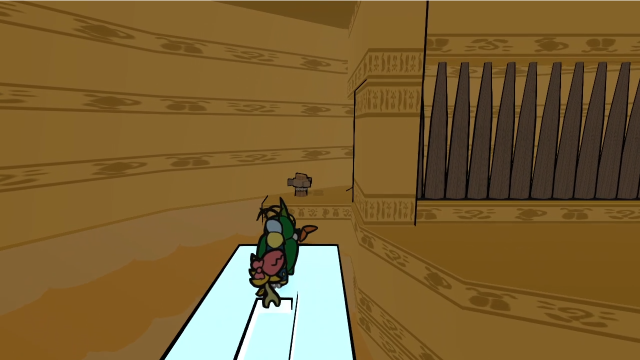 We need to use the Beemerang to turn that crank, but the timing can be a bit tricky: we have to hit it, then get to a safer platform (so we don't fall down the pit) while keeping the Beemerang spinning. 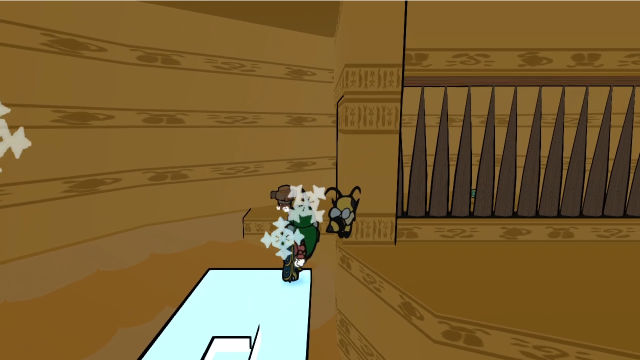 Conveniently, the corner is close enough to this ledge that we can just jump across here. You can see the spikes starting to lower as the crank turns. 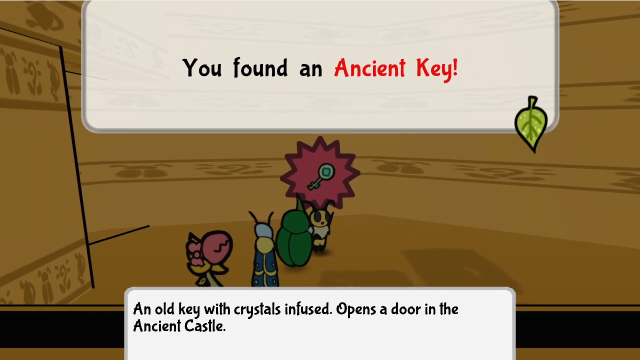 In the cell, we find this key. We're going to need that to progress.  As soon as we cross back to this side, the spikes start going back up. If you don't cross quickly enough they'll raise again, but there's a gap in the left wall of the cell that gives access to the crank, so you can lower them again without getting stuck.  Now, before we leave this room, let's get that Crystal Berry. 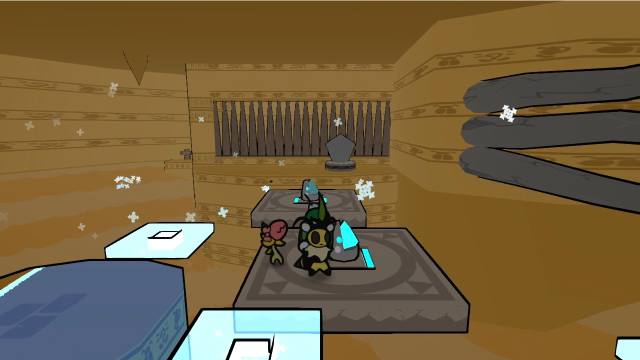 This platform has been moving back and forth across the eastern half of the room.  The spikes coming out of the wall are low enough we can't go under them, but the ice platform should help. 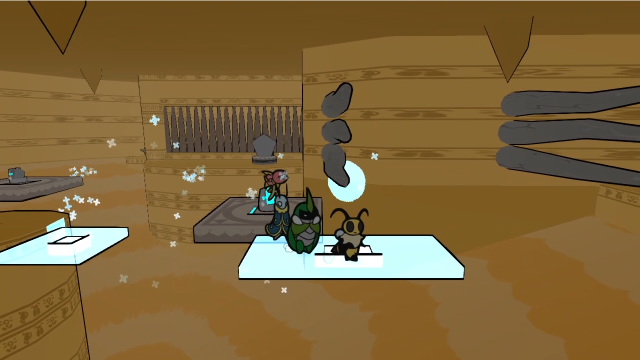 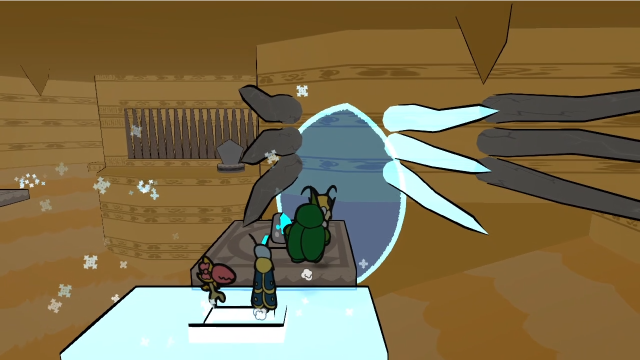 We have to get back on the moving platform before it gets out of range and the ice disappears, but... those ice spikes are going to be a problem. 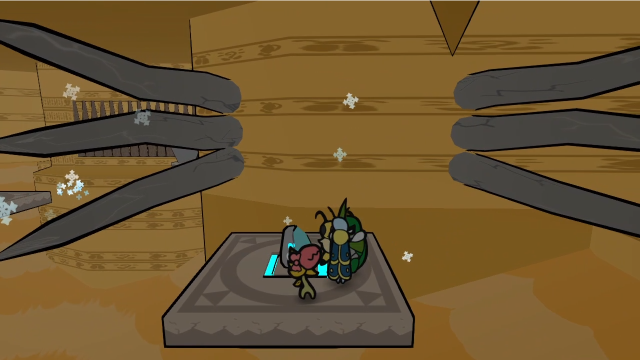 We have to disable the switch to make them disappear. 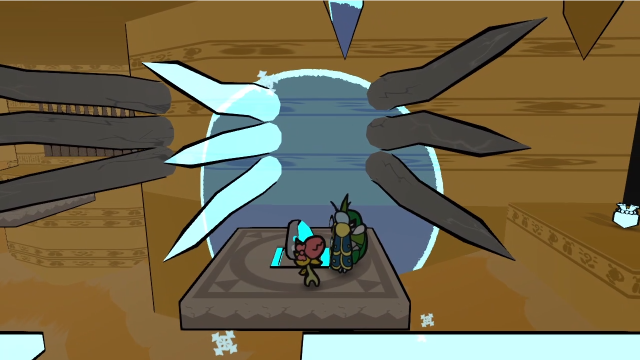 Then immediately enable it again, to get the next ice platform so we can get around the second set of spikes. 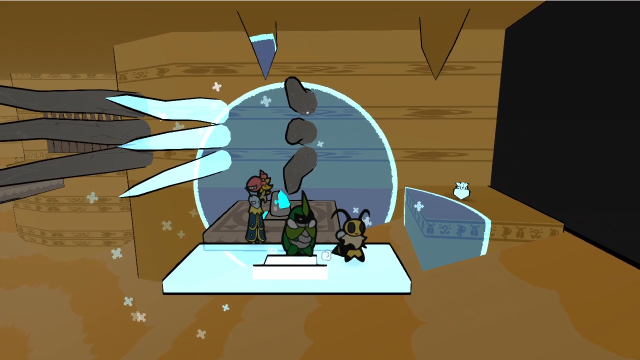 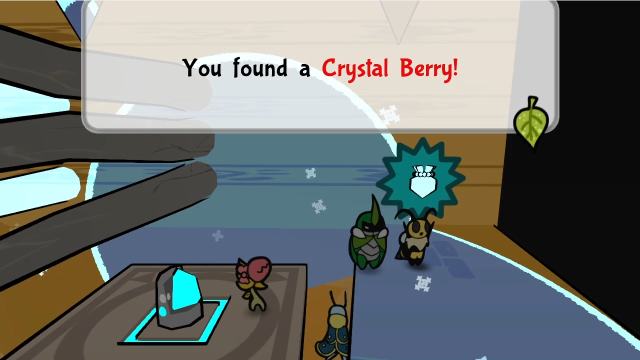 There we go! That was fun. 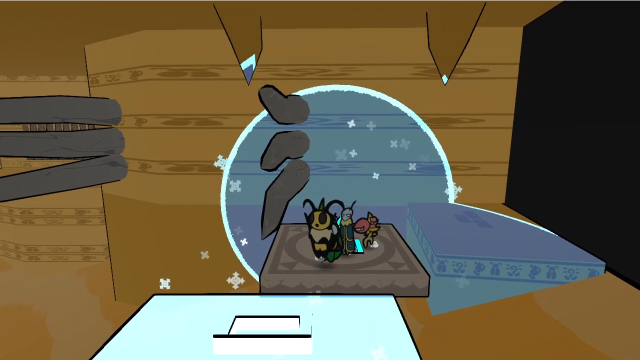 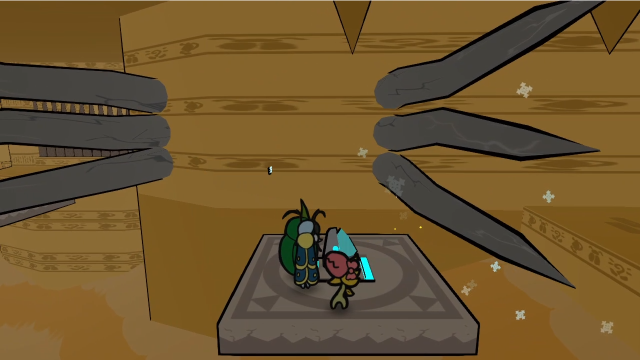  We repeat the process in reverse to make our way back.   We've done everything we can in this room; let's get out of here.  This seems like a good place to wrap things up for now, since we're back at the central save crystal. Next time, we'll use the key we found to open the path east, and keep exploring the Sand Castle! I'll see you then. Explopyro fucked around with this message at 20:00 on Oct 9, 2021 |
|
#
?
Oct 4, 2021 04:56
|
|
|

|
| # ? Apr 26, 2024 12:58 |
|
|
I've recently played through and finished The Legend of Zelda: Skyward Sword, and am now realizing the way these ice crystals work is very similar to the Timeshift Stones in that game. It's fun how different puzzle philosophies can end up sharing blood!
|
|
#
?
Oct 4, 2021 06:04
|
|