


|
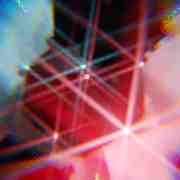
fart Simpson you nailed the colours on those stars! Hidden Dwelling
|
 #
?
Nov 20, 2022 01:34
#
?
Nov 20, 2022 01:34
|
|

|

|
| # ? Apr 19, 2024 23:20 |
|
|
toiletbrush posted:fart Simpson you nailed the colours on those stars! reminds me of enders game or three body problem or any number of sci fis with a hidden asteroid base
|
|
#
?
Nov 20, 2022 11:53
|
|


|
hidden dwelling
|
|
#
?
Nov 20, 2022 16:50
|
|
|
Forgotten Robots Impossible Pathway 
|
|
#
?
Nov 20, 2022 18:12
|
|

|
Komojo posted:Forgotten Robots Fantastic work!
|
|
#
?
Nov 20, 2022 18:33
|
|


|
Yeah, those are great, good job! How did you do the tracks? Fart Simpson how the heck did you get geometry all gnarled like that? Looks sick. Also I'm trying to improve my asteroid but no matter what I do it always looks like a little thunderbirds model...is there a trick to making stuff look big? (asking for a friend etc lol)
|
|
#
?
Nov 20, 2022 19:50
|
|
|
toiletbrush posted:Yeah, those are great, good job! How did you do the tracks? yeah the trick is long focal distance on your camera
|
|
#
?
Nov 21, 2022 00:00
|
|

|
i think my hidden dwelling was a little too dark and needed some highlights. so ive touched it up a bit
|
|
#
?
Nov 21, 2022 01:06
|
|
|
toiletbrush posted:Yeah, those are great, good job! How did you do the tracks? blend file is here: https://mega.nz/file/9IxDxBYC#ybU0H-SsellfNFJCsuv9dy6KQ4Puqnak6MbyktSV2CE but basically to get that look, i just used a noise texture with low scale to displace everything along the normals, but specifically didn't displace things pointing "up" as much, the idea being that a walked path should be smoother. then i layered on another displacement with higher scale for the fine details using the same trick. i wanted to make it look like the walls had been scratched and dug out, but to get that look i ended up needing a lot more geometry and this was already like 10 million vertices lol  the other thing i did was the walls themselves were made as a hexagon (curve circle with 6 points). but i scaled out the hexagon to make it wider and then used more distortion on the base shape of the hexagon profile ot make it feel more lopsided and uneven. this actually worked great and everything looked way better after i did this 
|
|
#
?
Nov 21, 2022 01:15
|
|
|
Komojo posted:Forgotten Robots man those robots are awesome. really nice composition and lighting too
|
|
#
?
Nov 21, 2022 01:42
|
|
|
Jenny Agutter posted:yeah the trick is long focal distance on your camera i watched this video a long time ago and it made sense https://www.youtube.com/watch?v=cFXO-82Eodo
|
|
#
?
Nov 21, 2022 02:04
|
|
|
Futuristic Garden done.  I don't think I can get these into legible screenshots anymore. Started with a grid, deleted everything but the vertices, extruded the hell out of those at lightly randomized vectors, converted to curves, adjusted radius according to length, converted back to mesh to flesh them out. Used a boolean to cut holes in the floor. Extruded circles for the rings. The doorway is literally just a plane with an emission shader on it lol. There's nothing around the metal floor with the trees, it's just a black void. Bluemillion fucked around with this message at 04:17 on Nov 21, 2022 |
|
#
?
Nov 21, 2022 03:54
|
|

|
toiletbrush posted:Yeah, those are great, good job! How did you do the tracks? I had to search for how to recreate the curve modifier behavior in the geometry nodes. I found this solution and implemented it in my scene:  I can kind of understand what's going on there but it's pretty convoluted and it would be nice if they just had a "curve modifier" node. The input to the curve group is just a series of cubes repeated using mesh line -> instances on points.  For the curves themselves, I actually typed the coordinates in by hand:  I was challenging myself to do everything in the geometry nodes (except for the lighting.) Here's what the whole scene looked like for Forgotten Robots: 
|
|
#
?
Nov 21, 2022 06:49
|
|
|
Bluemillion posted:I don't think I can get these into legible screenshots anymore. 
|
|
#
?
Nov 21, 2022 07:10
|
|
|
Bluemillion posted:Futuristic Garden done. looks really good. btw i find it might be easier in your first step to make the grid, then just do a "mesh to points" node and then instance a curve line on each point and then realize the instances. i think working as much as possible in curveland tends to be easier idk. i like the doorway idea lol, especially for those background elements that are blown out or dark you can cheat a hell of a lot and it will still look good
|
|
#
?
Nov 21, 2022 07:15
|
|
|
Komojo posted:I had to search for how to recreate the curve modifier behavior in the geometry nodes. I found this solution and implemented it in my scene: that curve modifier thing is a neat trick. i guess the benefit over a curve modifier node is maybe that you can alter the behavior as you see fit? although yes it would be nice if it was just built in. i think theyre going to be ultimately adding a lot more nodes like this. at the recent blender conference there was a whole 45 minute talk about adding a bevel node and how it ended up being way more difficult than they thought (should be in 3.5 i think they said)
|
|
#
?
Nov 21, 2022 07:18
|
|
|
fart simpson posted:looks really good. btw i find it might be easier in your first step to make the grid, then just do a "mesh to points" node and then instance a curve line on each point and then realize the instances. i think working as much as possible in curveland tends to be easier idk. Is there an easy way to extrude a curve?
|
|
#
?
Nov 21, 2022 14:57
|
|
|
Bluemillion posted:Is there an easy way to extrude a curve? why do you need to extrude it? you just set the endpoints
|
|
#
?
Nov 21, 2022 15:04
|
|
|
ok last one. critical mistake is rendering with really low light and cranking up exposure. this needed 8096 samples with 256 light bounces in every cateogry and clamping disabled to look like this. took like an hour to render out a test frame. much better to render too bright and drop exposure lol
|
|
#
?
Nov 21, 2022 16:34
|
|
|
fart simpson posted:blend file is here: https://mega.nz/file/9IxDxBYC#ybU0H-SsellfNFJCsuv9dy6KQ4Puqnak6MbyktSV2CE btw heres some low sample noisy images but you can see the process i outlined here. this is without and of the distortion at all:  and this adds the fine detail, high scale noise along the normal:  then adding the low scale noise, but still using just the flat hexagon profile:  everything in the shape you dont see here is because of distorting the hexagon profile itself. i think distorting the profile curve had a large impact on the gnarliness
|
|
#
?
Nov 21, 2022 16:43
|
|
|
fart simpson posted:ok last one. critical mistake is rendering with really low light and cranking up exposure. this needed 8096 samples with 256 light bounces in every cateogry and clamping disabled to look like this. took like an hour to render out a test frame. much better to render too bright and drop exposure lol I like this version much better
|
|
#
?
Nov 21, 2022 16:43
|
|
|
FalseNegative posted:I like this version much better yeah i rendered the first one at midnight in a completely dark room and it seemed cool. and when i looked at it in the morning with actual light in the room i realized it was waaay too dark and today i worked on cleaning that up basically
|
|
#
?
Nov 21, 2022 16:49
|
|
|
toiletbrush posted:fart Simpson you nailed the colours on those stars! can you post the blend file for this? i want to take a look at it
|
|
#
?
Nov 21, 2022 16:55
|
|
|
Komojo posted:For the curves themselves, I actually typed the coordinates in by hand: fart simpson posted:that curve modifier thing is a neat trick. i guess the benefit over a curve modifier node is maybe that you can alter the behavior as you see fit? although yes it would be nice if it was just built in. i think theyre going to be ultimately adding a lot more nodes like this. fart simpson posted:can you post the blend file for this? i want to take a look at it Happy to effort post about it if you want an explanation toiletbrush fucked around with this message at 18:01 on Nov 21, 2022 |
|
#
?
Nov 21, 2022 17:58
|
|
|
toiletbrush posted:You might have been able to do that with a clever bit of getting points from a mesh and indexing into it - that way you can adjust where the wheels are and the tracks automatically follow. I do something similar on my asteroid file up top so I can change the shape of the asteroid and where the pipes go but everything still links together. its exactly those glitches that make it hard https://www.youtube.com/watch?v=16dpUQ57Xv8&t=2064s i hope you dont mind but i took a look at your file and tried to make it look more real to scale or something, like what you were asking about. just doing a few small changes i think gets it toward that path, you can play around with it to see if theres more you can think of it you want. basically what i did was 1. increase the exposure and contrast so the bright areas are much brighter and the shadows darker. this instantly looked more "real" to me because real space pictures are blown out and dark to an extreme 2. i put 1 more layer of fine detail noise on the asteroid to give it some little tiny shadows everywhere. i think layering noise like this can be really powerful for getting both large scale structures and also fine detail that the camera can barely pick up on. it gives a sense that theres more there if the camera was good enough to capture it all 3. added noise to the rubble too for the same reason 4. moved the camera really far back and used a long focal length with some depth of field the blurriness helps sell it because only computer renders are perfectly sharp 5. added a fog glow & dispersion effects in the compositor to make it seem just a tiny bit more like a real camera. also overlaid some noise to give it some "grain" that kind of stuff is like a starting point of where i'd look to make it look huge instead of like a toy. also had to disable the stars because the depth of field made them blurry. you could composite stars back in later i guess  file with the changes i made is here if you want to see https://mega.nz/file/dc4m2YbT#FUdnmJZqAXwNzRmK3YflIAVD-uebDJFa6zMFhmxUXE0
|
|
#
?
Nov 22, 2022 01:47
|
|
|
if i think about it more, i think you are basically almost there already you just want some harder shadows of varying sizes and some "camera imperfections". irl large scale objects tend to cast pretty hard shadows, when you look from far away. the shadows being soft and everything being in focus at the same time makes it look like a small object
|
|
#
?
Nov 22, 2022 01:53
|
|
|
i just made a simple node based inverse kinematics rig for a humanoid robot lol
|
|
#
?
Nov 22, 2022 06:30
|
|
|
looks like it�s doing a dance
|
|
#
?
Nov 22, 2022 06:45
|
|

|
fart simpson posted:its exactly those glitches that make it hard quote:i hope you dont mind but i took a look at your file and tried to make it look more real to scale or something
|
|
#
?
Nov 22, 2022 12:17
|
|
|
actual displacement. i didnt even need to increase the subdiv steps, i left it at 4 just like you had already. all i did was add in one more set position with one more noise texture, but changed the settings so it would be tiny changes that look "rough"
|
|
#
?
Nov 22, 2022 12:32
|
|
|
fart simpson posted:its exactly those glitches that make it hard Dang that made quite the difference!
|
|
#
?
Nov 22, 2022 14:44
|
|
|
25 / 26 - Ominous Skies
|
|
#
?
Nov 22, 2022 14:44
|
|
|
FalseNegative posted:25 / 26 - Ominous Skies sick
|
|
#
?
Nov 22, 2022 19:36
|
|


|
Thanks! 90% of the work for this scene was done in the compositor panel with composition nodes!  Here they are if anyone's curious, with the raw render pre-composition in the viewport.
|
|
#
?
Nov 22, 2022 21:09
|
|
|
Impossible Paths Not very original but was fun making things line up and figuring out a few tricks to get the shadows etc working right A slightly better perspective... 
toiletbrush fucked around with this message at 22:05 on Nov 24, 2022 |
|
#
?
Nov 24, 2022 21:17
|
|
|
toiletbrush posted:Impossible Paths This is positively goddamned gorgeous.
|
|
#
?
Nov 25, 2022 03:14
|
|
|
FalseNegative posted:25 / 26 - Ominous Skies nice bloom/glare
|
|
#
?
Nov 25, 2022 03:15
|
|
|
toiletbrush posted:Impossible Paths very nice
|
|
#
?
Nov 25, 2022 03:15
|
|
|
ive been really busy this week so im still stuck on forgotten robots. but i managed to make a little robot man and use geometry nodes to make a crappy little inverse kinematics rig so i can pose him  and using sine & cosine with the z value max 0 i was able to make him run a stupid little run animation https://i.imgur.com/4h84d9U.mp4 but i still dont have a scene for him
|
|
#
?
Nov 25, 2022 03:19
|
|
|

|
| # ? Apr 19, 2024 23:20 |
|
|
toiletbrush posted:Impossible Paths the texturing and colors on this are on point btw. are the decals on the boxes a bump map or actual geometry?
|
|
#
?
Nov 25, 2022 03:20
|
|