


|
14: A Pitcher's Worth a Thousand Words Last time...  (Thanks for making that, Leraika!)  35 - Reckless for Glory! (Bonus Boss) (Recommended listening! This really sets the mood.) 35 - Reckless for Glory! (Bonus Boss) (Recommended listening! This really sets the mood.)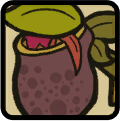 Click me for video! Click me for video! Let's see what we're dealing with here. 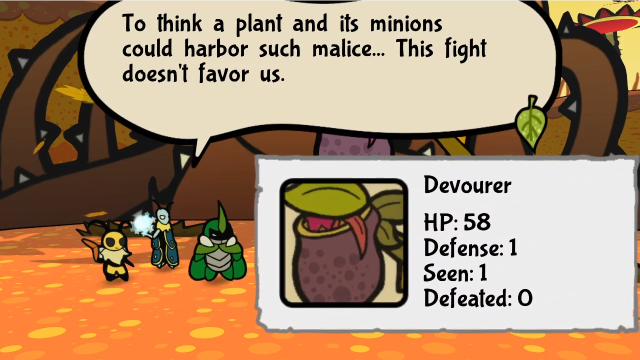  It may aim to swallow us. Vi, Kabbu, don't even think about fleeing before we break free. It may aim to swallow us. Vi, Kabbu, don't even think about fleeing before we break free.Oh. That's a lot of durability, compared to everything we've seen so far. The Devourer is one of five "Bounty" fights, challenging bonus bosses that I would estimate are tuned to be fought around Chapter 5 or so (the earliest we can face any of the others is midway through Chapter 4). Many people consider it the hardest of them (though I'm not quite sure I agree, it's certainly the most intimidating). But it's just here, and we can totally It isn't exactly a sequence break, since we can just come here, but I'm doubtful whether the devs intended anyone to try it at this point. The game will actually teach us about the Bounties soon enough, and give out sidequests to kill them, so I tend to think they expected that point would be the earliest people might try going after them. Even then, the Devourer is quite tough. We are here... significantly earlier than that. Nothing else for it, let's give it our best shot. 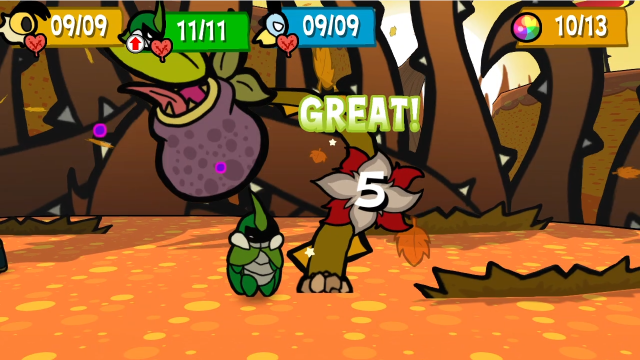 Let's give it a Heavy Strike to start off. 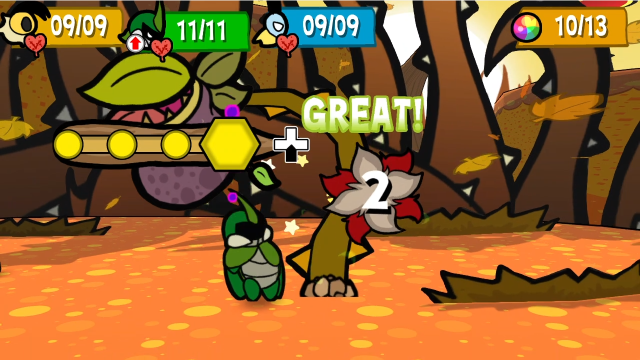 Then Vi relays to Kabbu for another attack, because of the defence.  Ouch! This is one of the less dangerous attacks the Devourer has, though blocking helps significantly (and my timing wasn't great this time!). Though, interestingly, it took me a while to figure out what's going on with the damage numbers here. Poison Defender seems to be kicking in on the first hit that caused the poison, and I didn't know it worked like that before this! (This attack has 4 base damage, but Kabbu has -1 defence from Favorite One, so I thought he should take 5 when not blocking.)  For its second action, the Devourer summons a Flytrap, which immediately attacks. It does this on alternate turns, as long as there are fewer than two Flytraps present. The flytraps have 8 HP and bite for 4 damage, as if the main Devourer weren't scary enough.  At the end of the turn, Kabbu takes poison damage, and Favorite One triggers. This isn't looking great!  This is turn two. Ouch. Each hit from that attack gave Kabbu two turns' worth of poison, too. 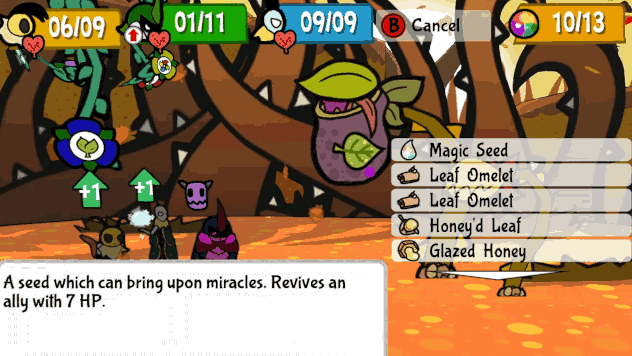 Vi throws Kabbu a Leaf Omelet so he won't die. 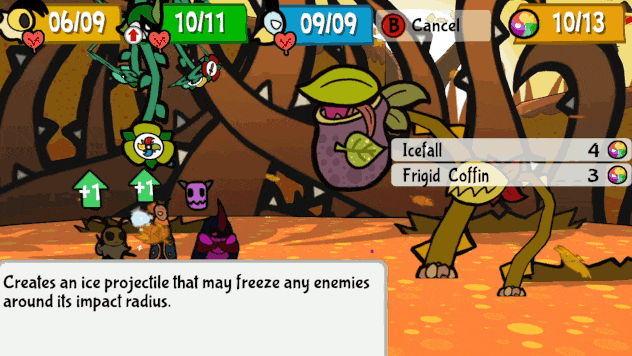 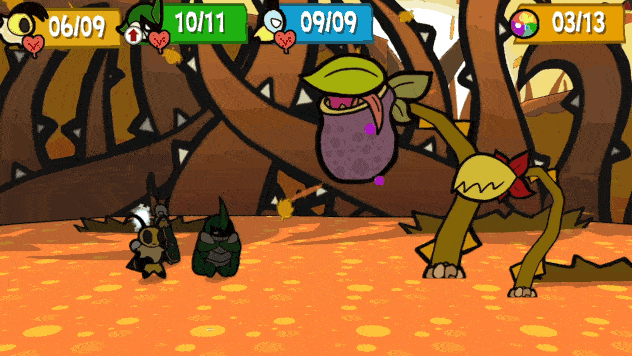 I thought we might have a better chance with the Flytrap gone, so Leif and Vi team up to get rid of it, after a relay from Kabbu. (Honestly, this was an inefficient use of my turn, it might have been better if I'd rotated Leif in front to boost the Icefall, and then Vi wouldn't have had to spend TP to finish off the Flytrap. But I didn't think of it until after healing Kabbu, when it was too late. You can't rotate unless everyone has an action remaining.) 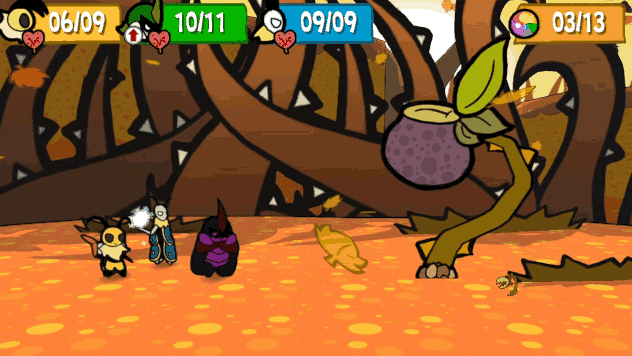 It does the acid spit attack again. It looks a lot less scary when I manage to nail the blocking, doesn't it?  For its second move (yes, it gets two actions per turn), it launches a poison blob into the air. This is a delayed attack that hits two turns later, it's 4 damage with 2 turns poison. This is by far the least scary attack it has.  Start of turn three. Favorite One triggered again, and it looks like the delayed attack is targeting our centre position.   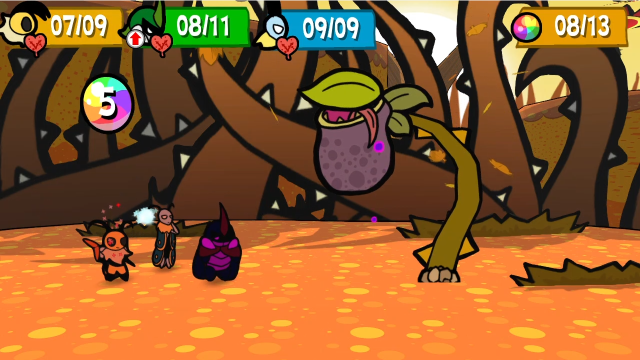 Vi's injured and I was getting low on TP, so I had Leif throw her a Honeyed Leaf. 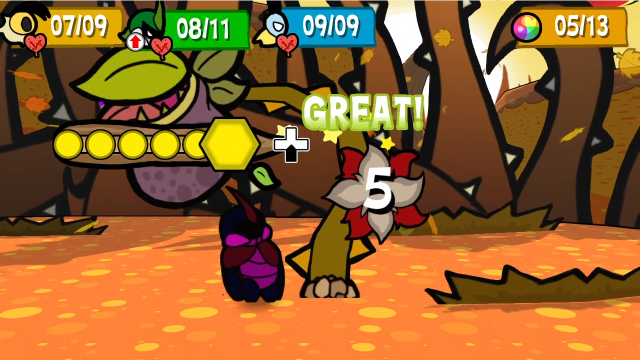 Kabbu uses Heavy Strike. 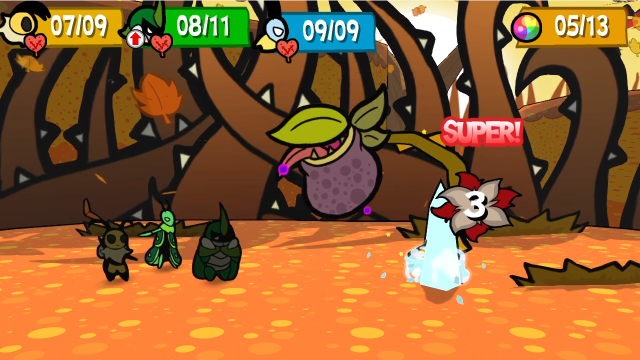 And Leif does a normal attack. This is with +1 charge-up, hitting an ice weakness, against 1 defence. 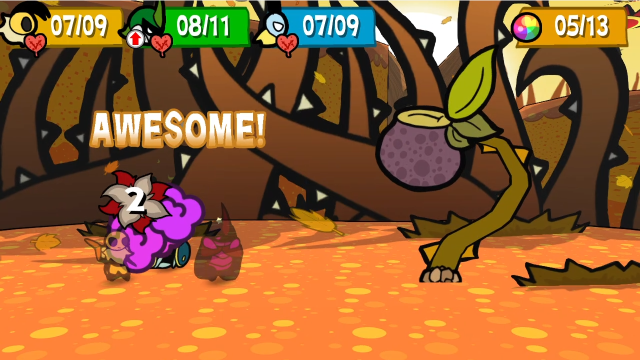  On its first move, it does the acid shots again, aiming two at Leif. This attack can hit 2-3 times, so this time we got "lucky". I'm shocked how consistently I've been blocking this; after missing the first two, I've somehow Super Blocked every one of these. It's helping.   And, because it's an odd turn and there's room, it summons a Flytrap which immediately bites us.  Vi has +2 charge-up and we have exactly 5 TP, so it seems like as good a time as any to use Hurricane Toss.  10 damage from a single attack is pretty solid! Though we're out of TP now, which isn't great.     I spend the rest of the turn trying to get into better shape. Running very low on healing items, though...   Another Acid Spit attack, and I guess I spoke too soon. I missed the blocks entirely here, and Vi went down after two full-damage hits. If I'd had better timing here, she could have lived.  Then... the flytrap attacks? This surprised me, because the Devourer only took one action this turn. I don't actually know why that happened. Maybe it was feeling merciful? No, that's not possible.  Or maybe it's because the delayed attack was queued up to hit this turn, though that would be odd if so, that isn't usually how they work. (A nice side-effect of putting Vi in front for damage here is that it also meant Kabbu, at full health, was in position to take the delayed attack.)  This isn't looking good!  But hey, it means we can see Kabbu's Pep Talk skill. For 5 TP, we can bring Vi back with 4 HP.   Vi heals Leif, since he's the worst off.   And Leif gets us back some TP. This is definitely starting to feel futile though, we're barely keeping up with all the damage that's coming in, and we're burning through resources fast.  The Devourer finally shows one of its other attacks: it has a poison breath like the Spider did, with a mash-style action command. This does 3 damage (and poisons) if you fail to fill the bar. Also, while it's not at all obvious, you actually have a split-second chance to Super Block between the bar going away and the damage happening, which reduces the damage further; needless to say, I didn't manage to get that here.  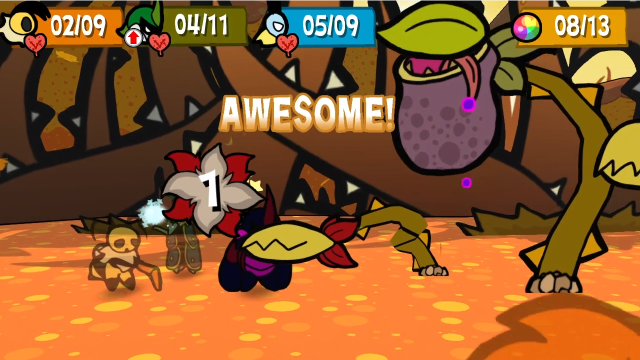 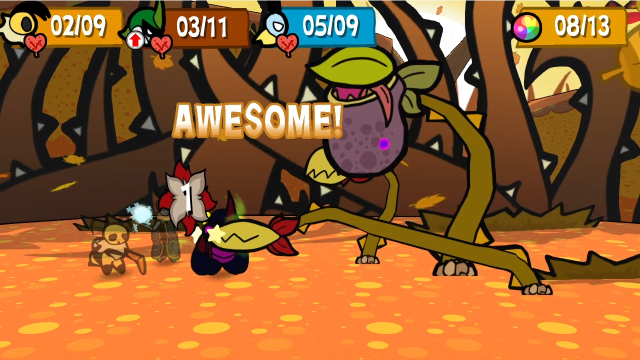 And, being an odd turn, it summons yet another Flytrap and they both bite. It's kind of lucky they went for Kabbu, thanks to Poison Defender, and I managed to time them well, but even with that, this is still a lot of damage coming our way! 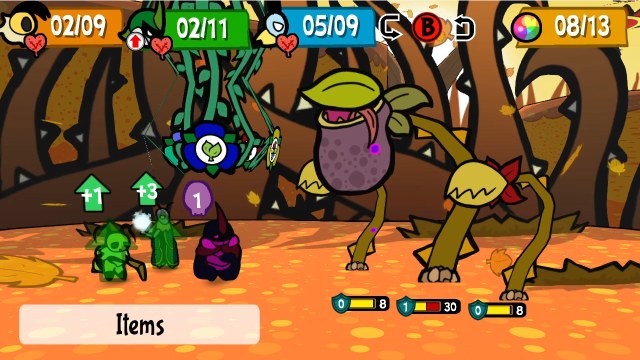 This really doesn't look good. 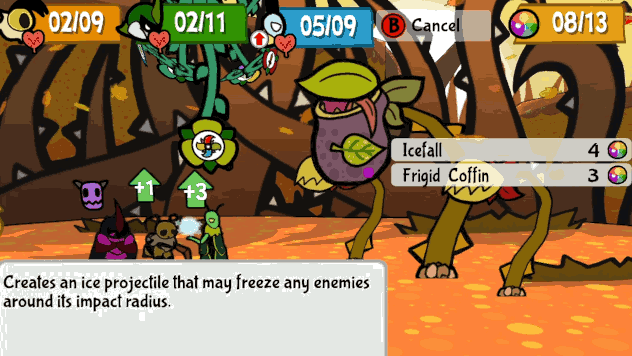 Look at this power, though! Icefall at maximum charge is a beautiful thing. (Unfortunately, it's just barely shy of killing the flytraps; if I'd had a Spicy Fries or similar attack boost item on me, it would've been smart to use that here, but sadly I left it in storage.) 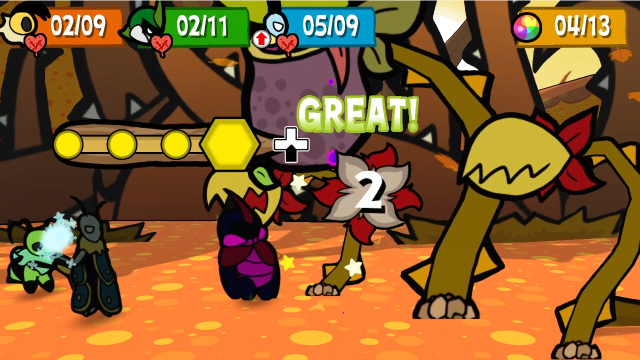 So Kabbu wastes a turn finishing one of them off. 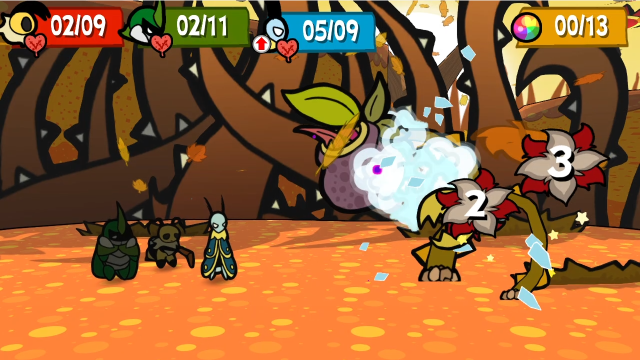 Then I realised the only sensible way to get rid of the other one was with another Icefall, so I'd really wasted Kabbu's turn. 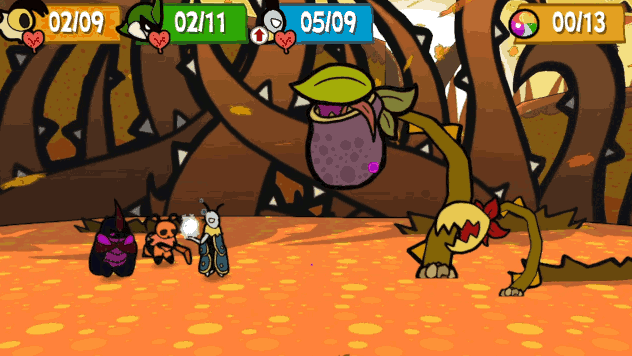 It didn't matter in the end, though, because the Devourer decided to finally show us its remaining attack. This is the Head Slam, and it's brutal. We didn't even see the worst aspect of it here, because I missed blocking and the damage was enough to end things; more about that in a moment. 09 - Game Over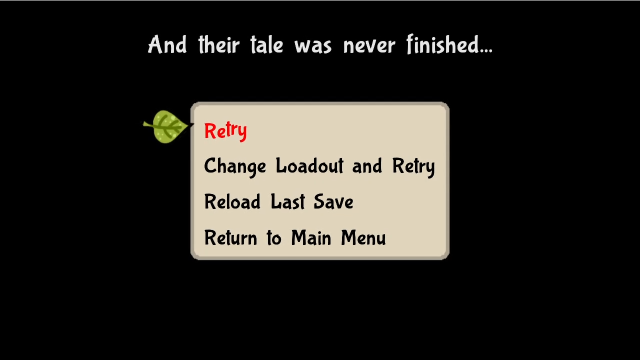 It's our first time seeing the Game Over screen. That's a depressing message, isn't it. That said, it's worth talking about how this works. When you lose a fight the game considers "important" (basically anything that isn't an overworld encounter; for instance, I know the battles during the cable car repair quest from last update count), you get the "Retry" and "Change Loadout and Retry" options; otherwise, you'll just see the last two. If you choose "change loadout" it takes you to the inventory screen, where you can move medals around and use items. I really like this: among other things, it's a good way to communicate that the game doesn't necessarily expect you to win fights on the first try, and wants you to learn from what went wrong and plan new strategies. It feels a tad awkward to me diegetically (the failed attempts don't happen, narratively speaking, so how did our characters know what strategy to use?), but it's such a good gameplay feature that I don't really care. There are a few caveats, though: this doesn't fully heal your team or anything, it just restores whatever status you were in when you started the battle. And if you put on medals like HP Plus or TP Plus here, the character will not be healed to the new maximum. So, sometimes, you might still want to reload your save and regroup there instead. 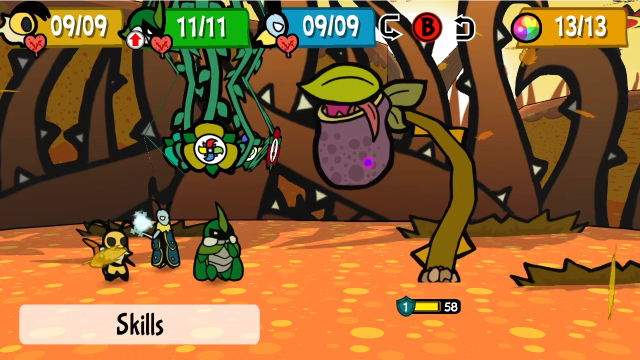 It takes you right back to the start of the fight, so you don't have to sit through any cutscenes again. That's not exactly an issue here, with how little lead-in the Devourer gets, but it certainly can be elsewhere in the game! It's the small things that show the devs care about your experience, sometimes. One interesting thing: when you retry (with new loadout or not), you get to keep your Spy data. So, technically, if you're the sort who cares about diligently spying, the retry gives you a minor advantage of not having to spend an action on it again. (Though, do note: every time you retry, the game increments the "seen" counter in your bestiary; that might bother some people. It did me, at first. That number can change elsewhere, too, though, so I stopped seeing it as a black mark on my files; I mention this only because I don't want anyone who does care to be taken by surprise.) Anyhow, clearly this attempt was unsuccessful, and ordinarily I wouldn't show a failure in such detail, but I wanted to give you a good sense of what it's like to stumble into this unprepared. I did make a few small mistakes, as I've mentioned (also, it would have been better to use the Magic Seed instead of Pep Talk, but I knew I was losing and wanted to show the animation for you). Overall, though, this was honestly a better-than-usual showing for conventional tactics here, and it could've gone far worse. It was left on 22 HP when it killed us, and I think that's a better than average outcome. So let's break down exactly what's going on with this boss, and then how we're actually going to deal with it. We didn't even see its most dangerous gimmick yet (because the Head Slam finished me off!). Here's what happens if you survive it: 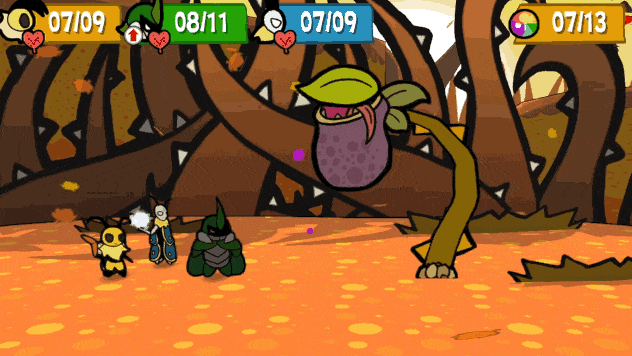 Head Slam knocks Team Snakemouth into the air, and the Devourer can catch and eat somebody on the way down. This isn't positioning-dependent either, it can get anyone. When I was first learning this boss ages ago I tried planning around it and assumed it'd always eat the person in front, which didn't go well for me. It doesn't always eat someone when using this attack; I don't know whether it's 50/50 or the odds are skewed. There's a persistent myth that successfully blocking or Super Blocking prevents it eating anyone, which even I believed for a while, but it's just down to chance. I can confirm I saw every combination of block or don't, eat or don't in various attempts while recording this update. 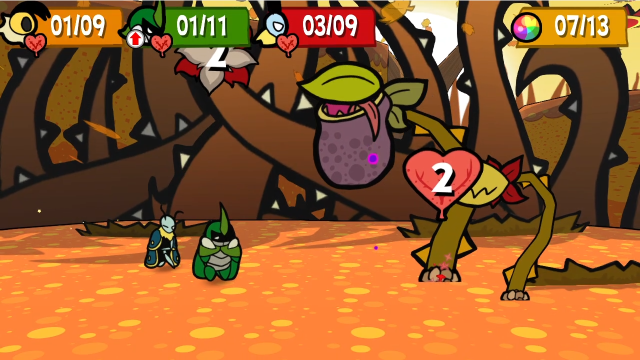 While inside the Devourer, the trapped character can't do anything, and at the end of the turn they take damage (I believe this is 20% of max HP, rounded up?) which heals the Devourer by the same amount. 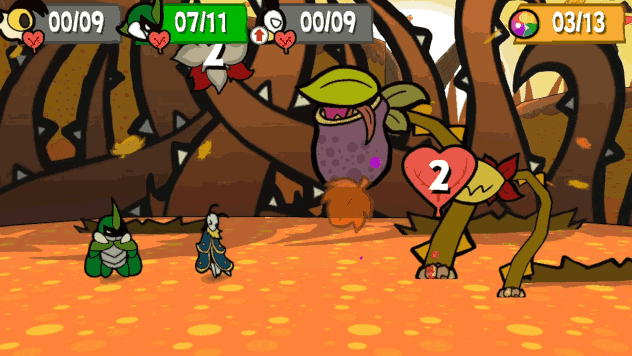 There's no way to make it release them, either, until they run out of HP and it spits them out already dead. So this attack is effectively like instant death, only even worse. (Someone in the comments on the wiki does claim it will release an eaten character after three turns if they're still alive, but I can't confirm this, I've never seen the battle go on that long win or lose.)  Also, if both uncaptured bugs go down, you instantly lose, even if the trapped one might survive a few more turns. (This is honestly the more common occurrence.) Especially with our current capabilities, generally speaking the Head Slam just means we lose the fight (unless we both Super Block and don't get eaten, and even then it's a lot of damage). It very often means that even for stronger parties later in the game. Everything else this boss does is tough, but manageable with sufficiently good block timing and judicious application of healing items (though it would still get tight and there's a real risk of running out). The Head Slam is the real killer. So... can we prevent it happening? The only real way to do that is by keeping it from getting turns, which means either disabling it with status or outright killing it first. The Devourer is immune to sleep and freeze, the two disabling status effects we have access to at this point in the game. (It has a more reasonable 50% resistance to Numb, and in fact the first time I beat it I used a Numb-based strategy to kill it without it ever getting to act. That was in 1.0.5, though, when you could inflict 2-turn Numb; it's been nerfed to last only one turn in 1.1, though that strategy can still be made to work. That's all moot for our current purposes, though, since we don't have access to the things we'd need.) So what's the strategy? How do we beat this now? For better or worse, it's going to be an outright damage race, combined with a hefty amount of praying the RNG will cooperate. The faster we kill it, the fewer turns it gets and therefore the fewest opportunities the RNG gets to screw us over. Let's talk briefly about how enemy AI works in Bug Fables. For better or worse, the game doesn't really have AI per se: the enemies select their moves randomly (not necessarily evenly weighted), but the pool of available moves is context-dependent. (For example, look back at Acolyte Aria: when she's on the vine, the only available move is the drop-kick, so she'll always do that; when she's on the ground, she chooses randomly between vine attack, defence buff, and making a new vine. She won't do the defence buff if she already has it active.) Some enemies gain access to new moves at certain HP thresholds, etc. Outside of this system, there are scripted triggers (for things like phase transitions or summoning adds, etc) that are usually tied to HP values or percentages, and are separate from the enemy's turns. This can still produce interesting complexity in enemy behaviours, but it does mean there's always an RNG element involved. The specific issue with the Devourer is that its attacks are so variable (the Head Slam is just so devastating) that a strategy basically has to assume some sequence in advance, and then will be more or less guaranteed to fail on other sequences, which means some percentage of attempts are completely futile. That can get frustrating to actually play. Anyway.    Here's the medal setup I'm going in with. Distributing the HP Plus medals evenly seems best to me here, because of how randomly the Devourer spreads out damage (and we don't have the time to waste actions taunting with Kabbu). Kabbu gets Super Block+, Poison Defender, and Weak Stomach to help compensate for Favorite One (which I'm keeping on because it can give us some extra damage, and every little bit helps). You can see I'm not fully utilising my MP here (I have 2 left over due to just not having things to equip), and that I have a few useless things on (Sleep Resistance, Mighty Pebble, Crazy Prepared, and Quick Flea are all worthless in this fight). If I were optimising solely for the Devourer, I'd want to upgrade HP on a few level-ups instead: it wouldn't save us from the Head Slam, but it'd reduce the impact of damage-distribution RNG and increase the odds of success.   Also, I reloaded a save, then went back to town and returned with some heavy ordinance. Time to carpet-bomb a pitcher plant.  35 - Reckless for Glory! (Bonus Boss) Click me for video! 35 - Reckless for Glory! (Bonus Boss) Click me for video! This was not my first attempt, as you can see by the fact the spying is already done.  The first thing we'll do is feed Vi some Berry Jam. This gives her 2 turns of Attack Up and 2 turns of Defence Up, both of which are going to make a big difference.  Leif tosses a Burly Bomb, which does 3 damage and applies Defence Down for 2 turns.  Now we break out the Hurricane Toss! It's turn 1 and we've already done a cumulative 13 damage. Something's odd, though. Vi has +1 attack here, but this Hurricane Toss damage is identical to in the failed run when she had +2 charge. To understand what just happened, we're going to have to talk about a bug in the battle calculations. Yes, this strategy technically incorporates exploiting a glitch. Attacks which "partially ignore defence" (Kabbu's horn strikes, Hurricane Toss) are programmed in a strange way, and seem to just check whether the enemy has nonzero defence then add 1 to the damage. You'd think it shouldn't matter that it's implemented this way, and in most situations it works out to the same thing. But, crucially, it makes this check before Defence Down is applied. So, if and only if the enemy has exactly 1 defence, these attacks end up doing 1 damage more than expected. With Hurricane Toss, this affects each hit, which in this fight amounts to 3-4 extra points of damage each time we use it. Negative defence is definitely a thing in this game, as we saw with Favorite One, and that would be a more intuitive explanation of what's happening here, but Defence Down and similar temporary effects don't reduce defence below 0. You can see this if you use any other attack on a debuffed enemy. This gets even weirder when you involve a medal called Antlion Jaws, but we won't find one for a while yet so I'll hold off on discussing that until we do. The devs are aware of this issue and have chosen not to fix it, they've said it would require too fundamental a revision of the combat system. I'm not entirely sure I believe that, but it's their prerogative, and it's not exactly gamebreaking.  On its first turn, the Devourer uses its poison breath. I don't mind seeing this; it's one of its less threatening attacks (even if I still didn't manage the Super Block).   It also, as always, summons a flytrap which gets to bite. I don't love seeing this hit Kabbu before Poison Defender is active, but he'll be fine.  At least we get the Favorite One trigger.  Vi now has +1 charge from Favorite One, in addition to the boosts from Berry Jam, and the Devourer's defence is still lowered.  Which means the second Hurricane Toss hits even harder than the first! 14 damage in total.  Kabbu uses the Roasted Berries to give everyone a bit of healing (and, thanks to Weak Stomach, activate his Poison Defender). Technically, something like a Leaf Omelet offers more HP per inventory slot, but we want the whole team staying alive as long as possible, and the Devourer spreads damage around more often than it concentrates it, so Roasted Berries it is.  Leif breaks out the first of many Spicy Bombs. 5 damage is significantly more than any of our characters can do without spending TP. There is something a bit weird about the hitboxes in this battle, though: Icefall can hit the Devourer and both Flytraps simultaneously, but bombs seem not to be able to (possibly because bombs have to be centred on an enemy, while Icefall can be more precisely positioned). I think if you bomb the left Flytrap the secondary explosion hits the Devourer, but if you aim at the big one they're both slightly too far. 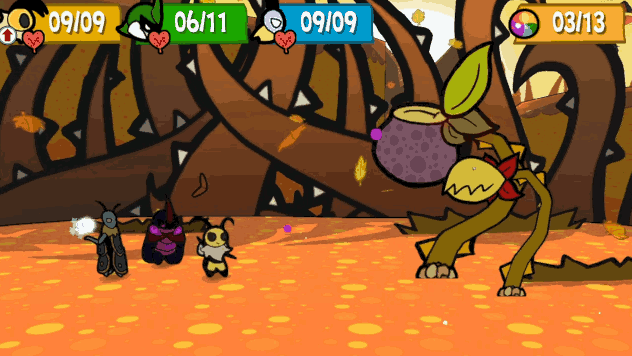 At least we're getting good mileage out of that defence boost on Vi, I suppose. I could've definitely blocked better here. 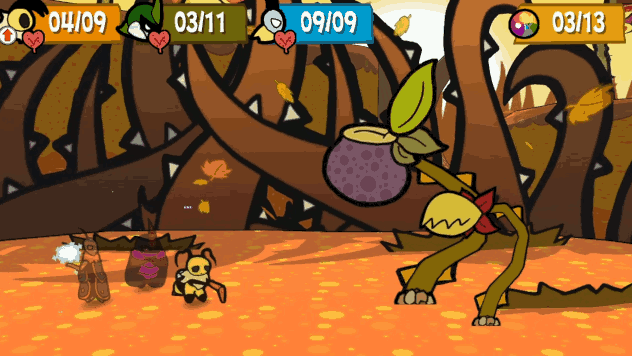 I certainly won't complain about seeing the delayed attack, though. 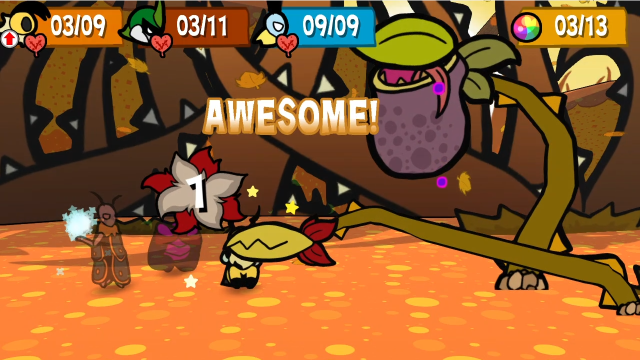 The flytrap also gets to attack, of course. 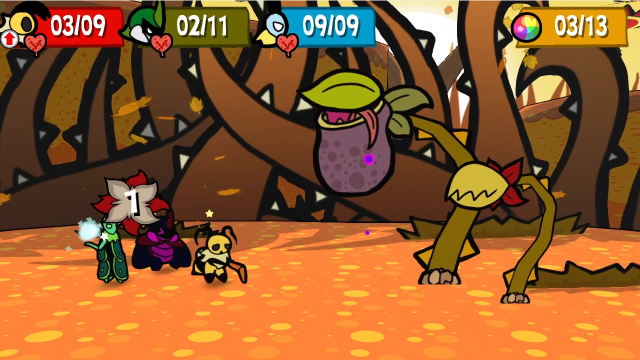 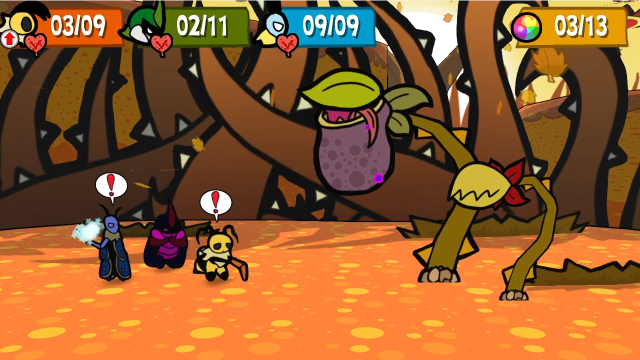 Kabbu takes poison damage, and then we get the Favorite One trigger. 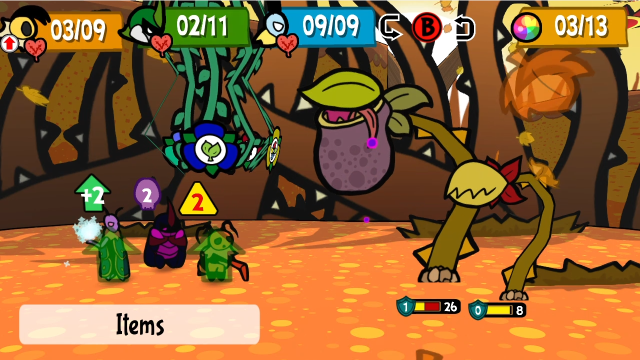 Leif's still on full HP, and he also now has +2 charge. Seems like it's time to move him into the front. (Generally speaking, you want to put whoever is healthiest in front on this turn, now that Vi's out of attack boosts and will be joining the bomb squad.) The delayed attack is targeting that position, but it can be safely ignored, win or lose this fight's going to be over before it matters. 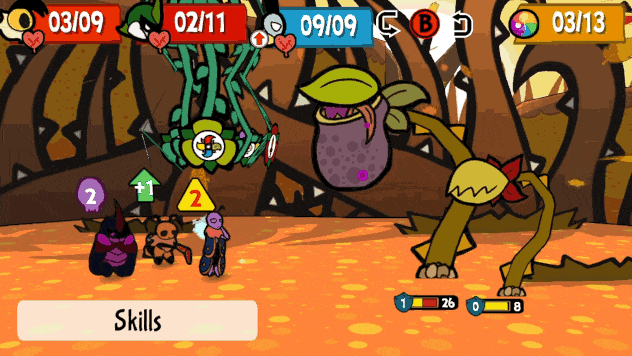 With the last 3 TP we have, Leif uses Frigid Coffin since (with all his boosts) it will do more damage than a bomb would. It's convenient that I wanted him in front anyway. 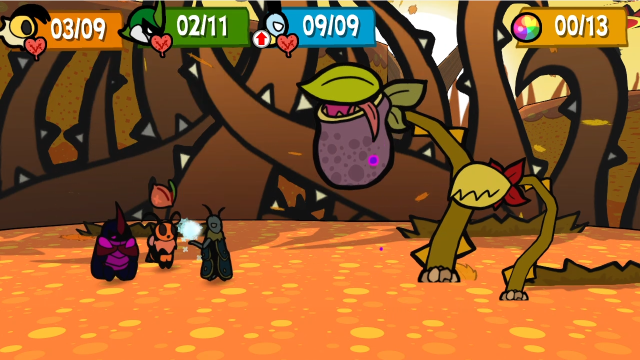    Bombs away! Also of note here, Spicy Bombs ignore defence against the primary target (but not for targets hit by the splash damage). Other types of bomb don't have this property. If they did, I'd be using Poison Bombs instead for a bit more chip damage.  It uses the poison breath again, and, even better, I actually manage to get the Super Block. I'm starting to feel pretty good about my chances.  Although it could still go pear-shaped. It gets a second flytrap this turn, and they're both going to attack.   The best possible outcome: both of them went for Leif!  At this point, it's over. You can see how close this is: there's next to no chance we'd survive another turn of attacks.   We don't even need all the actions this final turn, or every bomb I brought. (This is thanks to Favorite One boosts.)  We don't have to kill the Flytraps, they die automatically when the main Devourer does.  And it's done.  11 - Key Item! 11 - Key Item!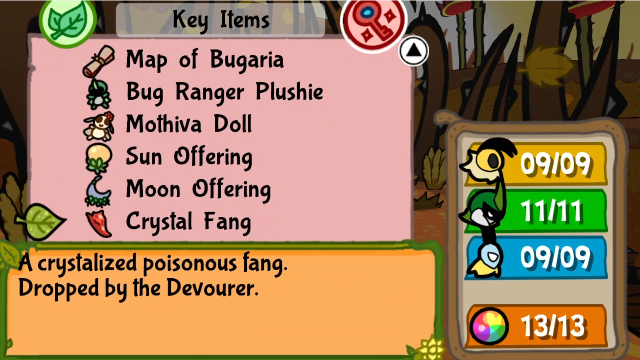 It leaves behind this item, which we immediately pick up. We'll find out what it's for later. After the Devourer is beaten, there's also a new banter: Sorry, Kabbu... We didn't heed your warning. It's alright... we're all safe, and that's all that matters. It's alright... we're all safe, and that's all that matters. Phew... I'm gonna think twice next time Kabbu feels danger... Phew... I'm gonna think twice next time Kabbu feels danger...So, that's the Devourer beaten on Hard at the earliest possible opportunity. In the interest of full disclosure, I did not develop this strategy in its entirety. The lion's share of credit should go to the Paper Mario challenge streamer Kappy, who demonstrated it in his ongoing "Rank 0" run (playing with a menu code that prevents EXP gain, and equipping no medals). This is much more difficult than what I did, or at least much less likely (requiring more persistence for viable RNG). I had been experimenting with fighting the Devourer this early myself, and thinking along similar lines, but the last few pieces didn't click into place until I saw Kappy do it (I hadn't incorporated the "ignore defence" glitch into the maths, among other things, and I completely overlooked Roasted Berries as a healing option). Before seeing his video I'd beaten it on "normal" at this point, but not Hard Mode. Adding medals to his strategy greatly widens the window of potential RNG sequences that could lead to success (and in my successful run, I finished one action early and was able to save two Spicy Bombs relative to the plan). That said, the odds with my setup don't seem that bad. I don't have a lot of data, but my first successful recording had some issues and I had to do it again, so at least I have two points. The first time, I succeeded on the eighth attempt, and the second on the sixth.  You can see this reflected in the screenshot from our bestiary. I'm not sure if the second time was faster due strictly to luck, or due to getting better at the block timing from all the practice, but I'm at least reasonably confident you have a better than 10% chance to win with my setup, and each attempt only takes 2-3 minutes. It was a lot less frustrating than I thought it was going to be, frankly. I think it's literally impossible to beat it this early on the harder difficulties you can access through menu codes. It might not even be possible on Hard if you wear the Hard Hits medal, but I haven't tried that. Anyway, that's the Devourer fight. I'll also shortly be posting an interlude with my overall thoughts on this boss and how it might be redesigned to fix some of the issues, then we'll get back to the main playthrough in the next proper update.
|
 #
?
Apr 10, 2021 04:32
#
?
Apr 10, 2021 04:32
|
|


|

|
| # ? Apr 27, 2024 16:13 |
|
|
Design Interlude: Fixing the Devourer I'll be honest. While I think the concept for this boss is fantastic (both the general idea of fighting a pitcher plant, and having a late-game superboss available early to try whenever you feel ready), there are some serious design issues with the actual fight, and it needed at least another pass of revision and playtest. Let's take a stab at fixing it. The first thing I'd do is remove the Head Slam from its randomly-chosen moveset and make it happen on a HP trigger instead (either at half HP if we want it to happen once, or 2/3 if it should happen twice). It's the core gimmick of the fight, it doesn't seem right to have it potentially not happen. Likewise, having it randomly grab someone or not isn't a great idea (it just makes the fight RNG-dependent and encourages retrying until you get the right outcome), so let's have it either always grab someone, or do it if the player doesn't block. I'm not keen on tying it to blocking though, the difference shouldn't be quite that stark (and I've complained enough about "save or die" gameplay in the Paper Mario Master Quest thread, let's not have more of that). Then I'd add a secondary target (maybe the lid?) with its own HP which, if damaged enough, will cause the eaten character to be released. (The player can then think about trade-offs and prioritise: they can try to recover their action economy, or they can focus on killing it.) It doesn't have to have a lot of HP, but should probably be a bit more than you can comfortably take out in one turn (I'm thinking maybe 6, to keep it just out of Spicy Bomb range?). Another possible change, though I'm less sure this is necessary, is that it could behave differently while it has a character inside. Maybe have draining the trapped bug count as one of its turns, so the overall effect has it get less aggressive to the bugs outside? Or it could get one or two entirely new attacks (it seems a bit weird to me that, as it is now, the Devourer still does its spitting-things-out attacks while it's ostensibly eating, so this might help with flavour and verisimilitude). If it's substantially different, that adds to the trade-off question of whether the player wants to focus on getting the party member back, versus continuing to do damage. I'd probably give it a bit more durability to discourage blitz tactics, but reduce its damage output somewhat to compensate. In other words, the core goal of my revision is to make the gimmick more interesting, give the player more ways to interact, then require them to engage with it. The whole point of having a gimmick boss is to put a new twist on the combat and give the player something new to think about; if the best approach to a boss is "pretend the gimmick doesn't exist and roll the dice", it isn't serving its purpose. These changes might make the fight a bit more difficult than it is currently, but more importantly, they reduce the swinginess between attempts and make it overall more fair. I don't think you actually have to change that much to make this a much better and more satisfying fight; I think what I've outlined here is more than enough, and it should still be recognisable and feel qualitatively similar. The other thing I'd be strongly tempted to change, of course, is either to make it at least partially visible before you approach, or give the player an option to run away when it pops out. There's a place for ambush enemies in games, don't get me wrong (if nothing else, they're good at throwing a wrench into your resource management plans), but I think it's a bit rude to ambush the player with a superboss. The small flytraps, for instance, could be given an overworld sprite and become an ambush enemy that pops out like the Devourer currently does? Let's discuss, friends. In the meantime, I'll leave you with a few photos of pitcher plants. I took these at the Royal Botanic Gardens in Sydney about two years ago, they just happened to have a carnivorous plant exhibit on when I was visiting. I've always had a soft spot for carnivorous plants; I'm not really sure why. Maybe it's a twisted reflection of being vegetarian? ") 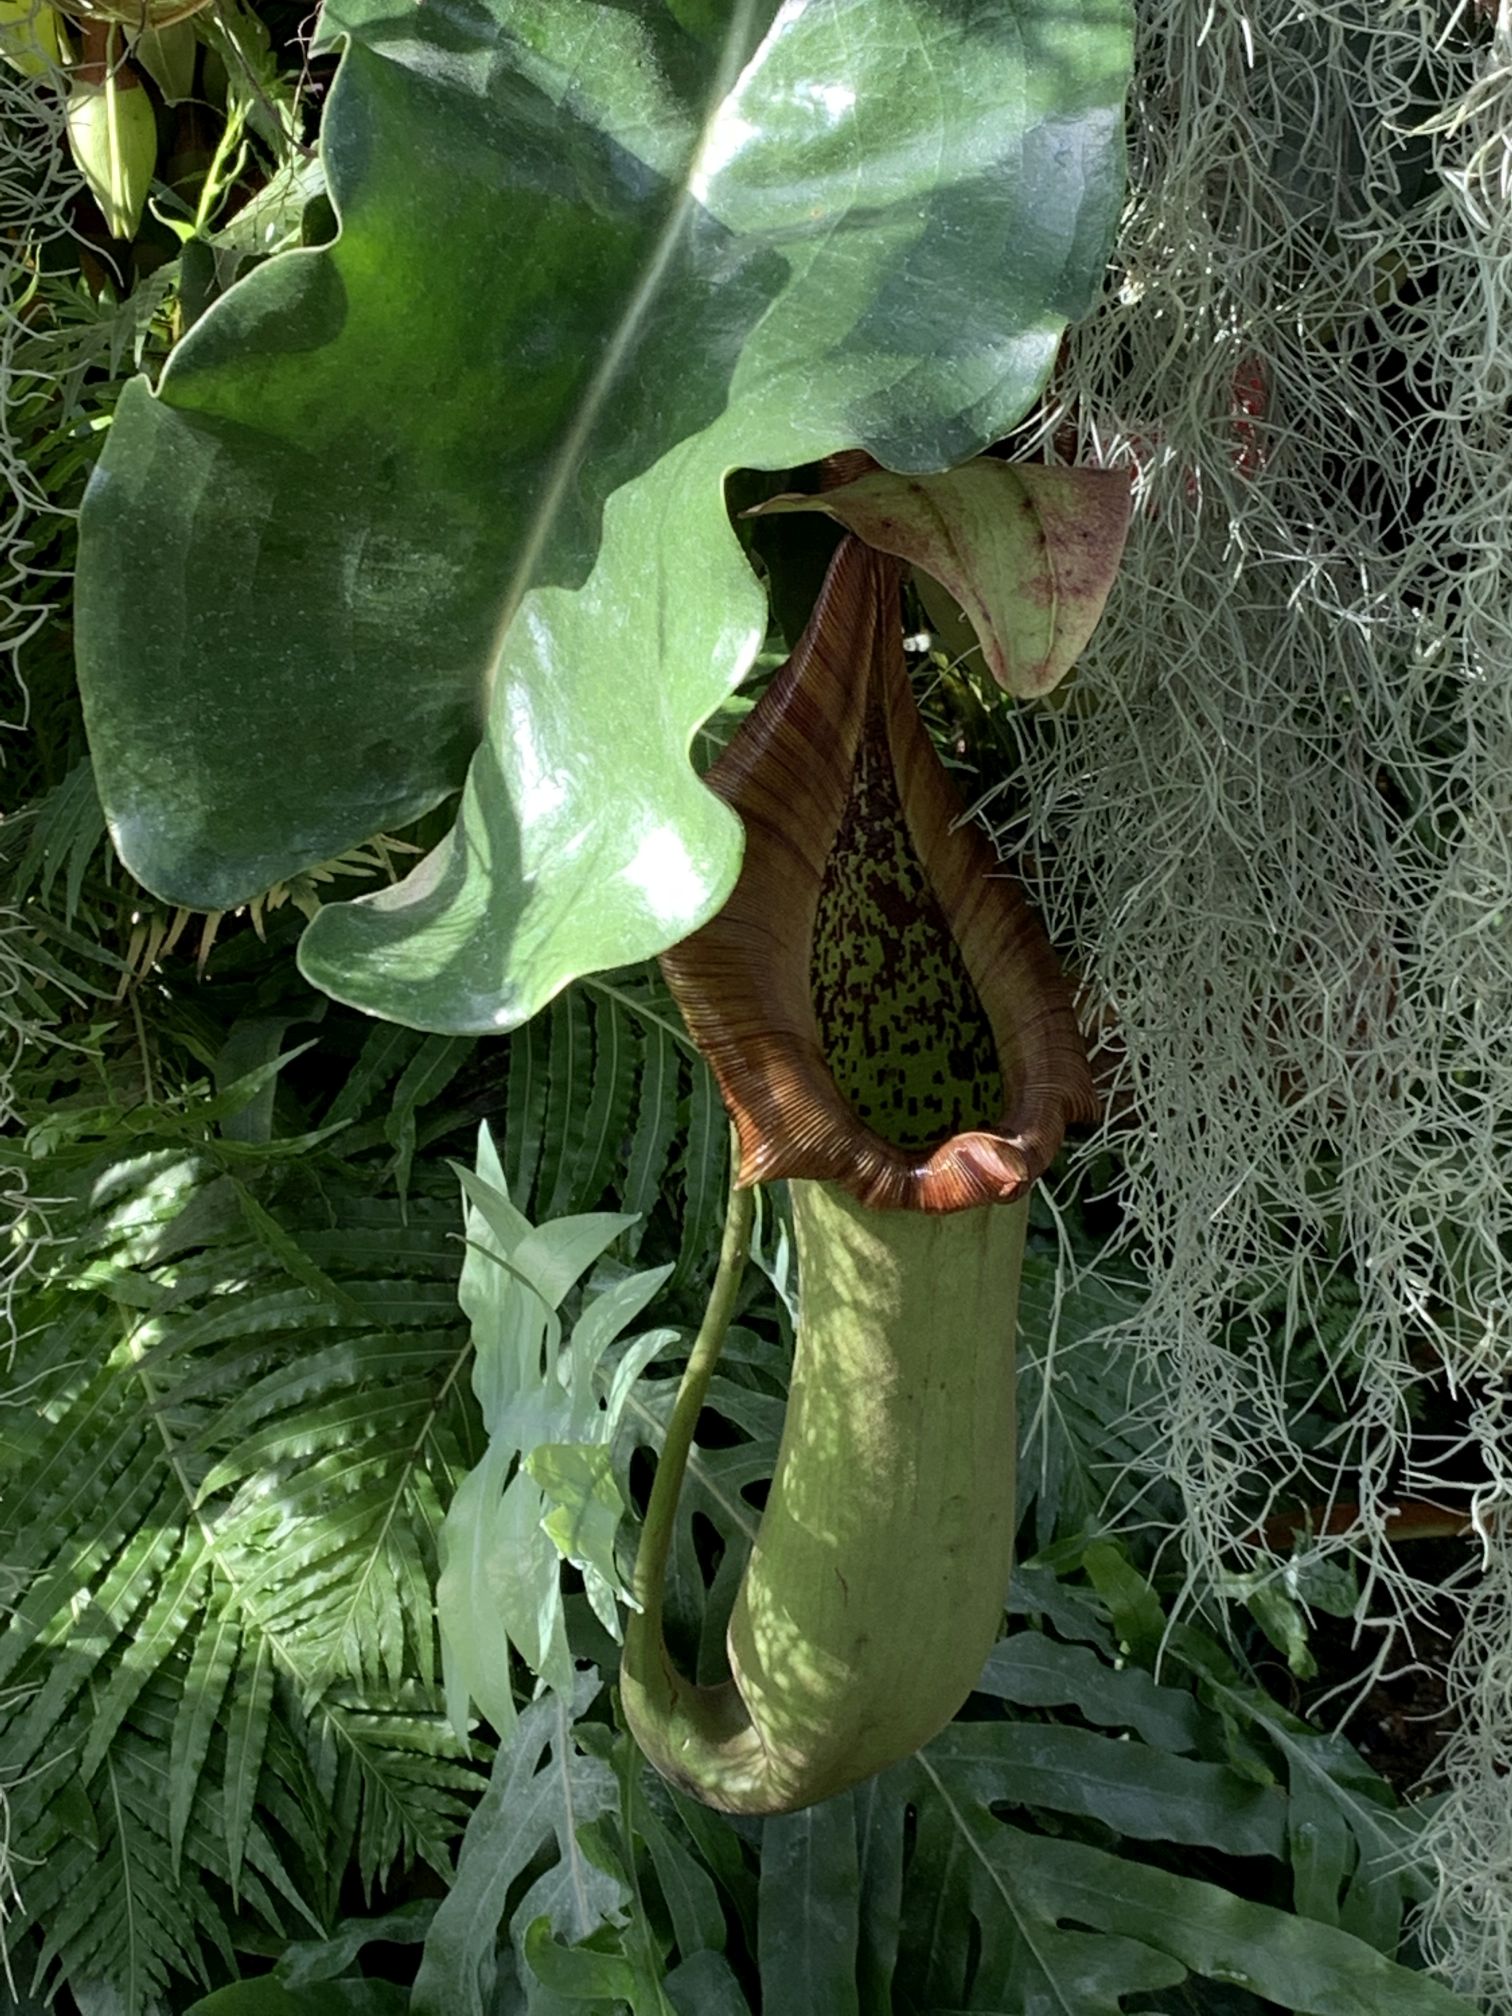 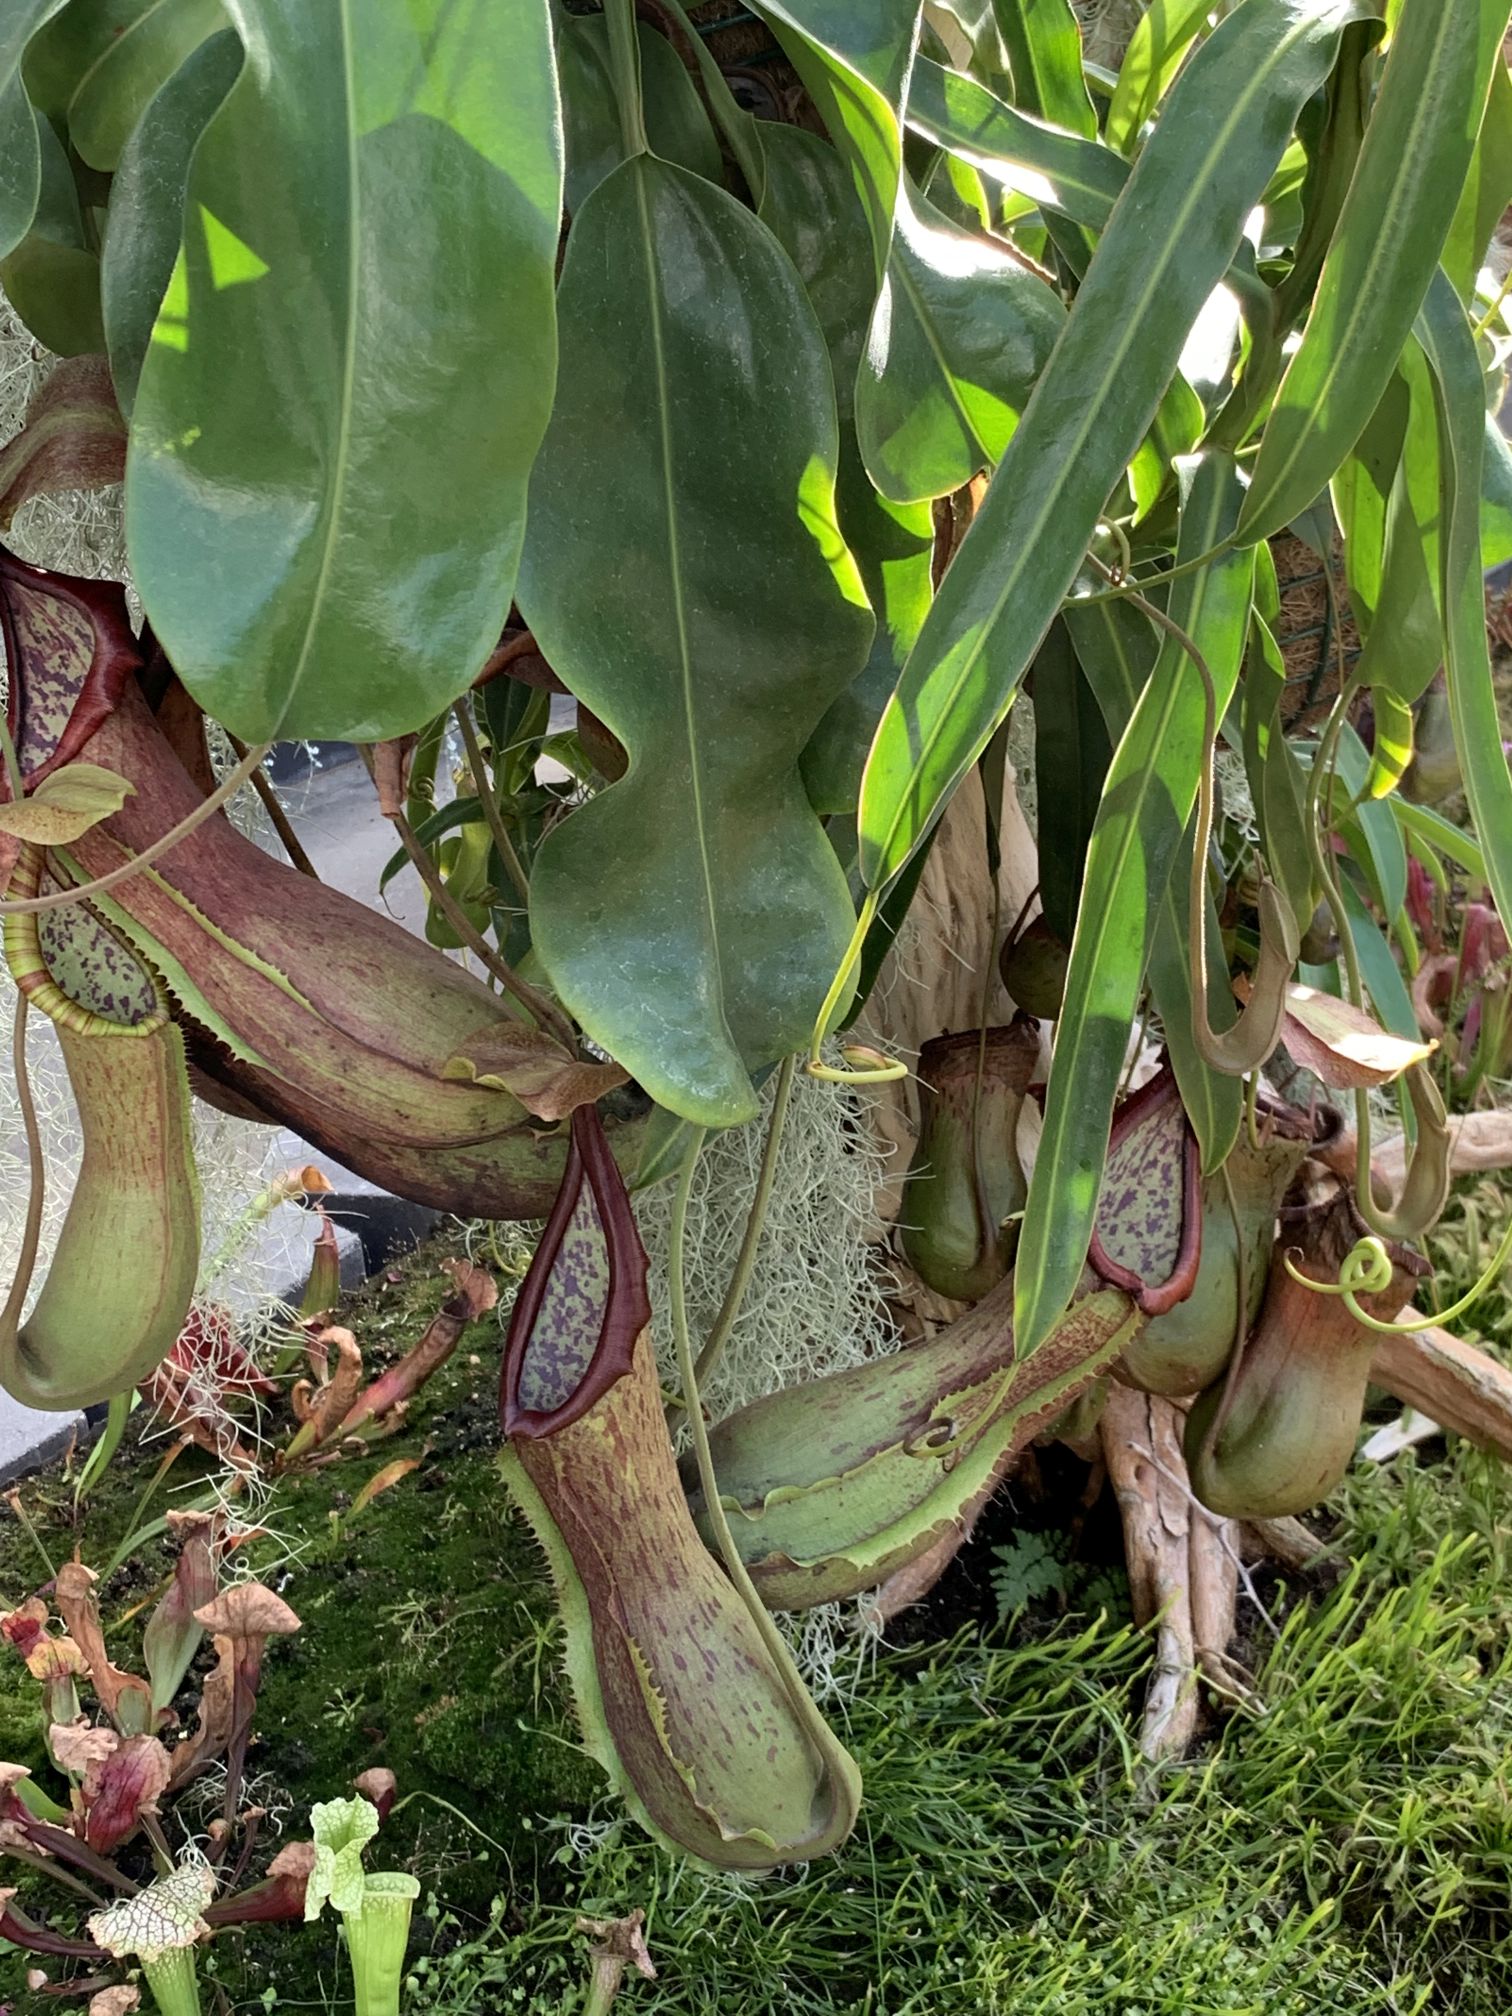 
Explopyro fucked around with this message at 04:38 on Apr 10, 2021 |
|
#
?
Apr 10, 2021 04:32
|
|
|
I ran into the Devourer only slightly later, choosing to finish the Chapter before backtracking to the mystery crank leading to it. I attempted the fight a few times throughout the game, but despite being the first Bounty I found, it ended up being the last one I killed. I never did figure out the Spicy Bomb recipe on my own, which is probably a big factor. Head Slam both a) removing a party member with no countermeasures b) giving the boss regen and c) leaving the party member dead once you get them back is such a rude combination (is both even the right word for a list of three? ah, gently caress it).
|
|
#
?
Apr 10, 2021 05:19
|
|


|
Wow, nice. I did my first playthrough on Normal difficulty, and I still wiped twice on Devourer before I gave up. I think I came back post-Chapter 3 (or maybe 4?) and managed to kill it. And that's on Normal. A few notes on the Devourer's AI. First, on why the Devourer doesn't always make two attacks. The Devourer doesn't pick two random moves each turn. Rather, it makes one "direct attack" and one "follow-up". The direct attacks are the poison spit, poison breath, and slam attack. It picks one of these at random, with the poison spit being preferred above 50% HP, and the slam attack preferred afterwards. More on the slam attack in a second. The follow-ups are summoning a Flytrap or launching a delayed attack. This move is not selected randomly. The Devourer prefers to summon, and will always do so if it can -- but the move's got a cooldown (2 turns on Normal, 1 turn on Hard). Also there needs to be enough room. Failing that, the Devourer uses the delayed attack. But that also has a cooldown (which is a random 2-4 turns, regardless of difficulty). If it can't use either move, the Devourer doesn't get a follow-up that turn. Lastly, the slam attack. The Devourer can use this attack at any time, but it's significantly more likely to if it's at half health or lower. The move itself has a 1-turn cooldown, so it won't use it twice in a row. The Devourer can only eat someone after this attack if it's lost at least 30% of its HP (and it always eats if it can). It will never use the slam attack while its mouth is full. The Devourer will indeed spit its victim out after three turns, if they're still alive. But as you say, it's rare for the victim and the party to both survive that long. I think the reason the "eat the party member" gimmick doesn't work here is twofold: 1. The party is small enough that losing one party member is a colossal blow. With the Devourer's massive damage output, and its ability to summon backup, three party members is barely enough to stay healed up and still do some damage. With two party members, you simply can't keep up. 2. There's no way to deter the attack (except Numb, which you won't get for a while), and no way to rescue the party member once they're caught. So you can't really strategize around it, you just have to hope it doesn't use the attack. Your proposed changes would make a huge difference, but an alternative suggestion is to remove the Flytraps. There's just too many things to do in this fight, and your action economy is literally being eaten alive. A better implementation of this gimmick was done in Darkest Dungeon, with the Hag boss (who can trap a party member in her cauldron). There, you have a party of 4 characters, the Hag is the only actual enemy in the fight, and you could free your ally by breaking the cauldron. ...now I kinda want to see a Bug Fables take on Darkest Dungeon.
|
|
#
?
Apr 10, 2021 05:41
|
|

|
Explopyro posted:14: A Pitcher's Worth a Thousand Words  I think you wrote more than a thousand words though! Good show, it's nice when games give you the opportunity to do cool things if you figure out how.
|
|
#
?
Apr 10, 2021 07:11
|
|

|
Yeah wow that was pretty incredible. It took me a few chapters later to take this guy on for re and he still wasn't easy. I think I was just underestimating attack items too, dont think I ever used those bombs in a serious fight. Seriously, kudos.
|
|
#
?
Apr 10, 2021 08:35
|
|


|
Fun fact: There are a few pitcher plants that have other strategies than just eating insects. Nepenthes hemsleyana is a pitcher plant that's evolved an elongated tube with a lip in it. A bat called "Hardwicke's woolly bat" roosts in the plant, which gets nitrogen from the bat guano. Small bonus note about Paper Mario: Master Quest, since Explopyro mentioned it. � Work on version 2.0 is still going on. I'll probably post a Chapter 2 update post one of these days. � I'm working on making the AIs for all enemies completely deterministic in the new version of the game. Most are simple; some, not so much. � As for the 'save or get beaten up' thing... there's not much I can necessarily do, but I've got some good balance testers now. I'm going to do my best to listen to them.
|
|
#
?
Apr 10, 2021 08:40
|
|


|
I think the Devourer ate a slight defensive nerf in a patch but yeah it was by far the bounty boss I had the most trouble with. The others weren�t nearly as harrowing in comparison for me. I was doing a hard mode + hard hits run for Bug Fables, and Devourer was a real roadblock. I ended up fighting it much later, and while I figured out how to deal with the other bounty bosses, taking down Devourer felt kind of hollow because the strategy I used was luck based. In that I was hoping Lief wouldn�t get eaten or the fight was pretty much unwinnable at the point I chose to tackle the boss at. (The fact that he can burst down the plants and Devourer and making use of one of his later skills was the core of my strategy. So if he got chomped yeah that was an automatic reset.) The head slam definitely feels like it needed to have been tweaked more. You barely have much counterplay to it other than skipping the mechanic entirely. And it�s such a huge wrench in the battle on top of all the other moving parts the battle has that adapting to it on the fly is kind of really not feasible because of the sheer disadvantage that a) being left with 2 party members is and b) you have no control over who gets chomped. If the flytrap mechanic wasn�t in, adapting to the situation from having a random party member be eaten would be more feasible, but as it stands all the moving parts together is kind of a bit much.
|
|
#
?
Apr 10, 2021 15:12
|
|

|
I think the most impressive part of all of this is that it was on hard mode. I played the entire game not on hard for my first playthrough and I still had Devourer horror stories. And yeah, not knowing about bombs was probably a contributing factor for sure. Though I don't tend to like DPS races as a mechanic in general, so... eh. I feel like I could say more but I just woke up. Clearly I'm not that good at this game, and I need to replay it on hard soon.
|
|
#
?
Apr 10, 2021 16:21
|
|

|
I can't even get close to it with the Hard Hits Medal on, unless I put on Bug Me Not. For note of position in the story, I'm at the beginning of Chapter 3. Probably going to wait until after Chapter 3 before attempting it.
|
|
#
?
Apr 10, 2021 16:22
|
|
|
Alien Arcana posted:A few notes on the Devourer's AI. First, on why the Devourer doesn't always make two attacks. Thanks for this! That makes a lot of sense, and I'm glad to have some resolution to the mystery of when the eating happens (even if it's even worse than I thought it was!). I don't think I knew that cooldowns were a mechanic in the game, but it makes a lot of sense as a way to keep the AIs from repeating the same action too often. I really appreciate you looking under the hood and bringing that knowledge here; I'm approaching things mostly from empirical observations, but of necessity that means I'll probably get some things wrong or make faulty assumptions, and I'd rather not mislead anyone. Procrastine posted:Head Slam both a) removing a party member with no countermeasures b) giving the boss regen and c) leaving the party member dead once you get them back is such a rude combination (is both even the right word for a list of three? ah, gently caress it). Alien Arcana posted:I think the reason the "eat the party member" gimmick doesn't work here is twofold: Araxxor posted:The head slam definitely feels like it needed to have been tweaked more. You barely have much counterplay to it other than skipping the mechanic entirely. And it’s such a huge wrench in the battle on top of all the other moving parts the battle has that adapting to it on the fly is kind of really not feasible because of the sheer disadvantage that a) being left with 2 party members is and b) you have no control over who gets chomped. If the flytrap mechanic wasn’t in, adapting to the situation from having a random party member be eaten would be more feasible, but as it stands all the moving parts together is kind of a bit much. Yeah, it honestly feels unfair to play against a lot of the time, and I think it's the reason so many people get aggravated with this fight. The action-economy loss of being down a party member is huge in a game where you have only three characters, and the attack does so many other things on top of that (healing itself? seriously?). Even if you come here much later in the game, it can be hard enough to keep up with the damage output, and being down a character is just crippling. Removing the flytraps is another solid suggestion. I think I didn't consider it because they add a lot to the aesthetic of the fight, and if you're good at blocking them they're honestly less threatening than the rest of what's going on, but that might be the easiest way to tone down the damage output. Alien Arcana posted:A better implementation of this gimmick was done in Darkest Dungeon, with the Hag boss (who can trap a party member in her cauldron). Oh, this is interesting! That sounds very similar to what I was proposing here; there's nothing new under the sun, I guess. Alien Arcana posted:Wow, nice. I did my first playthrough on Normal difficulty, and I still wiped twice on Devourer before I gave up. I think I came back post-Chapter 3 (or maybe 4?) and managed to kill it. And that's on Normal. Procrastine posted:I ran into the Devourer only slightly later, choosing to finish the Chapter before backtracking to the mystery crank leading to it. I attempted the fight a few times throughout the game, but despite being the first Bounty I found, it ended up being the last one I killed. I never did figure out the Spicy Bomb recipe on my own, which is probably a big factor. Arzaac posted:Yeah wow that was pretty incredible. It took me a few chapters later to take this guy on for re and he still wasn't easy. I think I was just underestimating attack items too, dont think I ever used those bombs in a serious fight. Alxprit posted:I think the most impressive part of all of this is that it was on hard mode. I played the entire game not on hard for my first playthrough and I still had Devourer horror stories. And yeah, not knowing about bombs was probably a contributing factor for sure. Though I don't tend to like DPS races as a mechanic in general, so... eh. I feel like I could say more but I just woke up. Clearly I'm not that good at this game, and I need to replay it on hard soon. Thanks, everyone! I don't blame anyone for coming back much later to deal with it; it's certainly what I did on my first playthrough (and on the higher difficulties). It's really easy to build it up in your head as something terrifying after the first impression it tends to make, and honestly it's not that rewarding to beat it early. The thing about the Devourer is, I think it's the boss that requires the biggest change from what I keep calling "conventional tactics" for lack of a better term; approaching it the way you'd approach most bosses in this game usually leads to failure. Once you make the mental switch to "this thing is a glass cannon, I need to kill it ASAP before it kills me", it's mostly just a question of figuring out where the damage is going to come from. If you don't know about Spicy Bombs (or don't think of using them), it's a lot harder to get the necessary rate of damage until later when there are more medals available to choose from. There are plenty of strong glass-cannon/burst-damage builds in this game and I think most of them can handle the Devourer fine with a bit of luck. Araxxor posted:I think the Devourer ate a slight defensive nerf in a patch but yeah it was by far the bounty boss I had the most trouble with. The others weren’t nearly as harrowing in comparison for me. I couldn't find any explicit details about that in the patch notes, and the first version I played was 1.0.5, so I'm not sure. Earlier patch notes do make a few references to fixing softlocks in the fight, I guess it took them a while to work out some kinks, but I didn't see any mention of balance changes. I know exactly the skill you're thinking of. Amusingly, the wiki recommends a strategy using that skill that kills it in two turns. I might show this off or something similar later, though I didn't want to here because it requires things from Chapter 5. (Spoilers at link for upcoming medals, skills, and items.) Honestly, one of the biggest issues I have with the Devourer's design is that victories over it tend to feel hollow: the RNG-dependent strategies mean it ends up feeling like it "let you win". This is probably why I leaned so hard on the Electric Needles (Numb) strategy for a while: it might be kind of cheap, but at least it's reliable. ChaosStar0 posted:I can't even get close to it with the Hard Hits Medal on, unless I put on Bug Me Not. For note of position in the story, I'm at the beginning of Chapter 3. Probably going to wait until after Chapter 3 before attempting it. That seems sensible; I don't actually recommend anyone face it this early, unless they're specifically doing it as a challenge run. It's more fun to face it later when you can engage a bit more "fairly" (although fairness is relative). The battles in this area can be surprisingly tricky, and there are a lot of them. Attrition definitely takes its toll. (Would you believe I forgot about Bug Me Not? Although it wouldn't have helped me on the LP file anyway, since I'm still getting EXP from these enemies. Quick Flea does the trick just fine, though.) vilkacis posted:
I'm pretty sure I did too, but it's the principle of the thing. (Also, honestly, I owe the title to my partner, I asked her to help me think of pitcher puns and as soon as she said this I knew it was the one. The runner-up was "The Bells of Victory", for a Pokemon reference, but I wasn't in love with it.) I do like when games make things like this possible. Quackles posted:Fun fact: There are a few pitcher plants that have other strategies than just eating insects. Nepenthes hemsleyana is a pitcher plant that's evolved an elongated tube with a lip in it. A bat called "Hardwicke's woolly bat" roosts in the plant, which gets nitrogen from the bat guano. Oh, that's cool! Thanks for bringing it to my attention. Quackles posted:Small bonus note about Paper Mario: Master Quest, since Explopyro mentioned it. Take your time, but do know I always enjoy seeing your updates on the project. I'd offer to help playtest but I think I'm probably going to be preoccupied with this LP for a while, it's probably not realistic to expect I'll have the time. Deterministic AI seems like a good direction to take things for Master Quest. I think you'll find wide agreement from the challenge-run community, too, judging by the comments I've seen several of them make about the RNG elements in Bug Fables among other things. (I don't hate the RNG stuff for casual play, I like a bit of unpredictability to have to respond to, but when you get to the edges of what's possible and fights become puzzles, it just gets frustrating.) Explopyro fucked around with this message at 01:27 on Apr 11, 2021 |
|
#
?
Apr 11, 2021 01:16
|
|
|
Explopyro posted:I know exactly the skill you're thinking of. Amusingly, the wiki recommends a strategy using that skill that kills it in two turns. I might show this off or something similar later, though I didn't want to here because it requires things from Chapter 5. (Spoilers at link for upcoming medals, skills, and items.) Oh uh, funnily enough that wasn't actually the skill I was talking about. It was both of his shielding skills. The fight was a bit more attrition based for me and I had to use those to tone down the damage output while redirecting attacks to Kabbu so I'd be in a better position for the fight once the head slam mechanic happened. And after flytraps spawned there Leif was the only one capable of bursting down the plants and Devourer so if he got chomped yeah it was game over. Ideally my strategy had Kabbu be the one chomped as my setup had Vi and Leif as my DPSers, but unfortunately that's not guaranteed, and even Taunt can't change that. Vi being eaten was a setback, but one I could live with. But Leif was a no no, he was too core to my strategy.
|
|
#
?
Apr 11, 2021 01:59
|
|
|
Araxxor posted:Oh uh, funnily enough that wasn't actually the skill I was talking about. It was both of his shielding skills. The fight was a bit more attrition based for me and I had to use those to tone down the damage output while redirecting attacks to Kabbu so I'd be in a better position for the fight once the head slam mechanic happened. And after flytraps spawned there Leif was the only one capable of bursting down the plants and Devourer so if he got chomped yeah it was game over. Ideally my strategy had Kabbu be the one chomped as my setup had Vi and Leif as my DPSers, but unfortunately that's not guaranteed, and even Taunt can't change that. Vi being eaten was a setback, but one I could live with. But Leif was a no no, he was too core to my strategy. That's really interesting! Now that you say it I can see why you'd take that approach, but I wouldn't necessarily have thought of it (those skills are very strong though!), and I've found it's pretty rare to see approaches other than the damage race one. I love how many different tactics people come up with to succeed in this game, I really do.
|
|
#
?
Apr 11, 2021 02:11
|
|
|
15: Into the Golden Hills Before we start, Alien Arcana has provided more details on how the Devourer works: Alien Arcana posted:A few notes on the Devourer's AI. First, on why the Devourer doesn't always make two attacks. So it's a bit less random than I'd thought (and this makes more sense of the eating behaviour), though still quite variable. I'm not sure I knew that the game used cooldowns behind the scenes to regulate enemy attacks, but that seems like a sensible way to implement it to me. I stand by everything I've said about the fight, though. 26 - Golden Lands On the way back to the Golden Settlement, I saw the caravan was here and decided to pick up a couple of Drowsy Cakes. 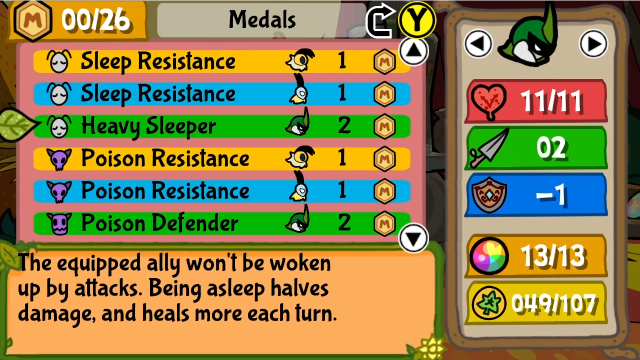 And I decided that, despite my misgivings, we'll give Heavy Sleeper a go on Kabbu. I don't have any specific plans for it, but I have nothing else to do with the MP so I may as well give it a chance.  Let's finally head north. 30 - The Sacred Hills There's a lot to see here, including new music. This song is a nice change of pace, it really evokes an eerie feeling and makes this place feel different despite using the same visuals as the rest of this region. ...I feel weird. No kidding. Even the air feels strange. This is not sacred land in name alone. There must be forces at play we can't see. We won't let it stop us, though!Our characters have picked up on it too, though presumably for other reasons. 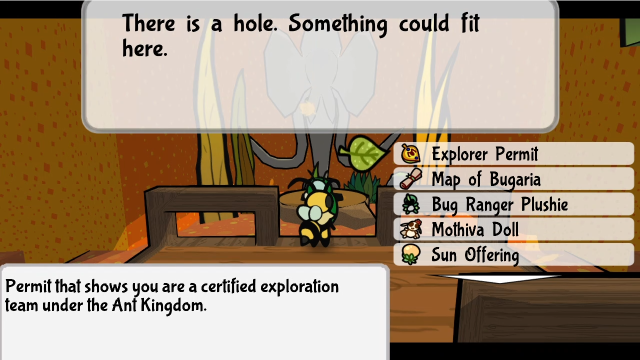 To the north, there's a hole at the base of the Venus statue, and it prompts us to use an item. Nothing we have does anything, though; presumably finding what goes here is going to be our goal for the area.  Going too far toward either the right or left exits triggers a cutscene. 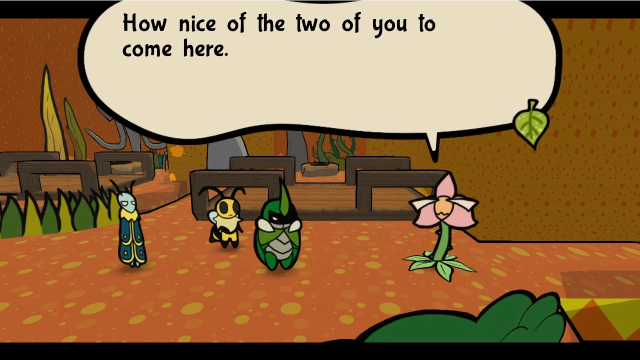 Goodness! Eeep! That plant can talk! ...It can't count, though. Goodness! Eeep! That plant can talk! ...It can't count, though. Huh? So there's three of you? Huh? So there's three of you?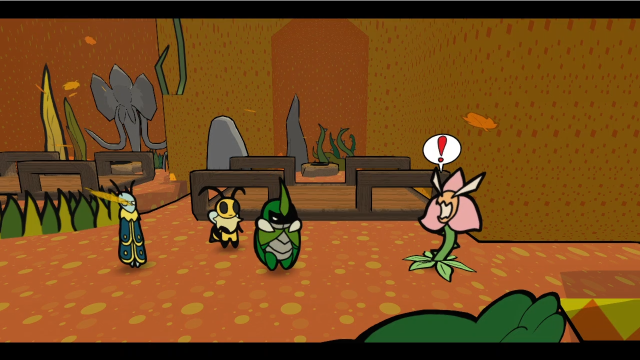  I see. Hm. So that's how it is. So what brings you here? Come to take in the sights? We're here for the artifact! Fame and riches! I see. Hm. So that's how it is. So what brings you here? Come to take in the sights? We're here for the artifact! Fame and riches!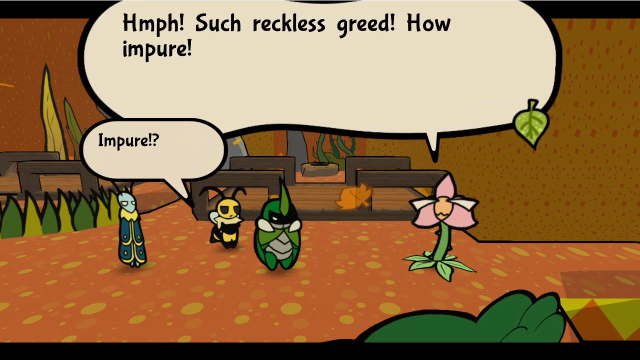 Dear plant, we assure you there is more at play than mere riches... Yeah right, you bugs always say the same! Nice going, Vi. If you want to get the artifact, you'll have to get to the top... Dear plant, we assure you there is more at play than mere riches... Yeah right, you bugs always say the same! Nice going, Vi. If you want to get the artifact, you'll have to get to the top... After it says this, the bud just poofs away. Vi, announcing openly you are here to take treasure wasn't very smart. I mean, I wasn't gonna lie or anything! We're sure that's the reason. Whatever! You heard it. Treasure's at the top, so let's get climbing! Let's be careful. Something feels off about this place.After this conversation ends, we're back in control and can go explore.  Just north of where the plant surprised us, there's another hole that seems to need an item. Again, we don't have it. Let's go east to start with. You can take the two sides of this area in whichever order you want, but I prefer starting with the right side (I think the difficulty curve and escalation of the puzzles flows better if you do that).  We're immediately confronted with a crank and a bridge.  Using the Beemerang Halt on the crank makes the bridge rotate, until we let go of the button, when it will slow down and come to a halt. (The game is fairly kind about this, and will generally snap bridges like this to the closest right angle.)   And now we can cross, though all that's over here is a flower dripping water, and another crank that controls the bridge from this side. Seems like we've got an ice block puzzle coming up. Those flowers are dripping dew... how refreshing. Ugh, I'm getting Snakemouth flashbacks... I need to make sure to stay dry! Silly Vi. Let's make sure to utilize that water wisely to explore the area! It's been a while since we froze stuff... We're looking forward to it.Checking the banter for the area reminds us that we can freeze droplets.  So let's do that, even if it's not clear yet what we need it for.  Kabbu knocks the ice cube onto the bridge. There's nothing to do with it on the platform we were on, so clearly we need to take it elsewhere.  Then we can turn the crank again to orient the bridge vertically. From the bridge, we can start to get an idea of what we might need the block for: in the back corner of this area, there's a ledge too high for us to jump up. We must need the block to climb it. (If you have trouble manipulating the ice blocks, especially on the bridge, one trick you can do is getting it onto the end of the bridge and then making sure to rotate that end closest to the north platform. You need to hit it fewer times that way.) 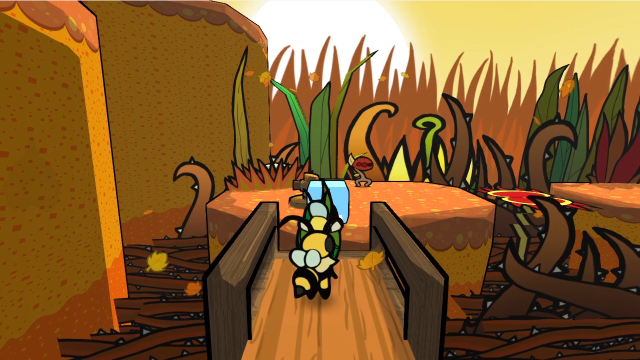 Kabbu knocks the ice block onto the north platform. Before we keep going, though, let's get that Chomper out of the way. 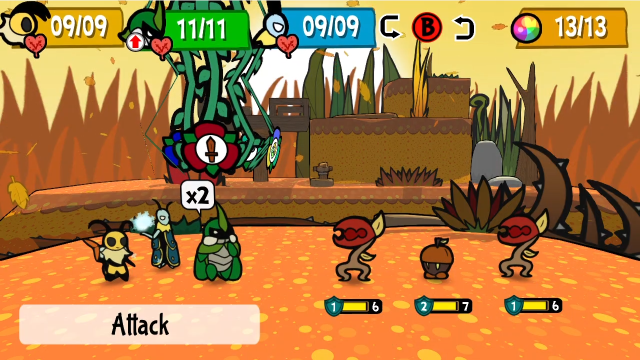 We're already familiar with Chompers, thanks to having explored the "bonus" area in the Golden Path. If we hadn't, this would be our first time seeing them. This is a pretty straightforward battle, we can make quick work of it. 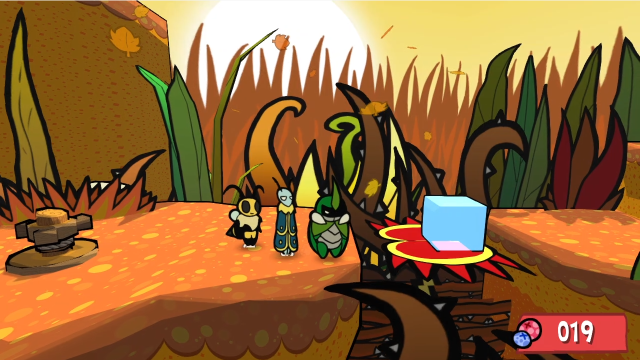 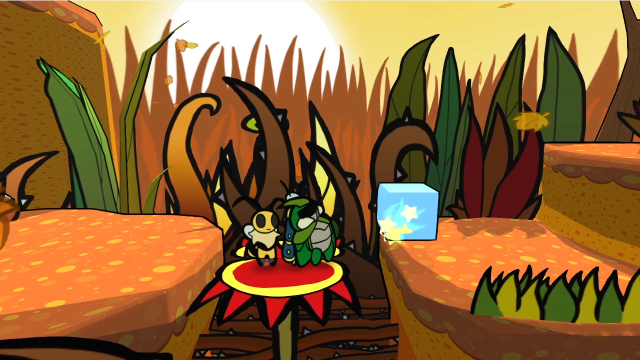 Here's where it gets a bit tricky. We have to get the ice block over to the far side, and that means getting it across this flytrap. If you jump onto the flytrap, you have enough time to hit the block and then immediately jump to reset the timer. There's not a lot of leeway, though, and if you mess up and get chomped, you'll lose the ice block and have to go back for another one.  Success.  At the top, we find this crank. Clearly, this goes in one of those holes we saw in the central area.  To get back, we have to rotate the bridge while standing on it again.   Out of curiosity, I tried the crank on the hole at the big statue, and got this special message saying it doesn't fit. Other items just get "This item does nothing."  It goes to this hole on the right.  As you might expect, it's a crank. We can raise the elevator now.   At the top, there's a new path to the north. Let's go there.  This room's pretty big, and has quite a bit going on. It's been a while since we saw flying Seedlings! Time for some smacking! Wait. Huh? Haven't you noticed the spikes in our path? Yeah, but what's that got to do with my smackdown? I see...! We could freeze them to get across! Mhm. Finally, a non-violent solution. Yeah, cool. Whatever... I really want to smack something, though.Don't worry, Vi, there will be plenty to fight soon enough. I've seen people get stumped by this room, at least briefly, but if you check the banter it basically hands you the solution. This is the first (but certainly not the last!) time the game asks us to use frozen enemies as platforms. (The flying Seedlings in this area can be fought if you really want to, but there's only a single one in the battle, they don't drop anything, and they respawn instantly. They're clearly here for another purpose.) 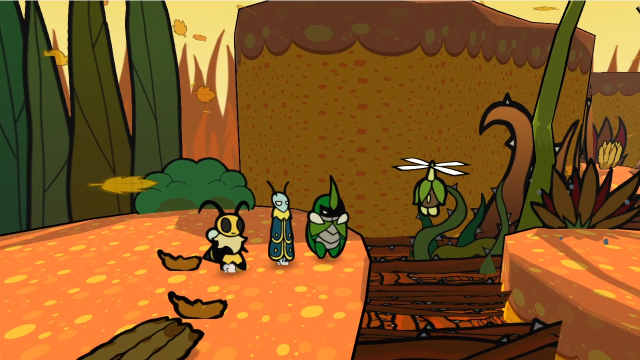 This gap is too wide for us to just jump across. 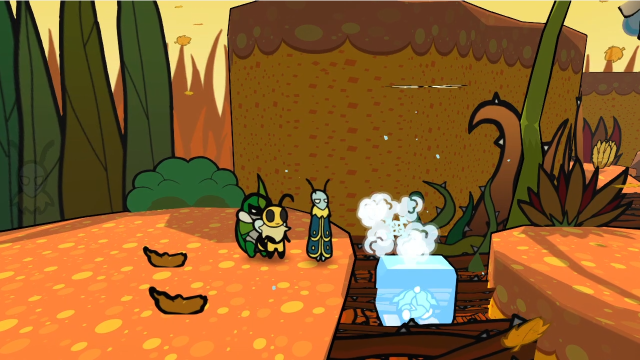 There we go! Unlike the blocks we make from water droplets, enemies don't stay frozen forever, but you get plenty of time. 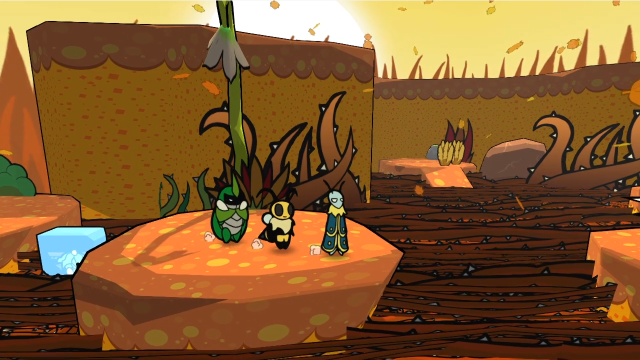 The next gap is bigger; we have to get more creative now. 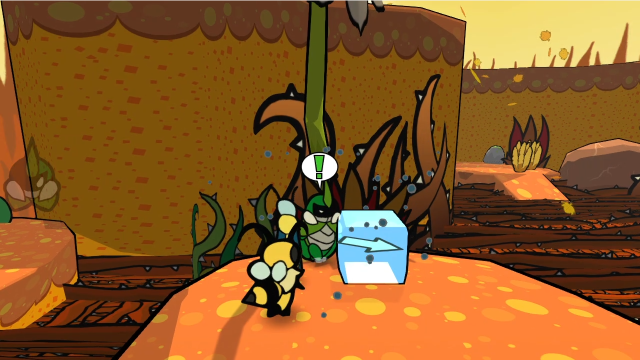 This flower produces water droplets, so we can make an ice block.   What you're supposed to do here is use the ice block as a stepping-stone to get close enough to the Seedling, then freeze it and use it to get the rest of the way. Somehow, I managed to get it to land perfectly in the centre, and then jank my way across without using the Seedling at all; I don't recommend this, but it's apparently possible. DO NOT touch the red mushroom. It launches you back to the platform we were just on. It's very frustrating if you do this by accident, and I think it's a bit unfortunate it's placed the way it is because it's very easy to walk into.   Things are getting complicated here. We have a dripping flower, and a bridge to the east that we can't rotate (if you look carefully, the crank is on the platform to the north).  We freeze a block.  Once again, the ice block serves as a stepping-stone to reach the Seedling, then we freeze the Seedling to get to the platform. 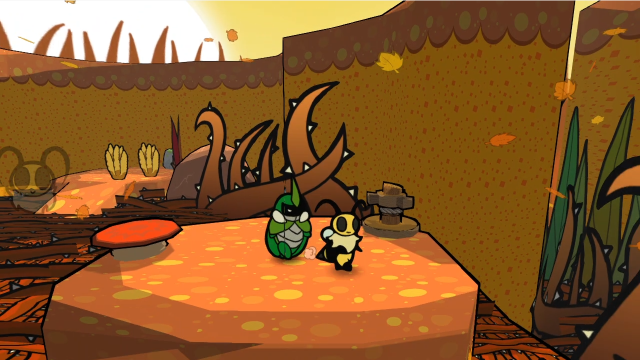 Again, watch out for the red mushroom. This gap in particular is quite tricky, because it's harder to judge where you are vertically than horizontally, and aiming field skills vertically is harder (with the way the controls work), and you don't want to get sent back before doing the important thing.  Which is rotating this bridge to a horizontal position. 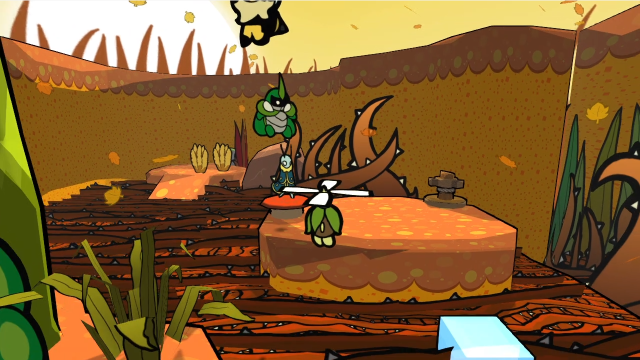  Now we can step on the mushroom and get launched back. 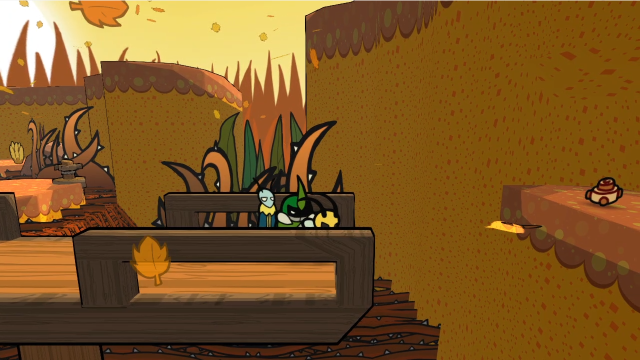 At the end of the bridge is another conundrum: there's an item on that ledge, but it's too high for us to reach with the Beemerang!  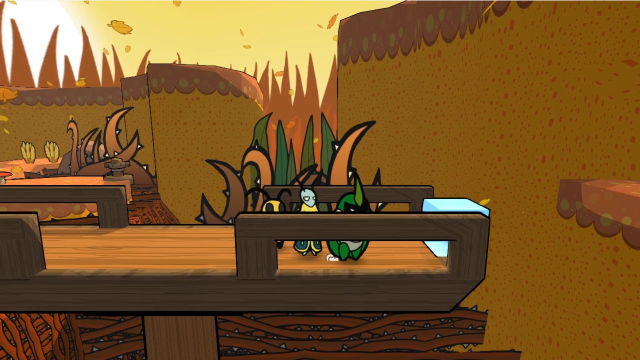 The answer is to go back and bring an ice block here.  Standing on the ice block, Vi can reach the item.  ... Top half? Guess it was never going to be that simple, was it. Still, this is progress.  We're done here, so the mushroom is no longer terrifying and we can use it to get back. (The observant among you may notice there's a platform in the back we haven't gone to, coming off a ramp out of the spikes. We don't have the ability needed to reach it, but it's worth remembering for a later time.)  Whee! 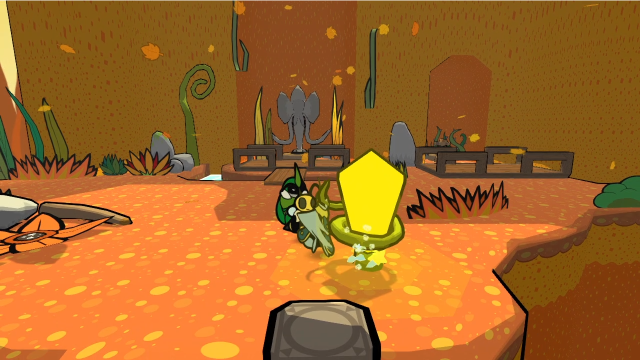 One nice thing about the segmented structure of this area is that we're constantly returning to this central hub, and there's a yellow save crystal here, so we can use TP more or less freely.  Let's head west now.  It's hard to see from here, but this room is very big. What a vast space. It doesn't seem like there's a way to cross... Nah, it's fine. I see a lot of cranks! I just have to be smart with the Beemerang! You mean the A.P.B.D.? Isn't it the A.B.D.P.? It's the Beemerang!(They're both wrong. It's A.D.B.P. And I am now sick of typing all those full stops; I'm firmly with Vi on this one.)  Almost didn't see this Chomper until it was on top of me! It was hiding just offscreen to the south. 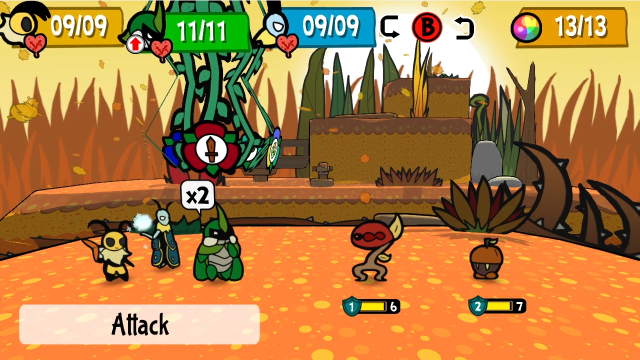 This is a pretty easy fight. 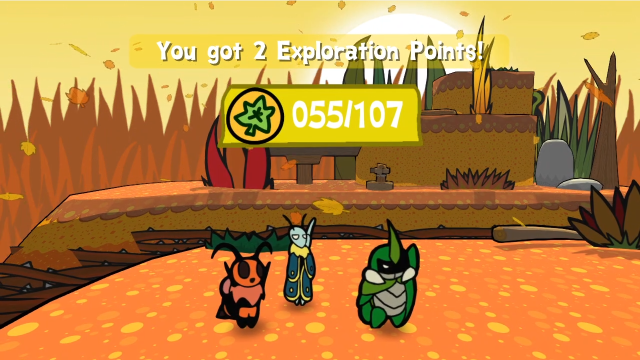 Acornlings are no longer worth any EXP, and Chompers are just giving us two. The drop-off in yield as we gain levels is very significant. We're a tad overlevelled after doing the bonus area, but if we hadn't gone there we'd be getting the EXP here instead, so it all tends to even out. 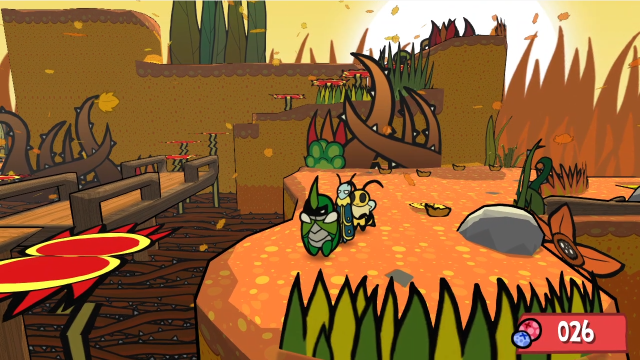 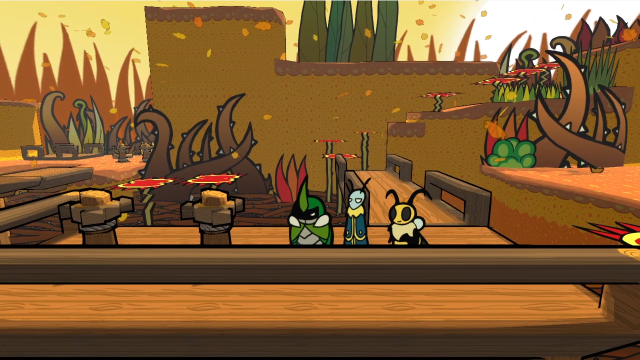 Here we can start to get a better idea of what we're dealing with. Before touching any of those cranks, though, we should take the easternmost plank north: is that a staircase of flytraps?  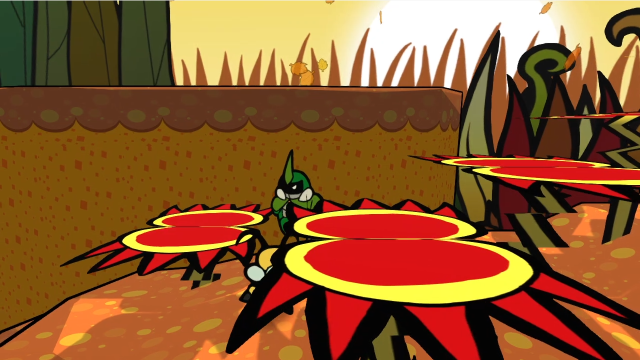 This one's a bit tricky to get up to, you need to jump from the right side. The ground's at an angle and the other sides are too low. 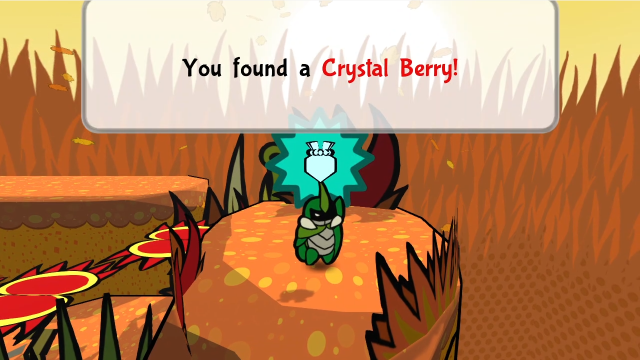 There's a Crystal Berry just sitting there waiting at the top. I'll take that, thanks. That's all, though. Let's go back down. 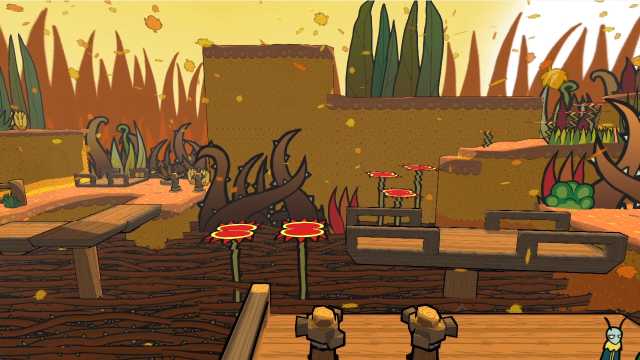 Now that we've checked out the north, we can use the crank on the right to turn that plank horizontal. 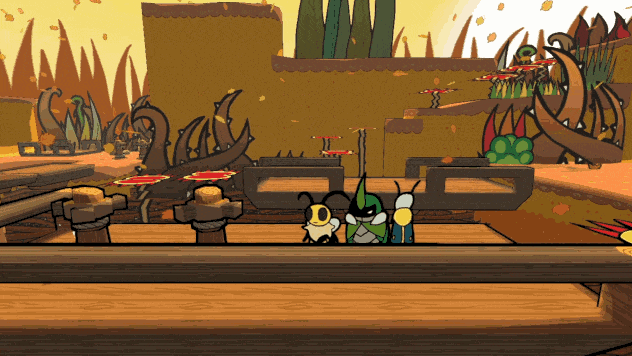 And the left crank lets us rotate this L-shaped platform, so we can get the rest of the way across. 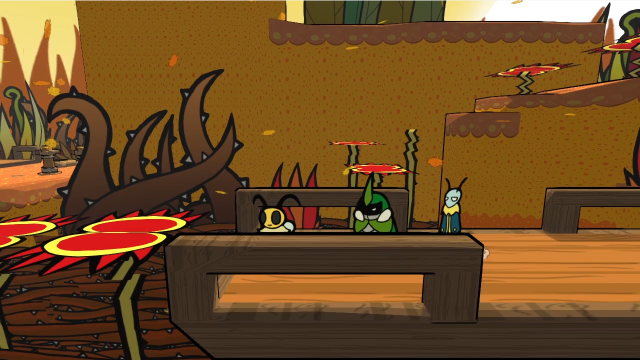 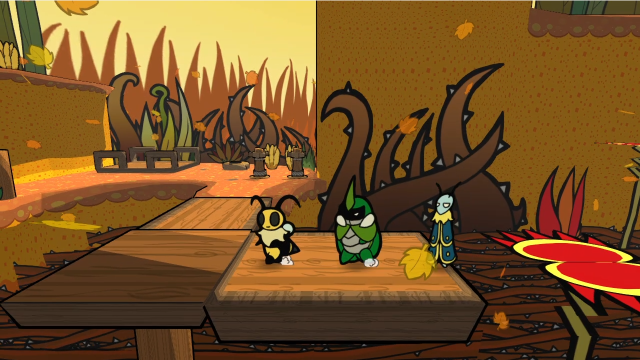 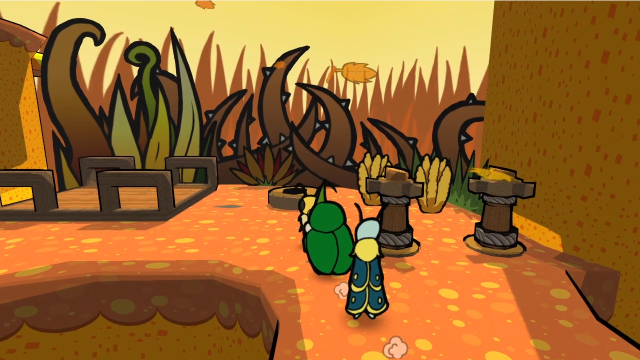 Looks like there's another elevator here, with another hole that's missing a crank. 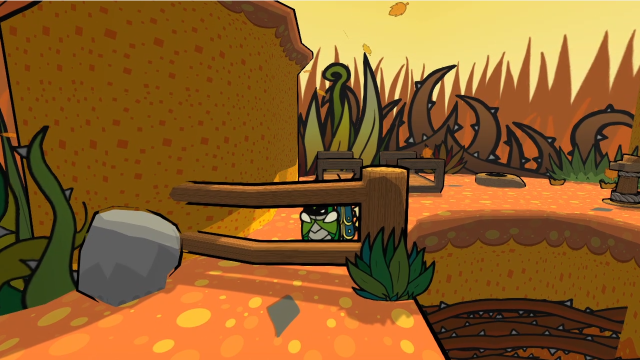 And this gate blocks us going south. Or at least, it blocks the easy way. 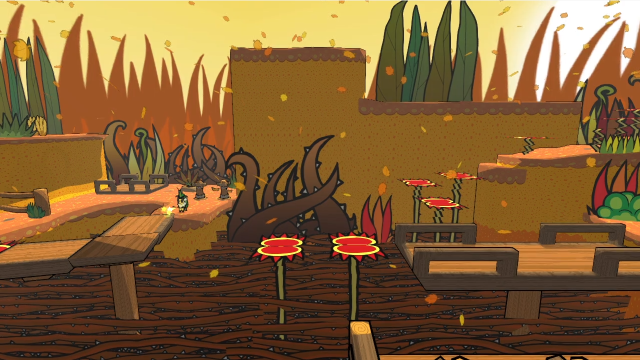 The two cranks here also control the main platforms in the room; what we have to do is rotate the L platform again, then go over that way. 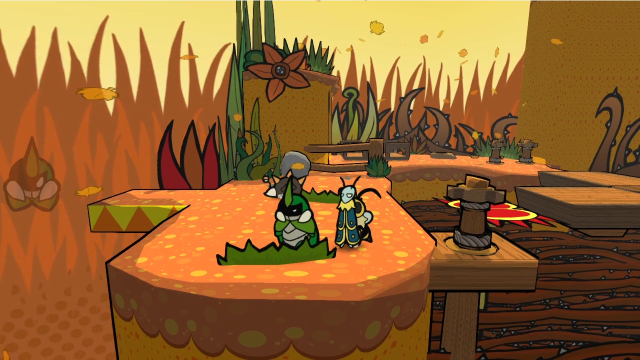 There's also a Numbnail waiting on this side. 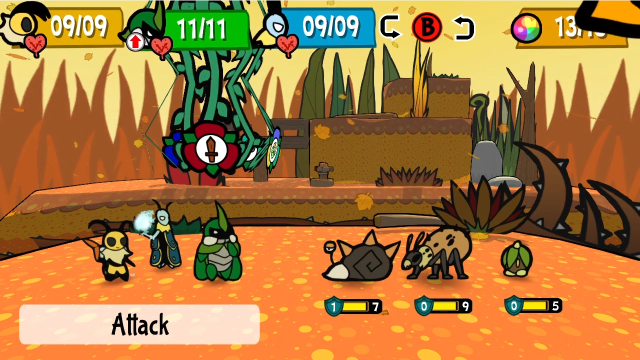 Weevils still yield decent EXP, at least. 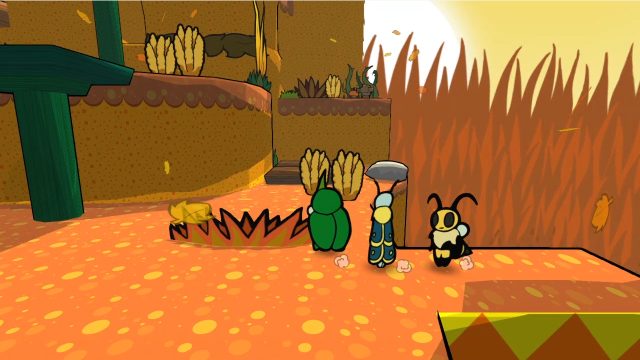 This area looks more complicated. So these lifts move differently when the cranks turn! Gold star, Kabbu. So the green ones go down, and the brown ones up? Indeed. How nice of them to color code them!The banter explains the puzzle so I don't have to. Mostly, anyway. 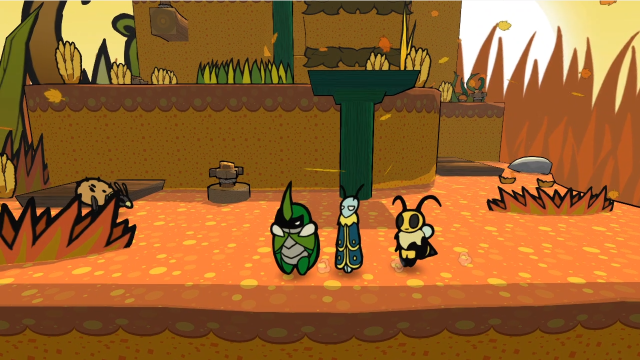 Coming around south gives us a bit more perspective. 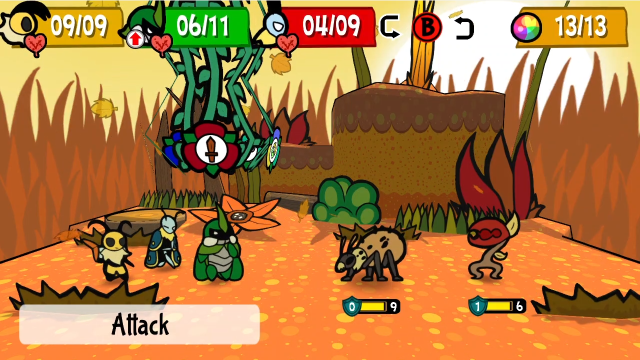 Let's fight the Weevil first. These battles are still pretty simple.  Up we go! We can see the platforms' gimmick in action, brown ones lift up and green ones go down when you turn the crank. This crank here just controls the two platforms next to it. 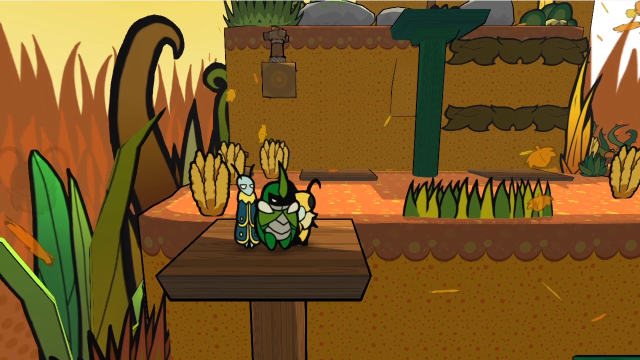 That gets us up to the main platform. See the crank behind the weeds in the back left corner? 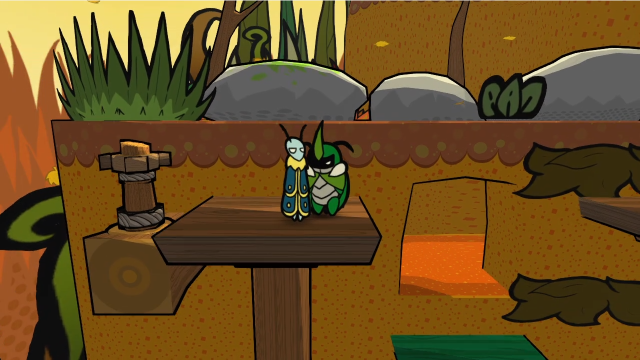 This is a bit tricky. We can ride this one up, then jump to the green platform... 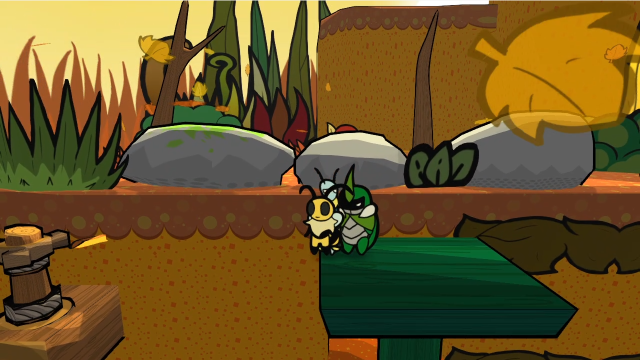 ...hit the second crank on the way up... 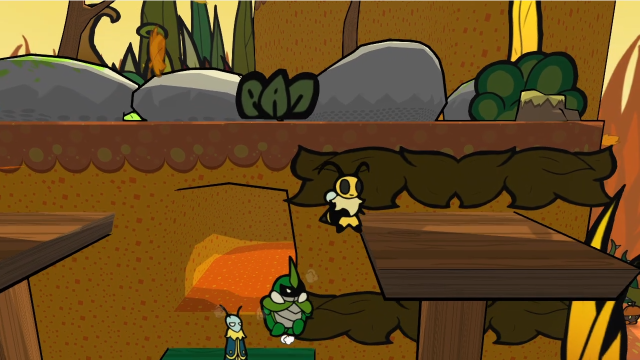 ...then jump to the last brown platform. This jump's pretty tricky, and looking at this screenshot I have no idea how I actually made it. Vi's barely got a toe on there, and that platform is rising! 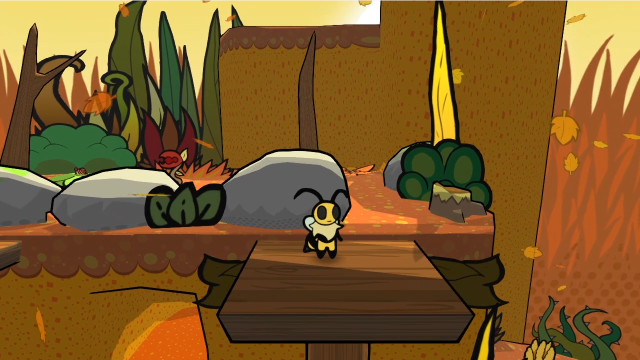 But it worked. Let's check out what's up here.  An enemy, of course. 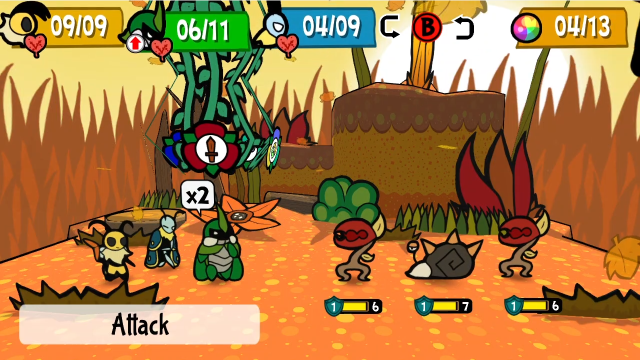 Chompers and a Numbnail. I'd have sped past this battle, but something interesting actually happened:  Kabbu got hit by the Numbnail and sent to sleep, so we get to see Heavy Sleeper take effect!  What on earth? All the documentation I've seen on I think I underestimated this thing. I still don't think you can really build a strategy around it, but it seems decent to put it on for incidental benefit if there are sleep-inducing enemies around.  There's the Heavy Sleeper icon next to Kabbu.  Anyway, we finish the battle. The rest of it was pretty straightforward. (And yes, Kabbu got another 6 HP heal on waking up the next turn.)  There's another small crank hiding in this pile of leaves. We know where to take this. 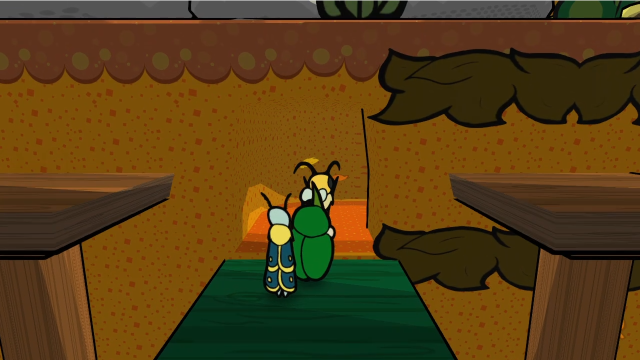 Before we go, there's one last thing to check out in this room. We went right past this tunnel halfway up the wall...  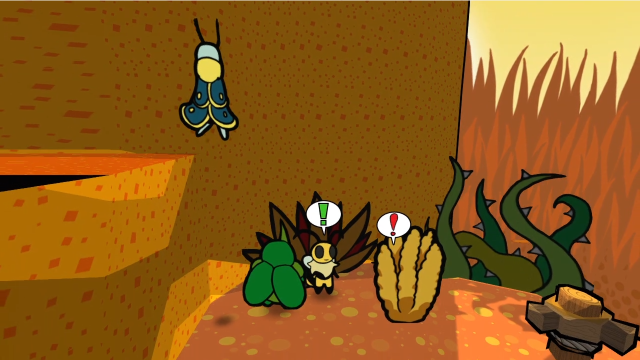 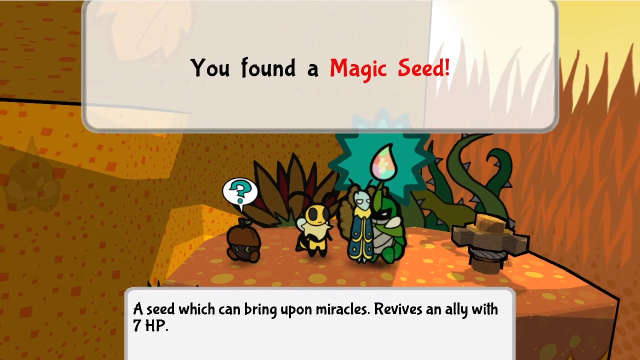 This ledge has a Magic Seed hidden in a weed, and an Acornling. I won't turn up my nose at that. 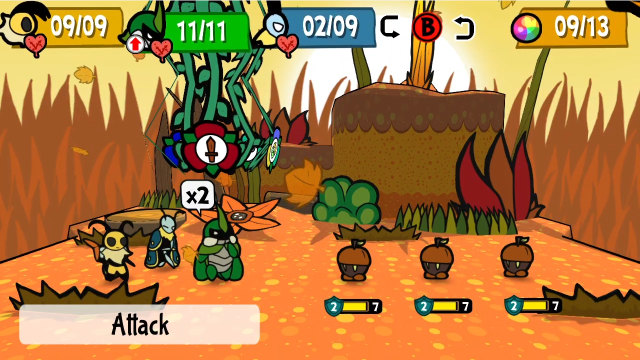 There are three of them in the battle, but it's still nothing to write home about. 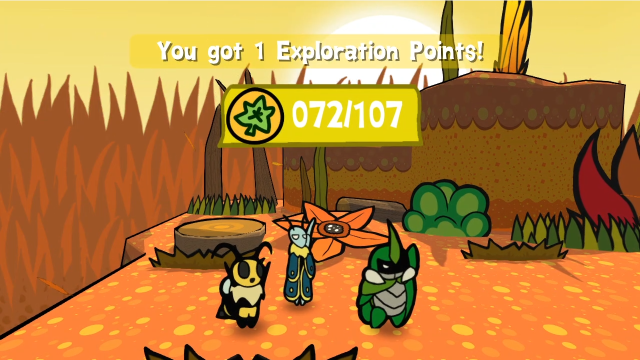 Nor is the EXP. 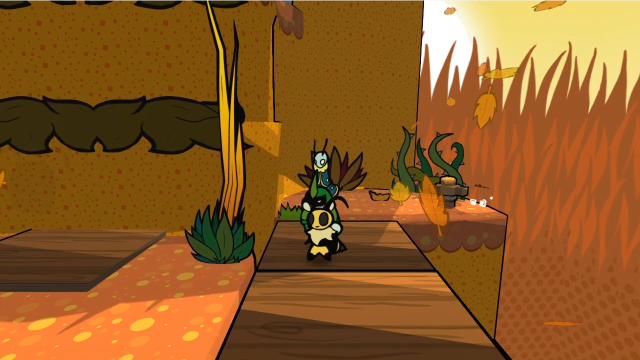 Turning the crank raises these platforms and gives us a shortcut back to the first ledge. I think this is meant to make it more convenient if you take the tunnel first, but I did it backwards. Oh well. 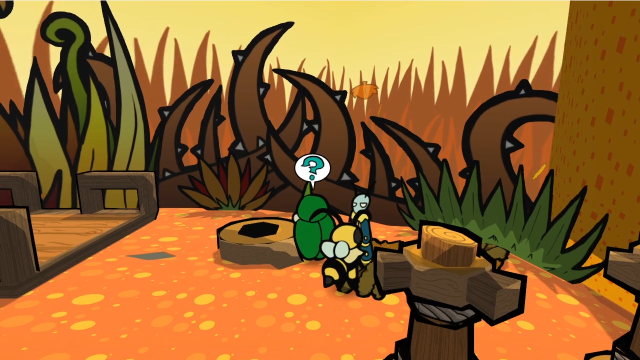 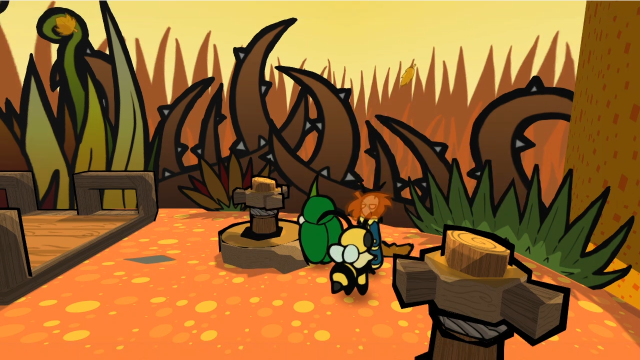 Just like before, the crank goes in a hole and we can now use an elevator. 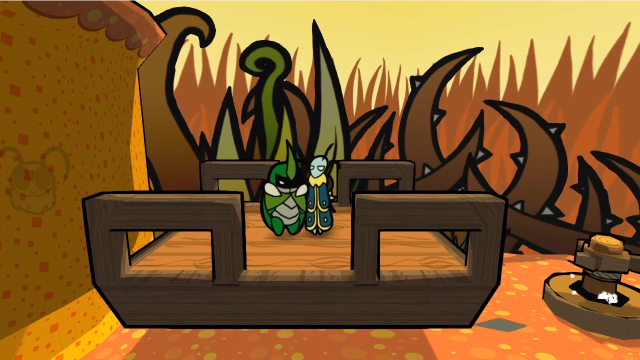 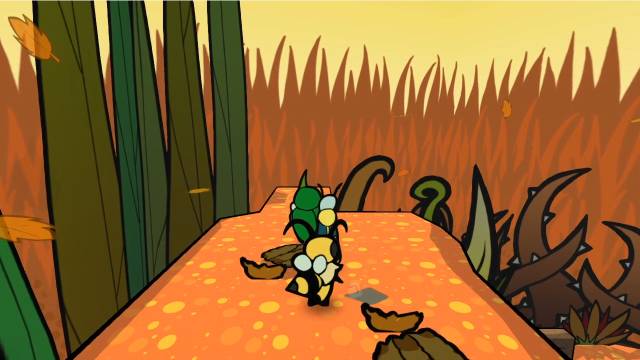 To the north we go. 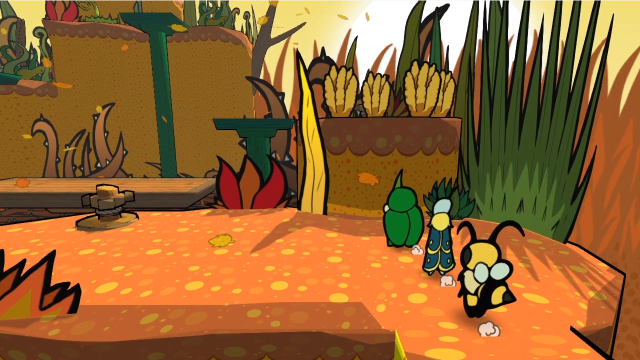 It's another mess of elevators and cranks! This looks like a job for the Beemerang. Mhm! The professor's upgrades actually helped out a ton! We should probably start thinking up a performance report for when we see her again... Uh... report? Right... We will deal with that later. Let's focus on the mission!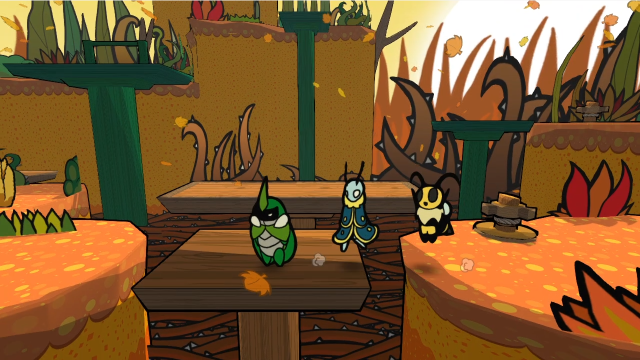 Let's survey the area a bit before we start messing with the cranks.   And get rid of these guys.  This is definitely a dead end unless we can reposition the elevators.  This crank does just that, but if we want to be able to get over, we need to be standing on the brown platform when we start spinning it. 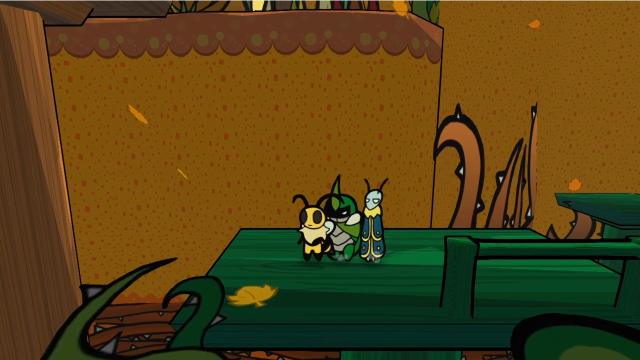  Let's go left first. Letting the green platform rise again, we can get over here.  Where a Midge tries to ambush us. 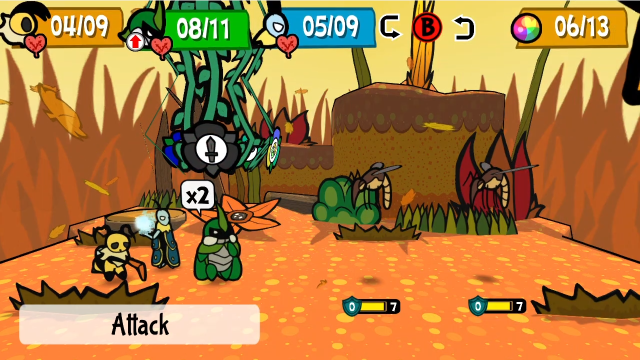 It's just a fight with two Midges, like we've seen plenty of times before. 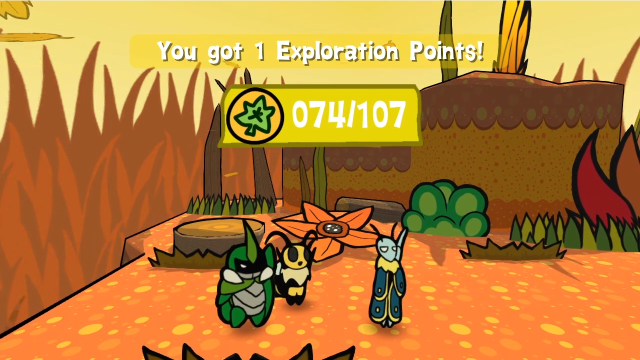 Midges have joined the club of enemies we're too high rank to get EXP from. 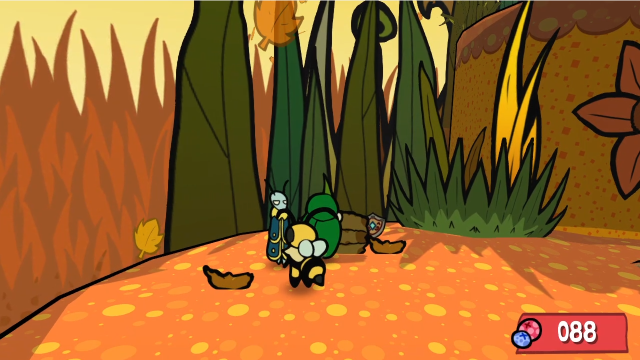 Was that a medal hiding behind that weed? 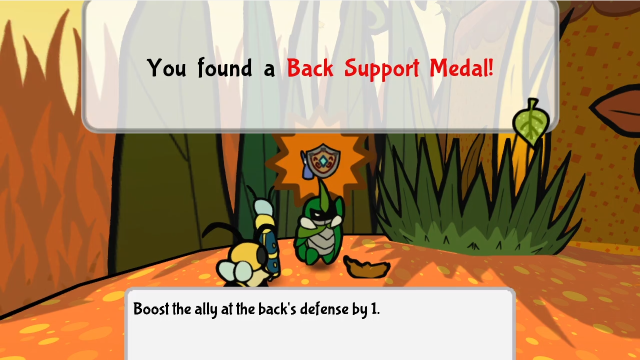 This was slightly more situational before v1.1, when the "Swap Positions" command was added, since previously you didn't have full control over who was in the back (if Vi was in front, Leif would be in back, Kabbu in front would have Vi in the back, and Leif in front had Kabbu in the back), but the update gave us full freedom, and made this medal a lot more versatile as a result. You can do some clever things with this if you're willing to fiddle with positioning on the fly; if nothing else, the obvious thing you can do is put Kabbu in the rear when you want him to use Taunt. 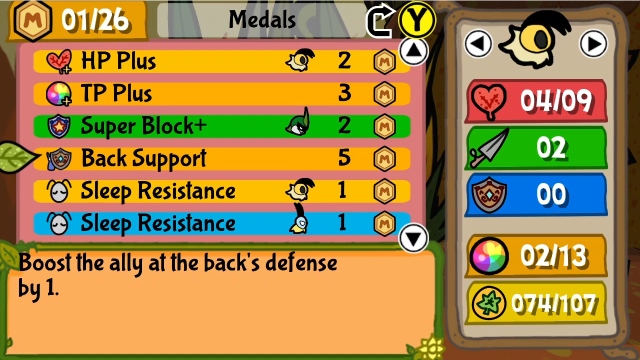 Needless to say, that's going straight on. I actually have more medals than I have MP now! 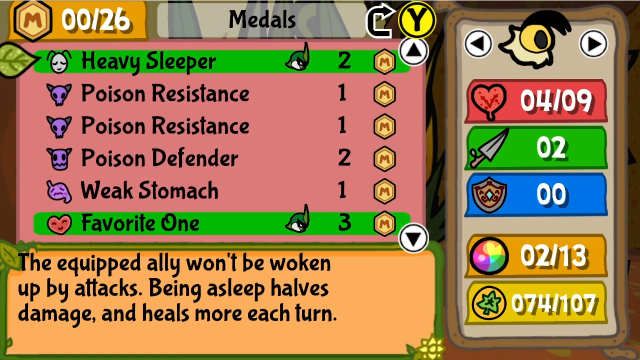 I took off all the poison-related medals for now, since there aren't any poisonous enemies in this area. We could still get some benefit out of Poison Defender if we equipped Weak Stomach too, but the benefit's pretty marginal and I won't miss it right now.  With the crank (and some good timing), we can get back onto the green elevator. 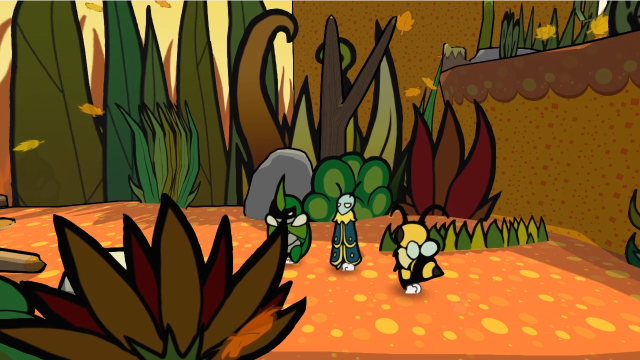 Let's see what's up here. 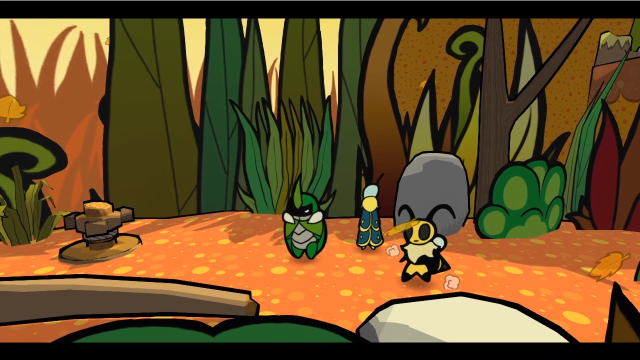 There's another crank... 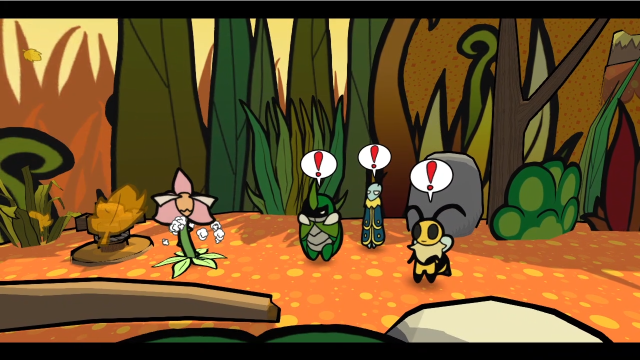 But this Venus' Bud pops out when we try to approach it. 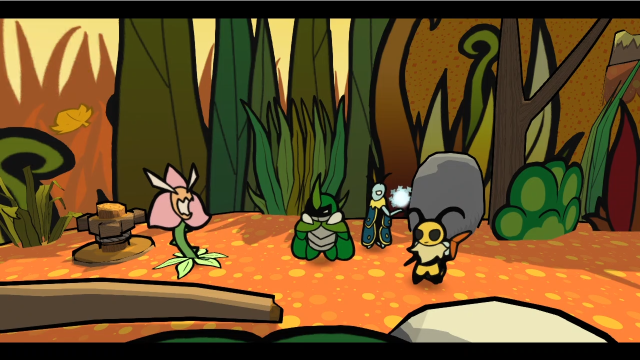 And it looks hostile! 29 - Team, This One's Stronger! (Miniboss) 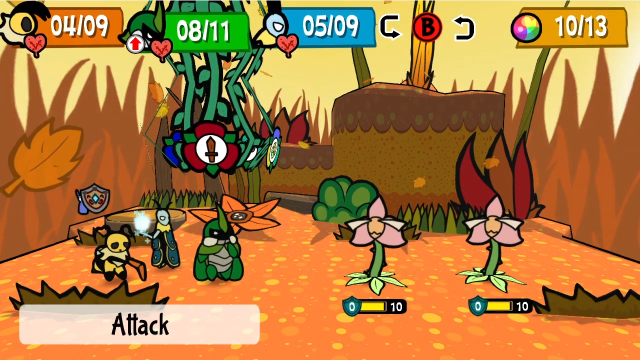 It's a battle with two Venus' Buds. These are exactly the same as the one we (might have) fought alongside Aria, but they're a lot less scary when she's not around. 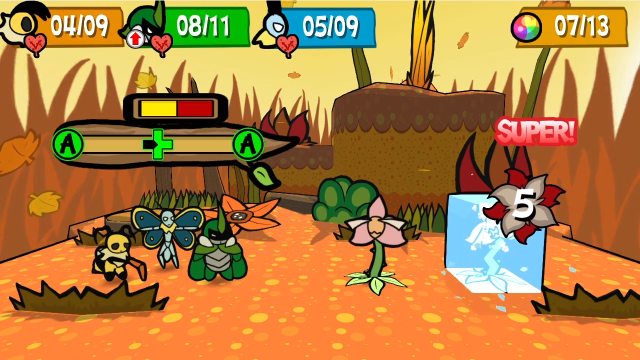 Freezing one of them with Leif basically trivialises the entire fight. We can take out the other in two turns, just in time for the first to thaw and be low enough on HP to go down in one turn as well. 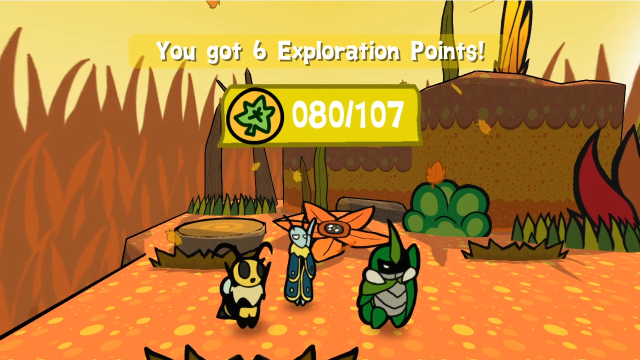 That's that. 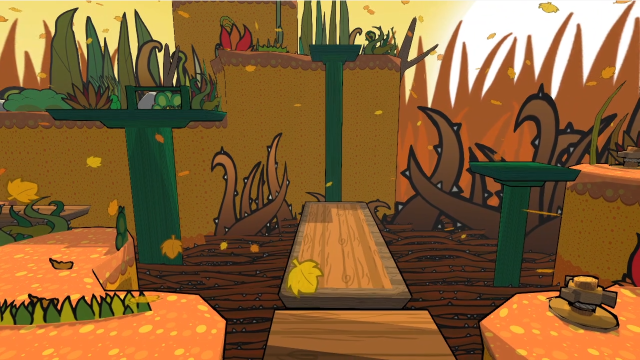 Turning the crank up here rotates this large plank, so we can have it go vertical. 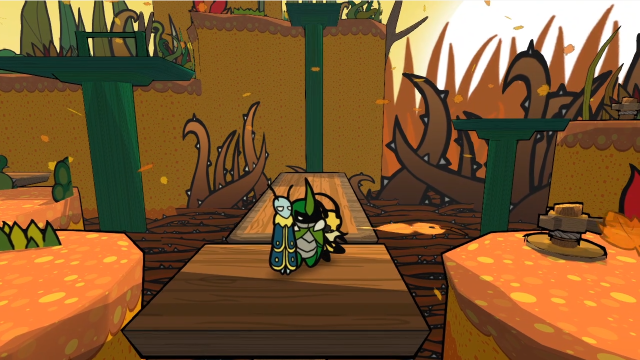 Once again, we need to lower the green platforms so we can ride one up. 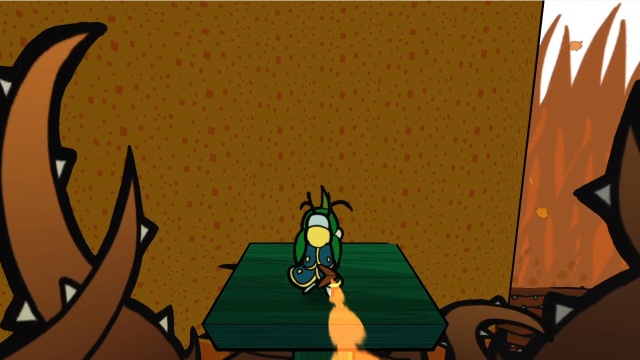 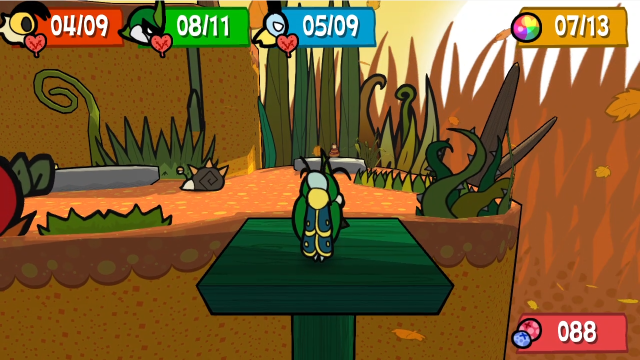 Up here is a Numbnail...  It's simple to take care of.  And, at long last, the other half of the big crank.  I hope you weren't attached to the halves, because as soon as we've collected both of them, they will automatically combine and become the Big Crank. We know where this needs to go.  On the way back, though, I return the bridge to horizontal and come over here, there's one last platform we haven't explored yet.  There are just some weeds up here. 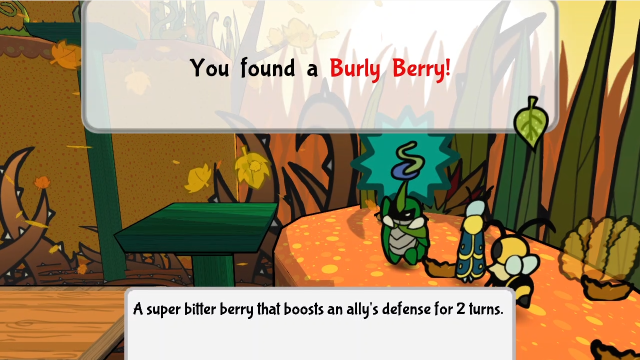 And one of them has a Burly Berry in it. Not bad; these are always nice to have, although I'm not entirely sure it's worth the hassle of moving all the platforms again (I think you're intended to grab this before fighting the Venus' Buds and turning the crank, that would probably be slightly more efficient). 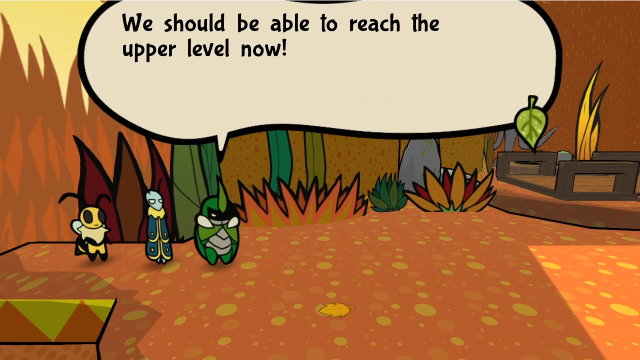 Hmm... Something's odd. Let's make sure we're ready. Hmm... Something's odd. Let's make sure we're ready.When we return to the hub area, this conversation triggers automatically. This is very obviously warning us that something will happen when we insert the crank, and encouraging us to use the save crystal. 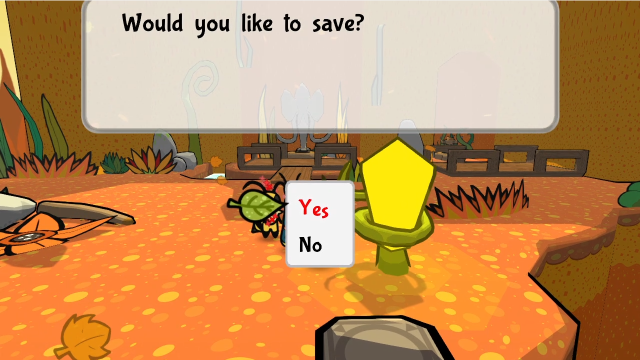 Who am I to refuse? 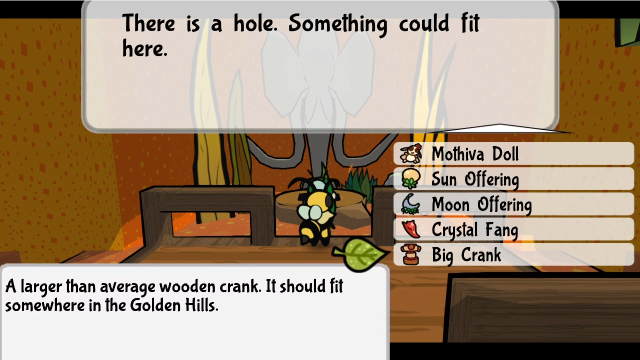 Let's put the crank in place.   What's this? Who said that? 66 - Mothiva's Grand Stand! Zasp and Mothiva walk in from behind us.   Excuse me!? It's Mothiva! From the festival concert! Wow! It's an honor to meet such a famous individual! Hmph. That's better. And she came with her personal stalker. Excuse me!? It's Mothiva! From the festival concert! Wow! It's an honor to meet such a famous individual! Hmph. That's better. And she came with her personal stalker. I couldn't resist sneaking in! Seeing you work has been so inspiring! Heheh. Thanks! I couldn't resist sneaking in! Seeing you work has been so inspiring! Heheh. Thanks!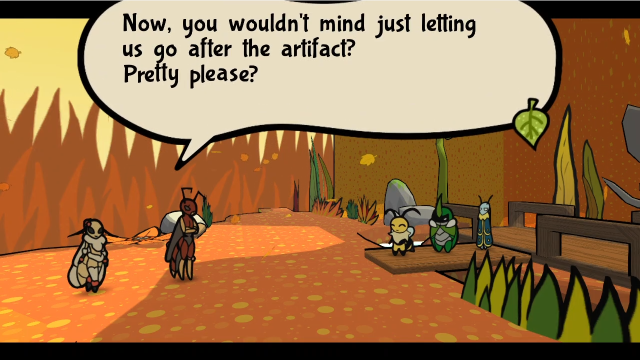 WHAT!? No way!? We put in all the effort! Aw, come on? I'll even mention you in my next show! You'll get so much exposure! Hmph. Think of all the exposure we'll get turning in the artifact. WHAT!? No way!? We put in all the effort! Aw, come on? I'll even mention you in my next show! You'll get so much exposure! Hmph. Think of all the exposure we'll get turning in the artifact.(This is rather pointed, isn't it, especially from an indie game. The devs knew what they were doing.)  I wouldn't recommend getting sassy. Tch. What do you even need the artifact for!? While I was busy bringing joy to Bugaria's citizens, you snuck into Snakemouth! And now everyone's just talking about you! That's not our problem! I ain't giving up that reward! The summit may hold answers for us. So we're not going to budge. I don't really care about fame, or riches. So I would let you pass, but... Oi, Kabbu! It matters to my friends. So my answer is no! I wouldn't recommend getting sassy. Tch. What do you even need the artifact for!? While I was busy bringing joy to Bugaria's citizens, you snuck into Snakemouth! And now everyone's just talking about you! That's not our problem! I ain't giving up that reward! The summit may hold answers for us. So we're not going to budge. I don't really care about fame, or riches. So I would let you pass, but... Oi, Kabbu! It matters to my friends. So my answer is no!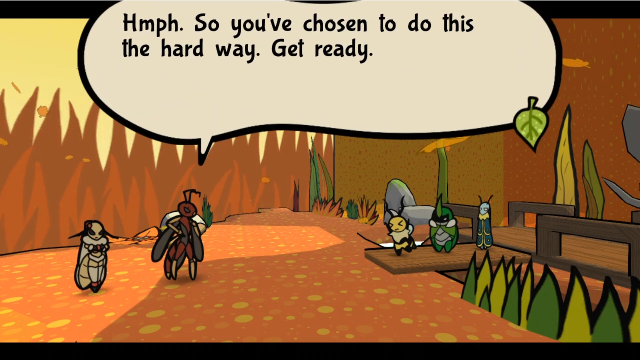 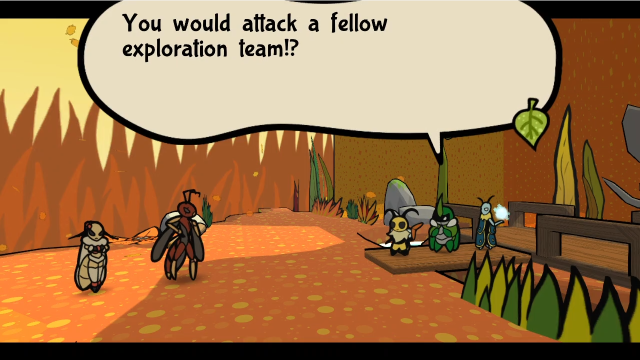 Ohohoho! It's a bug eat bug world, on the way to stardom! We'll just put you to sleep for a bit! This is stupid... Have it your way! You're gonna get smacked down! Ohohoho! It's a bug eat bug world, on the way to stardom! We'll just put you to sleep for a bit! This is stupid... Have it your way! You're gonna get smacked down! 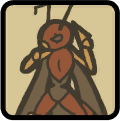 Click me for video! 29 - Team, This One's Stronger! (Miniboss) Click me for video! 29 - Team, This One's Stronger! (Miniboss) 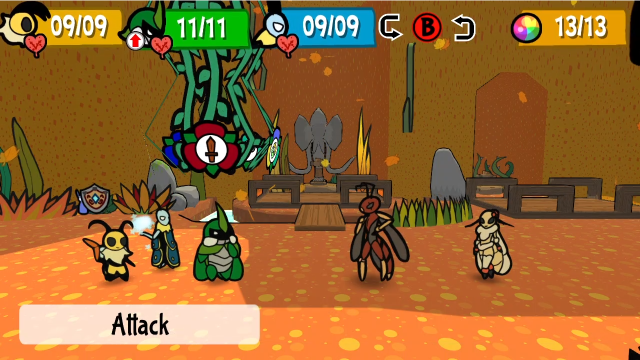 Looks like there's no talking this out. We're going to be fighting Zasp and Mothiva. This is a pretty interesting fight. Let's do some spying. 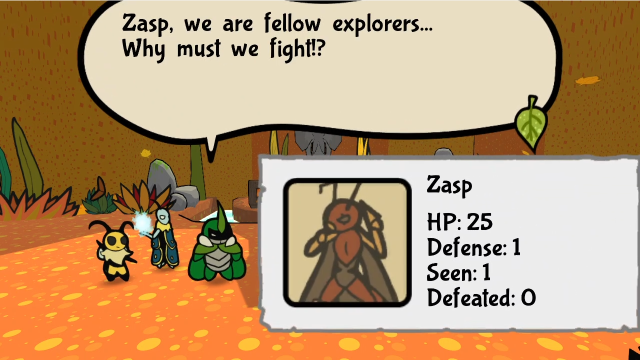 As much as it pains me, I won't let you get in my way! As much as it pains me, I won't let you get in my way!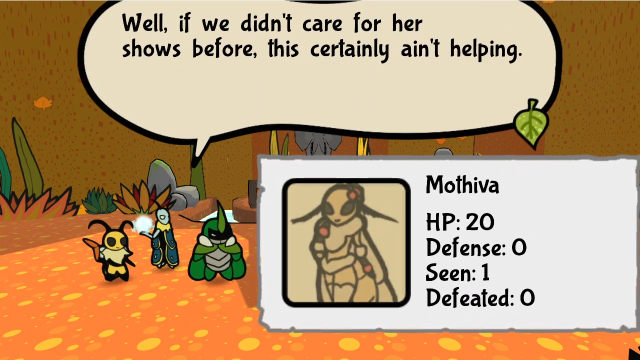 We should probably knock her out first, even if Zasp gets mad. Let's wrap this up. We should probably knock her out first, even if Zasp gets mad. Let's wrap this up.Despite what Leif says here, there are advantages and disadvantages to taking them out in either order, and I'm not convinced his advice is the best. 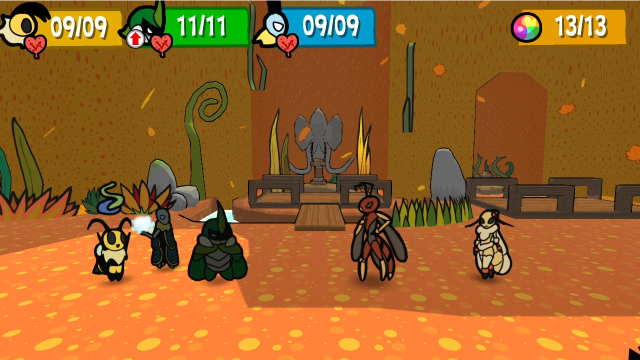 Easy come, easy go. I decided to have Vi use the Burly Berry we just found on Kabbu. 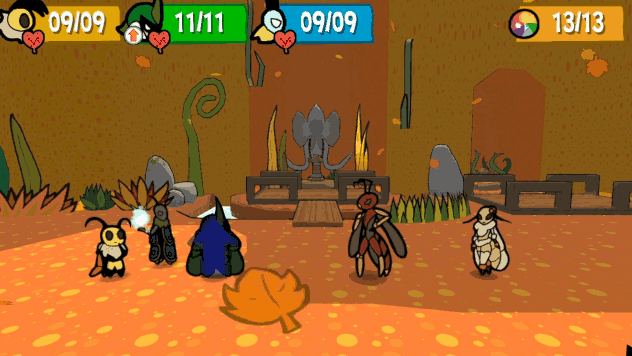 First up, Zasp uses this martial arts combo (and vindicates my use of the Burly Berry by focusing on Kabbu). This can do anywhere from one to three hits, and with the way he teleports around, each hit can be against any member of our party. 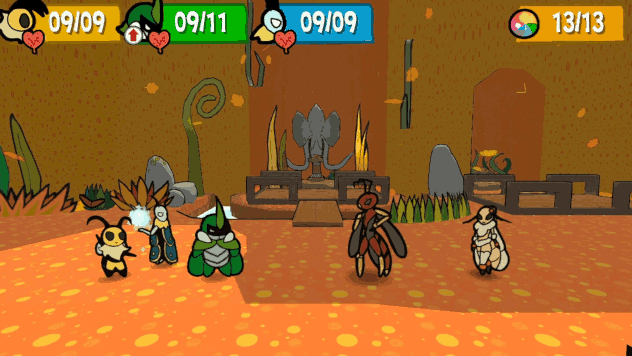 Mothiva can use Turn Relay? Yes, yes she can. 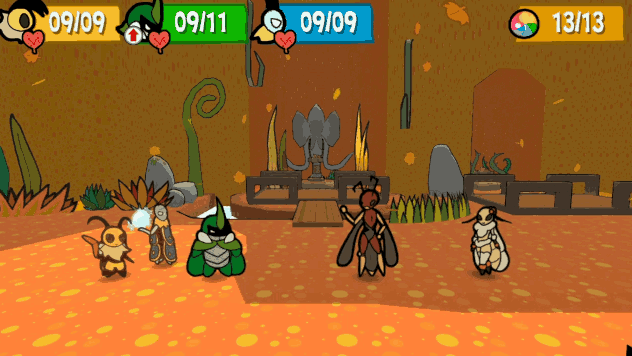 Zasp also has a taunt move, with a very similar animation to Kabbu's. It works a bit differently, as we'll see shortly. 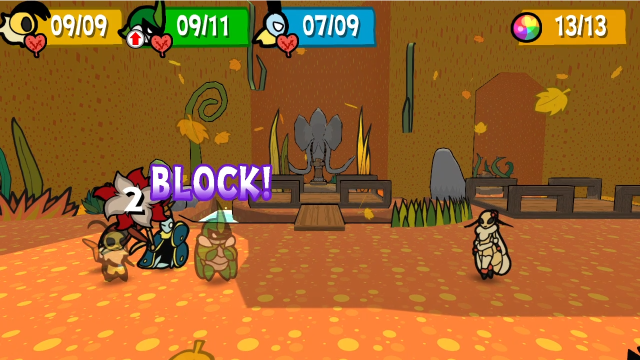 And immediately after taunting, he goes into the combo again, though this time it's only one hit against Leif. I'm not sure if the taunt is just free or not; he seems to do fewer hits of the combo on a turn after he taunts, but that could just be coincidence. 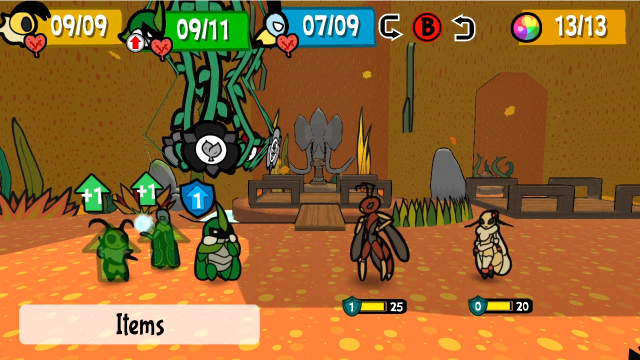 Now that it's Kabbu's turn, we can see the effect of the taunt! It prevents him from using anything other than the basic Attack and Strategies menus, every other flower is greyed out. 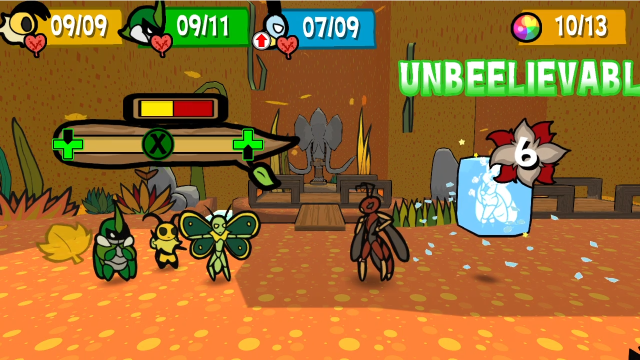 Let's have Leif freeze Mothiva? 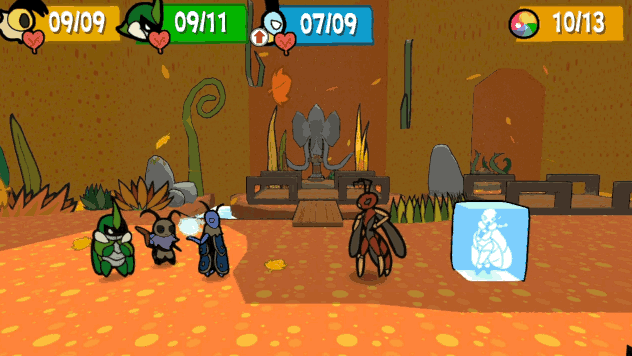 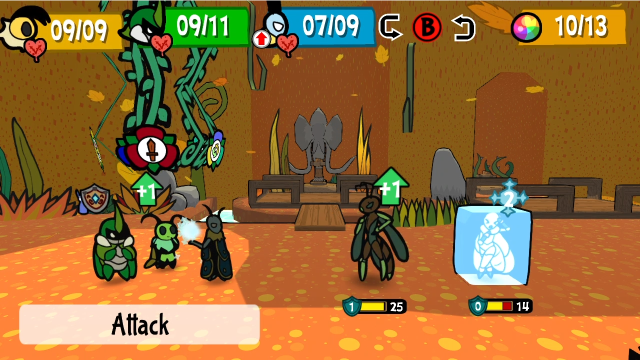 Maybe that wasn't the best idea. Whenever Zasp sees you hit Mothiva, he immediately has this angry reaction and gets a charge-up. It's very similar to the effect of the 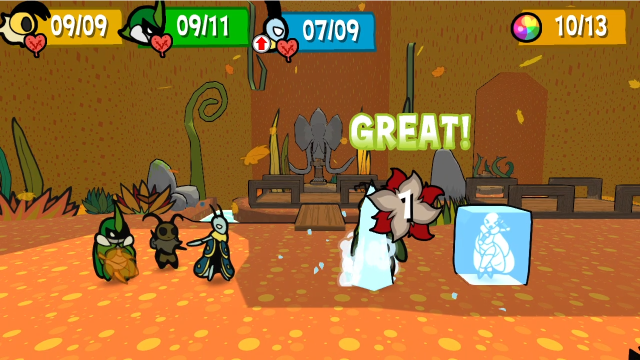 I wanted to save up Vi's charge, so I had her relay to Leif instead. 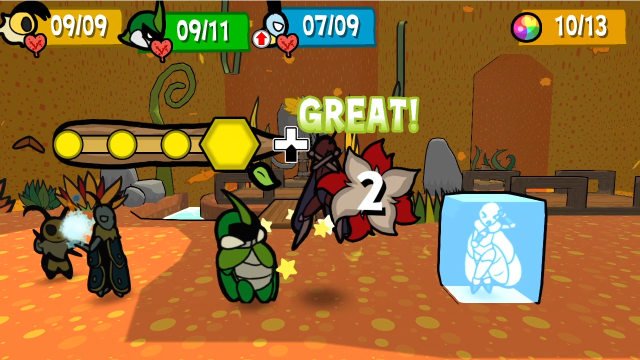 And Kabbu has little choice but to attack. 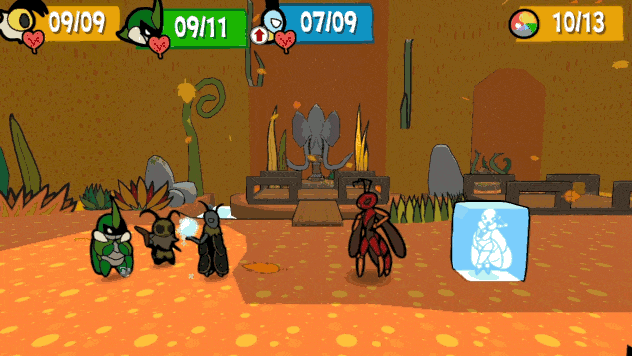 Ouch! This is Zasp's other main attack, the needle throw. He can throw 2-3 needles, distributed randomly among our party. They do a base damage of 3, but when he starts getting attack boosts, this can get scary fast. 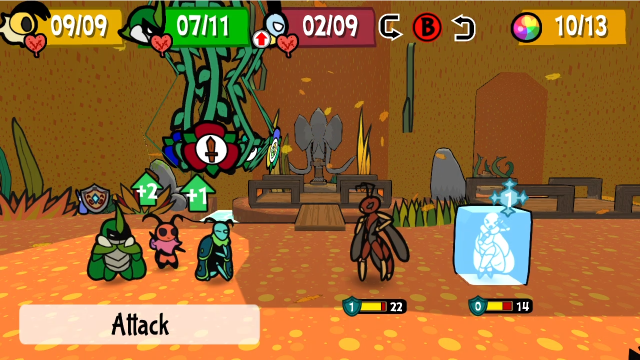 Leif is looking a bit worse for wear. Let's get him into the back. 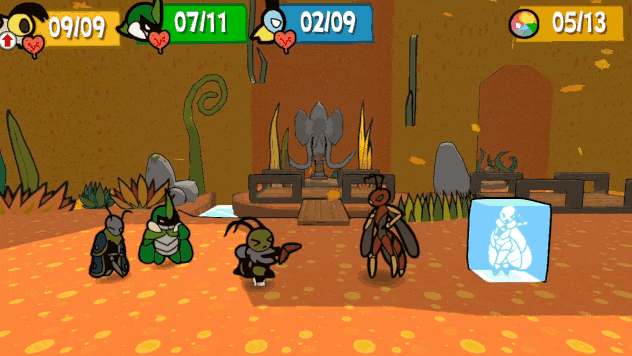 Also, with two charge-ups, let's do a Hurricane Toss! 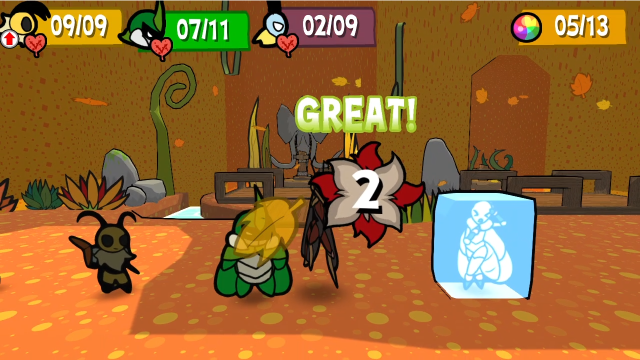 Kabbu just attacks. 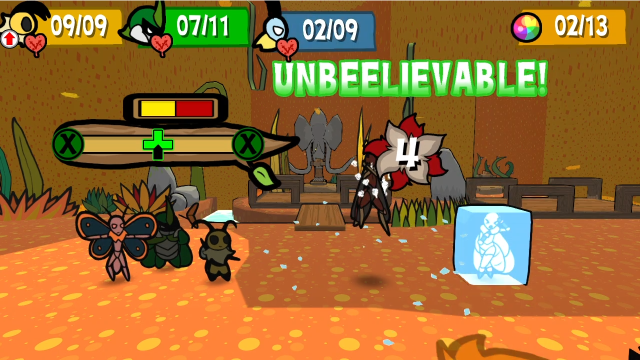 And Leif attempts to freeze Zasp, but it doesn't take (he's got 70% resistance so this was basically a toss-up). This was a bit of a greedy play, it would have been safer to heal Leif, but it ended up working out. 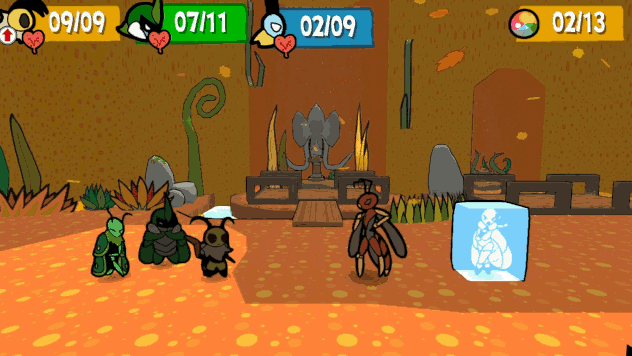 Zasp uses a Spicy Berry on himself. 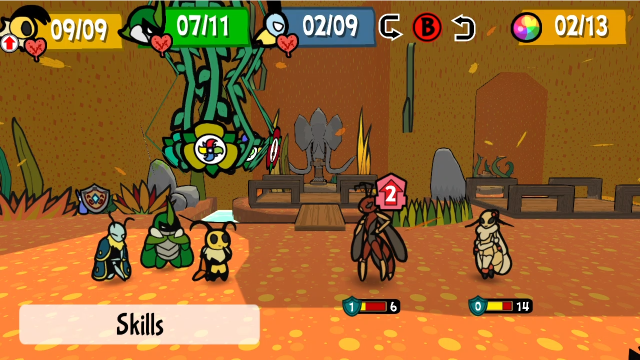 That would be pretty scary, but thankfully we've gotten him low enough on HP that we can take him down this turn. 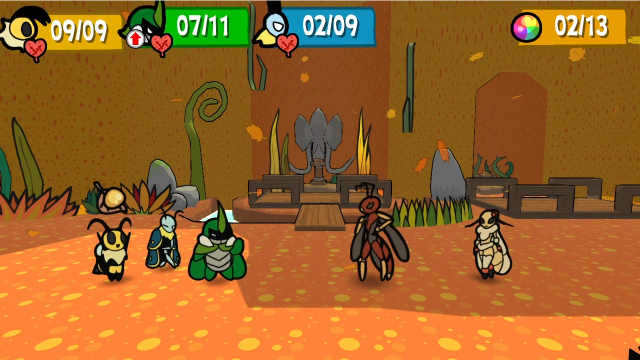 Also, I get around to healing Leif.  Thanks to the TP restoration on the Honeyed Leaf, Kabbu can do a Heavy Strike.  And Leif finishes Zasp off.  Mothiva does a new attack this turn. This giant... exploding music note... attacks our entire party for 3 damage; luckily I managed to Super Block it.    Let's just get some normal attacks in.   Apparently, the power of scolding is enough to bring Zasp back into the fight. (I was actually pretty surprised not to see this on the previous turn, Mothiva is very likely to do this.)  It only brings him back on 5 HP, though, so we can just knock him right back down again.   With him having a point of defence, the easiest way to do this is to have one of the others relay to Kabbu.  This way, Vi can get some chip damage in on Mothiva too.  This is probably the scariest thing Mothiva can do (keep in mind the numbers there are with Back Support active!). If you don't block the trip-kick, she'll do three stomps, each of which hits for 2. This is very often lethal; it is not a good idea to underestimate her.  But she had 3 HP left, and we survived that turn, so it's over. (I'm actually surprised she didn't use the revival move again; a lot of the time I see this fight devolve into a sort of loop at the end, because she's very prone to using that. Poor Zasp.)  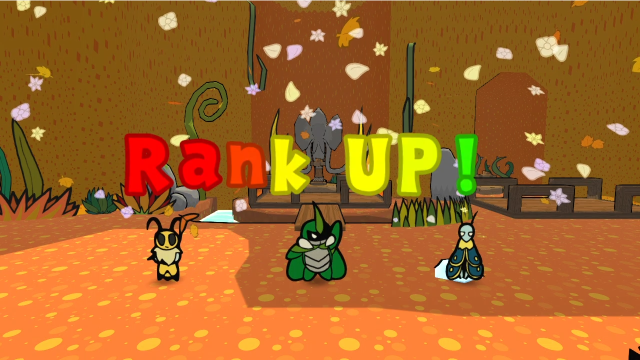 This fight gives us enough EXP to reach Rank 9. 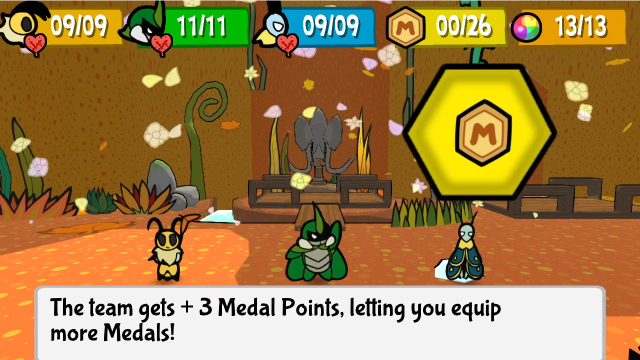 I will have more MP, thanks. 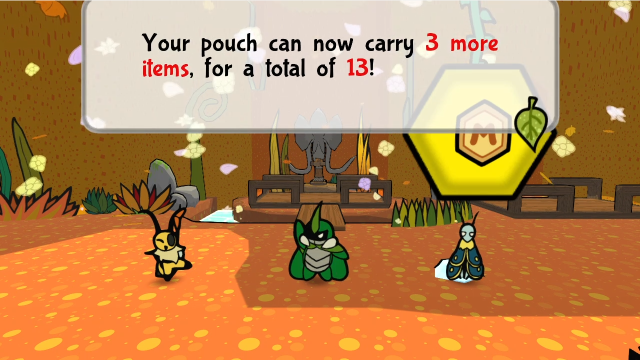 And as a nice bonus, we get this. We're not stuck with a 10-item capacity for the entire game! 13 really does feel a lot more comfortable.  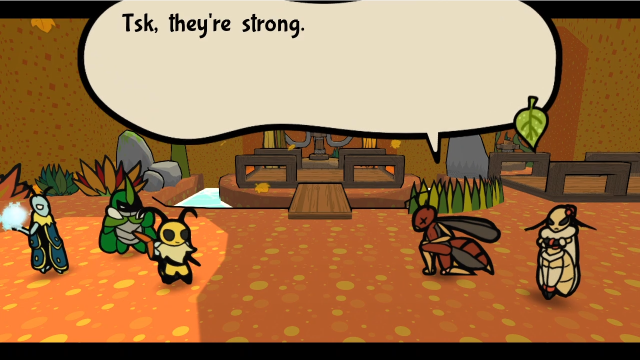 How DARE you sully my fluff, you talentless, disgusting peasants!? That's what you get for trying to hijack our mission! Mothiva, you are nowhere near as kind as I hoped you would be. Mhm. And Zasp? You lost the little respect we had for you. Silence! I won't forget this... You haven't seen what an amazing performance I can give! Mothiva, we should retreat for now. I know that. And not because you told me! We'll meet again, Team Snakemouth. How DARE you sully my fluff, you talentless, disgusting peasants!? That's what you get for trying to hijack our mission! Mothiva, you are nowhere near as kind as I hoped you would be. Mhm. And Zasp? You lost the little respect we had for you. Silence! I won't forget this... You haven't seen what an amazing performance I can give! Mothiva, we should retreat for now. I know that. And not because you told me! We'll meet again, Team Snakemouth.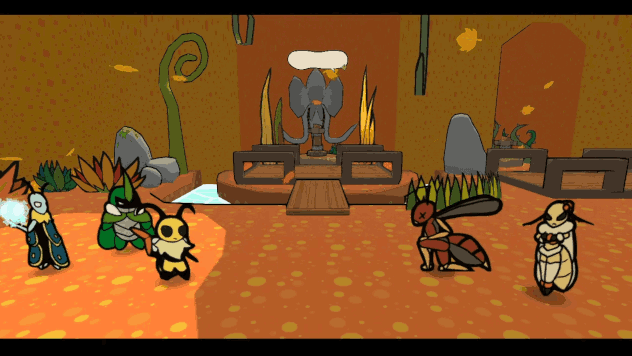 Zasp apparently has the ninja smoke bomb ability. The things some would do for fame... I mean, I almost can't blame her. Getting an artifact really bumps you up in the ranks! Not like I was gonna let them take it from us, though! Well, despite that unexpected detour, we should be able to proceed now. We sense some strong magic up there. Let's make sure we're prepared.Looks like we've secured ourselves some rivals, for better or worse. The game really seems to like hinting that the player should save in this area. It also might not be a bad idea to restock on items, if that fight took a lot of them (this run was fairly clean, but it can go badly if you mess up, or if you don't quite figure out their gimmicks). They have a couple of other moves we didn't see during that fight:  Mothiva has a second musical attack, which throws a barrage of 2-3 notes for 2 damage each. Unlike Zasp's multi-hit attacks, this is always focused on a single character. 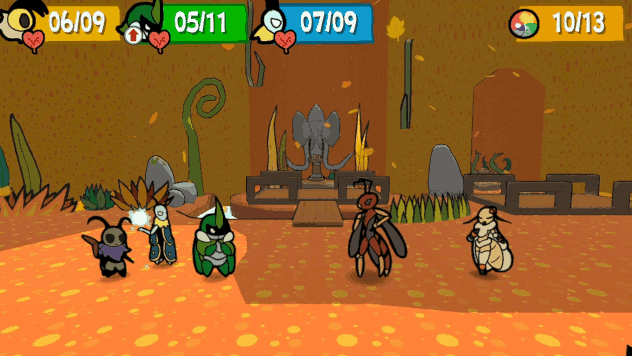 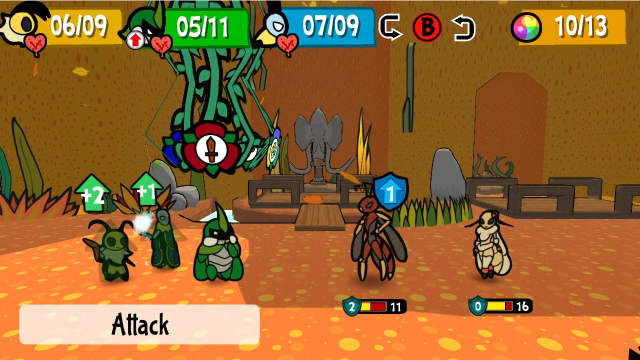 Mothiva can do this song, which gives Zasp Defence Up. She doesn't ever boost herself, only him. 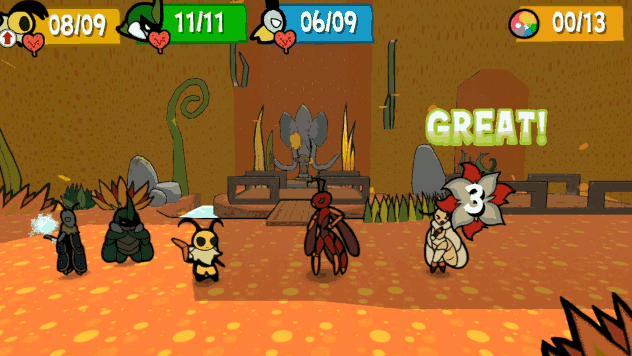 And if you take down Mothiva first instead, Zasp gives himself a permanent Attack Up. 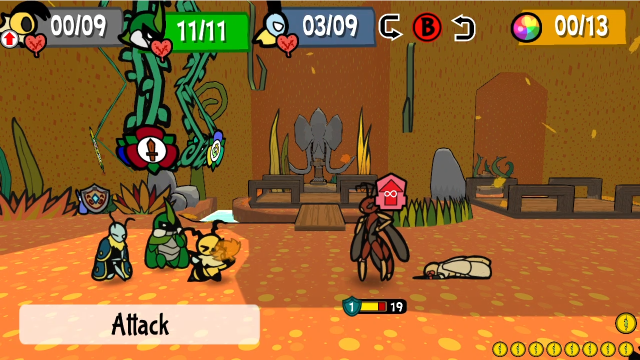 Yes, that's an infinity symbol on the arrow. I've seen this freak out a lot of first-time players, who don't necessarily realise the number indicates duration and interpret this as "infinite attack". It's not quite that scary, but still something you probably don't want to have happen, this will make his combos hurt. It's even more terrifying if you've hit Mothiva multiple times that turn, in which case he could have charge-ups on top of it. I really like this fight. The game's definitely starting to take the gloves off a bit here, giving us a few different gimmicks that interact in interesting ways (and give you multiple ways to approach the fight), and they also serve a narrative purpose on top of that. "You thought you should go after the squishy mage/healer? Gotcha!" is a trick a lot of RPGs have pulled, but it's a classic for a reason, and I think it works well here. On top of this, they've been given a lot of similar capabilities to Team Snakemouth (Turn Relay, charge-ups, items) so it really does feel like we're fighting another exploration team. Also, I'm pretty sure these two were responsible for my first Game Over, on my first playthrough. Anyway, this seems like a natural stopping point for today. Next time, we'll use the crank we spent so long assembling and climb even higher. Explopyro fucked around with this message at 02:21 on Apr 16, 2021 |
|
#
?
Apr 15, 2021 06:56
|
|
|
Yeah, these guys gave me a game over too. I was at a lower rank than you due to not doing the Devourer fight and not grinding for money. I also missed the Weak Stomach Medal. This was basically the toughest fight in the game so far. Still haven't really started on Chapter 3, been distracted with Youtube videos.
|
|
#
?
Apr 15, 2021 07:22
|
|
|
Definitely think the reason this fight works so well is that so many other versions of the tough guy/squishy mage fight basically just make you lose for doing the wrong thing; usually knocking out the squishy guy makes the tough guy incredibly strong, able to dish out one hit kills. Here, you get a warning. You tap Mothiva and Zasp gets mad, don't do that. Then if you don't heed that warning, you get to face buffed up Zasp. And buff Zasp isn't insurmountable either, but you're in for a tough fight if you left him at max hp.
|
|
#
?
Apr 15, 2021 07:47
|
|
|
Arzaac posted:Definitely think the reason this fight works so well is that so many other versions of the tough guy/squishy mage fight basically just make you lose for doing the wrong thing; usually knocking out the squishy guy makes the tough guy incredibly strong, able to dish out one hit kills. Yeah, this is an example of good boss design in Bug Fables. There's three different ways to approach this fight, and all three can be made viable: 1. Take out Zasp first, then Mothiva. The safest approach, but if Mothiva keeps reviving her partner the fight can really drag on. 2. Take out Mothiva first, then Zasp. The fastest method, but also the most perilous, as Zasp will be boosted at all times. 3. Divide your damage between them, then take them both out in one turn. Avoids or minimizes the fight's gimmicks, but you'll be dealing with two opponents the entire time. I personally prefer number 3 because I like the dramatic finish. Styling on Team Mothiva is its own reward. The Iron Kabbu strategy (buff his defense as high as you can and have him Taunt) works really well in this fight because Zasp and Mothiva both make heavy use of multi-hit attacks, and defense gets subtracted from each hit individually. At this point you have Back Guard and defense-boosting items; if you can get normal blocks consistently you can stop 3 damage per hit, which is enough to take most of the (ahem) sting out of Zasp's boosted attacks.
|
|
#
?
Apr 15, 2021 17:21
|
|
|
Not much to say about this part. I like the music here, and the fight was tricky but not insurmountable for me on normal difficulty. I was caught a bit off guard by what seemed like a sudden heel turn for Mothiva but at least it's early on so they give the pair plenty of time to develop past that kind of trope. Honestly the most intriguing thing was the comment from the bud. No payoff for that for a while yet but it sows some seeds of intrigue.
|
|
#
?
Apr 15, 2021 17:34
|
|
|
The very beginning of the Sacred Hills music reminds me of the beginning of the fortress music from Yoshi's Island. I like the Venus comment because while it's foreshadowing, a player might also just assume "She thought there were only two bugs because there's only two offerings."
|
|
#
?
Apr 16, 2021 00:22
|
|
|
ChaosStar0 posted:Yeah, these guys gave me a game over too. I was at a lower rank than you due to not doing the Devourer fight and not grinding for money. I also missed the Weak Stomach Medal. This was basically the toughest fight in the game so far. Still haven't really started on Chapter 3, been distracted with Youtube videos. You should be able to get Weak Stomach from the caravan if you missed it. That said, yes, this fight is definitely something of a wake-up call (though I think the impact in this LP is lessened a bit by my showing the Devourer first...); I remember on my first playthrough that this fight was the moment I realised how seriously the game wanted me to take my strategising, and that I couldn't afford to goof around. Arzaac posted:Definitely think the reason this fight works so well is that so many other versions of the tough guy/squishy mage fight basically just make you lose for doing the wrong thing; usually knocking out the squishy guy makes the tough guy incredibly strong, able to dish out one hit kills. I think this is exactly right. The fight punishes you for doing the things you're not "supposed" to, but it does so in a way that you can survive and therefore learn from. The problem I have with a lot of similar fights in other games is that you basically need to play it "wrong" to learn how the gimmick works, then do it correctly on a retry; even if the game doesn't expect it, there's a part of me that things it's important on a diegetic level that these encounters be winnable on the first try. Alien Arcana posted:Yeah, this is an example of good boss design in Bug Fables. There's three different ways to approach this fight, and all three can be made viable: There is also approach #4, pack a few Numbnail Darts or Sleep Bombs and sedate Zasp (he has 35% resistance to sleep on Hard), then take down Mothiva while he's unconscious and can't respond. I haven't tested it but I think he doesn't get the Attack Up this way? It's great how many different tactical approaches you can take here and that they all work for different reasons, that's usually a sign of a well-designed fight. You raise a good point about having Kabbu tank here, too. I think I tend not to think of it at this point in the game because it feels like an inefficient use of TP, but it can definitely be effective. I will absolutely be showing off some of those strategies later in the LP. Alxprit posted:Not much to say about this part. I like the music here, and the fight was tricky but not insurmountable for me on normal difficulty. I was caught a bit off guard by what seemed like a sudden heel turn for Mothiva but at least it's early on so they give the pair plenty of time to develop past that kind of trope. Mothiva's heel turn didn't quite feel like it came out of nowhere for me; she was clearly irritated/resentful about something (as I tried to highlight when her lines came up), but I agree prior to this point it wasn't obvious what kind of antagonist she'd end up being, or maybe even that she'd be an important character. (About the only clue is a metatextual thing, this is the kind of game in which we do fighting and therefore any hostile NPC is likely to express that hostility through the battle system.) Twelve by Pies posted:The very beginning of the Sacred Hills music reminds me of the beginning of the fortress music from Yoshi's Island. I didn't pick up on that myself, but I can definitely hear it now I look. Alxprit posted:Honestly the most intriguing thing was the comment from the bud. No payoff for that for a while yet but it sows some seeds of intrigue. Twelve by Pies posted:I like the Venus comment because while it's foreshadowing, a player might also just assume "She thought there were only two bugs because there's only two offerings."  I meant to draw attention to this line in the post and then completely forgot to comment on it, so thanks for that. That's what I get for depriving myself of sleep to finish the post. I think it's really well done too, though it's probably for the best I didn't say anything because I don't want to give anything away. I meant to draw attention to this line in the post and then completely forgot to comment on it, so thanks for that. That's what I get for depriving myself of sleep to finish the post. I think it's really well done too, though it's probably for the best I didn't say anything because I don't want to give anything away.
|
|
#
?
Apr 16, 2021 02:20
|
|
|
Explopyro posted:
 That jump's tight enough that it felt more like a sequence-break than an intended path. That jump's tight enough that it felt more like a sequence-break than an intended path.
|
|
#
?
Apr 16, 2021 12:20
|
|
|
Quantum Toast posted:I was stuck on that bit for over half an hour, counting the time I spent backtracking to see if I'd missed something. Oh, that jump is definitely A Thing, it's definitely not obvious that it should work. (As is actually hitting the crank on the way up, my first time going through this I wasn't at all sure I was supposed to be able to do that.) I'm kind of pleased the screenshots I got ended up looking so weird, it helps capture the experience of doing this. Unfortunately, as much as I love this game, I have to admit a lot of the actual platforming can feel a bit janky and awkward at times.
|
|
#
?
Apr 16, 2021 20:39
|
|
|
Explopyro posted:Oh, that jump is definitely A Thing, it's definitely not obvious that it should work. (As is actually hitting the crank on the way up, my first time going through this I wasn't at all sure I was supposed to be able to do that.) I'm kind of pleased the screenshots I got ended up looking so weird, it helps capture the experience of doing this. I think a big part of it is that it's tricky to jump around while holding the beemerang button. Stick that on one of the shoulder buttons and I suspect this stuff would be a lot more manageable.
|
|
#
?
Apr 16, 2021 23:19
|
|
|
Quantum Toast posted:I think a big part of it is that it's tricky to jump around while holding the beemerang button. Stick that on one of the shoulder buttons and I suspect this stuff would be a lot more manageable. Hm, yes, probably. Honestly, the best fix would probably just be to make the beemerang spin into a toggle button (which would also be better considering how the button mapping interacts with Vi's third field ability). Press B once to throw it, press B again to engage spin mode, press B a third time to call it back. I wonder if they got tunnel vision with respect to Paper Mario, since Koops in TTYD had you hold the button to keep him spinning? (Even if they used the ability quite differently in puzzle design.)
|
|
#
?
Apr 16, 2021 23:53
|
|
|
 Fanart time! This was created by Moriri, who won an art contest in the Bug Fables Discord. I honestly think it's amazing 
|
|
#
?
Apr 19, 2021 01:06
|
|
|
free him
|
|
#
?
Apr 19, 2021 01:08
|
|
|
I have so many questions
|
|
#
?
Apr 19, 2021 02:40
|
|
|
Release Prisoner 5408, aka Tanjerin, aka Professor Tor Coolguy.
|
|
#
?
Apr 19, 2021 02:58
|
|
|
That is one very literal game of Monopoly.
|
|
#
?
Apr 19, 2021 05:07
|
|

|
Is Kabbu sleeping?
|
|
#
?
Apr 20, 2021 09:51
|
|

|
Torrannor posted:Is Kabbu sleeping? He's praying, this is based on a 'draw the squad' meme. 
|
|
#
?
Apr 20, 2021 10:11
|
|

|
This is the first time I've seen that meme, thanks. But it's quite appropriate, Kabbu has displayed a surprising spirituality in the last few updates.
|
|
#
?
Apr 20, 2021 10:18
|
|
|
Junpei posted:He's praying, this is based on a 'draw the squad' meme. Oh, that helps a lot with figuring out Zasp's pose in the other picture. I was very confused.
|
|
#
?
Apr 20, 2021 18:42
|
|

|
16: The Sun is Also a Flower 30 - The Sacred Hills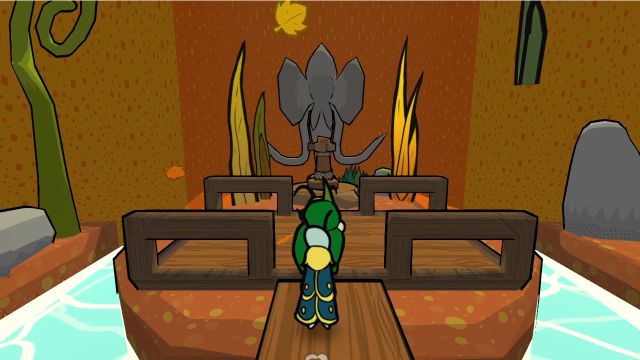 When we left off last time, we'd just installed this crank, but were ambushed by Team Mothiva before we could use it. That's no longer a problem.    Things look quite different up here!  Leif has a reaction immediately. Are you alright!? It's been a while since one of those episodes... We're probably getting close to the artifact, then? Ngh... Yes... So much magic... Perhaps you should stay here, Leif. Until we clear a path. N-No. We're fine now. We won't retreat when we're so close. Look, stop acting tough! It'll be bad if you trip and stuff! Thank you, Vi. But we're fine. Let's go. If you feel weak at any point, we'll stop. Let's go, team!This could be a problem. I hope Leif is feeling okay... Yeah. Vi, we must keep watch over him. (...Thanks.)The area banter just reinforces this. Let's take a look around.  To the north, there seems to be a path between these two Venus statues, but it's blocked off by what looks like a fence made of brambles. 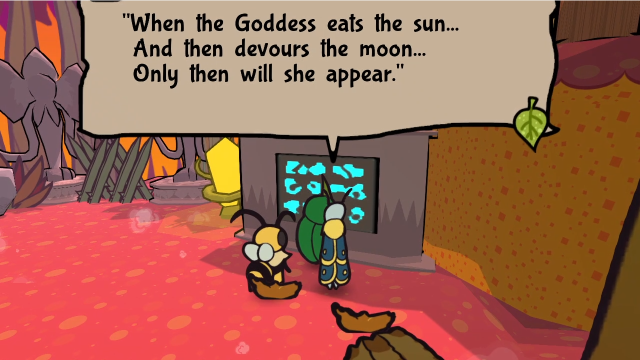 That is... certainly a way to word that. Are we sure this is something we want to be doing? Nevertheless, this sign is our hint for how to progress. 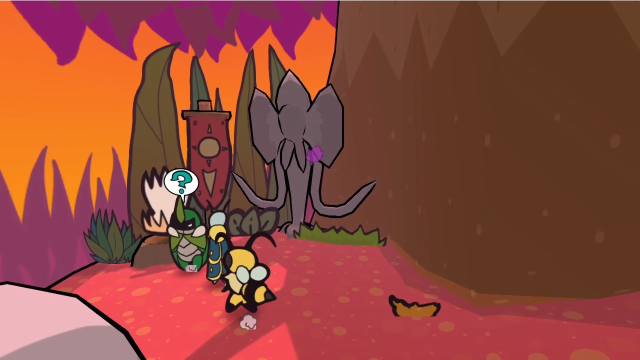 On the west side of this area, there's another Venus statue, and what looks like a flytrap mouth. The sign with an image of the sun on it suggests what we should do. 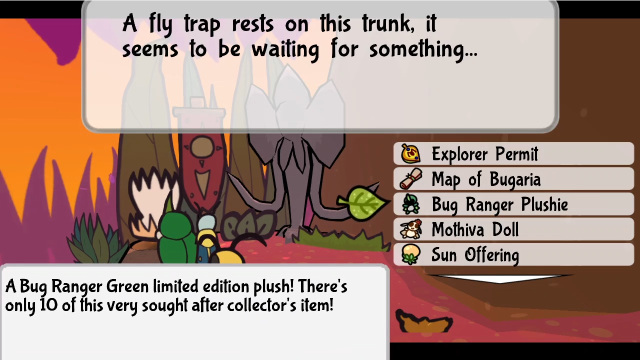 Give it the Bug Ranger plushie, of course! 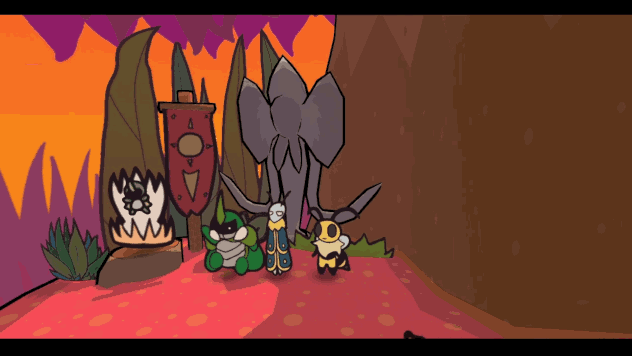 Kabbu freaks out while the flytrap munches on it, then a Venus' Bud pops out of the ground. This texture... This must be that famous Green Ranger plush! Oh, what a great offering! Vi, Leif, how dare you! Give it back! Taking back an offering!? You ingrates!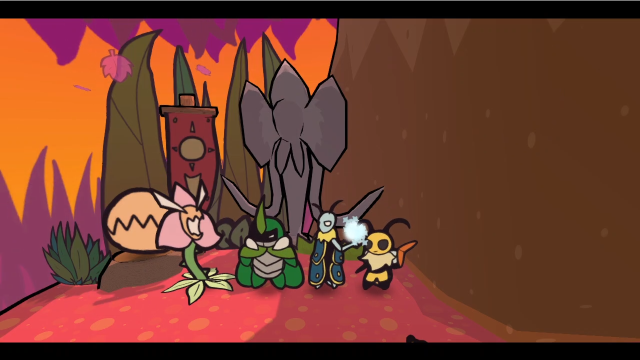  Ooh, new leaf colour! 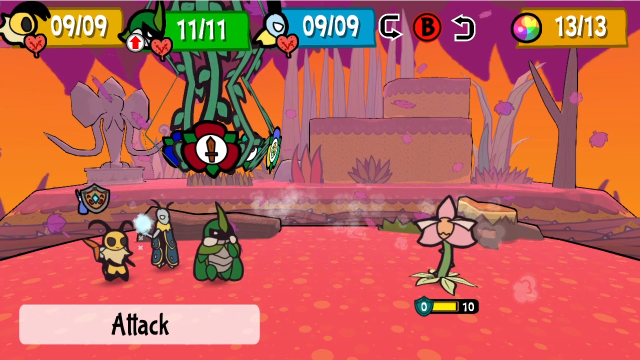 Attempting to give the wrong item means we have to fight a Venus' Bud. These aren't very intimidating by themselves, though; it isn't really any more than an annoyance. They've also stopped giving EXP. 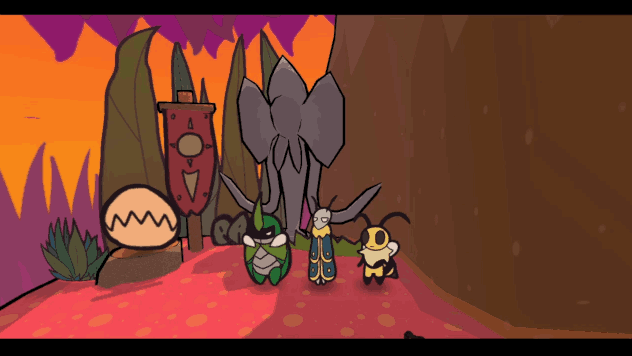 After beating it, the flytrap coughs up the plushie. 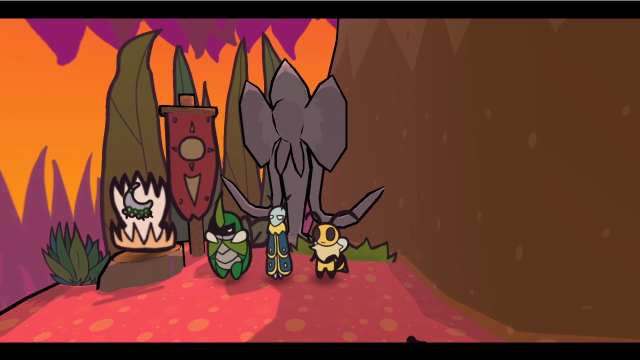 This reaction is unique to the Bug Ranger Plushie. Trying to offer other wrong items (including the Moon Offering) triggers a similar scene, but without any dialogue, the bud just pops out and a fight starts. 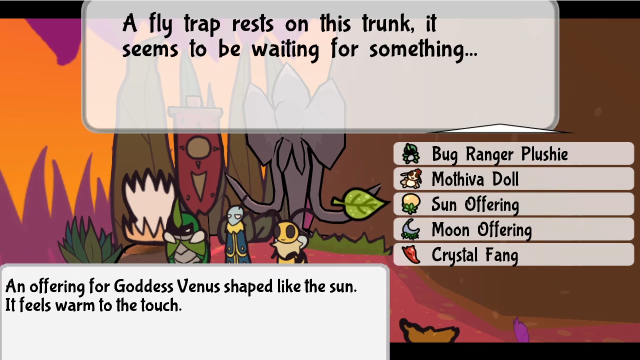 What we need to do, of course, is use the Sun Offering.  This time, no bud appears, the flytrap stays closed, and a success noise plays. 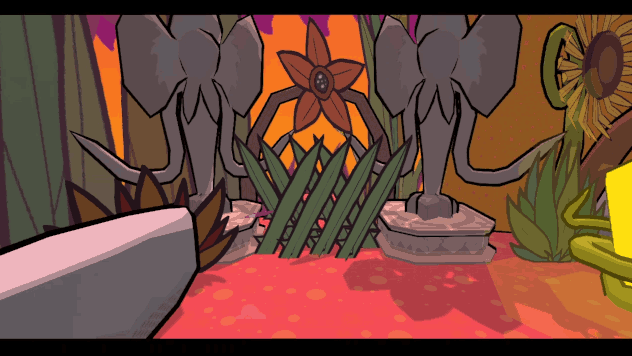 Half of the barrier lowers. We still can't progress in that direction, though, the other half of the barrier must correspond to the Moon Offering. 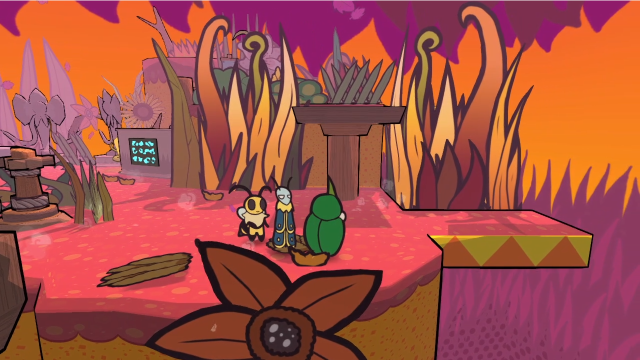 We're going to have to head east. There's clearly something on top of that ledge, but we can't get up there from here: the brown platform is stuck in a raised position, and there's a bramble fence at the top anyway. 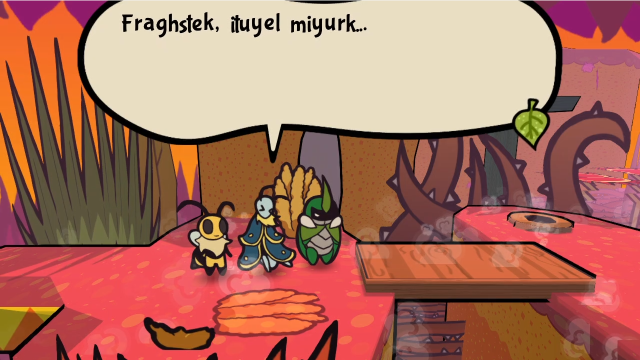 Leif, you're speaking weird again... S-Sorry. It's been happening randomly... This area's magic is too potent... Let's try to finish the mission quickly. Leif, you're speaking weird again... S-Sorry. It's been happening randomly... This area's magic is too potent... Let's try to finish the mission quickly.Leif reacts to the magic again in the area banter.  There are still a few enemies about.  The leaves are purple now? I'm not sure why, but there are a lot of different colours for the battle transitions up here.  This isn't particularly intimidating. Especially since, in full knowledge there's a yellow save crystal in the previous screen, I don't feel any need to conserve TP; I can just have Leif freeze the bud so it doesn't interfere while we deal with the Acornling.  Let's get a better look at the area. There's a hole on this platform where a crank needs to go, so we're still not done looking for those. There's also a big bridge leading further east.  Those flytraps in the 'background' are too far to reach from the bridge in this position, we're going to need to rotate it and presumably that's what the crank will let us do.  On the platform, there's a Chomper waiting.  It has a Venus' Bud with it. Again, though, these fights aren't interesting enough to show. 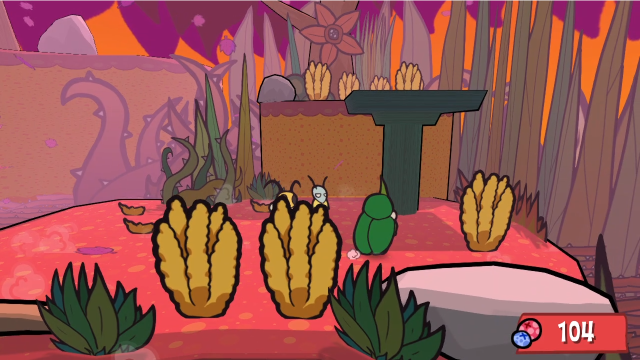 What do we do here? There's nothing immediately apparent to lower the green elevator. 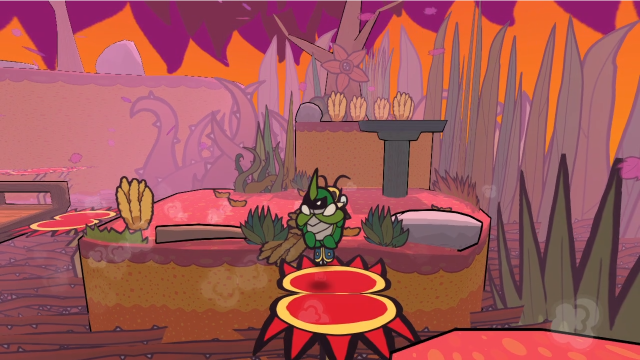 But there's a path to the south behind those cuttable weeds! 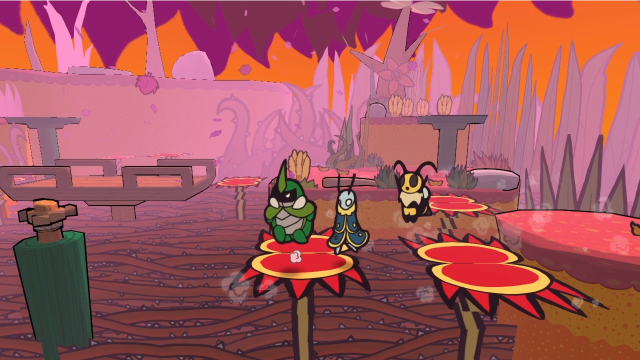 There's the crank! This can be a bit tricky, though: we have to get the Beemerang to turn it, without getting chomped by the flytraps we're standing on. 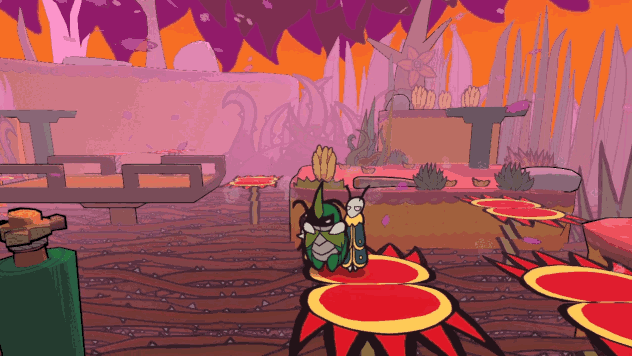 But you have enough time when you factor in that jumping resets the flytrap's state. We can see the platform going down. 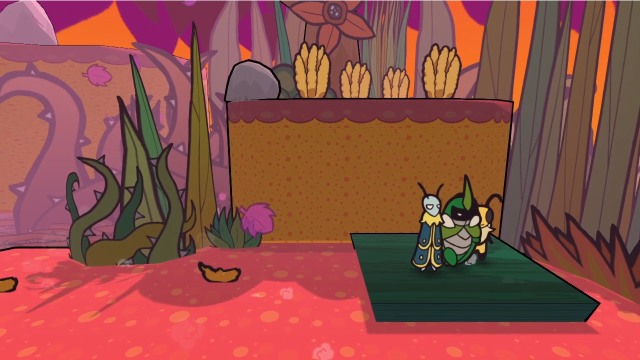 Now we just head back and get onto the platform before releasing the Beemerang. 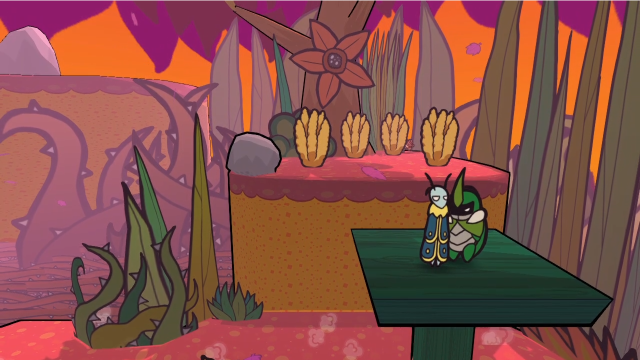 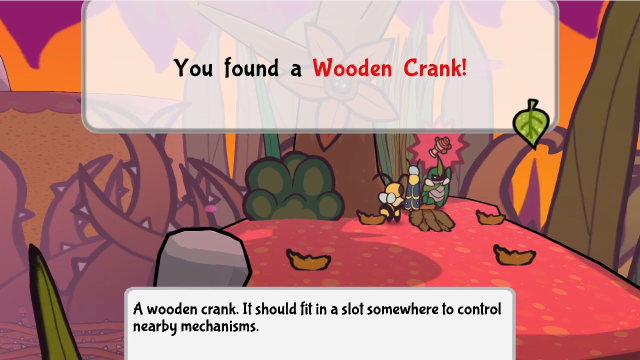 The crank we need was hiding behind some weeds up here. 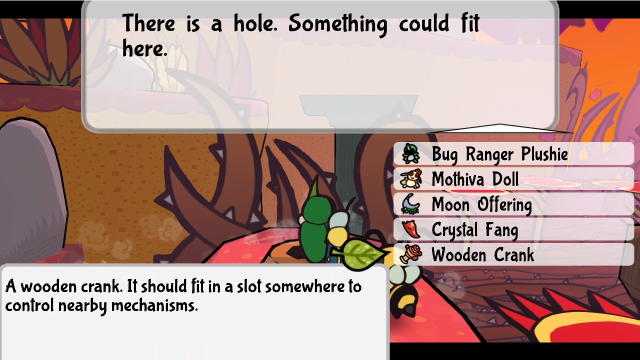 So let's go install it. 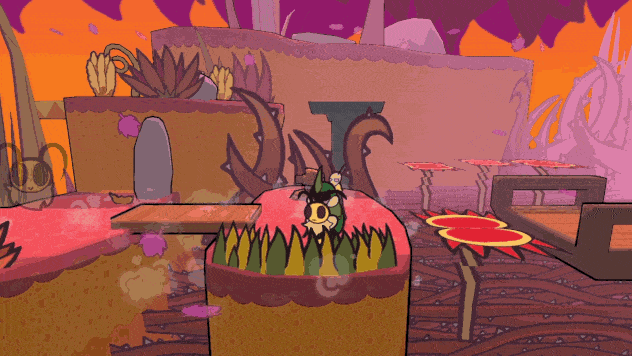 This crank both lowers the green platform, and makes the bridge rotate. This means we can't rotate the bridge into place and stop it: we're going to need to keep it spinning, and ride the bridge while it's moving. 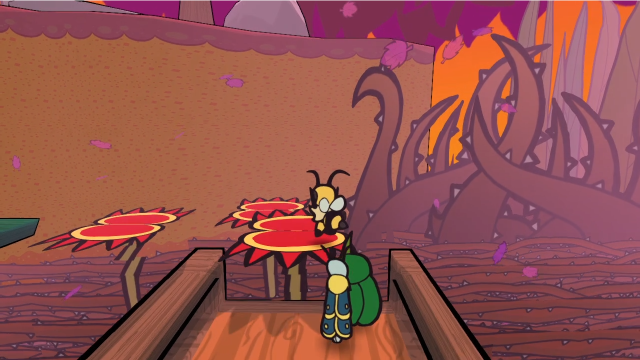 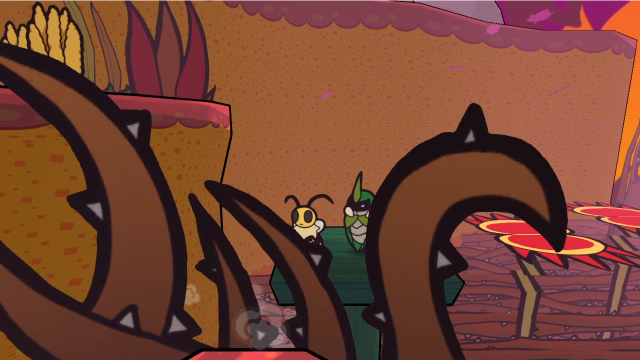 Get to the green platform, then release the Beemerang and ascend.  Easy enough.  There's nothing up here except a path back to the first screen, but that's what we were looking for.  Up here is the flytrap looking for the Moon Offering, as well as a wooden lever.  Hitting the lever makes this barrier lower, and also starts the elevator moving. 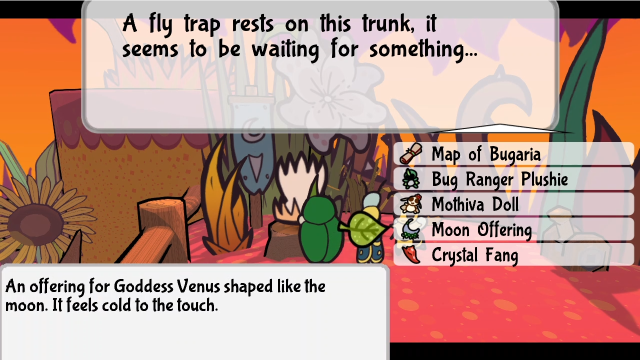 Let's drop off the Moon Offering. 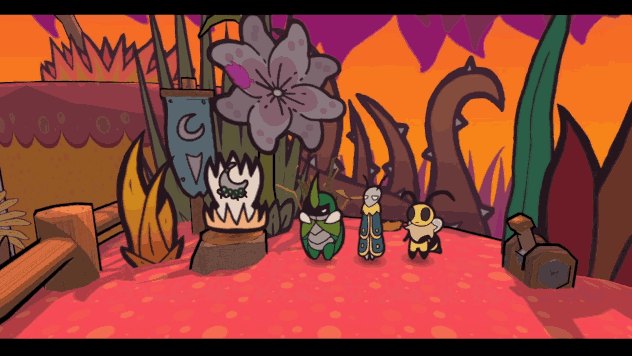 Just like before, the flytrap eats it. 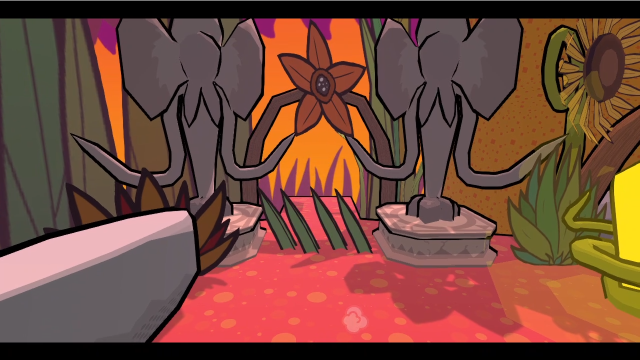 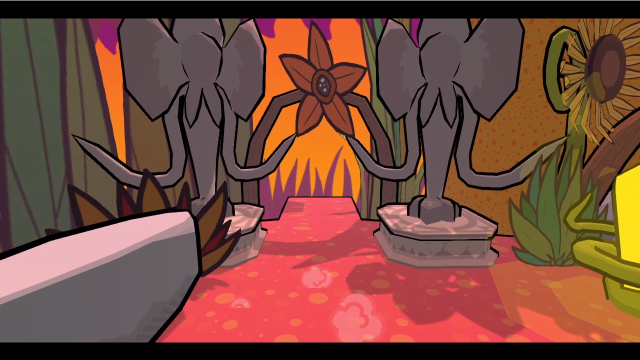 And the second layer of brambles is now gone, clearing the path forward. 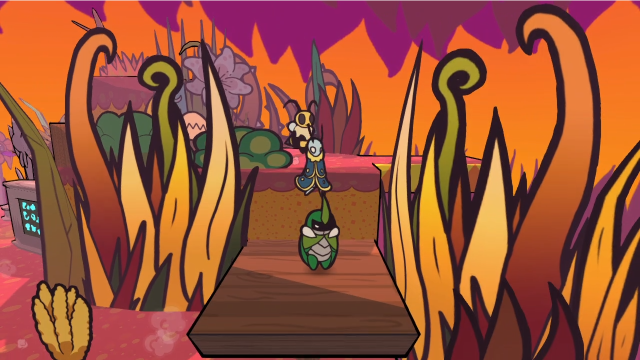 This elevator rises and falls automatically, so we can use it as a shortcut down, or back up if we need to do that for some reason. 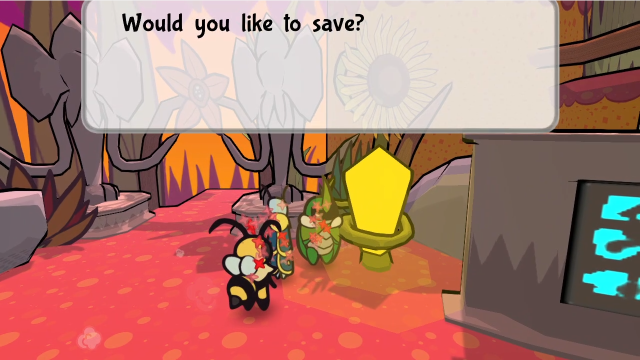 I won't turn down free healing before moving forward. 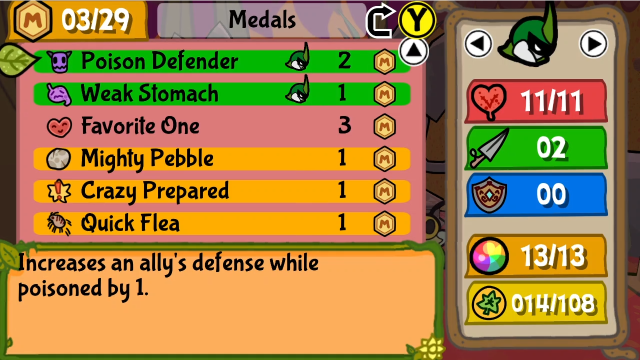 Also, I'm removing Favorite One here, despite having nothing else to use that MP on. I could defend this decision in strategic terms, but the actual reason I'm doing this is that having it equipped makes it hard to show off the upcoming boss properly. 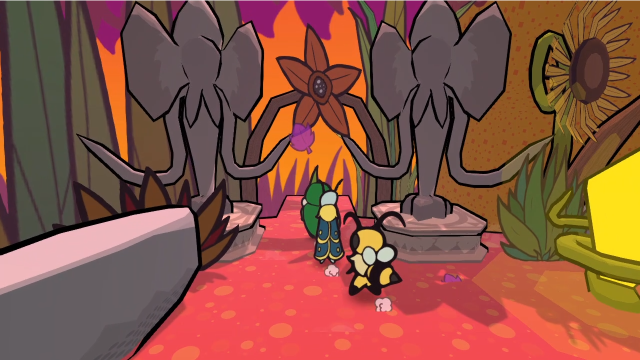 Let's go!  The artifact certainly isn't in plain sight, the way it was in Snakemouth. Ngh... The magic... is very strong here... So, the artifact is close isn't it? It should be. Let's find it... And leave as soon as we can.Just like last time, there's a banter here, despite the fact the game obviously just wants us to go forward and start the cutscene.  You sure? I mean, it's just flowers all around us. Flowers... That's it! One of these flowers must be the artifact! Uh, probably not. Only one way to find out! Start cutting, Kabbu! W-What! You sure? I mean, it's just flowers all around us. Flowers... That's it! One of these flowers must be the artifact! Uh, probably not. Only one way to find out! Start cutting, Kabbu! W-What!(I can't help wondering if this is poking fun at the way the gameplay encourages you to cut down every plant you can the rest of the time.)   31 - Venus, Goddess of Bountiful Harvest 31 - Venus, Goddess of Bountiful HarvestWell, if there was any doubt about Venus existing before, there certainly isn't now.   Hee hee hee! Indeed. The one and only. I've been keeping my ear on you, with my precious buds... I was really, really hoping all the bridges and monsters would stop you. So stubborn! And now, you'd even trample upon my garden!? My precious garden!? I-It was just a joke, okay? We just need the artifact! Hee hee hee! Indeed. The one and only. I've been keeping my ear on you, with my precious buds... I was really, really hoping all the bridges and monsters would stop you. So stubborn! And now, you'd even trample upon my garden!? My precious garden!? I-It was just a joke, okay? We just need the artifact!(This is not the way, Vi.) To line your pockets, hmph! You cared more for an artifact than your... blue friend there. Washed up from a river, yet you worried more about a material thing than your own companion! W-What? How did you... My roots travel all across the soil. Sometimes, I catch some gossip. I-Incredible! This is truly the feat of a higher being! You're so chivalrous and kind. So why won't you share your burdens with your friends? Huh? Venus, please! Say no more... What's your deal!? Is nagging people a Goddess' job? You know everything, then? What bothers Vi, Kabbu, and us. Well, not everything. But I certainly know more than you lot. You're so chivalrous and kind. So why won't you share your burdens with your friends? Huh? Venus, please! Say no more... What's your deal!? Is nagging people a Goddess' job? You know everything, then? What bothers Vi, Kabbu, and us. Well, not everything. But I certainly know more than you lot. ...You, you're all way different than your average bug. Greed, sadness, purpose... Such diverse motives within your team! ... Please, tell us! Vi! Kabbu! Leif! The artifact, and all the questions you want to ask... If you get through my special trial, they are yours! Bring it on. We will have our answers. Heheh! Well said! It's artifact time! Venus, despite everything, I will face your trial with honor! ...You, you're all way different than your average bug. Greed, sadness, purpose... Such diverse motives within your team! ... Please, tell us! Vi! Kabbu! Leif! The artifact, and all the questions you want to ask... If you get through my special trial, they are yours! Bring it on. We will have our answers. Heheh! Well said! It's artifact time! Venus, despite everything, I will face your trial with honor! 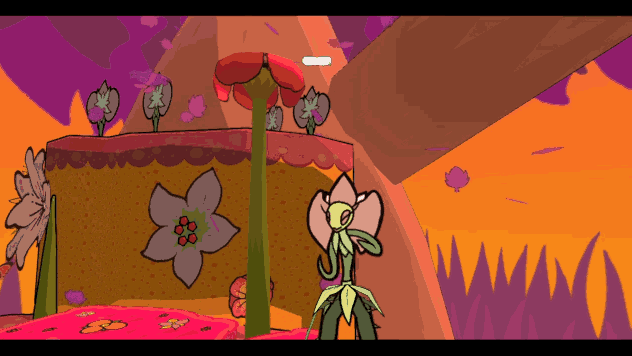 Venus gestures, and the big sunflower disappears into the ground... 13 - It's Getting Scary!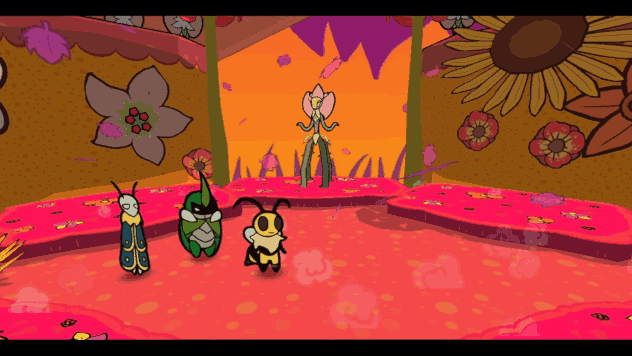 ... and reemerges as a huge monster. 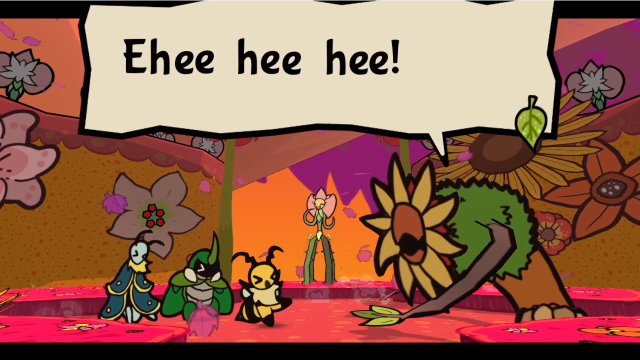 W-What in the shining crown of the Queen is that!? T-That's way bigger than the spider! ...Get ready, you two. We're getting what we came for. Fight! We can do it! 32 - Frenzied Sunflower Dance (One of my favourites!) W-What in the shining crown of the Queen is that!? T-That's way bigger than the spider! ...Get ready, you two. We're getting what we came for. Fight! We can do it! 32 - Frenzied Sunflower Dance (One of my favourites!) Click me for video! Click me for video!  It's an RPG, how many of you were betting we'd fight a god at some point? Let's see what we're dealing with, anyway.  But it kinda smells like pollen. It's really distracting... Gah! Leif, just hit it already! But it kinda smells like pollen. It's really distracting... Gah! Leif, just hit it already!I'll admit I'm tickled by the idea that a monstrous flower is a problem because it messes with Vi's instincts.  Venus' Guardian has 51 HP and 1 Defence, which is significantly more durability than the previous bosses (not counting the Devourer, which we fought early). This is certainly a step up from the Spider, and the minibosses we've been fighting.   Let's take things slowly for now and just do some normal attacks.  Venus likes to interject a lot in this fight, too.  For its first attack, the Guardian does this arm chop and hits Kabbu for 5 damage. I don't know why, but I'm really not good at judging the block timing on this. (Also, if you're paying attention, you'll notice Venus in the background doing the same gestures, she's clearly not a passive participant here.)  After it attacks, Venus grants it an Attack Up buff. This isn't guaranteed to happen: she has a 35% chance to give it either Attack Up or Defence Up at the end of each turn, but won't give it a second buff if it has one already. This chance also increases later in the fight.  That turn could certainly have gone better.  I'm still just going to do normal attacks with Kabbu for now.  While Leif goes for a Frigid Coffin, to hopefully mitigate the effects of that attack buff?  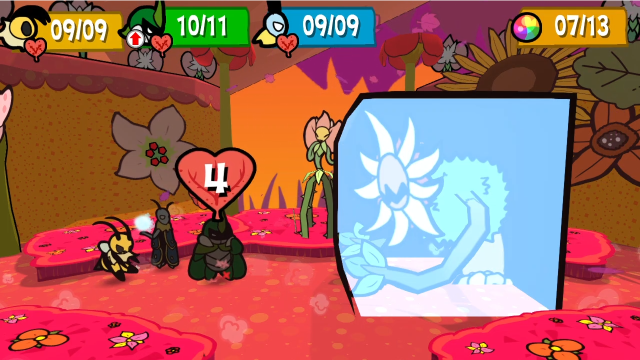 And Vi uses Secret Stash to heal Kabbu. Obviously, I don't want to be breaking it out of the ice. 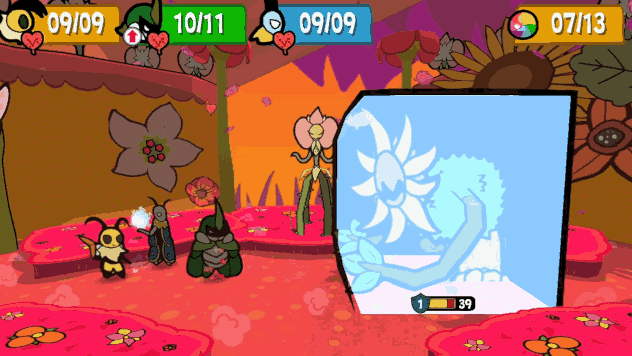 No luck there! If you've been relying on Leif's freezing to coast through fights, this one might be something of a wake-up call. If the Guardian is frozen, Venus will just break it out at the start of the turn, and this doesn't cost it any actions. (This means there's no reason not to break it out for extra damage if you happen to freeze it.) 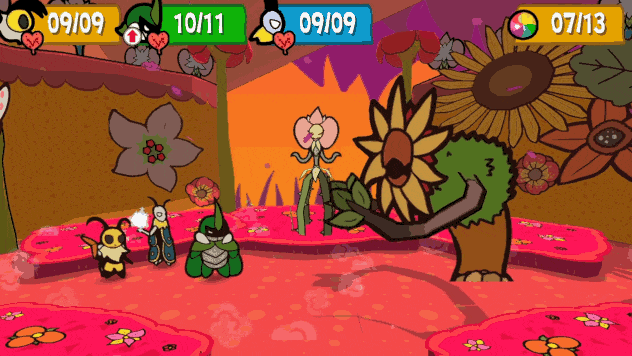 We get to see a new attack this turn! The Guardian shakes and launches a bunch of Hard Seeds at us. This can launch 2-3 seeds, distributed randomly over the party; the base damage is 3, but we're seeing it here with +1 attack. This attack also has a reasonably high chance (I don't know the exact numbers) of giving Team Snakemouth a free Hard Seed if they have room in their inventory. You can see that happen here, Vi holds it up briefly after the attack has ended. 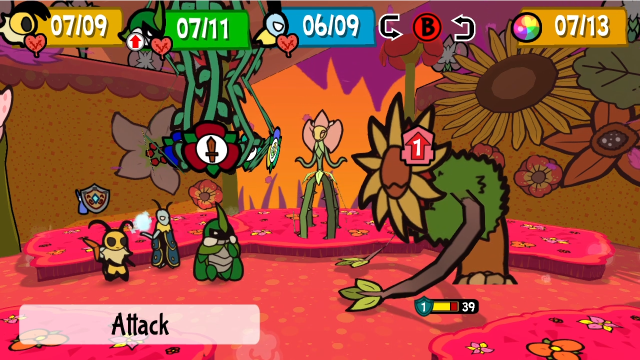 We're making progress, if slowly.    Just another round of basic attacks for now, though I had Vi relay to Kabbu instead for the third one (which gets an extra point through its defence).  But have you ever seen something like this? But have you ever seen something like this? Well, that's different. This indicates we've entered the second phase of the fight, which triggers when it has 65% or fewer HP remaining.  It also attacks immediately after rising into the air. I'm pretty sure this Hard Seed attack has the same properties as the one from before, just with a different animation (and, again, we get a seed from it).  The Guardian is flying now; hopefully Vi can bring it down?  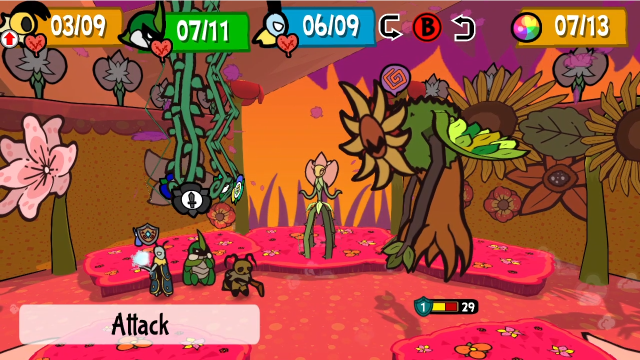 Not quite. An NPC gave us a hint a while back that some enemies require multiple hits to knock down, and Venus' Guardian is the first of them. That new symbol means it's off-balance, and a second hit will bring it down.  So Kabbu relays to Vi and she does the job. 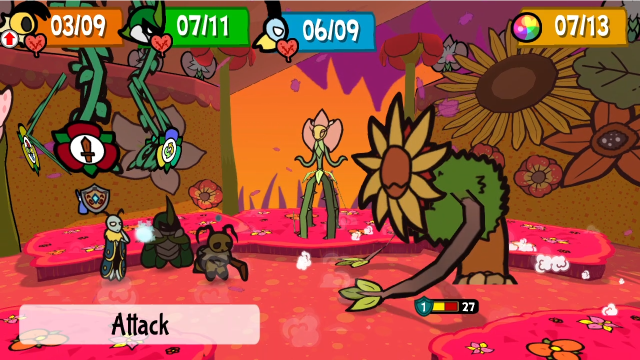 And now it's back on the ground! Before we move on, let's talk about something weird: Vi was doing more damage than she should have, wasn't she? While Venus' Guardian is flying, it has a unique weakness: it takes an extra point of damage from all attacks. 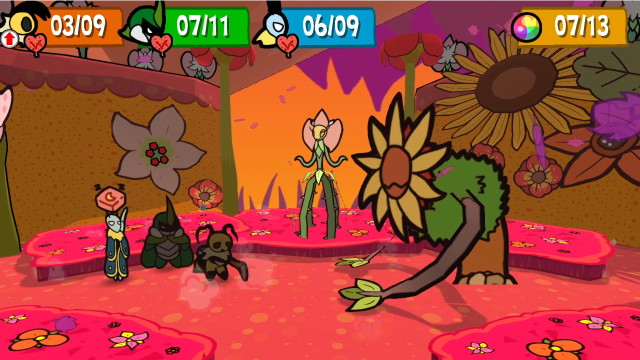 Vi's looking low on HP, and I wouldn't mind a bit of TP recovery, so we may as well use one of Chekhov's Drowsy Cakes. 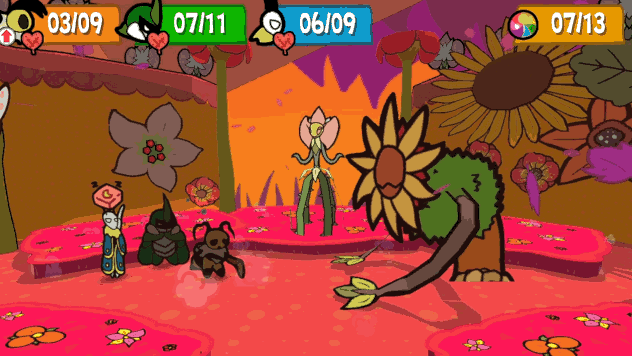 At the end of the animation there, you can see a puff of smoke, indicating the sleep effect did try to take effect. But Vi has a Sleep Resistance medal on, making her immune and allowing her to benefit from the healing without any penalty.  At the beginning of its turn, the Guardian sprouts wings again. It always does during this phase. 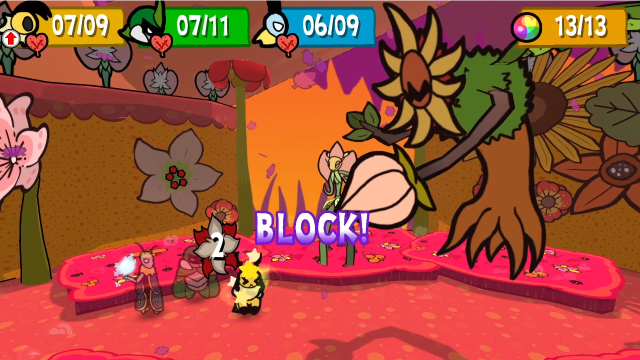 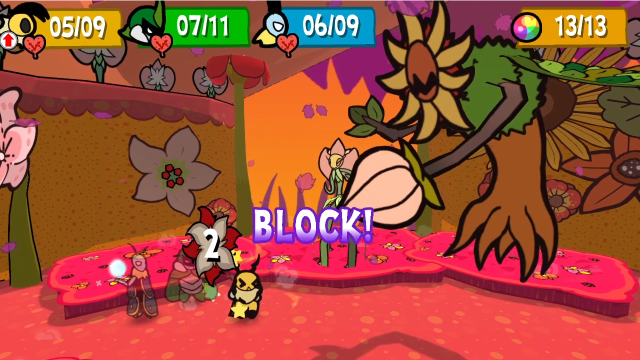 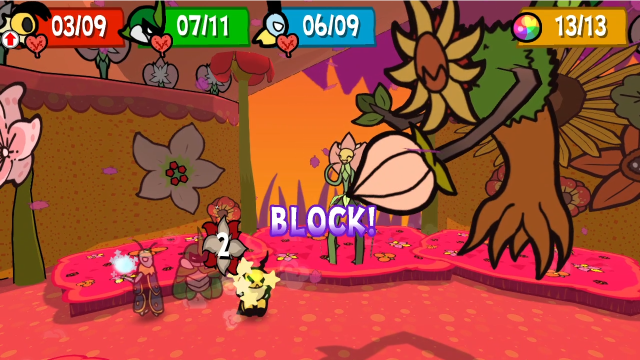 Good thing I healed Vi! All three Hard Seeds it fired went at her. (And I didn't even get the freebie this time.) 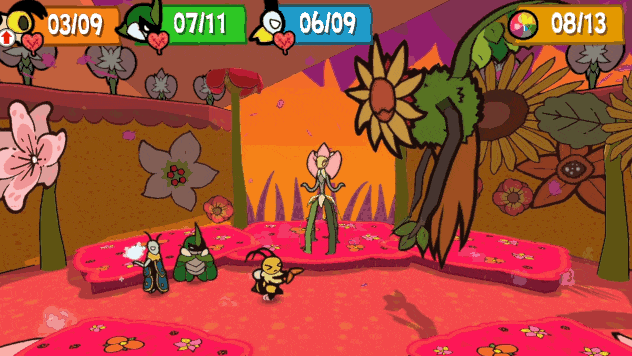 Time to stop messing around. Here's a Hurricane Toss. This is where you can really notice the effect of the Guardian's weakness: the +1 damage is applied after every other calculation, so the follow-up hits of Vi's Beemerang moves end up doing 2 at minimum. You can really chew through its HP quickly if you know about this. 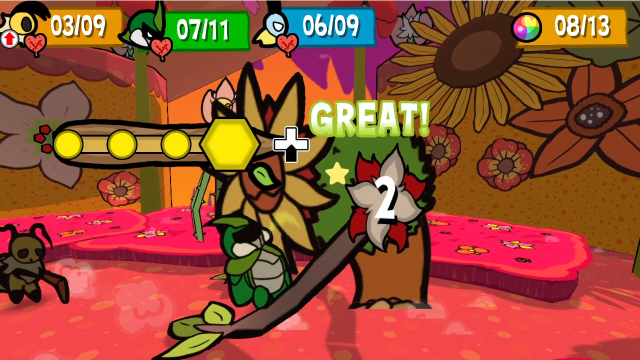 Kabbu is still just attacking. 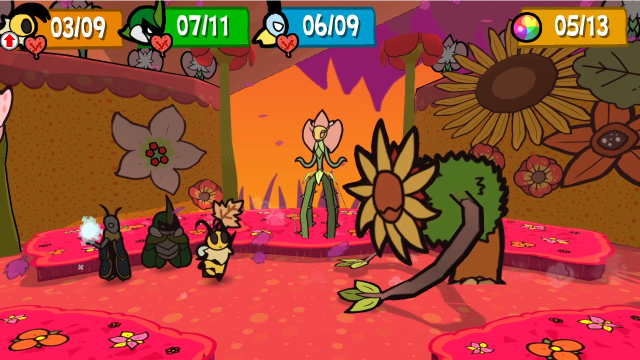 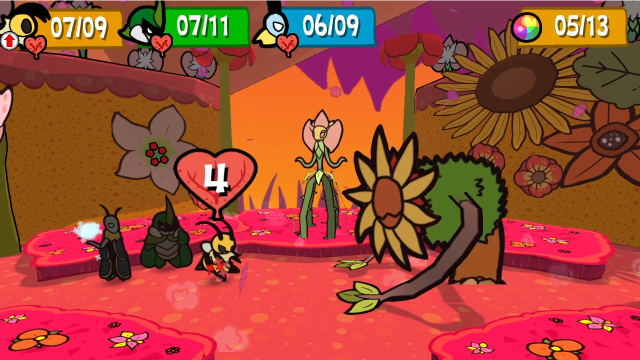 And Vi's low on HP and in front, so Leif relays to her and she heals herself.  But I can fight dirty too! You better get ready! But I can fight dirty too! You better get ready!Looks like we triggered the next phase! This happens when it's below 37.5% HP.  Venus summons a bud behind the Guardian.  Then she gives it a Defence Up buff. (This one isn't random, it's part of the transition into this phase. Though the random ones are also more likely now: the chance of triggering those increases to 60% when the Guardian is at 33% HP or lower.)  And the bud uses its healing breath on the Guardian. (I realised here that the buds' healing breath must not be a fixed number, it's clearly doing 10% of max HP and rounding up.)  It doesn't attack, though, so while that turn definitely prolongs the fight, it can also be a bit of a breather.  The first thing to do here is have Leif freeze the bud with Frigid Coffin. We don't want it healing the Guardian again, and Venus won't break it out the way she does the big one.   Kabbu keeps the attacks coming. (Though these damage numbers are weird, and I can't fully explain them. I think there's a bug causing the Defence Up boost to be ignored here, and since it's happening on Kabbu's attacks it's probably connected to the 'ignore 1 defence' issue somehow, but I'm not completely sure what's happening.)  At least I was able to partially block the chop this time.  Almost there.  Rotating Leif in front, he can do enough damage to finish off the bud with a normal attack (+1 for ice weakness, +1 for the enemy being frozen).  Vi eats another Drowsy Cake.  Which restored enough TP that Kabbu could switch to Heavy Strike.  We finally see another of the Guardian's attacks: it can do this arm sweep to hit the entire party at once. I'm usually better at blocking this; you can see here I jumped the gun a bit, I think I misread this as the chop which comes out a bit faster.  It has 12 HP left; we should be able to finish things this turn, with a little luck.  First off, a Frigid Coffin from Leif. And the freeze is successful, which we needed. (This was likely but not guaranteed: at 50% base freeze resistance, and having been frozen once before, the Guardian had 68% resistance. Incorporating the -30% from Frigid Coffin, the chance of a successful freeze was 62%.)  Kabbu does a Heavy Strike. 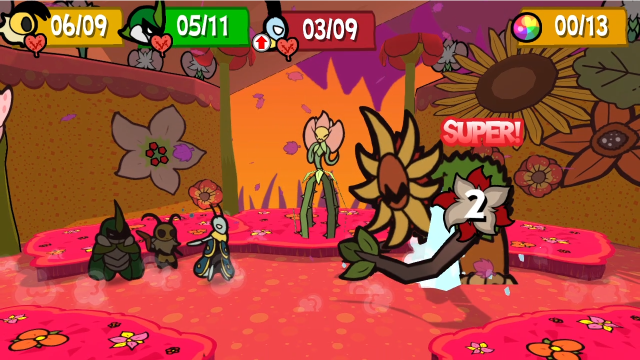 Then Vi can relay to Leif for the final 2 damage. 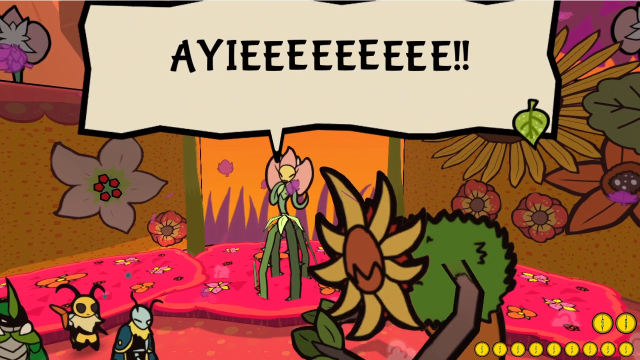 I don't think Venus liked that.  And that's it for Venus' Guardian! It's a pretty straightforward boss, though the phase changes keep it interesting throughout. I think the Hard Seeds are given out to help make sure you can knock it down even if you don't remember you can use Turn Relay or Vi's multi-hit attacks. (Also, I have to admit I don't know why they did the "extra damage" weakness instead of having its defence drop by 1 while flying. It's not quite identical, but using defence would have made it more consistent with the rest of the game.) It has one other attack we didn't see: 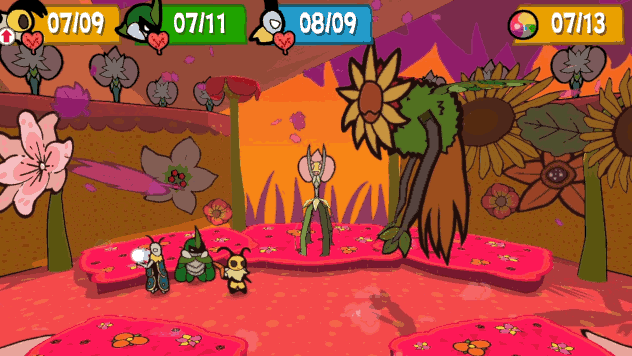 While flying, in addition to launching the barrage of Hard Seeds, it can also launch a Spicy Bomb which hits the entire party for 4 base damage. (Unlike the actual Spicy Bomb item, this doesn't ignore defence.)   It is our honor to hear so, Venus. Now, if you'd answer us... And hand over the artifact! It is our honor to hear so, Venus. Now, if you'd answer us... And hand over the artifact! Hm? Were your roots not all across Bugaria? Well, my buds don't really have eyes. I can only sense things with them, you see? So you didn't see what happened to us in Snakemouth Den? Tell me more, you curious thing. Back when Elizant the First ruled, our team was on a scouting mission to Snakemouth... We fell under, and a spider trapped us. We went asleep and woke up. When Vi and Kabbu saved us. So many moons later... That was quite a while back. Let me try and remember. ...... Yes, a team of three. One of them falls, the other two flee with their lives. They lived! Thank goodness! The remaining one lingers, yet the presence vanishes. What, it just vanishes? Hm? Were your roots not all across Bugaria? Well, my buds don't really have eyes. I can only sense things with them, you see? So you didn't see what happened to us in Snakemouth Den? Tell me more, you curious thing. Back when Elizant the First ruled, our team was on a scouting mission to Snakemouth... We fell under, and a spider trapped us. We went asleep and woke up. When Vi and Kabbu saved us. So many moons later... That was quite a while back. Let me try and remember. ...... Yes, a team of three. One of them falls, the other two flee with their lives. They lived! Thank goodness! The remaining one lingers, yet the presence vanishes. What, it just vanishes? Even now, I cannot sense Leif's presence. Although I see you here. I'm sorry, but that's all I can tell you. Venus, thank you. Knowing our team was safe brought us much peace. Hee he he! Ain't a Goddess for nothing! We are ever closer to the truth, Leif. Yup! Awesome! No questions from you, Kabbu? Thank you, Venus. But don't worry. I am managing quite well... If anyone's fine on the team, it's Kabbu! Hm? I'll respect your wishes on this. Anyways, that just leaves... Even now, I cannot sense Leif's presence. Although I see you here. I'm sorry, but that's all I can tell you. Venus, thank you. Knowing our team was safe brought us much peace. Hee he he! Ain't a Goddess for nothing! We are ever closer to the truth, Leif. Yup! Awesome! No questions from you, Kabbu? Thank you, Venus. But don't worry. I am managing quite well... If anyone's fine on the team, it's Kabbu! Hm? I'll respect your wishes on this. Anyways, that just leaves... But anyways, here you go- But anyways, here you go- 16 - Lost Treasure 16 - Lost Treasure   After a festival of joy, friendship and bonding, the path to the sacred hills opened for them. Filled with determination, they gathered the pieces to reach its highest point and fought off Zasp and Mothiva along the way. Now that they've earned the Goddess' approval and artifact, could the way to the Everlasting Sapling finally be within reach...!? After a festival of joy, friendship and bonding, the path to the sacred hills opened for them. Filled with determination, they gathered the pieces to reach its highest point and fought off Zasp and Mothiva along the way. Now that they've earned the Goddess' approval and artifact, could the way to the Everlasting Sapling finally be within reach...!?  We should go report back, then. That tablet is important to find the Everlasting Sapling that the Queen's searching for. I do not know how it works, but it should hold clues on how to locate it. Thank you, Venus. How can we ever repay you? Hmm... Just promise to visit me sometime, alright? Bring Aria if you can! Hee he he! Oh, and don't tell others of me, of course... Stay safe, and remember, I'm always watching over you. We should go report back, then. That tablet is important to find the Everlasting Sapling that the Queen's searching for. I do not know how it works, but it should hold clues on how to locate it. Thank you, Venus. How can we ever repay you? Hmm... Just promise to visit me sometime, alright? Bring Aria if you can! Hee he he! Oh, and don't tell others of me, of course... Stay safe, and remember, I'm always watching over you. And there we have it, the end of Chapter 2. In the end, Venus was a lot less sinister than might have been expected, she's just a benevolent goddess with a capricious sense of humour. We're definitely going to need to think about the implications of what she's told us.    Just like last time, because we're playing on Hard Mode, we get two achievements for finishing the chapter. Next time, we'll get our mission briefing for Chapter 3. Explopyro fucked around with this message at 05:34 on Apr 21, 2021 |
|
#
?
Apr 21, 2021 04:17
|
|
|
I think I accidently skipped The Boss's 2nd Phase. I don't remember it flying. I remember the bud, but not it flying.
|
|
#
?
Apr 21, 2021 05:29
|
|
|
I love Venus' animations. Between her pantomiming the big attacks, and giggling after the seed barrage... you can tell she's having a blast.
|
|
#
?
Apr 21, 2021 05:43
|
|
|
Venus is an incredible character, and I like how a deity is presented in a positive light for a change! Plus her design is so beautiful too, for what little the game's graphics do to make that apparent. I should find some good fan art of the battle and share it, I know at least one piece I really liked is out there but I don't think I saved it at the time unfortunately.
|
|
#
?
Apr 21, 2021 06:31
|
|
|
Interesting thing to note is that this boss has a slightly higher amount of HP in normal mode, 62, but has 0 defense. Unlike the old version of PM Master Quest, this game definitely knows how important any bit of changes to the defense stats are and how that can change your damage options.
|
|
#
?
Apr 21, 2021 06:32
|
|
|
ChaosStar0 posted:I think I accidently skipped The Boss's 2nd Phase. I don't remember it flying. I remember the bud, but not it flying. That's actually really interesting! The problem I kept running into (and the reason I eventually decided to record the fight without Favorite One) is that it's really easy to just kill it in the second phase and skip the third entirely, but skipping the second seems like it might be a bit trickier. I don't doubt you can do it, though (and I certainly believe you, since the flying always seemed like one of the most memorable parts of this fight to me). Alien Arcana posted:I love Venus' animations. Between her pantomiming the big attacks, and giggling after the seed barrage... you can tell she's having a blast. Venus is great. I interpreted her gestures to mean she was mostly (if not entirely) controlling the Guardian the whole time, but either way she's definitely having fun with it. Alxprit posted:Venus is an incredible character, and I like how a deity is presented in a positive light for a change! Plus her design is so beautiful too, for what little the game's graphics do to make that apparent. I should find some good fan art of the battle and share it, I know at least one piece I really liked is out there but I don't think I saved it at the time unfortunately. She really is a great character. I'm not usually a big fan of gods in fiction, to be honest, but Venus just... works somehow. I think it helps that she's explicitly not either omnipotent or omniscient, she's just powerful and knows a lot so she can be a character like everyone else (and you don't have to constantly ask "why doesn't she just solve it with godmagic"). It's completely believable that the bugs would regard her as a god, but her presence doesn't break the story. For some reason, I keep mentally categorising Bug Fables with the Kiseki/Trails games almost as much as with Paper Mario. A lot of that was just to do with the general feel of the worldbuilding and level of detail, the constantly-updating NPC dialogue etc, but I'm realising now the fact that both have benign/positive portrayals of religion might also have had something to do with it given how rare that is in games. (Or maybe I'm overthinking and it's just because I played them in reasonably close proximity.) Araxxor posted:Interesting thing to note is that this boss has a slightly higher amount of HP in normal mode, 62, but has 0 defense. Unlike the old version of PM Master Quest, this game definitely knows how important any bit of changes to the defense stats are and how that can change your damage options. Yeah, this is interesting. I came across that when I was looking up the details and thought it was curious; from what I can tell, in normal it also doesn't get the "+1 damage" weakness while flying, which honestly makes me think they may have overcompensated a little. It wouldn't surprise me if it tends to go down a faster on Hard, on average. I definitely appreciate them being thoughtful about this sort of thing, though. (It all goes out the window a bit when you look at the enemy stats for HARDEST, though. I loaded up an old file for testing purposes recently and was amused to note that there isn't a single enemy with less than 1 defence, or at least not in the bestiary. I think one or two summoned enemies might still have had 0. God, HARDEST was fun.) To be honest, I haven't actually played on normal (except to experiment with early Devourer), so I'm probably not going to have a lot of insight into how things change between that and Hard.
|
|
#
?
Apr 22, 2021 02:13
|
|
|
|
| # ? Apr 27, 2024 16:13 |
|
|
Explopyro posted:That's actually really interesting! The problem I kept running into (and the reason I eventually decided to record the fight without Favorite One) is that it's really easy to just kill it in the second phase and skip the third entirely, but skipping the second seems like it might be a bit trickier. I don't doubt you can do it, though (and I certainly believe you, since the flying always seemed like one of the most memorable parts of this fight to me). Yeah, I did use Favored One Kabbu. As I get the medals for them the build will eventually be Favored One Kabbu, Status Needle Vi, and Party Support Leif.
|
|
#
?
Apr 22, 2021 05:08
|
|