


|
This project has a sad beginning: I was dumb and dropped my gas tank, leaving a dent. All of the local PDR places are booked years out (this is hail country) and to ship it off I'd be without this bike for months... or would I... So I got the idea to buy some cheap busted tank off ebay and fix it up enough to ride around while my real tank is being worked on. Project goals:
Here's the godawful thing, I say godawful because I'm actually a few weeks into the restoration now: quote:93 Honda CB750 Nighthawk Gas Tank. USED, I'M NOT A MECHANIC TANK AS IS! Tank has few pin holes. I've been told it's fixable but again not sure. 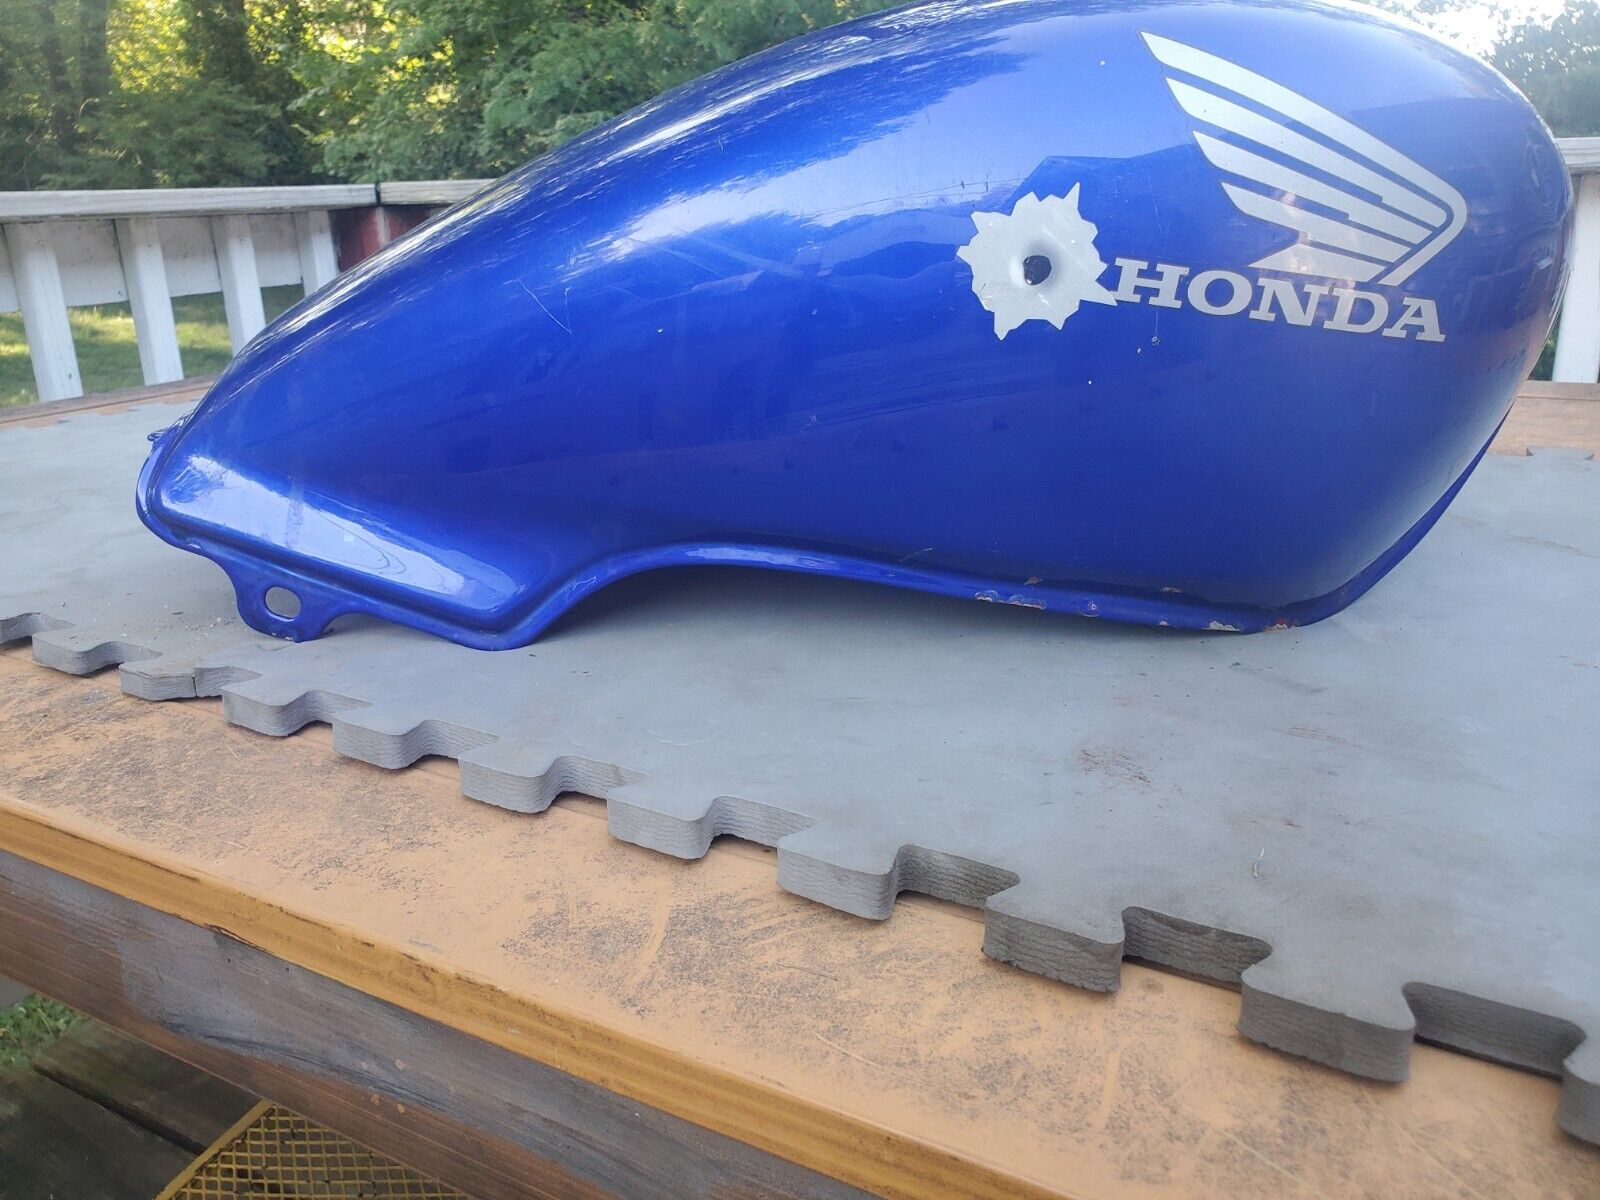 Oh cool it comes with a sticker! 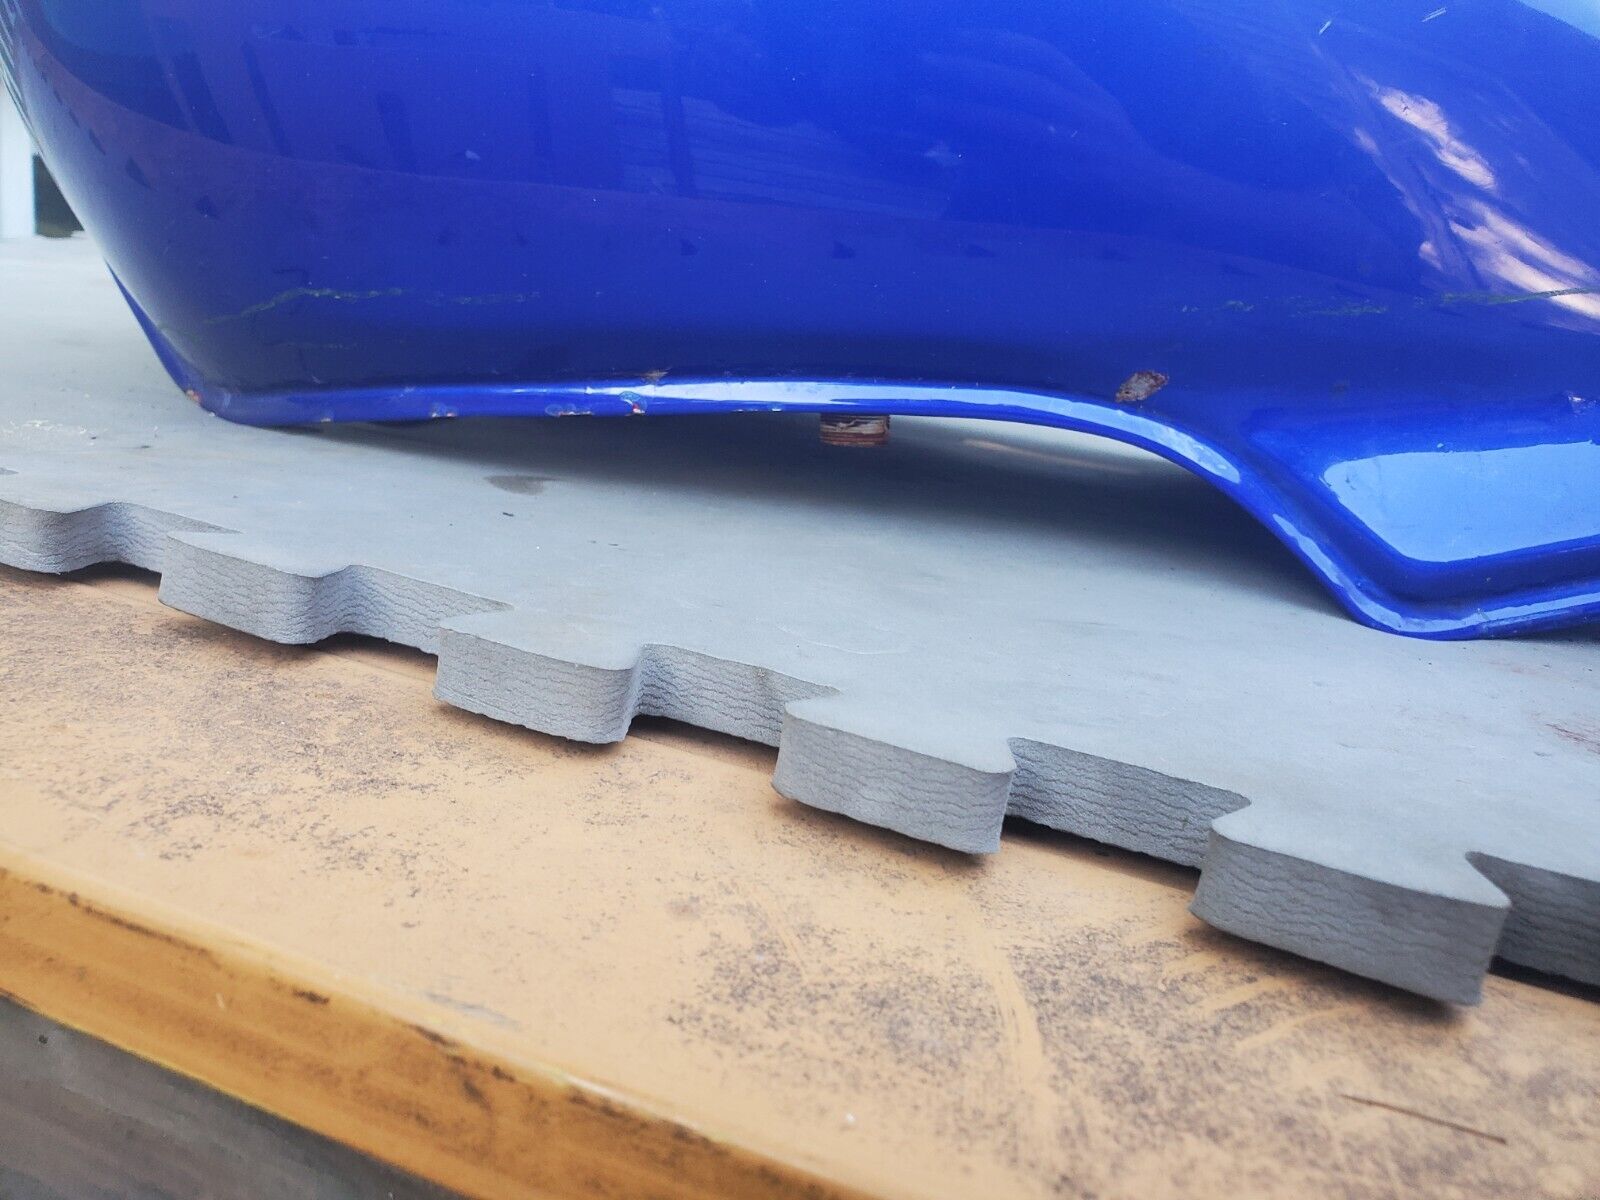 Pinholes! 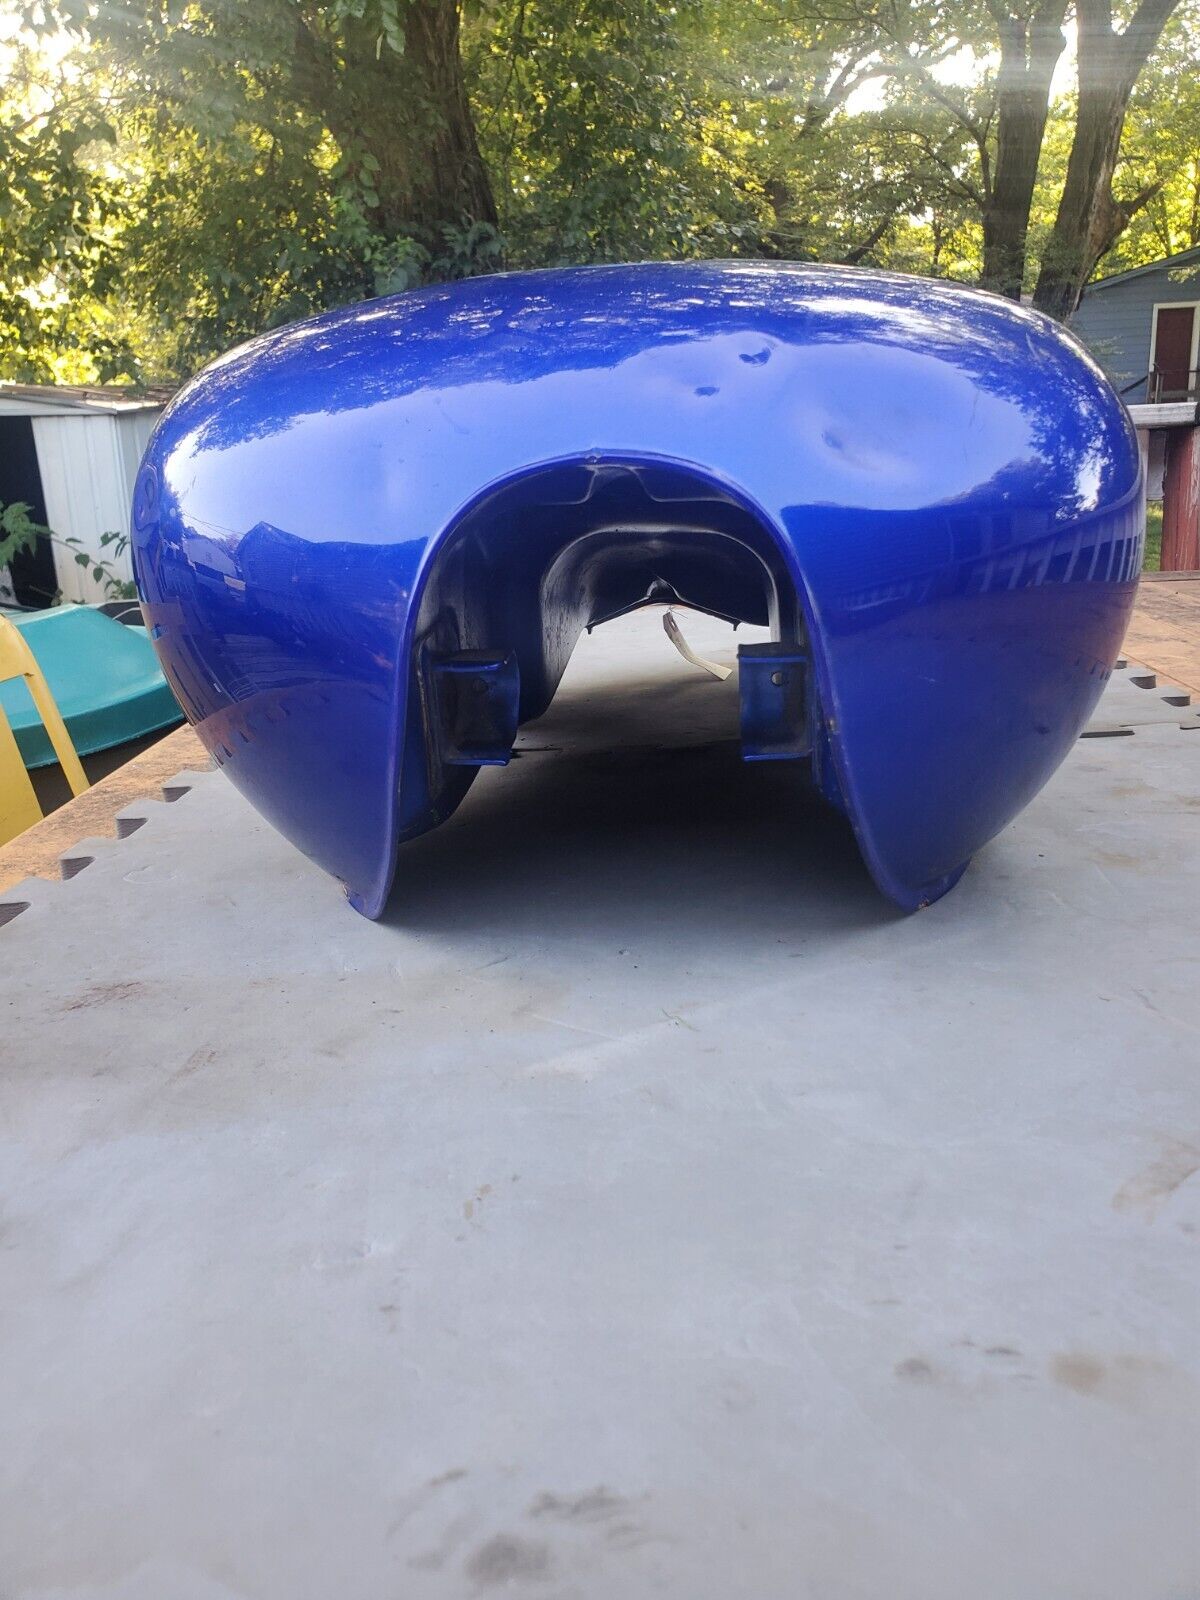 Dents! 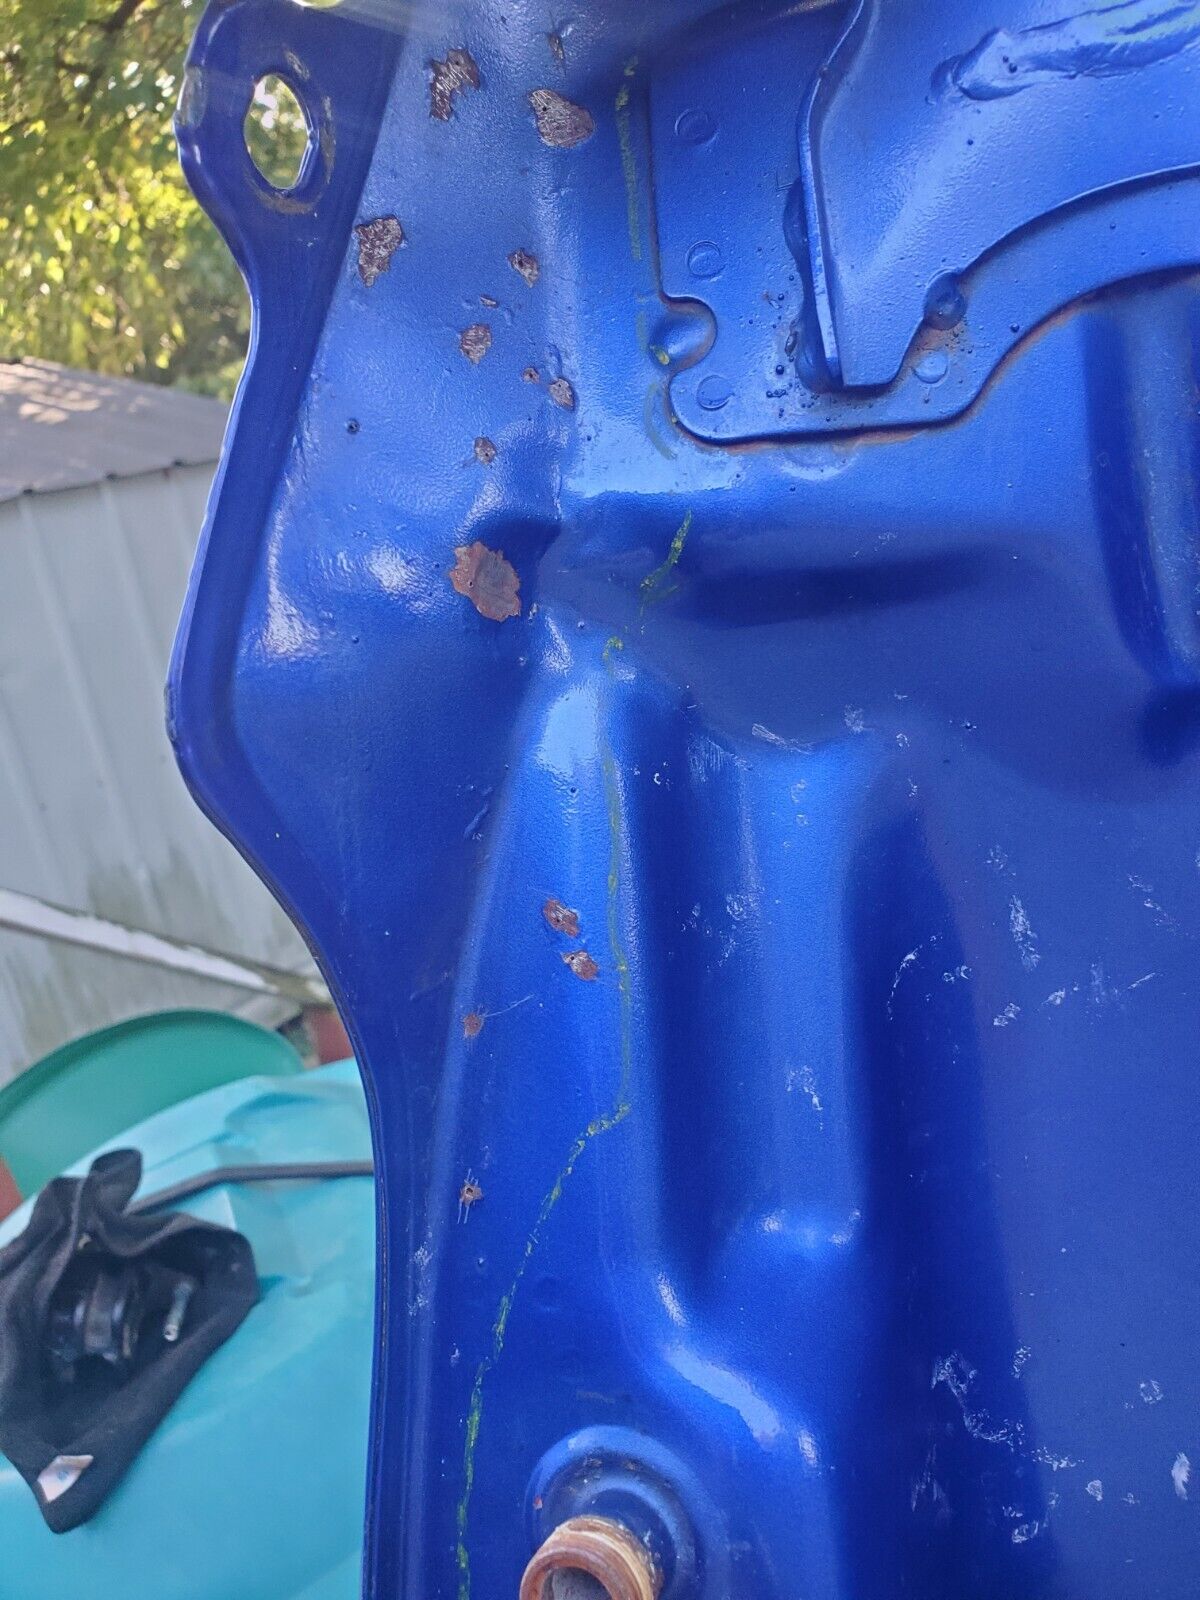 Rust bubbling! 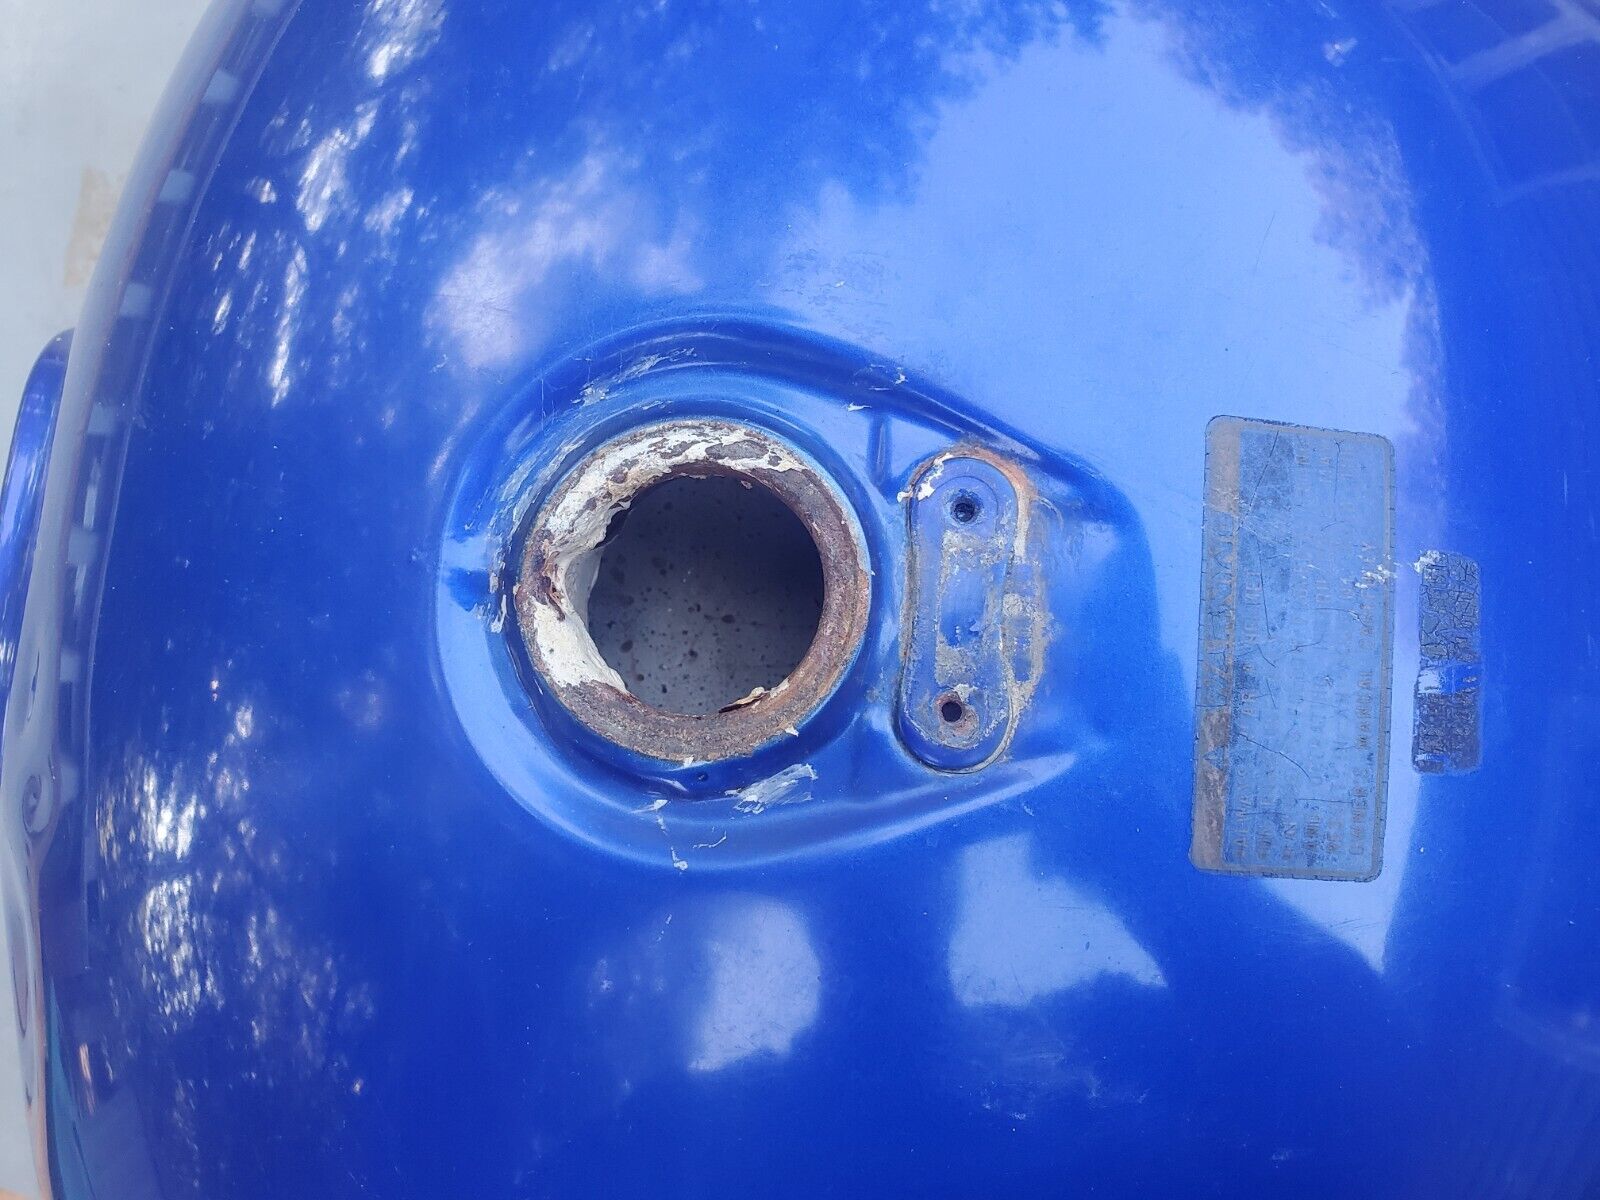 lovely tank liner! If you're reading this you're already screaming that this is a bad idea. I know, now. Ulf fucked around with this message at 19:05 on May 9, 2023 |
 #
?
May 9, 2023 18:05
#
?
May 9, 2023 18:05
|
|


|

|
| # ? Apr 26, 2024 08:16 |
|
|
So now I've got the thing in hand, let's take a look at it.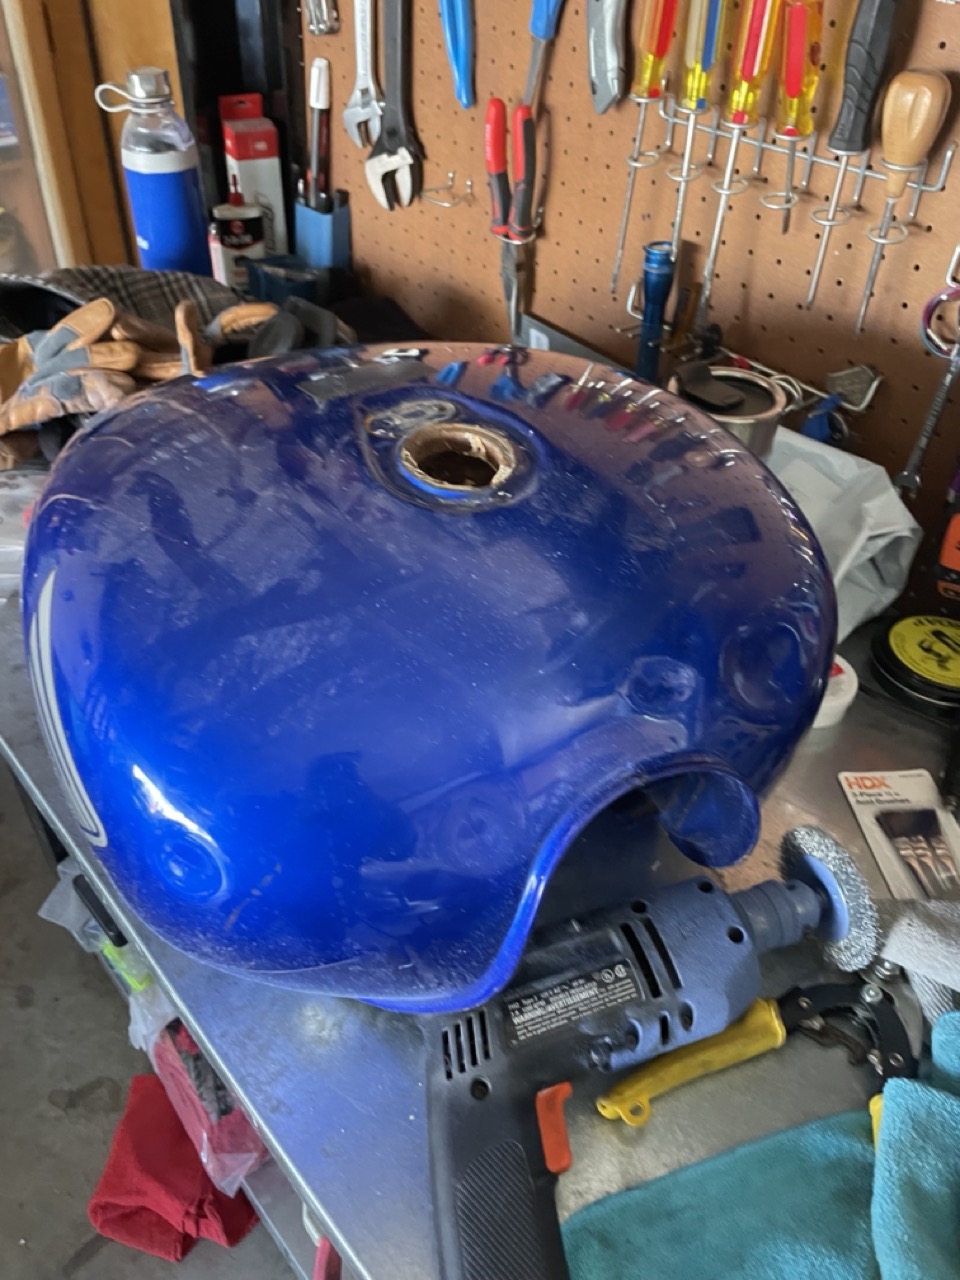 That's a 10-4 on it being dented. One more showing here that wasn't in the ebay pics. Excited to learn bondo, but that's going to be a few months out. 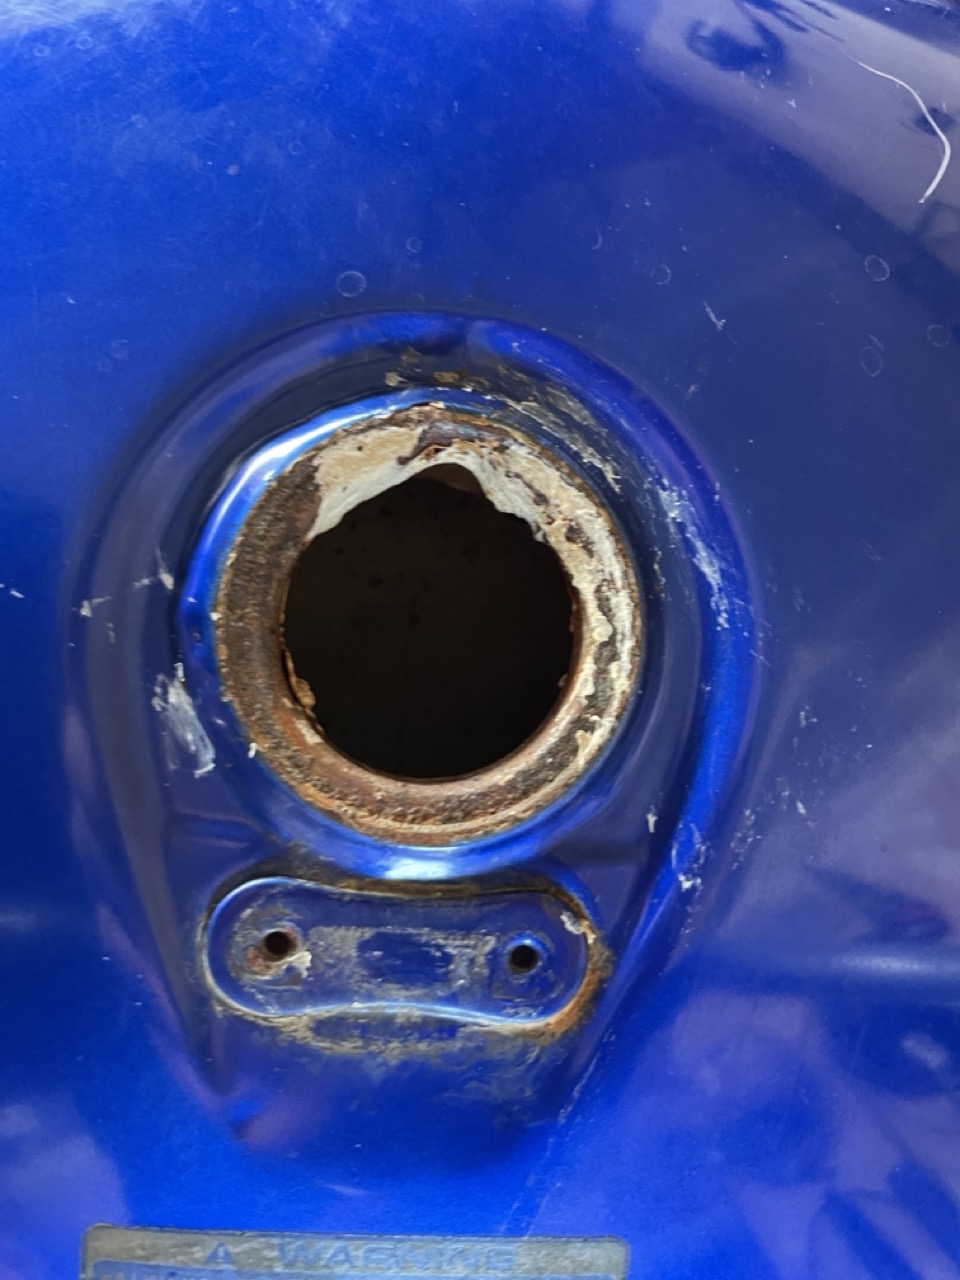 Somehow the lovely Kreem liner looks even worse in person. Spoiler this was a lot of fun to get out. The paint is going away, so I'm not shy about murdering it with a wire brush drill attachment. Here's what I find underneath: 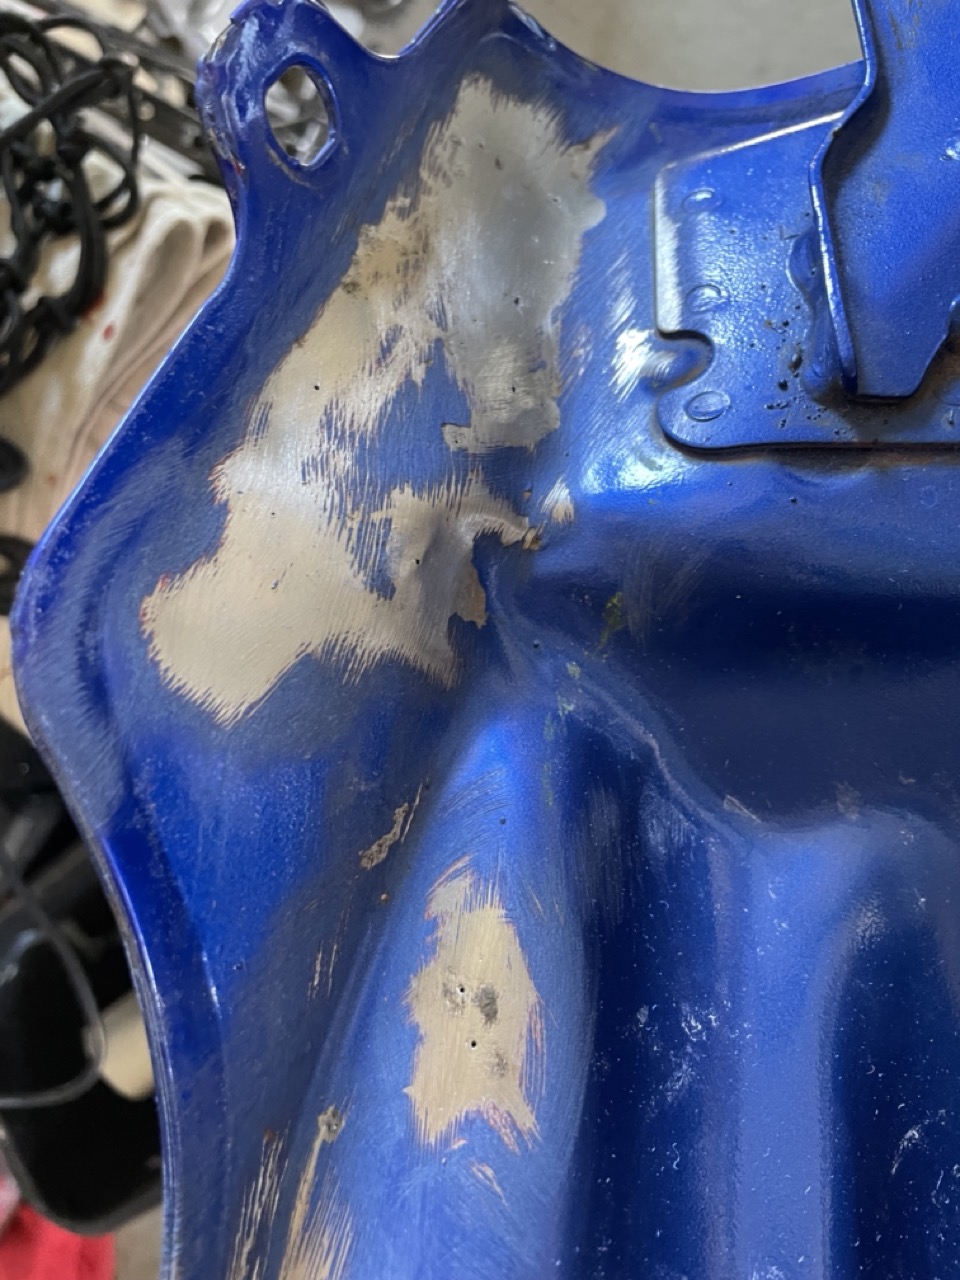 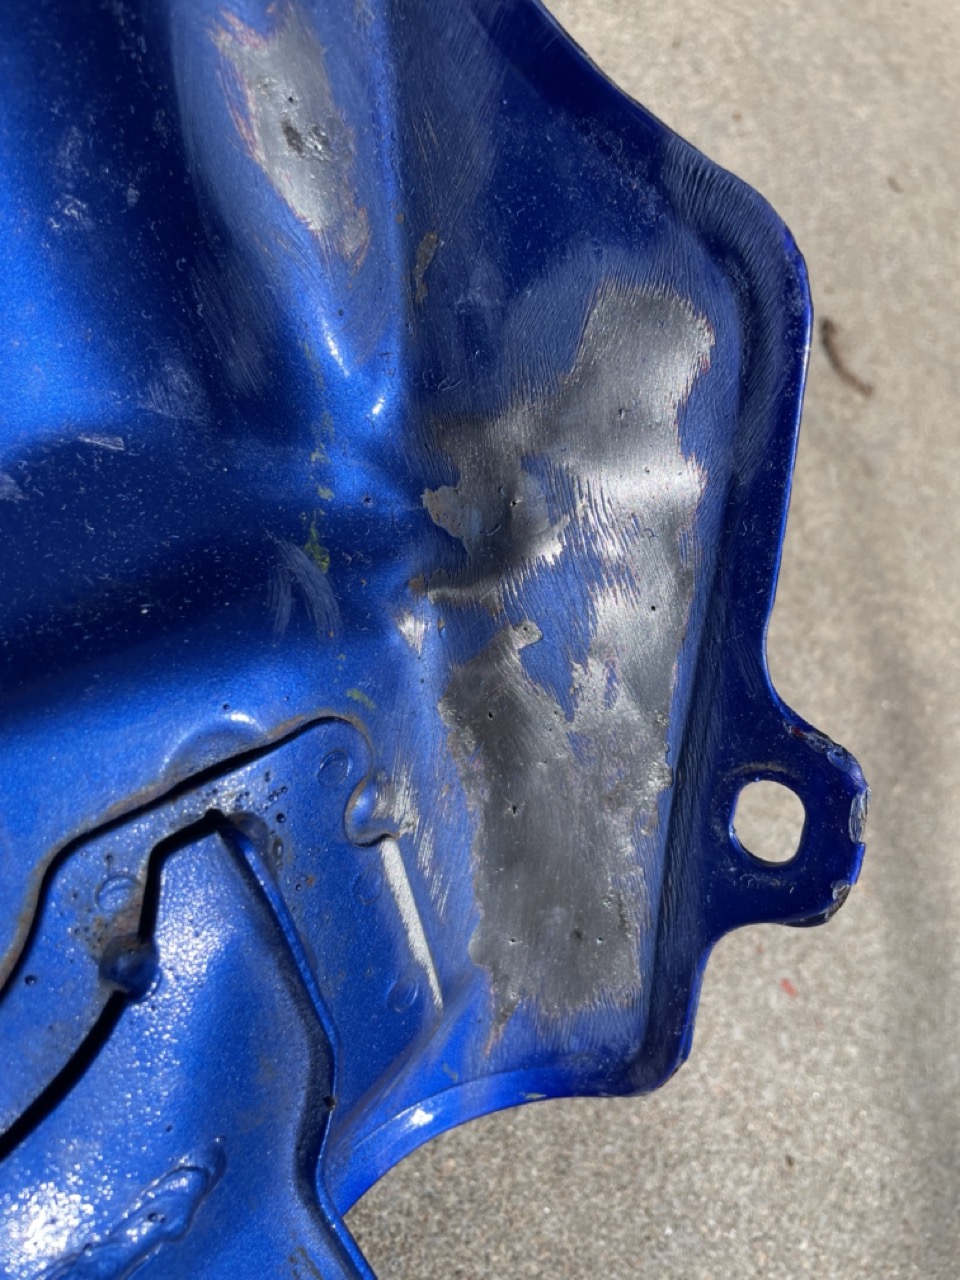 These are what we'll call "clean" pinholes. Solder will fill these nicely. 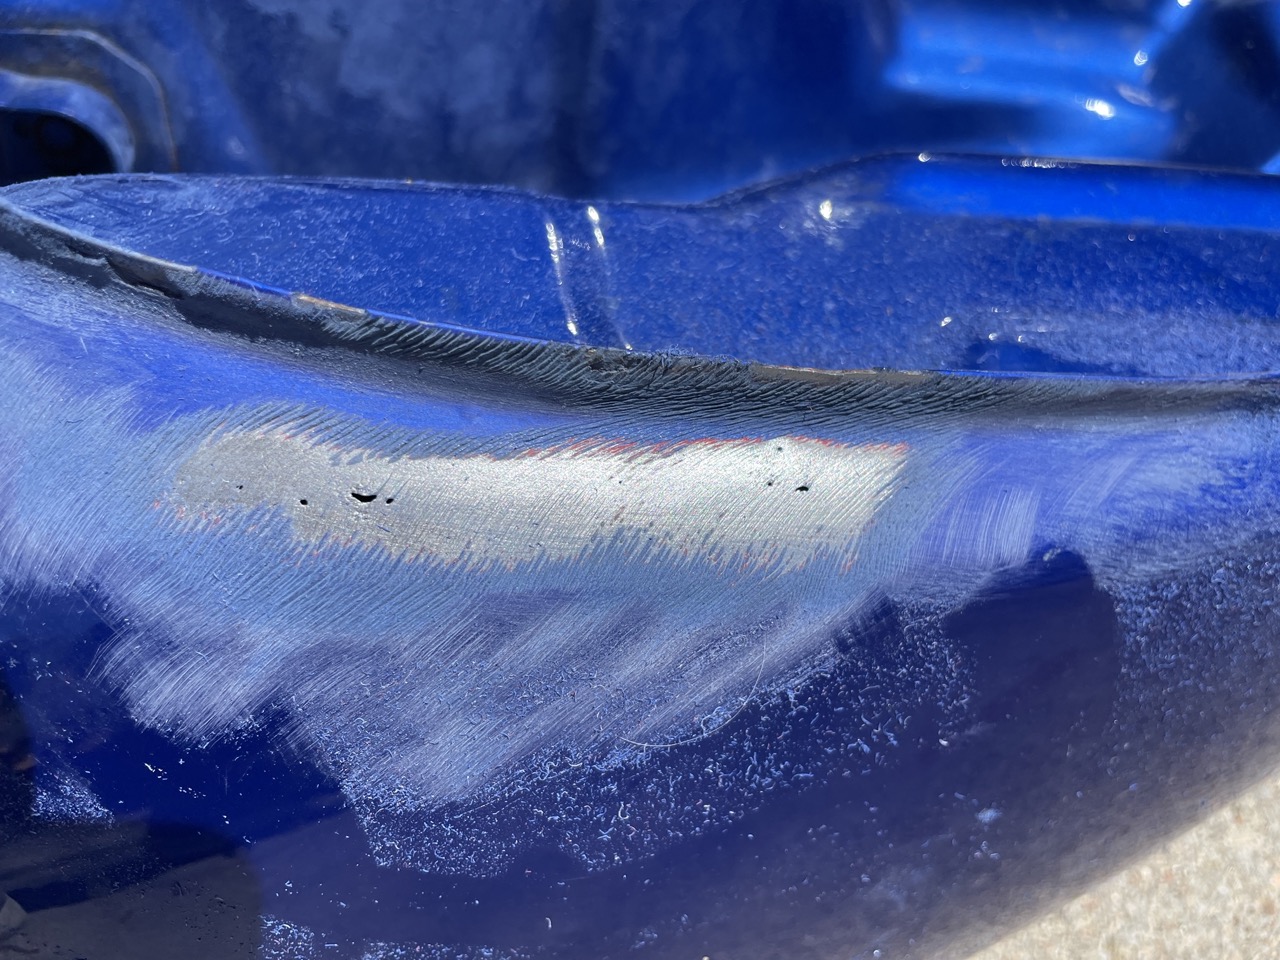 These are still do-able, but starting to look worse in terms of how little metal there is back there. 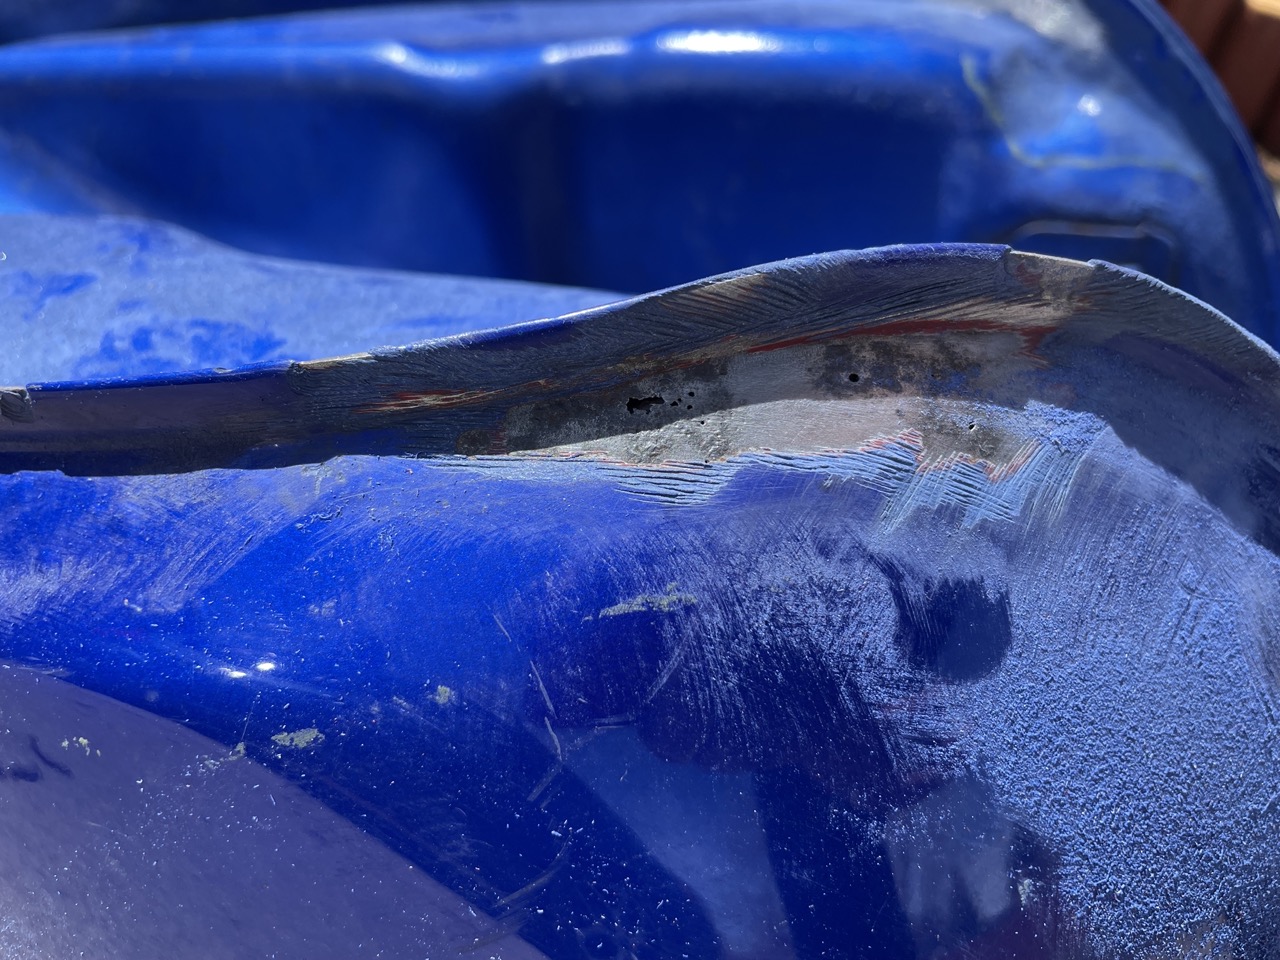 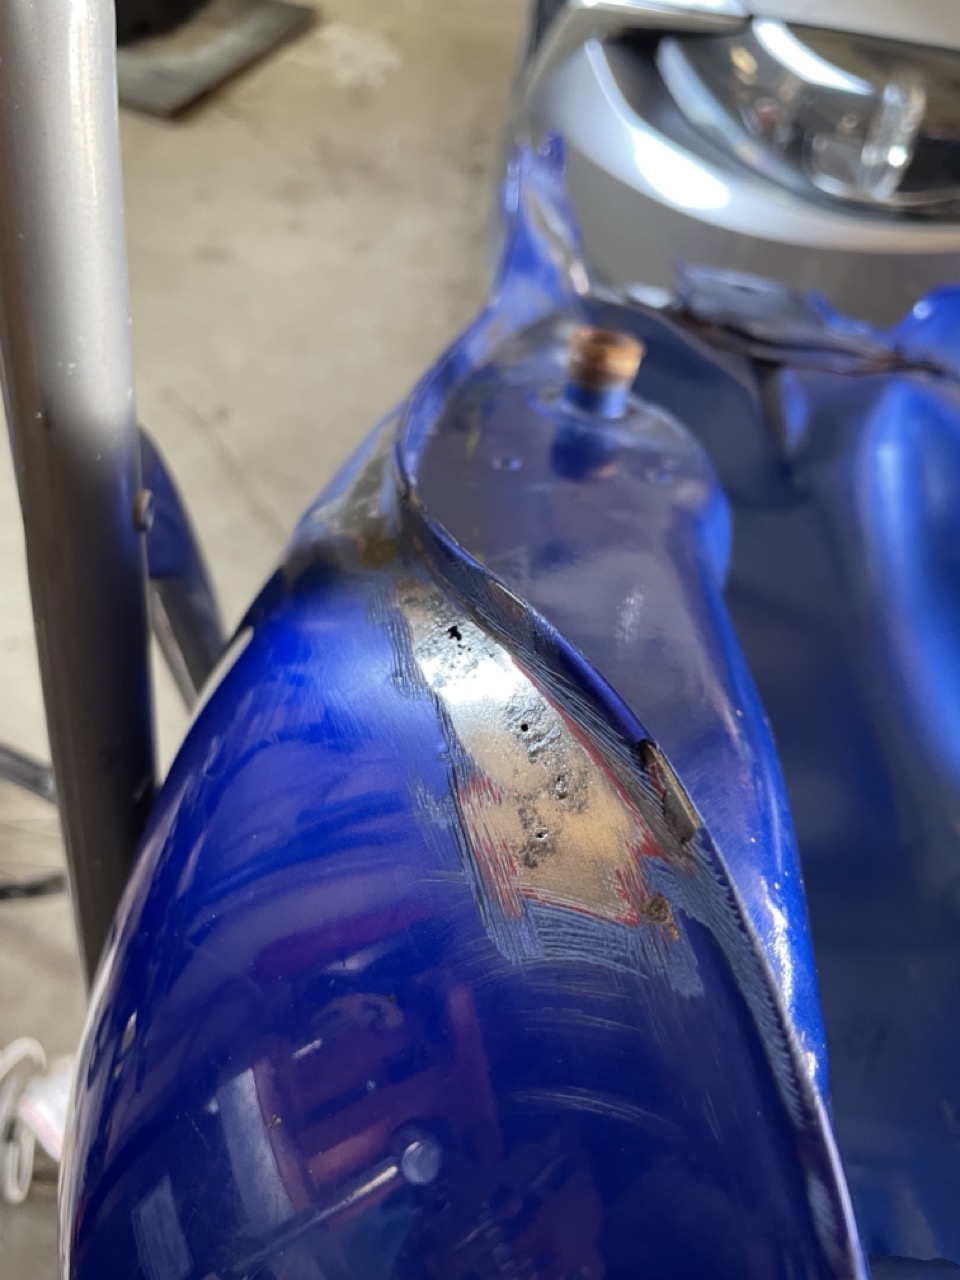 Ugh, I really thought it wouldn't be this bad. Still solderable but some of the strength of this tank is going to be wishes and dreams by the time I'm done. I just want to quote the ebay ad again: quote:Tank has few pin holes. Ulf fucked around with this message at 19:17 on May 9, 2023 |
|
#
?
May 9, 2023 18:16
|
|
|
One hidden surprise in the pics above, did you catch it? The pic of "clean" pinholes the tank ear is actually bent out about 10ş from true. Great, this has crash damage or something! (you can't really tell from this pic, it's something I only picked up looking down the barrel of the tank, and when comparing/fitting it onto the bike. It's since been bashed into shape).
|
|
#
?
May 9, 2023 18:18
|
|
|
Need to solder the thing so it'll hold water for electrolysis / acetone for Kreem softening. I've never done sheet metal soldering, just electronics and stained glass. I'll learn as I go. 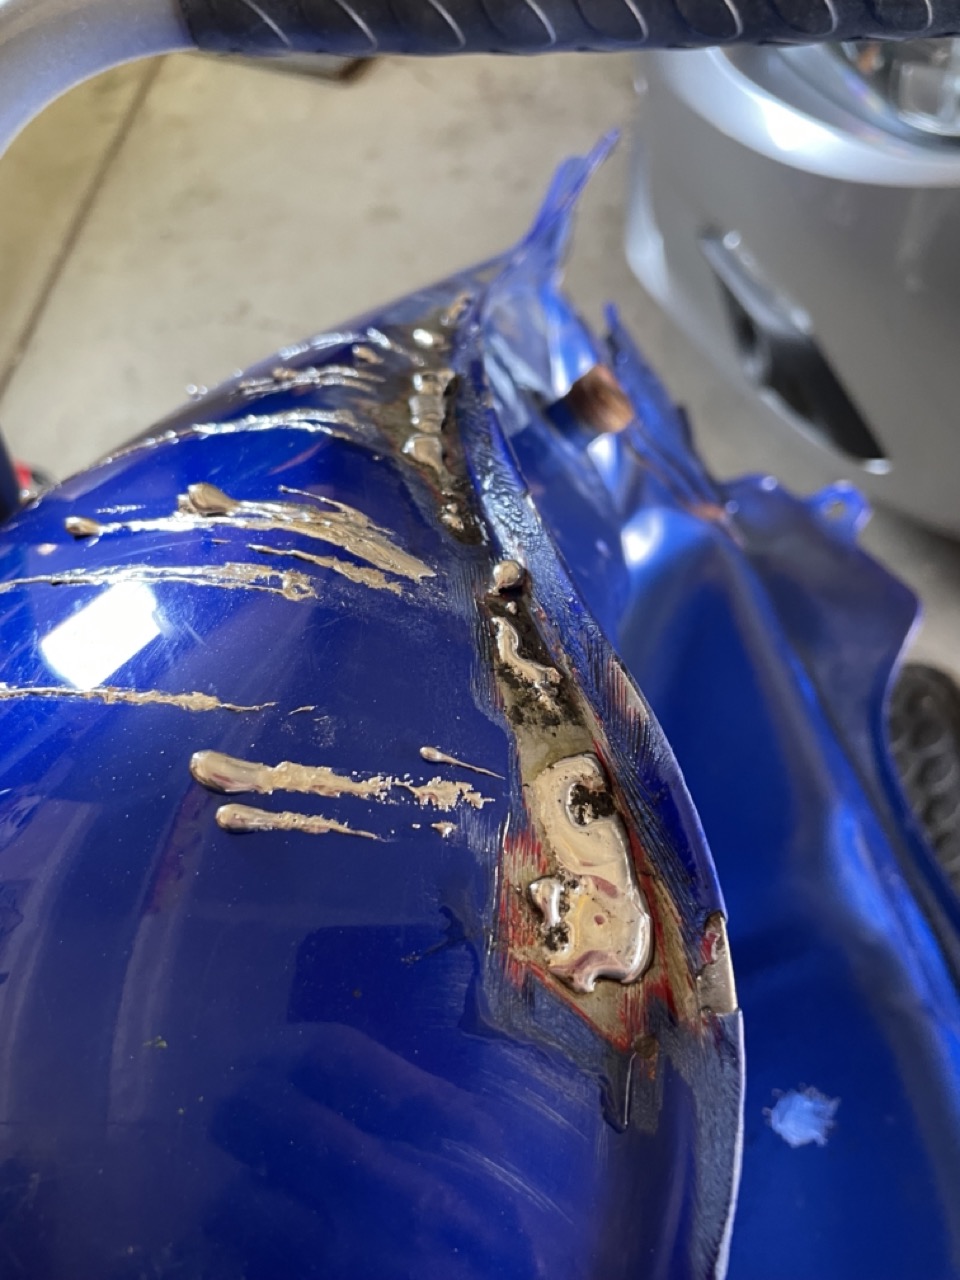 Wow, this looks like a nightmare! 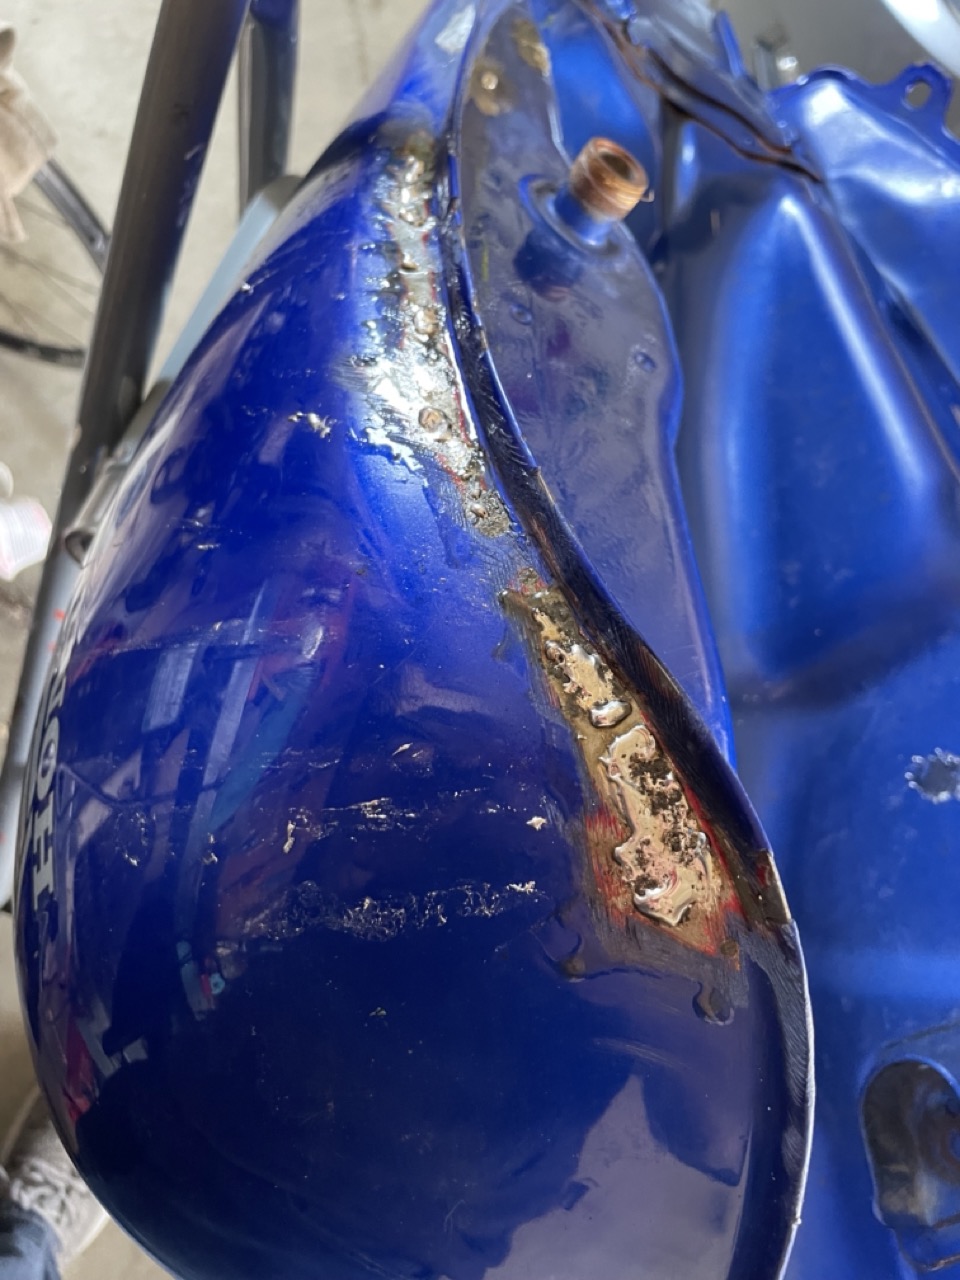 Slightly better, I've figured out to solder on a level plane so it doesn't drip. 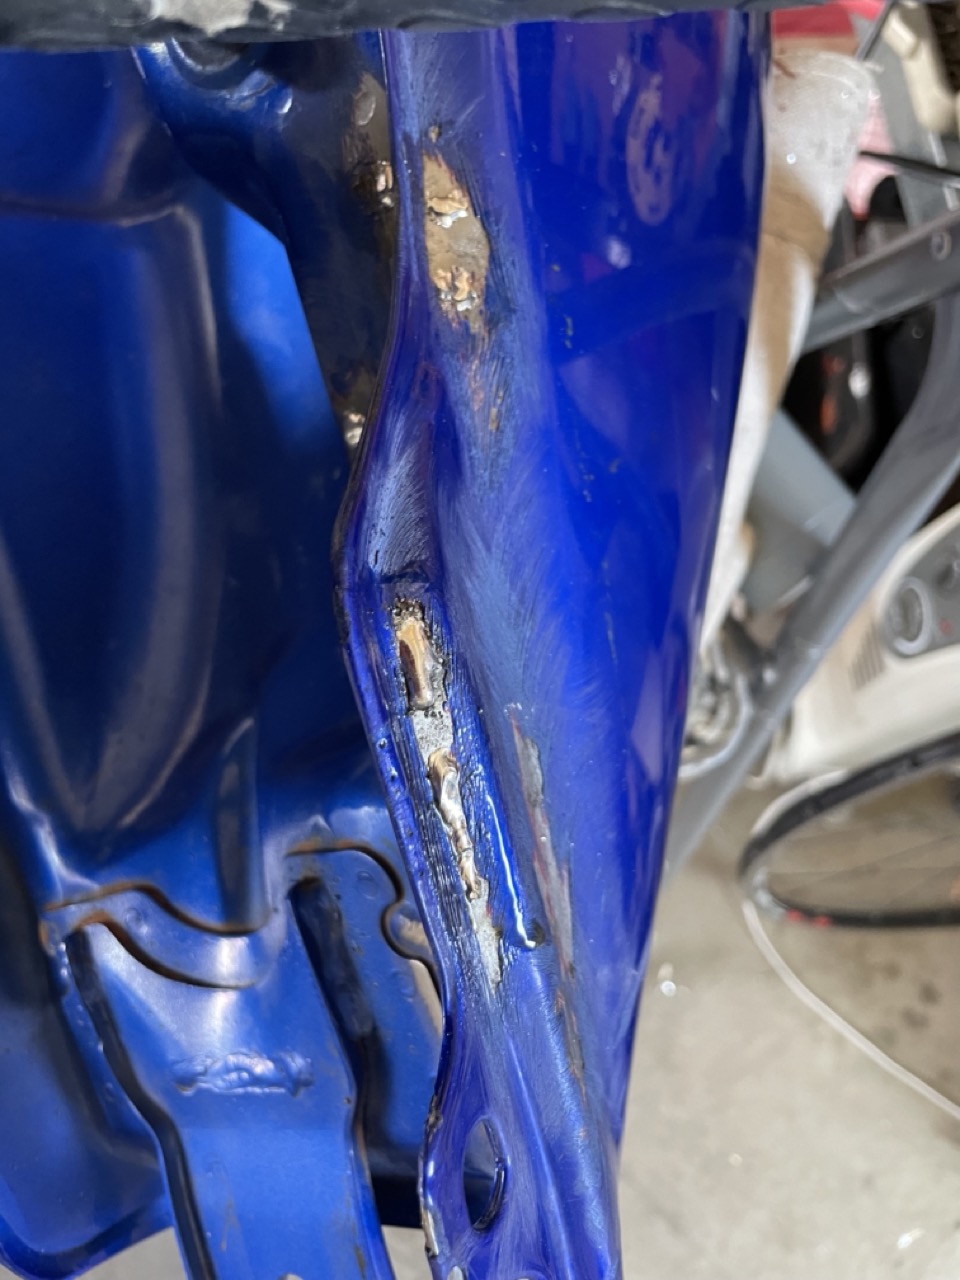 I've figured out to pre-heat the tank edges, making the solder happier about flowing. 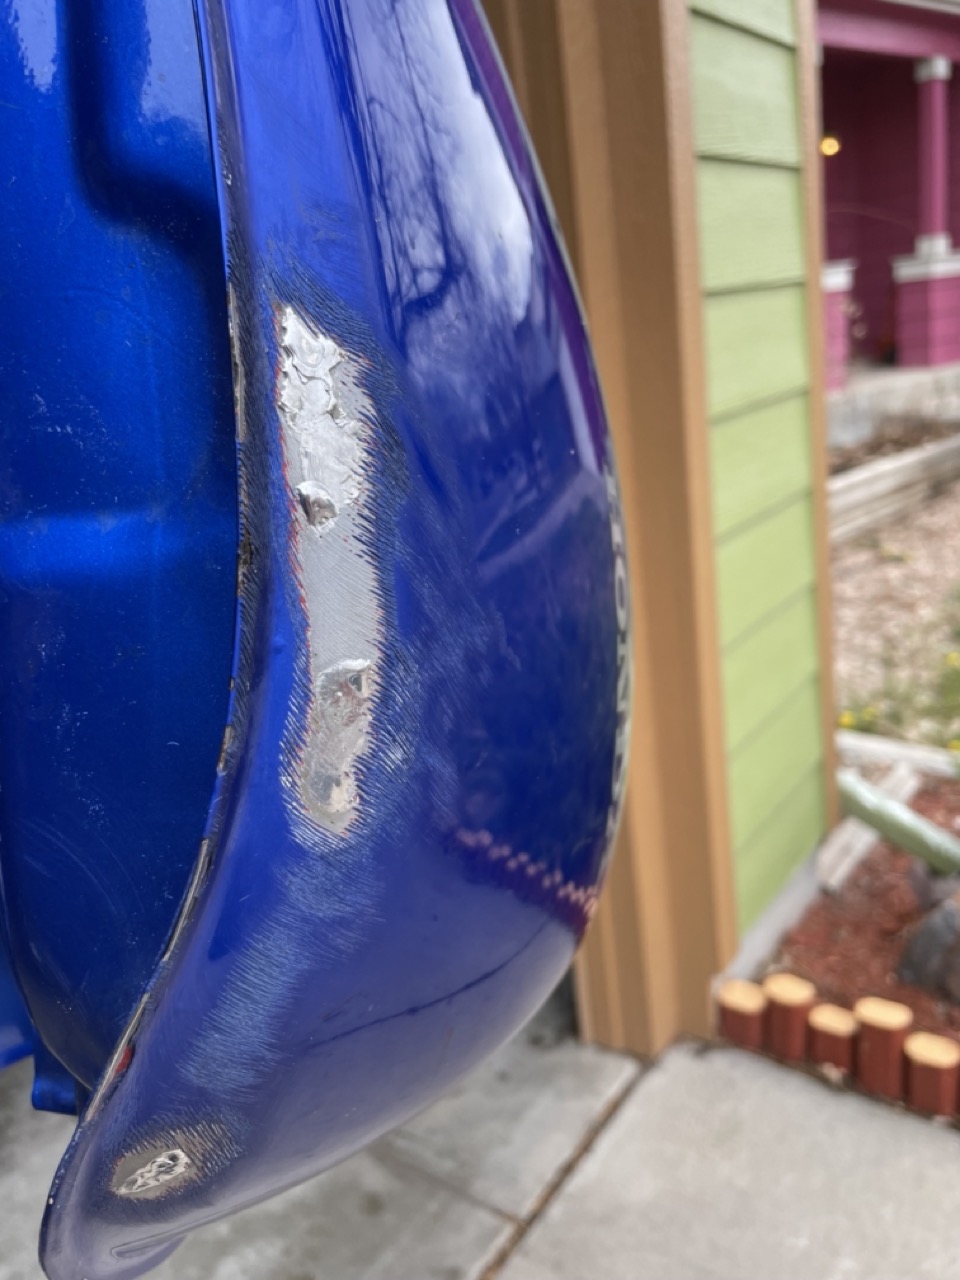 Eventually I get my technique down. Don't worry, I'll have plenty more opportunity to practice. Ulf fucked around with this message at 19:17 on May 9, 2023 |
|
#
?
May 9, 2023 18:26
|
|
|
It holds water now, so I start the electrolysis.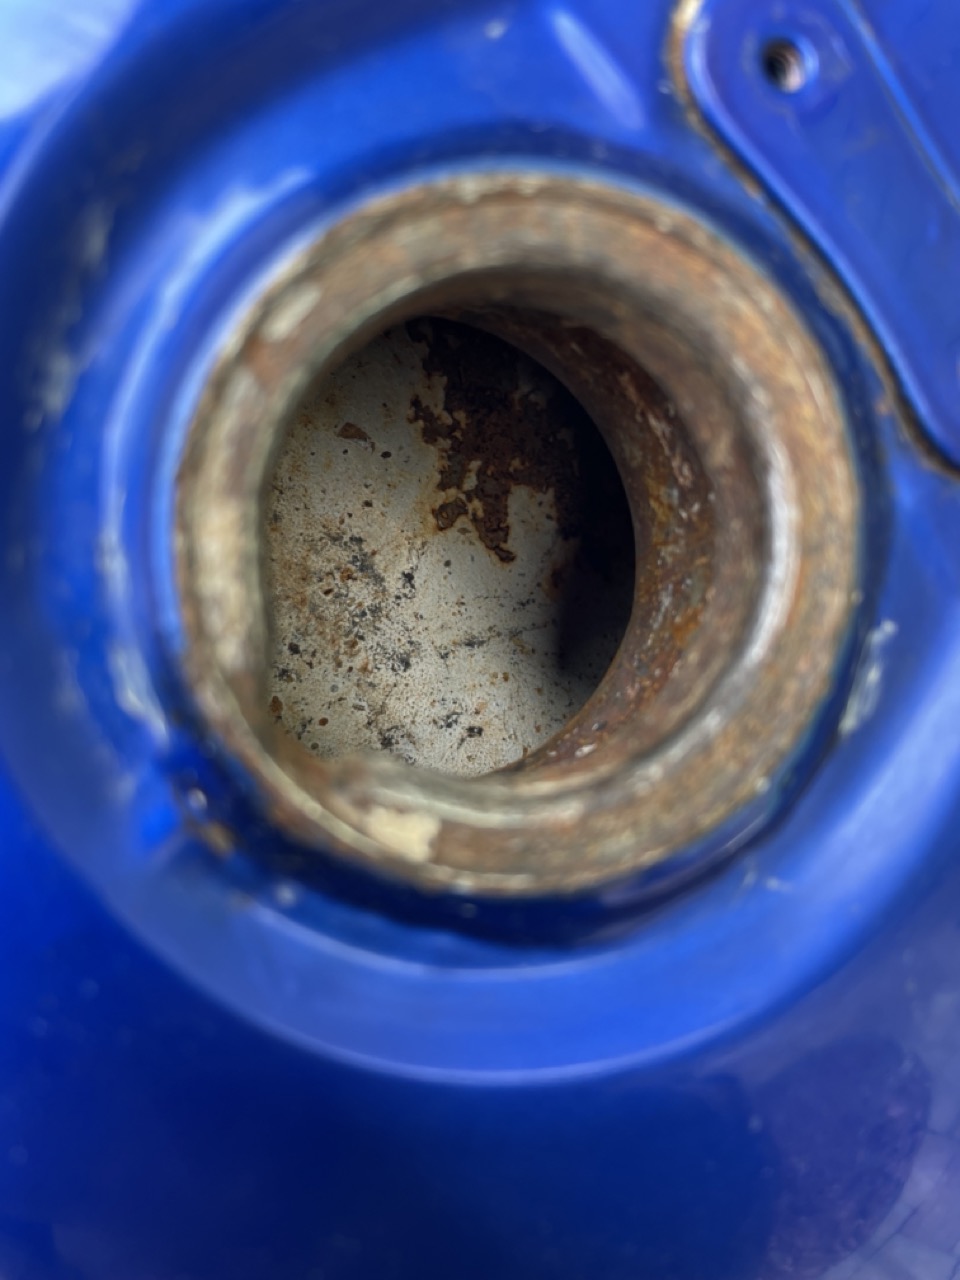 I've chipped some Kreem away, but here it is on the inside. Where the Kreem is missing, you see it's all rust underneath it. 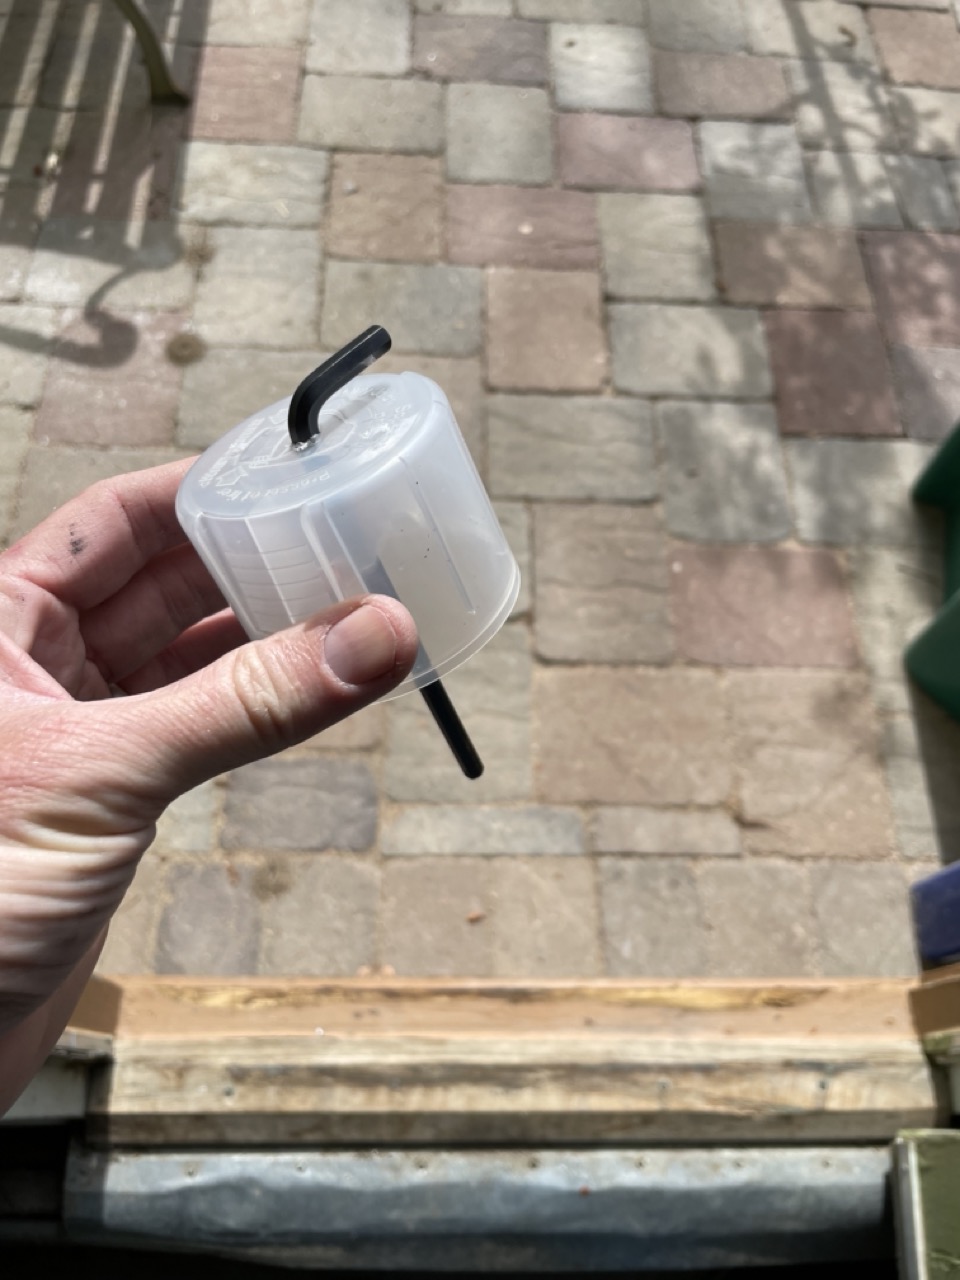 Here's my starting anode, a big SAE hex wrench and a spraypaint cap. 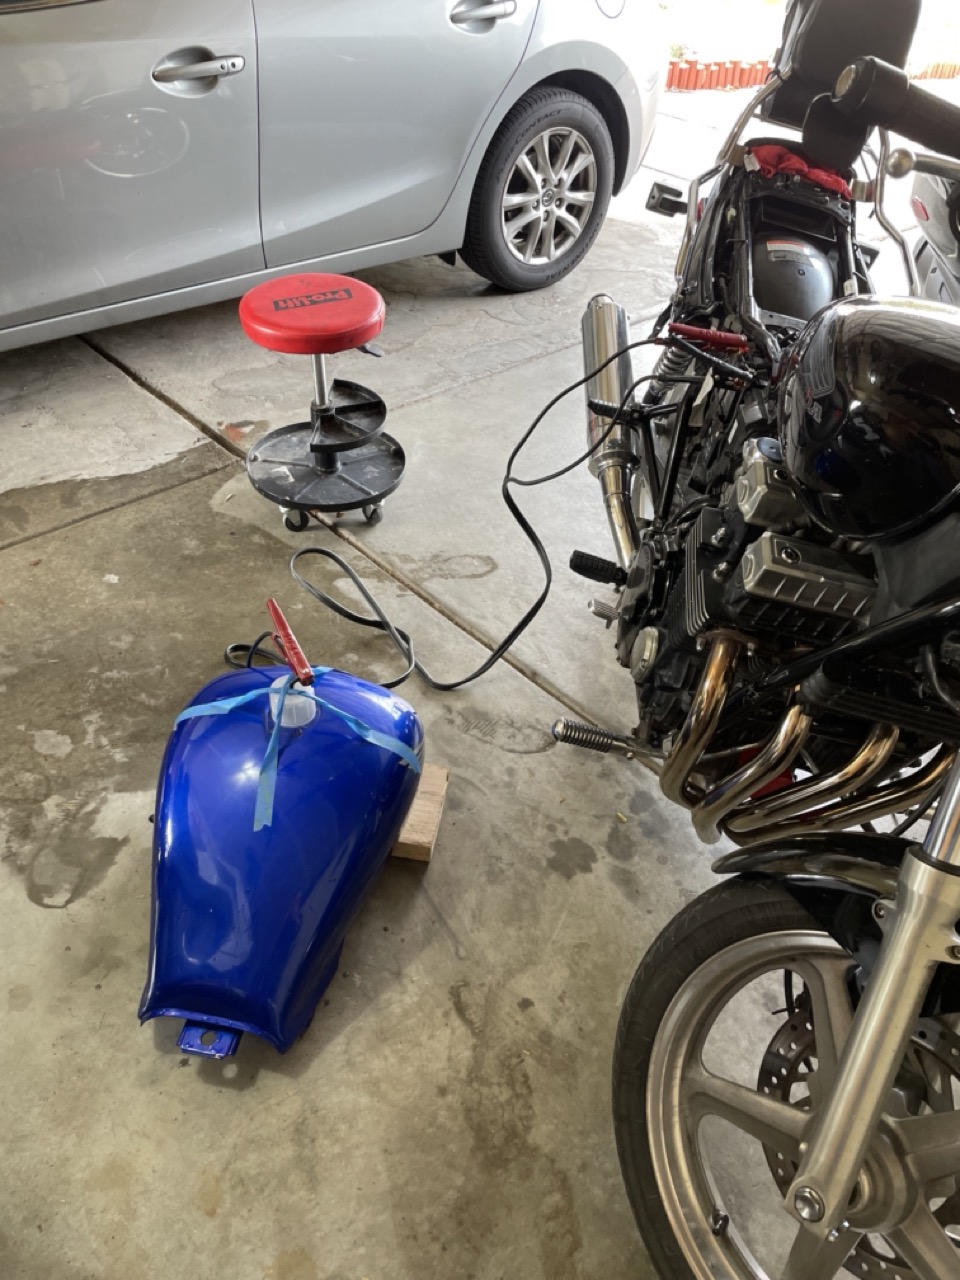 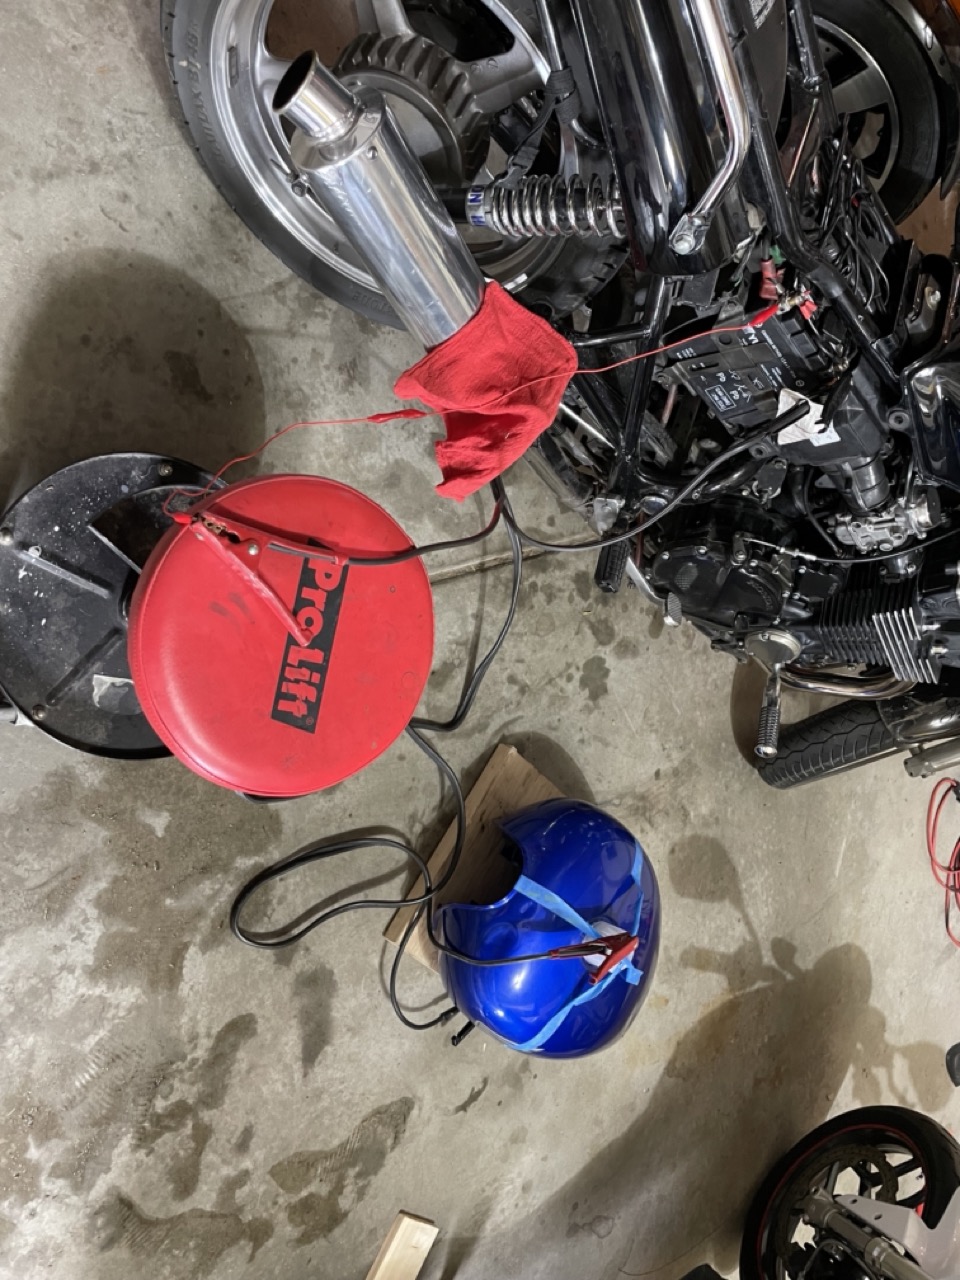 My first setup, I need to drive it off a real battery since my charger is too smart to put power into a tank of washing soda and water. Yes, I know this is a dangerous setup, I added some sacrificial 20ga wire links and in future I'll move this outside / away from the rest of the motorcycle. 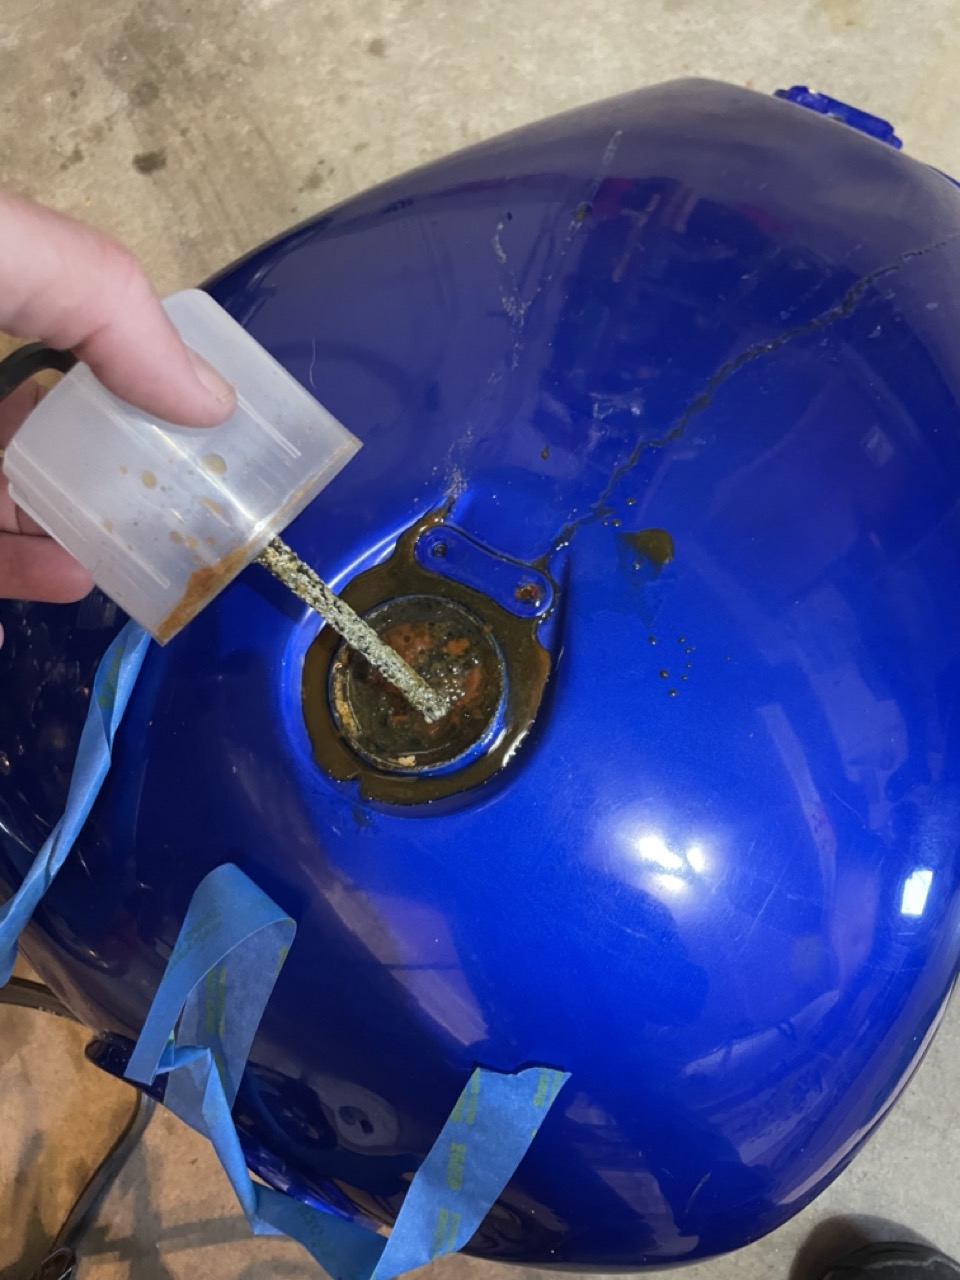 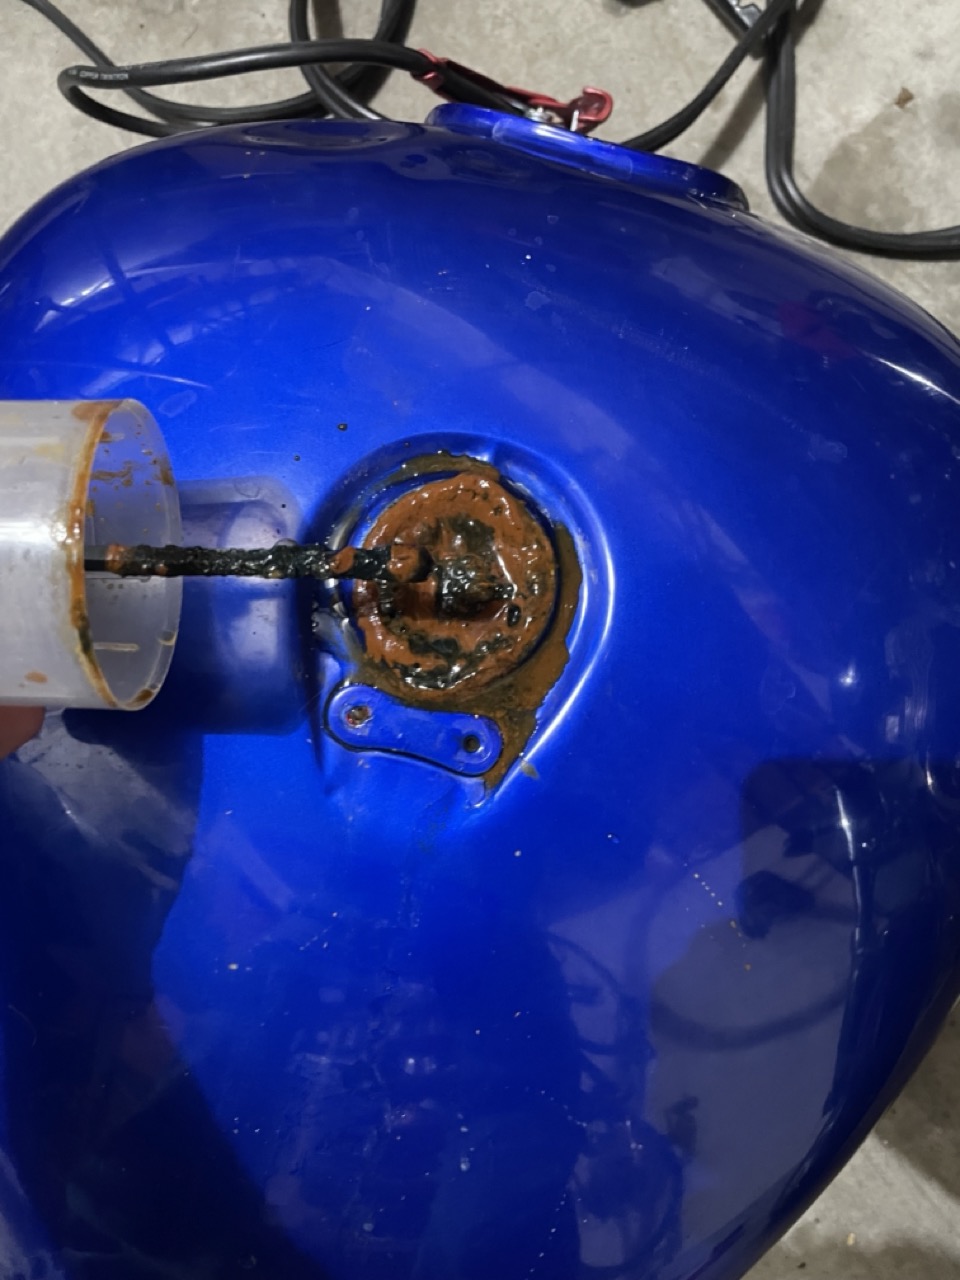 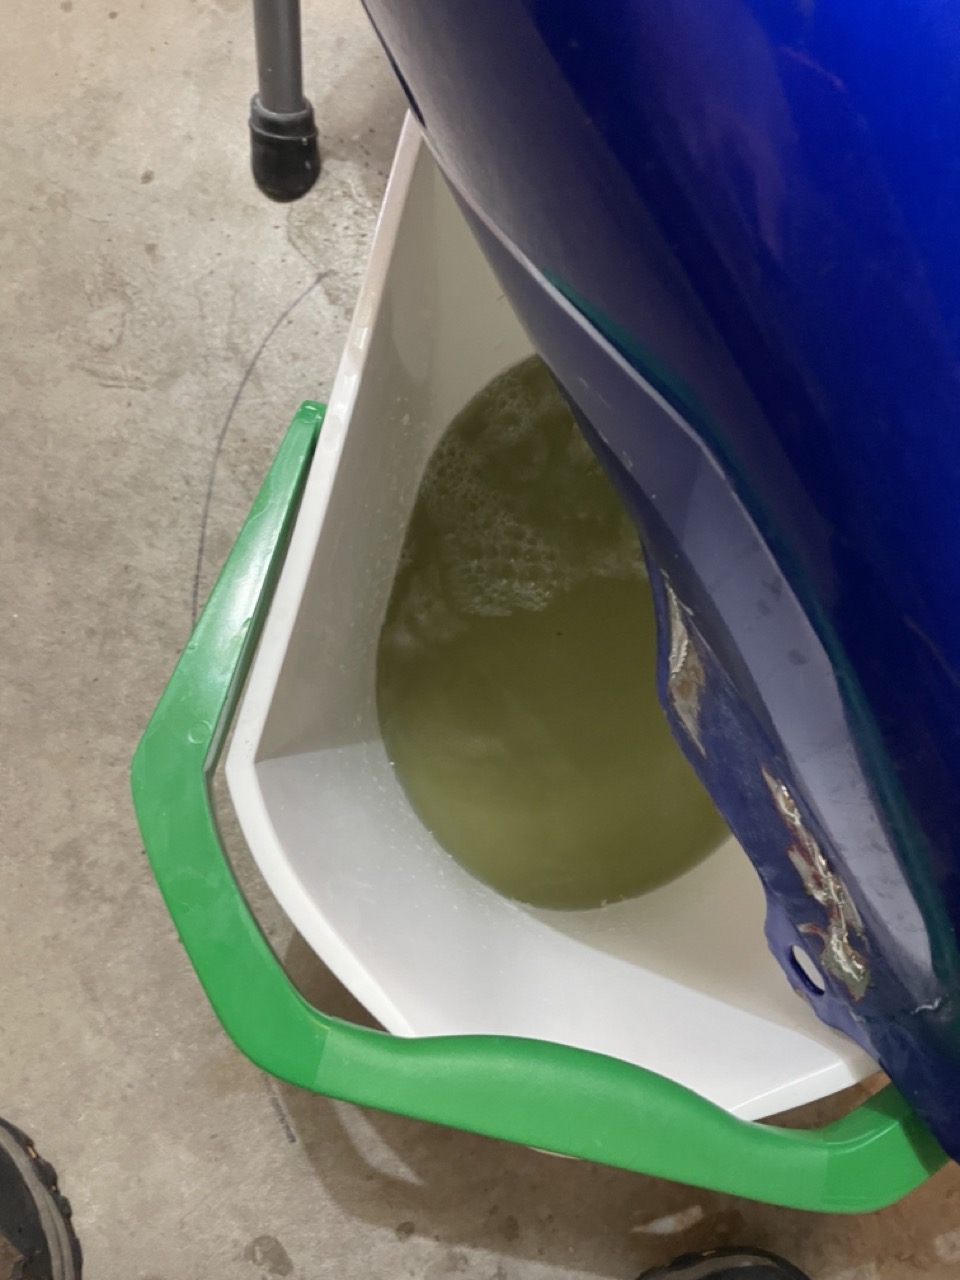 Some views of what's coming out, this time the liquid is green, sometimes it's black, sometimes orange. 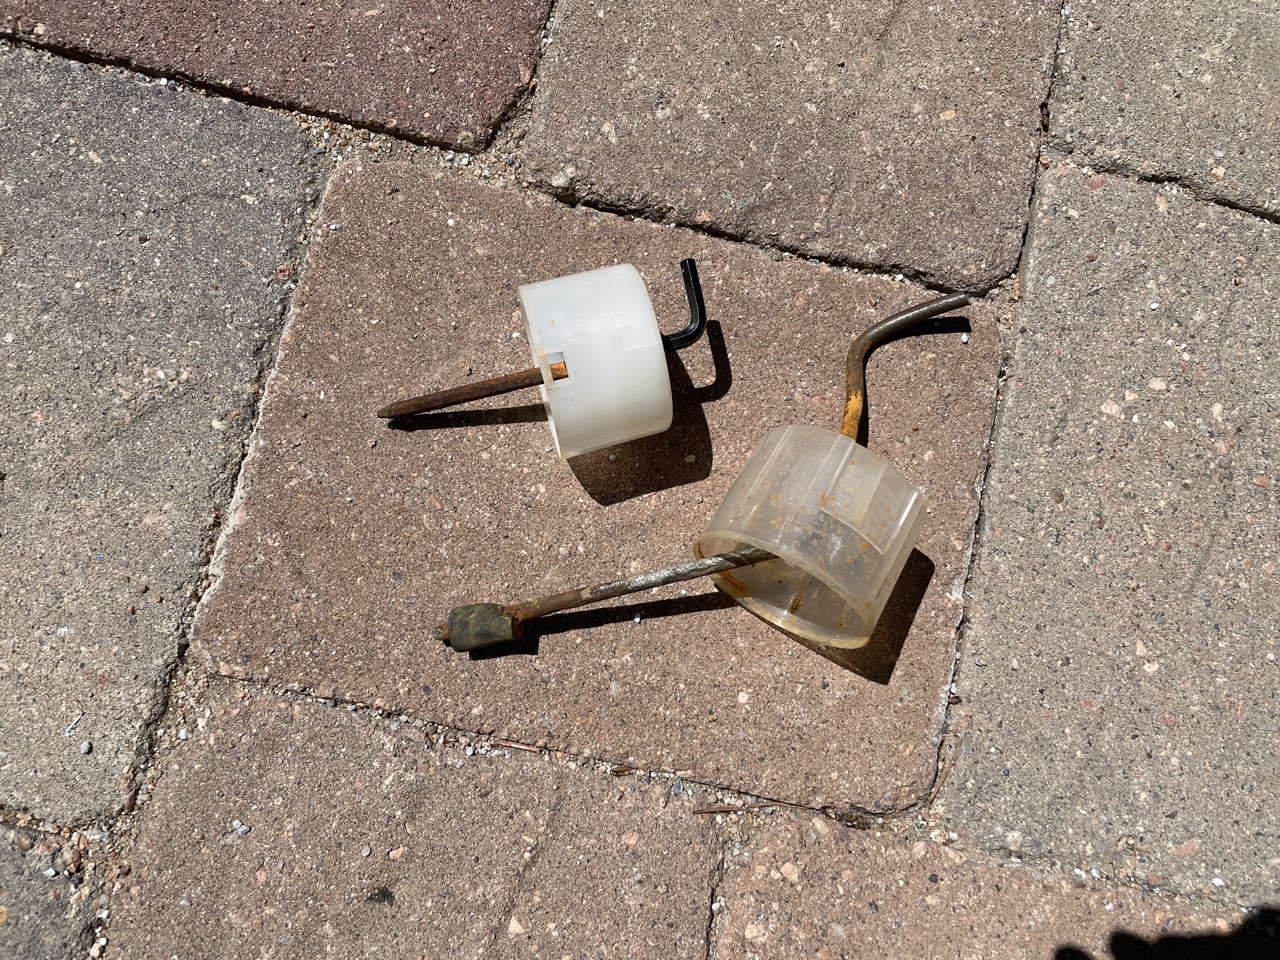 Eventually I make an anode that's longer (more amperage) and bent to "see" more of the tank surface. Here's the view after each anode has had about 20 hours of pitting and point discharge. 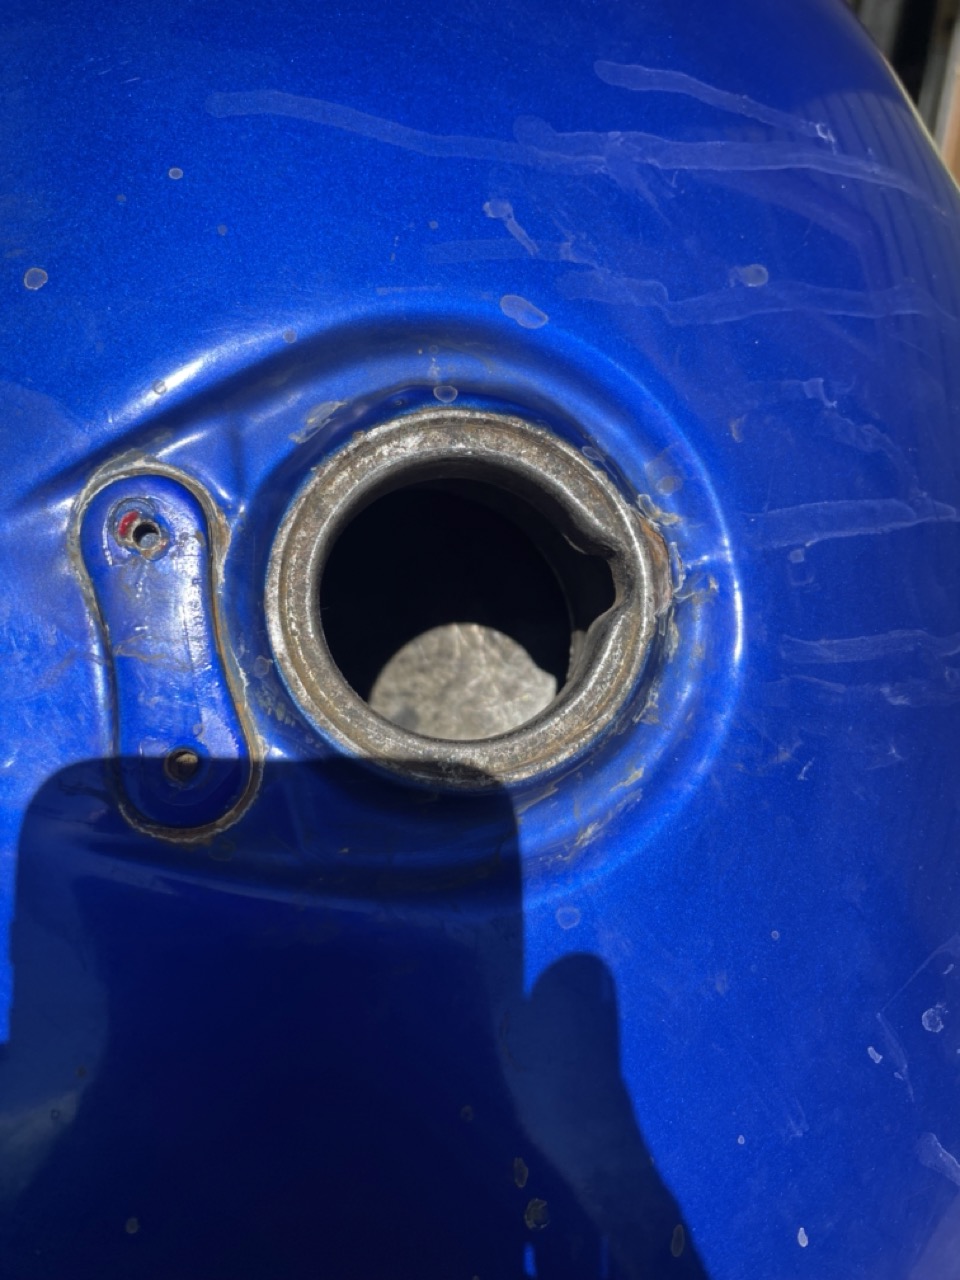 Still about 20 hours to go (I'm still getting orange scum out of it), but I'm seeing clean metal now, and most of the Kreem has lifted off due to the rust beneath it transporting away. Ulf fucked around with this message at 19:18 on May 9, 2023 |
|
#
?
May 9, 2023 18:41
|
|
|
Time to get that lovely Kreem™ liner out! I put in a quart of acetone, and this is the chunky salsa that came out. 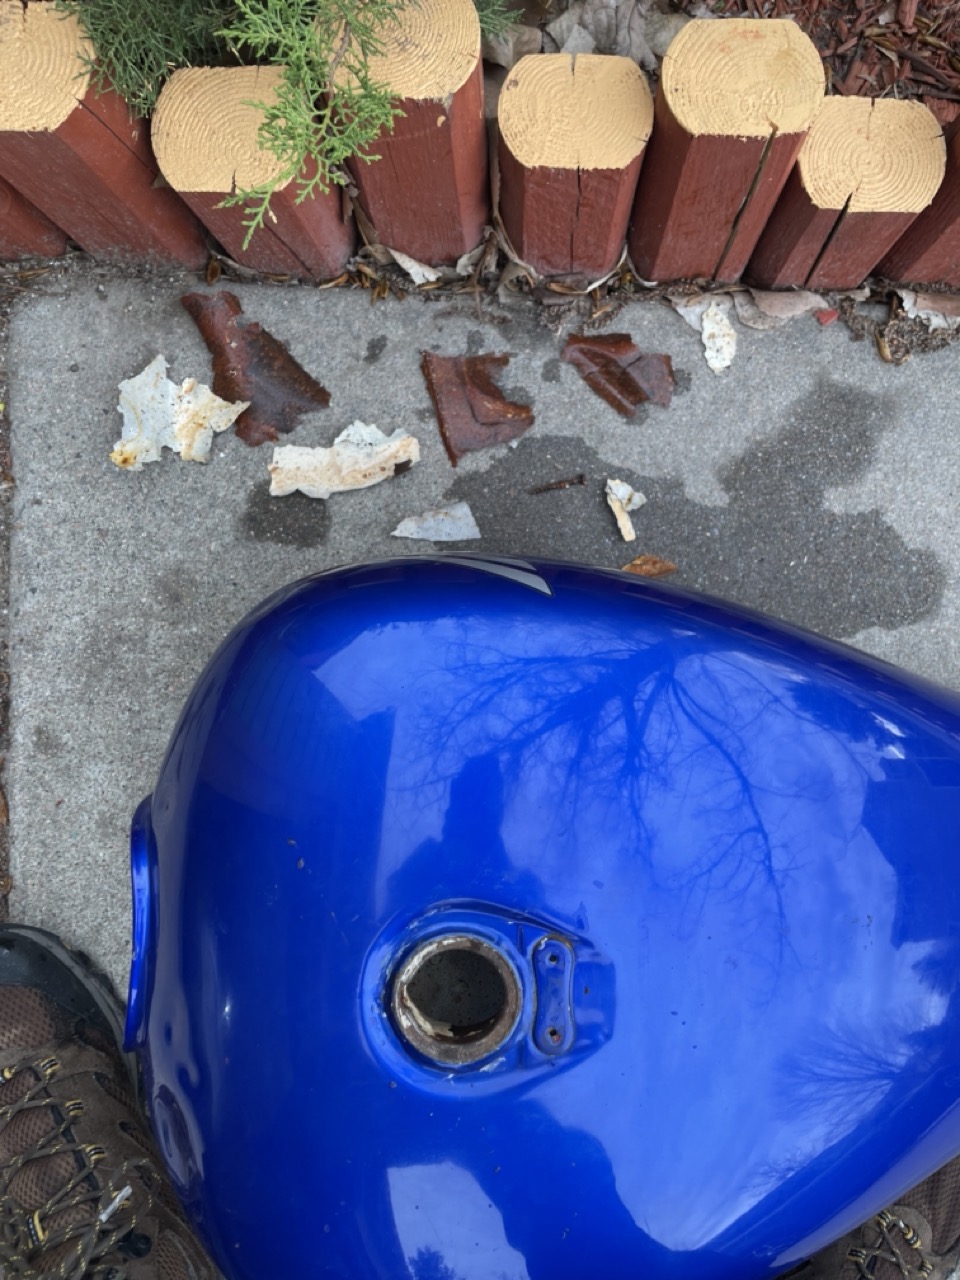 Here's the big flakes that were lifting off. It turns out that putting a tank liner in a rusted tank means the liner won't stick. 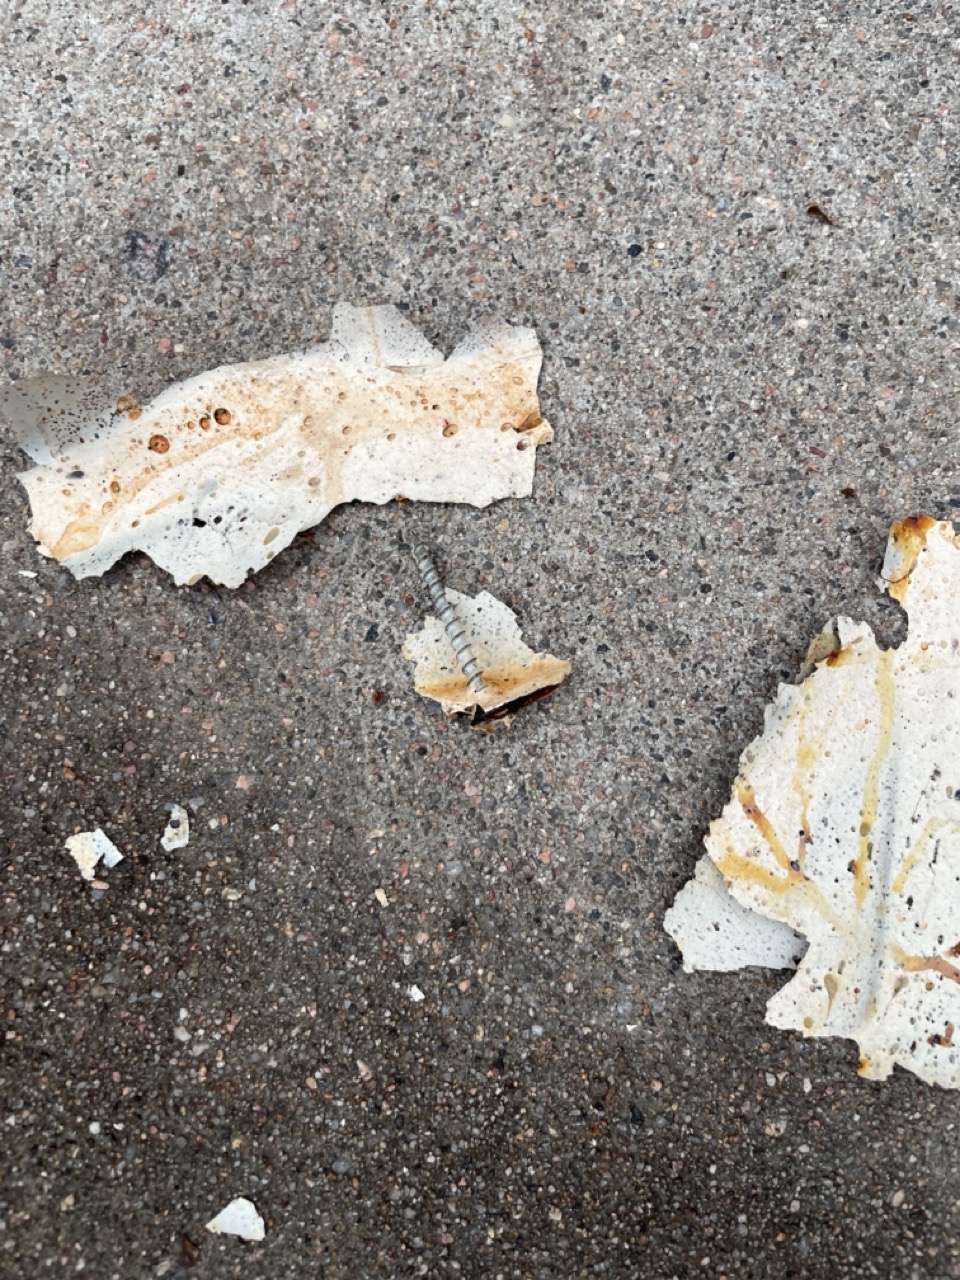 Some of it with drywall screws that the PO had left in when he lined it? At this point I'm shaking the tank and there are still some big chunks inside that I can't get out. Unfortunately this tank design has a long fill neck that makes it impossible to get my fingers in or to easily get things out. I spend literal hours shaking this heavy thing upside down and hoping for the best. Eventually I come up with a flip technique that leaves the last chunks in a place visible where I can needlenose them out. 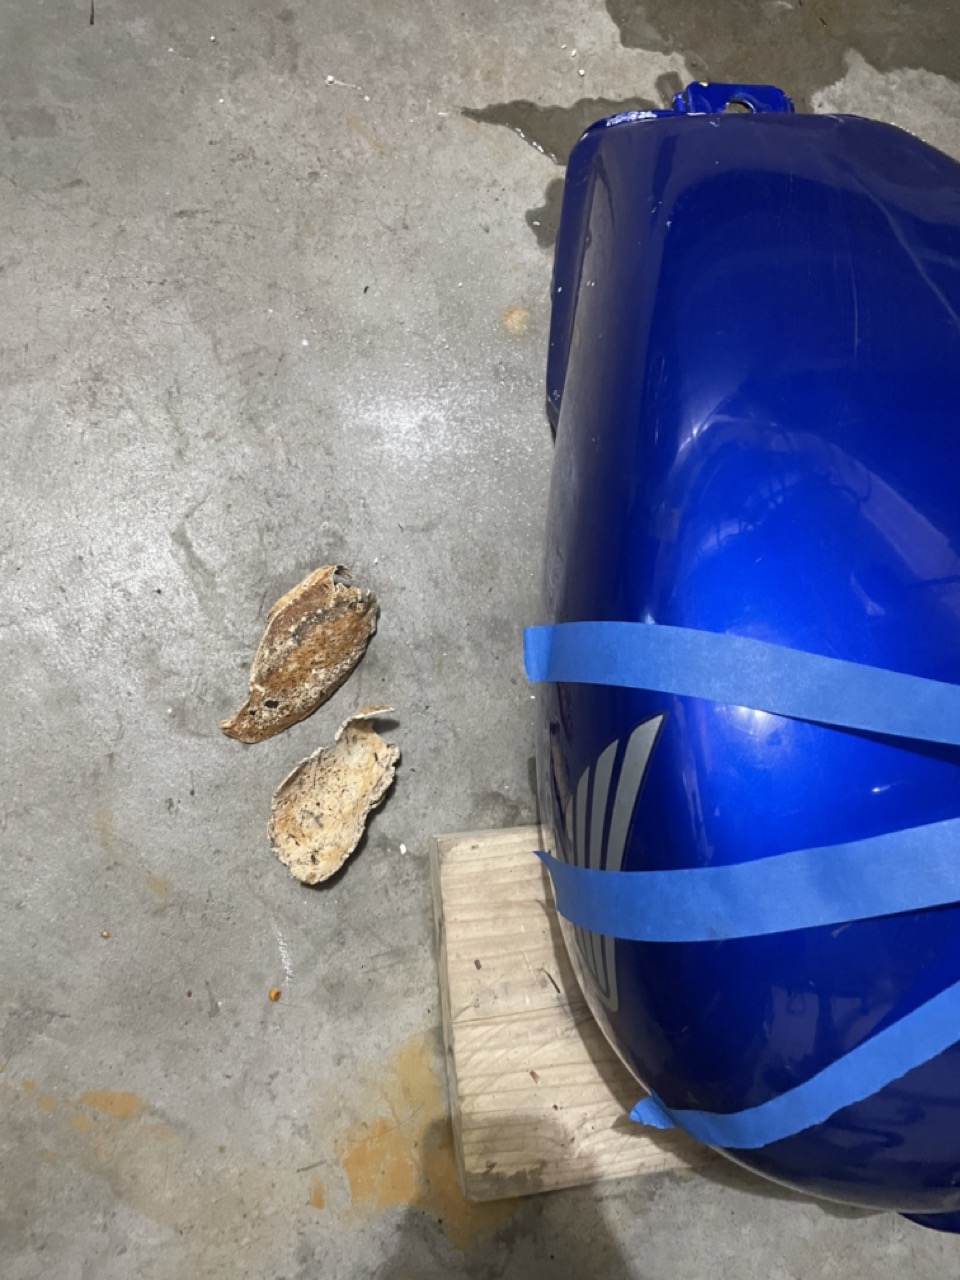 Getting these two out felt like passing a kidney stone. 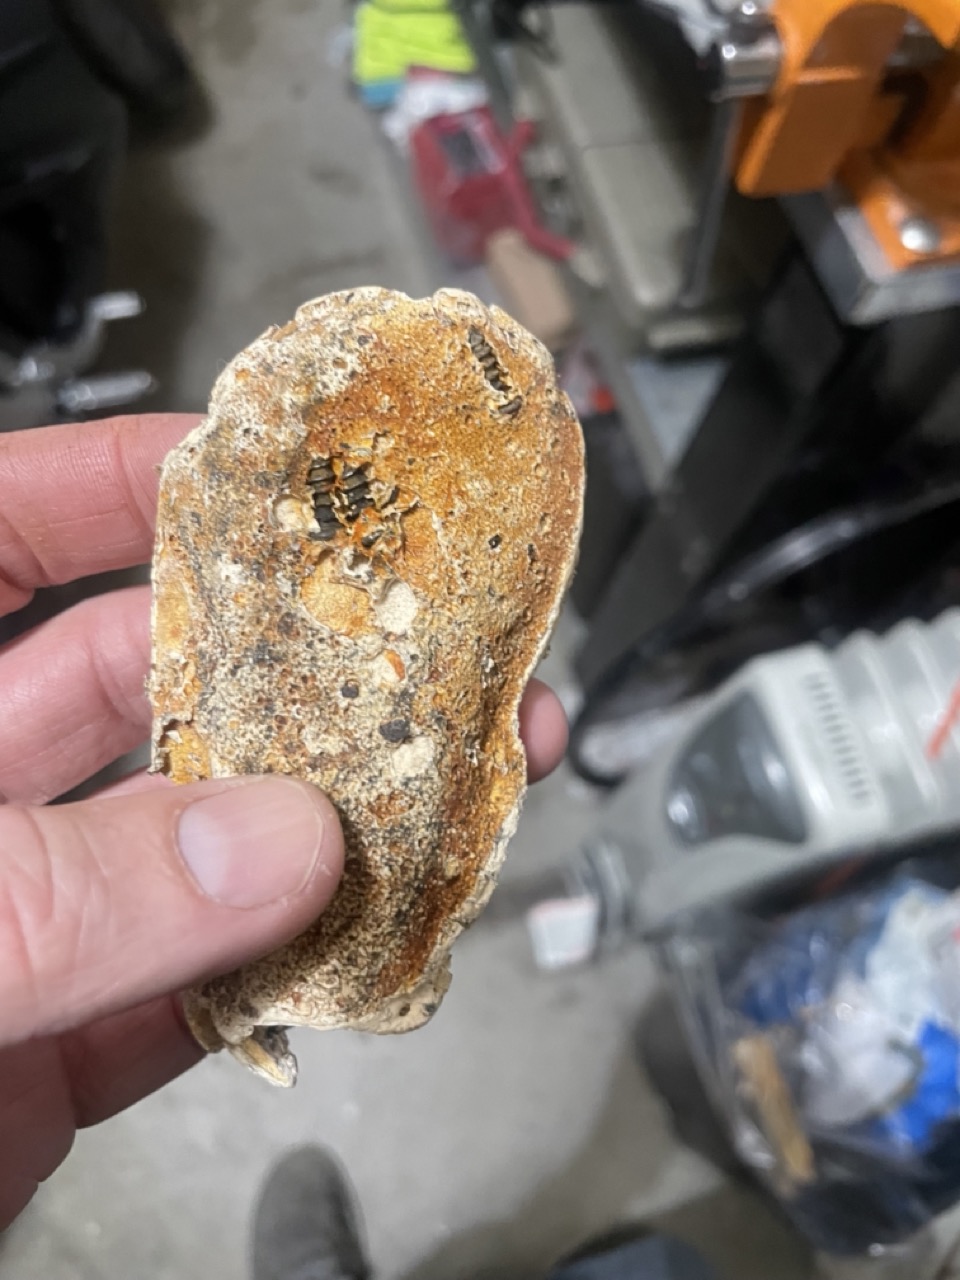 Close-up showing, yep, more screws the PO had left in there. 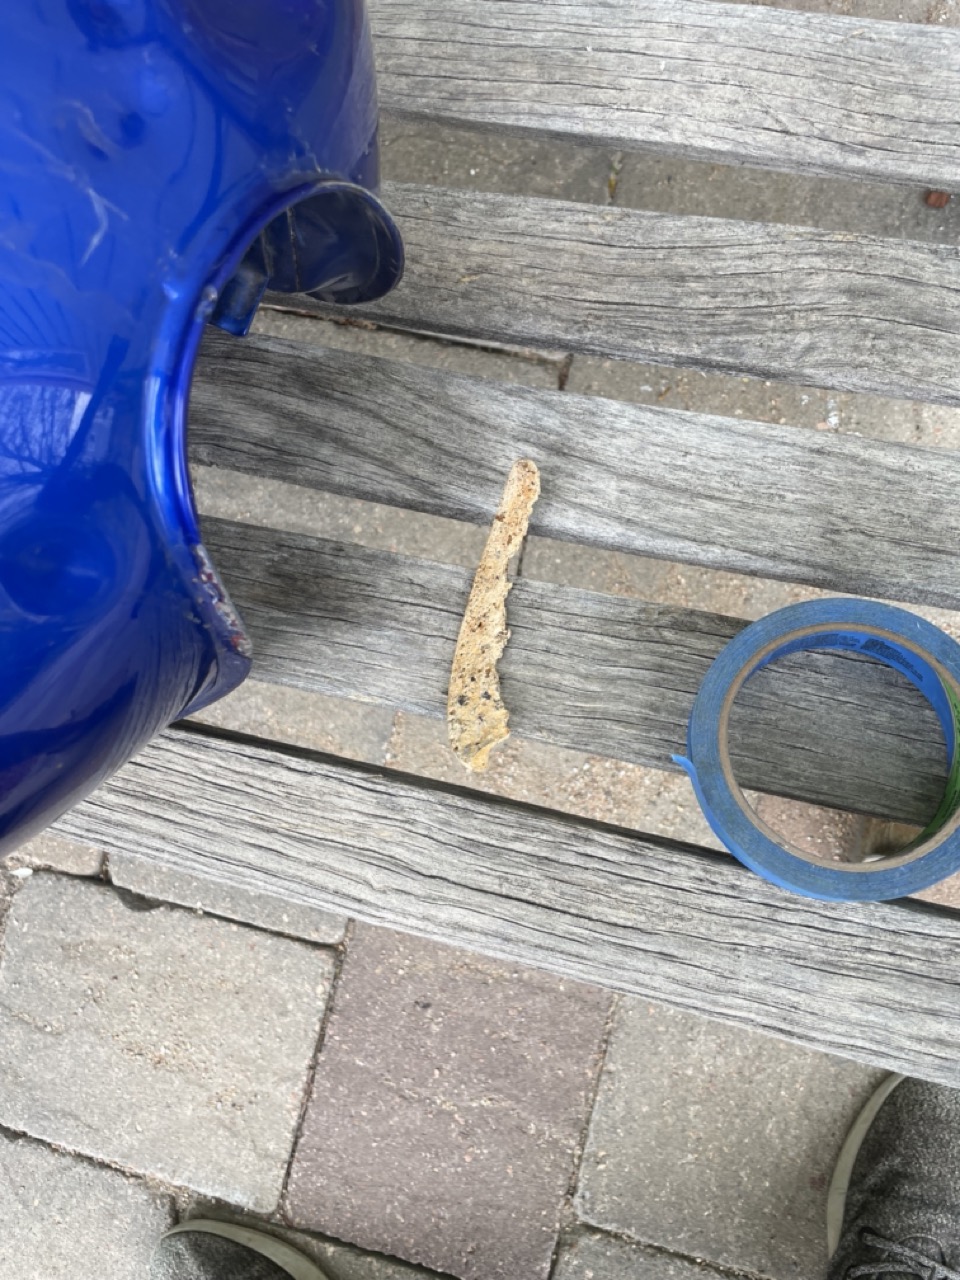 Finally got the last chunk of liner out. I can now shake the tank and nothing rattles. Feels good man! Ulf fucked around with this message at 19:19 on May 9, 2023 |
|
#
?
May 9, 2023 18:50
|
|
|
Test fitting the tank on my bike, to make sure there's no model differences and that nothing's bent too far out of shape: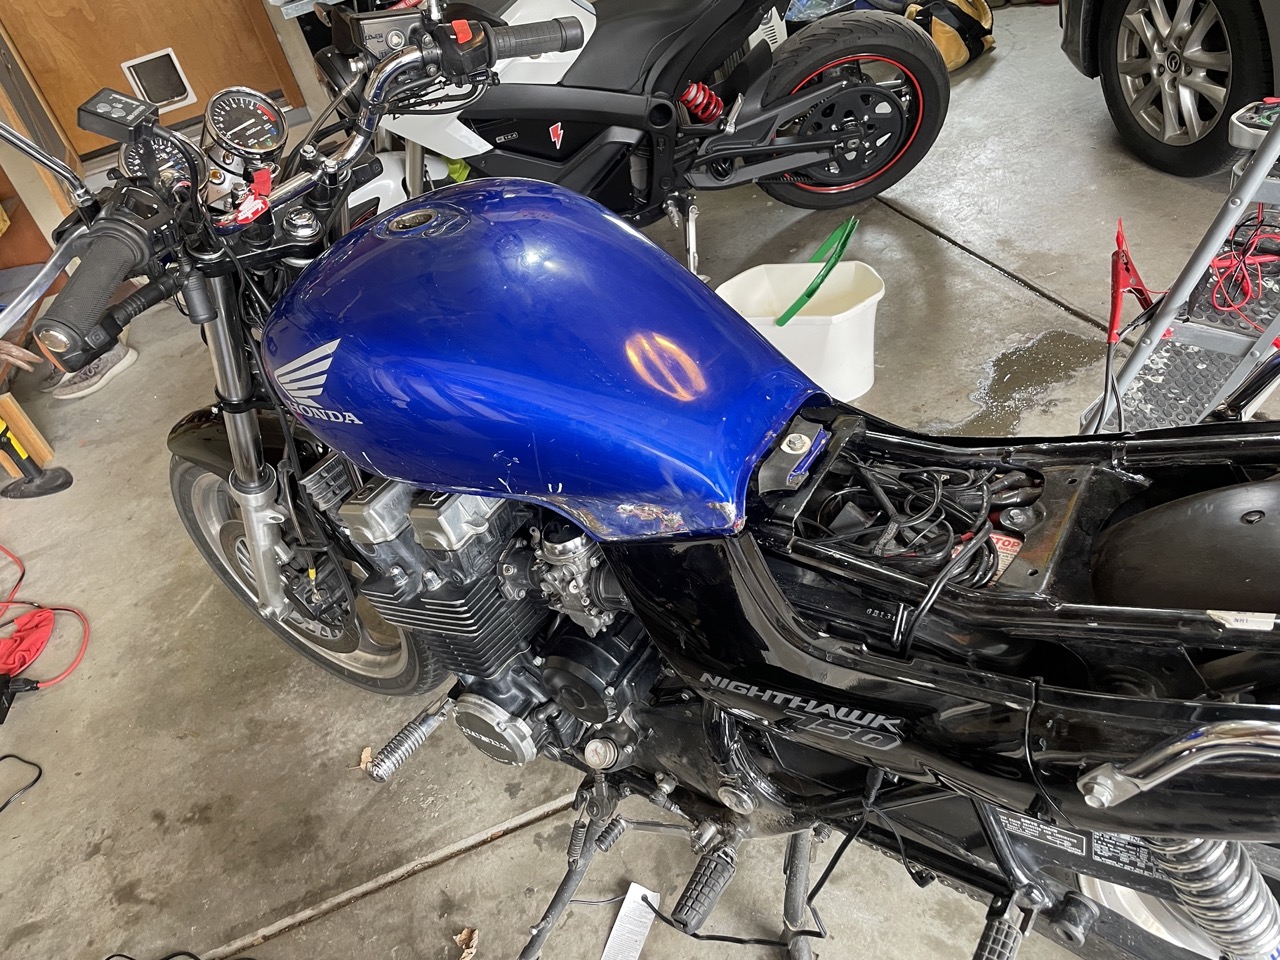 If it fits, I sits! I buy a copy of all the rubber mounts needed, but I'll still need to move the gas cap across when/if I want to use this. I'm going to POR-15 / primer before I actually put fuel in it but this is promising as far as my "minimum" goal goes. Ulf fucked around with this message at 19:20 on May 9, 2023 |
|
#
?
May 9, 2023 18:57
|
|
|
Spent another week electrolyzing whenever I had a few hours to babysit it (it keeps raining here so I don’t just leave it running). Today I finally said “good enough” and degreased, etched, and POR-15d the inside. Starting the clock on the 4 days of drying the liner. EDIT: por15 pic, there's not much to see. And unfortunately I didn't have enough to fully line the tank. I needed at least a quart, but I had the smallest can: 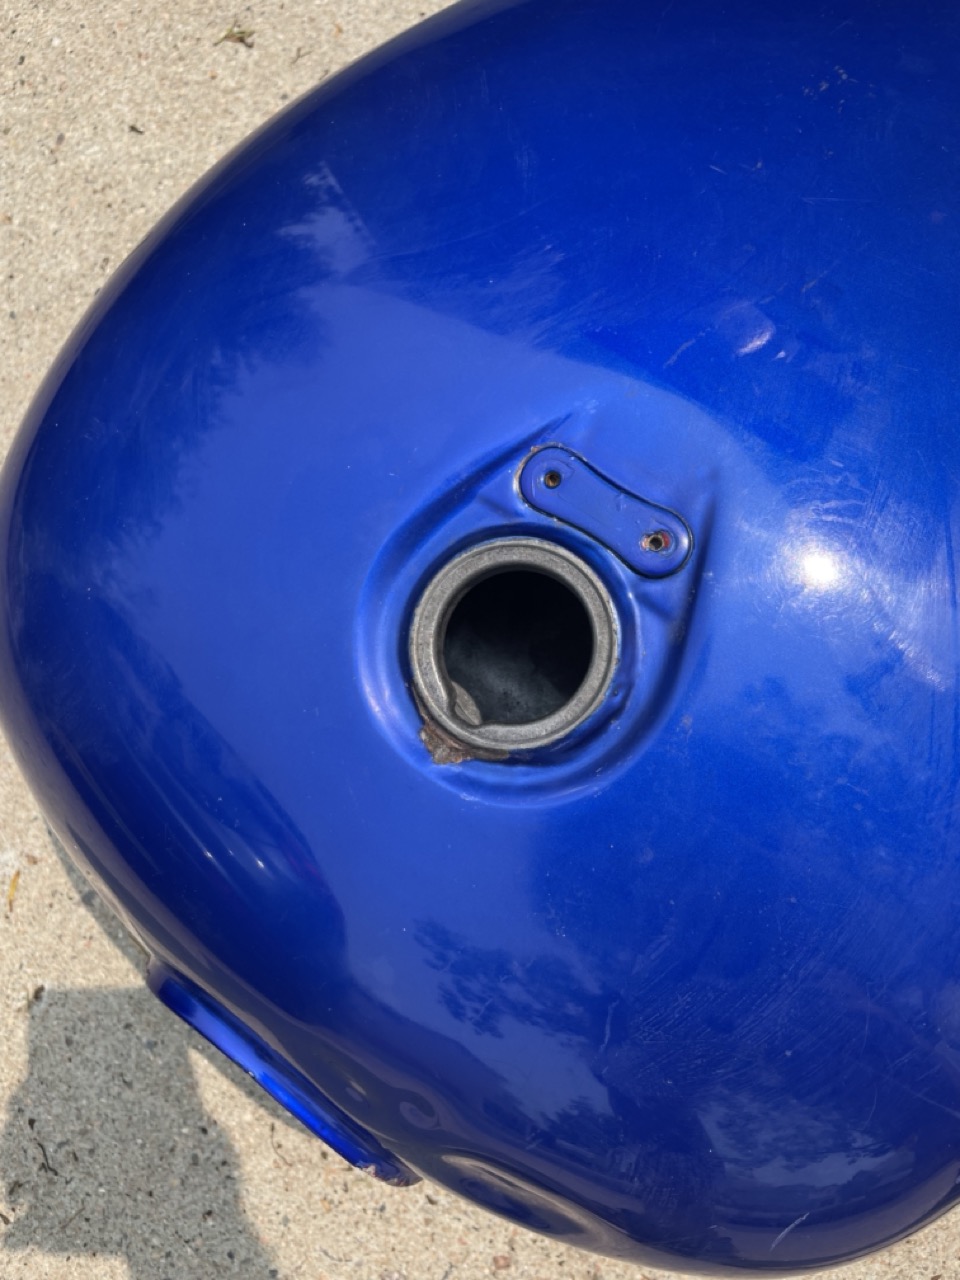
Ulf fucked around with this message at 02:58 on May 27, 2023 |
|
#
?
May 18, 2023 21:22
|
|
|
Interesting to see what's involved, seems like a surprising amount of effort!
|
|
#
?
May 19, 2023 15:04
|
|


|
Great work. Good to see Spring rolling around and all the project threads starting up
|
|
#
?
May 19, 2023 19:10
|
|

|
Stripping the paint took three days. I started with chemical stripper. I'd seen youtubers use stripper and have it bubble off the paint in what seemed like a few hours, but it wasn't even getting through the clearcoat. 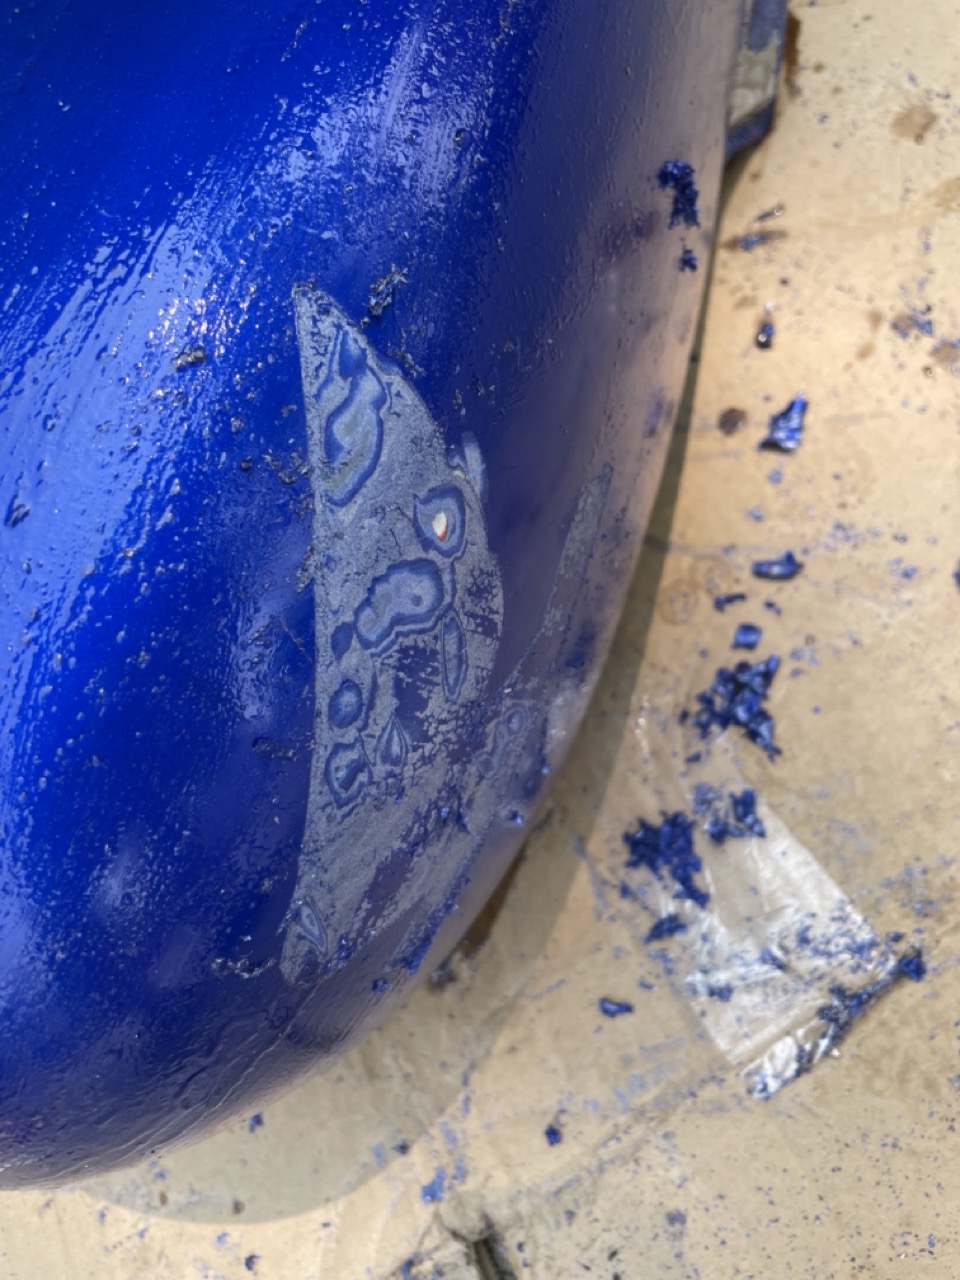 After the stripper started working around the decals (which were under the clearcoat), I pried them off and put another layer of stripper on to see what it'd do. After a few hours I tried scraping a bit, and this gives a view of some of the layers involved. This is nowhere near the metal; you can see 3-4 paint layers here but there were five or six total. This paint was thick. Honda was not messing around with the paint on this. 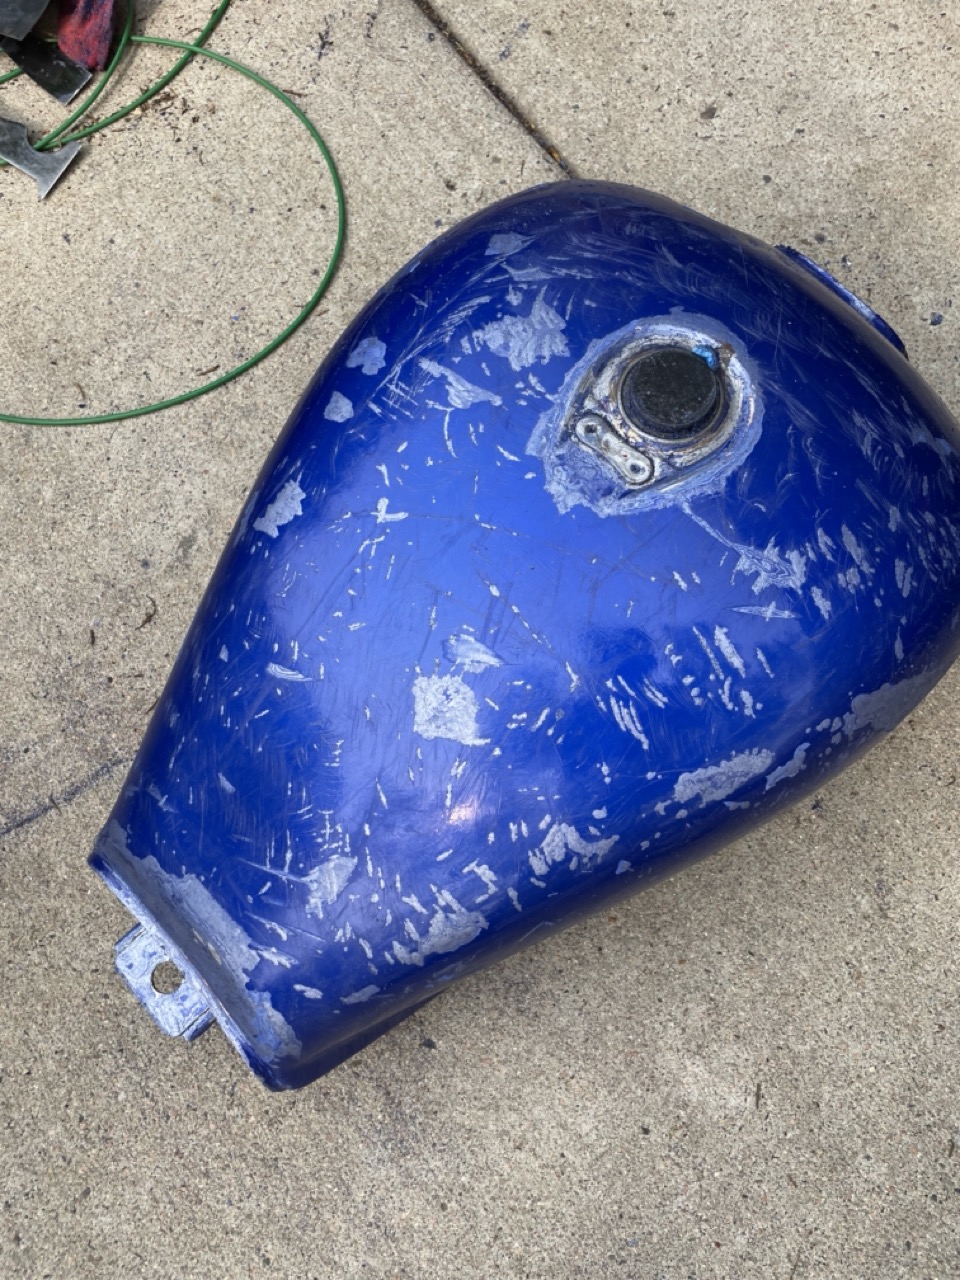 I started using some wire brushes to rough things up to see if more stripper could get under it, this is a few more hours worth. 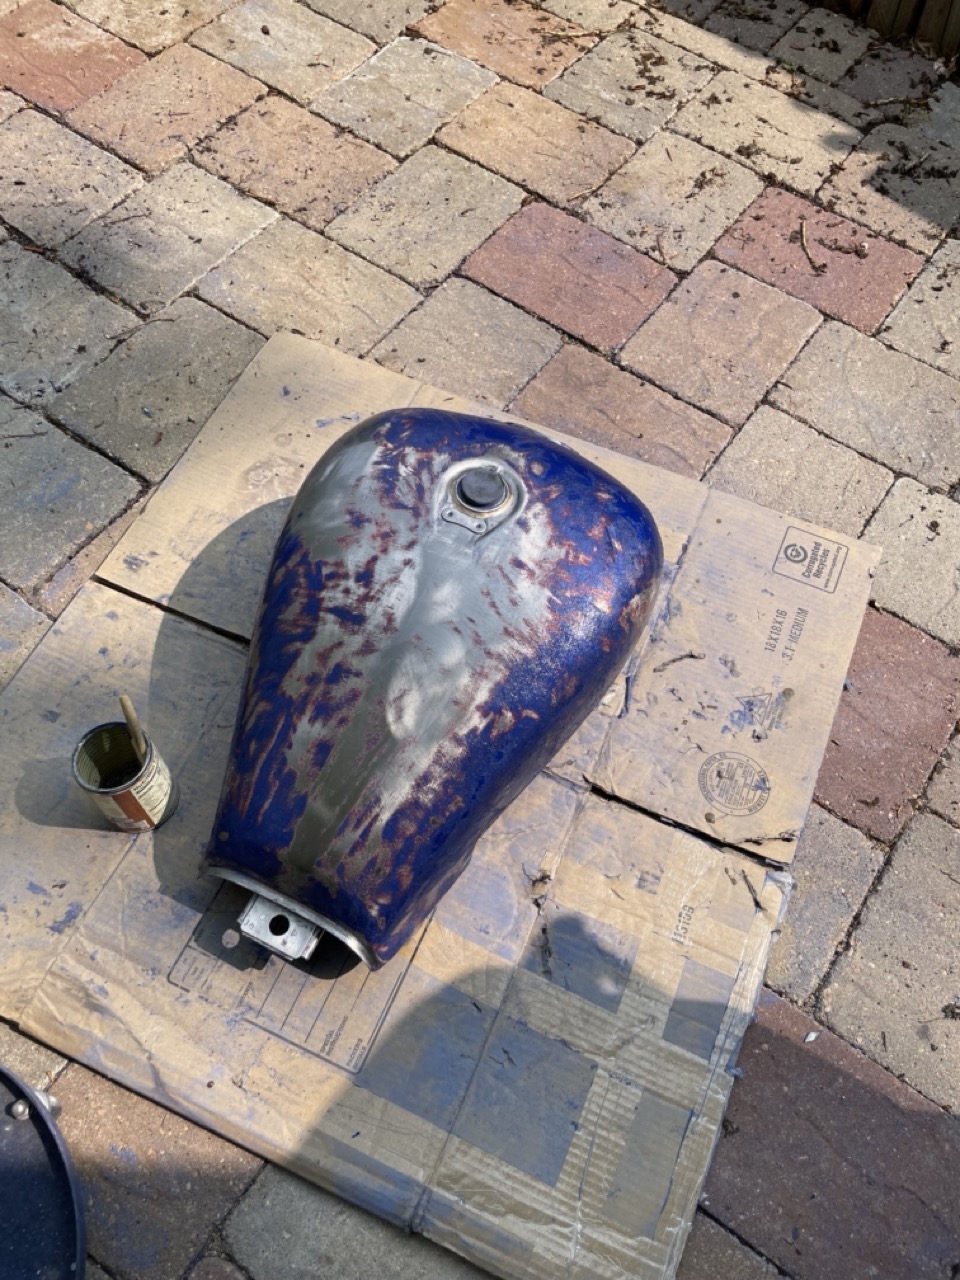 I gave up and started using a drill with a copper wire brush. This took more hours to do. 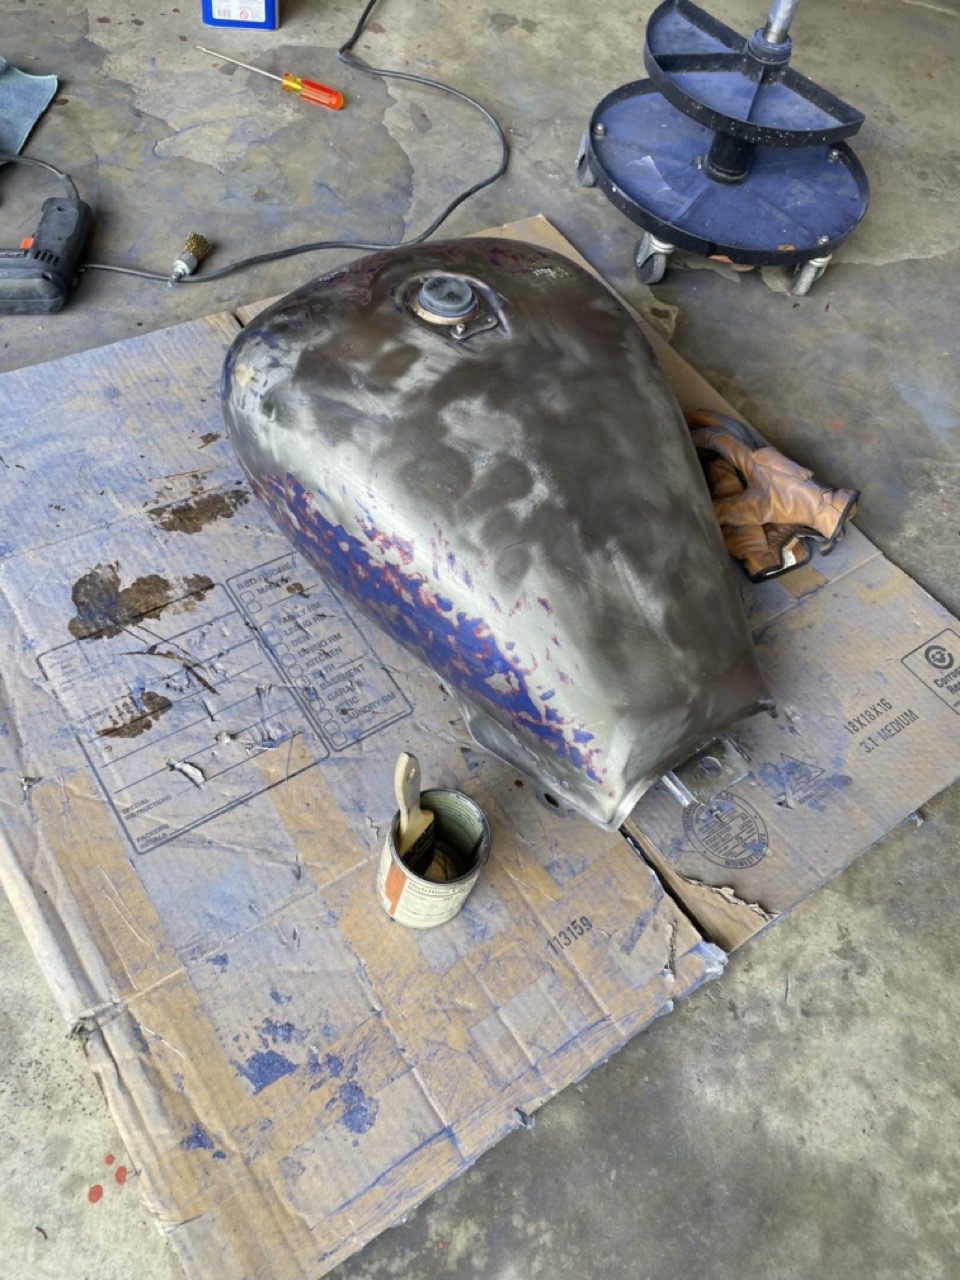 Another half day of work, the bare bits are starting to come together. I'm alternating chemical and mechanical stripping at this point. I'm sure if I knew what I was doing I'd have the right tools and this would only take a few hours total. 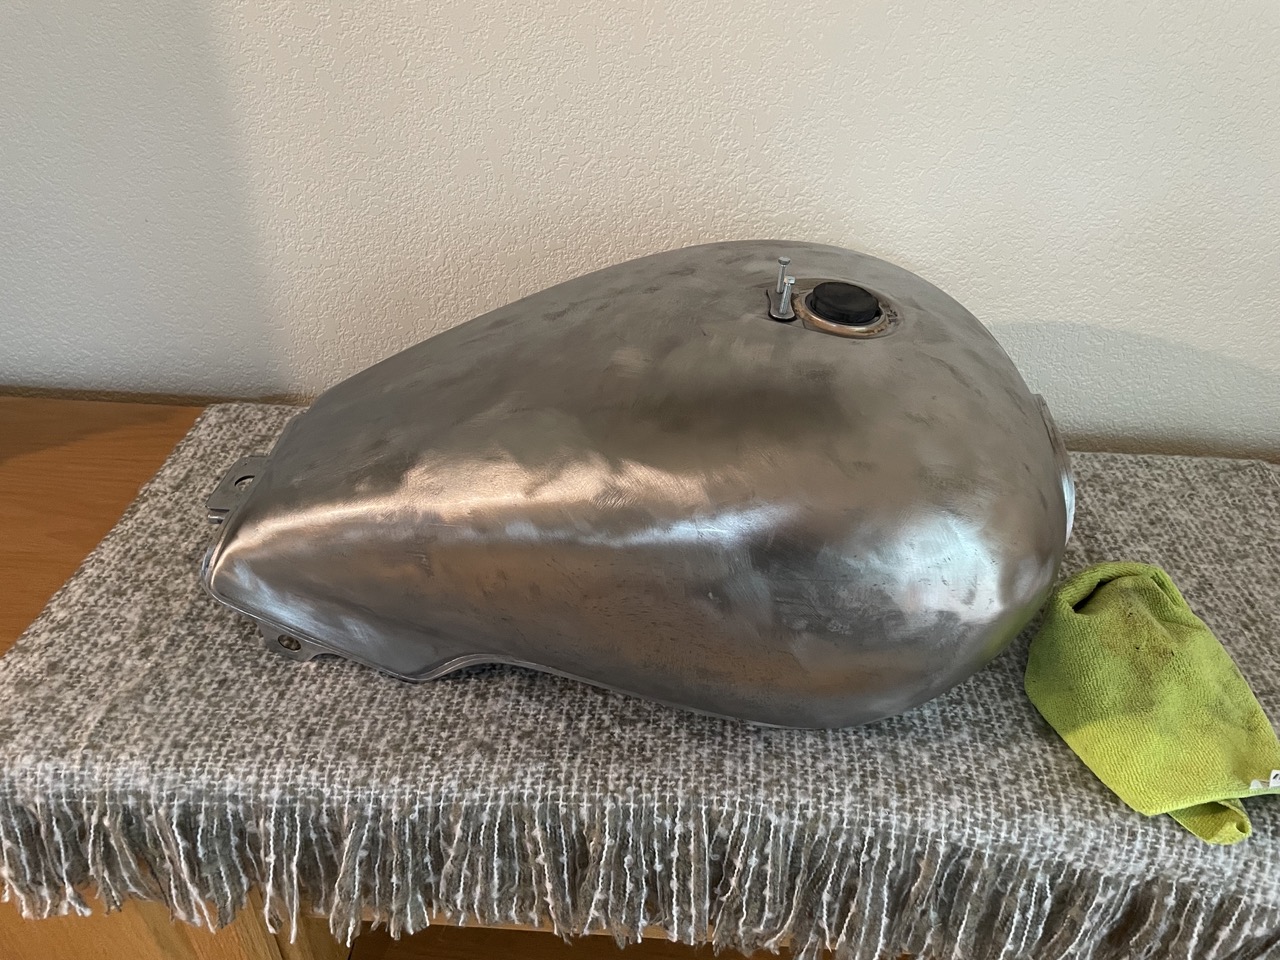 Bare metal baybee. There's still some crumbs left at this point, but they just took some time and attention to get. 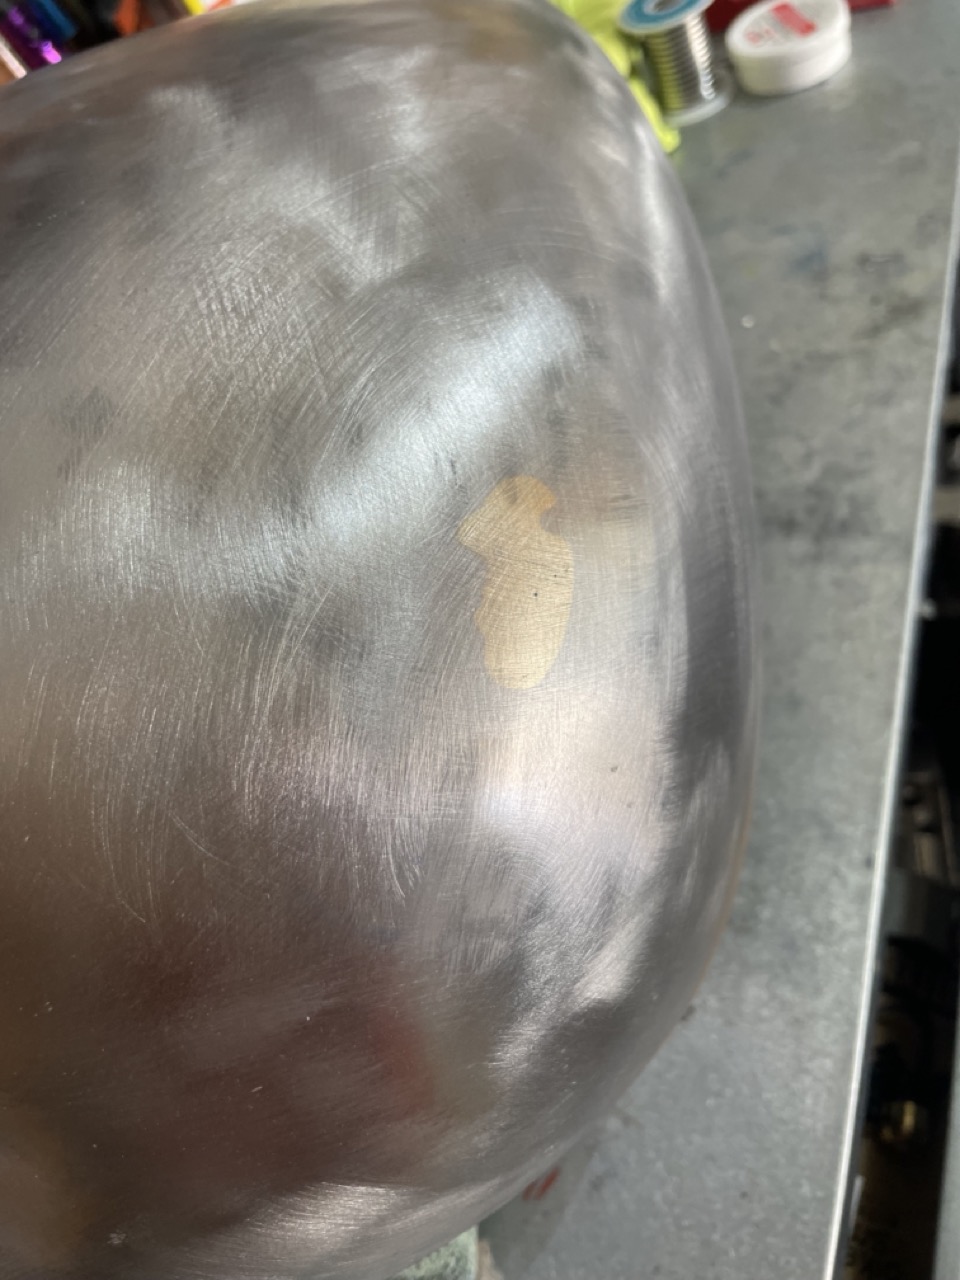 This tank is full of surprises! Under the paint I found this discolored metal patch, not sure what it is but maybe a brazed fix done at the factory? The OEM paint on top of it was flawless, and the metal itself feels perfectly continuous.
|
|
#
?
May 27, 2023 03:06
|
|
|
Time for primer.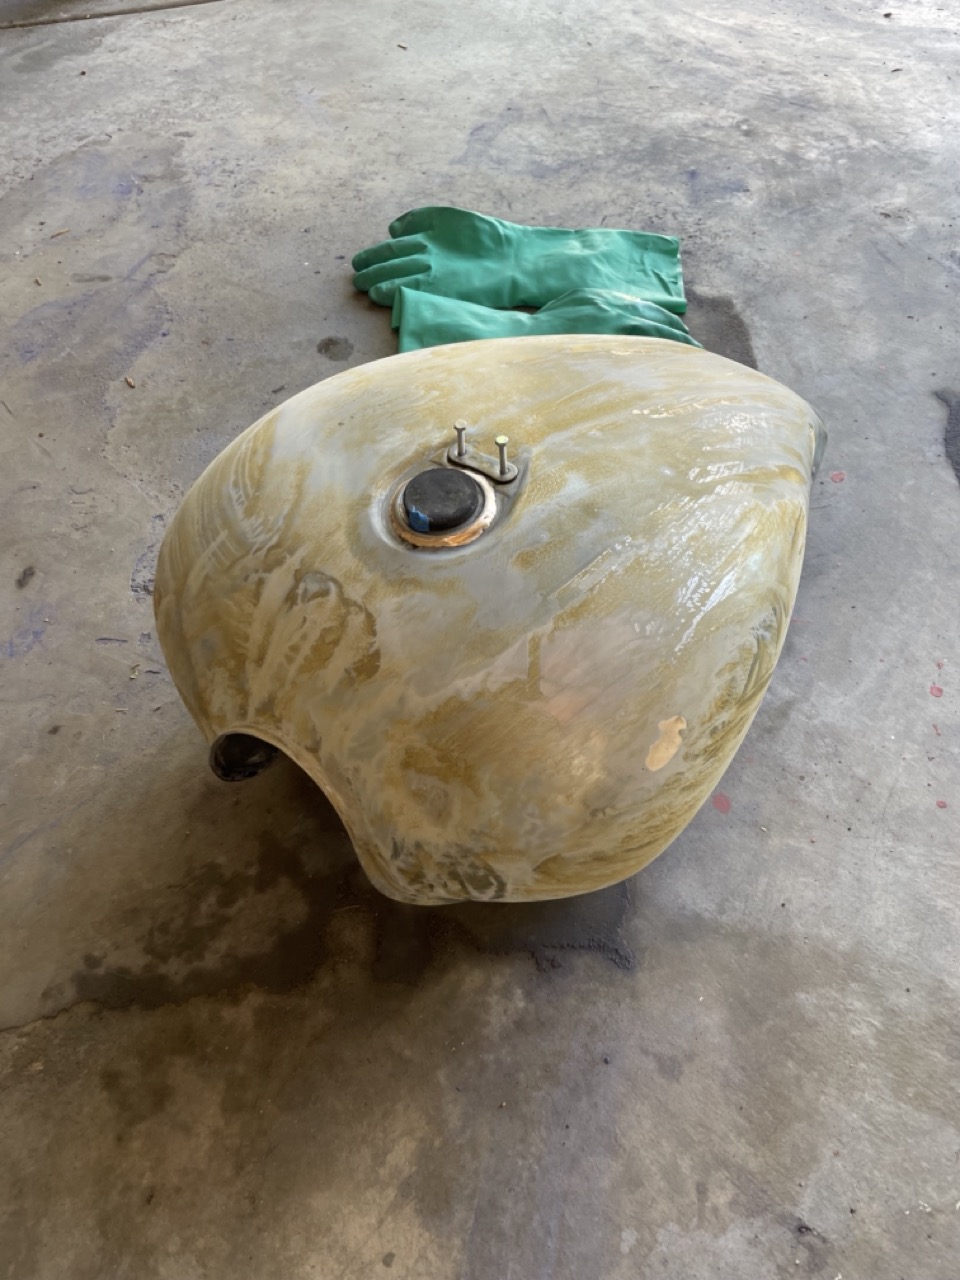 I had a gallon of metal etch so I put it on. This is before I washed it back off.  First can of primer. This is several coats, it got a bit furry toward the end. Maybe there was some crud on the nozzle. I waited a day to cure and wet sanded with #800, to knock the fur off. No pics of that.
|
|
#
?
May 27, 2023 03:09
|
|
|
At this point I need to go off script and back up a bit. Usually you'd do body work next (I'm choosing to do filler over primer by the way; I wanted to get primer on to stop flash rust). But this thing is so full of rusty pinholes that are going to ruin any paint or bondo, I need to get the thing completely leakproof.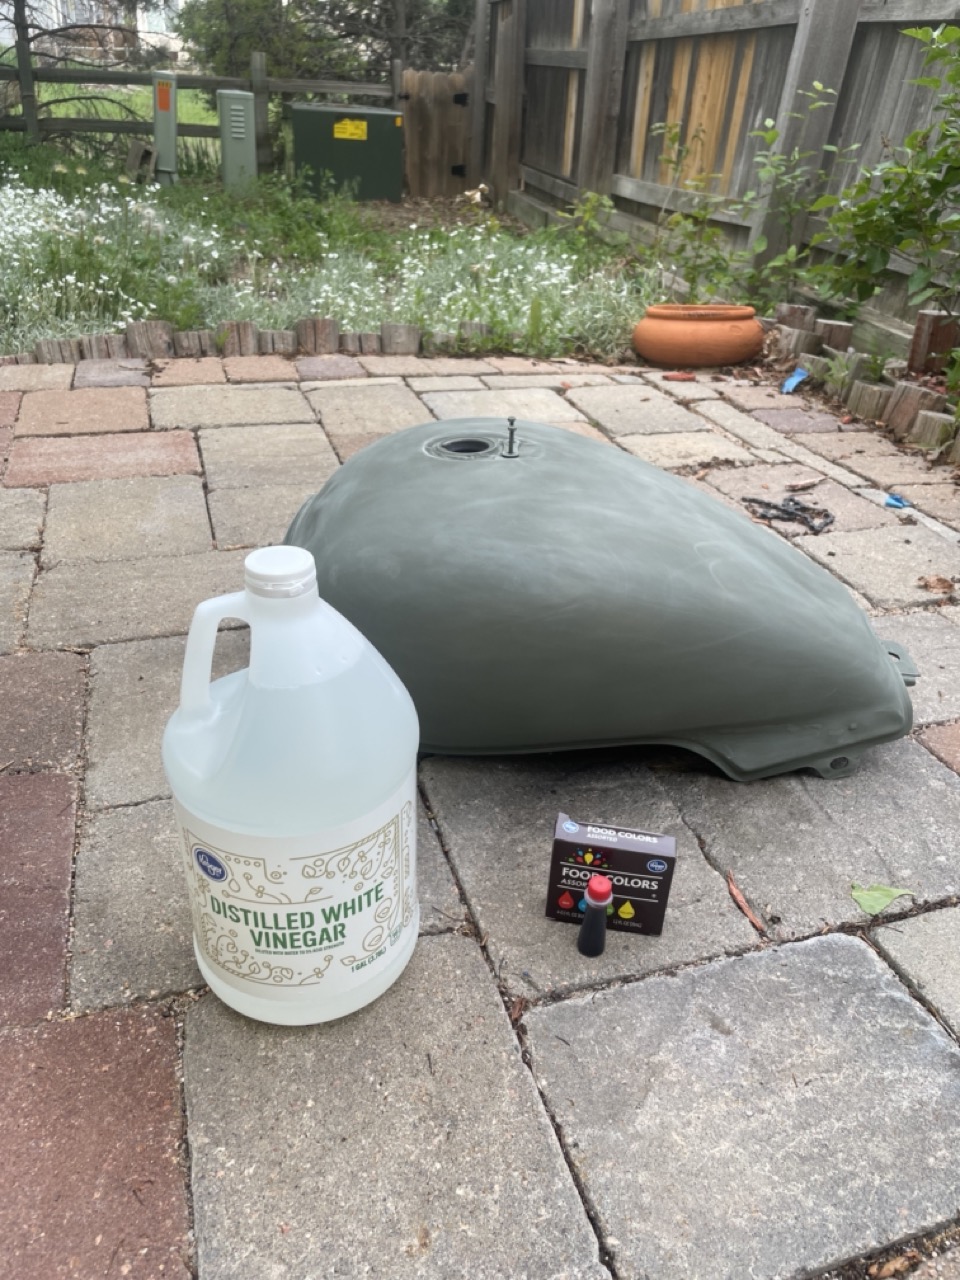 Here's my homemade leak test setup. I'm using vinegar and food coloring; vinegar is cheap and less likely to cause rust than water. My plan is to leave it overnight, in the morning I should see where any last pinholes are from the evaporated traces of dye. Unfortunately it didn't go to plan, even though I'd been electrolyzing with liquid that seemed to stay mostly in the tank this started dripping instantly. I'd had some slow drips with the electrolyte but I think soapy water has higher surface tension than vinegar. I drained the tank back out, started the heat gun drying it, and marked all the pinholes. Eighteen holes for me to patch tomorrow! 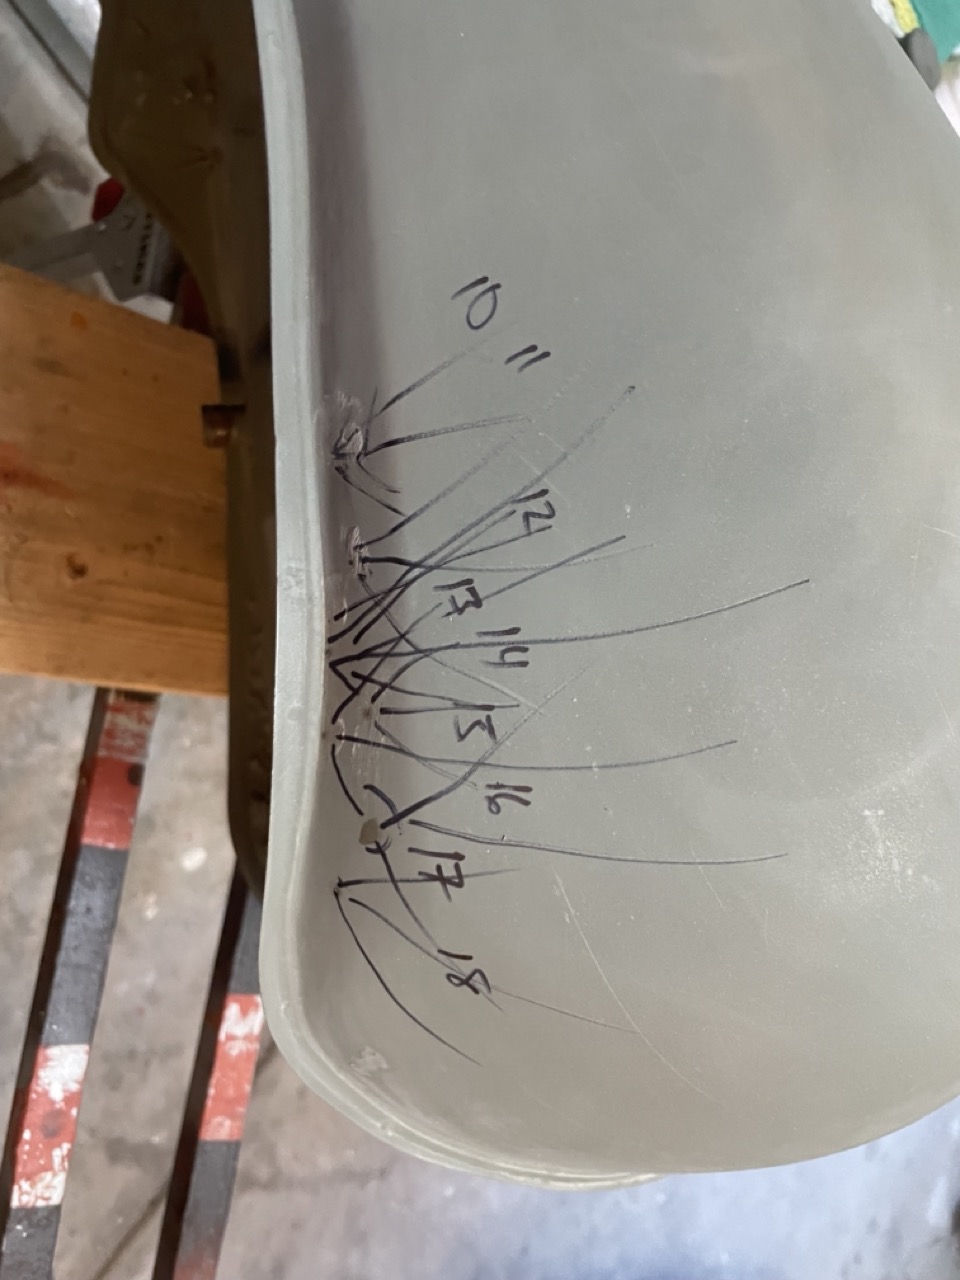 Let's go back to that seller description again: quote:Tank has few pin holes. 
Ulf fucked around with this message at 03:24 on May 27, 2023 |
|
#
?
May 27, 2023 03:18
|
|
|
Oh, and since I'm seeing such a huge difference with vinegar vs soap-water, once it's patched up and holding vinegar I'm going to check again with a tank full of fuel. Hopefully it doesn't show another dozen pinholes!
|
|
#
?
May 27, 2023 03:22
|
|
|
How do you patch a pin hole? Do you just solder on top and sand it down? Is that an incredibly stupid idea?
|
|
#
?
May 28, 2023 04:01
|
|

|
That’s what I’m doing, yeah. And I can’t sand down too far or it reopens the hole sometimes. Gonna be a layer of Bondo covering all of this lumpy solder when I’m done I think. Maybe I should do a little research and see if there’s anything I can do technique wise to get the solder pulled further into the pinhole.
|
|
#
?
May 28, 2023 04:30
|
|
|
Do a practice run on a random bit of sheet metal of similar thickness? Drill some tiny holes (there are cheap tiny pcb drills down to like 0.3mm) and see what works best. Best possible patch would be one where you see some coverage of solder on the other side. Might not be achievable with the inside surface of the tank, but a solder technique that does that on a test piece should be doing well on the tank. Since it's not a pressure tank, it's not like you need a very good deep solder joint for it to hold fuel. I'd probably try "countersinking" the pinhole a bit (with a drill bit or such) to create a small pit for the solder to be in that isn't outside the tank surface.
|
|
#
?
May 30, 2023 12:05
|
|

|
I just finished sealing it up, and it's sitting for 24h full of dyed vinegar now. Will do more passes if any leaks continue showing up, then I'll fill it with fuel for another check. I tried hand-spinning a small bit in a few of the holes to make a better indent... the biggest problem I'm having is that the tank is so curvy, impossible to brace on my bench, and I don't have a 3-axis vice to hold it perfectly flat for each hole. That along with solder always having a mind of its own meant plenty of sloppy fixes that I'm just grinding down with a Dremel. Sometimes I got lucky, this magical fill on the 18th hole was a tiny bit of solder that lodged itself perfectly: 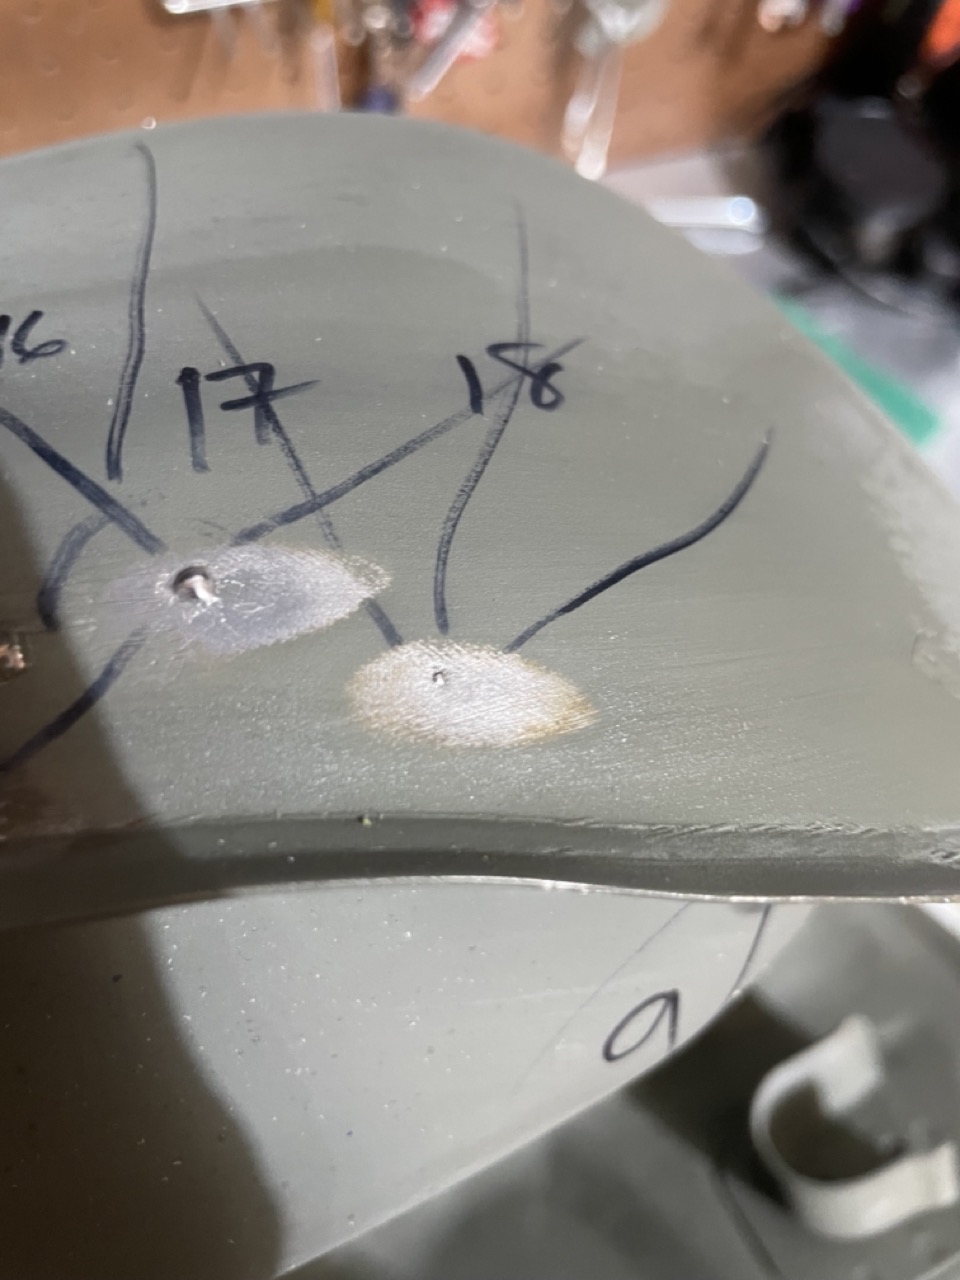
|
|
#
?
May 31, 2023 00:13
|
|
|
About a month ago I mounted up the tank on my bike: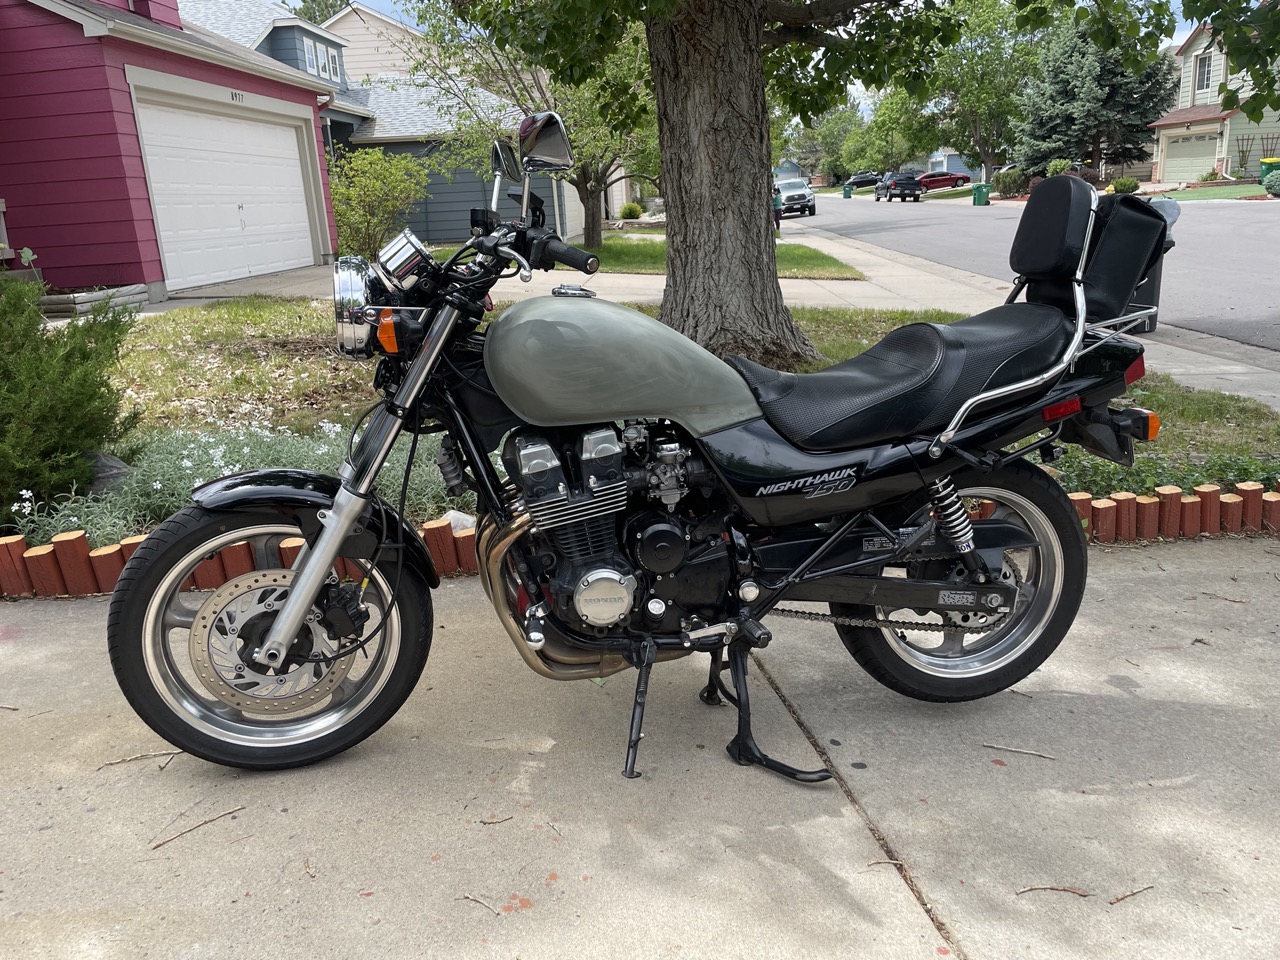 Every week or so I'd take the tank off and seal up the pinholes that had showed up (I don't think they're appearing fresh; the really tiny pinholes just take a day or two to show their leak). At least with the tank full of fuel it won't rust up any further. 
|
|
#
?
Jun 26, 2023 05:10
|
|
|
It's bondo time :party: First, fix up the dents in the top/front of the tank. Mix the bondo and hardener: 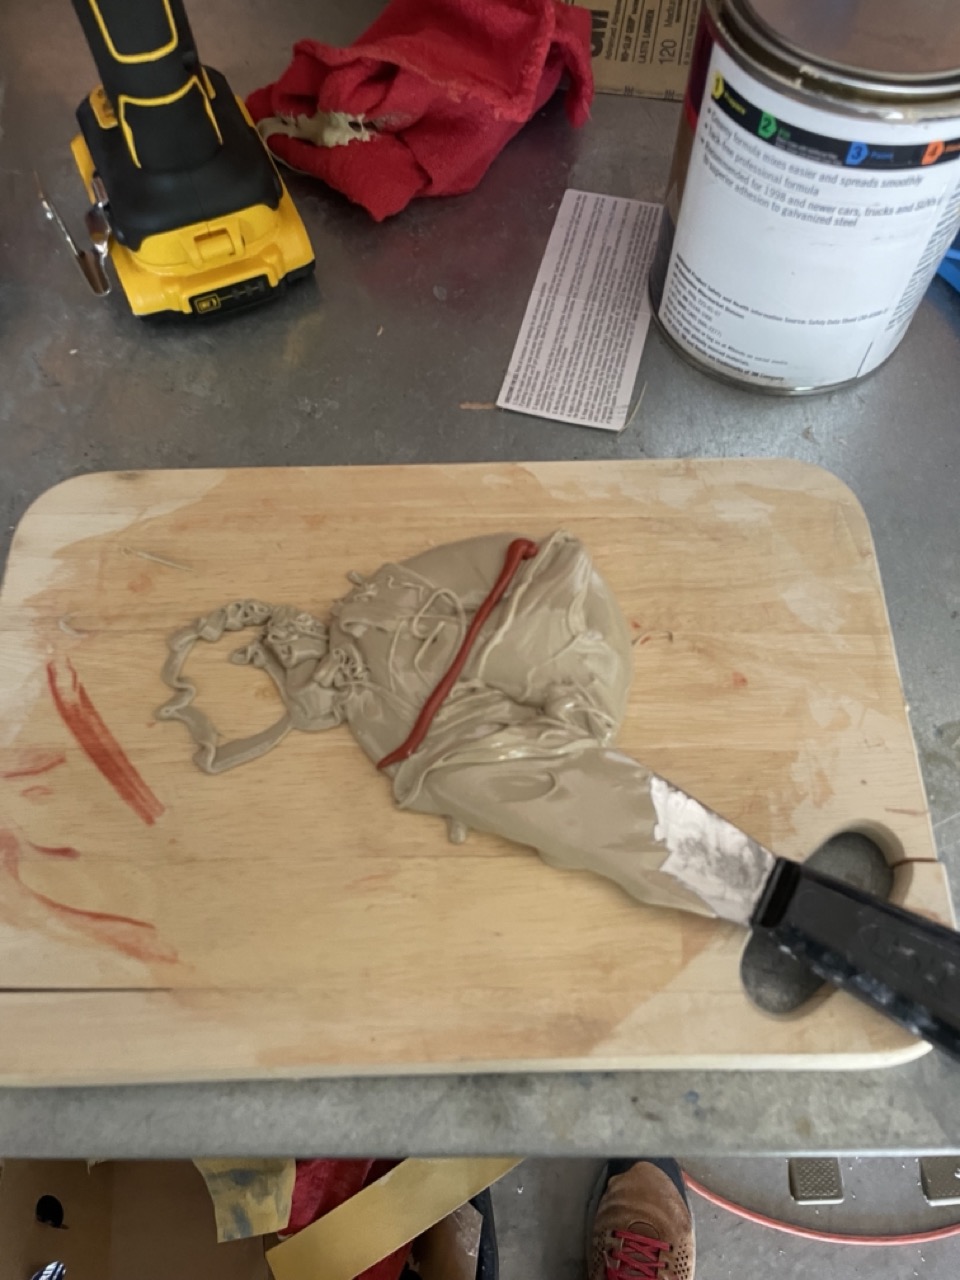 If you got the proportions right, it'll match the color of the Bondo™ brand spreader: 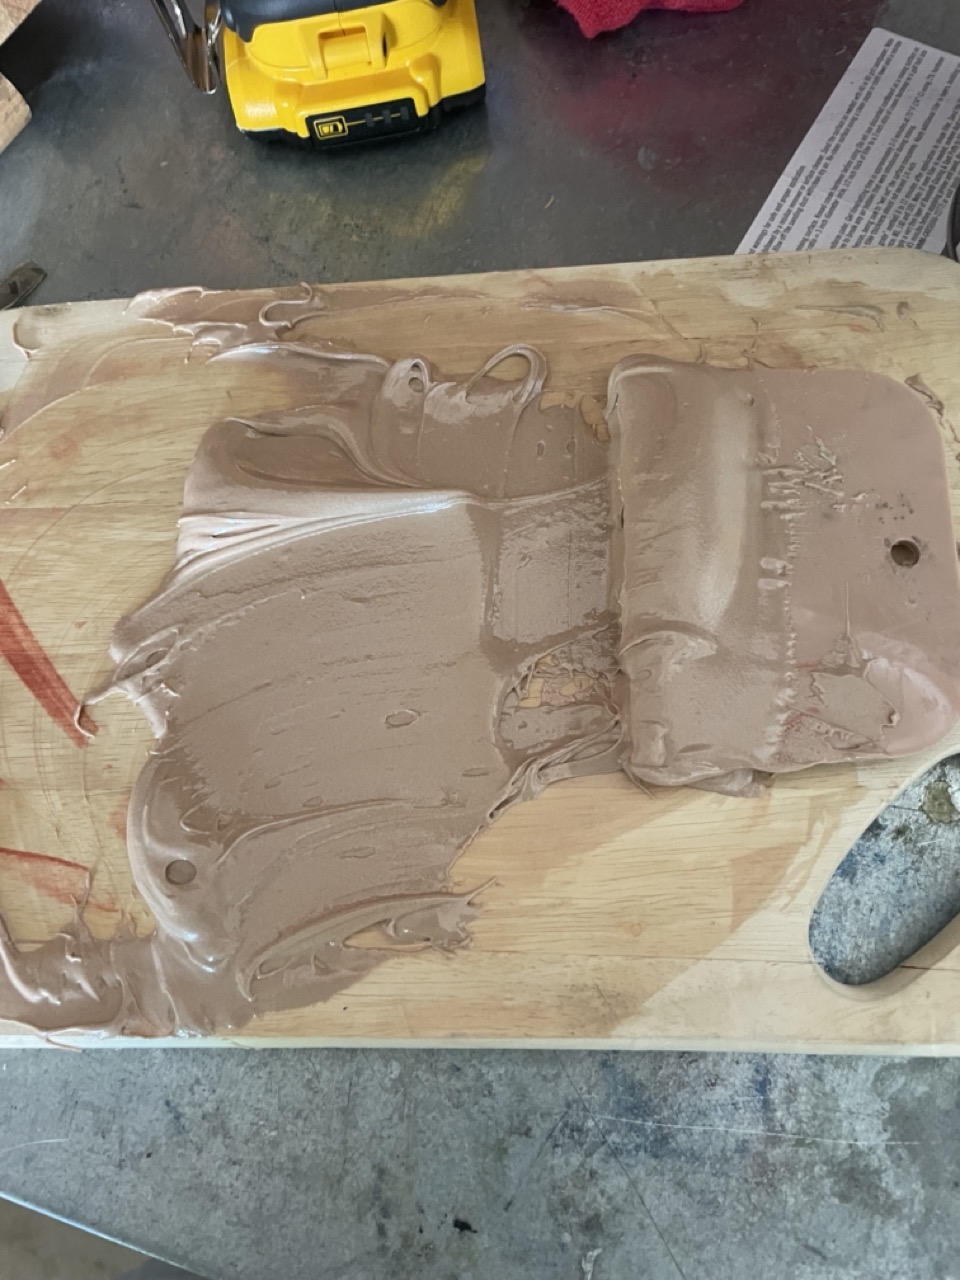 Put it on thick and knock it down with a grater: 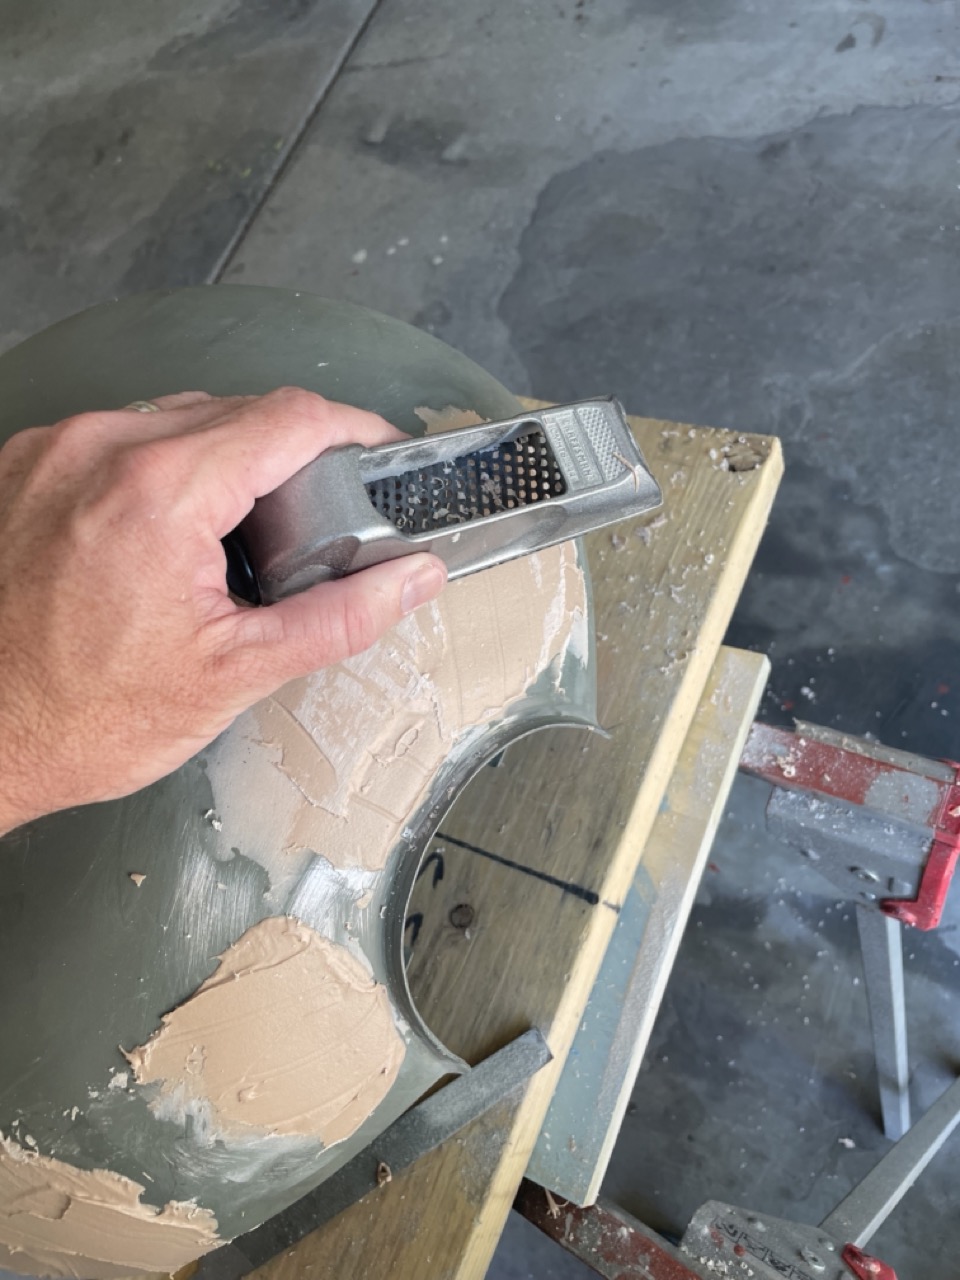 Sand it down through 120, 220, 320. This is probably between 120 and 220. It's also application #2 of 3 (you can see the dent on the right isn't fully filled yet): 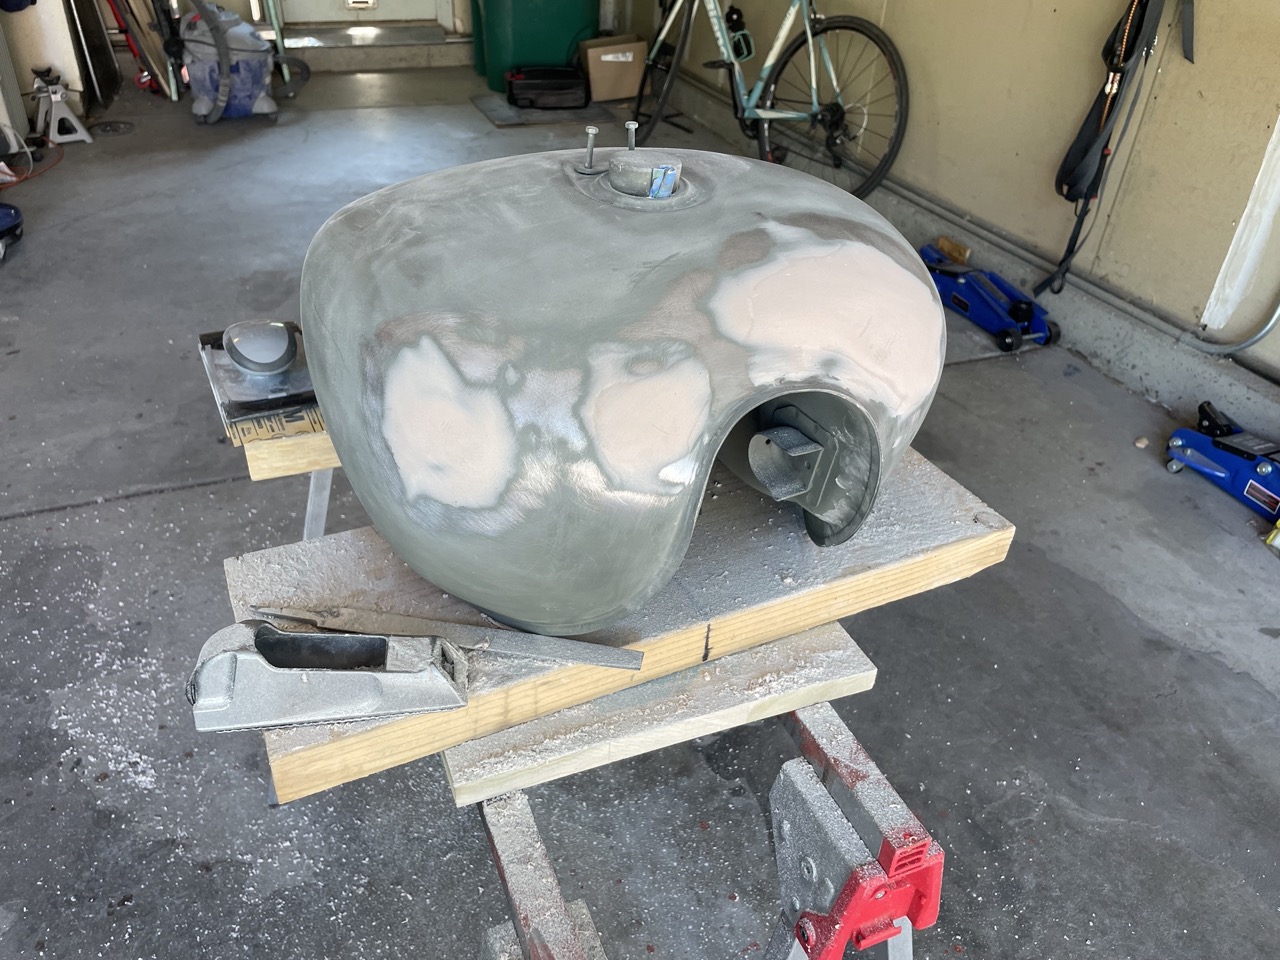 All done: 
|
|
#
?
Jun 26, 2023 05:13
|
|
|
Now to take care of the "rust belt" of pinholes along each side. Take the primer back off with a medium-aggressive wire wheel. Take a look at how gnarly this metal we need to cover up is: 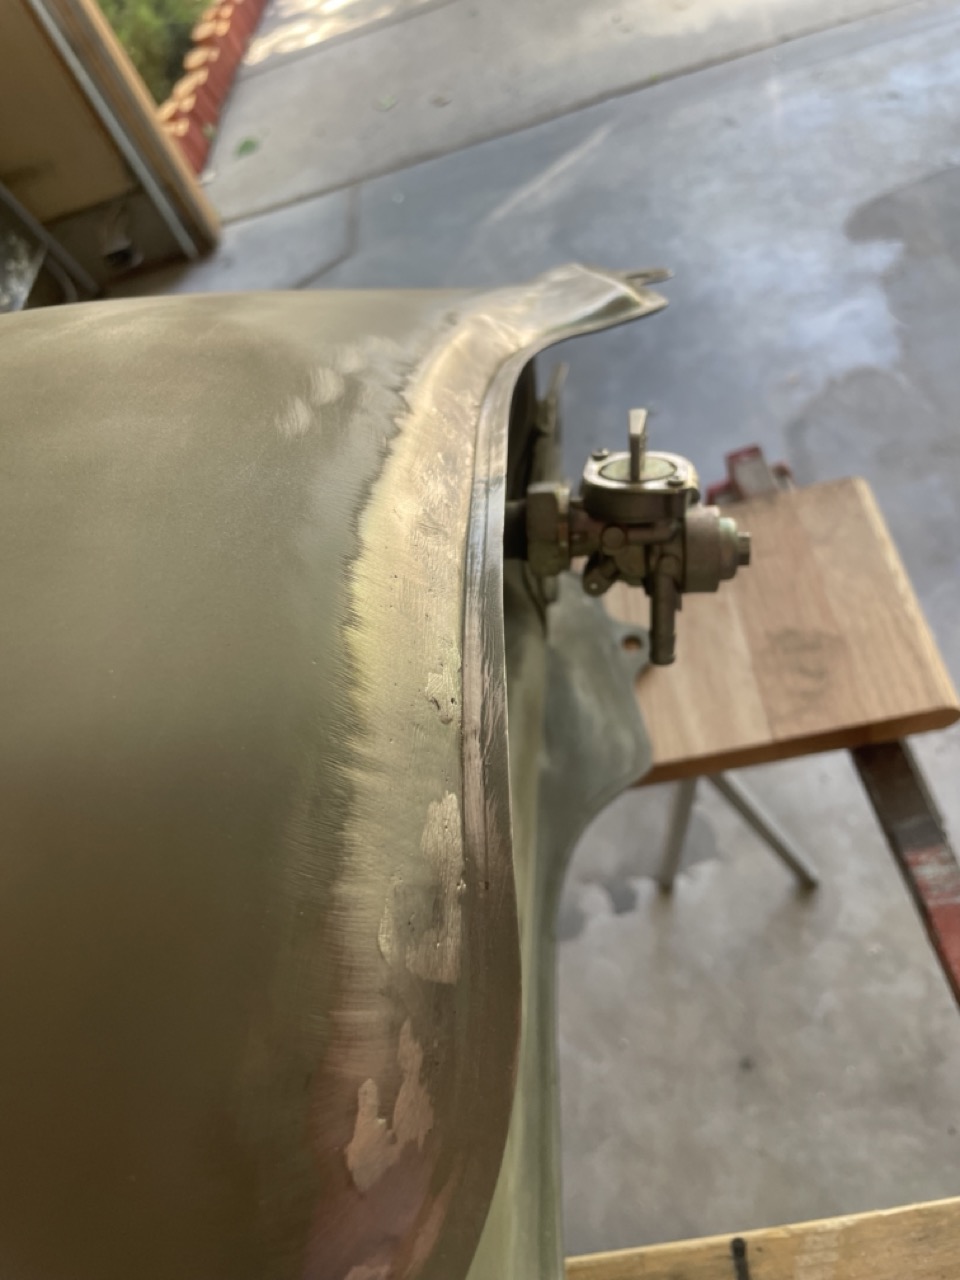 This back "ear" of the tank is wavy like gravy, doesn't really show up in this pic but the ear/tab is all crumply: 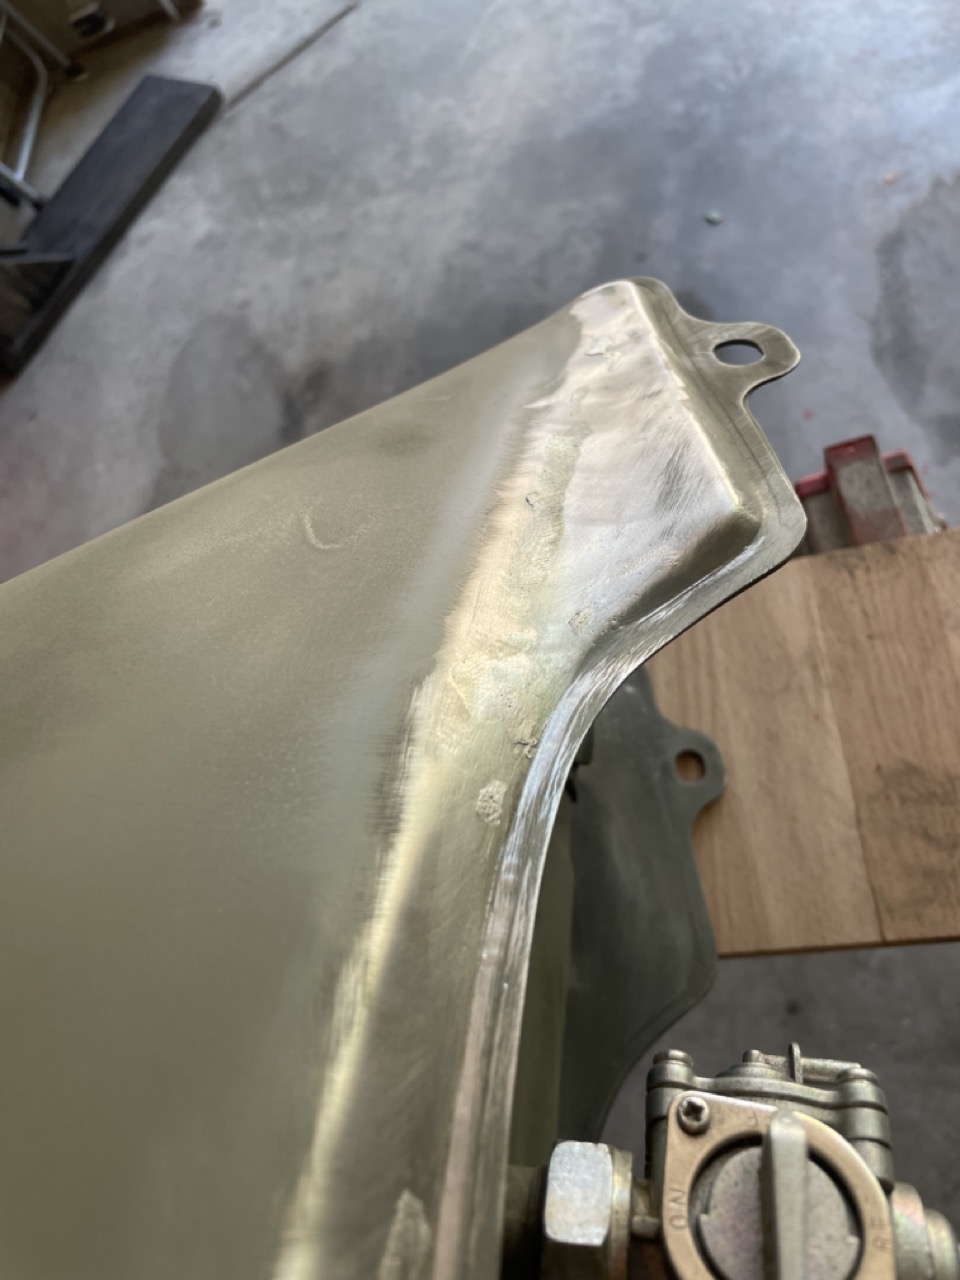 The wire wheel was aggro enough to knock some new holes, I finally perfect my tank soldering / dremeling. I know this doesn't look amazing (due to different appearance of ground solder vs bare metal) but these patches are very flush, very little filler will be needed over them: 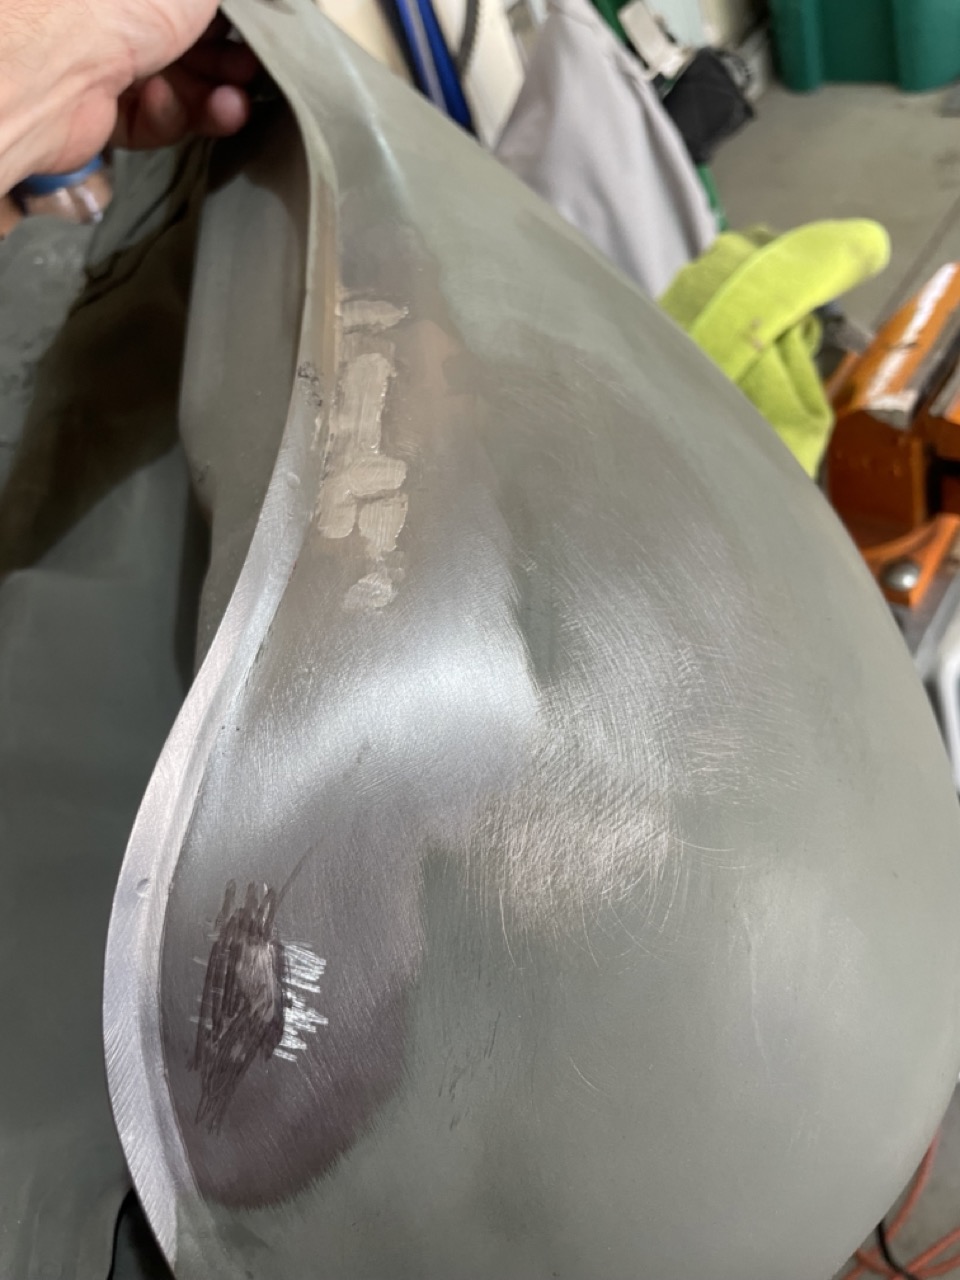 It went on thick. This isn't a dent fill, we're building new structure over all these solder patches:  Grate and sand it down to a new level: 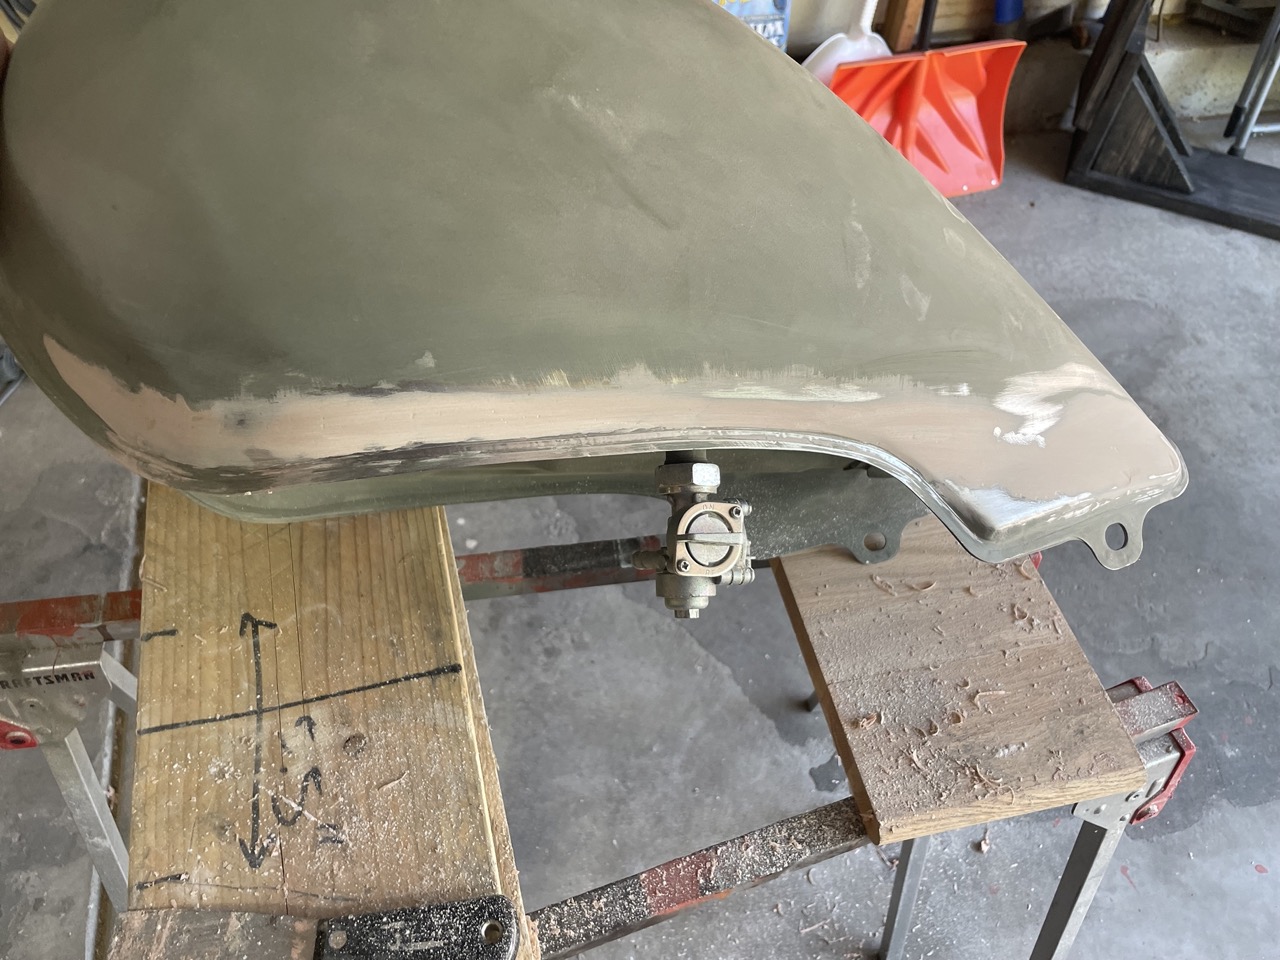 Oops, you can see a new pinhole leak in that one. I stopped, fixed it back up, and laid down more filler on the area. The "ear" is flattened back out: 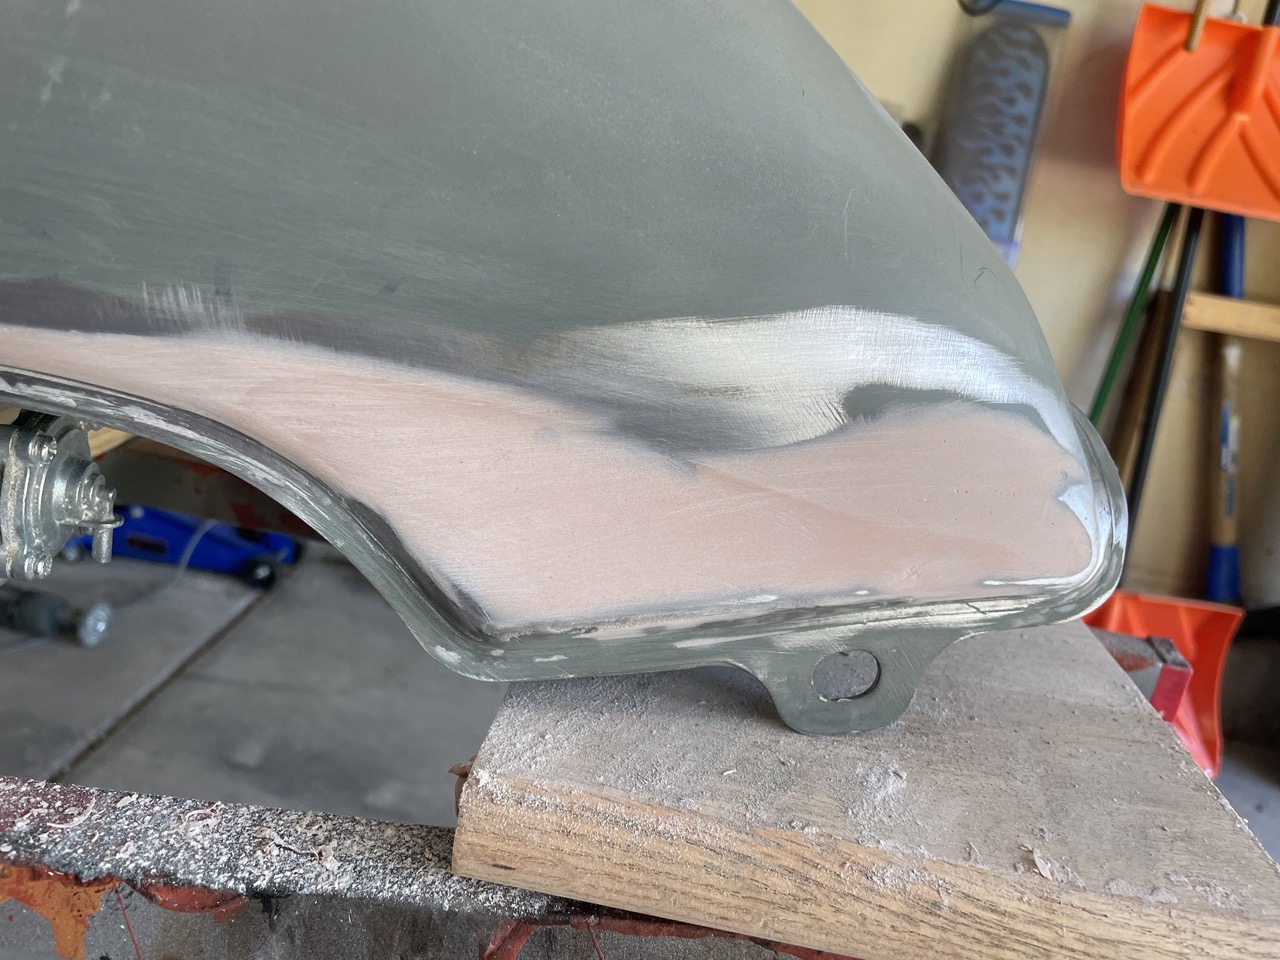 Here's the result of the first pass. I went back later to fix the flaw toward the front (the shadow is also making it look worse than it is): 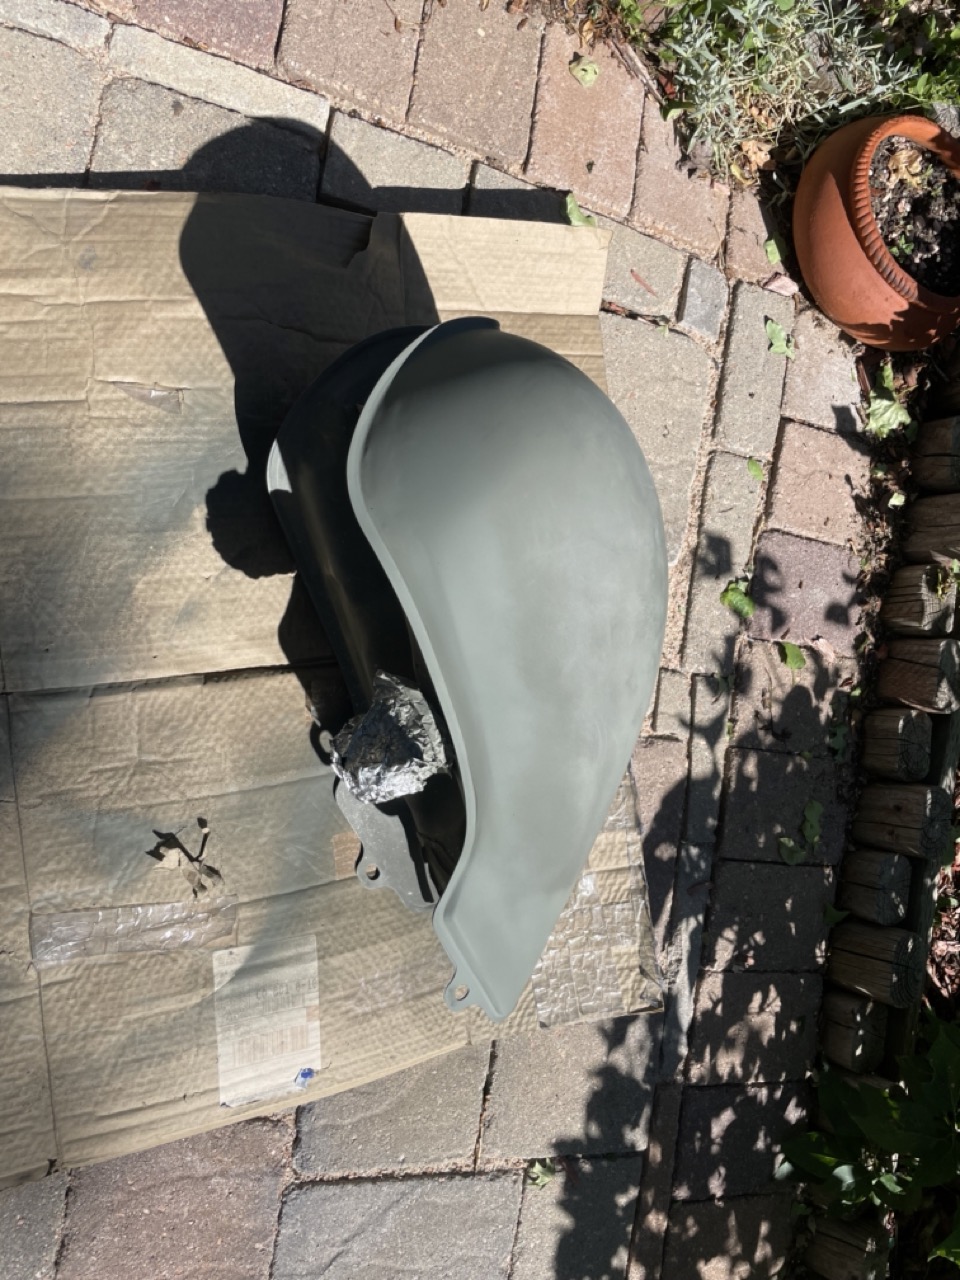 The tank's now sitting in my garage full of fuel to make sure no more leaks appear. If they don't then I'll start painting in a bit.
|
|
#
?
Jun 26, 2023 05:22
|
|
|
That's a lot of work! It's gonna be awesome when all those dang holes get patched up. I don't know what your final color is going to be, but I'm really digging that semi-shiney green look.
|
|
#
?
Jun 26, 2023 08:23
|
|


|
I was mocking up some multi-color designs but it’s going on a Nighthawk so there’s really only one color choice. https://youtu.be/zSkGtW-fQ3s The fun bit is going to be the decals, I have repros from one of my first bikes that I plan on putting on and I think it’ll look great.
|
|
#
?
Jun 26, 2023 17:01
|
|
|

|
| # ? Apr 26, 2024 08:16 |
|
|
And since you mention the shiny green: it’s the brand of self-etching primer that I’m using which is a matte army green, and then a lot of 2000 grit, rubbing, handling, and tack cloth (beeswax) that are shining it up a bit. Before I put paint on I’ll be washing it down with soap so I’m hoping the wax and grime will come back off.
|
|
#
?
Jun 26, 2023 17:04
|
|