|
I posted this in the fashion megathread in YLLS but I wanted to get a sanity check on the fit of this modified t-shirt:  My first attempt at making major modifications to clothes! This is the third shirt but the first I will wear because the others were just cheap thrift store shirts to home the fit.
|
 #
?
Mar 23, 2014 15:07
#
?
Mar 23, 2014 15:07
|
|


|

|
| # ? Apr 28, 2024 22:32 |
|
|
I saw that in YLLS but here's my reply. I assume you're going for a conventional fit here. It's giving you a bit of an hourglass figure -- try and get the shirt to hang and not hug your body. There is bunching at the armpits. It looks skin tight across your pecs as indicated by the smaller horizontal creases. The shoulder seams are too wide -- they're hanging off your shoulders. I think that the seams should be at the point if you follow the V of your chest in a straight line up to the top of your shoulders. The sleeves themselves look a little narrow or lanky to me. Also the tight fit of the shirt is clashing with your loose jeans. Sorry brother. How did you modify this?
|
|
#
?
Mar 24, 2014 03:15
|
|
|
No worries. Just a simple re-do of the side seams. Also as I noted in the YLLS thread I just picked up some dirt-cheap too-large shirts to mess around with before moving on to others that I actually want to wear. The "finished" product suffers from that crappy source product and that is why the shoulder width and sleeve length is off. The tightness is partially a result of me washing the shirt after modifying it. I got, washed, and sewed some slightly more expensive shirts today, watching particularly for shoulder fit and sleeve length when selecting They fit much better, hanging more naturally and not bunching as badly. I still need to get the hang of armpits but I think this should work out without going into full-blown from pattern territory.
|
|
#
?
Mar 24, 2014 03:40
|
|
|
I posted up my Juki DU-1181N for sale in SA-Mart if any sewing people might be interested in moving to the industrial side Post is here
|
|
#
?
Mar 25, 2014 15:33
|
|

|
I'm getting started sewing and won't be able to make it to a fabric store in person for another month or so. But I already have my machine and I'm eager to get started! Currently I am just destroying old clothes and scraps I have around the house. The solution is to buy some fabric online, but that's tough for two reasons. 1. I want interesting, loud fabric. 2. I have only a very cursory idea of what type of fabric is appropriate for different styles of clothing, based on internet research. Can anyone help? I REALLY like Alexander Henry and Timeless Treasures style ridiculous fabric, but it's all "quilting cotton." Is that okay for something like a circle skirt? I do have an unlined dress from Modcloth in an Alexander Henry fabric and it's... okay. For circle skirts/skater dresses (my garments of choice which I plan to make over and over this summer until I'm good at it) I feel like I need a stretchier fabric. But then I read stretchy fabrics are not great for beginners. Can anyone point me towards a good brand and type of fabric to order? Or is Alexander Henry fine for what I want? I have basically looked at all my favorite dresses and they're mostly polyester/spandex/rayon blends or 90% cotton with some other fabric for stretch.
|
|
#
?
Mar 26, 2014 02:23
|
|

|
comets! posted:I'm getting started sewing and won't be able to make it to a fabric store in person for another month or so. But I already have my machine and I'm eager to get started! Currently I am just destroying old clothes and scraps I have around the house. I use quilting cottons for all kinds of things. But if you want just a circle skirt or whatever that is fine. I suggest checking out Fabric.com Cotton twill or Sateen with a bit of stretch is a nice option for a few things as well.
|
|
#
?
Mar 26, 2014 02:37
|
|

|
comets! posted:I'm getting started sewing and won't be able to make it to a fabric store in person for another month or so. But I already have my machine and I'm eager to get started! Currently I am just destroying old clothes and scraps I have around the house. After cleaning out my closet of old clothing and taking all my wifes old scrubs, I hit up goodwill and thrift stores for cheap older stuff that looks good. Couple bucks can go a long way there.
|
|
#
?
Mar 26, 2014 03:10
|
|
|
Quilting cotton will work for some garments, but I don't think it would drape right for a circle skirt. They might work for an a-line skirt or something with a gathered waistband, though.
|
|
#
?
Mar 26, 2014 08:12
|
|


|
What if you cut it on the bias? It would be still be a fairly full skirt, but I like that in a circle skirt.
|
|
#
?
Mar 26, 2014 19:44
|
|


|
I've made at least a couple of circle skirts out of quilting cotton. I like the drape of them. But I also make sure not to use anything that is lightweight. The problem with quilting cotton is that it isn't always consistent in it's quality.
|
|
#
?
Mar 27, 2014 00:48
|
|
|
Funhilde posted:Trying to make a dog hat for a friend. Not sure if this looks right but I think it is close enough. This hat is awesome by the way, do you make a template and then put things together or just cut out pieces and pin them then sew it together when they look good? Clicking your profile you're actually a professional, I'm more of what you call a hack, I just make poo poo up then throw it down. The stuff you have in your gallery is fantastic. Bitter Beard fucked around with this message at 02:03 on Mar 27, 2014 |
|
#
?
Mar 27, 2014 02:01
|
|


|
Thanks guys. I might just order a little and see how it goes. I'm guessing the first few things I make will be kind of bad anyway.
|
|
#
?
Mar 27, 2014 02:02
|
|
|
Bitter Beard posted:This hat is awesome by the way, do you make a template and then put things together or just cut out pieces and pin them then sew it together when they look good? Mostly I just cut things out and see what looks right.
|
|
#
?
Mar 27, 2014 02:03
|
|
|
I've got a 24x18 long cutting mat, but I want to cut some 1 inch strips that are the full width of my material (in this case 1 meter, or about 39 inches). I don't want to buy a "normal" mat that's that going to be huge in both dimensions, because I don't have room for that and also it would be super expensive. Any idea what I can use to cheaply cut a long strip like that?
|
|
#
?
Mar 28, 2014 16:28
|
|

|
FISHMANPET posted:I've got a 24x18 long cutting mat, but I want to cut some 1 inch strips that are the full width of my material (in this case 1 meter, or about 39 inches). I don't want to buy a "normal" mat that's that going to be huge in both dimensions, because I don't have room for that and also it would be super expensive. Any idea what I can use to cheaply cut a long strip like that? Just fold the fabric in half? I assume you are using a rotary cutter? I have cut several layers at once this way.
|
|
#
?
Mar 28, 2014 16:43
|
|
|
Funhilde posted:Just fold the fabric in half? I assume you are using a rotary cutter? I have cut several layers at once this way. That's a, uh, pretty good idea. Not sure why it didn't occur to me.
|
|
#
?
Mar 28, 2014 16:47
|
|
|
FISHMANPET posted:That's a, uh, pretty good idea. Not sure why it didn't occur to me. I run into these kind of things all the time. Making all these silly hats and I didn't think to use iron on junk to do the appliques. It has saved me HOURS.
|
|
#
?
Mar 28, 2014 17:25
|
|
|
Why can't I cut fabric straight when I fold it? Every loving time I think I have everything at right angles, I double check it, and then cut it and it's all hosed up. Is it just a practice thing or am I doing something wrong and stupid?
|
|
#
?
Mar 28, 2014 22:31
|
|


|
NancyPants posted:Why can't I cut fabric straight when I fold it? Every loving time I think I have everything at right angles, I double check it, and then cut it and it's all hosed up. Is it just a practice thing or am I doing something wrong and stupid? Your fabric may be thwarting your efforts. Before you fold/cut, make sure the weft threads (perpendicular to the selvedges) are indeed perpendicular to the selvedges. You may need to pull one corner of your fabric piece to get everything square. Do NOT use the cut edge from the store as "square". If you want to make REALLY sure everything is squared up, find the first weft thread that goes all the way across the cut edge (doesn't get cut off by the store cut or whatever) and gently pull that all the way out. Now you'll have a line all the way across the fabric to use to square up the fabric. I can try and find/take pictures to make more sense if you need it.
|
|
#
?
Mar 28, 2014 22:59
|
|

|
It amazes me what can transpire within one day. Picked up a Juki DNU-1541S for a screaming deal and once I got home I ran down to a local shirt printer to pay for a shirt for somebody from our guild going to this game event(Pax East), I wanted to make a cool shirt for them to wear. Paying the guy I saw he had this awesome Barudan Beat IV sitting there with a crap ton of accessories, when I said 'That's great machine' he replied 'I'll sell it to you for 500 bucks' I said, I don't have that kind of cash but I can trade you something for it instead? We then quickly made a deal, now it's sitting in my garage. Hasn't really set in yet. He said he was super busy with his shirt printing business and just literally did not have the time to mess around with the embroider and it was taking up more room then he wanted to give up in his shop, so earlier today he was thinking 'I need to get rid of this thing'  Just acquired a Brother PE770 on Thursday and made up a thing for another Goon  Now I'm going to be figuring out how to convert that to a professional level embroidering machine. I still can't believe it. Bitter Beard fucked around with this message at 04:56 on Mar 29, 2014 |
|
#
?
Mar 29, 2014 04:51
|
|
|
Fuuuuuuuu E: make blue jeans! Make everything!
|
|
#
?
Mar 29, 2014 11:13
|
|
|
I have a sewing problem that I can't quite seem to solve. I make leather products, and one thing that sells well is collars. I make collars with leather and fabric; I use a sturdy leather for the main part, a soft garment leather for the front and rolled edges, and either a fabric or a leather backing. All hosting is mine. Step 1 : Lay out the pattern on a piece of sturdy leather  Step 2 : Glue that to a piece of garment leather  Step 3 : Cut collar into shape, insert strap / buckle etc. Step 4: Lay a strip of garment leather, good side down, onto the garment leather side of the collar. Stitch.  Step 5 : Apply adhesive to back of collar, and roll strips into place.   And this is where I run into problems. I take a piece of fabric that's already been cut and hemmed into shape. I put it on the back of the collar, and then try to run another line of stitching snugged right up against the edges. But it's way too easy to make a mistake...  In this example, the foot of the machine was right on the edge of strap that runs down the middle, and it shifted just as the needle came down. That puts a hole in the rolled edge, which ruins it. So I have to start over. Since I'm sewing with this side face up, it's very easy for the fabric on the bottom to get misaligned, then I have a loose spot. Ideally, I wouldn't have to do this second round of stitching at all; you'd just see a smooth face on the front. But, I want the back to look nice, too; not just be a bunch of exposed edges. Here's a side view  However, I can't figure out a way to finish the edges without doing another round of stitching, the part labeled "second round of stitching." I considered gluing the fabric to the back, and gluing the edges of the collar over it, but my concern there is that, in time, the glue will weaken. A stitch lasts a lot longer. Plus, when the fabric part does work out, it looks great; no exposed edges, everything is either seamed or hemmed or whatnot. Due to the stiffness of the leather, I can't just sew everything inside out and then flip it back. Is there another construction technique that would work? Or is the only answer "get better at sewing" ? Pagan fucked around with this message at 20:47 on Mar 31, 2014 |
|
#
?
Mar 31, 2014 20:44
|
|

|
Pagan posted:I have a sewing problem that I can't quite seem to solve. I make leather products, and one thing that sells well is collars. I make collars with leather and fabric; I use a sturdy leather for the main part, a soft garment leather for the front and rolled edges, and either a fabric or a leather backing. All hosting is mine. Maybe a different foot will help you- either a zipper foot or a "stitch in the ditch" foot. It keeps the item that is being sewn lined up for stitching.
|
|
#
?
Mar 31, 2014 20:50
|
|
|
Funhilde posted:Maybe a different foot will help you- either a zipper foot or a "stitch in the ditch" foot. It keeps the item that is being sewn lined up for stitching. I've thought about that; the only downside is this is a heavy duty leather machine; it doesn't use feet that I can buy just anywhere. A single sided foot (close to a zipper foot) costs around $80, and I'd like to be sure that's my best option before spending the money. Here's a picture of the leather sewing machine next to my kenmore. 
|
|
#
?
Mar 31, 2014 21:05
|
|
|
Pagan posted:I've thought about that; the only downside is this is a heavy duty leather machine; it doesn't use feet that I can buy just anywhere. A single sided foot (close to a zipper foot) costs around $80, and I'd like to be sure that's my best option before spending the money. Oh I am jealous. The other problem that may be if you are sewing through glue. In that case you can use just a bit of wax paper on the top of the project and that will help pull the glue off the needle. (this is just a general trick- I have no idea how it works with leather) Maybe there is a way to make your own DIY kind of guide to keep the stitch in the right place.
|
|
#
?
Apr 1, 2014 00:25
|
|
|
That leather sewing set up looks sick! I'm really trying to save up for a serger/coverstitcher set up right now, very jealous of people with such professional equipment. I think that a zipper foot is really probably your best bet, it'll keep you snugged up in the ditch of that seam. So, I think I've finally figured out a drop-crotch pattern/alteration that I like. I kept trying on ones in the store that were too gathered at the waistband and made me look like a pumpkin, so I took it into my own hands.  I took a pair of large old lady linen pants, and cut off the bottoms of the legs. Then I split the inner leg seam open and used the fabric from the bottom to make a melon shaped gusset. Then I took off the waist band, made a button fly at the center front seam, tapered in the outer side seams, made a pleat, and stuck the waistband back on. And put some cuffs on the bottom of the leg. It probably would have been faster to just start with yardage, but hey the pants were only $1, and I learned some things.  I wouldn't wear them tucked in with that shirt, but just so you can see them under there. Still have to put the buttons on though. Super light and comfy! And *less* pumpkin-like than most. I also made some stupid shirts. I realized almost none of my summer shirts fit, so I've been making quite a few.  Playing around with an extended yoke on a sleeveless shirt, inspired by this McQ shirt  Except I had to make it cheesy, apparently. I'm no good at making minimal/clean looking clothing. I like stupid details too much. I would probably interface the yoke next time to make it a little cleaner. This fabric was also very wrinkly/hard to press which didn't help.  I have, since this picture, put buttons/buttonholes on this! And, uh, ironed the collar out. Found the fabric at the thrift store and decided to faux Givenchy/Versace it up. This was probably meant to be curtains or tablecloths originally.  This was originally a disco shirt that had some damage, but the fabric was too good to give up. And I guess this is OK to post here? Maybe it would be better in the needlepoint thread since I didn't make the shorts. I wanted to test if you could cross-stitch on spandex:  You can--if you keep it stretched while you work and use waste canvas/water soluble canvas. I've got bigger, more terrible plans for this that are peculating until I get a serger. Phew, sorry about the long post, I forget about this thread, then come back and get too excited to share everything I've been working on.
|
|
#
?
Apr 3, 2014 15:17
|
|
|
I finished my first two sewing projects this weekend! The first was a denim straight skirt which is, shockingly, nice enough looking that I can wear it out in public. The second is this clutch. The hardest part was gluing it into the frame. The most fun part was shopping for the fabric and figuring out which portion of the design I'd use for the clutch   
|
|
#
?
Apr 7, 2014 04:48
|
|
|
Goldaline posted:
Love these, the shorts are really sweet. The linen shorts are..interesting. I'm not a fan of the drop crotch, but you did a great job modifying those pants. I always enjoy your posts here, Goldaline. You have a unique style and awesome skills.
|
|
#
?
Apr 7, 2014 12:12
|
|

|
Staryberry posted:I finished my first two sewing projects this weekend! The first was a denim straight skirt which is, shockingly, nice enough looking that I can wear it out in public. The fabrics you chose are both really neat. Where did you find them?
|
|
#
?
Apr 8, 2014 01:44
|
|
|
Staryberry posted:I finished my first two sewing projects this weekend! The first was a denim straight skirt which is, shockingly, nice enough looking that I can wear it out in public. Where did you get the frame?
|
|
#
?
Apr 8, 2014 03:25
|
|


|
So . . . . I just bought 3.5 yards of a gorgeous peach floral pattern silk/cotton blend, and a little over a yard of a gorgeous rust-red linen. I'm looking at a few patterns--this one out of the silk for a top and maybe these shorts or these shorts for the linen, but I'm not sure if I should make another pair of shorts for pajamas or casual wear or whatever (I imagine the silk is probably kinda sheer for a bottom to wear out), or if I should make a different top? Or hang onto it for lining something? I'm kind of a beginner still so the patterns I'm looking at are pretty simple so I'll come away with something wearable. Thoughts?
|
|
#
?
Apr 8, 2014 03:52
|
|
|
Huge Liability posted:The fabrics you chose are both really neat. Where did you find them? Thanks! I live in Los Angeles, so I went to Michael Levine in the Garment District. The outside is Echino Decoro - Kalmia. I don't remember anything about the inside fabric. It was a quilting cotton that I thought complimented the outside fabric. Stultus Maximus posted:Where did you get the frame? I bought the frame from etsy. https://www.etsy.com/listing/171871099/8-x-3-antique-brass-purse-frame-with?ref=shop_home_active_17
|
|
#
?
Apr 8, 2014 03:58
|
|
|
All of your sewing projects look fantastic, I need to spend more time on my sewing machine now that my latest Goon project is completed, so much to do and learn so little time. Pushed my Barudan to the limit making one shirt utilizing 63,000 stitches out of 65,000 locations of stitch memory, as always learned a ton working with it. If the take up levers are not in the proper up positions you break a needle, if the carriage isn't in the right place you break a needle, thread gets jammed up break a needle, not paying attention going from first to sixth thread and the thread cutter hasn't done it's job break many needles. I was literally down to 3 needles, 4 heads had theirs stolen, to complete this design.   What's incredibly nice about this embroider machine, that nothing else I've used has, is the ability to reverse in your pattern stitch out and redo or thicken up where a thread frayed or change thread because it just completely sucks and start again. On the quotes part the bottom of the hoop was screwing up the words and I had to ditch out on the ~Kotaku part plus 'racist' was the last word in the last sentence there, I think what was left is an improvement actually. The other sentences I had to jog around with the X/Y controls and just let r rip when I thought it looked like the right spot. I put one needle in backwards and it kept shredding the thread so some of the letters got a little hosed up as I tried to fix them only for the restitch do the same thing only worse. If I had another shirt and this didn't need to be in CT on Thursday I would have started over. The file conversions took a bit to figure out as well, Wilcom doesn't like you using older software it seems and won't even save as older versions with their TrueSizer application. I had to go through some hoops to get everything funneled down to pipe through an old LPT1 cable to the embroiderer, not to mention this Beat IV is from the 90s and a lot more mechanical then the modern industrial embroider machines of today, so after doing some maintenance on this it can spit some oil out onto the shirts or whatever I'm trying to put a design on. The more I use it the more I kind of like how it operates, it's pretty dangerous. I didn't catch the alignment properly and it tried to start putting the needle into the side of the hoop and of course shattered a loving needle I couldn't spare. But the adventure was really fun and that's why I sew as a hobby.
|
|
#
?
Apr 8, 2014 06:20
|
|
|
 https://www.youtube.com/watch?v=YIR_UTgvaMU https://www.youtube.com/watch?v=YIR_UTgvaMU "Open Source Knitting Machine" http://openknit.org posted:
http://openknit.org
|
|
#
?
Apr 10, 2014 07:12
|
|
|
That thing produces some really ugly crap and simpler/better things already exist. I'm confused. It doesn't even do a ribbed hem so the "clothing" they make is rolling up on itself.
|
|
#
?
Apr 10, 2014 14:09
|
|

|
The "knit software" looks BASIC. In the simple way, and the "Girl, you basic" way. Like, it just has boxes for the height of the length, neck width, sleeve length/width, stuff like that. No visible options for shaping, types of shoulders, you can't even adjust the neck depth (scoop vs. boat neck for example), you can't adjust things like the armscye depth without adjusting the sleeve width. It doesn't even look like you can adjust the taper for the sleeves. I even paused the video and there doesn't appear to be any other options for customizing things. There are many many 'sweater software' programs that established designers use to size their patterns and I'm confused why he didn't just work off of one of those. There is so much more to clothing design than "neck width, body width, length, arm width". Also, SO EDGY putting your unblocked items on mannikins in people's stores. (I'm downloading the software now, I'll report back)
|
|
#
?
Apr 10, 2014 20:07
|
|
|
That was quick. Yeah, no options for neck type, shoulder type, shaping, nothing. So enjoy your knitted tubes with no shaping. This guy clearly isn't a clothing or knitwear designer, or even a knitter, really.
|
|
#
?
Apr 10, 2014 20:15
|
|
|
Huge Liability posted:The fabrics you chose are both really neat. Where did you find them? I was on Fabrics.com and I found the liner fabric that I didn't know the name of before. It's Bright & Buzzy Honeycomb Honey (Robert Kaufman) https://www.fabric.com/buy/0291820/bright-buzzy-honeycomb-honey?cm_vc=756b1813-cbc1-43b3-84bd-29889bf8fb7b Goldaline posted:
This shirt is so awesome. I love how you arranged the fabric.
|
|
#
?
Apr 10, 2014 23:11
|
|
|
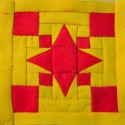
I -think- this is the right thread to ask this question (if not, mods please move it!) I am a quilting newbie, and am making a very basic beginner piece that's 50x65. I've just finished the top and am trying to figure how how the hell I should measure/cut the backing/batting, but the guides/book/whatever I read are throwing numbers and measurements at me and I'm just not getting it. How do I cut/piece my quilt backing/batting? Also: I believe I need a stippling foot to stipple the sandwich together, but I've had people tell me I can just do it without a foot on the machine, true/false? edit: the backing is 3 yards of fabric I haven't messed with yet and an unopened prepackaged batting (which I think is twin-sized? I'll have to look.) Stool Sample fucked around with this message at 02:50 on Apr 13, 2014 |
|
#
?
Apr 13, 2014 02:45
|
|


|

|
| # ? Apr 28, 2024 22:32 |
|
|
For your quilt the biggest thing you need to do is make sure the batting is bigger than the top piece and the backing is bigger than the batting. You then need to baste the three together. I use big quilting safety pins to baste. You want to place every safety pin around 4 or so inches away from each other. You can use a walking foot or regular foot to quilt it together if you are only quilting in straight lines. If you want to do fancy quilting then you would need a different foot. After it's all quilted together *then* you can cut down the batting and backing to be the same size as your top piece. Then you bind. There are a Lot of great youtube videos on different types of quilting techniques, so I would look there as a resource.
|
|
#
?
Apr 13, 2014 16:55
|
|